We had a bit of discussion on pricing previously:
which linked to my thoughts:
We had a bit of discussion on pricing previously:
which linked to my thoughts:
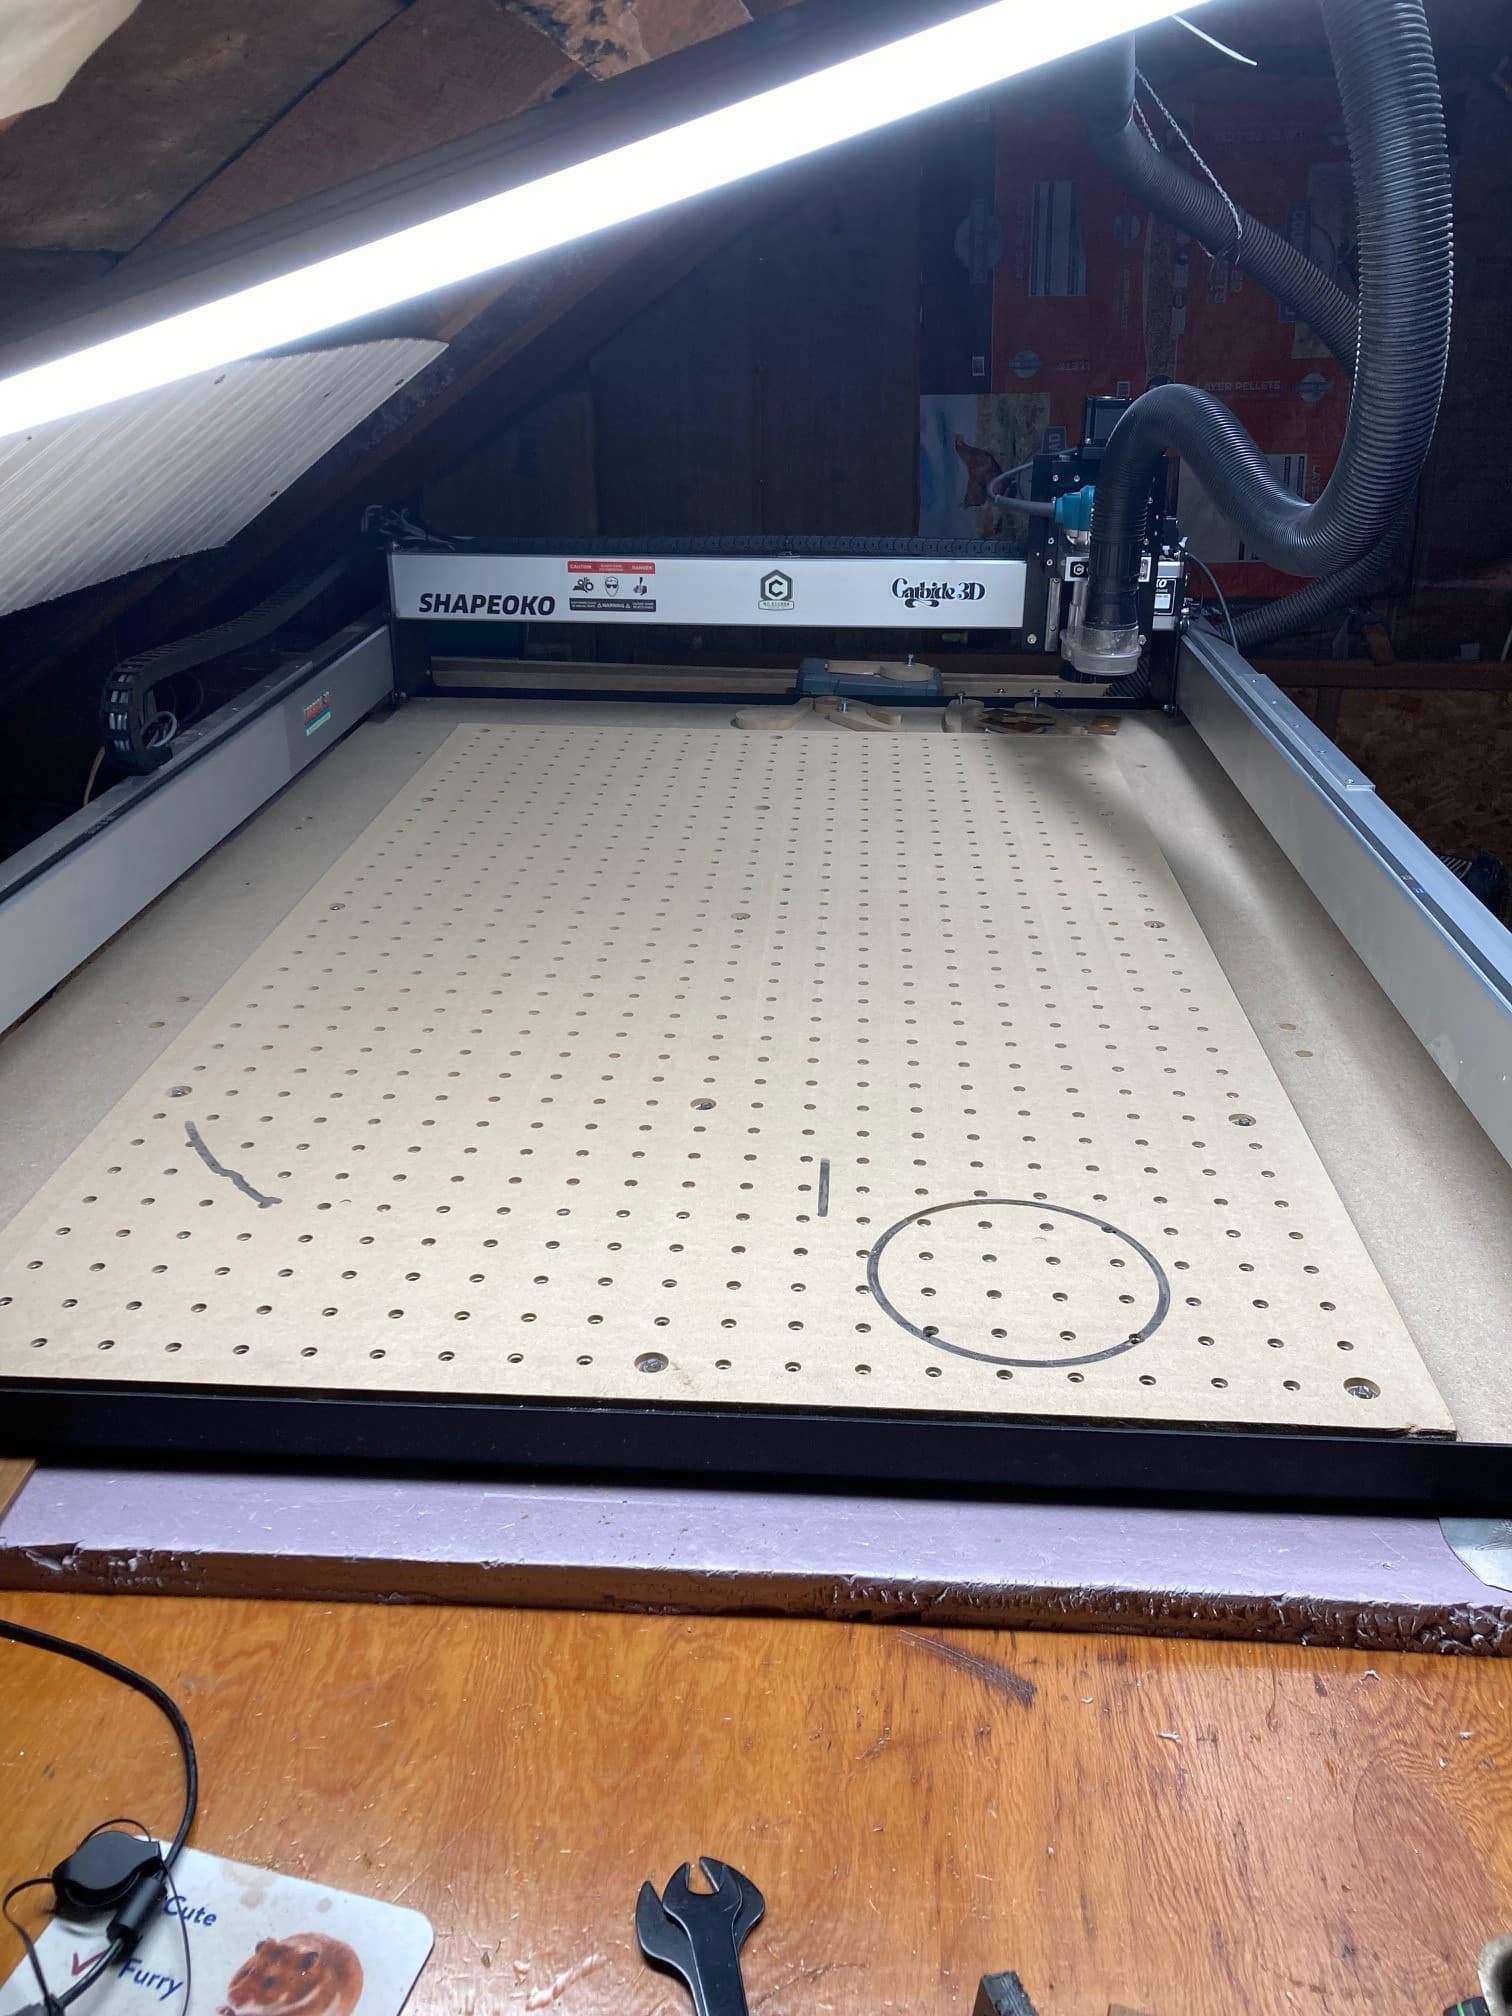
I cut (surfaced) my wasteboard today.That might might this the wrong topic to post under, oops. The wasteboard looks as smooth as a newborn baby (except for those ugly grooves ![]() ). I kind of want to replace the wasteboard now. The nice circle and the arc over to the left were both done by doing what Will tells us not to do, cutting slots. Both were made worse by poor workholding and not so tight tools. The circle was a slot in acrylic with an upcut bit. A little too fast plus the plastic flexed up, it was a bit louder than normal but I did not realize what was happening until too late. The slot to the left was in oak not anchored well. Alot of tool/ work vibration when that one sucked the tool down out of the collet. It was very clear things were not well but still happened quicker than I could think. This all happened months ago. A week ago, I put a Z plus on, getting ready to cut some aluminum and brass. The wasteboard was low in the middle about 0.04 inch compared to the front and back edges and I want this half way level for the metal cutting.The sag was probably from me climbing up on it working on the drag chains. I have laid on it multiple times. I also trammed the Z plus it and got it within 0.001" over an inch span with no fussing at all. This should be good enough for what I’m doing (decorative type things) but how close can you realistically get it?. I assume tramming is mainly for smoothness of bottoms of pockets? For some reason I was not able to surface the back edge of the wasteboard which I was able to do previously.There is a 0.5 inch wide ridge about 0.04 " inch high remaining . I did mess with Grbl dimension settings when I switched to the proximity switches and Z plus or it could be the Z plus itself. I may just remove the back 0.75 inch of the wasteboard. Now maybe I can cut something for real.
). I kind of want to replace the wasteboard now. The nice circle and the arc over to the left were both done by doing what Will tells us not to do, cutting slots. Both were made worse by poor workholding and not so tight tools. The circle was a slot in acrylic with an upcut bit. A little too fast plus the plastic flexed up, it was a bit louder than normal but I did not realize what was happening until too late. The slot to the left was in oak not anchored well. Alot of tool/ work vibration when that one sucked the tool down out of the collet. It was very clear things were not well but still happened quicker than I could think. This all happened months ago. A week ago, I put a Z plus on, getting ready to cut some aluminum and brass. The wasteboard was low in the middle about 0.04 inch compared to the front and back edges and I want this half way level for the metal cutting.The sag was probably from me climbing up on it working on the drag chains. I have laid on it multiple times. I also trammed the Z plus it and got it within 0.001" over an inch span with no fussing at all. This should be good enough for what I’m doing (decorative type things) but how close can you realistically get it?. I assume tramming is mainly for smoothness of bottoms of pockets? For some reason I was not able to surface the back edge of the wasteboard which I was able to do previously.There is a 0.5 inch wide ridge about 0.04 " inch high remaining . I did mess with Grbl dimension settings when I switched to the proximity switches and Z plus or it could be the Z plus itself. I may just remove the back 0.75 inch of the wasteboard. Now maybe I can cut something for real.
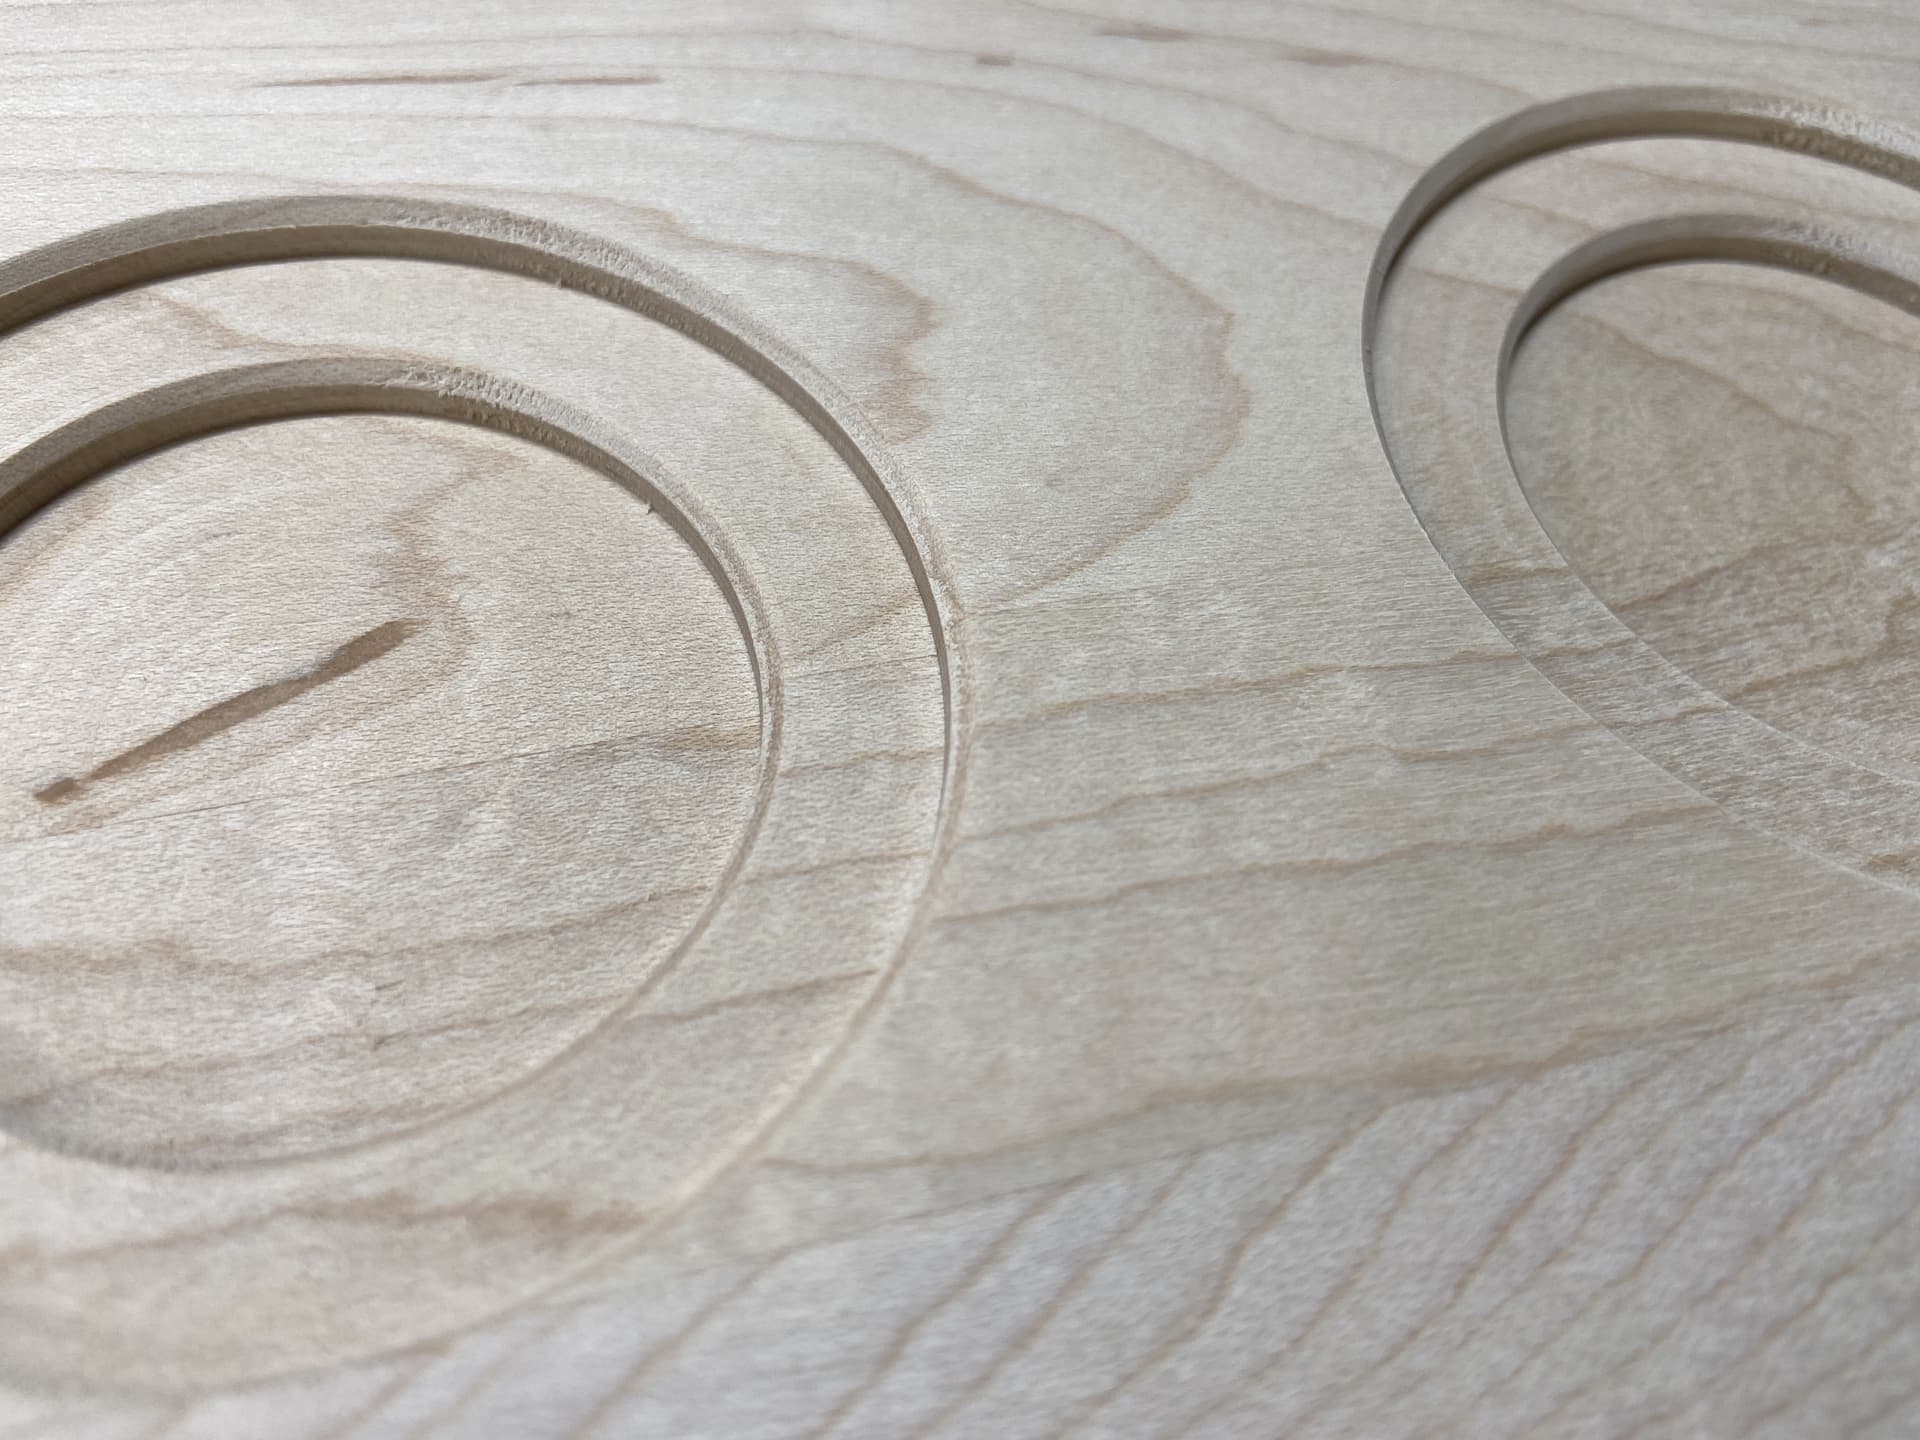
I’ve been known to grab a scoop of sawdust from my dust collector, mix it with some glue, and fill in such gouges.
Wish that would work for my most recent screw up. 4 inches, .5 deep. MDF, Pine, Cherry, Maple doesn’t look good together.
Tried sanding a piece of dark maple one time to fix an error that way. Stuck out like a sore thumb to me.
Good idea though.
What was the machining time?
I do this as well. I keep a labelled ziplock bag of each species of wood shavings in case I need to fix a small gouge.
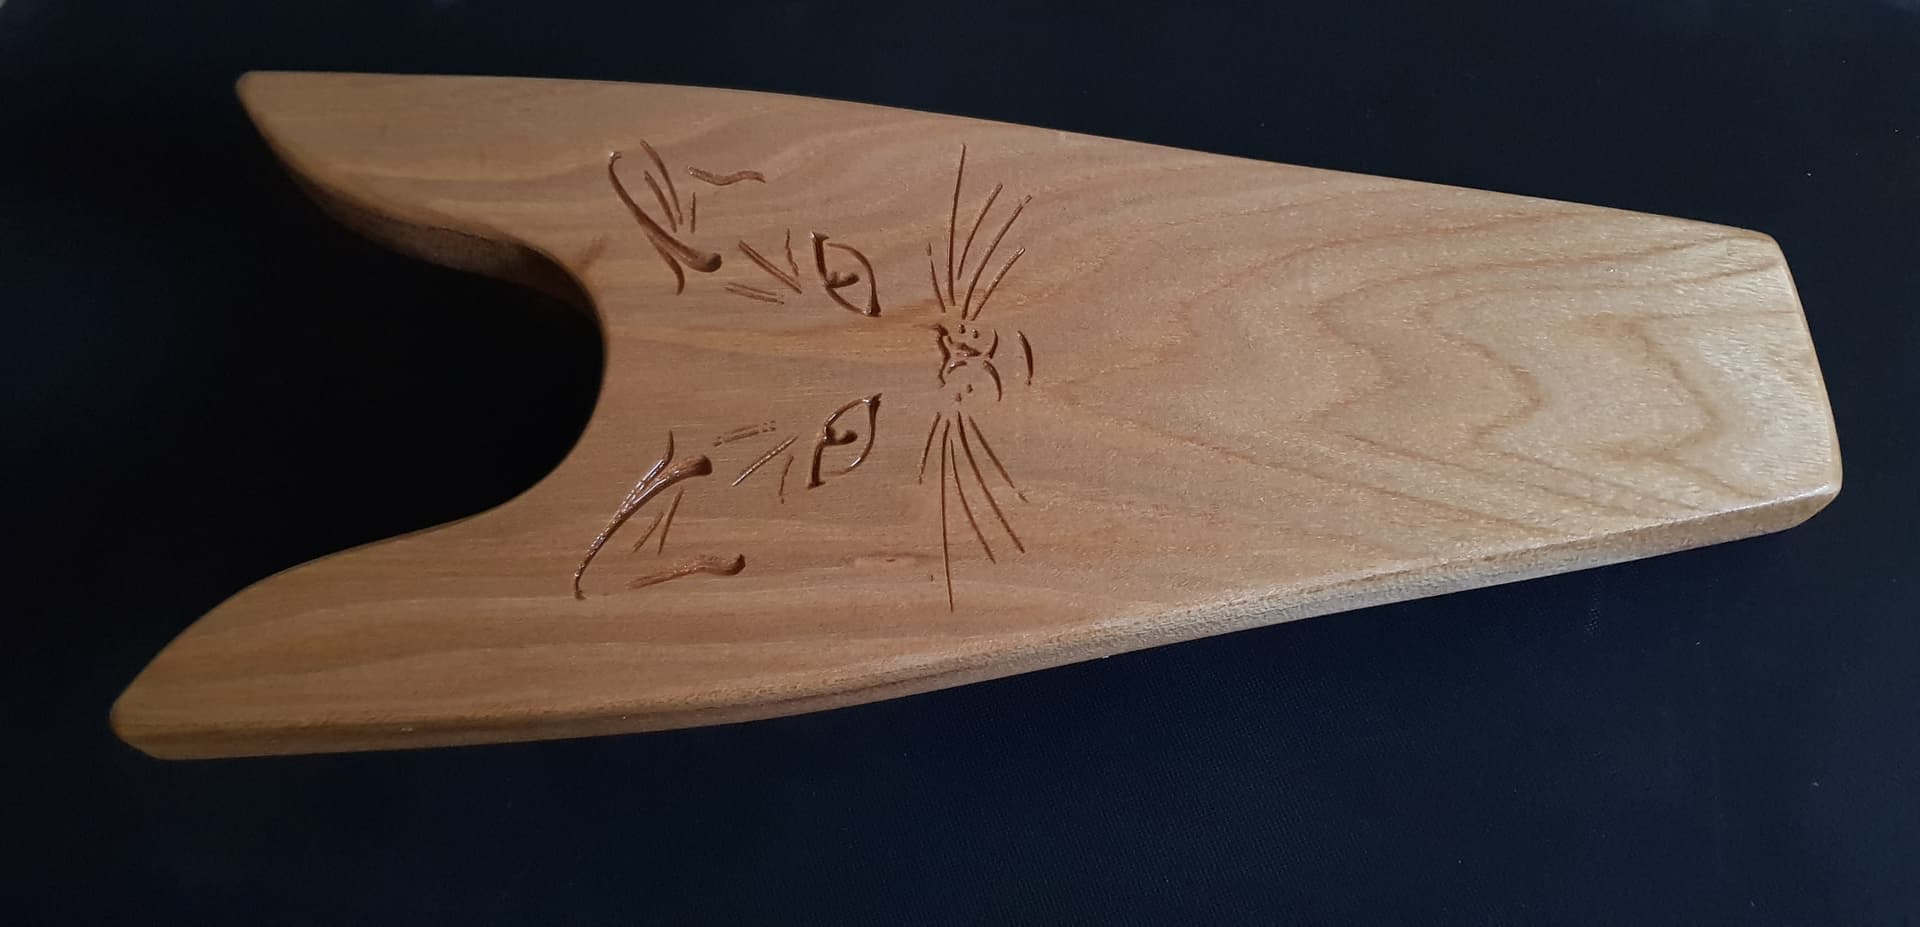
Another boot jack.
This one for a moggy loving friend. She “collects” cats, having brought one back to the UK from her time working in Vietnam and another (plus the first one) from her job in Italy.
I just wonder if they can understand each other!
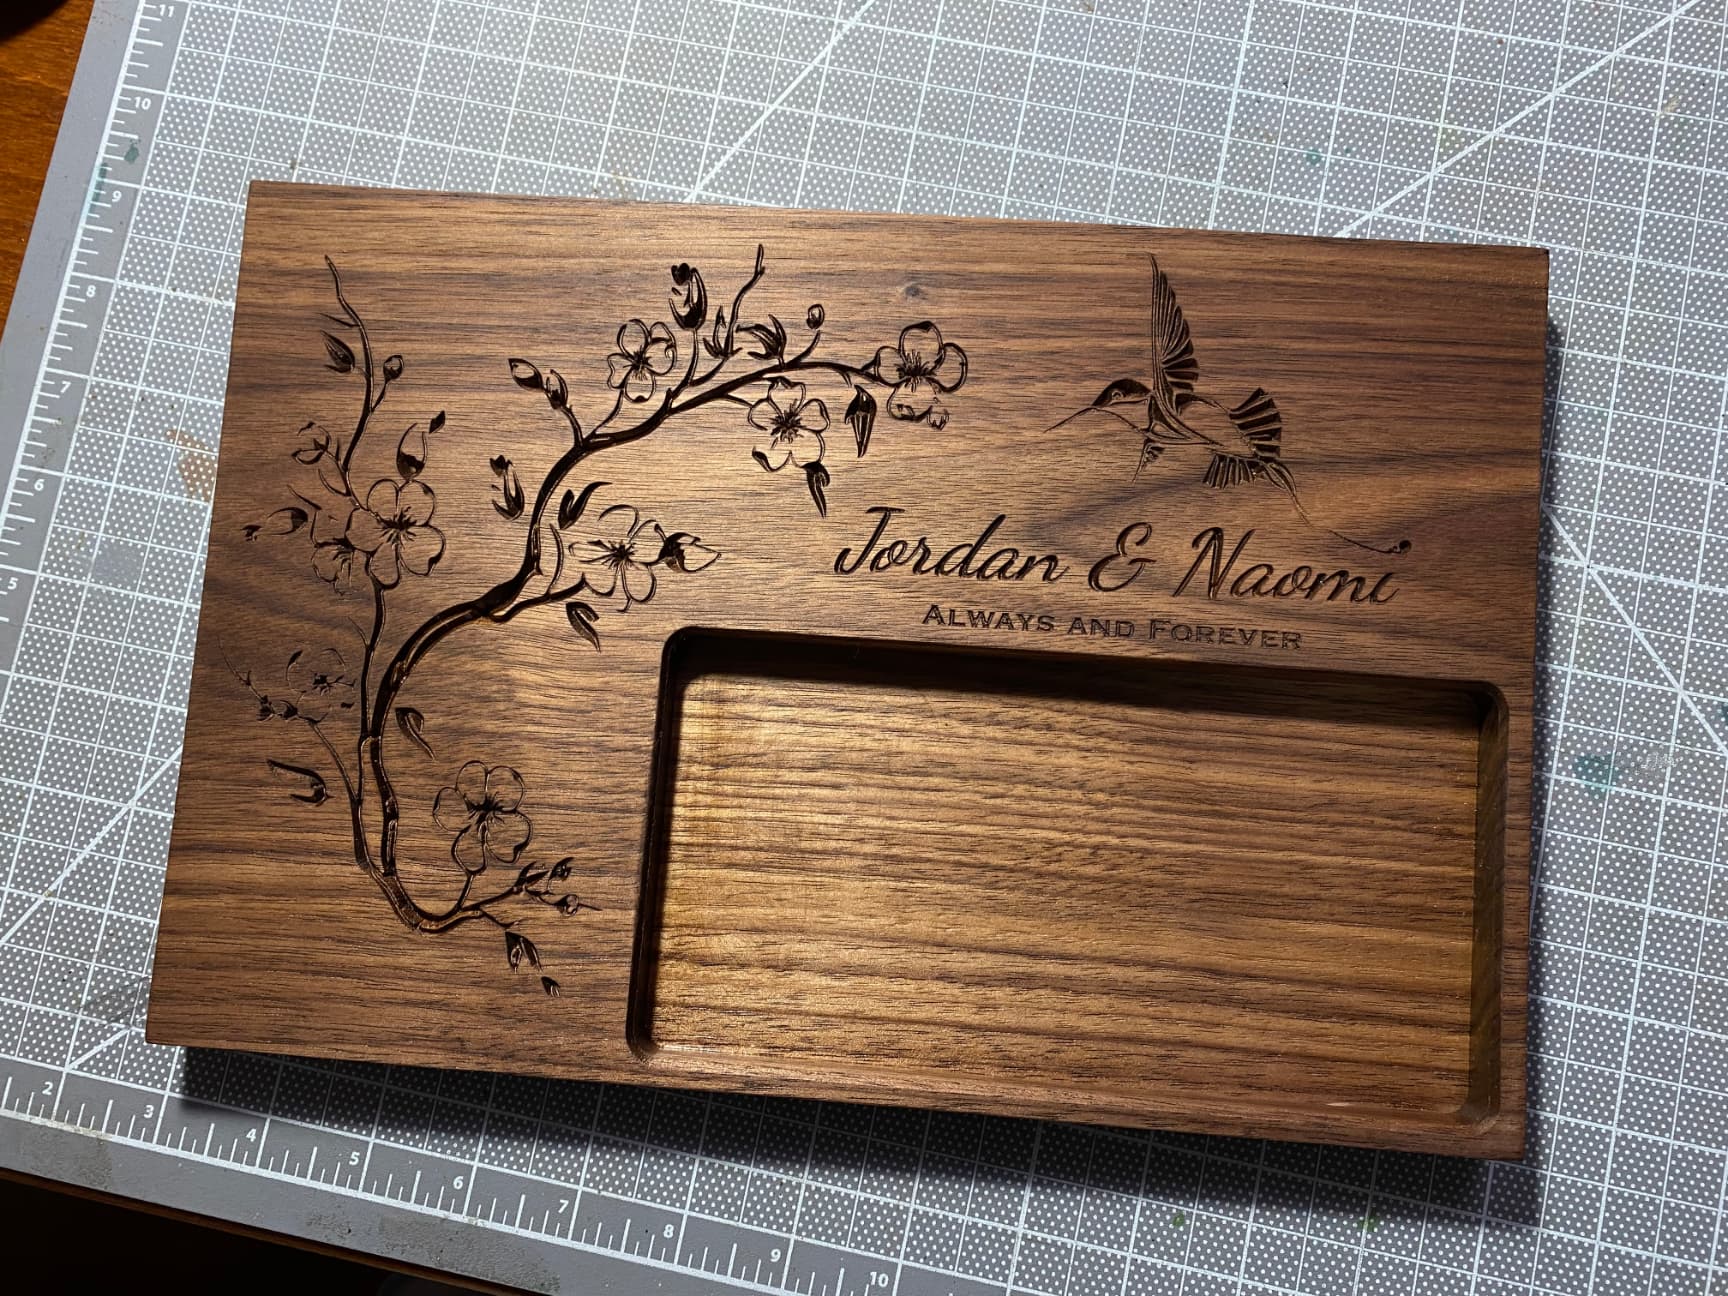
Thanks for the tip! I tried it out on my flight board, and it’s definitely more classy than a straight pocket.
That looks great! +1
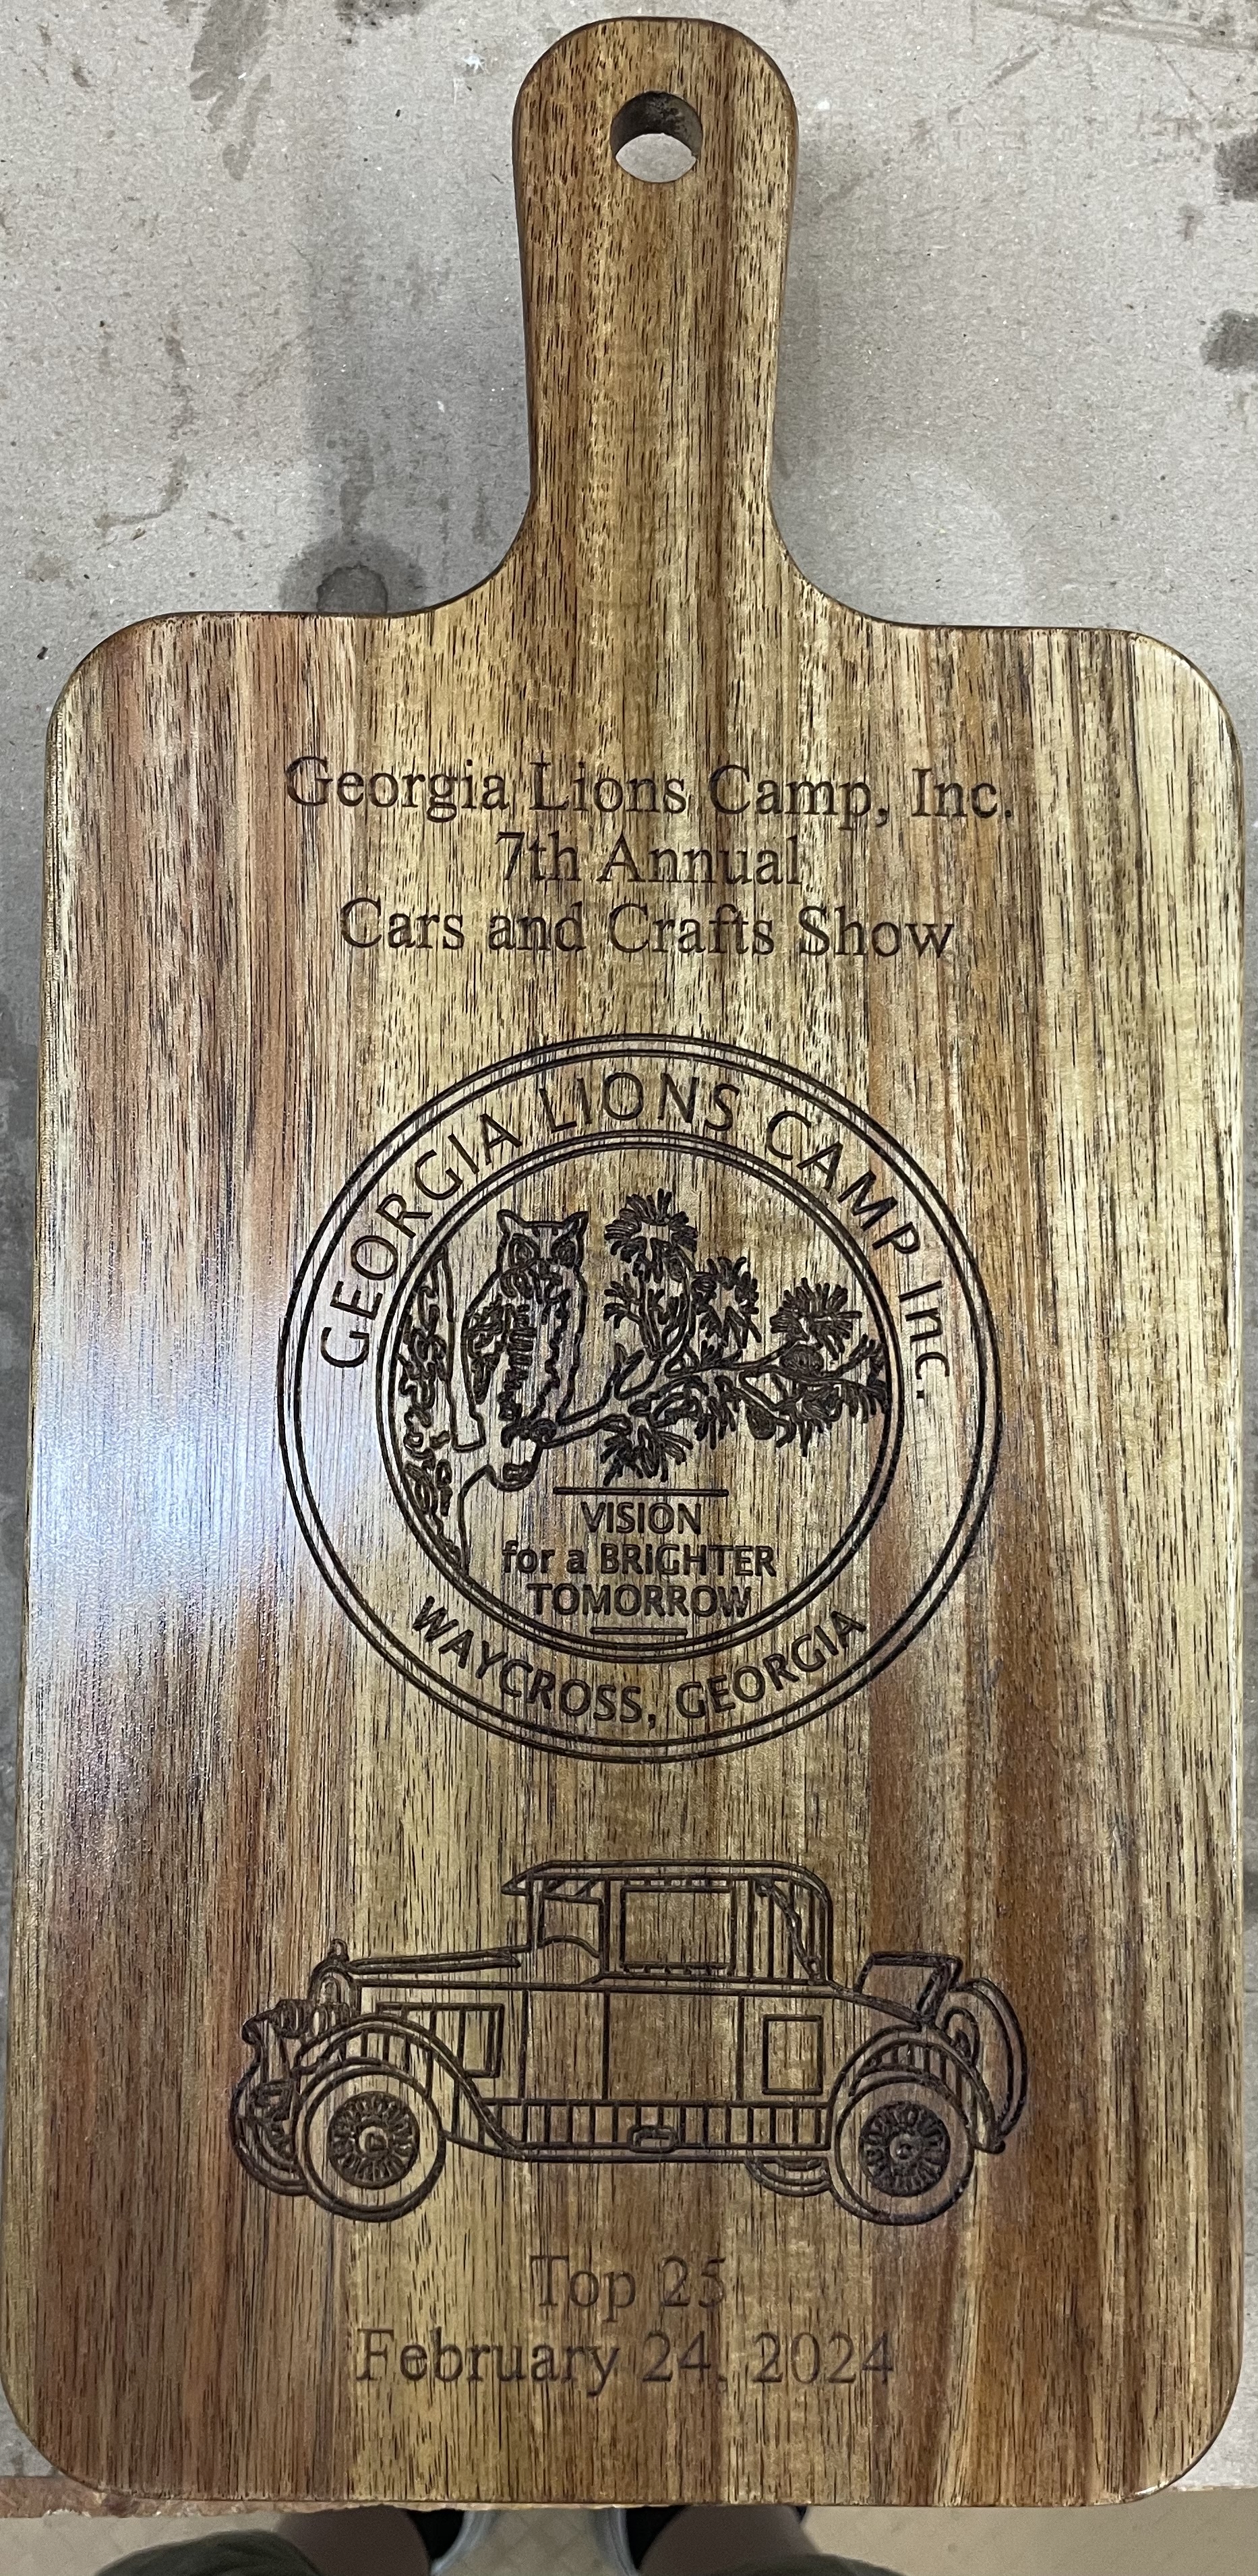
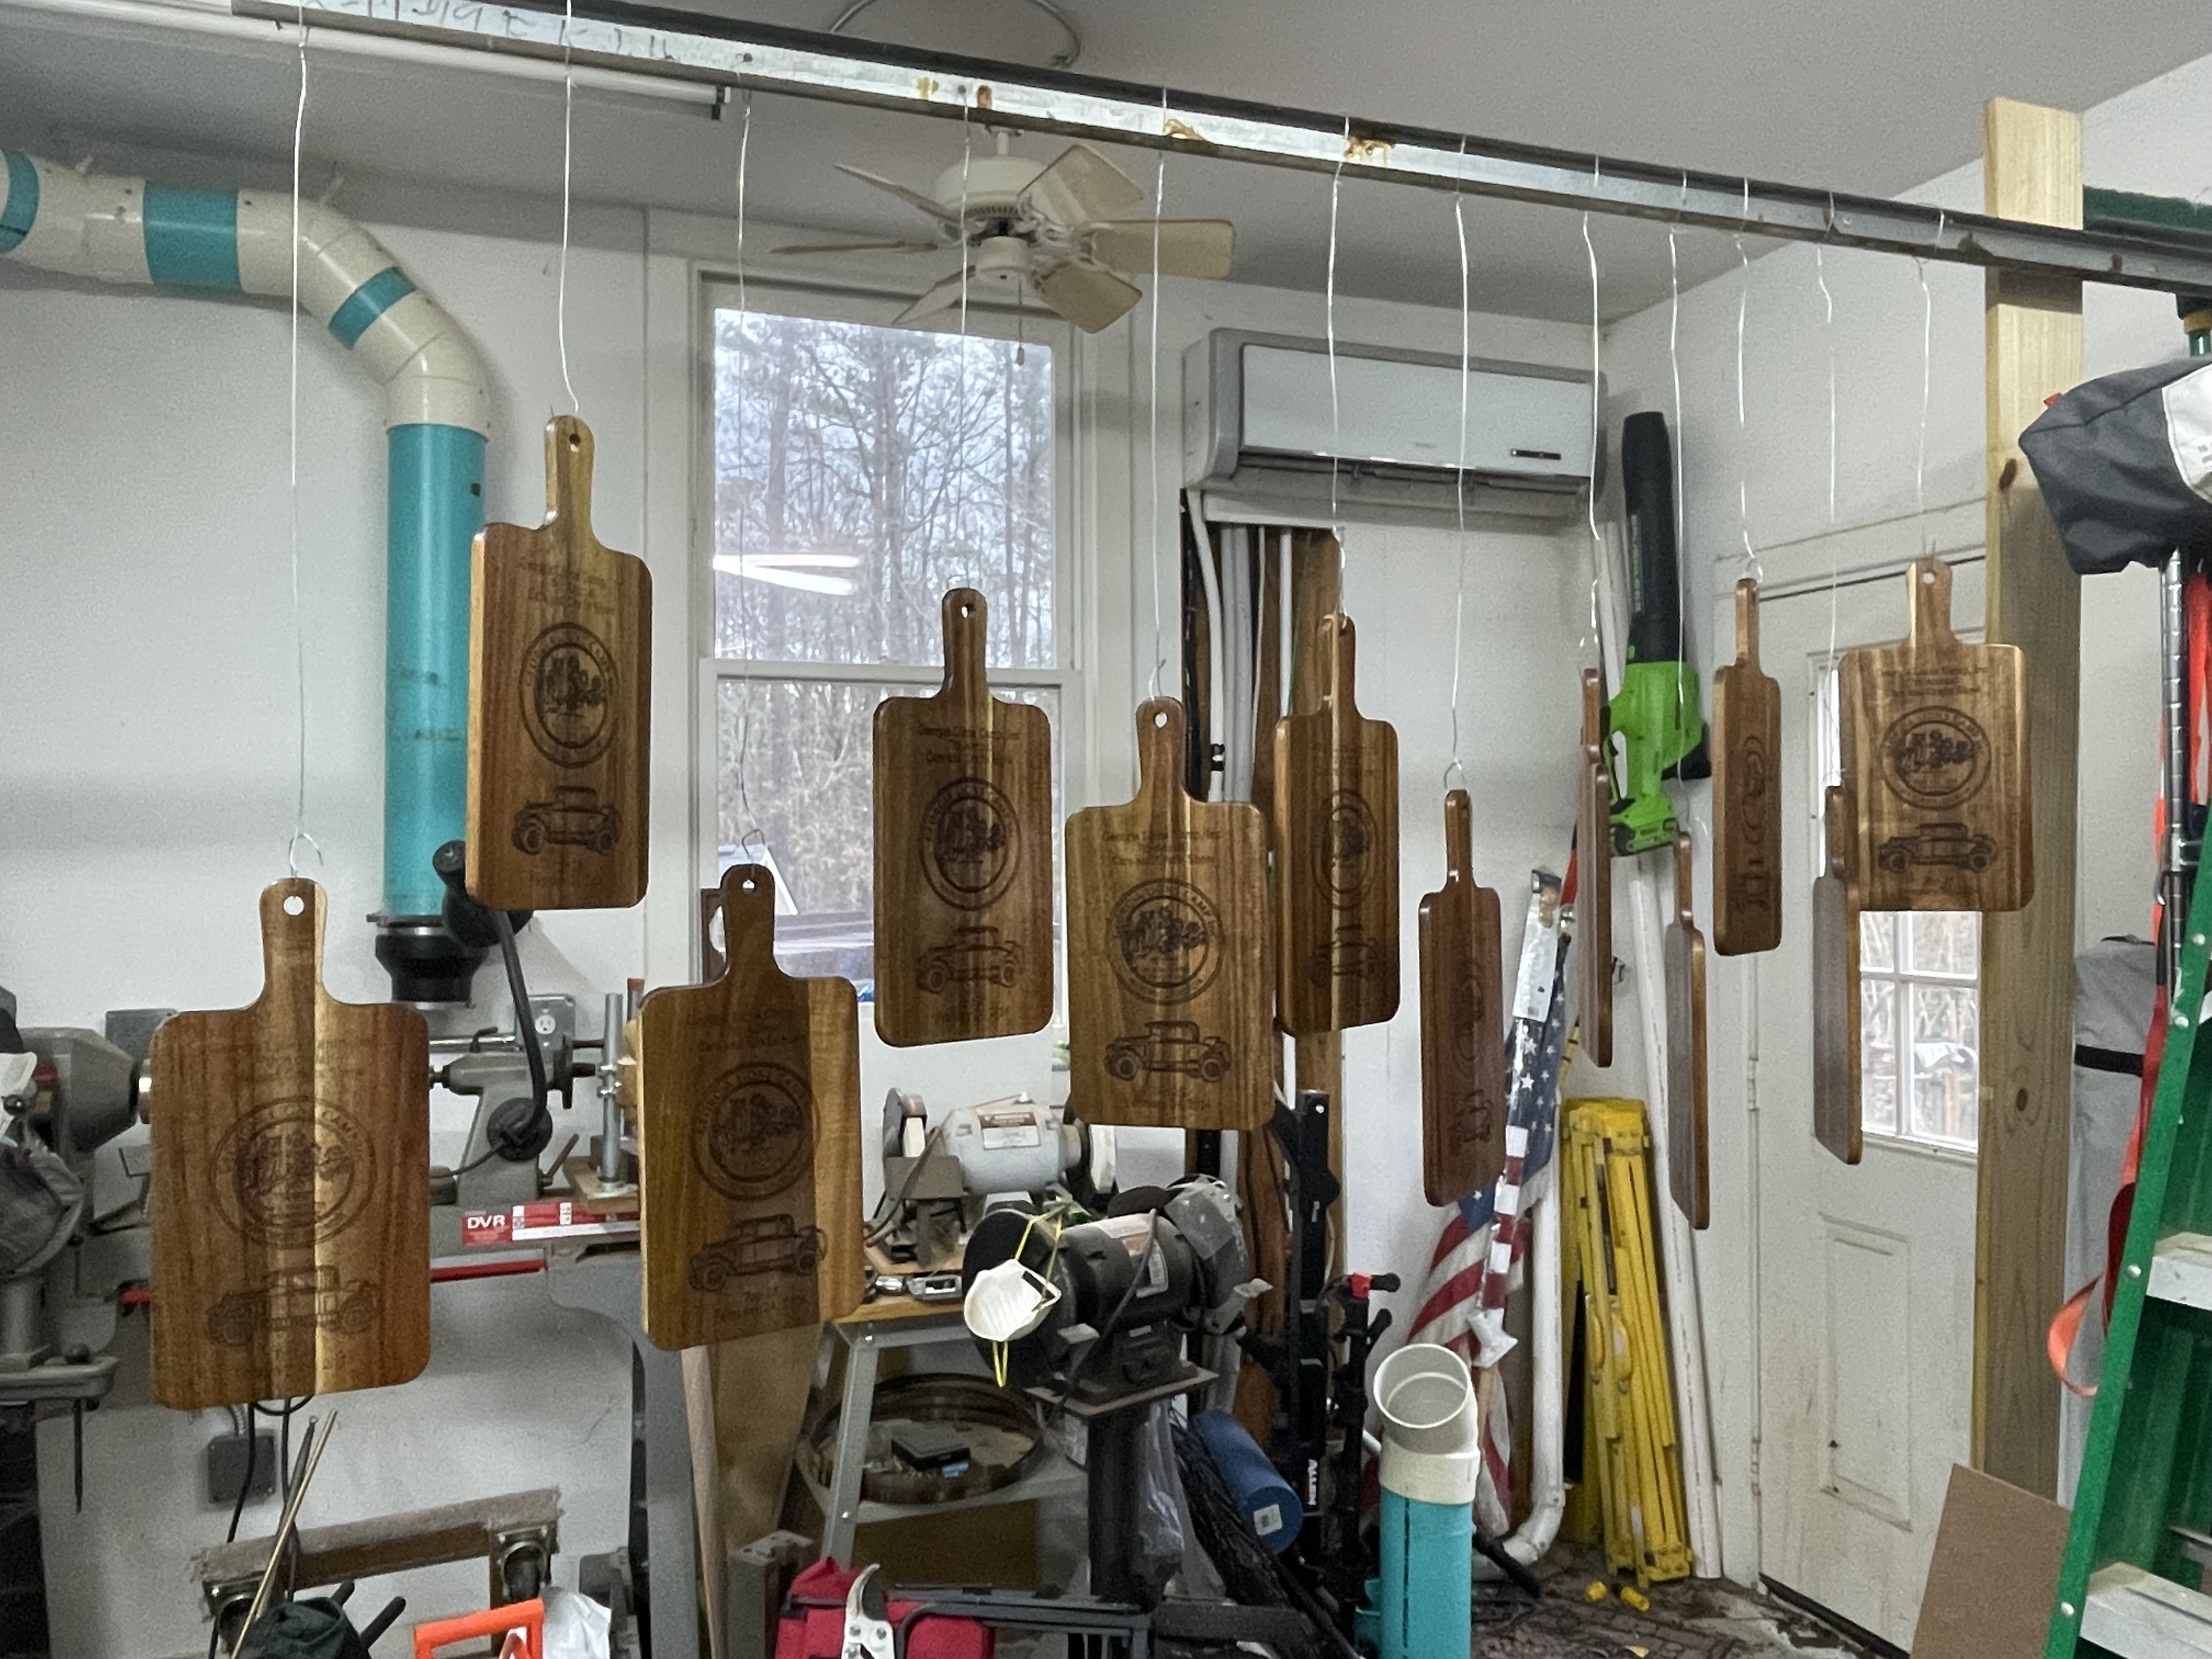
I finished 25 of these today.
It is an event to benefit a camp for the blind. Originally he wanted them done in some pine that he already had. I did a prototype to show him that pine would not be a good choice. I even bought an acacia board to do another prototype as a demonstration.
I told him that if he spent his budget on better materials I would do the job for free. So he bought some acacia serving boards off of Amazon.
It’s a combination of contour on the line and Vcarve for the text. I probably should have gone a little less deep.
I spent a lot of time cleaning up the logo and car images that he sent to get an acceptable level of detail.
Coated with dark Danish oil to bring out the carving and then 3 coats of wipe on poly.
He has offered to show some pieces of mine to sell at the show but I don’t know if I will have any time to make something for it and get it to him. I will attach my cards to all of them in the hopes of drumming up some work. I am thinking of offering an upsell by proposing to engrave a brass plaque for each winner with their names for $20 each or something like that.
The bonus is I figured out what those stupid rails overhead in my garage are for ![]()
I haven’t opened my garage door in 10 years I think. Maybe more.
What does this button do? Haha
Great job. 25 count is a bunch of work!
They look really good.
Yeah, I unplugged the opener so that an accidental press of the button doesn’t affect anything.
I would rather have used epoxy for the fill but didn’t have enough space to lay them all out. I thought about black paint and then sanding the top surface but was worried I would lose more detail in the owl, tree and car.
Total machining time was approximately 4.5 - 5 hours.
Great job! They turned out very nice.
You are bang on with that phrase. Keep it up @daveyJ
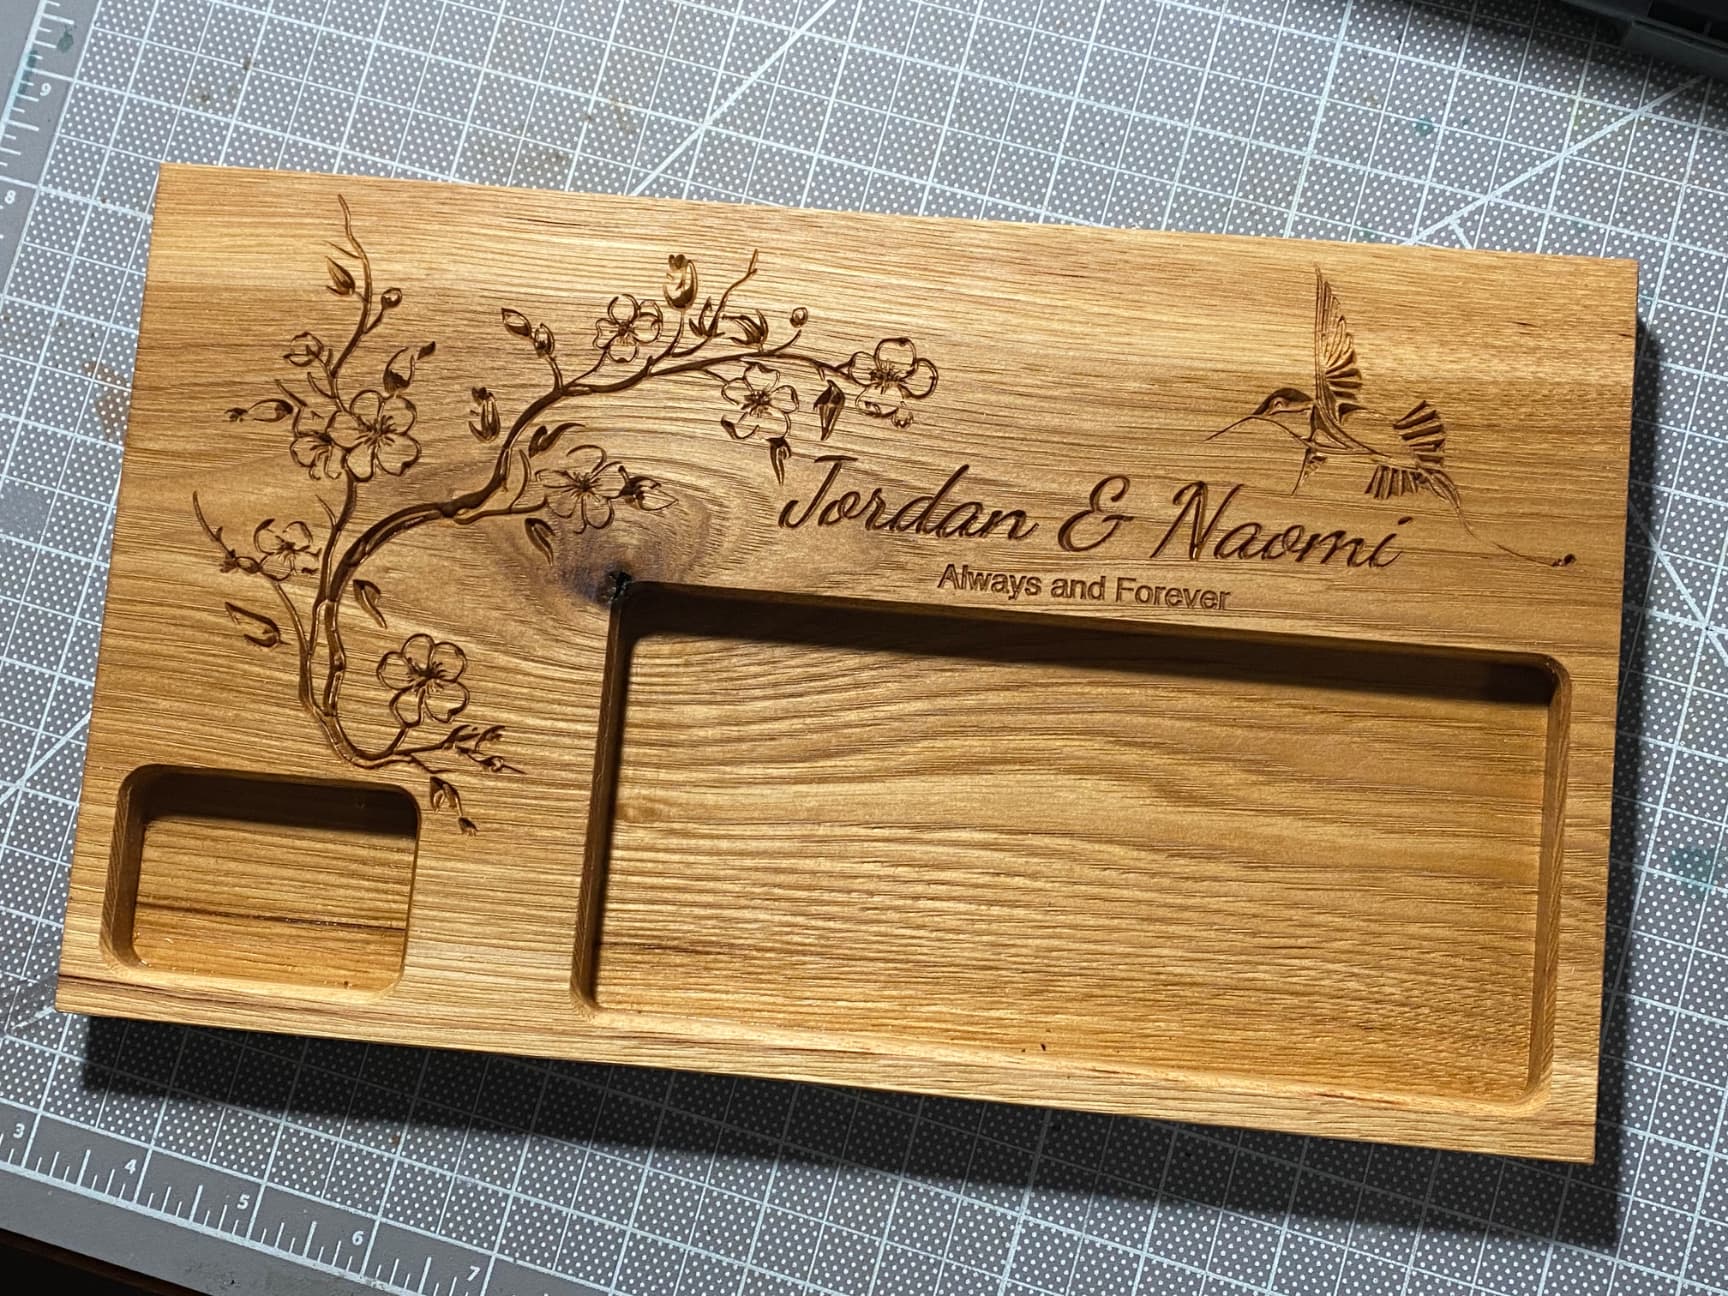
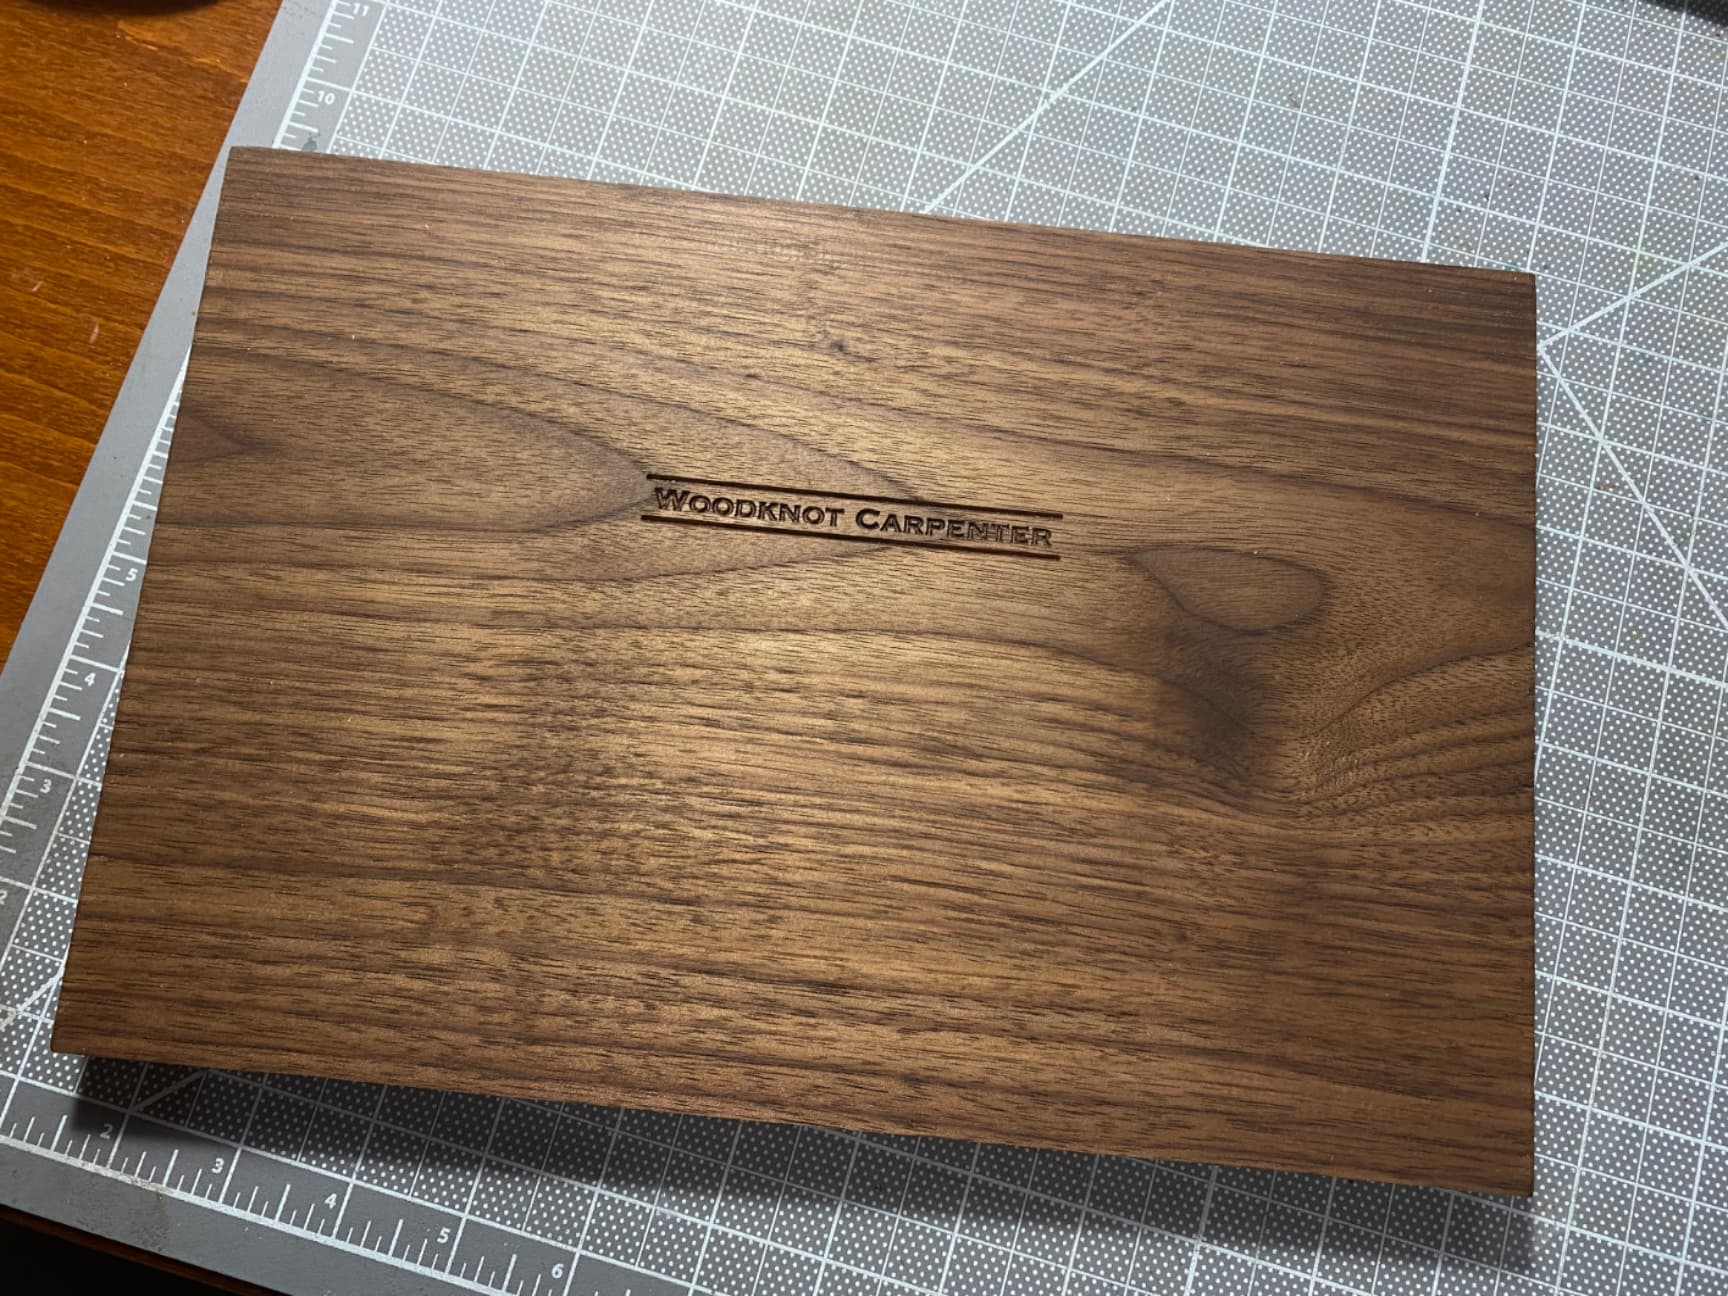
I decided to execute a “redo” of my third project; this time with Walnut instead of Hickory. Also, I changed the design; I decided I did not like the smaller pocket, plus I wanted the cherry blossoms to present more prominently. Also altered the tool paths for the hummingbird to get better definition on the upper wing. I like this one much better.
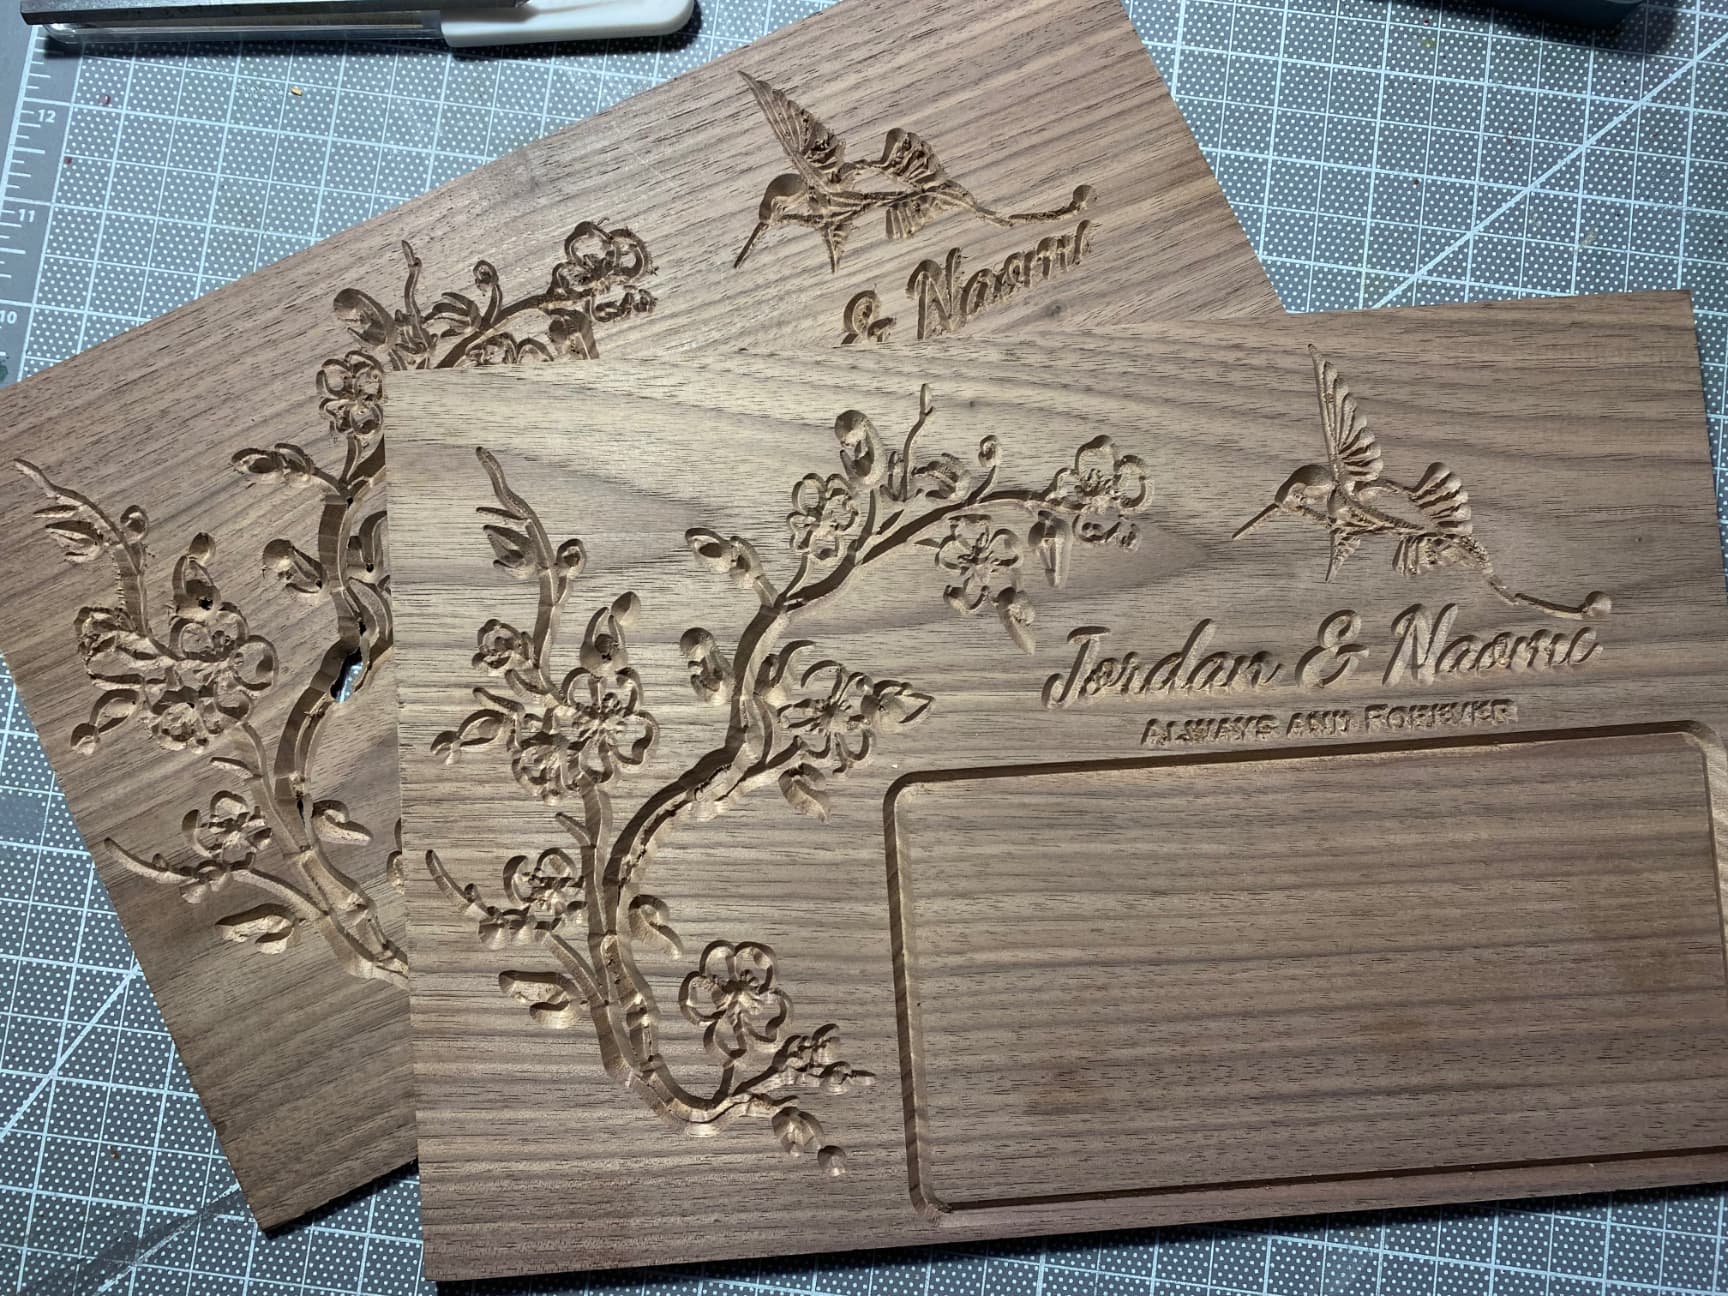
However, on the way to this final success, here’s what happened. I had noticed that some of the line work on the first project was too light. So I prepared and installed an expensive piece of Walnut onto the waste board, then went back into Carbide Create and lowered the start depth of the cuts to .02 inches below the top surface.
After the job had been running a while I stopped it, because the resultant cuts looked absolutely awful: over blown and all detail lost. Fine! I mounted a second piece and adjusted the cuts to start right at .000 from the surface. I got the same results. What the heck! OMG, it took me two times to realize I had put the 90° cutter into the router instead of the 60°.
At $16.43 per board foot, there was no way I was tossing two boards. I used my bandsaw and ripped off .25 inches of the surface and managed to salvage two nice boards. I will use them for an upcoming project. After that brain-fart I gave serious consideration to changing my name from “Woodknot Carpenter” to “Knothead Carpenter”. Seriously?
Undaunted, I mounted the third board, this time making sure I had the 60° bit installed. Again, I started the cut at .000 inches from the top; and again the lines were too light on the artwork. I left the board attached in place on the machine, opened CC and adjusted the cuts to start at .005 inches below the surface, then reran the job, making sure all unneeded tool paths were “disabled”. Miracles of miracles they came out fantastic!
I think that might even be a viable technique: re-run the same cut but .005 of an inch deeper. The second cut cleaned up much of the feathering/tearout around the top edges and also netted much more detail on the flowers while still retaining their delicate nature. What was also conveniently awesome was I did not have to redo BitSetter calculations. The Shapeoko remembers that last used zeroed settings.
After that bit of carelessness on my part I decided to make myself a “Think Through” sheet or check list. As follows:
Whew! Four projects completed with lots of wrong iterations in between. Oh well; I guess that’s why it’s called a “learning curve”. And yes, I’m still the Woodknot Carpenter. Take care!
Glad you could salvage it. We’ve all destroyed stuff we shouldn’t.
You learned the valuable lessons of mistakes turned learning. Being prepared to trash projects that didn’t go as planned is a must in our field. Always prepare for mistakes with material, that way you have backup just in case. If everything goes as planned on the first run thru and it’s all good, then you just have extra material for another project. I’m in rough country, so buying wood in bulk is easier for me, but the downfall is that I have to plane it so it has a smooth finish.
Planing and glue ups are my companions. Anyways, have you looked into maybe some of the finer tipped carvers? I’m talking about the 45 degree, 30 degree, and even the 20 degree carvers? These can be much more help on finer detailed works where you don’t want to have tool angle blowout. Designs sometimes suffer because we may not take into consideration how much of the side wood gets cut out from a vcarve. Then the next cut comes along and rips into the side of a previous cut making the lines side by side look crappy because of overcut and blowout.
If you do look into sharper point carving tools, also think about your desires for your type of work. If you are not going to have so much work with fine details then these sharper pointed carvers may not be for you. But if you would like sharper detailed work, buying these sharper degree bits would help for sure.
Learn and let learn is a motto to have as well. I have asked many questions about the CCPro and feel they were just easy questions, but, because I didn’t know the program as well, these simple design processes were not easily understood to me yet. We are getting there. Good luck on future designs and endeavors that may be profitable for you and yours.
Thank you for your response. Great information. I do not have anything finer than the 60° bit in my arsenal. But I till definitely look into purchasing a 45° or even a 30°.
Funny you mention planning and glue-up. I have plenty to really nice leftover pieces on my scrap shelves in the shop. Curly Maple, White Oak, etc. I agree; I think it’s time to get out the wood glue.
Thanks.