I suspected you spent time tweaking vectors to get the curves you wanted but was hoping there was an easier technique. Shading and 3D toolpaths would have given a more realistic outcome but I like the 60 degree Vcarve look, hence my question.
1 Like
Love the white-on-shadow effect of the lettering.
Did you airbrush the shadow?
If not then how?
I noticed that too - great look
A propane torch would do that nicely. I was wondering what kind of paint is on there. Looks almost pickled.
Looks awesome to me! Mr. Langhoff will love it.
Finished my 4th project since the purchase of my Shapeok Pro. It’s a coffee service tray for my wife’s birthday. Carved from walnut; used white oak and some nice looking scraps from my woodpile for the drawer bottom.
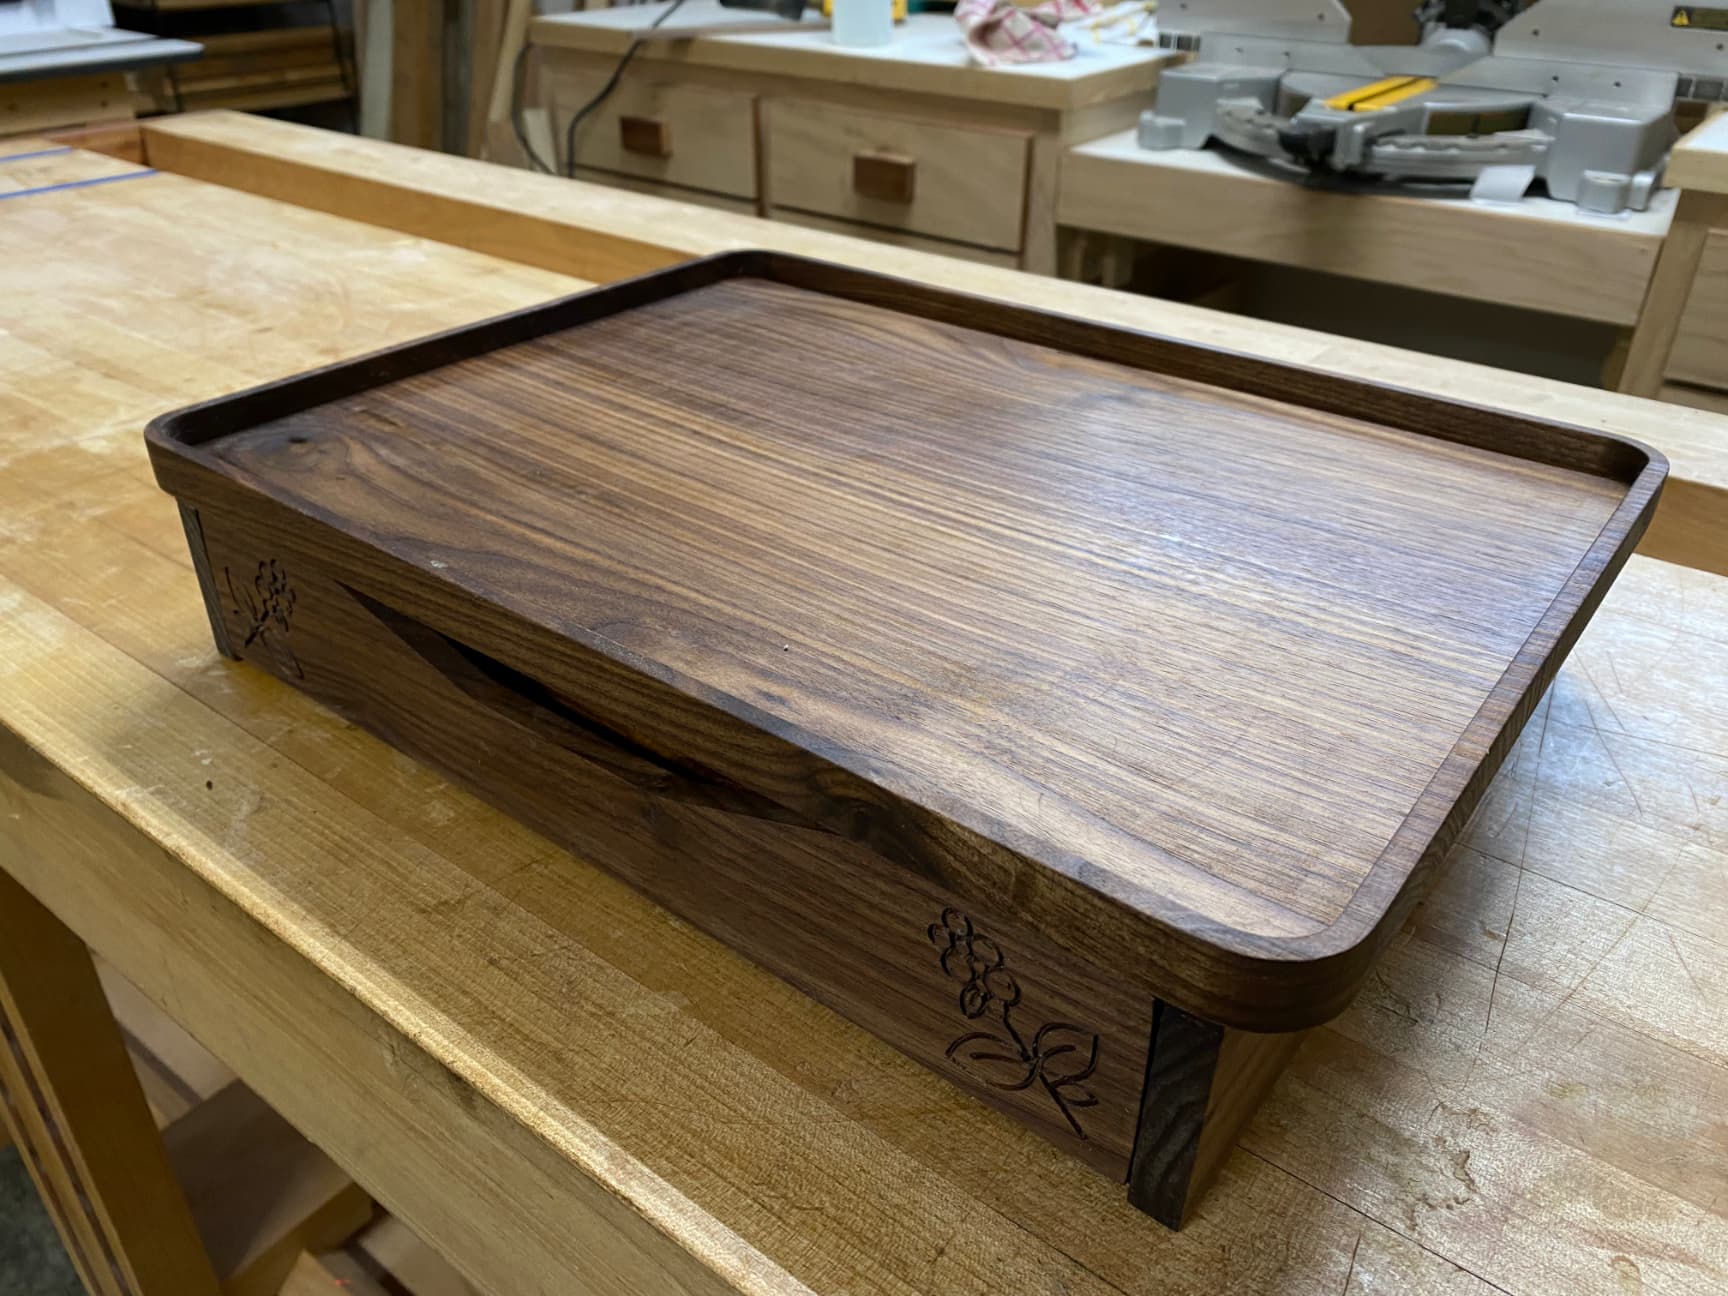
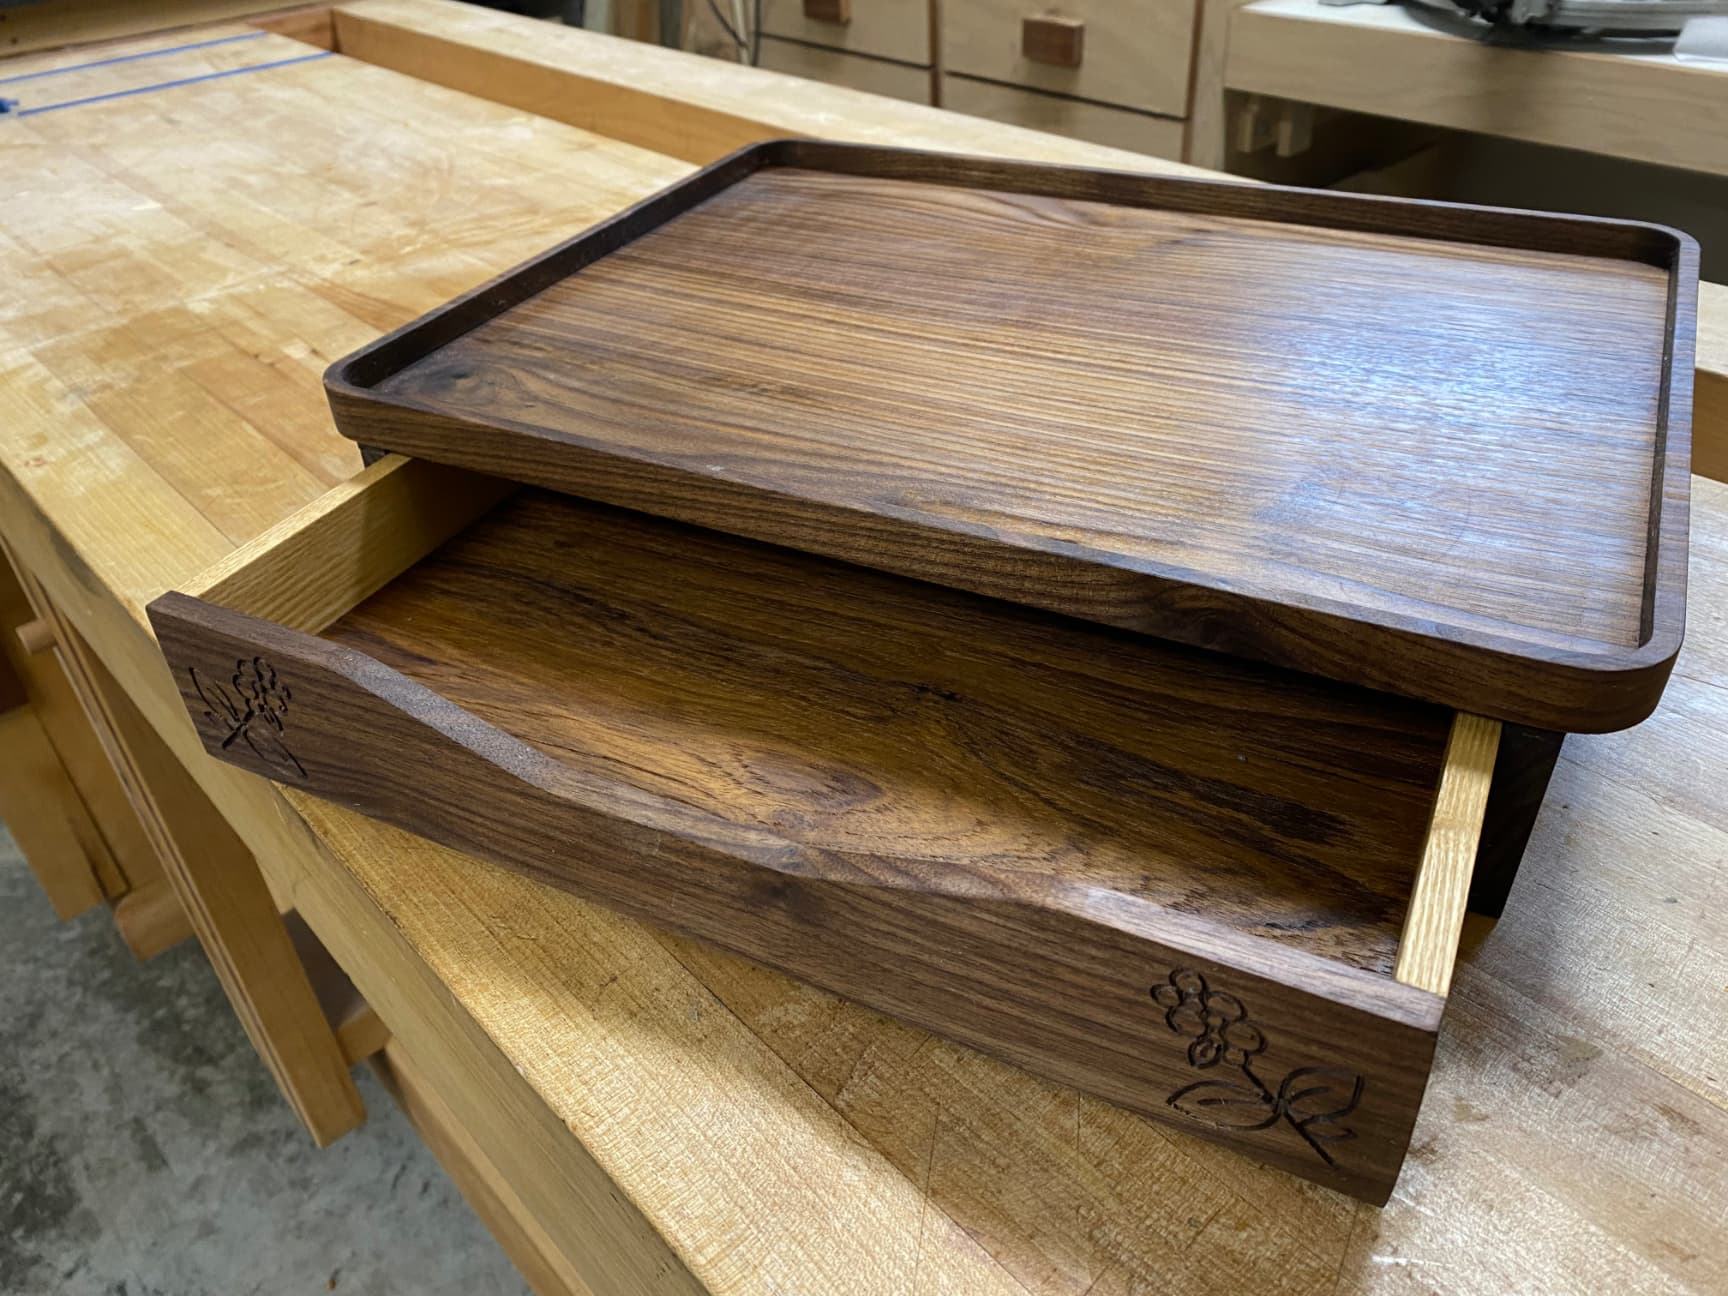
The top is 16.5" wide by 12.5" tall. A 1-inch diameter flattening/smoothing bit made quick work of the pocket cut on top. It only took 16 minutes as opposed to 63 minutes it would have taken with a standard 1/4-inch #102 bit. The little coffee bean flowers on the front of the drawer are simple V-carvings (60°).
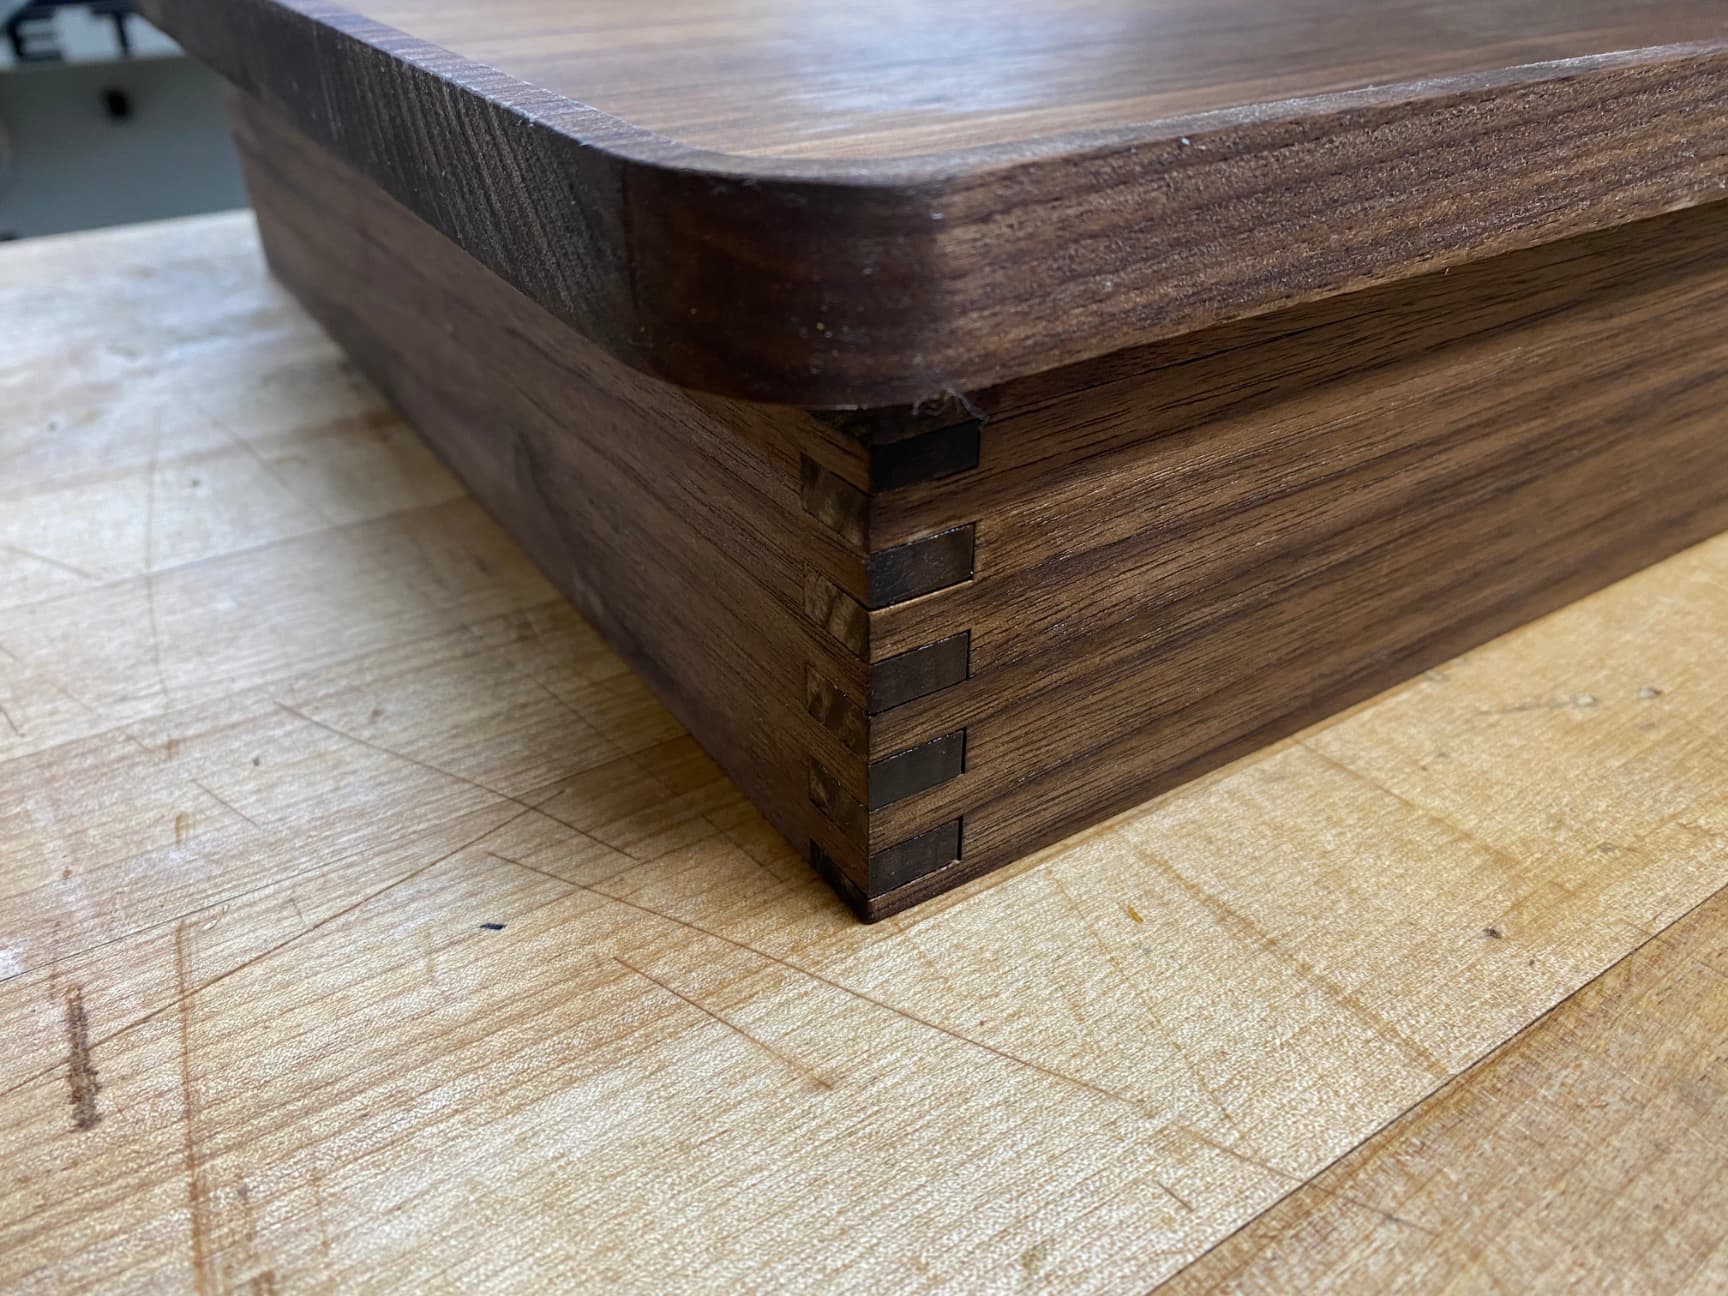
The rear corners are held together with box joints. First time I ever tried that technique. As you can see, they are not perfect, but they are solid.
I love using the Danish Oil also. Perfections in the surface can be sanded out and re-oiled, and blended in perfectly.
Can’t wait to have it on the kitchen counter. Having fun!
25 Likes
Very nice looking. I love to do finger joints. I have an Incra I-Box that I just put it on the table saw, adjust the blade height and in about 10 minutes I have a box made.
You never go wrong with walnut. It is one of my favorites. A lot of gun stocks are made of walnut and I have made a lot of bolt action pens and try to use walnut. The bolt action pen and the walnut are just a natural fit.
I am about to start a wedding presentation box for a friend’s daughter. It will finger jointed and carved on top and filled with epoxy.
Walnut and the white epoxy looks so good.
4 Likes
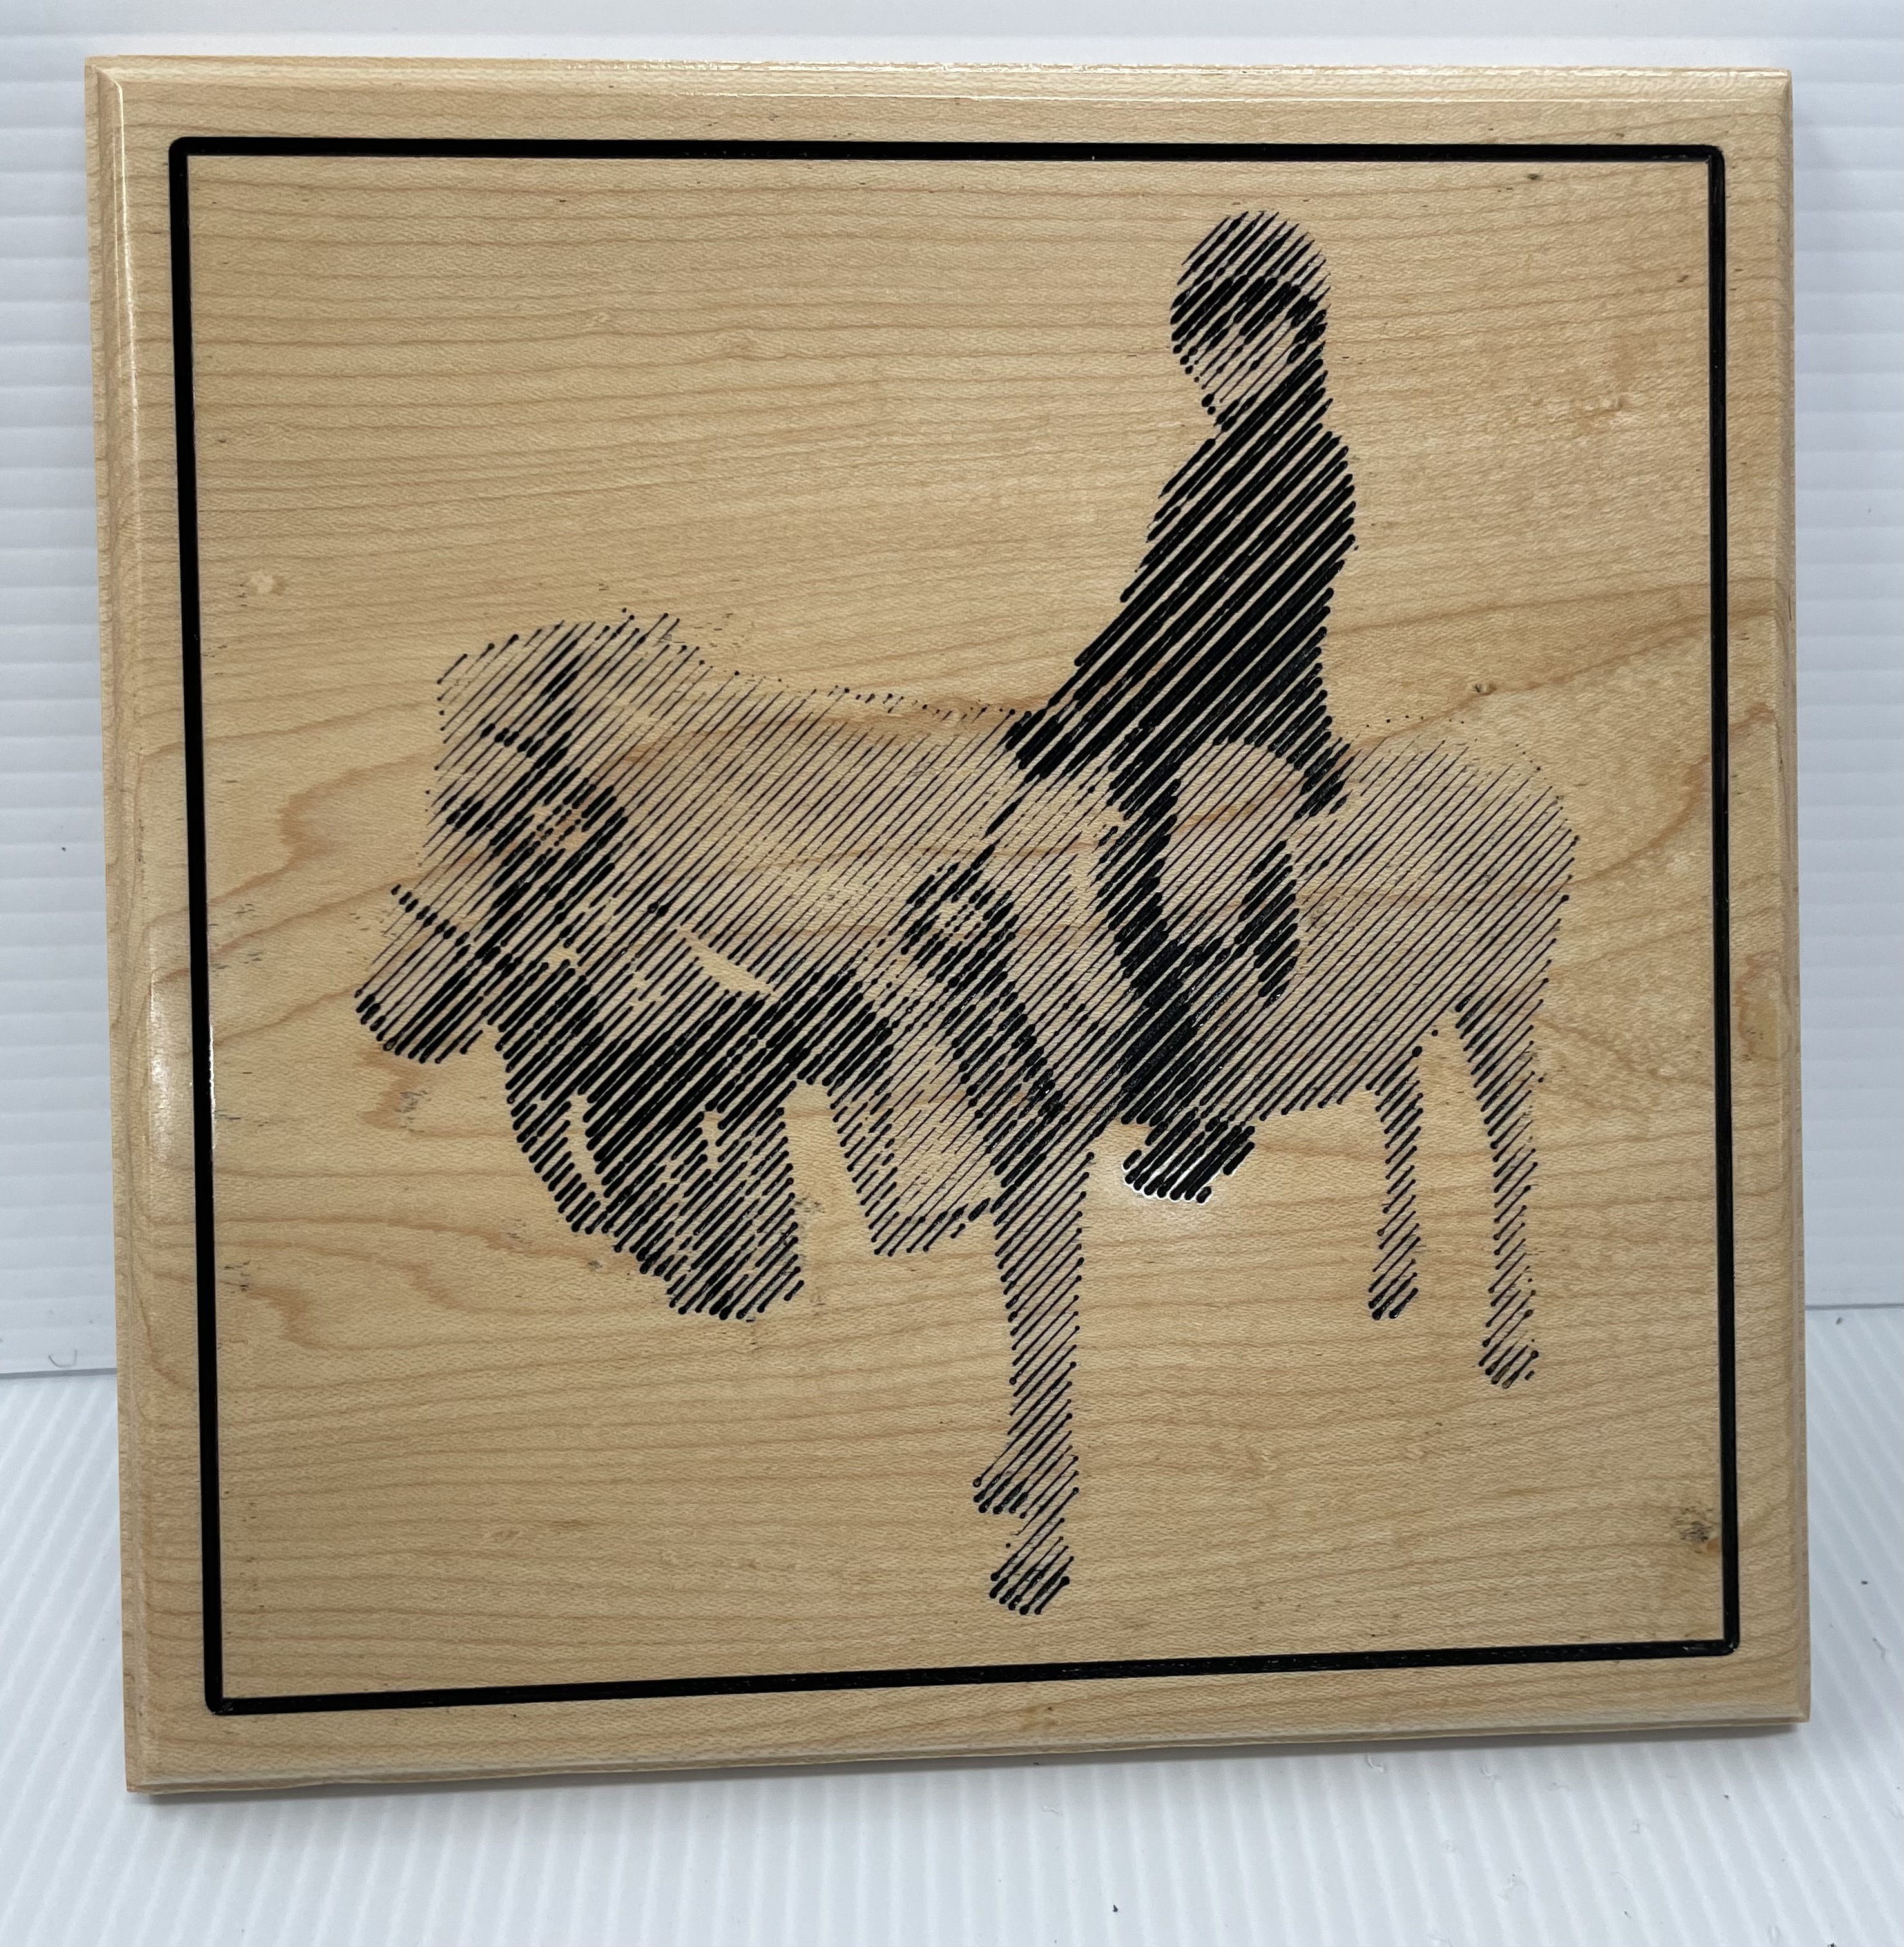
I did my first photo Vcarve yesterday. Well, actually my first was a failure so I flattened the board and tweaked the settings and got something acceptable. I still have some playing around to do to get better but this will pass for now.
17 Likes
Cullen,for a first attempt very good,how did you get the colours onto the wood?
After carving I used a small brush to put black paint in the carved areas including the border. Then I sanded that off when dry and put a few coats of poly.
It’s hard to see in that picture but I also use a ball nose bit to create a molding look around the outside. That was more apparent before so had to remove the top 1/8” ![]()
2 Likes
That’s great Cullen,you look at the carving from a distance and it is great.
Thanks. I would like to tighten the lines up. My first attempt I used hatching and a 30 degree bit. Pretty much all of the black area was obliterated.
In the redo I used a single direction and a 60 degree bit.
How did you render the photo. Did you use cutrocket generator?
A friend of mine had is daughter in-law ask if she could put her horse in his pasture. He lives about 3 hours away. He told her sure but it would be a lot of driving for her to come and feed and care for the horse everyday. She changed her mind about putting the horse at his house.
5 Likes
I used the photo Vcarve capability in Vectric Vcarve Desktop. And the swept profile toolpath for the edge rather than modeling in 3D.
I have not tried the halftone generator yet.
1 Like
Well done on the varve. I can definitely relate to having to redo the photo carving, playing around with the settings. One of the things I like about Vectric’s photo option is being able to manipulate the picture’s tone and contrast. You can really get the lights and darks to bring out the needed features of the photo.
I did tweak it a little with the dodging tool on the face in Affinity Photo but I have to admit that application bewilders me. I need to spend more time with it right now I just hack at it.
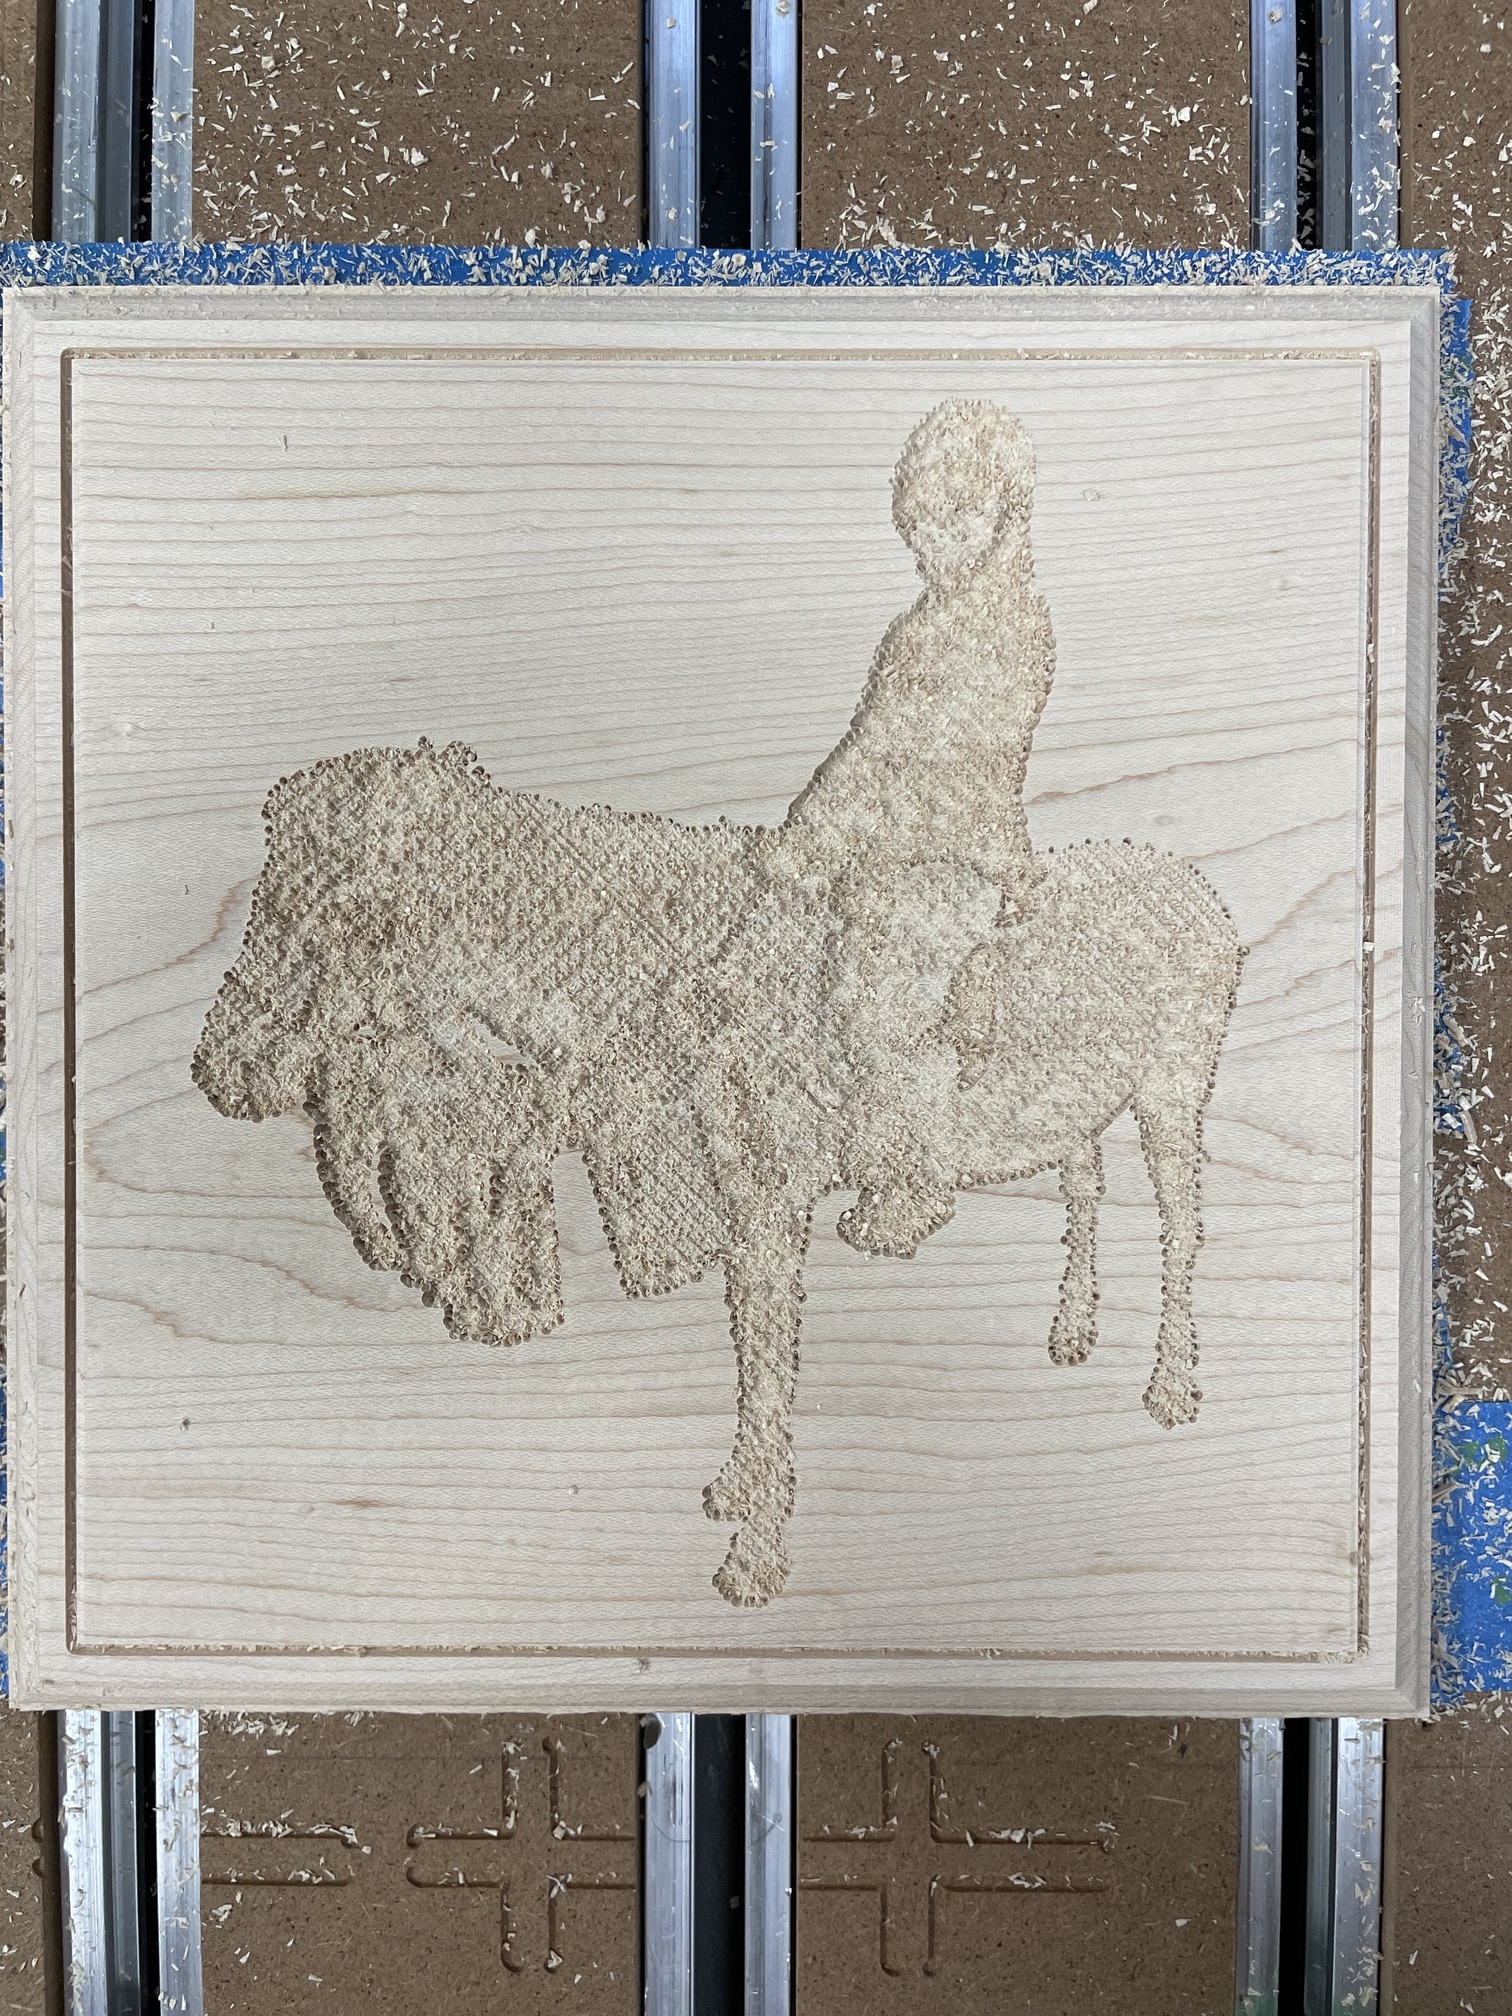
Here was the first cut:
I forgot in my earlier message that in addition to changing to a single direction and a 60 degree bit I also dropped the DOC from .1 to .05. I was pretty nervous that when I sanded the paint off with that low DOC I would go through.
It hearkens back to darkroom days and shielding a section of a print from the light, contrast w/ “burning” (focusing more light on an area to increase its darkness).
2 Likes
Exactly. I spent middle and high school dodging and developing pictures in my darkroom on a Bessler enlarger that my dad bought in 1959. I wore out a gear on the thing in 1982 and found the lifetime warranty along with the receipt. I contacted the company and they sent me a new one. Now I could make my own ![]()
3 Likes
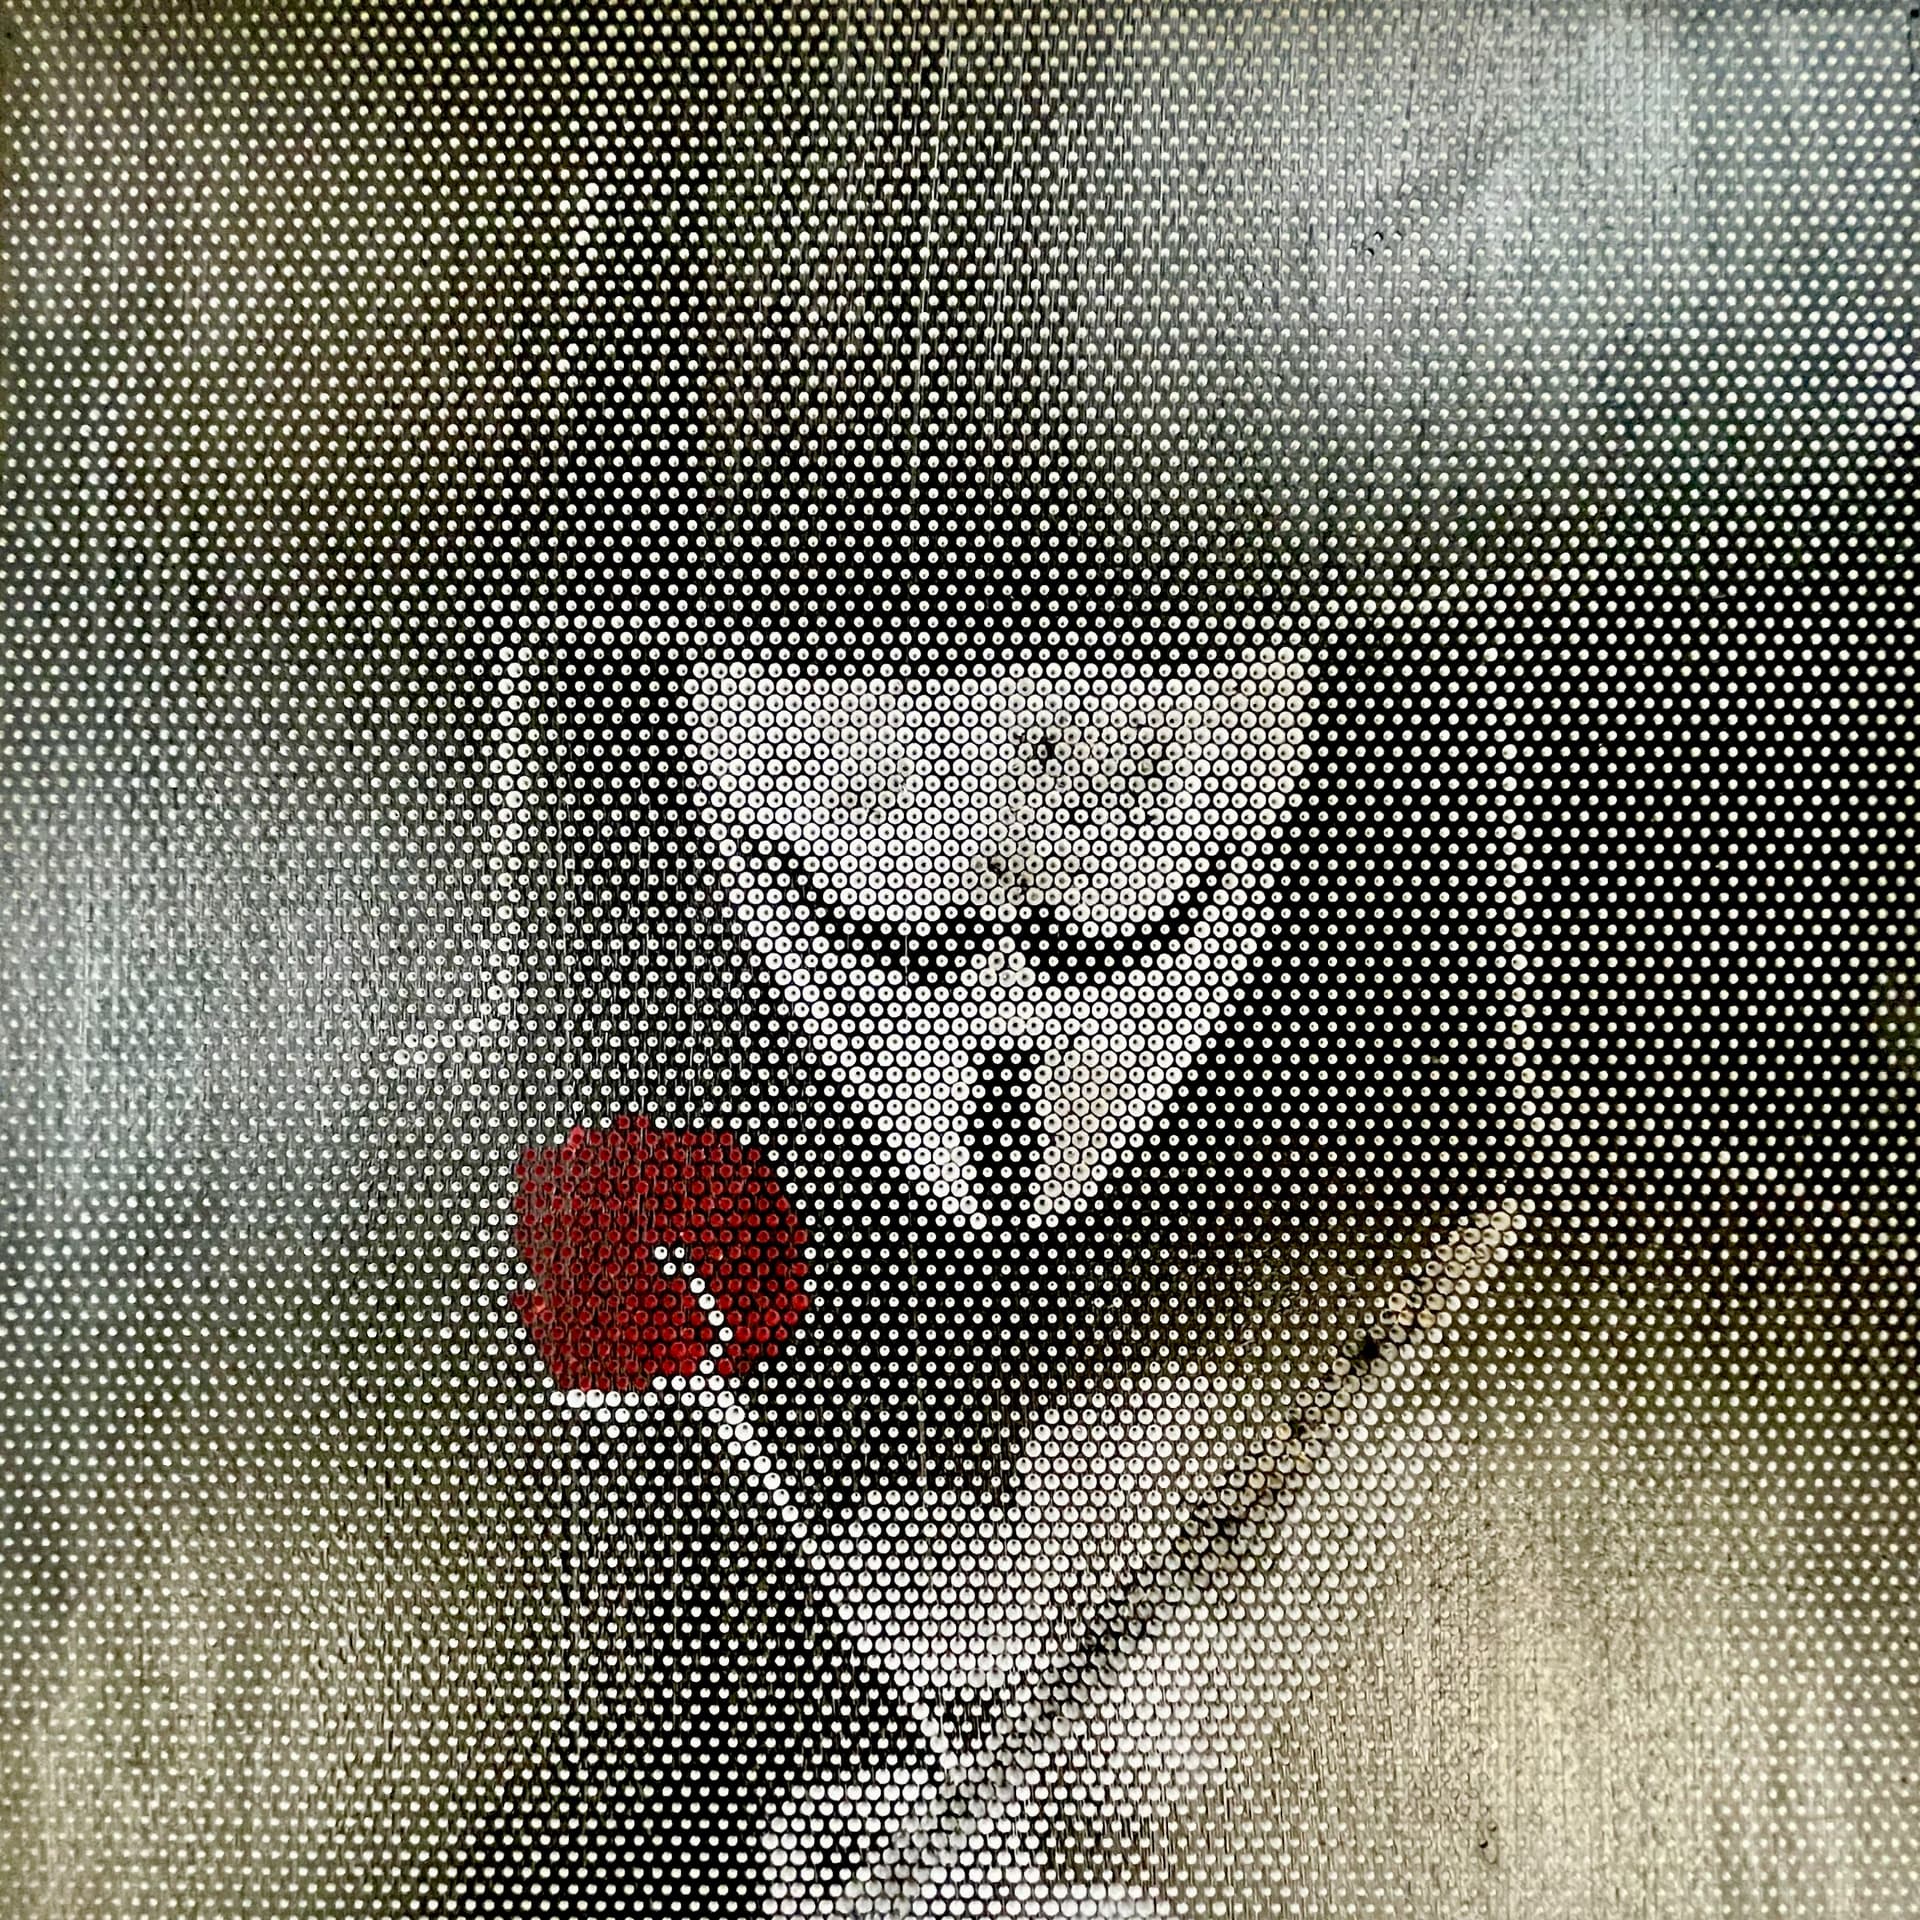
I’ve been watching this and think you might enjoy Spiral Betty.
There you can get SVGs to create photo images.
Some results can look fantastic, for example:
12 Likes
I like that. Can you send me the file so I can make it for my machine?