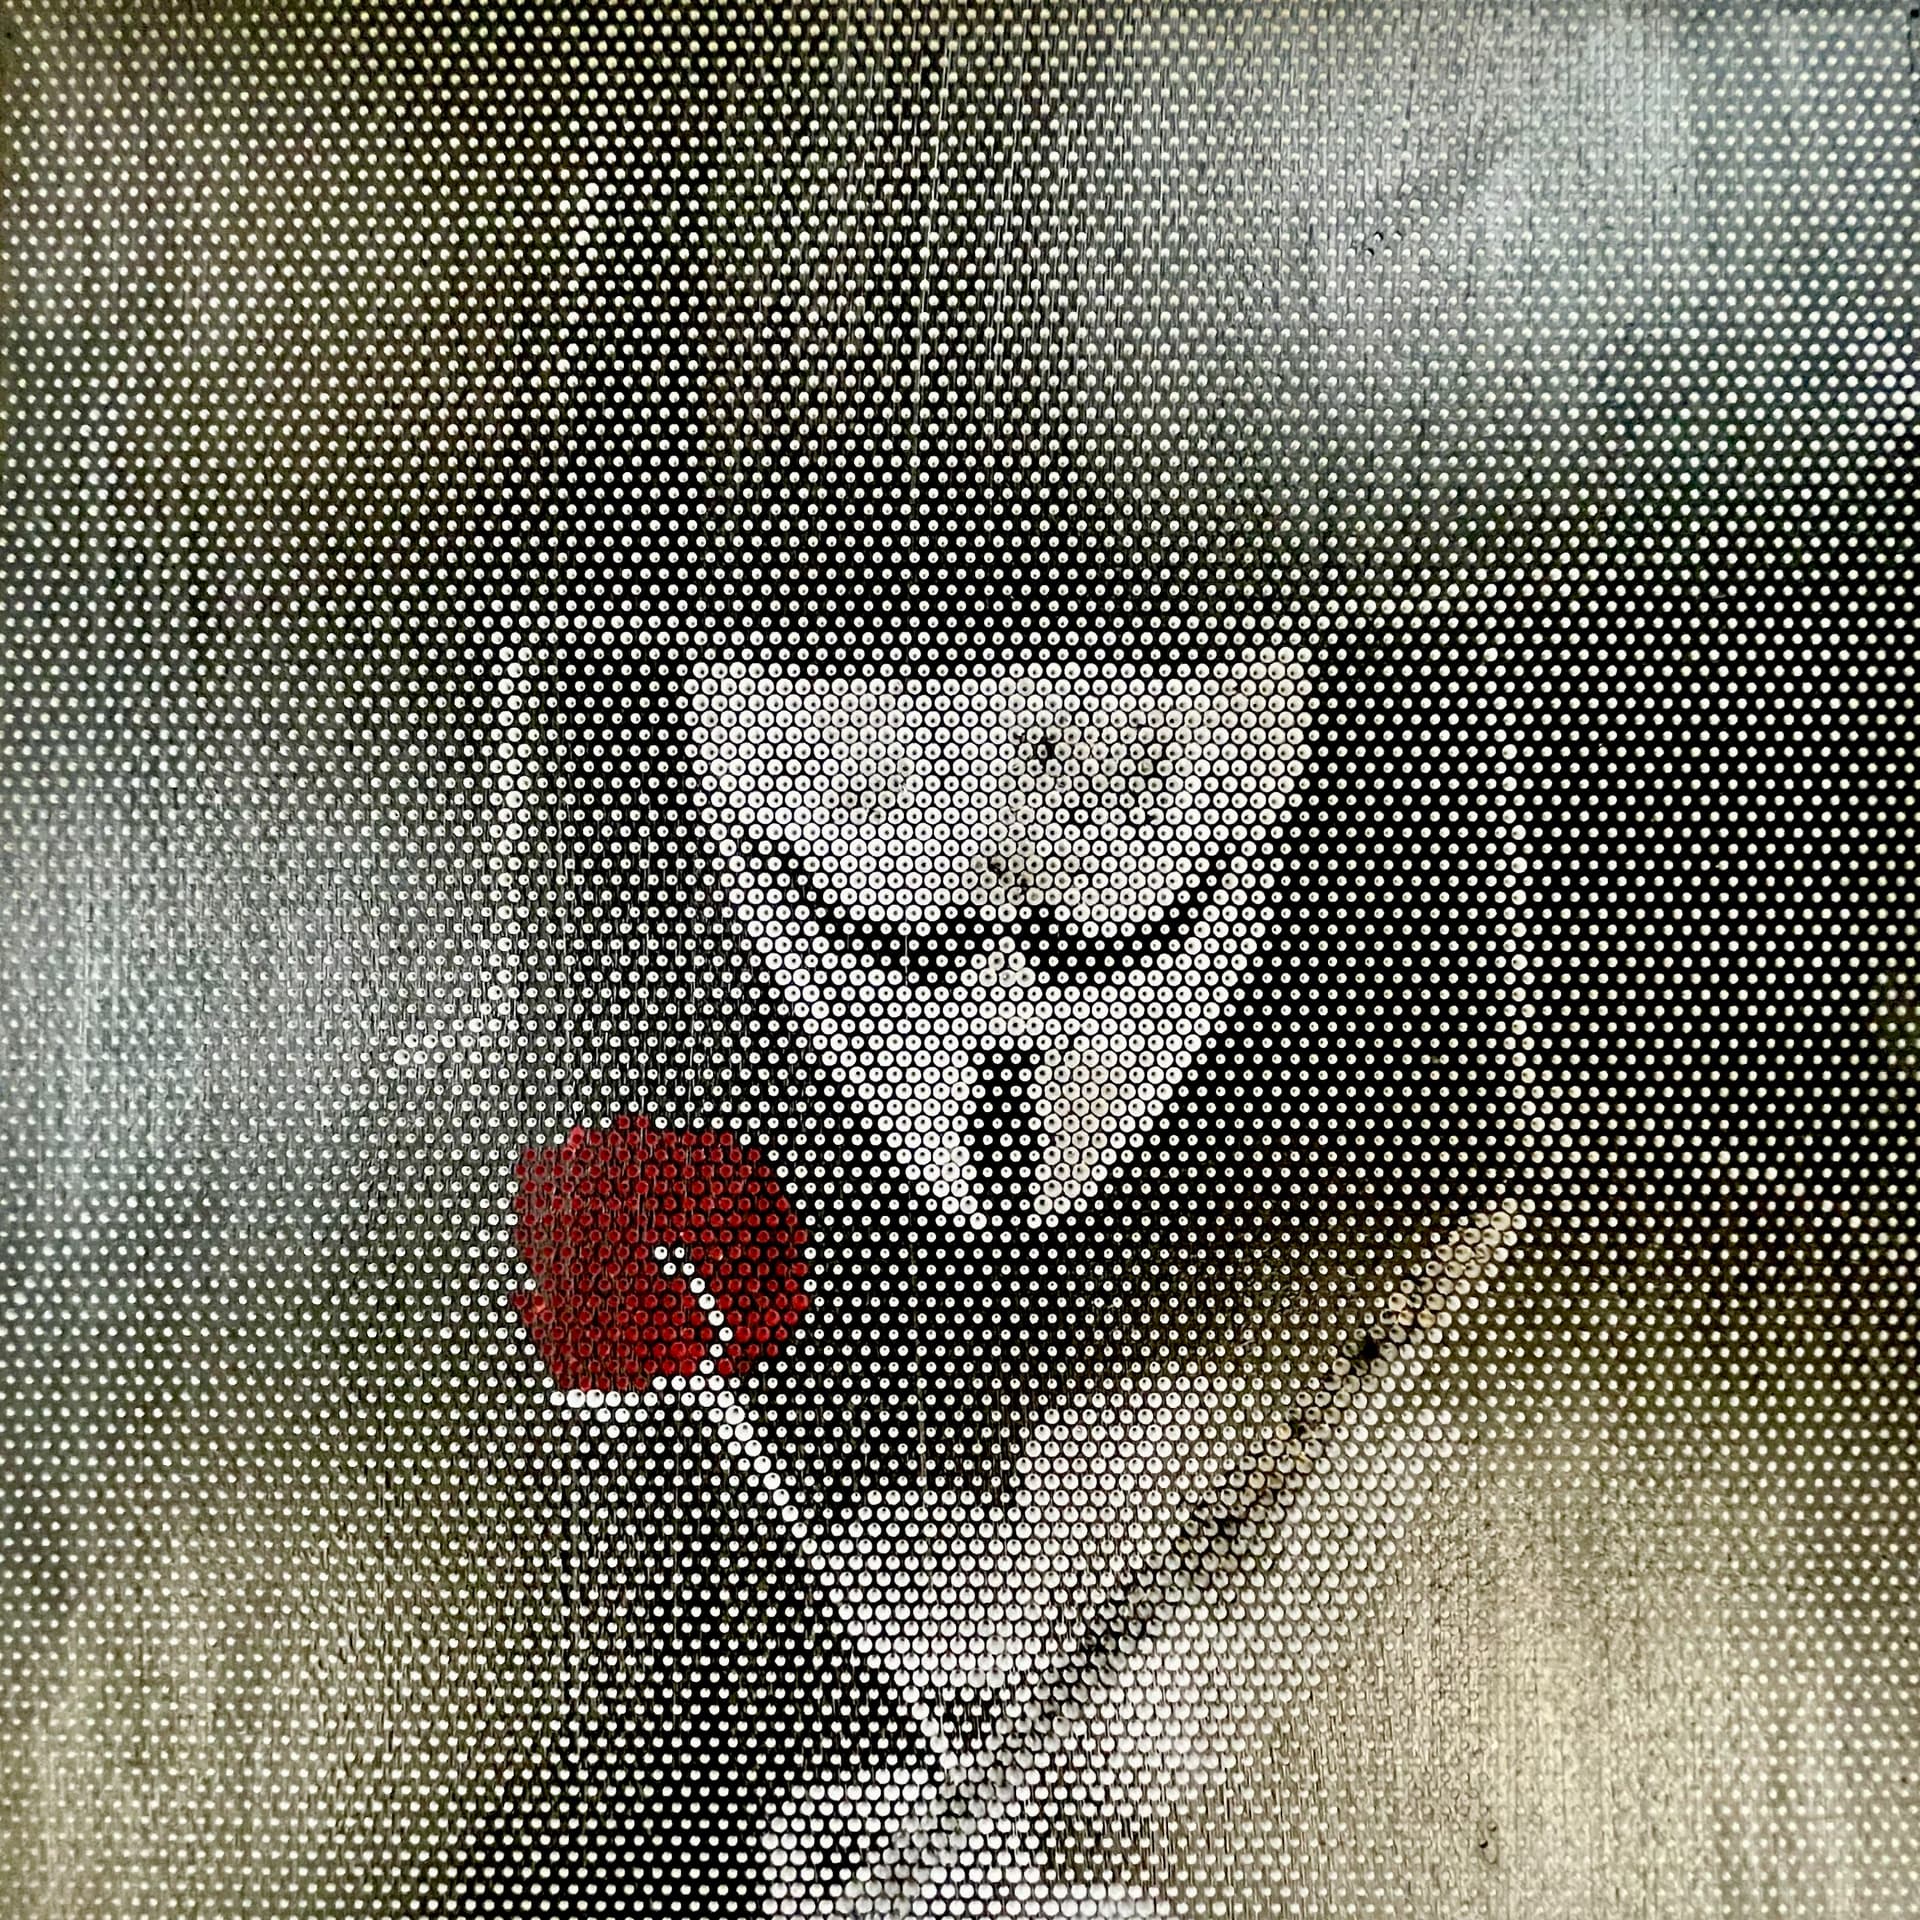
I’ve been watching this and think you might enjoy Spiral Betty.
There you can get SVGs to create photo images.
Some results can look fantastic, for example:
12 Likes
I like that. Can you send me the file so I can make it for my machine?
Spent a chunk of the weekend building five soil compression test setups for the Intro to Engineering class my wife teaches.
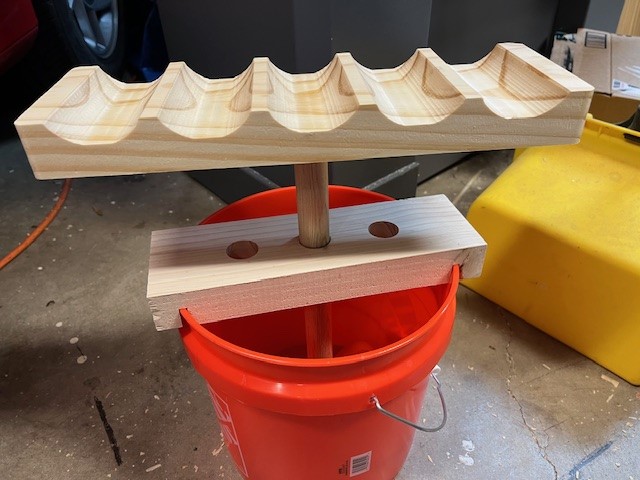
Prototyped it last semester, and now she wants to have multiple set ups for each lab group.
My first two-sided object (ok one side is just a one inch hole for the dowel). Designed in Fusion 360. Used an Amana Bowl bit. I probably could have speeded up things a little with shortening lift times and tweaking resolution on rest machining. (grooves didn’t need to be super smooth). The grooves are for holding water bottles as weights, if you were wondering.
This also was my first use of the Crush-it Clamps. I ordered a set when they came out, and this is the first time I got around to using them. Those things are FABULOUS! That made life a lot easier to do five of these things.
John
10 Likes
+1 for the bucket brace!
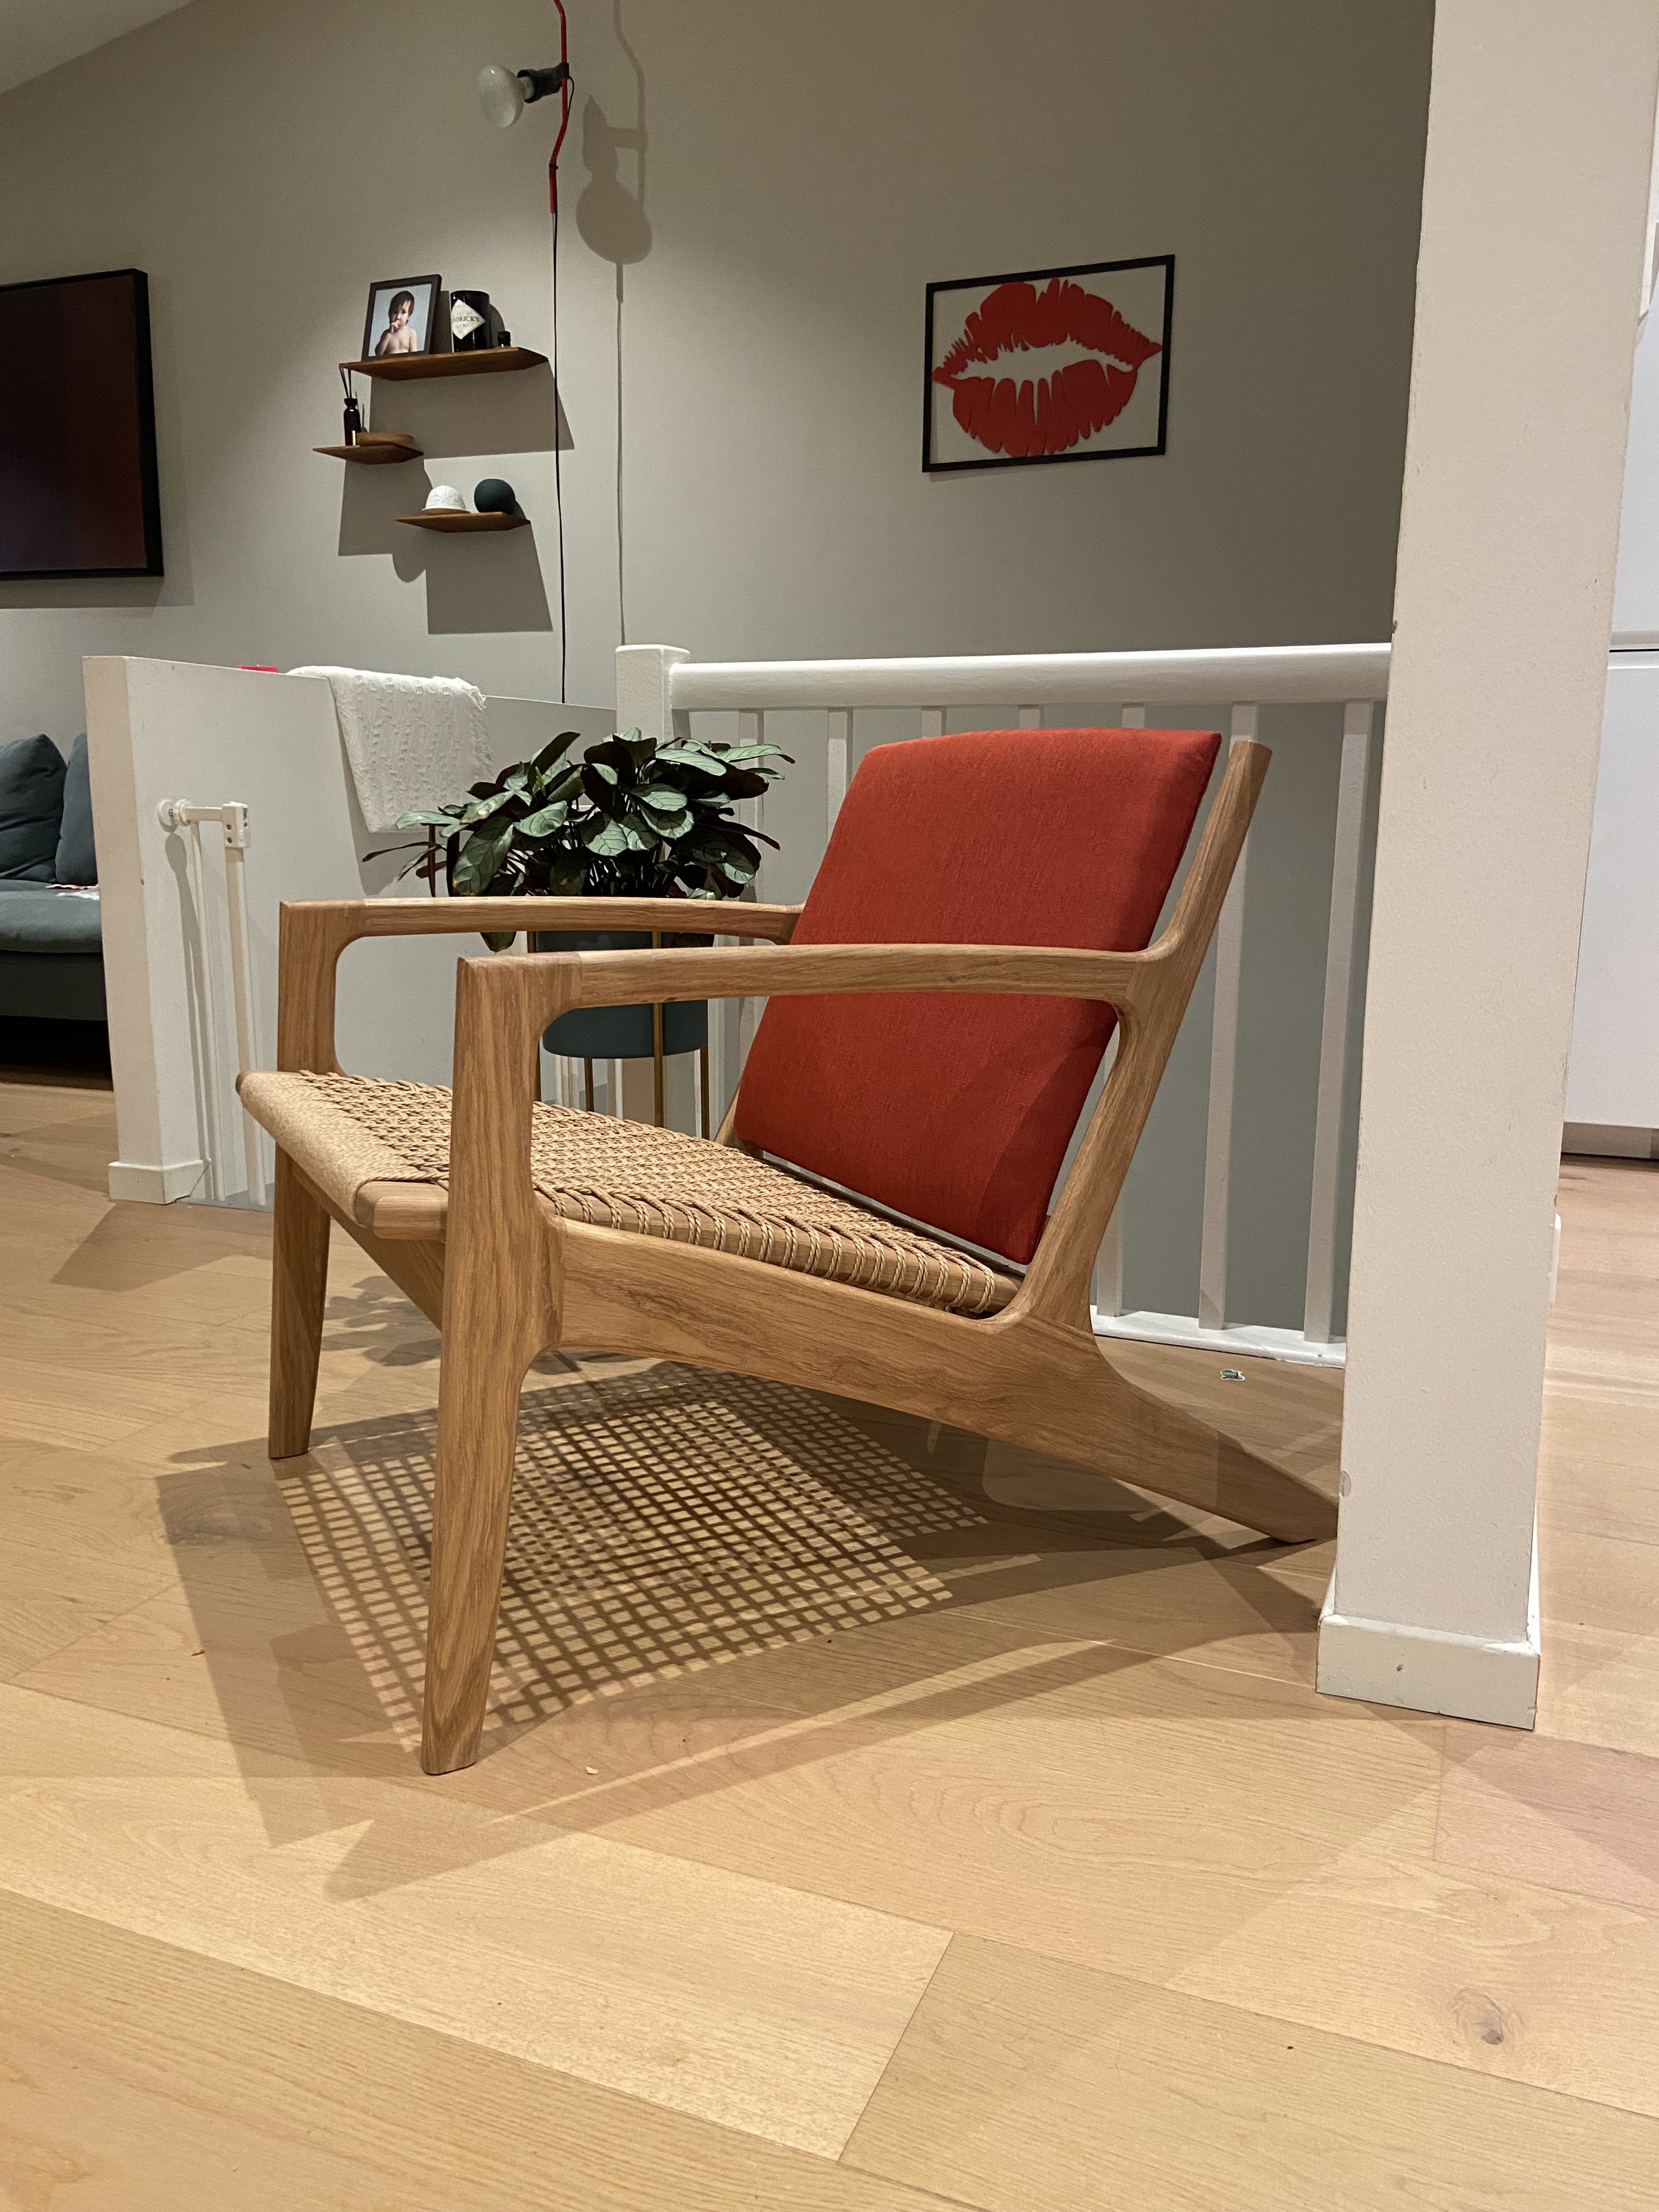
Not entirely made on my shapeoko 3, but if it wasn’t for @wmoy that got me hooked to fusion and cnc I would never have started this project! And my shapeoko got me into woodworking.
Drawn in fusion, templates are cut on my shapeoko along with the curved part of the seat.
Made a jig for bending the seatback also on my shapeoko.
Heavily inspired by morningworks’s amazing design and craftsmanship.
44 Likes
beautiful result Nessk, this is also on my list of things to make. #Chairsarehard
2 Likes
Nicely done! Did you glue the frame / arm rest pieces first prior to cutting then cut all as one part?
1 Like
That is a really nice chair. I have been a traditional wood worker for about 50 years. About 5 years ago I got an SO3 to supplement my woodworking. For about 3 years it just took over. Now I am back to a hybrid approach.
The Shapeoko is a great tool. My only advice is to not get wrapped around the axle and try to do everything on the Shapeoko. It is a great tool but some things are just faster and better done by hand or with other power tools.
How did you do the canning? Did you do the upholstery as well?
Now you just need a foot stool. The rabbit hole goes very deep.
4 Likes
The frame is in 4 pieces that was rough cut oversize to the templates mentioned above, then precisely cut on the joining edges, then they were all joined together using dominos. Then it was routed on a router table with a template bit and the template from my shapeoko.
1 Like
Very good points! And I can relate to the hybrid part! ![]()
Yes all is done by me. The seat is weaved by use of danish papercord. Hours on youtube to understand the principle, then a small test piece to try it out along with different spacing between the cords. I landed on 1"
The footstool is ready in fusion, but im not sure if i should make the sidetable or the footstool first! ![]()
5 Likes
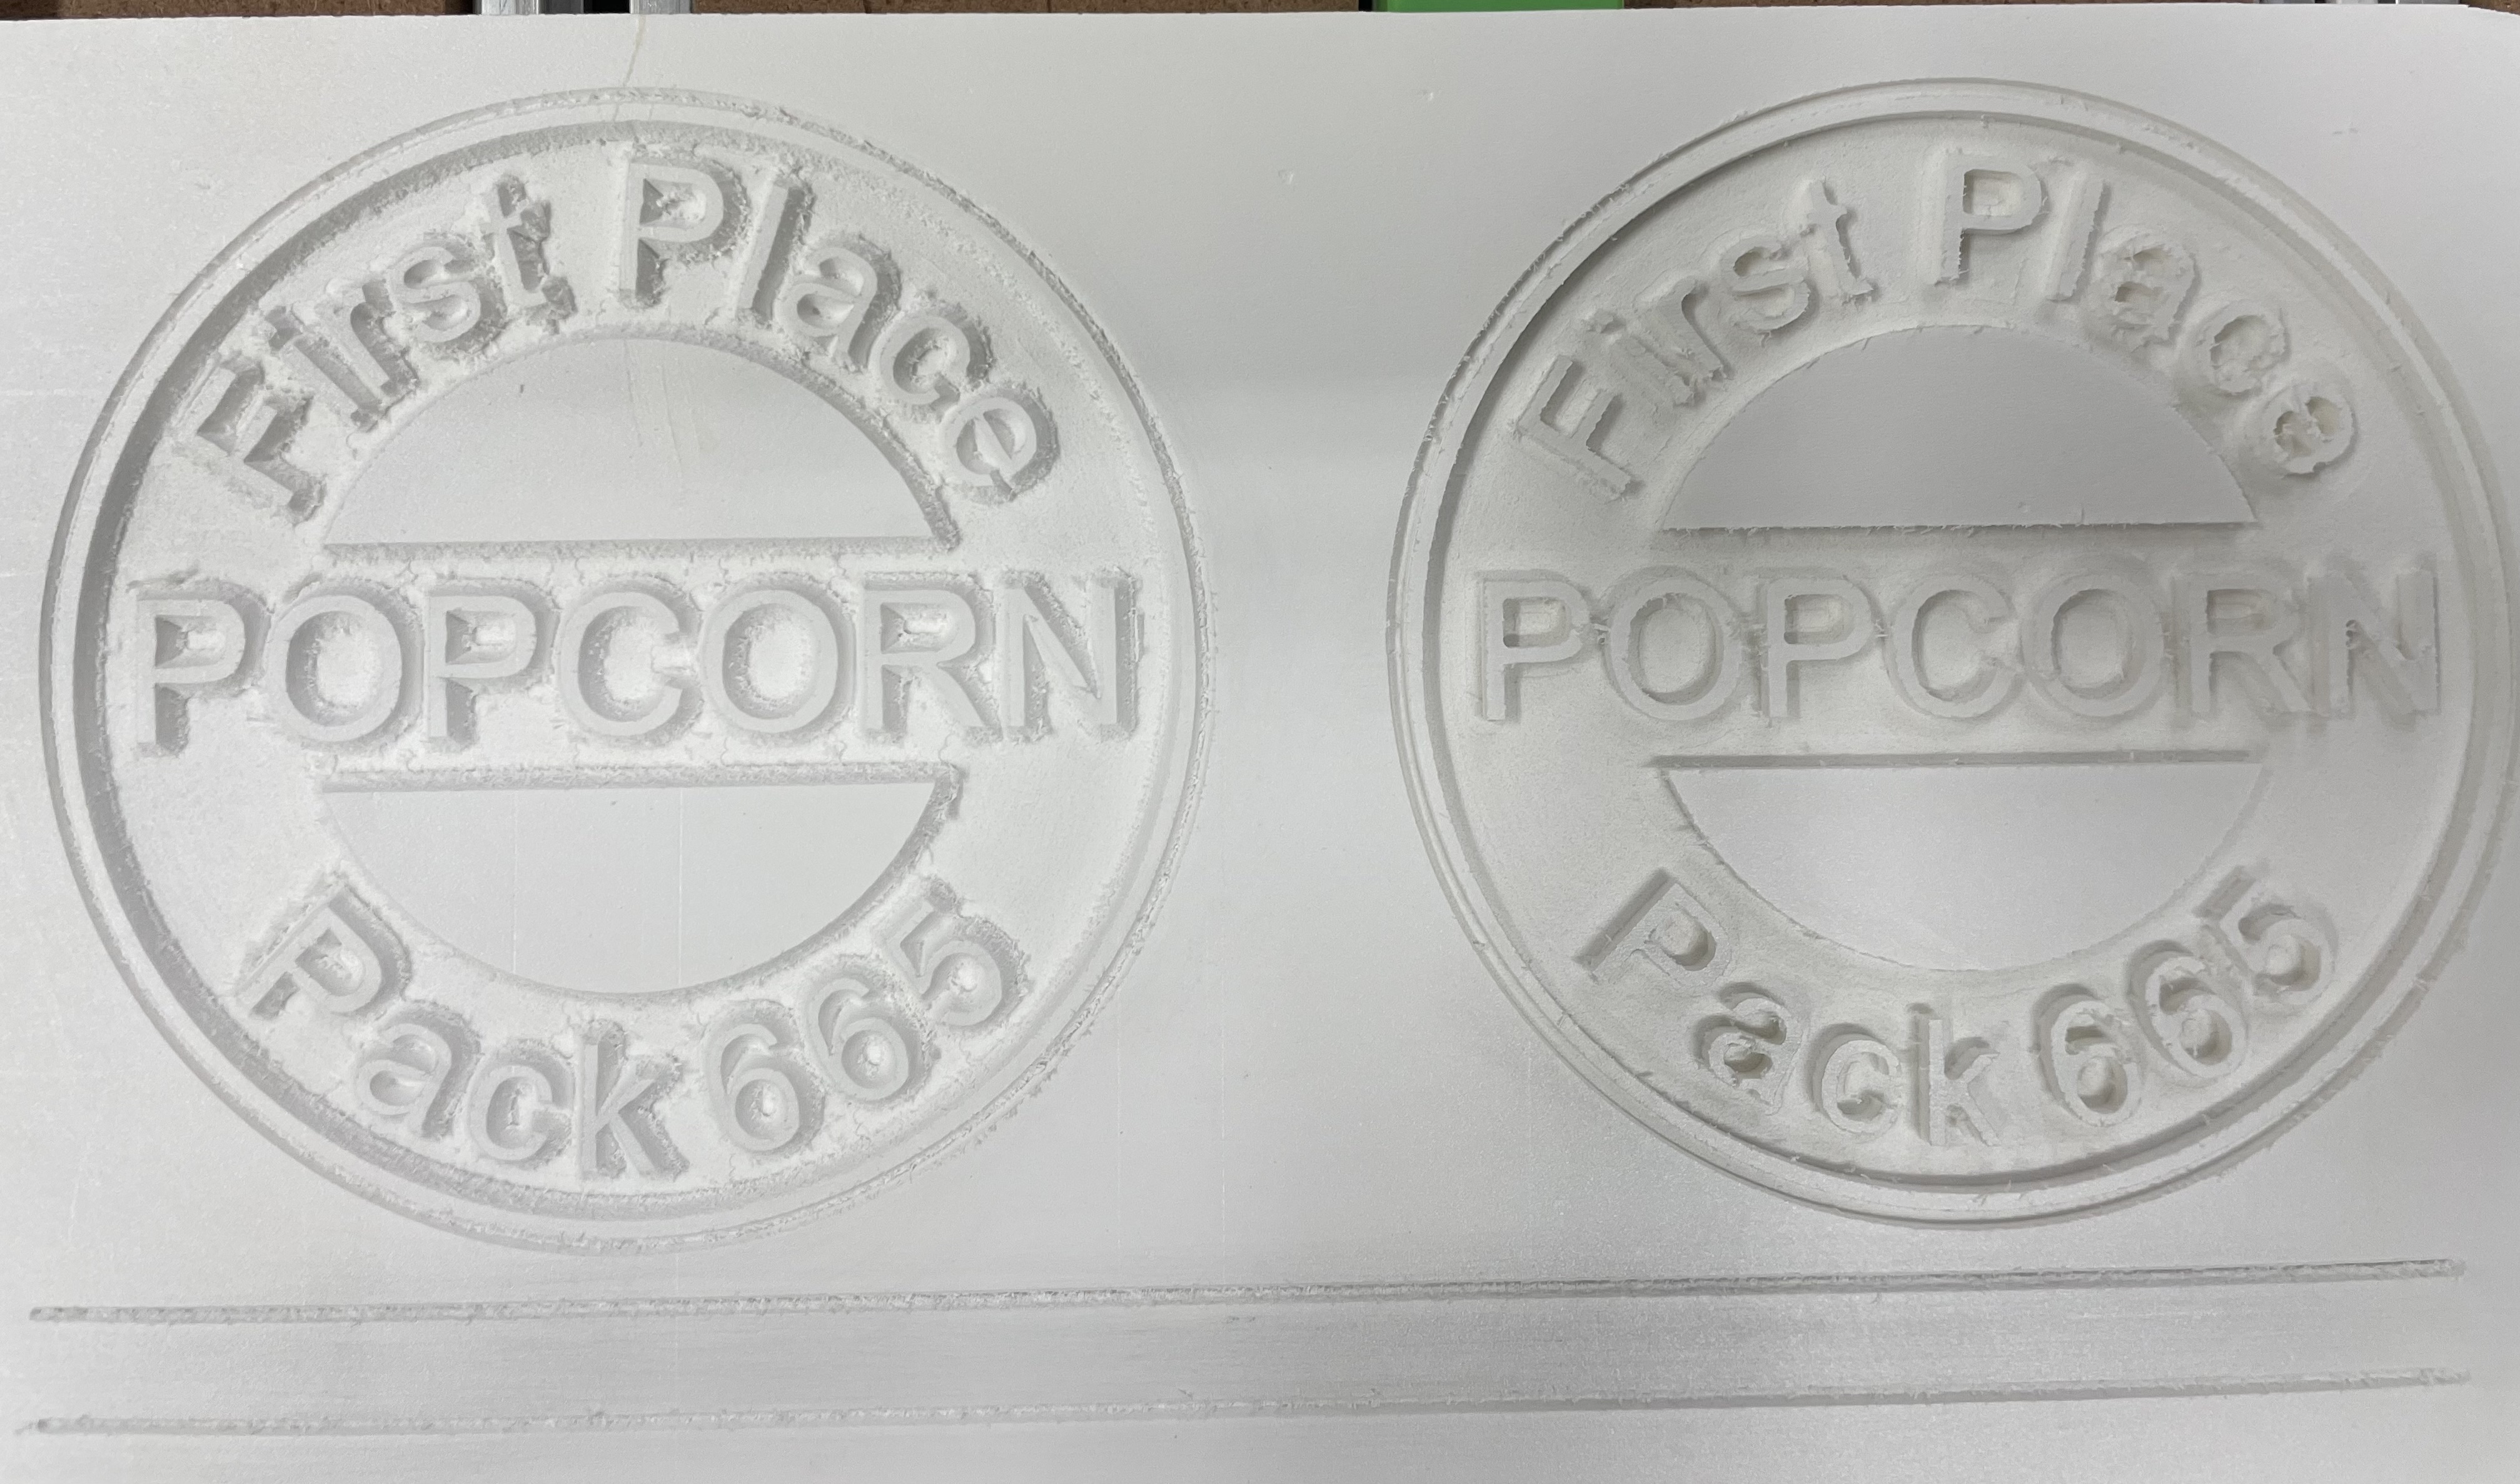
Our Cub Master wanted some plaques for popcorn sales and wanted them to look like popcorn boxes.
I didn’t want to cover nice wood completely with paint so I used PVC. This is what I came up with.

It still needs a little cleanup and a clear coat to give it shine. I am not happy about the visible brush strokes. I masked the whole thing to make painting after carving a little less messy but still have some issues.
I used a #302 for the V carving bits and then an 1/8” O flute bit and a 1/16” upcut.
It took a lot of cleanup after the carve mostly from the V as someone mentioned in a previous thread even though I had RPM pretty low and feed up high. After painting I decided to do a test (should have done it first).
On the left I used the same set of bits but ran the V carve passes twice. It didn’t really help.
On the right I used only the 1/8” O flute and a 1/16” O flute that I forgot I had. So the letters are “square” instead of having the V appearance but the cleaning will be MUCH less.
I guess 2nd and 3rd will get nicer looking plaques than 1st unless I have an abundance of time.
14 Likes
I always lower Z-zero by 0.002" on the second pass; even in wood.
1 Like
I could try that. In this case I expected the second pass to clean up a little of the mess left from the first but it really looks no different.
I can do some experimenting with other V bits that I have, but for this “job” I think I will forgo the V.
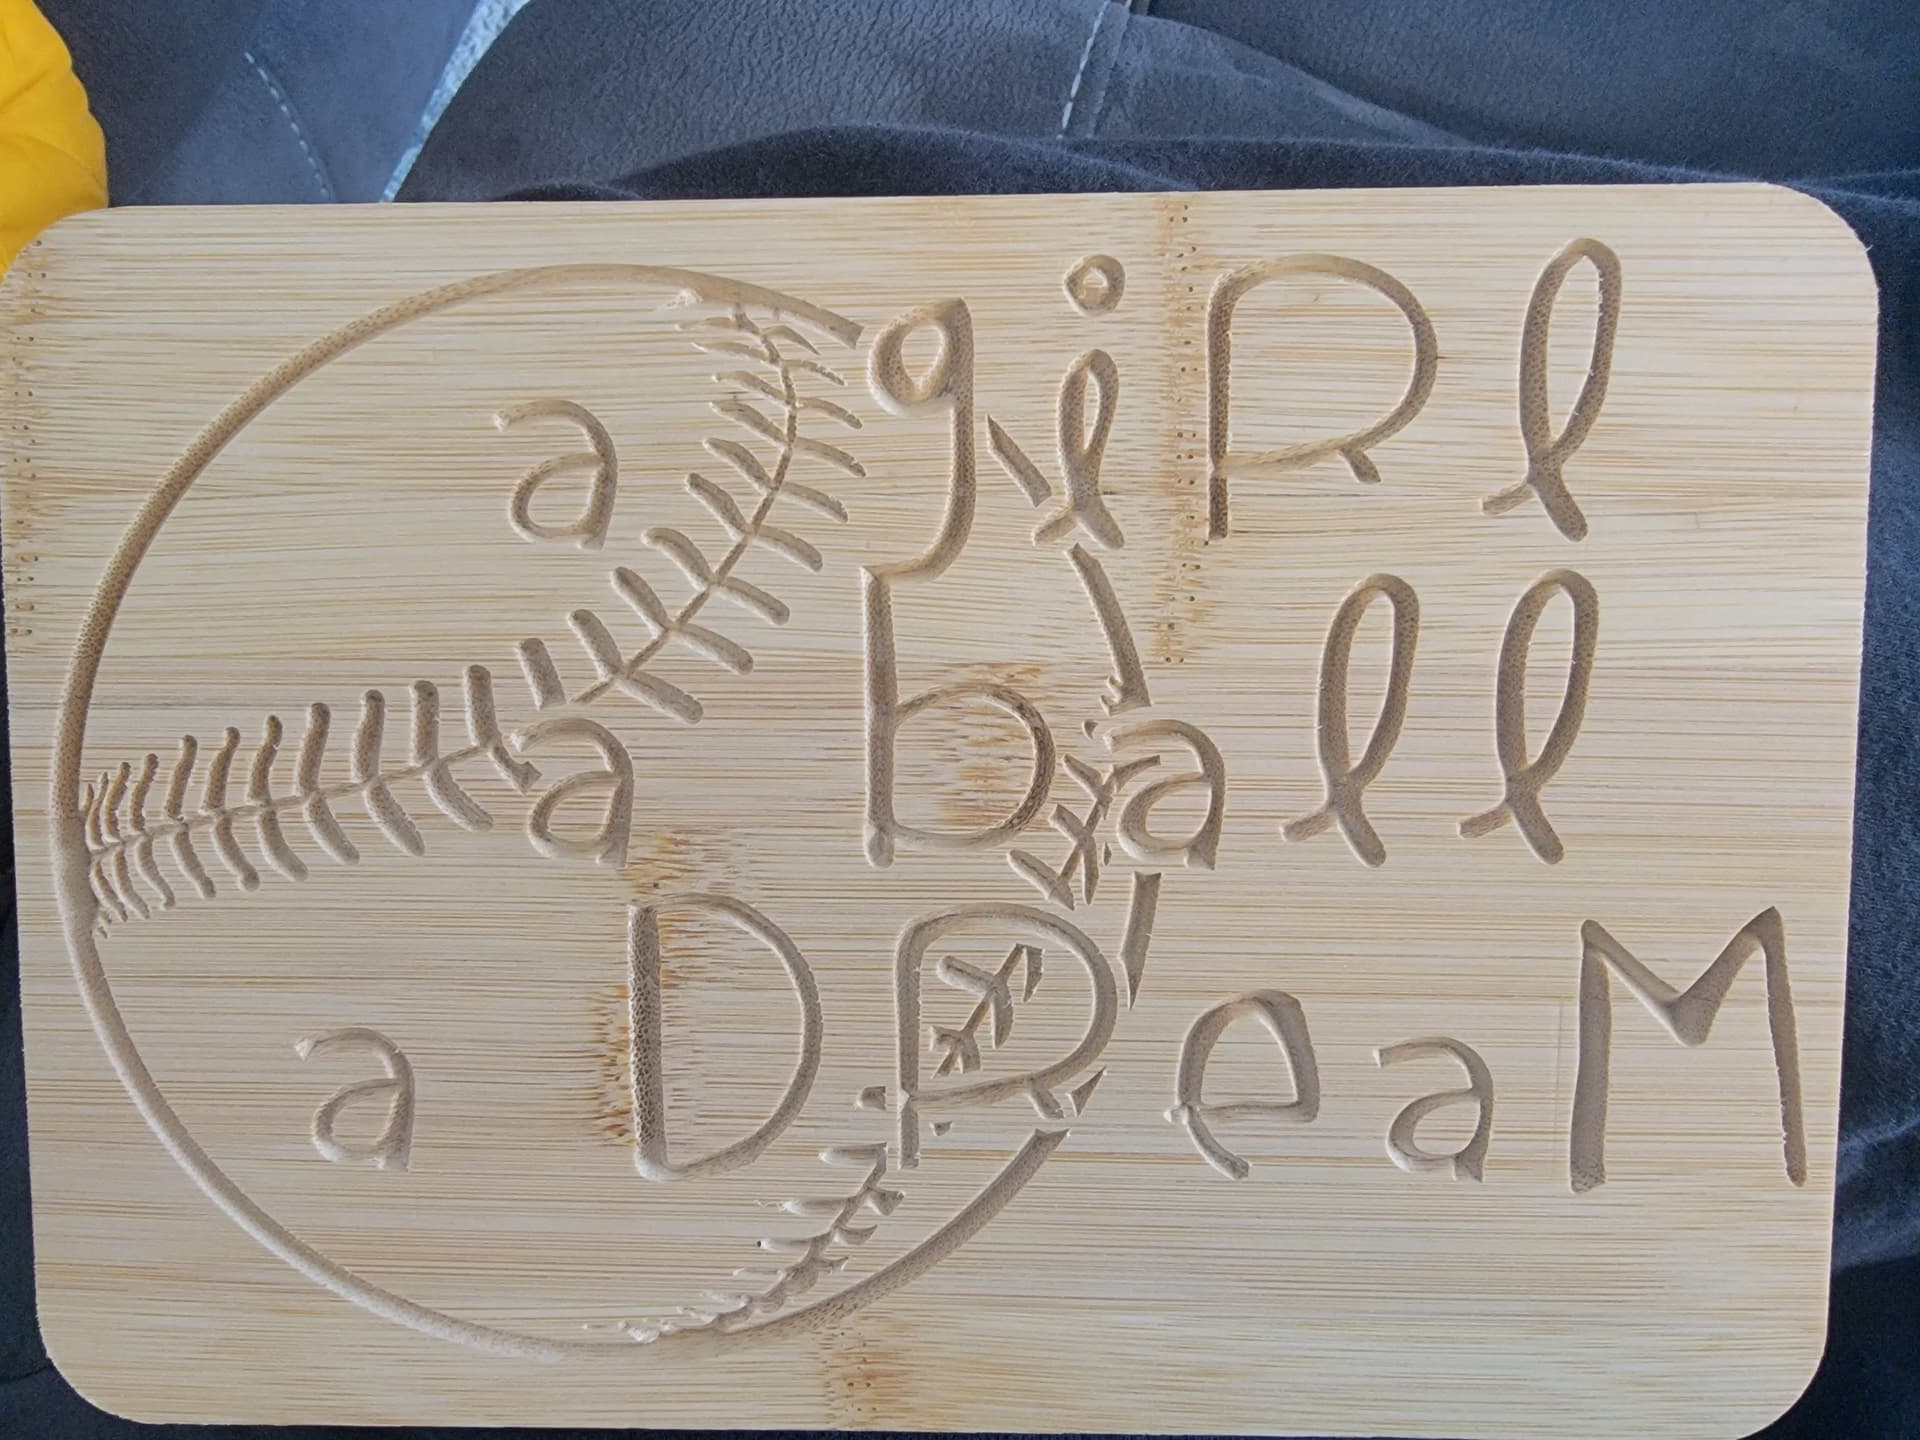
My first creation was admittedly simple so i thought i would post my second. A gift for my wife. Would take suggestions for finish.

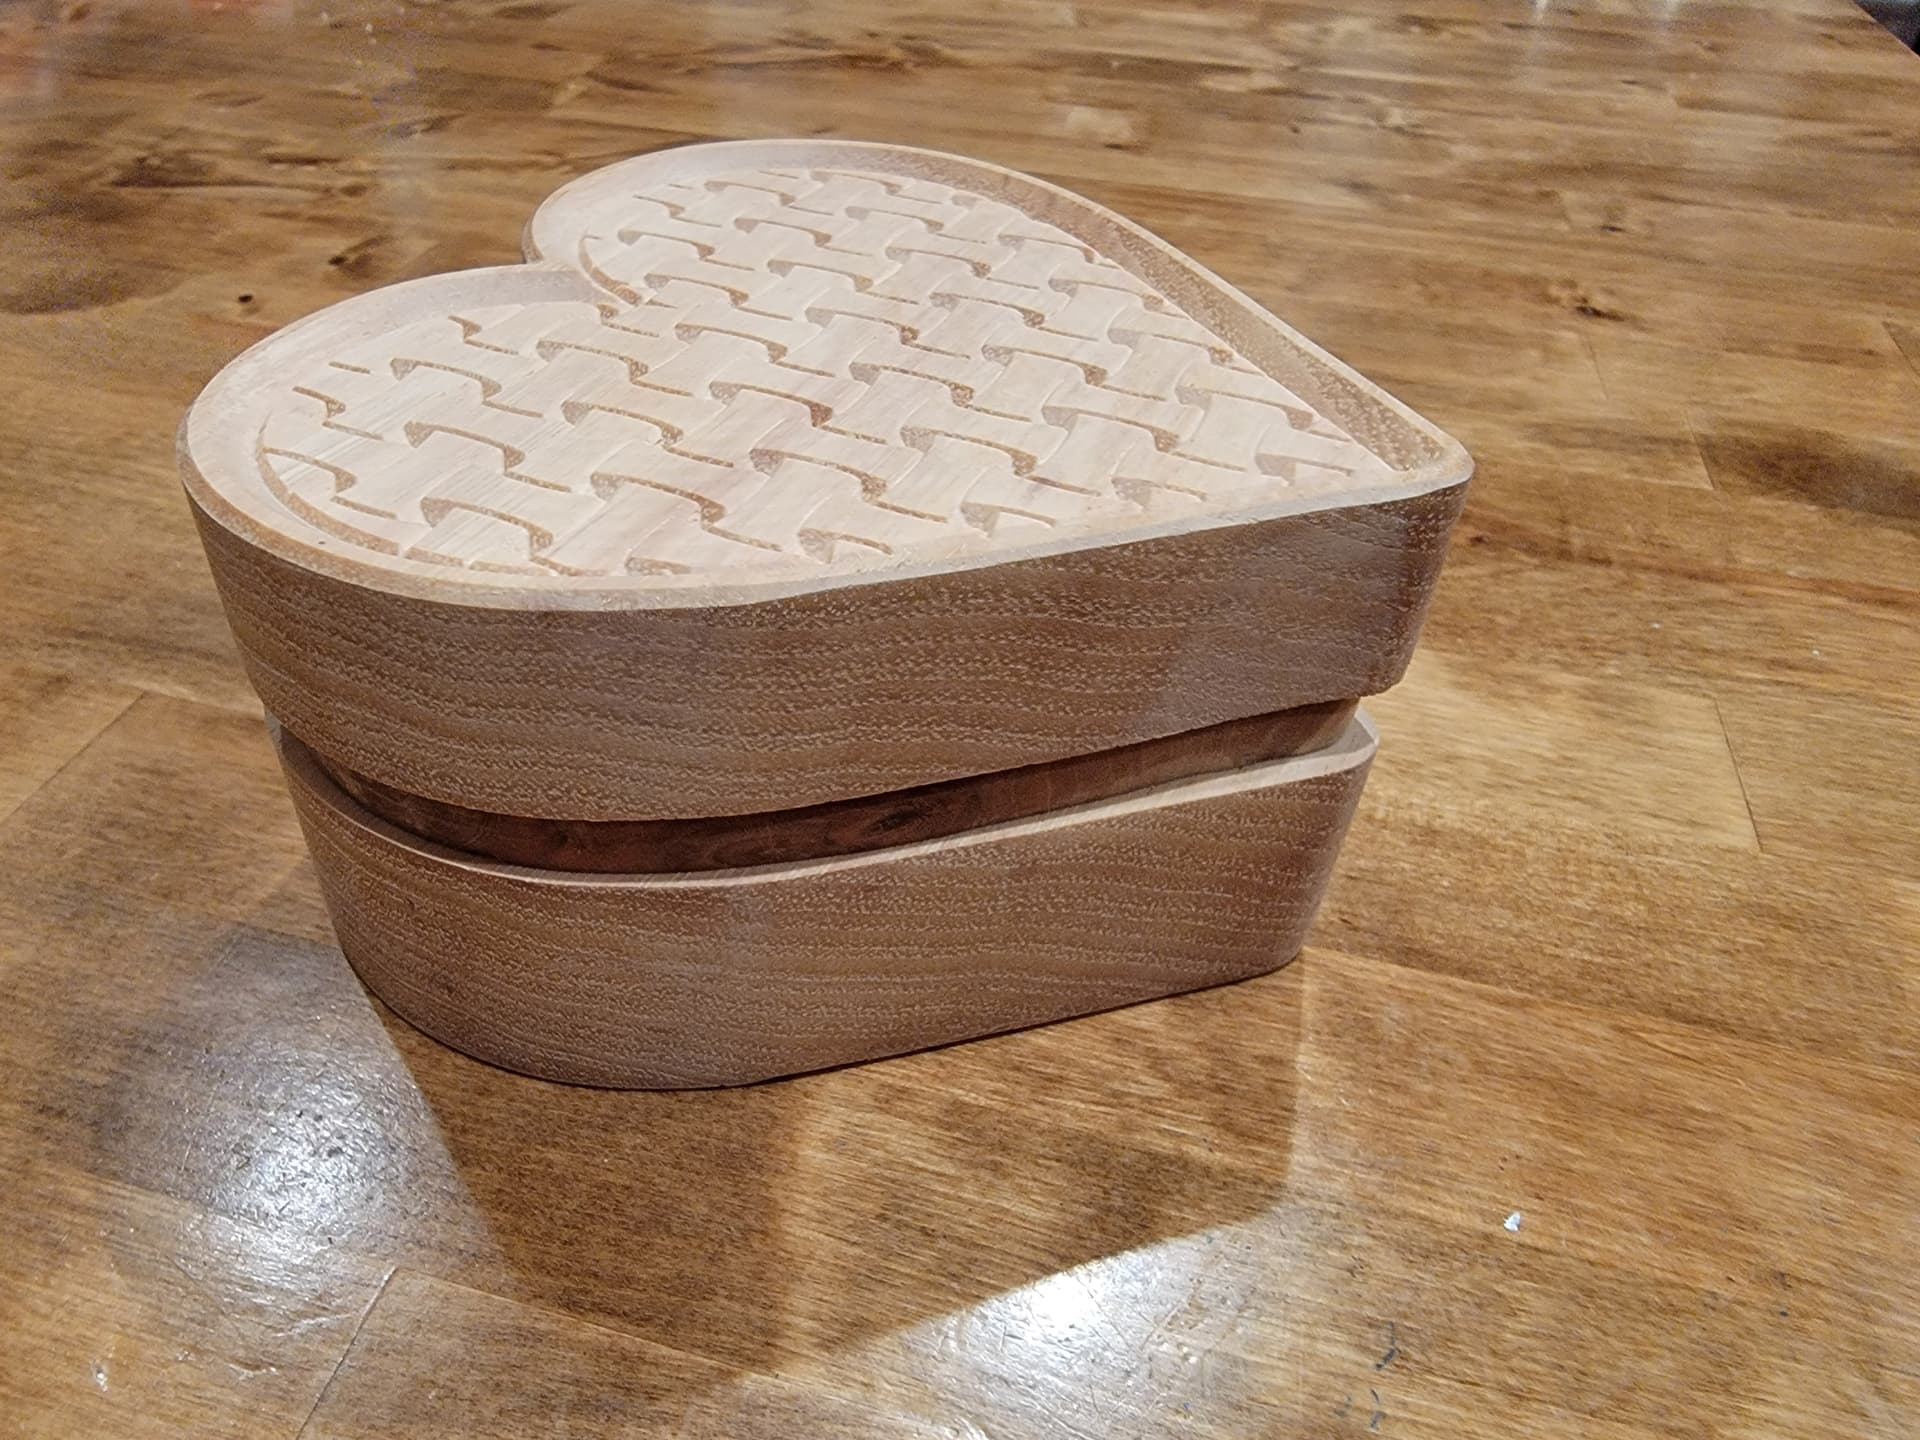
23 Likes
There is a universe of options. First decide if water or oil based.
Water based like Polycrylic is fast and easy. You should seal the wood with the sealer that is water based. Then apply the Polycrlic and it may take 2-3 coats. The down side of water based products is it tends to raise the grain so after the sealer and first coat you need to sand with fine grit sand paper to knock down the fibers that will pop up. The water based does not color the wood and is basically clear.
Oil based is more durable. Oil also darkens and warms up the wood. Personally I like oil based polyurethane. For intricate detail you can use a small brush to get down into the cracks. Oil based products does not usually raise the grain. However like the water based you need to sand with fine grit after the sealer and first coat. If you feel nibs you can sand with 600 grip paper to get a smooth finish.
To warm up water based finish you can apply a coat or two of dewaxed shellac. In the ready to use form is Zinsser Universal Sanding Sealer. It works with both water and oil based finishes. It will turn your project slightly darker and add warmth.
Lastly with both water and oil you have a choice of matte or glossy finishes. Personally I like the satin (Matte) over shinny but I have been given advice about craft show projects that women like shinny. So you would have to decide which finish is what your wife would like.
There is another alternative and that is Danish Oil and some other oils like Teak or Boiled Linseed oil. The beauty of Danish oil it is pretty much a one coat finish. If you find dull spots you can apply a second coat shortly after the first. Danish oil does not work well if you let the first coat dry and try to apply a second coat. The Danish oil is oil but has polymizers that harden and a second coat after the first has dried does not work well in my opinion. So if you want a second coat do it about 15 minutes after the first coat. The first coat will really soak in. The Danish/Teak/Boiled Linseed is oil based and will slightly darken the wood and warm it up. However they do not have the smell of oil based polyurethane every time you open the box. The water based has no after odor.
I like to put wax on the inside of the boxes because it does not smell and can be applied again in a few years if i has soaked in. Just be careful not to get wax on the outside because most finishes wont stick to the was. So maybe wait until the outer surfaces are finished to apply was to the inside.
Most finishes are not really cured for 1-4 weeks. They are dry to the touch but their final hardness is after all the finish has cured.
3 Likes
I’m falling in love with Odie’s Oil for little stuff. Easy to use and makes woods look great. The $40 a tiny jar scared me at first but it goes a really long way.
3 Likes
For the red, you could spray paint the PVC first and then cutaway to the white areas. For the popcorn where you want it to still be elevated, you could do a 0.005 pass to just clear off the paint. Just a thought. Looks great!
1 Like
Thanks. I thought about that and may give it a try. The black outline of the popcorn at the top makes that a little tricky as I painted those grooves with the masking still on the popcorn. I would have to do that, peel the mask and then cut that paint layer.
Or, if I am precise enough I could mask the top only and paint just the lower section with red. And then cut through the mask at the top and shave the paint off the white portions.
My original plan was to paint black in all of the v grooves but decided that was going to be a pain. Would it enhance or detract? What about the black outline of the popcorn? One of my kids asked me why I did that. I thought it would help it stand out but maybe it adds no real value.
You may not need the black, but maybe a ‘buttery’ (light/faint) yellow to give it some division. If you paint the whole piece red, mask it, cut it all out, then cover the bottom with some painters tape so you can then paint the popcorn area and level cut the popcorn high surface area to remove the masking and red paint and cut them out. Remove all the tape and remaining masking and you should be good to go.
It’s a pain to put it back on the table to finish after painting the second color, but since it’s a small area you could mask the wasteboard and machine with some heavy paper and paint them without removing them.
If you want to add a little darker yellow/orange for the kernels that could be done quickly by hand - they are recessed and probably don’t need to be super-sharp anyway. Again, just some thoughts, the yellow separation lines may look weird or be unnecessary.
Hope something there helps LOL
1 Like