If I go that route I will probably drop the outer groove which runs the perimeter and maybe do roundovers on the popcorn. It will take some rework in the file to shuffle vectors around to use the the O flute between the
Popcorn and the box colors and then use the V for the kernel recess.
I think I would rather take them off to paint especially since I have 3 to do. I did this in Vcarve Desktop so I am limited to a 25x25 envelop so I can’t gang them together to cut at once. I could do 2 though.
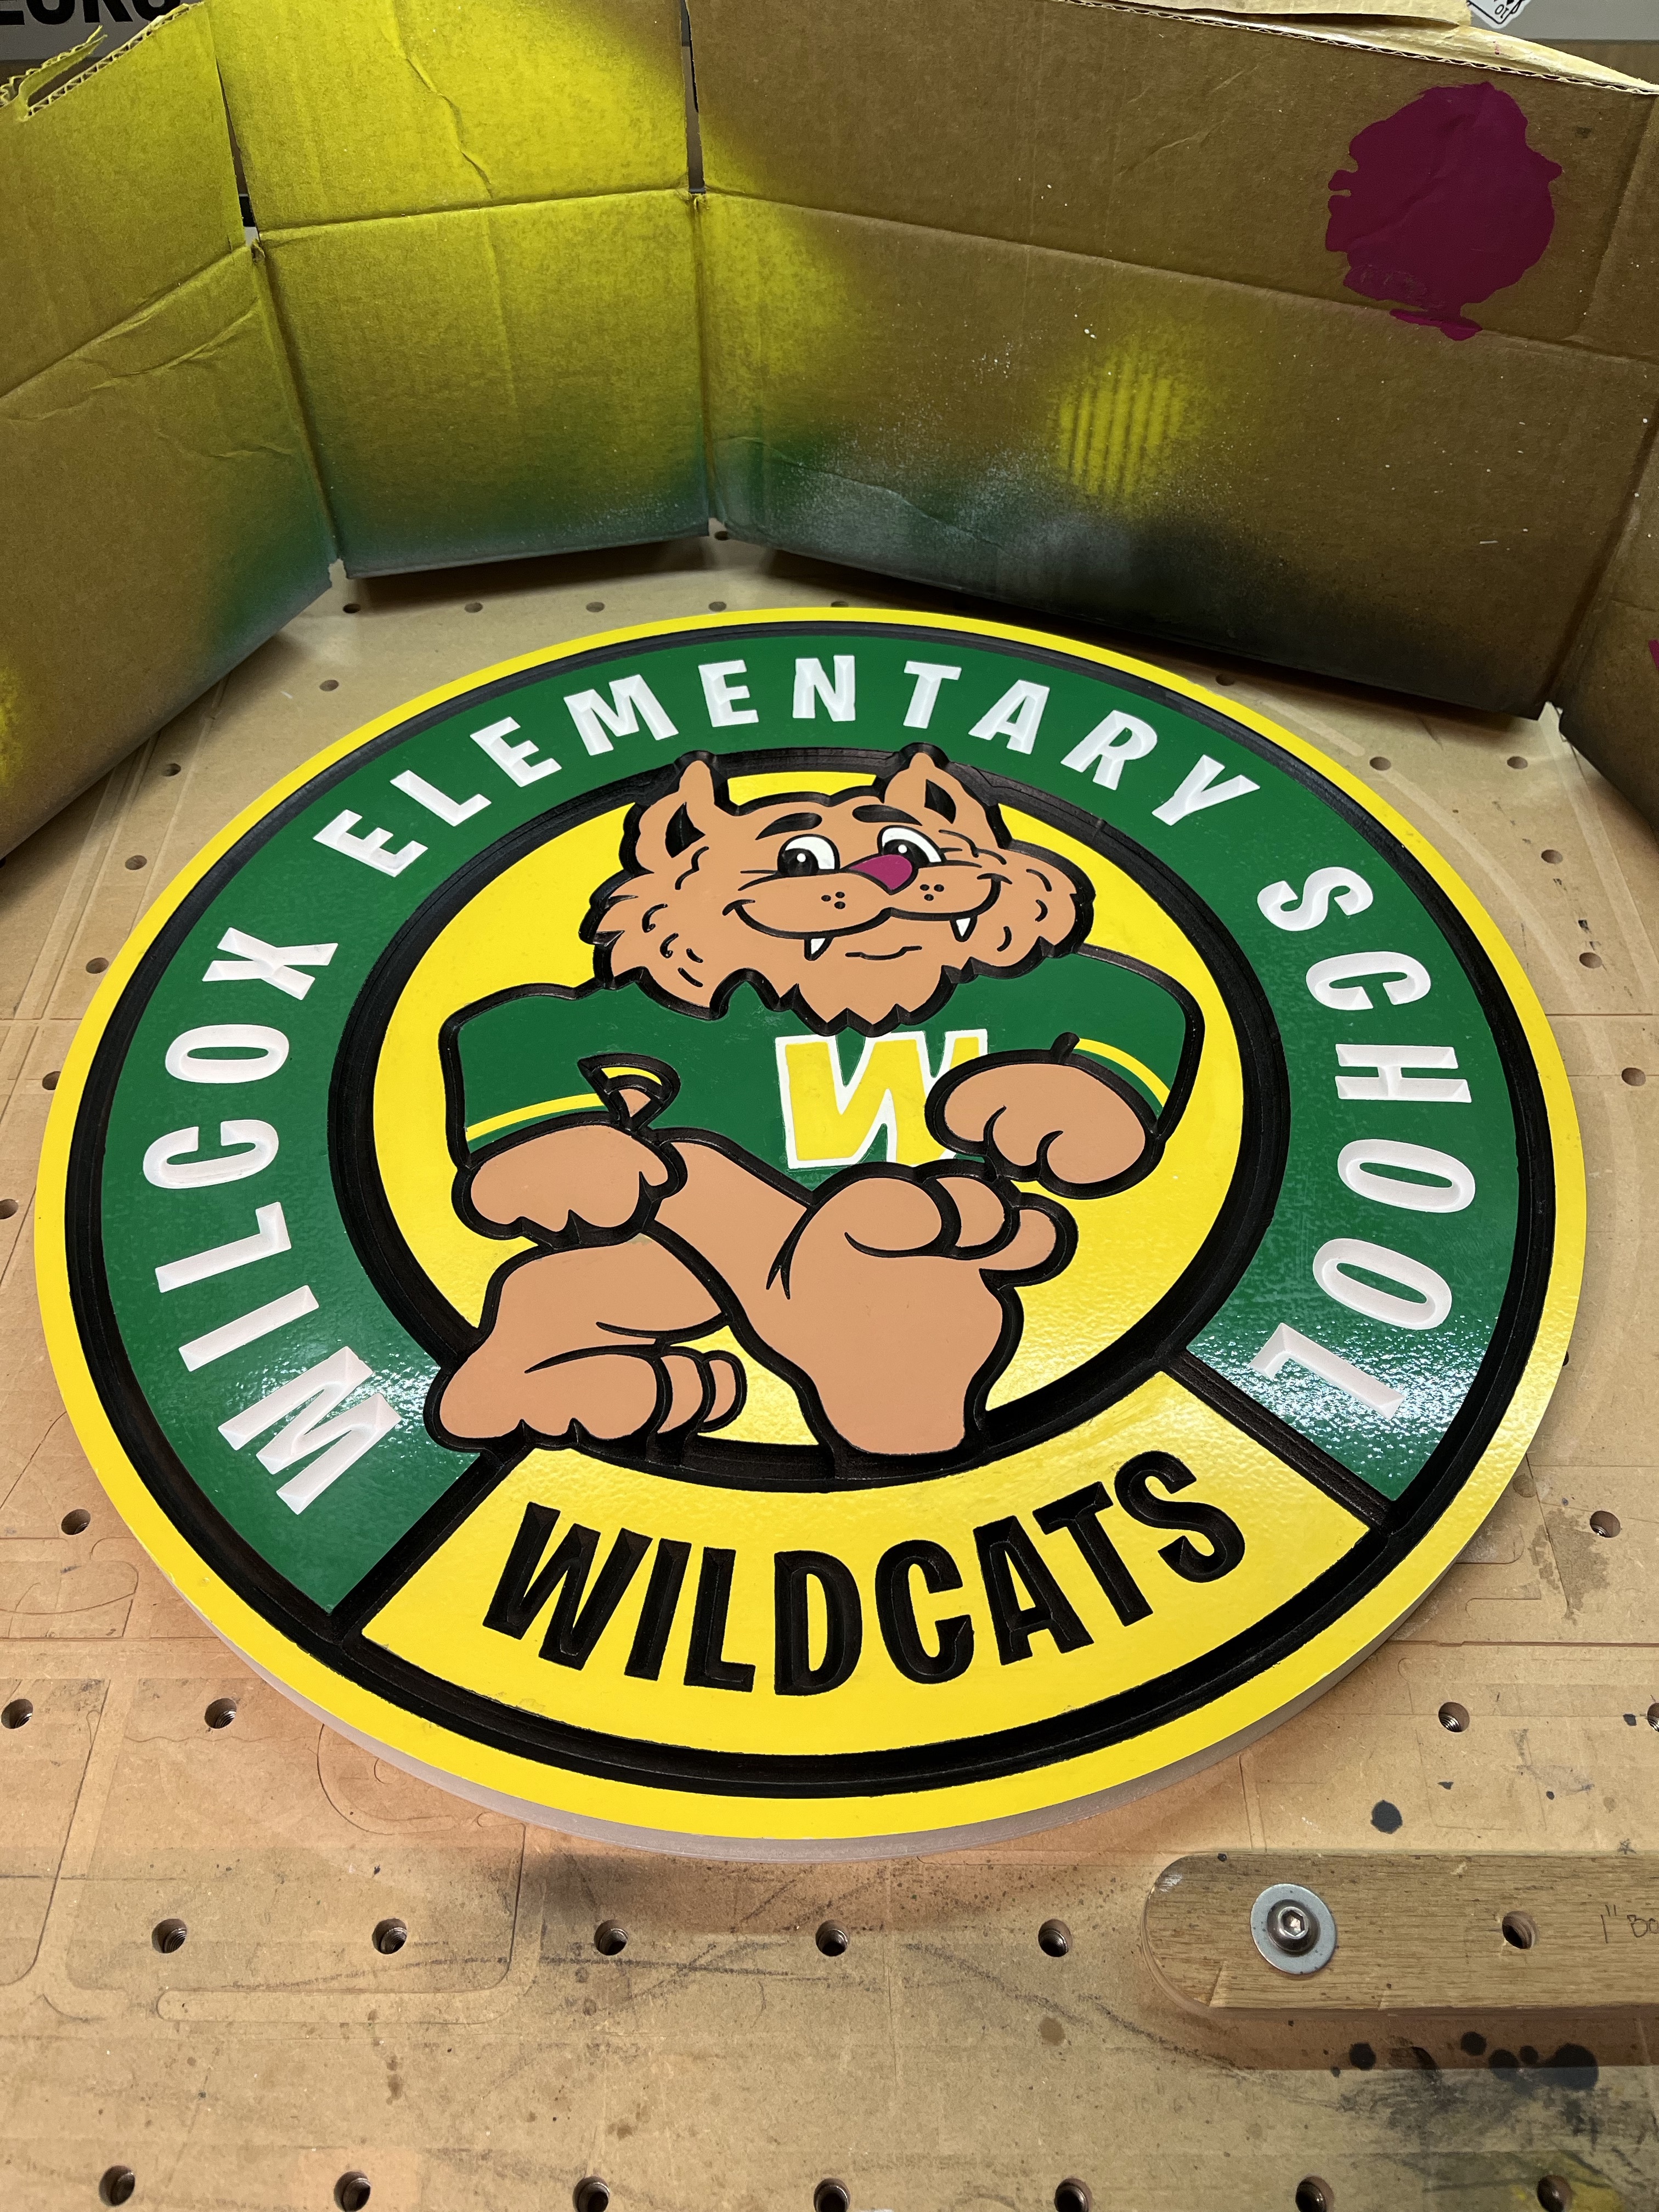
Made this emblem/badge for a school. I repurposed a 3/4” thick MDF door that was from an old cabinet so the final piece was a little heavy at about 18” diameter. Used a 90deg GrooVee vbit with 813 Oramask. This photo was prior to about 4-5 coats of spray-on Polycrlic, satin. Left a nice smooth finish.
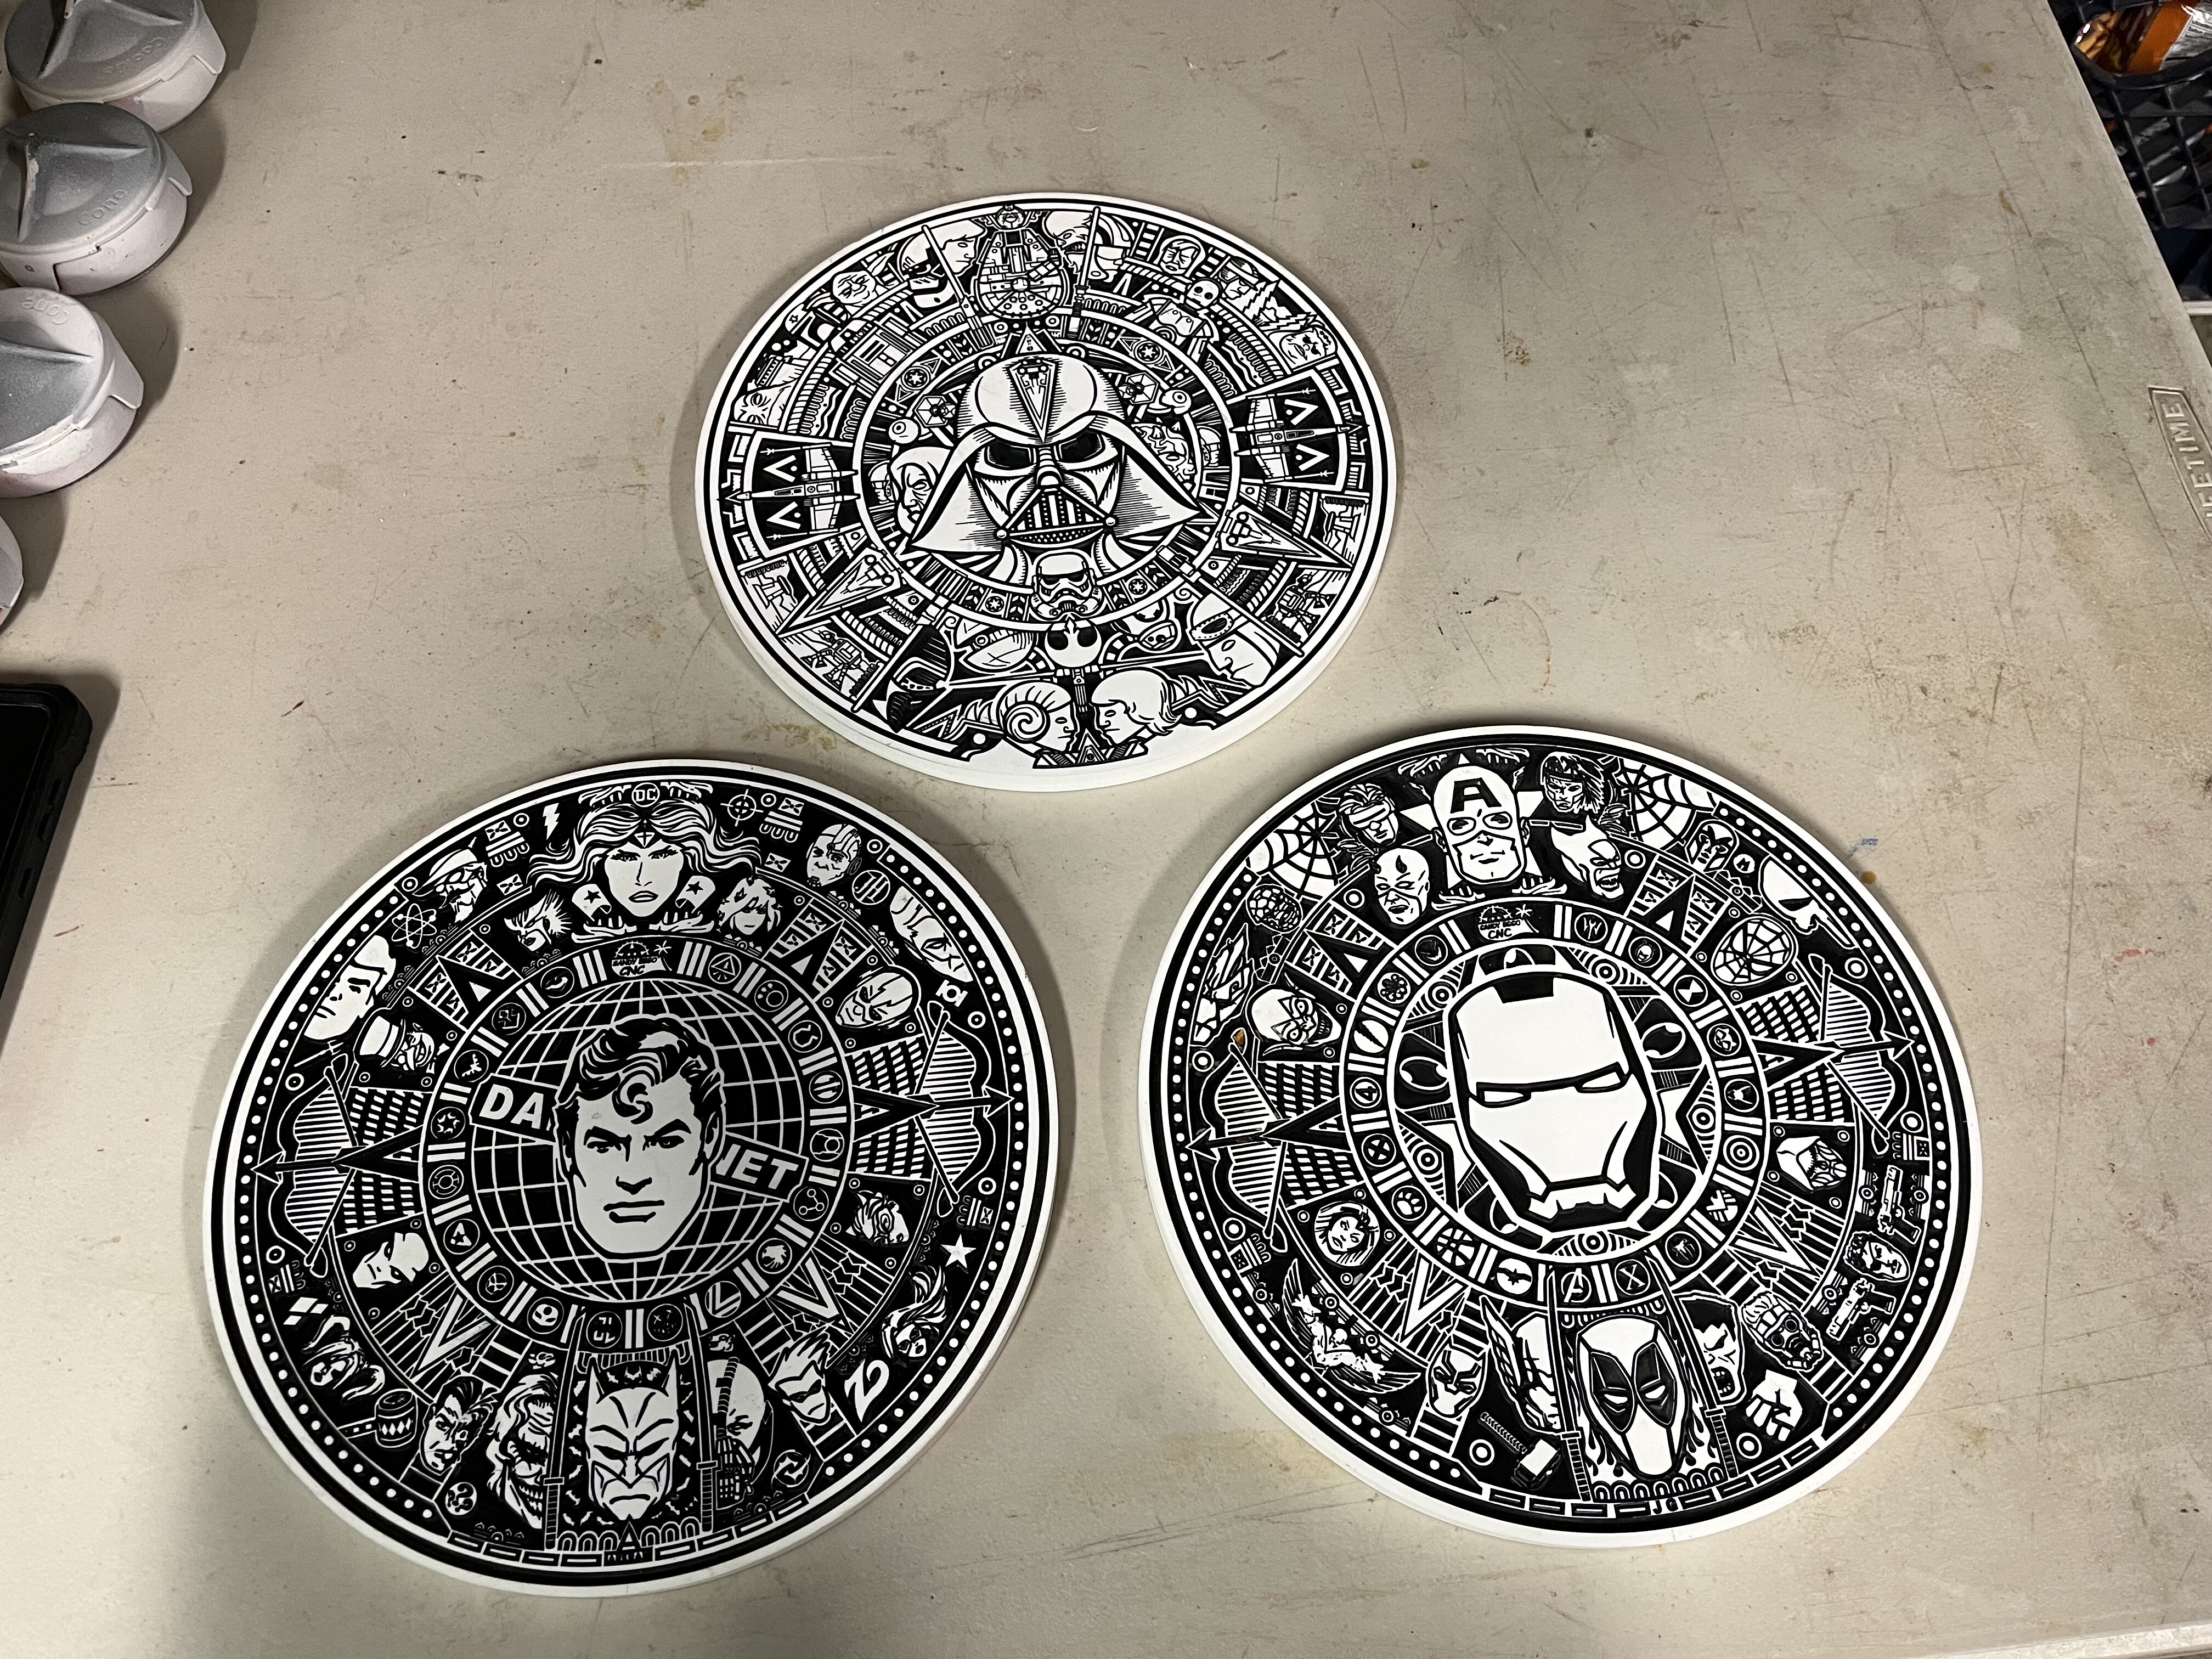
Also made these “calendars” for the kids from 1/2” white corian, ~9 in diameter. Used a 30deg vbit, sprayed them black, then sanded the top to reveal the white corian, again.
Sometimes I design something and going back and redesigning after running the project seems trivial when it is ok with the first regular design and run. I usually see things that are a bit off and could use a redesign adjustment. But then I wonder what is the point if it is only going it be a one time design?
If it is all voluntary work, then I can decide of the amount of time given to a design, but if I’m doing the job for pay, then I want it to be correct for sure, just hard to run something and see part of the design mess up because of not properly designing the project perfect.
But my once and done projects seem to be the most painful in the butt, because I take all the time to design, then run and find errors, then go back and tweak the design some, then run another. Once complete, the finished product is done and good to go. Then that design and program are obsolete. I don’t delete the designs, but I should.
Yes, multiple mask setups. The base color was the yellow. I also wanted to spray paint most of the colors. I, first, used a vinyl cutter mounted to my router to cut out areas like the green and tan but I cut the areas slightly oversized since I knew I would come back later and cut the v-grooves. Painted the colors, masking in between with painter’s tape and heavy paper since I was just trying to keep paint out of areas already painted. After drying, I removed all of the masking, did a final oramask. Cut the white letters, painted them, and masked them off after drying. I then cut and painted the v-groove, along with the black letters.
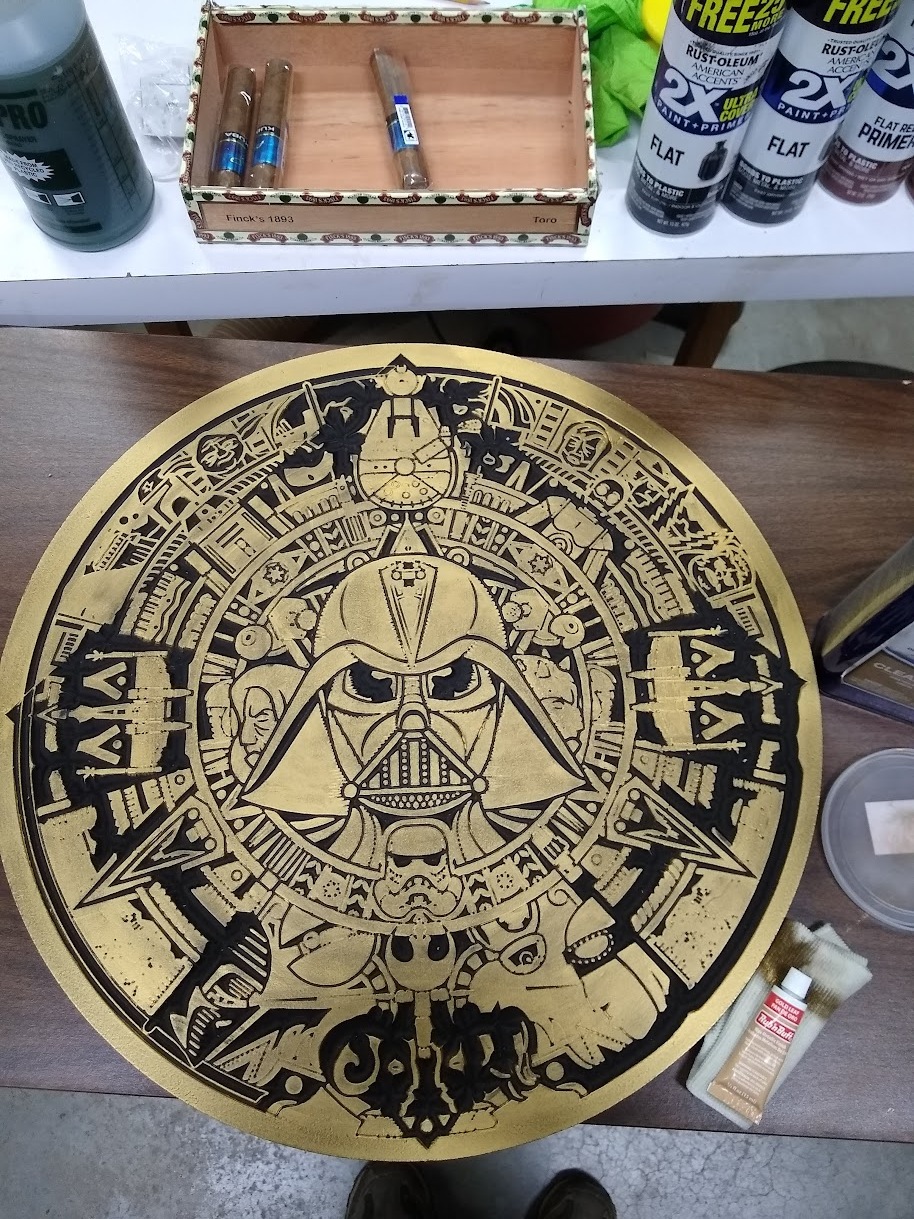
Very nice looking. I made those same 3 wall hangings before the Advanced Vcarving. They came out pretty well. I painted mine with a rattle can with red primer and then followed up with black rattle can paint. I then used Rub and Buff to color mine. The DC with silver and the Starwars and Marvel with Gold. They came out pretty good. I gave them to my son inlaw which is a fan boy for all the universes.
I know that was a lot of work. My wall hangings were 19", how big are yours?
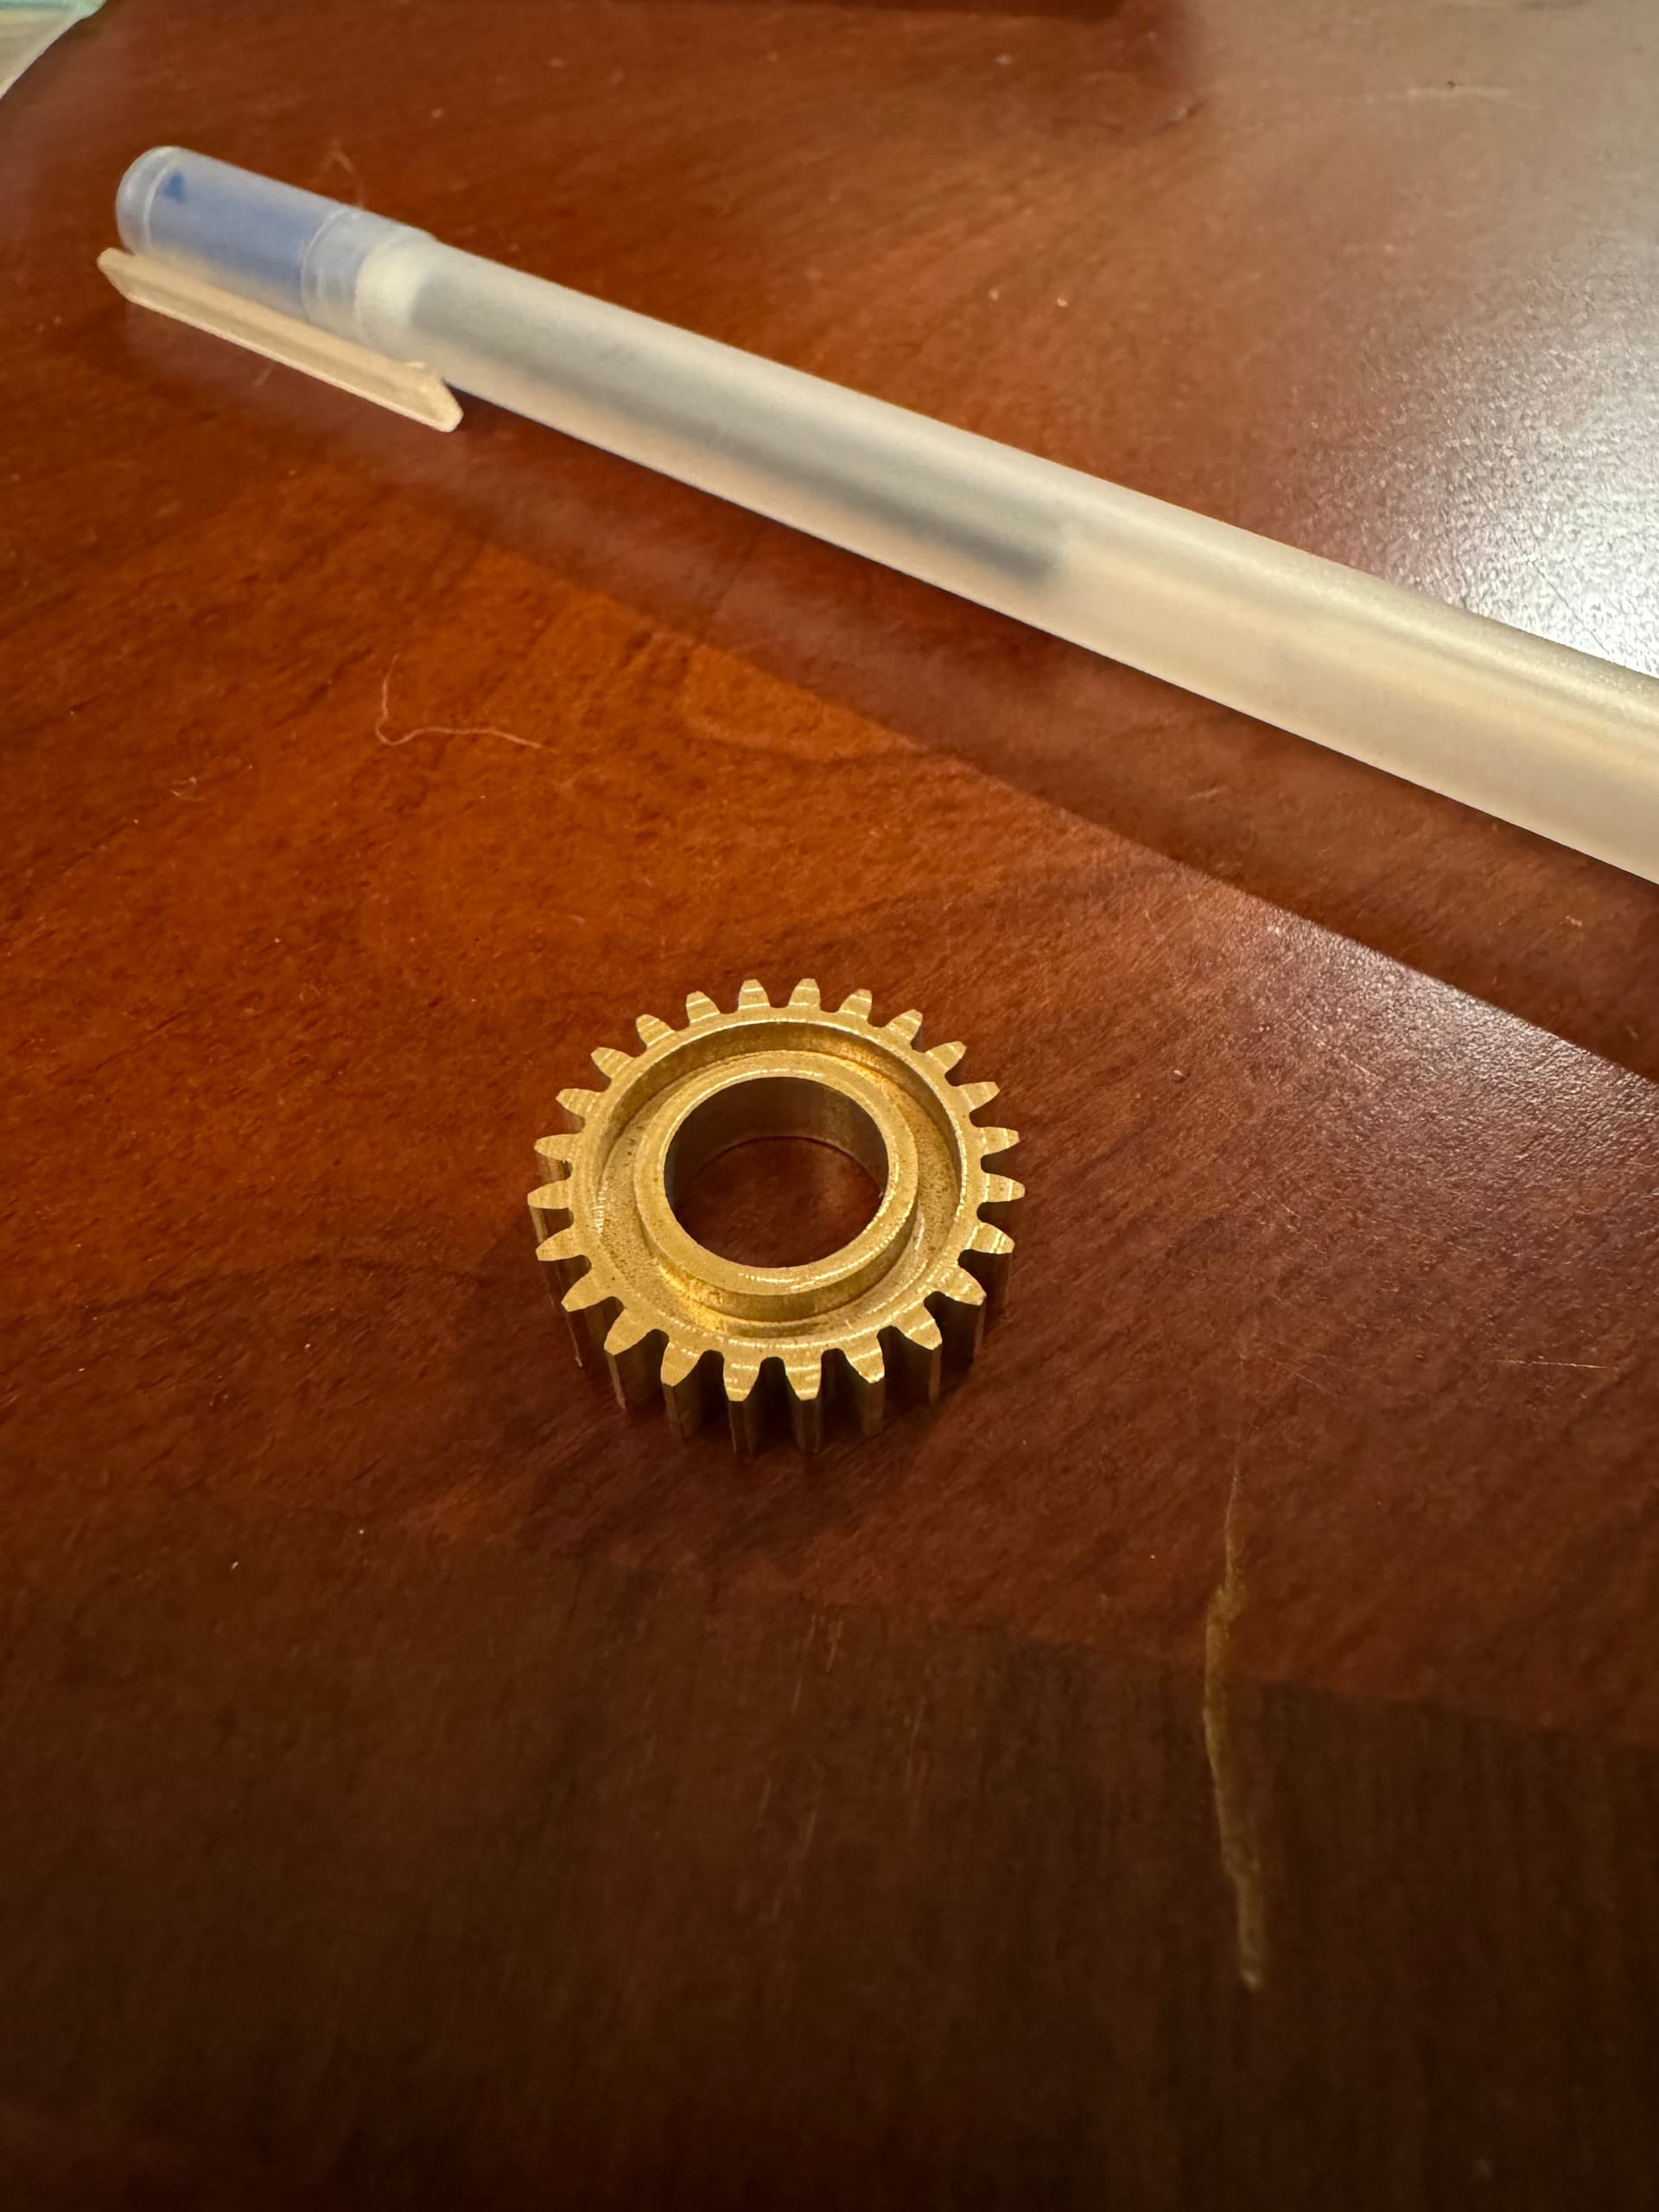
Not today, but cut a 0.8 module gear on 360 brass a couple of months back for an RC servo project I was working on. Mostly cut with the #112Z cutter, but used a specialized 0.025" end mill for the inner corners.
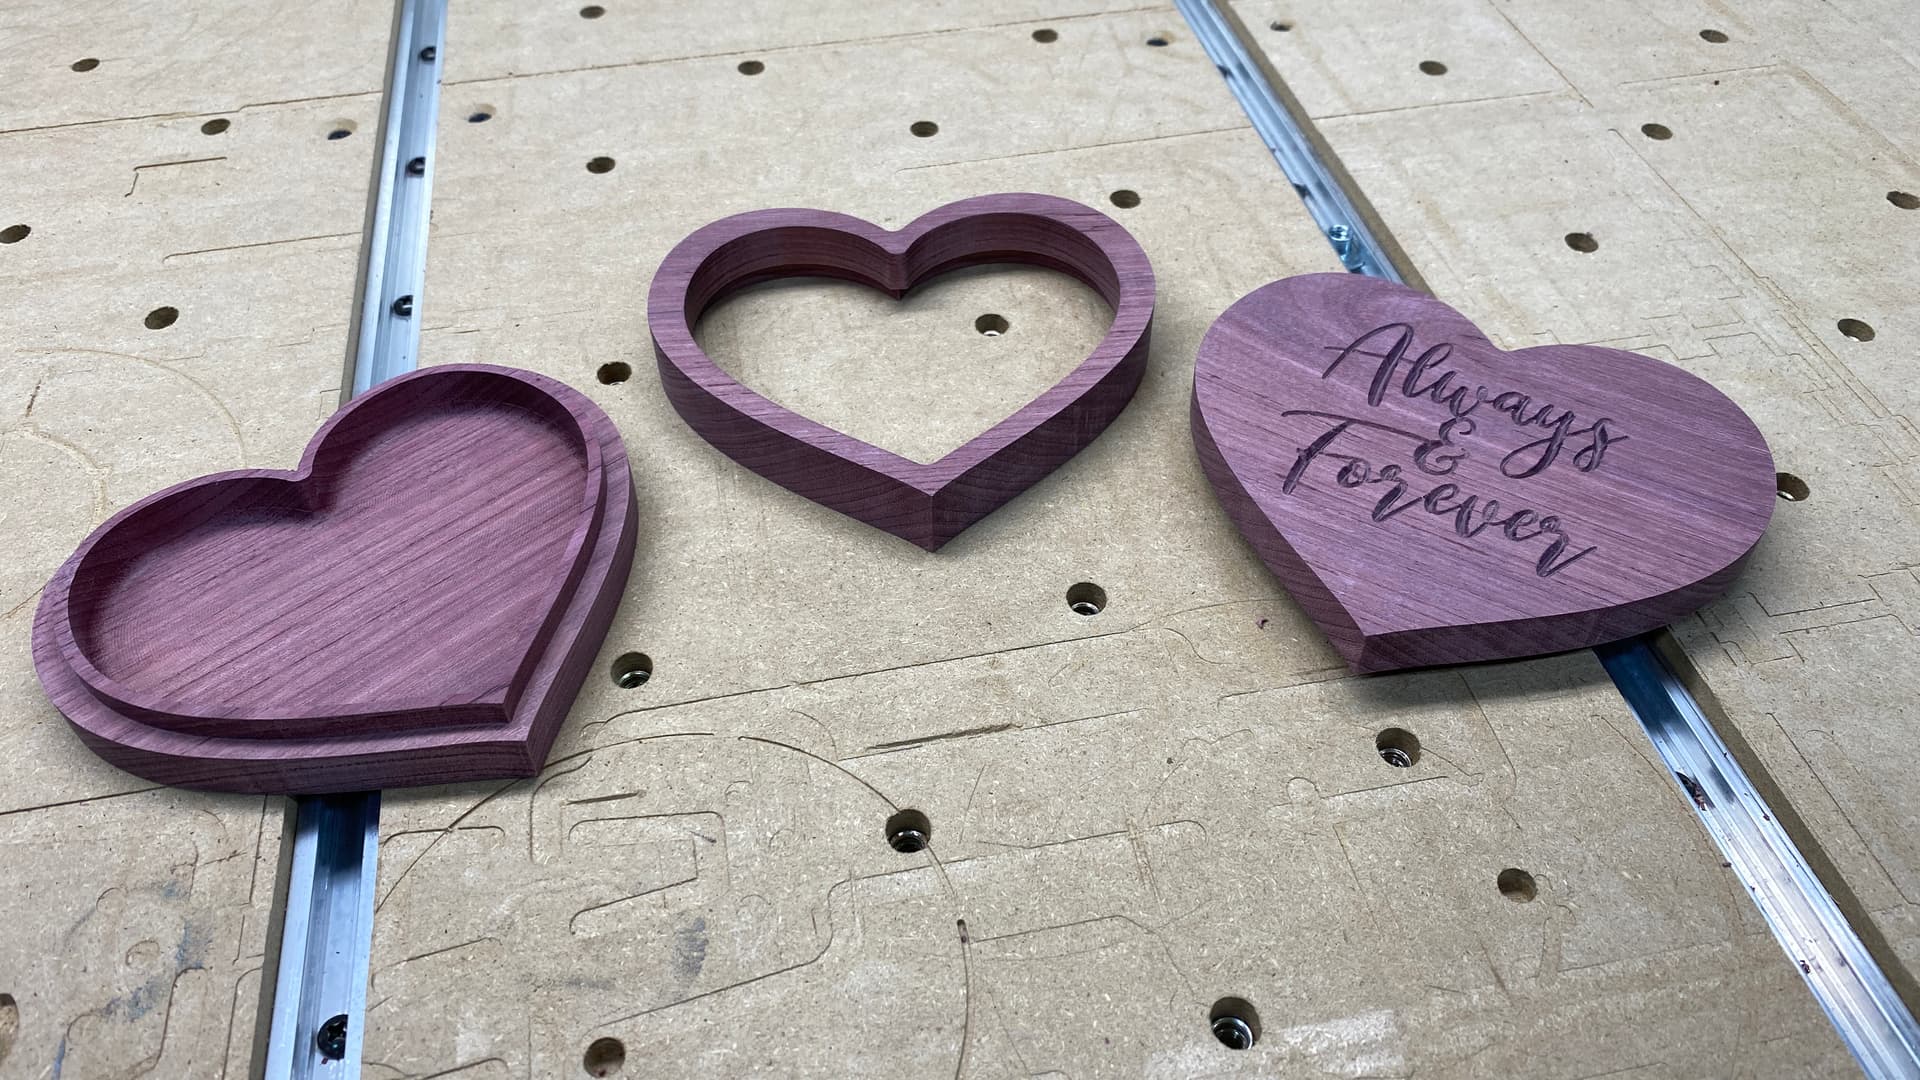
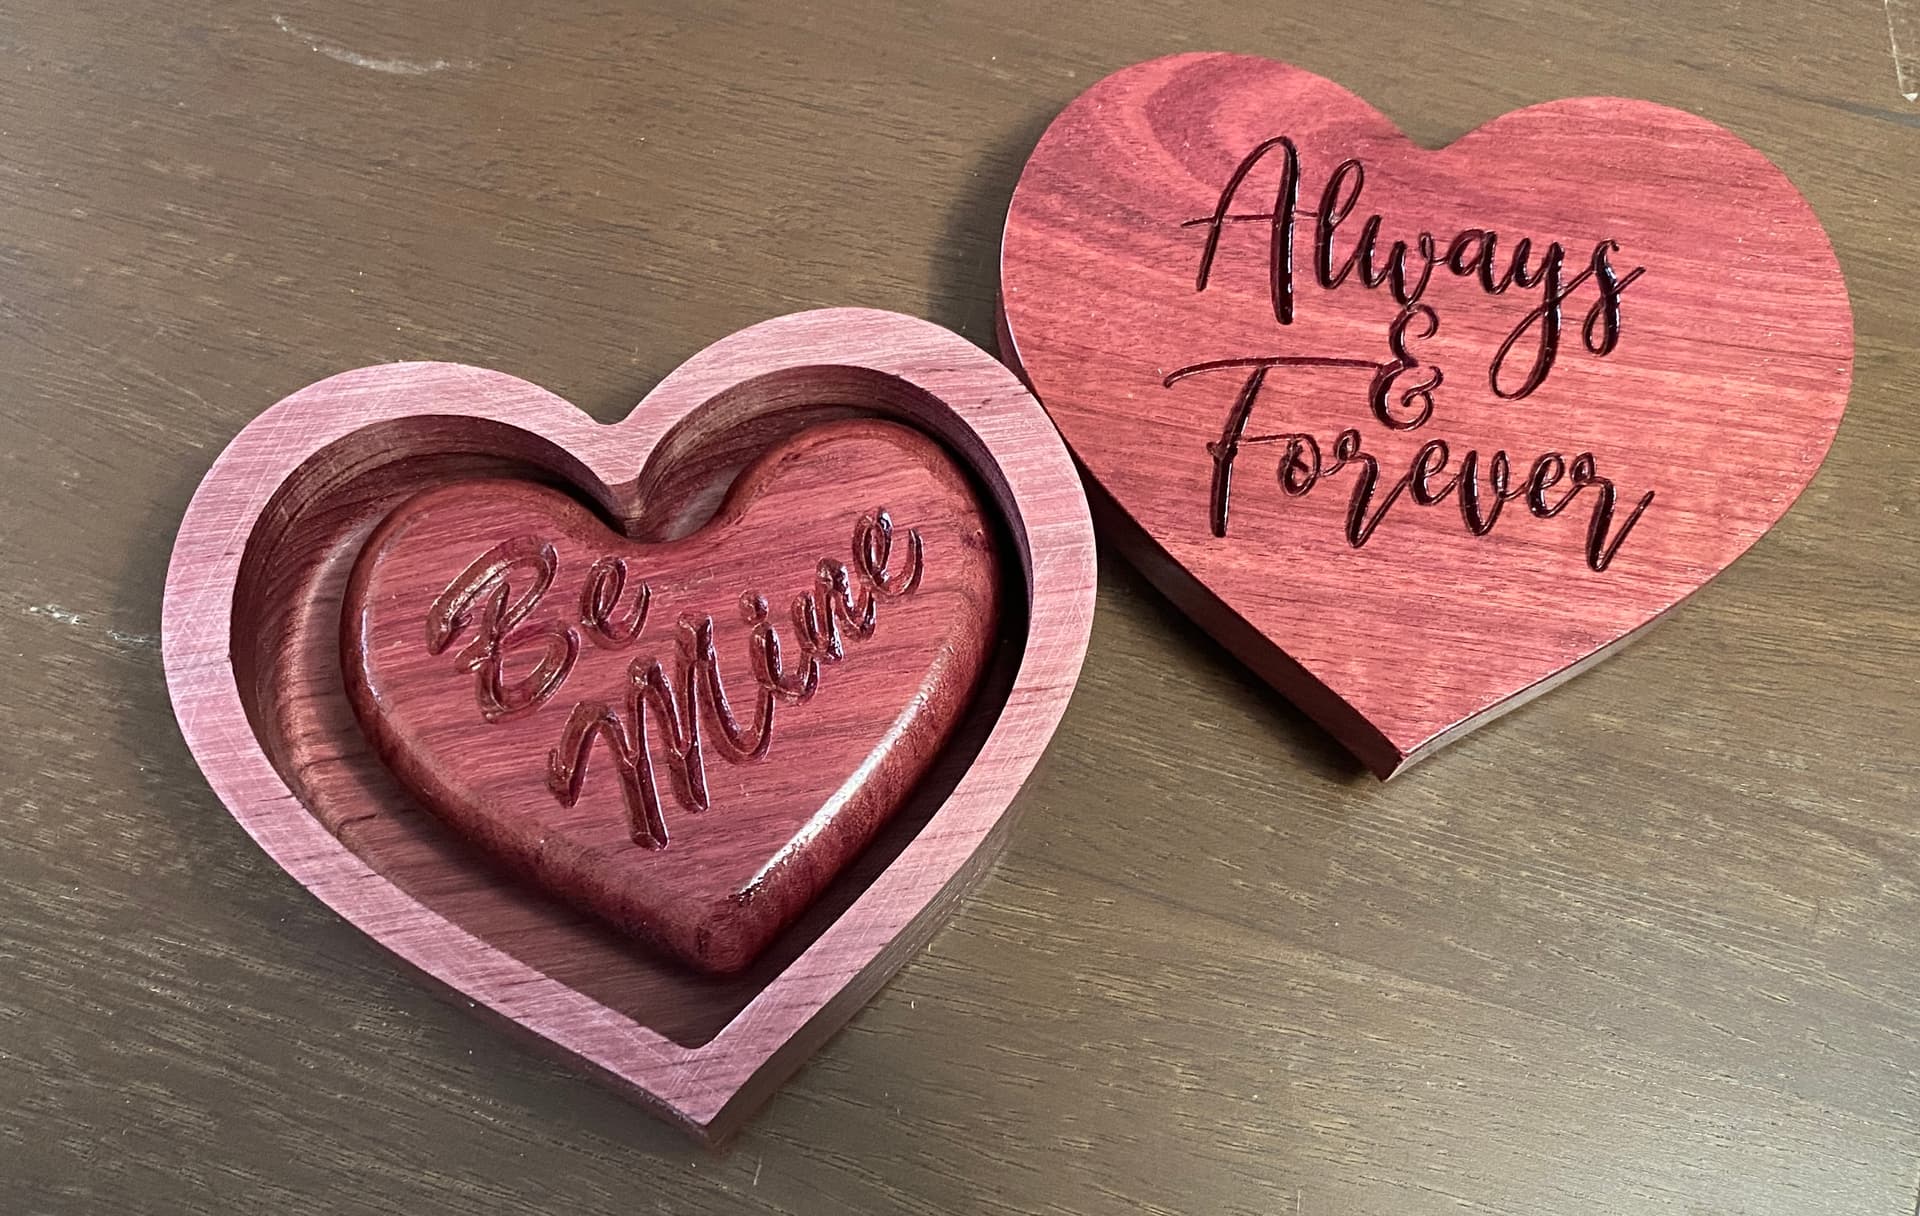
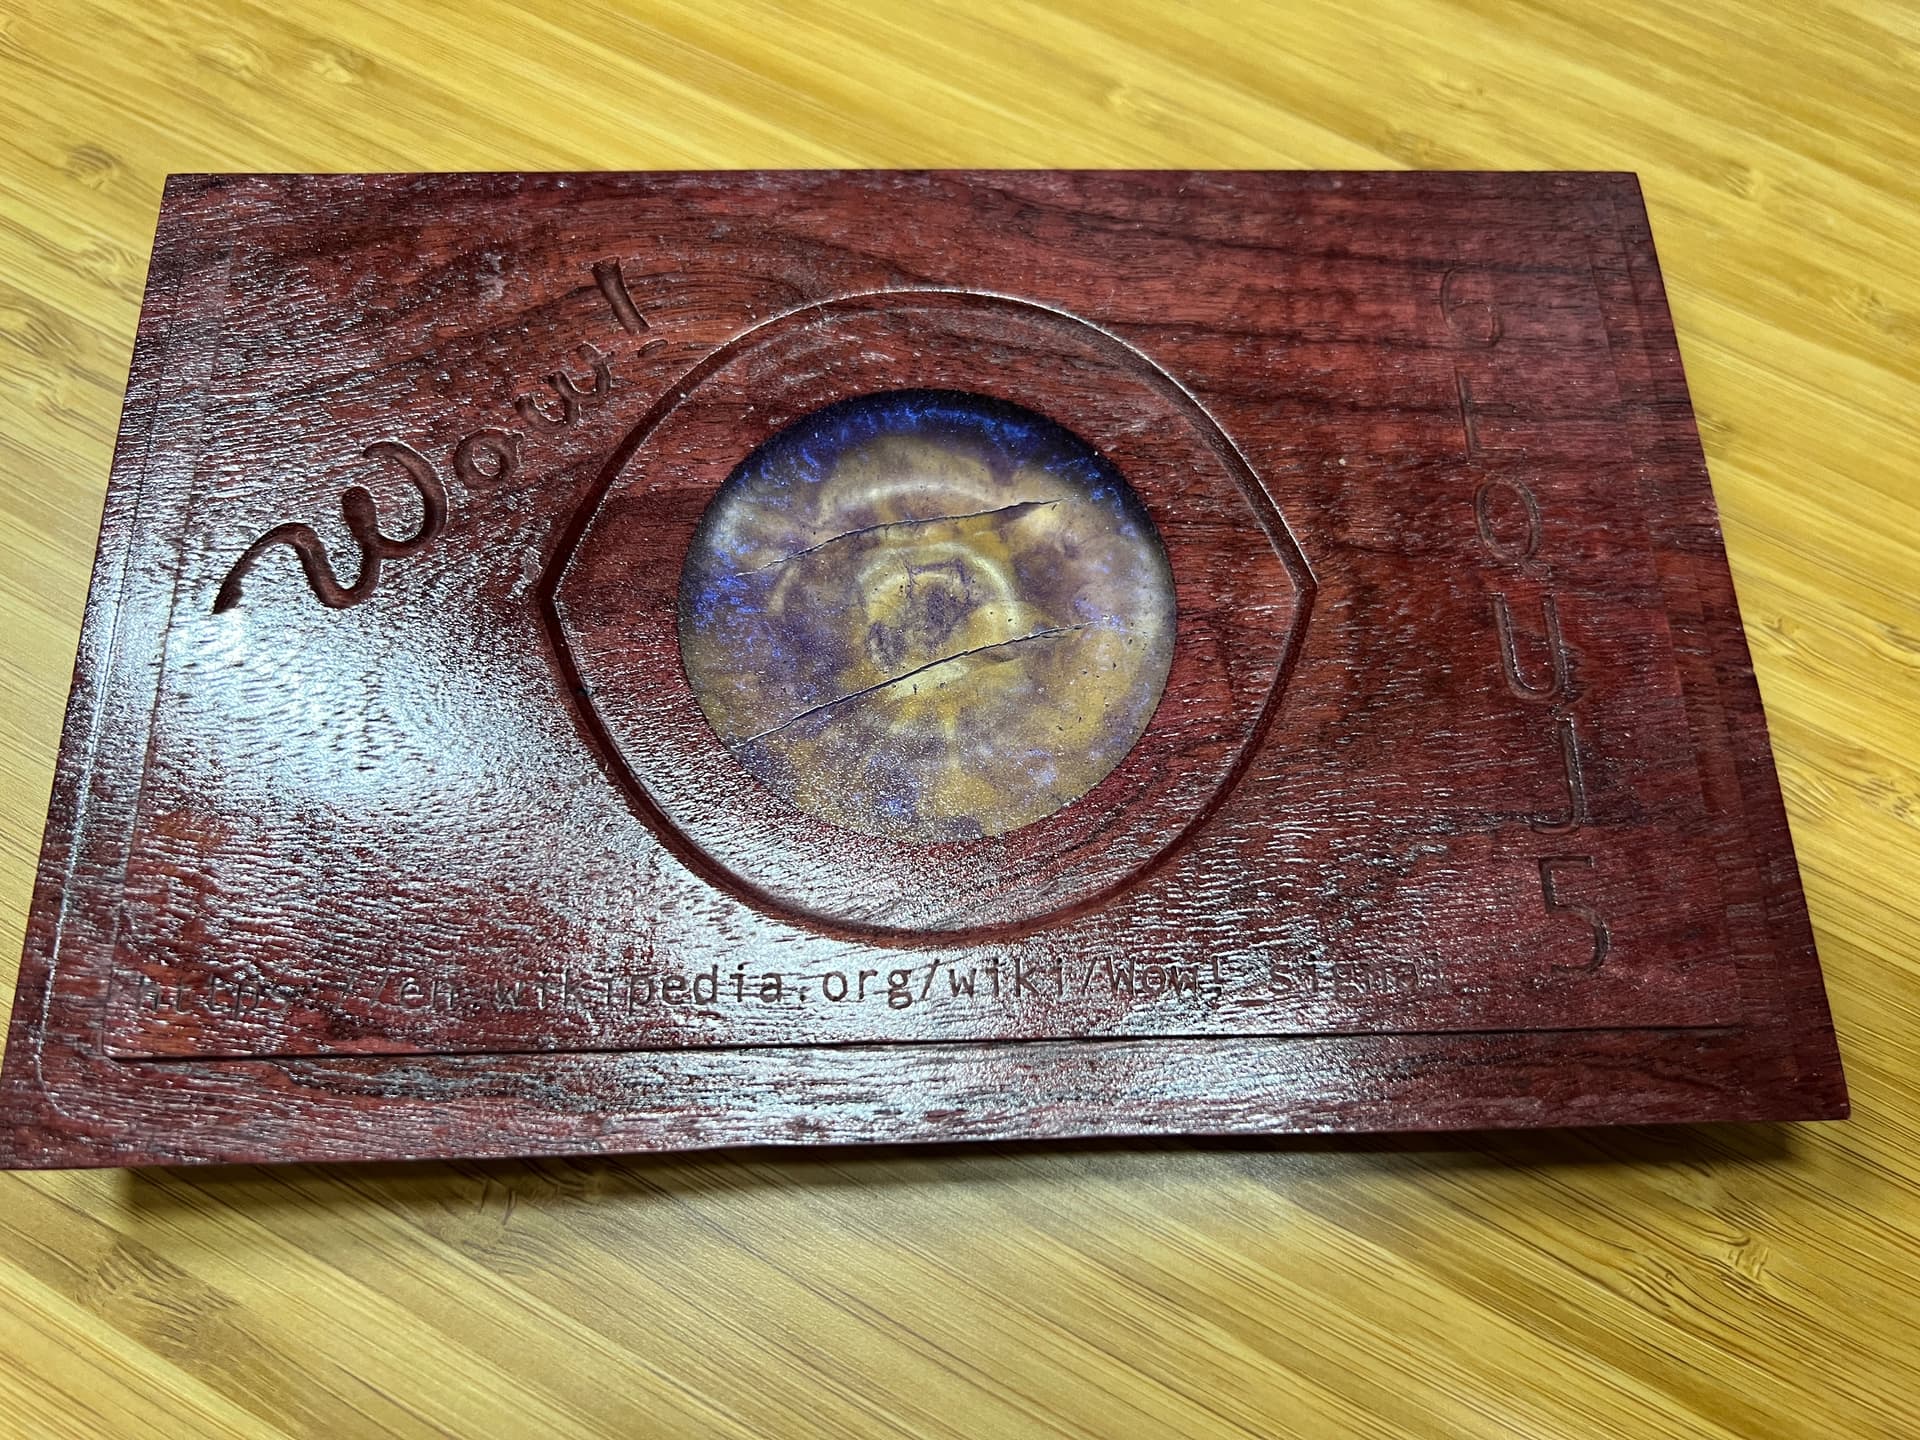
The wife and I were wondering around Rockler a few weeks ago when a piece of purpleheart wood caught my wife’s eye. Excitedly, she looked at me and said that she wanted something made from it. The board was milled to 3/4"x5"x24". I decided on a small jewelry type box. I made the base of the box in two layers that would be glued together. The engraved lid is a snug fit that can be easily lifted off.
I didn’t have a way to sand the curvy top, so I ran multiple 3D finish passes in alternate angles. The flat bottom I was able to sand. I use spray lacquer to bring back the shine. Overall it’s not crystal clear but it is pretty good, you can see through it.