Looks awesome @RichM Is this made out of two different pieces? Circle and tail? Or one piece? And is it maple? What paint finish did you use? Looks really great. -mw
Thanks! Yes, single piece of hard maple. I made a prototype with poplar as the base, which got painted and created a space for the maple medallion and tail tip that I glued on. It looked okay, but was maybe more work than it needed to be, so I just used 6/4 hard maple for the whole thing - which was still a bunch of tedious mask/paint/paint-fix work, but overall I think it was easier to make.
Paint is regular spray (rattle can) paint and polycrylic topcoat.
I’m about to venture in to airbrushing for the first time and see if that can be a little more efficient, less messy and wasteful. We’ll see LOL
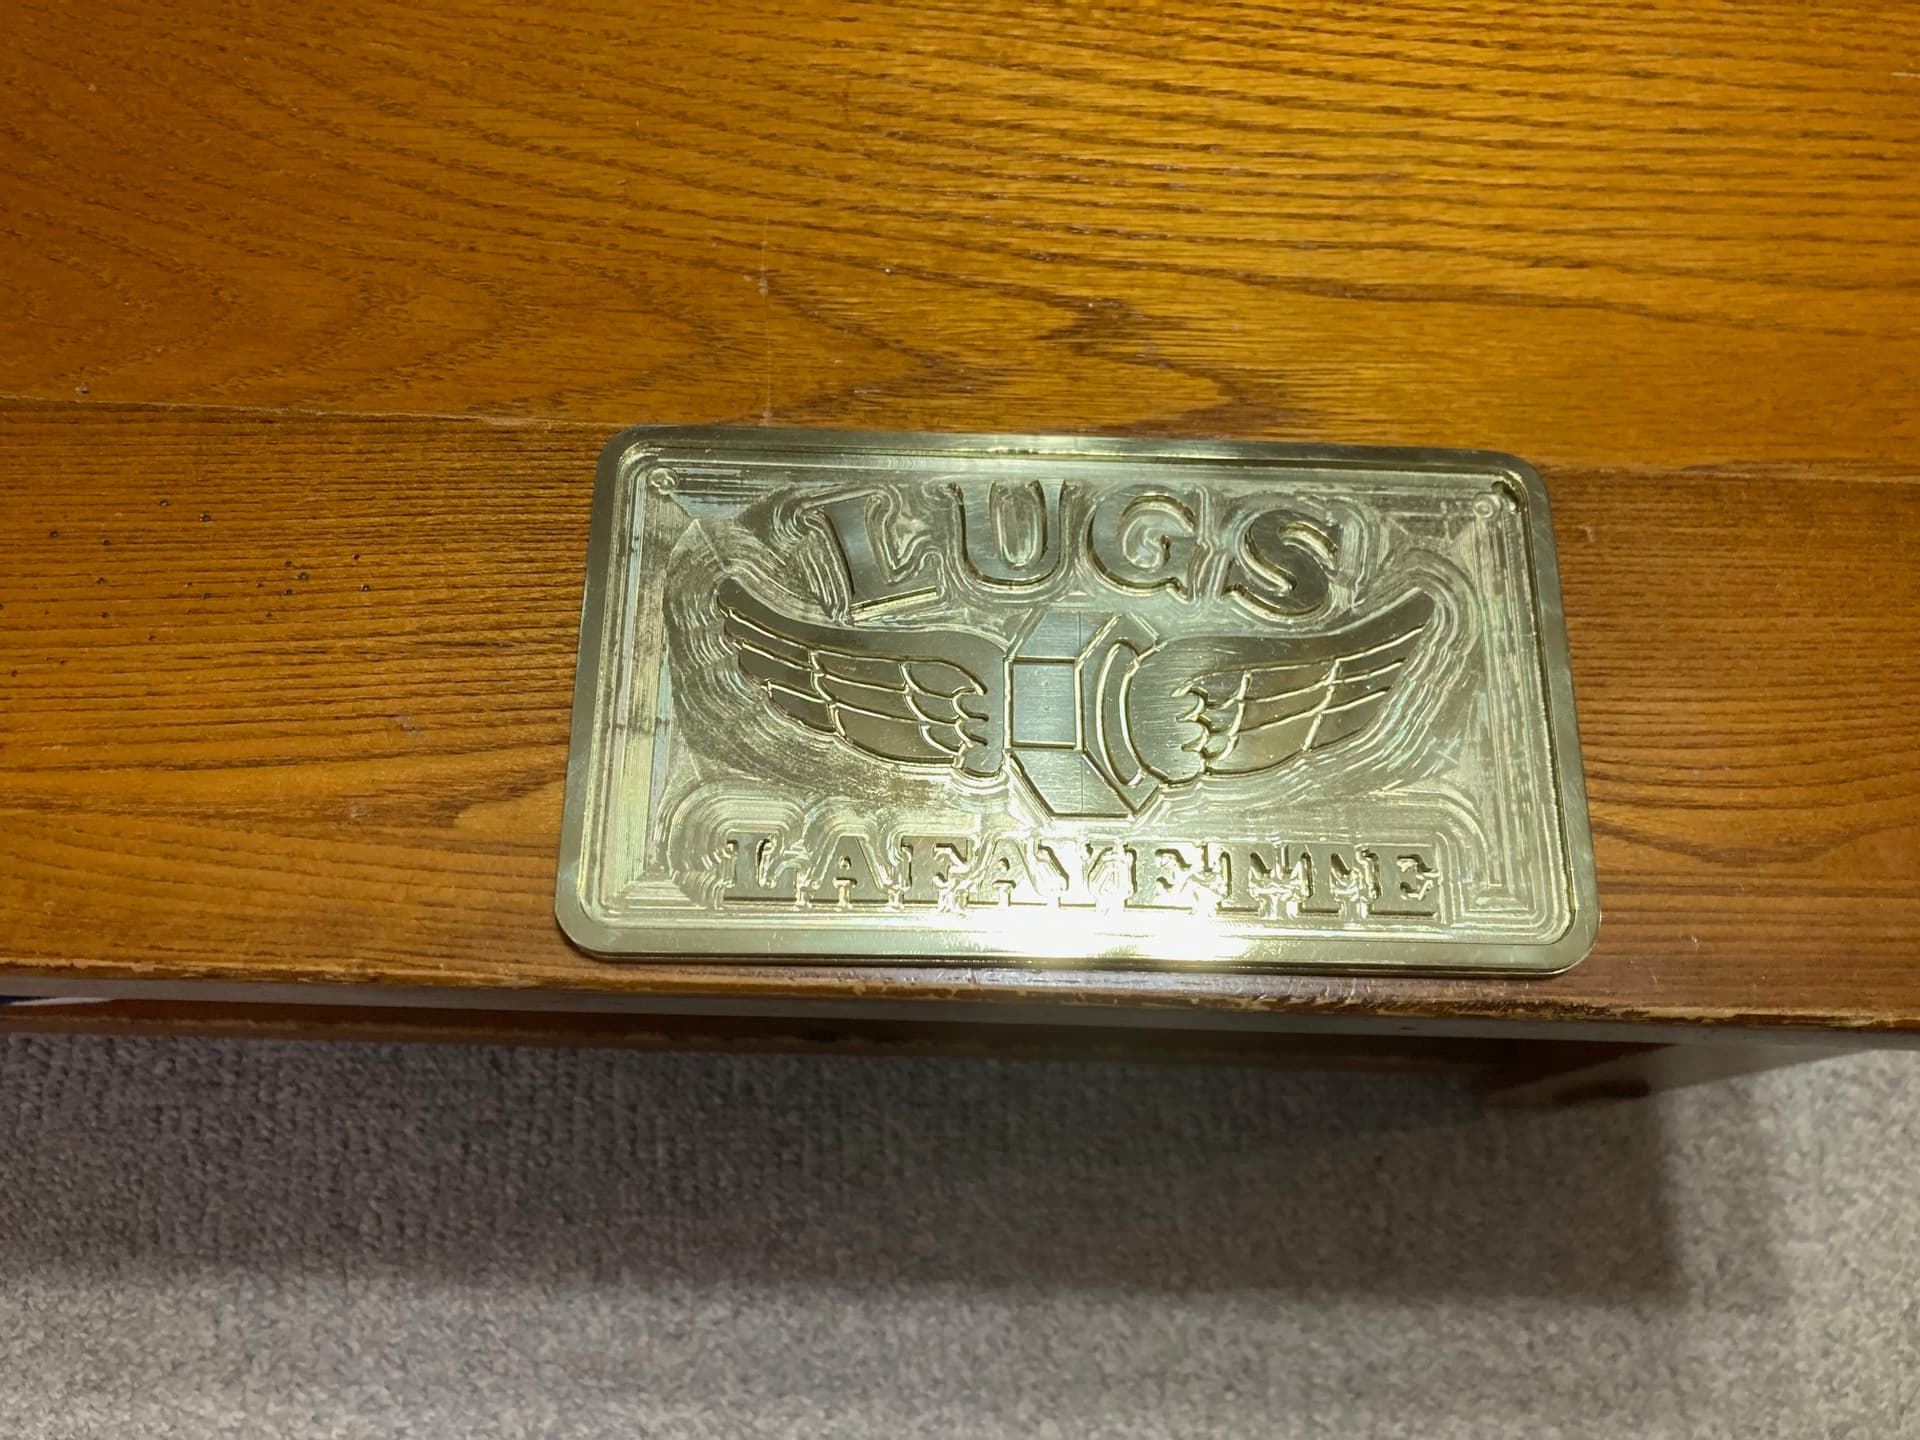
Car club plaque from images downloaded from the internet and modified in Carbide Create 757. In brass (unknown alloy), approx. 7.25 x 4 x 0.260 inch. Z plus on Shapeoko 3 XXXL (modified in such a way I no doubt introduced significant deflection). Milled with 1/8 and 1/16 inch end mills to a depth of 0.100 inch. No speed records and plenty of errors because I don’t do this often. Those are 1/16 inch slots in the wings but no catastrophe. After one more polish and cleaning, the bottom of the pocket will be painted black and the entire plaque given a clear coat.
21 Likes
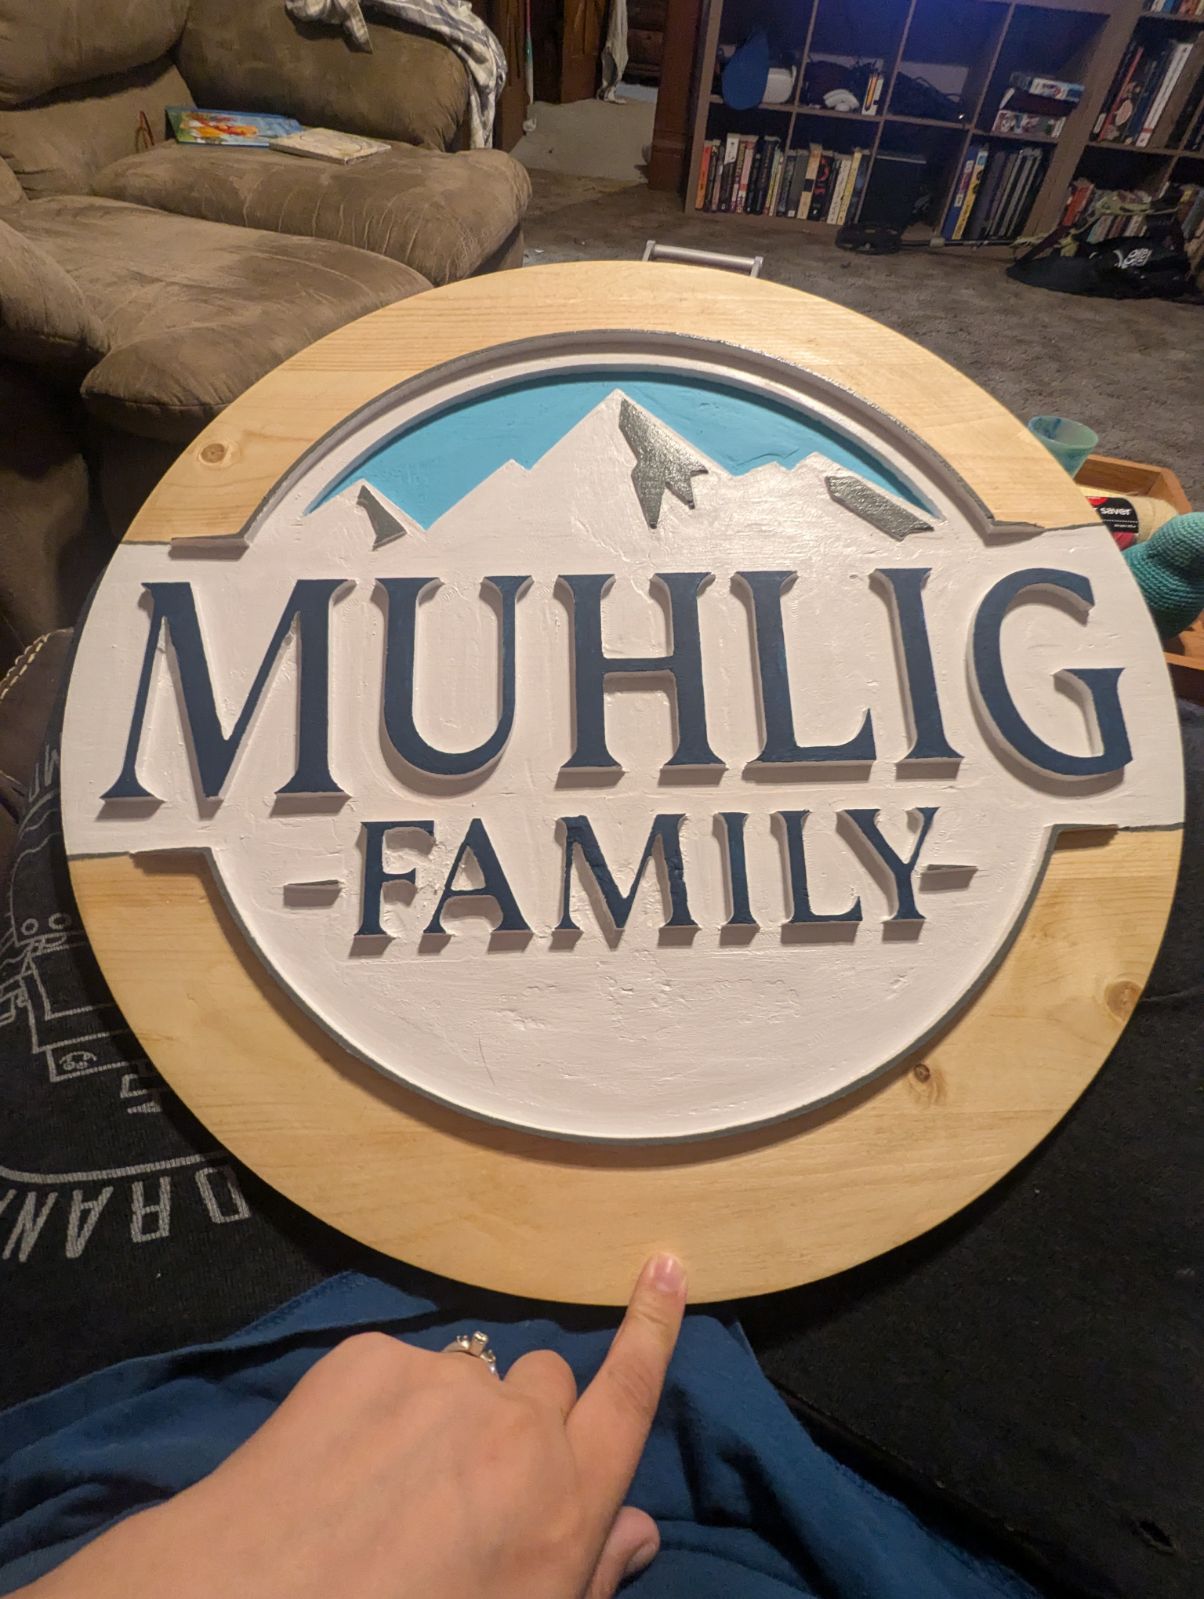
Very first project, a wedding present for a relative. Lots of learning to be done, but outcome was more or less what I had hoped for!
29 Likes
That looks fantastic! I’m sure they will treasure it!
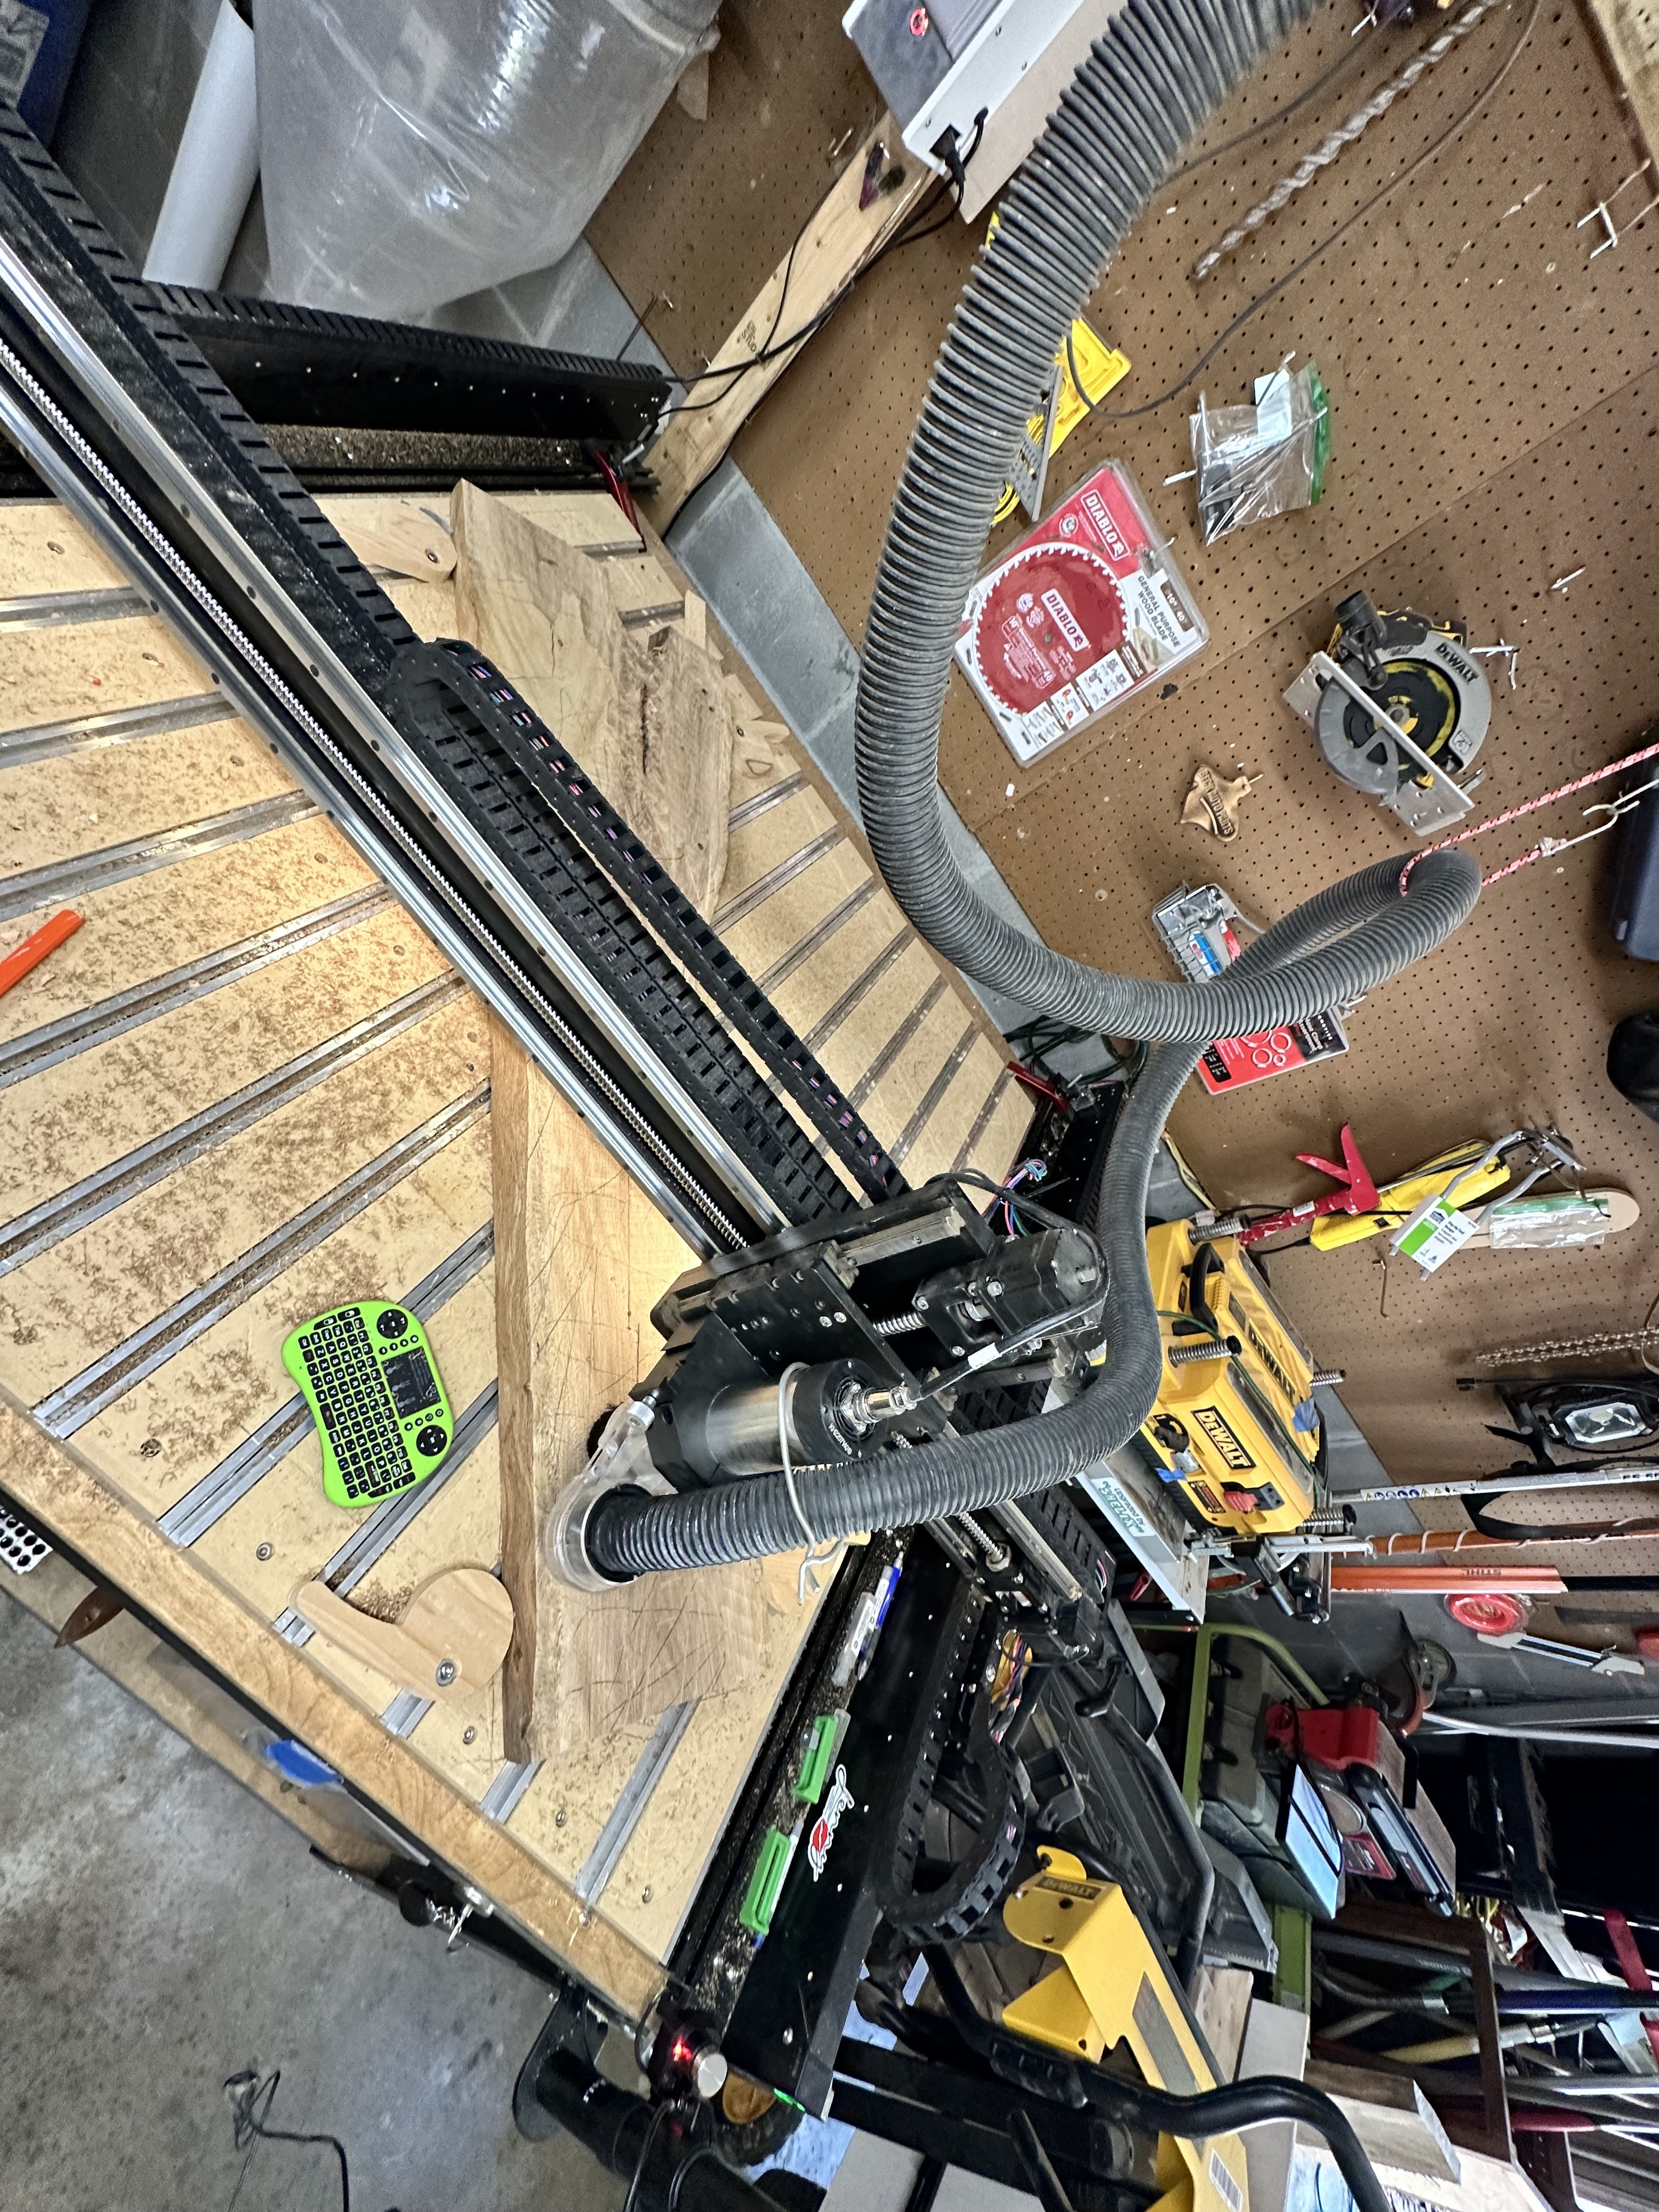
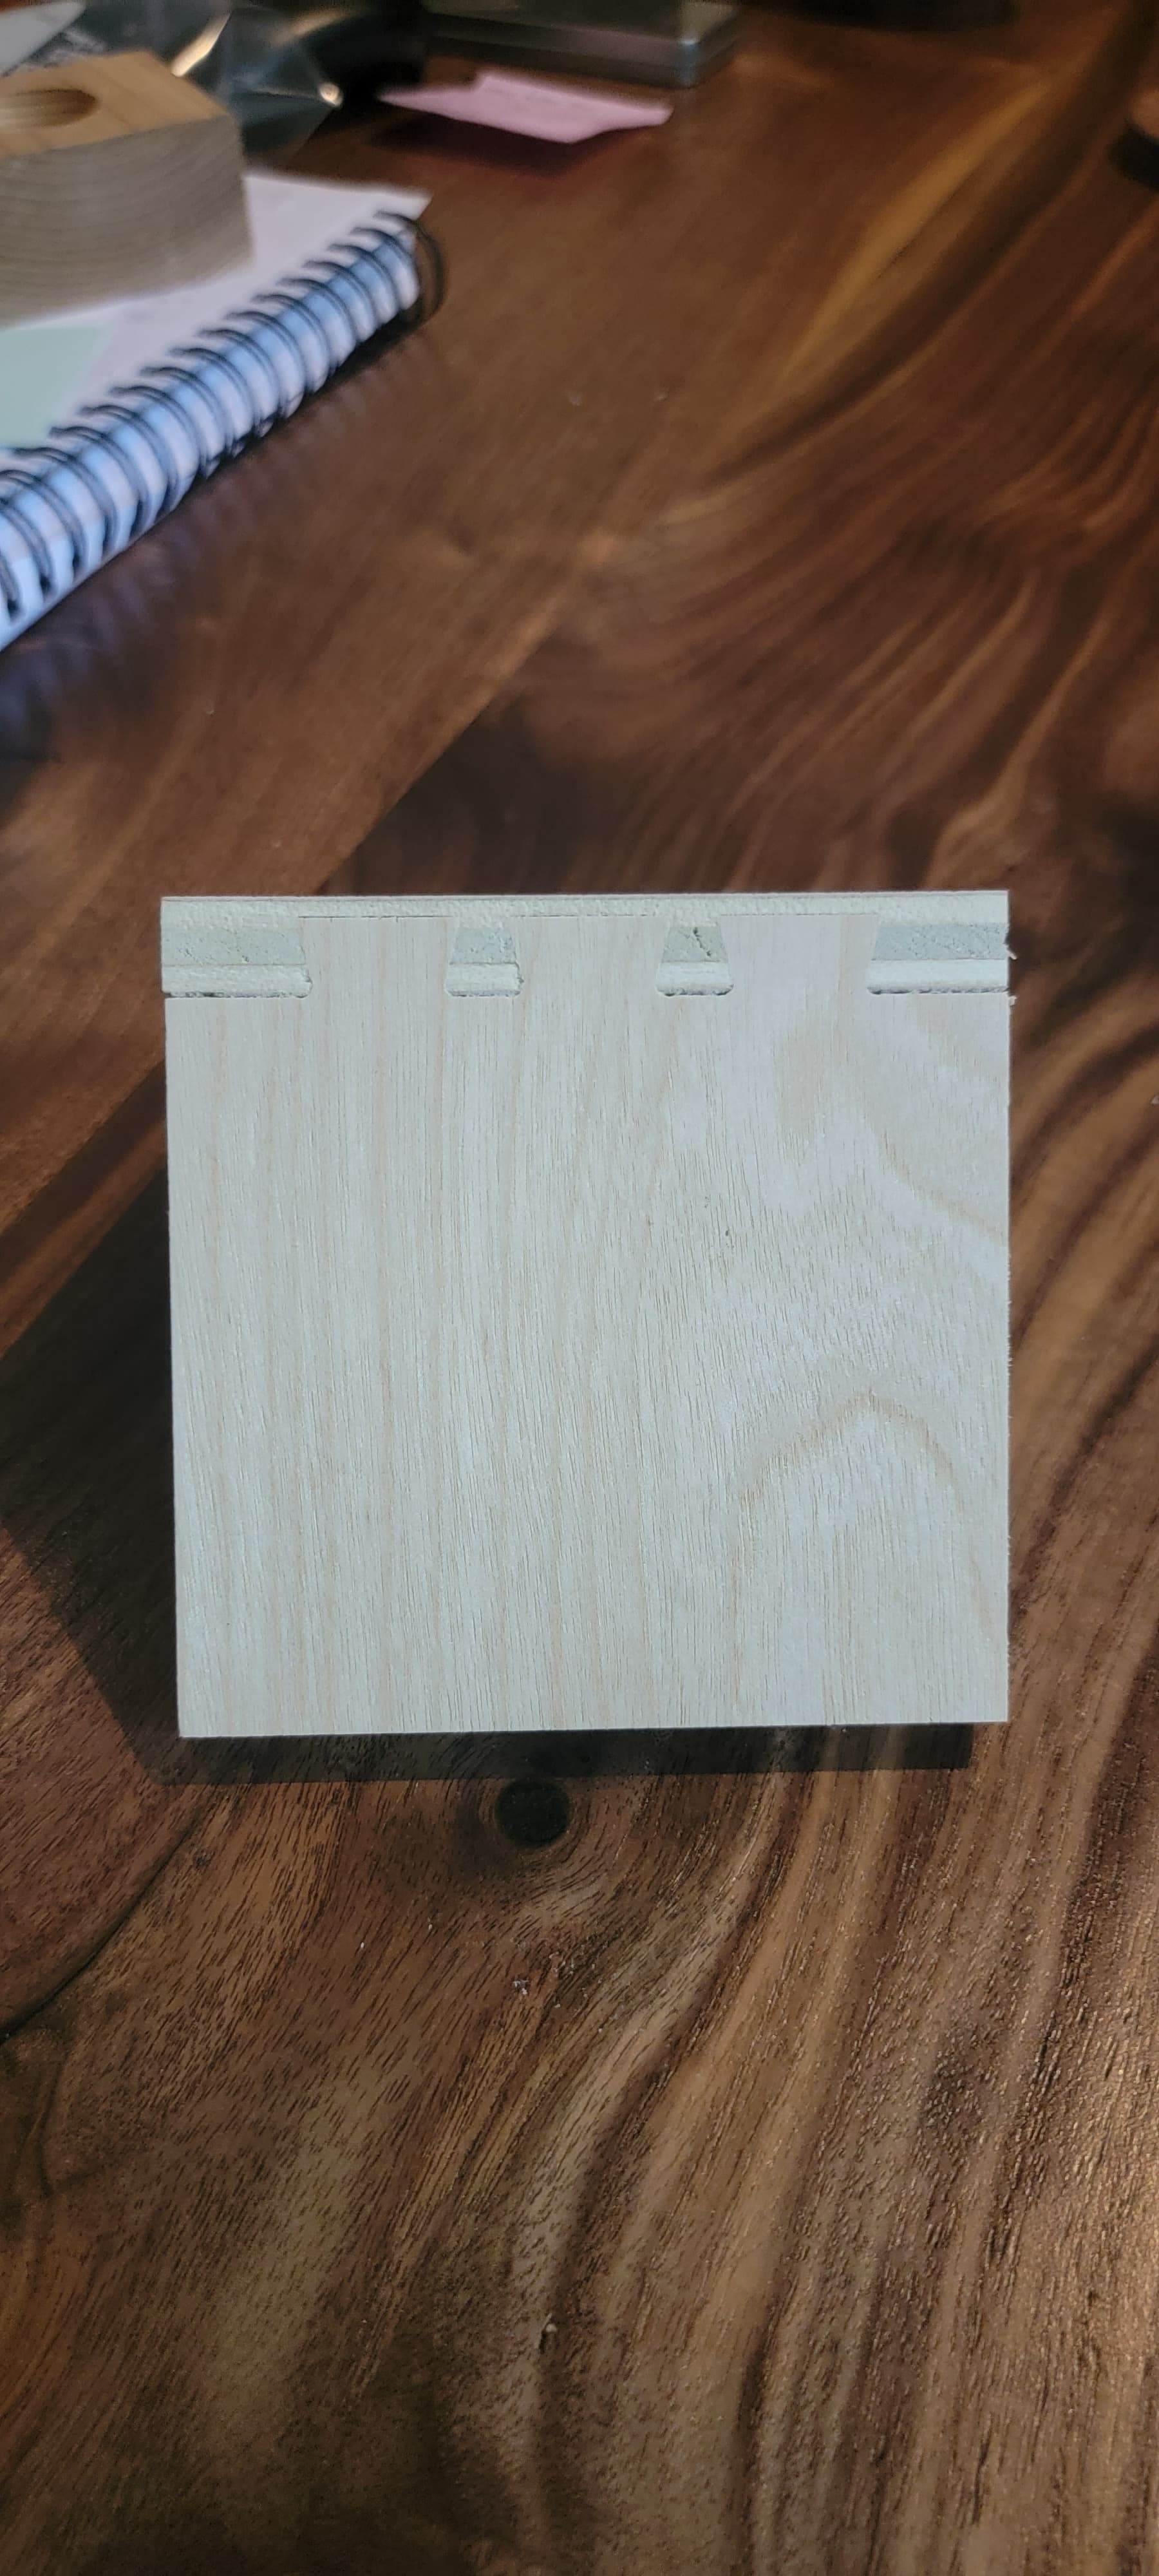
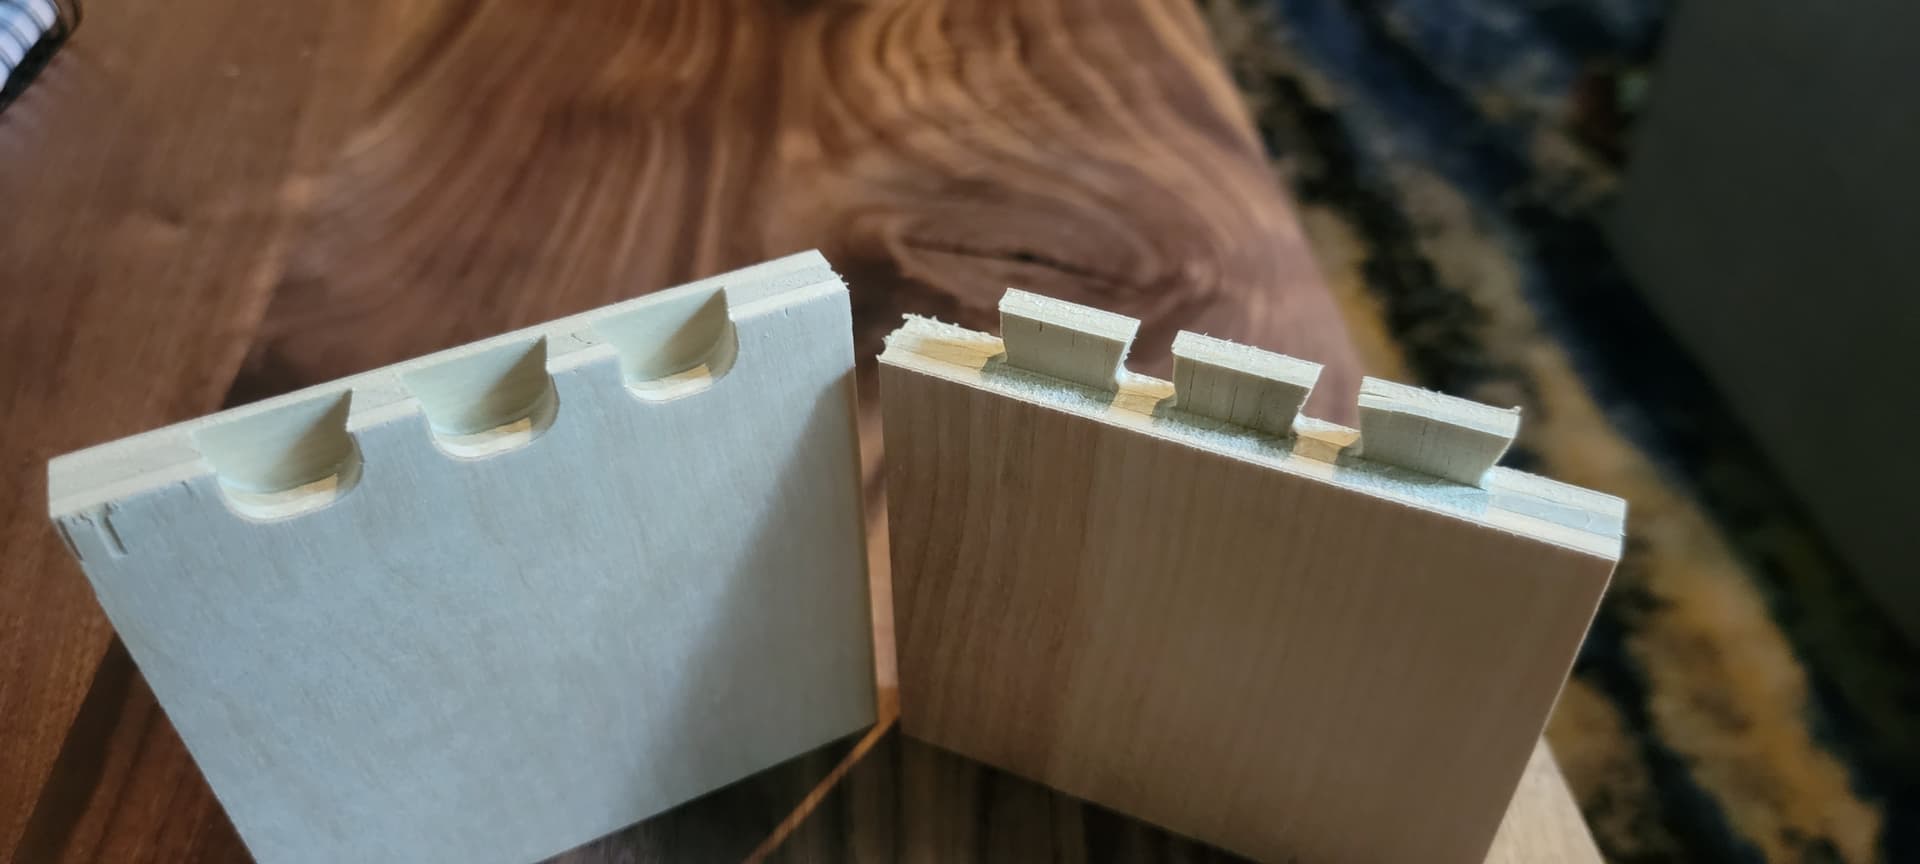
Reposting some dovetails after getting the microjig dovetail match fit bit. It pretty much allows flat cut dovetails on the CNC.
It was a little tricky to get the geometry right, but nothing too complicated. Too bad they don’t have different sized bits like this.
10 Likes
Show us what you got. Tell us how you did it.

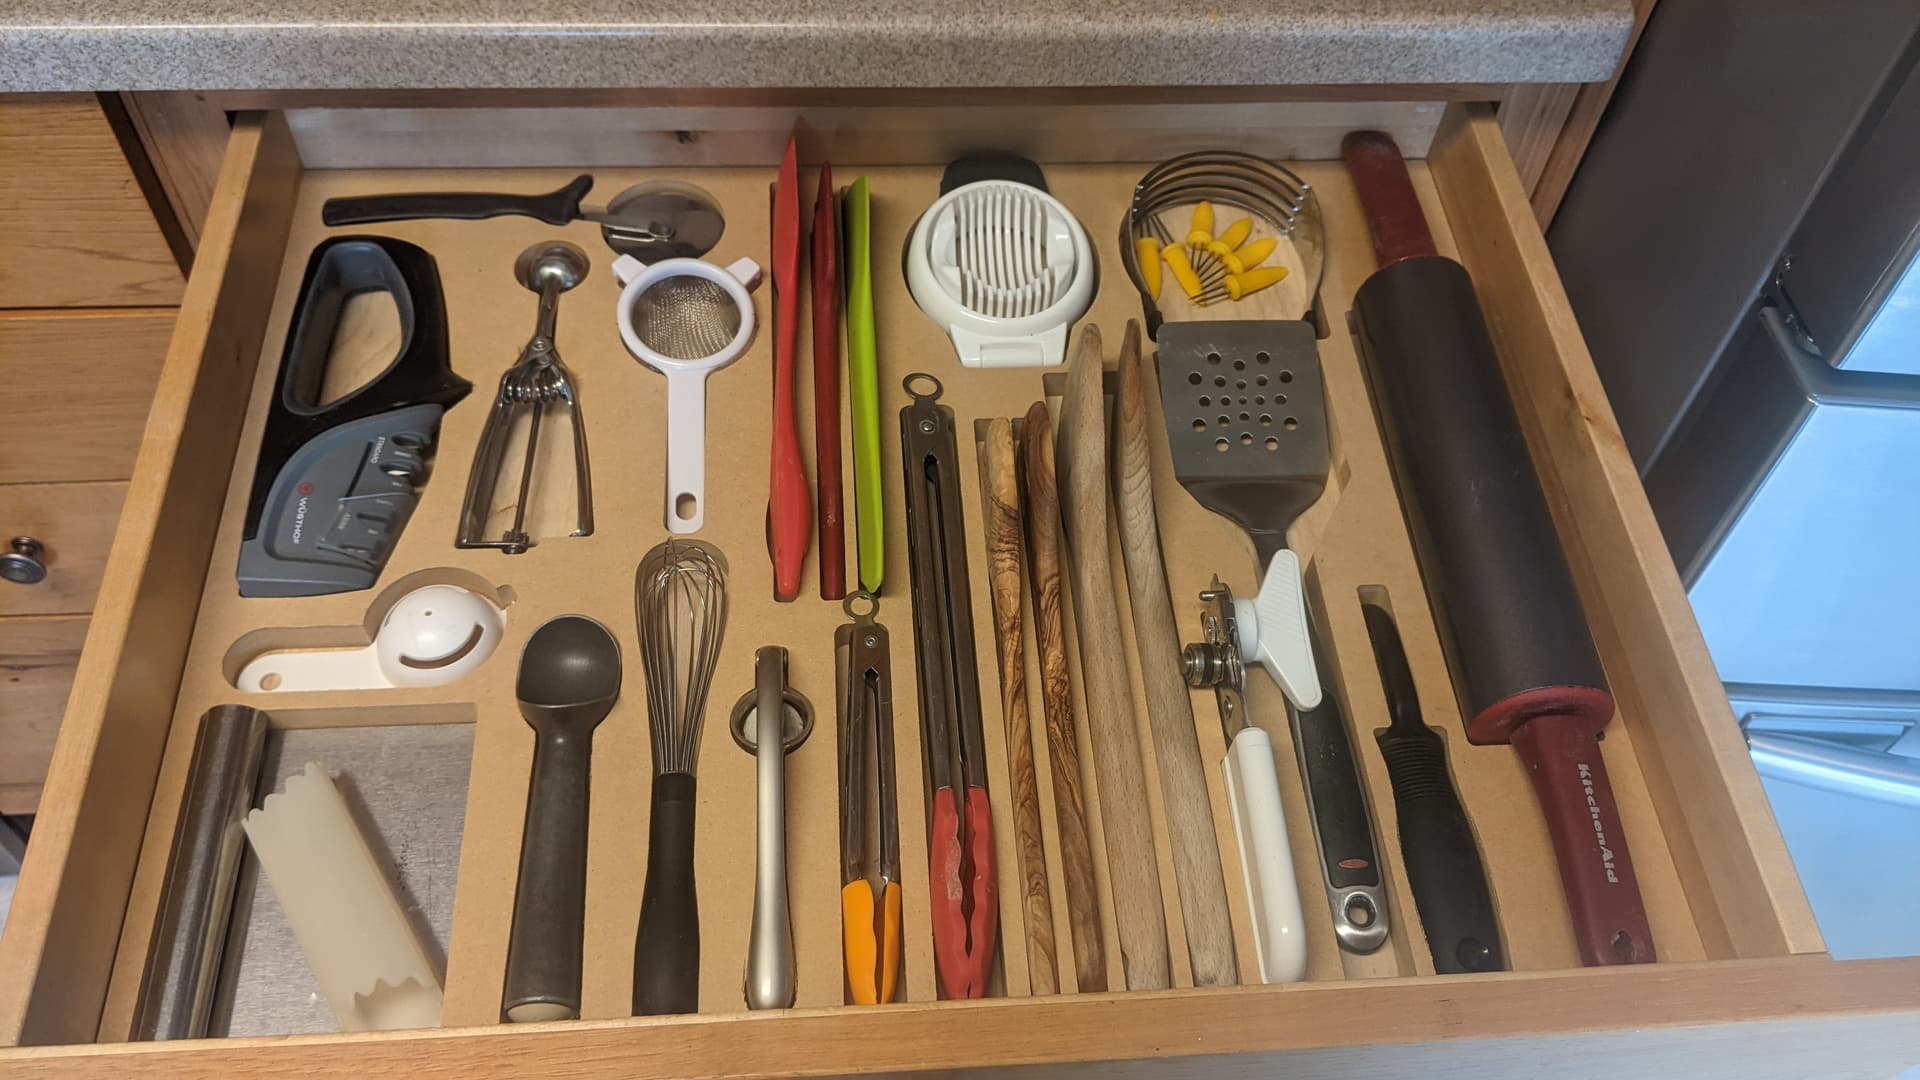
One project for my CNC work and one for the kitchen. It’s time consuming to do the measurements for all the pieces but worth it to have the organization.

32 Likes
I had organization. Then I got more bits😂
13 Likes
The items I don’t have in my workshop are a melon baller and an egg slicer. Gotta go to Amazon now! ![]()
+1 for design and cut but it isn’t human to be that organized! ![]()
6 Likes
Be honest: those corn skewers rolling around every time you open it drive you crazy, don’t they?
I think I’ll try this when the kids are out of the house.
3 Likes
If I were to do this for the wife we would have drawers from floor to ceiling. Like my shop, I need this to make that once a year, maybe.
Great job
2 Likes
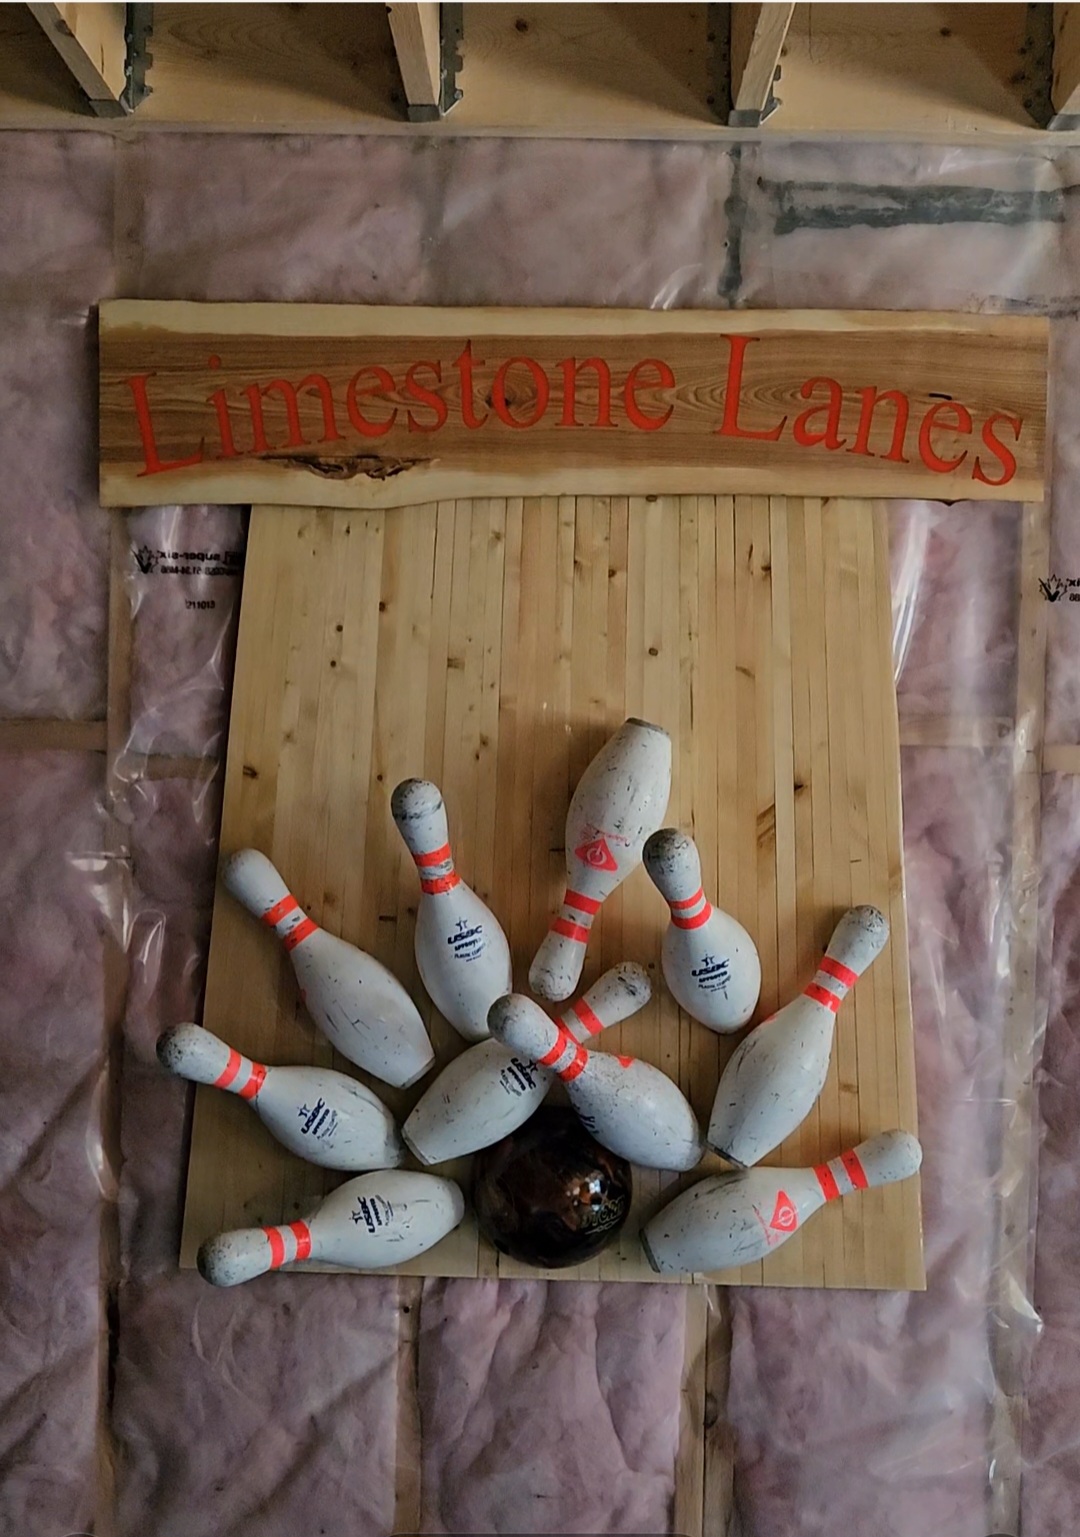
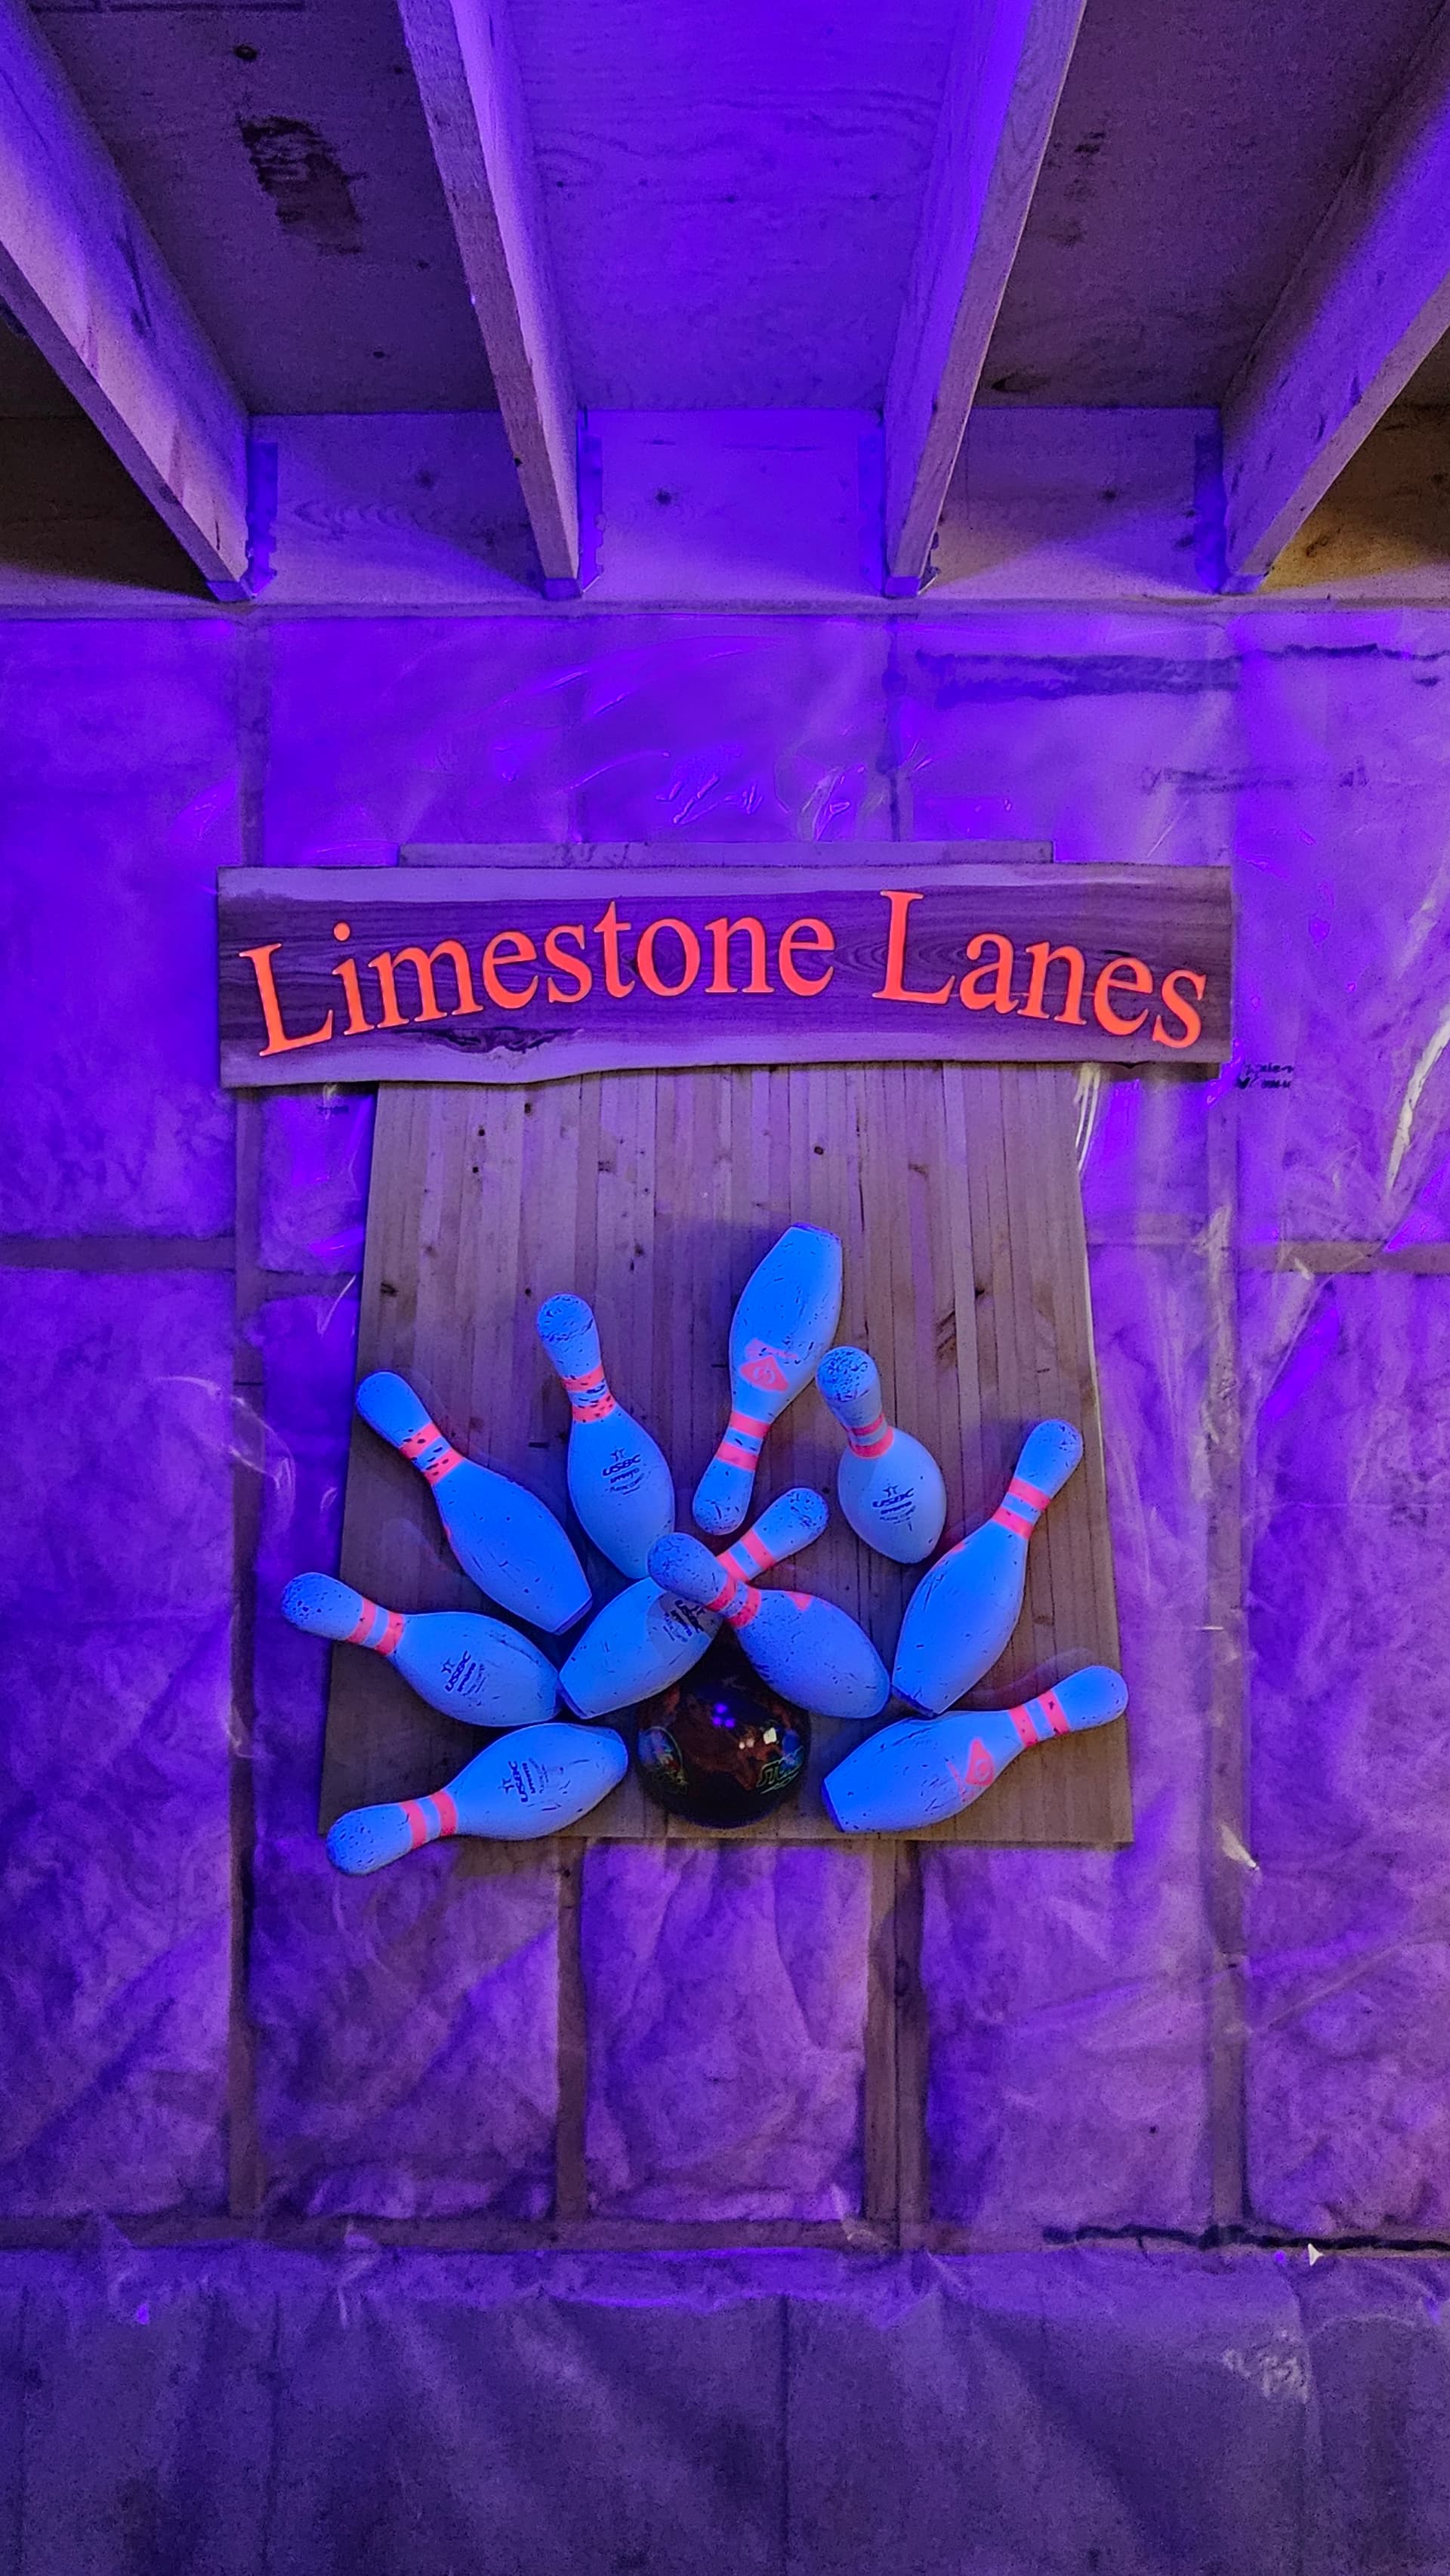
Fluorescent Black Light Resin Pour!
This helped make the project one of a kind!
Simple pocket and pour.

24 Likes
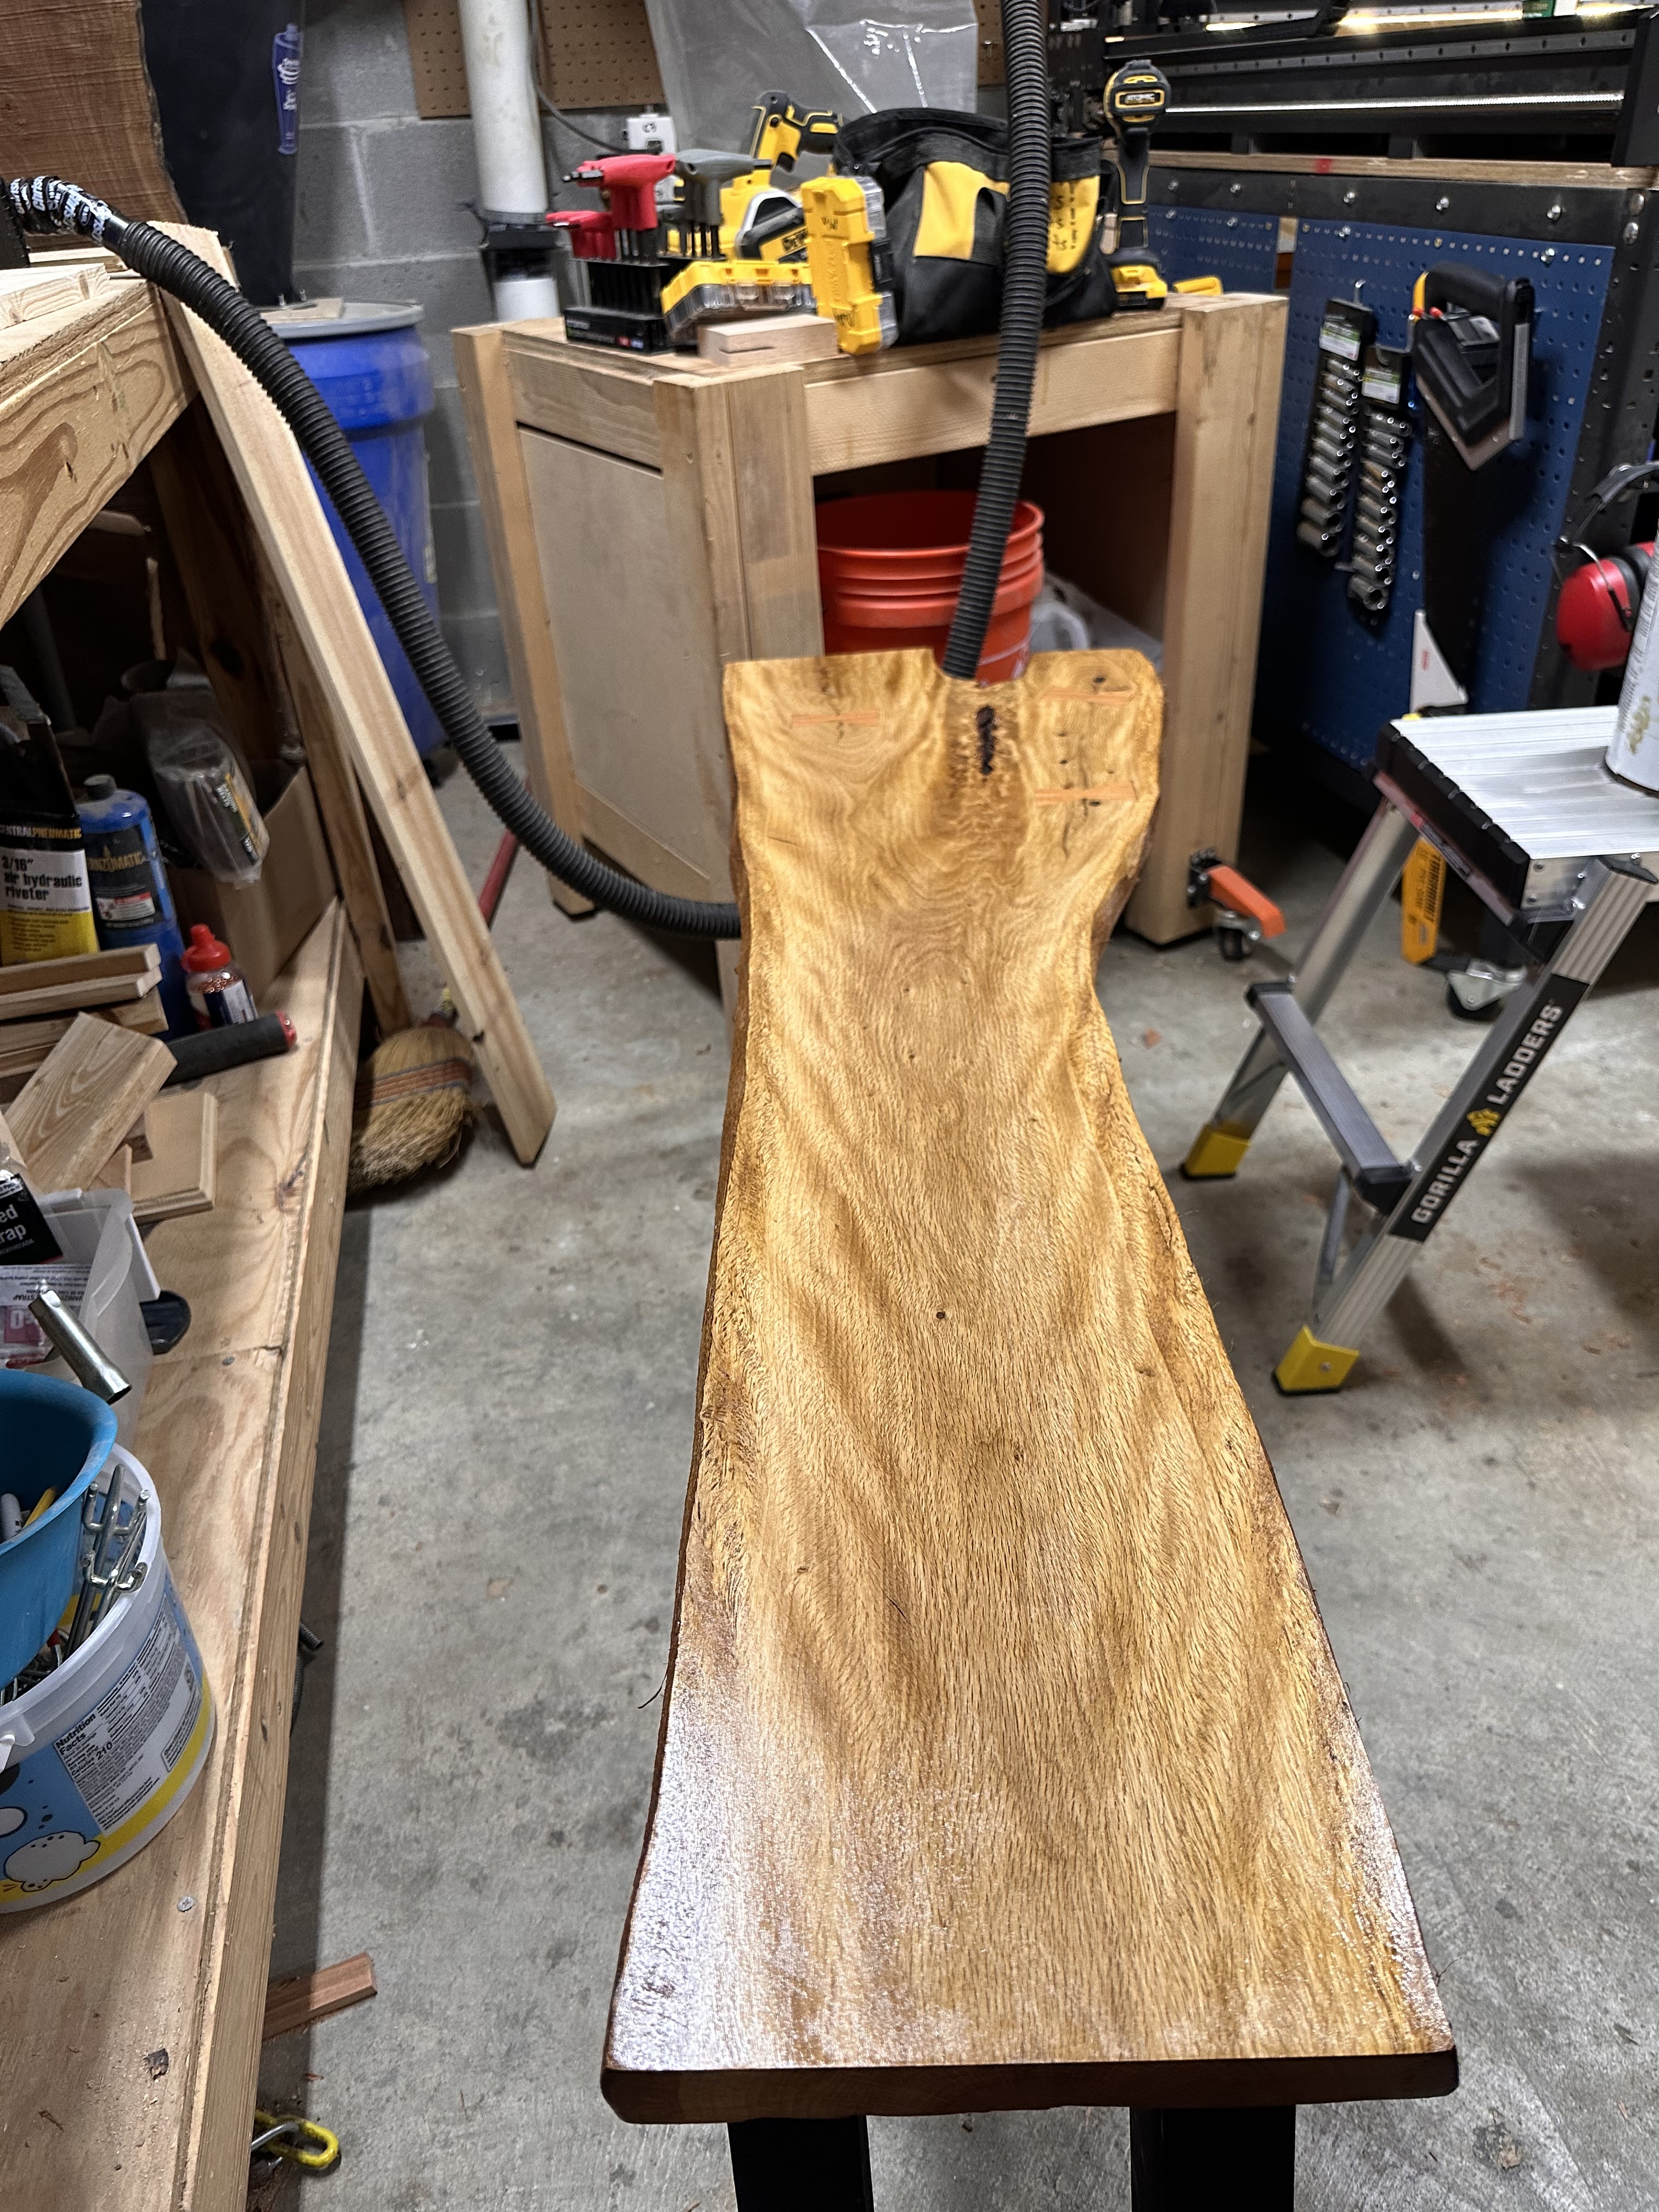
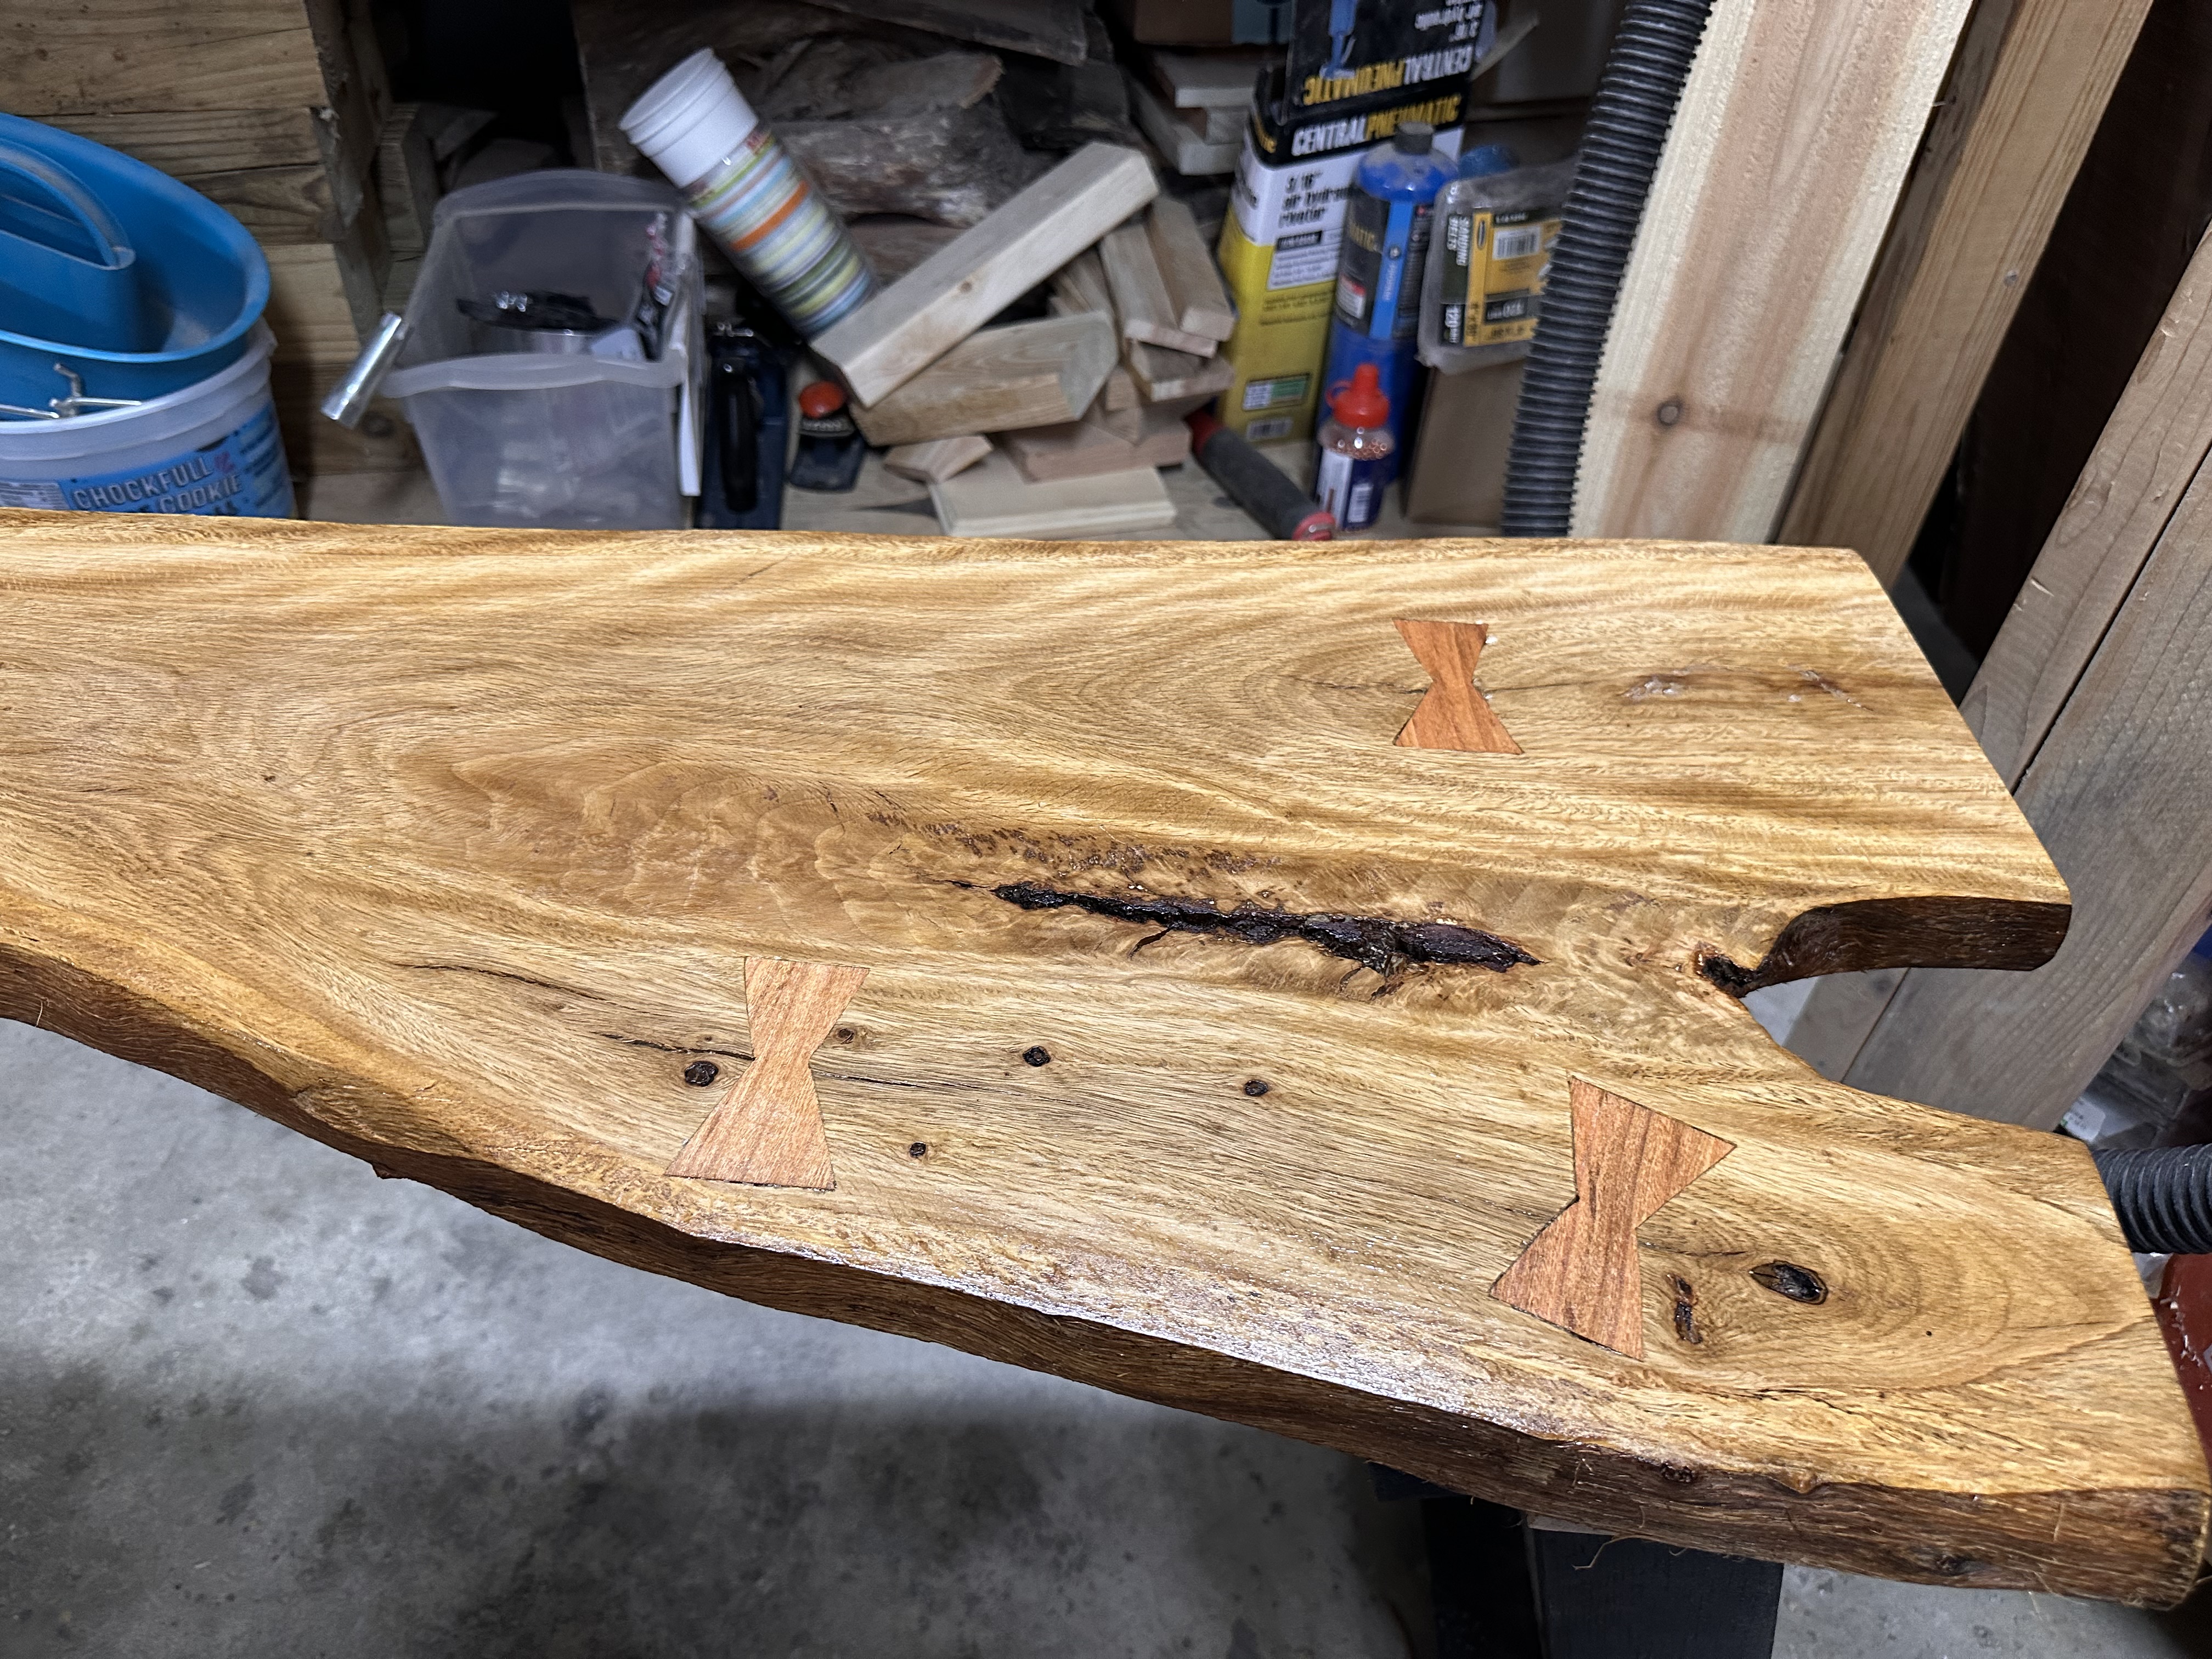
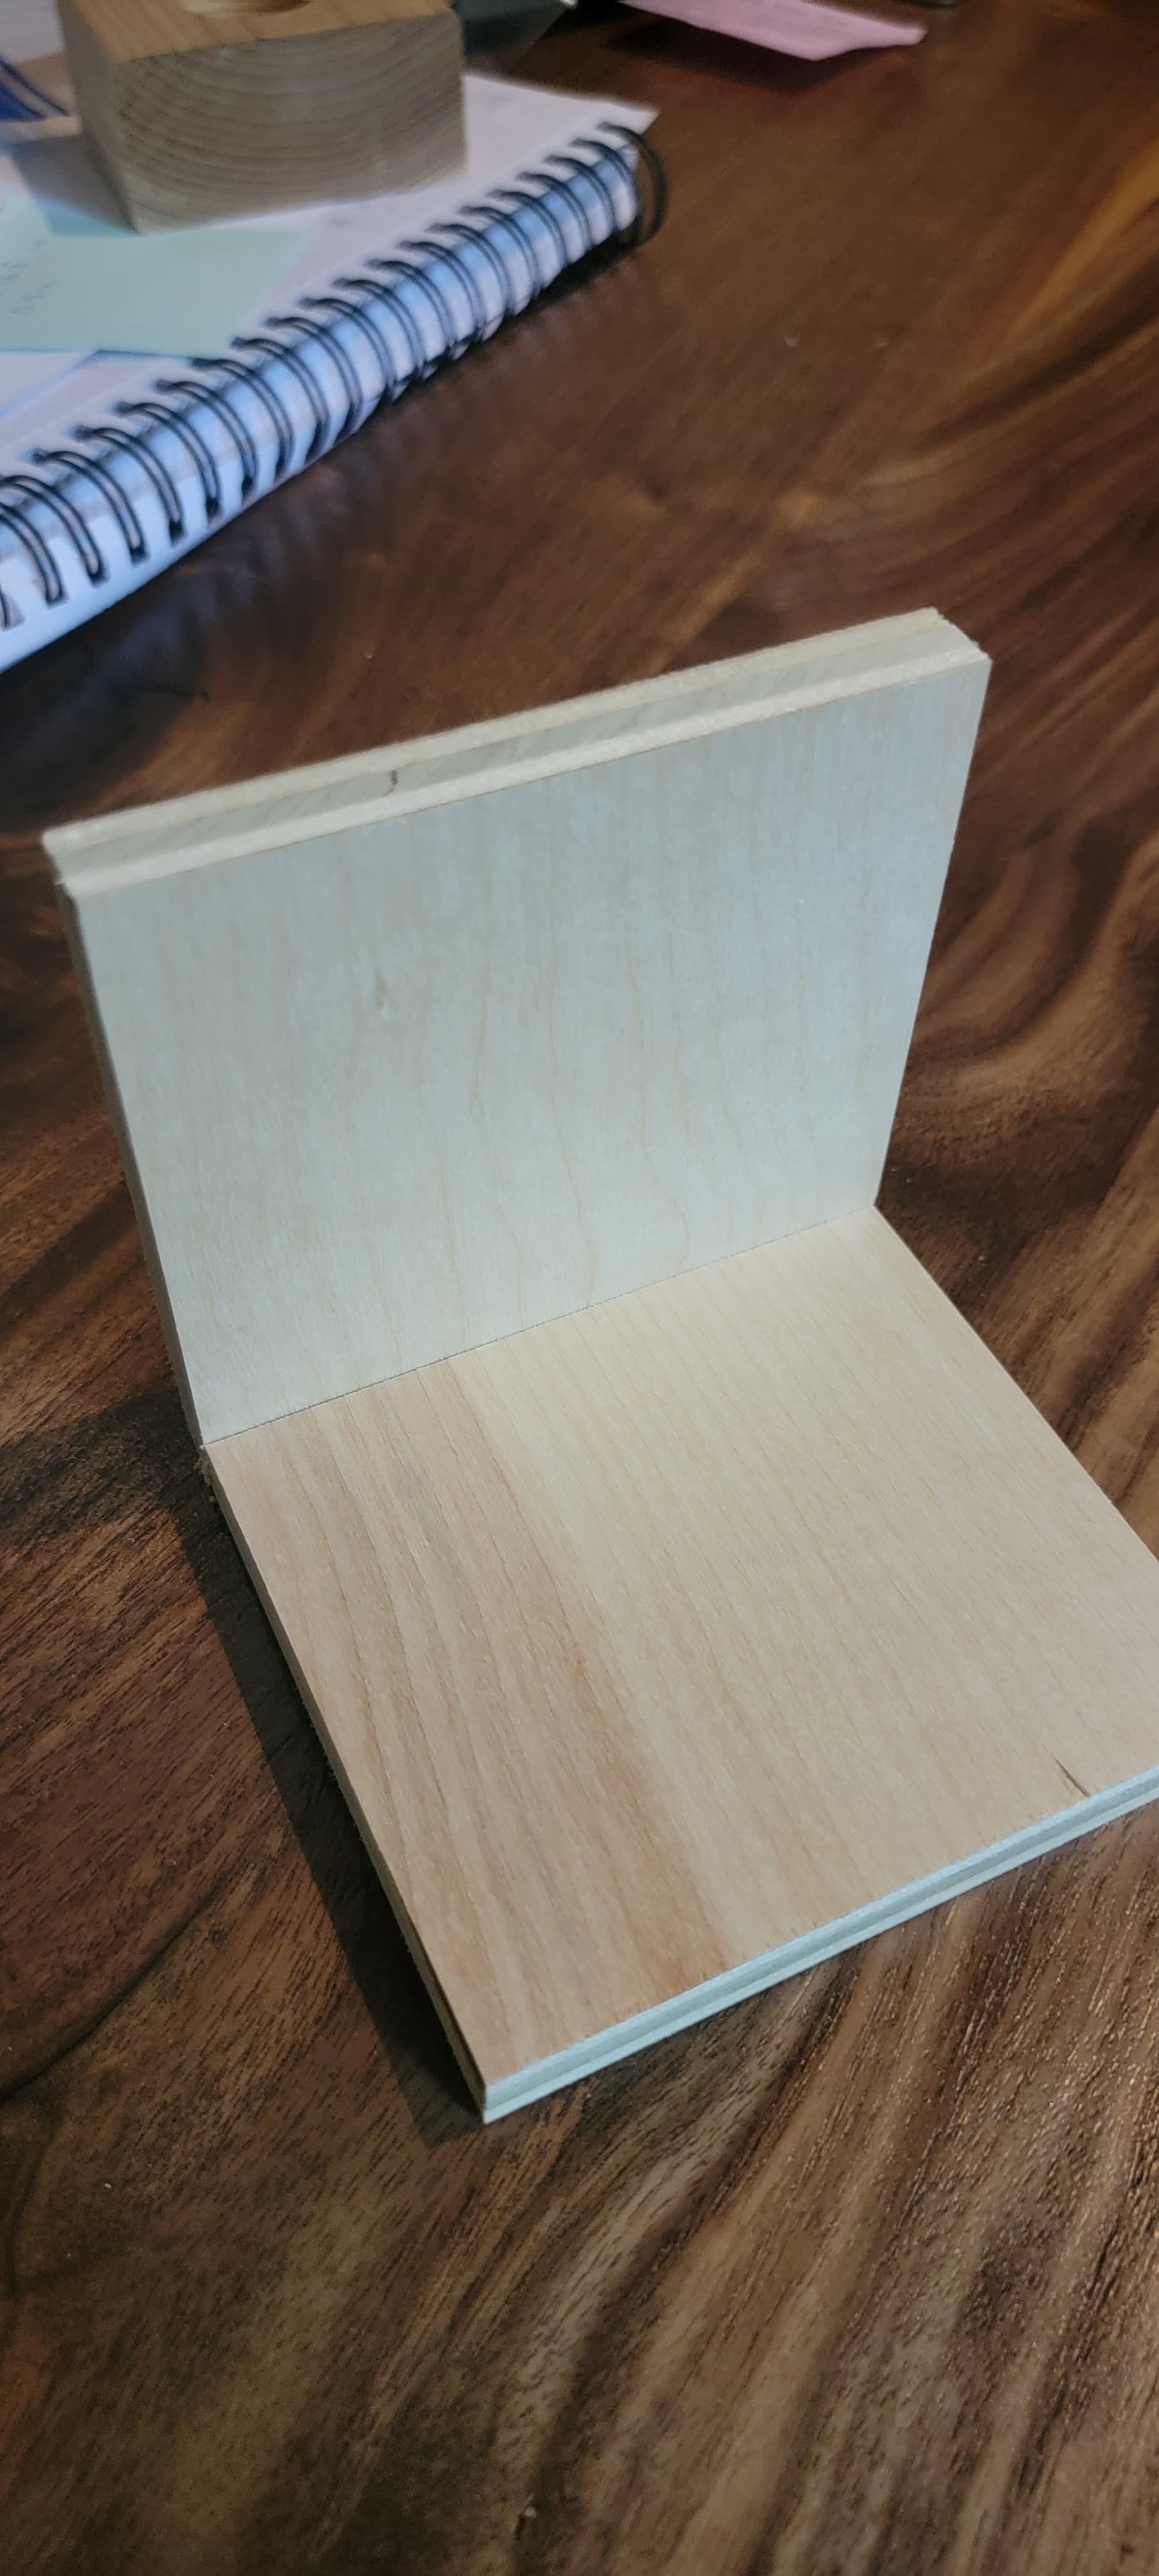
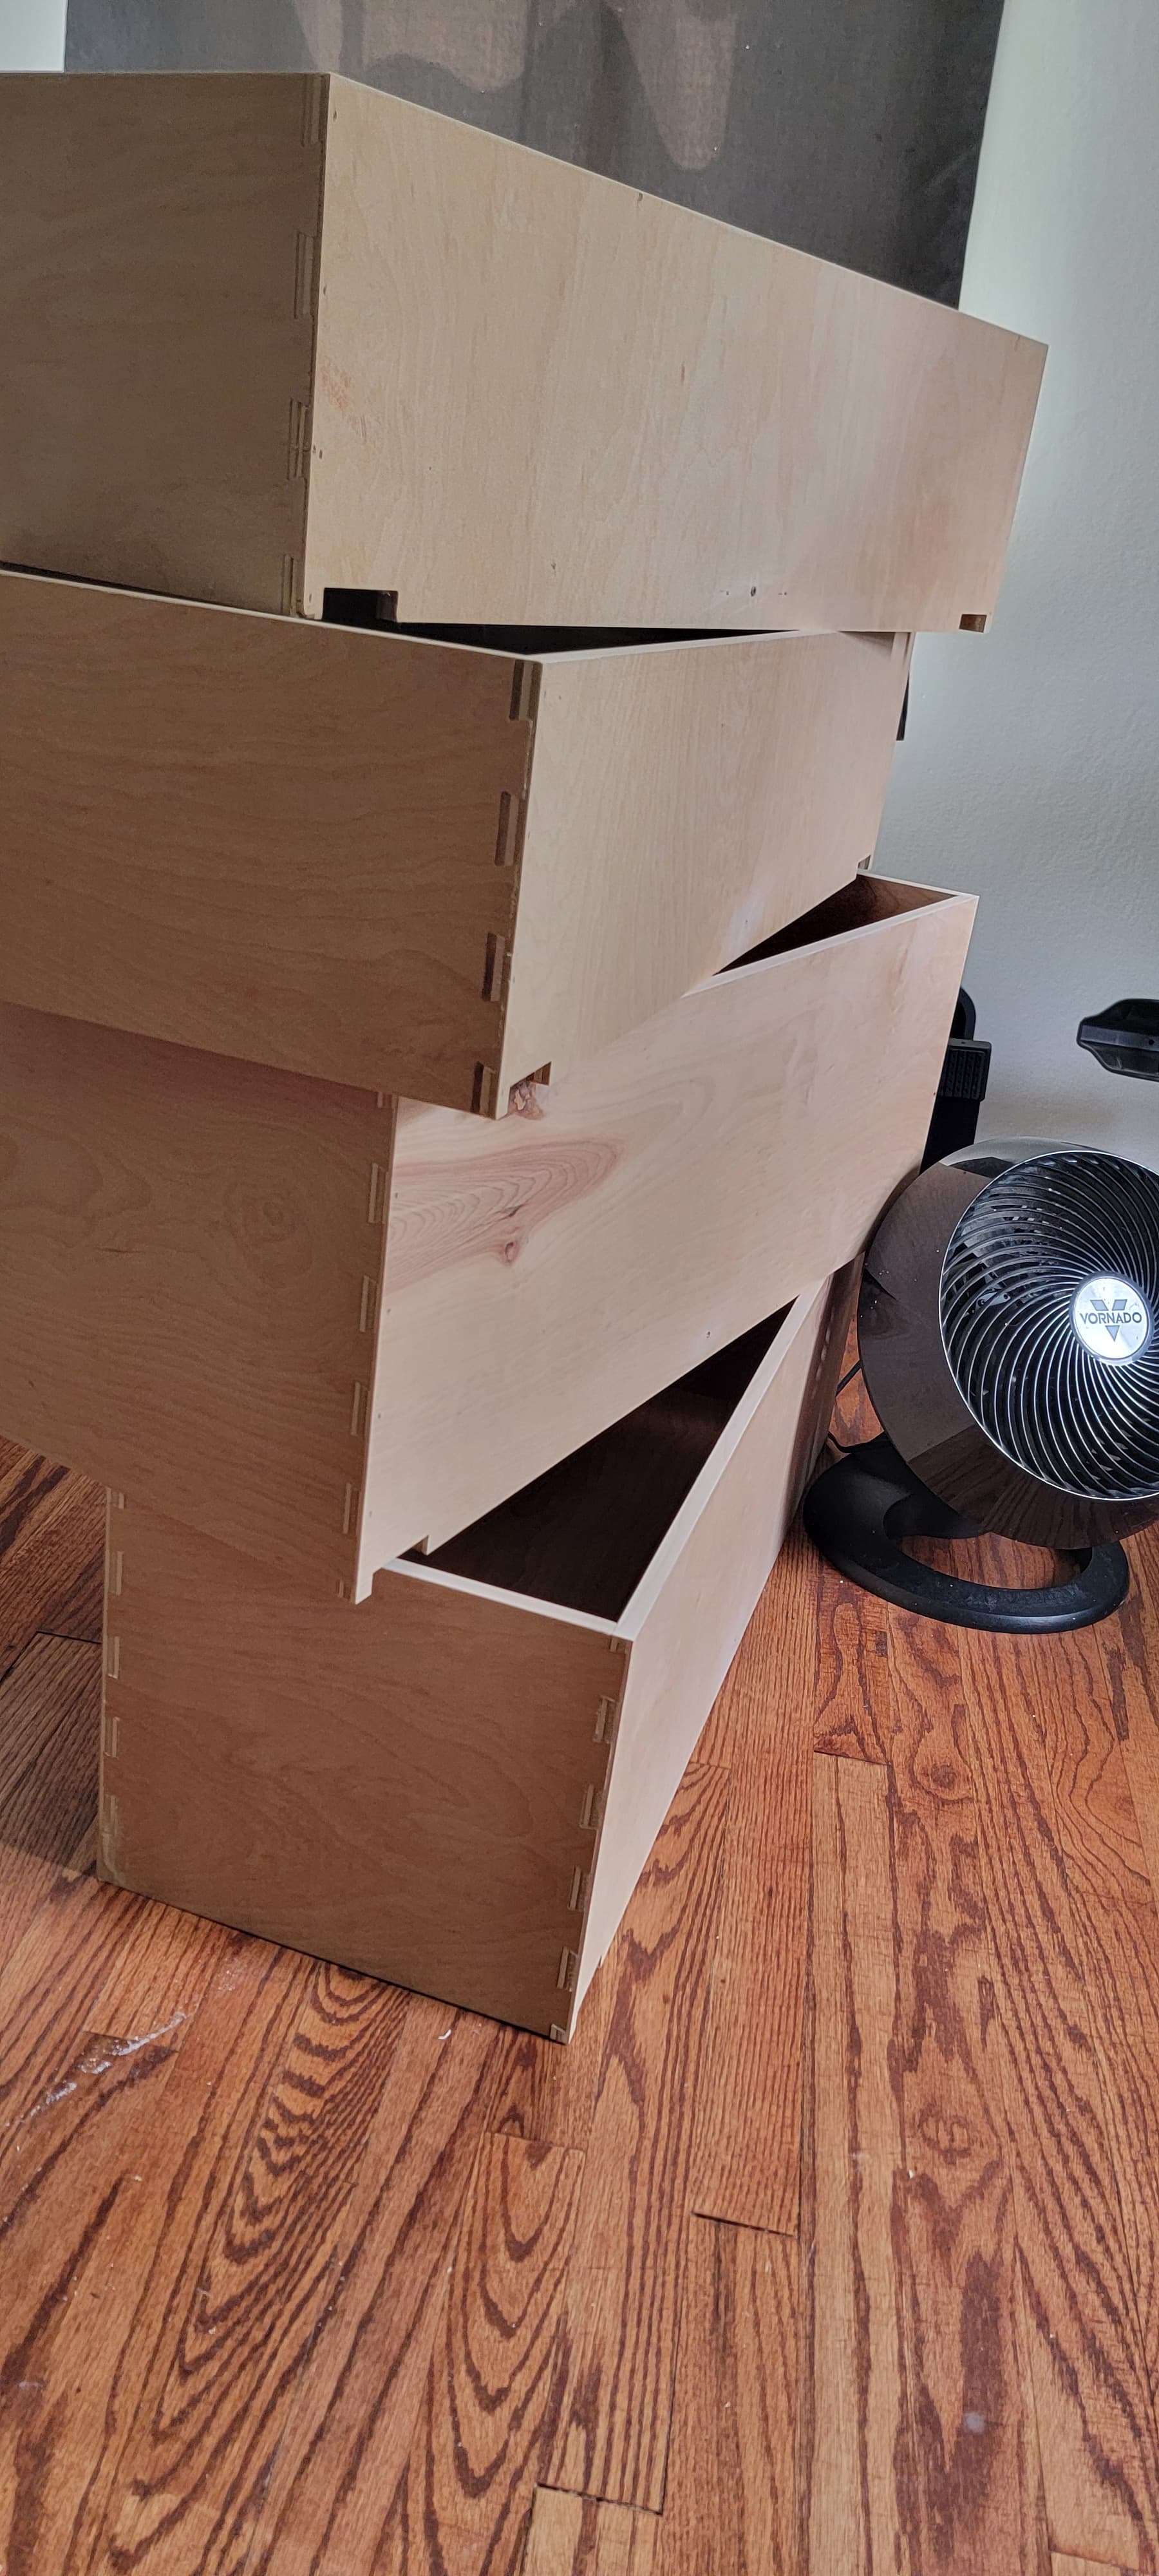
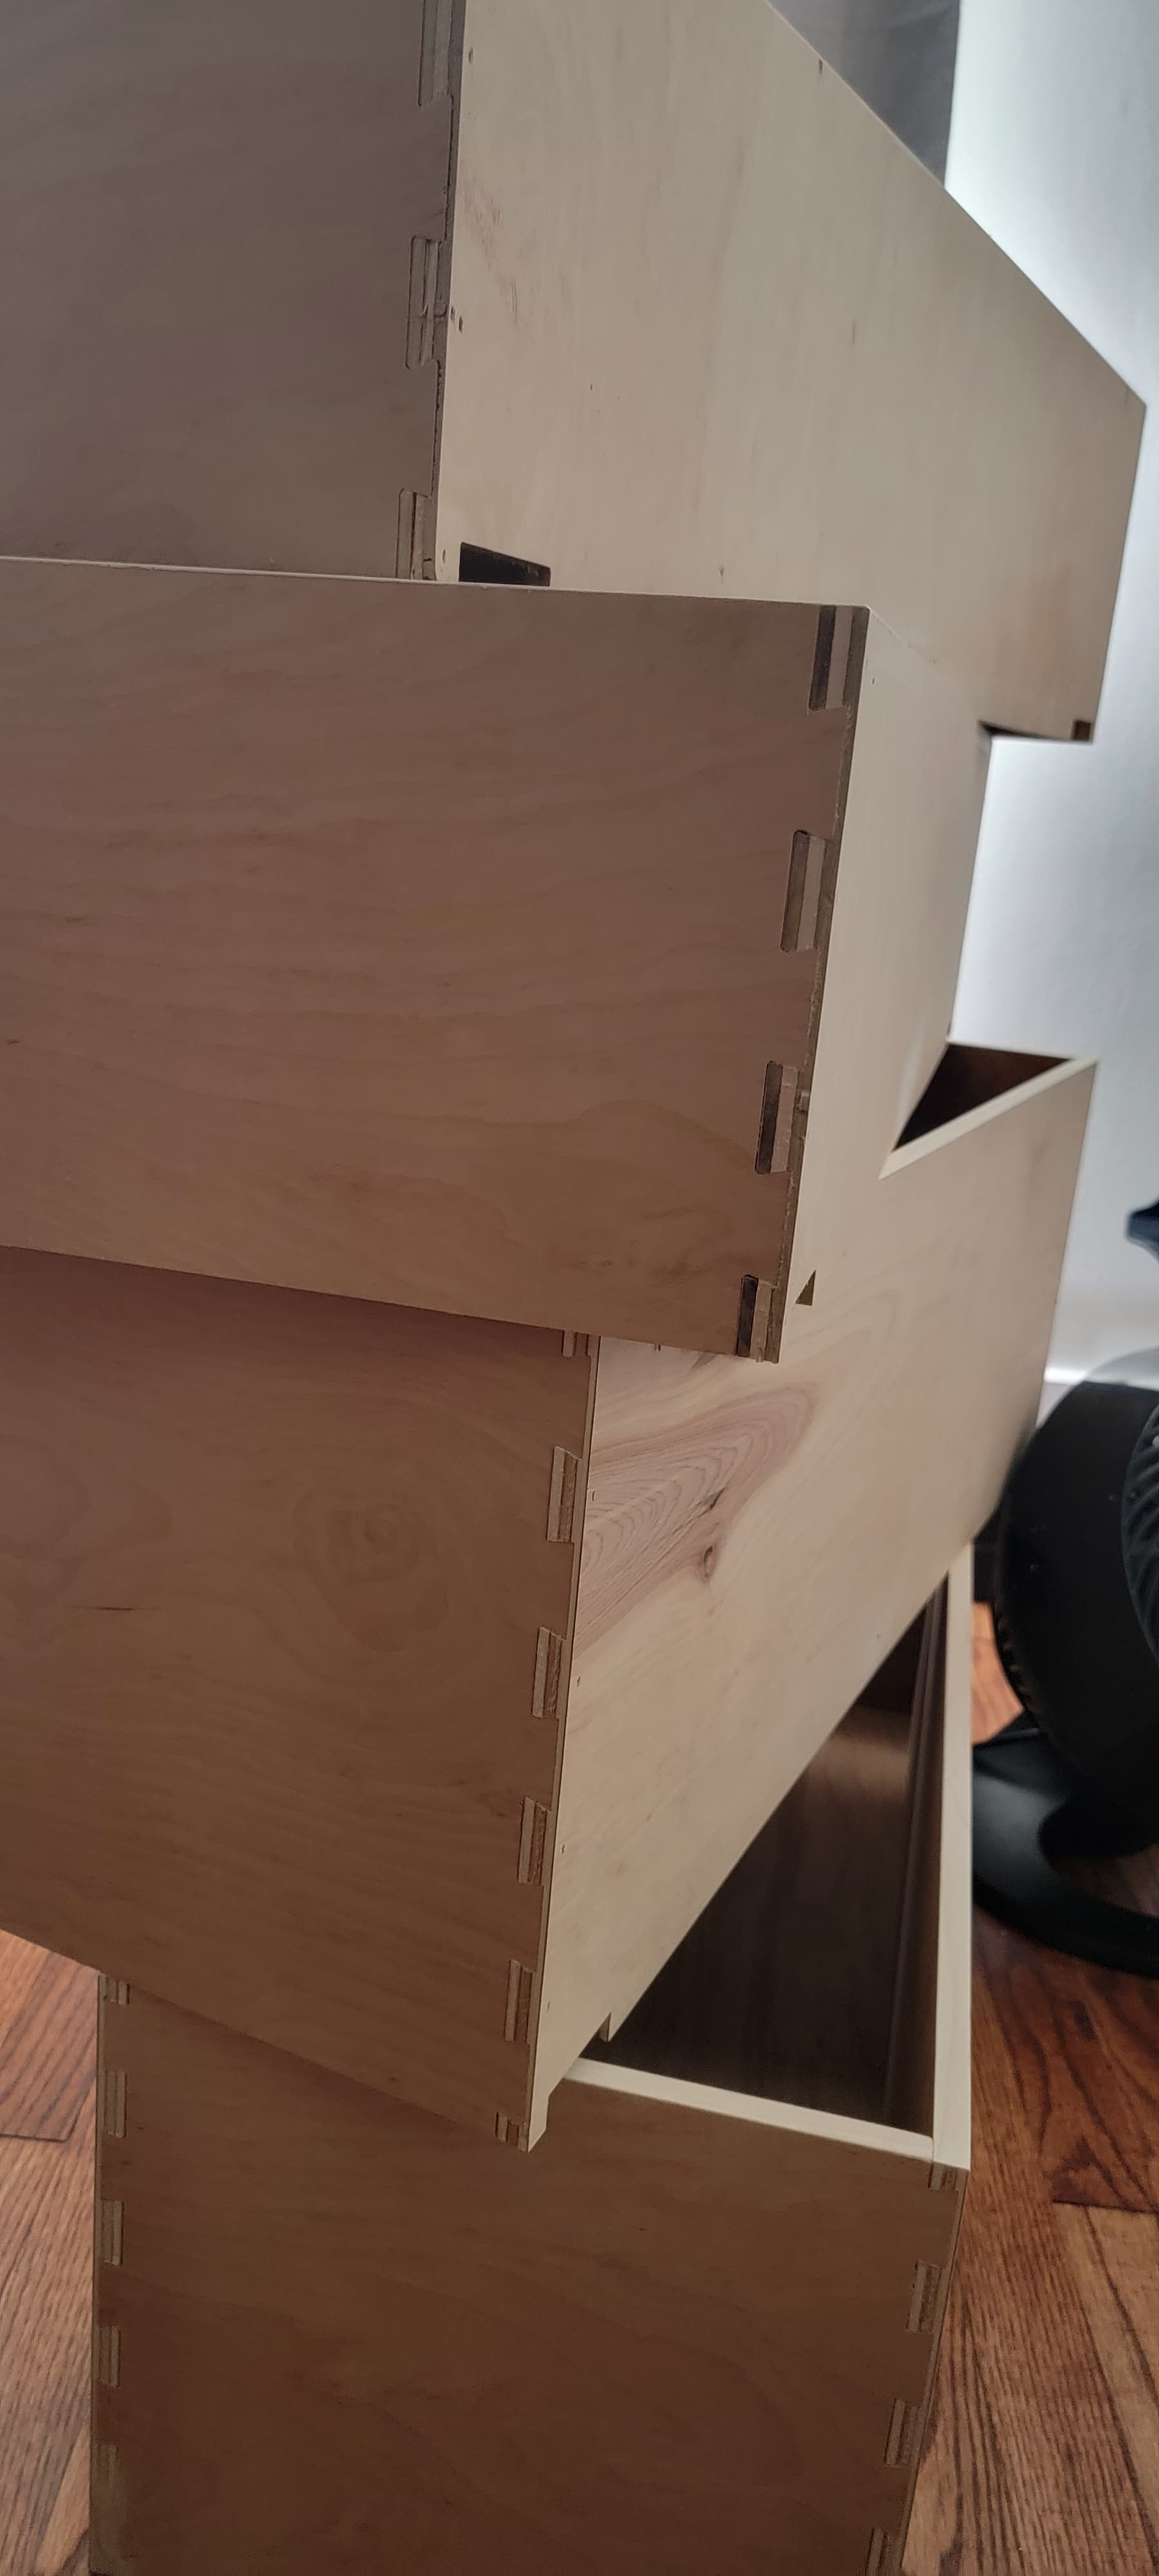
Dovetail drawer boxes. One sided machining. All parts of the drawer done on the CNC in one setup.
Redoing my kitchen in a couple phases. This is the start of phase 1. The cabinets are on the CNC right now.
9 Likes
Tell us how you did it. Your drawer boxes look thin, how thick are your drawer boxes?
2 Likes
They are half inch. They will be light duty, so they are plenty strong. (Or we will see soon enough.)
I used a special bit for the dovetail. I will post a guide on how to make them after the project. They are pretty cool. Straight from CNC drawers are sweet. I couldn’t find an alternative that didn’t require double sided machining.
1 Like
Please see:
and:
2 Likes
The sample project for the Nomad, modified slightly and stuffed with my current bits.
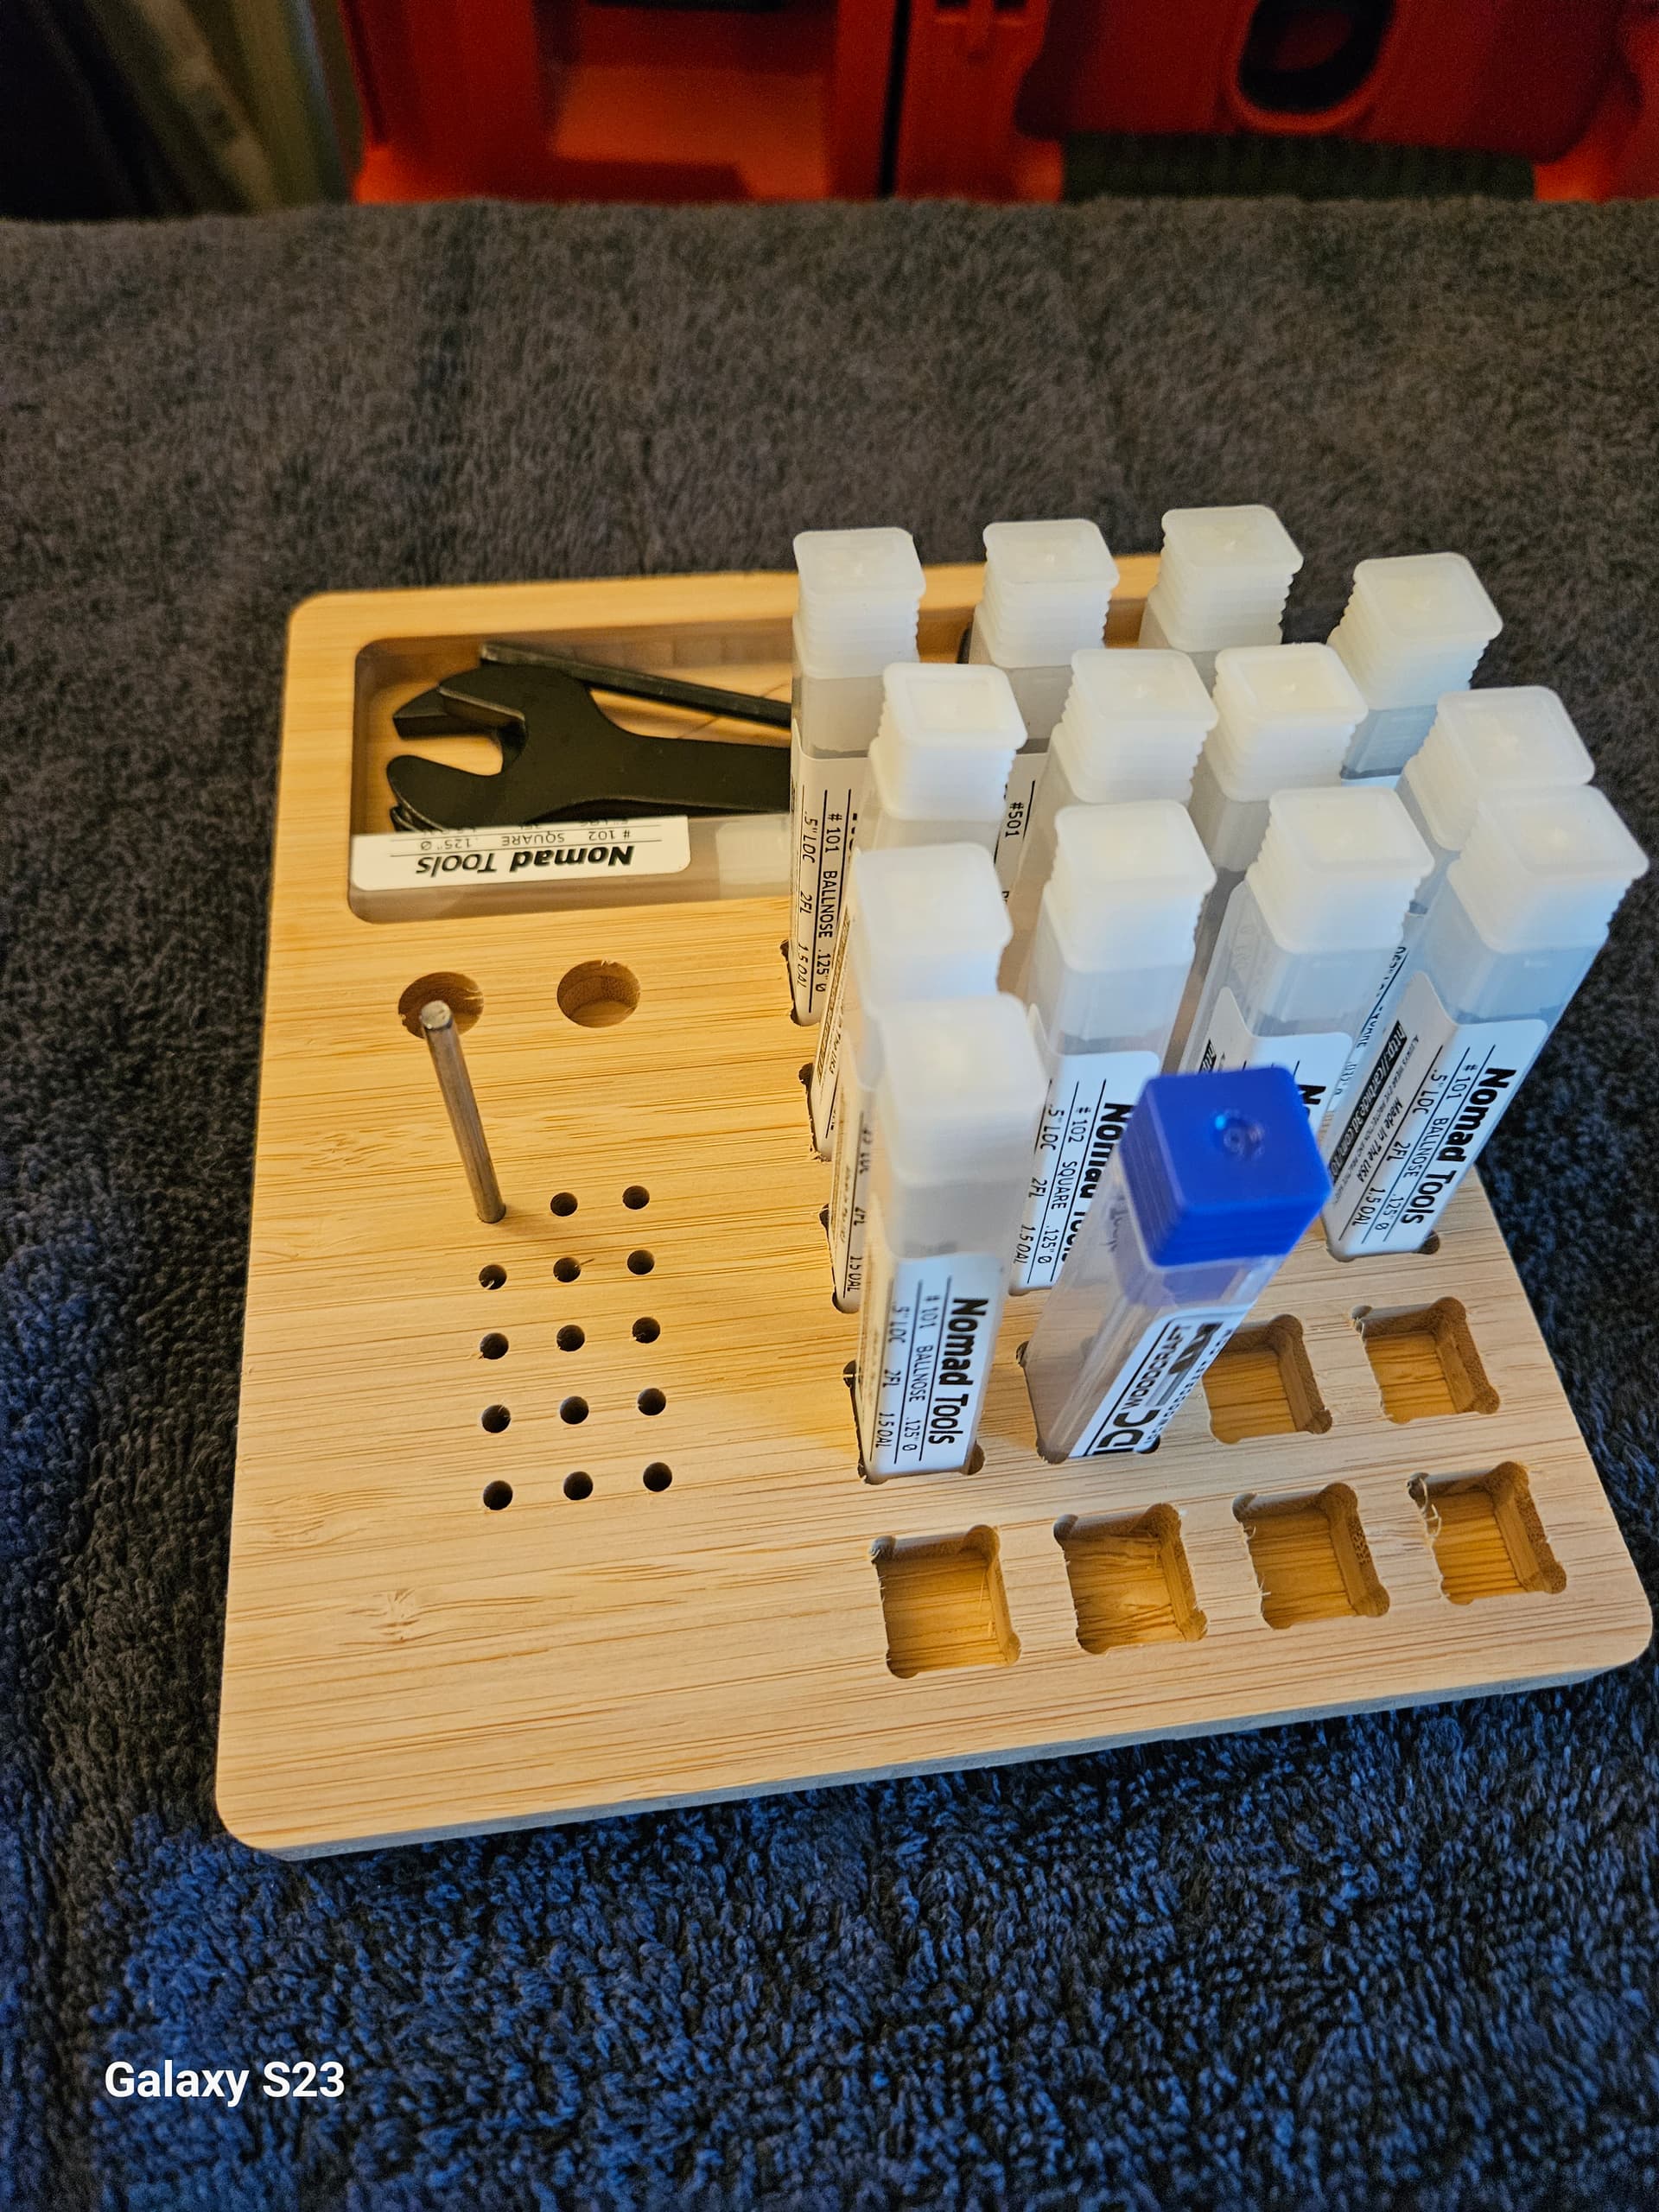
It’s the first thing that I have made. A little rough around the edges, but I cleaned up some of it with a chisel.
11 Likes
A downcut tool will help a lot for bamboo or wood.
3 Likes