What stepover did you use for the 3D finish passes? 5% or less should give a pretty good finish.
Ah, yes. I used 0.15mm, which i thought would make it pretty smooth but left very noticeable ridges and valleys.
@MagnoliaHaus What was your total amount of Z depth on the 3D carve finishing pass operation? I carved a fairly large wavy flag recently where the overall z depth on the carve was 2.5 inches. A little math: 256 z step levels available for a single depth map as there are 256 levels of gray available in standard RGB 8-bit png file divide that into 2.5 inches yields a single z-step of 0.009786 (round up to 0.01") and I can tell you that a 10 thousandths step is very visible. Now if CC supported the use of 16 bit png files that could open of the available steps to over 65,000 but to my knowledge it only supports 8-bit at this time.
Total Z was 40mm and the bit was sticking out a bit more than i was comfortable with. I was trying to avoid the collet nut from hitting the edge though.
If i used 0.15mm for the stepover, that would be 0.00591 inches. That’s half of ‘very visible’.
What would you suggest as a good stepover that won’t catapult the project into several hours of runtime?
I’m still very new, just over two weeks, ever touching a CNC. What is the 5% calculated from?
Tool diameter. A good rule of thumb for 3D carving is to use the largest ball mill you have, that still gives you the detail you need. For a bowl I would use my 1" ball. Then isolate the logo area & use the 1/8" or 1/16" as required.
1 Like
I see. So i created more work by using a smaller ball mill in effect. Now i have to learn how to isolate areas.
Are you aware of any CC Pro tutorials that cover this?
How did you model the logo into the bowl? If you used a vector, that is your boundary for the smaller ball mill. Or you may want to offset that curve outward by the radius of the cutter.
1 Like
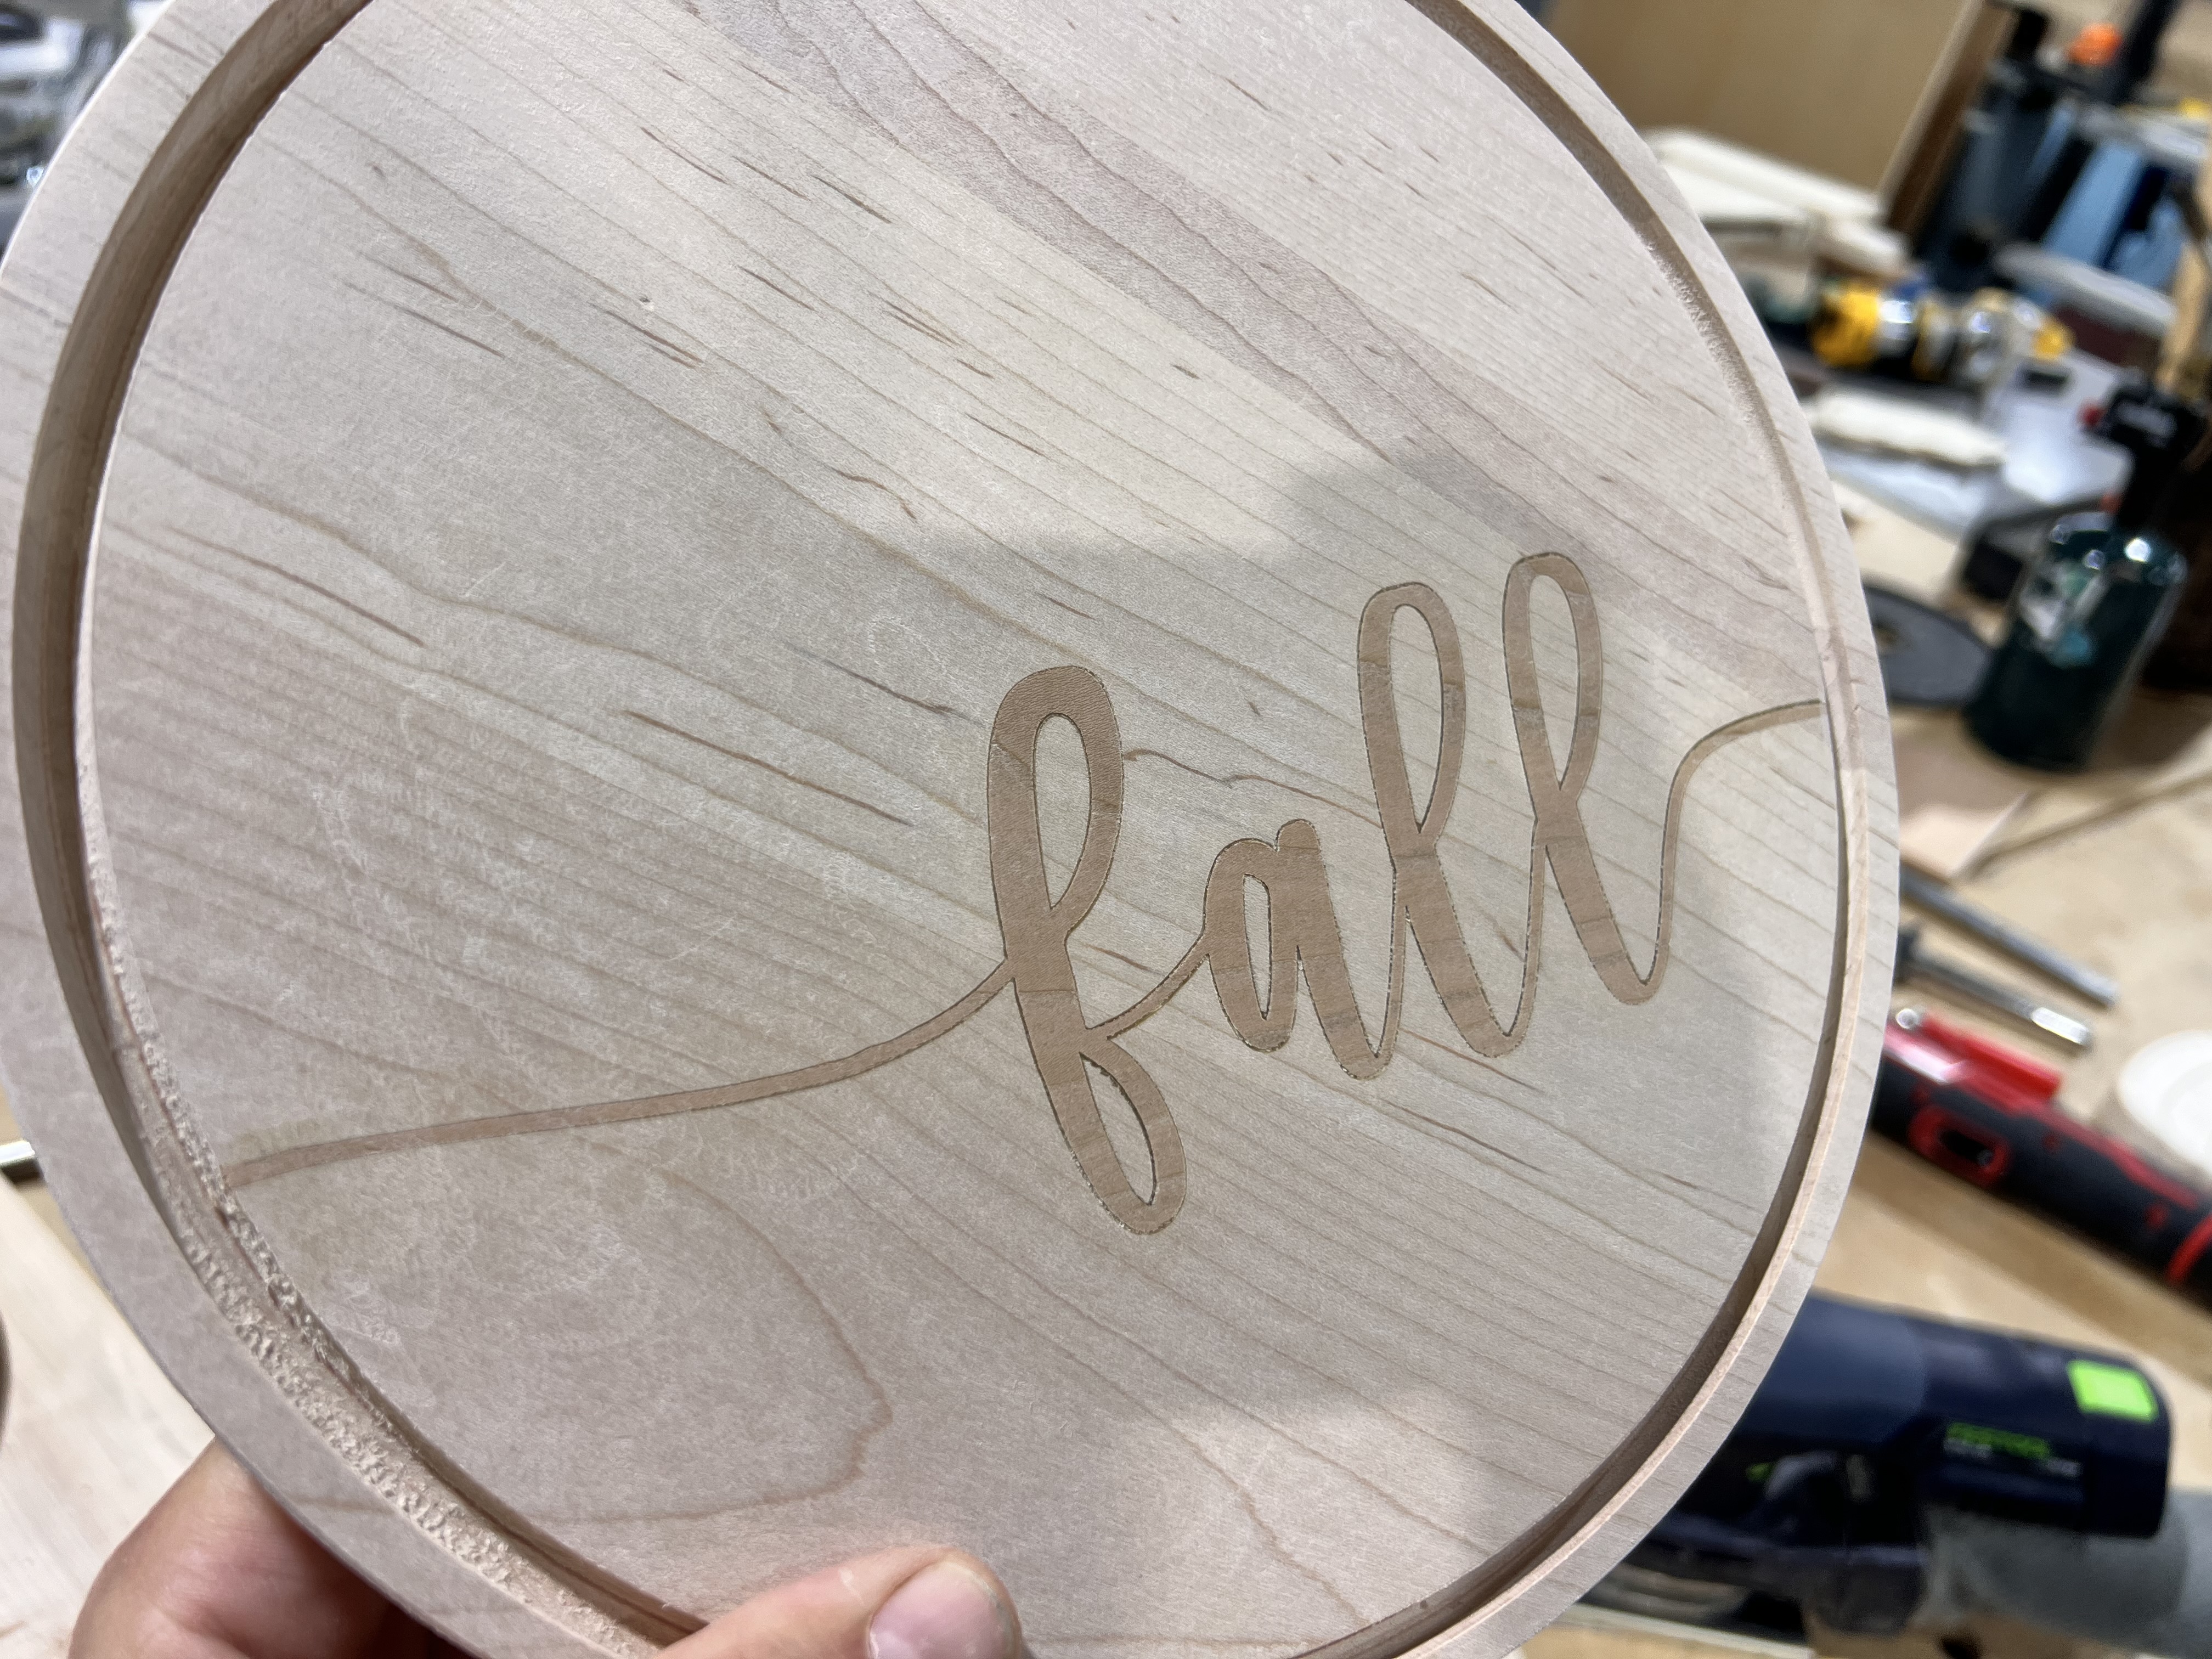
I had a B/W jpg and imported it. I guess I could have traced it and made it a vector first. That would make sense then as I was unable to assign anything to the image in way of toolpaths. I wasn’t even sure it would actually be there until near the end. That 1.5" mill kept hogging out material and seemed to go nearly to the bottom of the stock. ![]() I will try tracing tit and using it as a vector.
I will try tracing tit and using it as a vector.
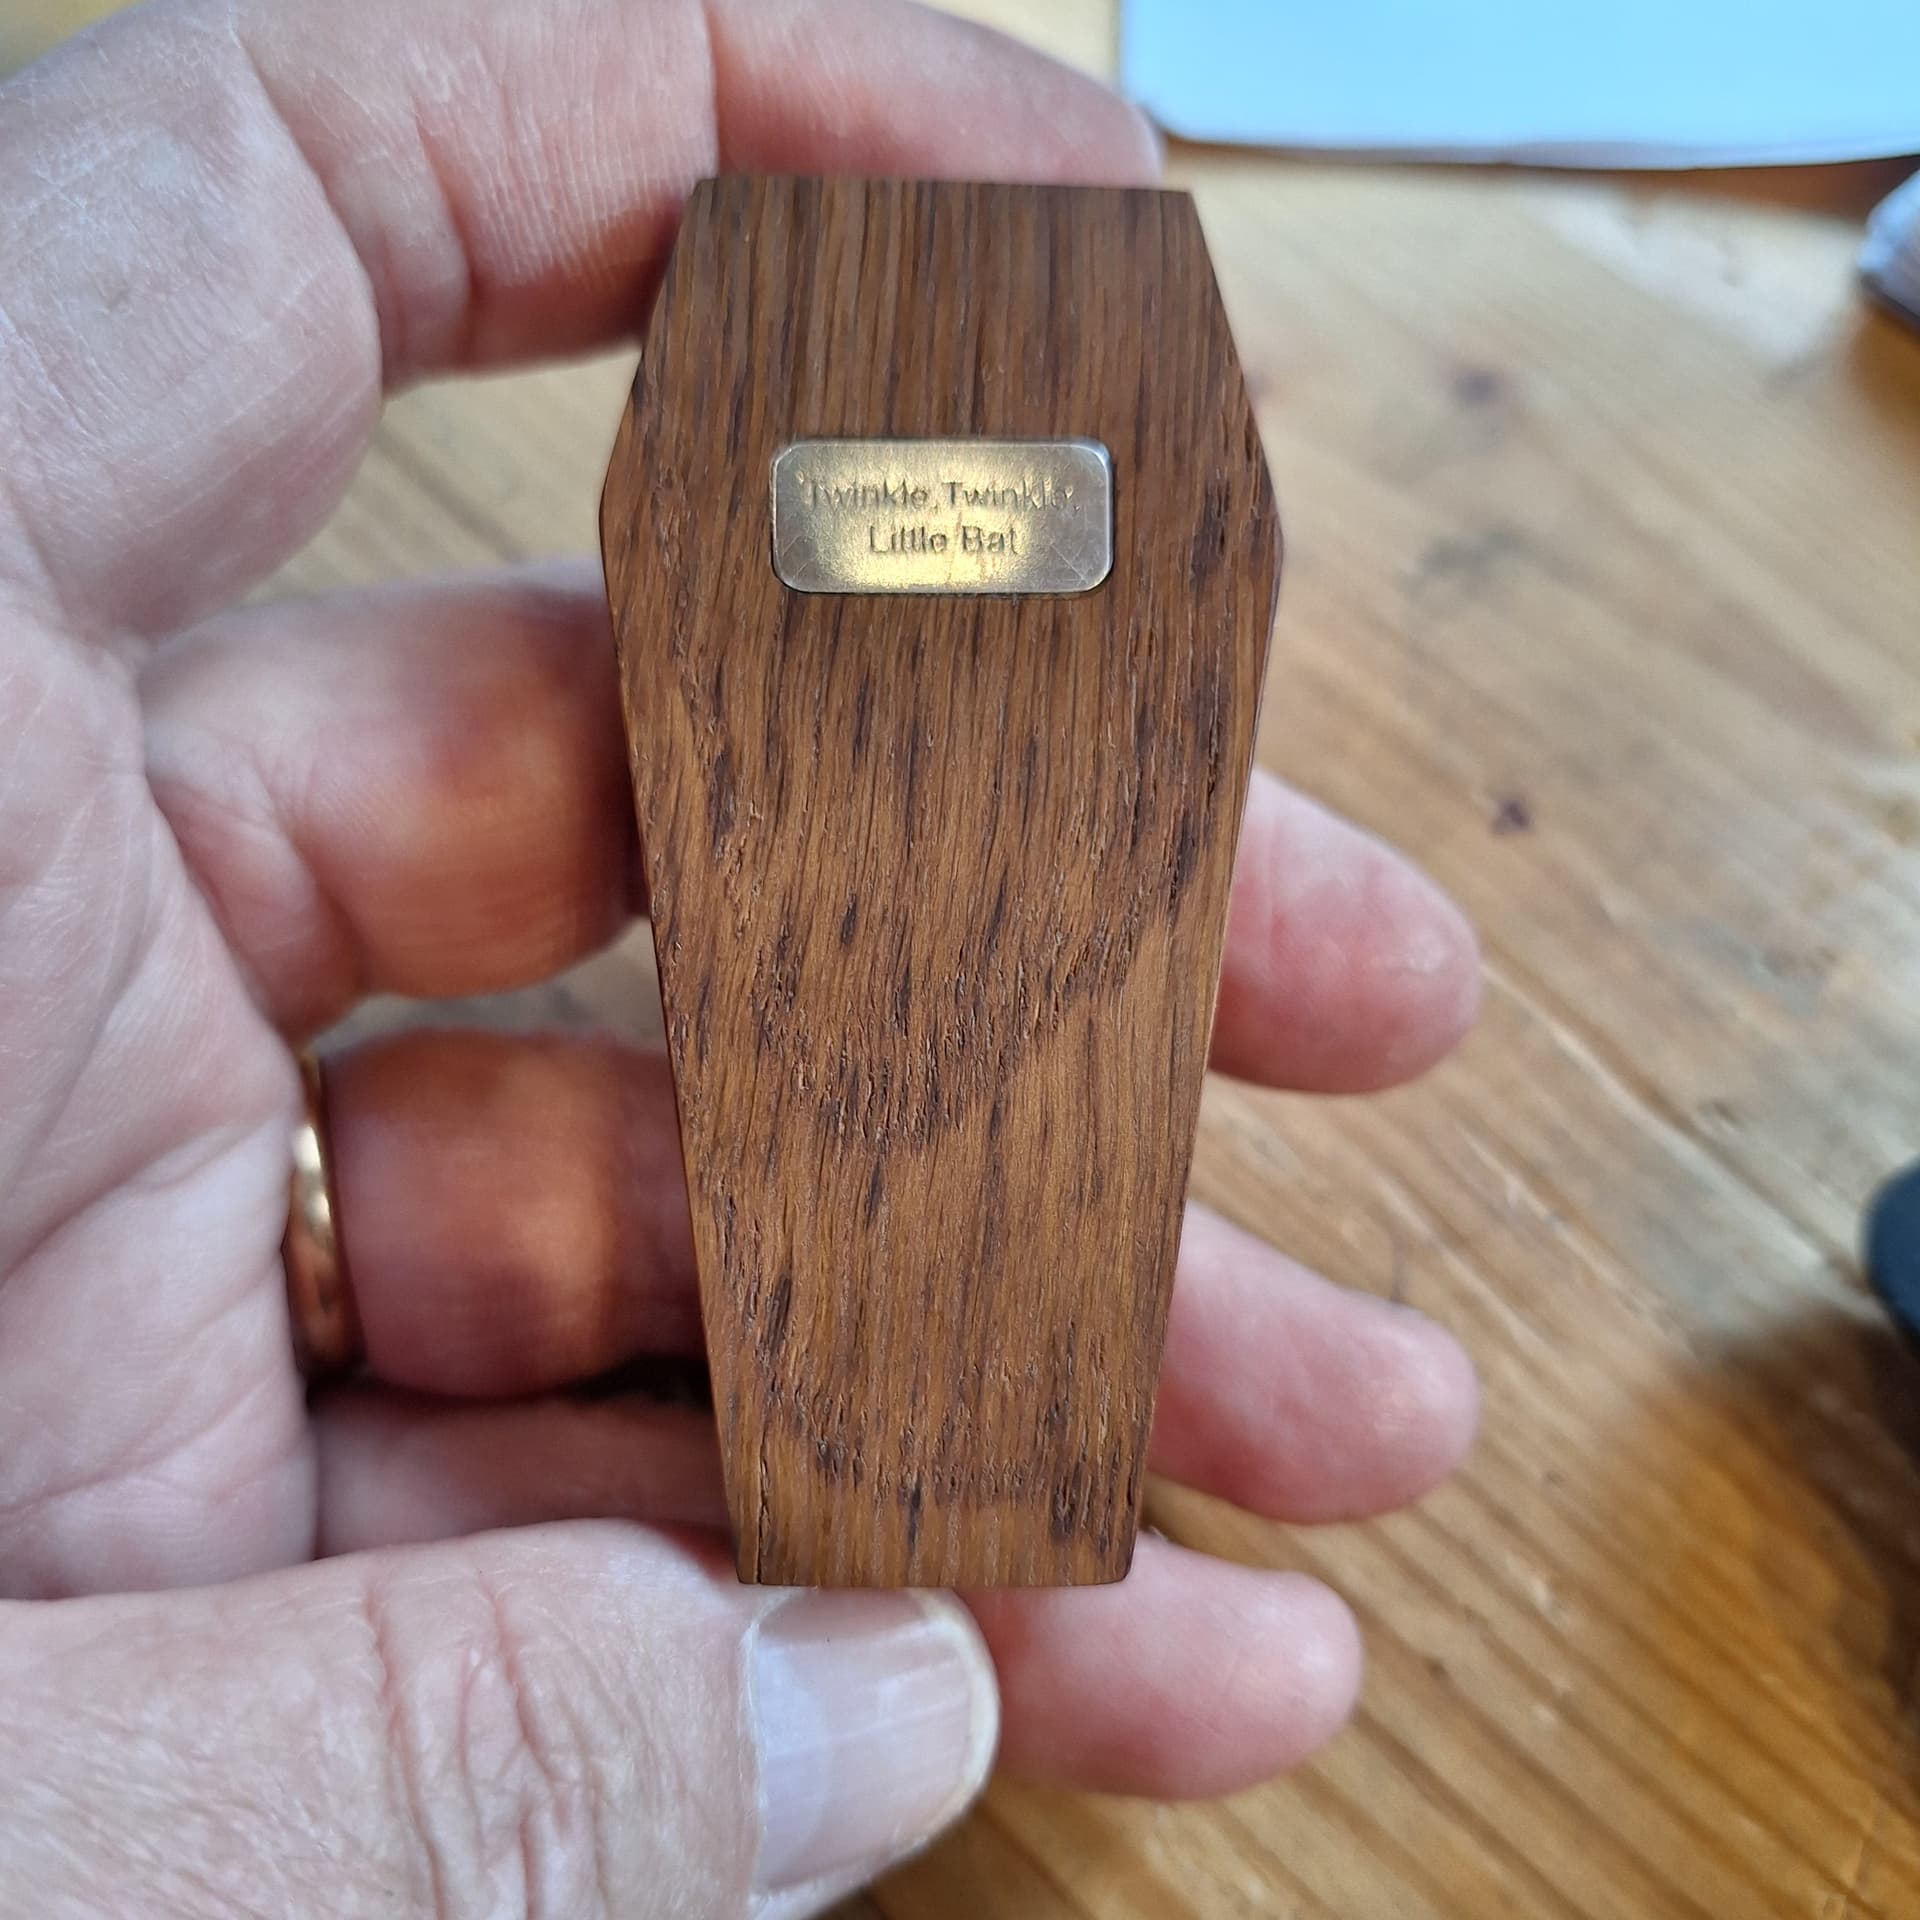
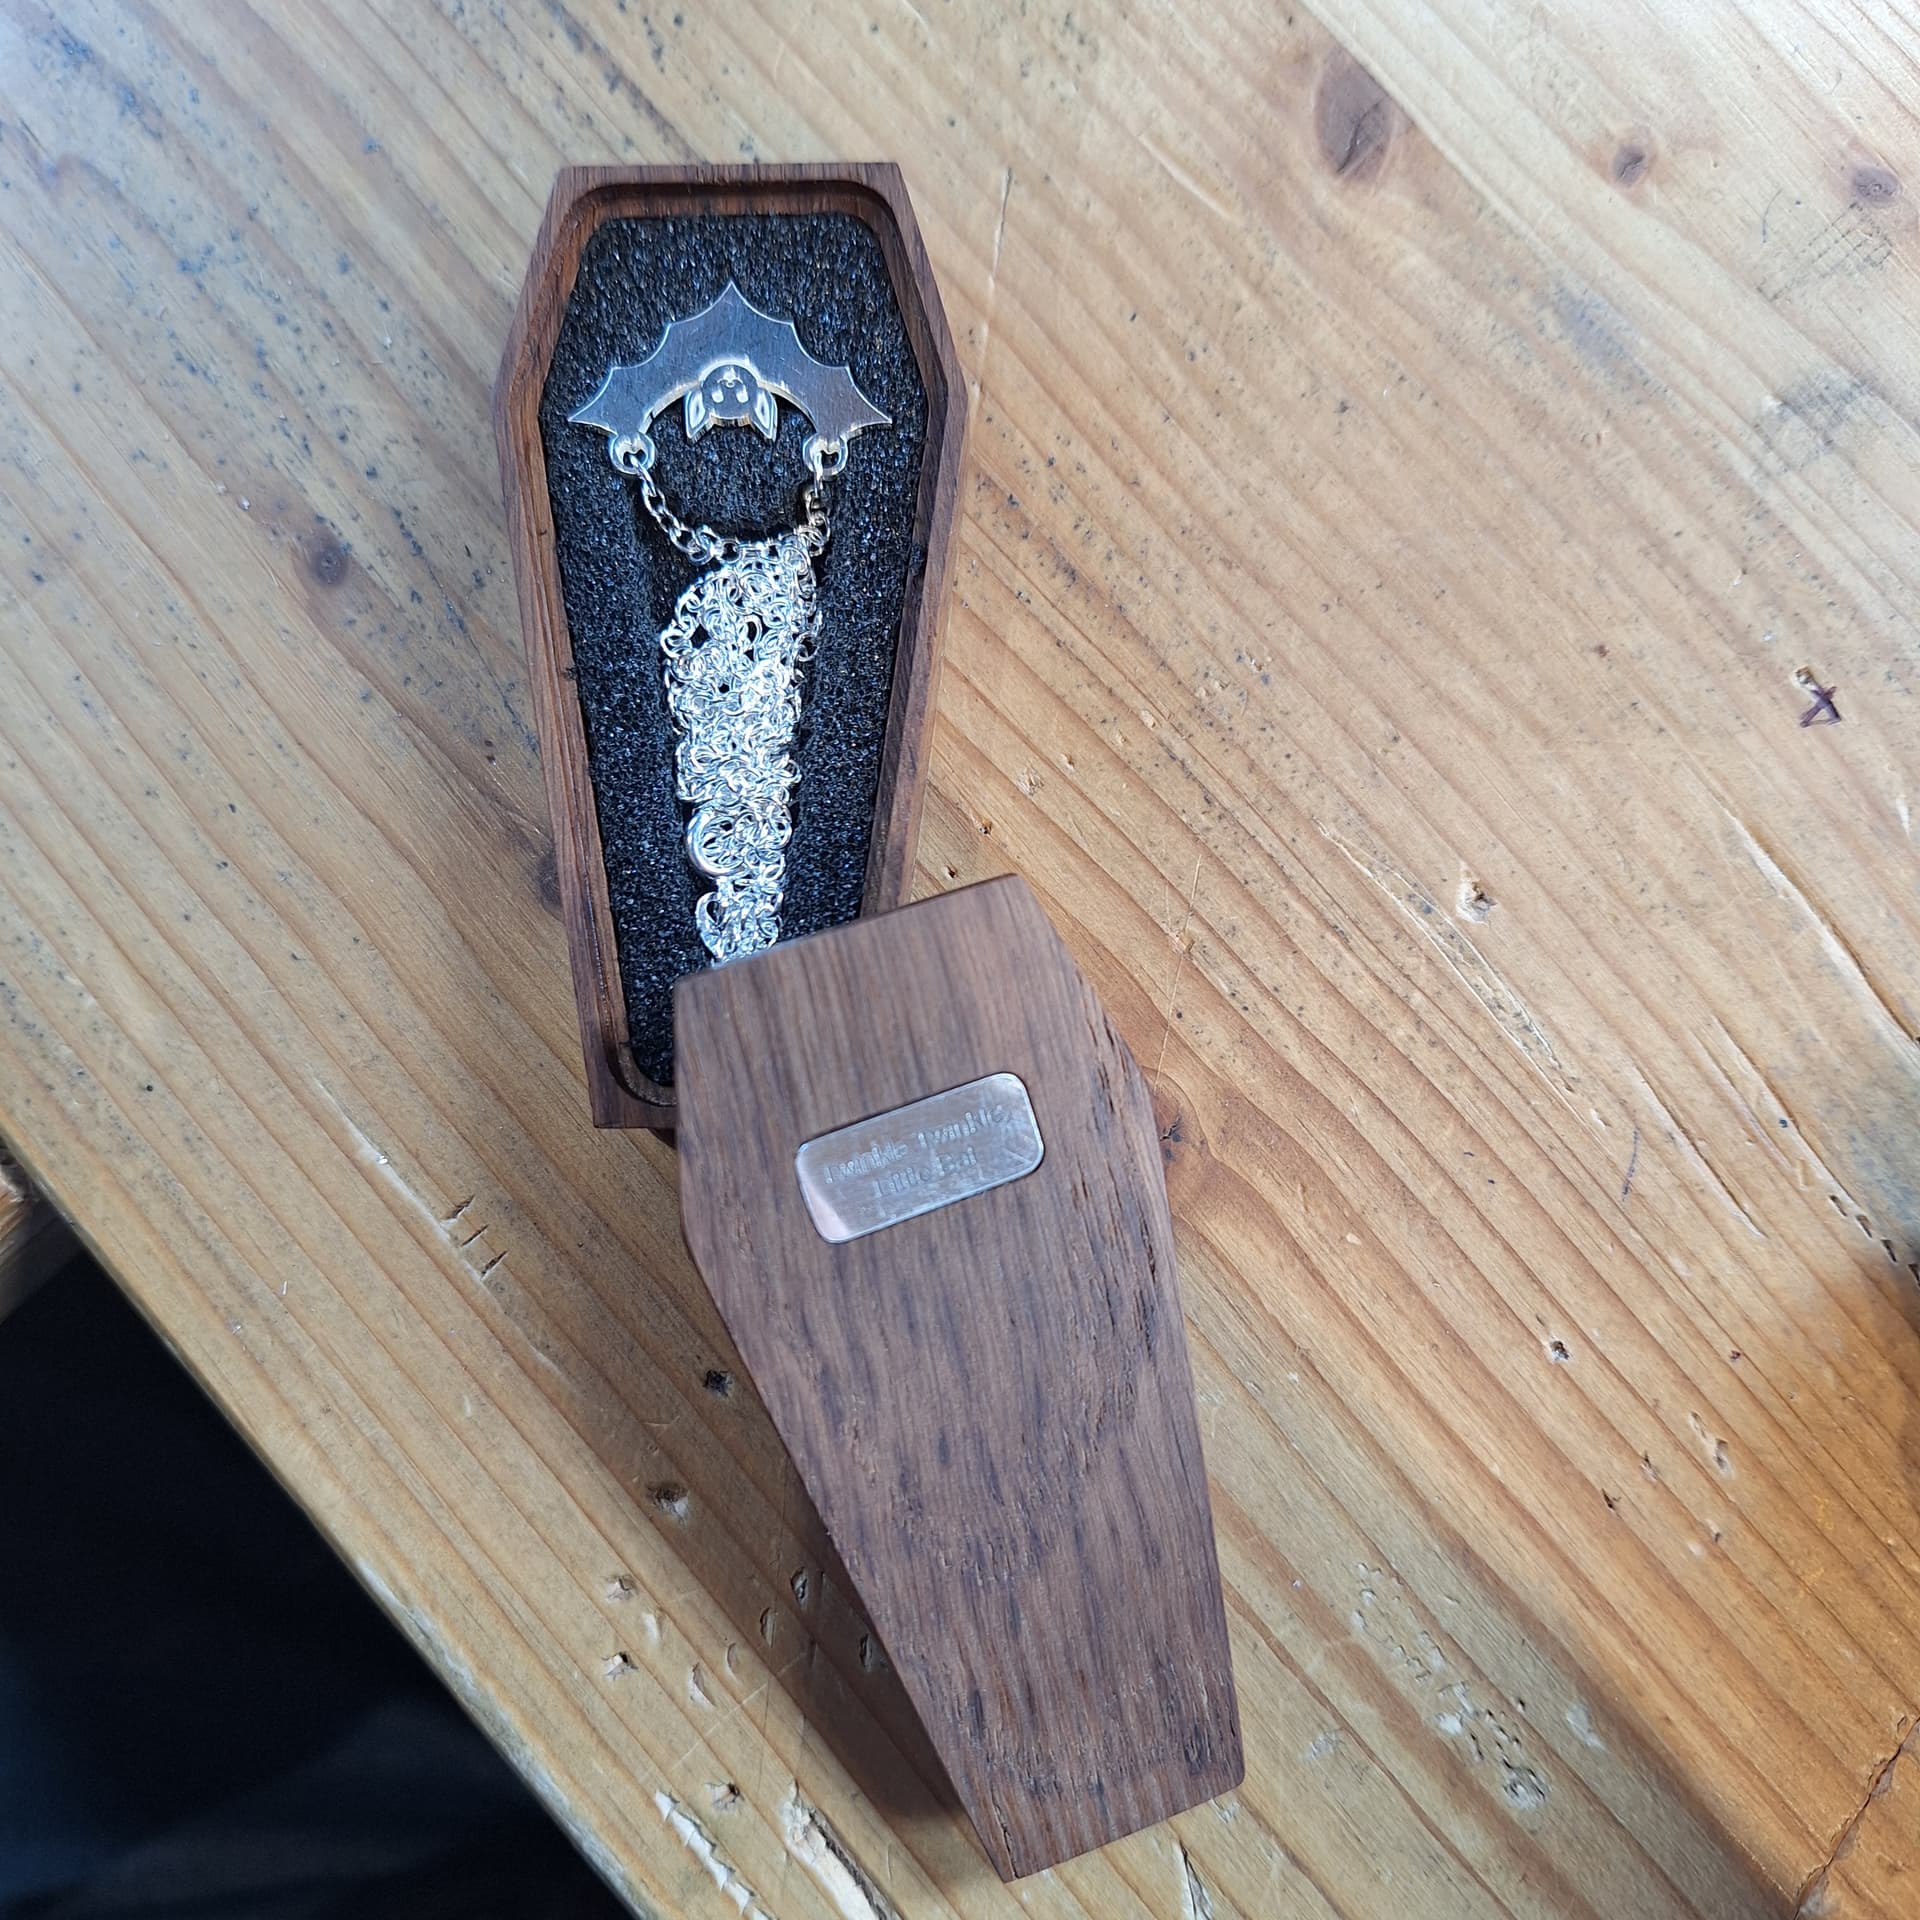
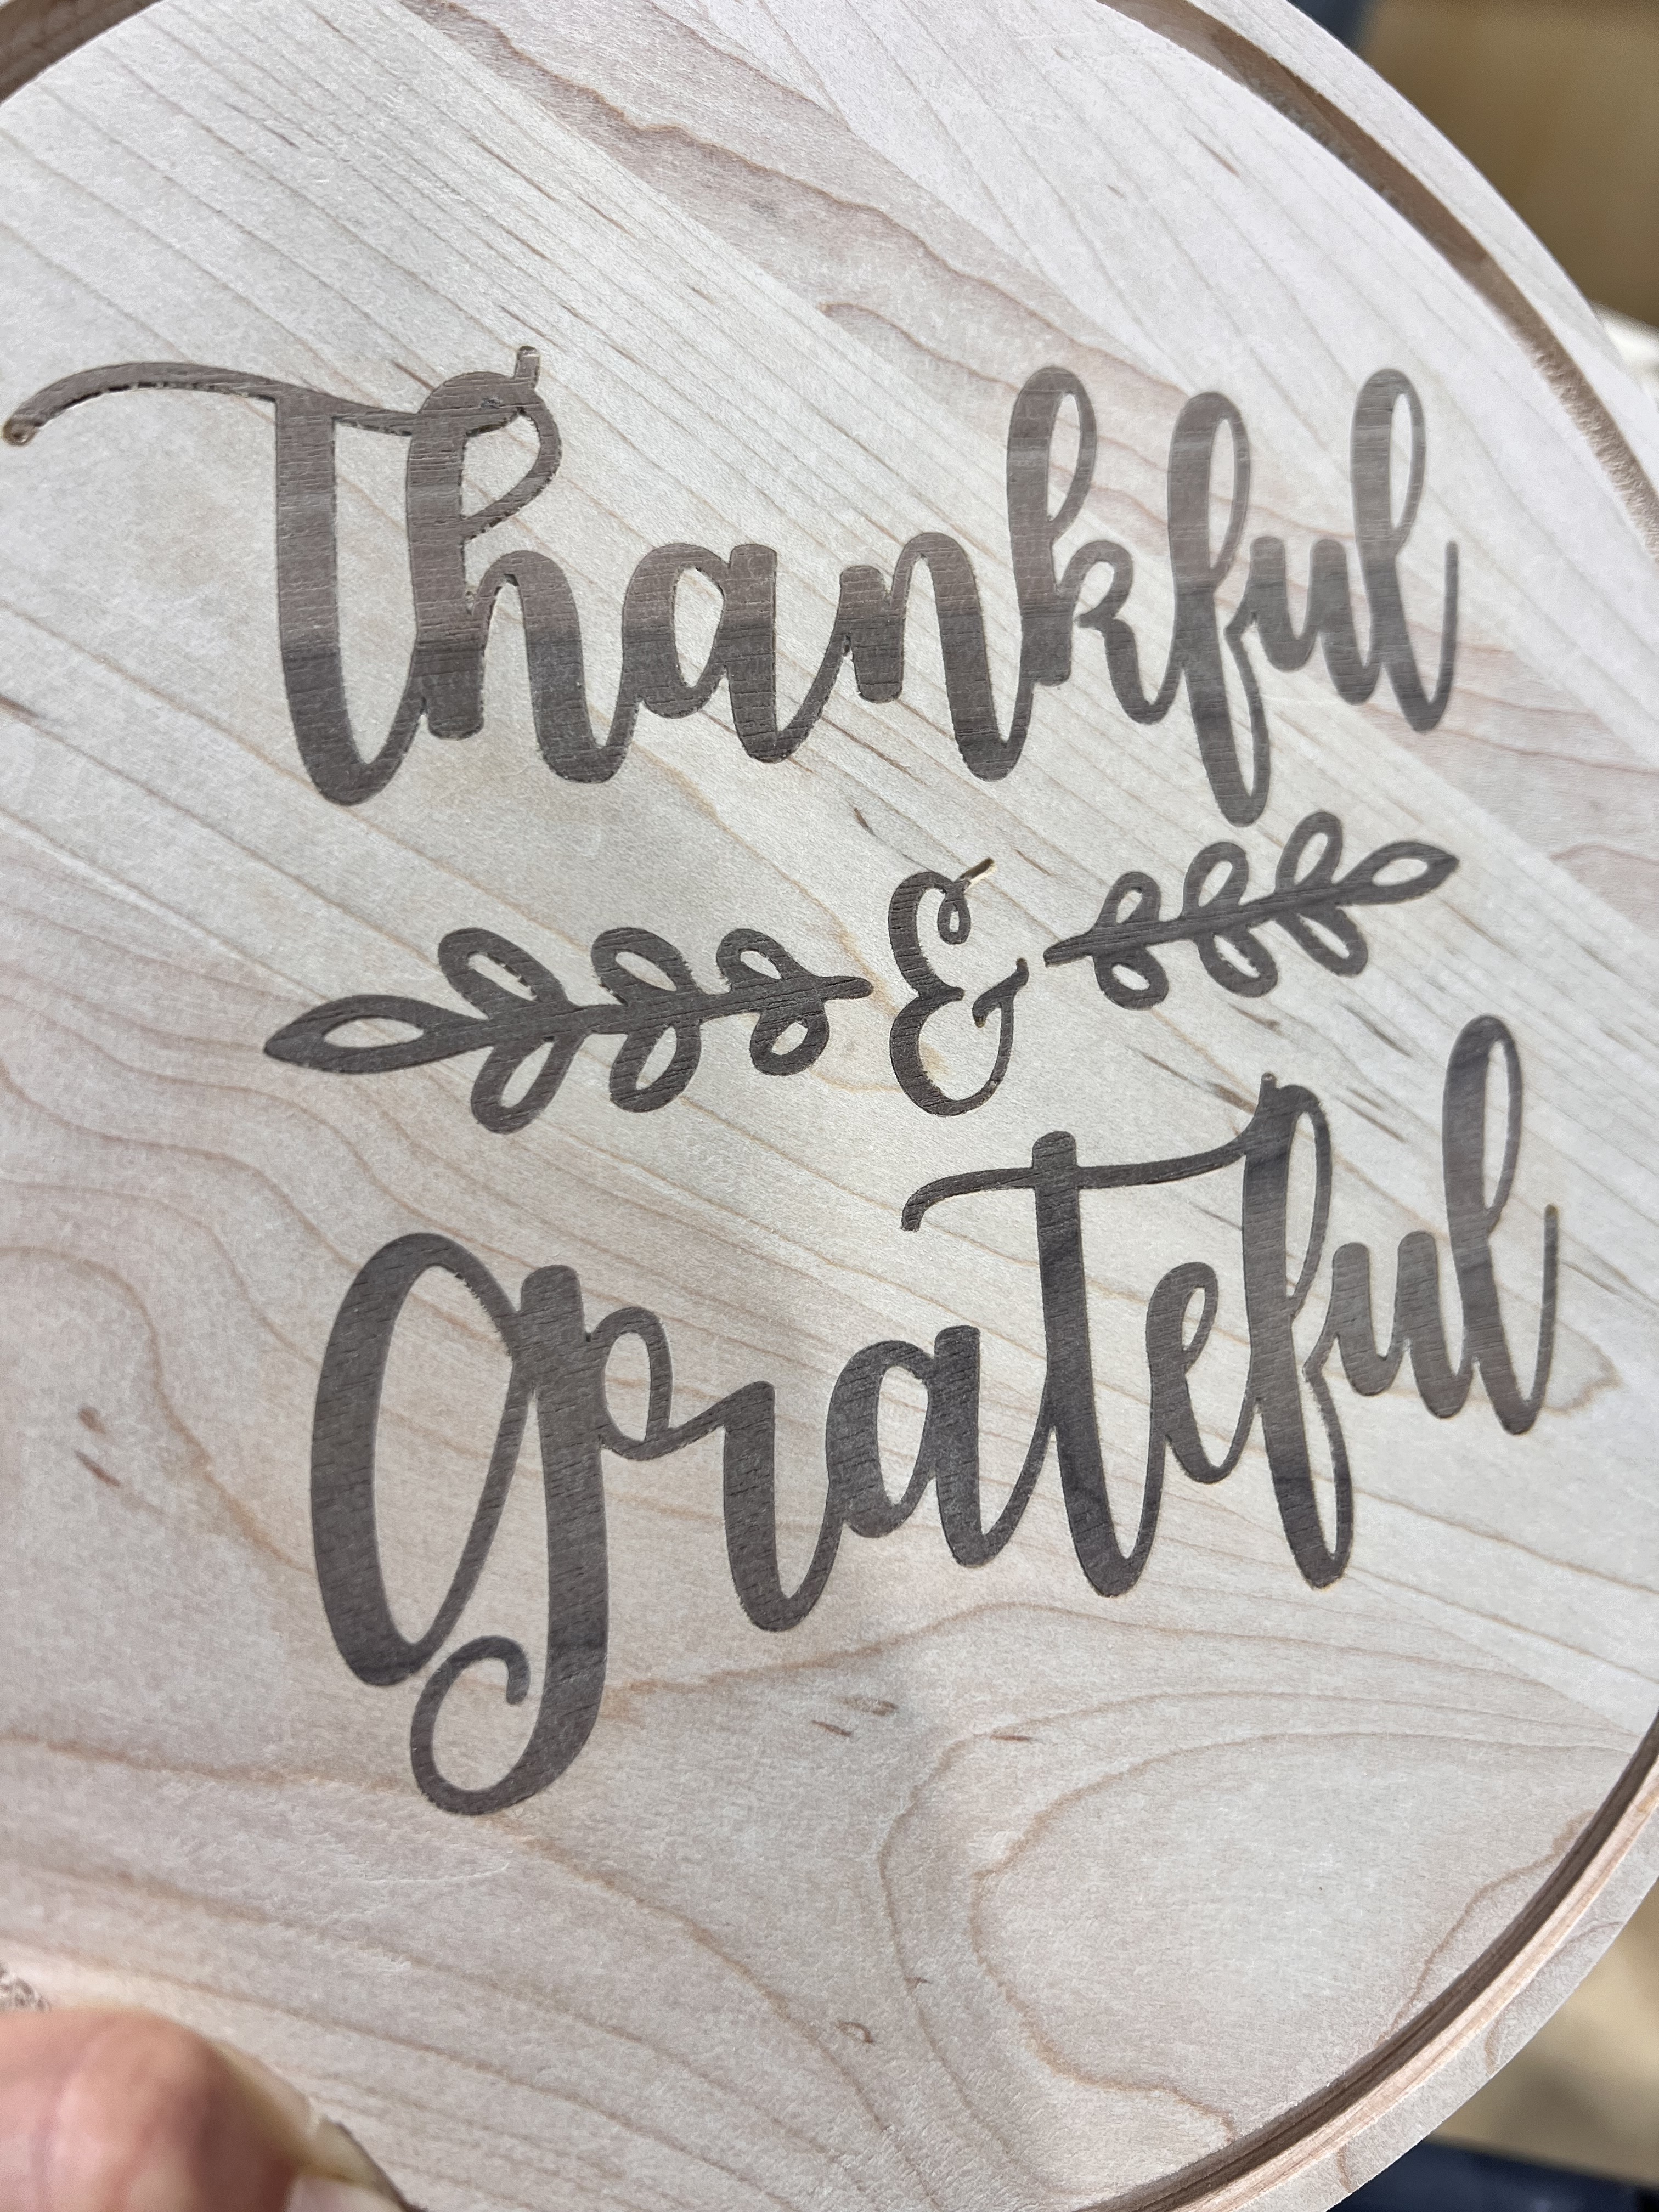
For someone who likes bats and Halloween.
Coffin from English Brown Oak (scraps from another project, so I experienced problems with shakes appearing in the timber once carved). It was carved on a Nomad along with the foam insert (pocket to hold the bat and bat chain). I usually mill the silver to make the bat, but instead, I used my new toy, a fibre laser, to get the detail inside curves. All are designed by the person requesting the items.
It’s a fun project using scraps (except the chain). I can now justify why I never throw anything away.
18 Likes
Inlays for days! Some better than others. Definitely not going to do inlays too fine again. I think I overglued the pieces by glueing both sides of the wood. Do you all glue just the one side? Feedback and constructive criticism always welcome.
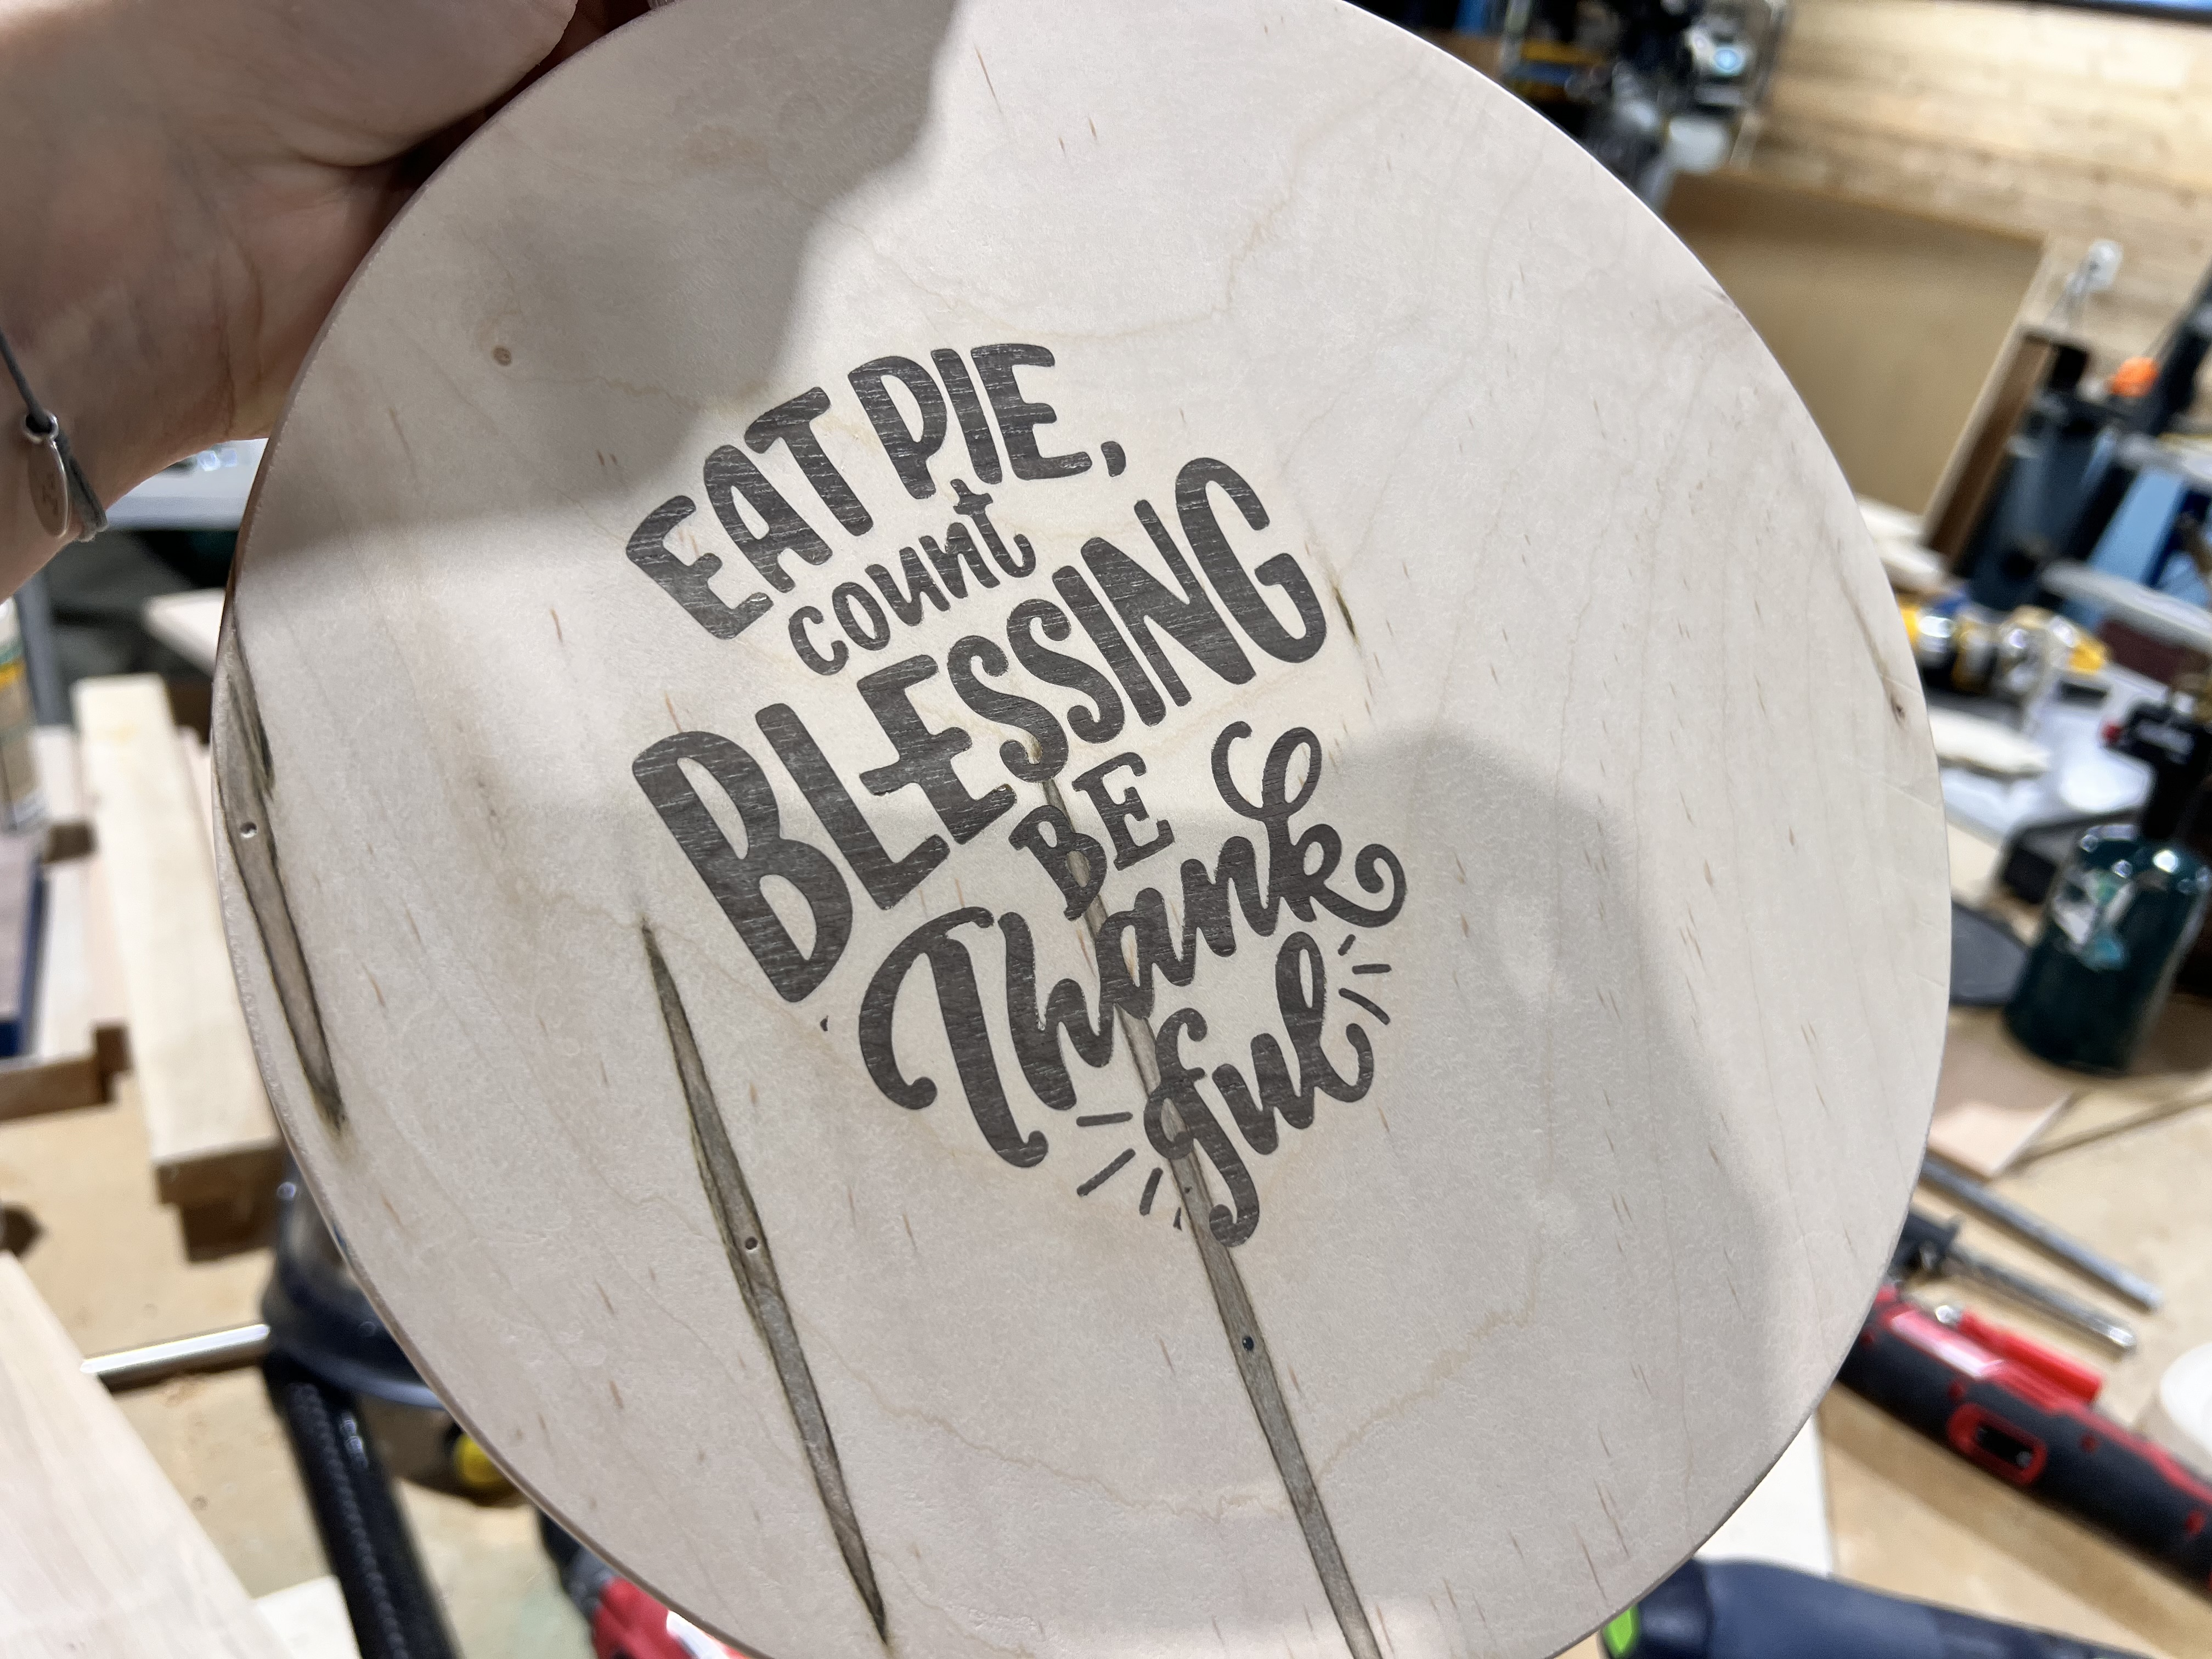
Big discussion here is: count blessing versus blessings … did I really miss an S there or can we say eating pie is a blessing … ![]()
19 Likes
Often people apply too much glue. Additionally people generally apply too much clamping pressure and squeeze all the excess glue out. I glued up a 2x4 panel to make a plaque and only put glue on one side of the joint. I then rubbed the two pieces together and spread the glue. I then clamped with parallel clamps. I initially just tighten them up and then add some F clamps to keep the joint level. Then apply a little bit more pressure. You want an even squeeze out but dont squeeze all the glue out. Never had a PVA (TiteBond III) ever fail.
You want the clamps snug but as tight as you can twist the handles. That causes glue starvation. Modern PVA glue is stronger than most wood it is bonding together.
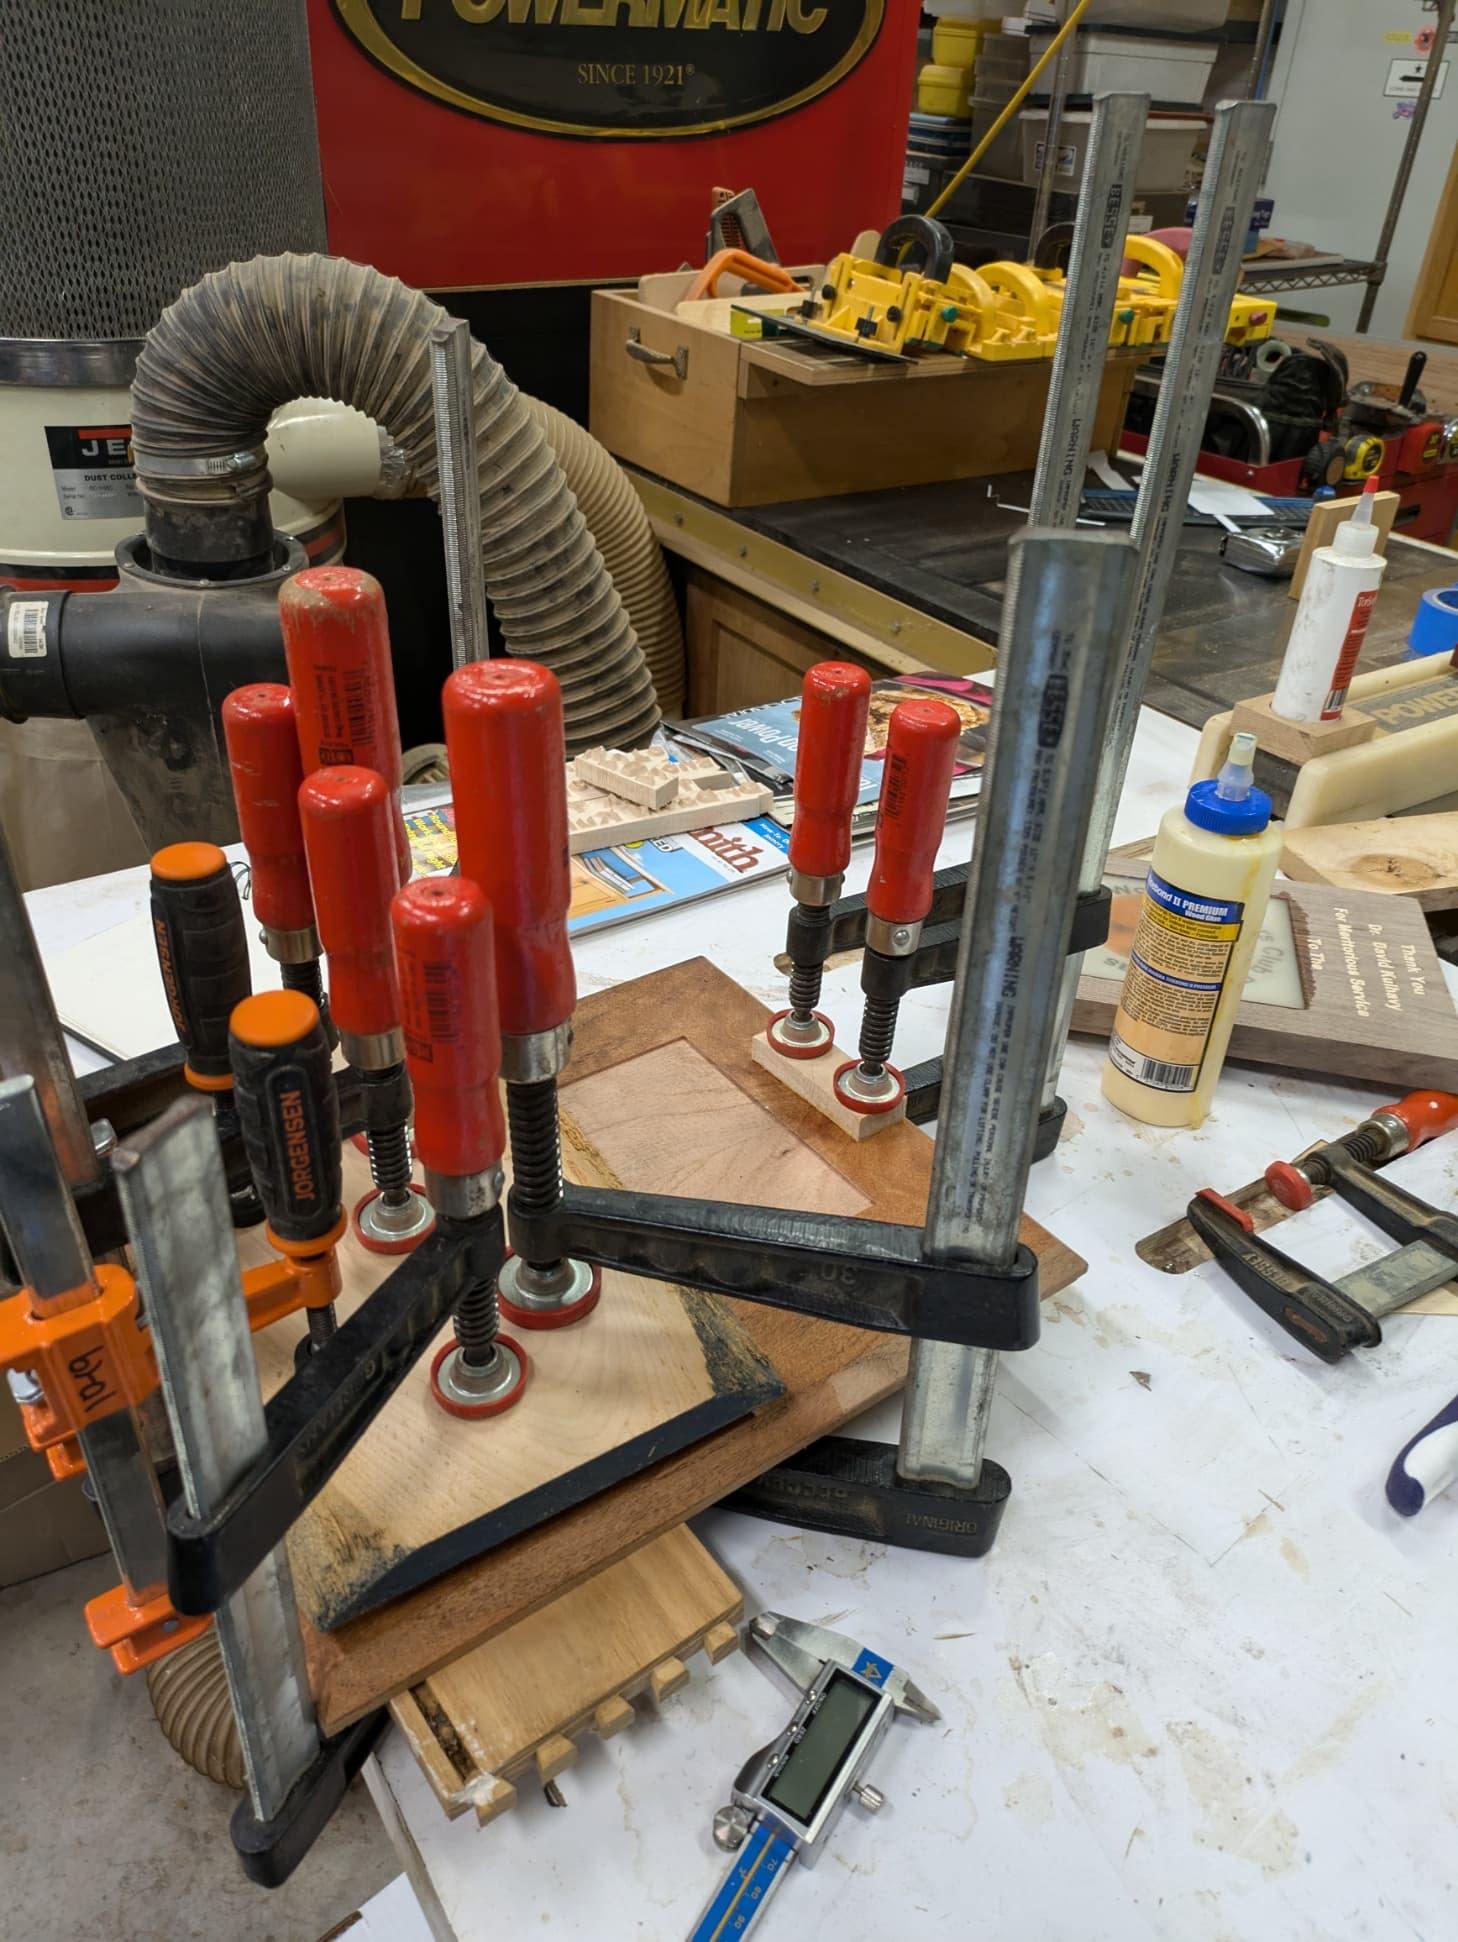
On inlays I would tighten up clamps more because I want the inlay to seat fully. If you programmed right you have a gap at the bottom to give the glue a place to squeeze out. I use a board as a caul to clamp the inlay in place.
Here is a recent inlay I did on a plaque. This is the inlay.
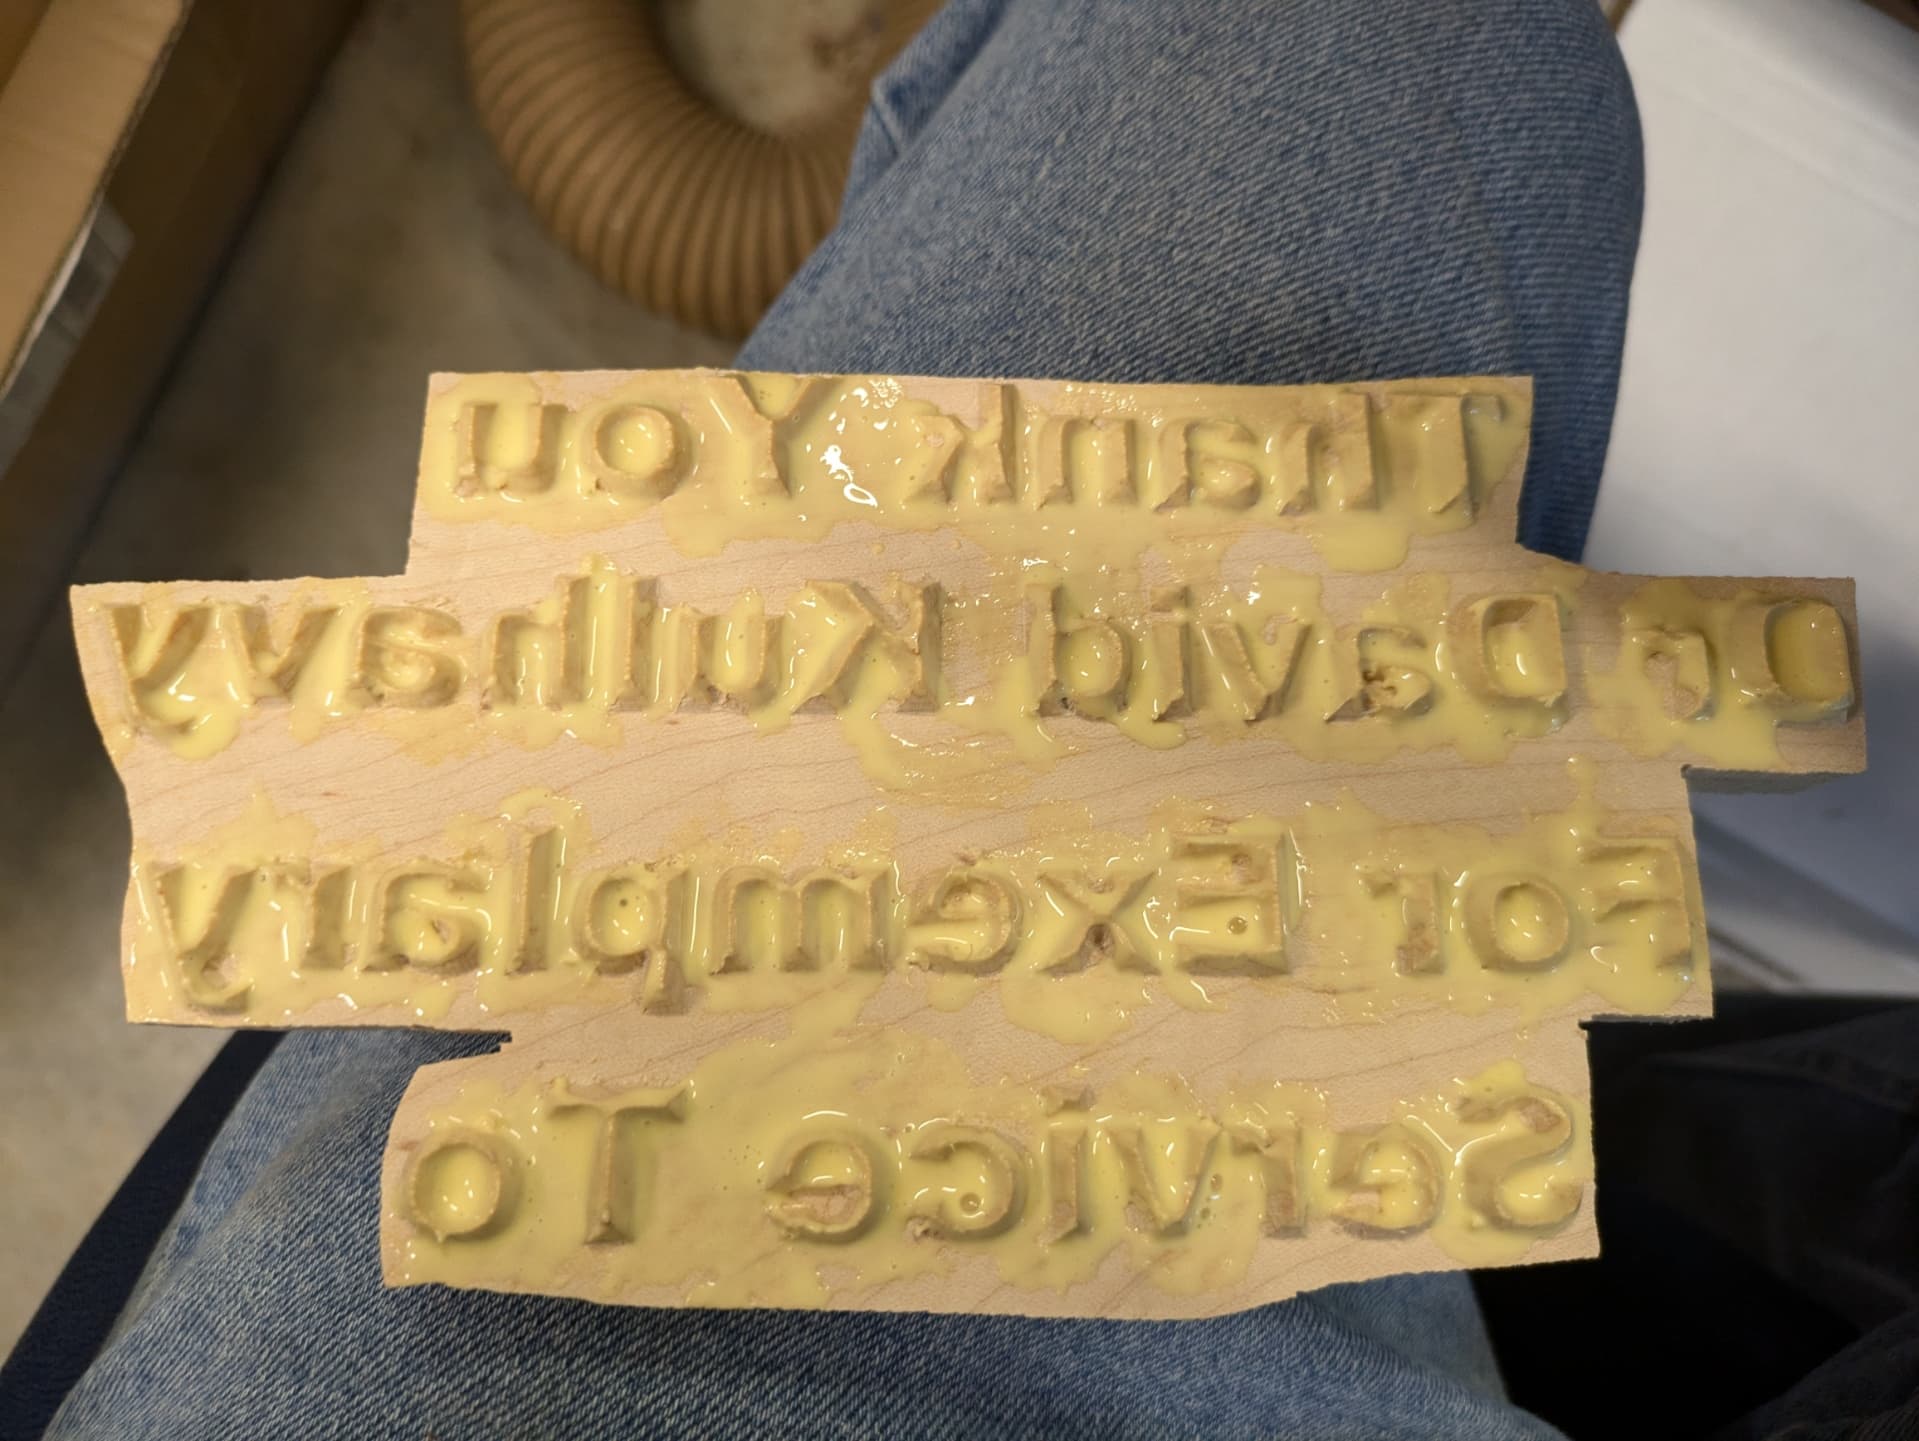
Here is female part.
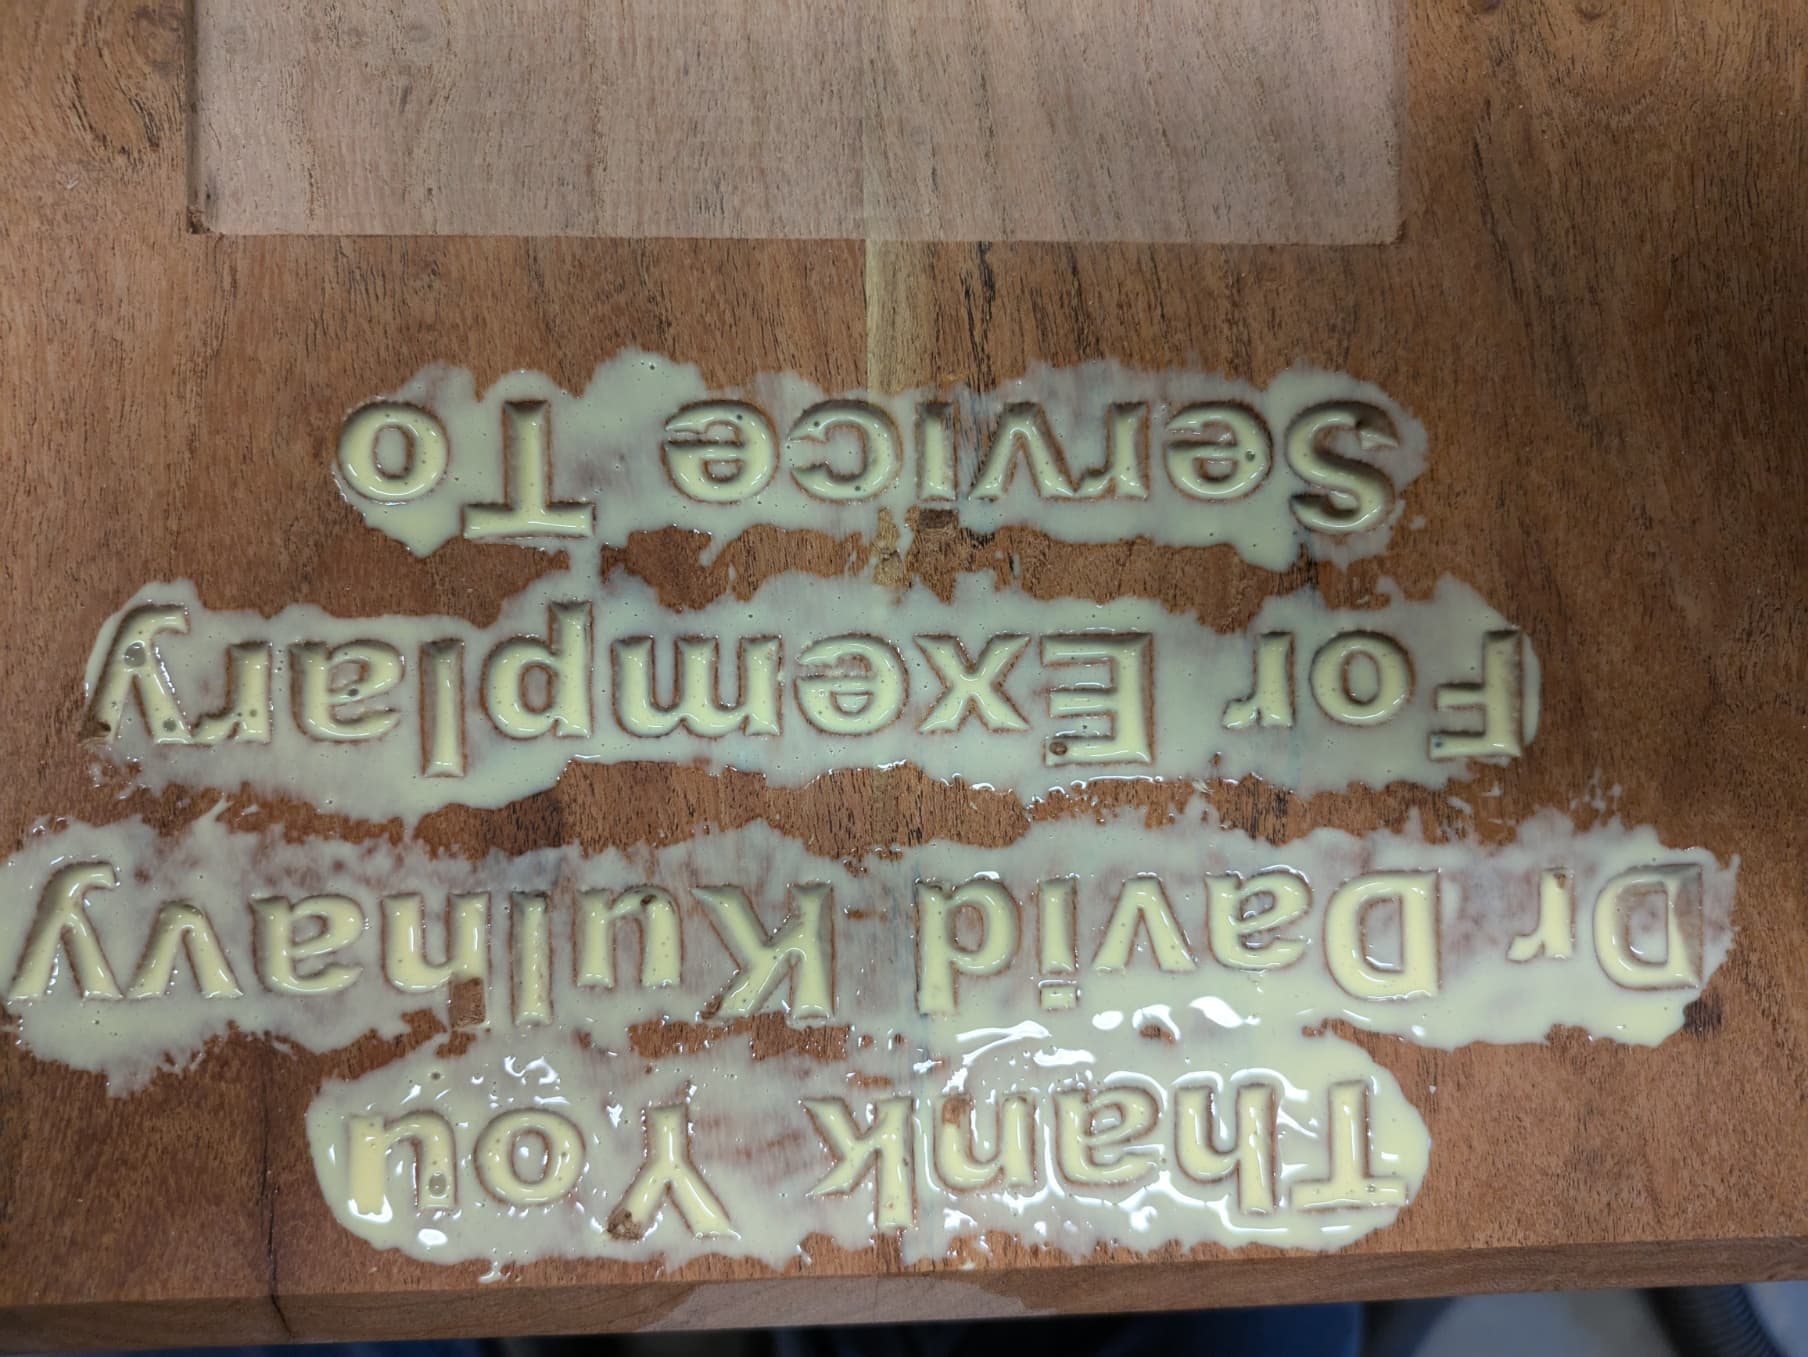
Here is the clamp up
For this project I used TiteBond II because I had run out of TiteBond III. I buy it a pint at a time and mark the date I open it on the bottle. PVA glue is good for about a year. After that I have usually used up the bottle but if not I throw it away. At the price of the PVA glue why take a chance. Additionally I shake up the glue before I use it. If you live in a cold climate you can put the bottle in some hot water before using and that gives you the best chance of the glue working when it is COLD in the shop. Winter is coming, slowly but surely.
5 Likes
I only apply glue to the pocket. Not a ton of experience with inlays, but one side works for me. For what it’s worth, many of the people producing high-end inlayed cutting boards only put glue in the pocket. For an inlay, I think it’s possible to apply too much glue - especially if there’s no gap (or very little gap) underneath the plug.
I also don’t think you can clamp an inlay too much. You need SIGNIFICANT pressure to ensure a gap-free fit on all parts.
1 Like
That look really useful.
There is just so much that CNC can do well.
Chip spray control for aluminum and soon steel
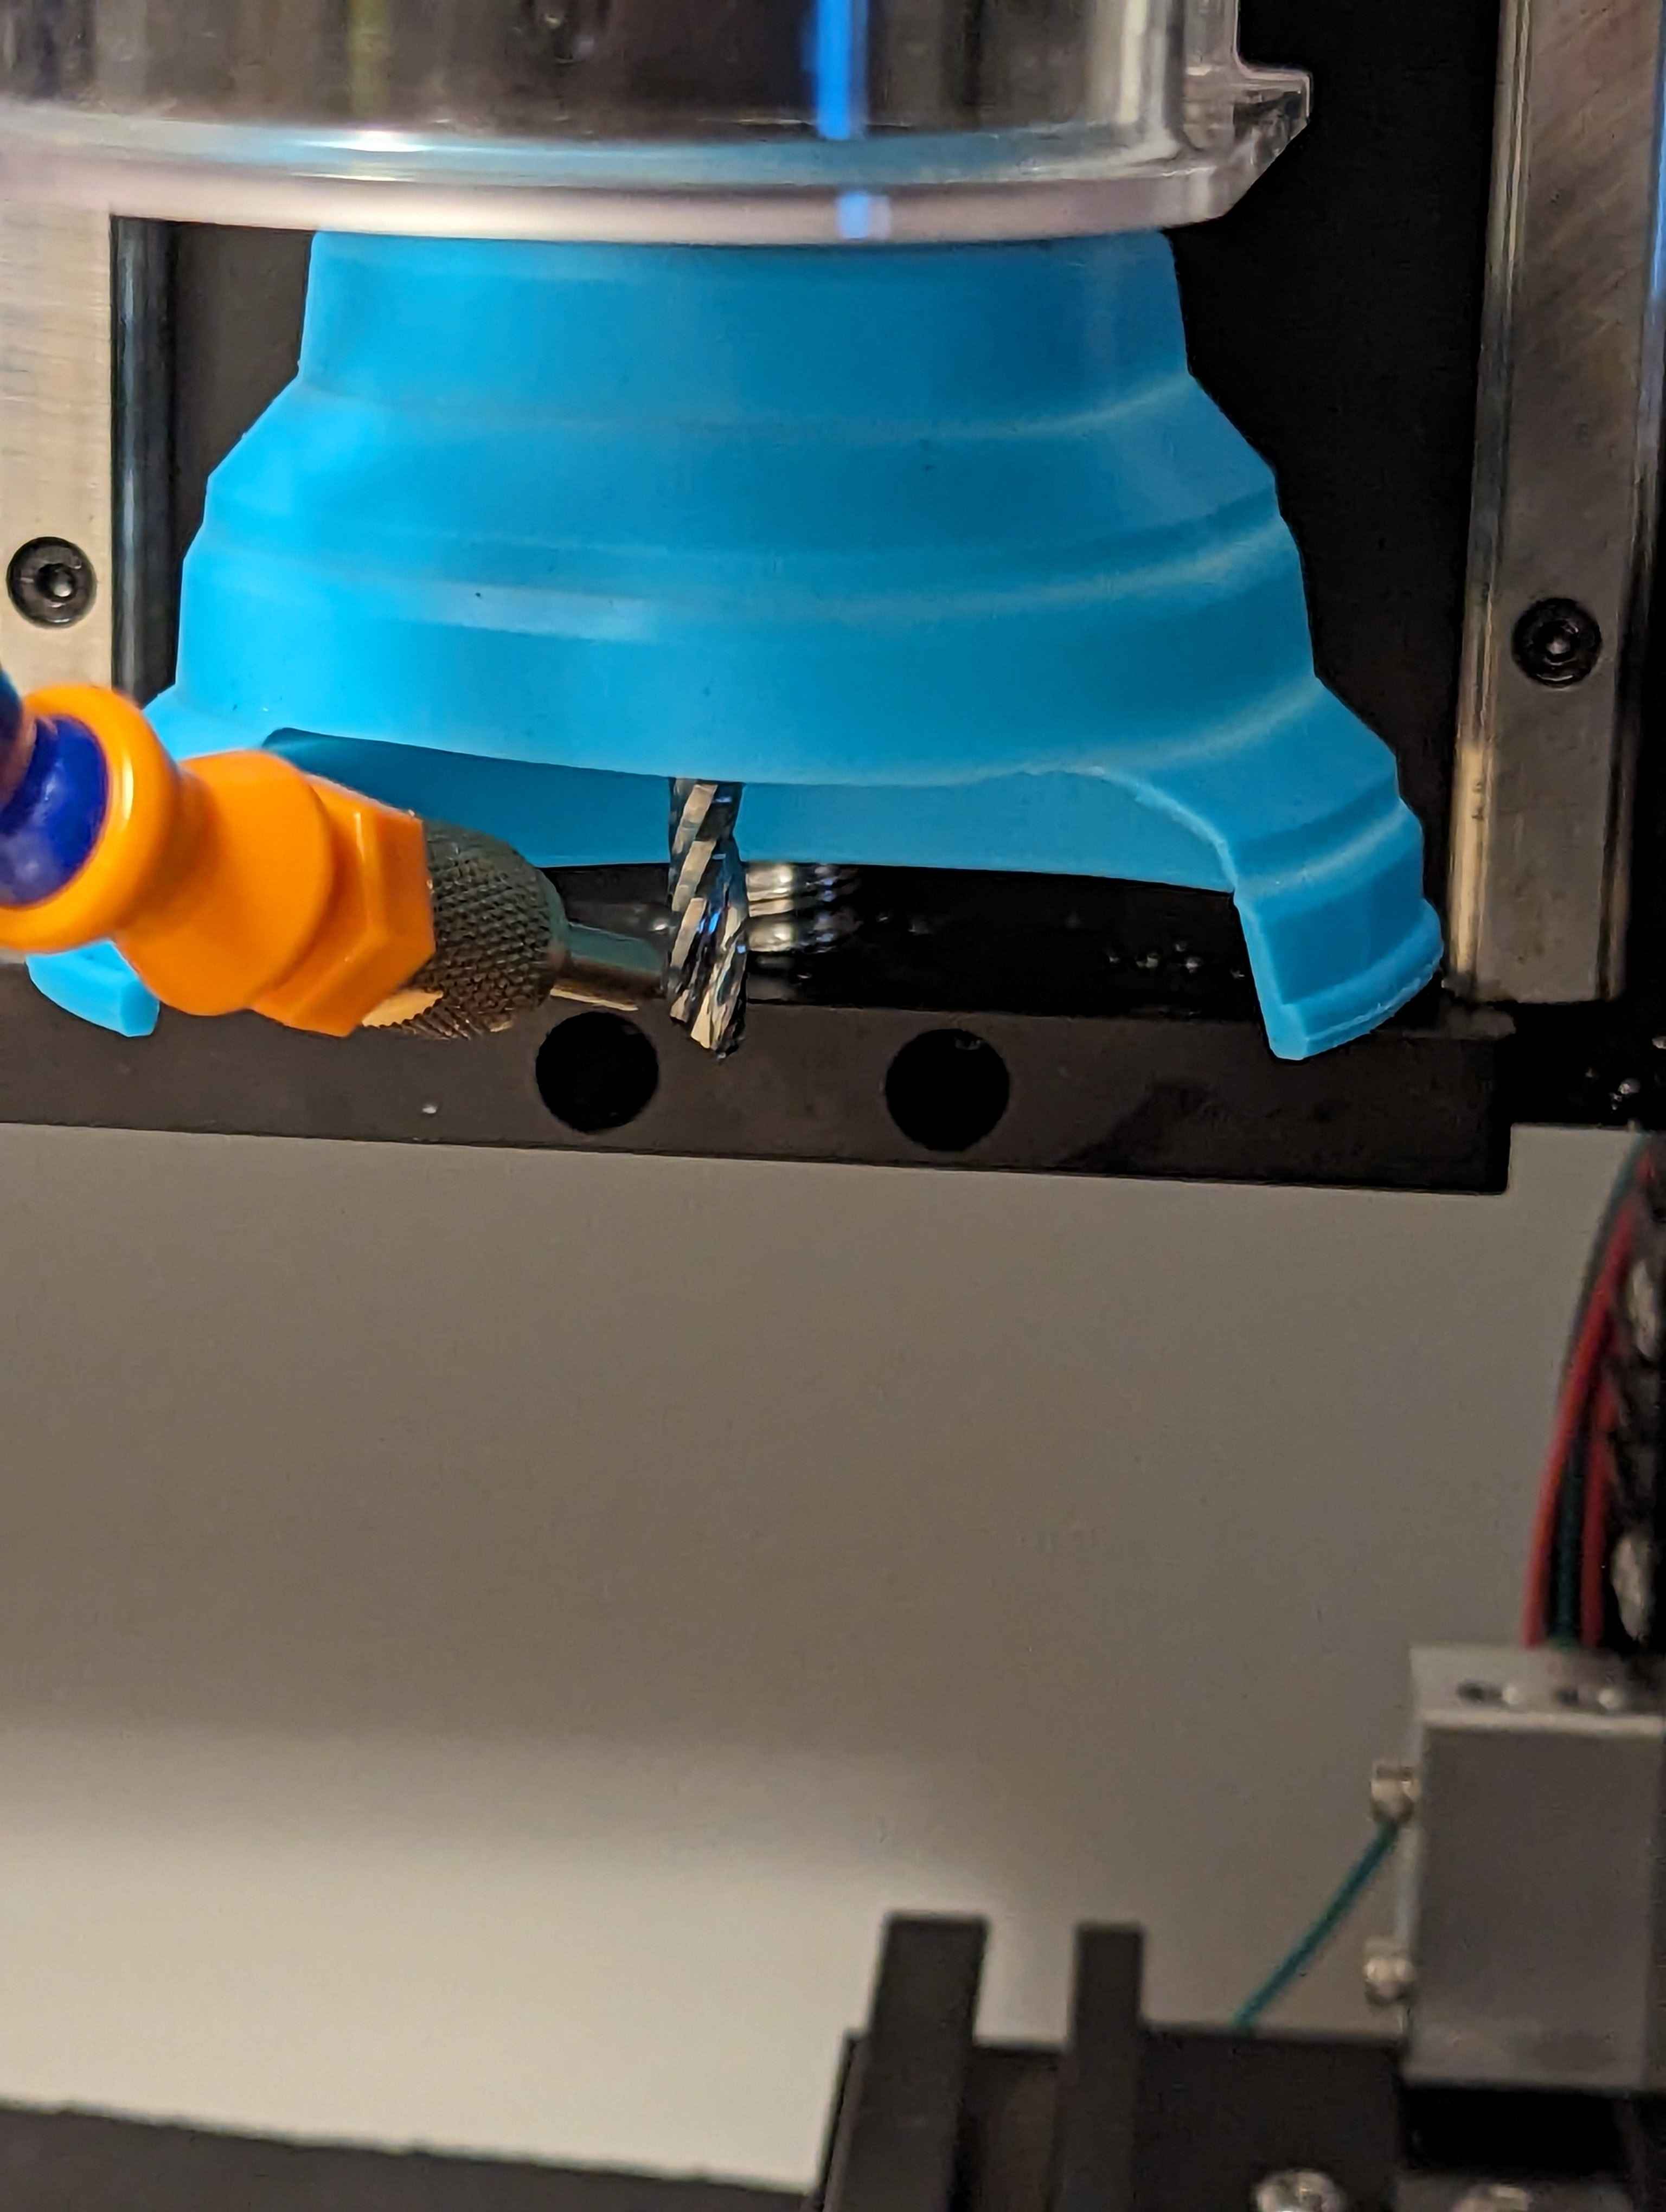
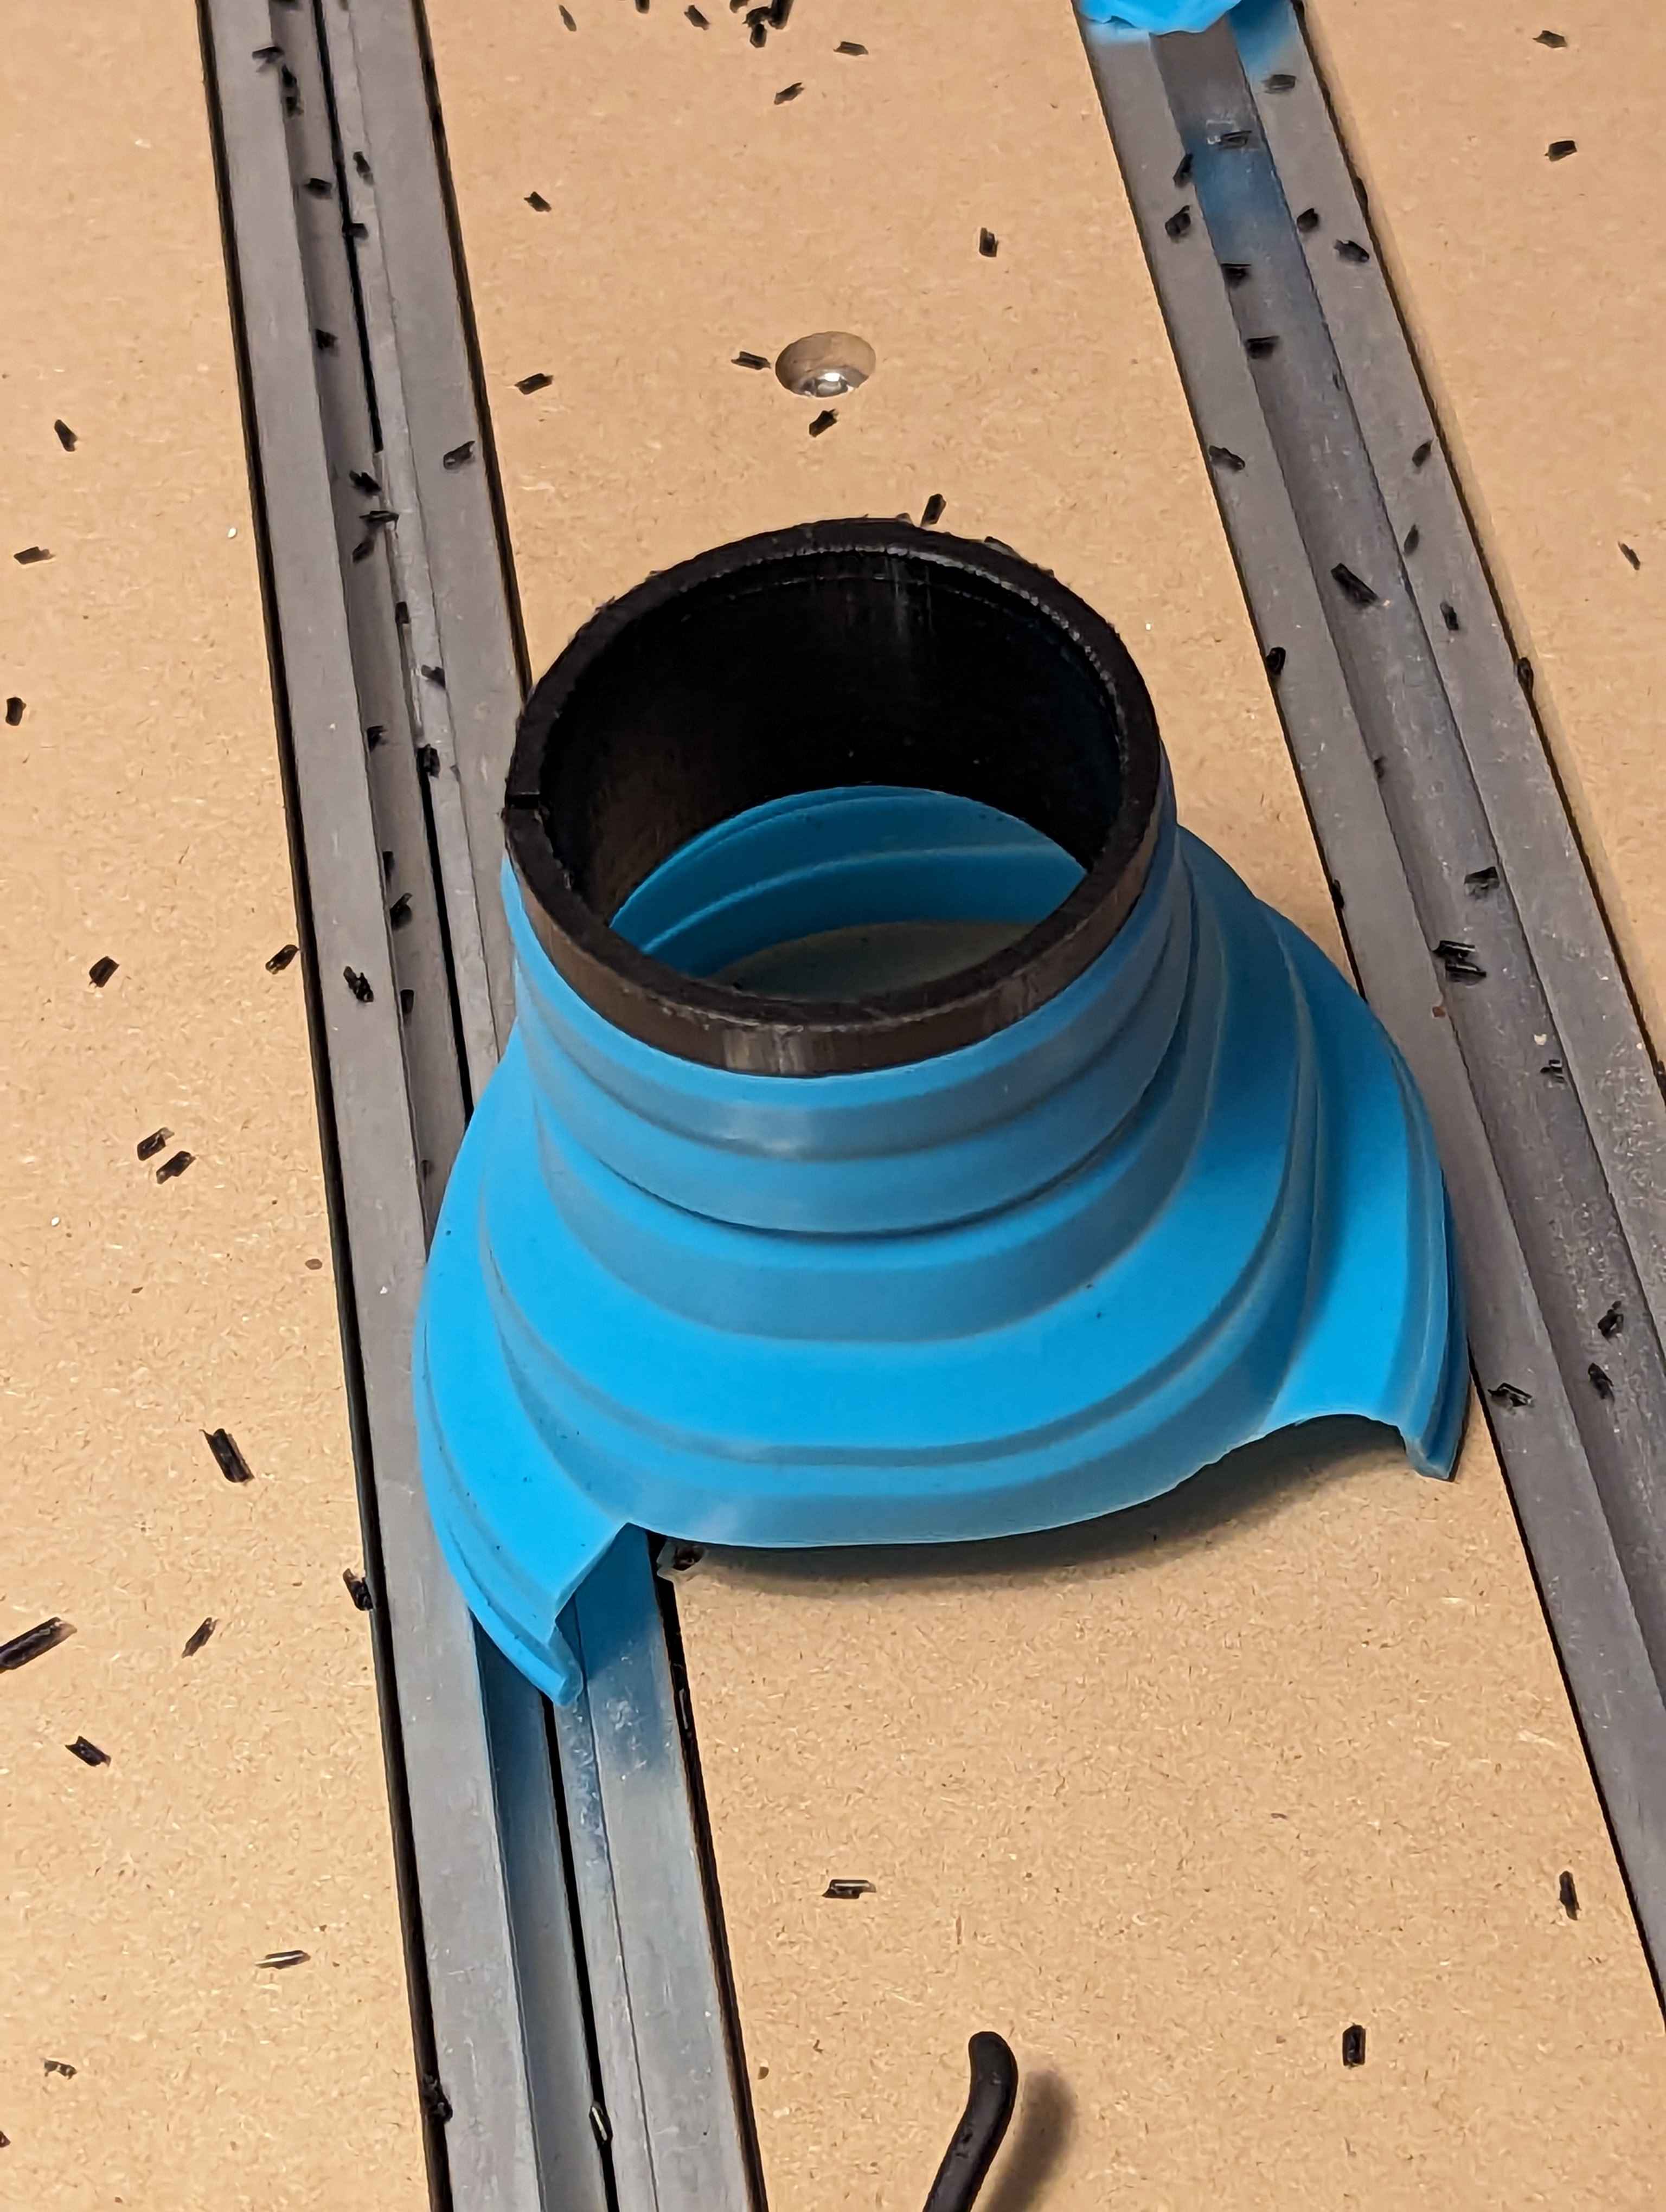
Found it buried in the forums here and added a collet so it can be used without having to move the sweepy and still holds tight enough it’s not going anywhere. The silicone would tear without the collet within 20 uses (after 3 it was showing deterioration) The collet becomes the wear point so I cut it out of 1$ in UHMW and the funnel was 3$ bringing this to a total of 4$ the other option being 400$ for a bellows for the X-axis next upgrade will be brush strips for the Y axis if I can make it happen for under 50$
5 Likes
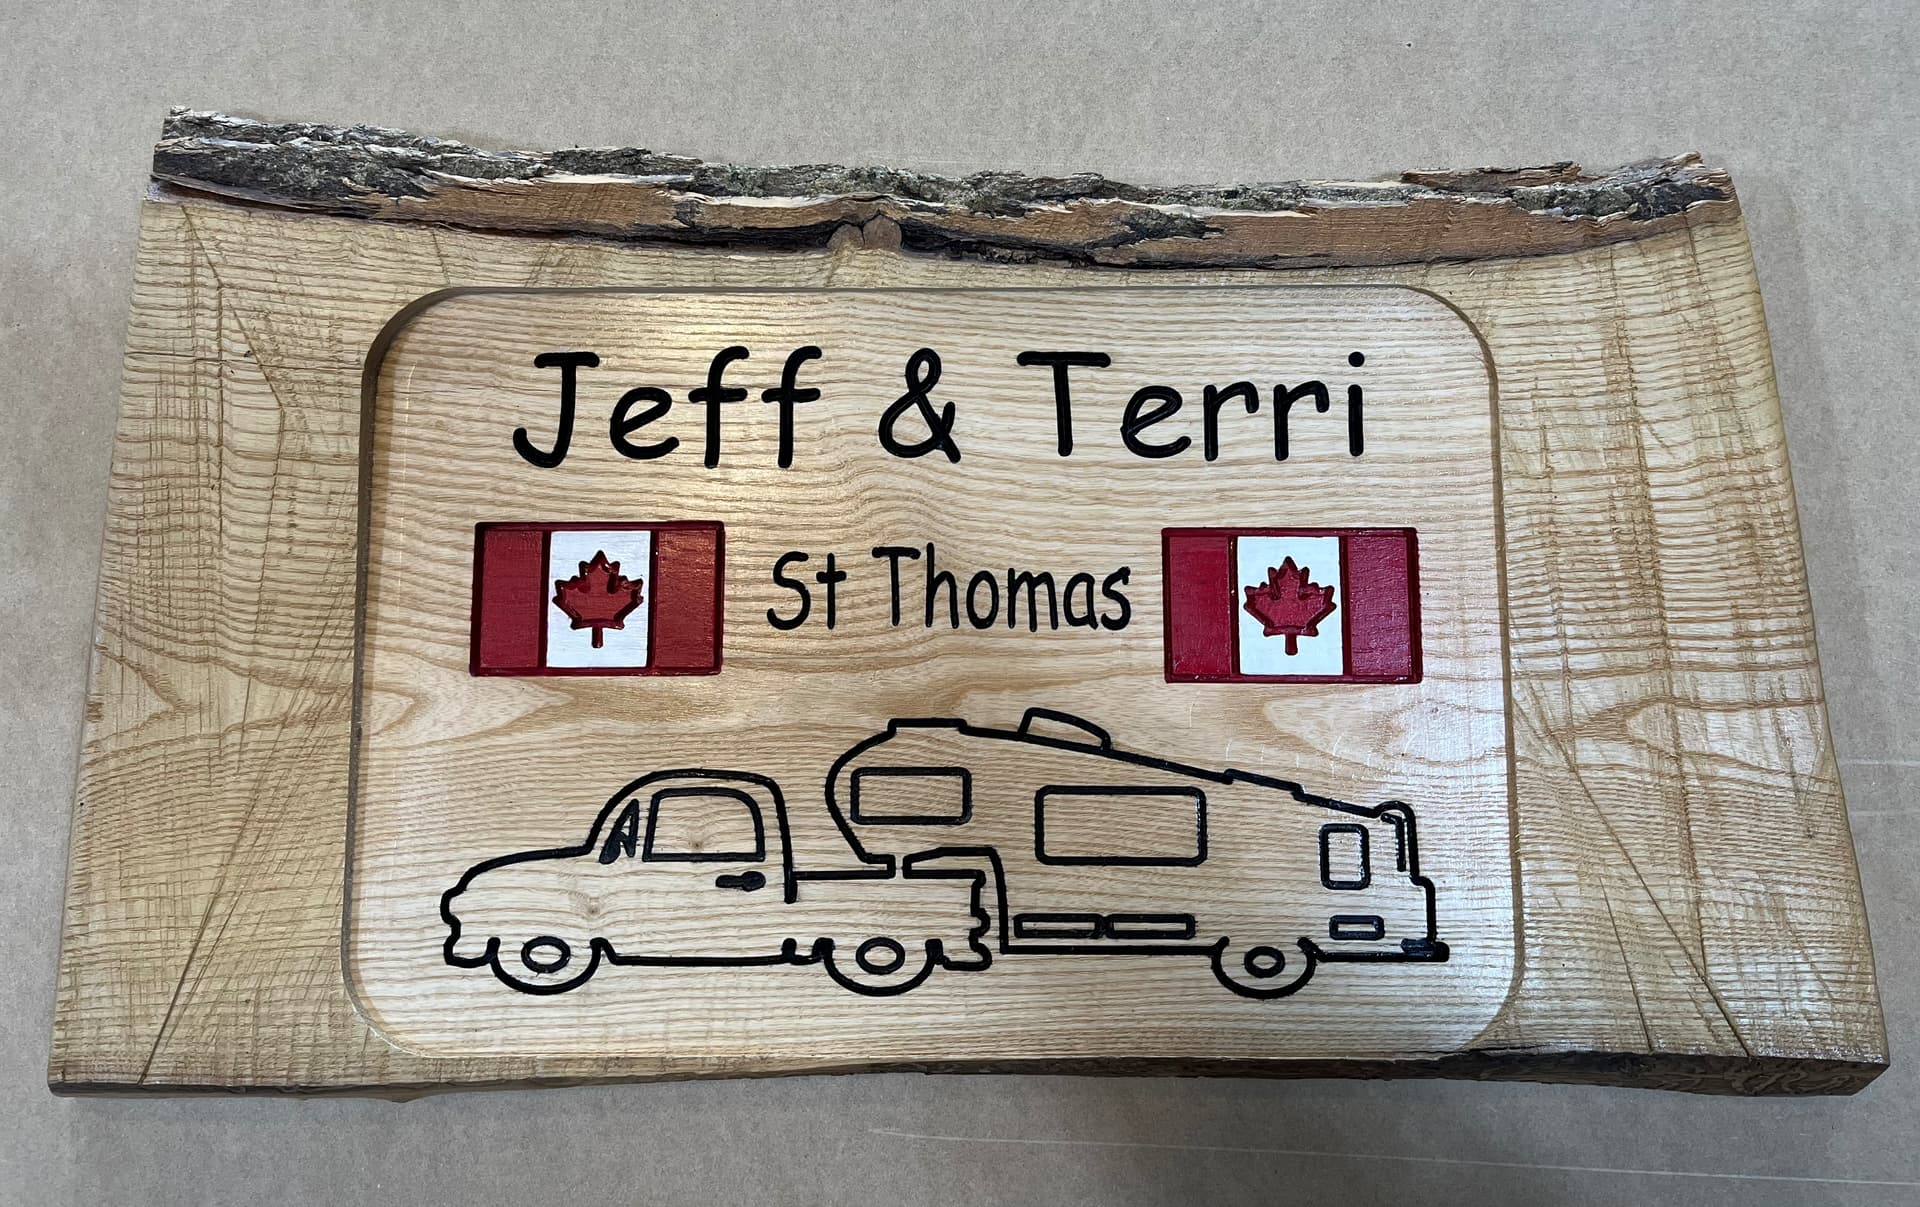
We do a fair bit of camping with our 5th wheel and see a lot of people have signs up at thier campsites so I thought what better way to use a piece of live edge thats been laying aroiund forever. It’s my first “real” project and I’m pretty happy with the final result.
16 Likes
Andy,
What Fiber Laser did you go with? I am in the process of adding one.
Thanks,
Dave
We looked at a few. There two broad categories; “retail marking machines” that are fully enclosed with safety door features etc and then there are “Maker” machines that are open to the world. I went for the later as it was just for me, I had flexibility on size of job and lens, and, probably the swing item, half the price.
It looks like, but I’m no specialist, that they are all variations on a theme of JPT based lasers and all out of China.
I went Commarker B4 60W MOPA. If I went again I may have considered OMG just because they seem more active.
I went 60W as there appeared to be a significant price increase to 100W but I wanted something that could engrave and cut silver, which it can easily down to about 2mm, so i didnt go below 60W. Did I need MOPA, probably not as I think that comes into its own when engraving color into steel.
I’m happy with it. Customer service and User group are responsive. But this is a CNC forum so I’ll stop there.
Andy,
Thanks for the info. I will have to check that one out.