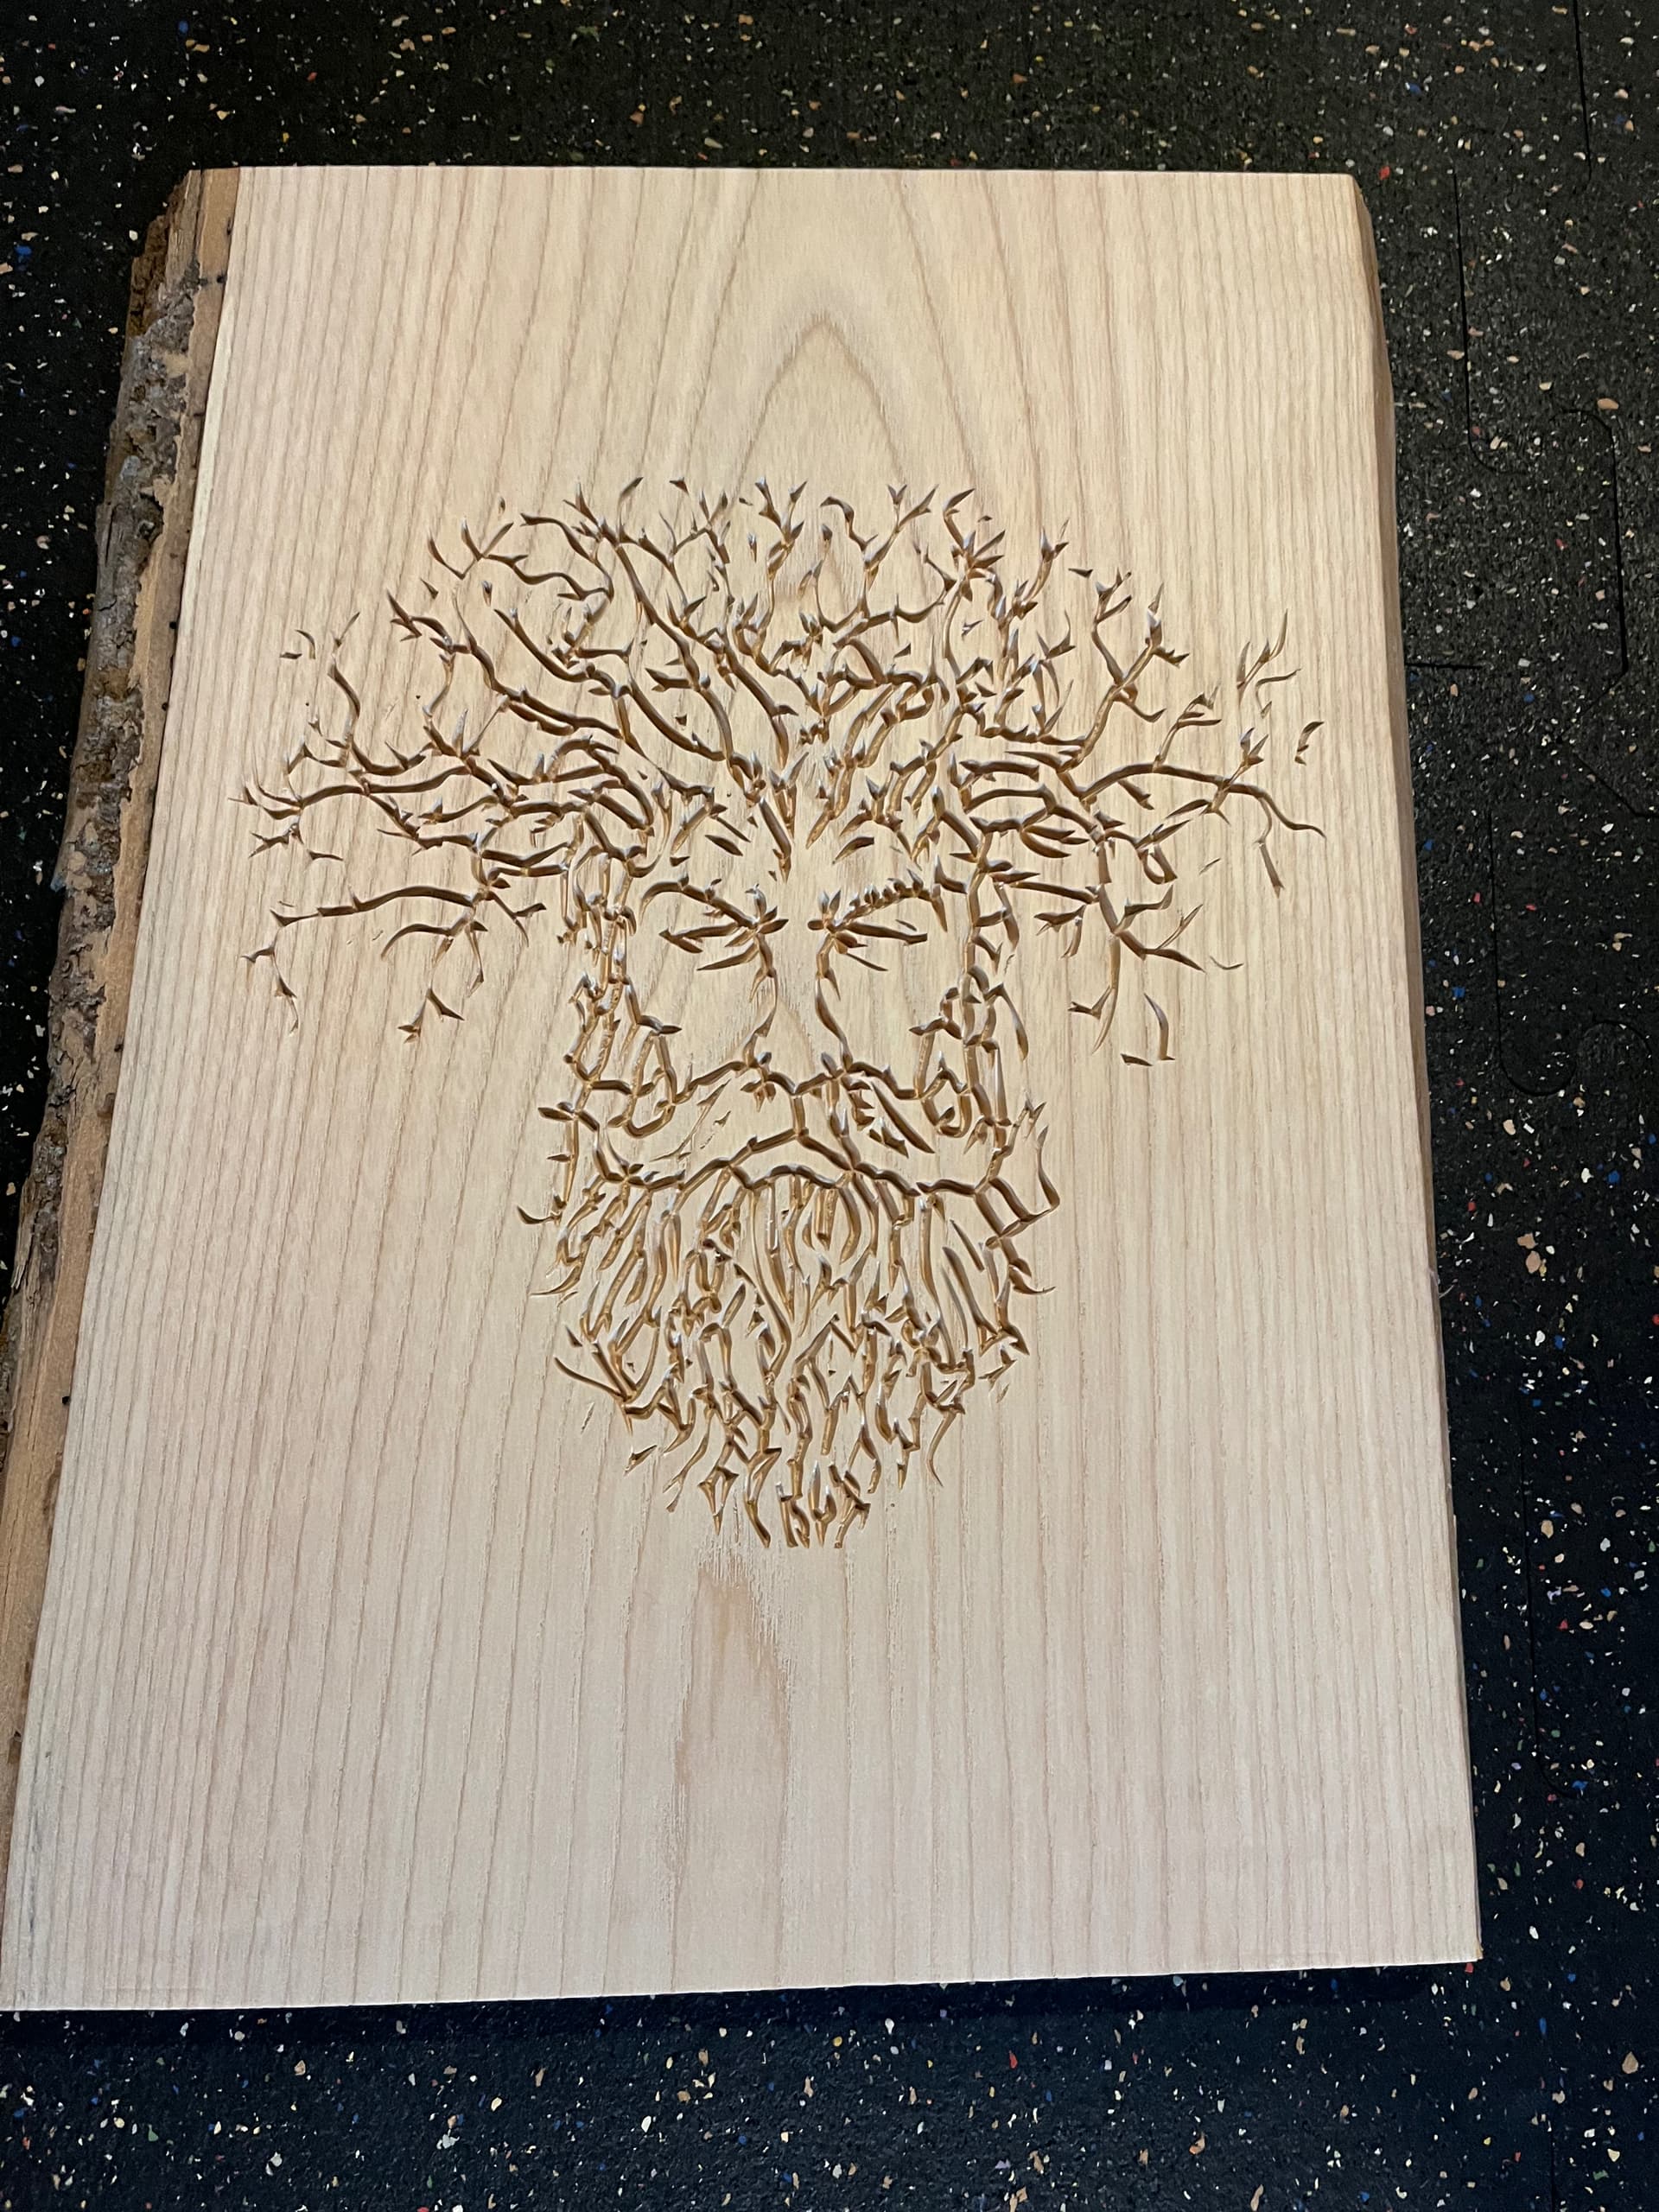
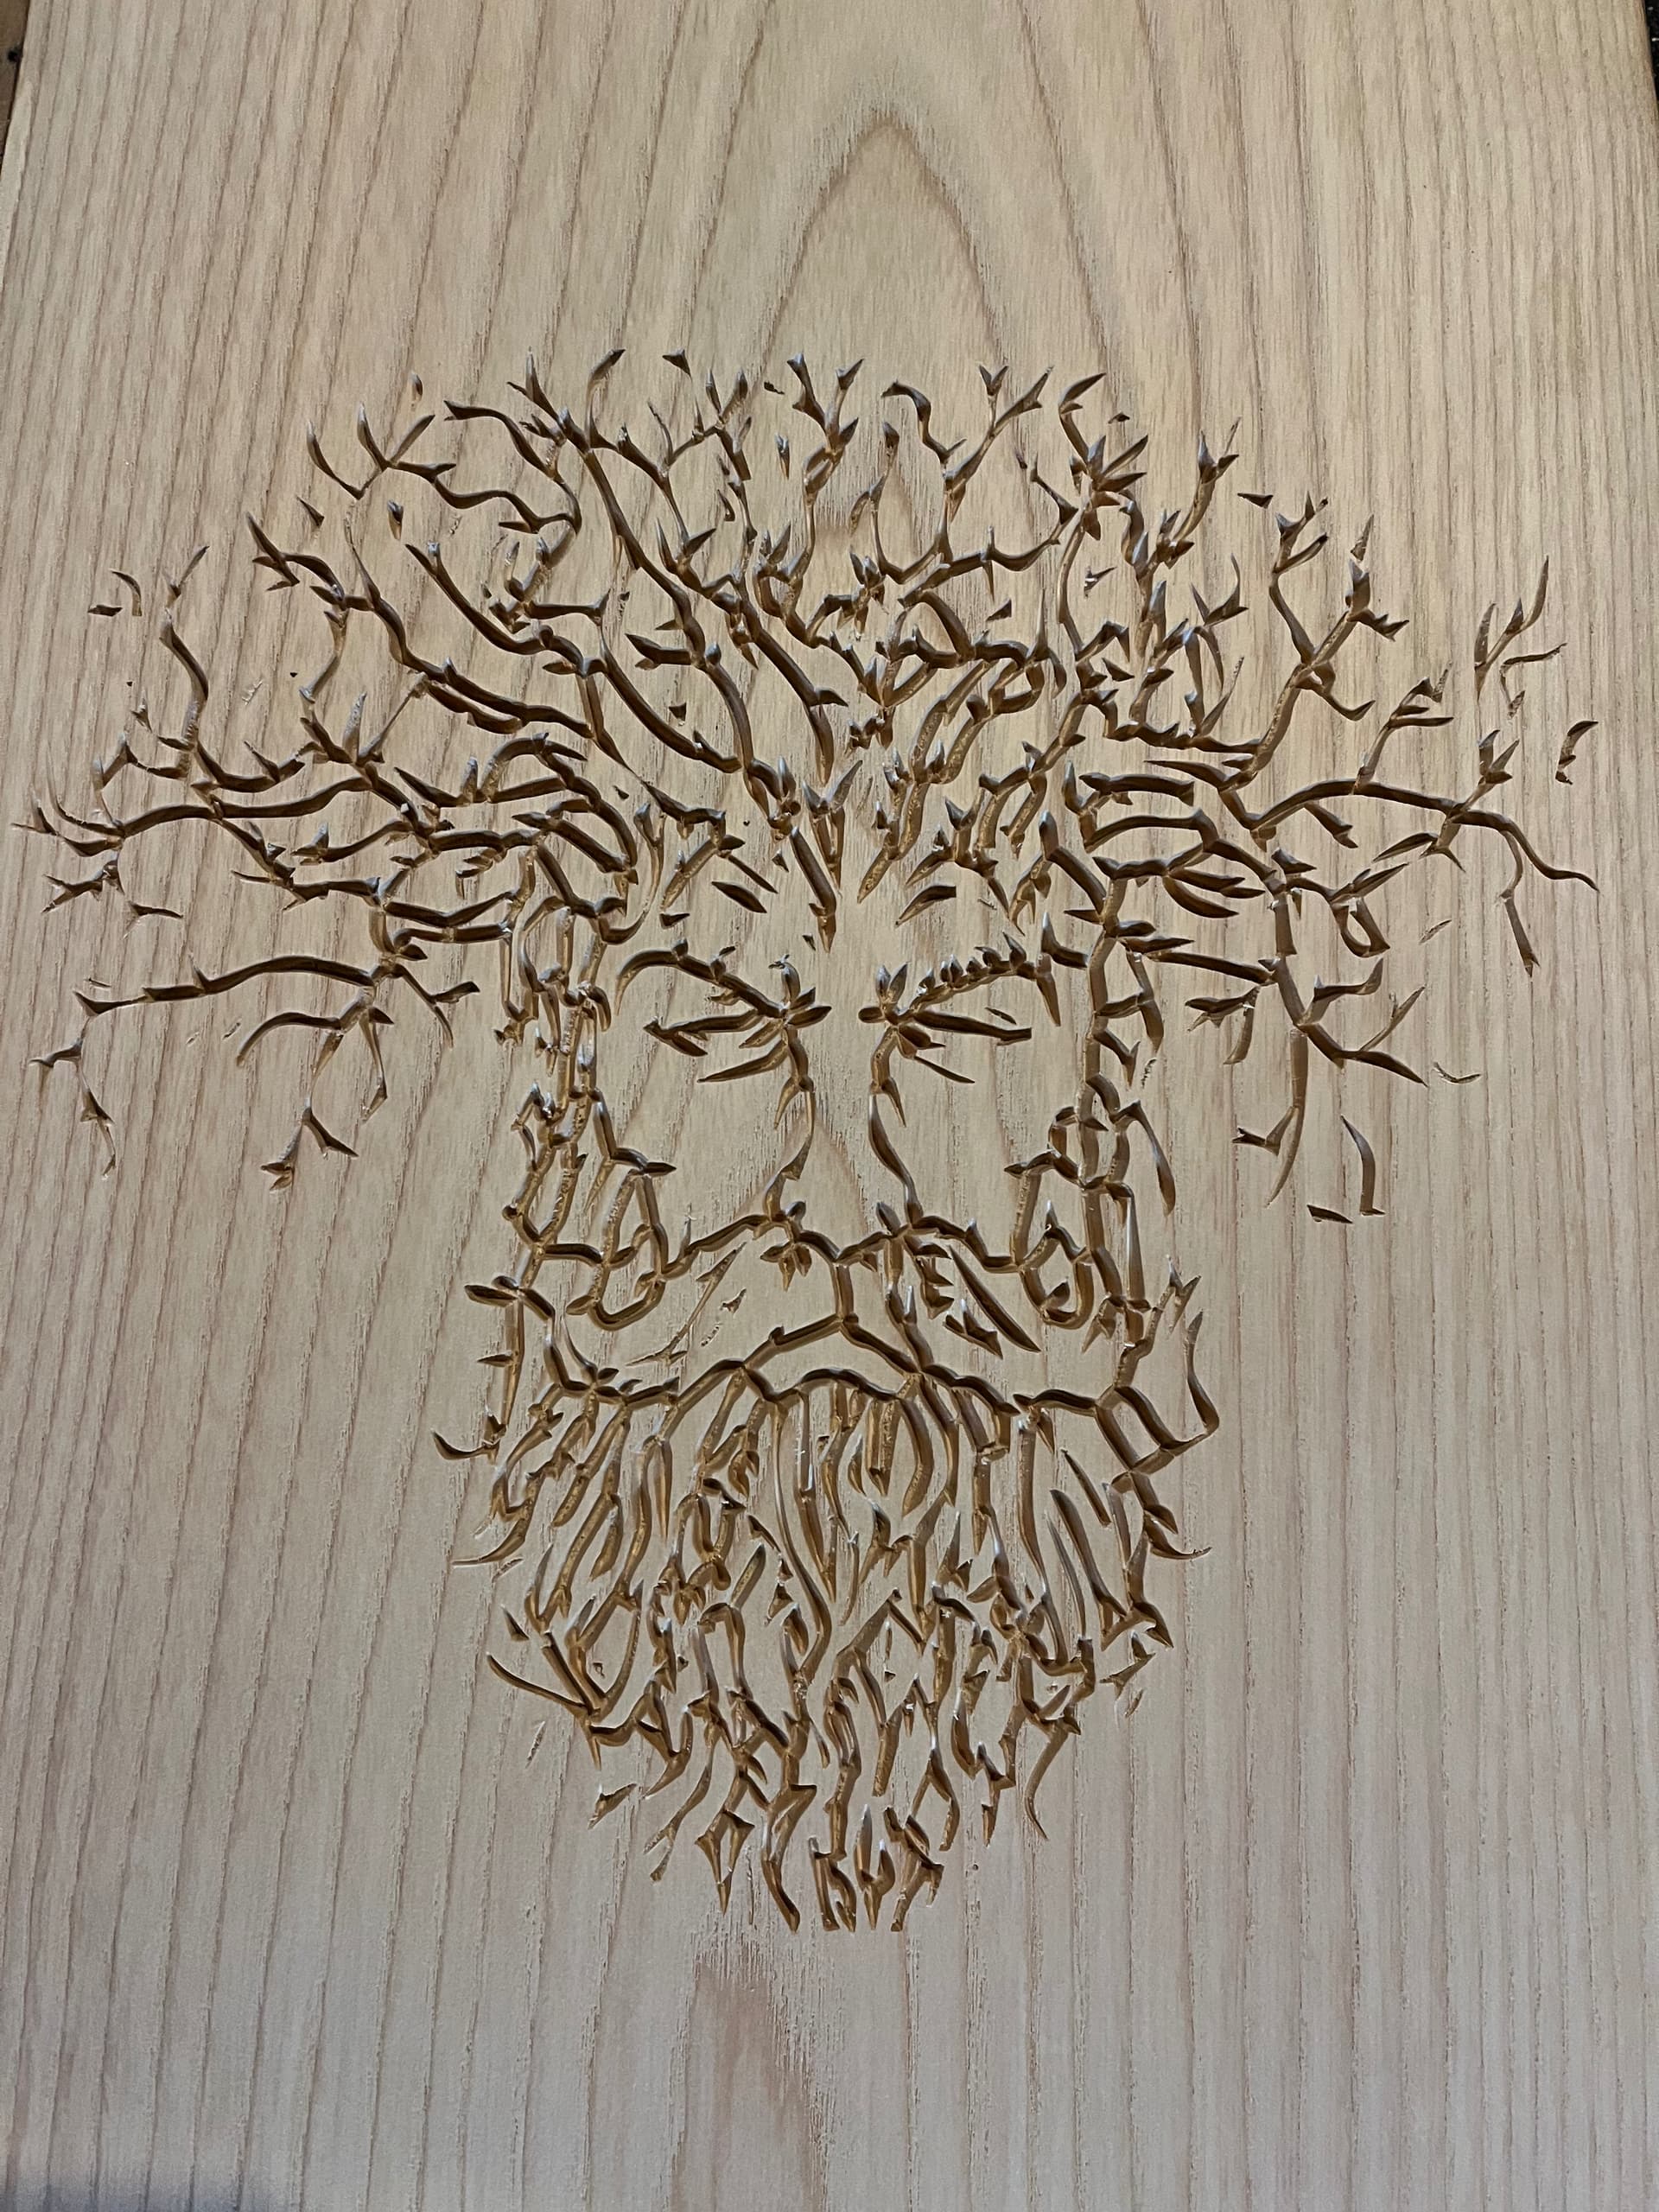
So today I changed things up a bit. I took a piece of natural ash, resized the tree spirit, standard Vcarve with a 30° vee bit and a 4mm DOC. There’s a lot more detail and the face is easy to make out from any viewing angle. I like this result better than the first one.
The learning curve continues… ![]()
20 Likes
Nice job! Send me some of that walnut if he’s giving it away ![]()
1 Like
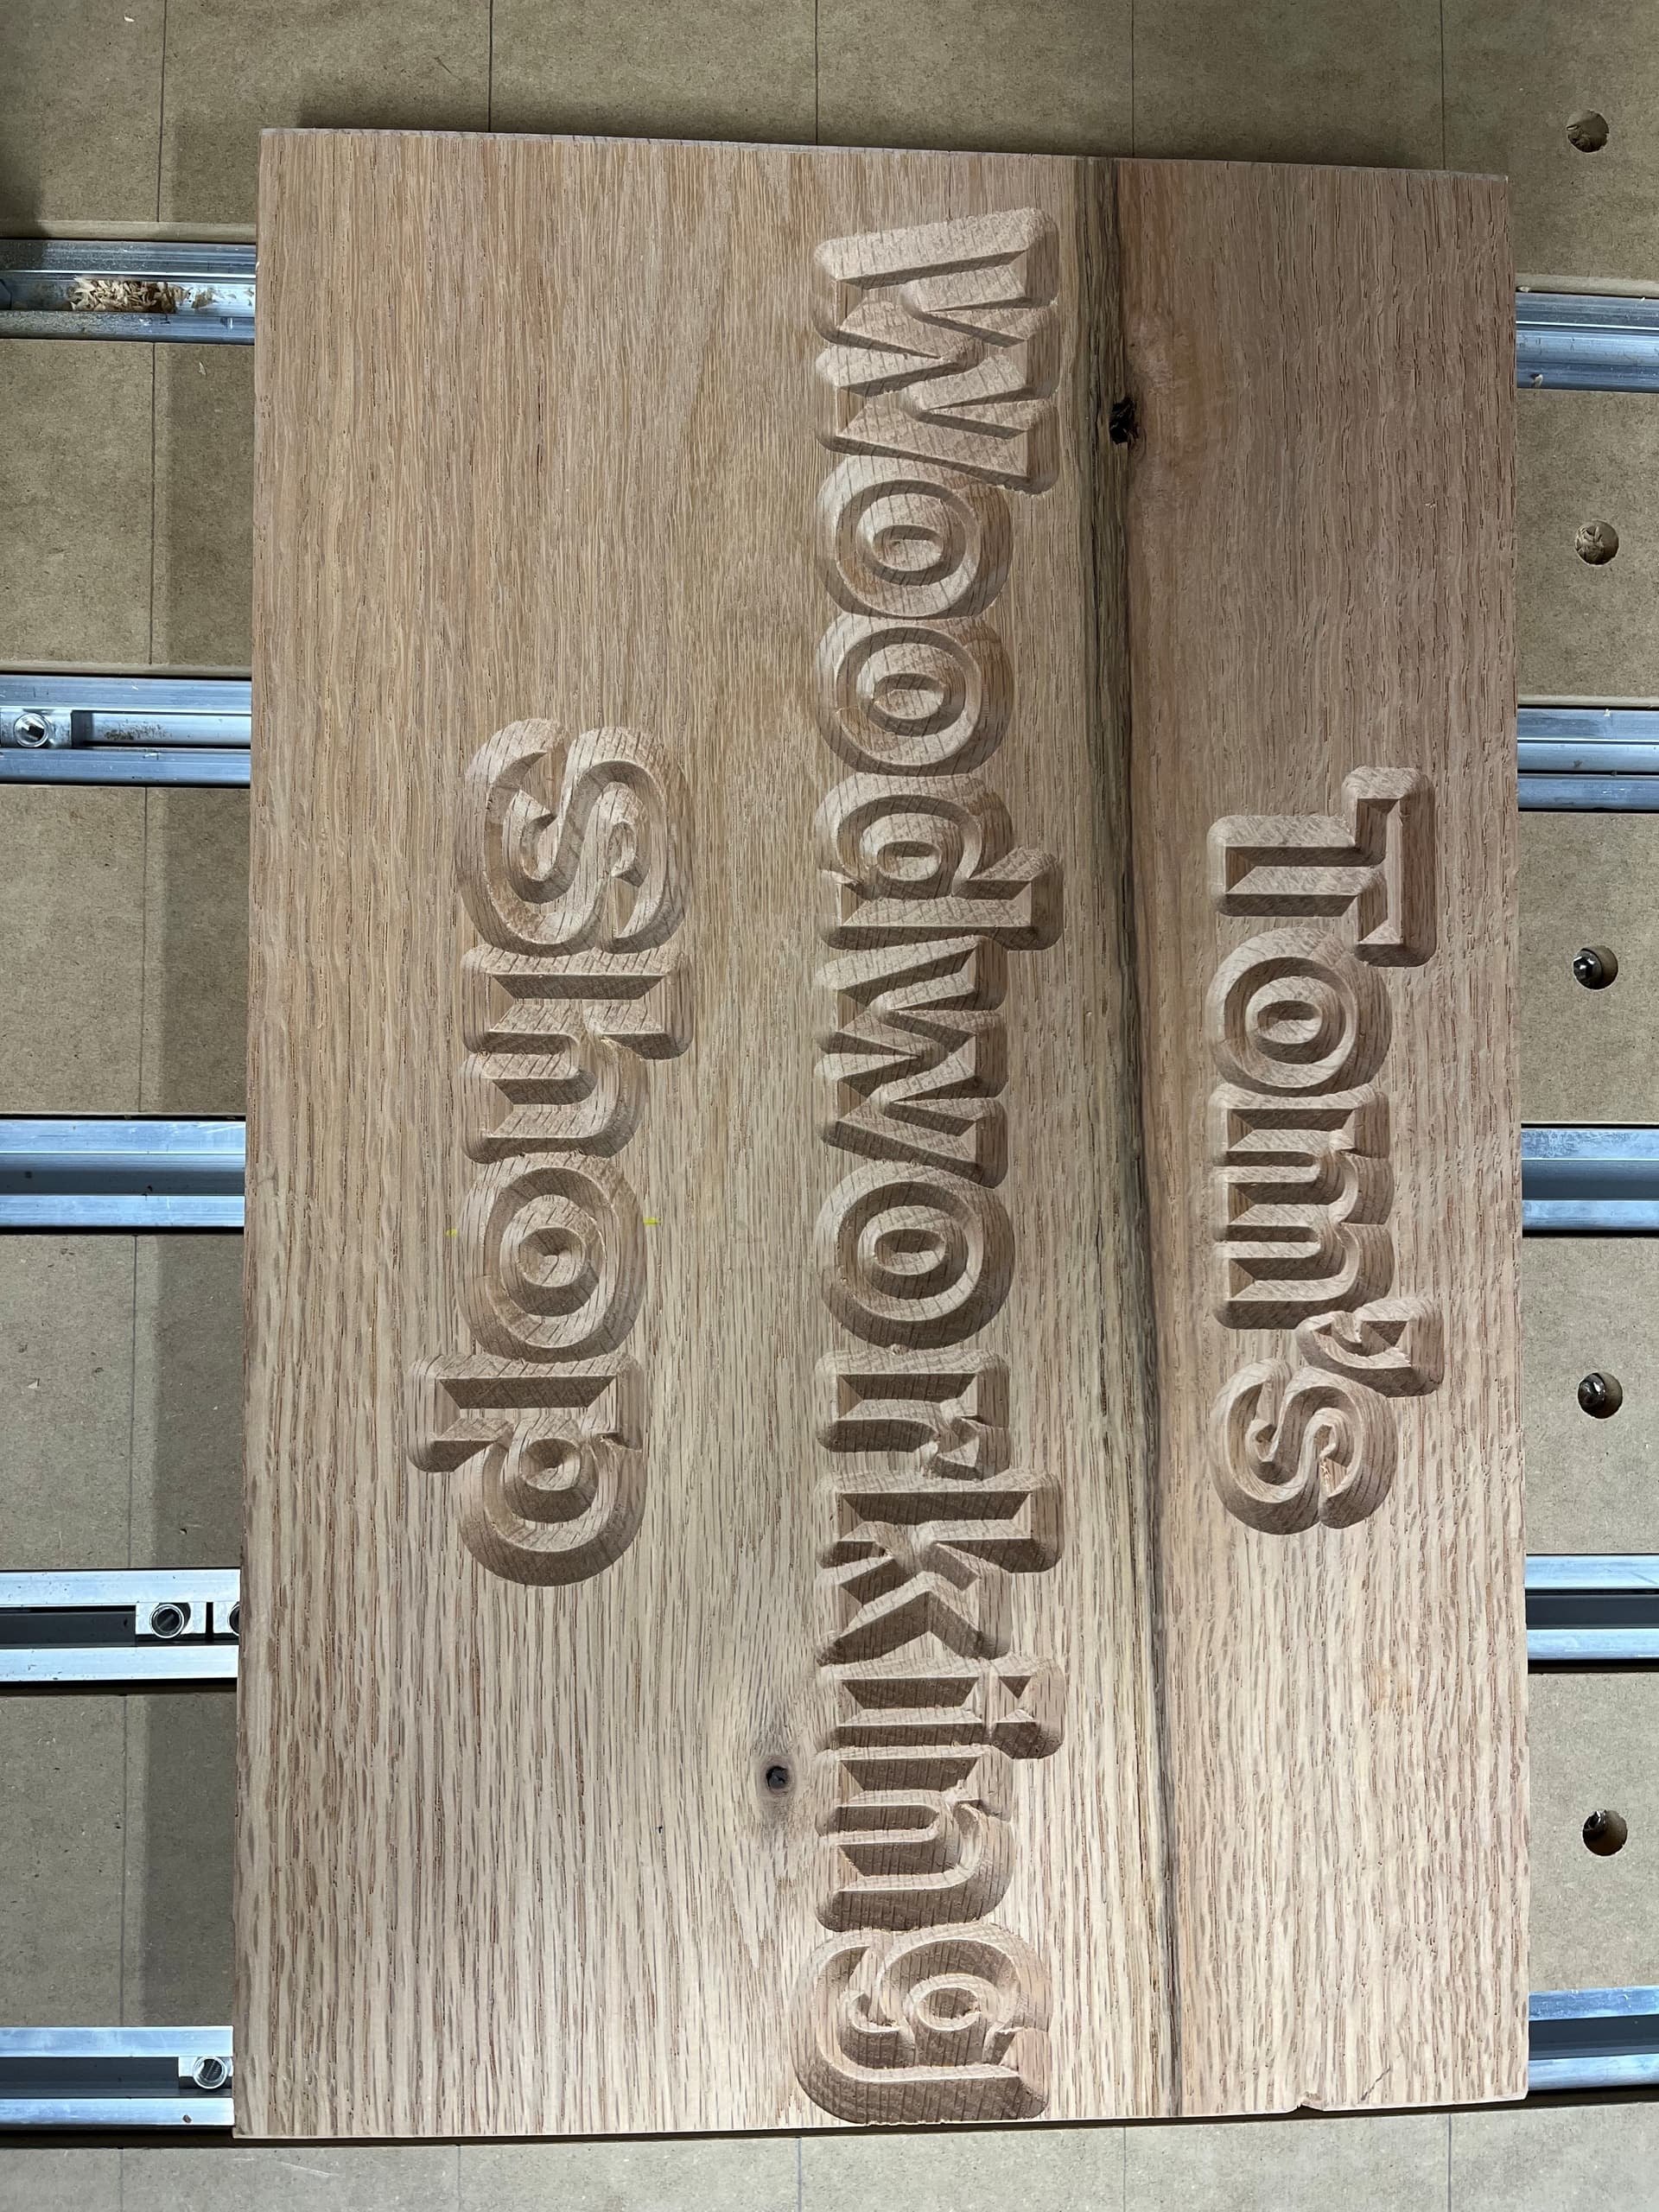
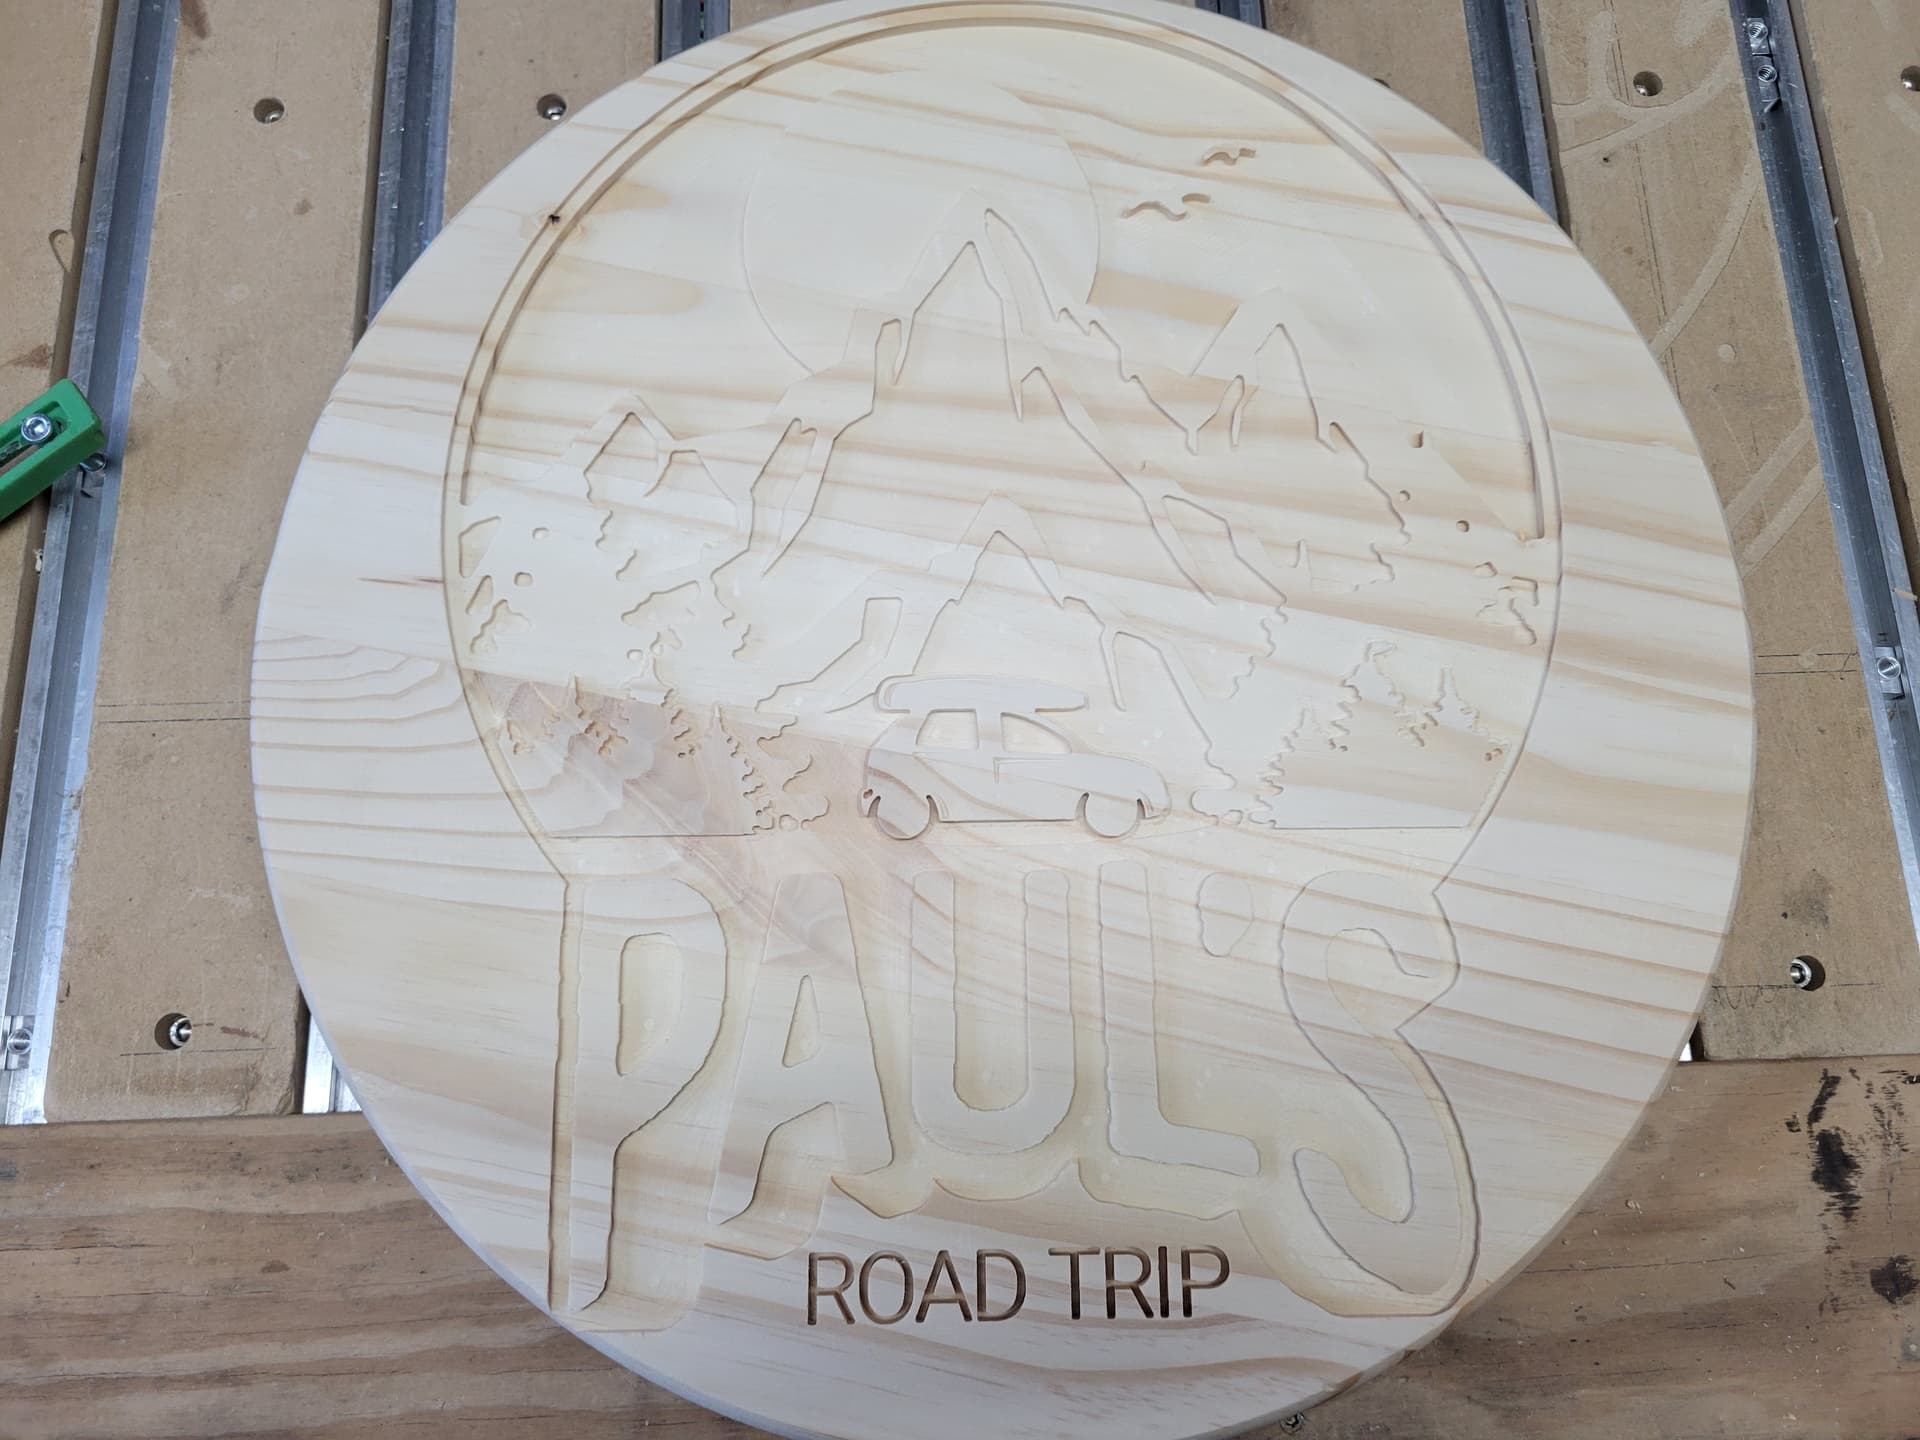
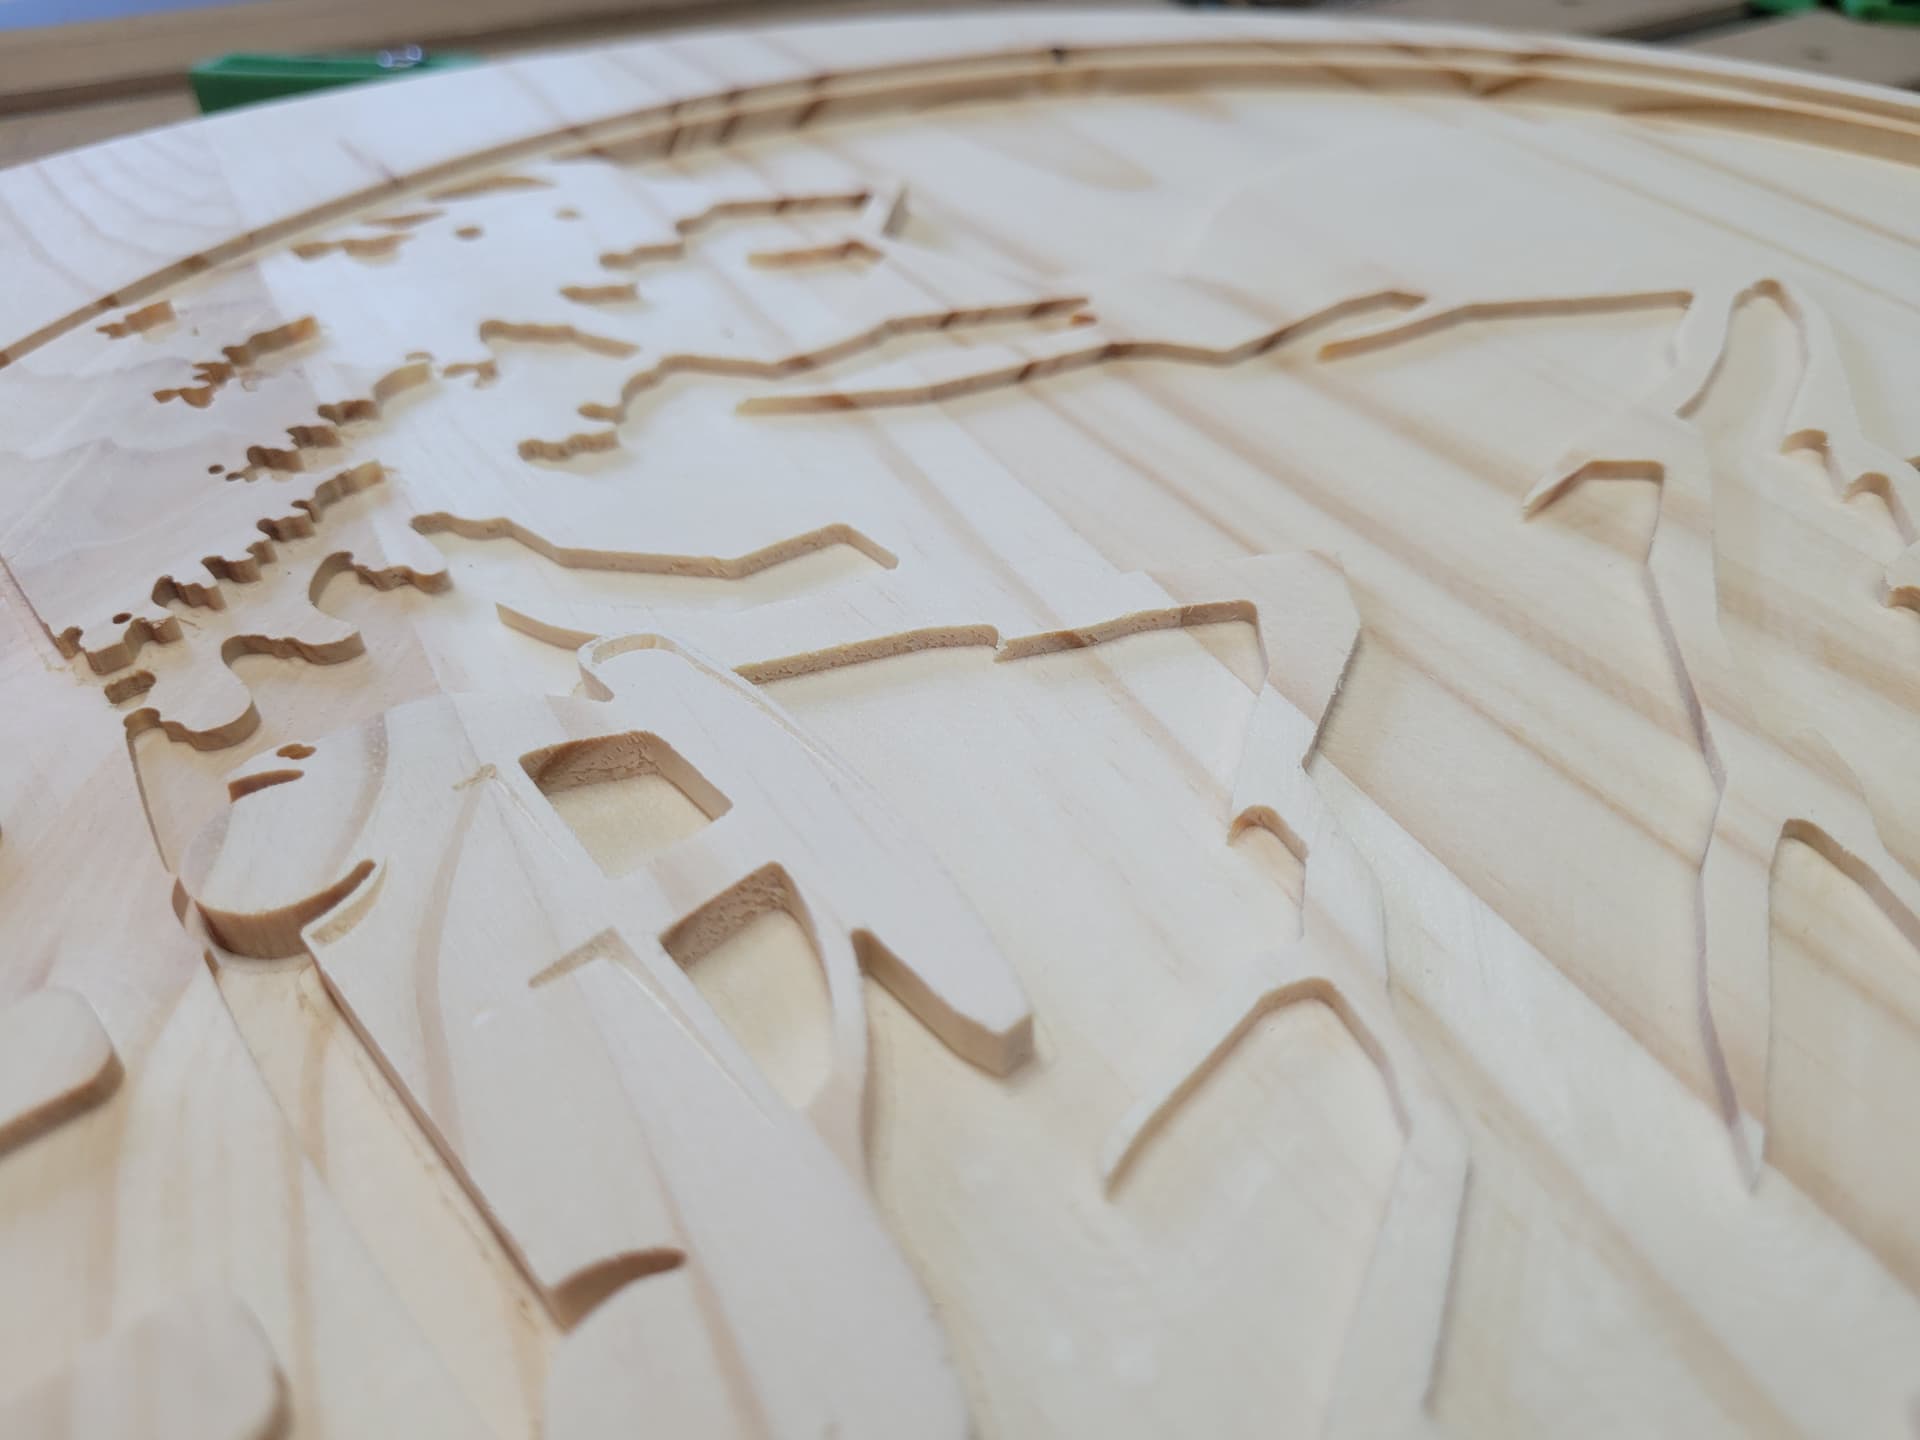
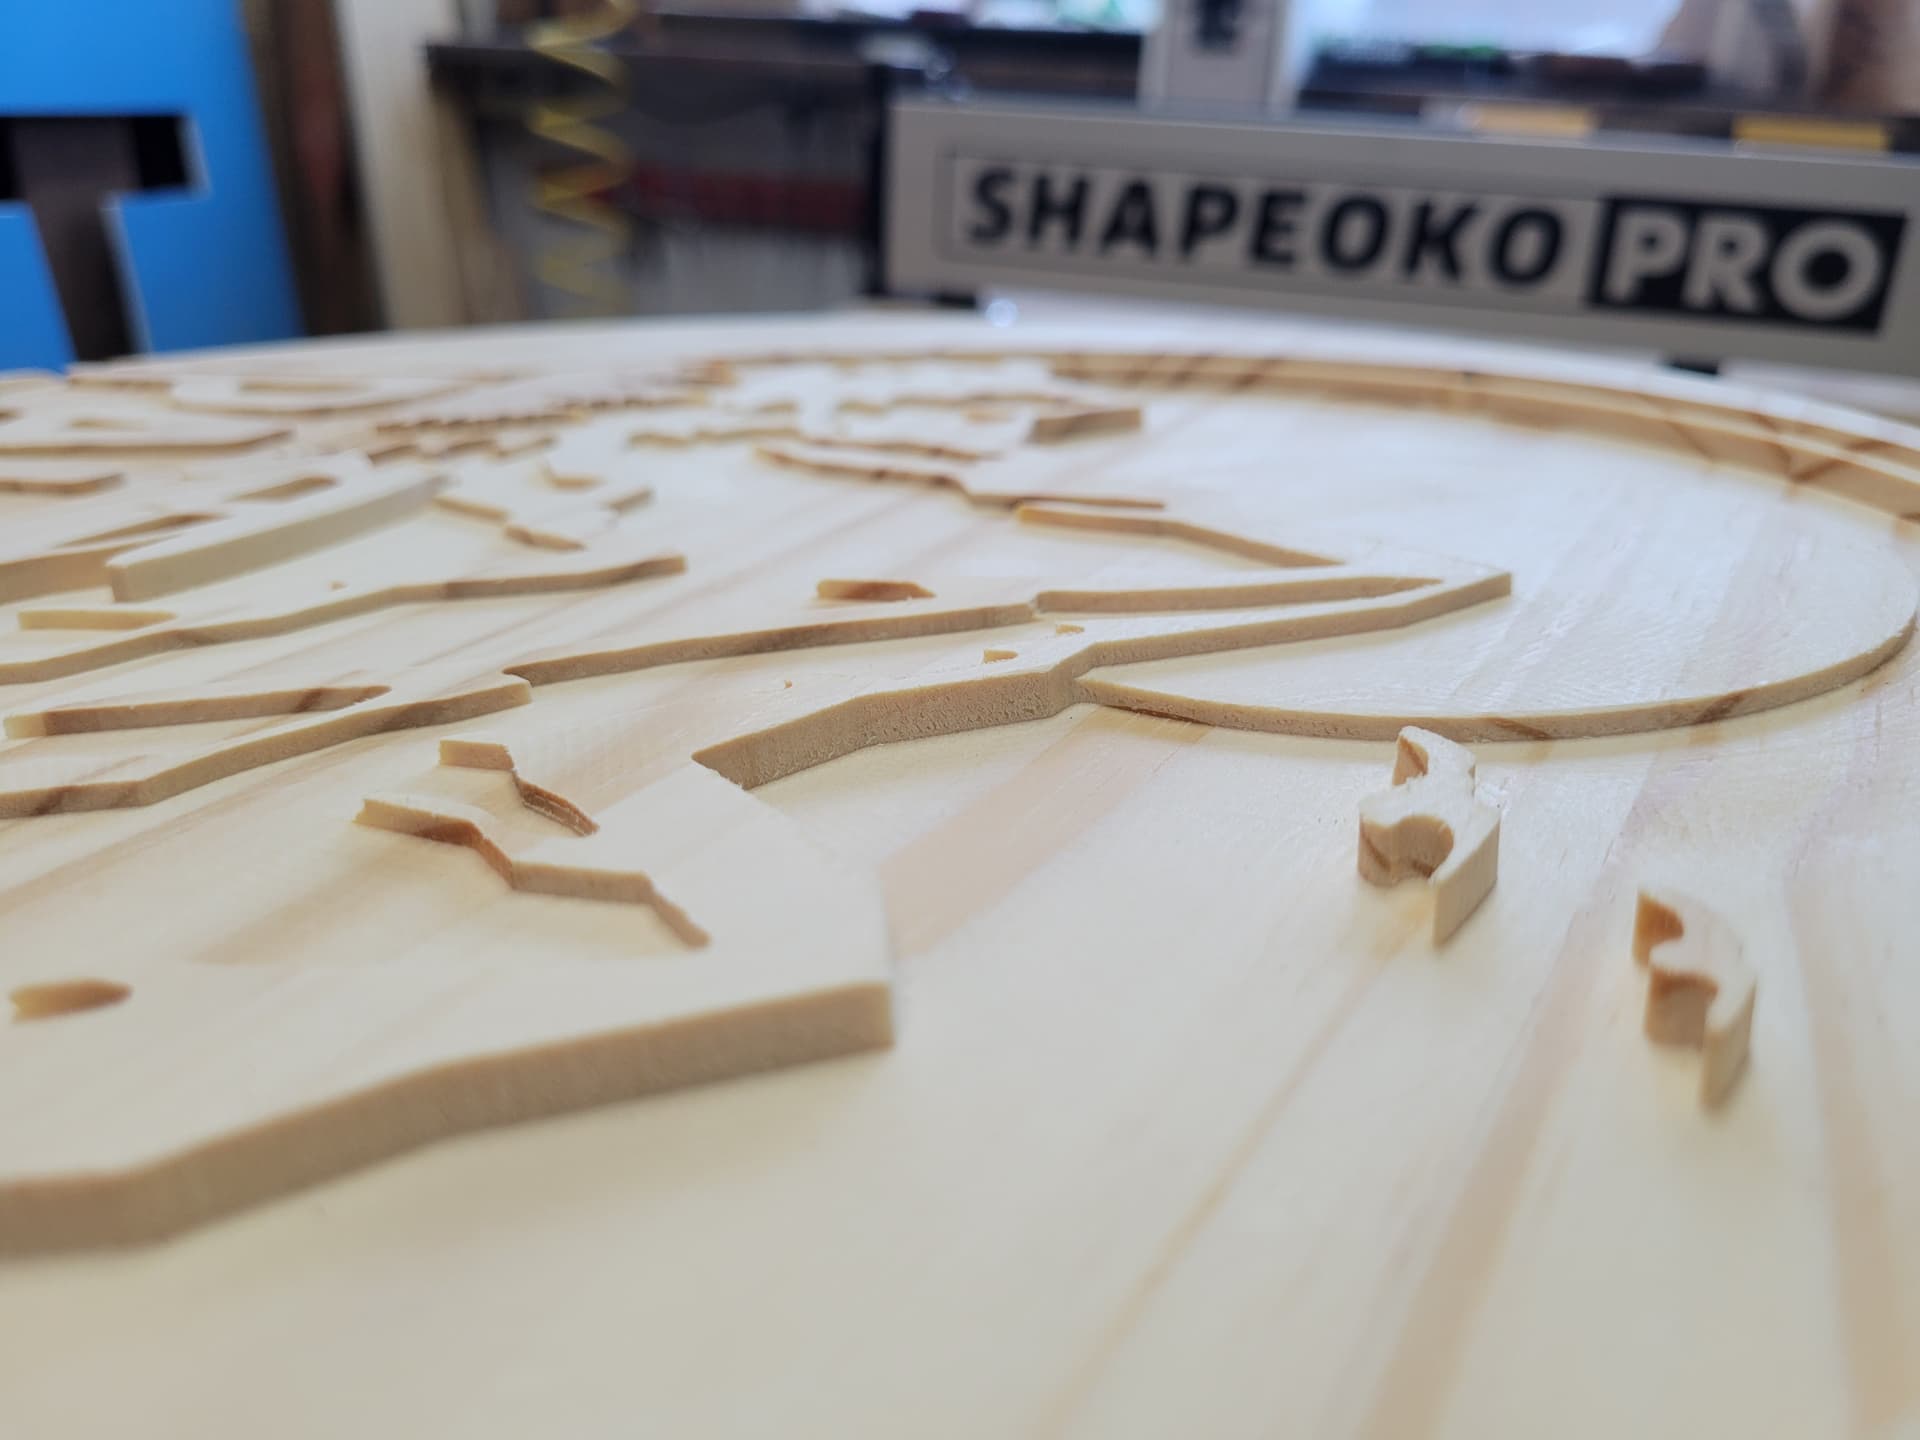
I am new to the group. I bought a S5 pro for Christmas but it took me a week to build the table for it and then I had to wait for the computer to show up. You have to love the USPS. It was shipped at the end of Dec. but took 3 weeks to get to the Midwest from New Jersey. The first thing I did was the sign for the shop and tonight I just got done building a small box for my Granddaughter. I am pretty happy with both of the projects. and it was a great learning experience.
16 Likes
I would try the inlay with the second carving you have here. It’s best to try and see if things will work, instead of being too afraid to try at all. Sometimes you will carve something and find it didn’t work out and into the trash it goes. Then other times you try something and it works out perfectly. Wouldnt hurt to try, but do it with cheaper woods so you can see how it functioned and if there is proper fitment.
2 Likes
Logo to be hand painted. Cut to different depths to make it look cool and convince volunteers they can handle this level of detail.

17 Likes
I finally got around to making the feet for the horse jump I did last weekend.
The whole thing is PVC including the feet. To get a thickness that was appropriate I glued 2 layers of PVC board together. But, my 1/8 plastic bit wasn’t long enough so I glued after cutting each layer separately. Since PVC glue dries instantly I put holes in the pieces and used bamboo skewers to make sure things would align properly. I got it together and then lifted the top layer, applied glue and slid the top down and pressed.
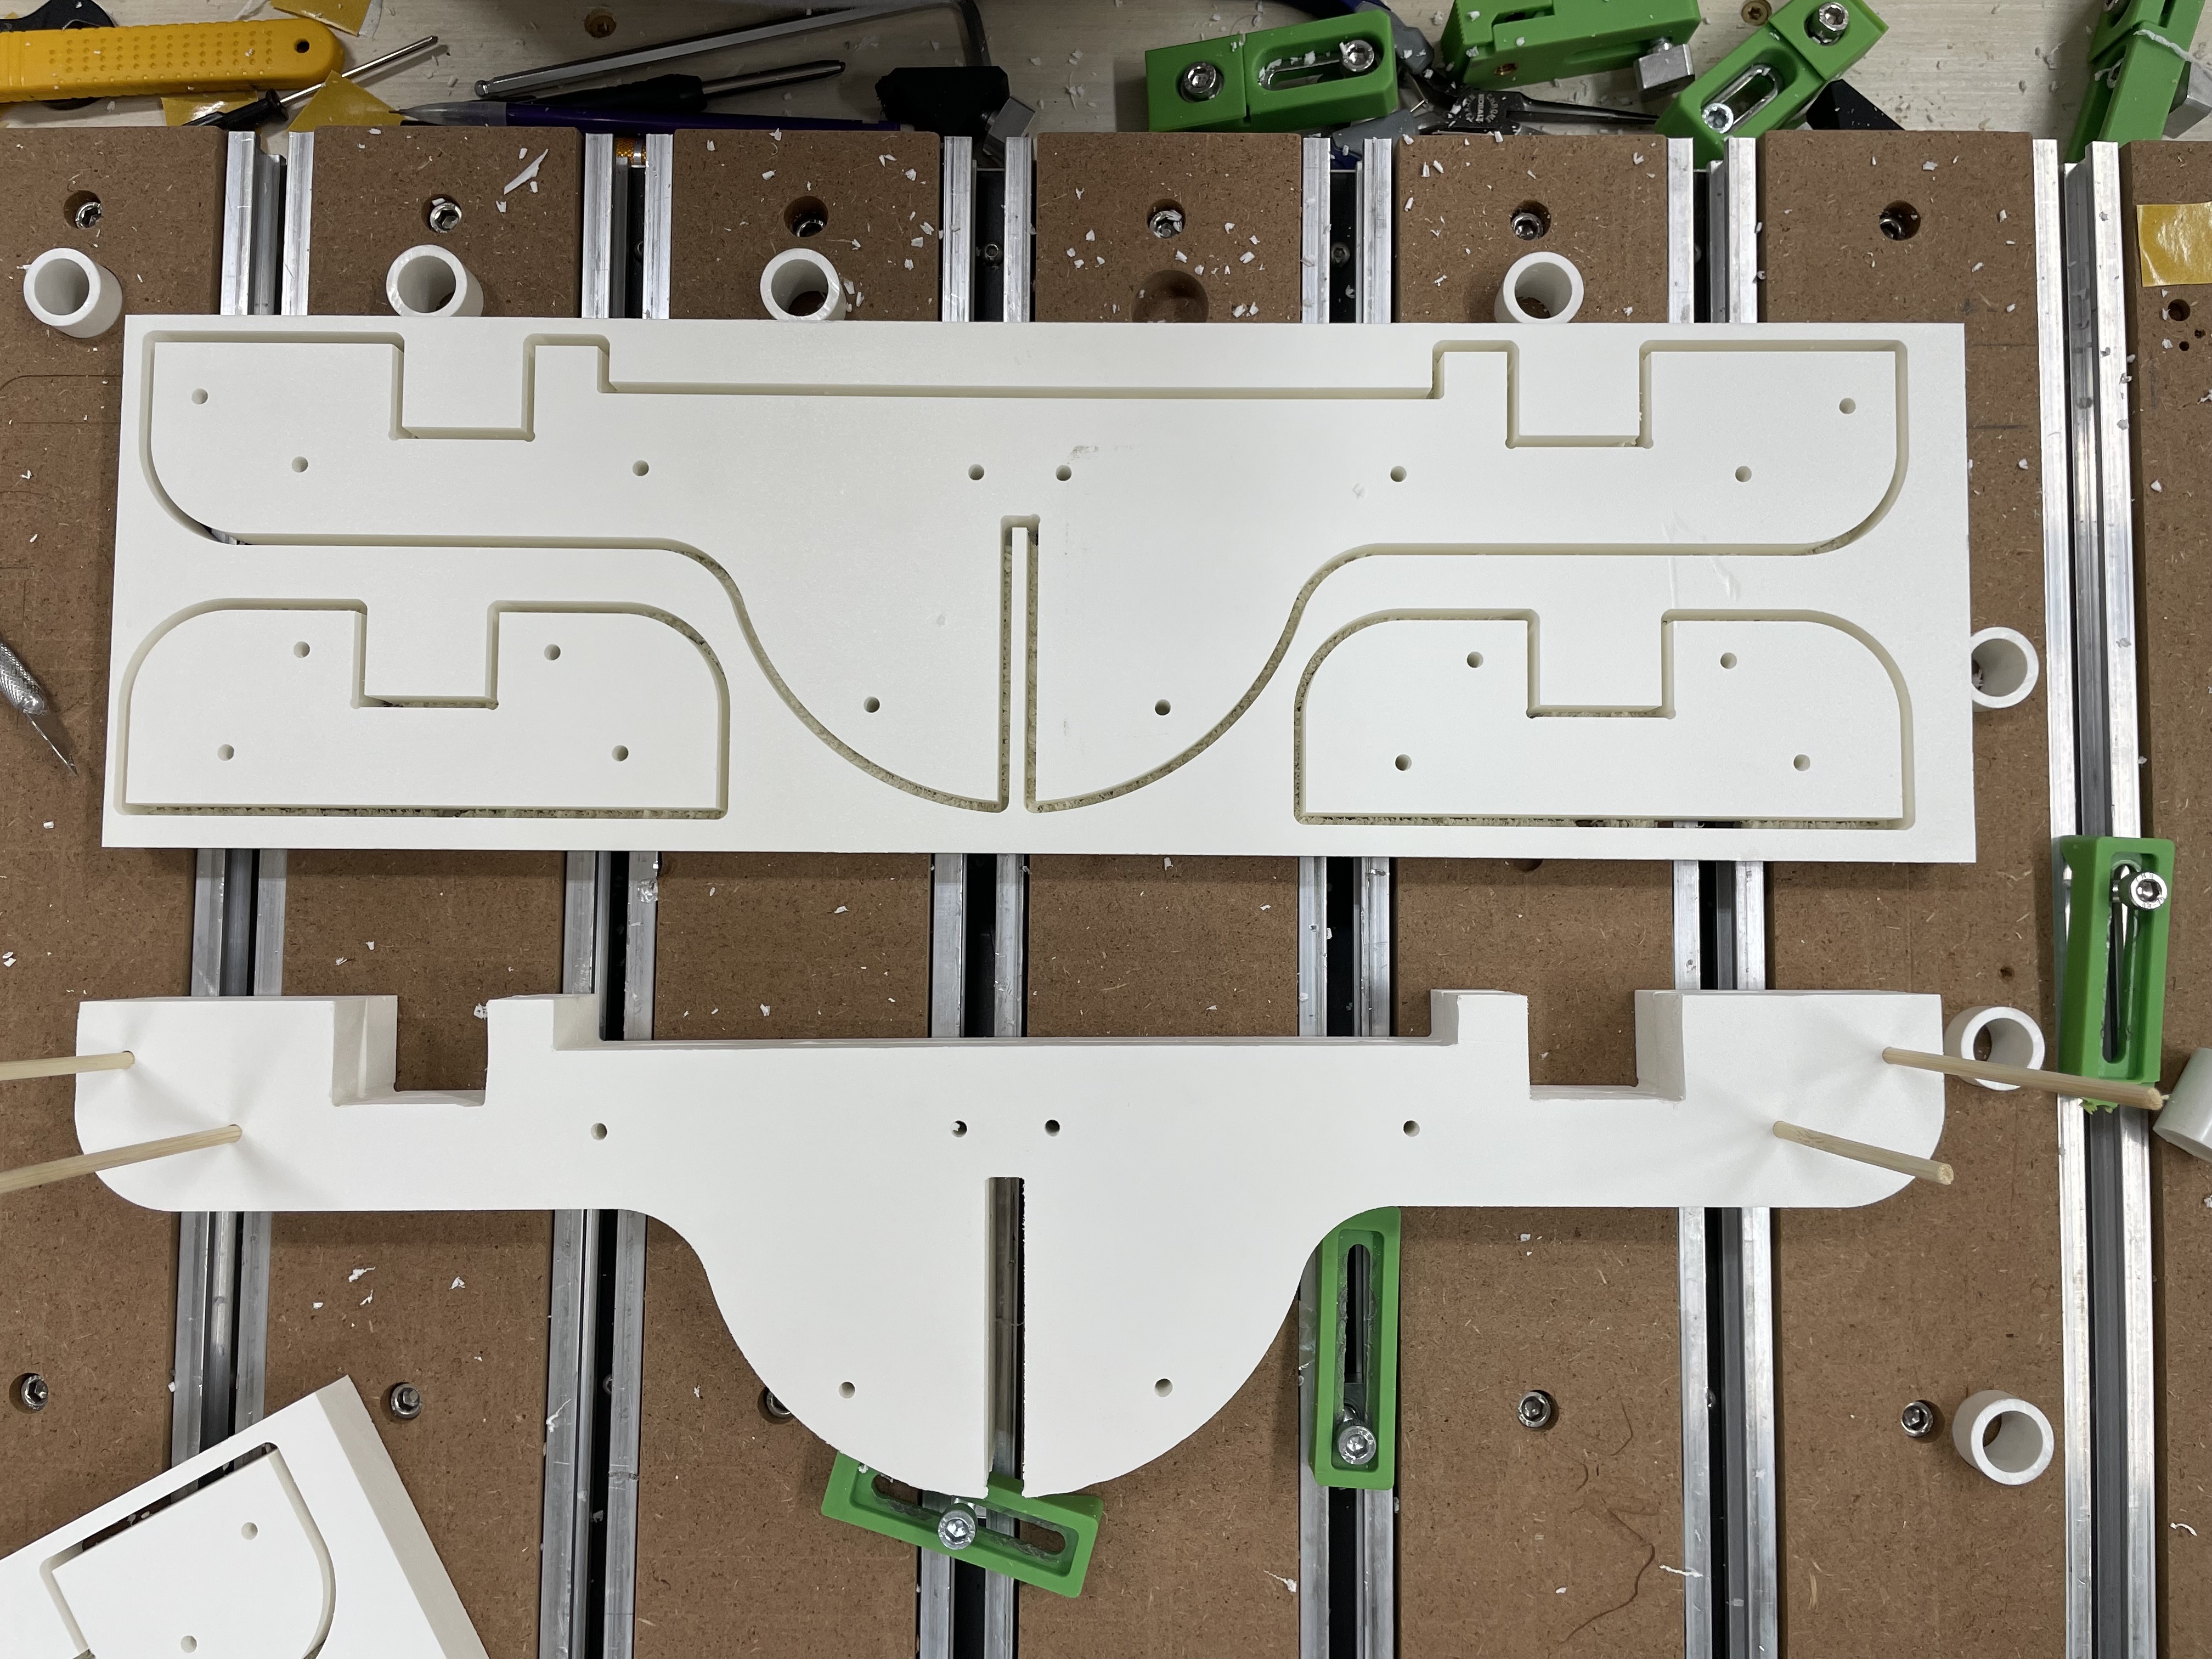

I am not sure this is economically viable, but it will last forever.
18 Likes
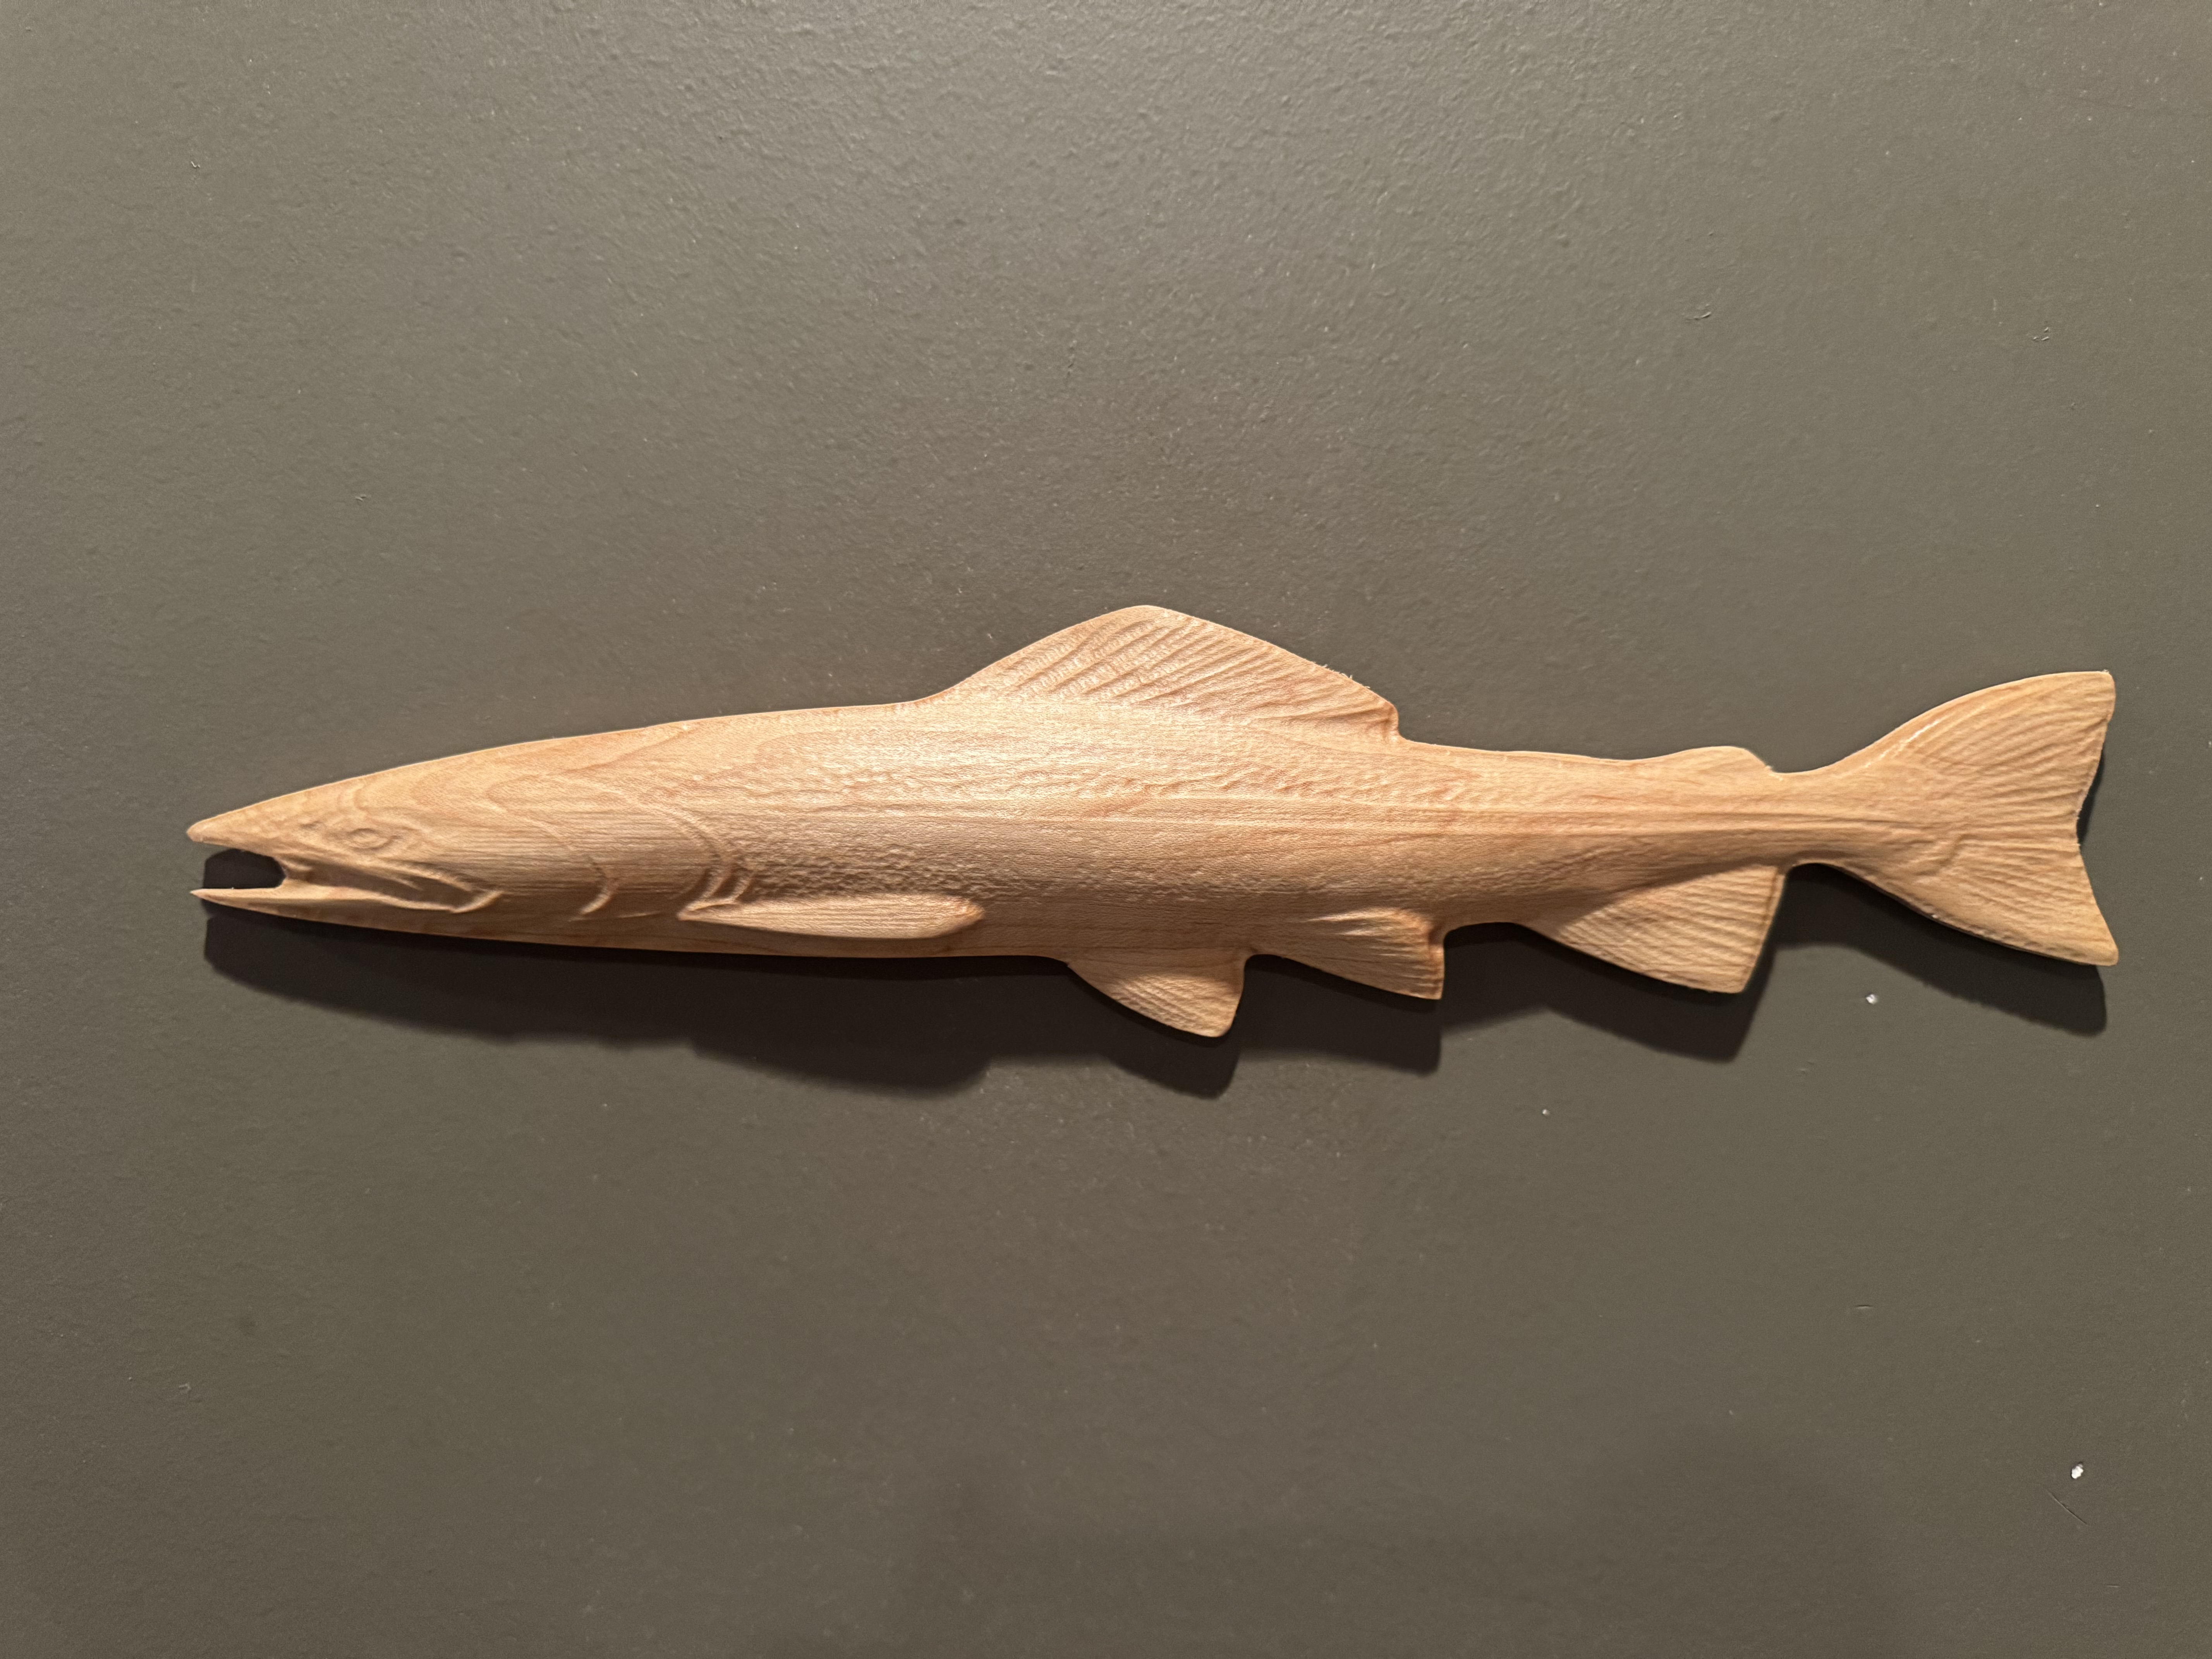
Started making some wooden fish for a business idea of a wooden taxidermy, would love some feedback! One thing I will be doing on future models is lowering the finish step over to lessen those machining marks. Looking to play with feeds and speeds to get machining time down on the larger fish!
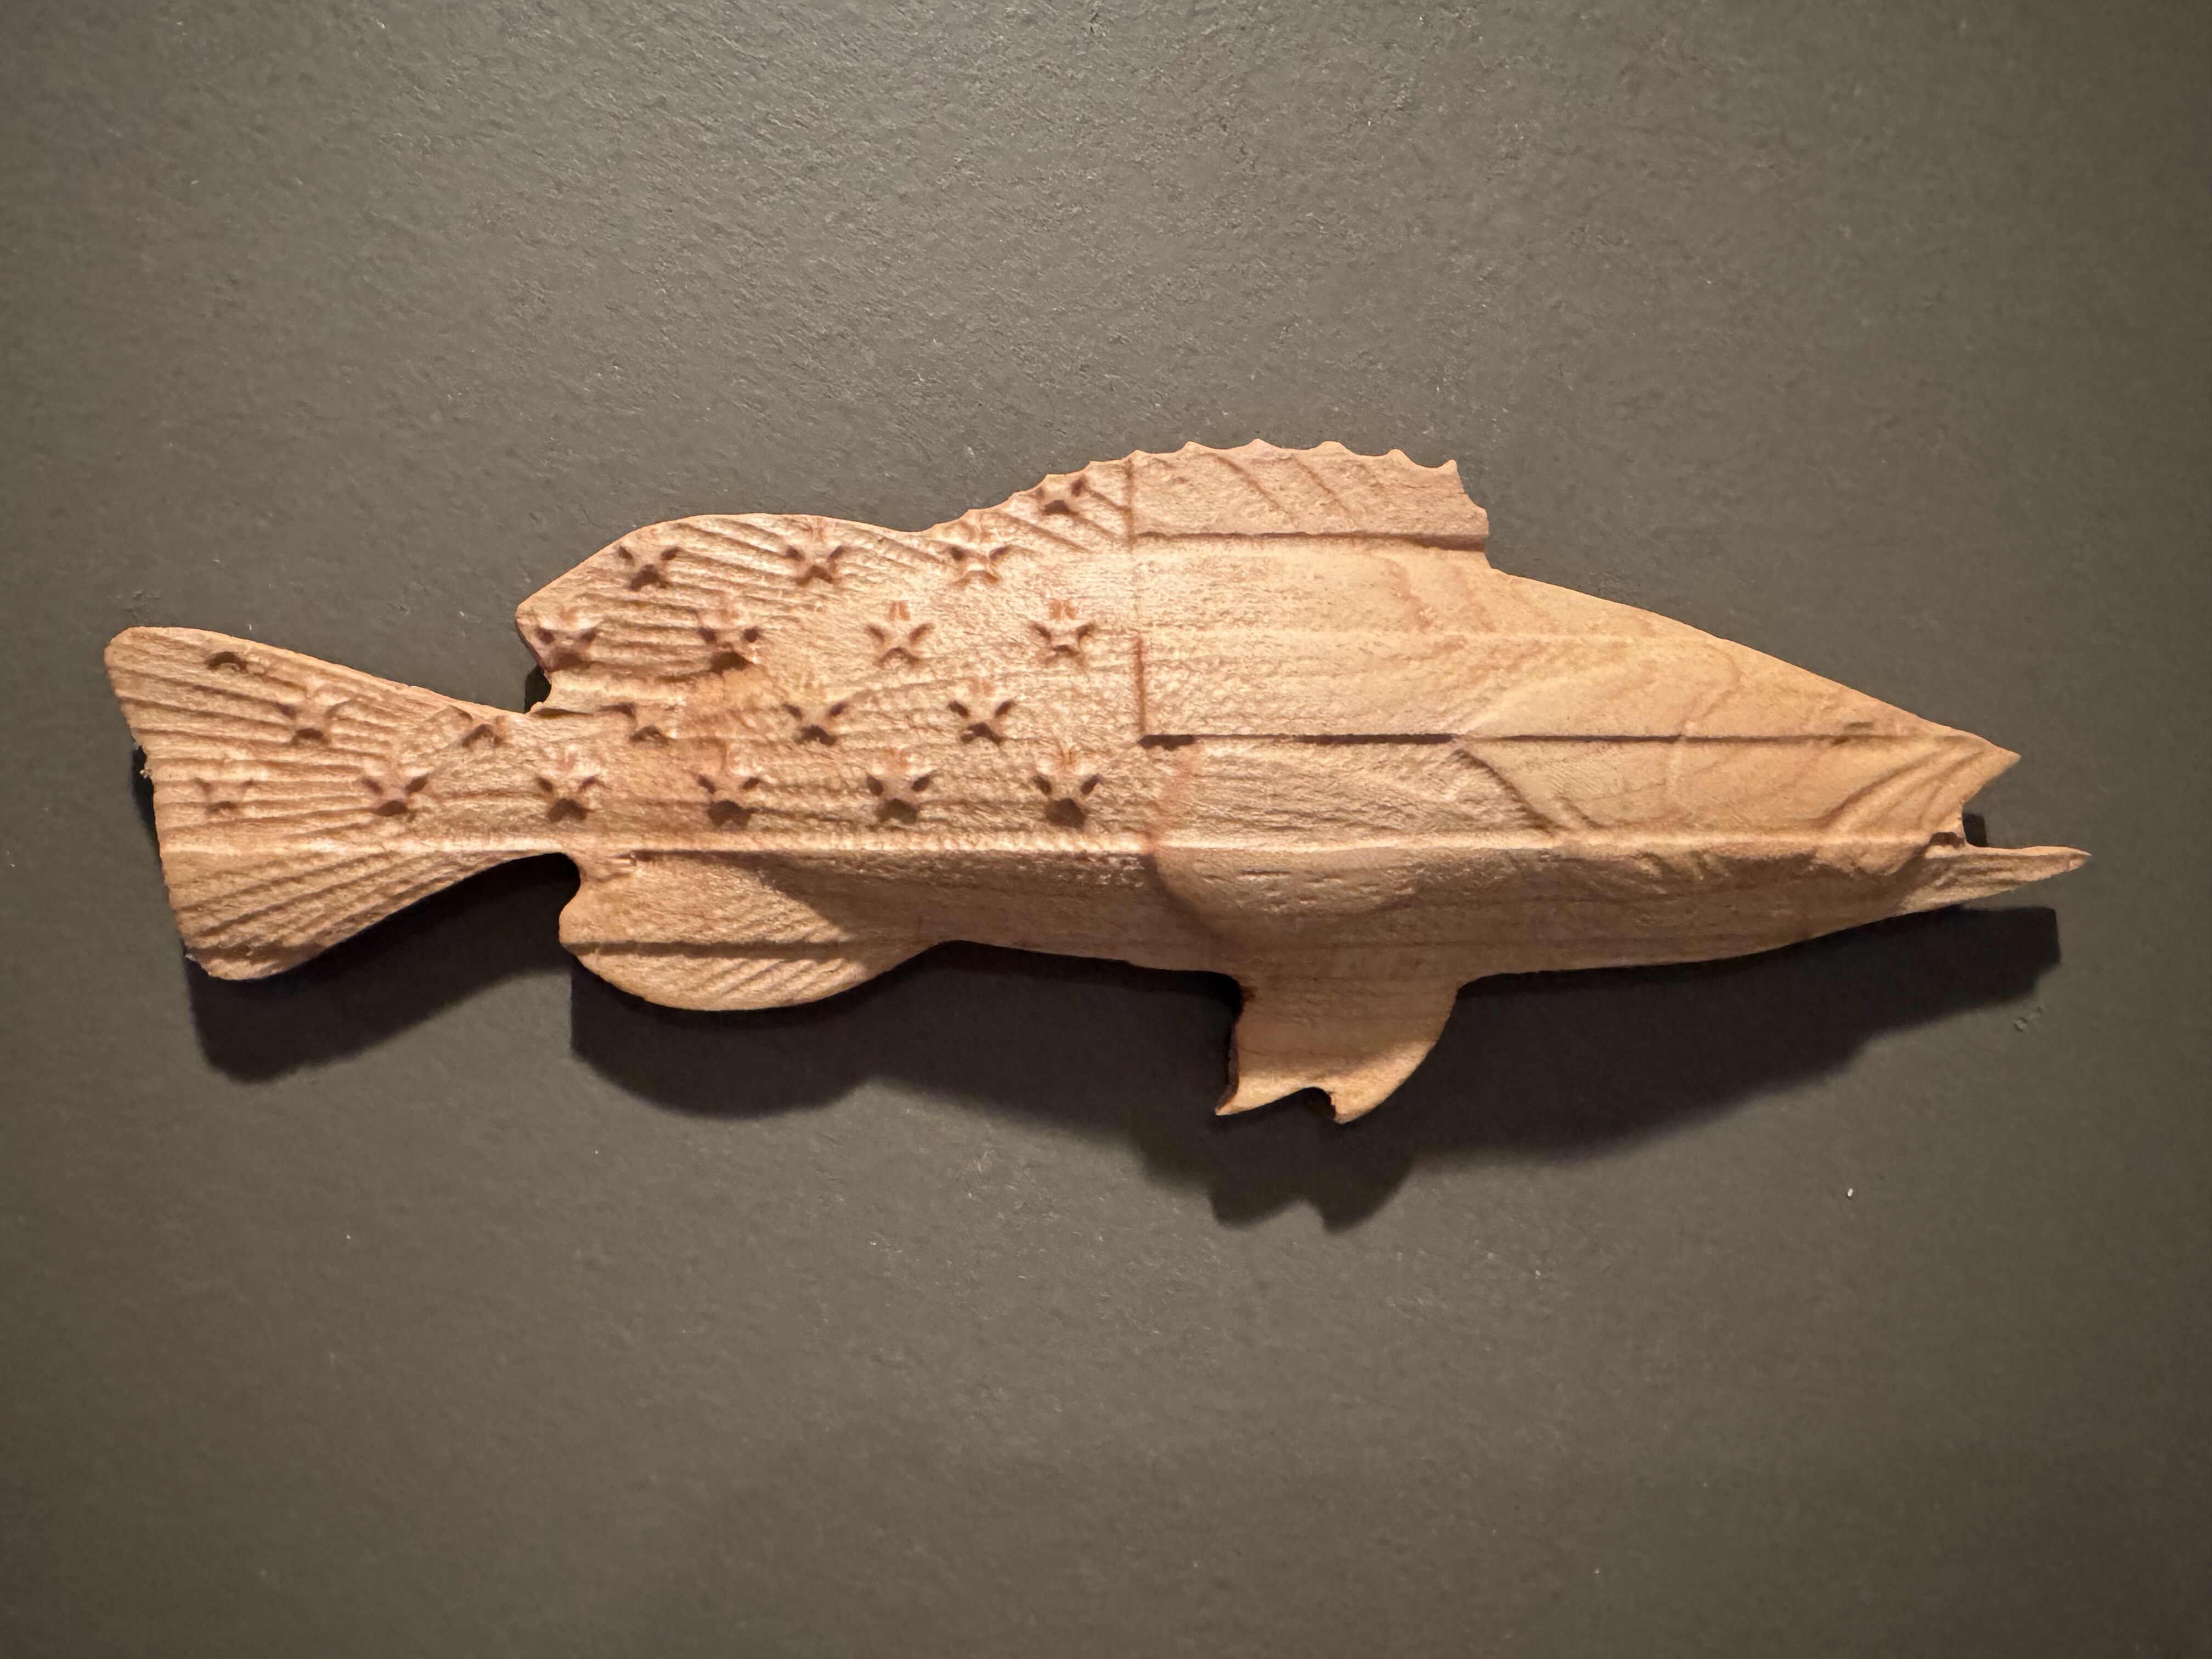
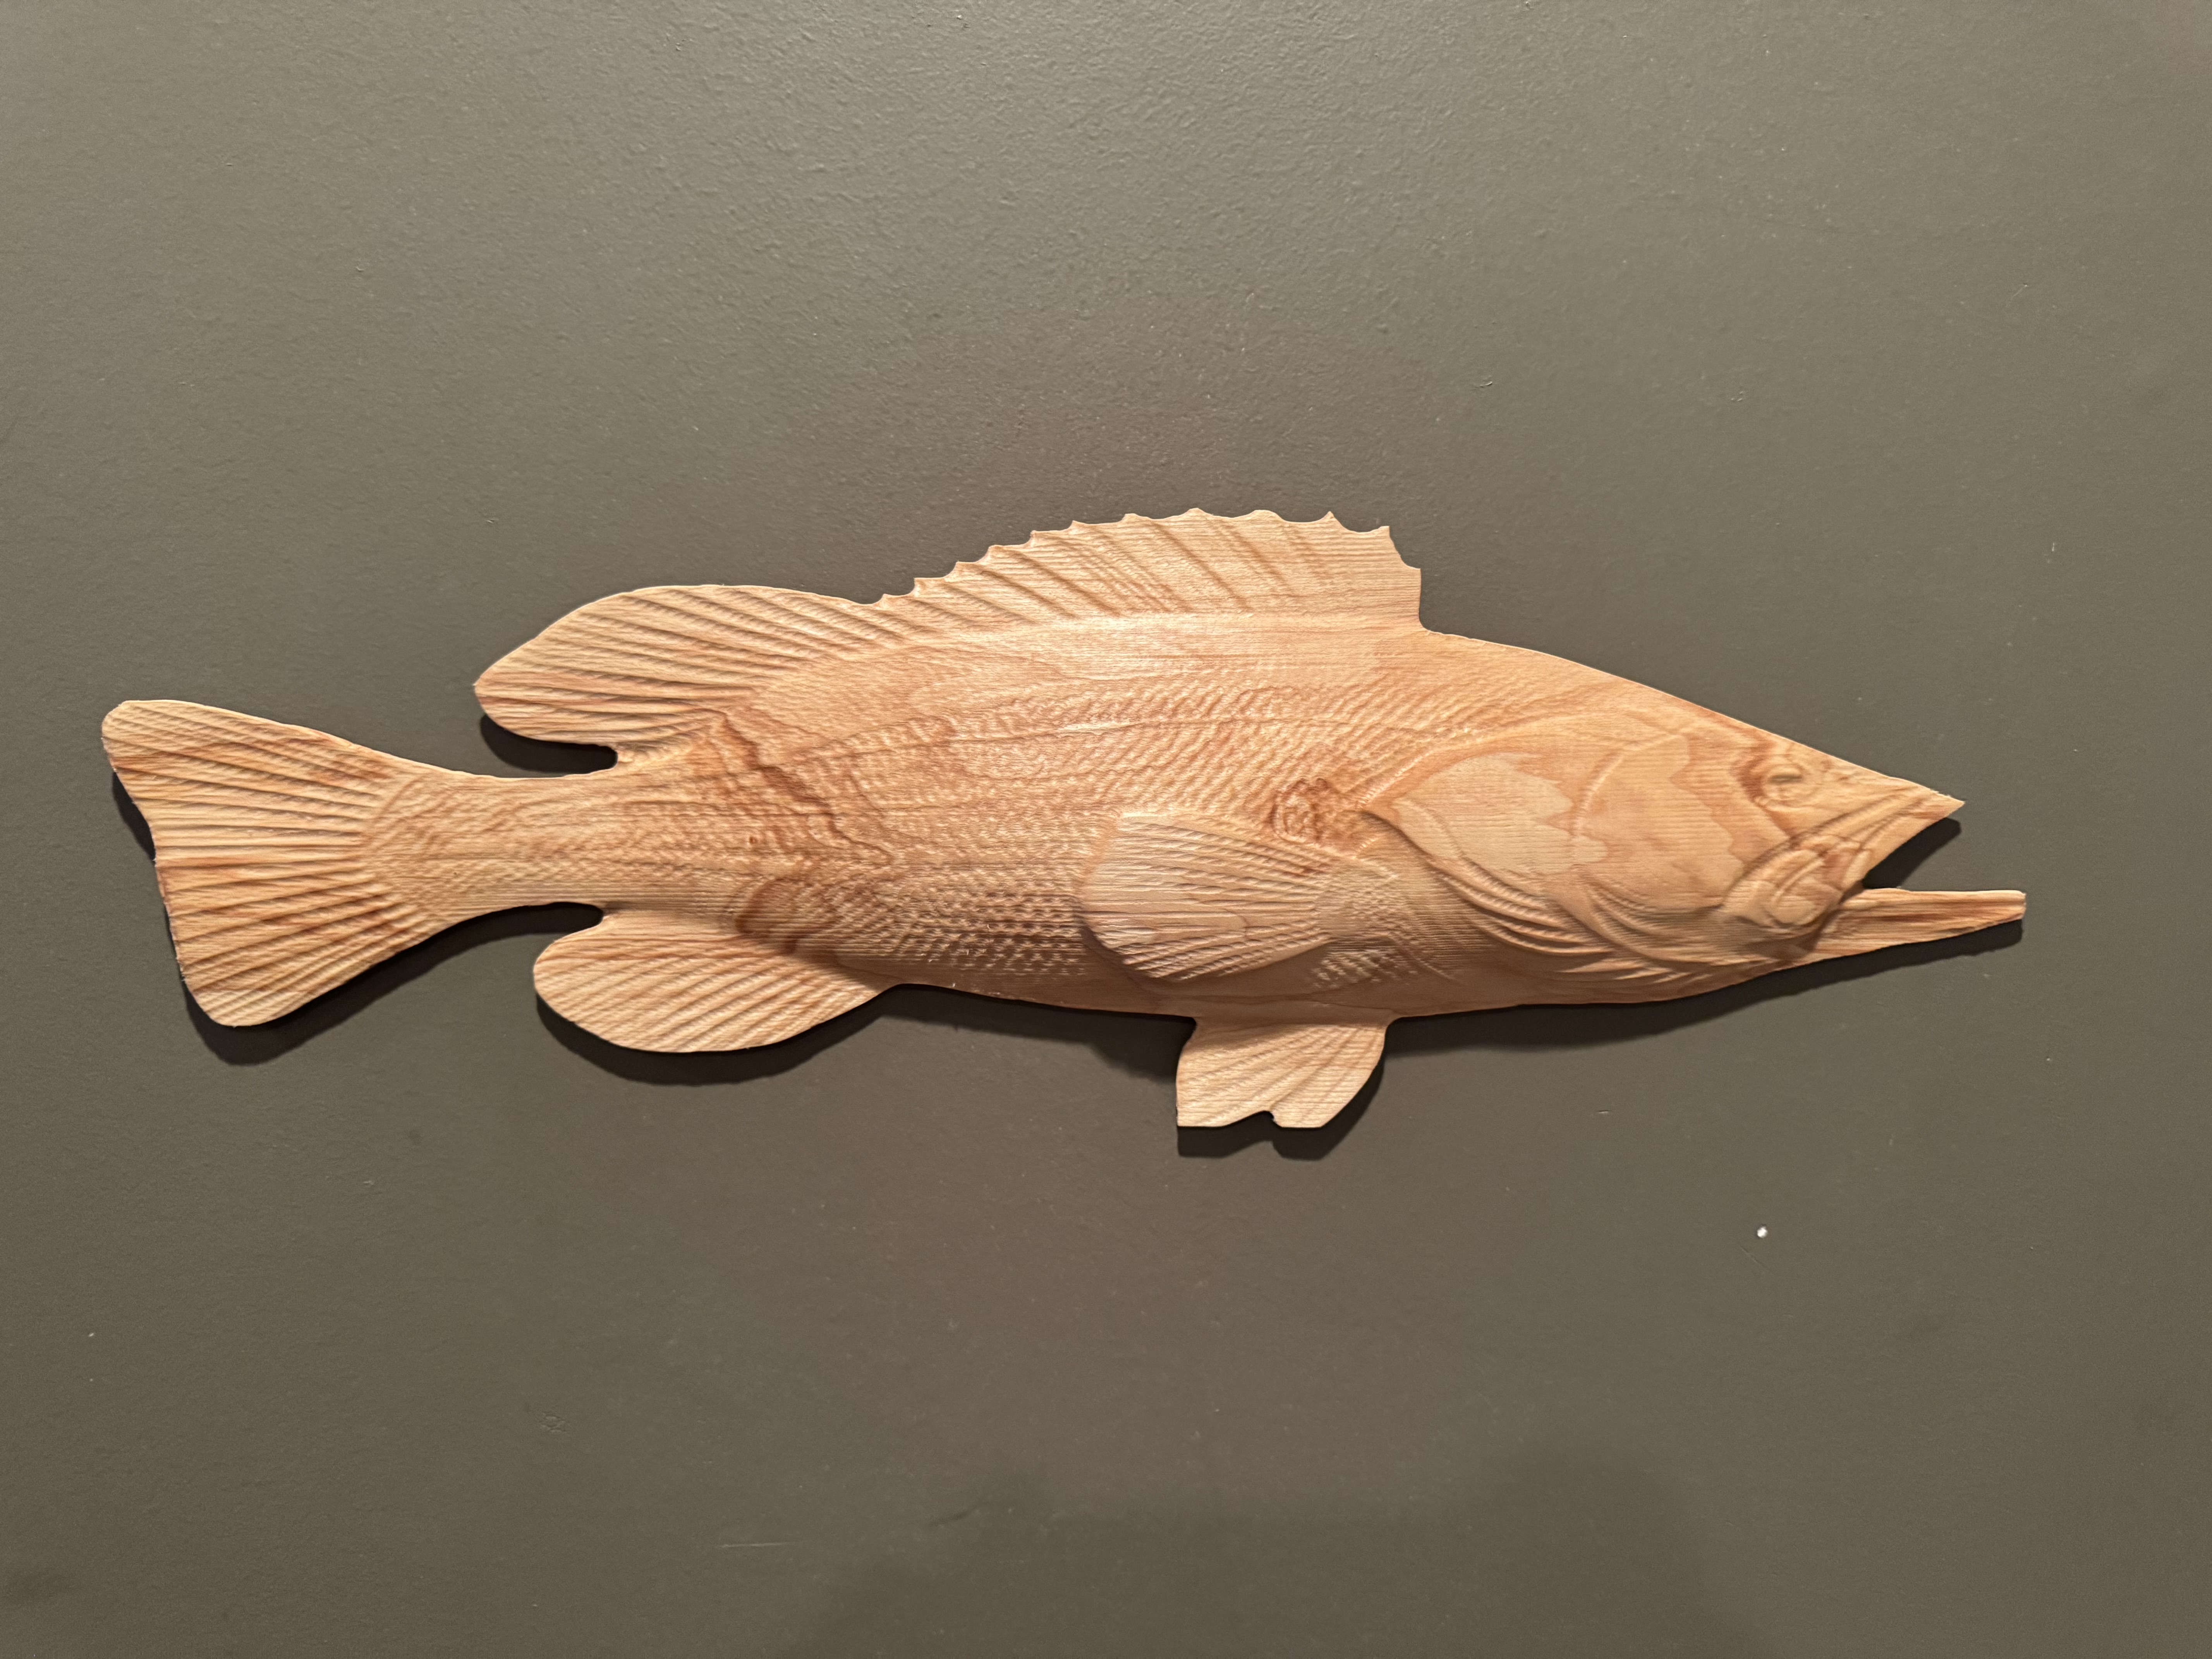
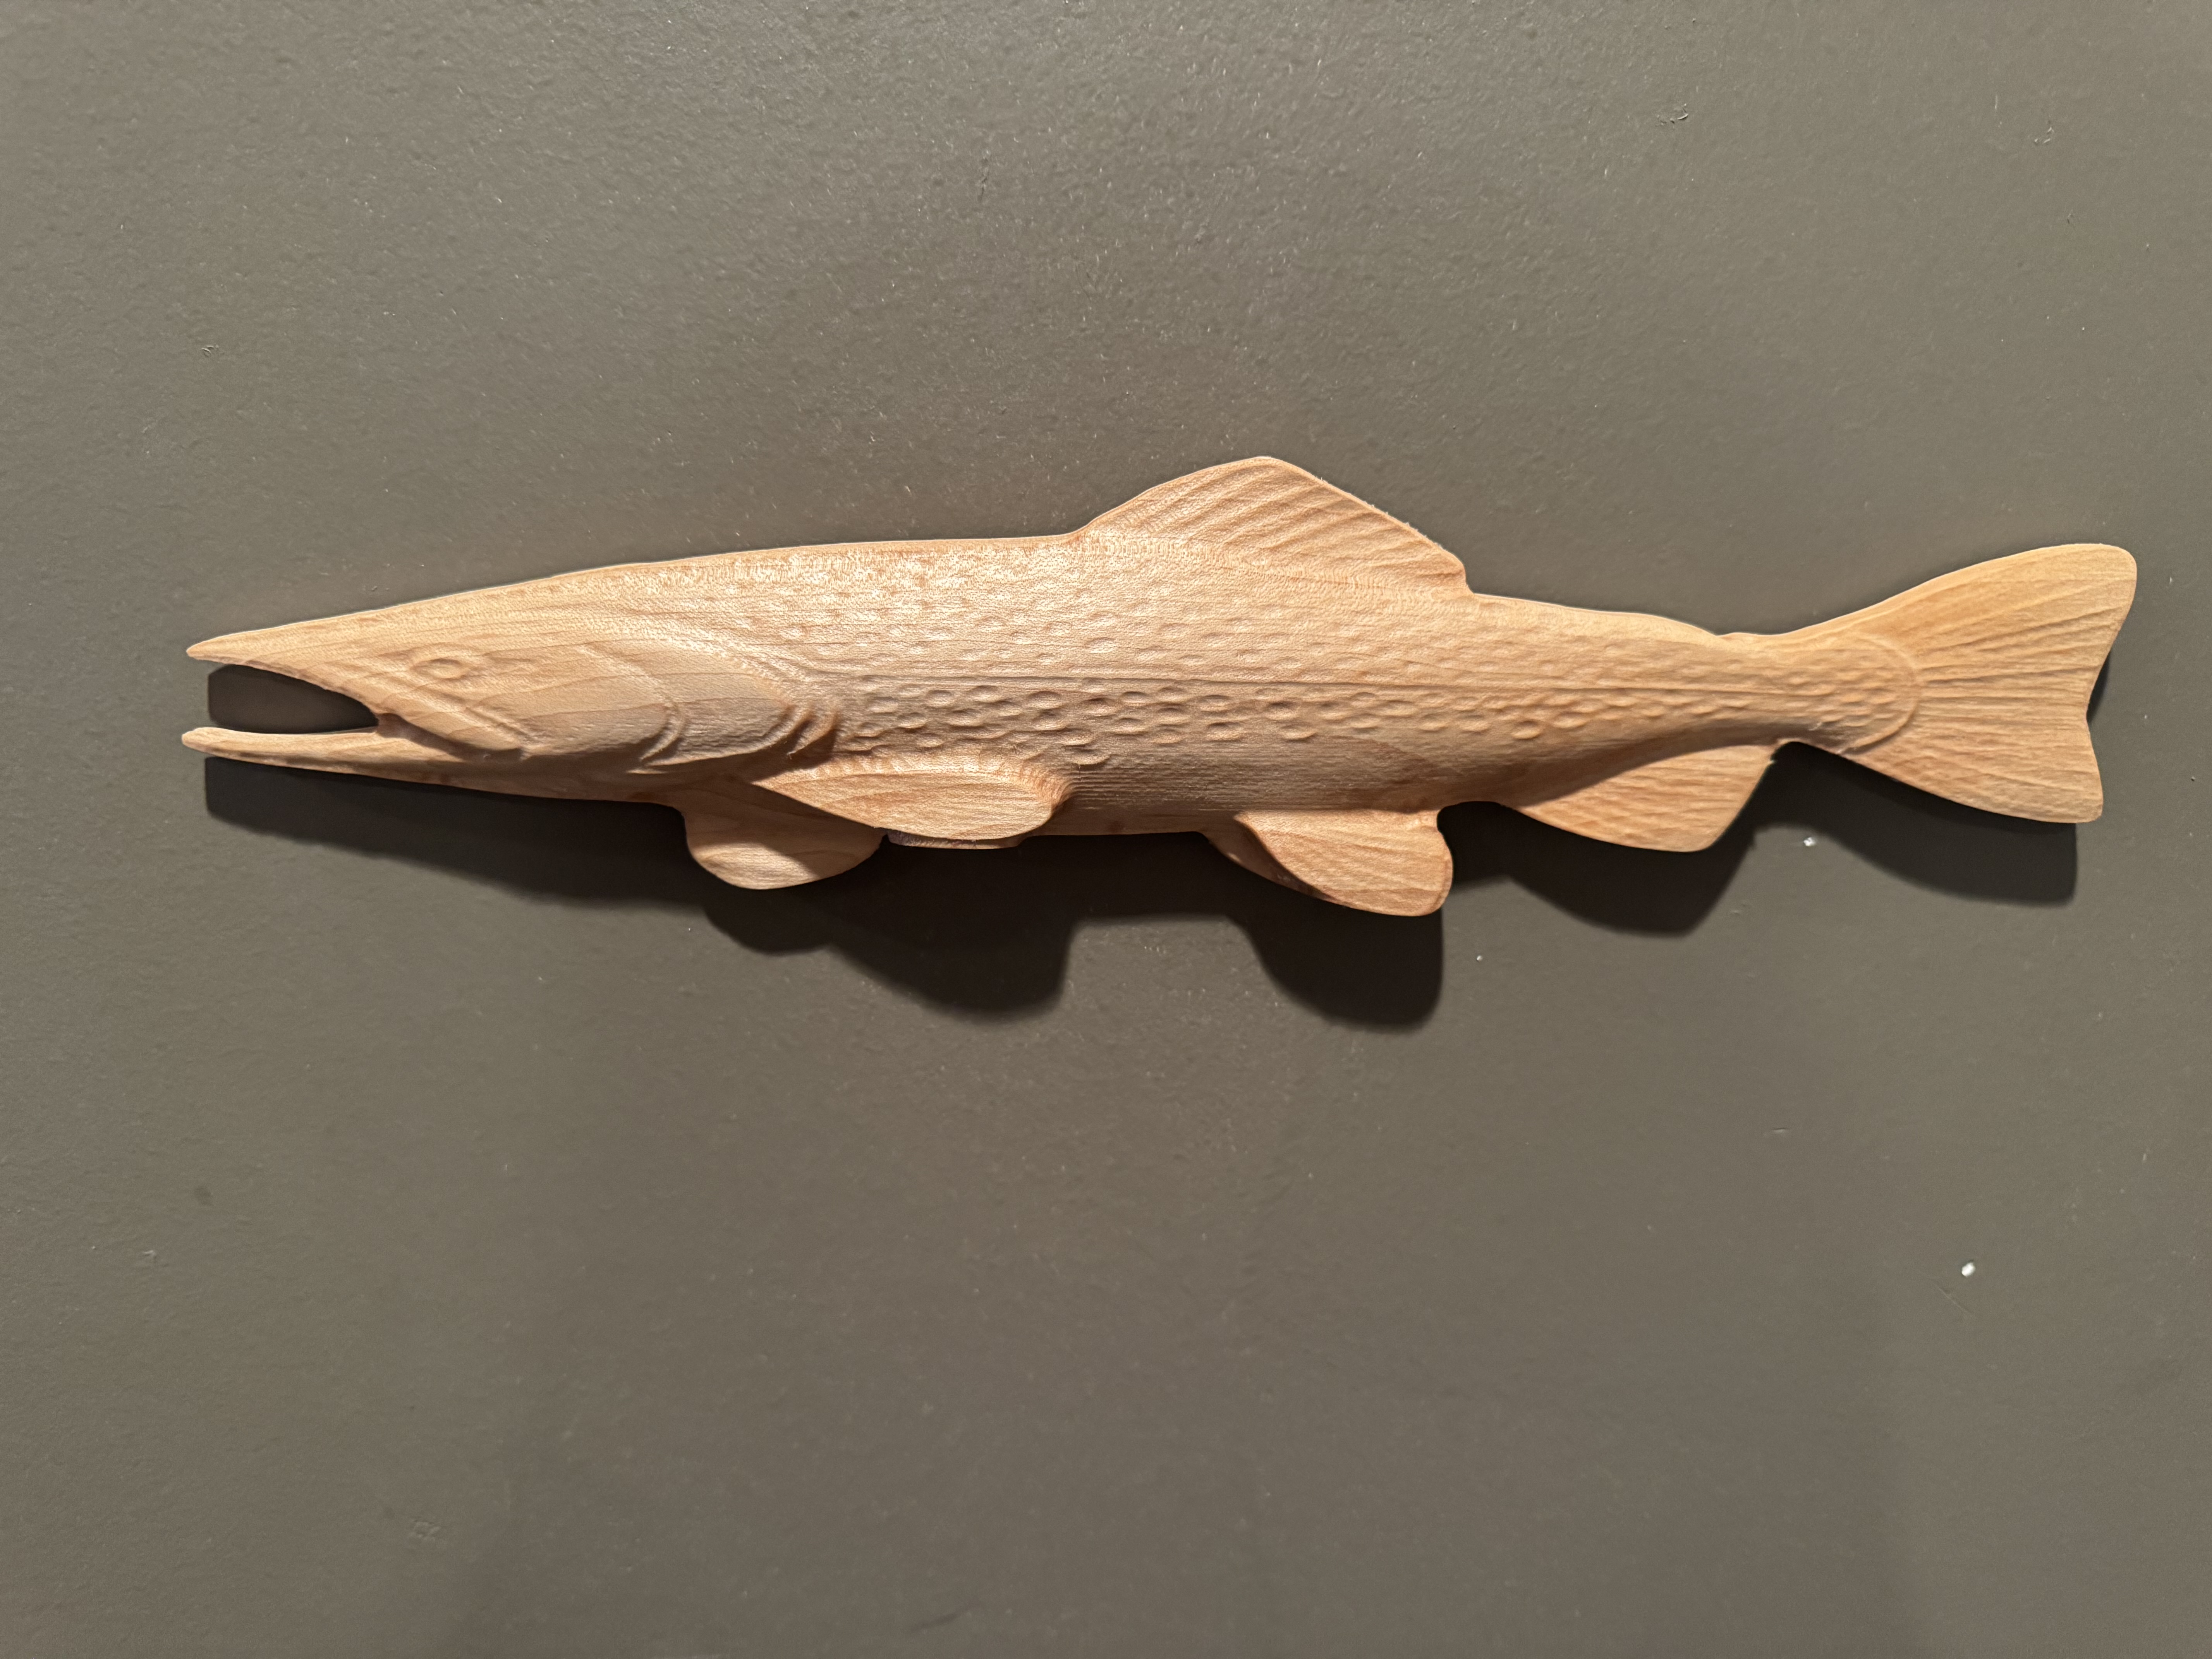
32 Likes
Nick they look really nice,out of curiosity what was the wood you used,it machined very well.
Thanks! I used some hard maple. Machines really well with some good details. For some reason I was getting some strings in my cuts clogging up my dust collection but that may be caused by me trying to push it a bit with speeds, never had that happen on other pieces of maple just this one board.
2 Likes
Love the fish designs. Did you design them yourself or did you purchase them from somewhere? I have been wanting to do some 3D style fish carvings and can’t find anything good enough that would get me to the rounded fish look. Everything that I pull up and try to work with it just comes up a chaotic mess that is nothing looking like anything close to a good 3D rendering.
That’s just if you don’t mind sharing. If you purchased the designs, I dont mind making the purchase to support the designer.
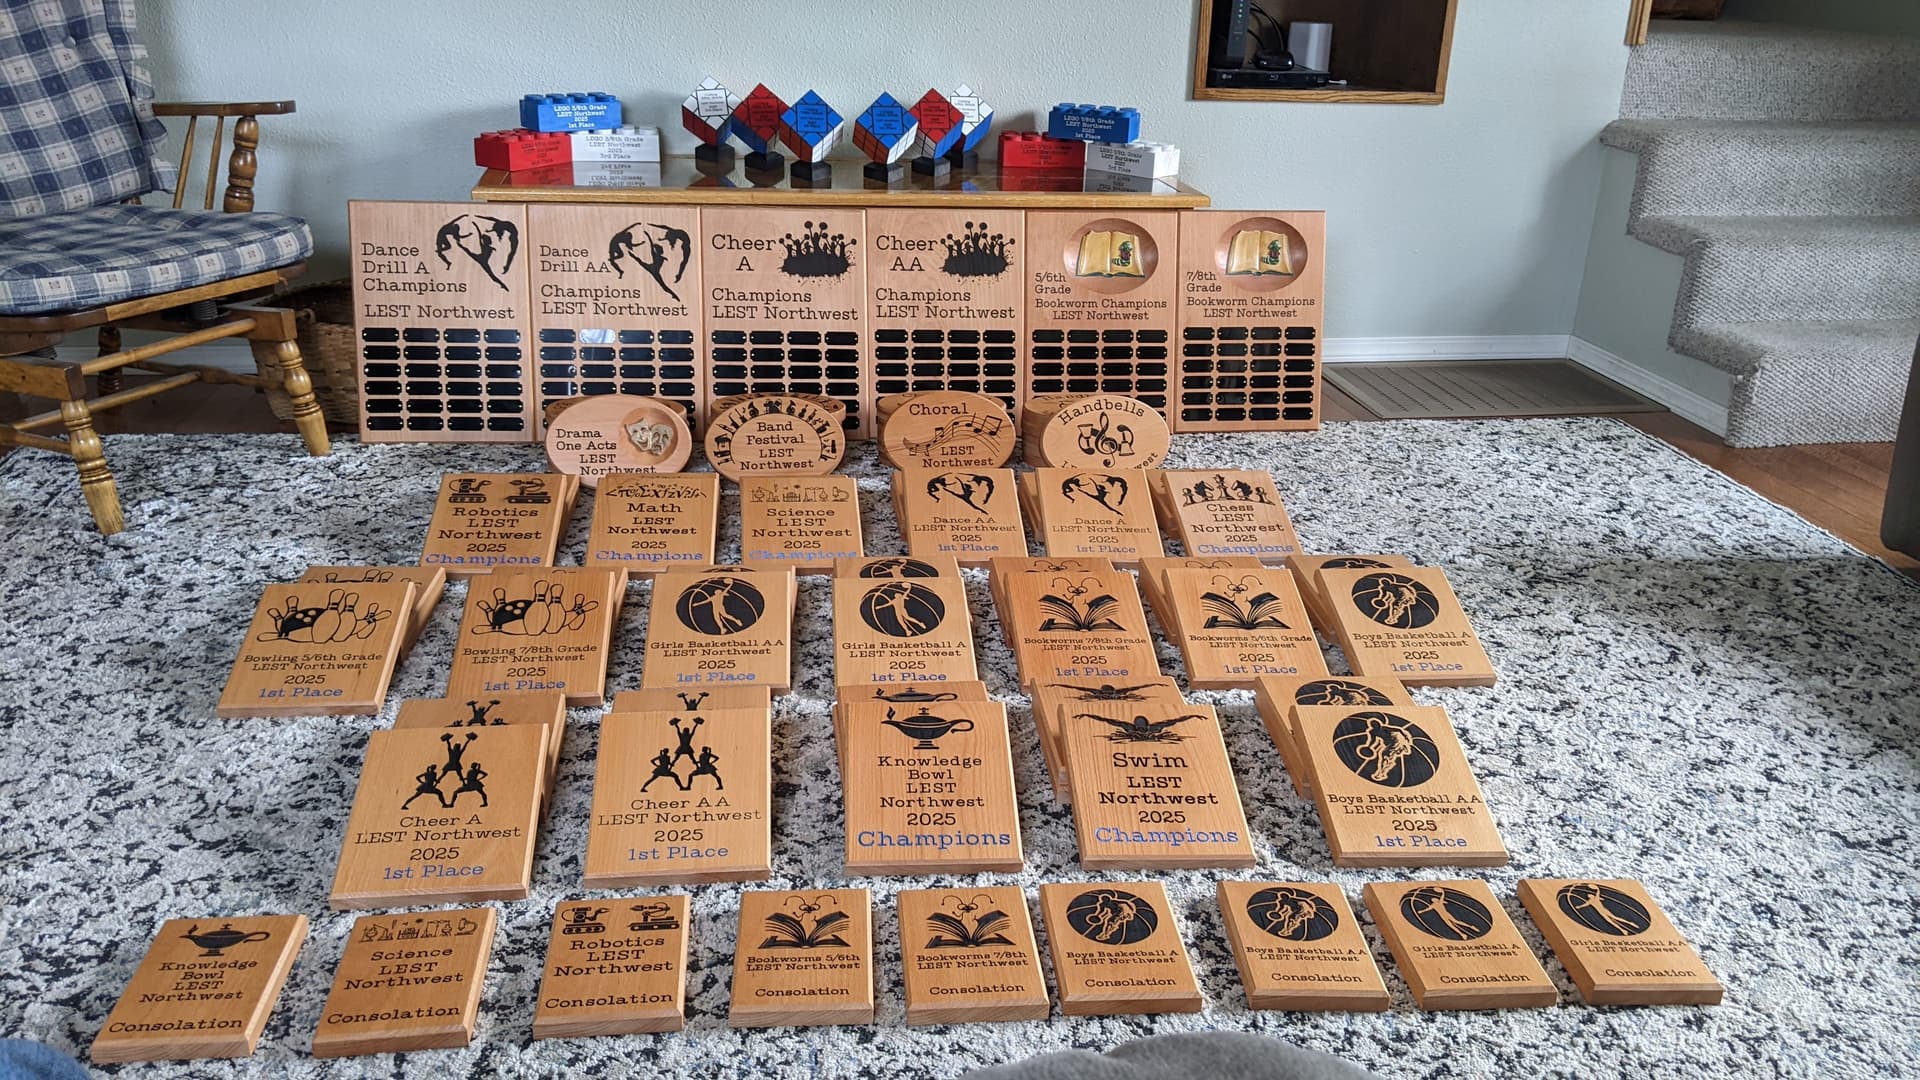
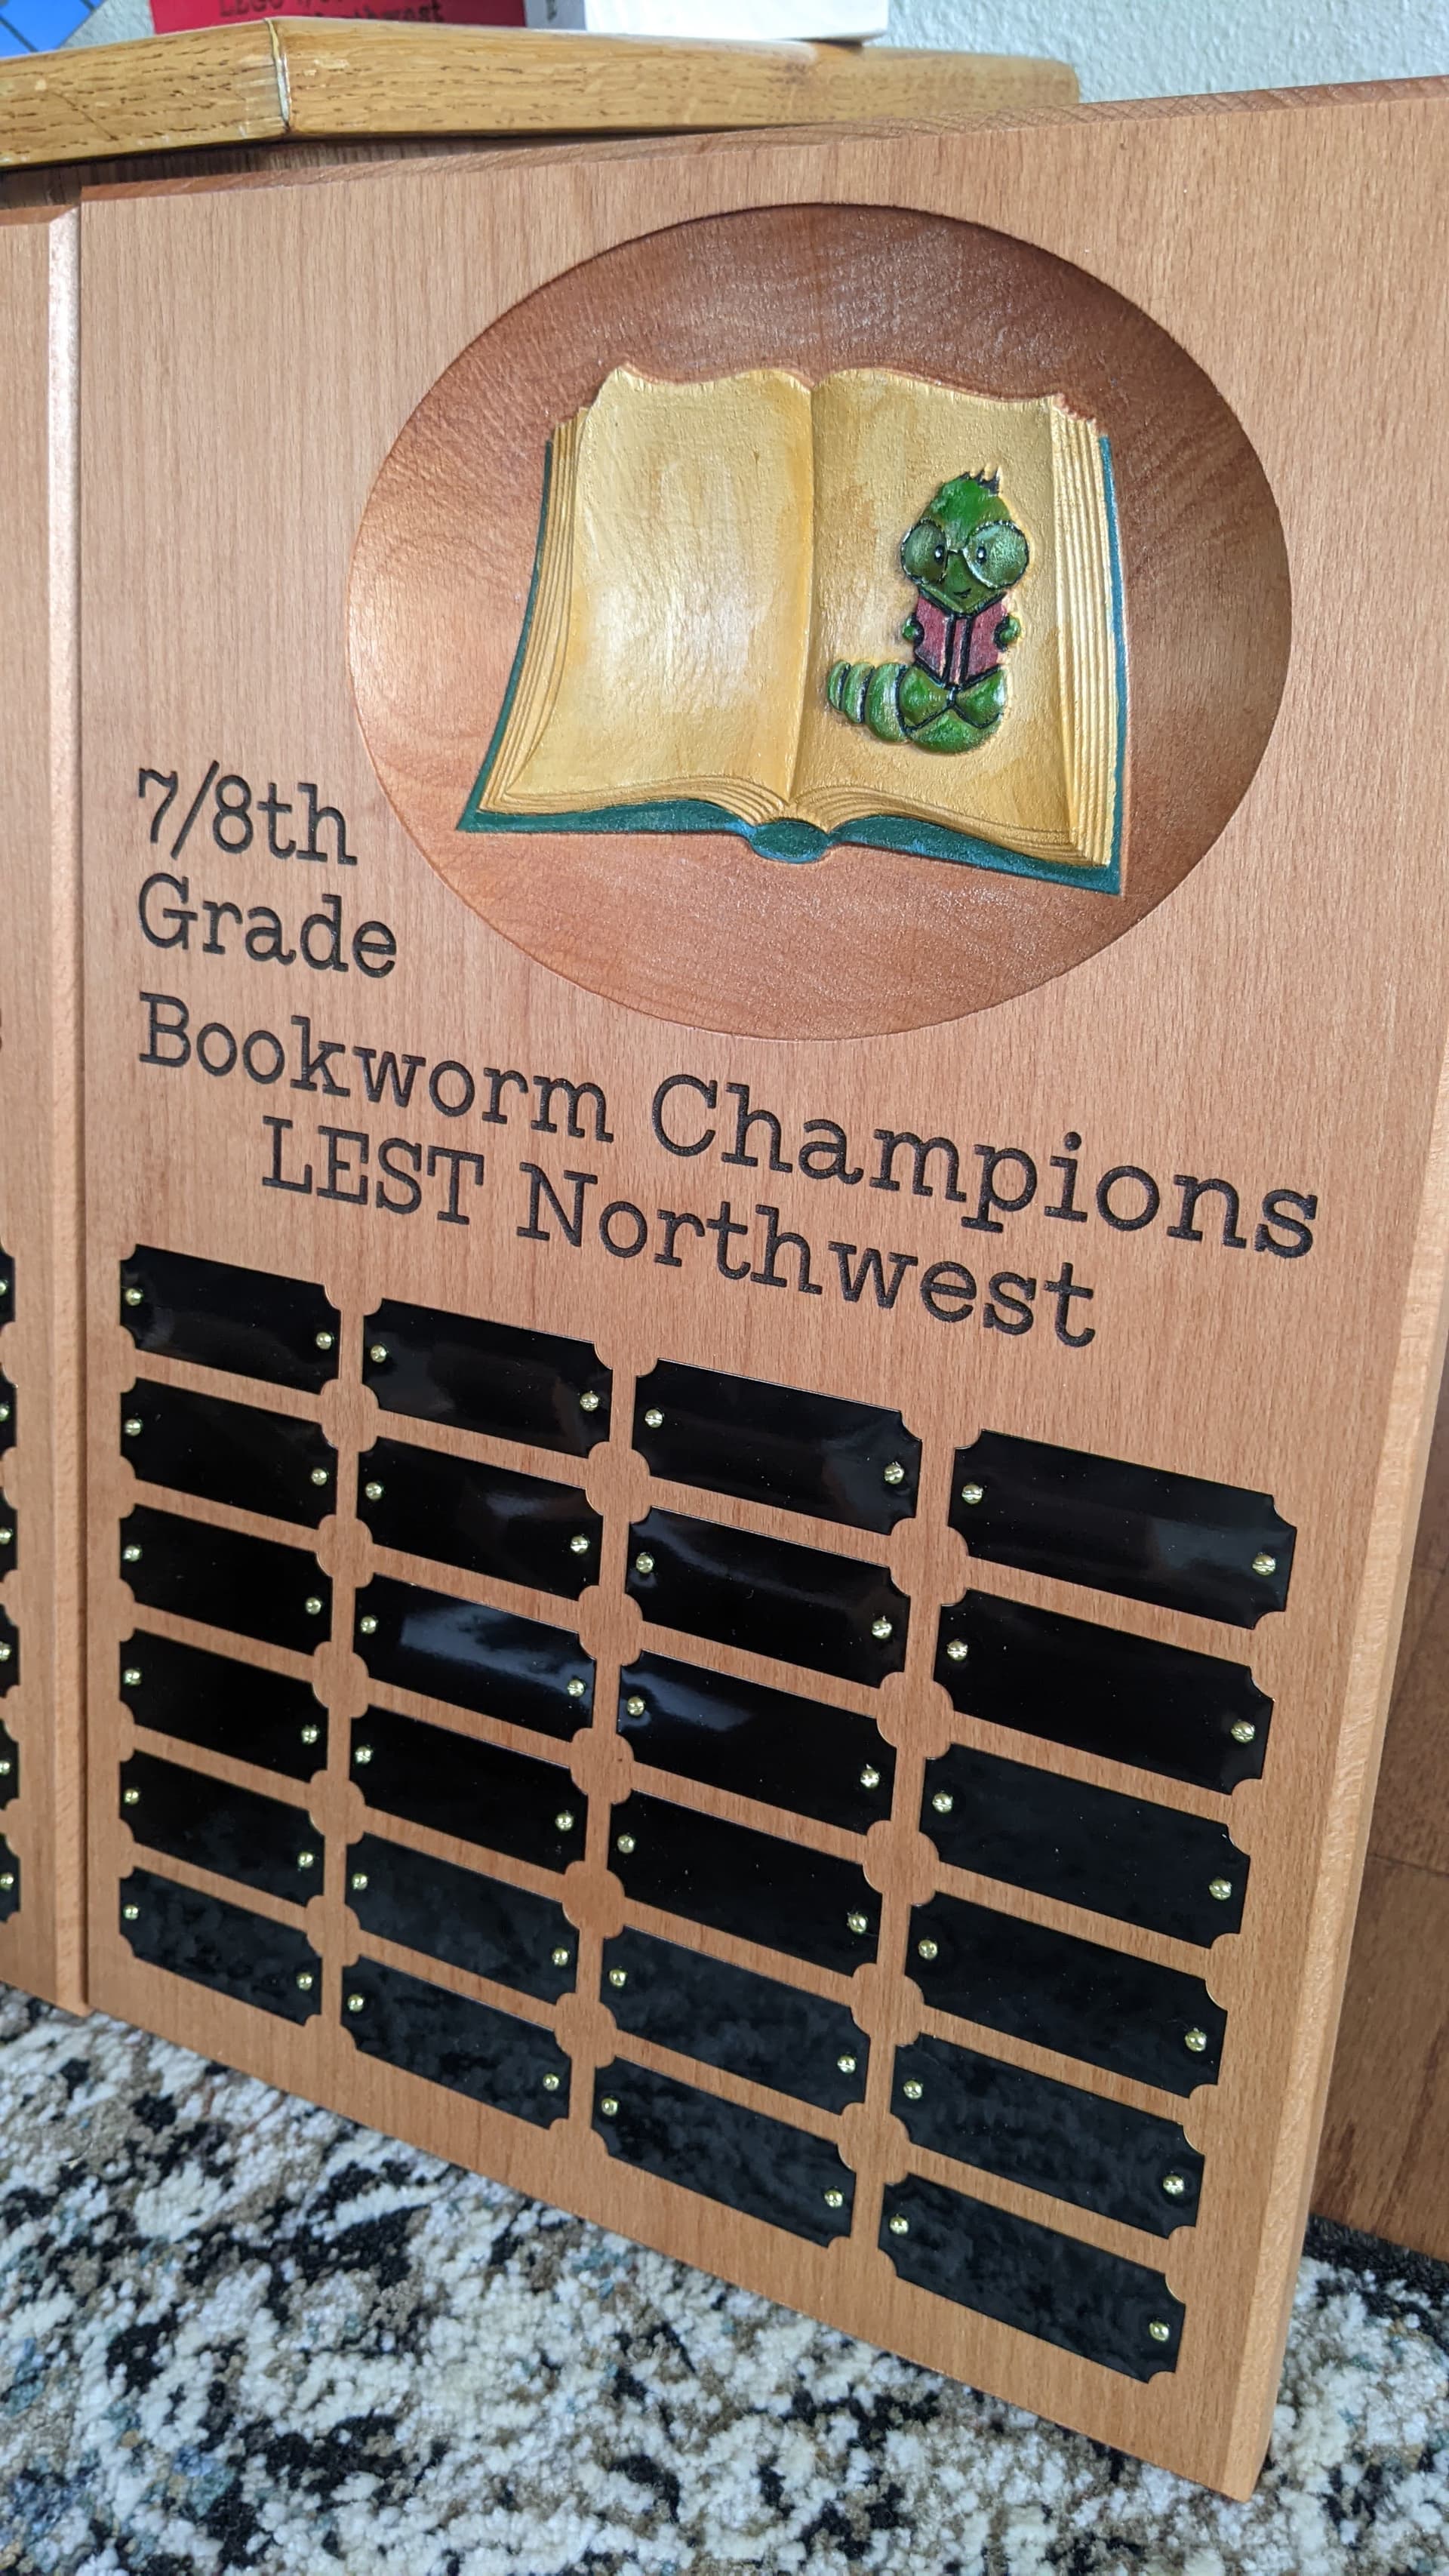
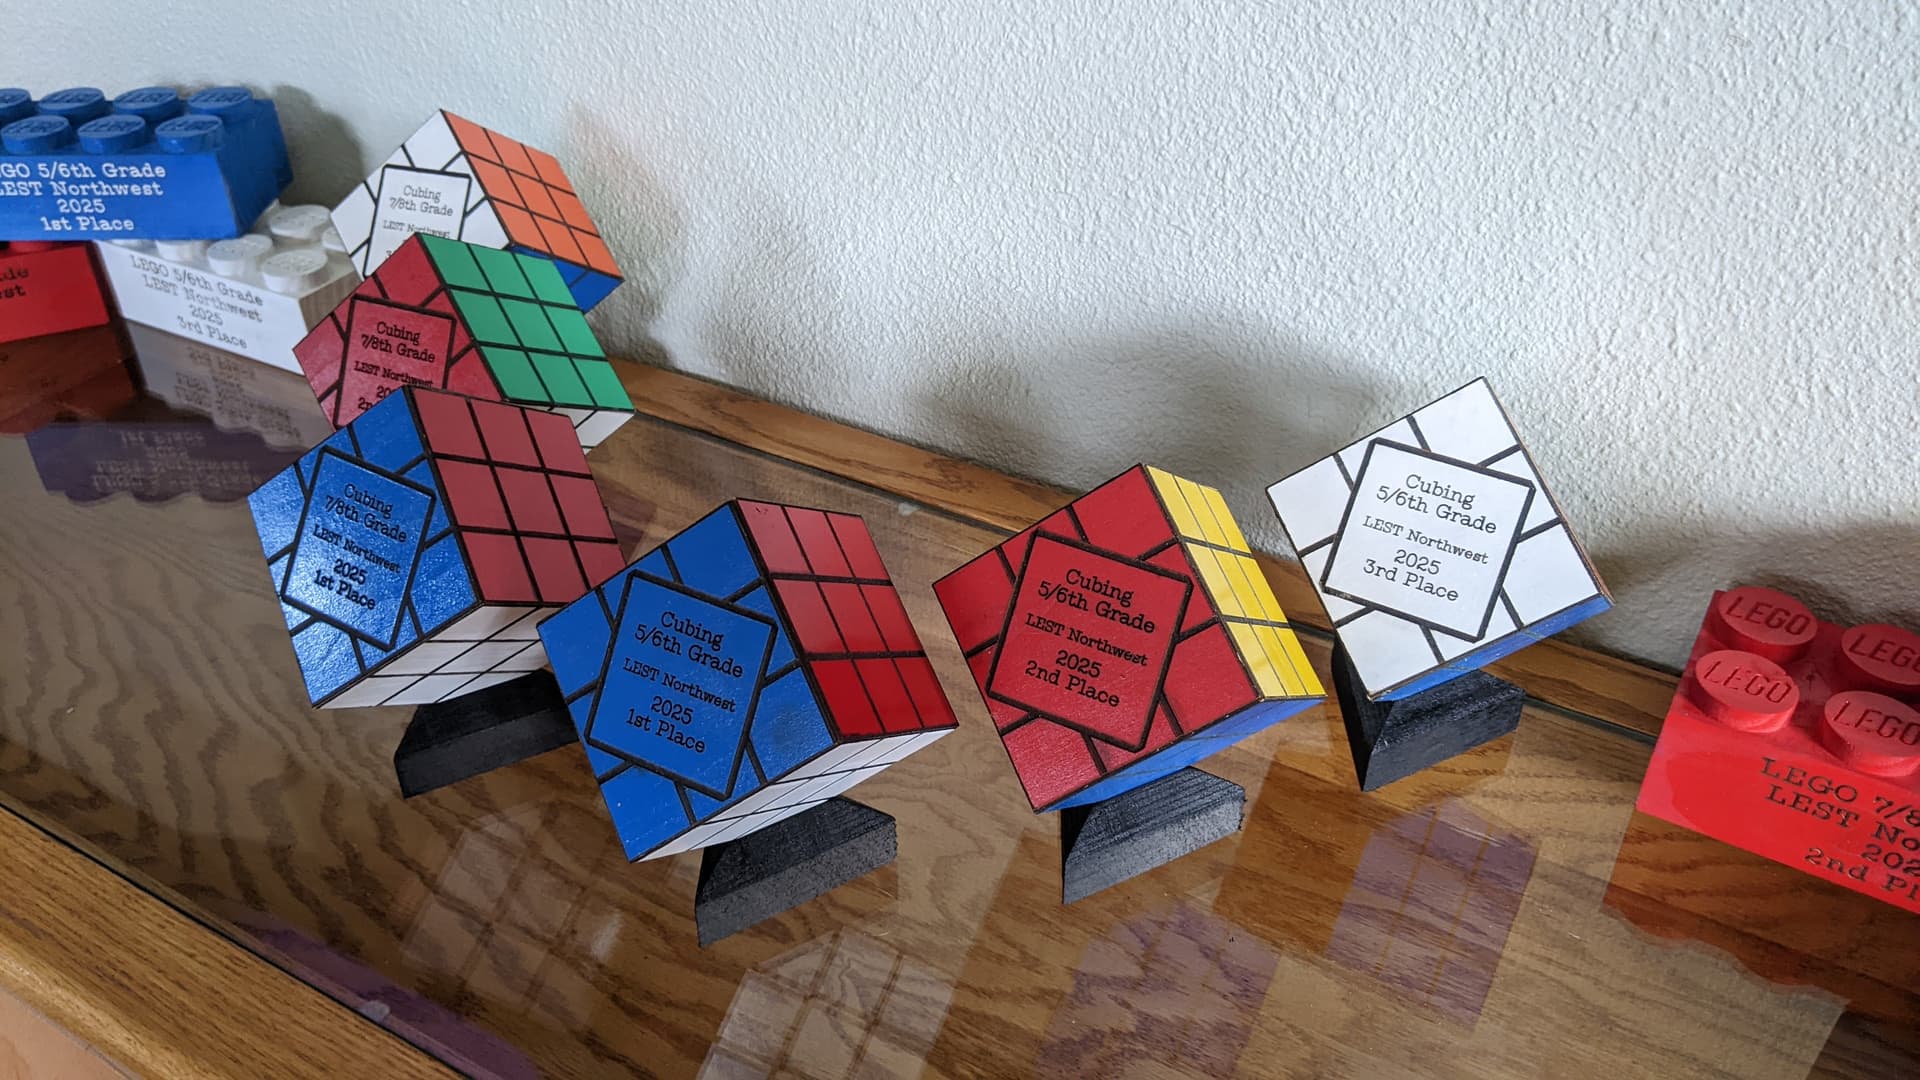
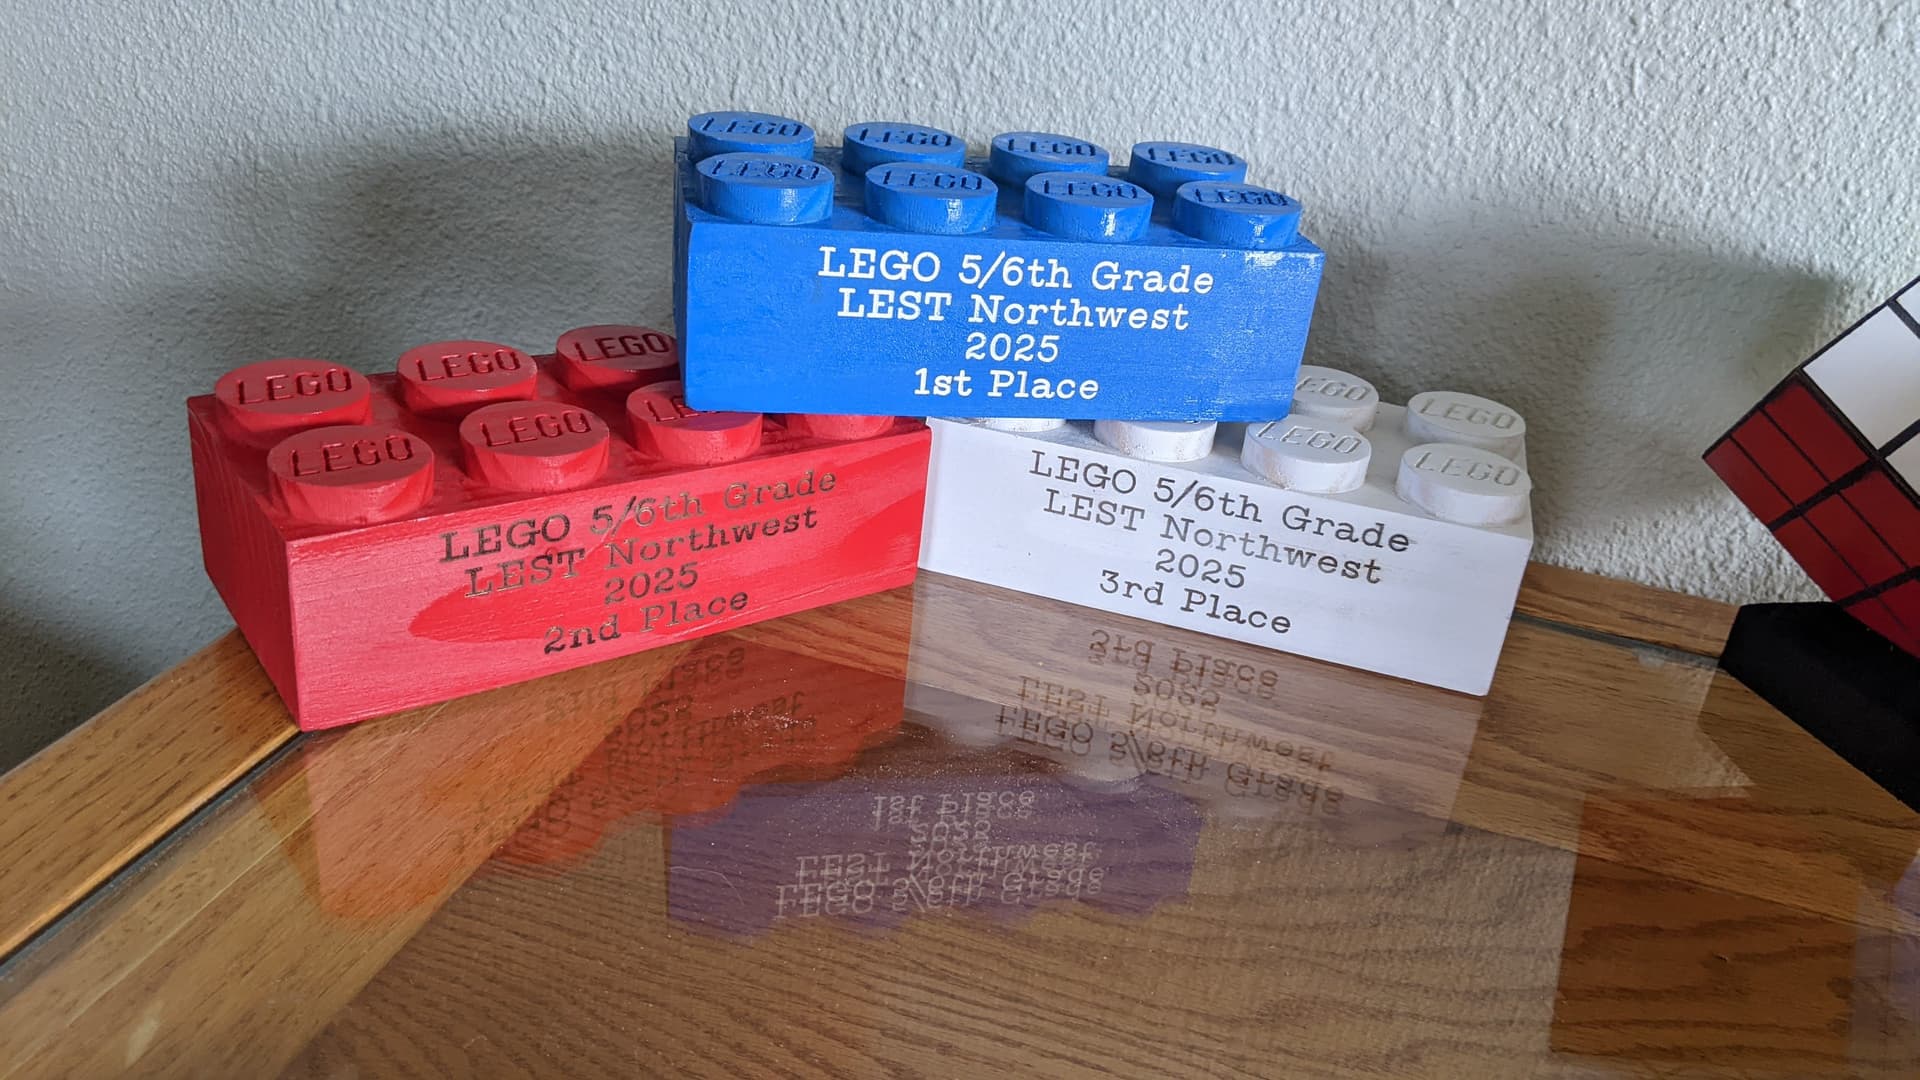
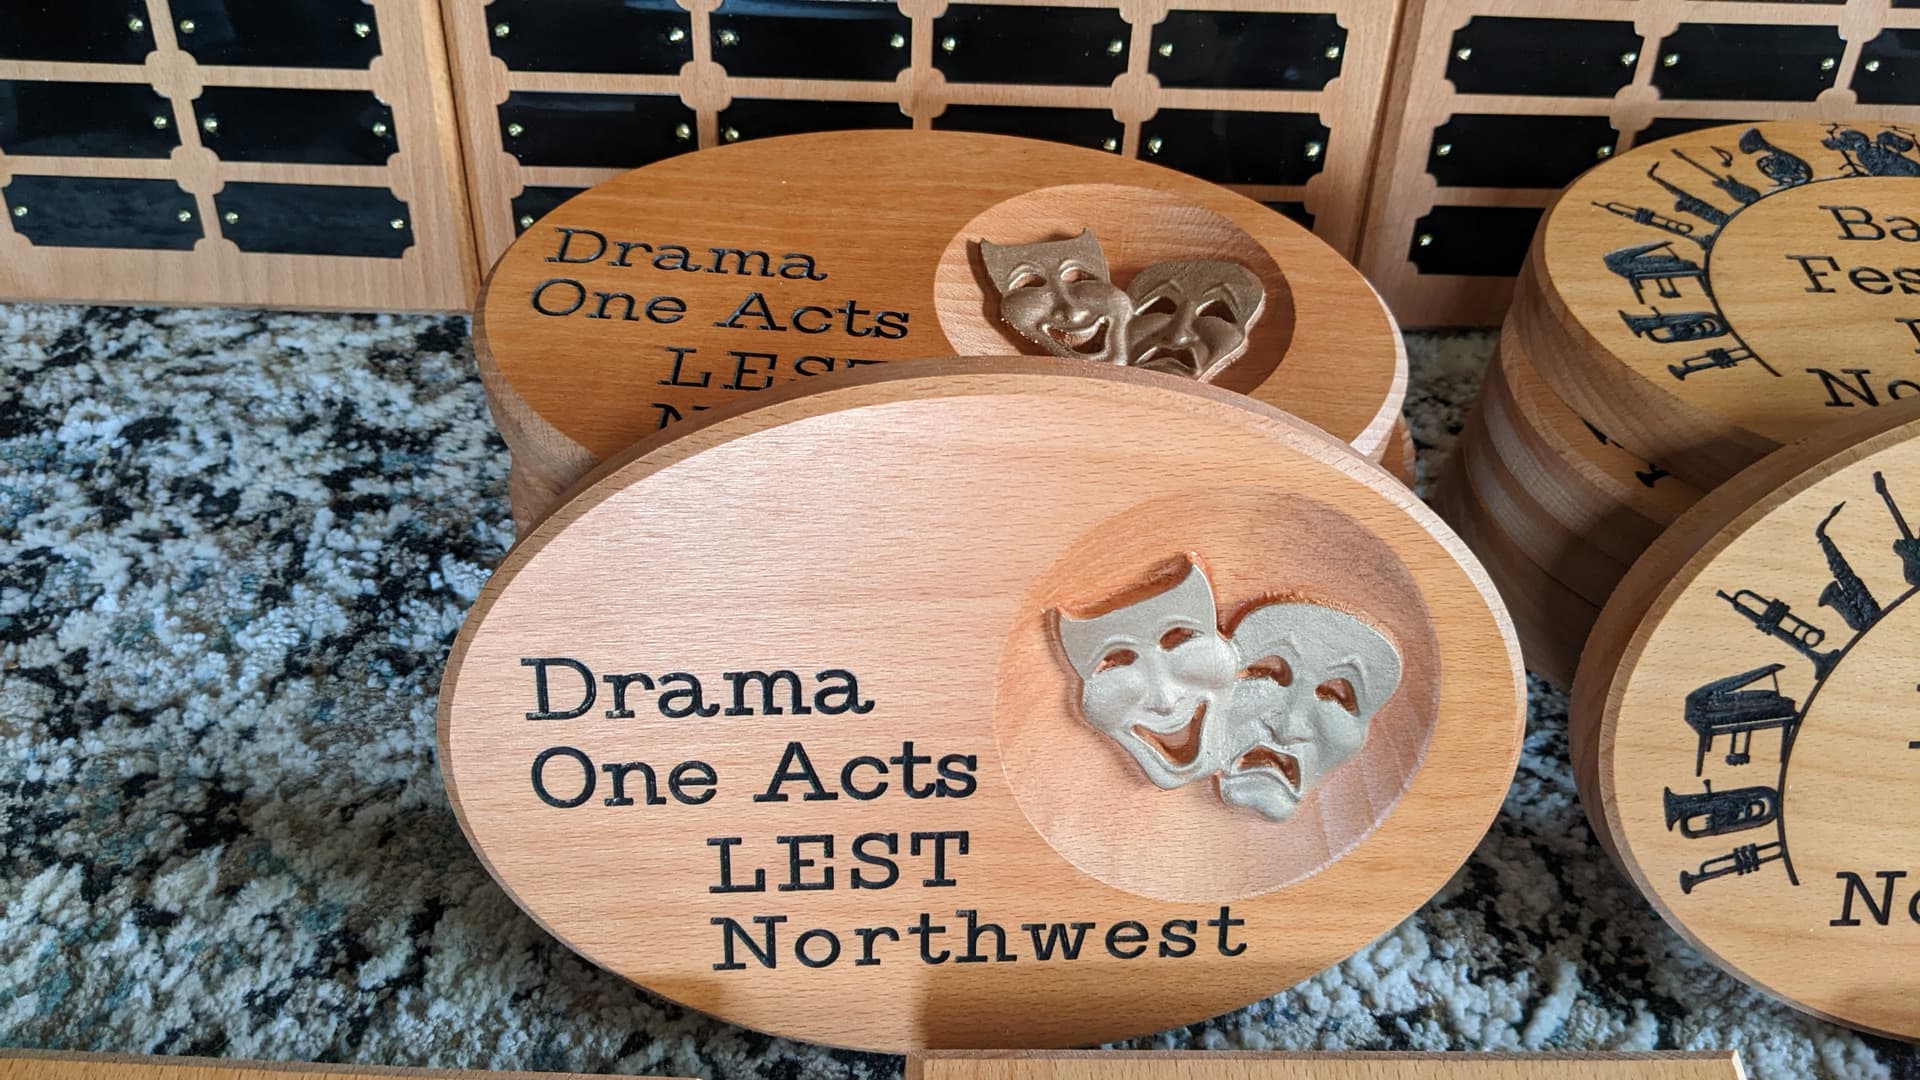
This is my 3rd year making plaques for a large regional tournament. Each year I find out ways to produce a better product and be more efficient with my time. The plaques are made from beech. I used a combination of my Shapeoko 5x5 and also using my 14w and 44w Jtech lasers in some of plaques. In previous years I’ve used paint (blue, red, and white) for filling in the 1st, 2nd, and 3rd Place engravings, but I have grown to like the look of using powder coat for this part. 105 plaques and about 81 hours of labor/machine time.
Here is the process that I have moved to and found to be most proficient and ensuring consistent quality plaques:
For most plaques I:
- Cut each plaque to size, bevel, sand
- Laser images and text and masking only the 1st,2nd, 3rd place. I do 3 plaques at a given time. I don’t have to spend as much time securing the plaques to make sure they sit perfectly flat on the bed to get a great result since I’m using a laser for this part (PREVIOUSLY I used my cnc router, but there were higher chances of chip out and uneven carves when it came to the very fine details). I would stain and laquer and mask each plaque completely, and then I would airbrush the plaques with black and either blue, red, or white.)
- Powder coat the 1st, 2nd, or 3rd Place (I don’t have to deal with any bleeding as with paint)
- Remove masking around the 1st, 2nd, or 3rd and sand as needed if powder coat got on the plaque in some places I didn’t want it to go. The powder coat sinks down just enough so the sanding doesn’t hit the powder coat in the engraved area.
- Stain and laquer finish. The powder coat is not effected by the stain.
31 Likes
That looks great! Where do you get the PVC board?
In my area Lowe’s stocks trim boards that are smooth on one side and woodgrained on the other.
Home Depot stocks those plus half sheets and both are available with smooth sides. Although I had to dig through the stack since they had the smooth ones mixed with the ones that have wood grain on one side.
1 Like
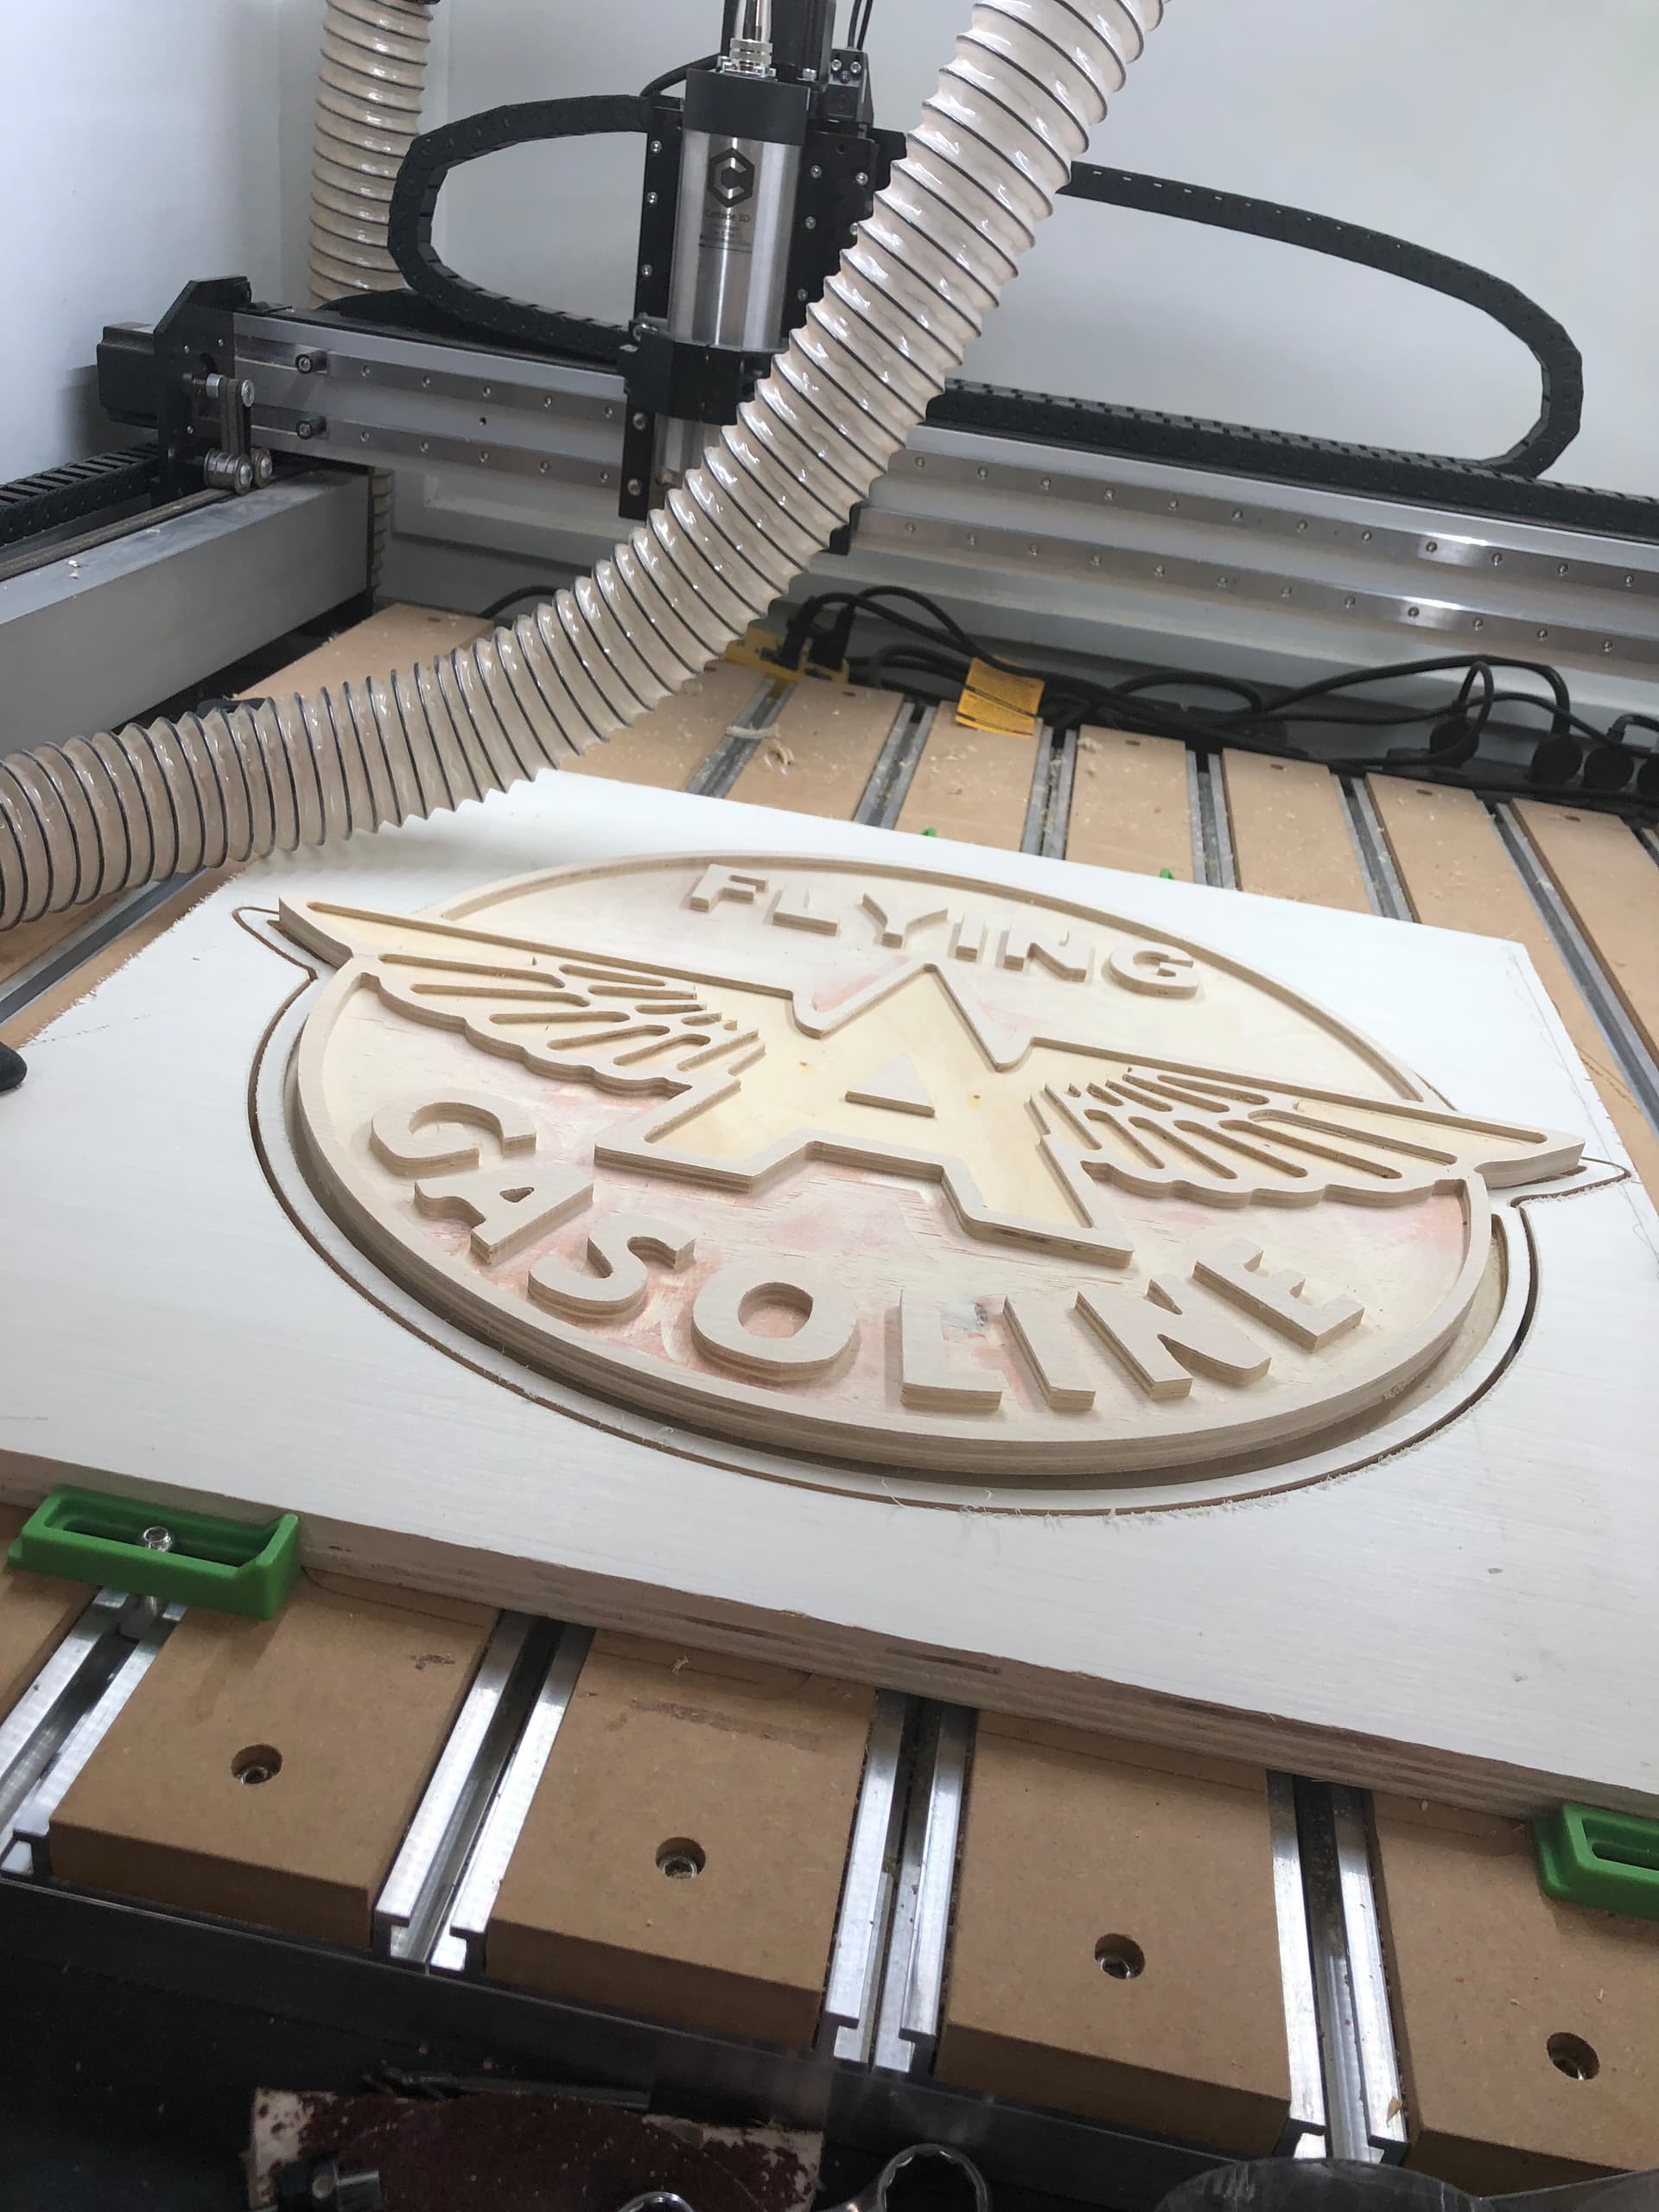
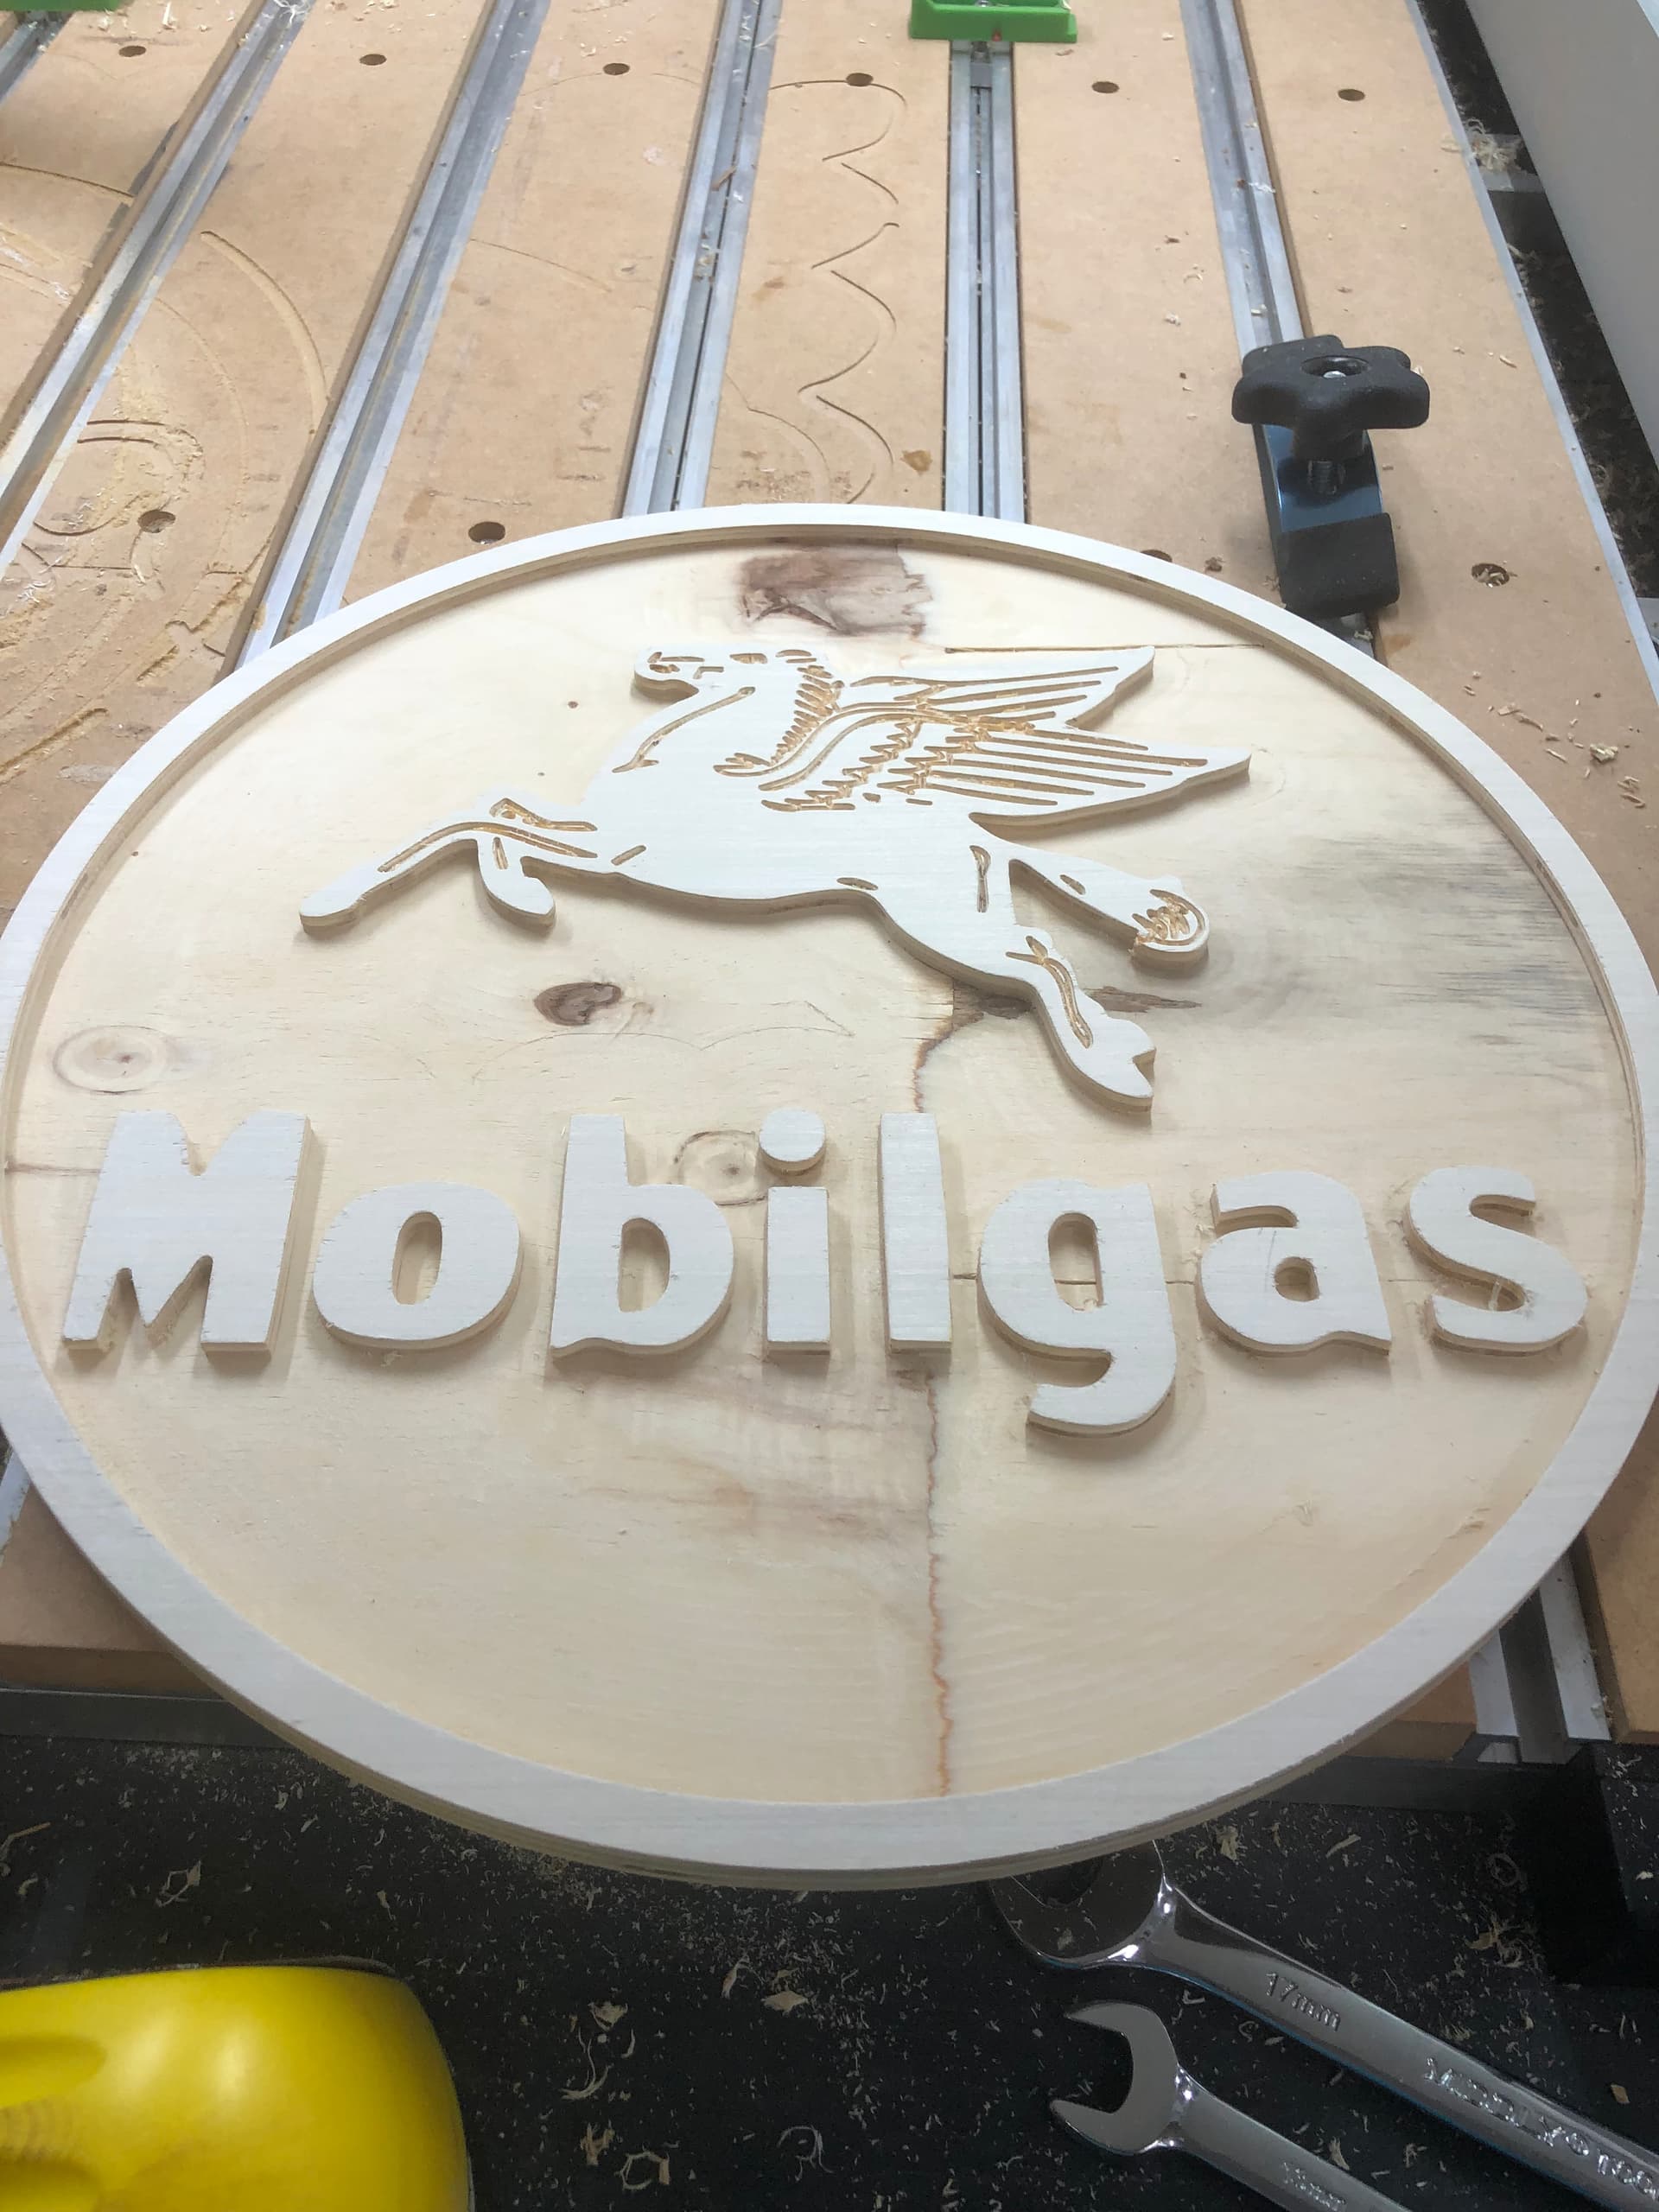
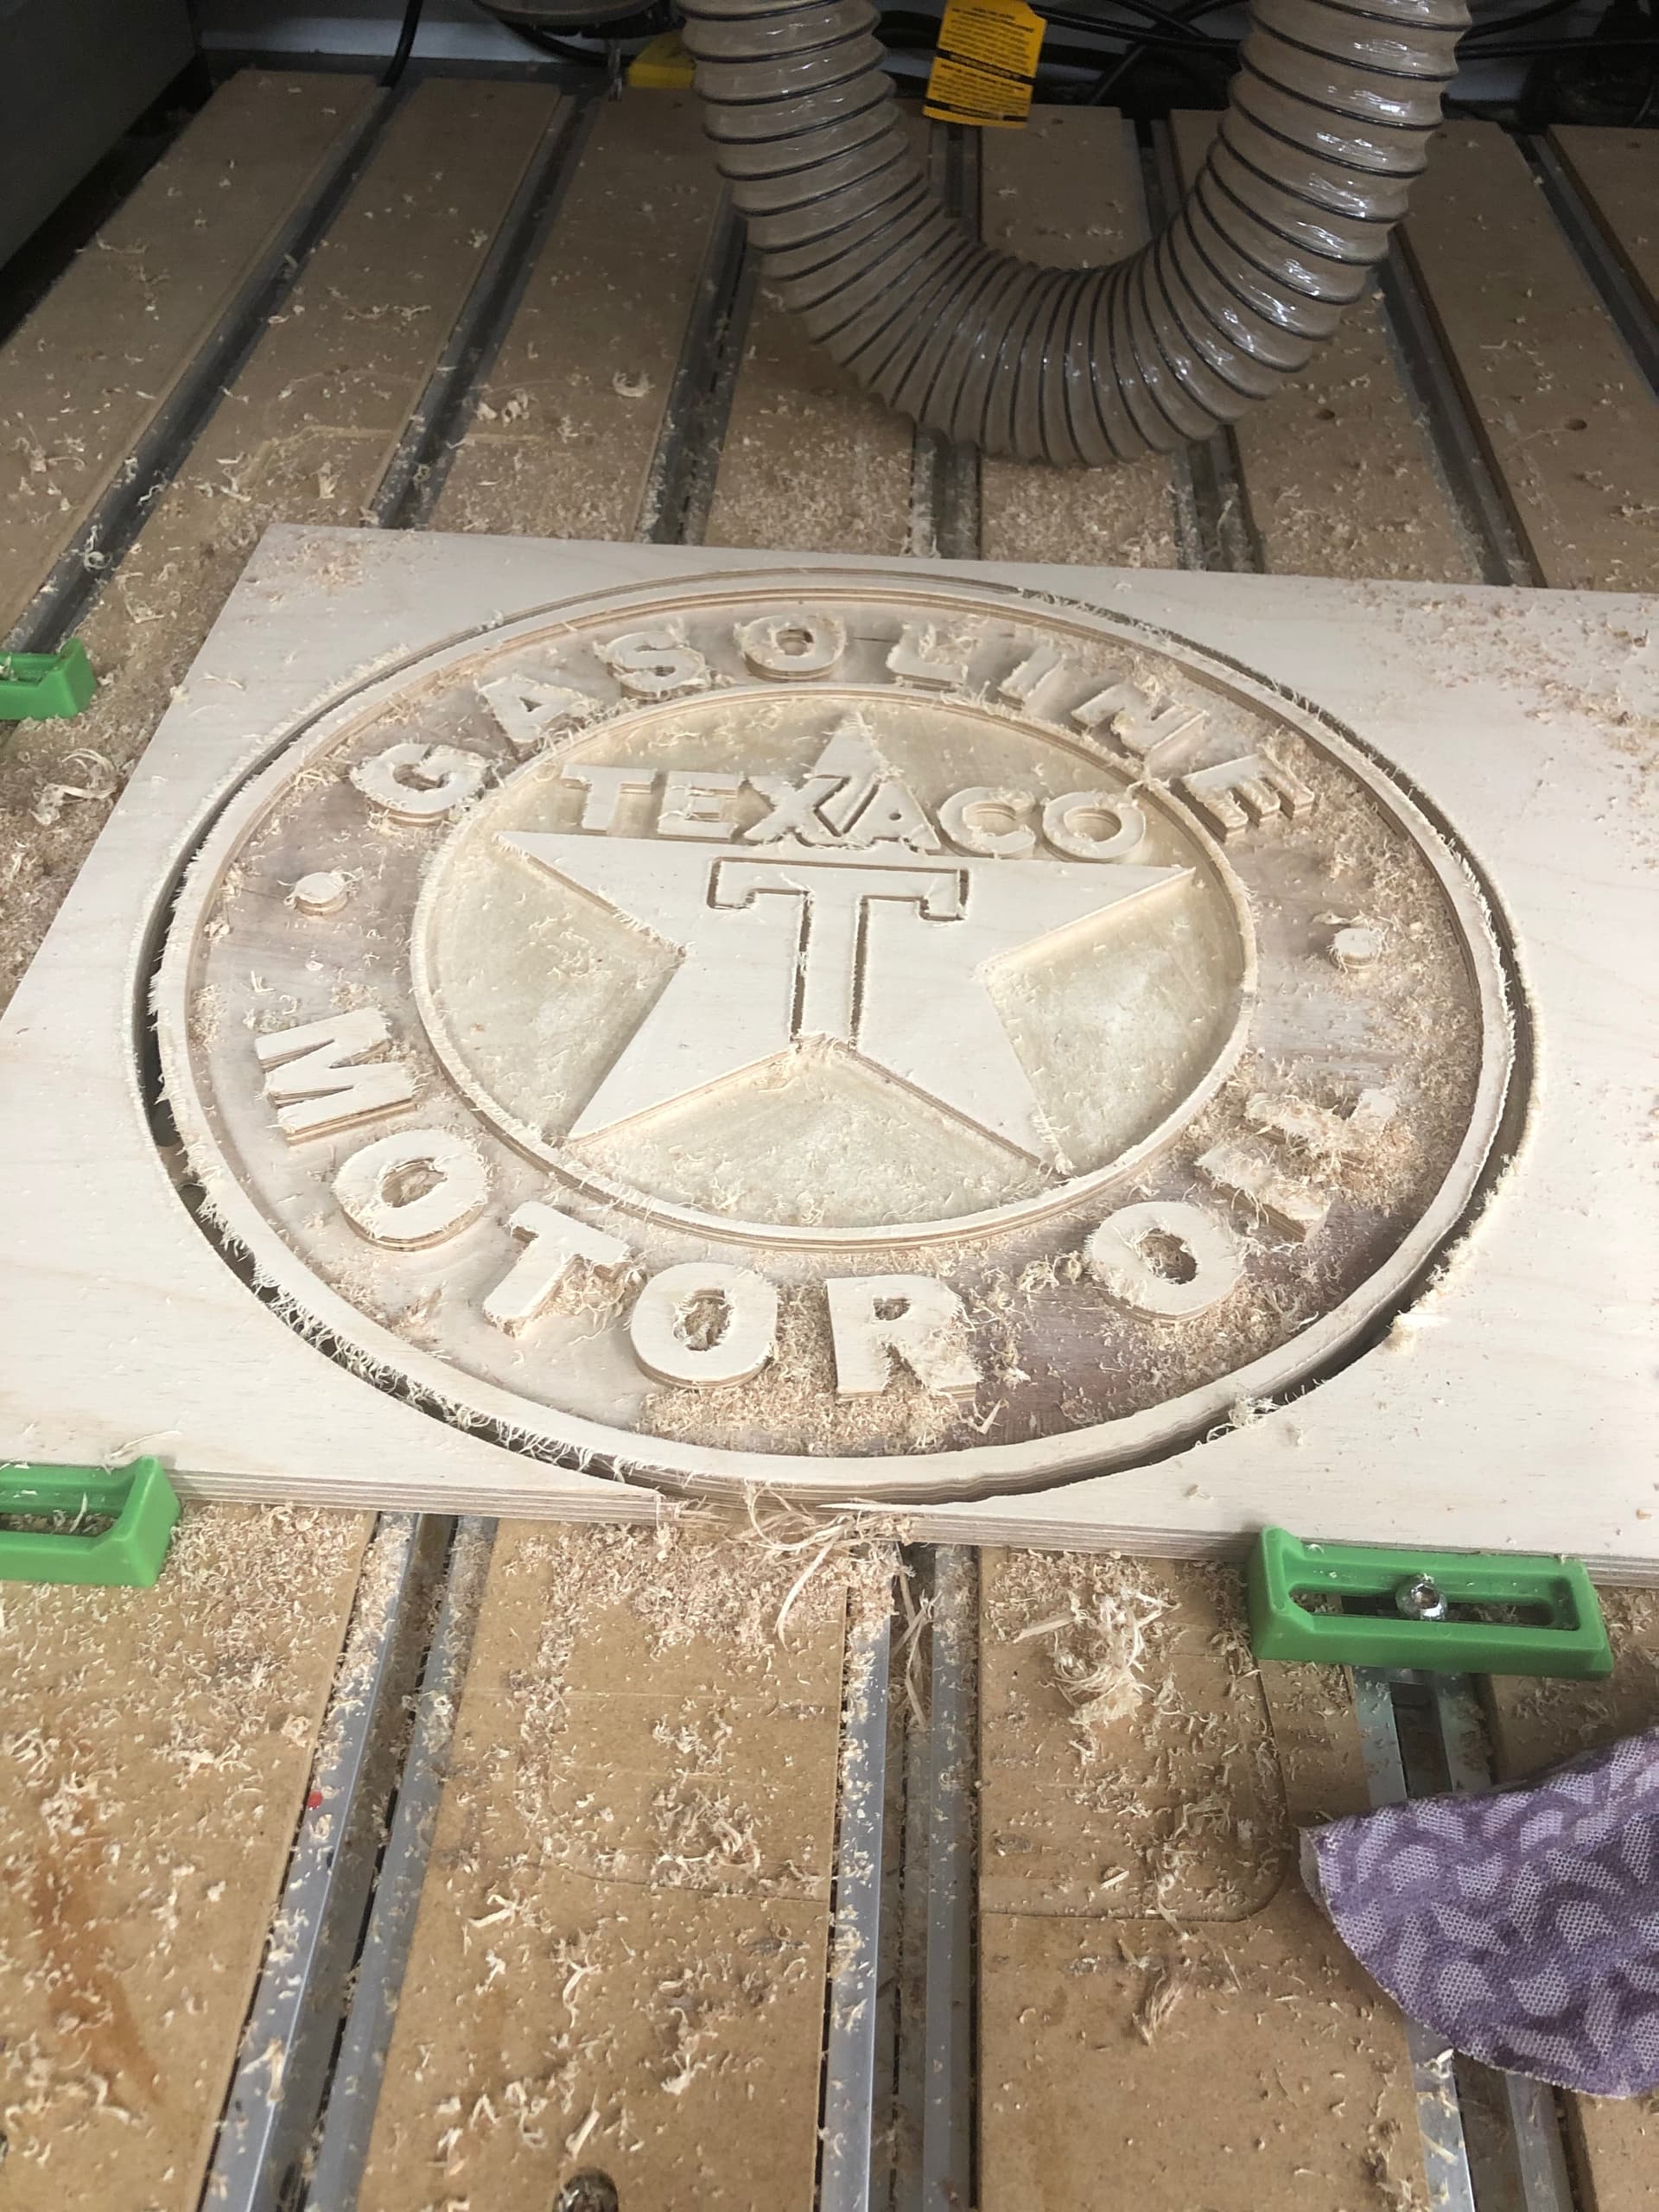
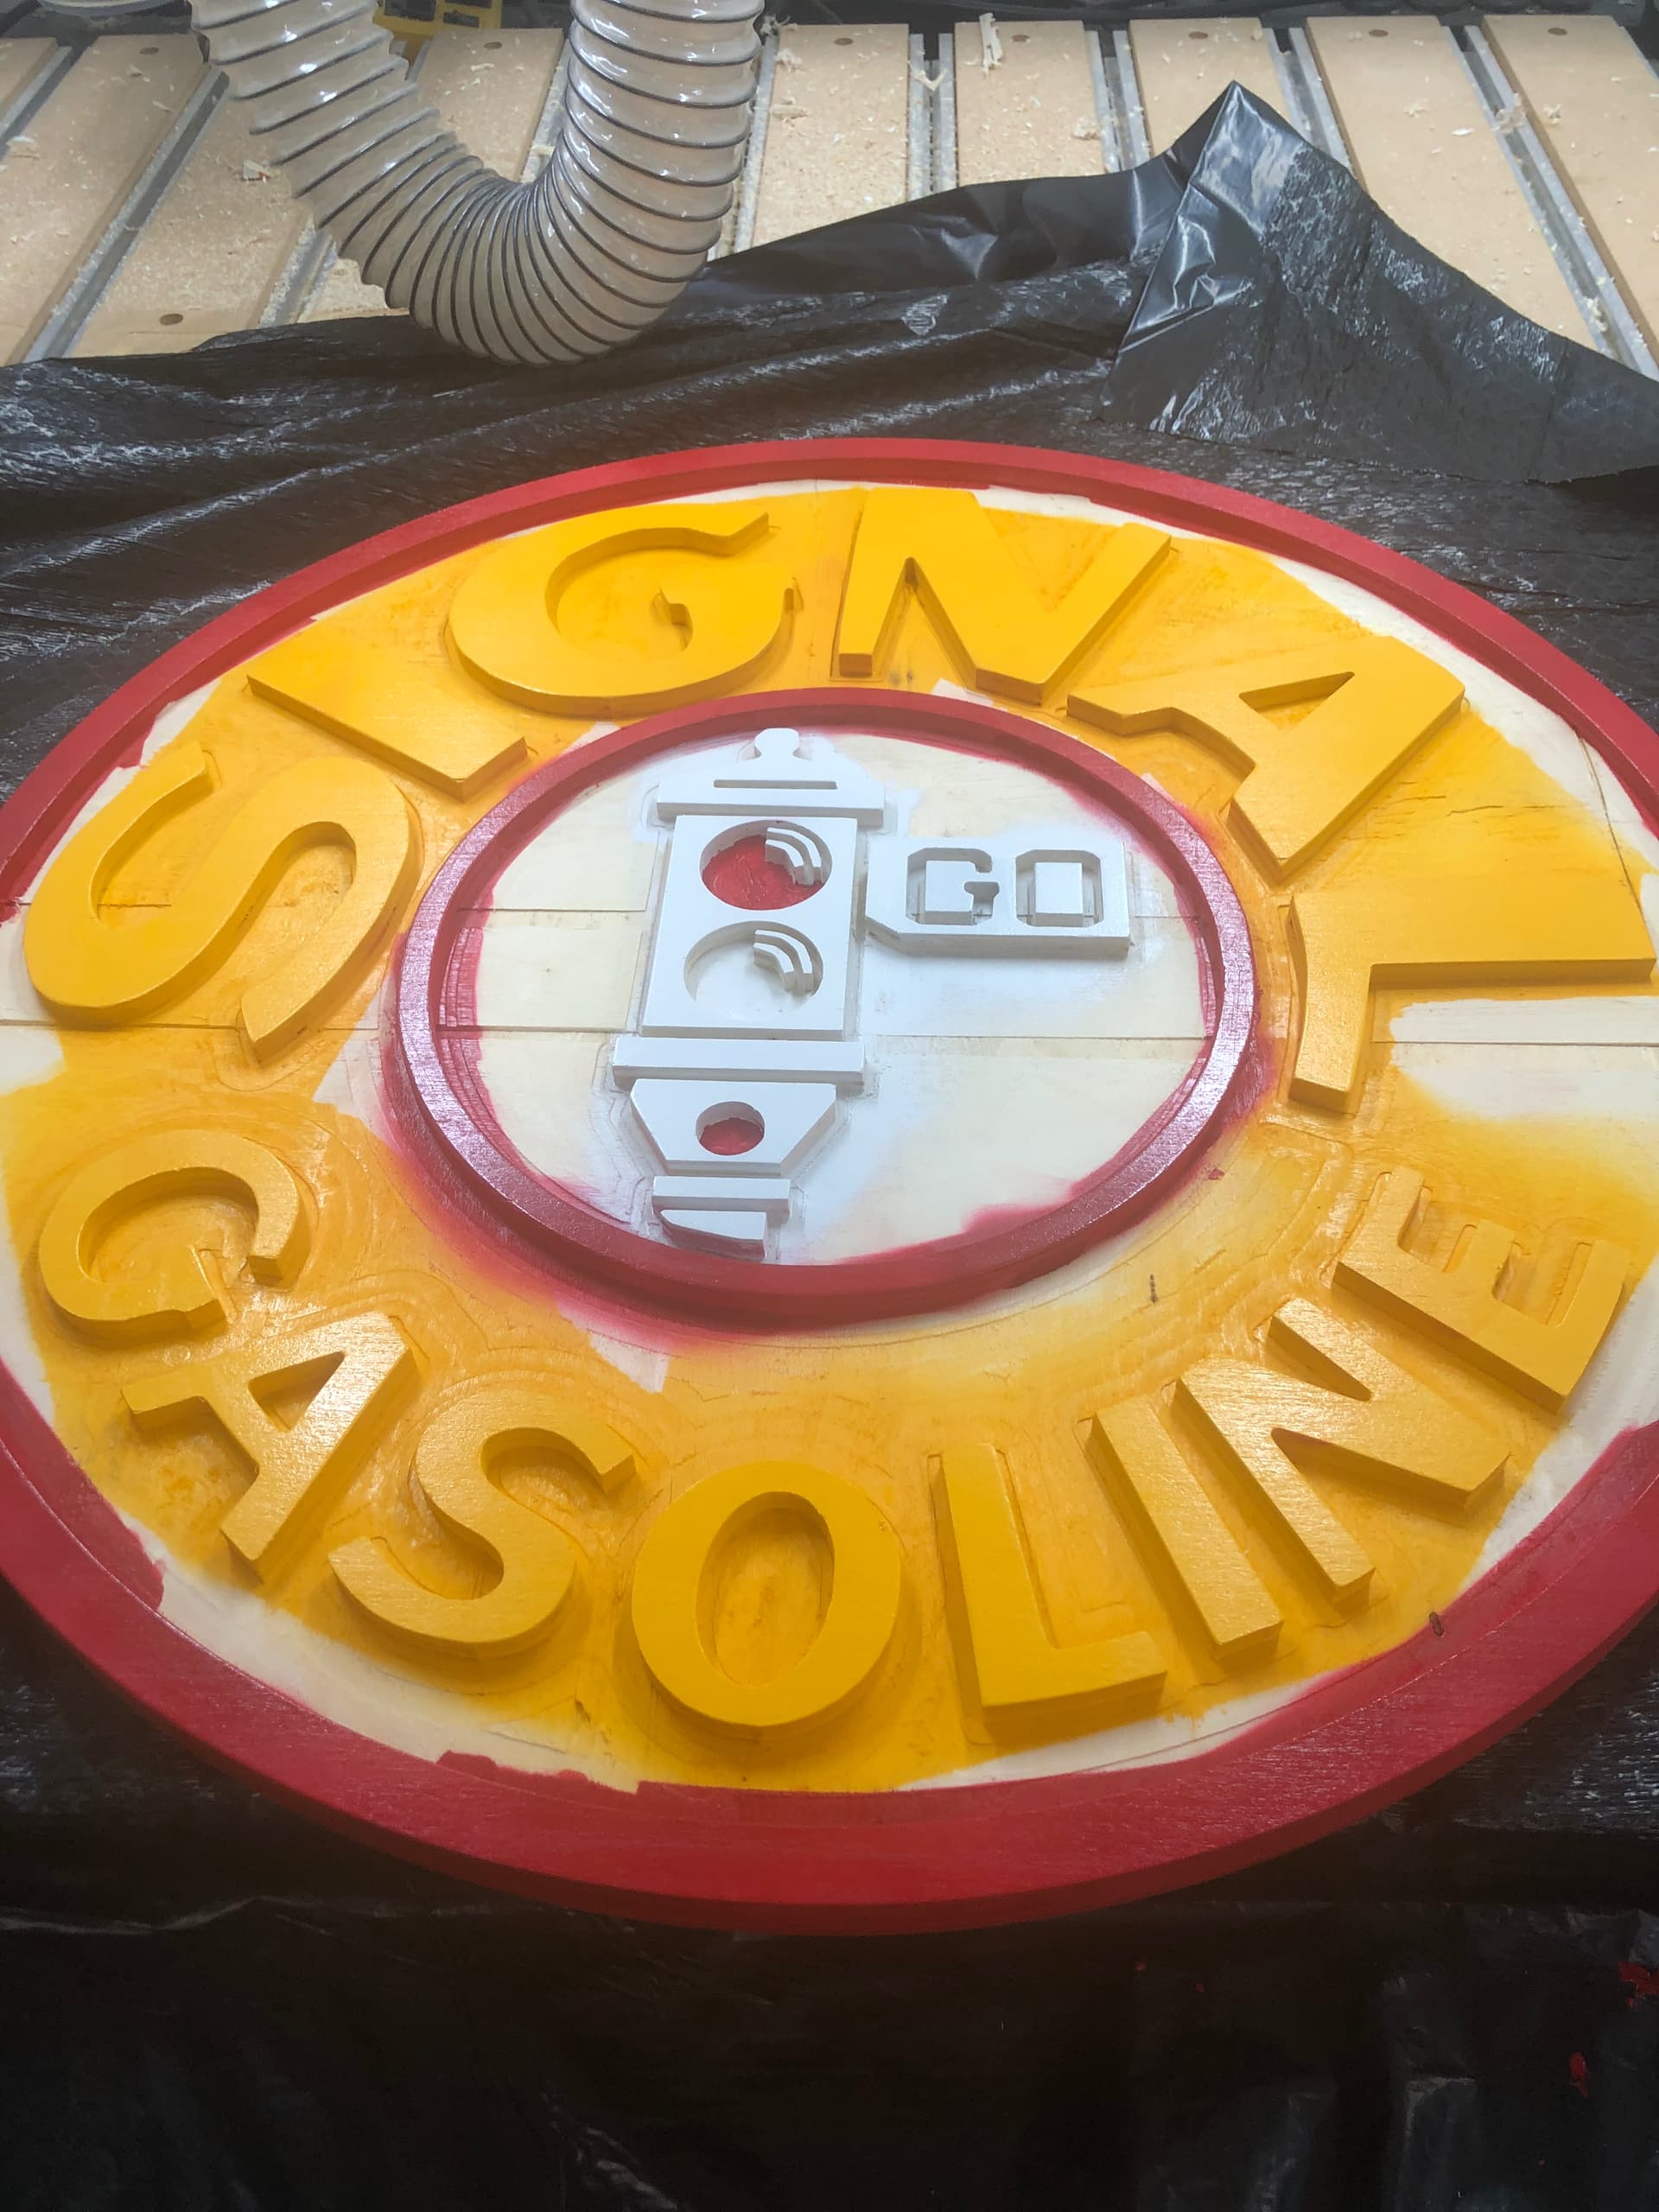
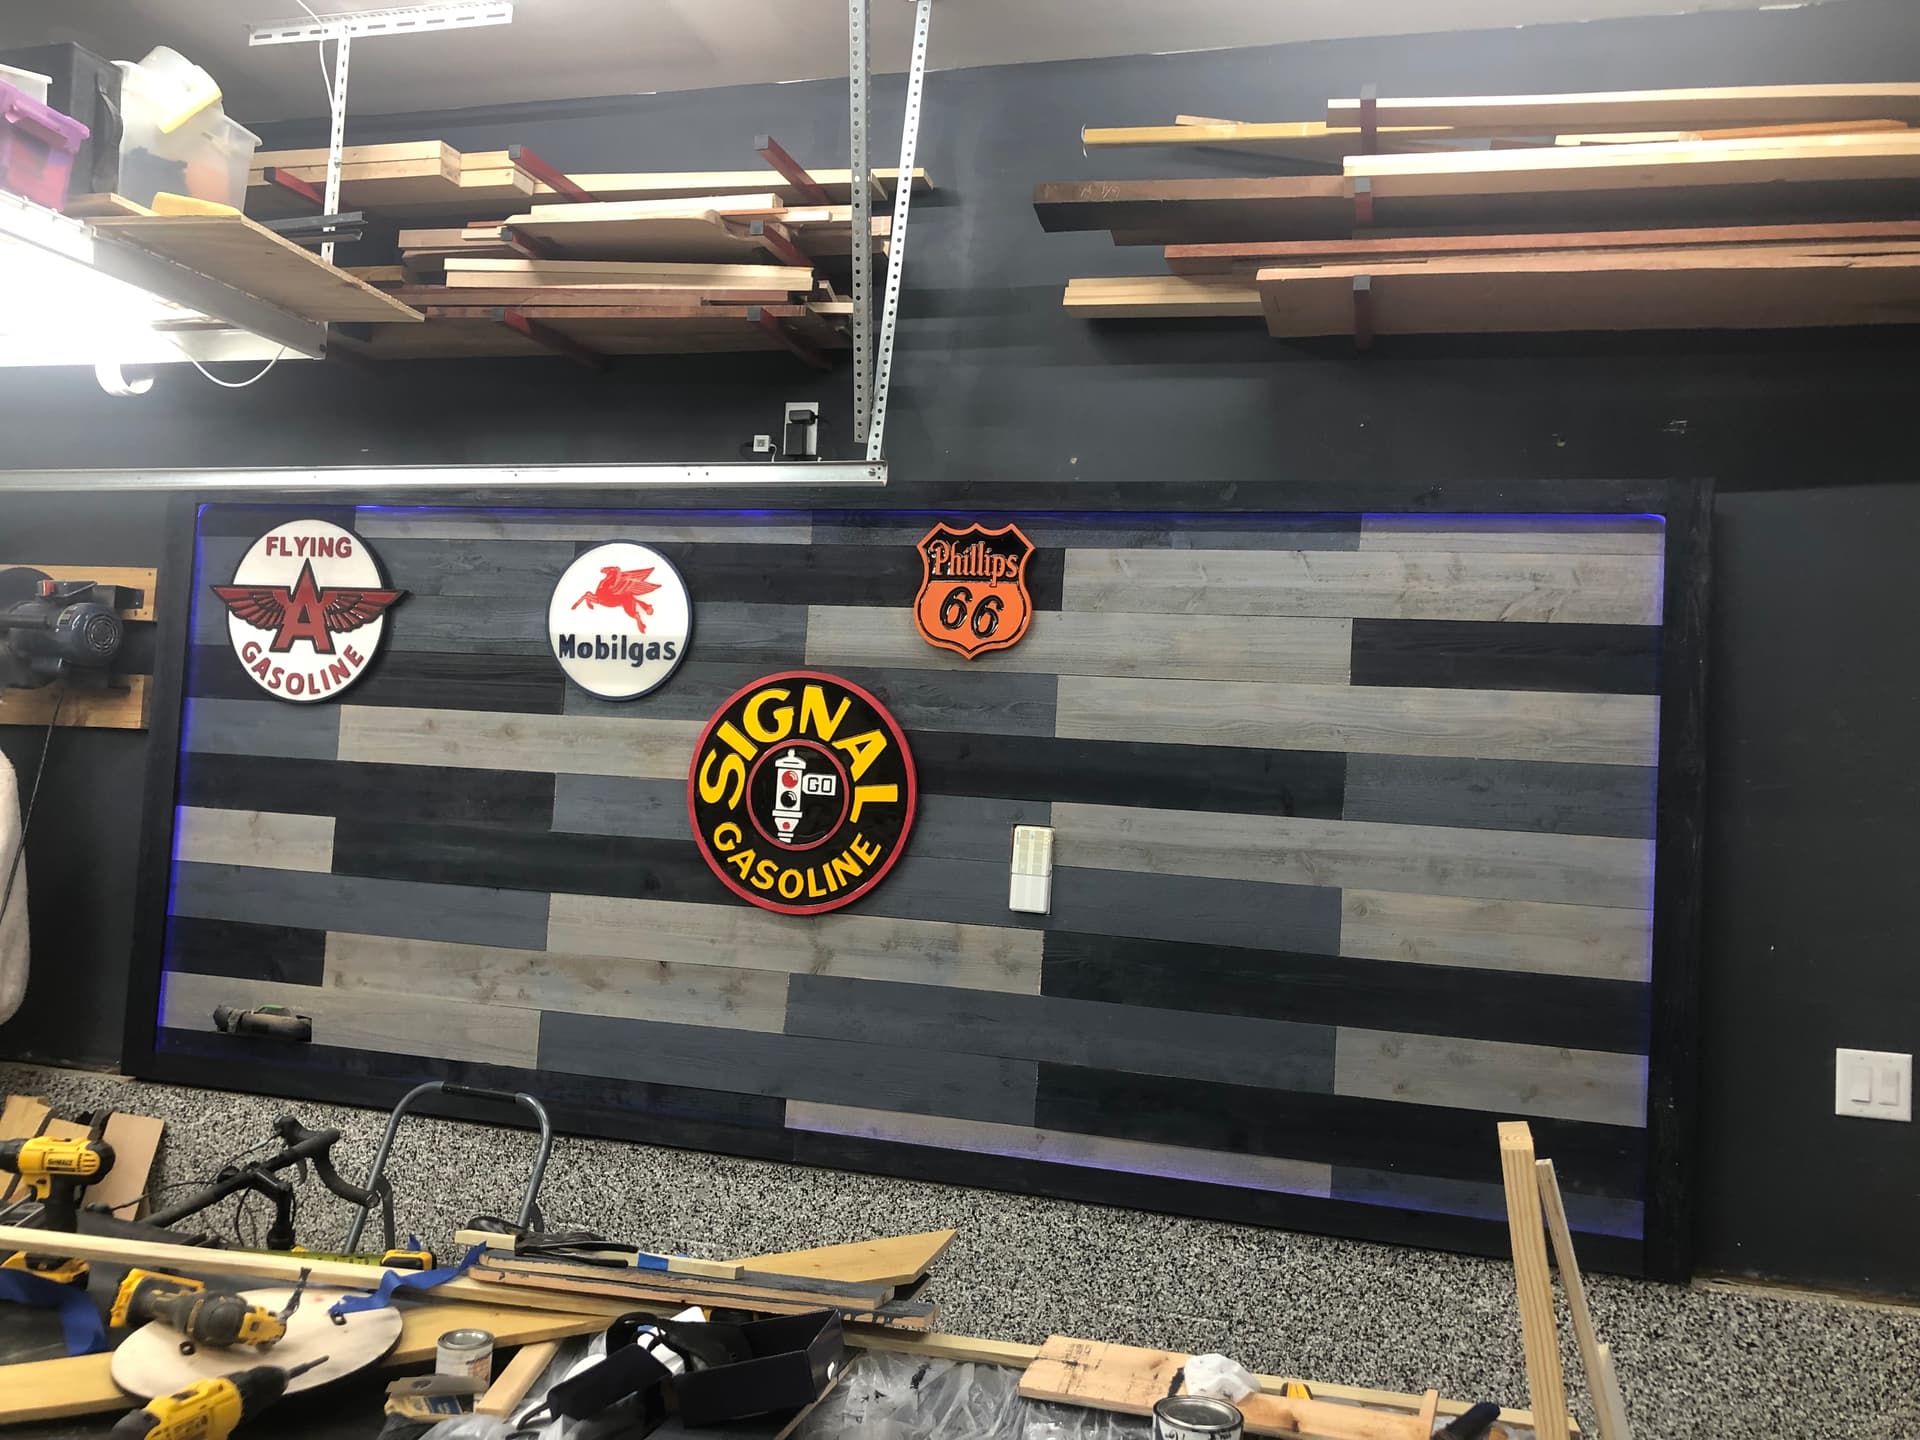
Have made quite a few gas signs with some plywood. Some turned out better than others. If trying it out I recommend using 3/4" plywood. Just looks better than the half inch. Not a difficult project but fun to do (except for sanding and painting them.) I’ve made more than what is shown and even sold a couple just to support the hobby. Anyway, I made these just to hang in my garage.
22 Likes
There are two types of PVC boards and sheets. Solid PVC and Foam Core PVC. Either will work but if you can get solid PVC it works better. If you use foam core and carve into the foam if it will be outside the foam will likely deteriorate. If used indoors both work but sun and weather will make the foam fail.
Thanks for sharing will see what the local box stores have. What kind of paint do you use on pvc?
Guy, I’m wondering about your experience with this failure, because most, if not all, of this foam core PVC is sold as trim on houses. Perhaps the failures don’t occur once the trim is painted?
This was actually discussed on This Old House today — when painting PVC trim there is a specific paint characteristic for how much light is reflected by the paint which is supposed to be taken into consideration.
When used as trim only the ends are cut. Usually there is other corner trim covering the exposed ends and paint. On a cnc sign even with paint the foam is exposed. The foam is not as durable as the PVC outer skin. So rain and sun can detoriate the inner foam exposed from carving it. Indoor projects don’t get the weather exposure.
1 Like
Hmm. I will defer to @baricl here for greater experience with the PVC. I can paint the edges as well and I guess would have to do the feet as well.
I don’t think I have any local sources for the solid core material and getting it shipped may be prohibitive.
The solid is probably smoother when cut and would look better painted. The other stuff being called foam core is a little deceiving. It’s as firm as the material at the surface but is rough and I assume has micro pores which I guess could collect moisture. I think it is likely that it would still last much longer than the wood. I will look for that info @WillAdams posted.
As far as paint goes, I have used rattle can or exterior or acrylic.