Thanks for the info on your work flow.
This is a simple cabinet. Baseballs are just under 3 inches diameter so that spacing dictates itself. Carbide Create allows for an ARRAY to be made after drawing out a single circle. Six by six seemed logical and aesthetically pleasing enough so six shelves were made and there we are. A piano hinge, rare earth magnets and plastic front are evident from the two images.
Nothing tricky about any of this as I alluded to by saying how most posts feature cool techniques, creative thinking, and careful planning. Mine was done in about four hours.
I just finished a clock for my brother-in-law.
The clock is cut from a block of poplar 12 x 12 x 1.375". Cavities were cut into it for two different color epoxy fills that were later machined for text and shapes. The face of the clock was also recessed for a clear epoxy fill. The finished diameter is a little over 11 inches.


The piston and connecting rod clock hands were cut from .035 black anodized aluminum using a 1mm end mill. Thanks @wmoy for the advice on feeds / speeds and cutting strategy!

Cutting the clock out of the block of poplar was a bit tricky. The longest cutter I have is the #205. With a flute length of 1", it fell a bit short. My strategy was to use that #205 to pocket down to just under flute length then add an .008" offset to the outside diameter of the clock and contour cut the rest of the way with 8 tabs holding it all together. The .008" offset kept the shank of the cutter from rubbing on the side of the clock as it finished the cut out. A little time with a piece of sandpaper cleaned that up nicely.

The back side was pocketed for the movement and a key hole slot.

20 Likes
Nice looking clock. I live in a small town in east Texas. There is a motorcycle museum on the square. I have taken plenty of pictures and made a video about the motorcycles there. The thing I noticed is the European and Japanese motor cycles did not have baking sheets under them. However every Harley had a baking sheet pan under them collecting oil dripping out of them. If you want to see the classic motorcycles here is my quickly done video on youtube.

3 Likes
LOVE WALNUT (and cherry, and sapele, and…)
1 Like
Beautiful work. Out of my league.
Congratulations
1 Like
Awesome looking clock! I like the raised numbers and epoxy finish. They really give it a good look.
Just thinking out loud… given the thickness of the material maybe you could have done the outside contour cut as a flip job, cut it out from both sides and saved some time sanding.
2 Likes
The rice that leaks from the japanese bikes absorbs any oil that might leak.p
3 Likes
This sounds like something you would start with “Confucius says…” or it could be an old Japanese Proverb ![]()
1 Like
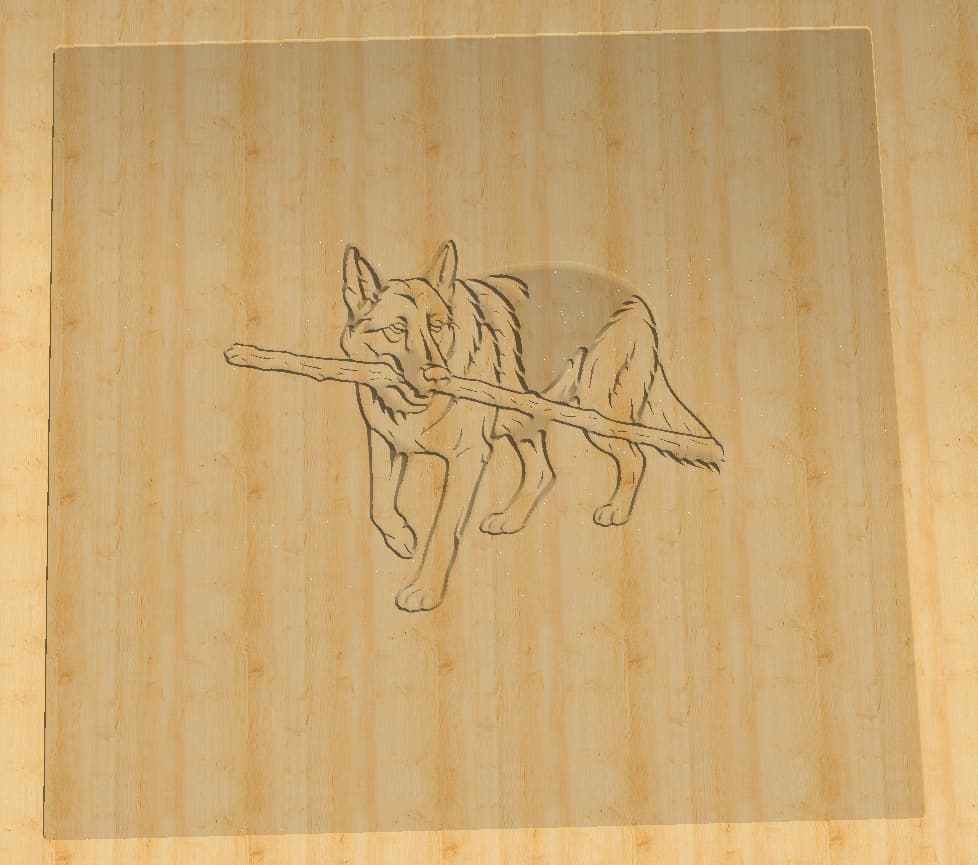
Try making a copy of the image and removing the background completely. Play with shadows, contrast and brightness also color saturation . When going from color to black and white bumping up certain colors fools the black and white conversion and improves contrast in turn giving more information for the system to pick up to draw or trace. Looks cool .
1 Like
Looks good. I have’nt tried this yet but soon.
What are the dimensions of your board? I’m working on my first that’s 12x5 and I maxed out the memory of my ancient laptop that I use to run the GRBL software.
It’s 17" x 5.75".
When I have it finalized and confirm the design I’m planning to post it on CutRocket


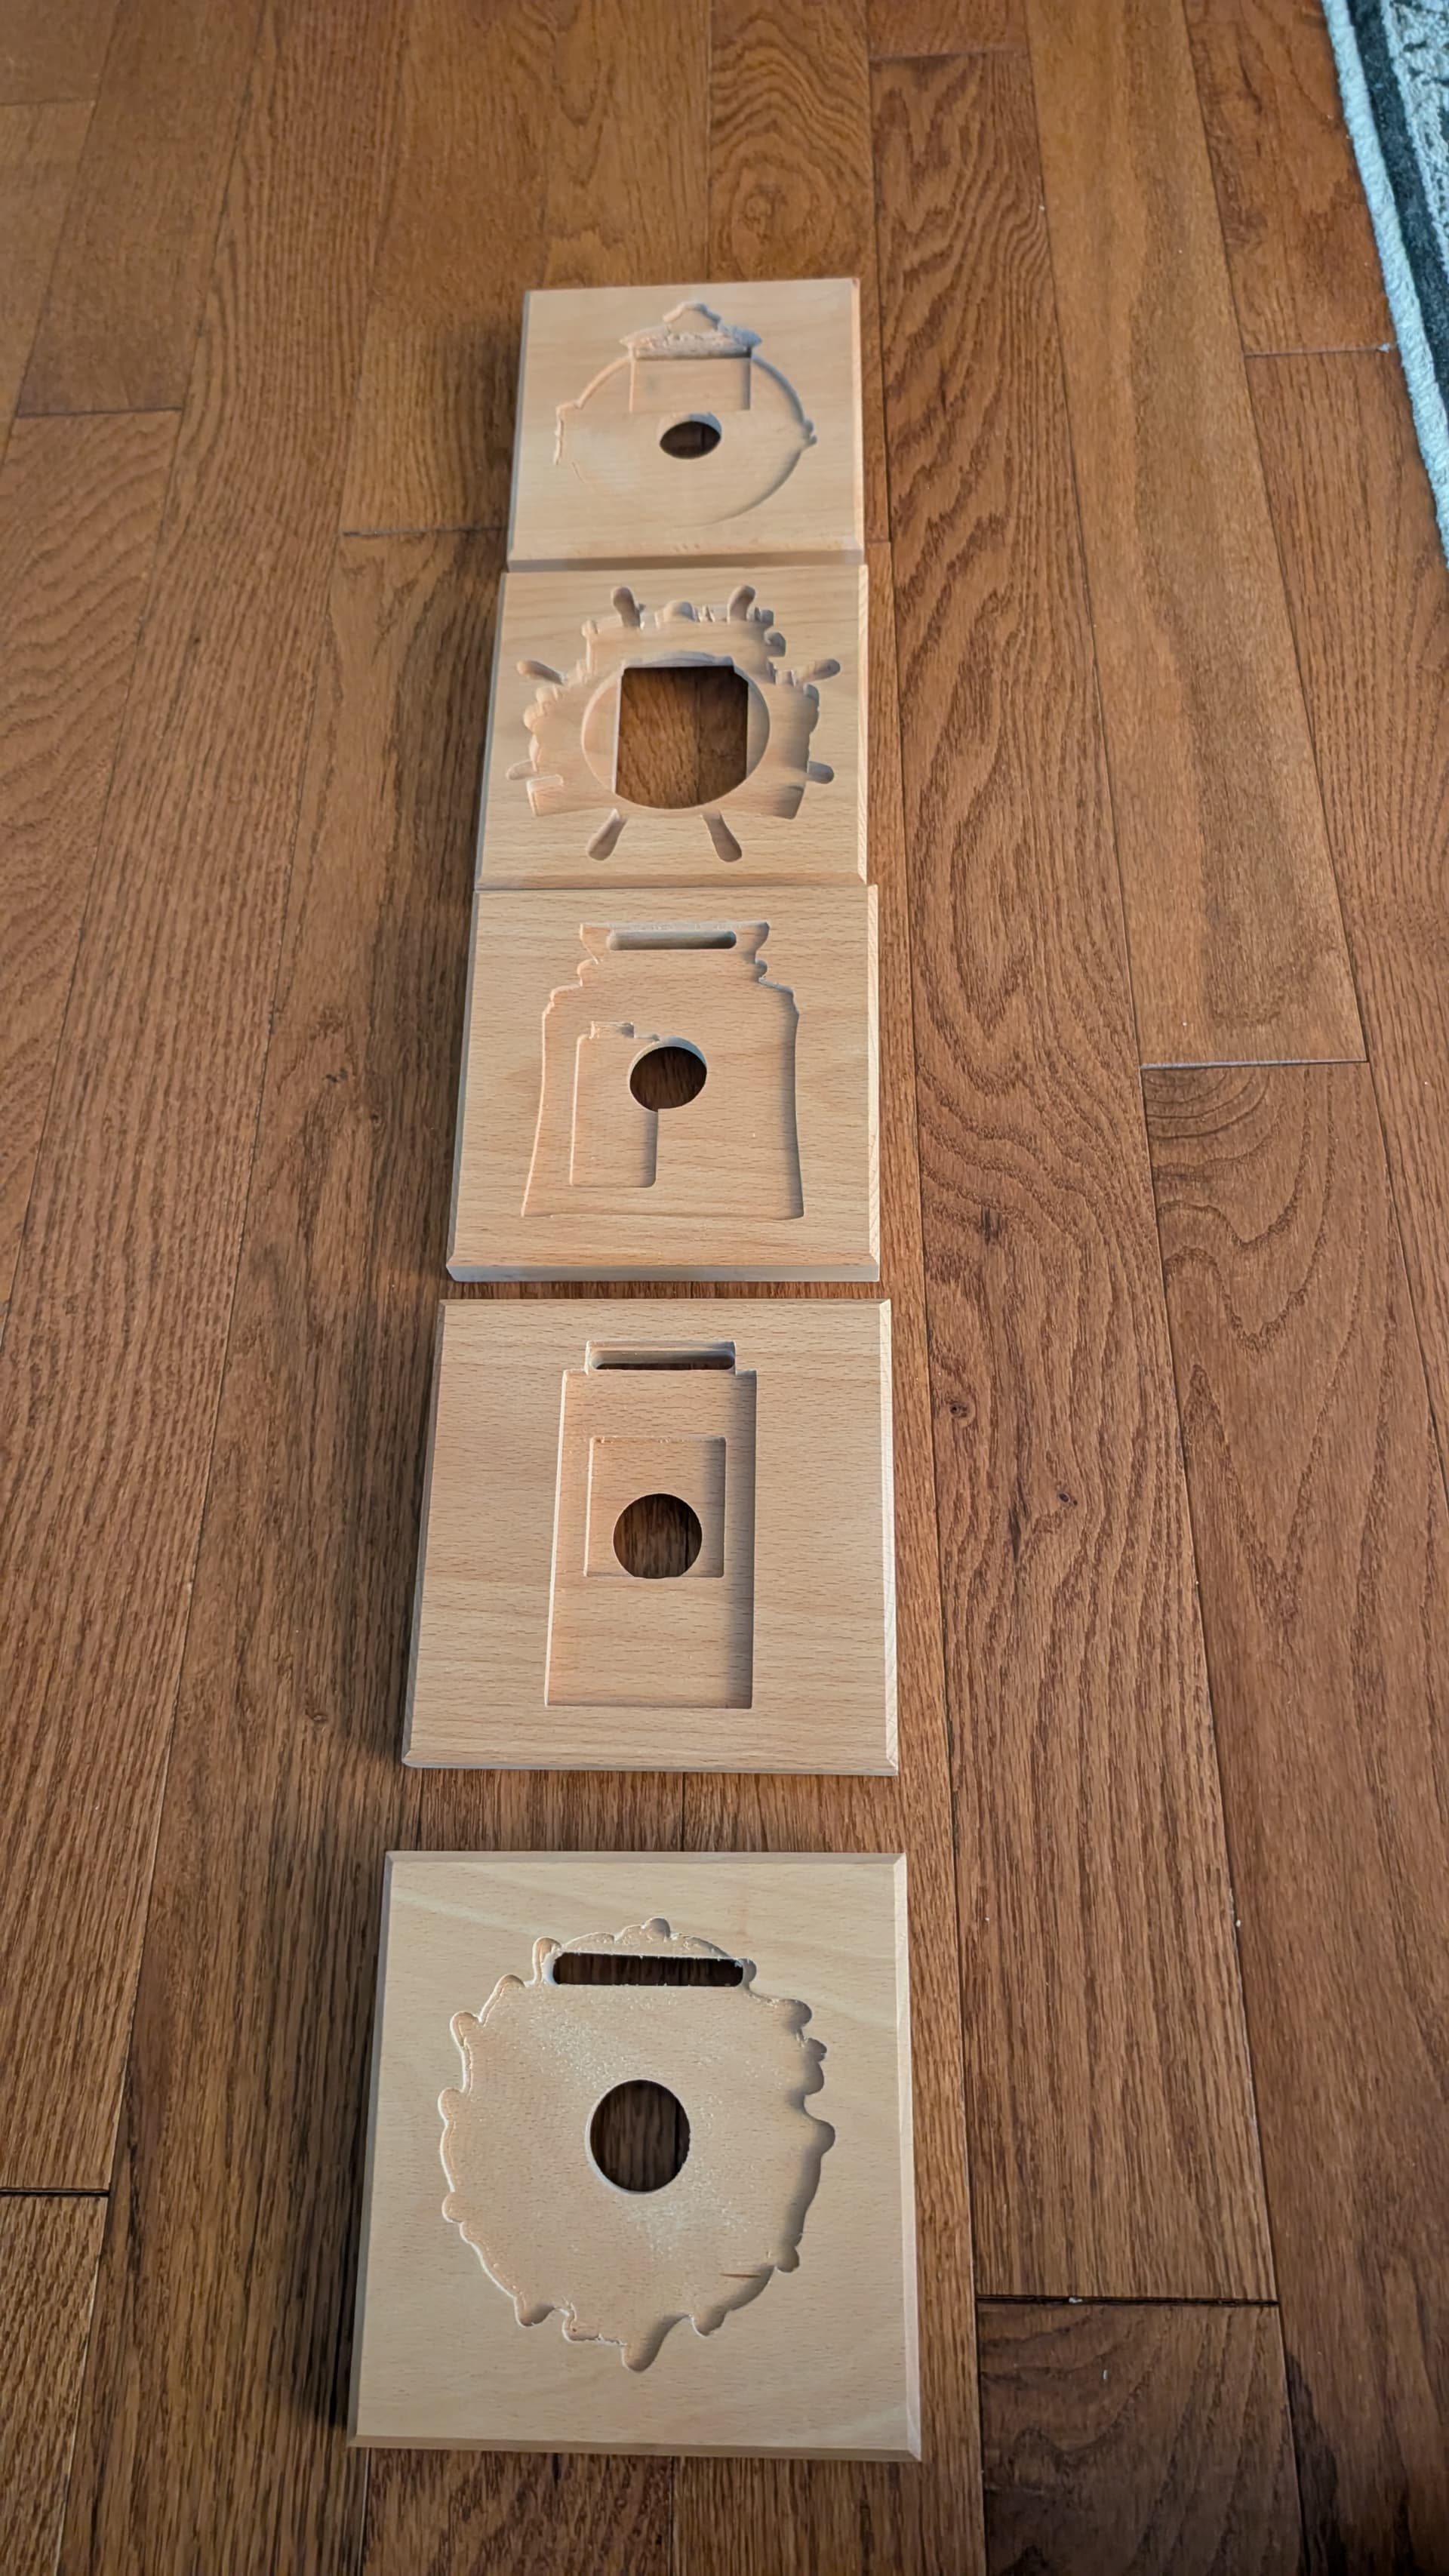
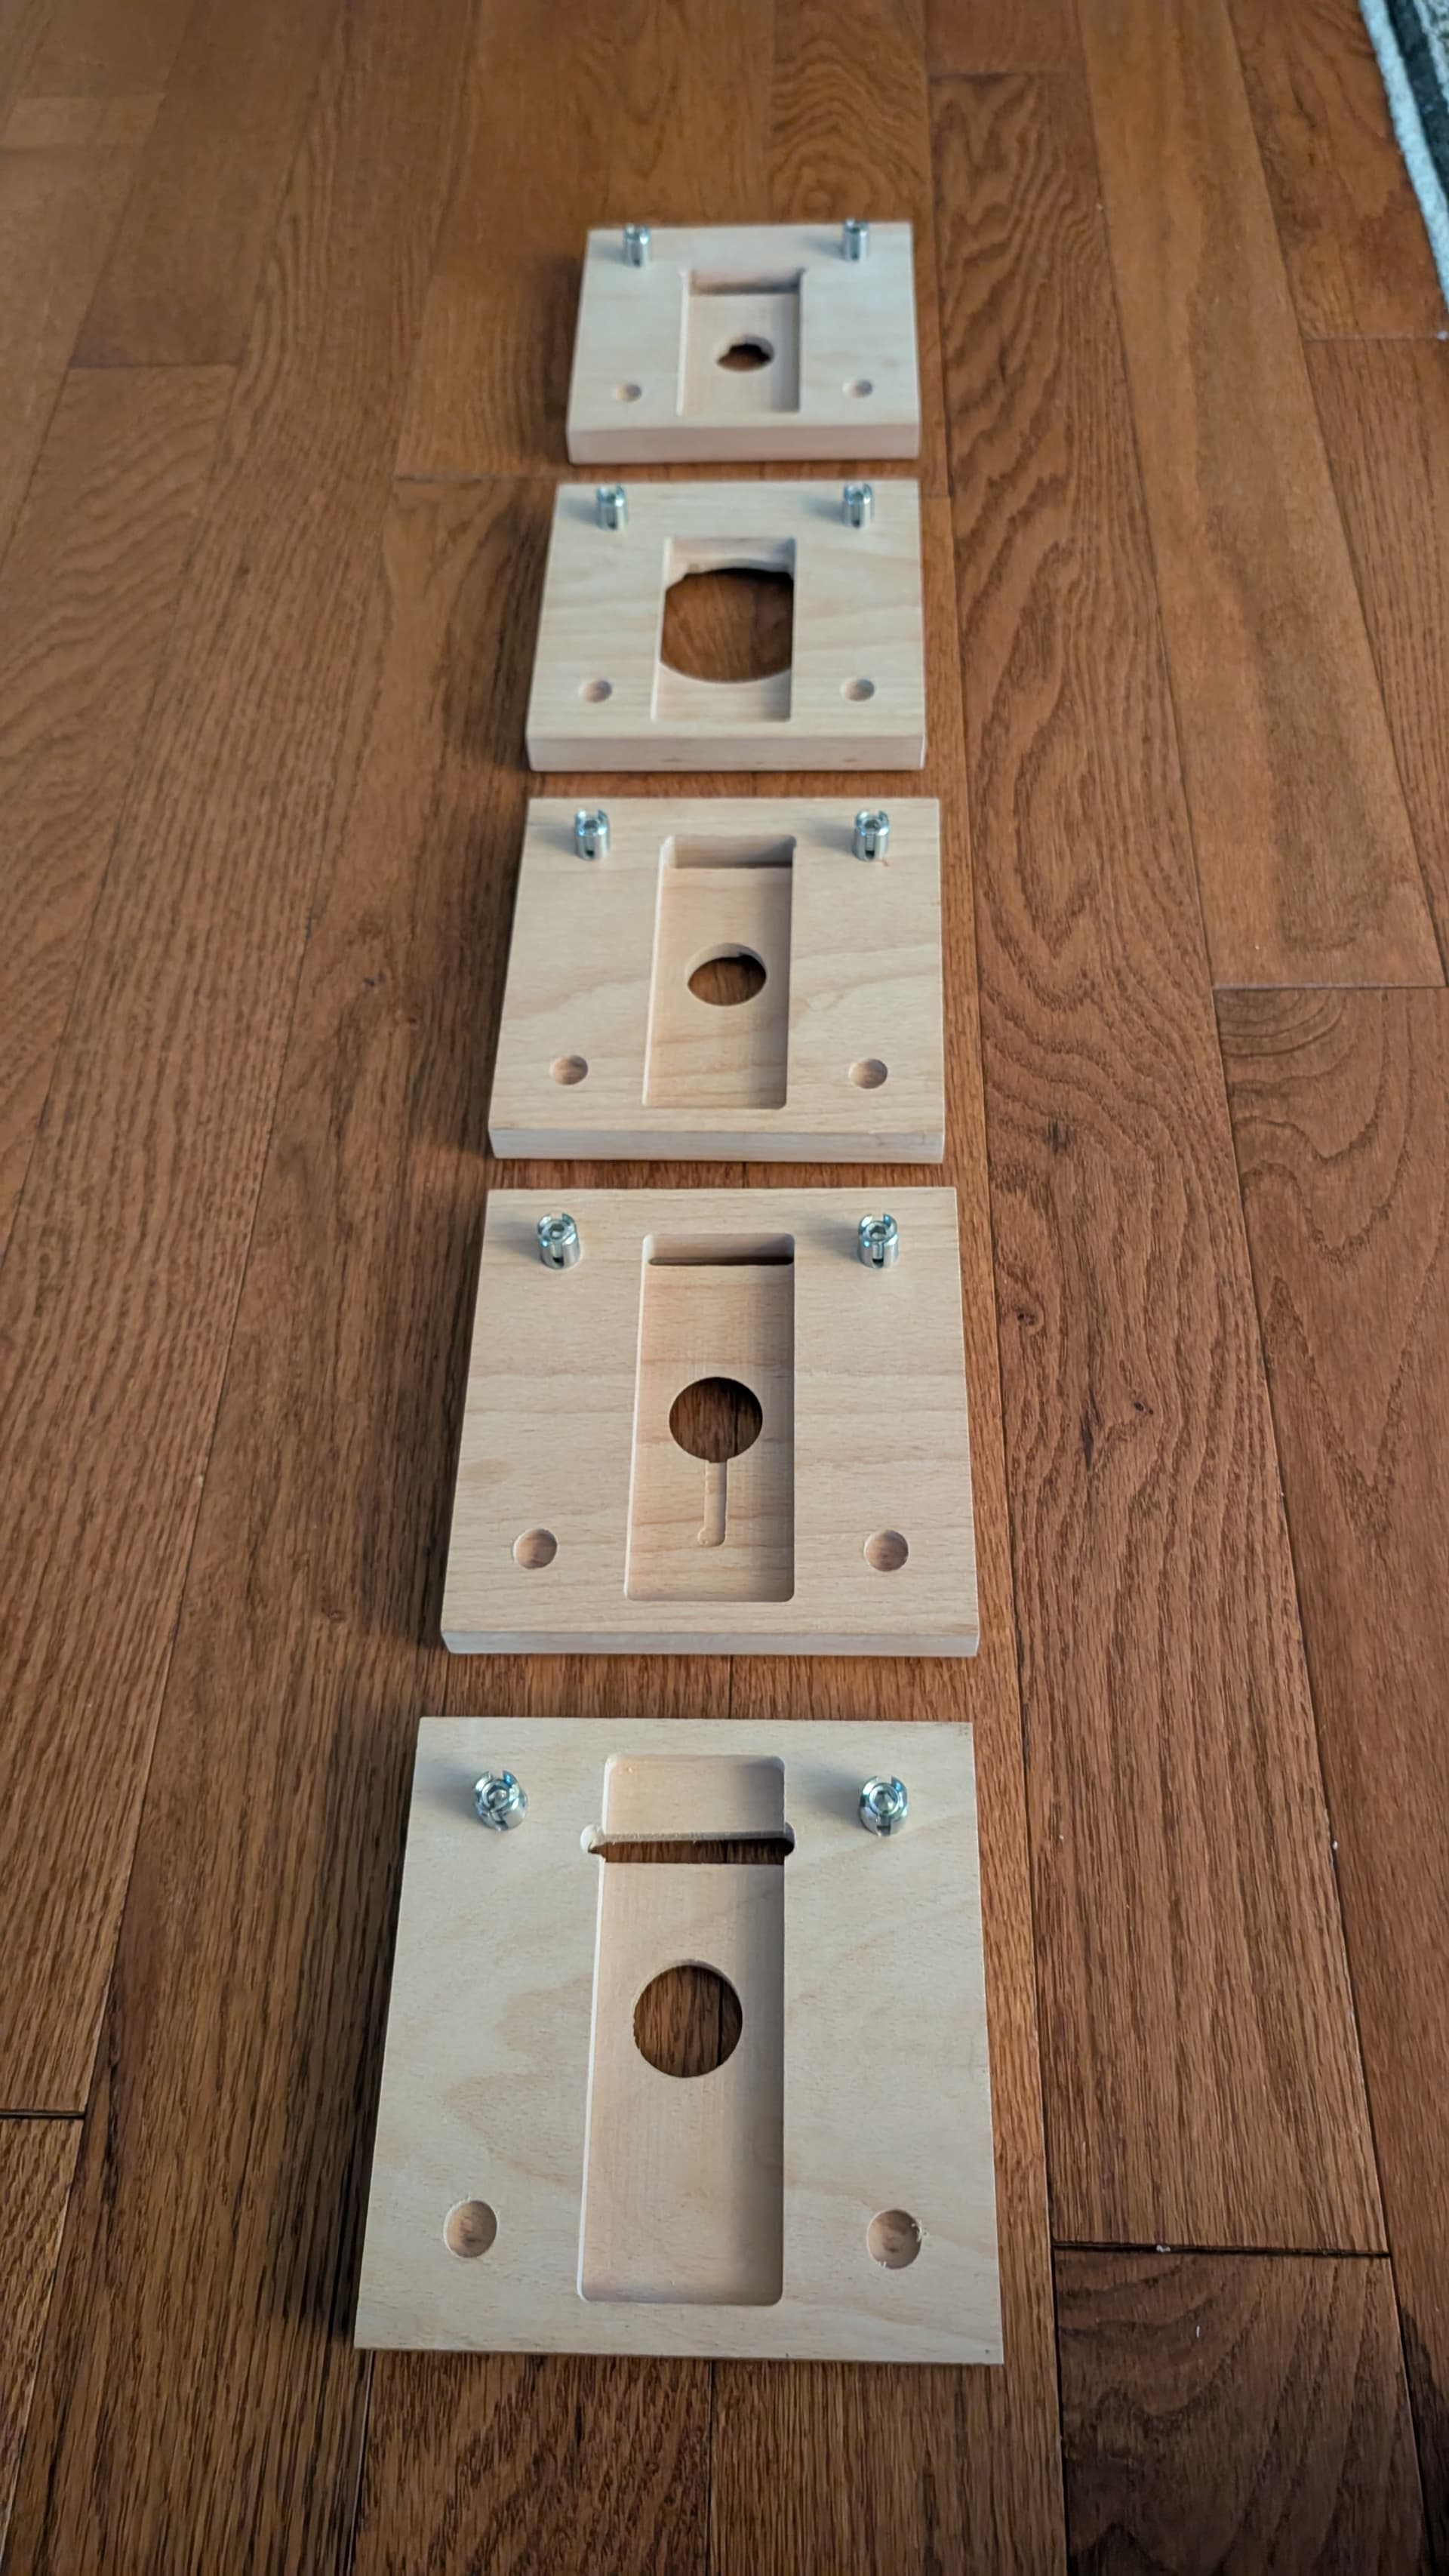
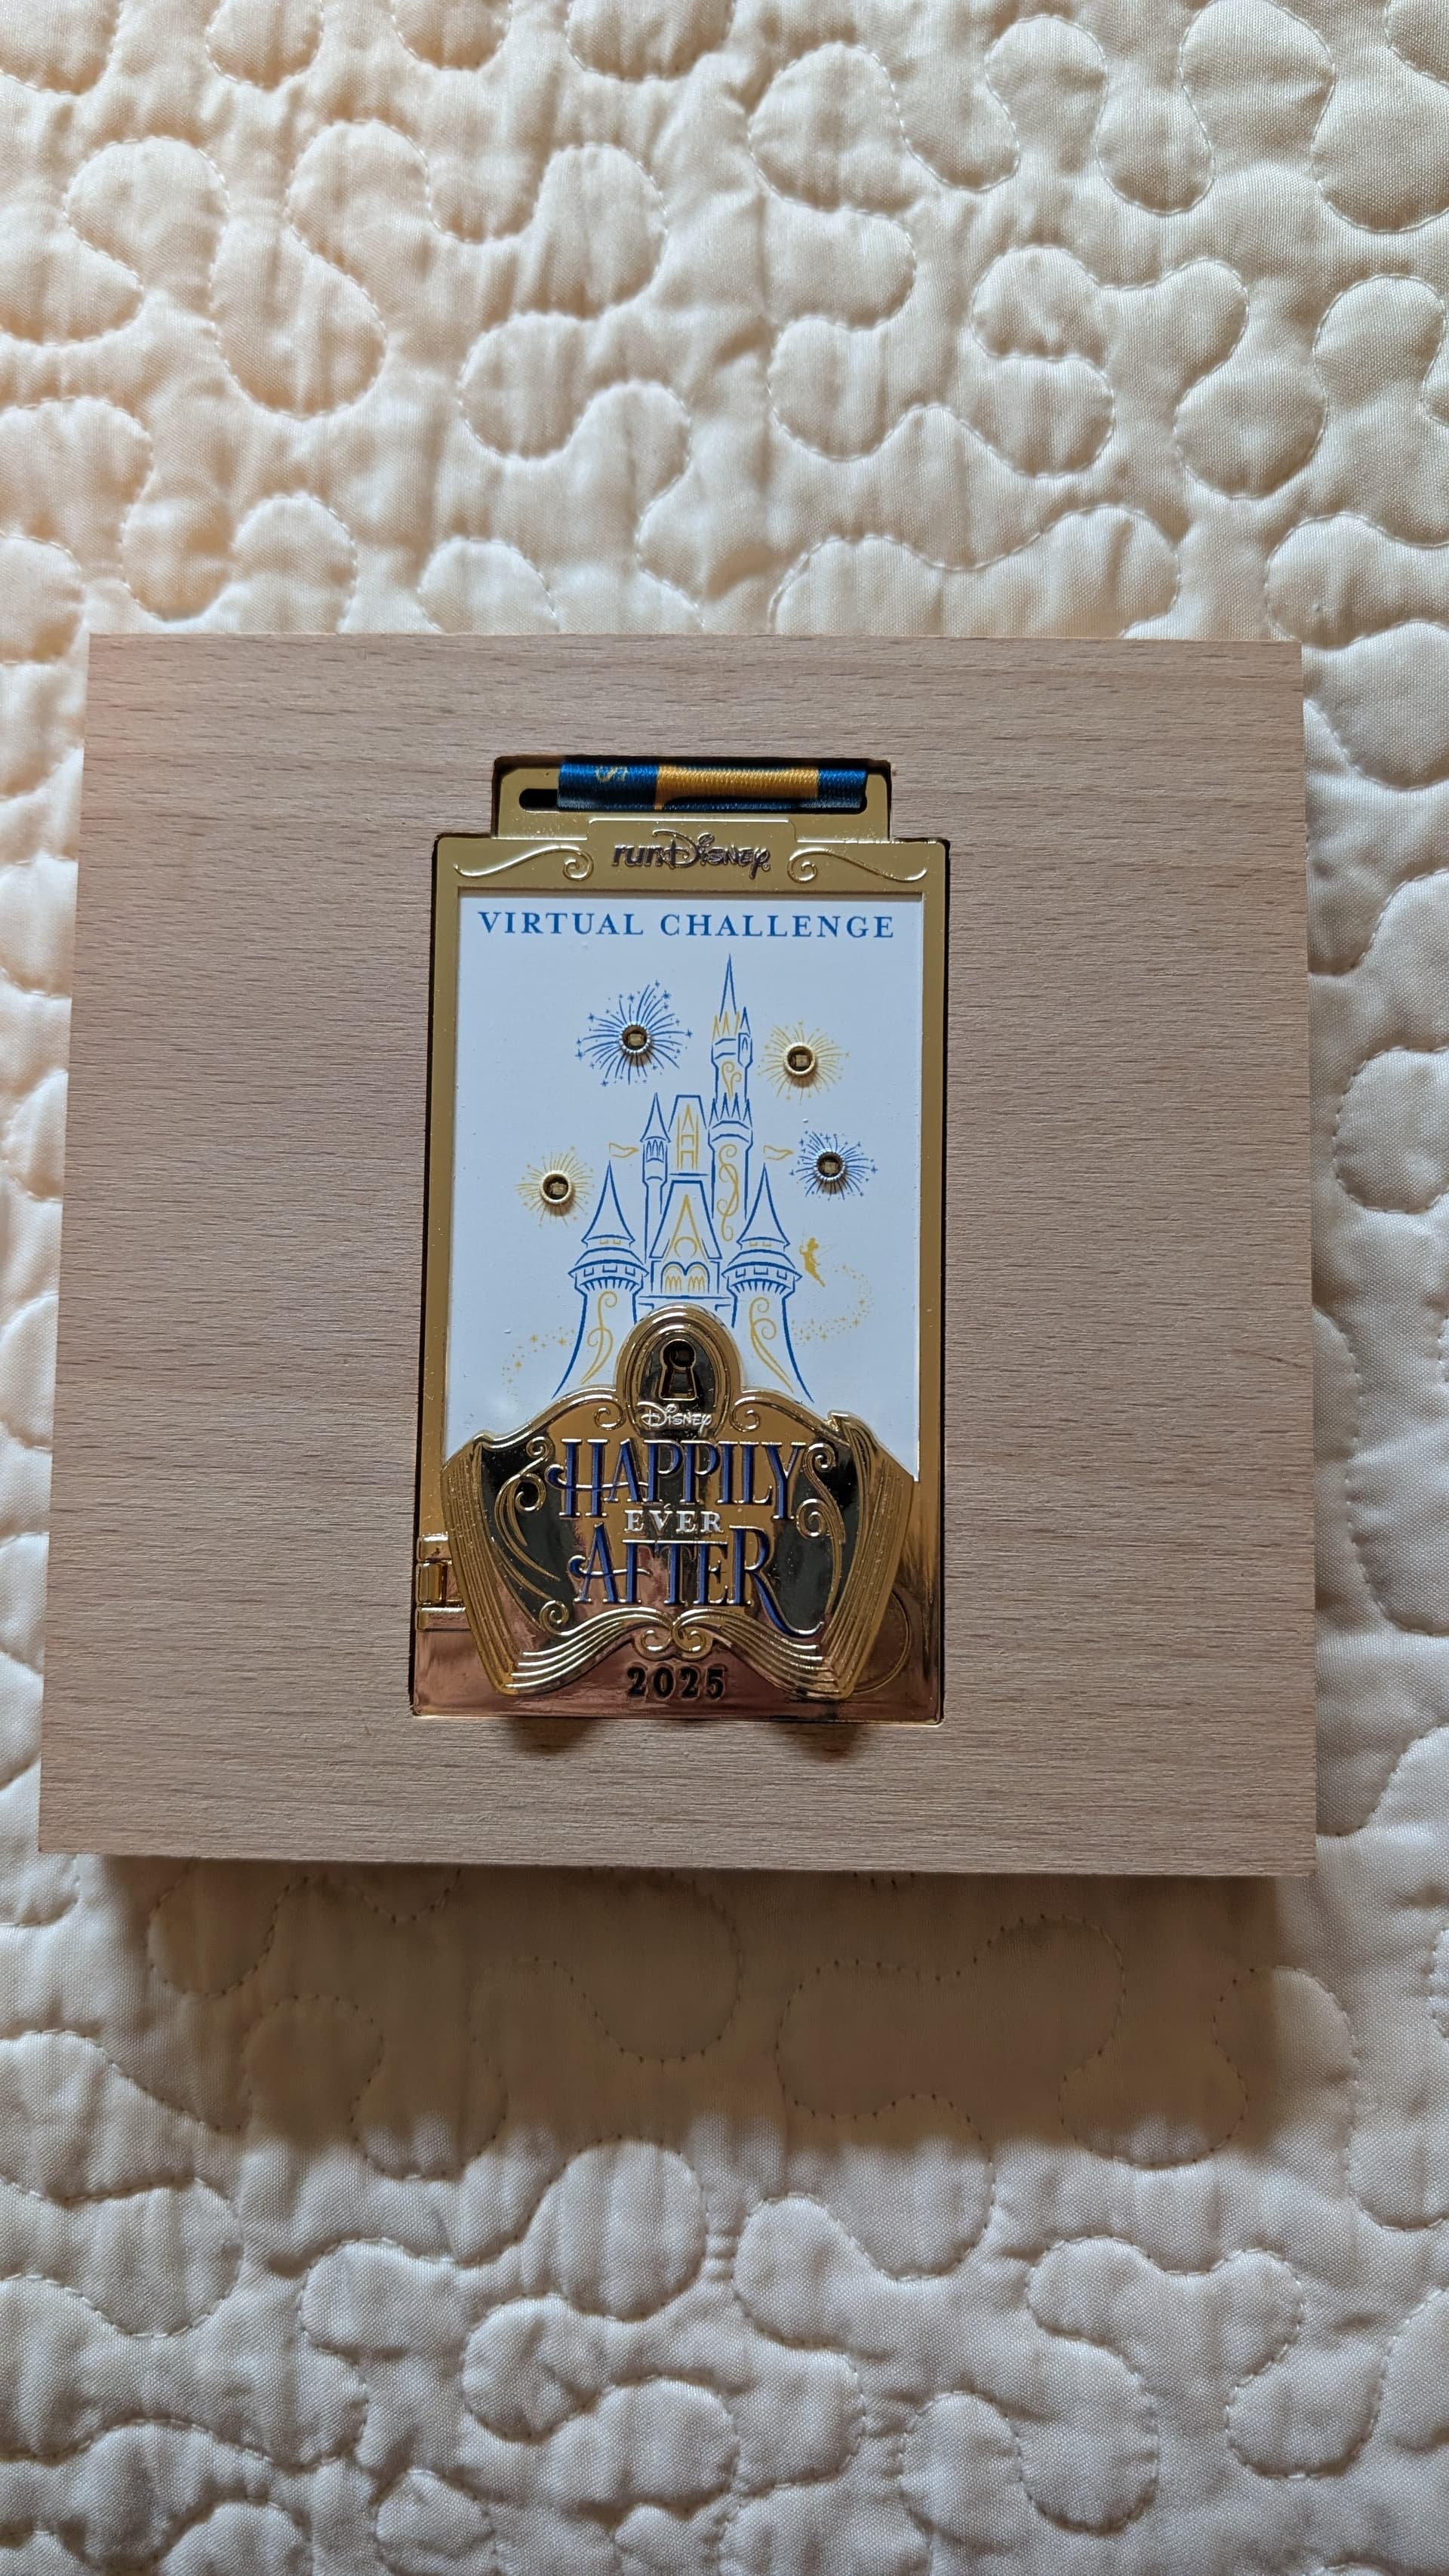
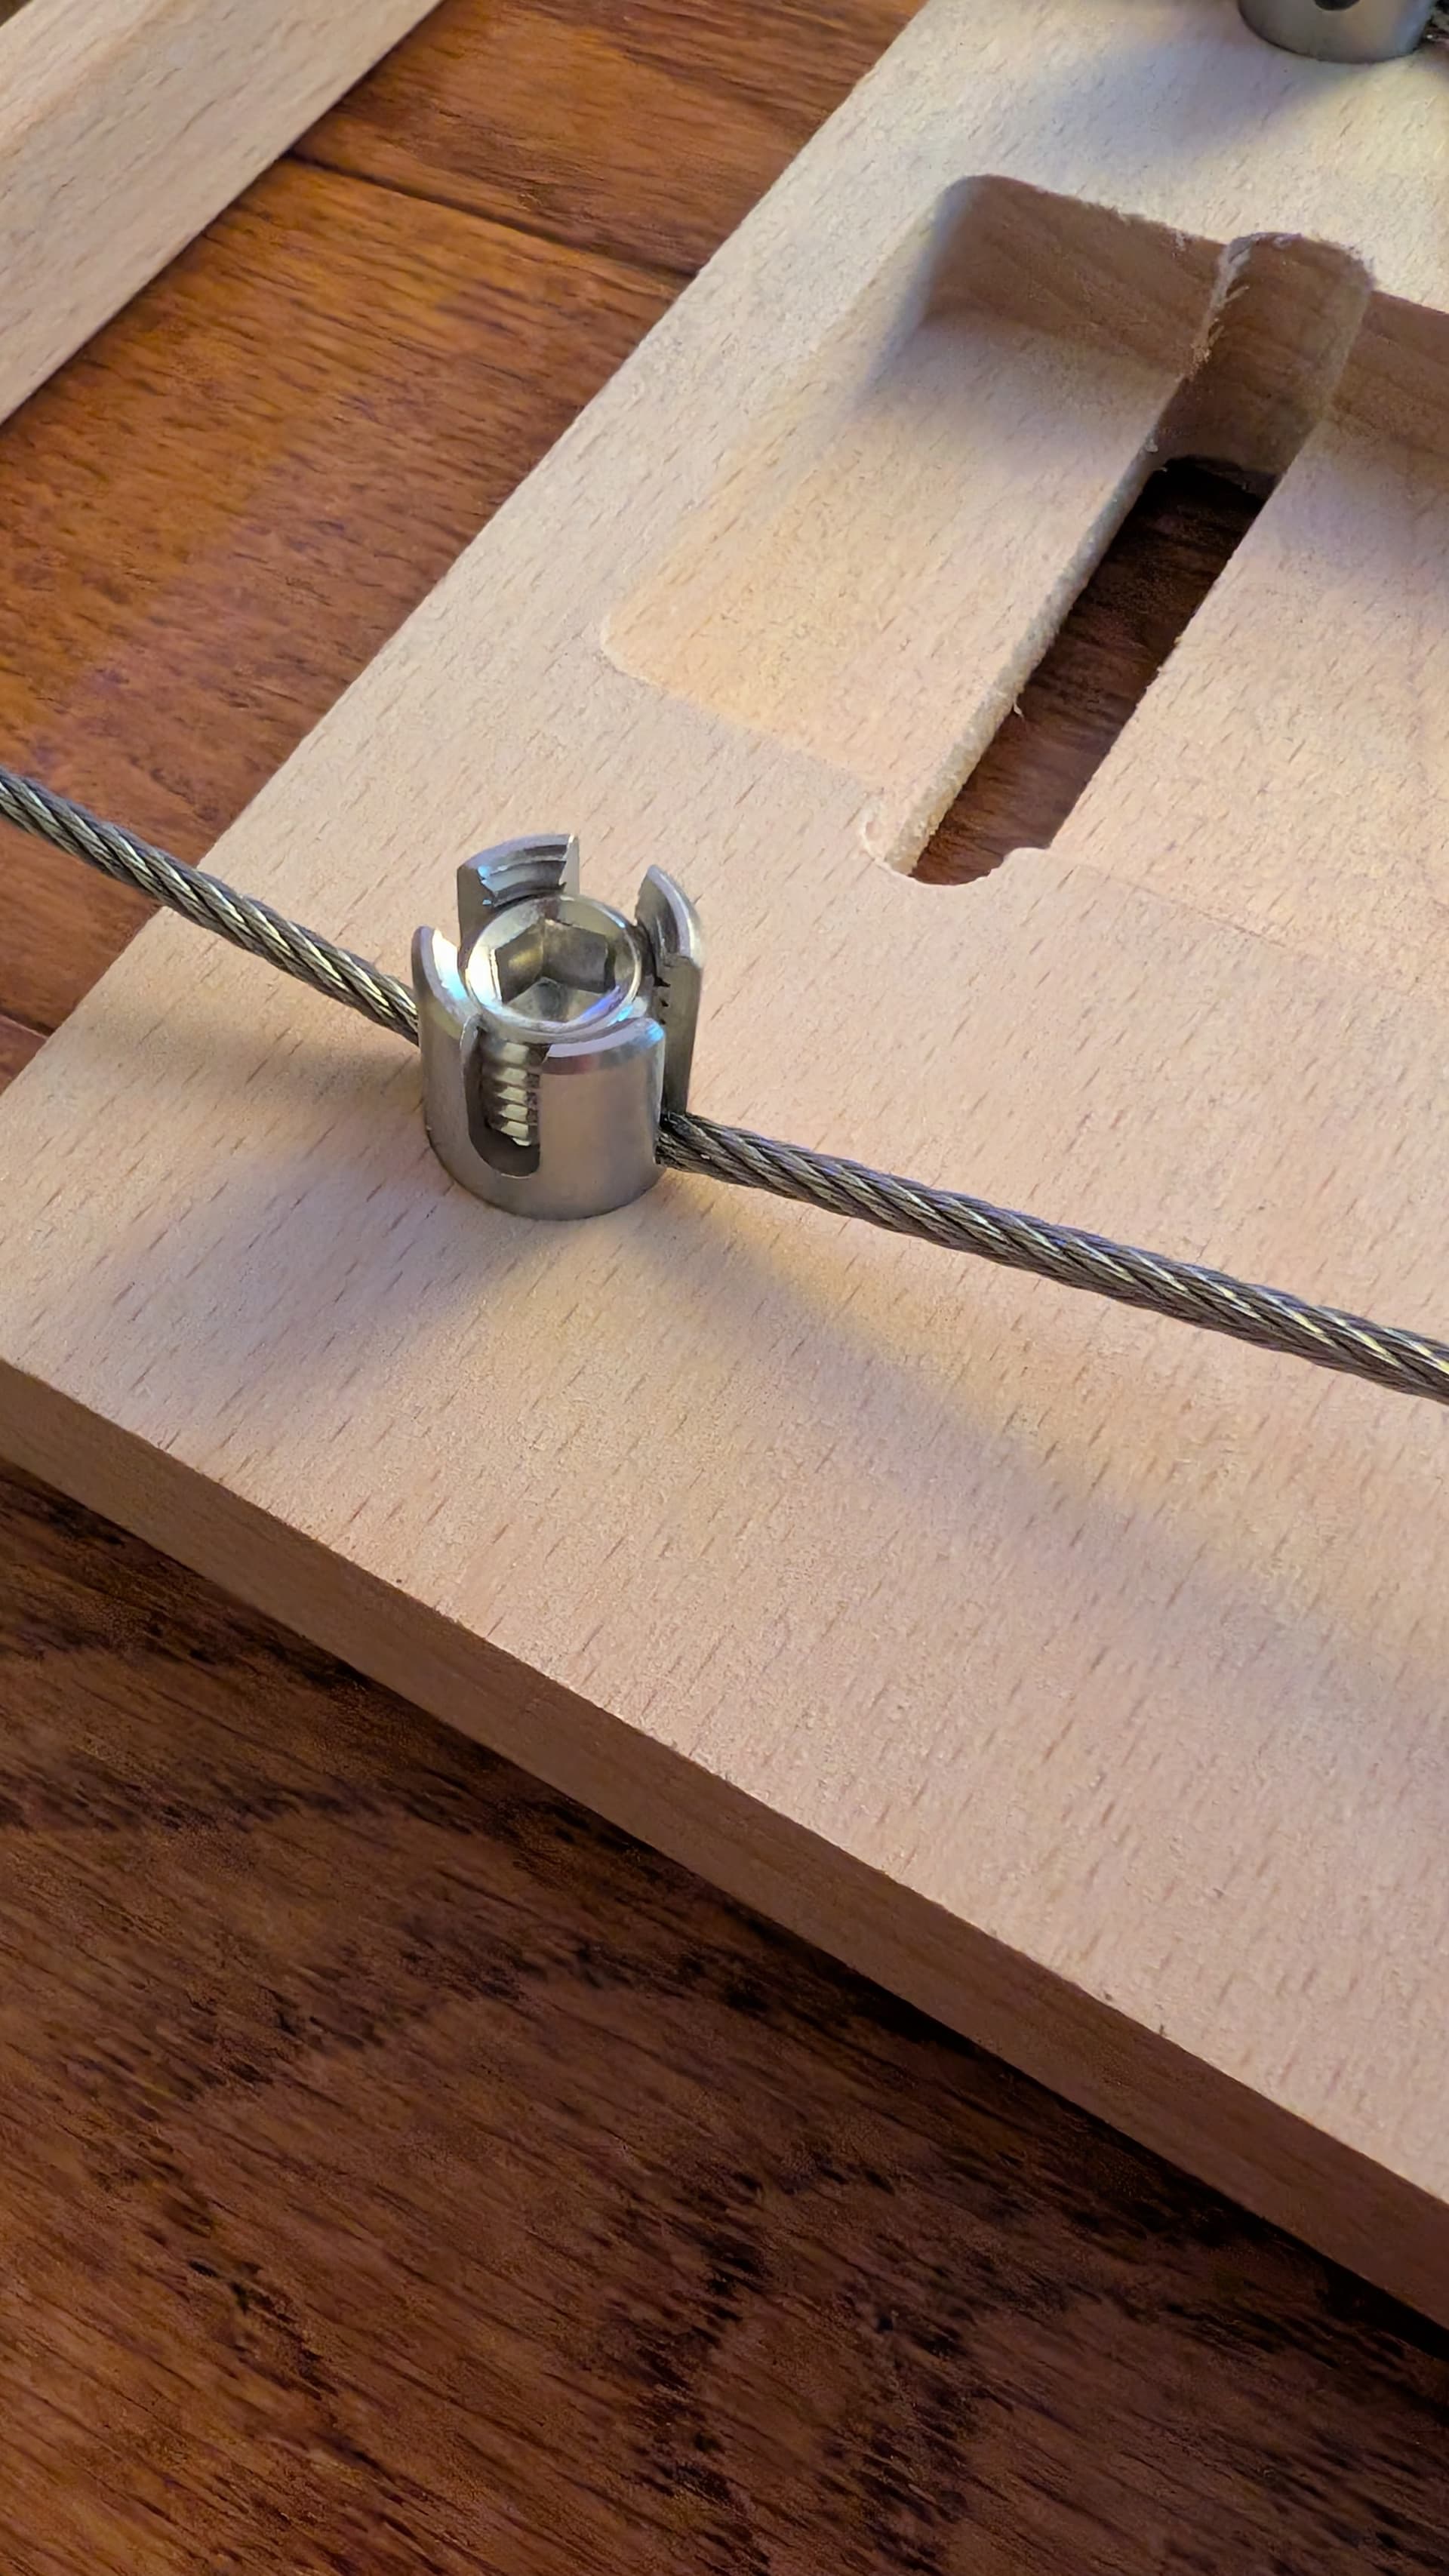
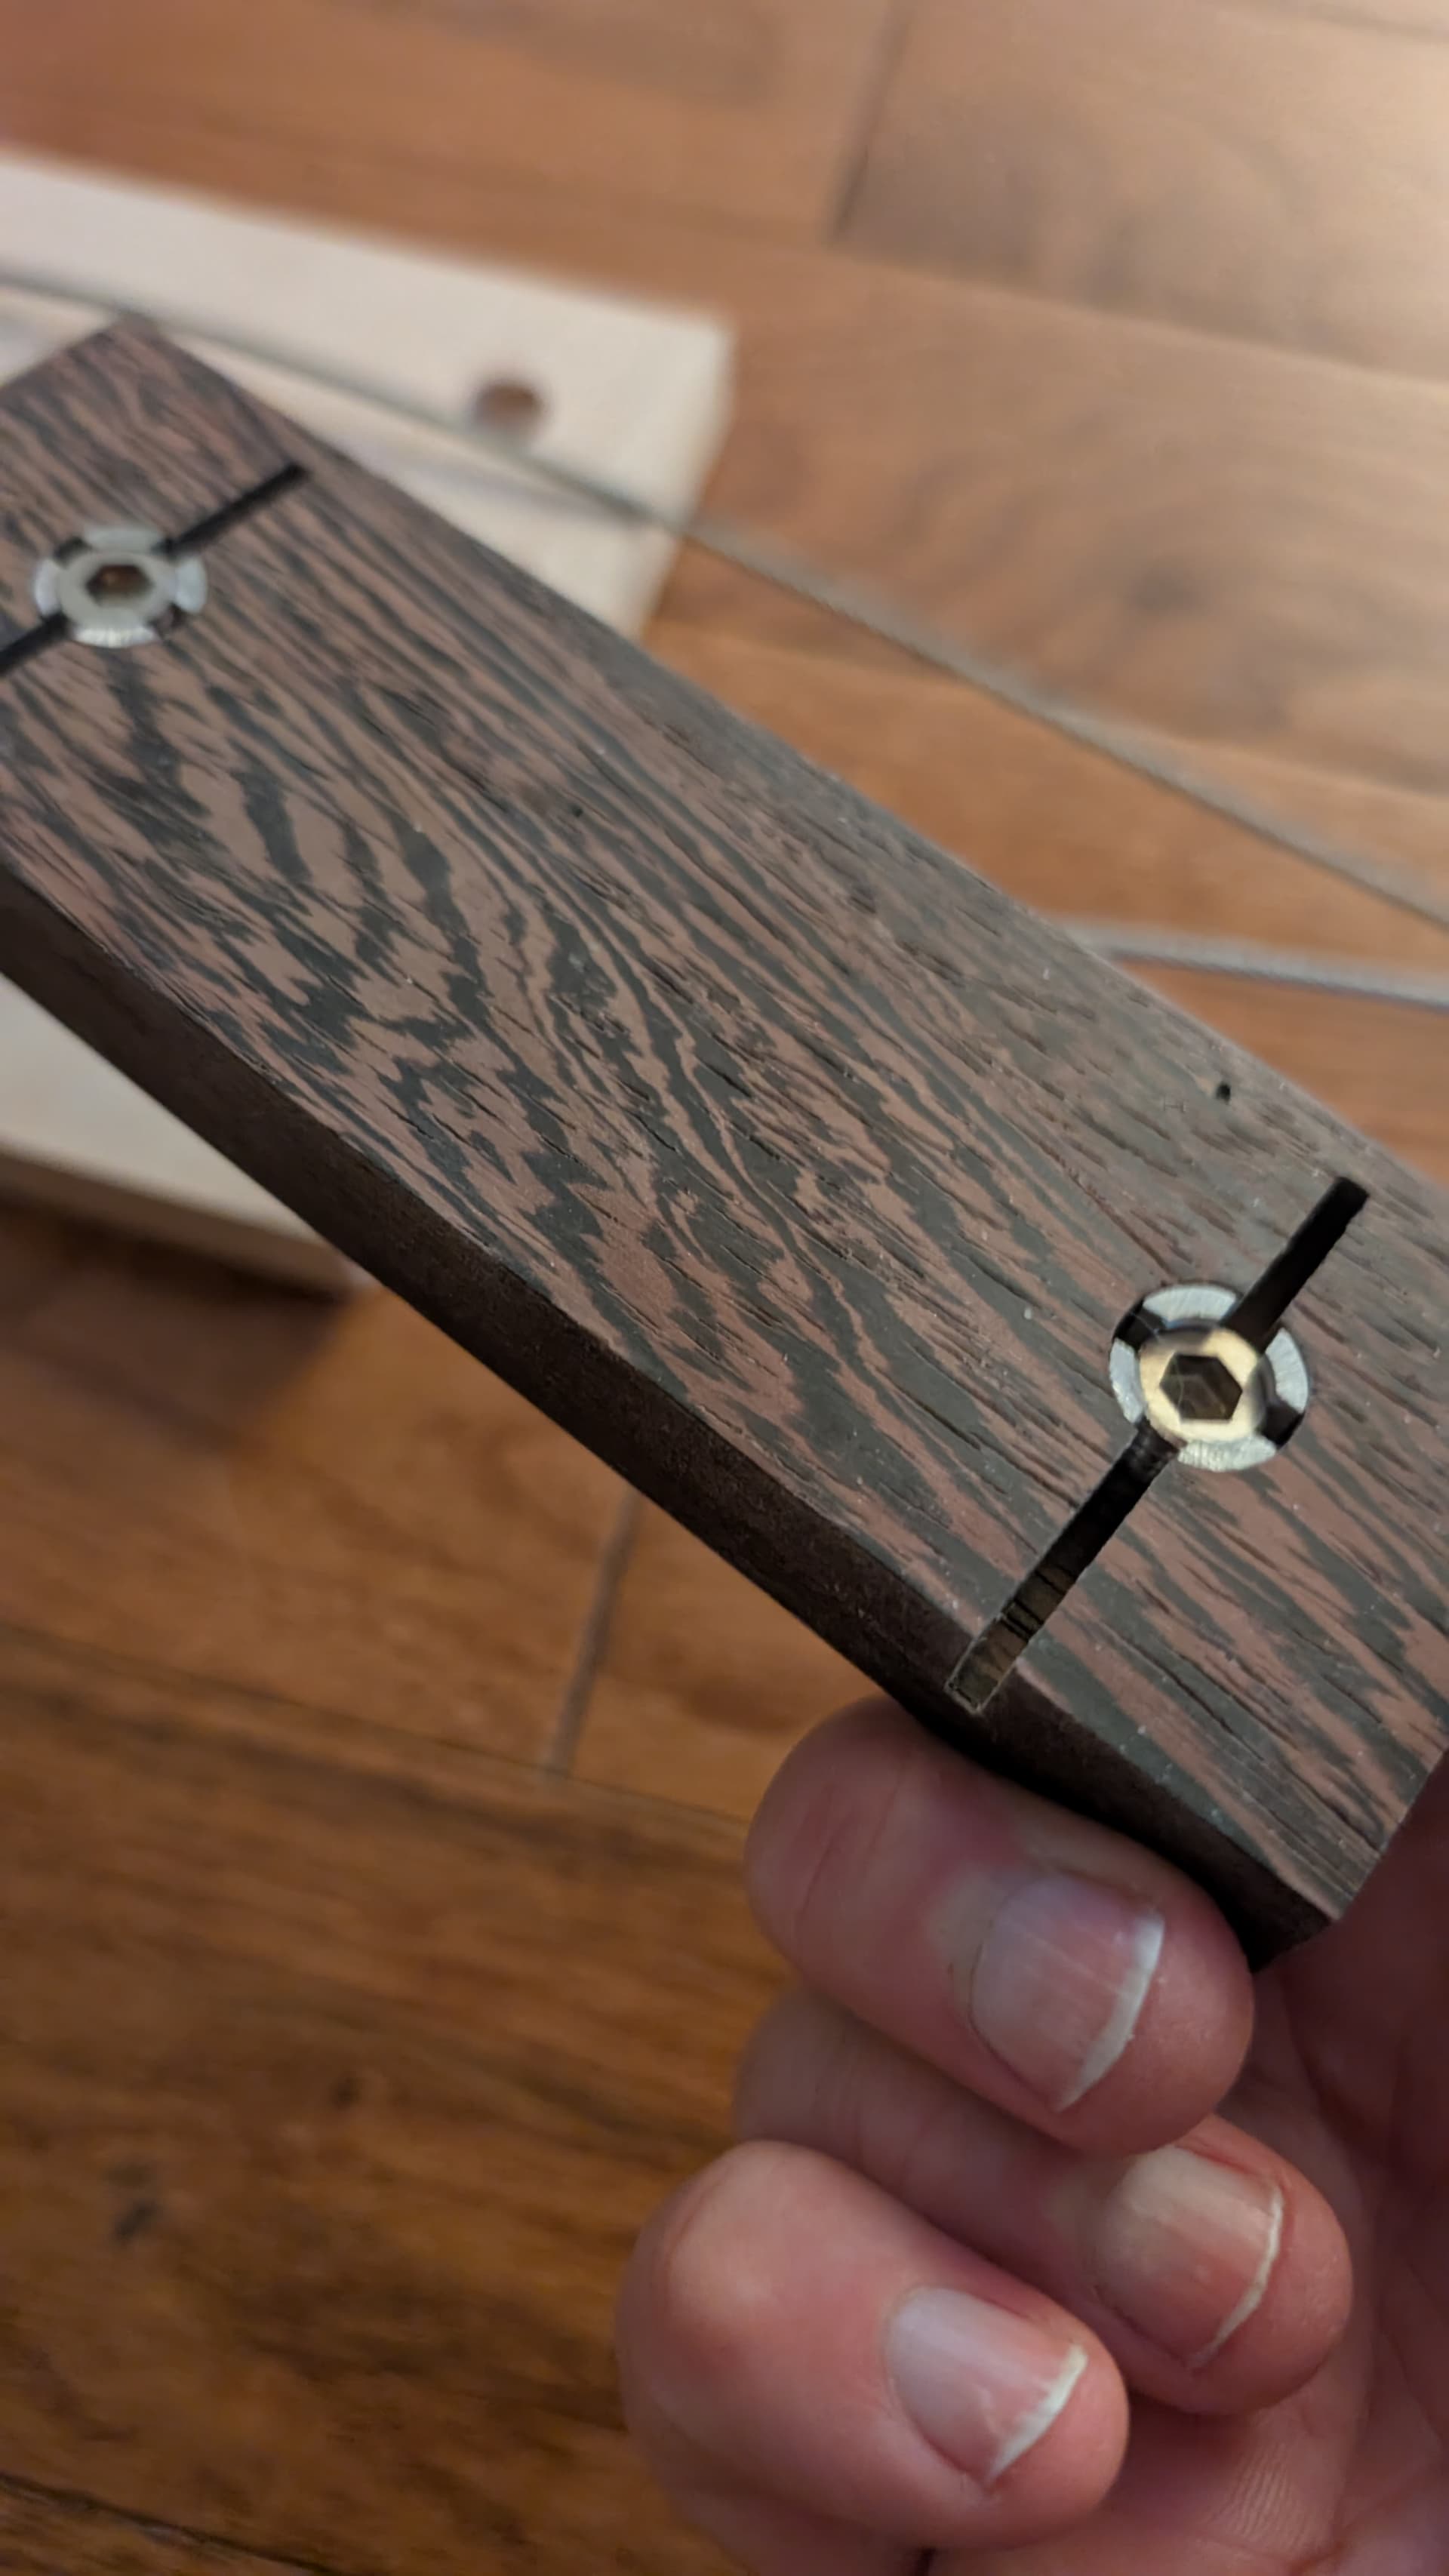
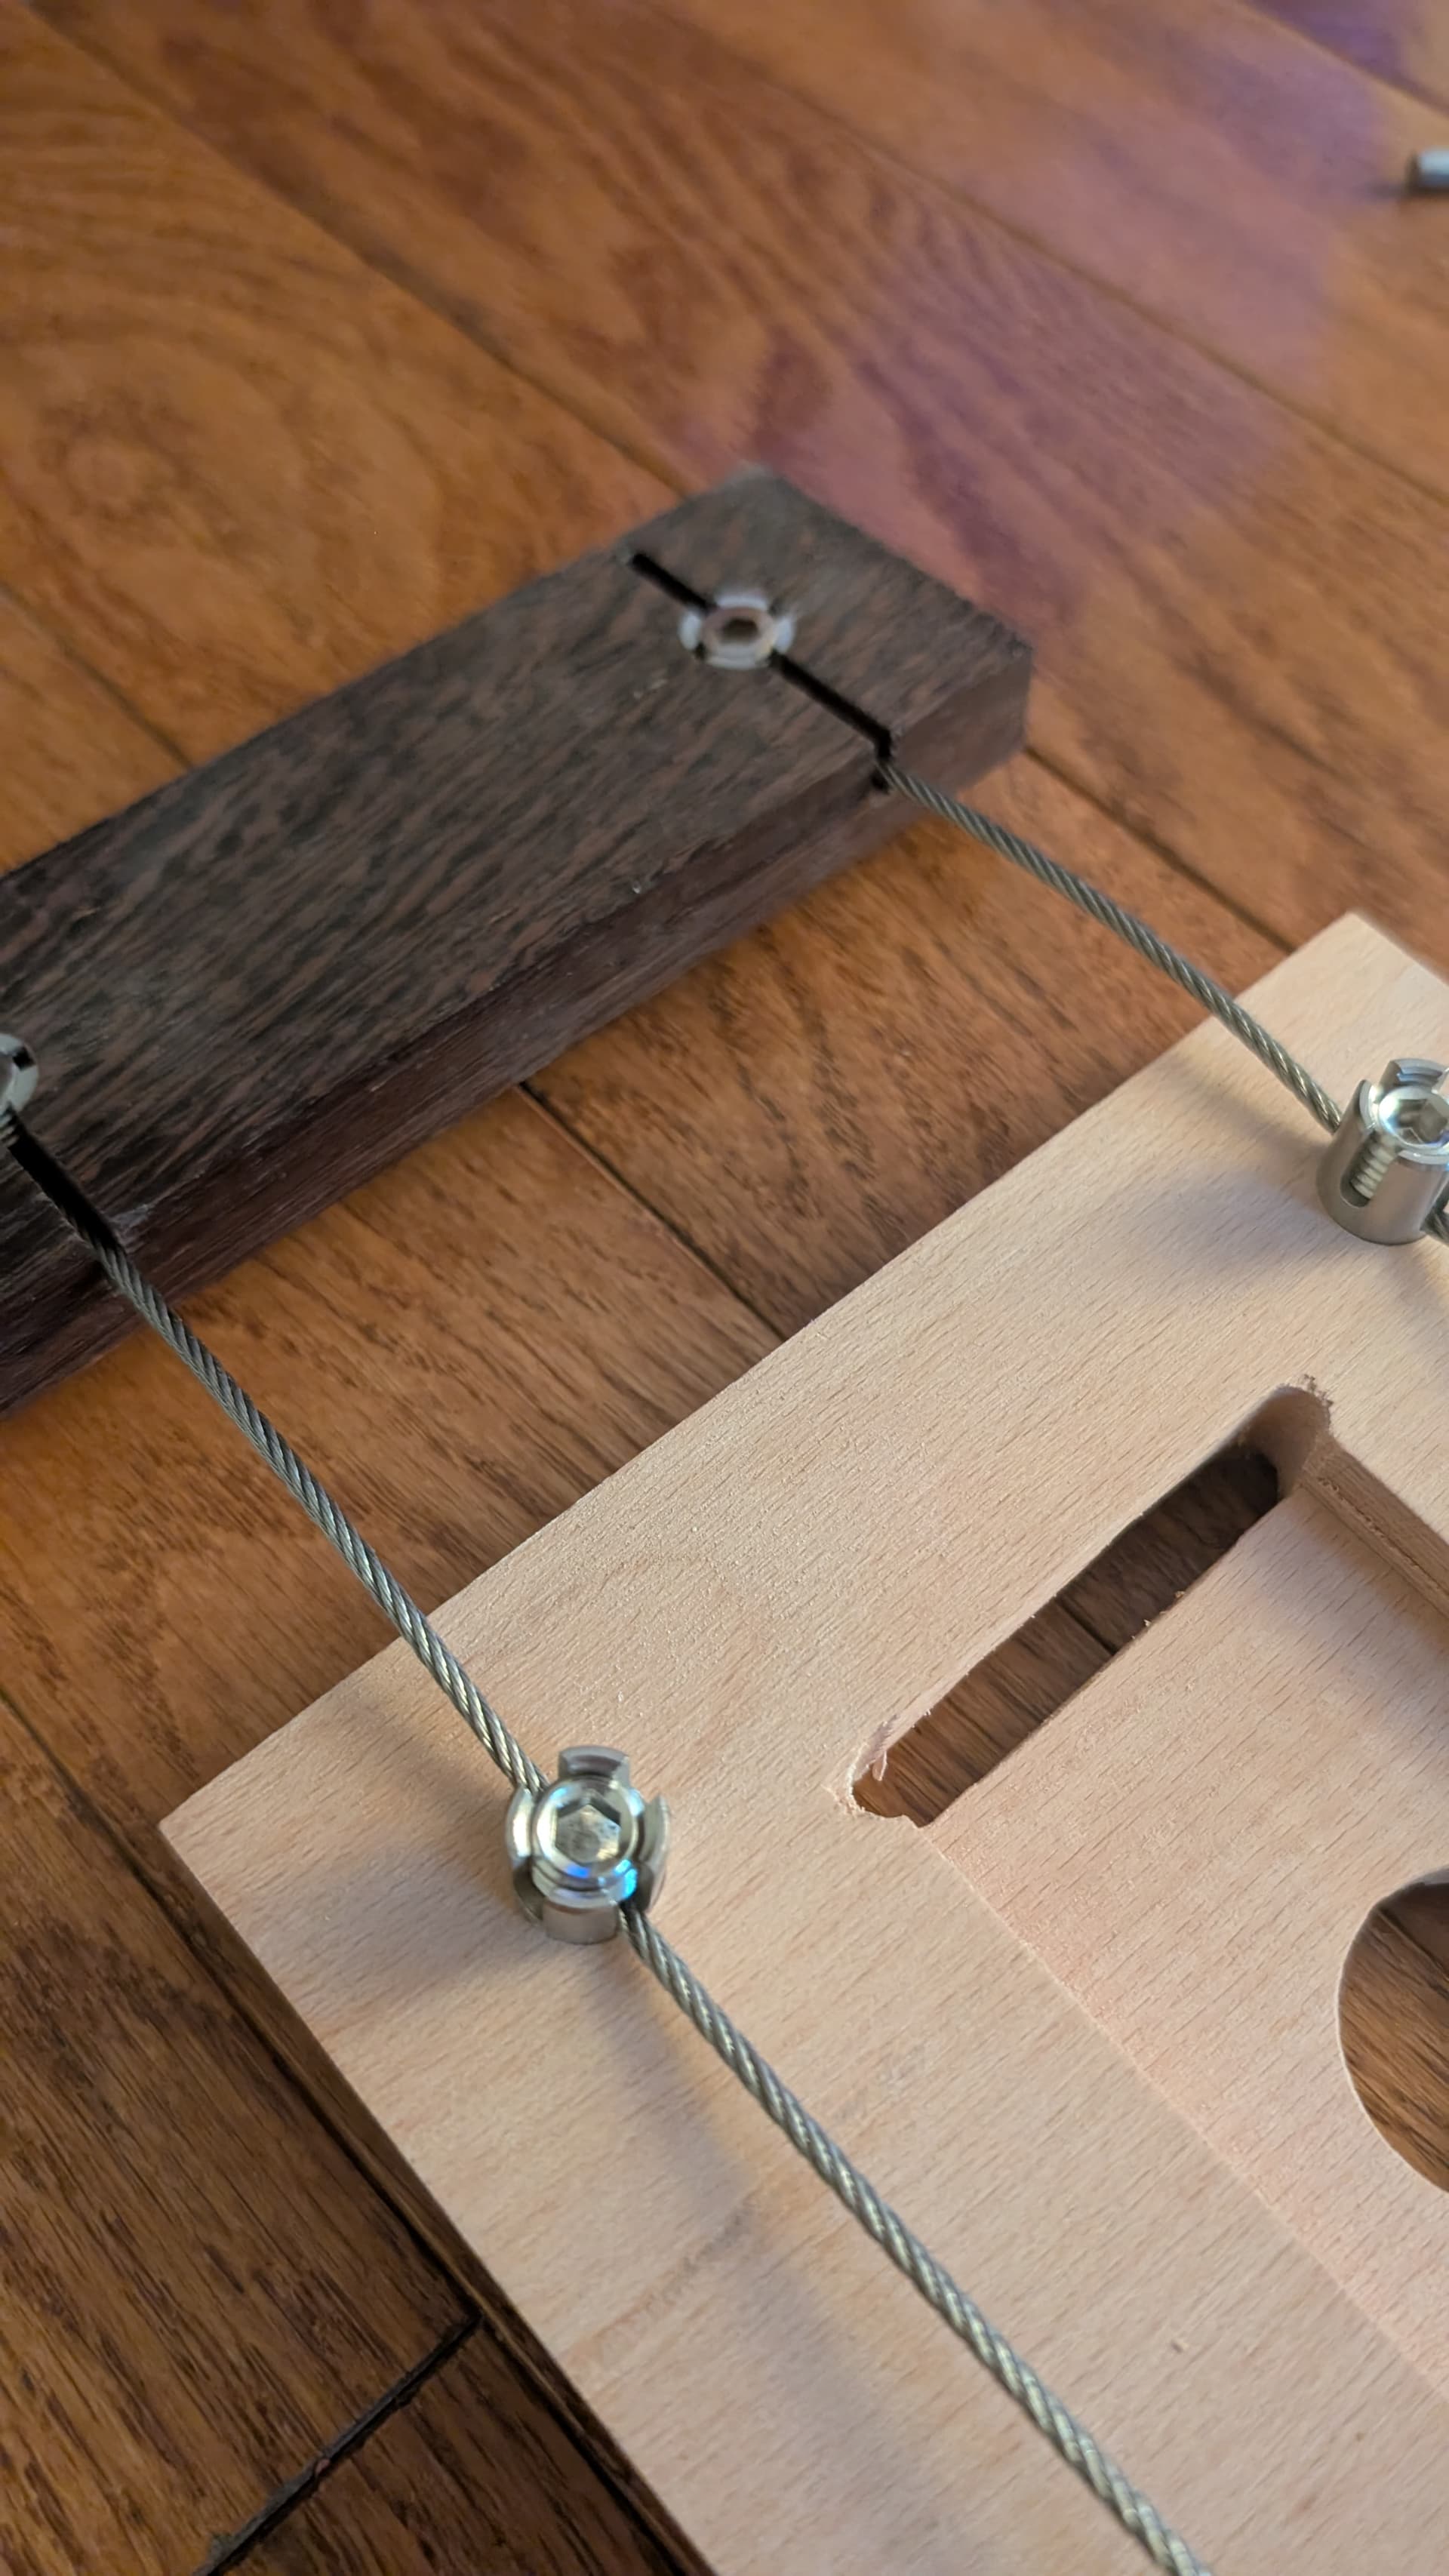
I was commissioned by a friend to make a display of her Disney running medals. I created an inset for each of them by either tracing them or taking a picture and then manually tracing the picture to create a closed vector. I started with MDF and tweaked the file till I got the piece to fit and then I created the final piece on beech wood. On the backside of each is an inset to receive the ribbon. I bought hardware so that I could use a cable system for displaying the pieces. Amazon.com : Acemaker 20pcs 1/8" Cable Cross Clamps, T316 Stainless Steel Cross Cable Clamps for 3mm Wire Rope or Rod Fittings, No Drilling Clips for Wire Trellis Kits (Invisible) : Patio, Lawn & Garden
I will post the final project in a couple of days.


27 Likes
What a great project, the fit is spot on. Good job!
1 Like
Nice!!! (I have ‘leveraged’ your image ![]() )
)
2 Likes
Nice hanger system. That’s a new one for me
2 Likes