Thats really expensive for colorcore, you can get 24x24x.5 for about $60 if you search around for it (i bought some from buyplastics one time, great service, but they send an awful lot of email begging for reviews, i kind of hate that)
I get all of mine from BuyPlastic as well. Very quick shipping.
I guess I didn’t notice their emails in the flood of other emails I delete multiple times per day.
1 Like
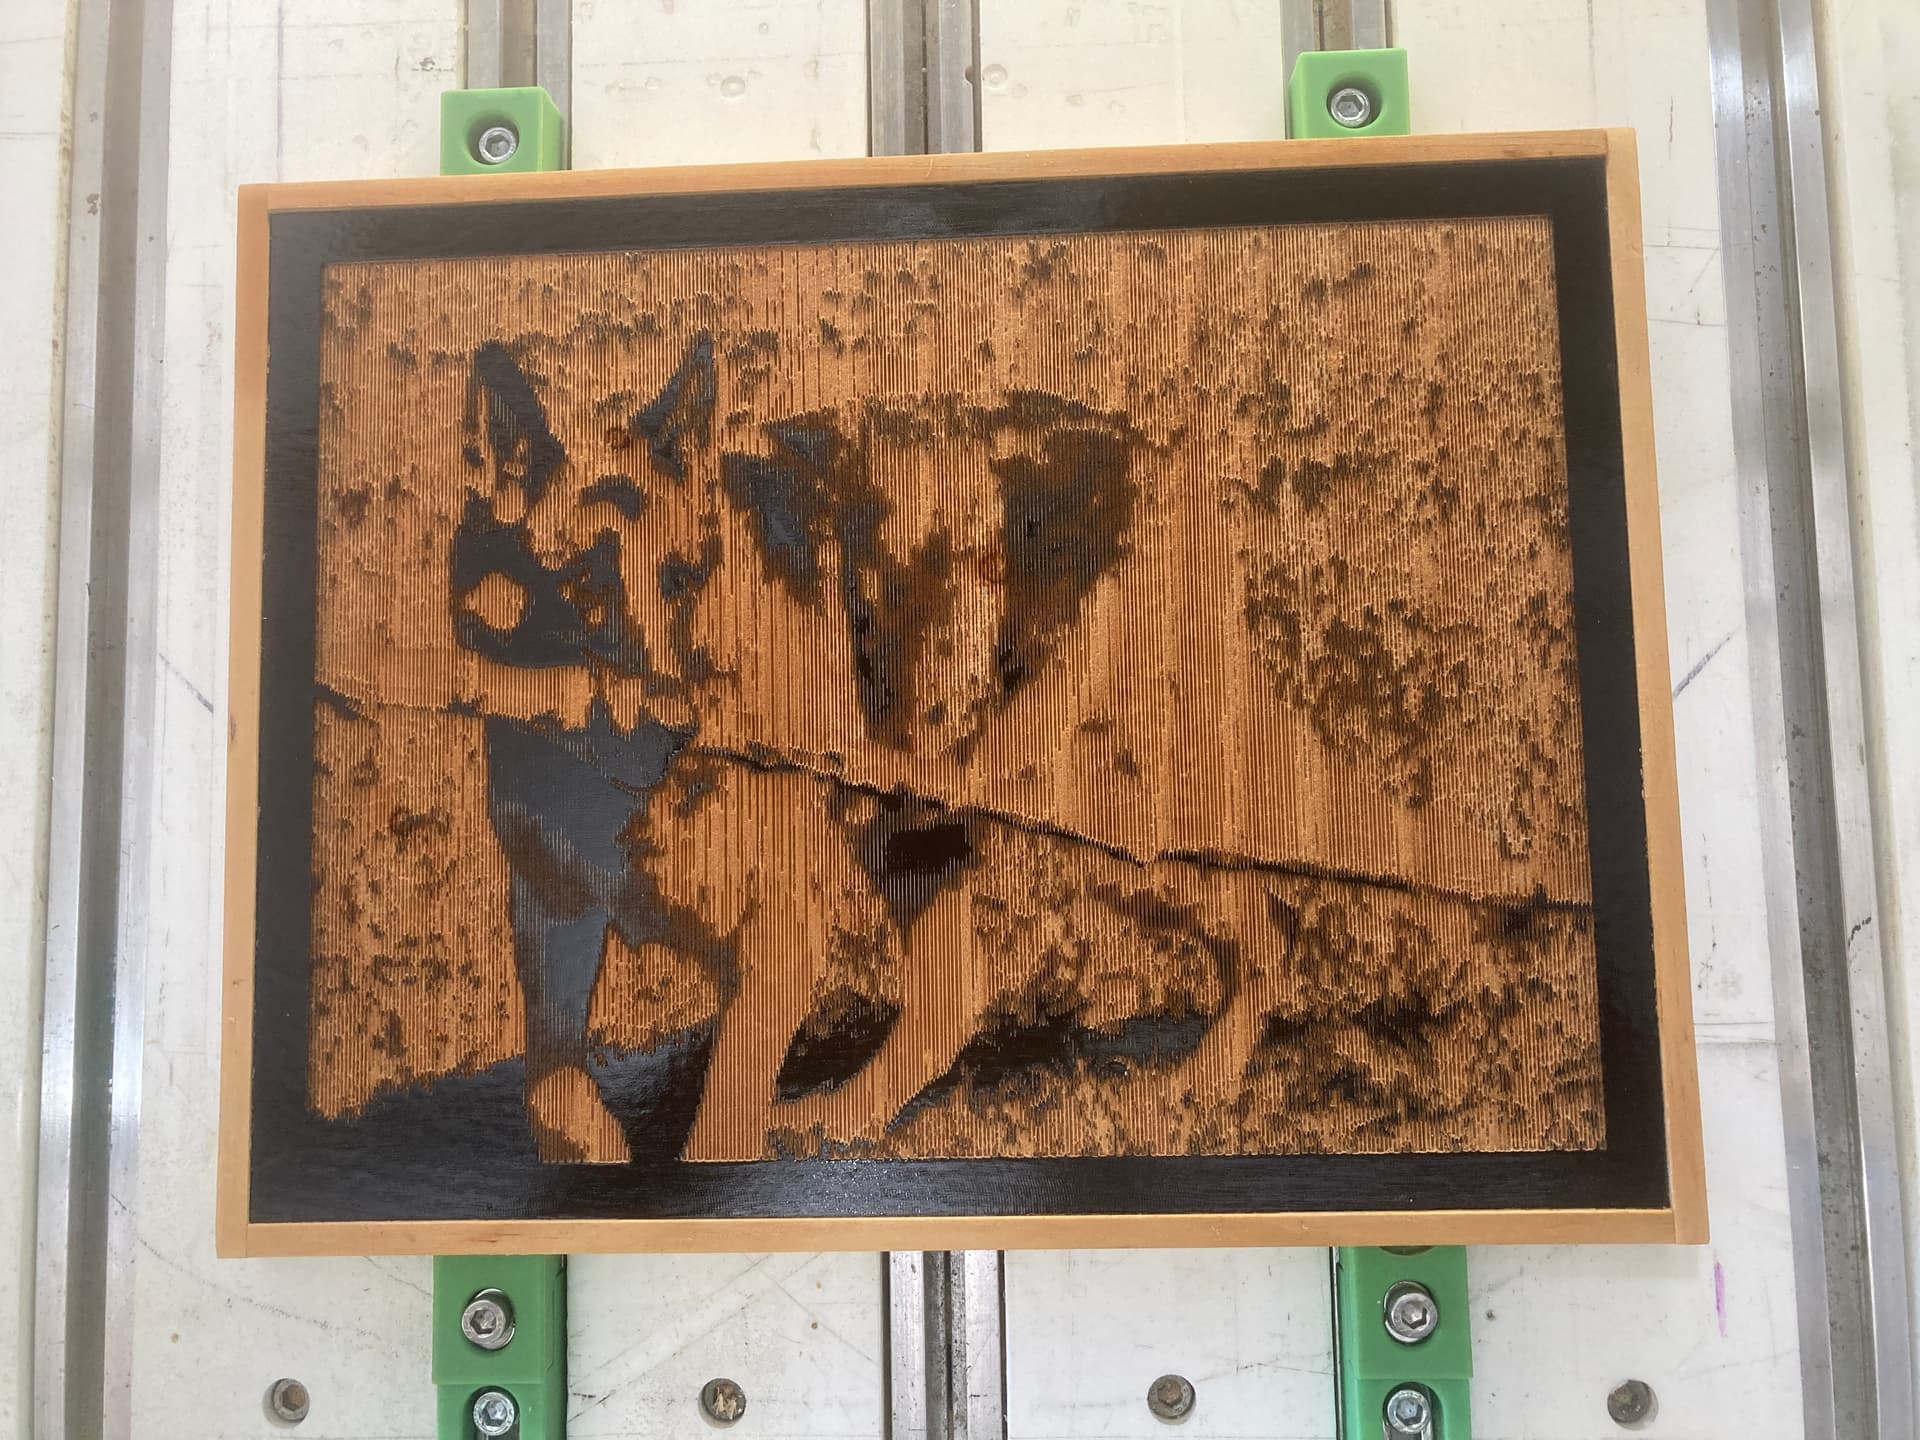
My sister-in-law asked me to cut this…

So I cropped & reduced the colors & increased the contrast a bit…

So I did a little math…
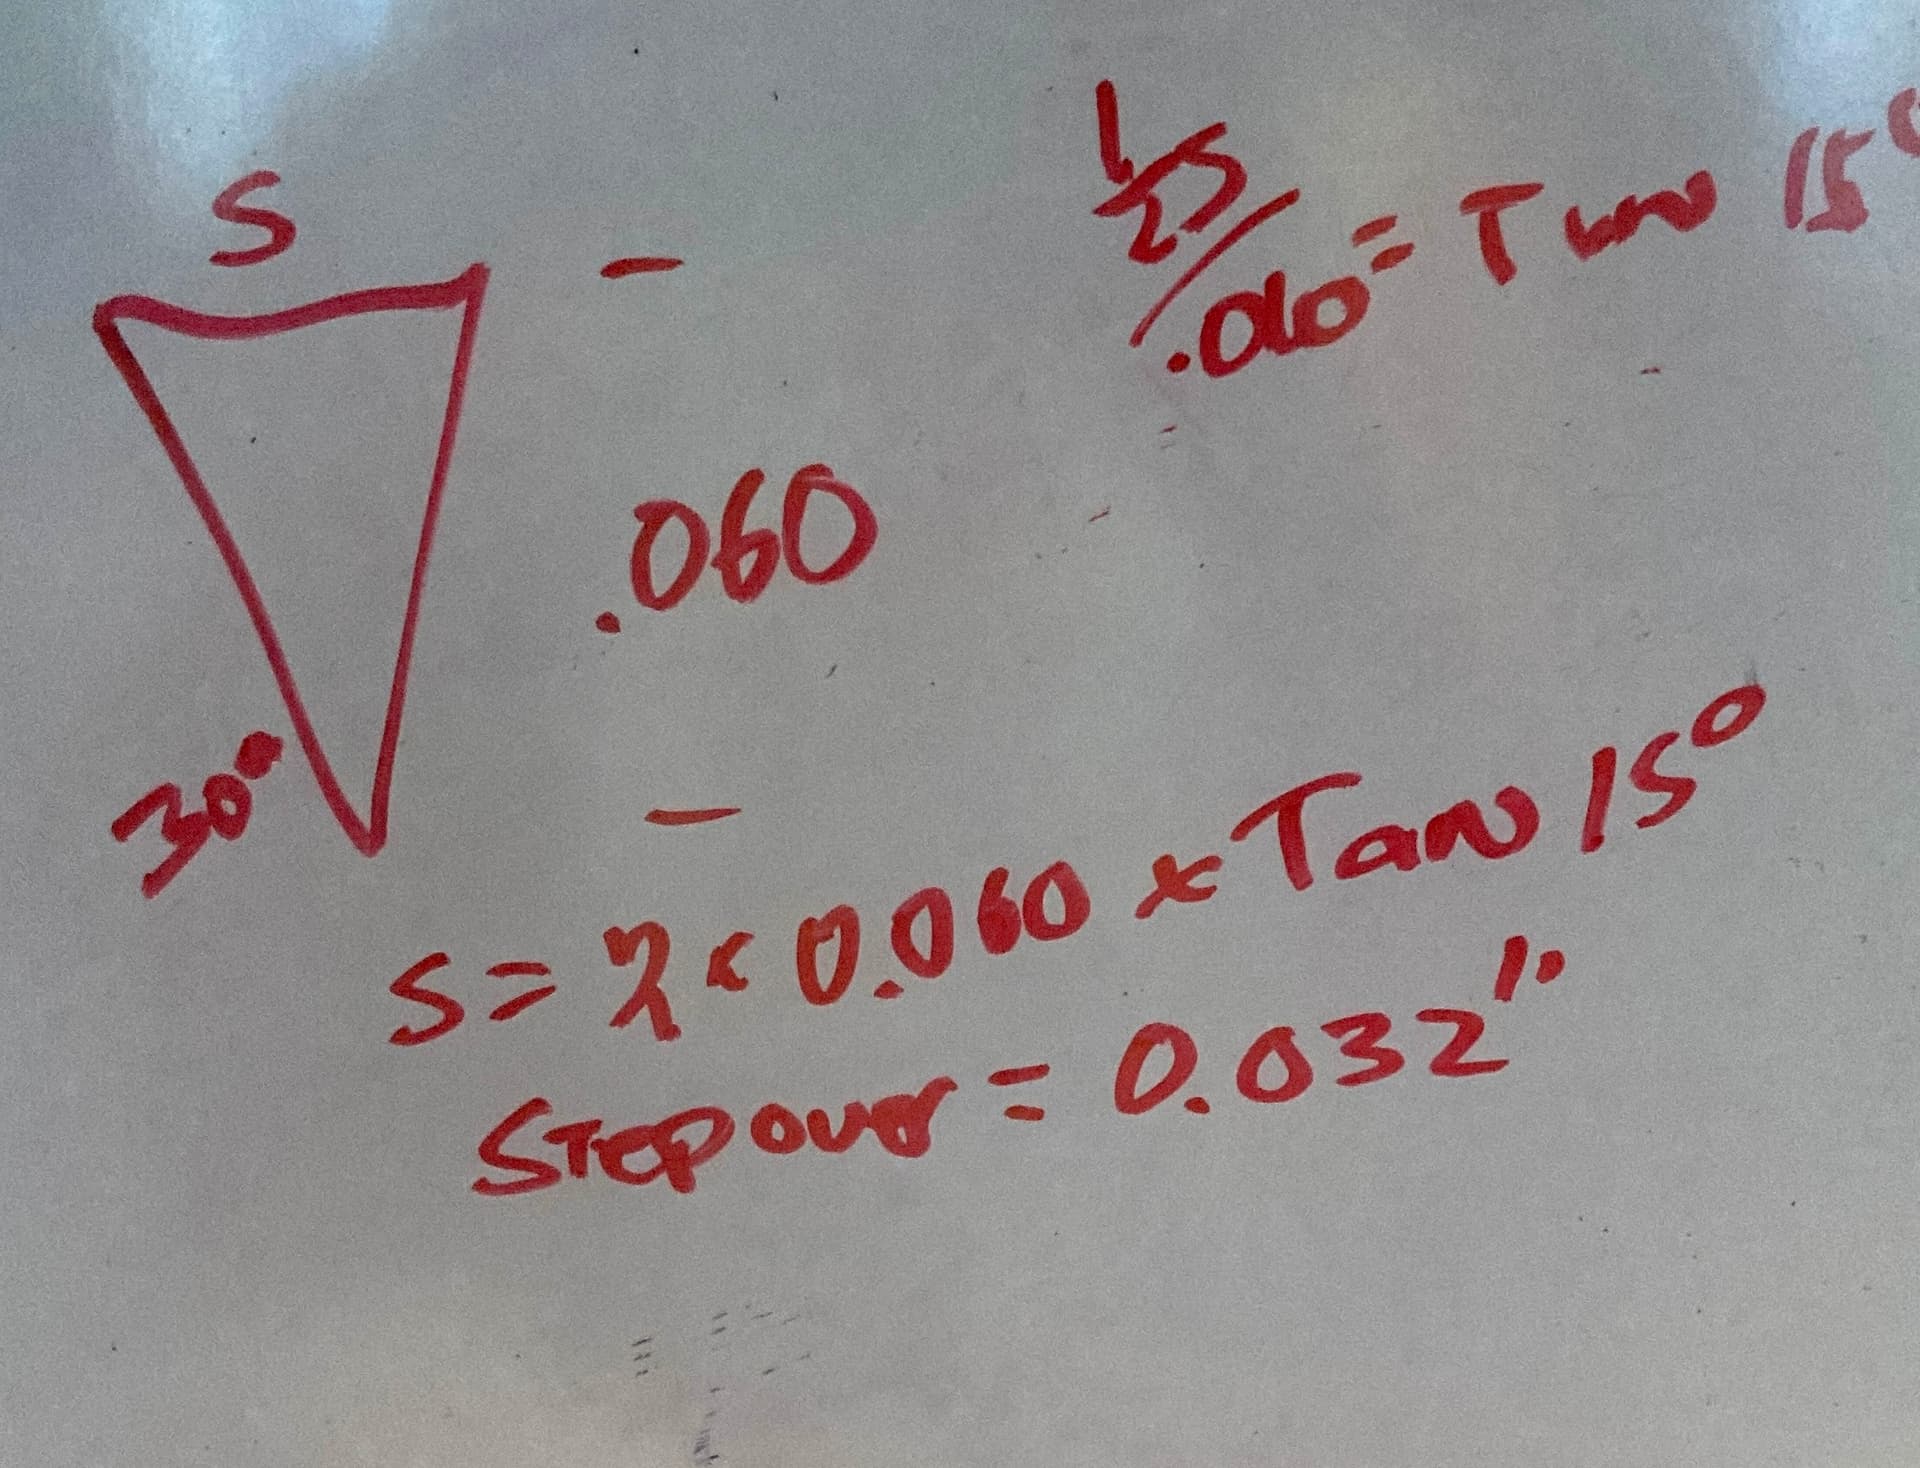
Imported the image to a solid component 0.060" height,
And machined it with a 3D Finish path with a 0.032" stepover using a 30° Vee.
I surfaced & painted a piece of pine black, then ran the path.
The lighter areas on the model were 0.060" deep, and the black areas 0.0" deep
creating a “half-toning” effect with the wider & narrower grooves.
Came out pretty good, given the image I had to work with. Might be a bit better not cut quite so deep. But She’s happy with it! ![]()
18 Likes
Nice work.
I find that organic objects are really hard to get a good handle on when tracing or image depth.
I stumble onto a good combination from time to time, but it’s not a process.
1 Like
Funny, you mention that. Another piece of Colorcore just arrived at my house today. It came from buyplastics.com
1 Like
7 Likes
Squirrel .
I am bad about side ways efforts, but you take it to an art form. My hat’s off !
1 Like
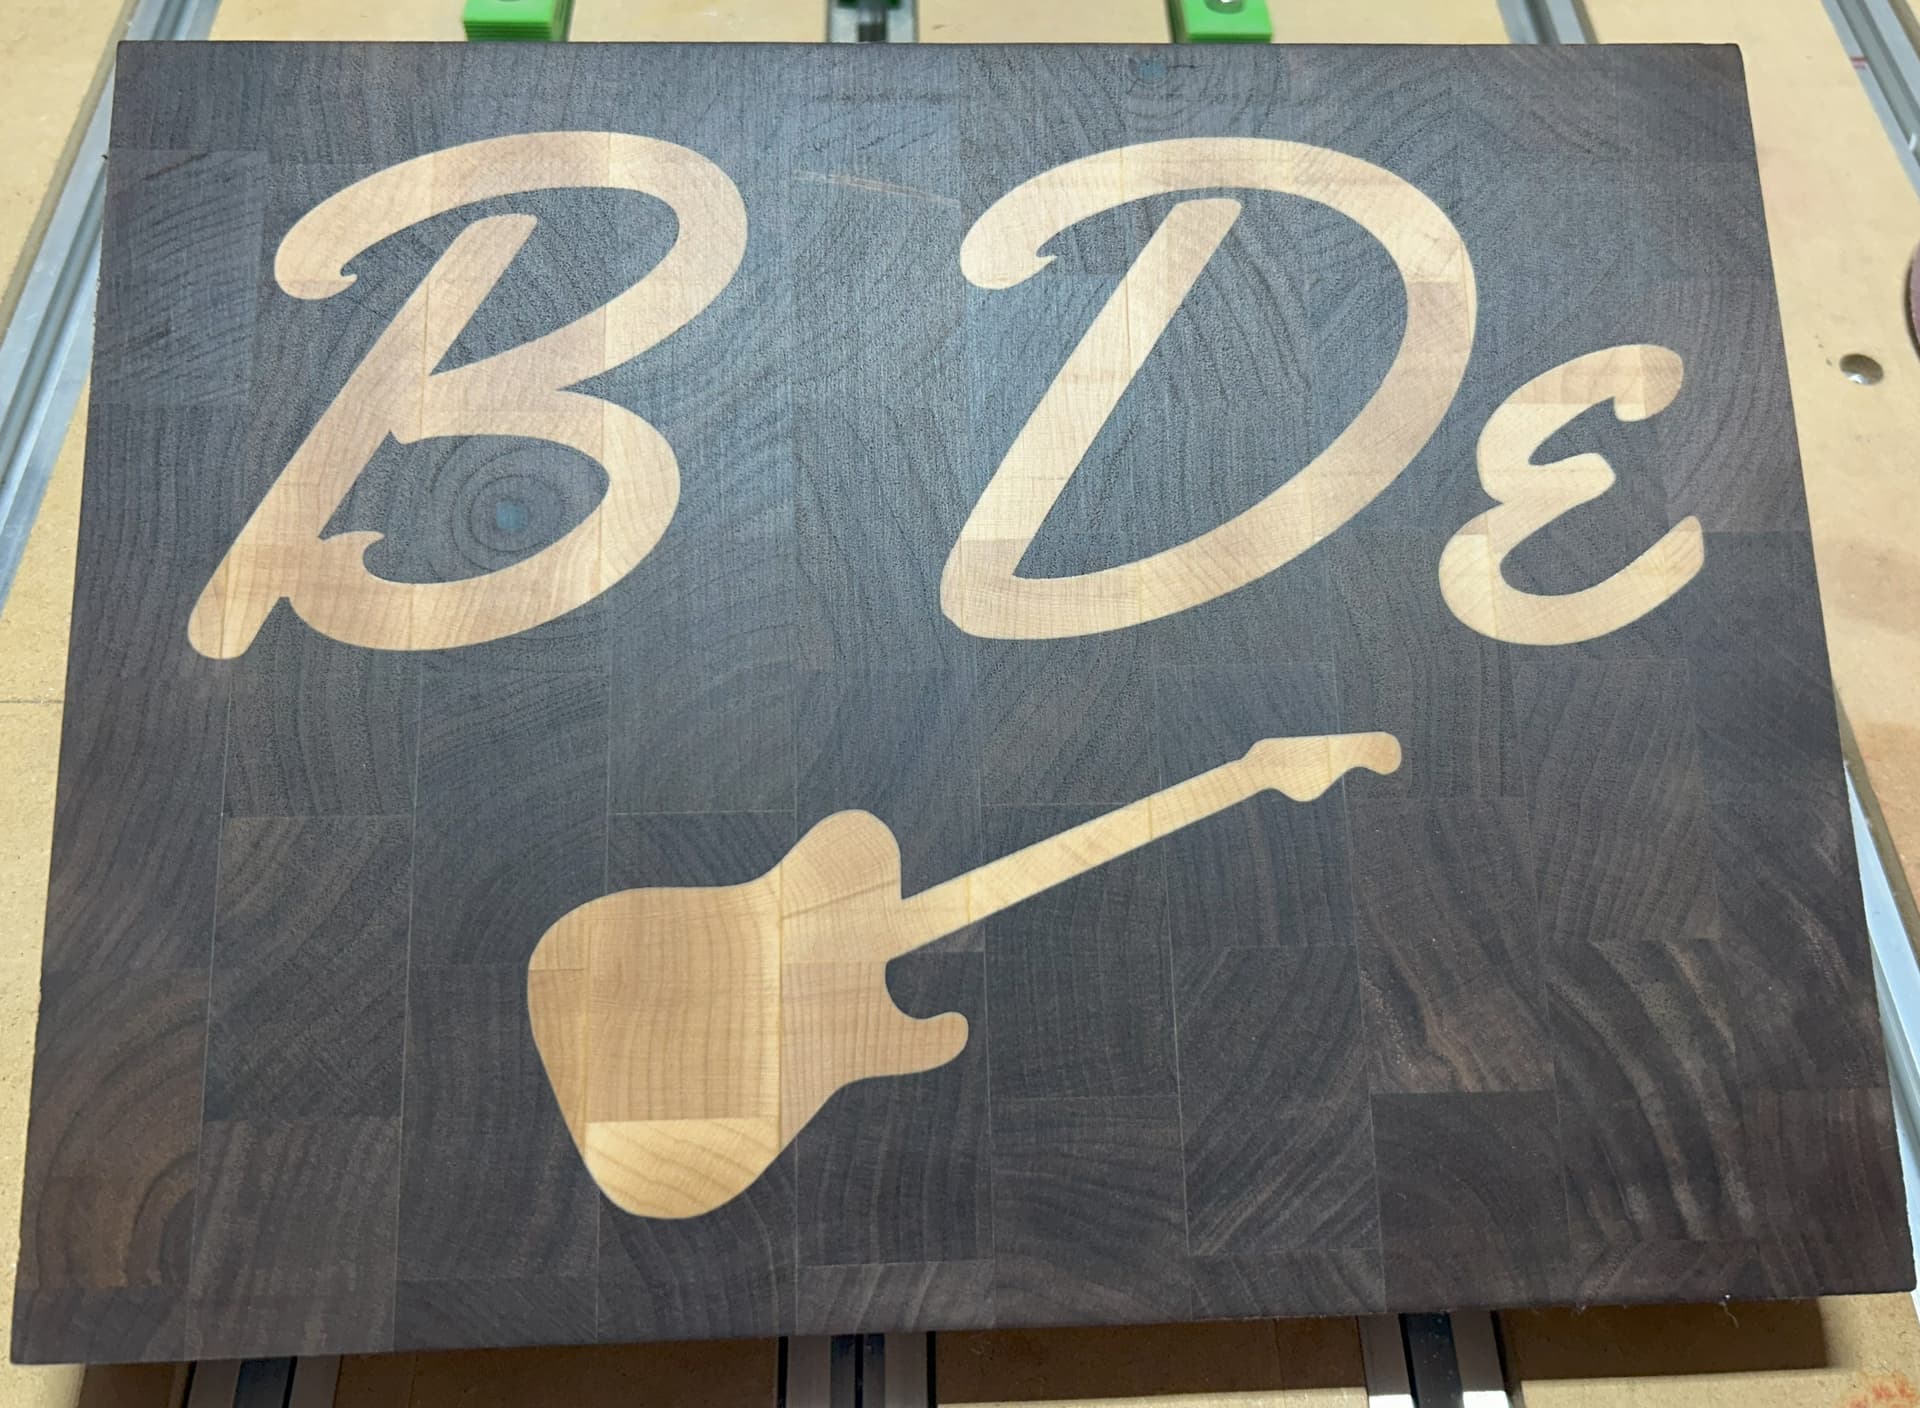
Looks great, Bud. I love how good that looks in end grain.
I was about to give you an A+ because I thought the seems of the maple and walnut glue-ups matched. They’re close.
2 Likes
Omg, whoa. That is some intense craftsmanship and understanding and knowledge of your machine !
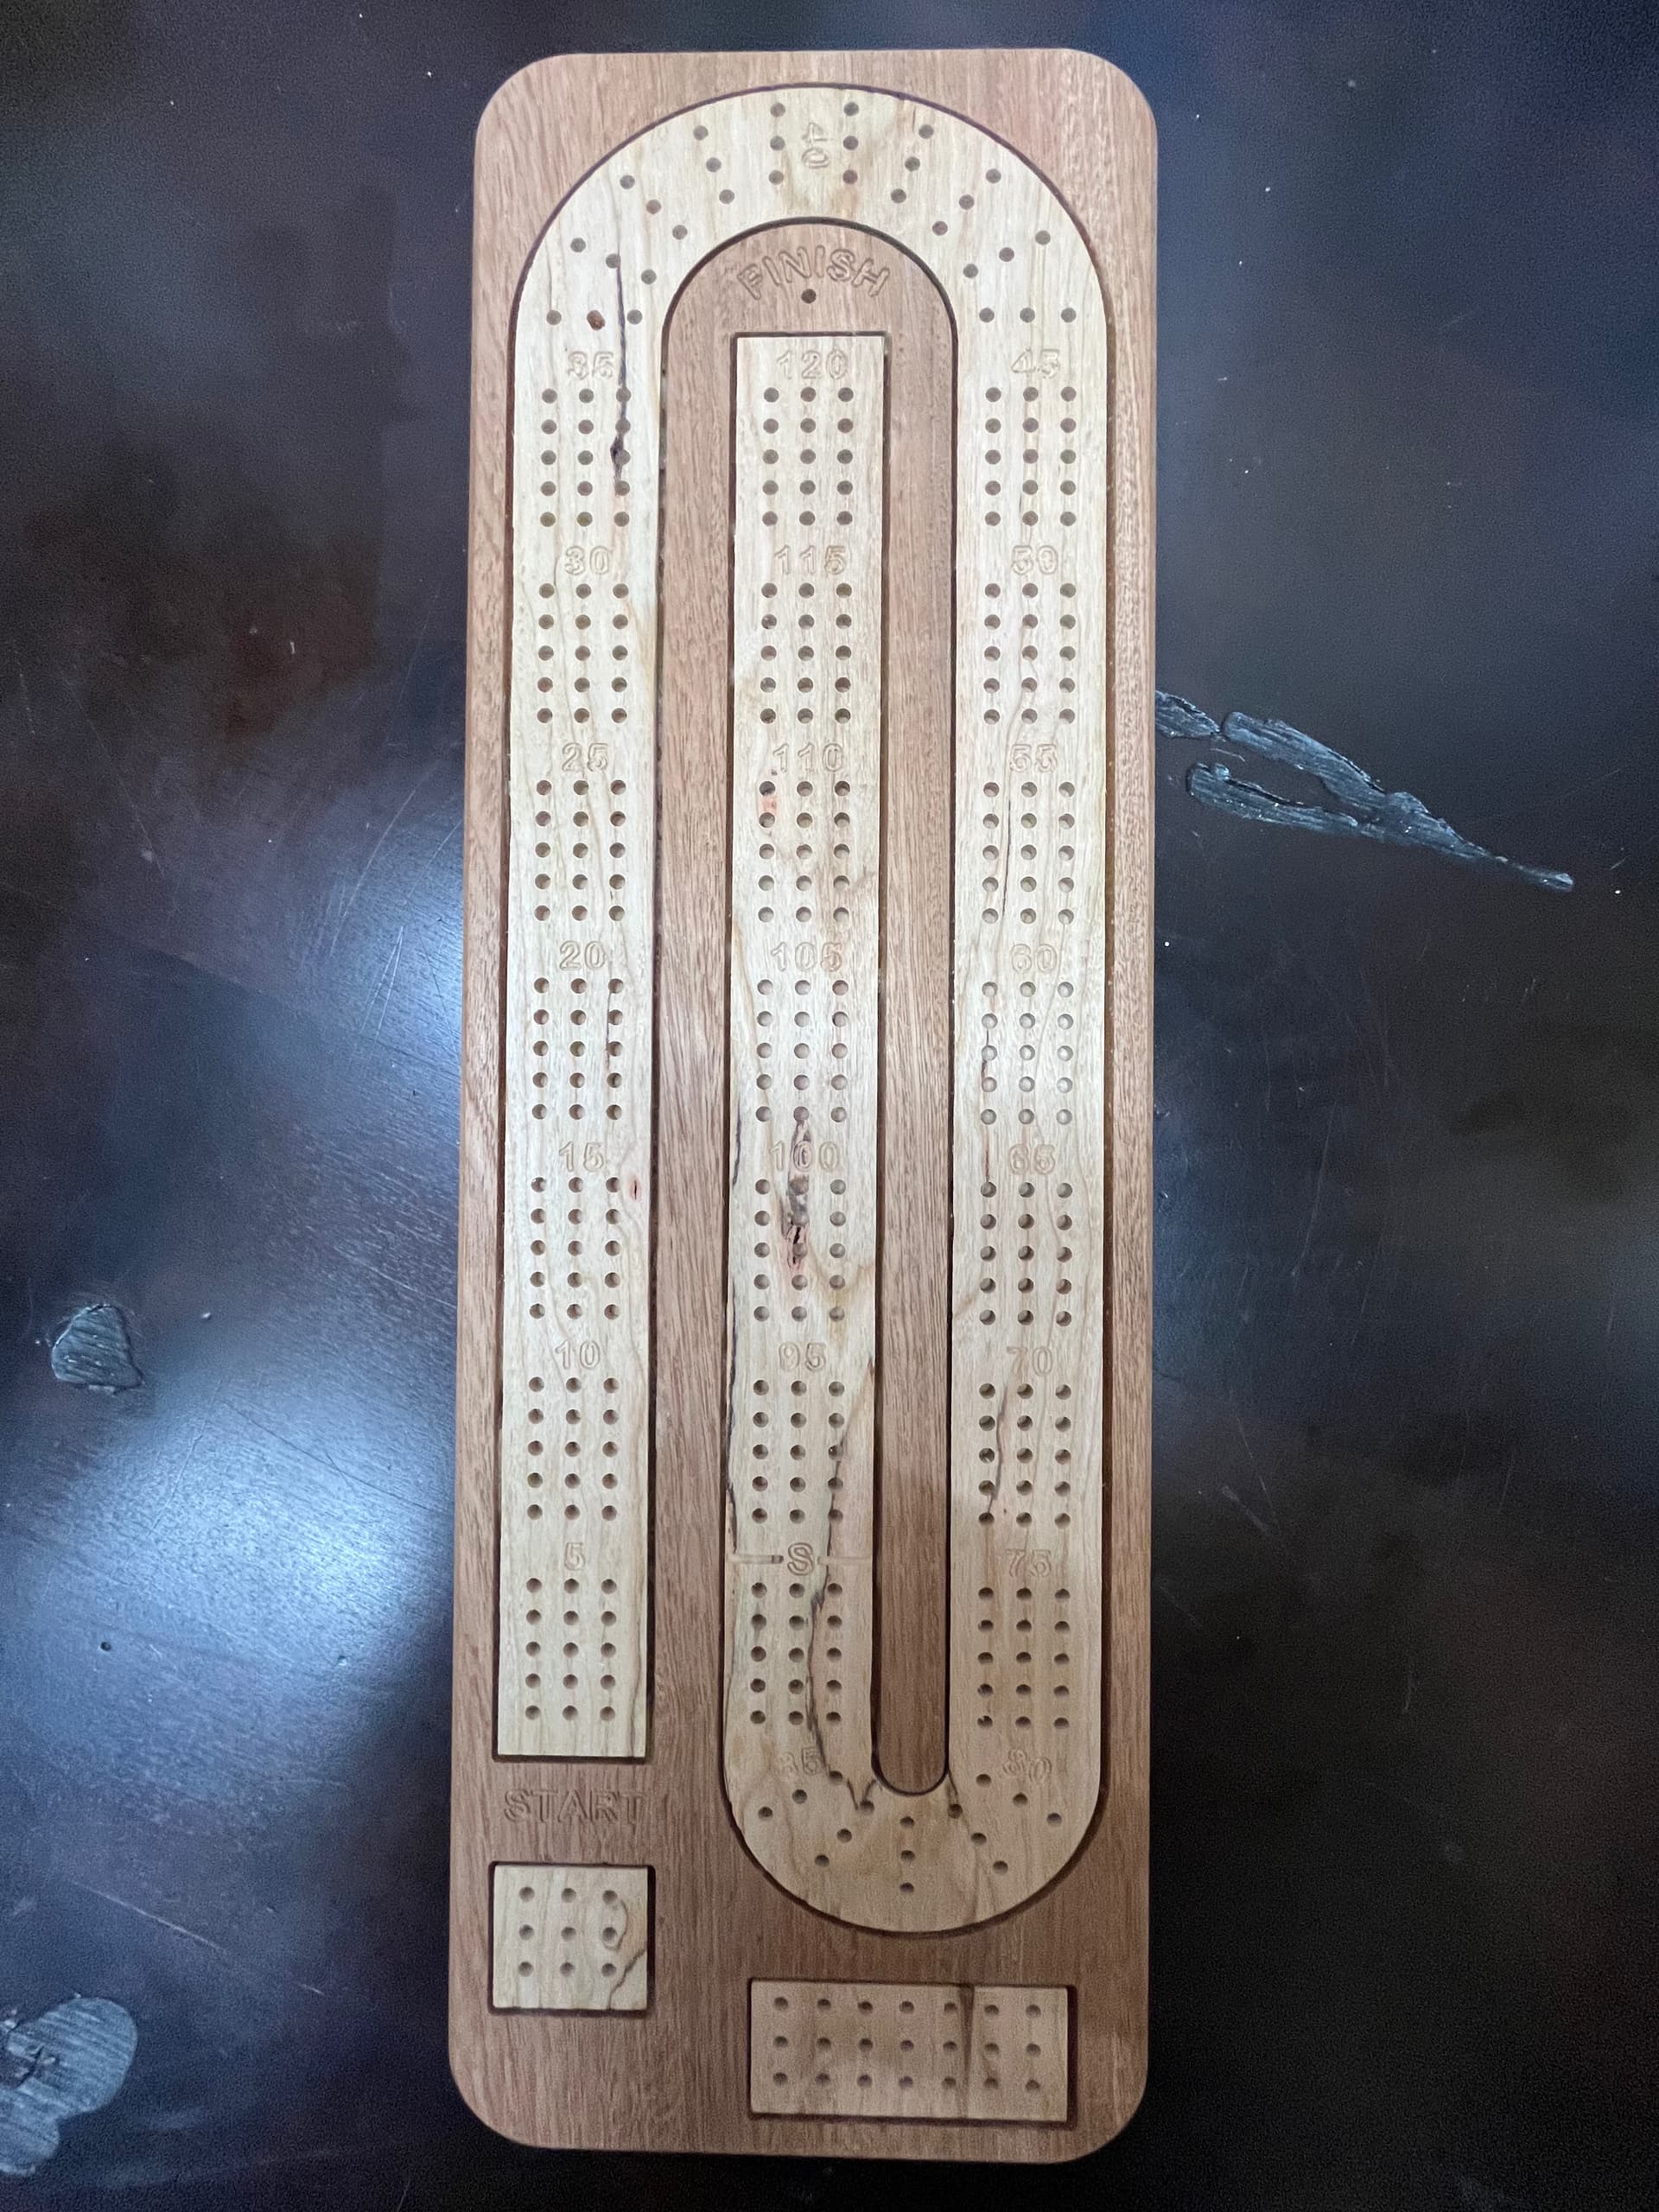
Here’s my first attempt at an inlay crib board. I used a piece of mahogany (from my previous score acquisition) with cherry inlay. The contrast turned out good between the two. You have to look close to see the numbers and start / finish wording so that will need some adjusting so they stand out better. Don’t mind the shadow at the bottom of the pic, my lighting wasn’t that good ![]()
19 Likes
I used to think crib boards were kind of a cnc beginners project but now I know they can be very challenging esp with layouts, borders, numbers and letters. Add to that inlays like you did… btw very nice… and they become complex pieces of work.
4 Likes
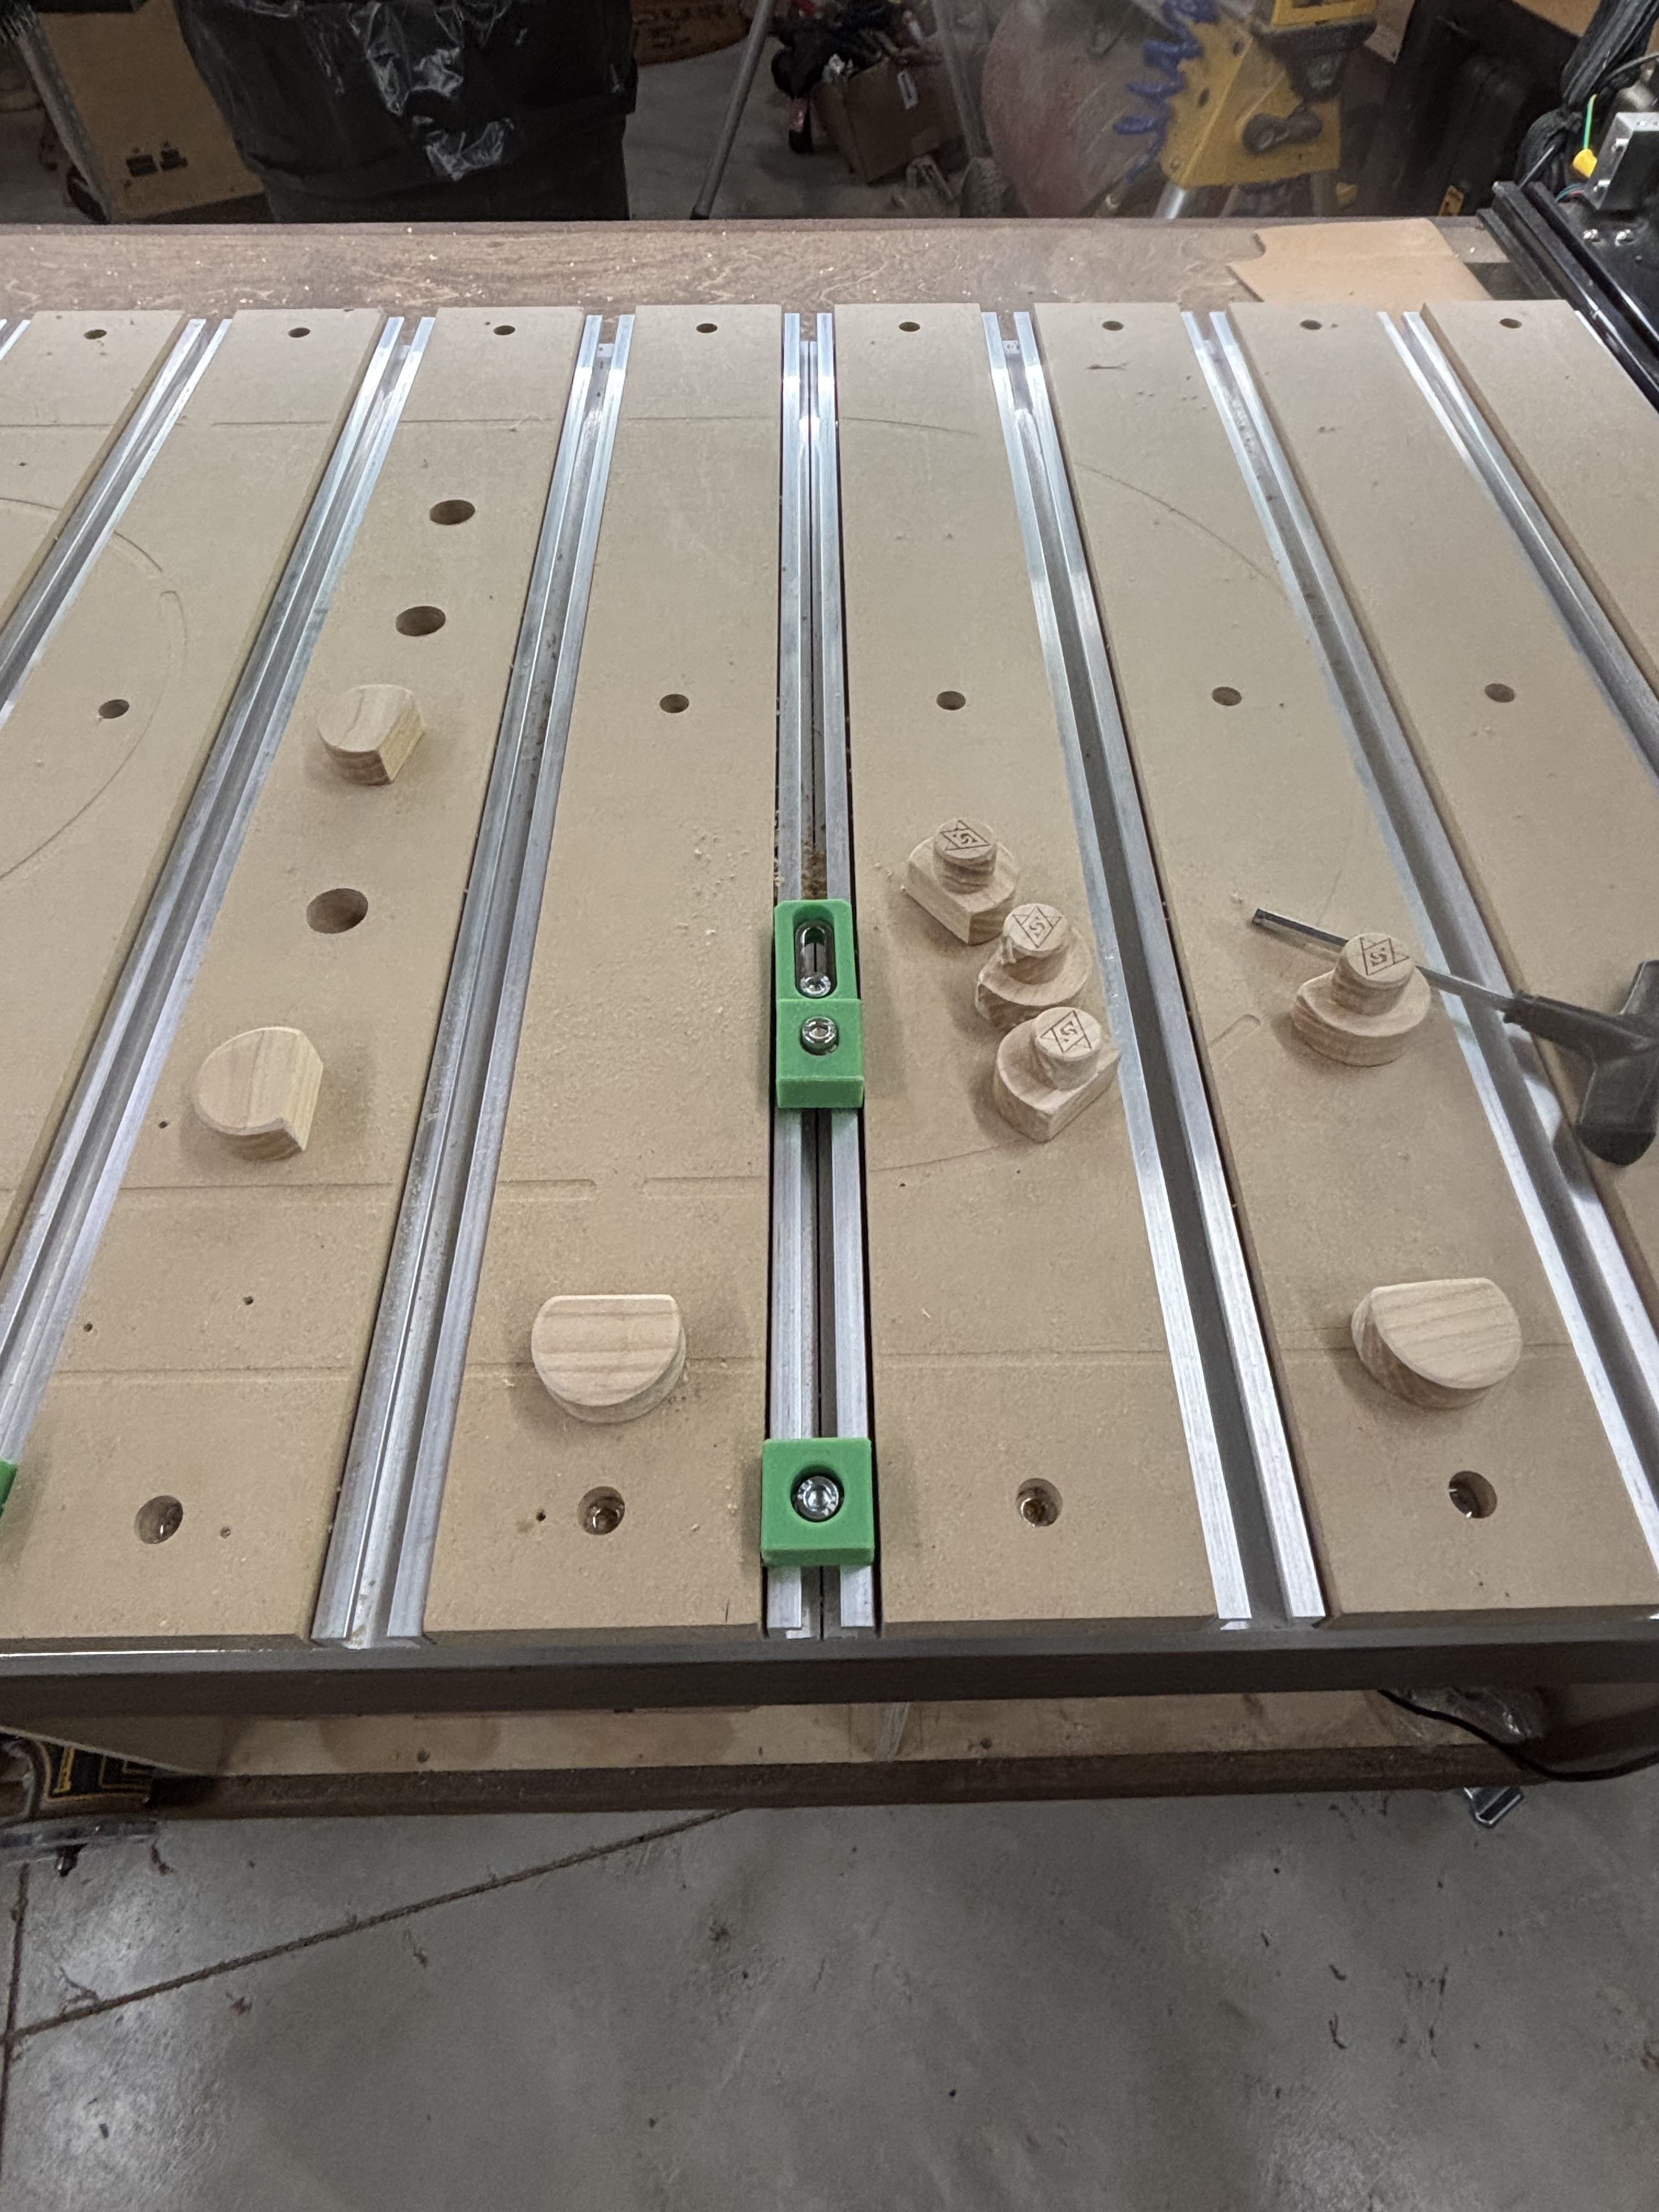
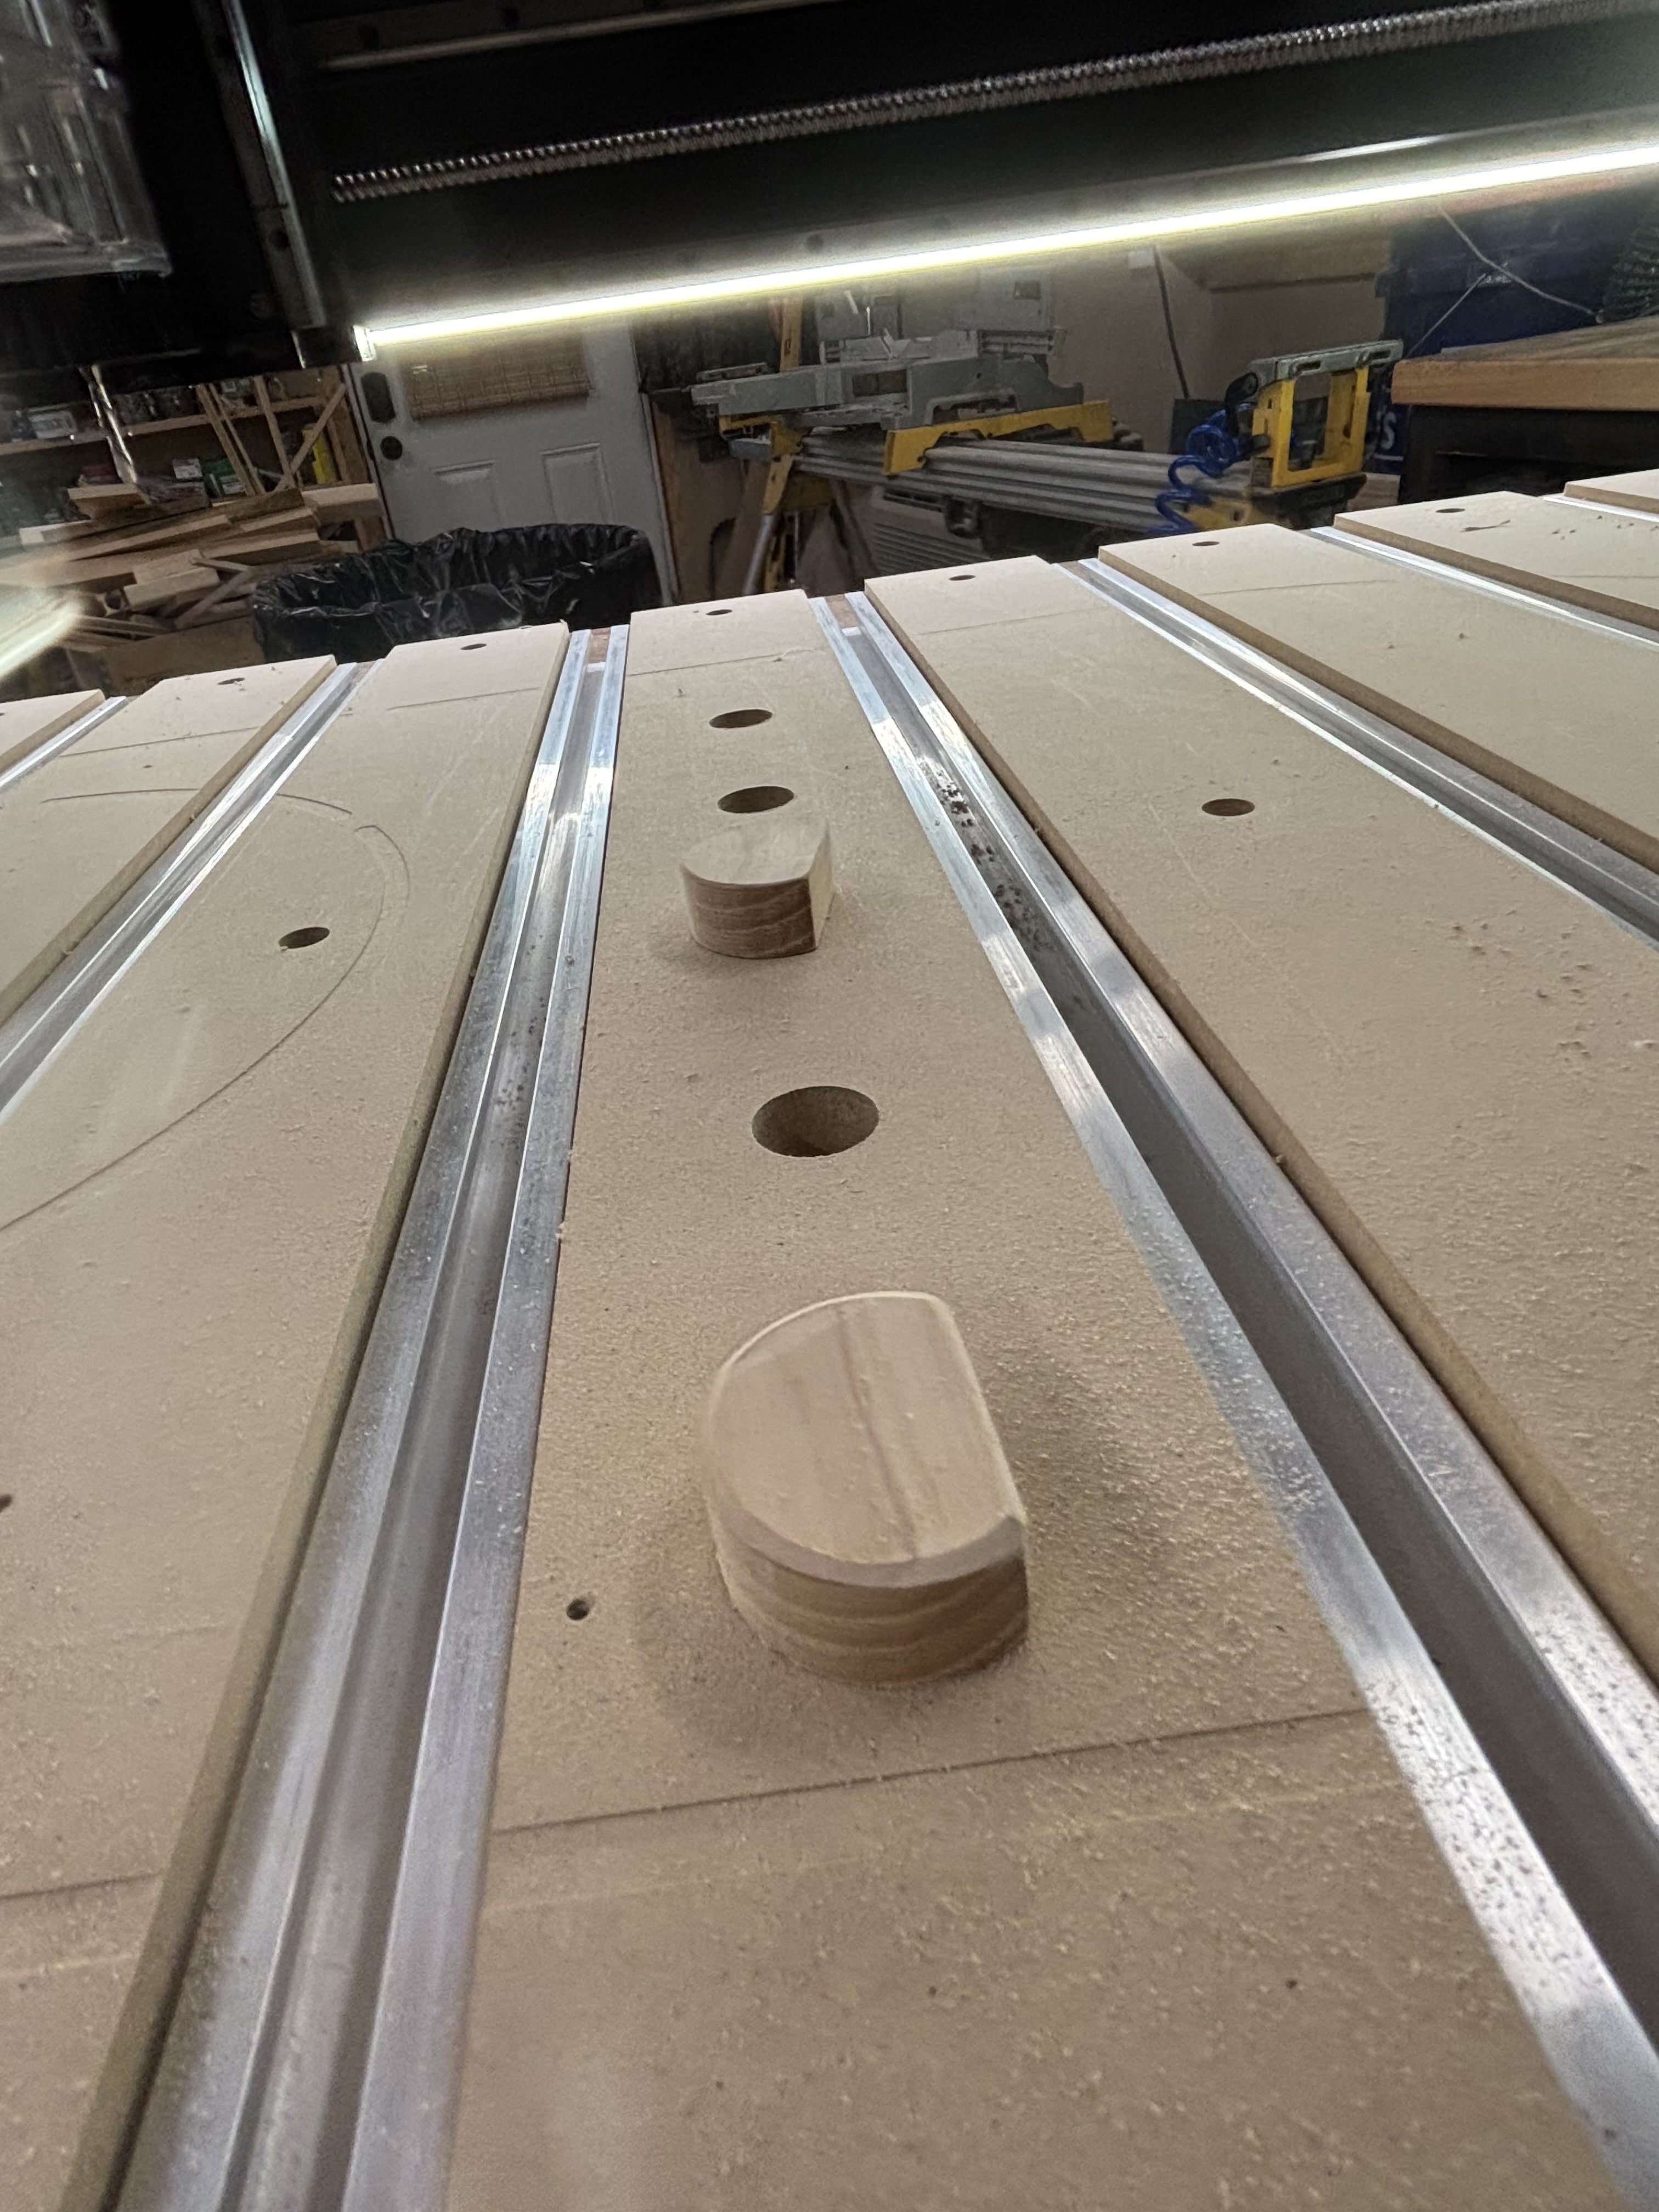
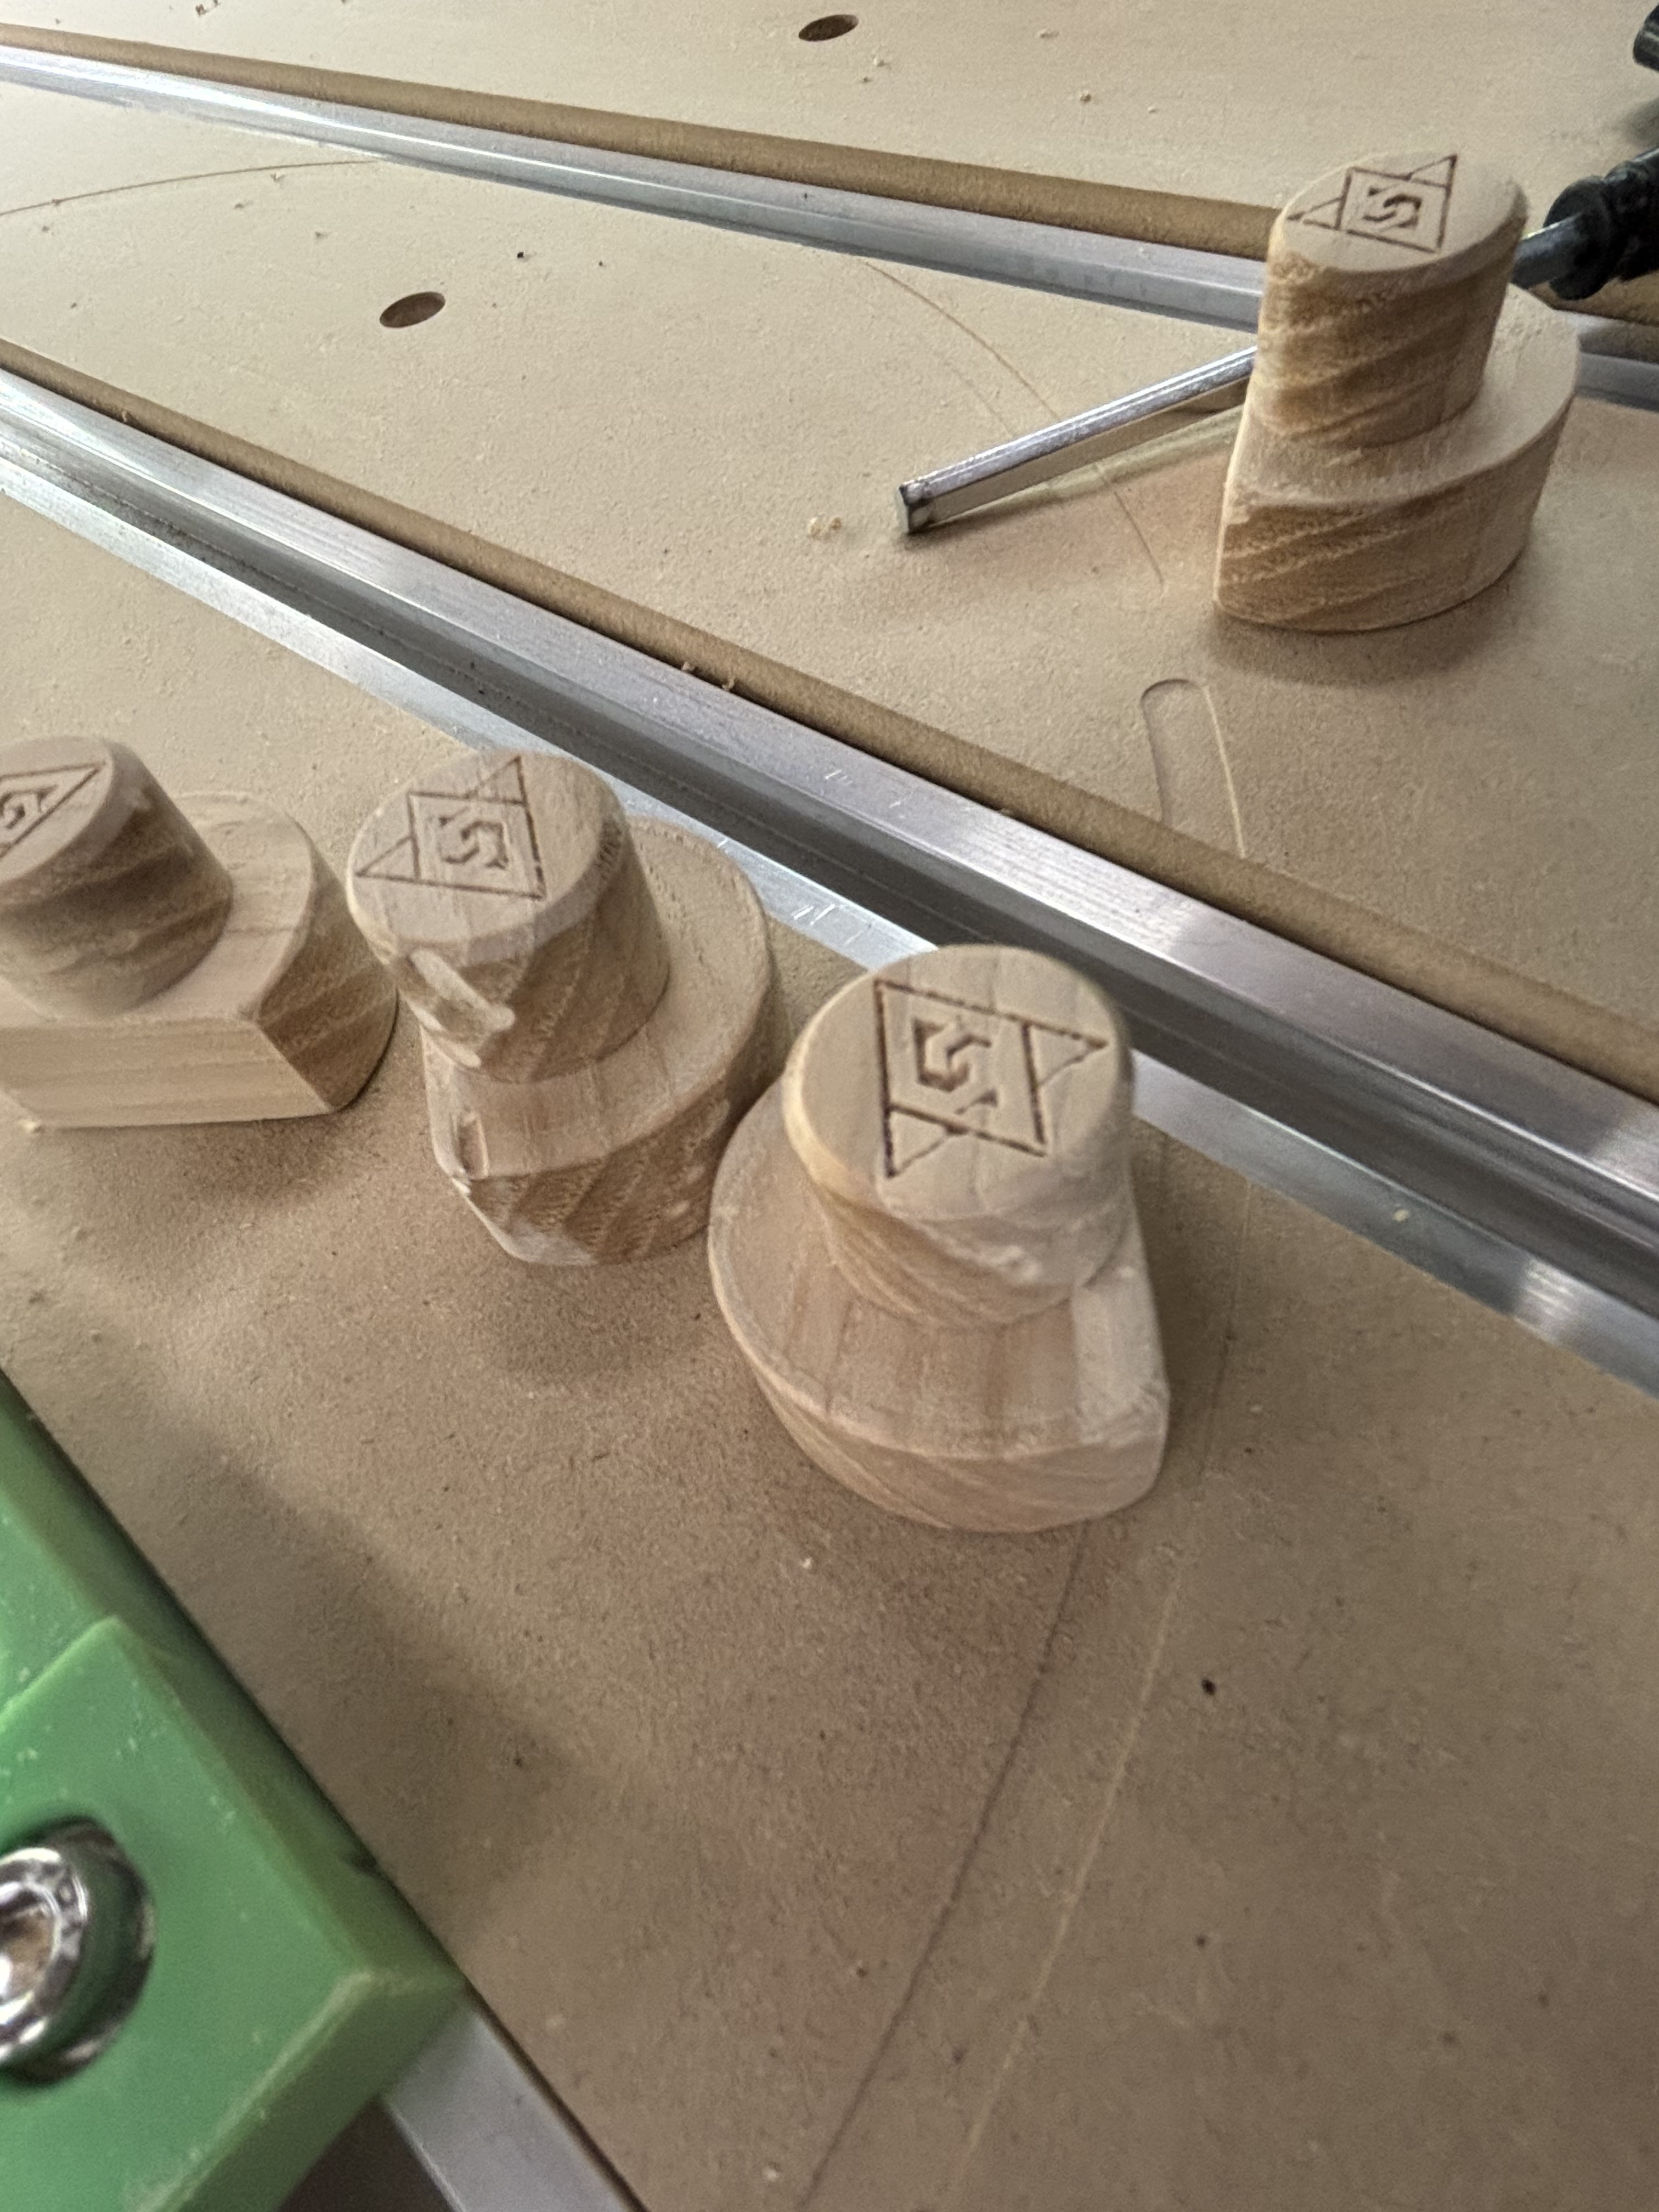
Finally got to making my bench dogs today. From Brown Ash.
Notice I also placed several dog holes in my spoil boards. This is a great upgrade! Used this set up today for a small sign. Worked great!
Inspiration completely from @robinhartleywillows . When I saw his table and dogs I knew I needed to do it too!
16 Likes
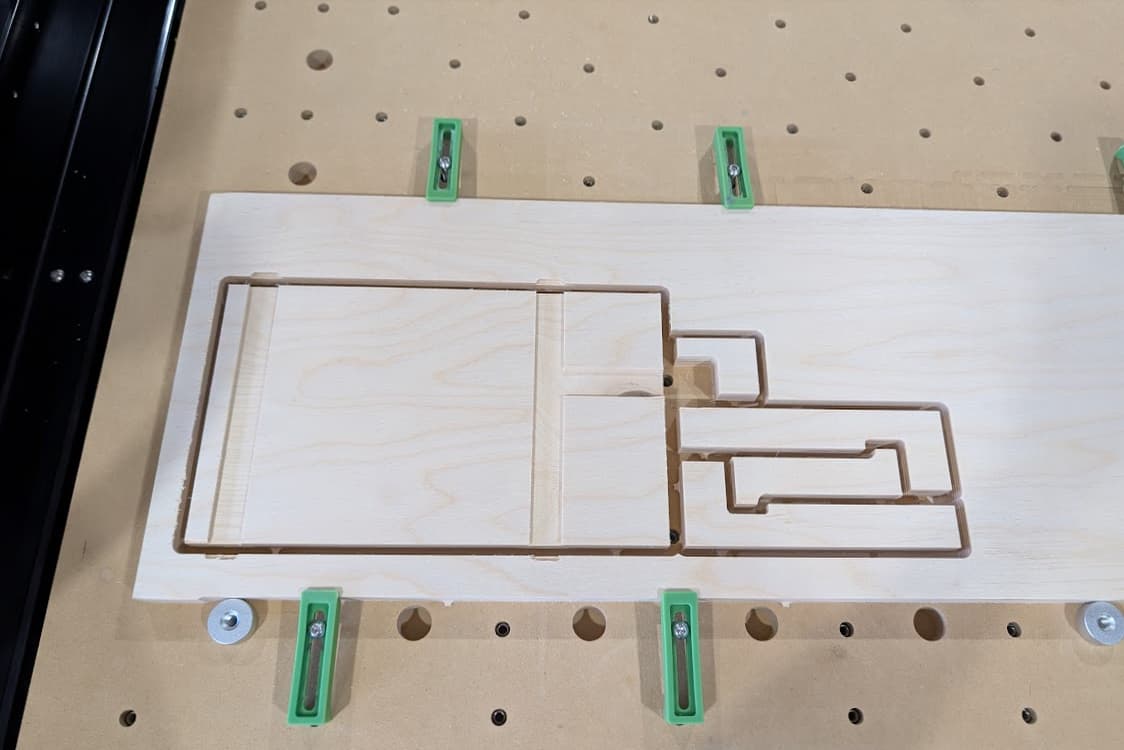
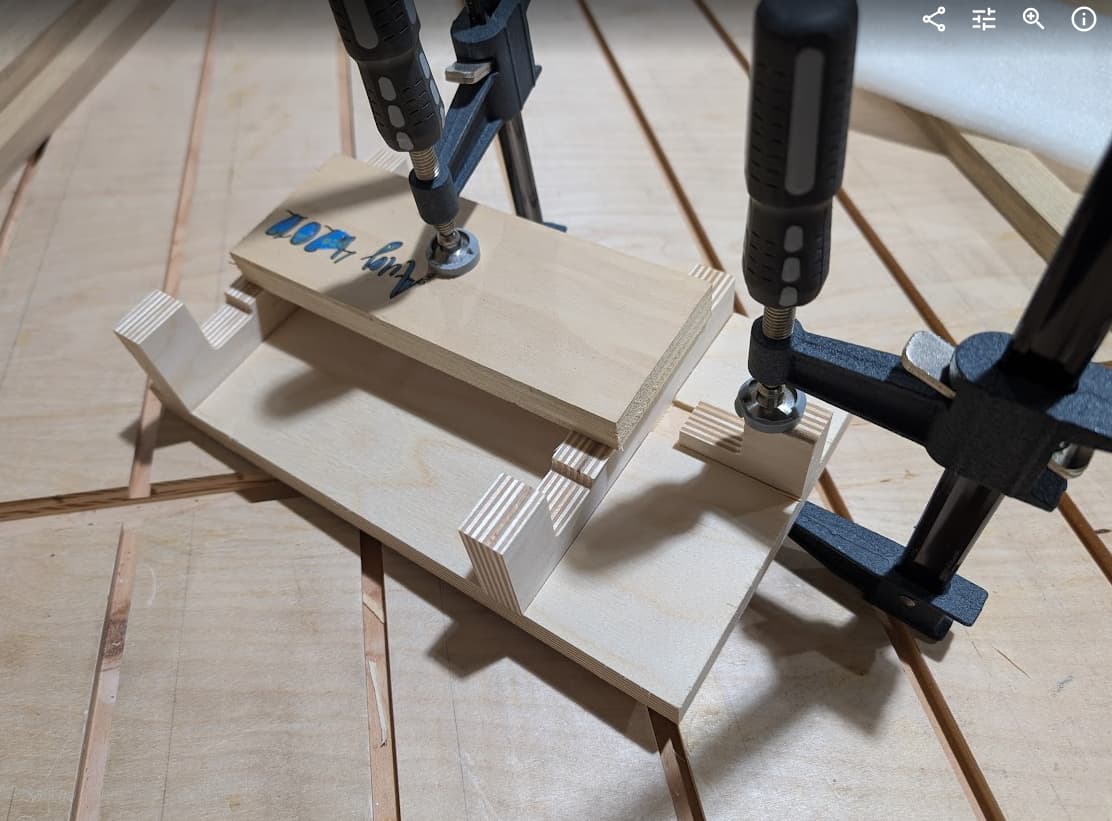
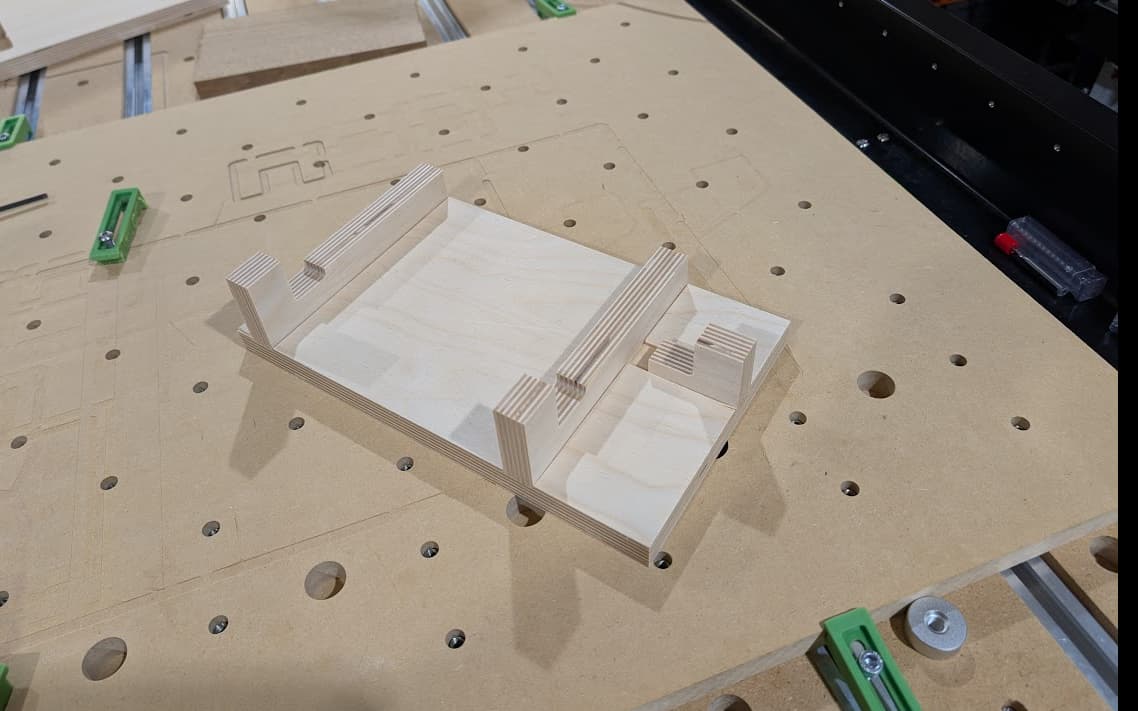
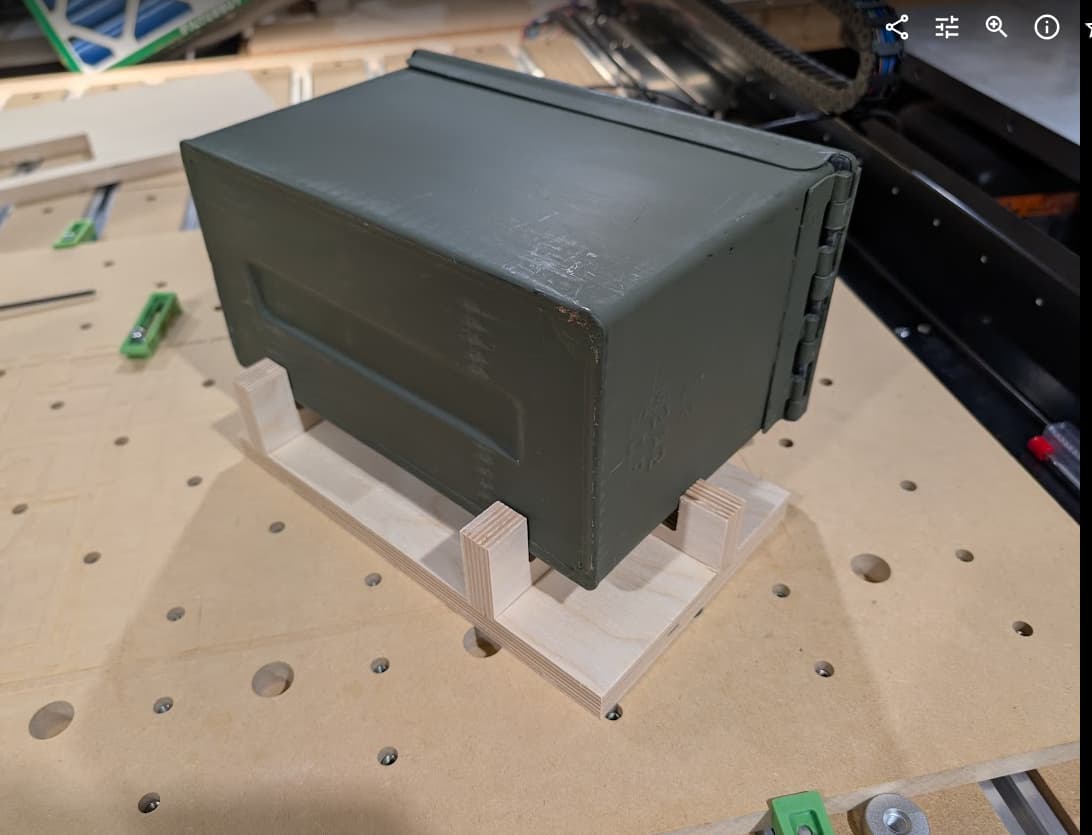
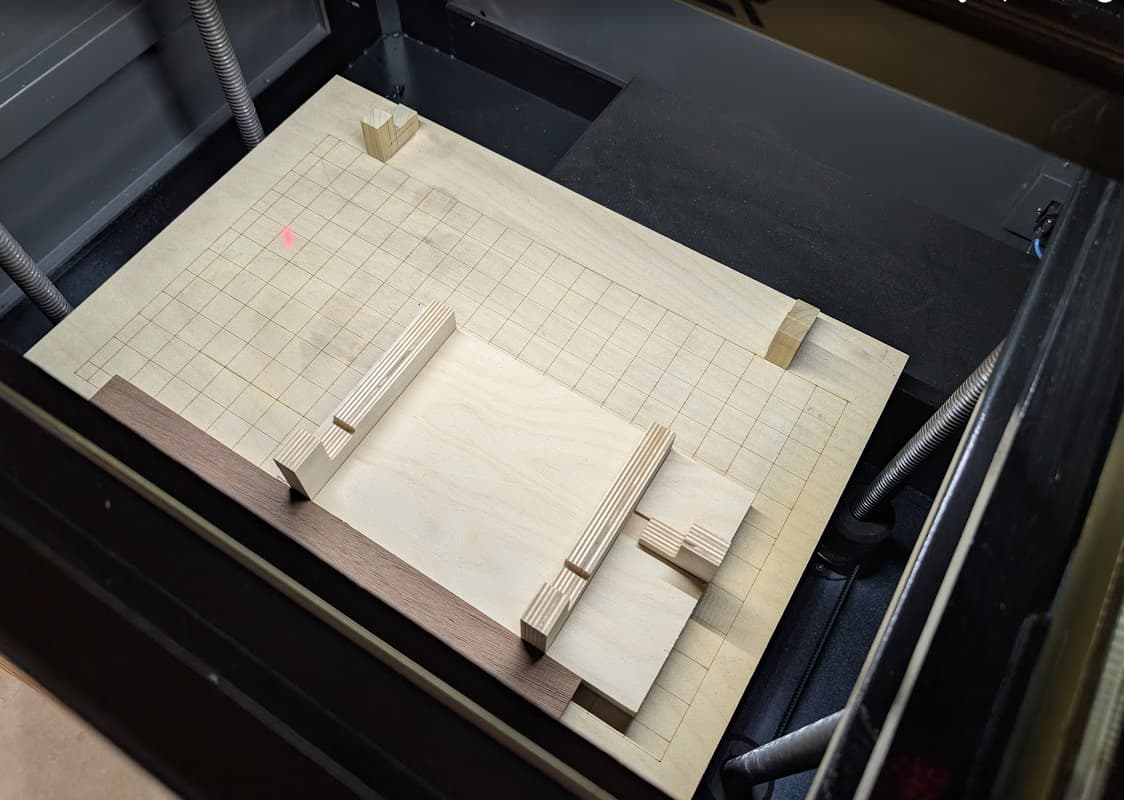
This is for work holding an ammo can for lasering. This keeps a zero corner to allow changes between jobs quickly. I find myself using the cnc for fixtures more and more.
Shallow pockets are made into the baseplate to aid accurate positioning of the risers. Also helps during glue up.
10 Likes
Great work @SirGariff, I’m glad you’re happy with the results after taking the plunge! The dogs themselves look really well made too - did you do them two sided so you could chamfer the top?
Not yet. I will soon. Being the idiot I am, I’m going to CNC a clamp so I can do some precise, consistent cuts on the bench dogs. Which includes chamfering. What you see is rough sanding so I can actually use them!
1 Like
Baseball Holes
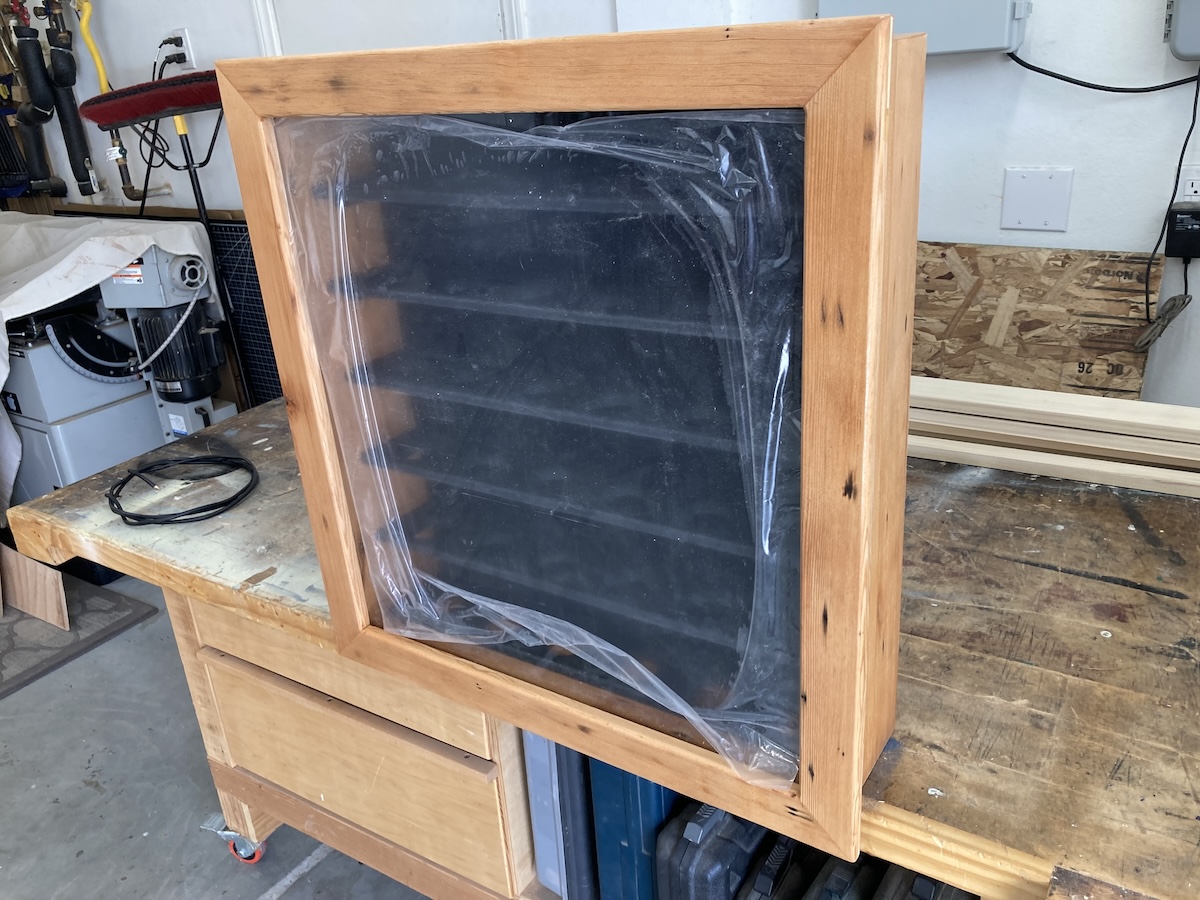
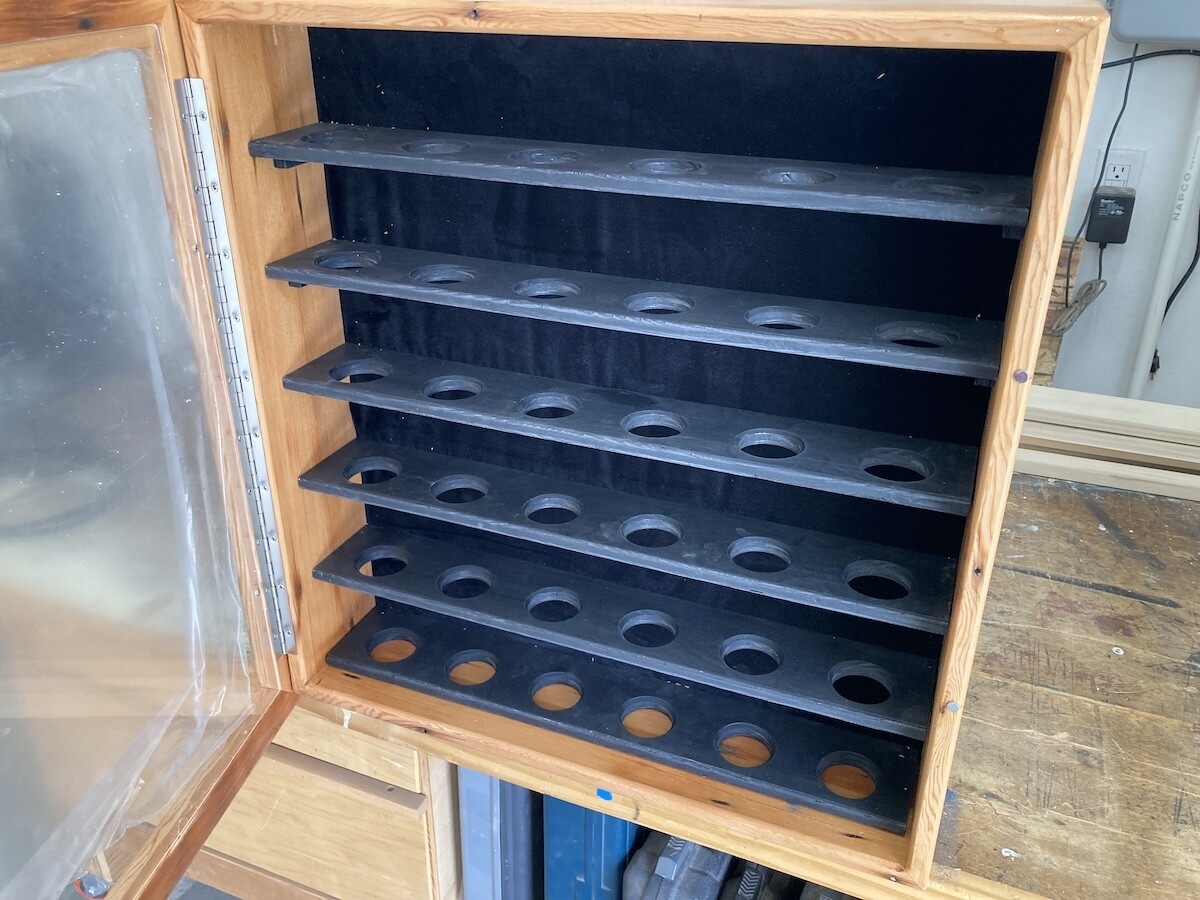
While you guys are busy doing detailed, cool pieces, I am making holes using the ARRAY function six times over. This display case will hold 36 baseballs. The recipient has been to all MLB stadiums and has the balls to prove it. (Room for a couple extra.)
18 Likes
Very nice display case!
How are the ball racks finished and how are they sealed to ensure the finish does not potentially bleed back into the baseball material?
The rack portion is simply painted flat black. We gave it some thought and realized that a baseball doesn’t weigh much, the paint is fully cured, and sooner or later we had to be done with the project.