Wood glue, (actually regular Elmers works well), clear epoxy, spray paint (project specific) and sander sealer as others have mentioned. Sometimes several sealing coats are applied if needed.
1 Like
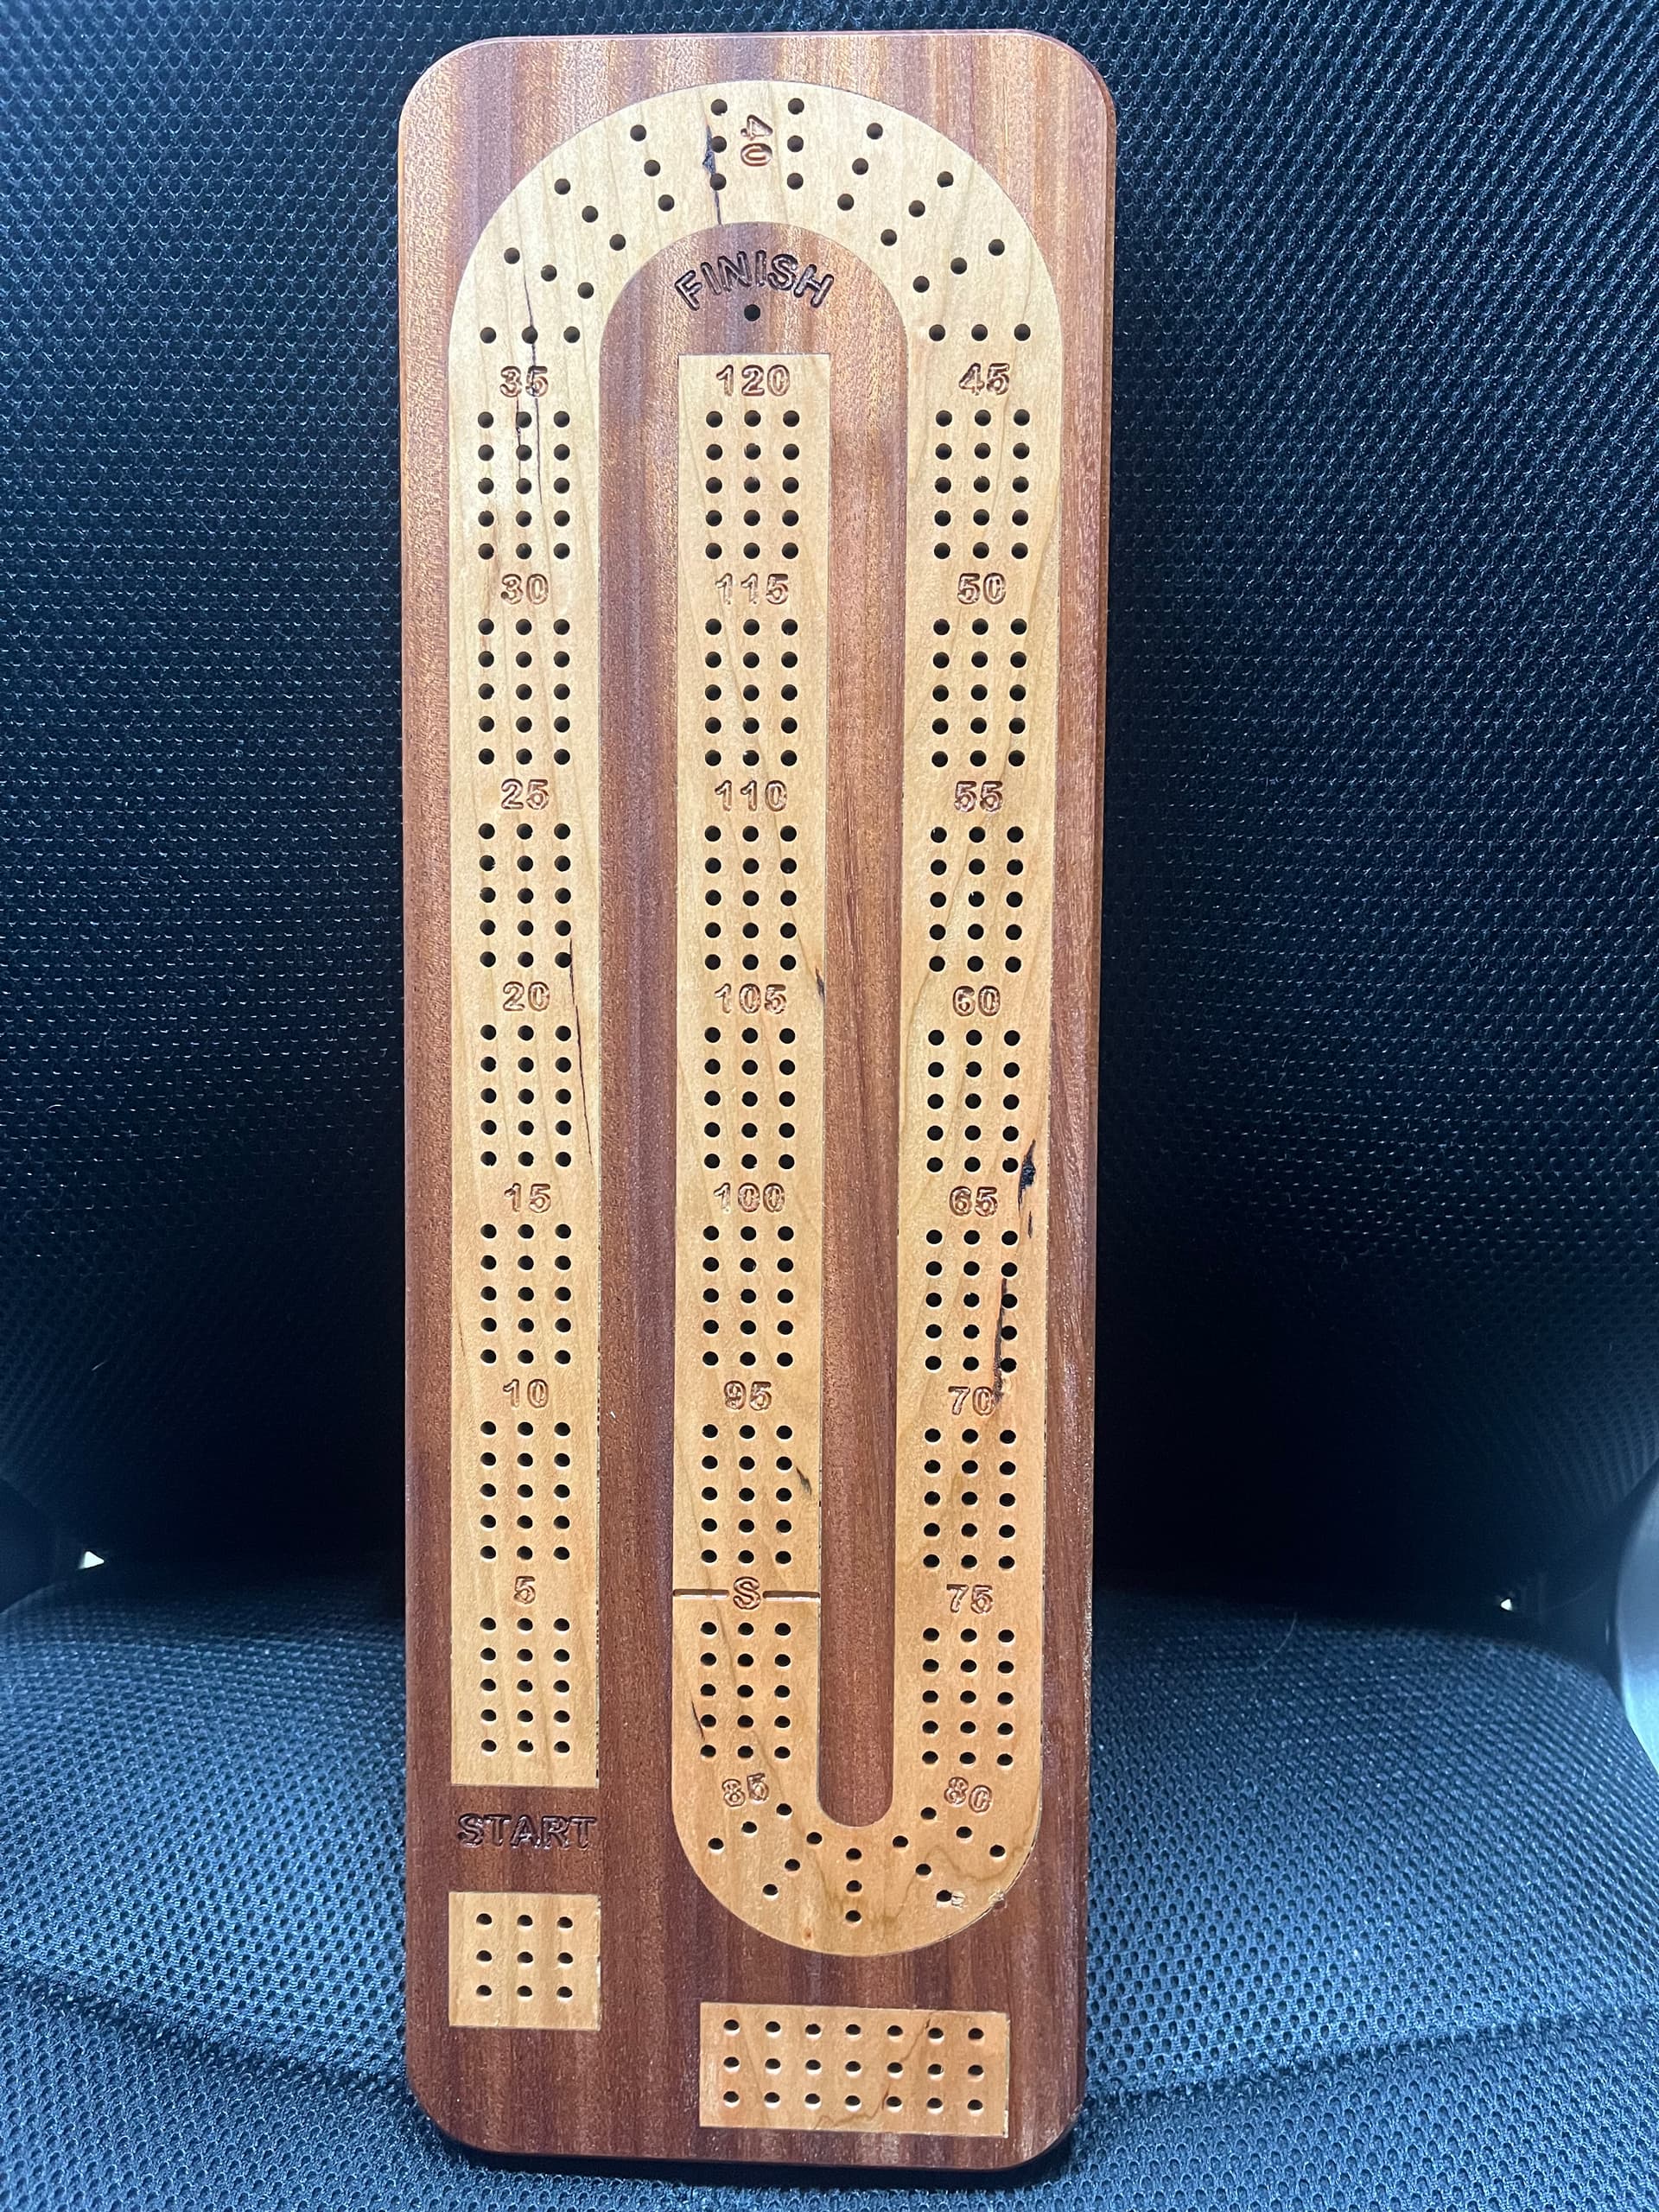
Awesome gift. What depth did you cut epoxy grooves to?
@Redlander super, thank you ![]()
1 Like
@Kevin.krk I’m not actually sure - I use the Fusion360 engrave toolpath and it varies the depth to get the right line thickness. Thicker lines mean deeper cuts so you don’t choose any single depth. Having said that, I think it was a max of about 7mm.
2 Likes
So you just use the default depth? Ok thx I appreciate the info.
1 Like
Yes, pretty much, sometimes I’ll adjust a bit to get a shallow final pass.
2 Likes
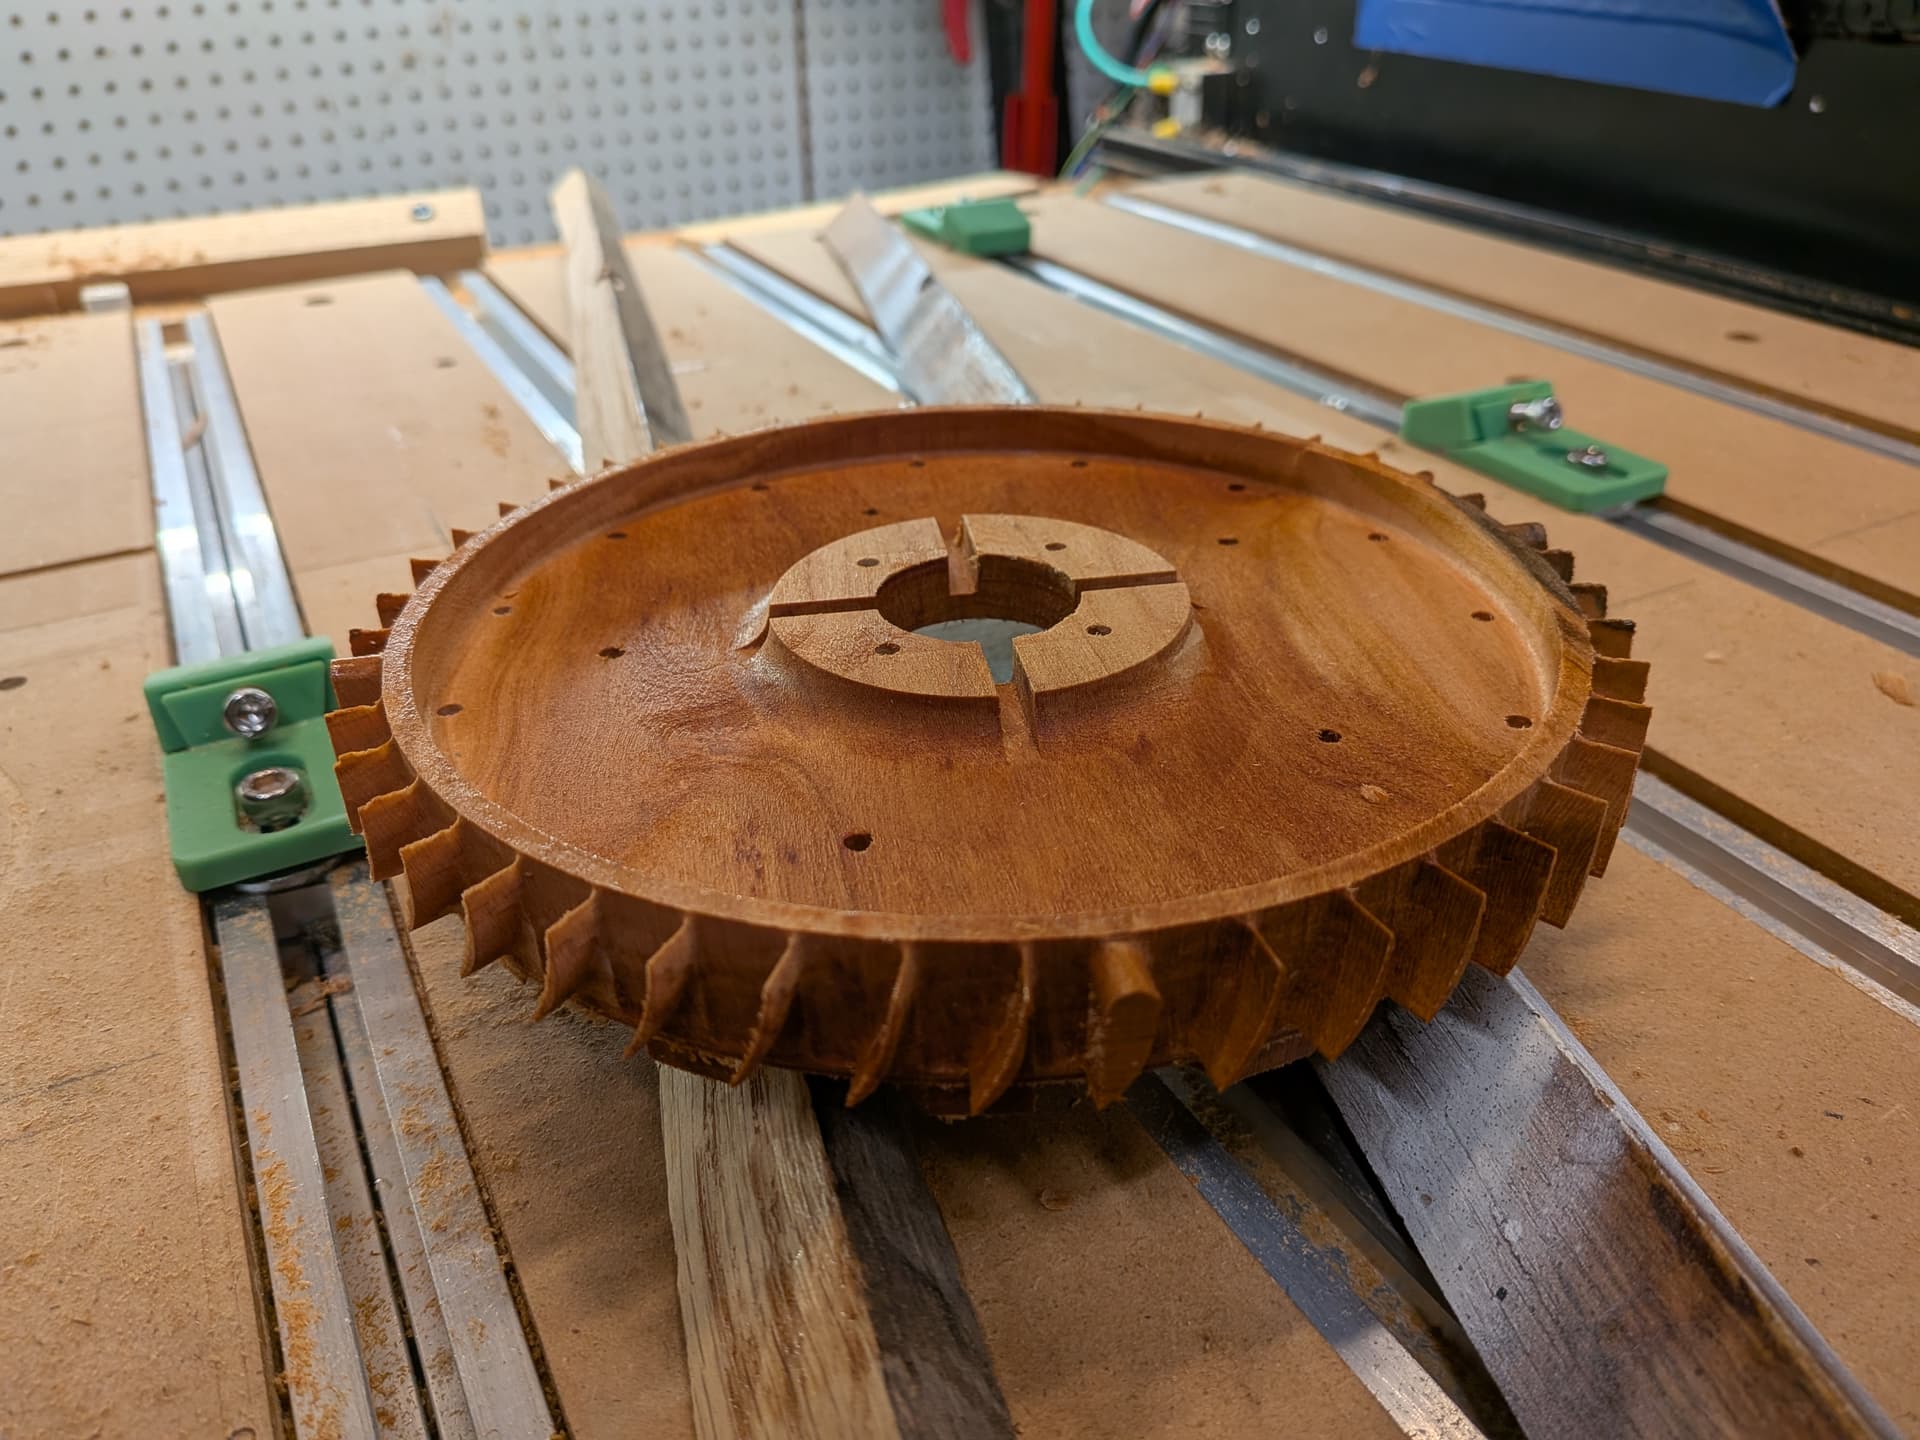
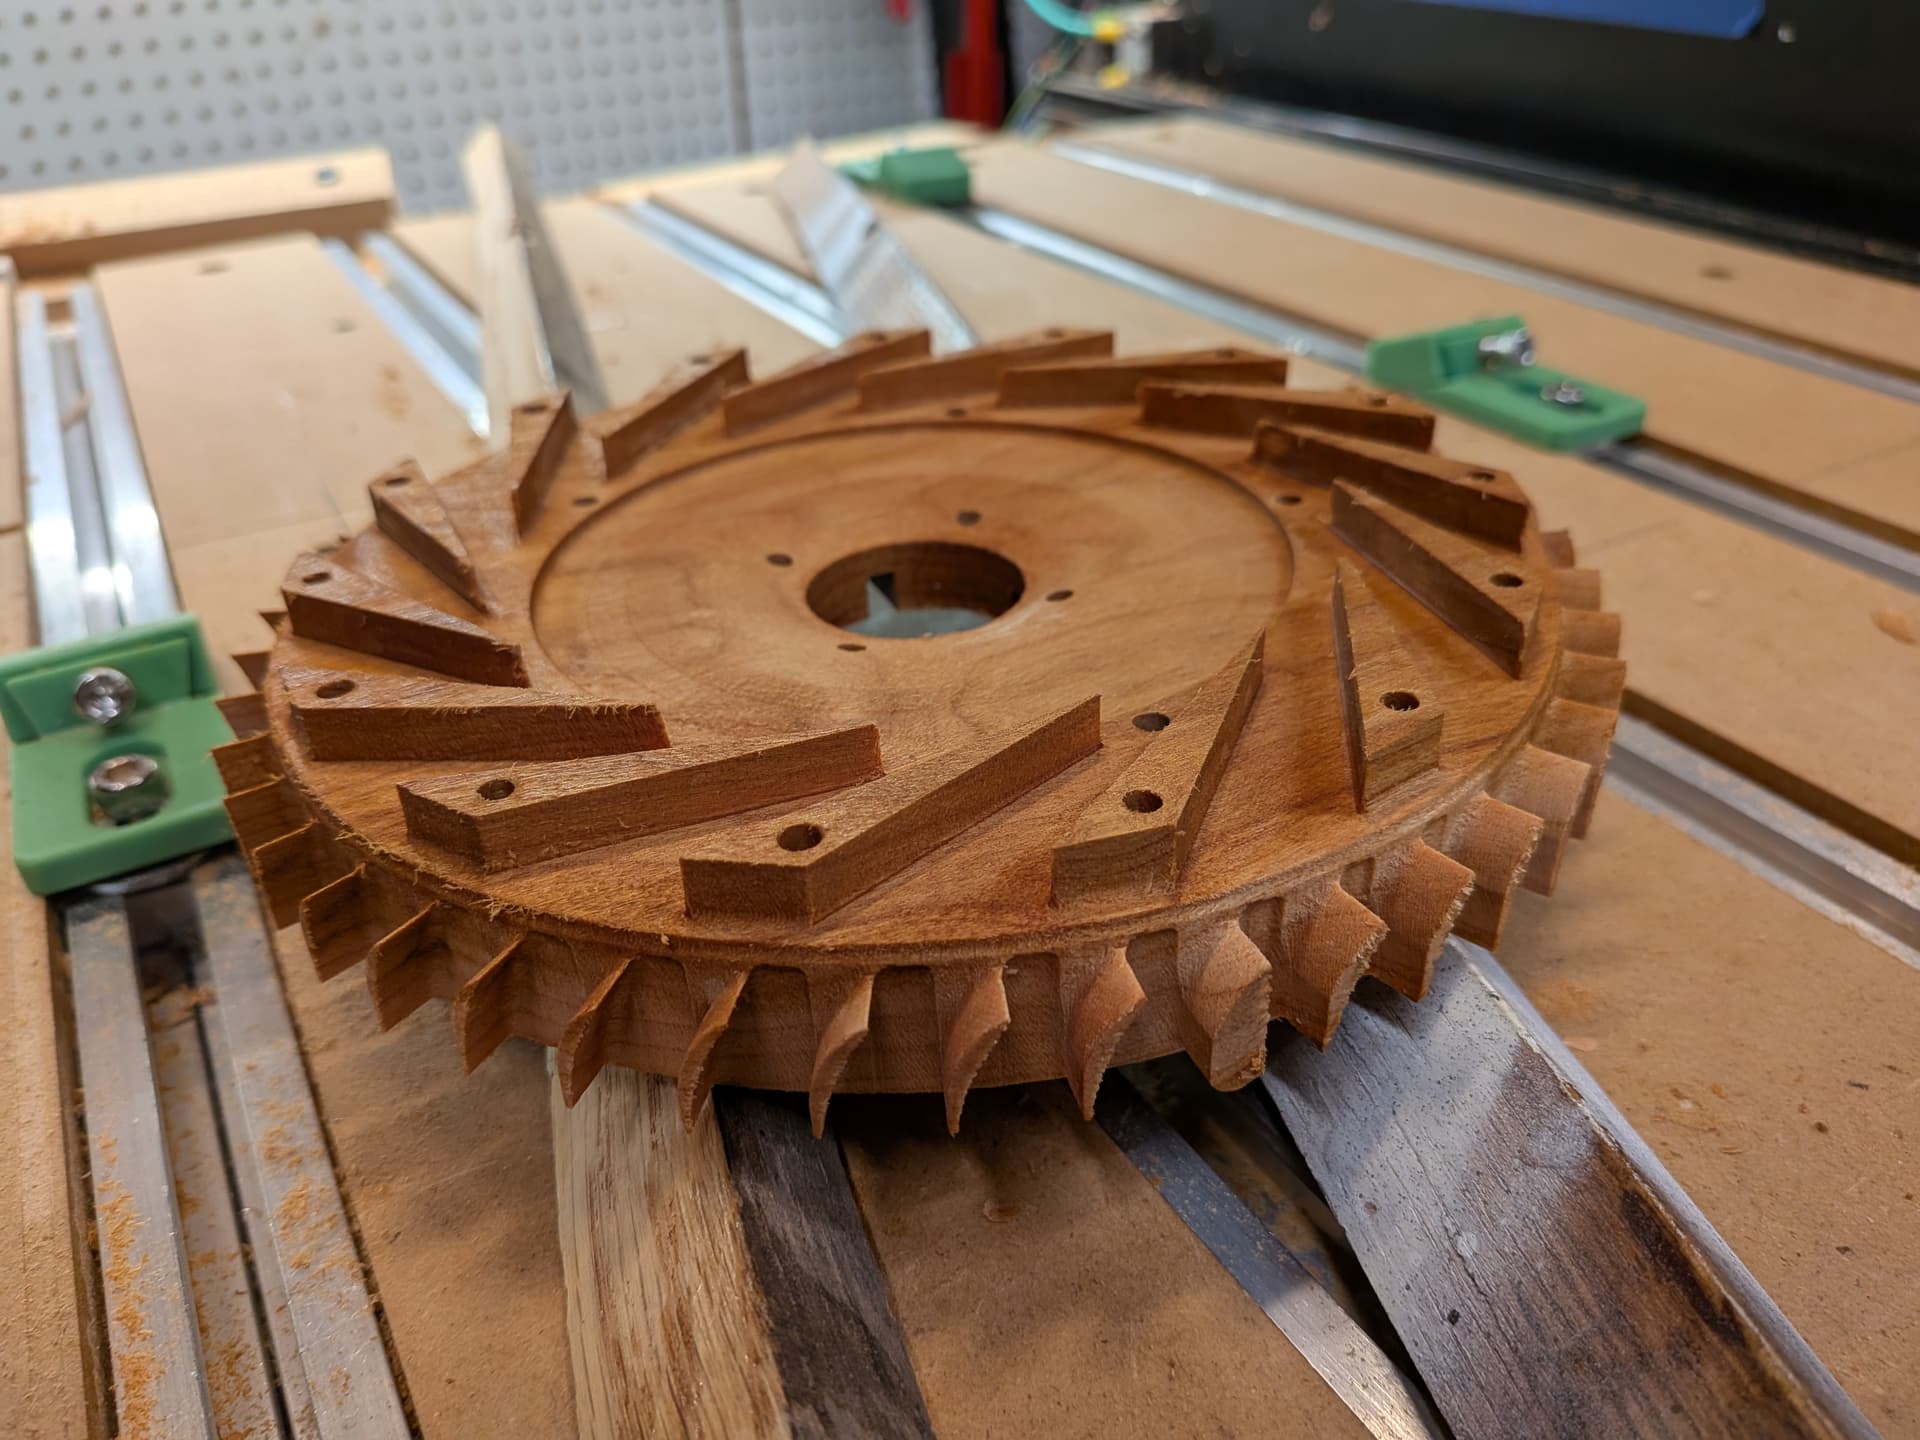
Glad you worked thru this project, looks fantastic. Amazing that part was milled out of wood.

16 Likes
Fiiiine I’ll do something simple and useful today too ![]()
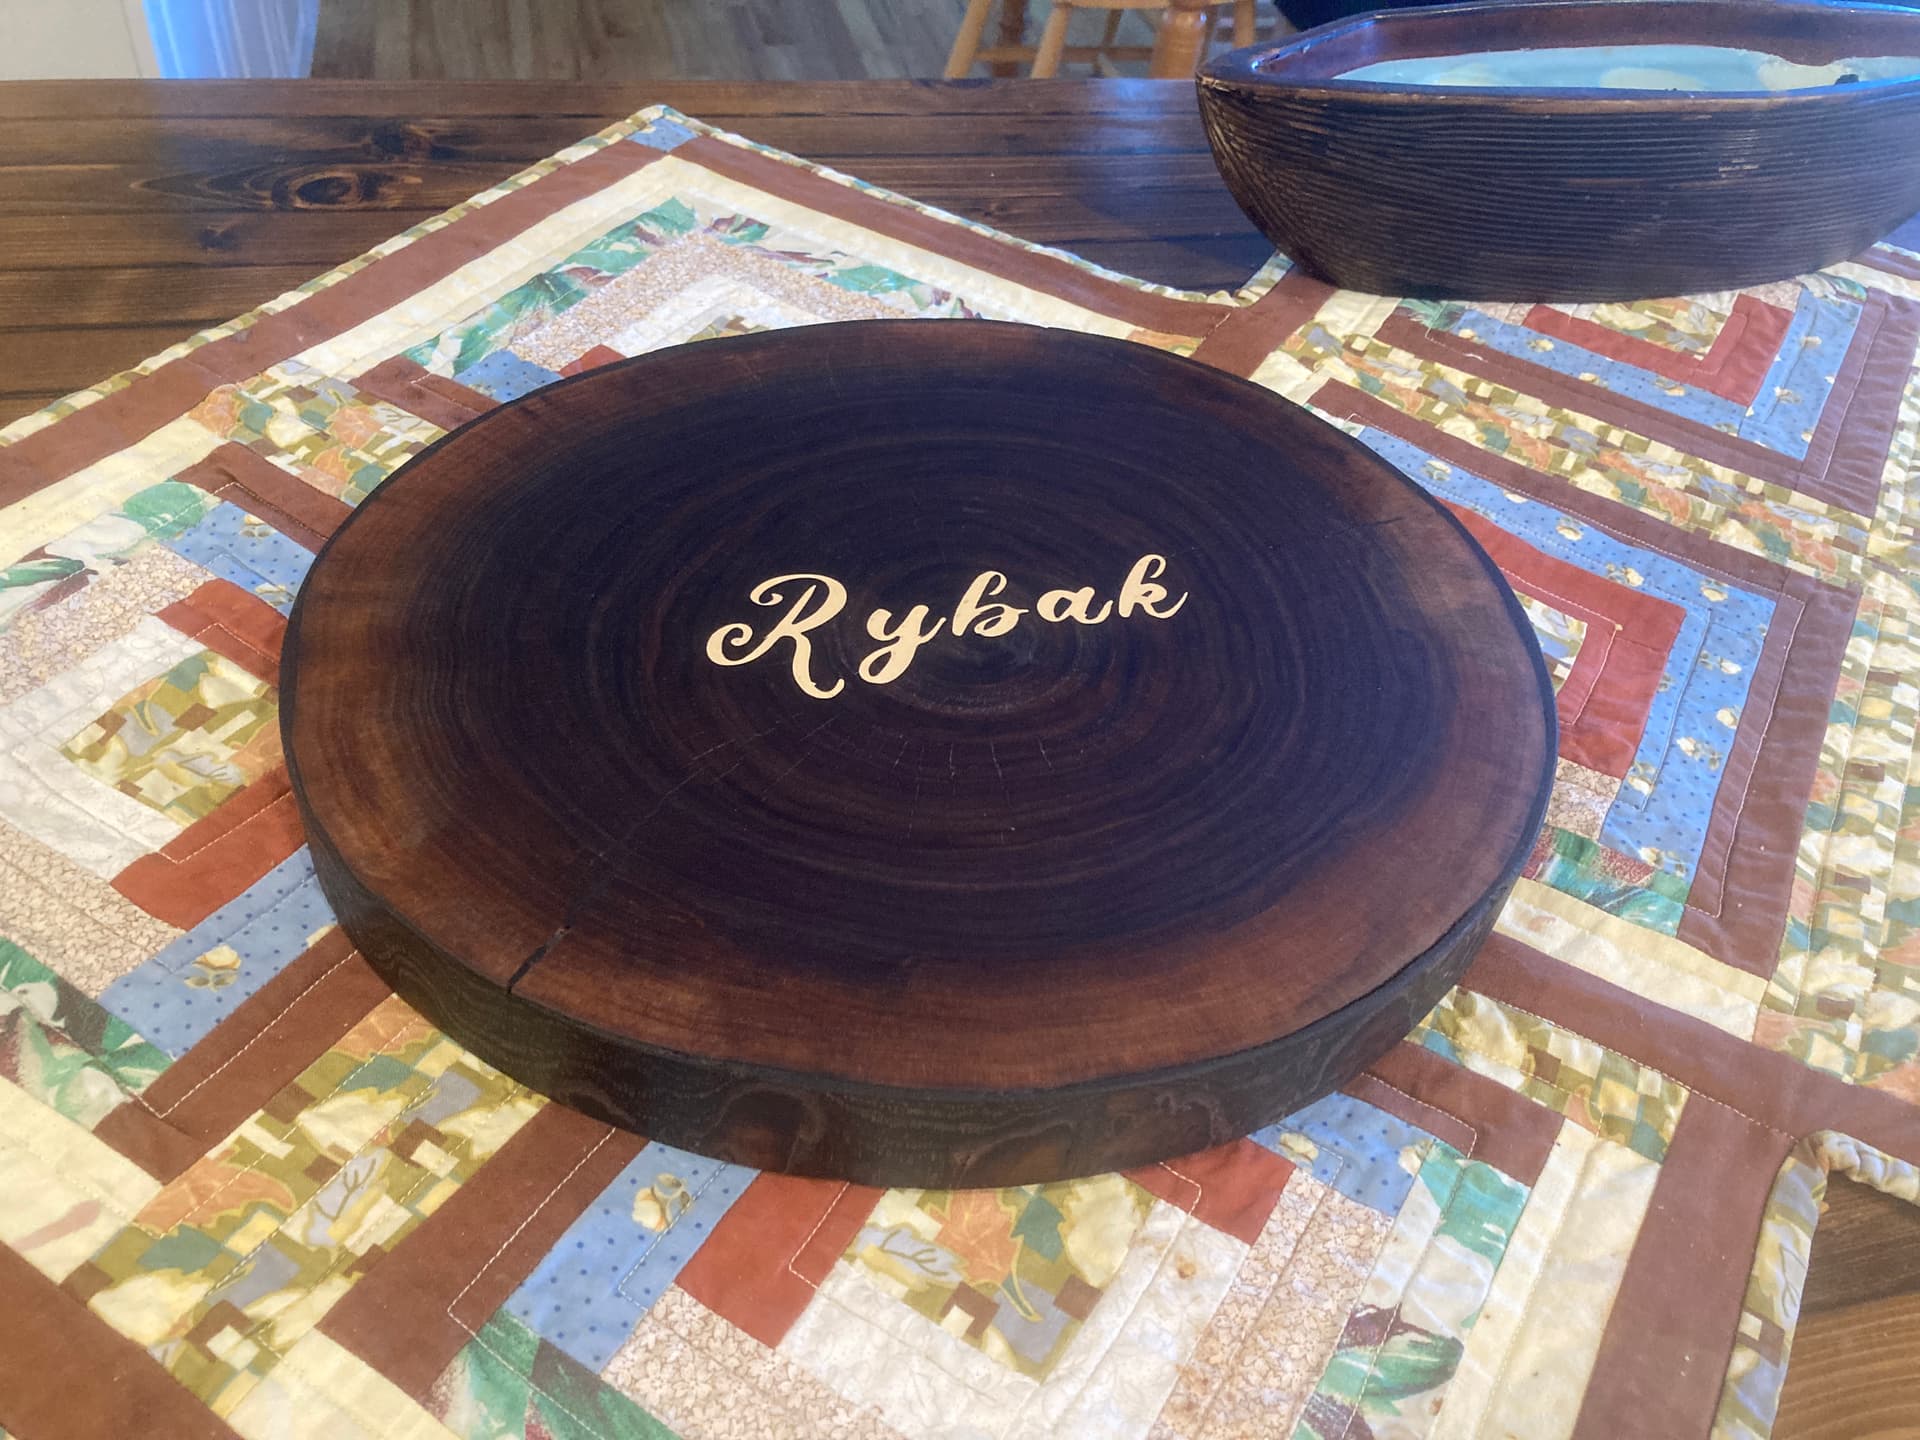
How do you keep the bark from peeling away, I’ve never had much luck with that.
I chiseled most of the loose bark away. The last 1/8" - 1/4" was pretty tight. As the wood dried it did split a bit & a few spots on the bark did separate. I filled the loose spots with epoxy & used a ratchet strap to clamp it. I really liked the grain pattern in the bark so I wanted to keep it.
7 Likes
I am a turner and bark seldom stays on wood after it is cut down. There are a few species that hold bark but most of it will fall off or fly off when turning. If you are careful you can glue it back on.
2 Likes
Thanks to this thread for inspiration:
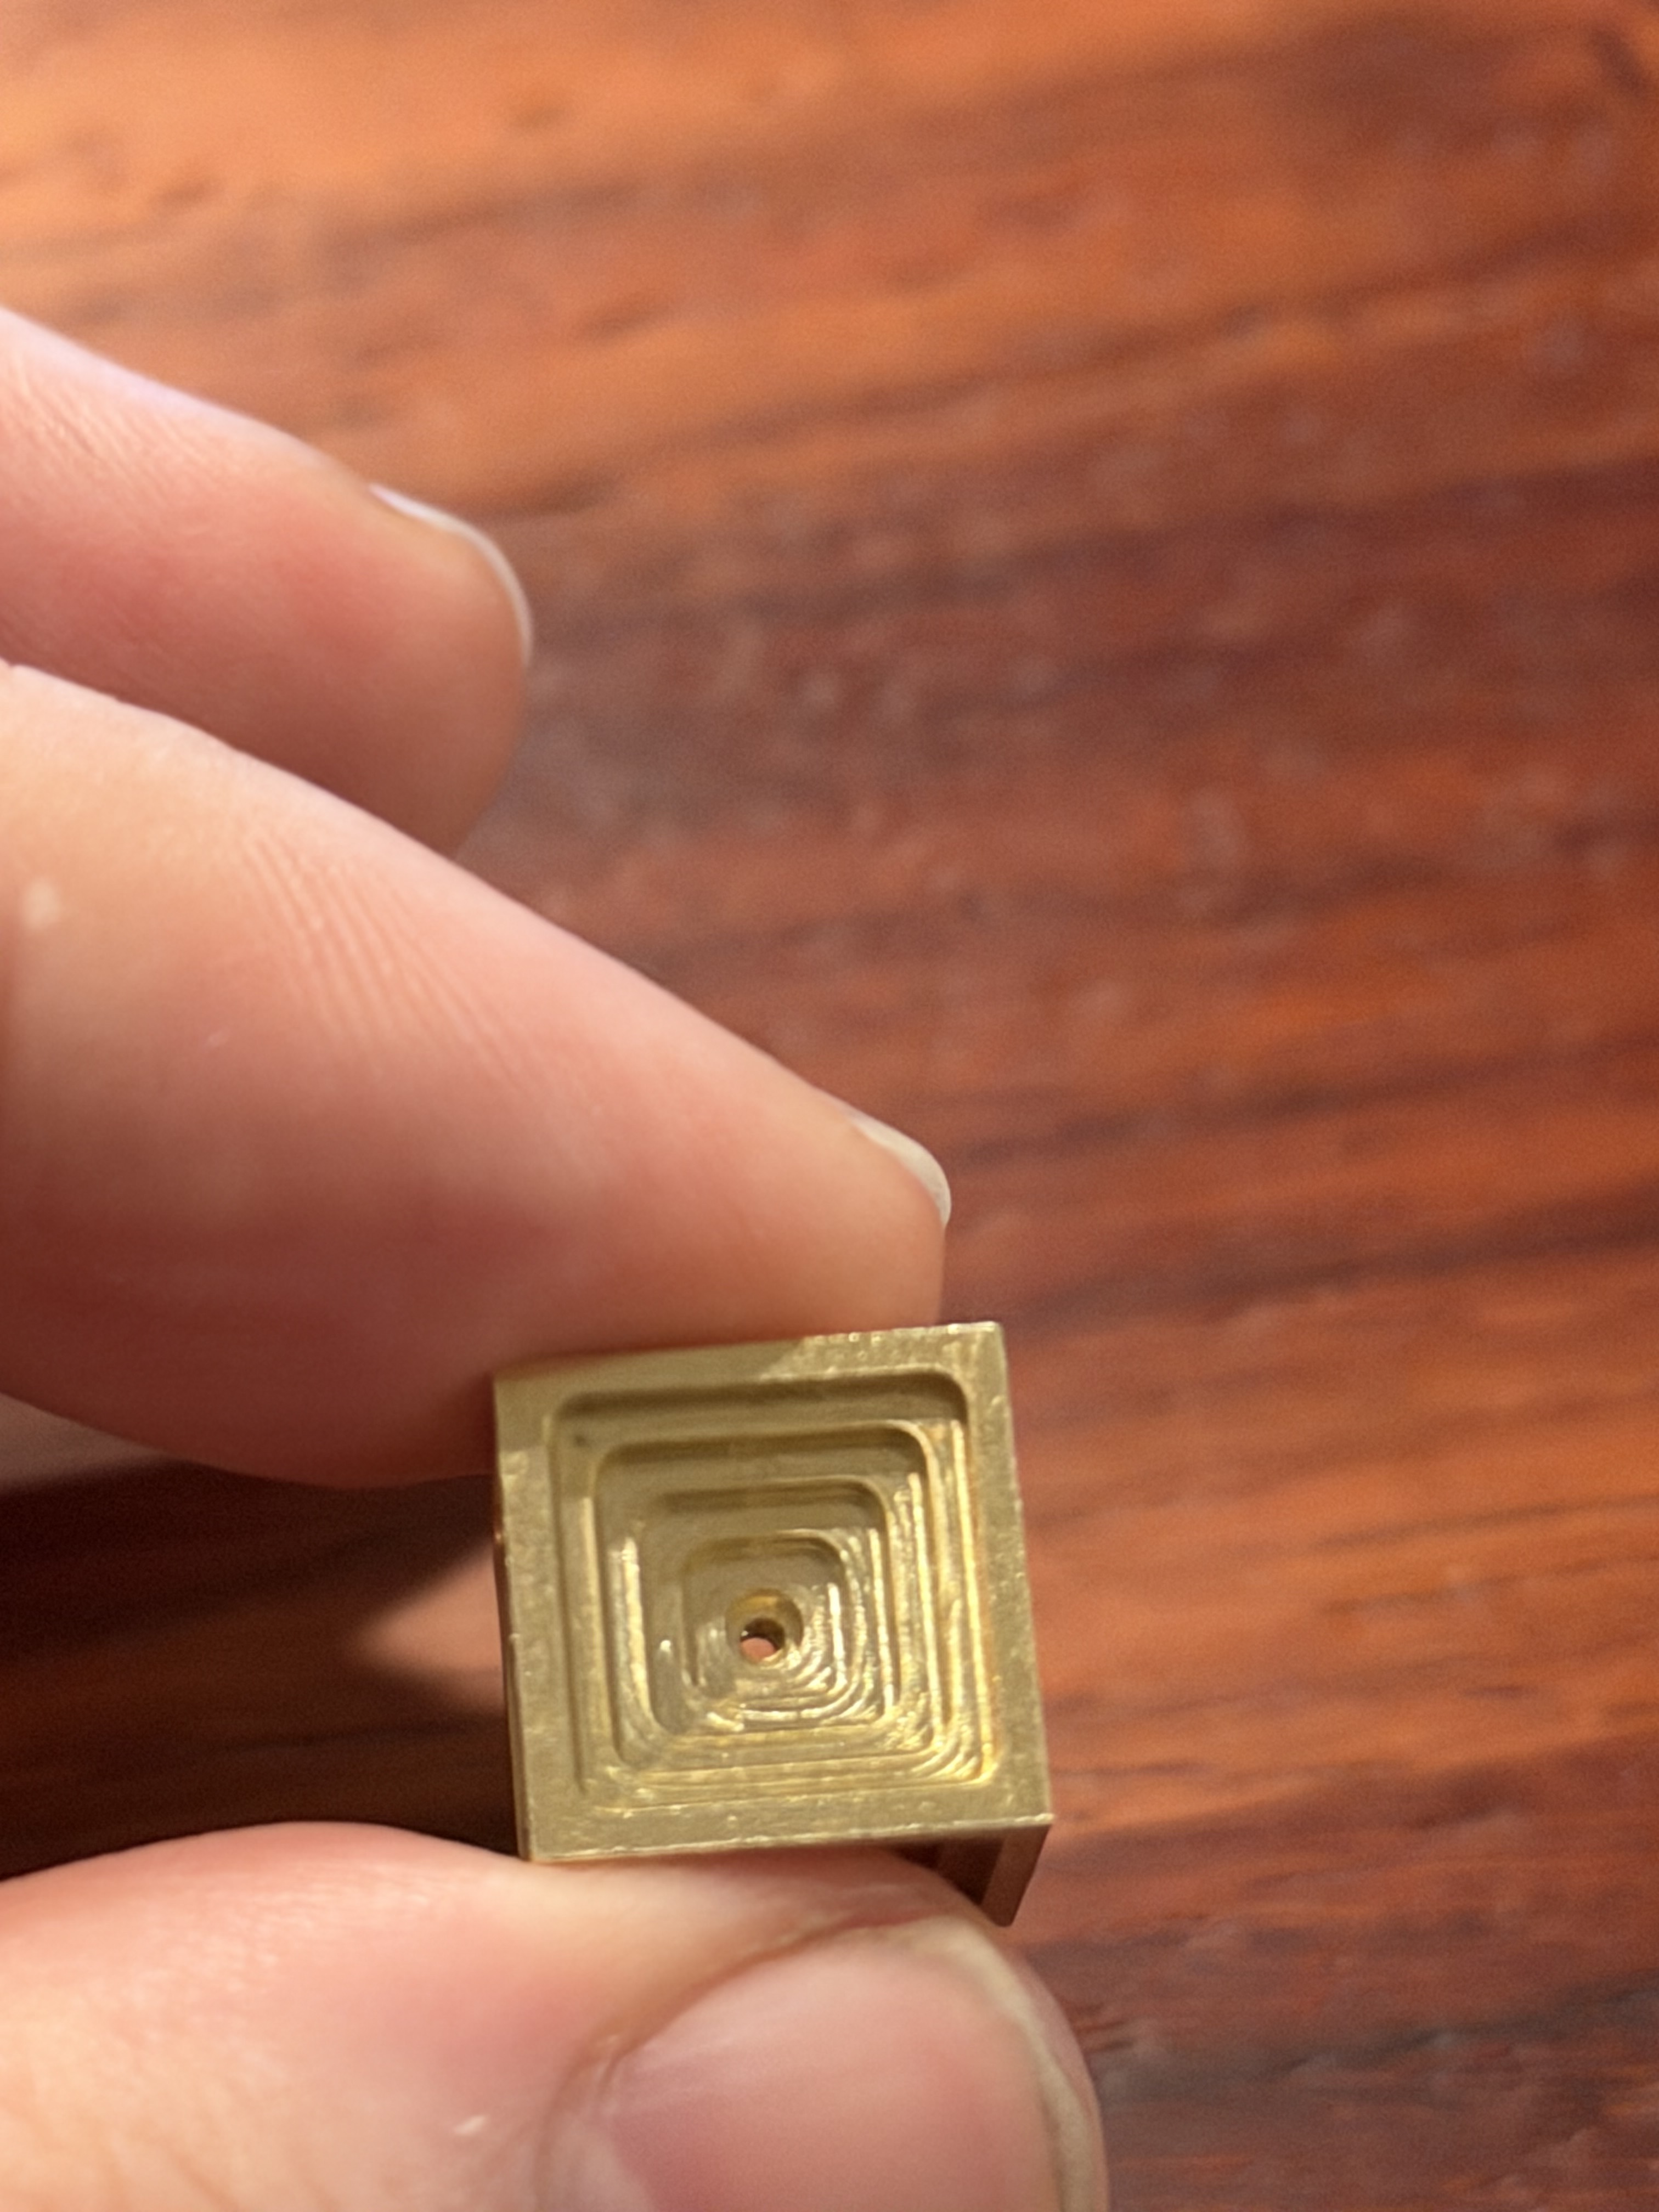
I made this ball in a cage (it’s an interesting design and execution challenge ![]() )
)
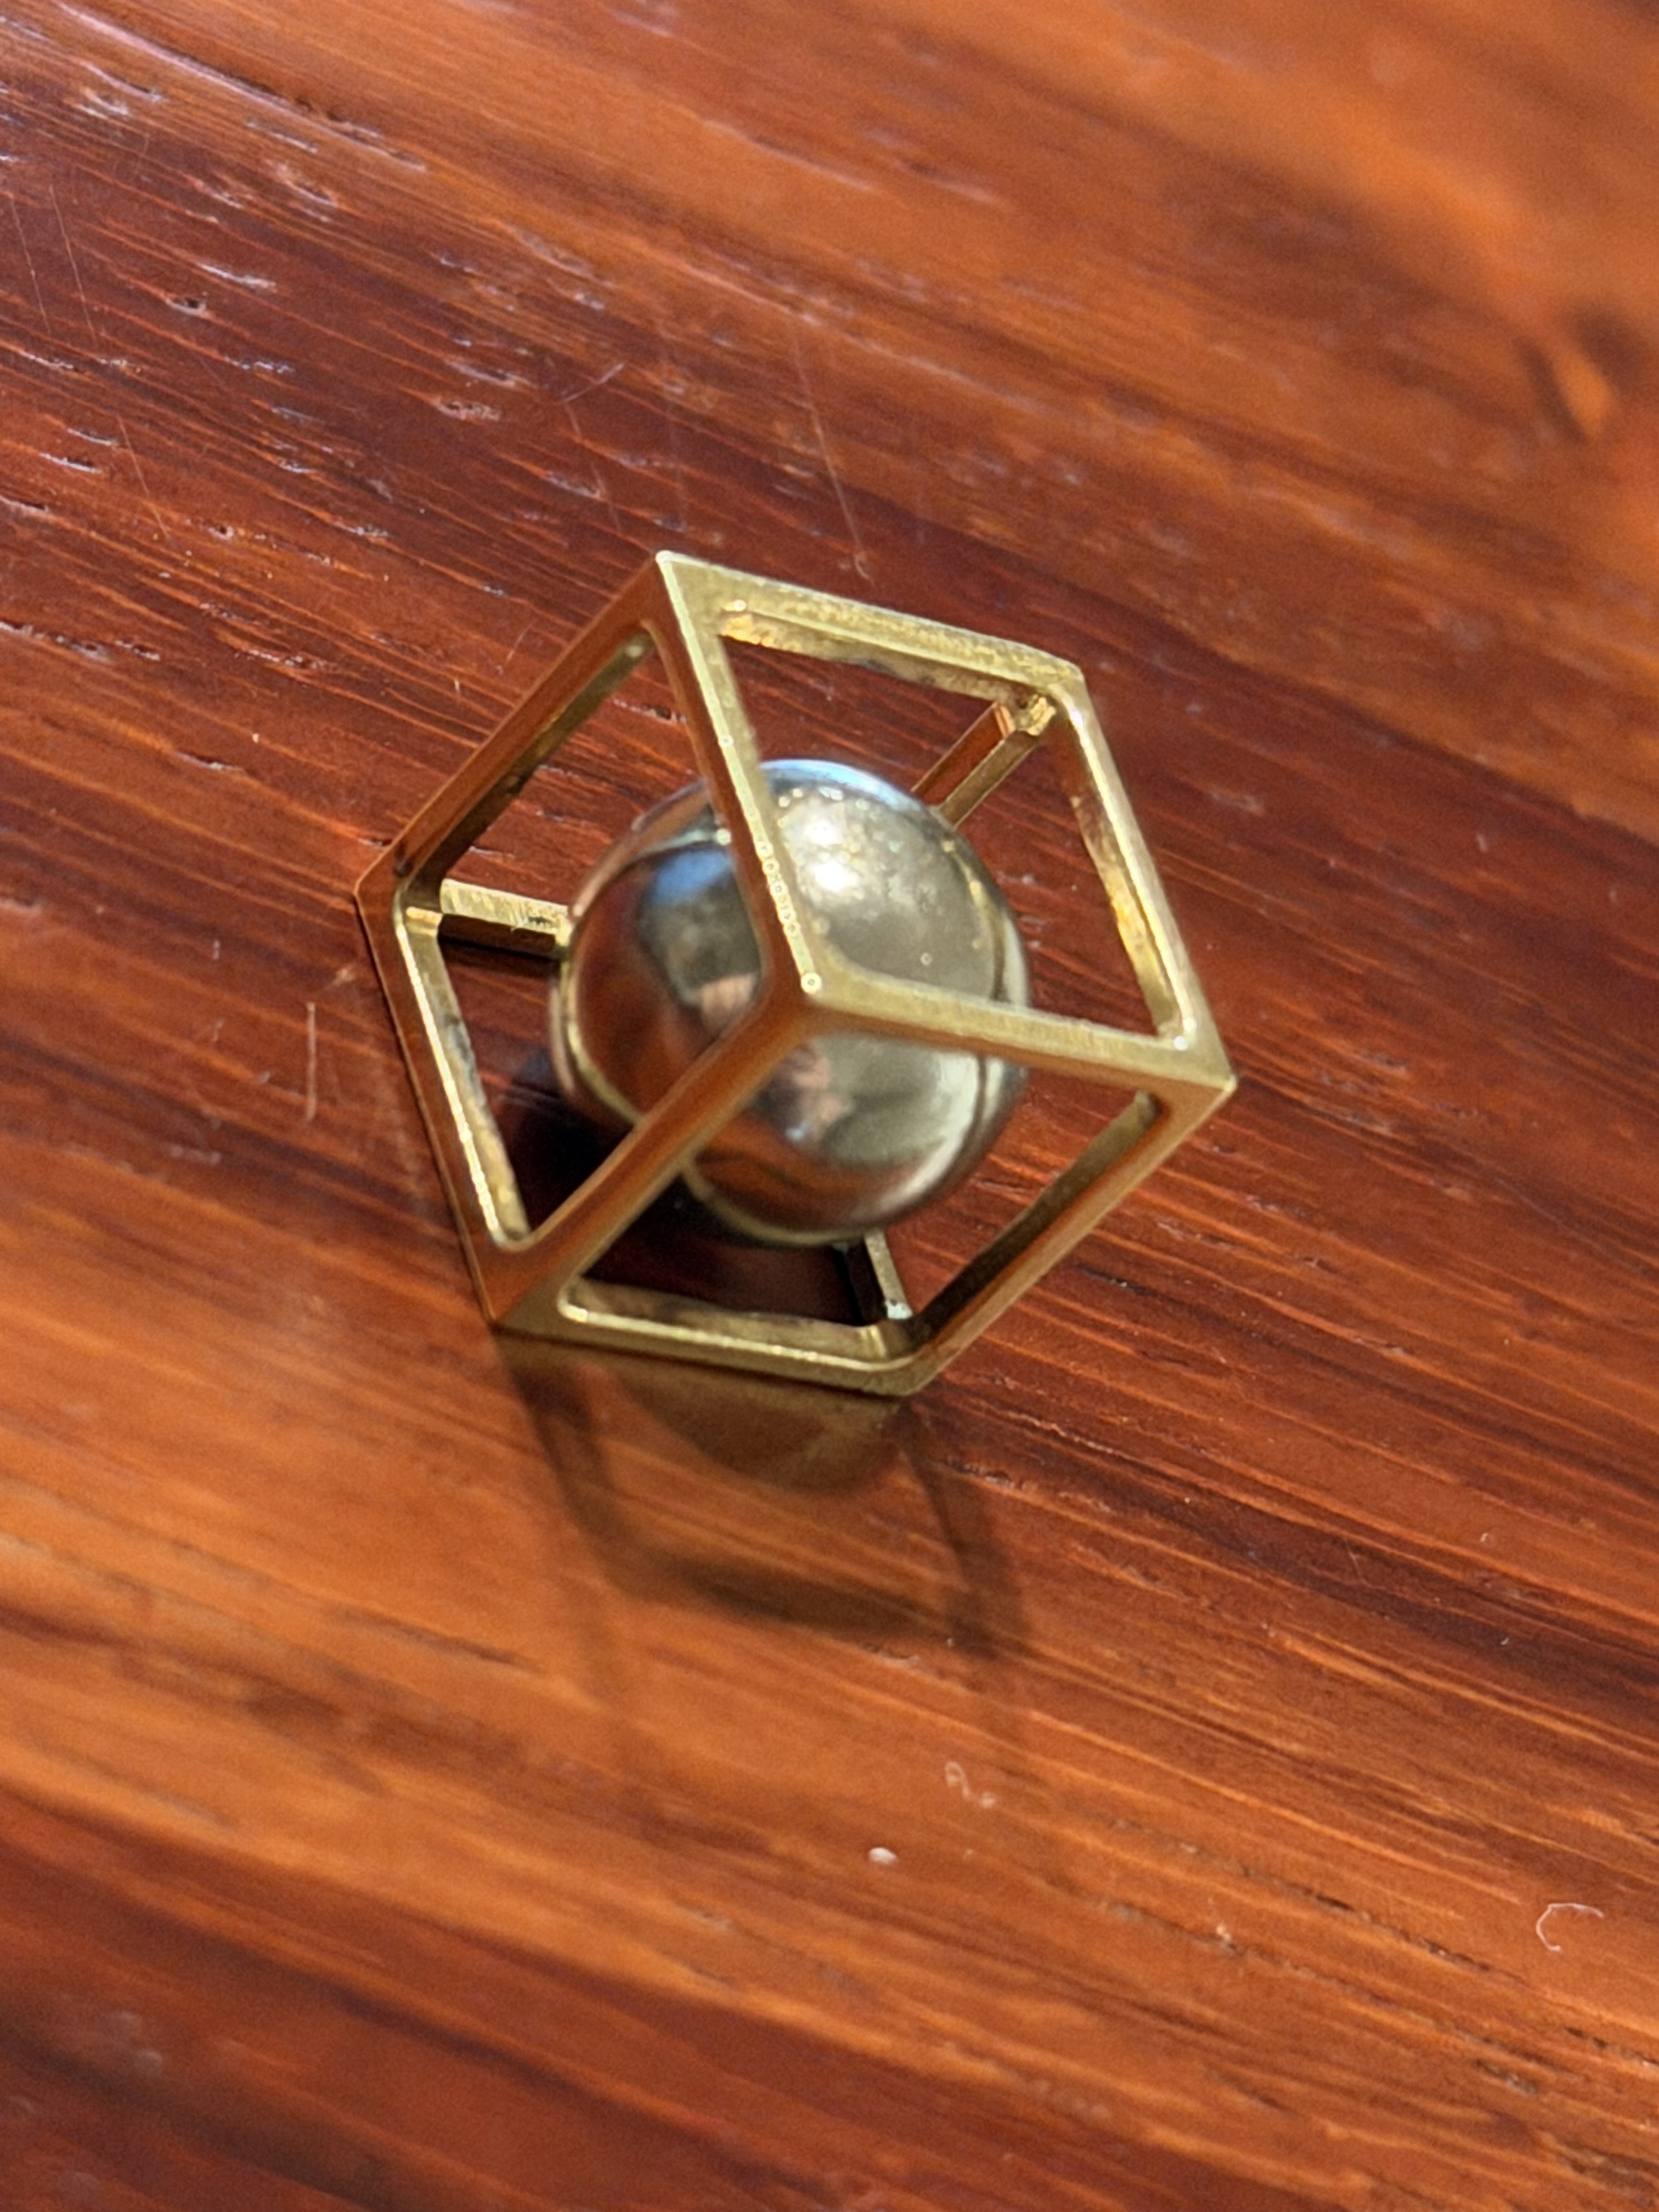
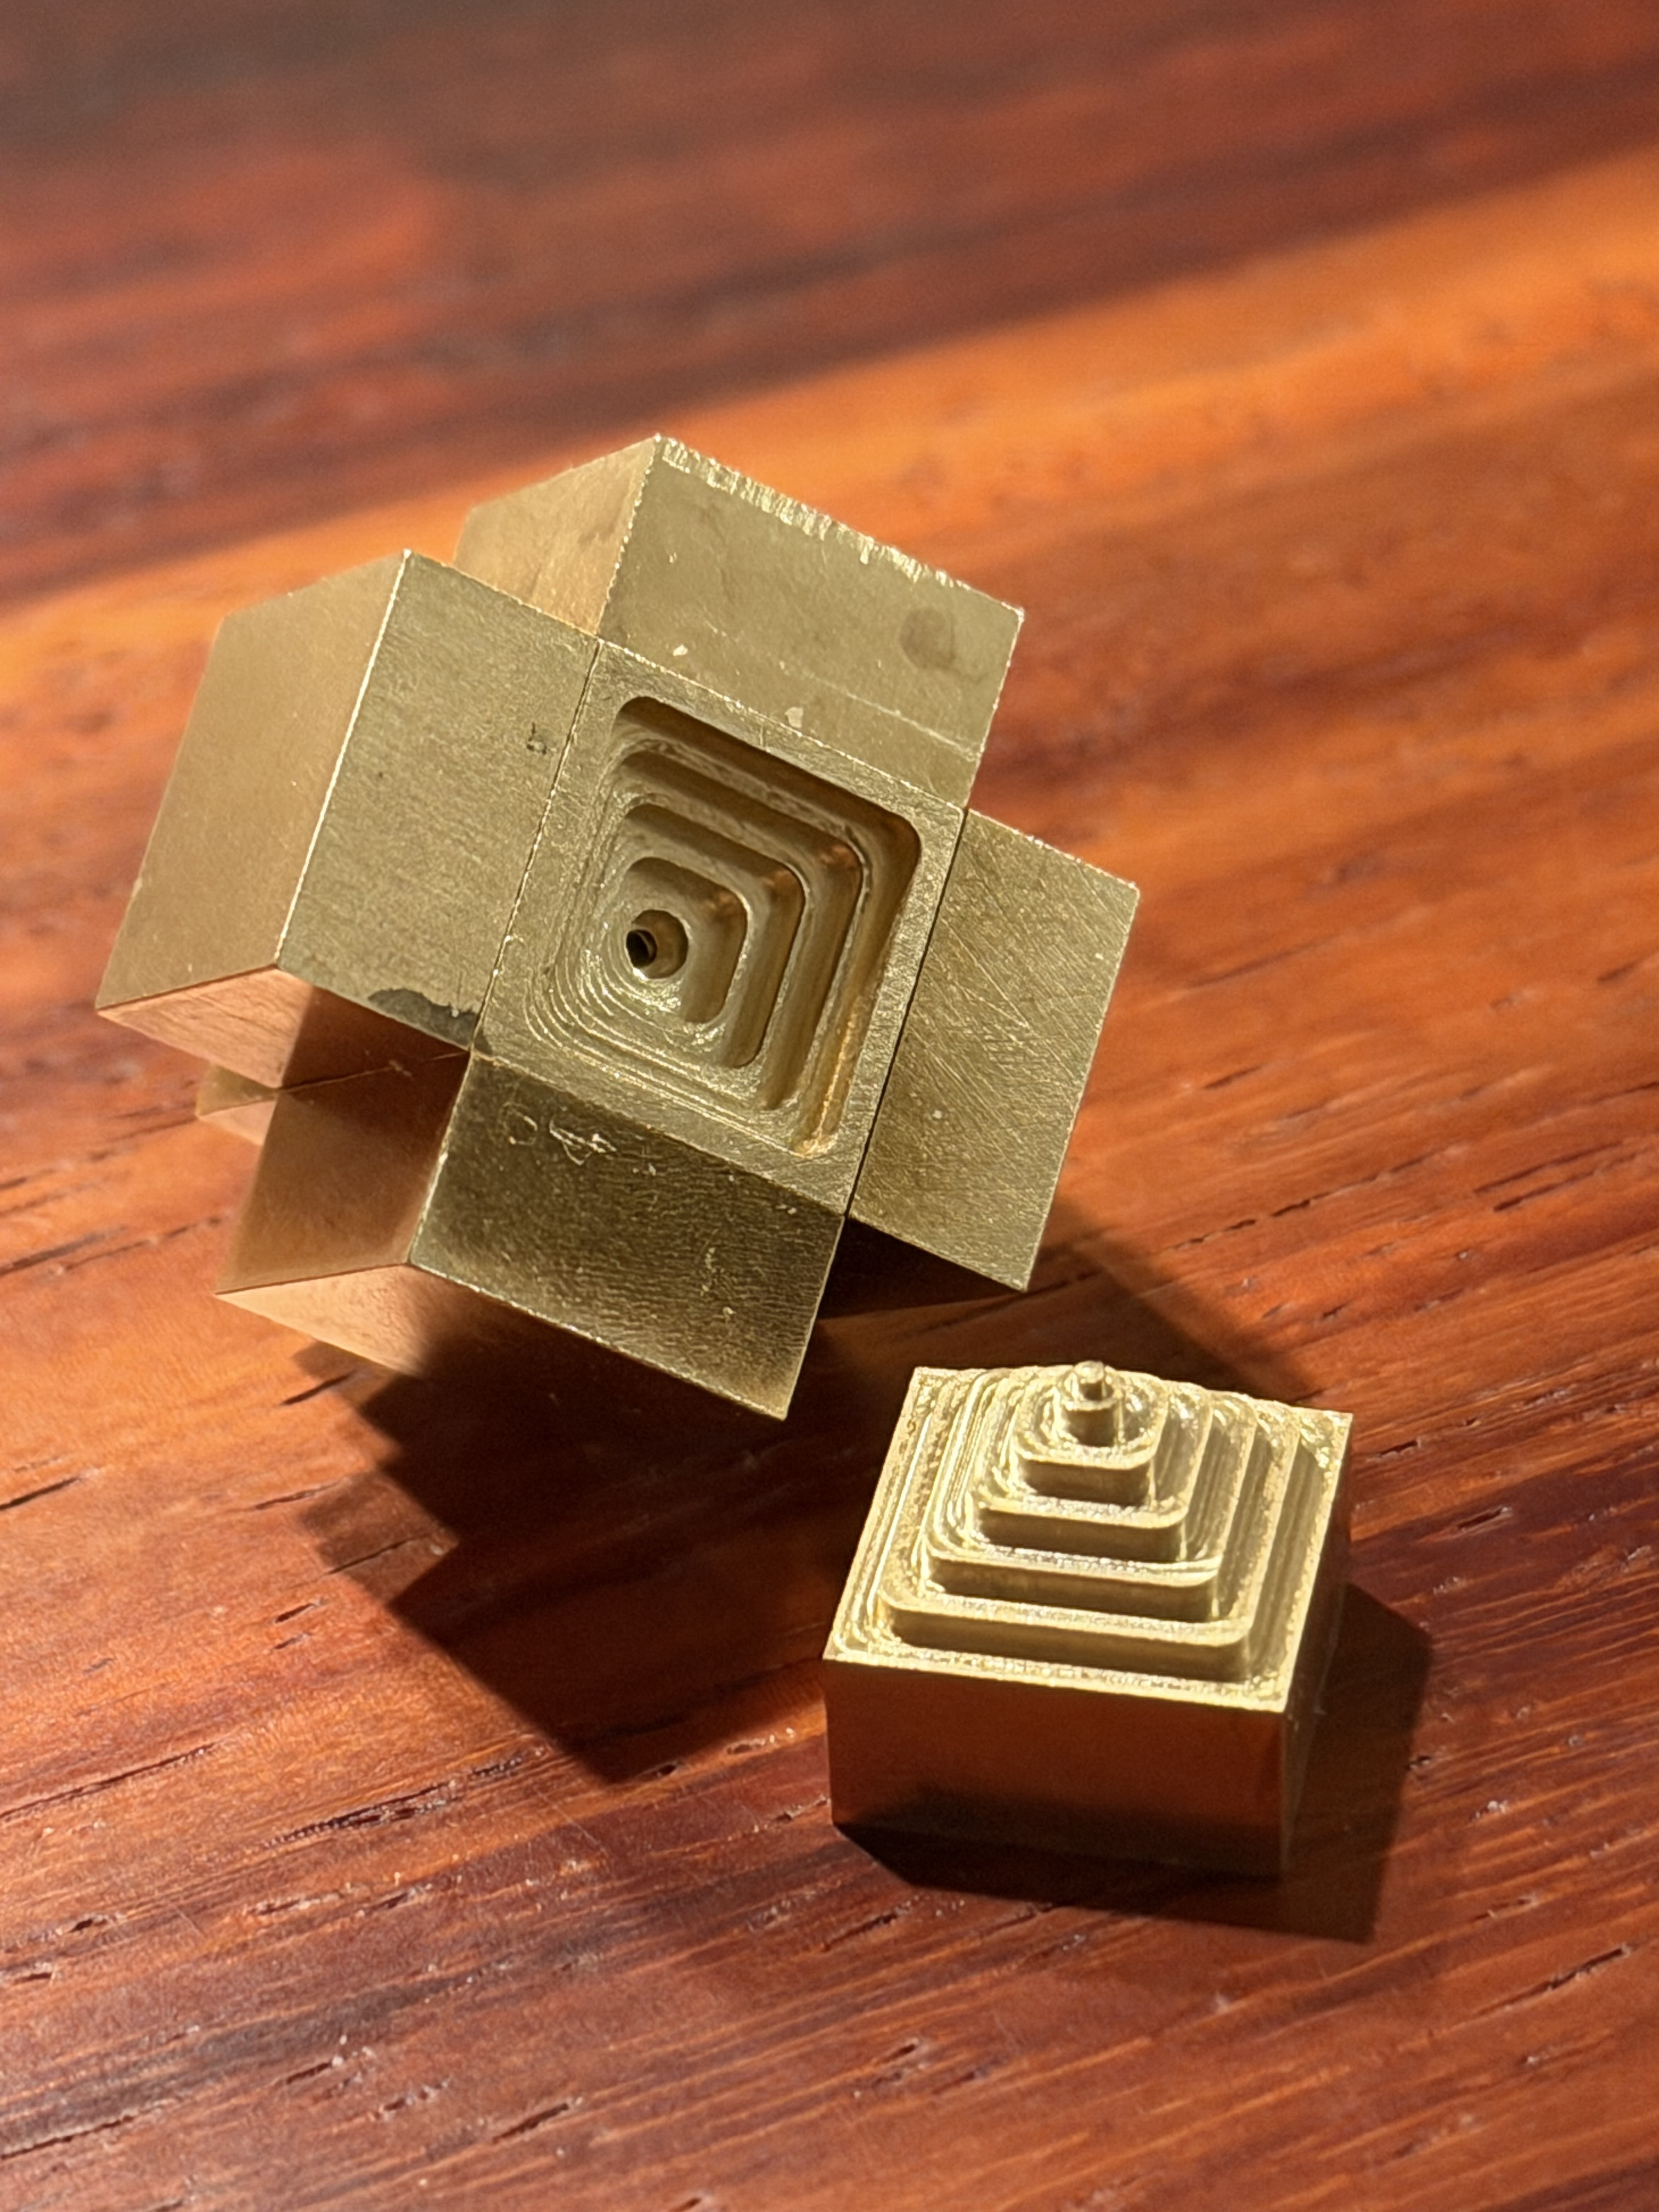
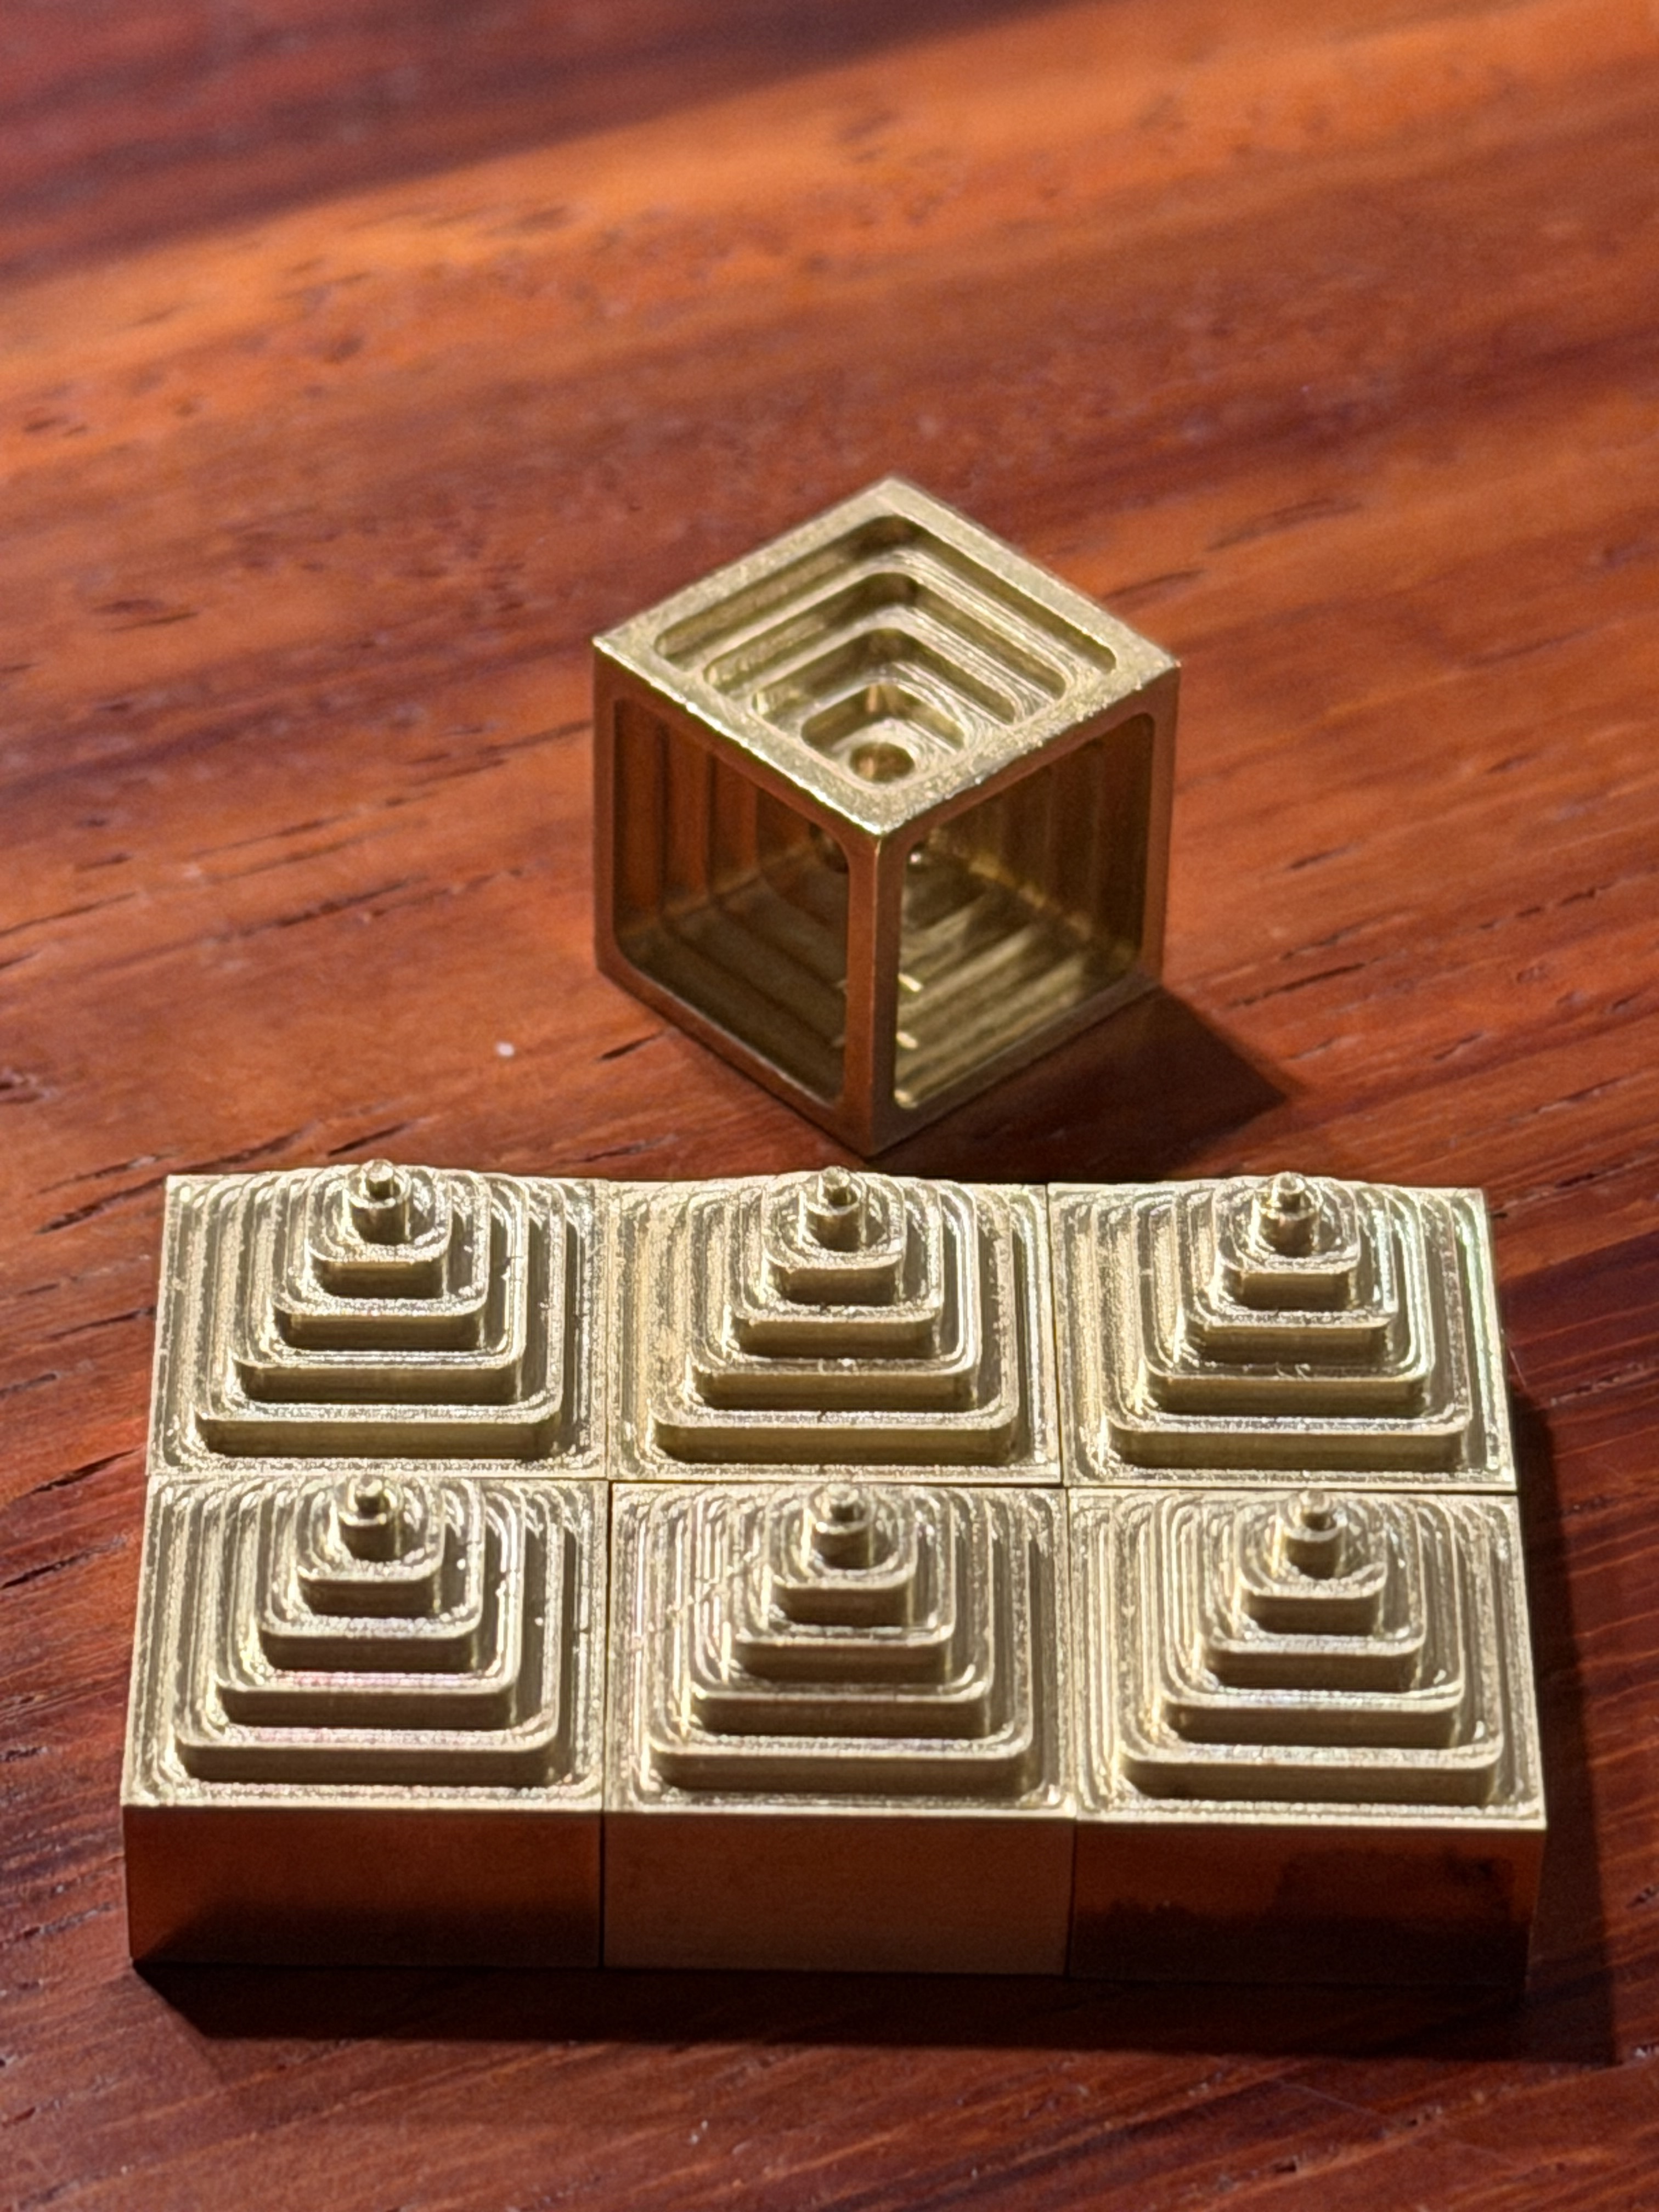
That practice got me interested in other structures I could cut from a cube:
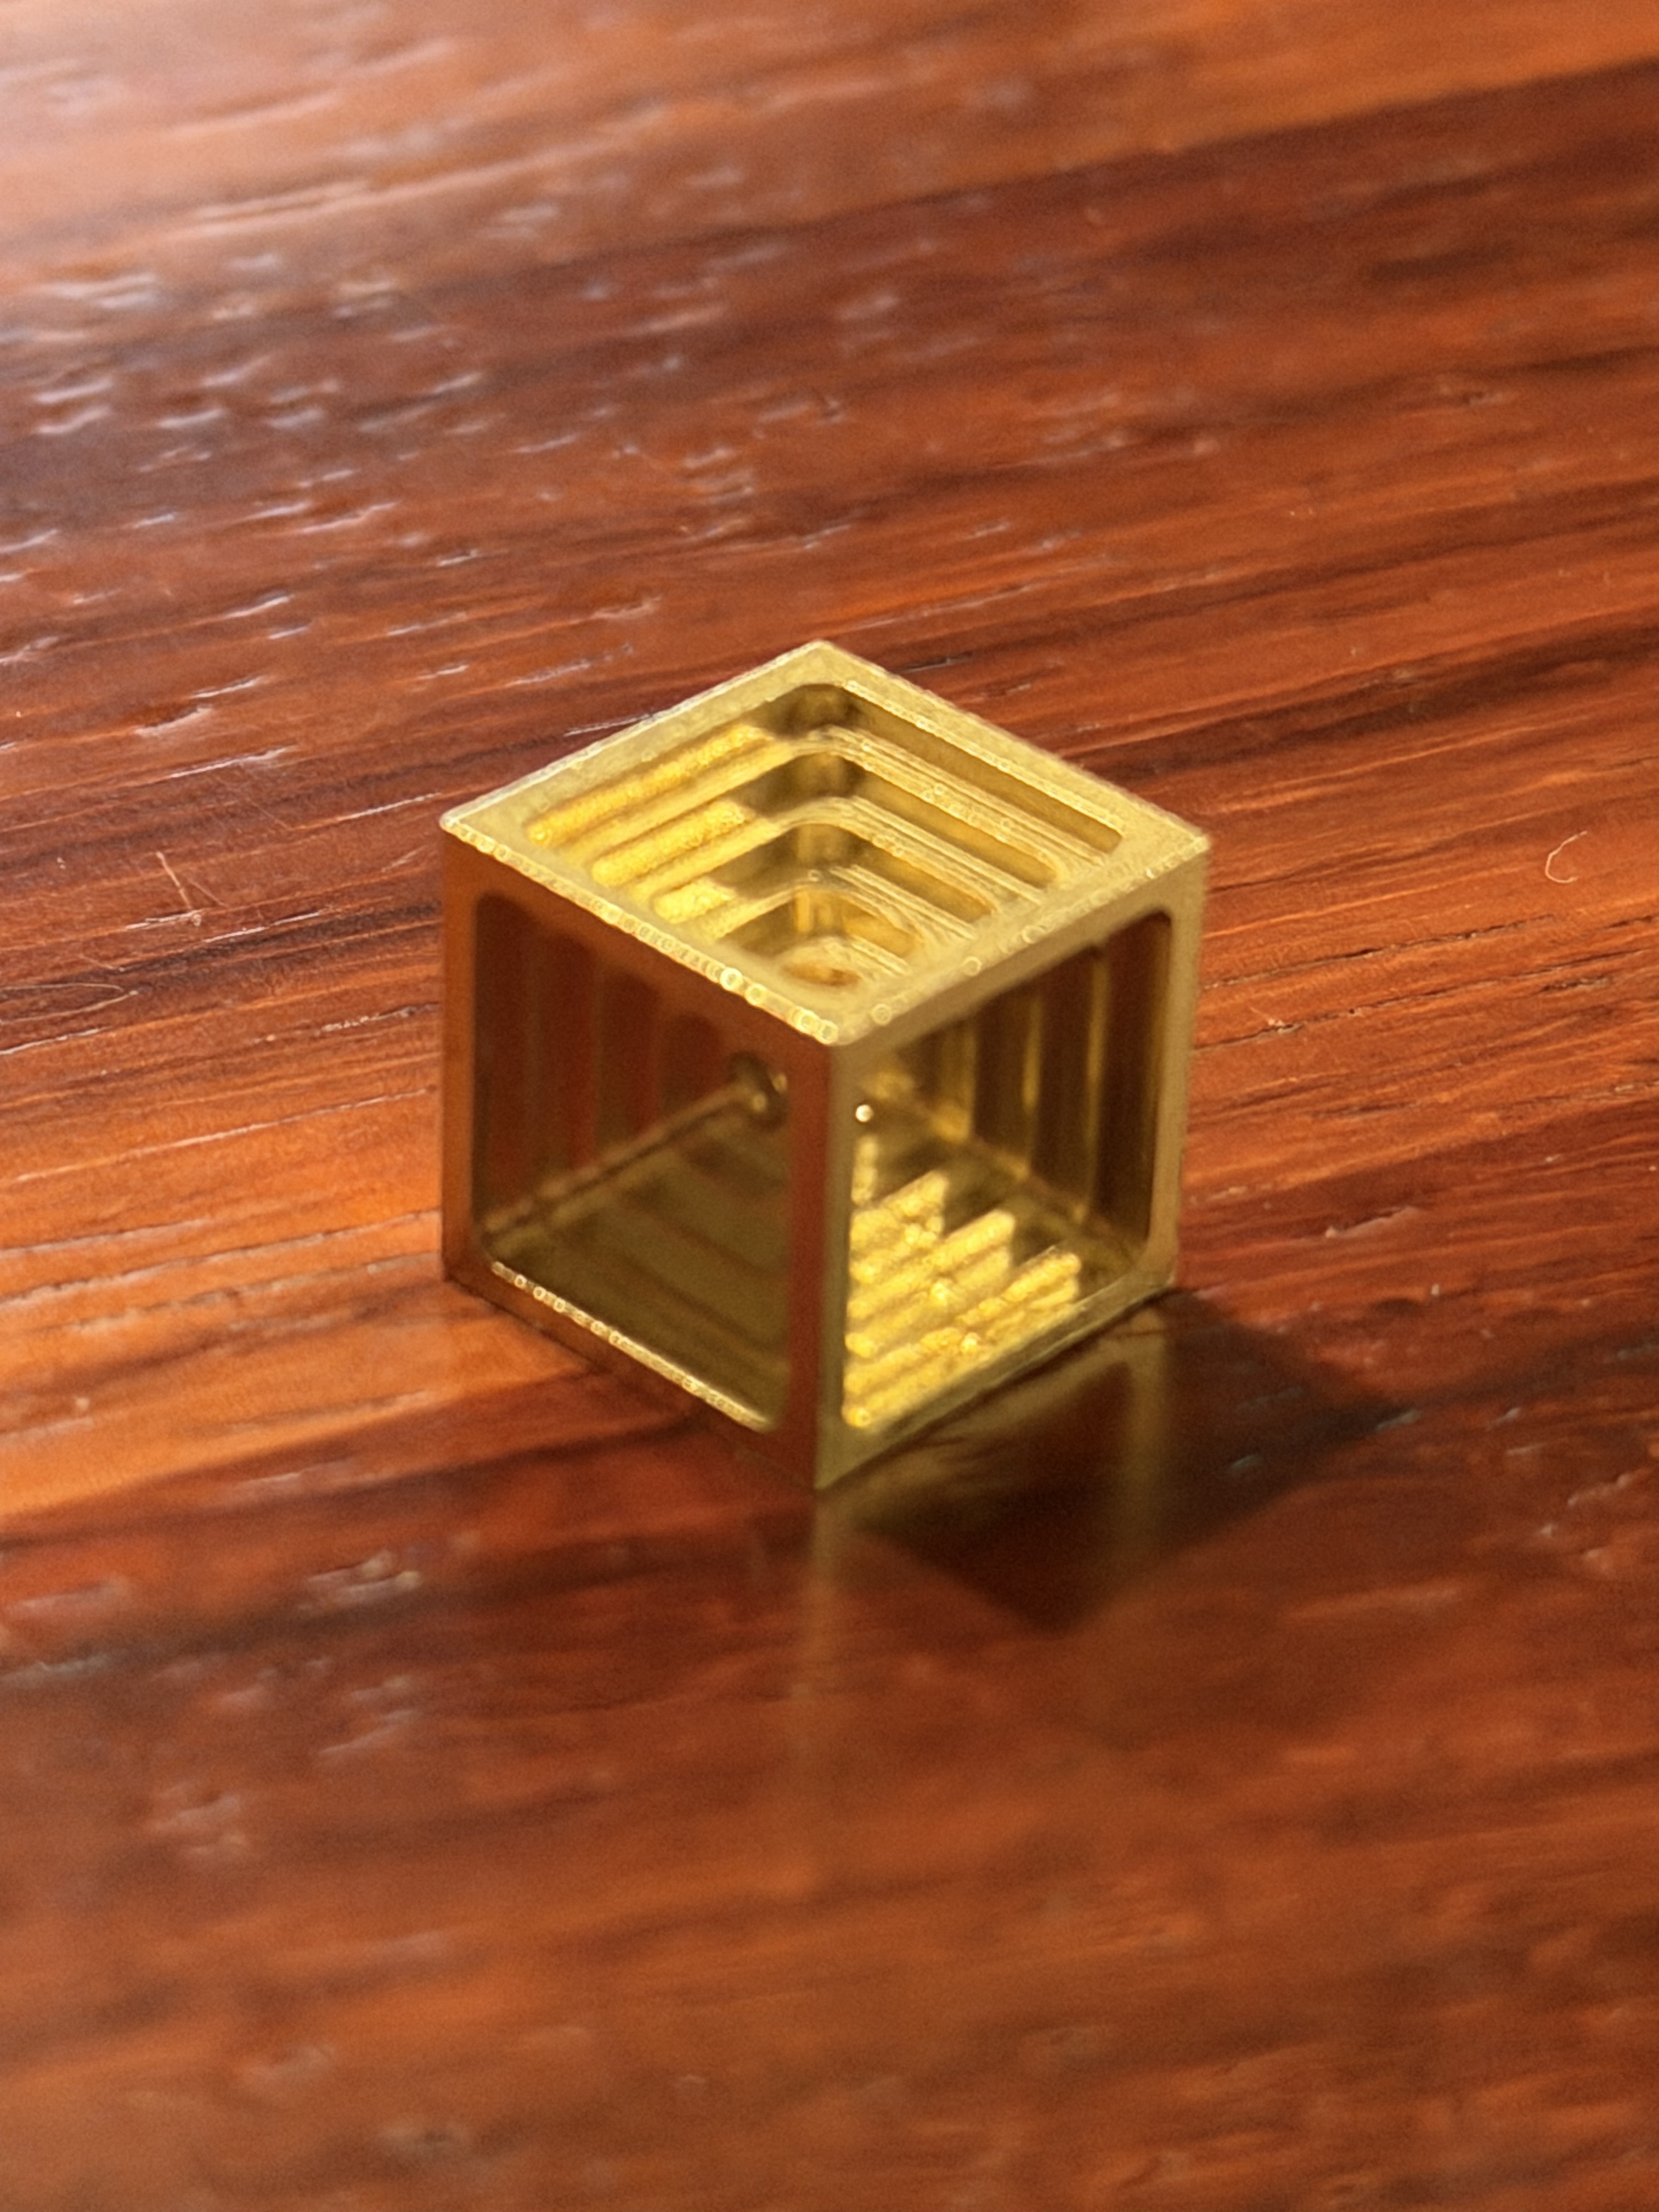
And now the wife wants a host of roughly cubic things that stack nicely ![]()


Just good fun playing with neat forms. Maybe some of these will be modified to make interesting pendants or something.
20 Likes
Now you need a negative shape to nest inside the stepped cube.
1 Like
You and the wife would get along just swell, she had the same idea ![]()
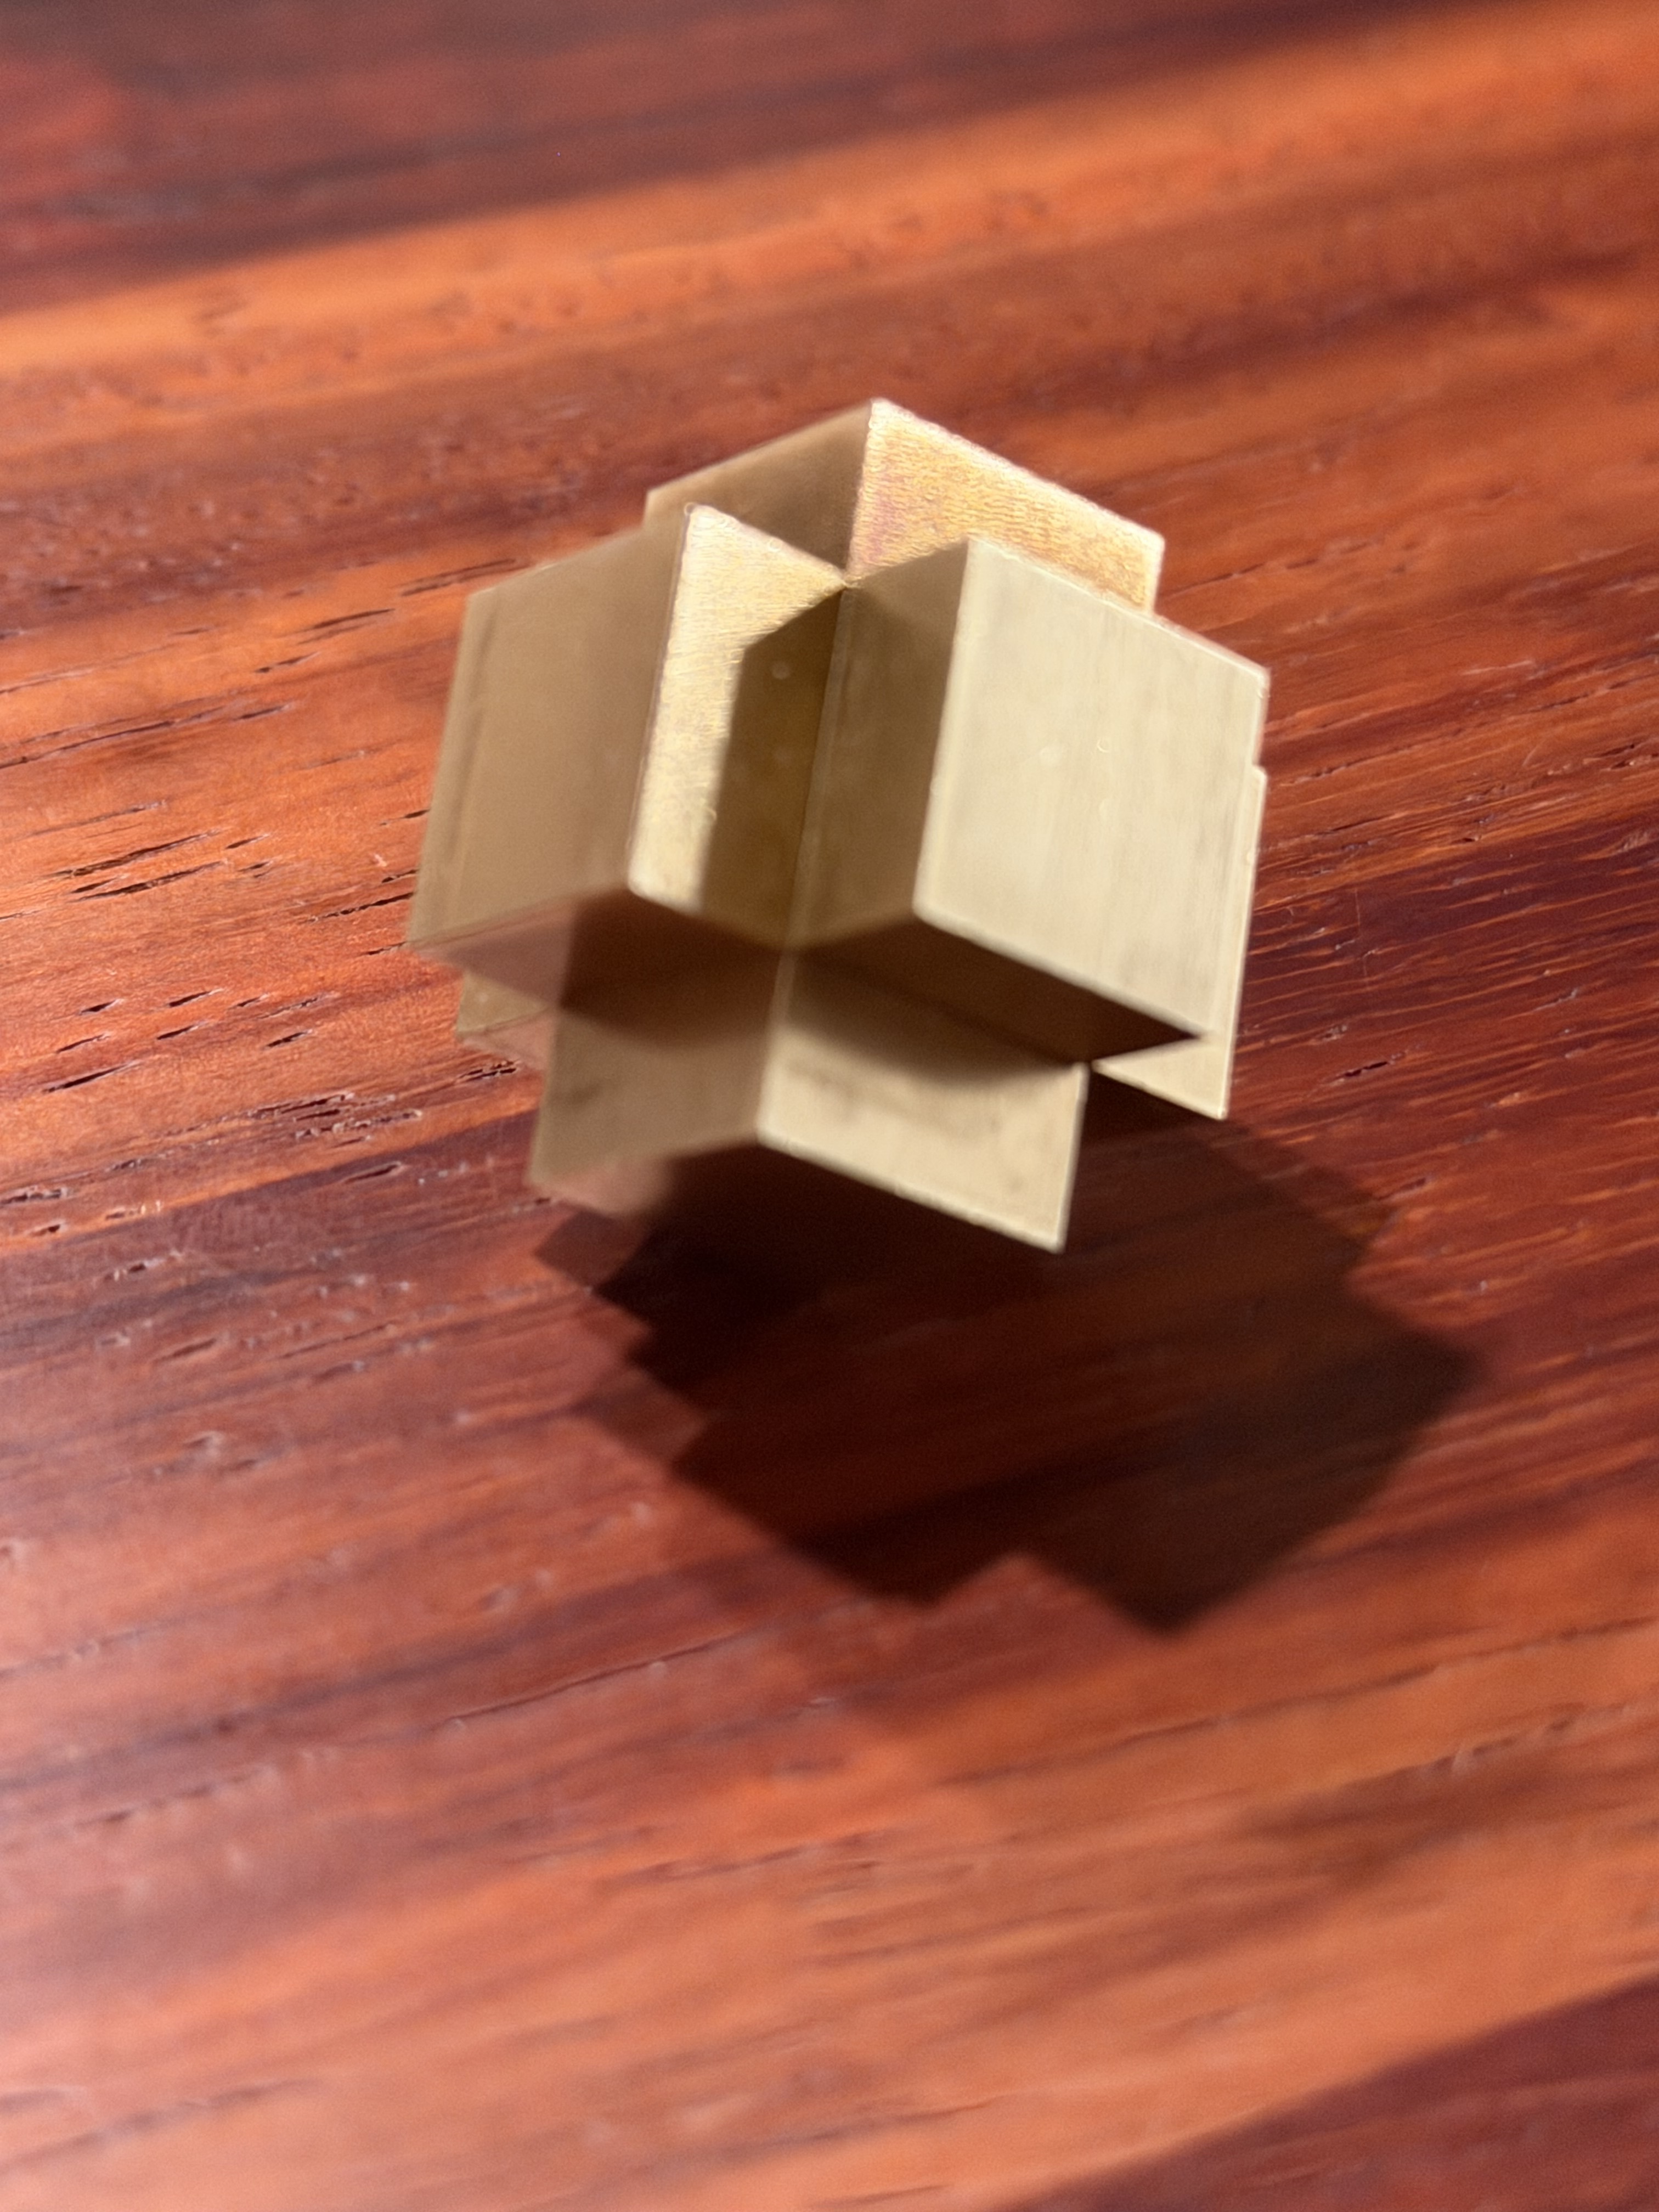
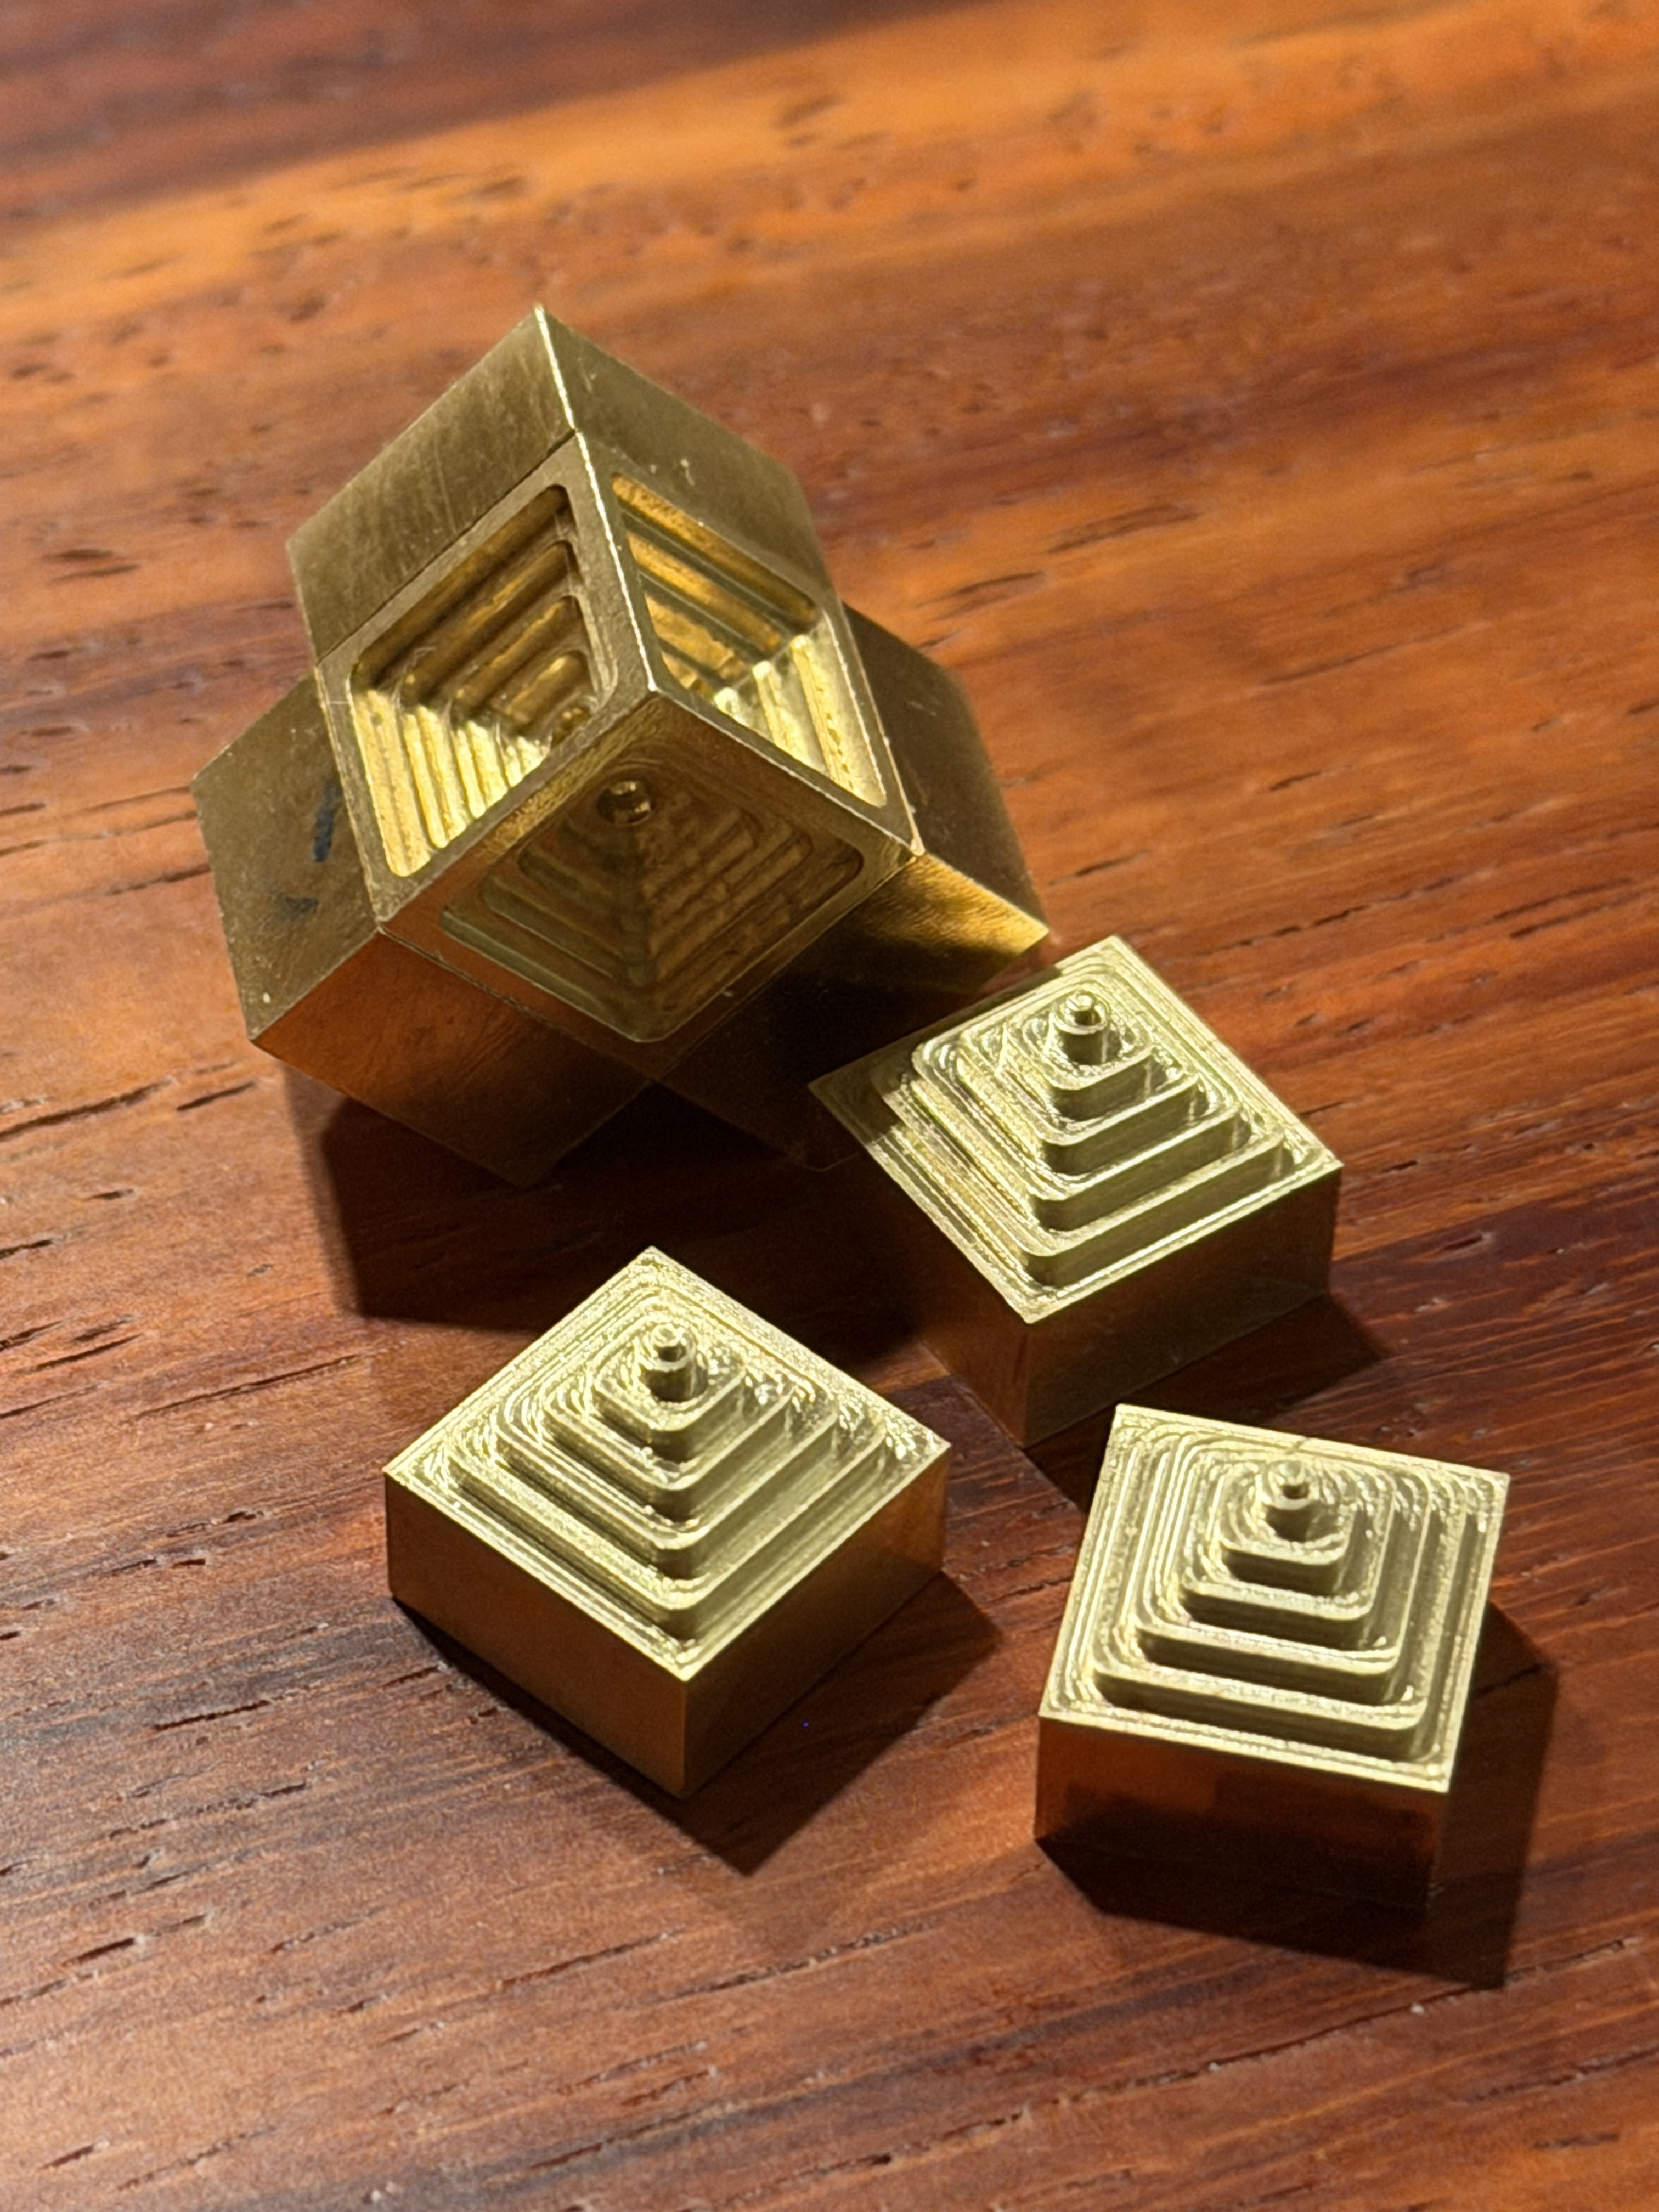
There is the slightest interference fit so the pieces stay together until actively taken apart. We can toss it around and roll it like a ball when it’s together but still pop the pieces off with finger strength.
The fit was dialed in with the first pyramid with a finishing contour on each step of -0.0625mm stock to leave. Put that into the final program and each follow on came out perfectly.
She says if you didn’t know they were pieces, you’d think it was a solid block…I think that’s pretty generous but I’ll take the compliment ![]()
(The interior core was deburred in a magnetic pin tumbler, no way I’m getting in there with tools)
16 Likes
Nice thread I love seeing what folks are making with their Shapeoko / Nomad machines. I milled a small wood inlay today, trying out new bits and seeing how clean I could get those edges. Also, when I’m setting up late-night projects I like lighting my workspace with a little neon from Miamineons gives it a cool glow and just makes the space feel more inspiring.
2 Likes
I wasn’t happy with the first iteration of my inlaid crib board so I tweaked the design and redid the project. IMHO it turned out much better. It’s made of cherry inlaid in mahogany. I gave it a light coat of Odie’s Dark Oil which really brought out the mahogany
I’m going to review the files again and post it on CutRocket if anyone is interested in trying it
21 Likes
![]()
How come everyone makes cribbage boards, but I only know one person that plays cribbage, and I taught her, and she always wins?!
6 Likes
You are obviously not hanging out with old (or old enough) people! ![]()
I started making cribbage boards because I made one for my wife and I, and people started requesting me to make one for them as well. Next thing I know, I’m selling them on Craigslist first, then OfferUp, then Etsy…
2 Likes
Hi Will, Paul Skapin here. I would like to show some items I made on the shapeoko 5 pro in the gallery. Not sure how to post in the gallery. Could you point me in the right direction?