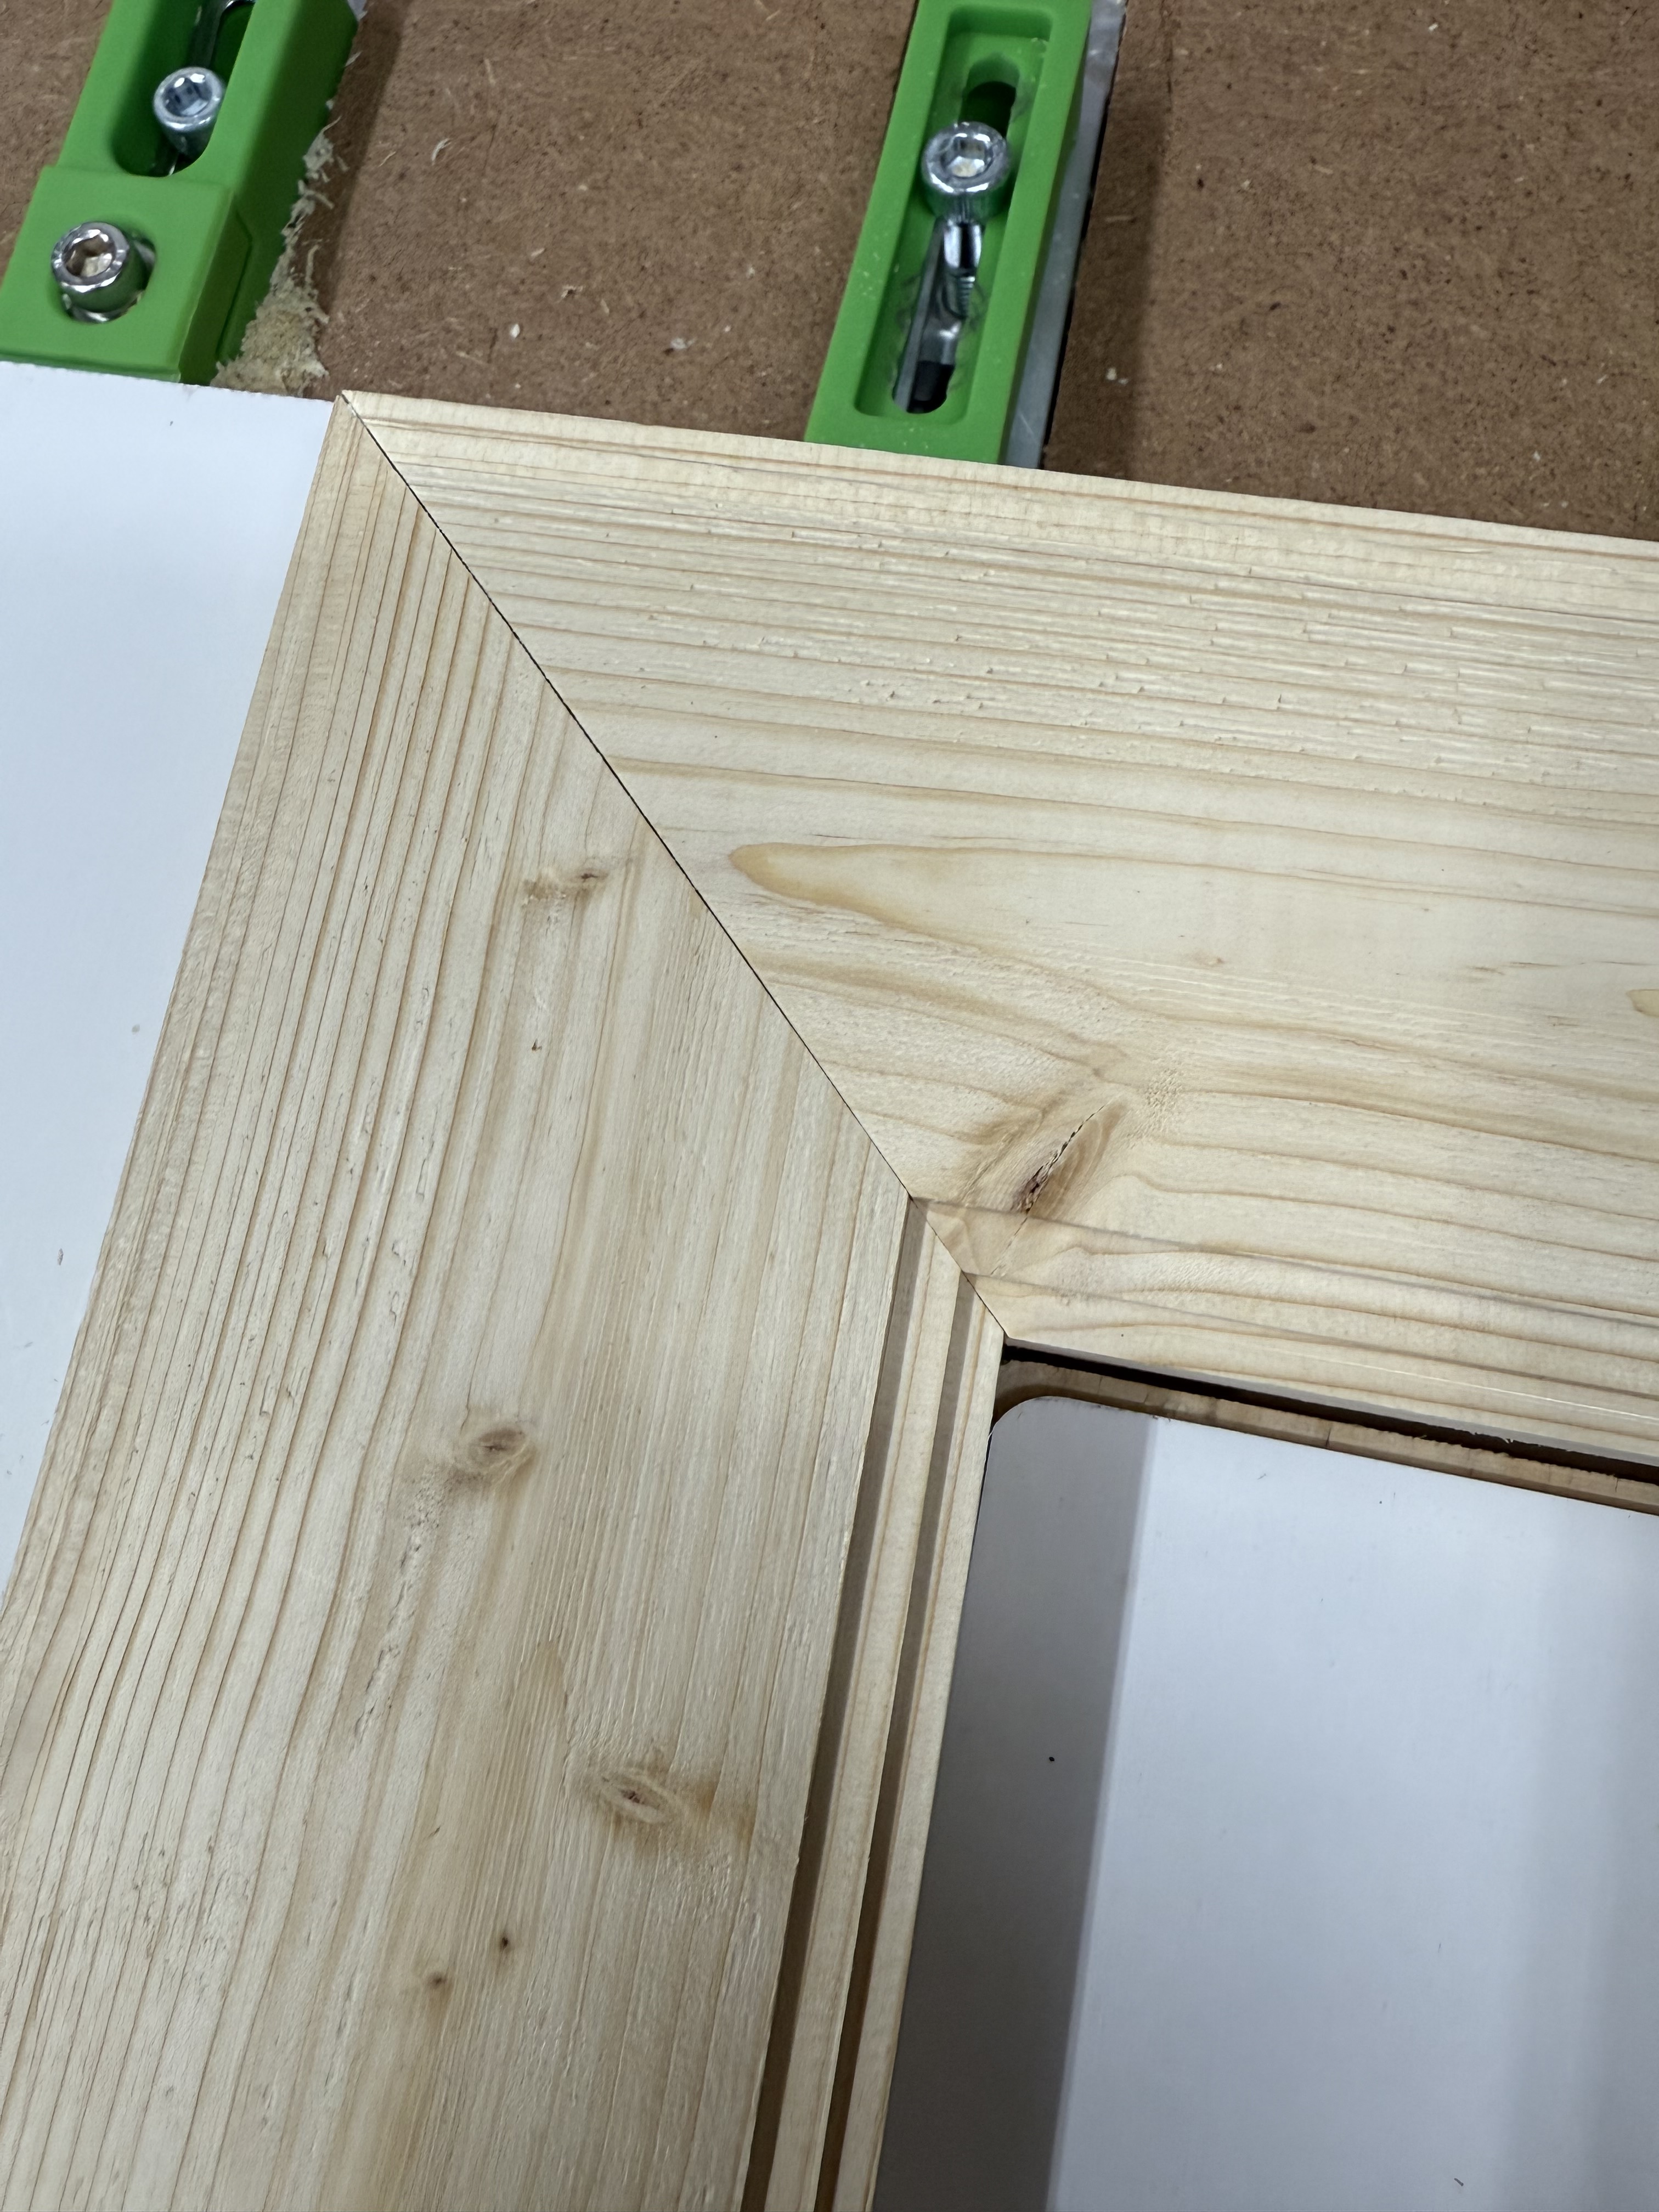
I don’t make a lot of mitered corners, but a while back I made a great jig for my tablesaw that works perfectly without any setup - and is super easy to use and make. The miters that I’ve made ever since have been spot-on - kind of automatically. It’s a design that’s been around for a really long time - and it just works.
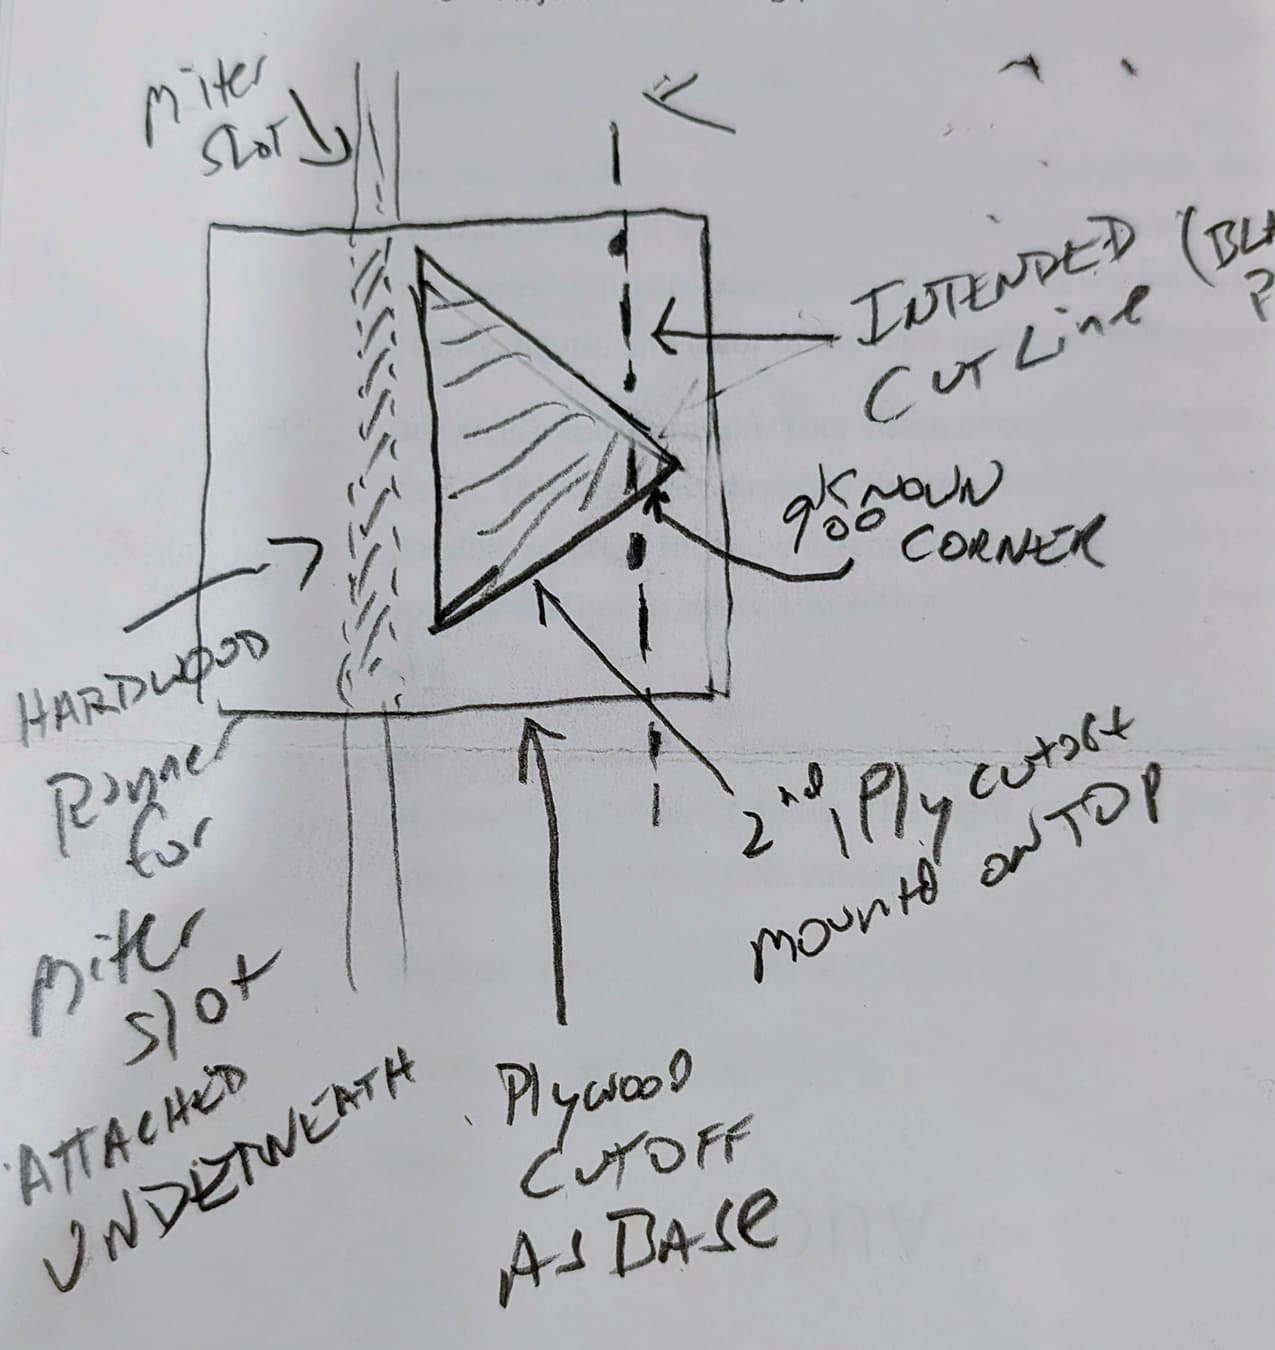
You need two offcuts of plywood and a hardwood strip.
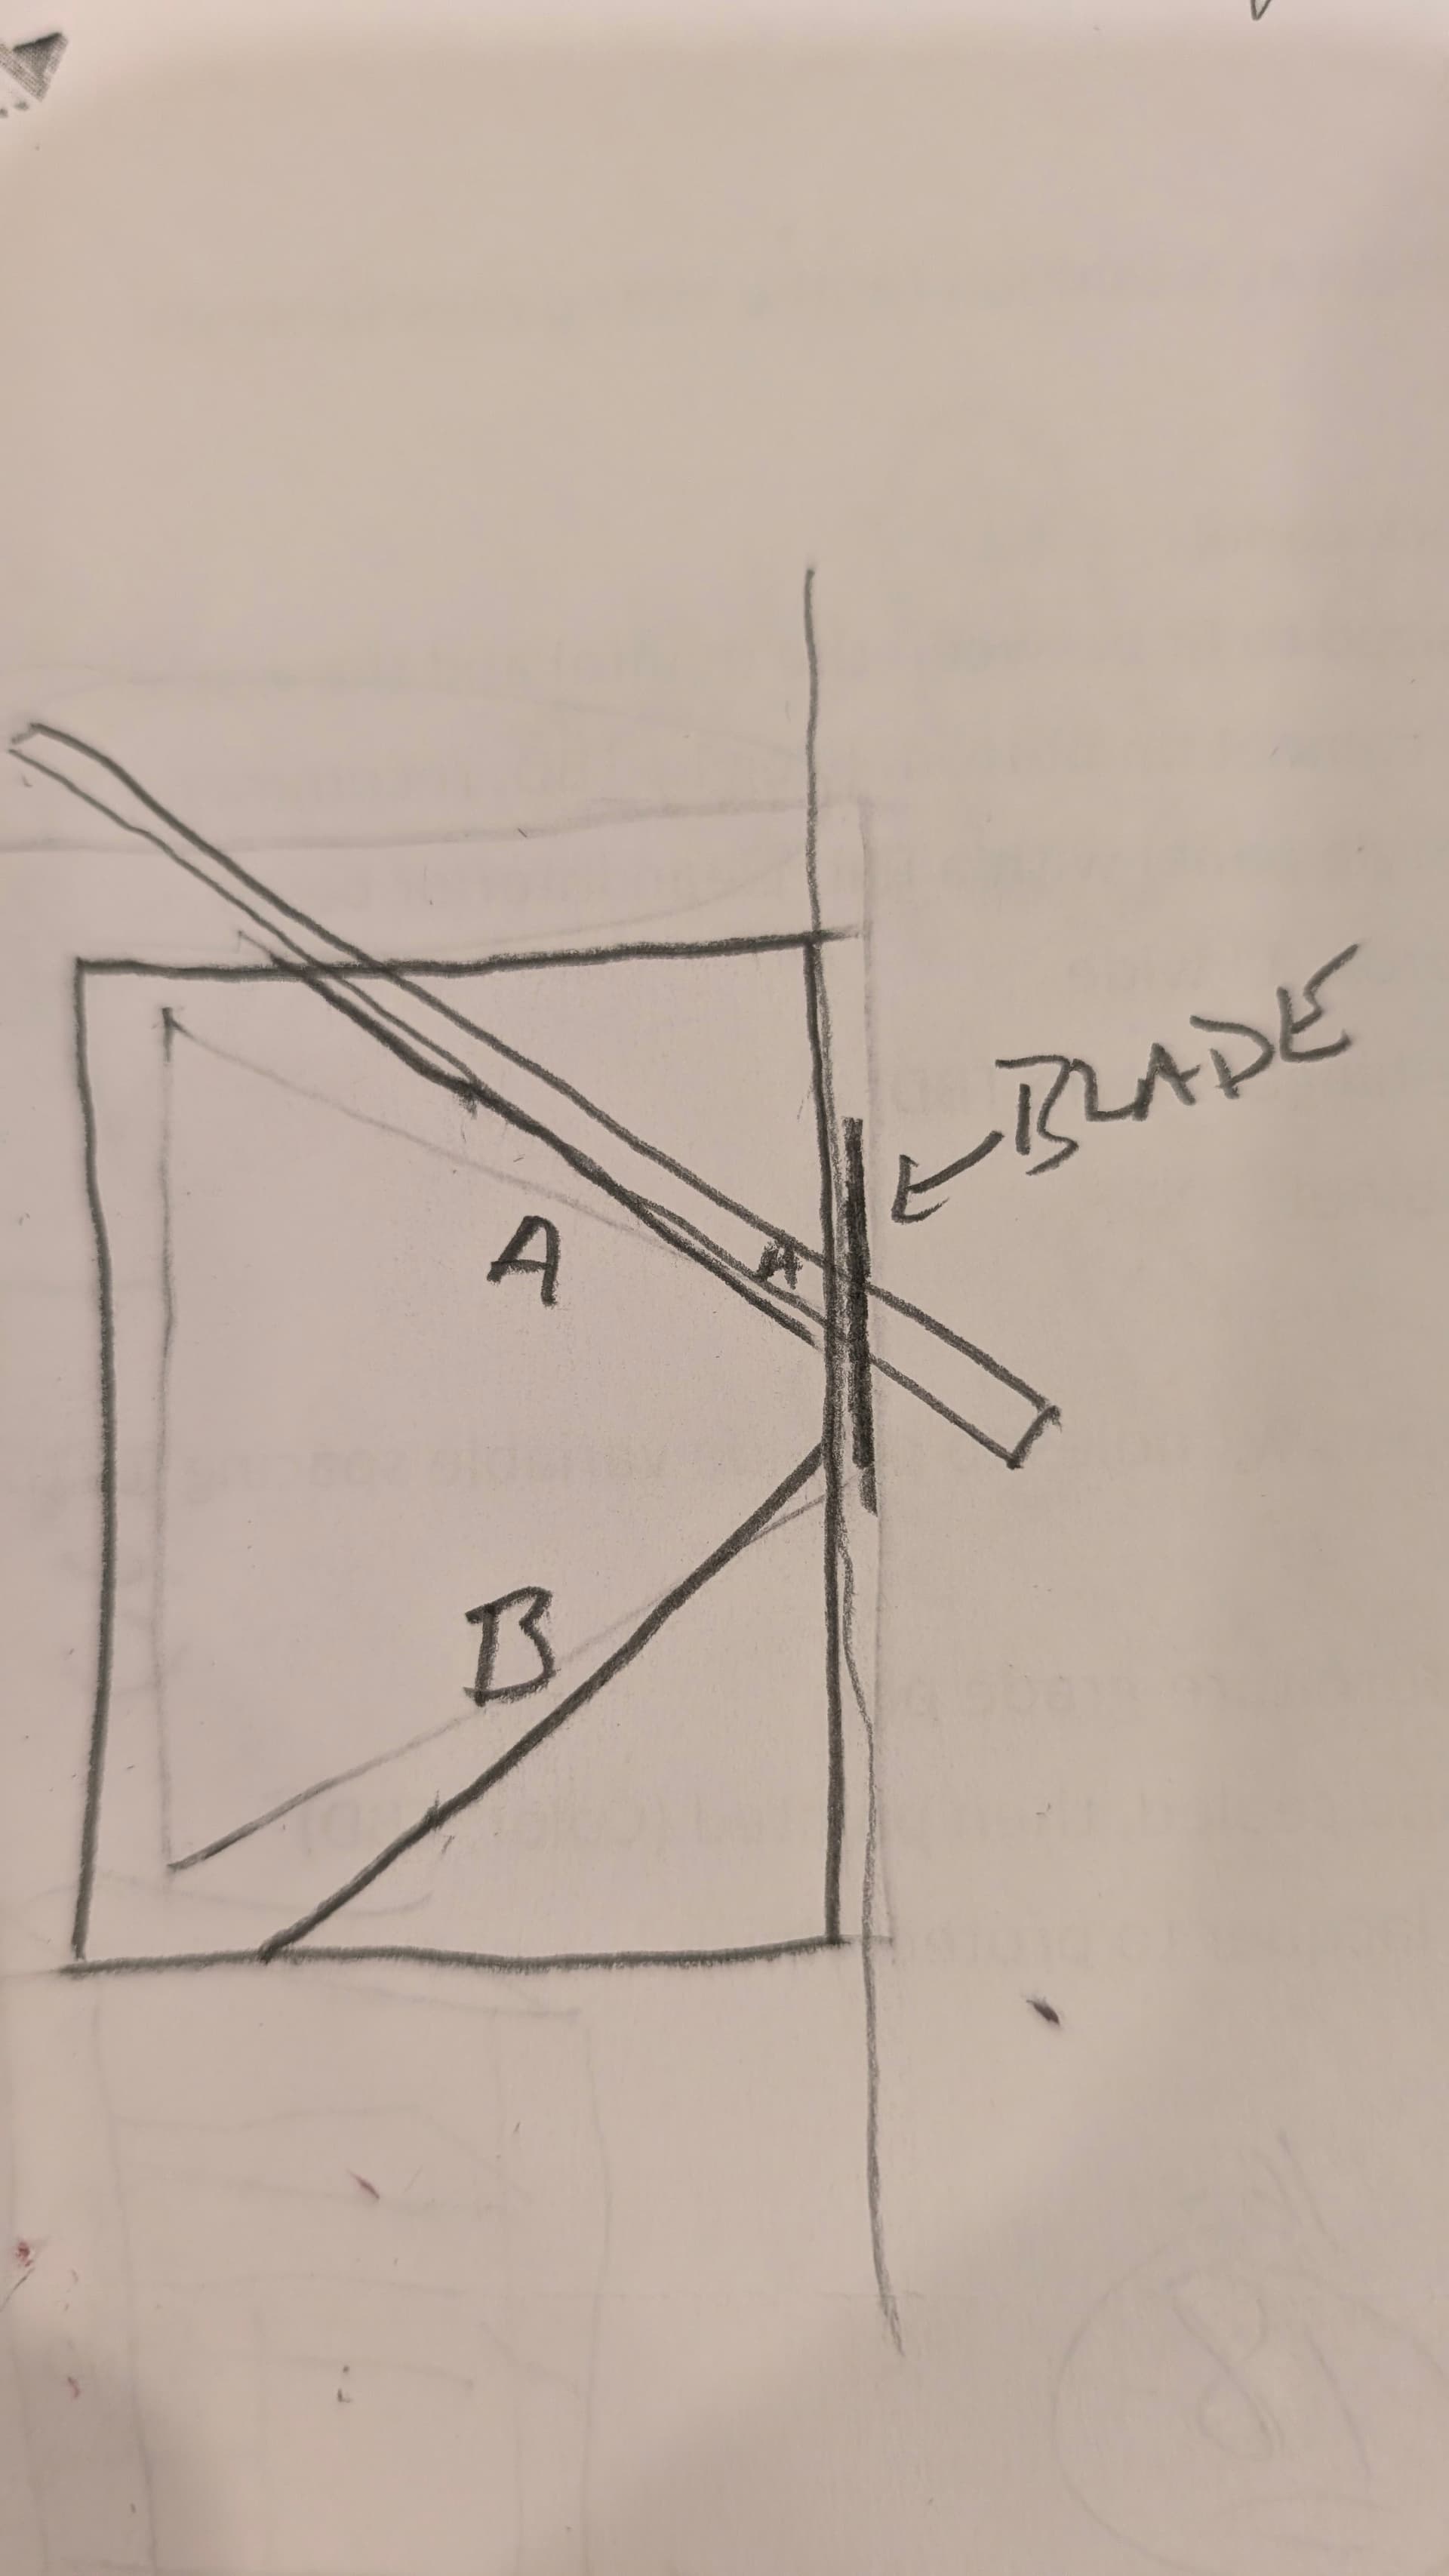
Take a known 90 (I used the manufactured corner of a piece of plywood that measured exactly 90) and glue and screw it on top of another offcut of plywood like this:
The 90 needs to be perfect (maybe cut it on your Shapeoko!), but the placement doesn’t…just get it as close to a 45 degree angle as you can (you can use a try square to get it into place…but again, if it’s off by a fraction, it’s not going to matter). The tip of the corner needs to extend past the intended end of the bottom board.
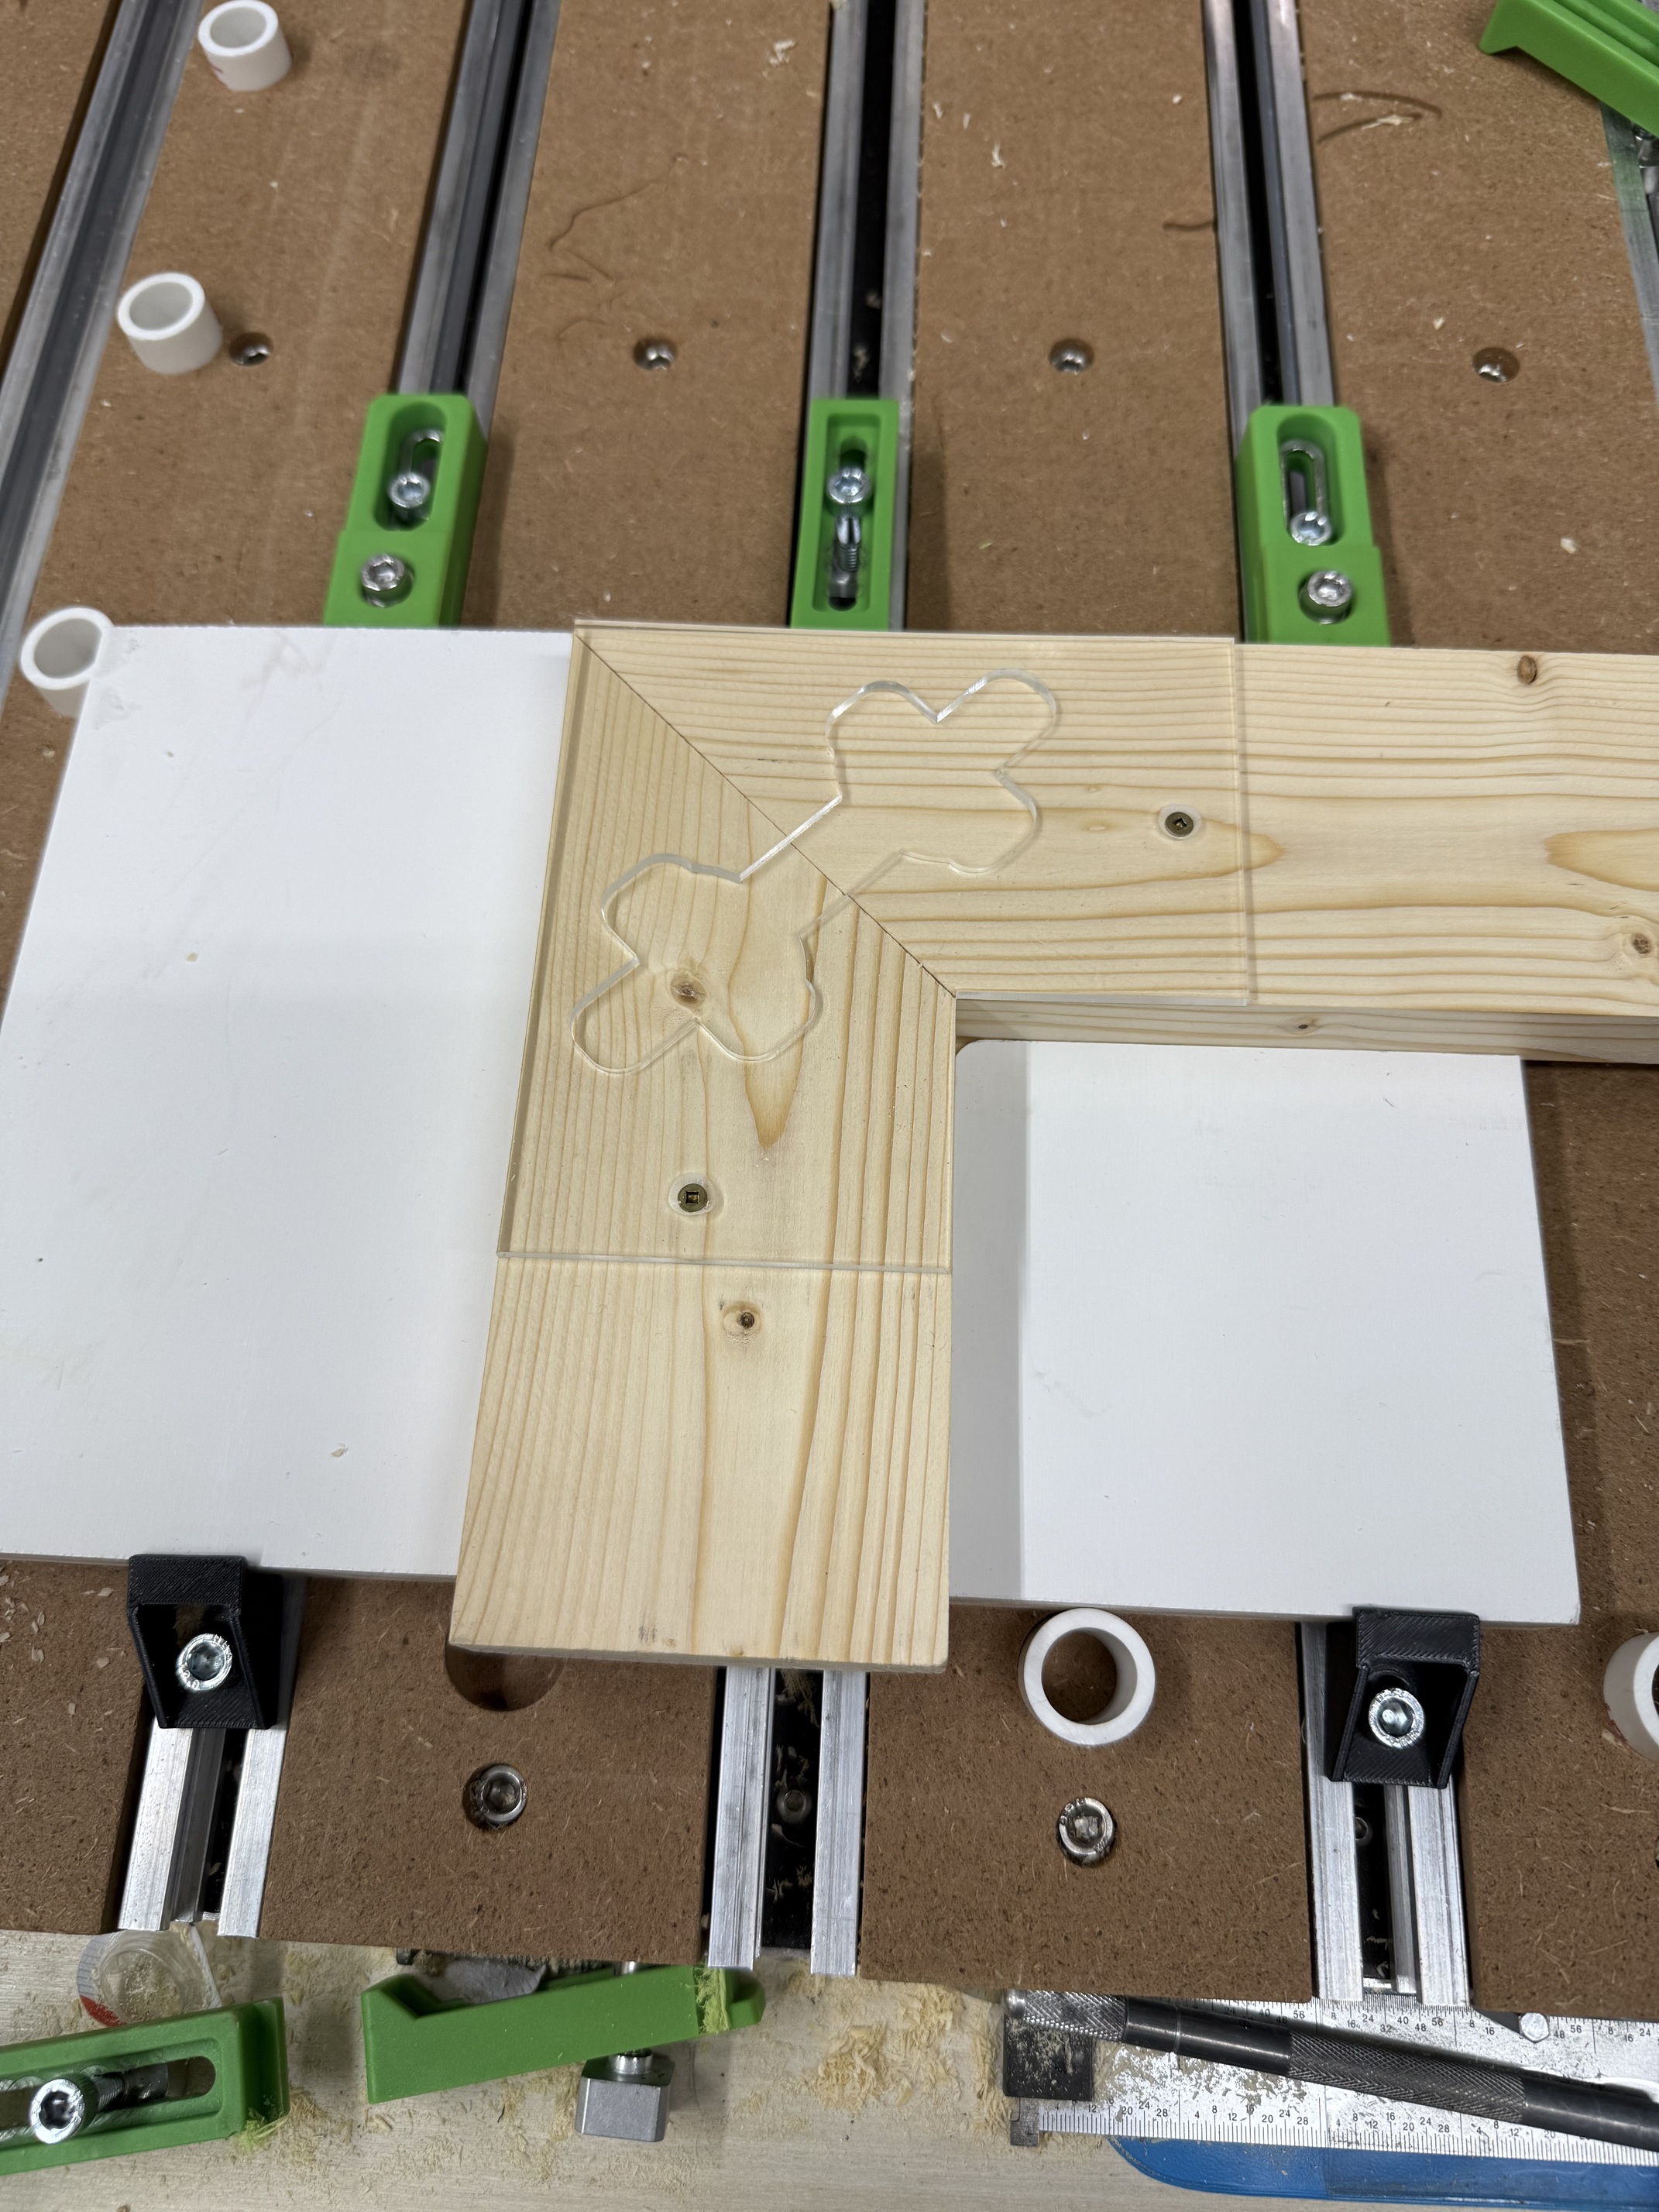
Affix the hardwood strip, sized to ride in the miter slot on your tablesaw using techniques that you use to make sleds or any other jig for the tablesaw (I can go into that, if you want)
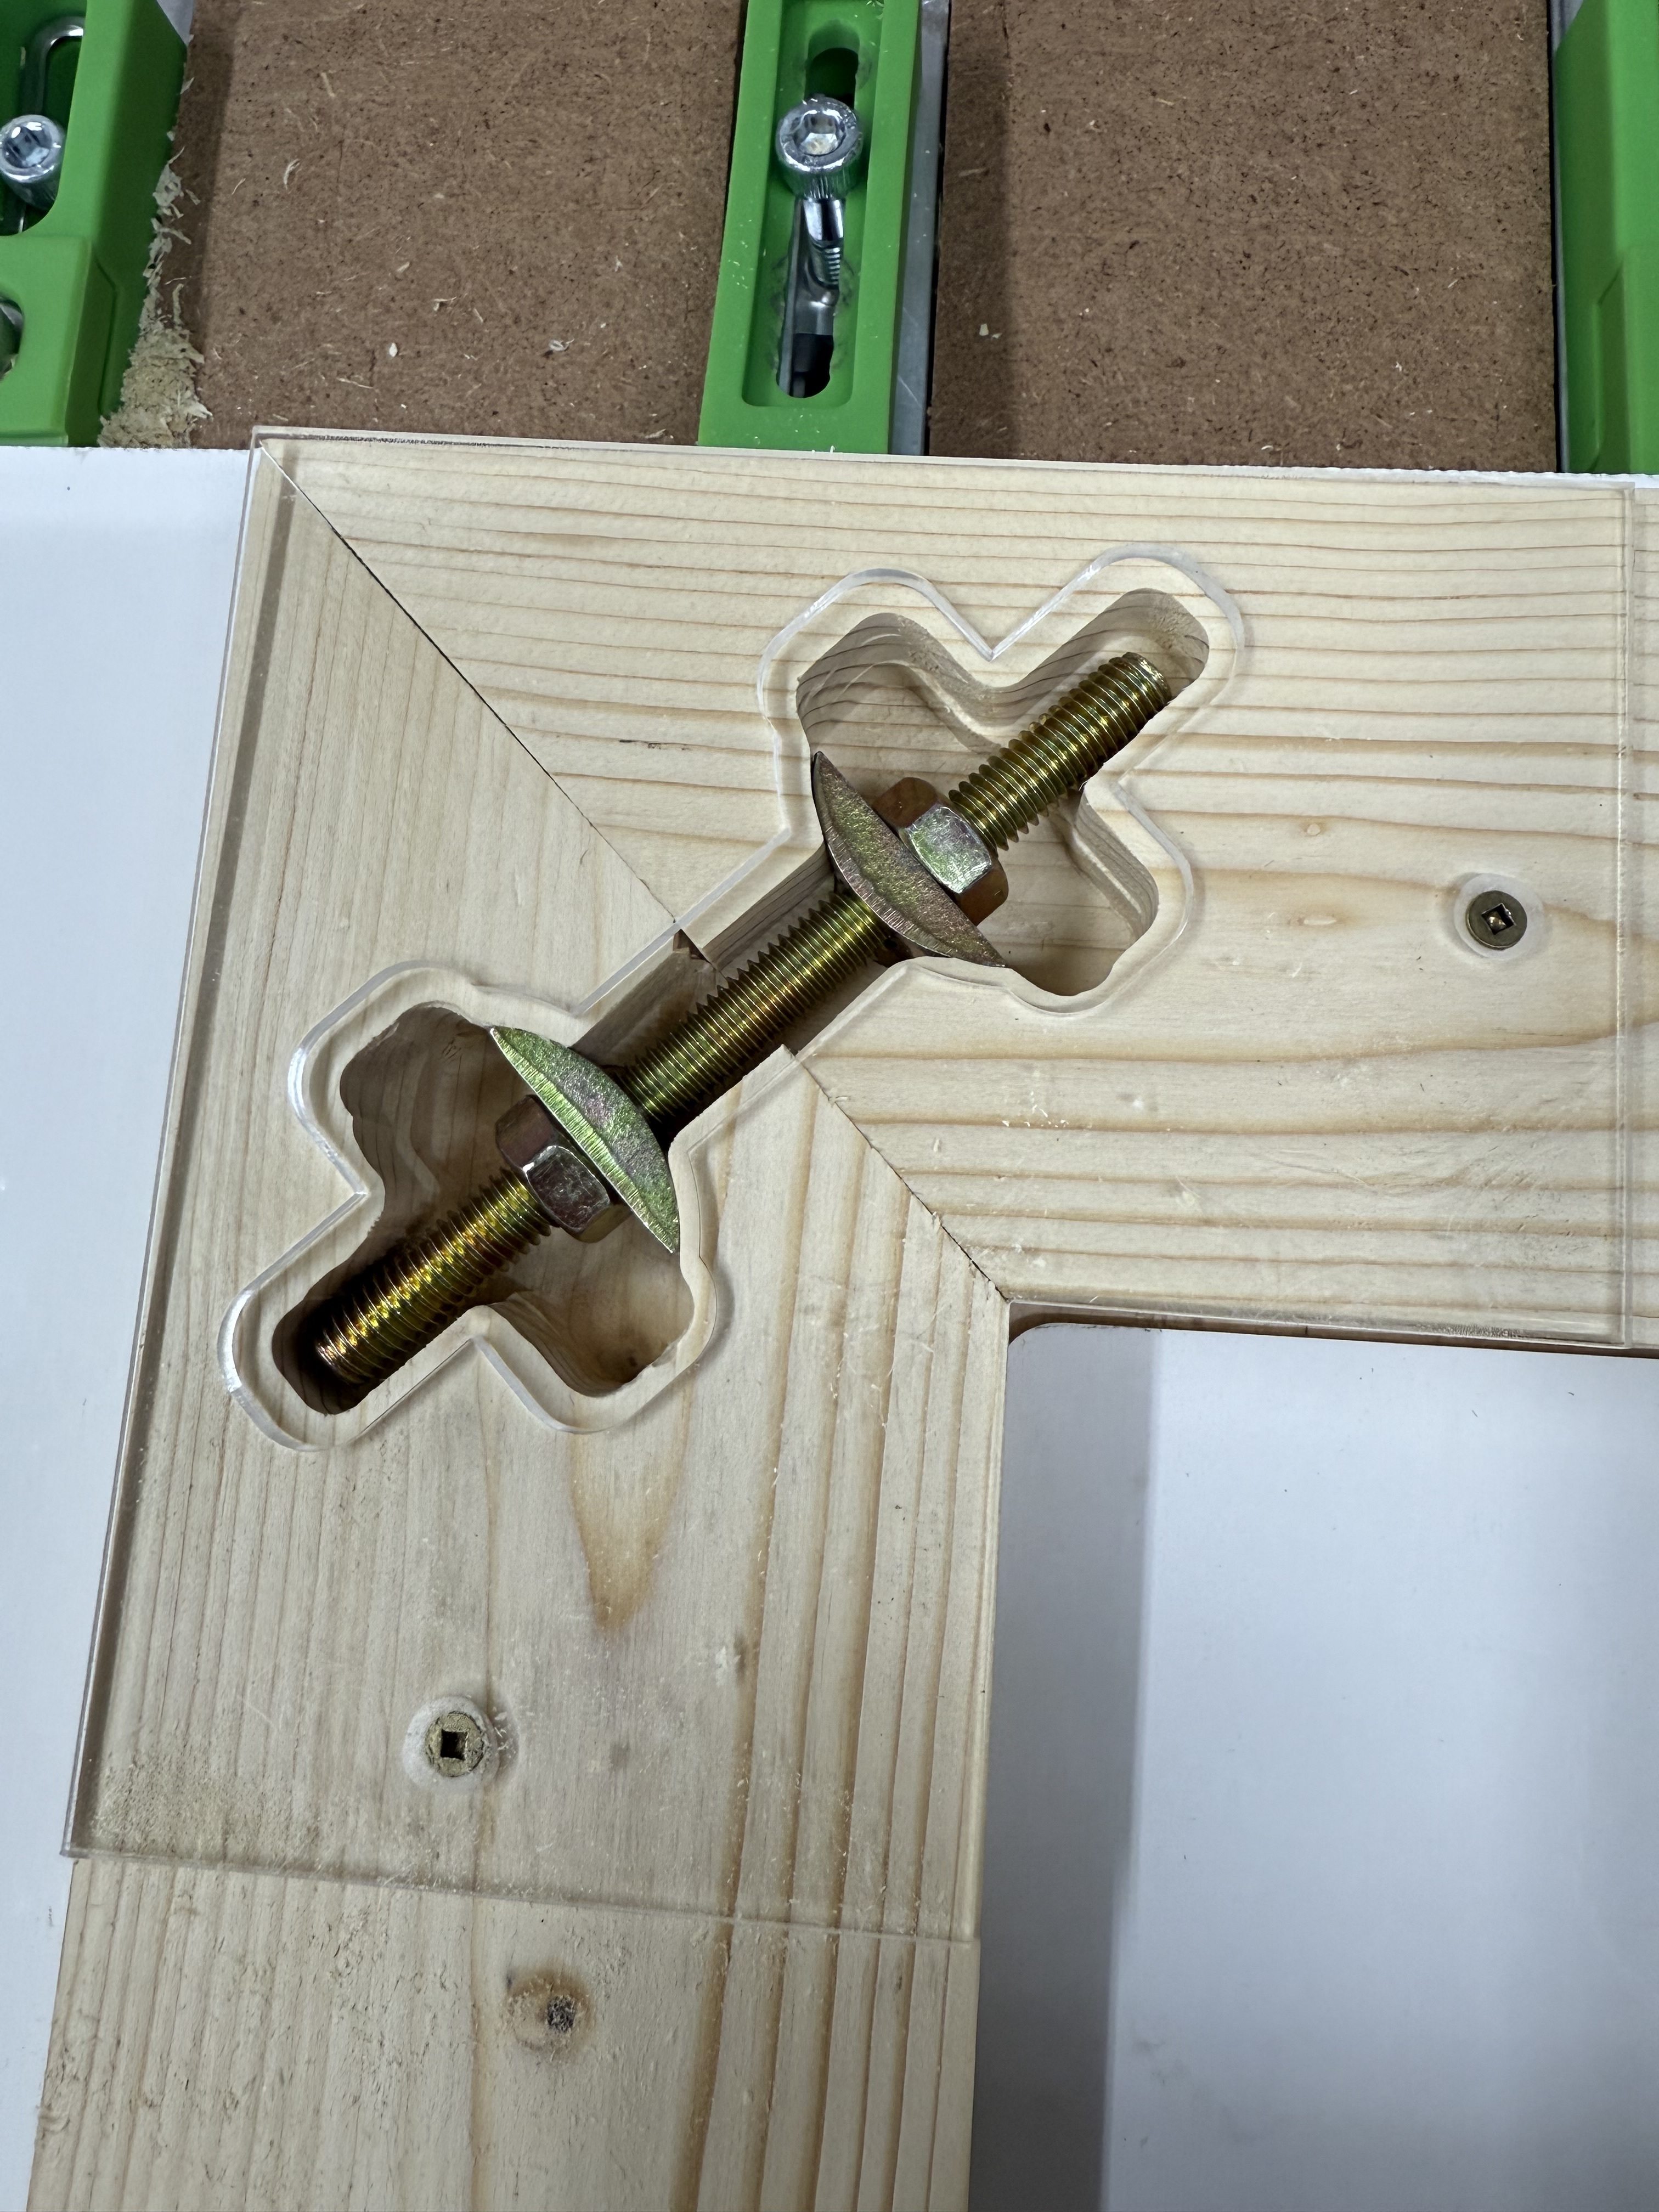
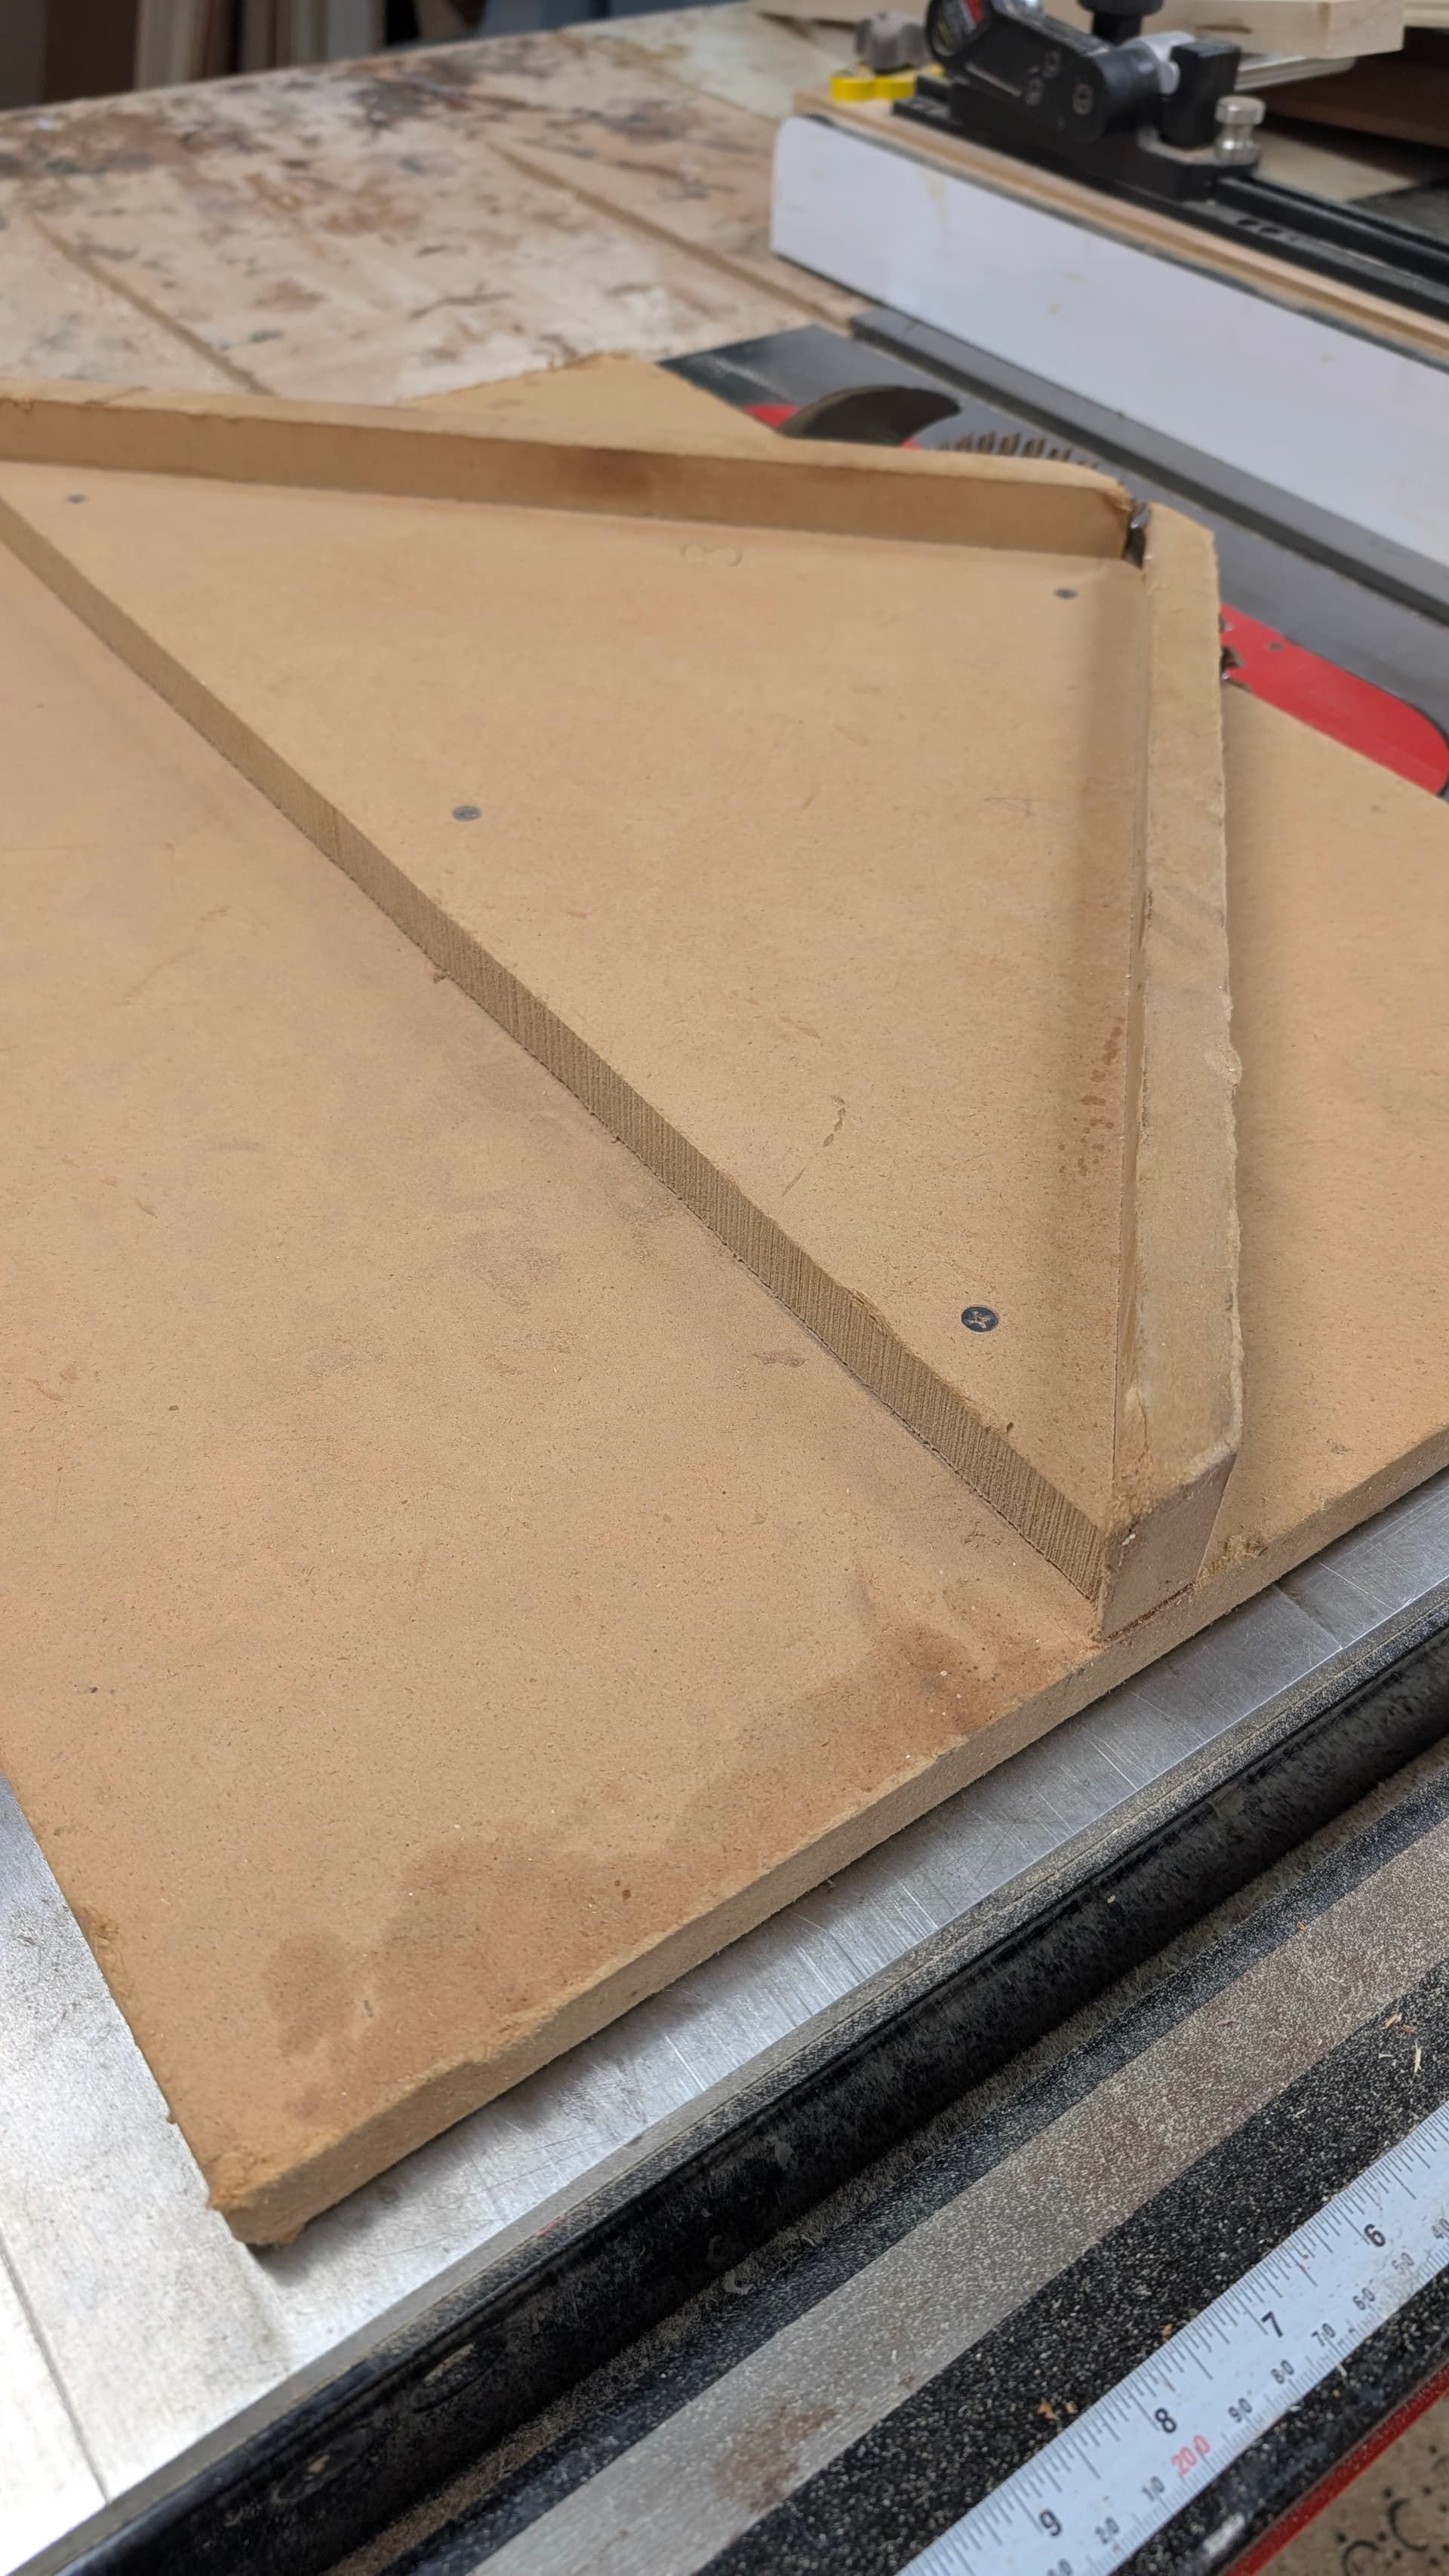
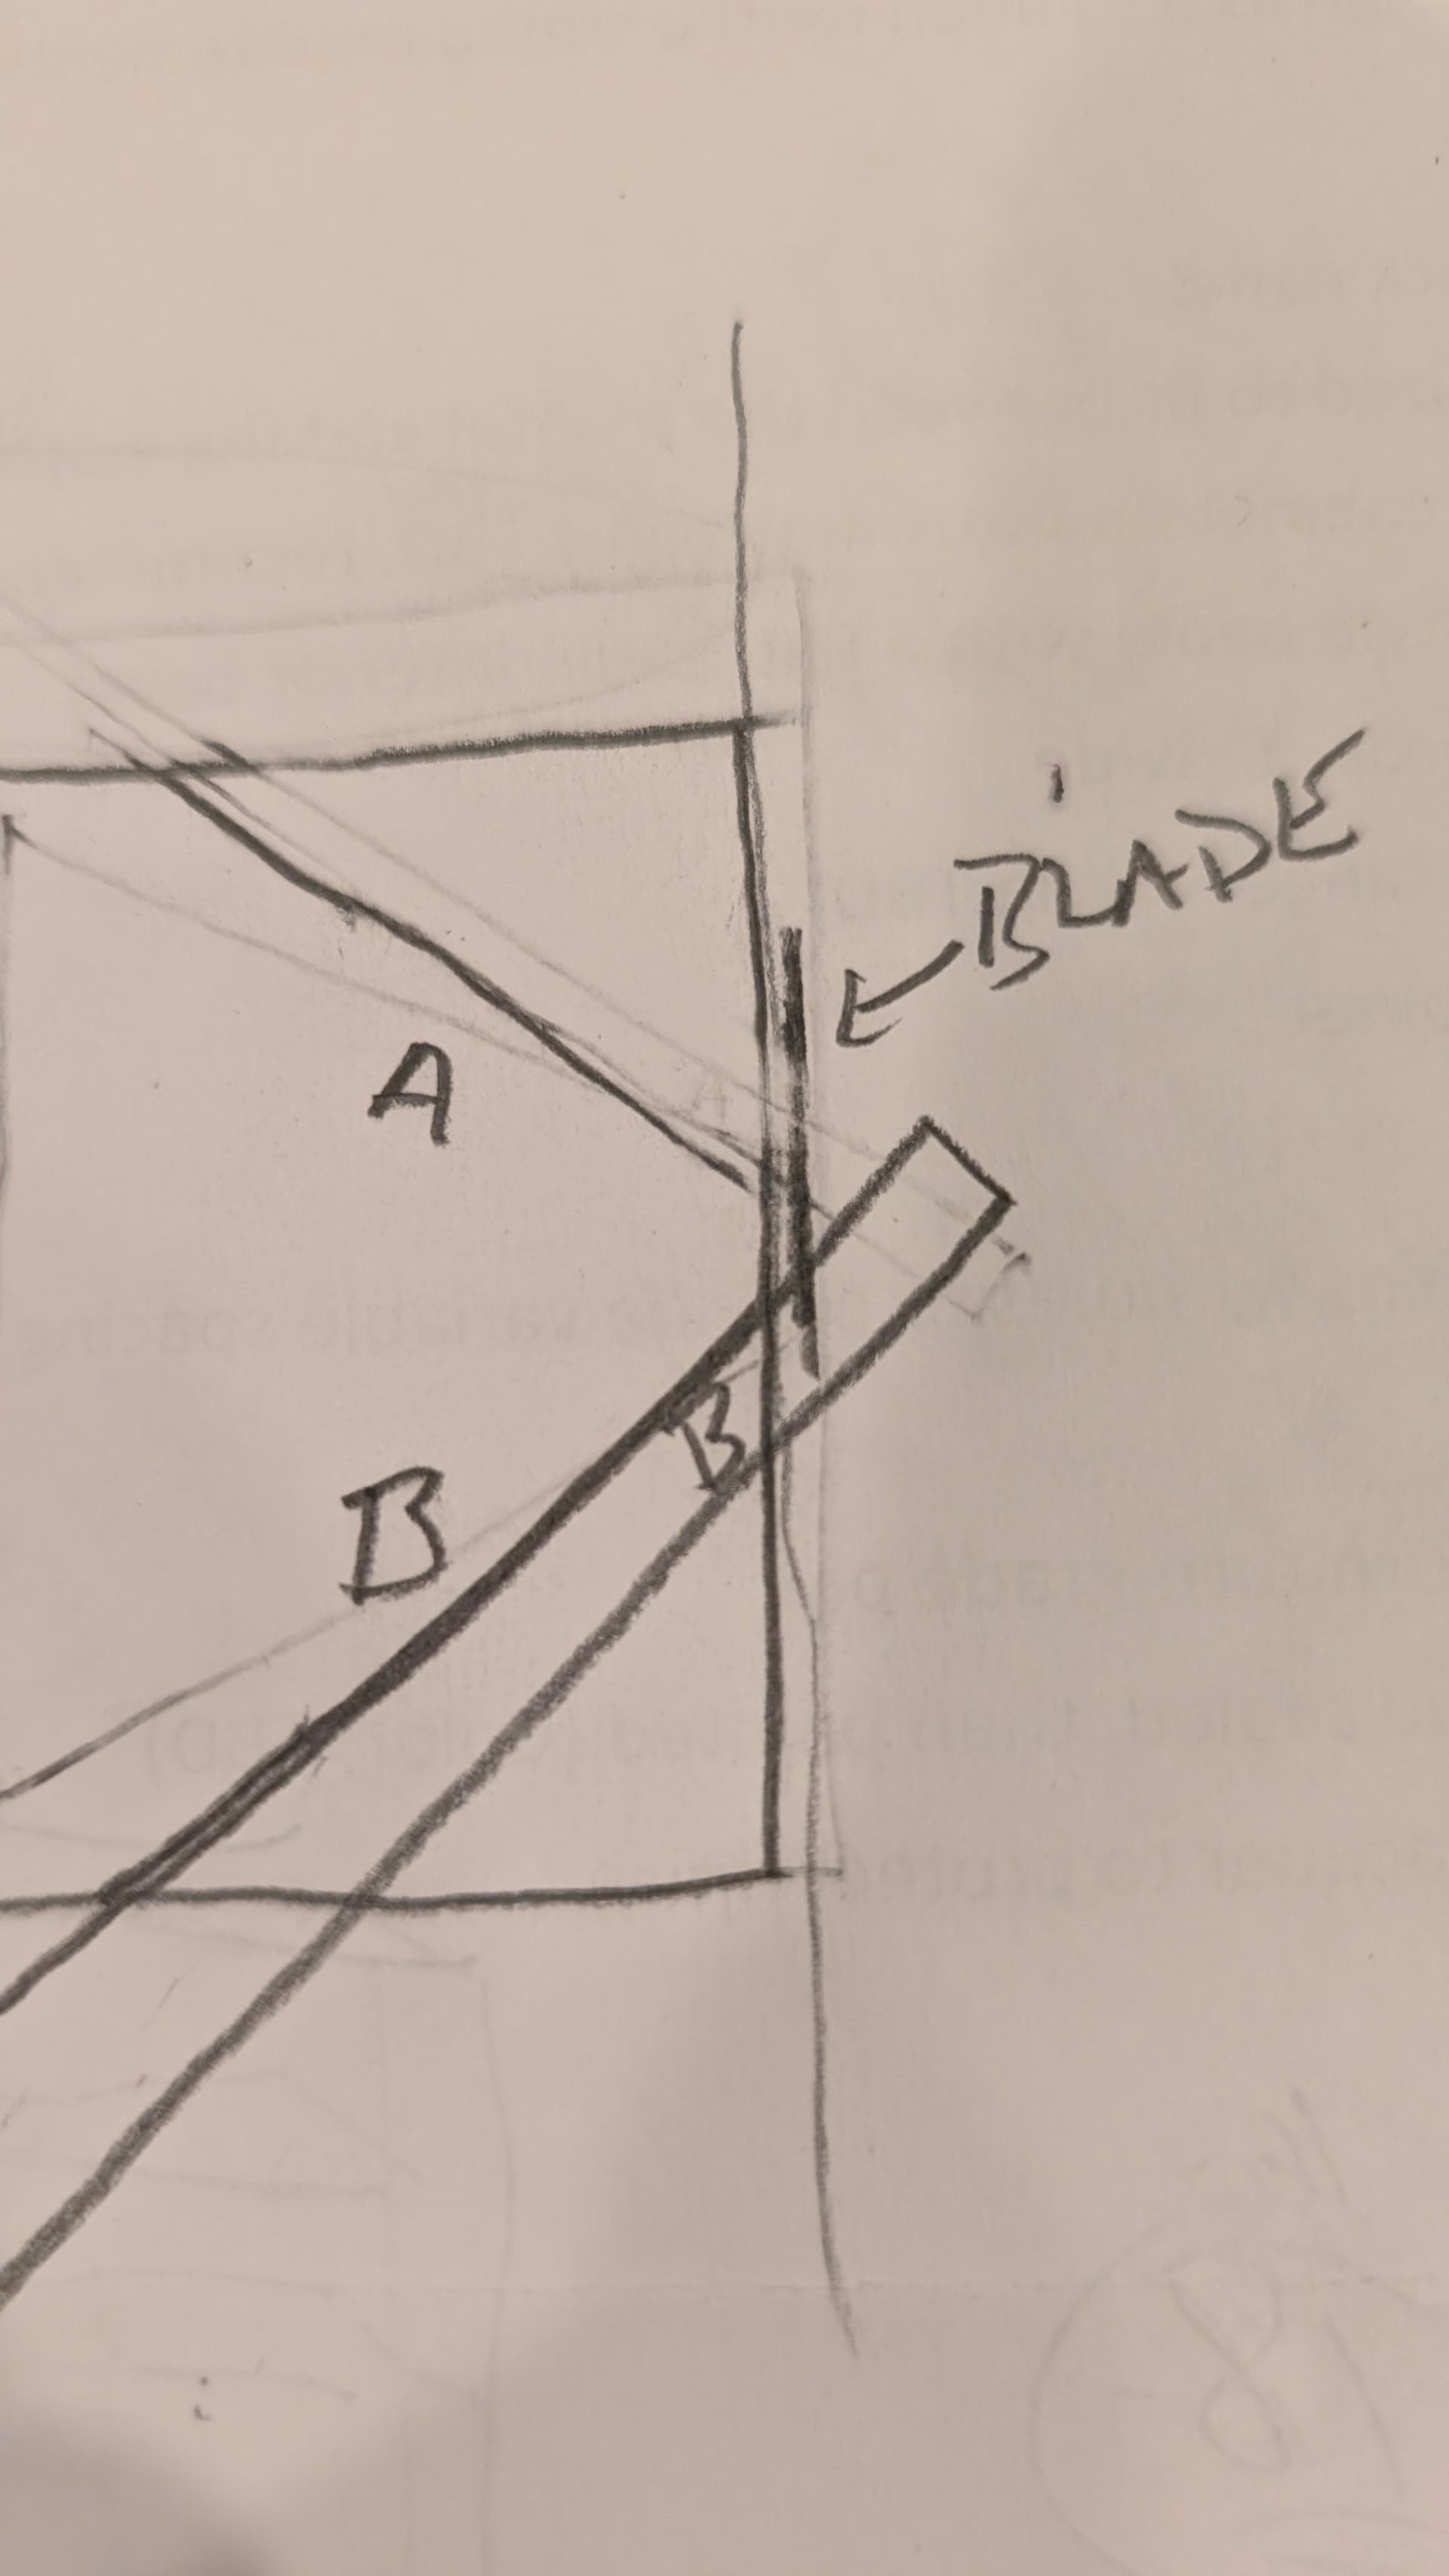
Then just put the runner into your slot, raise the blade, and cut off the right side of the bottom board and the corner of the top board in one cut. The resulting jig will snug up against the blade like this:
(Note: I put vertical pieces against my 90 so I could cut compound miters…you don’t need that unless you need to stand up moldings)
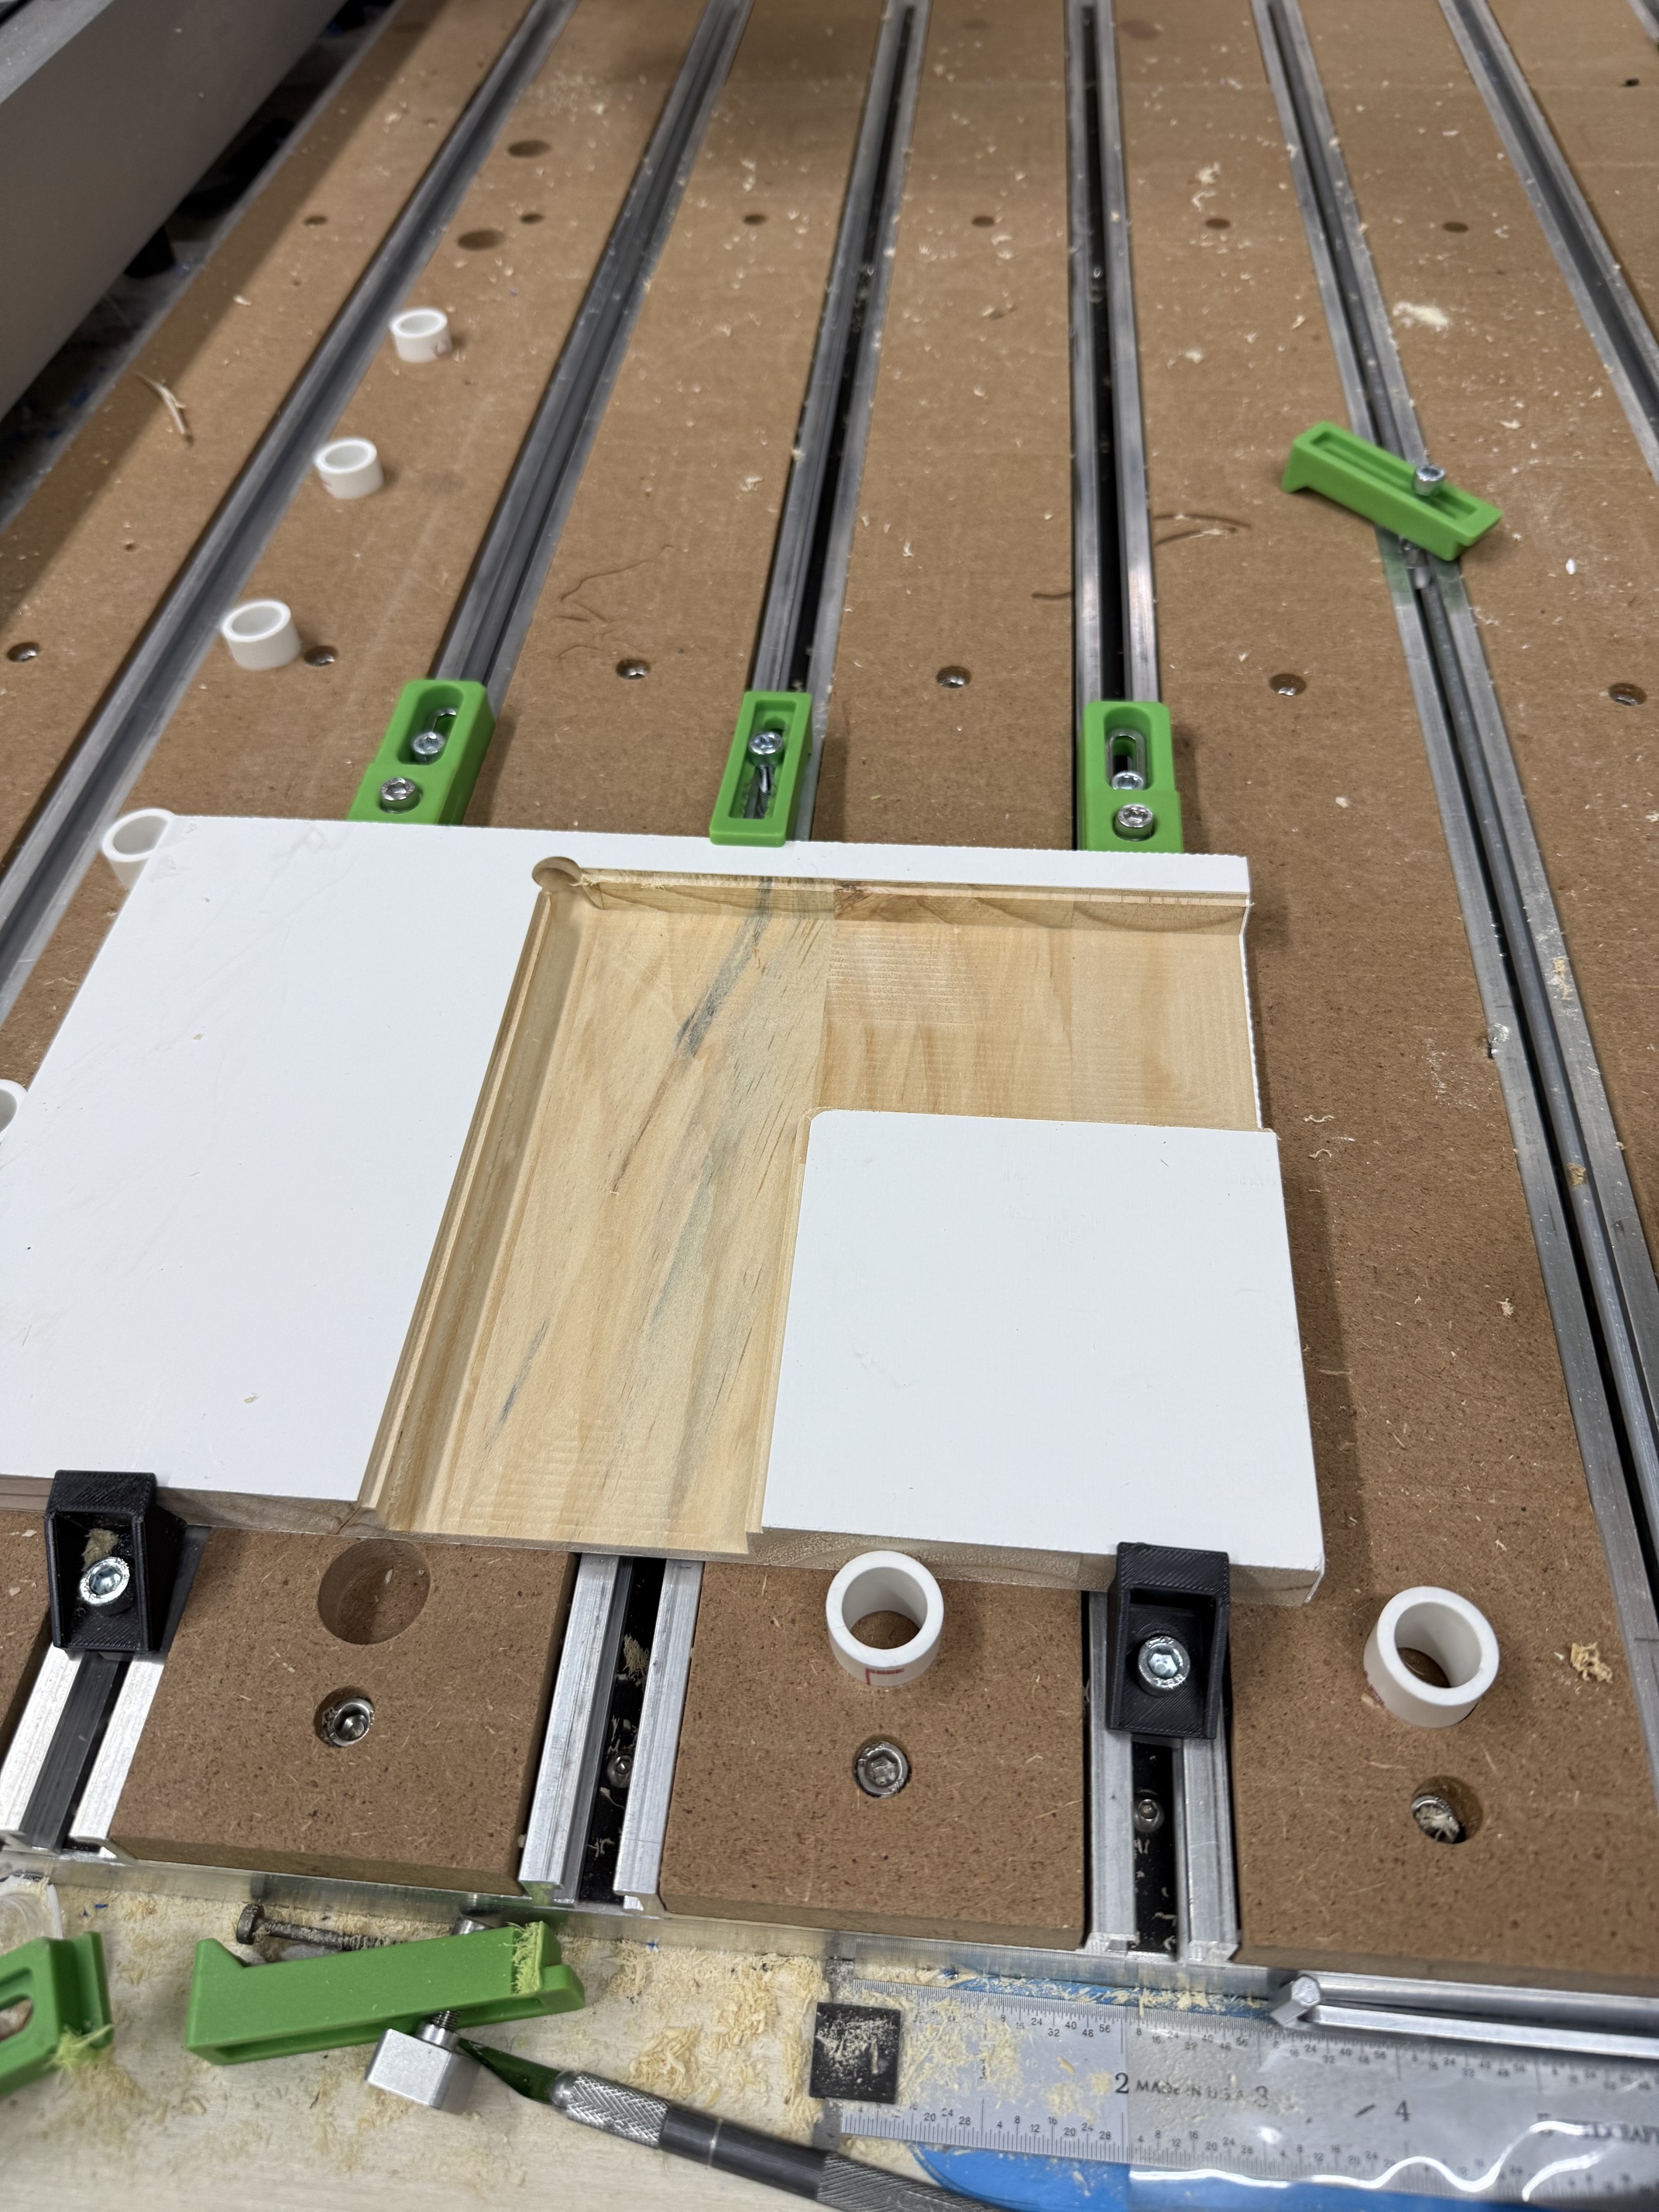
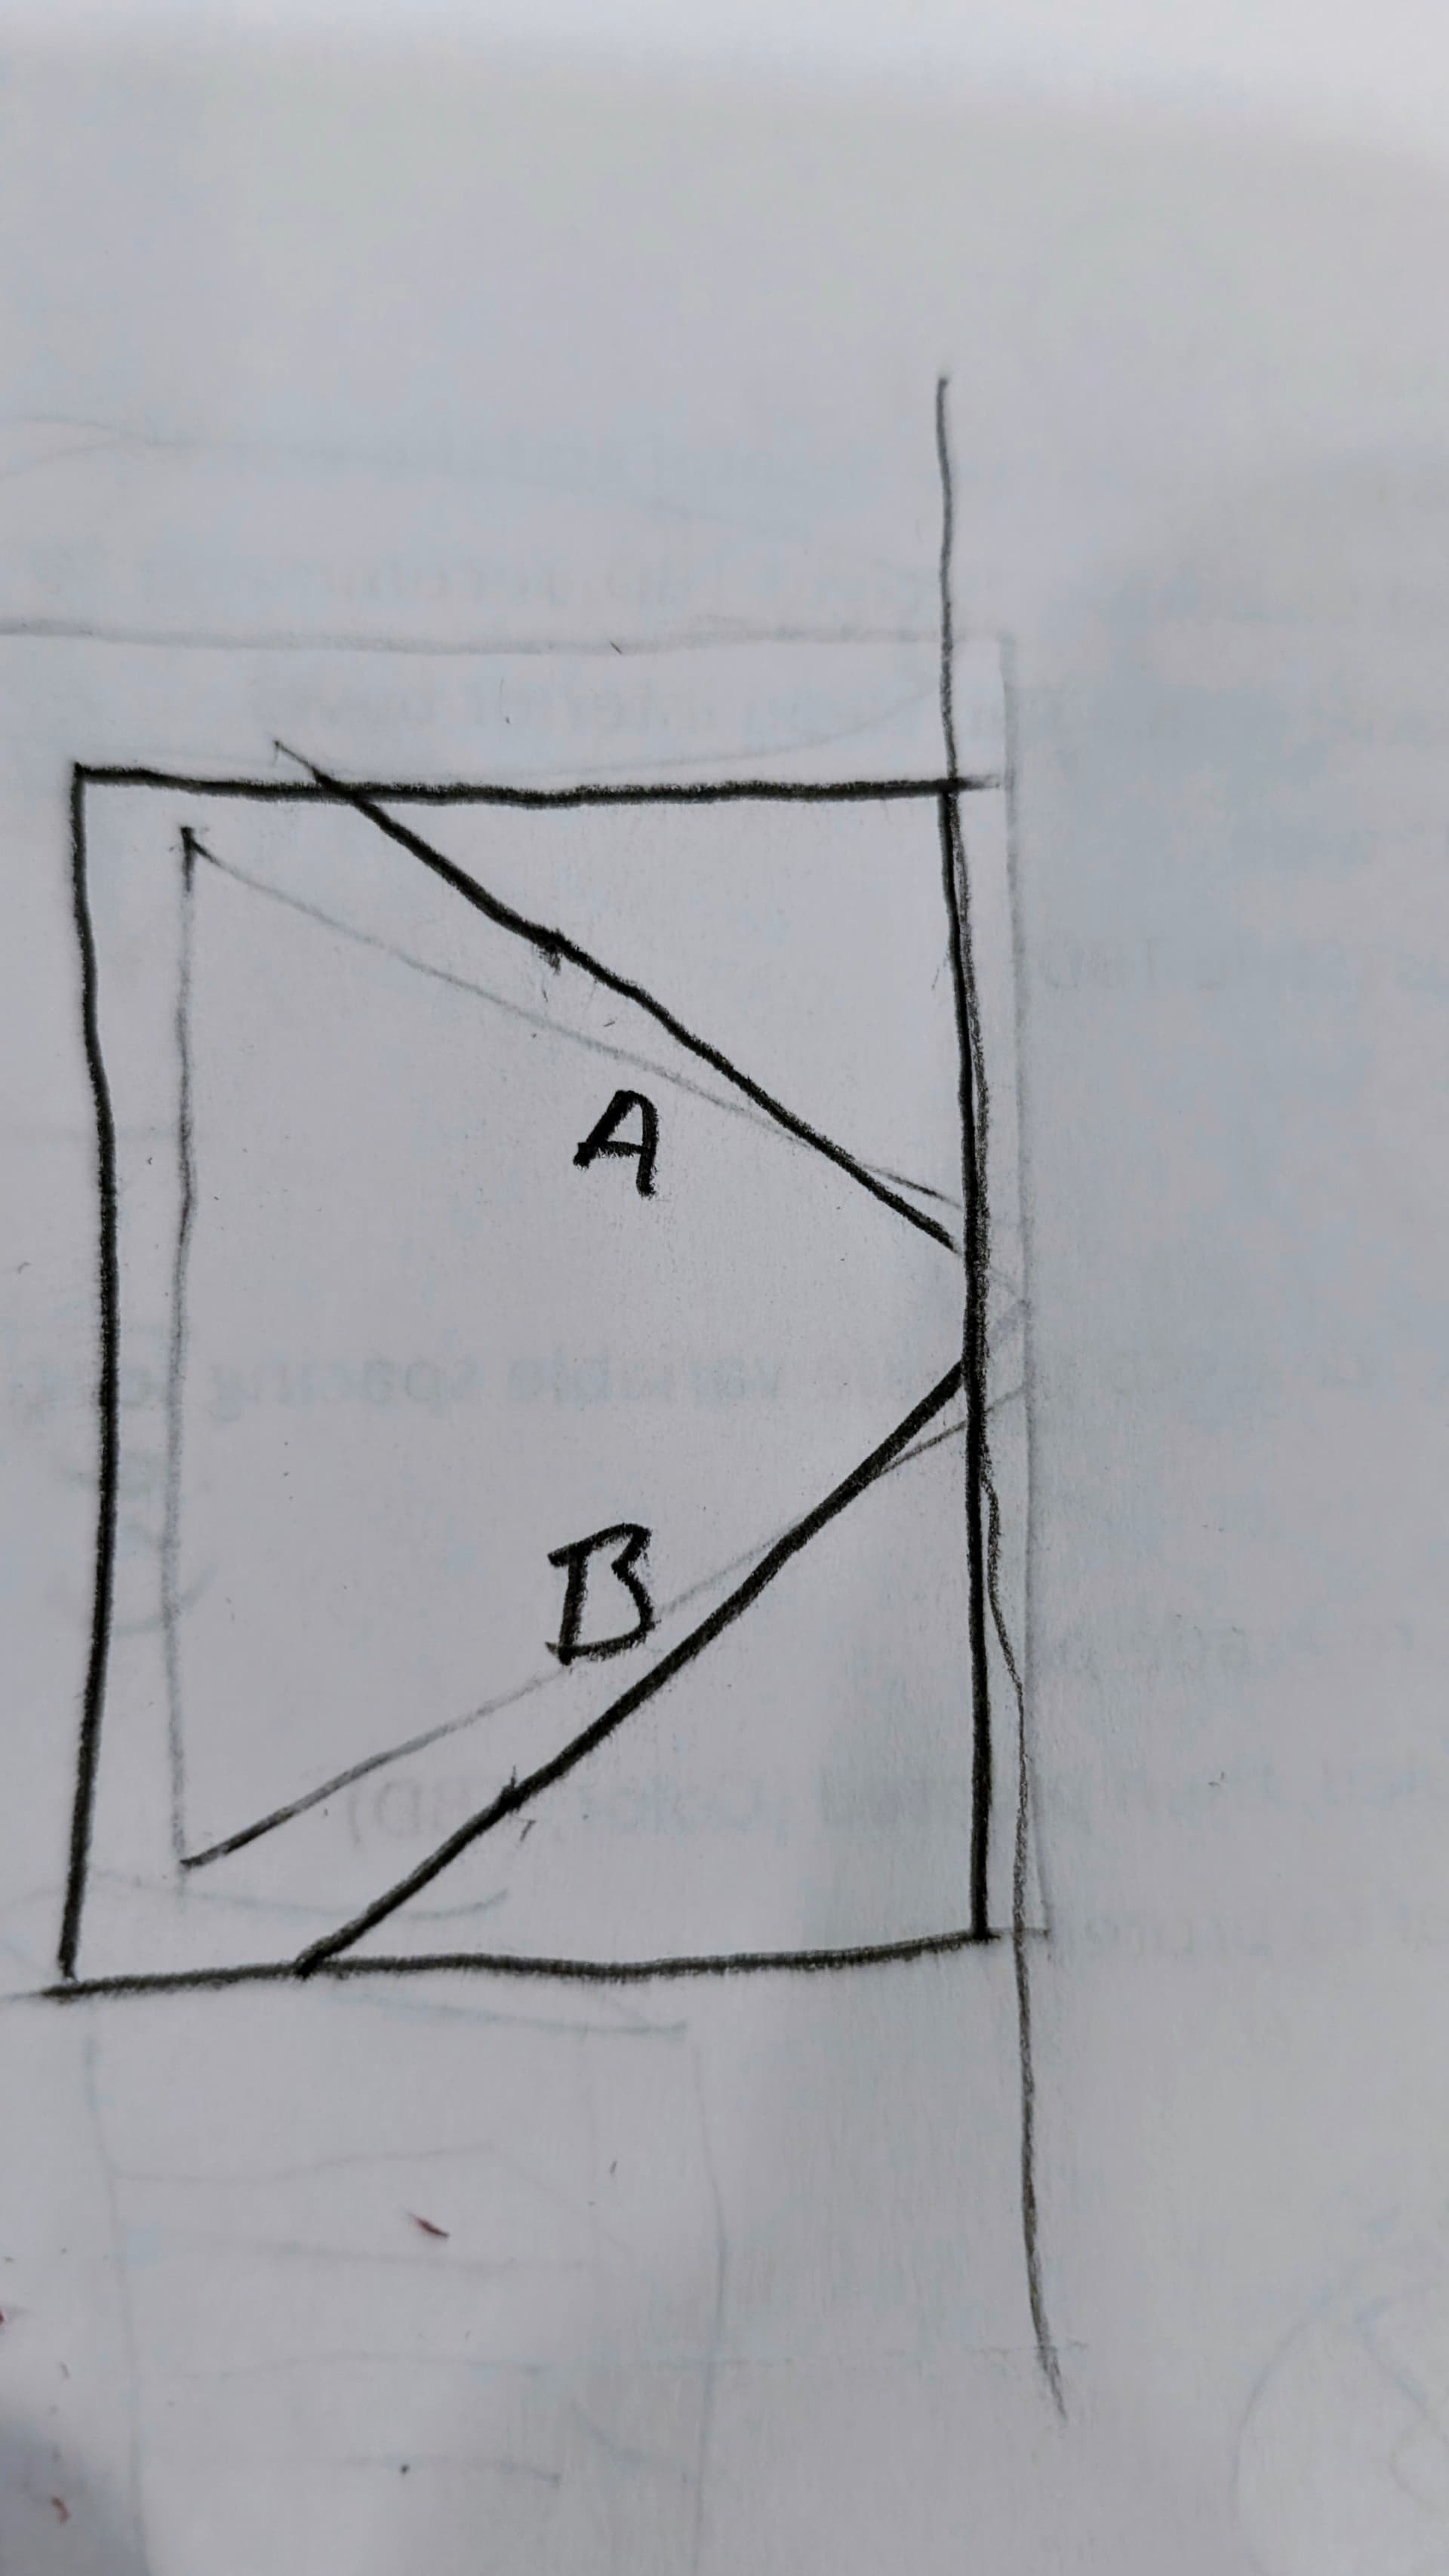
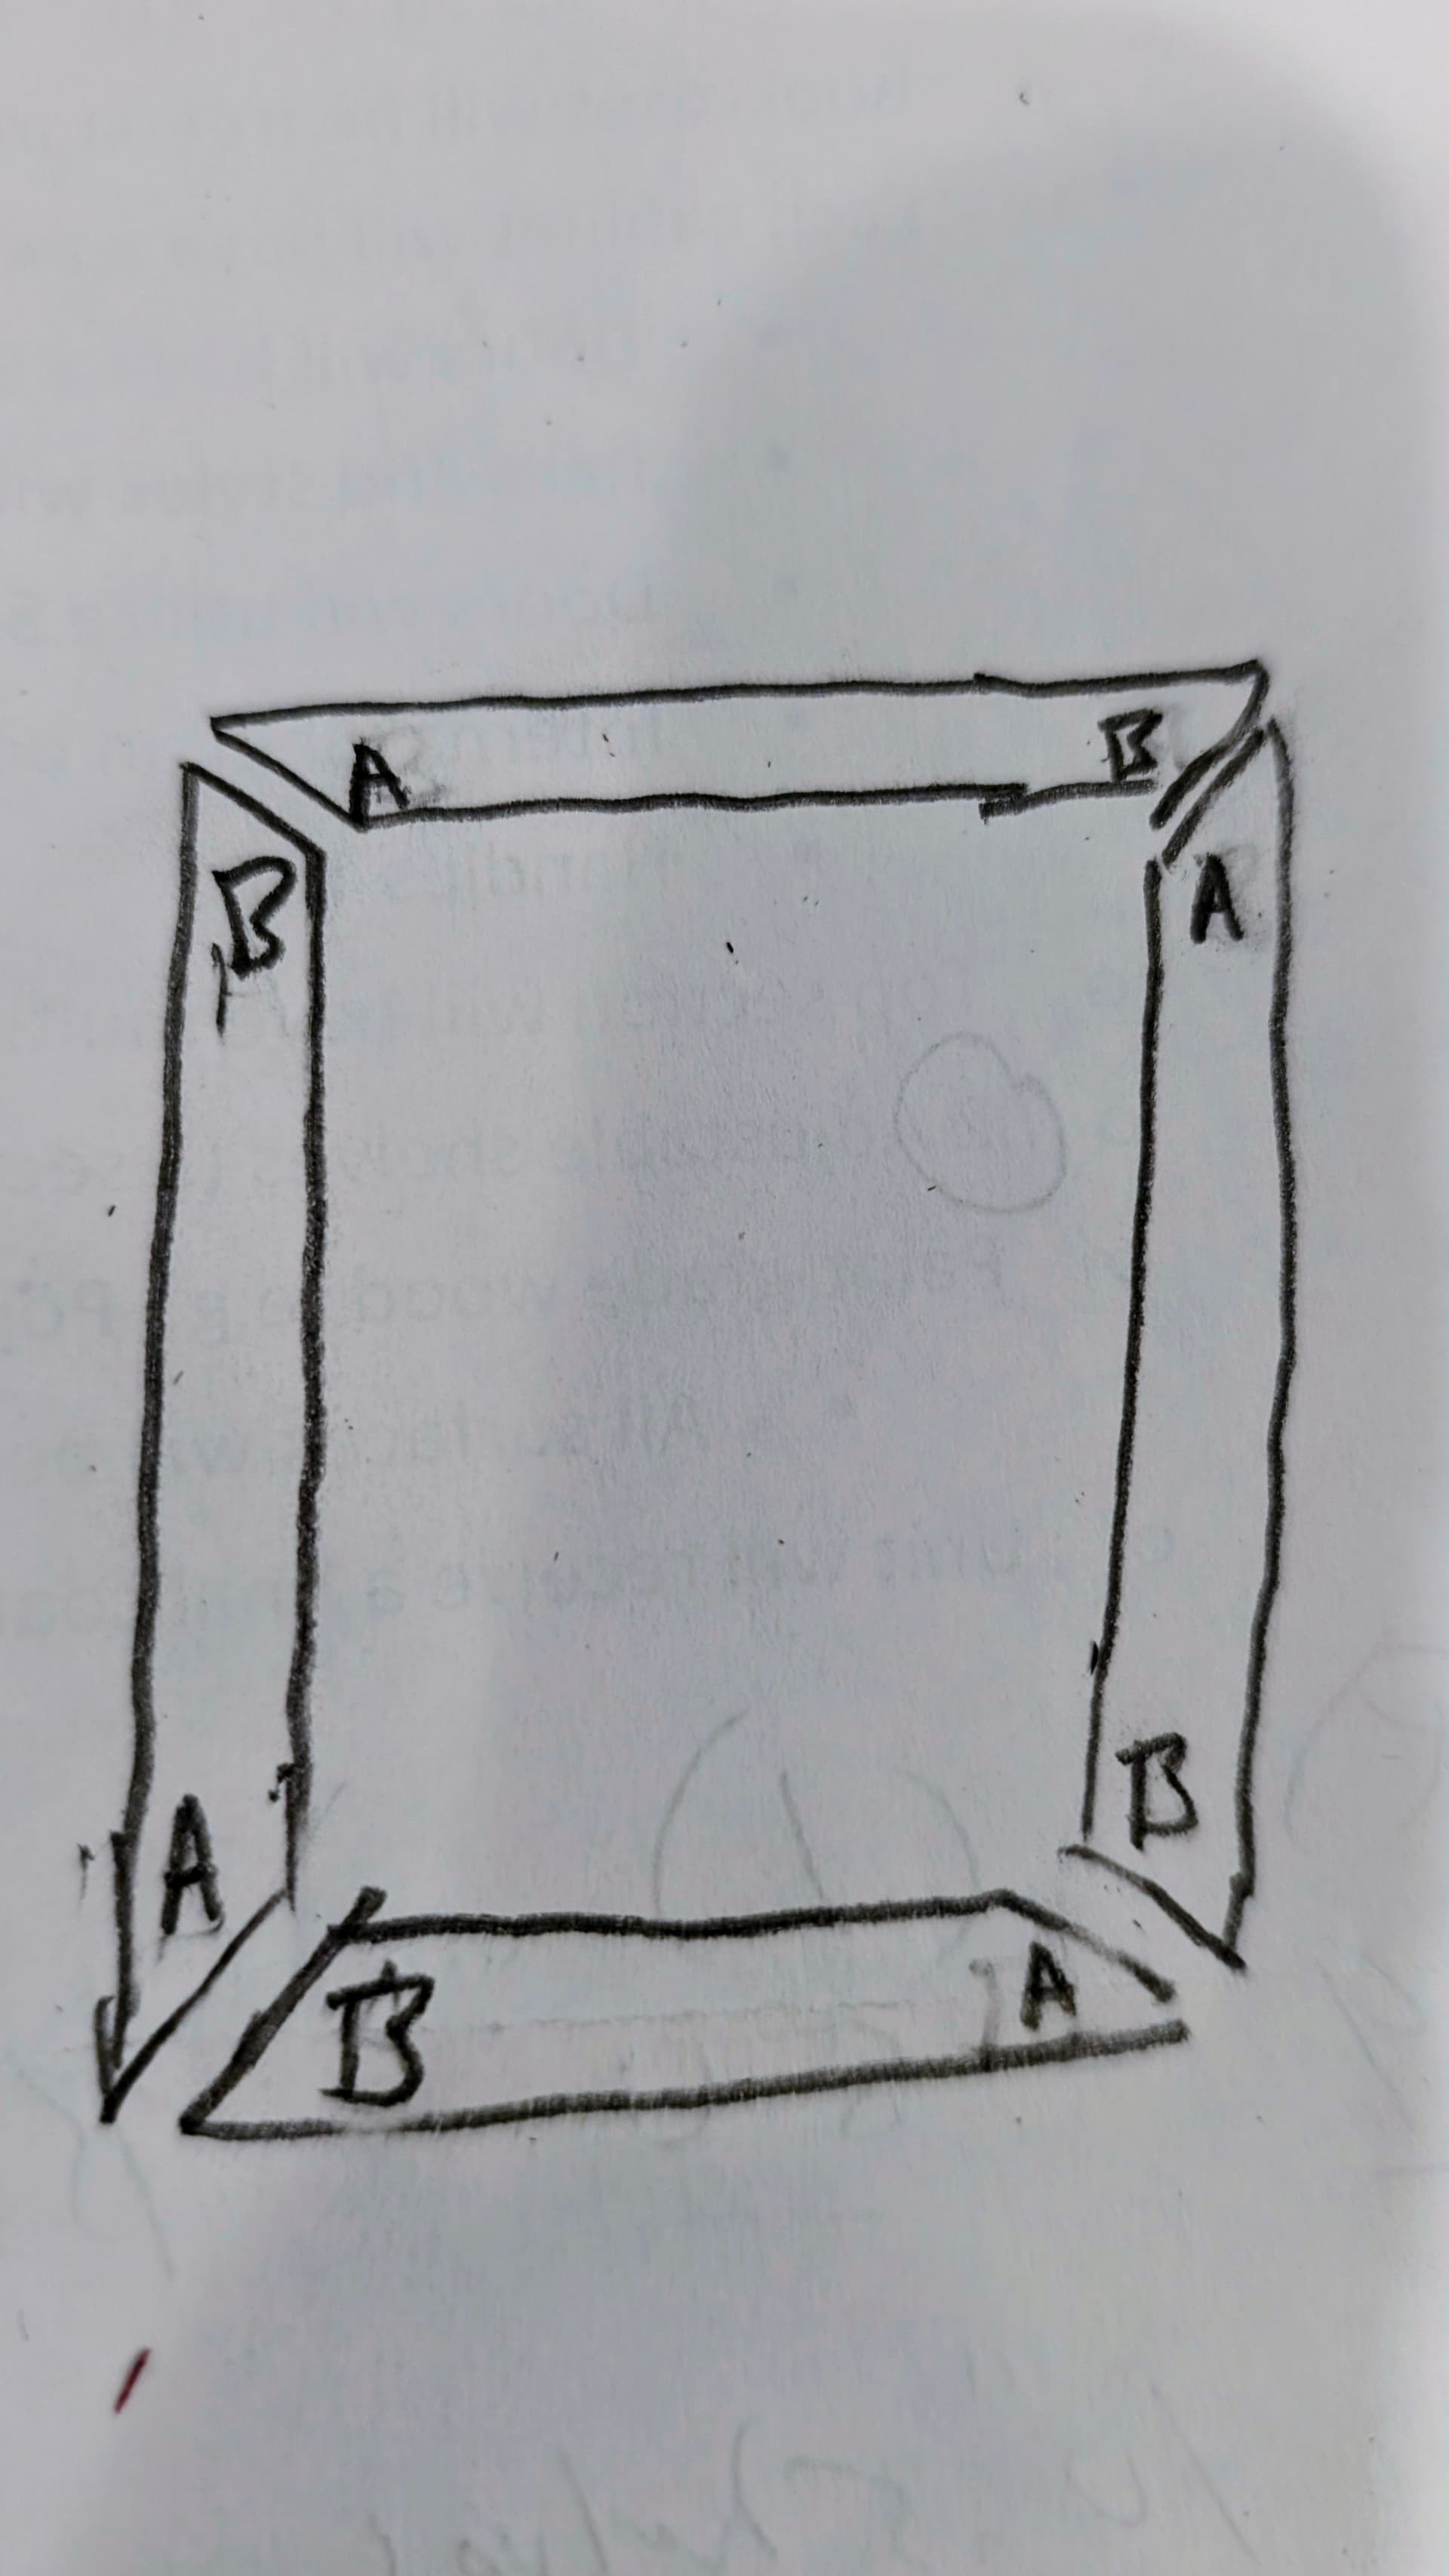
Now…to use the jig, simply cut the opposite sides of a miter with the piece referenced on opposite sides of the corner of the jig. So, each corner gets one cut on the “A” side and the other half of the miter gets cut on the “B” side.
Cut one side of the miter on A
Cut the other side on B
Since the angle of the corner is exactly 90, the sum of the A and B sides is going to be 90…even if your jig is not perfectly at 45 degrees. They compensate for each other (and any imperfection in your position of the hardwood strip).
If you cut each miter this way, with half cut from each side of the jig - the result is always perfect.
Gary