@jtclose
I love that barn! Is that a Woodmizer in there?
Hi Randy,
I’m a model railroader also. Work in the three gauges in HO, standard, 3 foot and 30 inch gauges. I started out with a Sherline 10 years ago. Purchased the Nomad 3 last fall. Just getting used to the software now. The Nomad 3 works a little different than the Sherline.
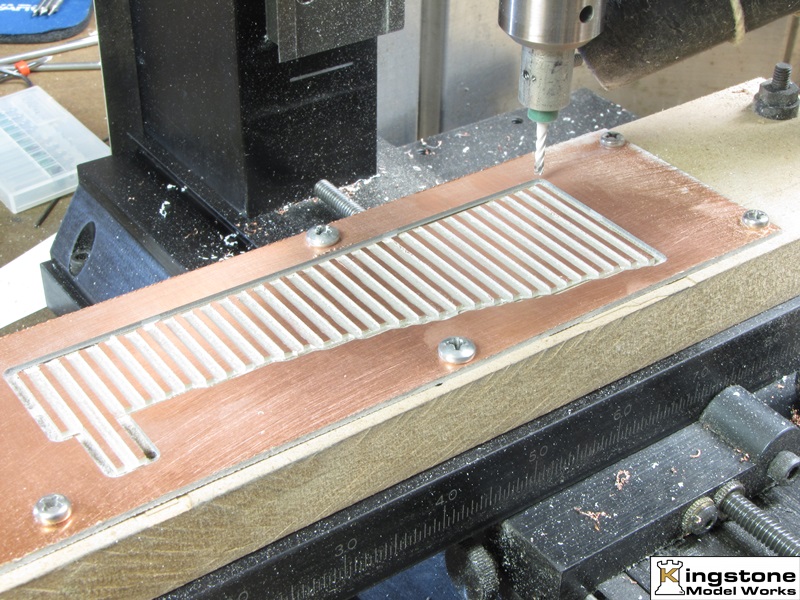
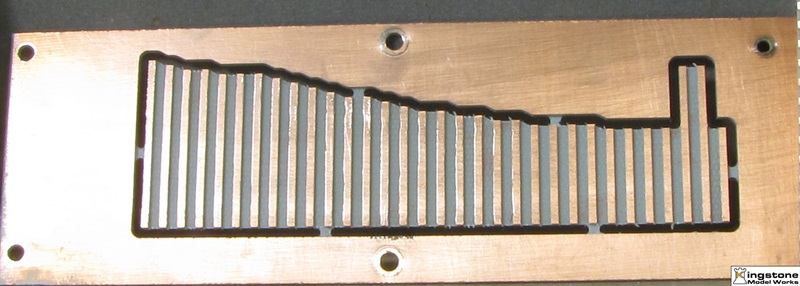
Going to give the Nomad a try the next time I need to make some turnouts.
Bernd
7 Likes
@Bernd
Could you give some context in how these are used? I’ve been trying to figure it out from previous posts and can’t seem to.
yes sir. That’s my Son-in-law’s gear
1 Like
A turnout or switch is used to go from one to two tracks as shown in the attached picture. Model railroaders can purchase these already built or they can lay down their own rail. There are more complex turnout’s but this one is the simplest. If this is not clear just ask.
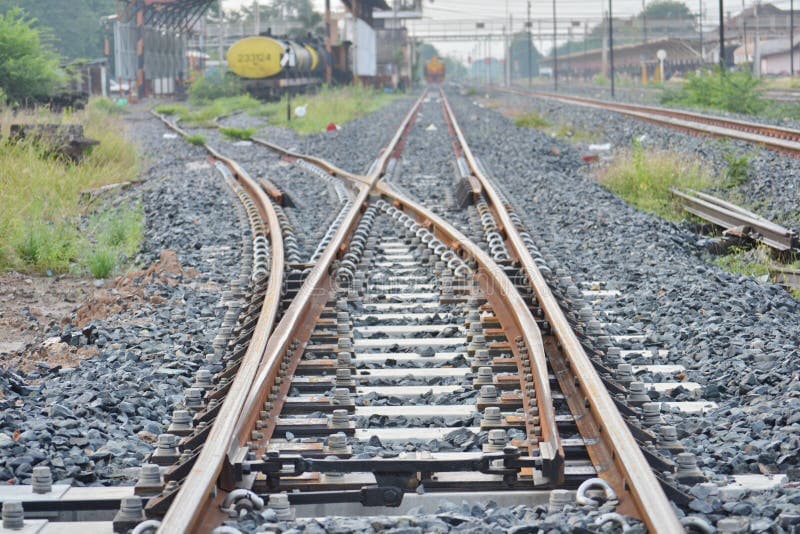
Bernd
5 Likes
So, your making a base plate that has all the arranged railroad ties for the switch? And then you attach tracks on top?
3 Likes
Exactly, @MarkE. The rails are soldered onto the crossties.
The other CNCable part I’m doing is the frog (crossing nose to the Brits) where the two “center” rails cross. Here is my former experiment, this past weekend I machined new frogs to go with my new turnout bases.
The rest of the rails (in my case, at least) are .040" tall and made of nickel silver, thus my choice of 1mm nickel silver sheet for the machined frogs. There are actually many other details to attend to. Here’s a YouTube video from a gentleman who goes about it a little differently and 3D prints alignment jigs. I will be CNC’ing my own alignment jigs to sit on top of the base. The little holes in the midst of my bases are for eventual alignment of the rail jigs.
3 Likes
Very nice, @Bernd. I saw your pictures and my first thought was “I don’t remember doing that on my Sherline”…  Your bases are so similar in design and execution. You will really enjoy cutting bases on the Nomad.
2 Likes
Yes I’m sure I will. One thing I discover when milling such thin material is that with an upcut endmill it has a tendency to lift the the center of the PC board and cause depth errors like cutting through the part to early. I saw your hold down was more toward the middle of the PC board. How’d you avoid hitting the screws?
Bernd
1 Like
This is super cool! It reminds me of my grandfather’s barn. Would you be willing to share the file, please?
I used SheetCam for the toolpaths, and it has a retract/G0 height setting that I put at .25" (in this case, I have used larger values if there are clamps to avoid etc) It will always pull the cutter up to that height before making a lateral move.
If you use CC I am sure it has a similar number to enter. I know that MeshCAM (which I use for full 3D parts) has such a setting. But I’m not at my PC so I can’t look them up directly or get screenshots.
But I am surprised that on a single turnout base you will get lifting. I’m using 1/16" FR1 (phenolic) PCB and not the stiffer FR4 (fiberglass) and still not had a problem as long as I put screws between the bases as well as around the corners. My tabs are .010" at the bottom of the material and all were machined correctly so I know that any pullup was much less than .010"
I am using tabs on two adjacent ties. You might want to move your tabs over in line with the center screws, and maybe make the tabs wider…
I should have been clearer on what I was cutting. I’ve been doing cutting on the Sherline using .020" thick brass sheet and cutting out six parts from one sheet. Here are the pics.
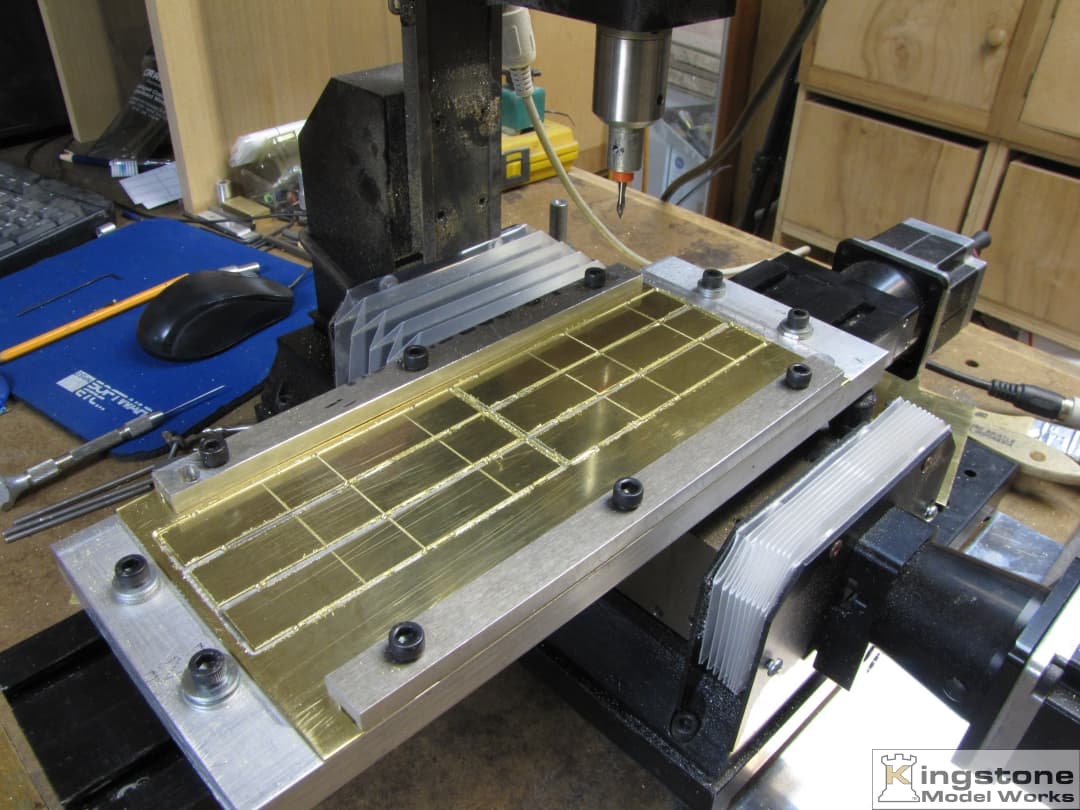
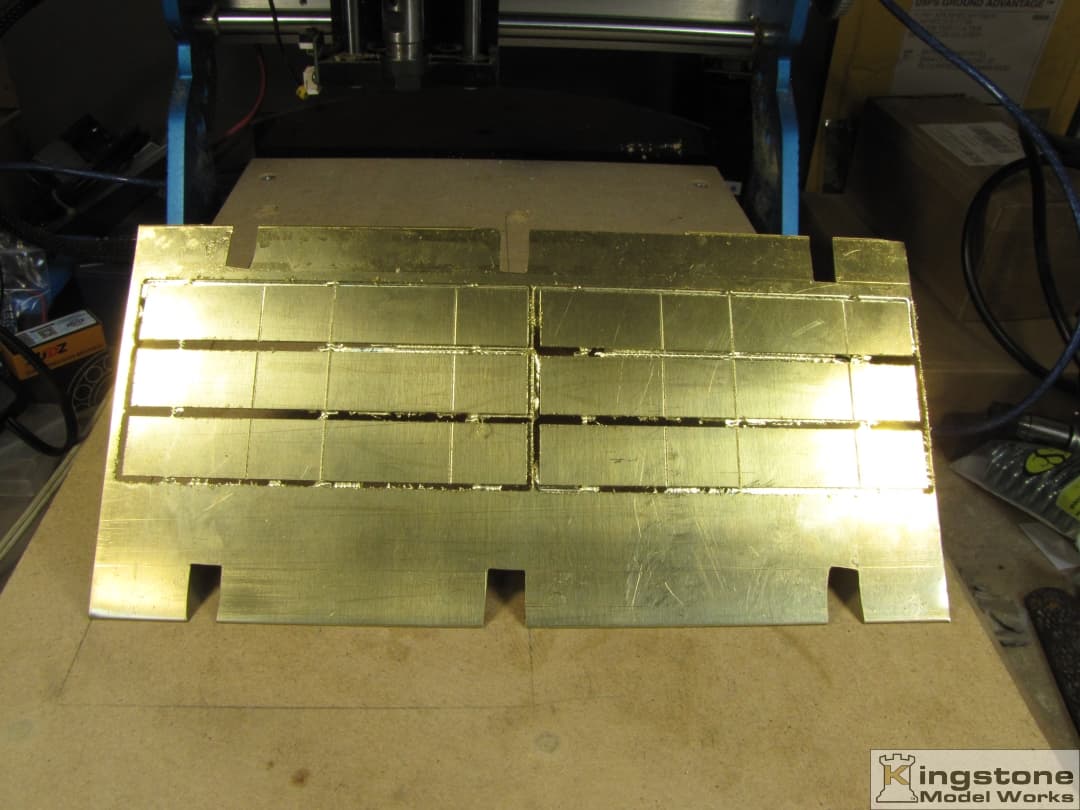
Here are the same size cutouts on the Nomad 3.
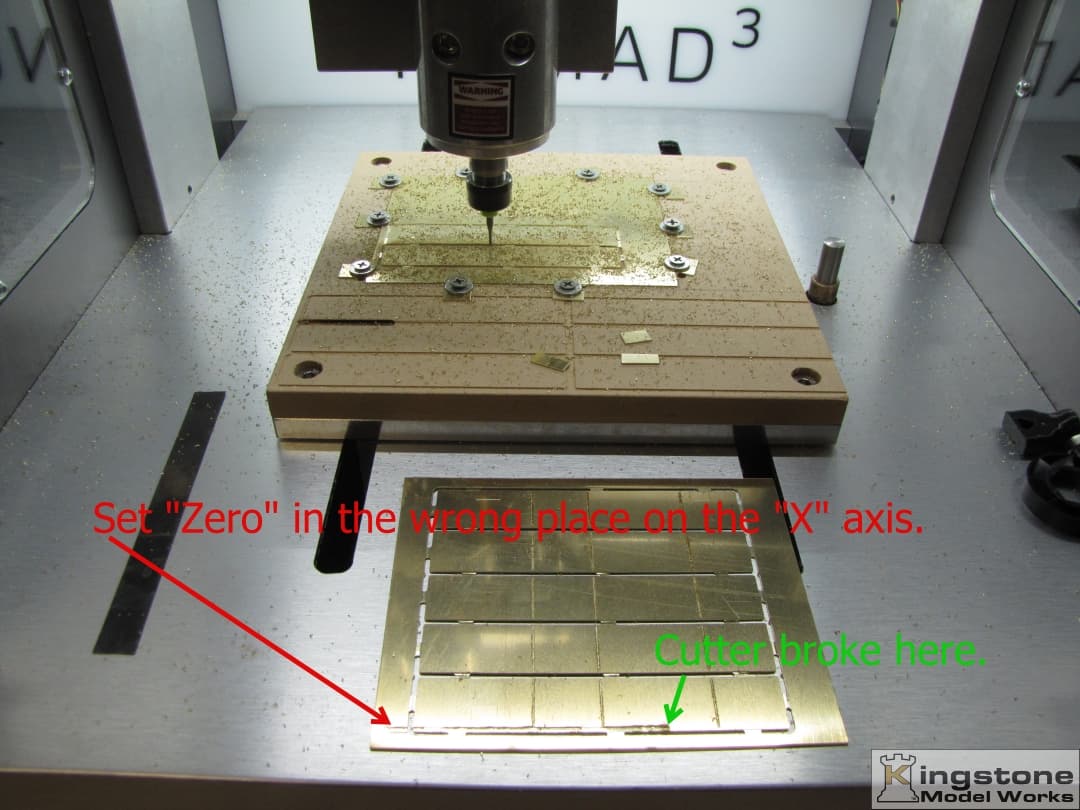
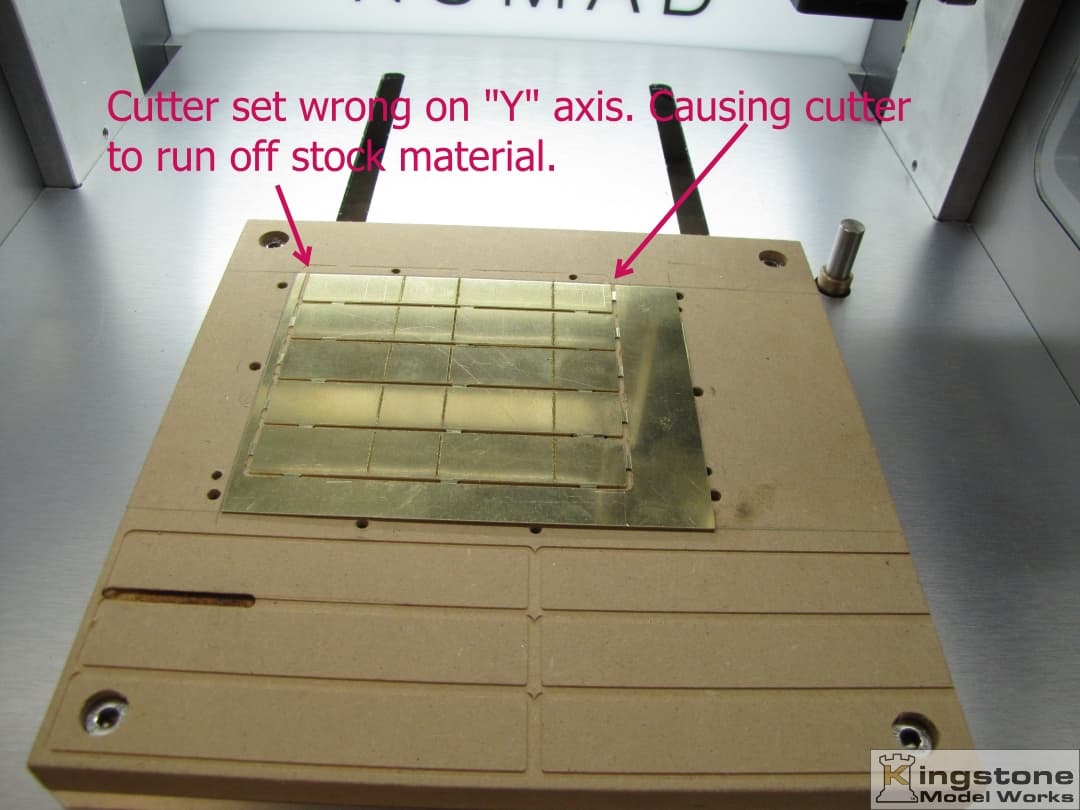
As you can see I need more practice on the Nomad 3.
Thanks for the answer on getting over the screws. I’m using MeshCam and am still quite new to this version. I actually started out with MeshCam on the Sherline ten years ago. I’m now using CamBam from an English company.
Bernd
3 Likes
I wasn’t happy with the yellow of the wood so I gave it a coat of oil based stain to dull it down. First pic is pre stain showing just how yellow the wood was.

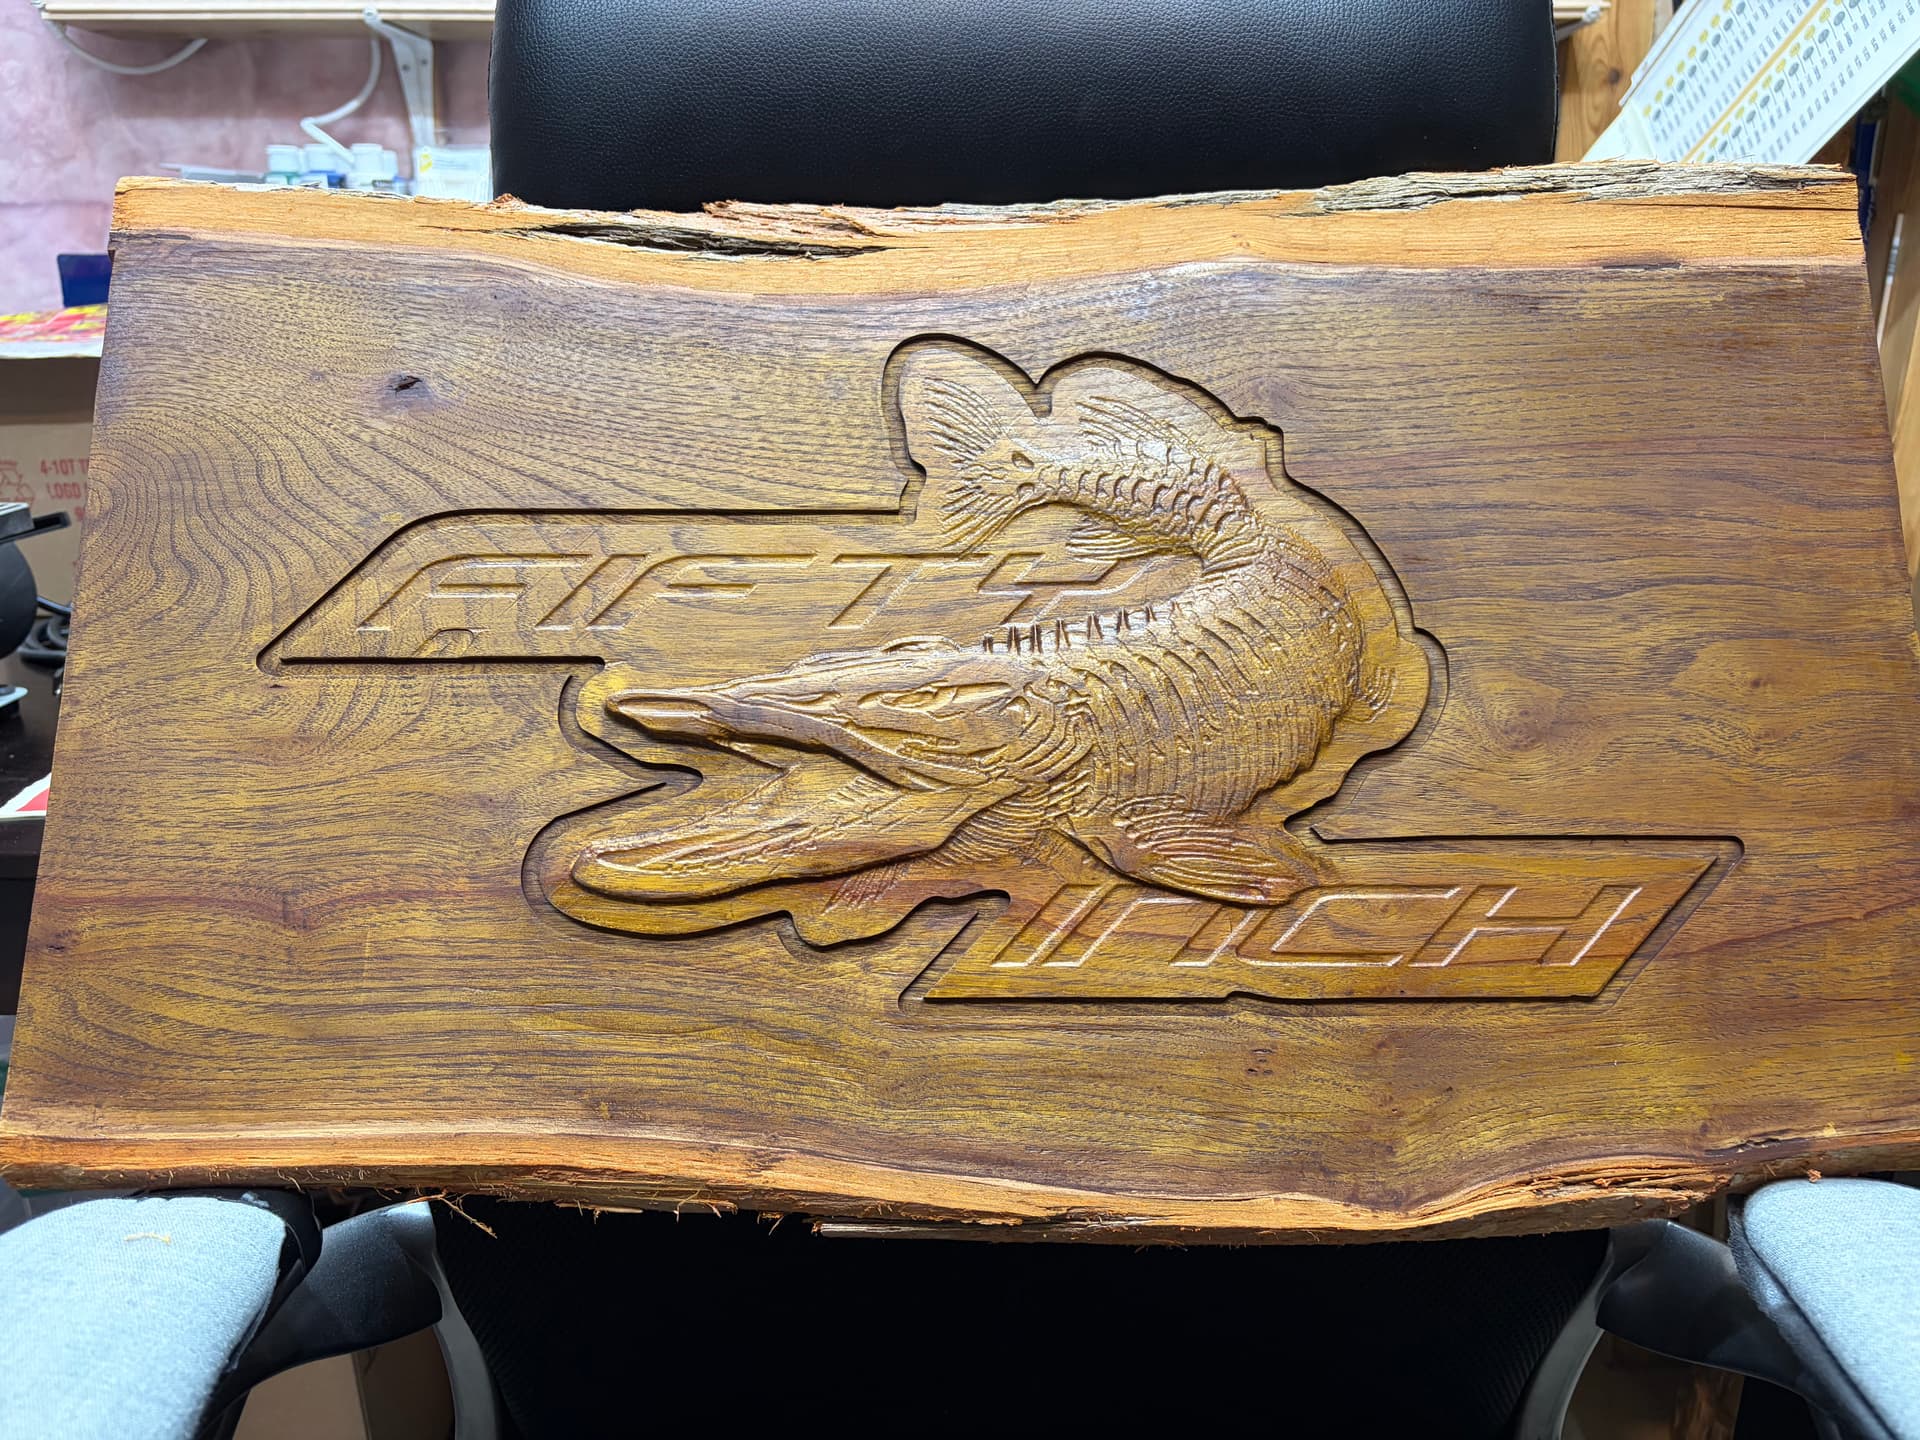
15 Likes
I think you really improved it. I never really stain a slab but that looks great. Makes it easier to see the detail in the fish too.
2 Likes
I said “Wow” right out loud when I scrolled down and saw it! Definite upgrade.
2 Likes
Thanks guys 
@MarkE First time using stain. Typically I like the natural look of wood but this one needed something to tone down the yellow wood and bring out the details. My sis in law runs a paint store so she gave me a box full of stain samples. I did a test run on a scrap of the same wood using 10 of them and this stain looked the best.
@SirGariff I wasn’t sure about it but that’s the reaction I was hoping for! Thanks Gary
4 Likes
Try Watco Danish Oil sometime. That’s my typical finish. I gravitate toward the Dark Walnut variety
3 Likes
Bernd, if you haven’t tried the blue-painter’s-tape-and-superglue, do give it a try. I have been machining parts from thin brass, aluminum, and 3mm acrylic sheet and the tape-and-glue method is really useful. With a well-faced spoilboard, I can set the cut to go just into the top layer of tape, which doesn’t hurt the cut at all.
1 Like
Another alternative is liquid hide glue on a sacrificial substrate. After cutting soak in a bucket water to release the glue
This is what Chris Fitch did in his cnc base camp series. He is one the guys from woodsmith magazine
2 Likes
Gorgeous piece of wood. And the stain really brought out the grain.
Who got the 50"er? I pulled in a 58 a couple yrs ago. I’m about 70mi west of you on Lk St Clair 
3 Likes