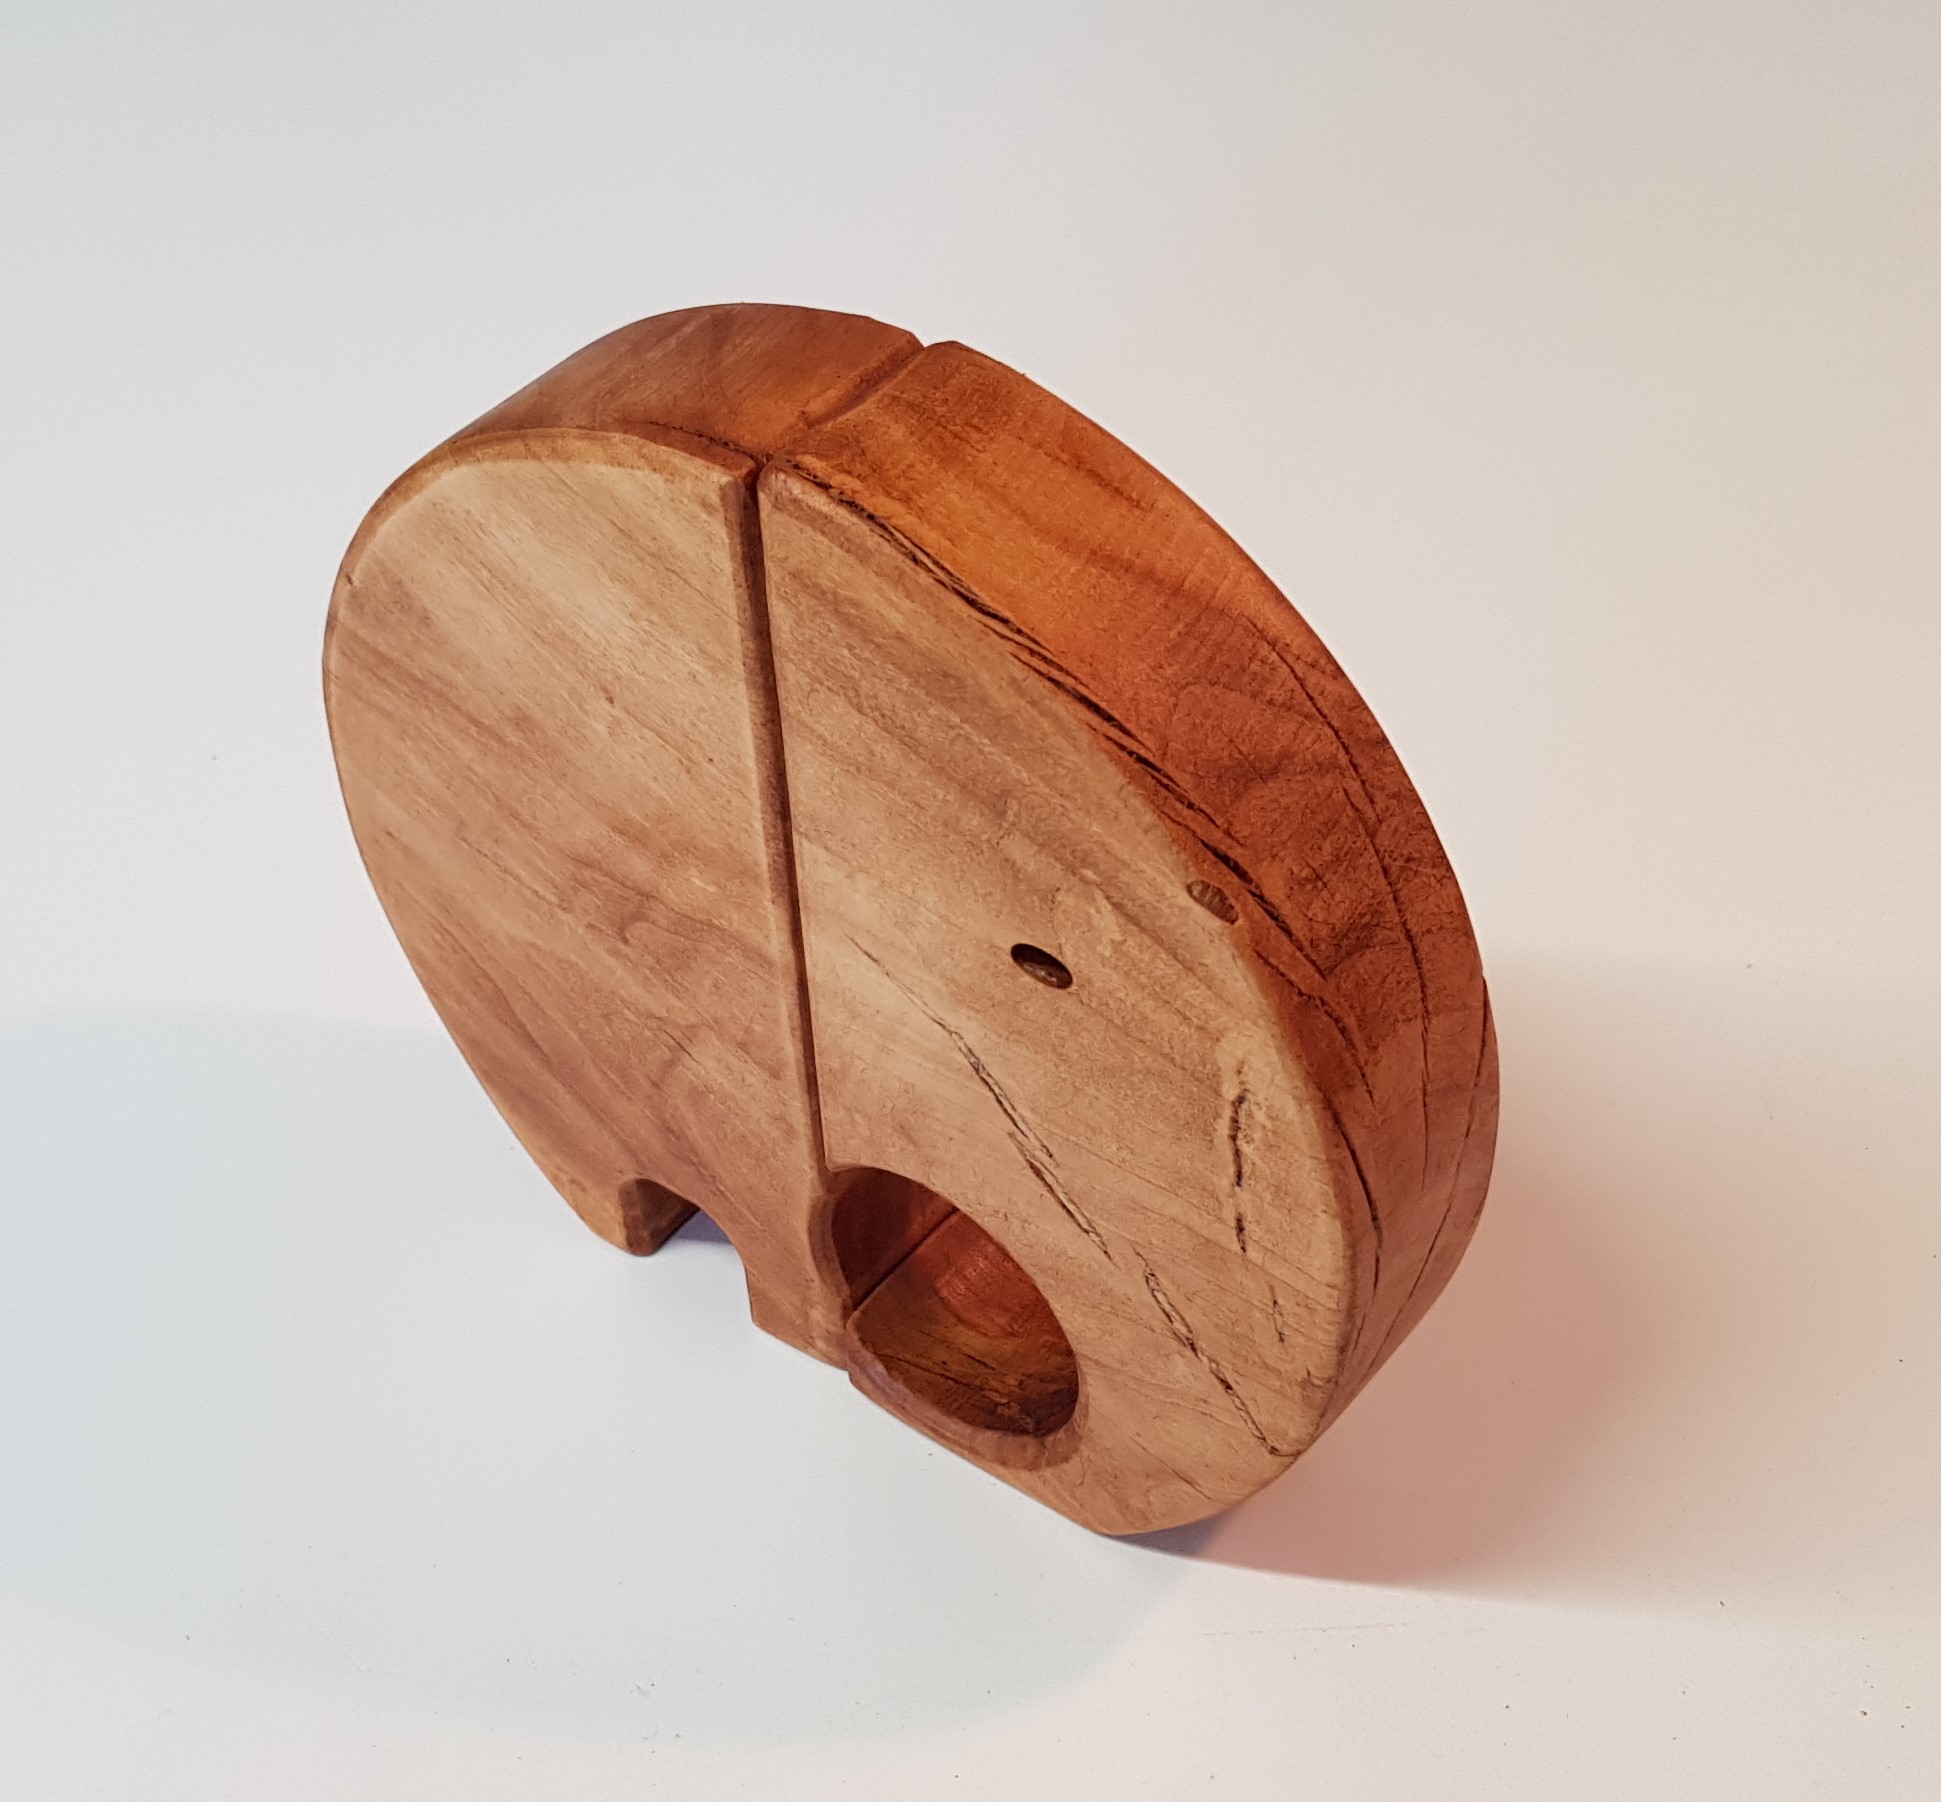
Another elephant in the room!
I just wanted to make something with the only piece of Hawthorne wood I had.
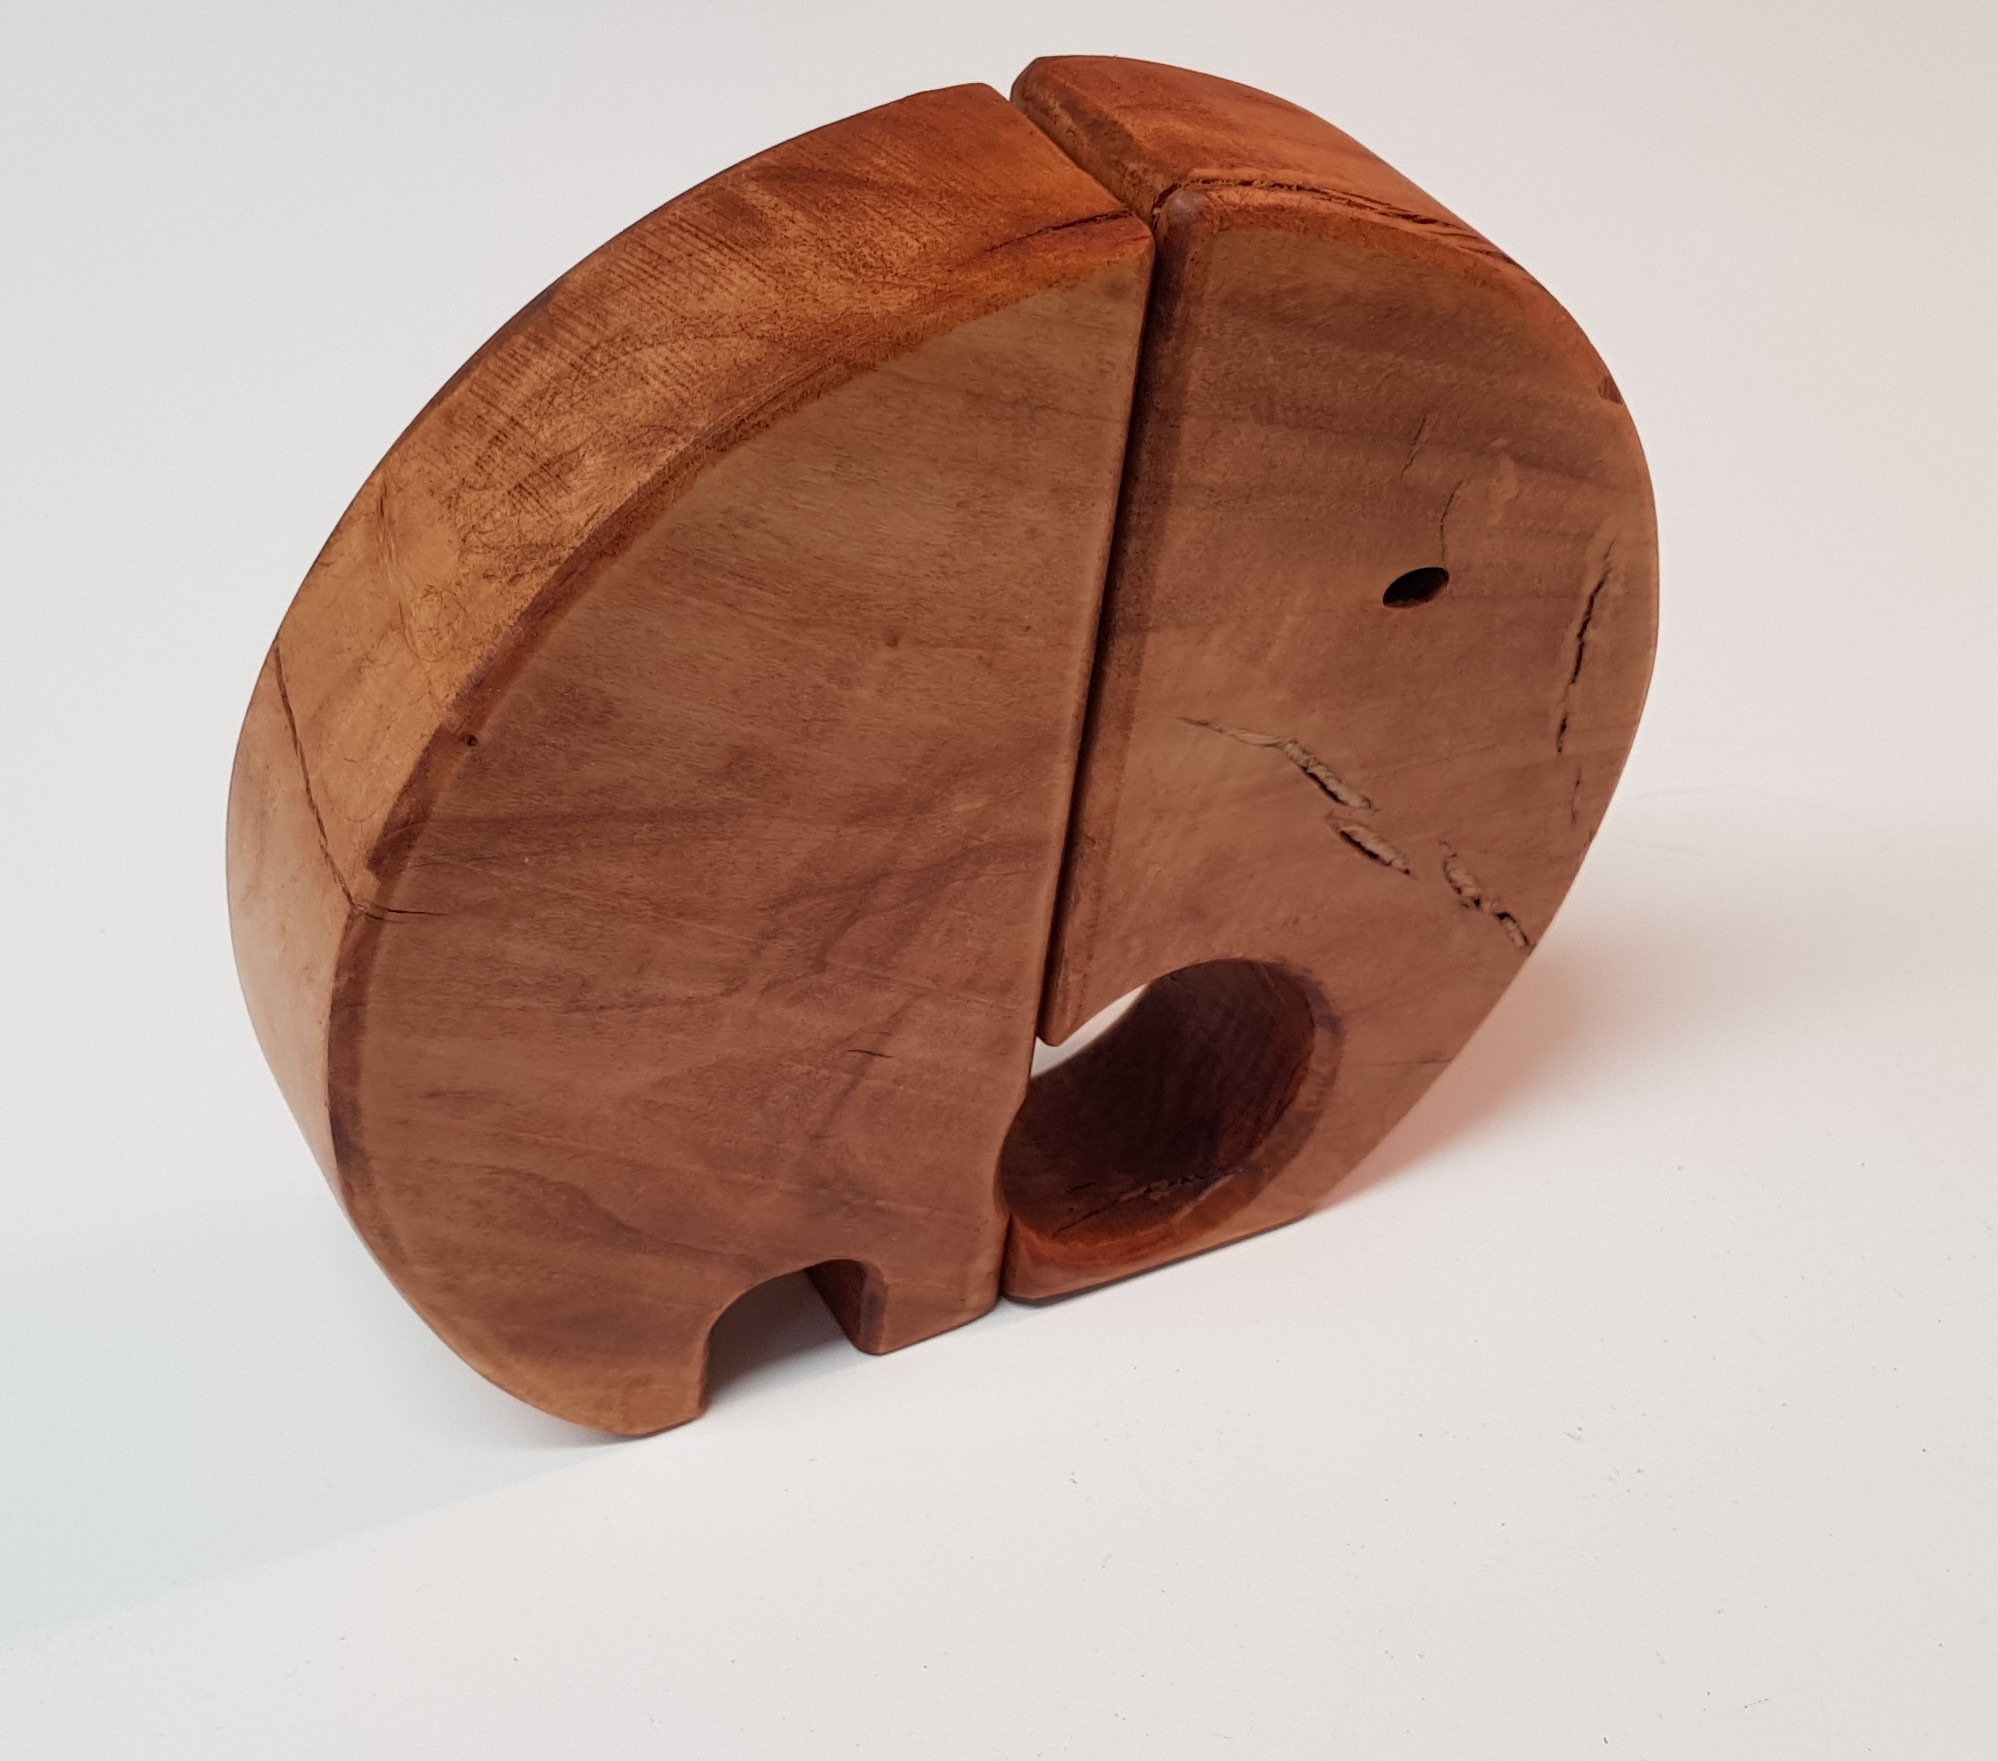
Another elephant in the room!
I just wanted to make something with the only piece of Hawthorne wood I had.
Didn’t quite get the scale from the first two pictures… that’s a nice chunk of wood right there!
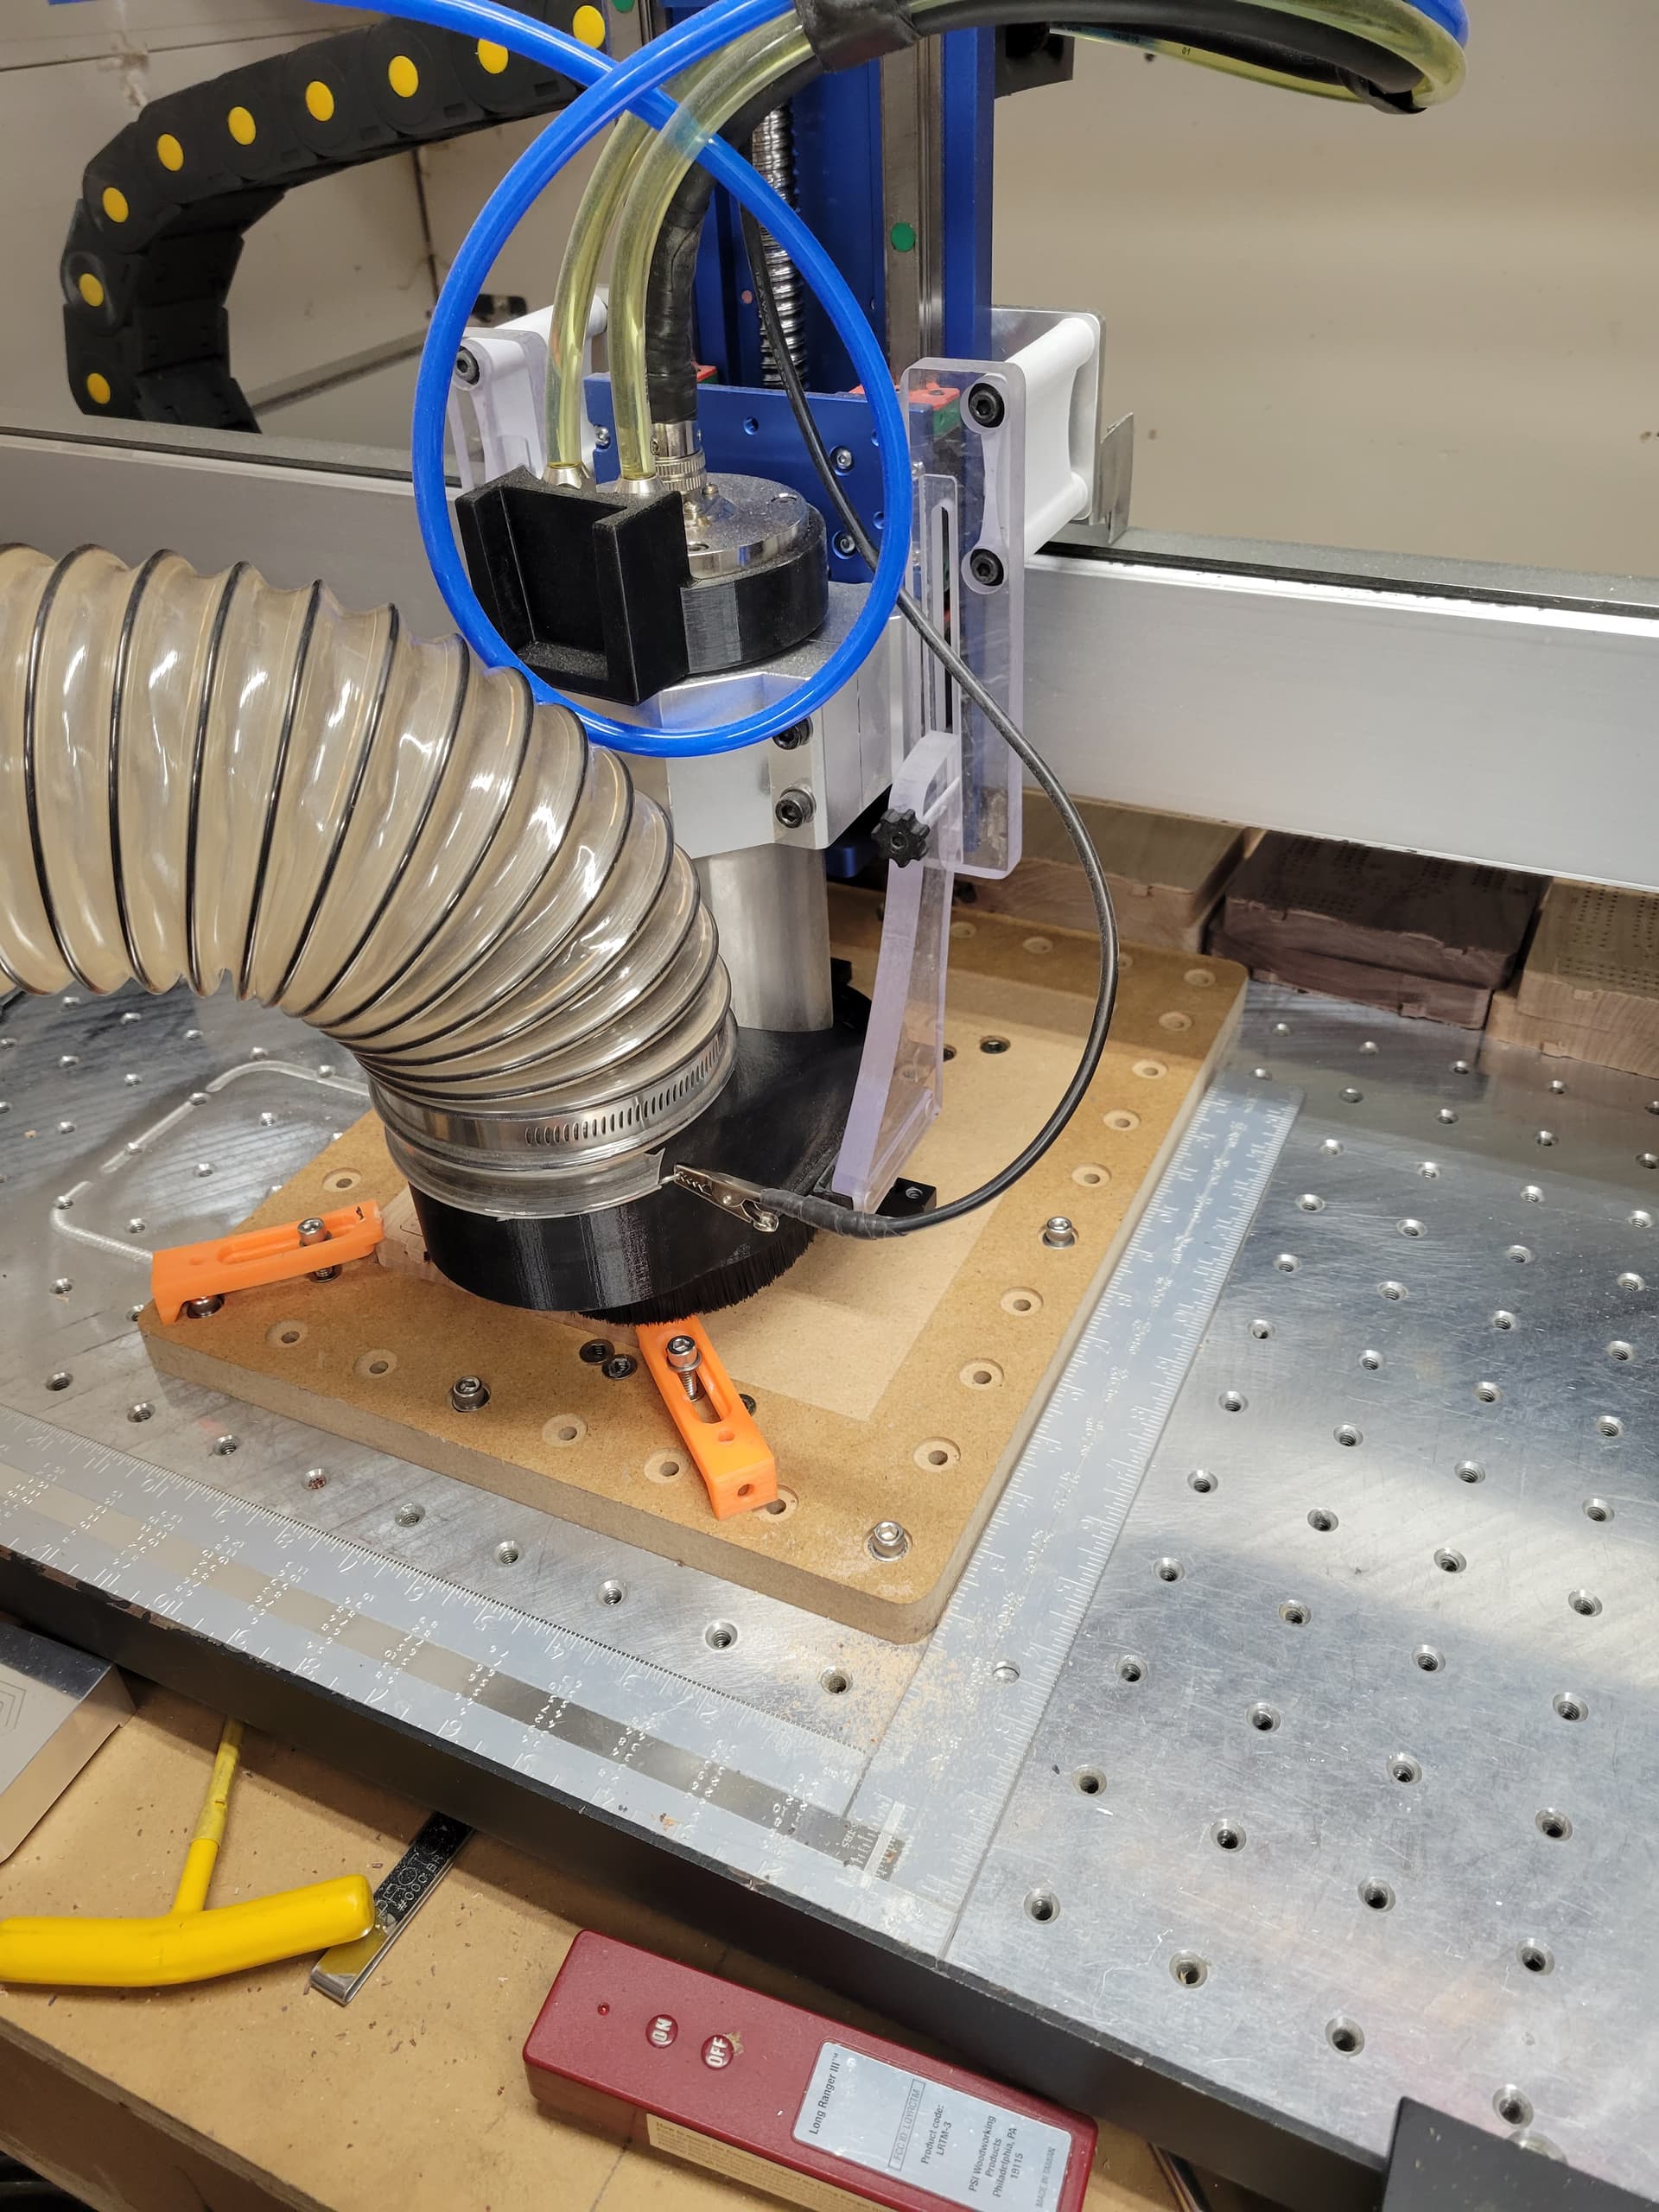
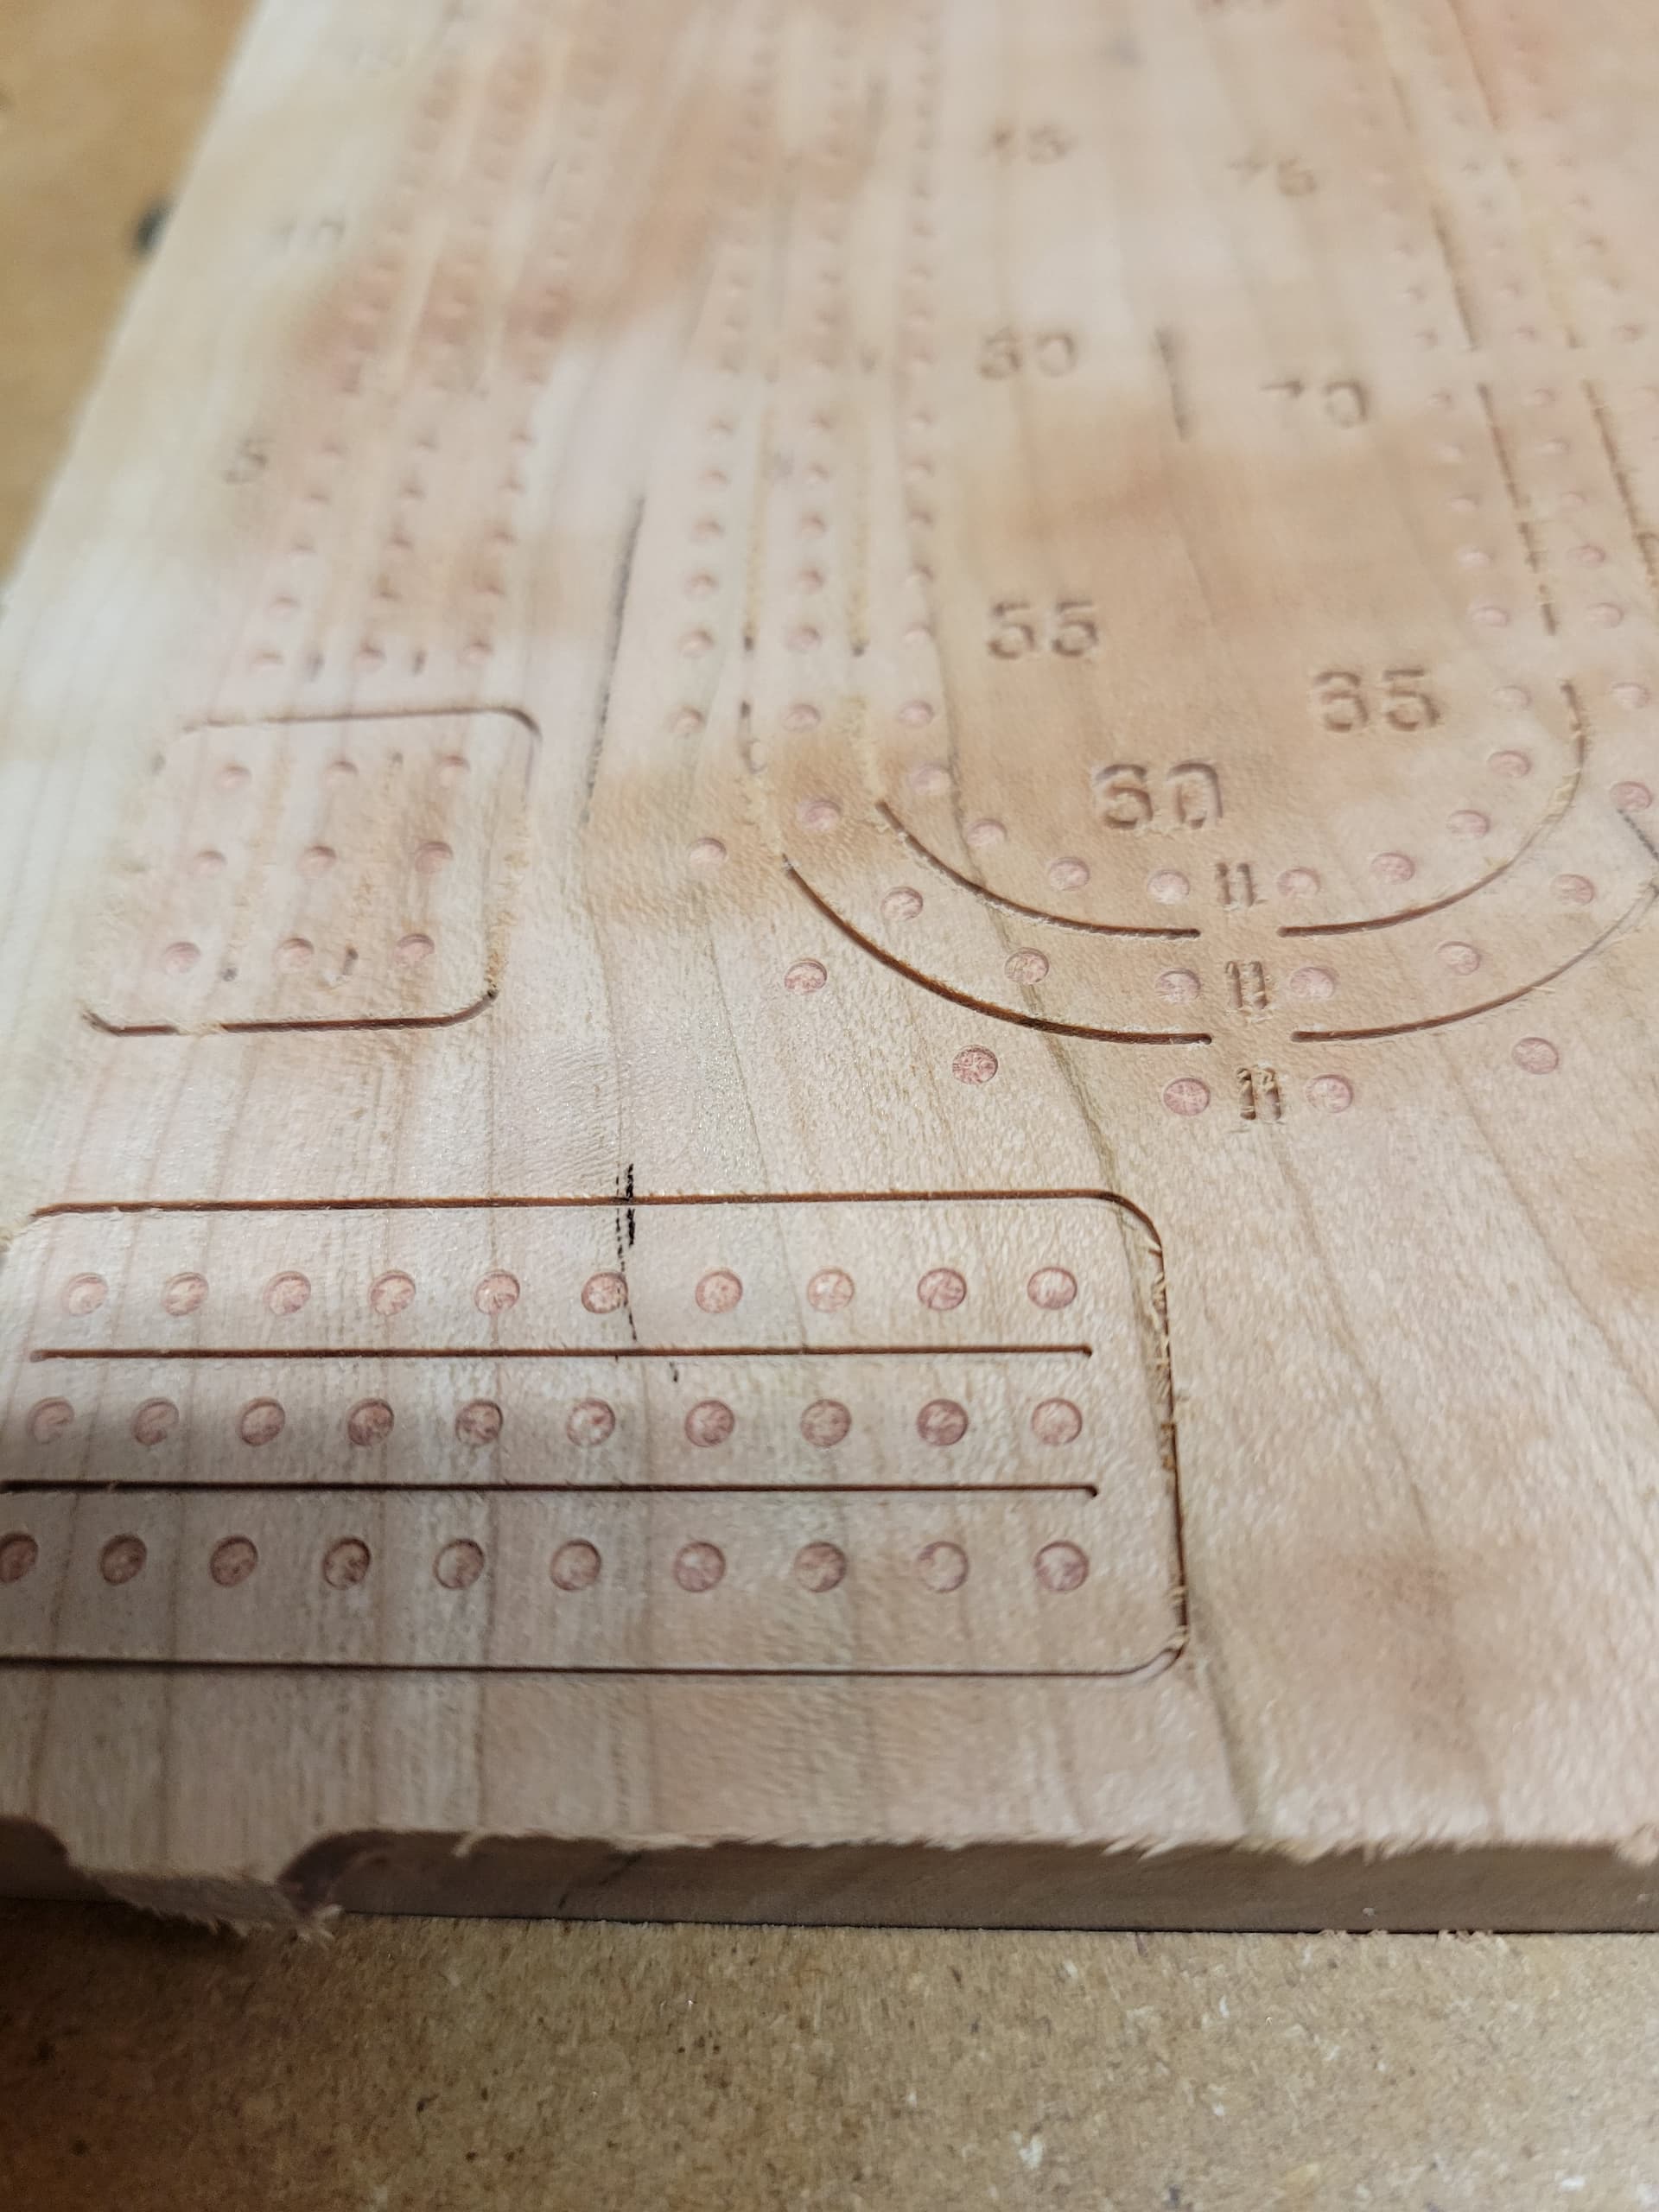
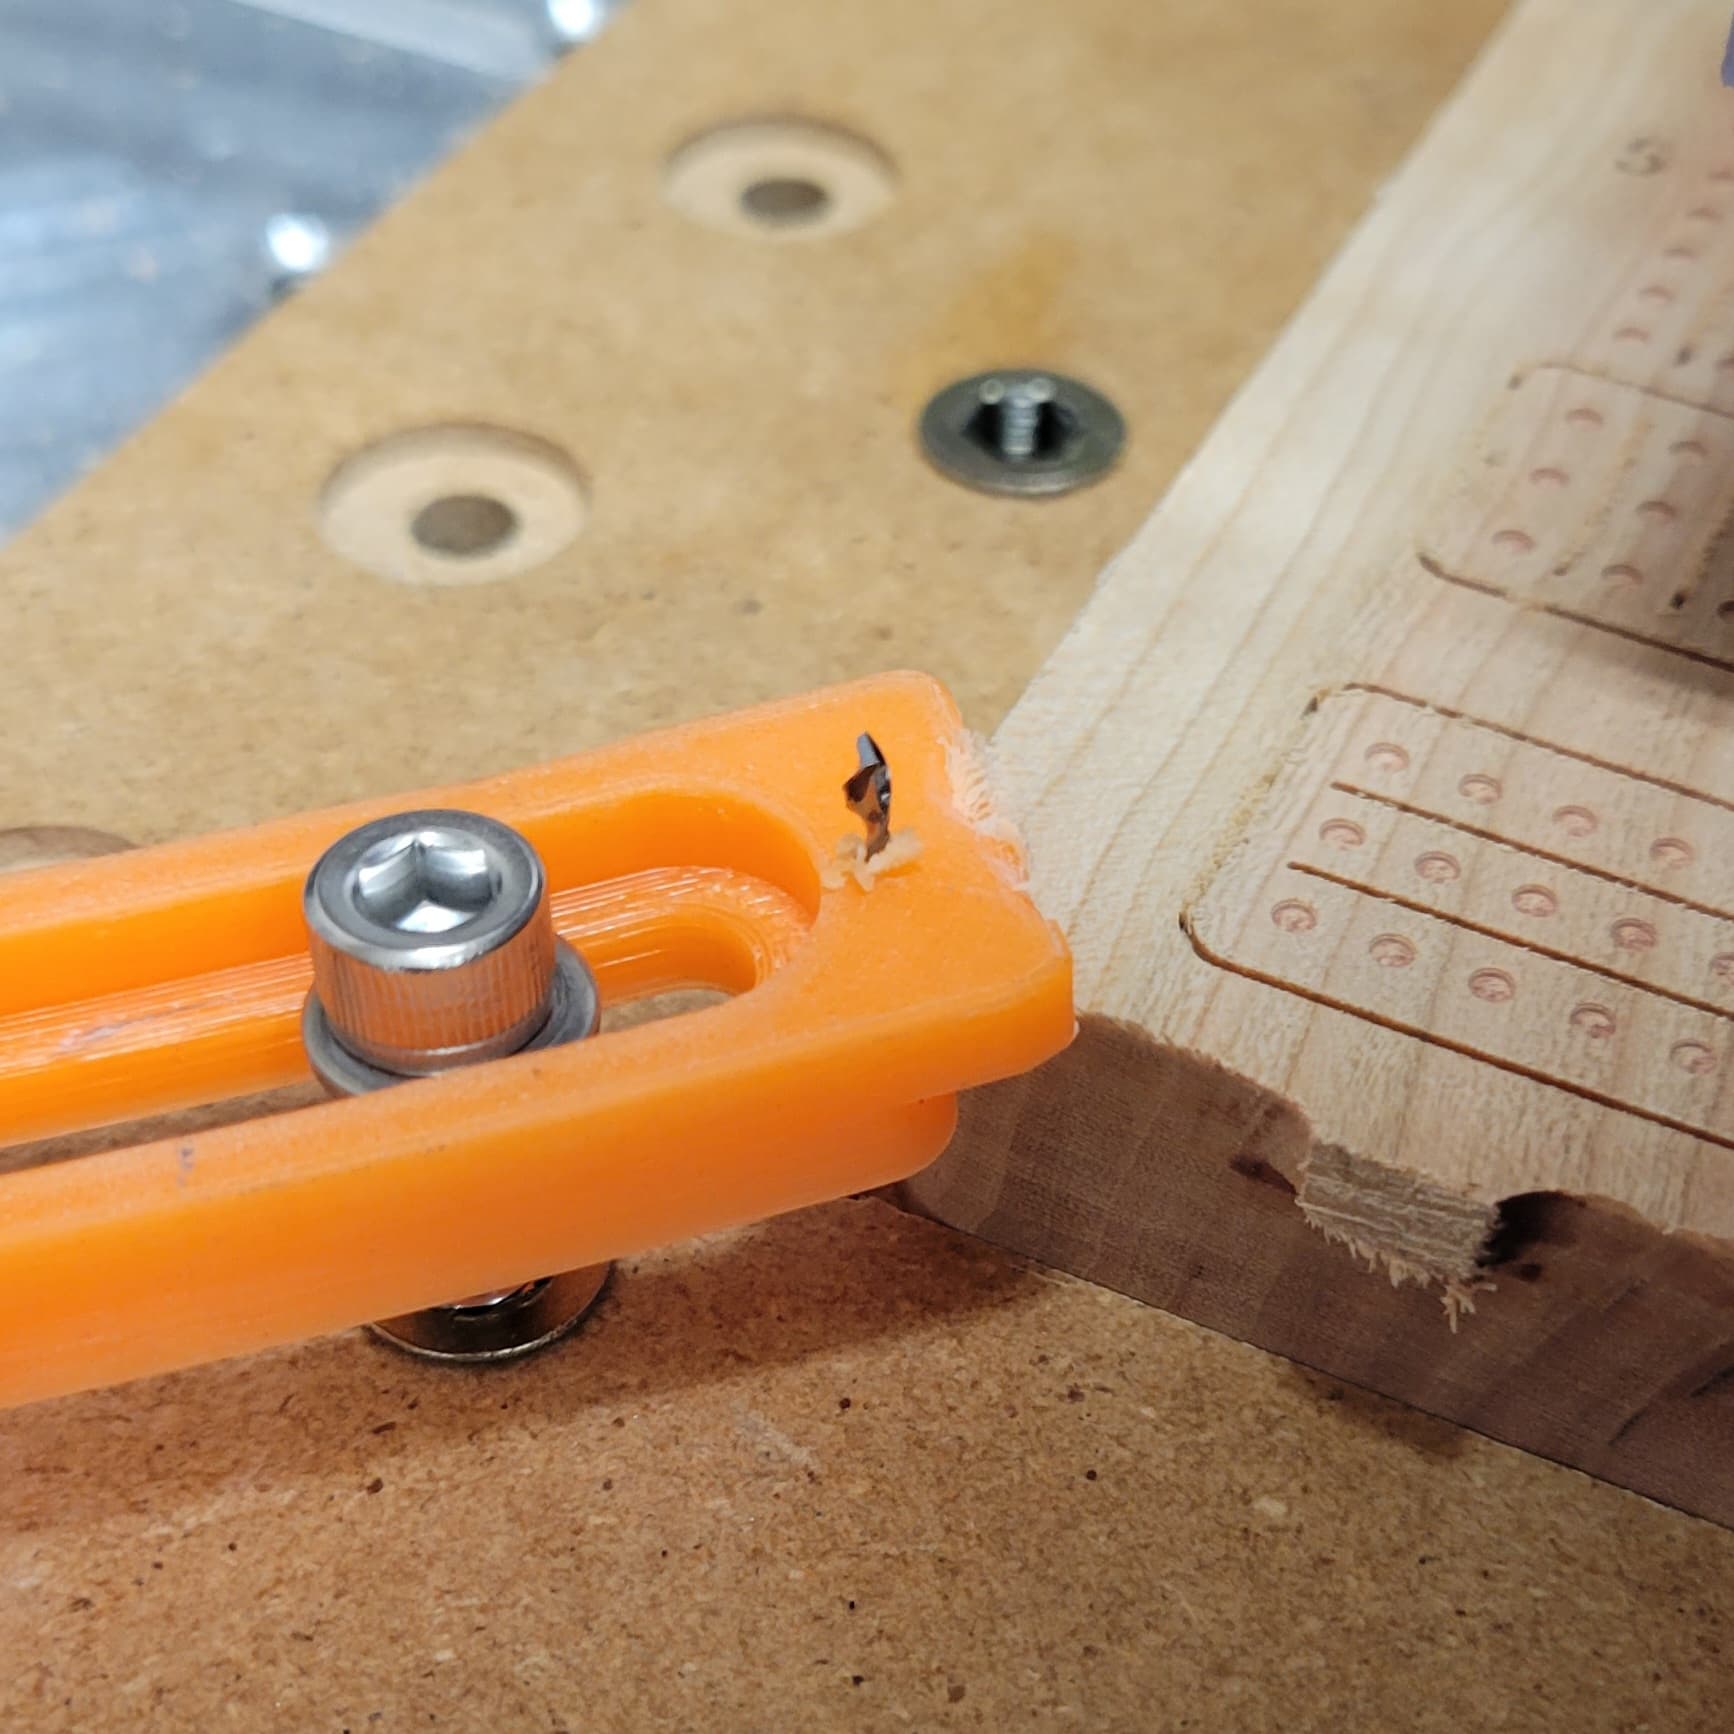
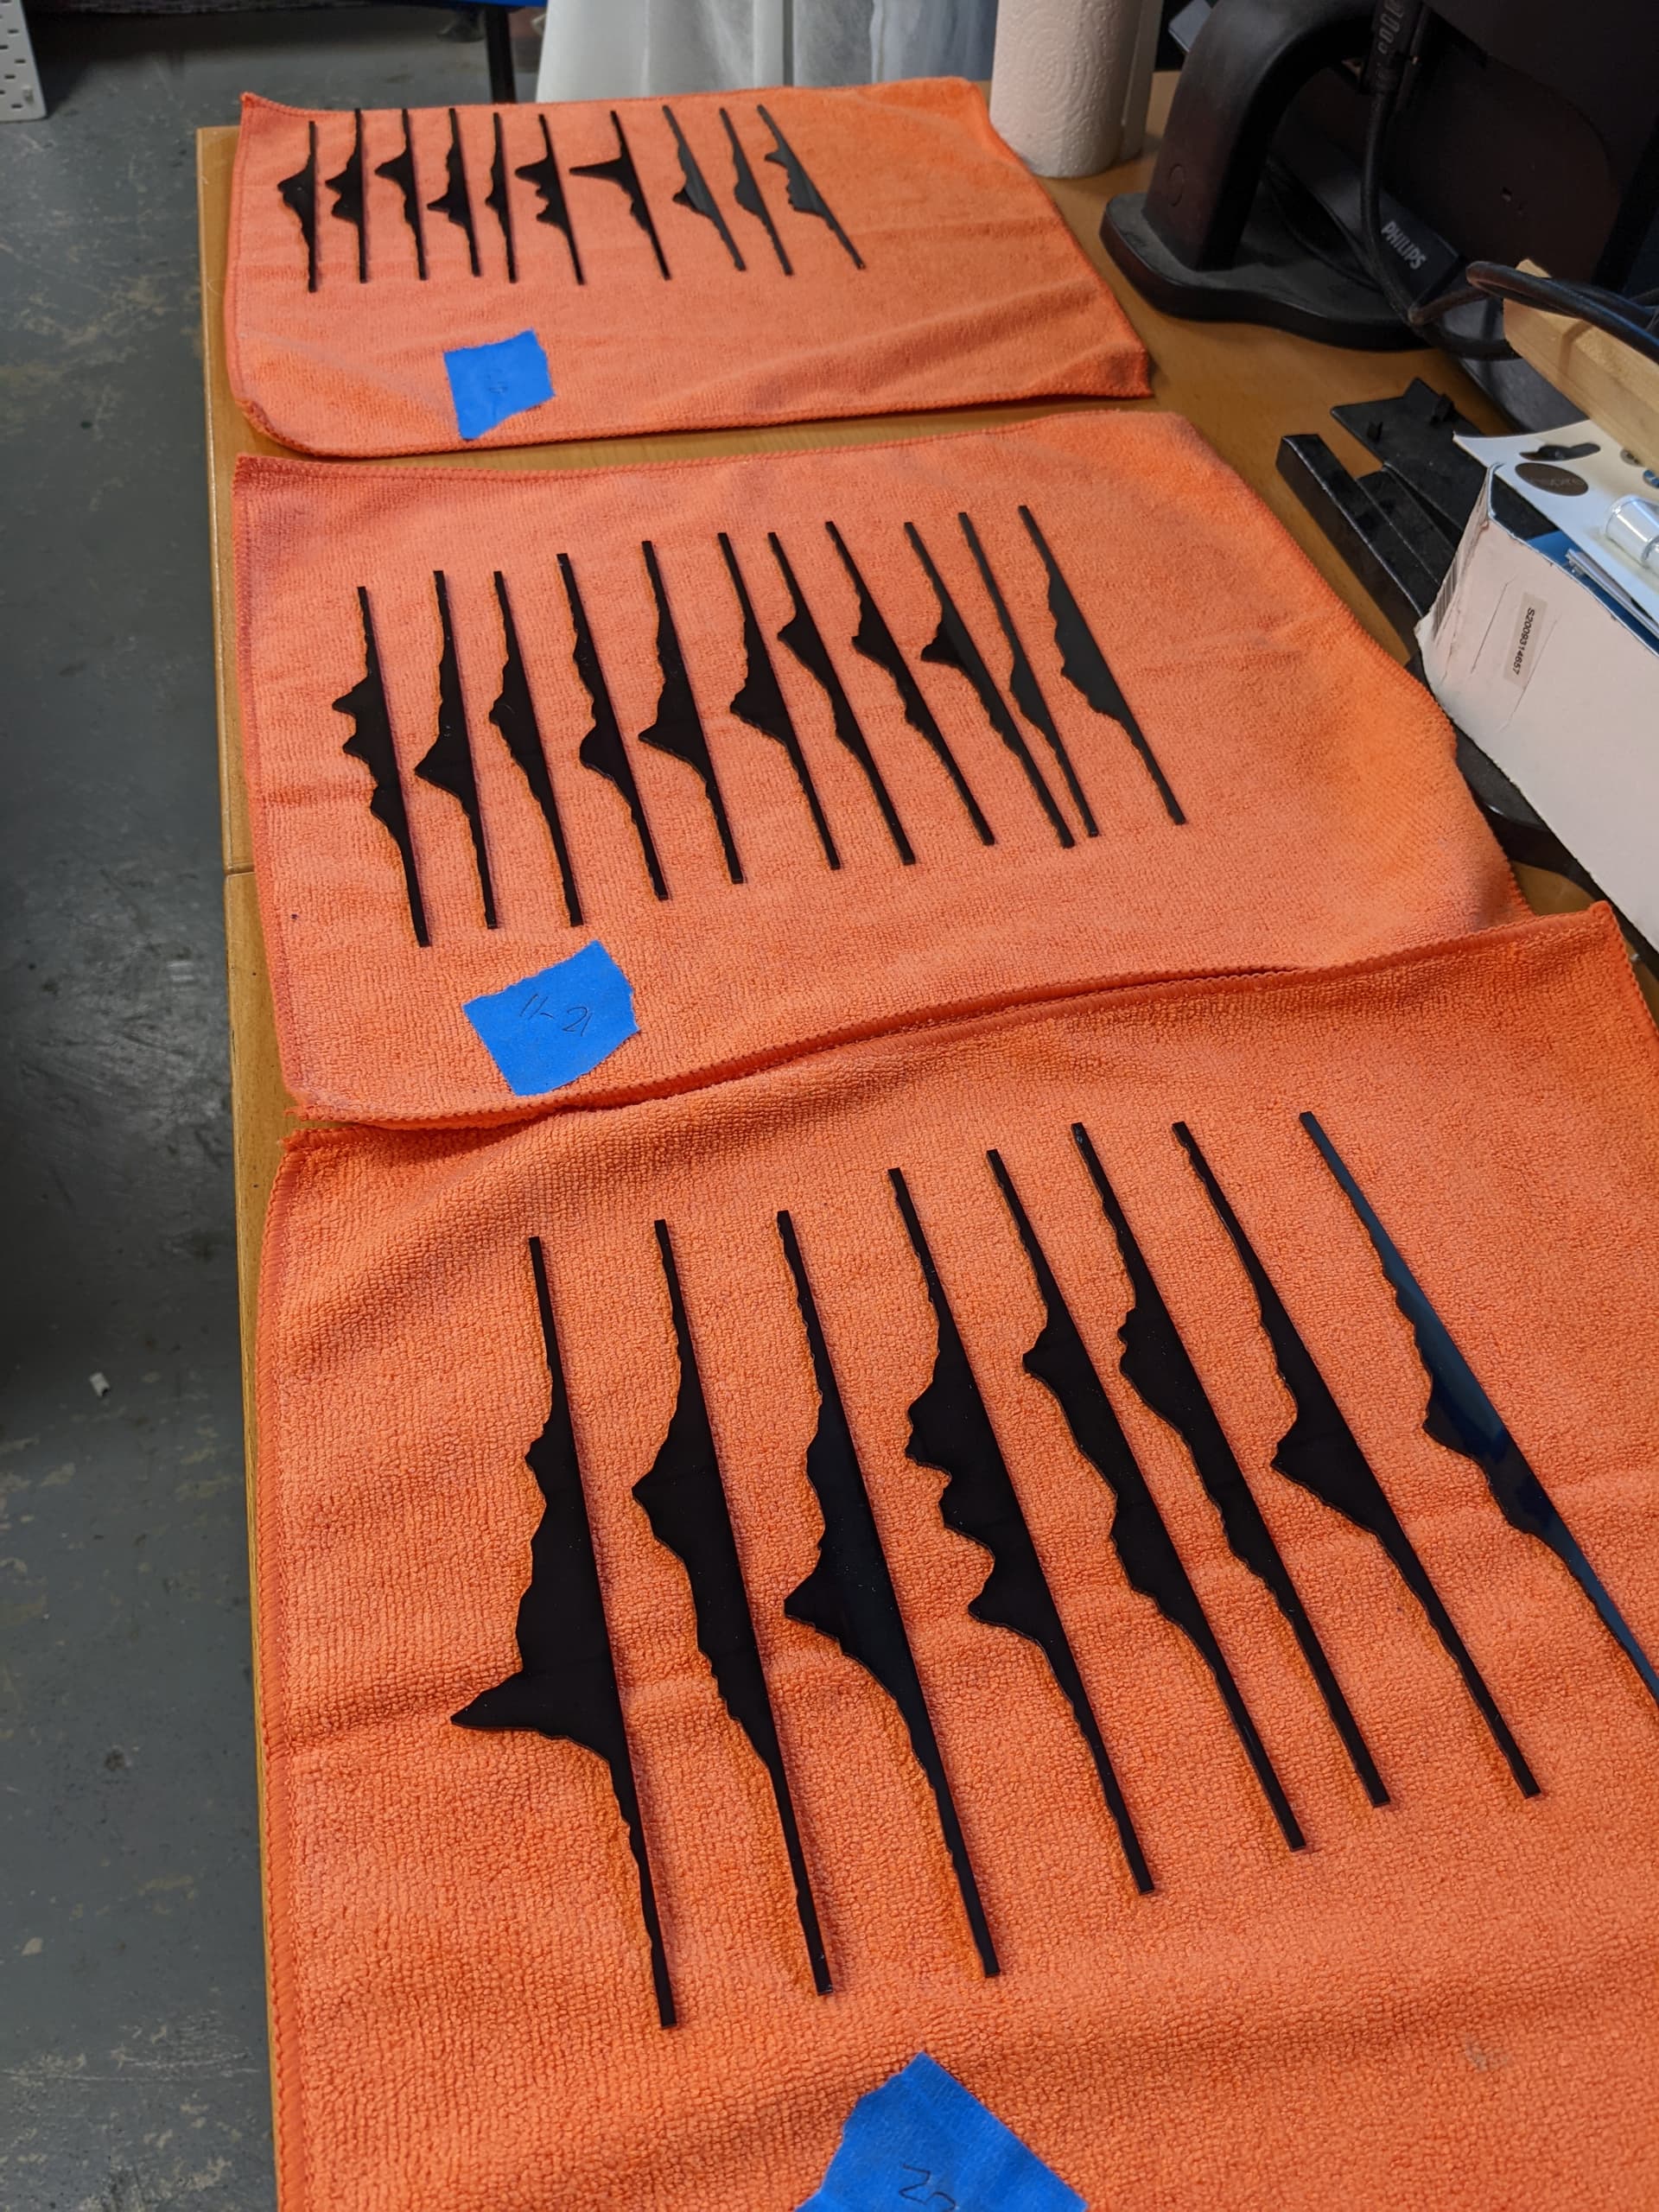
I spent about 25 minutes waiting for 400 holes to be drilled in a 3 Player cribbage board. My dust shoe completely covers the board, so I don’t get to see how it’s going until it’s done. Here’s what it looks like while drilling.
So, when it finishes and I move the spindle out of the way, I am greeted by this…
Apparently, I had the spindle too close to the clamp, and on start, it plunged to +0.10" then moves to the first hole. The bit sank into the clamp on the corner and snapped off.
Popped in a new drill and ran the code again and it worked out fine in the end.
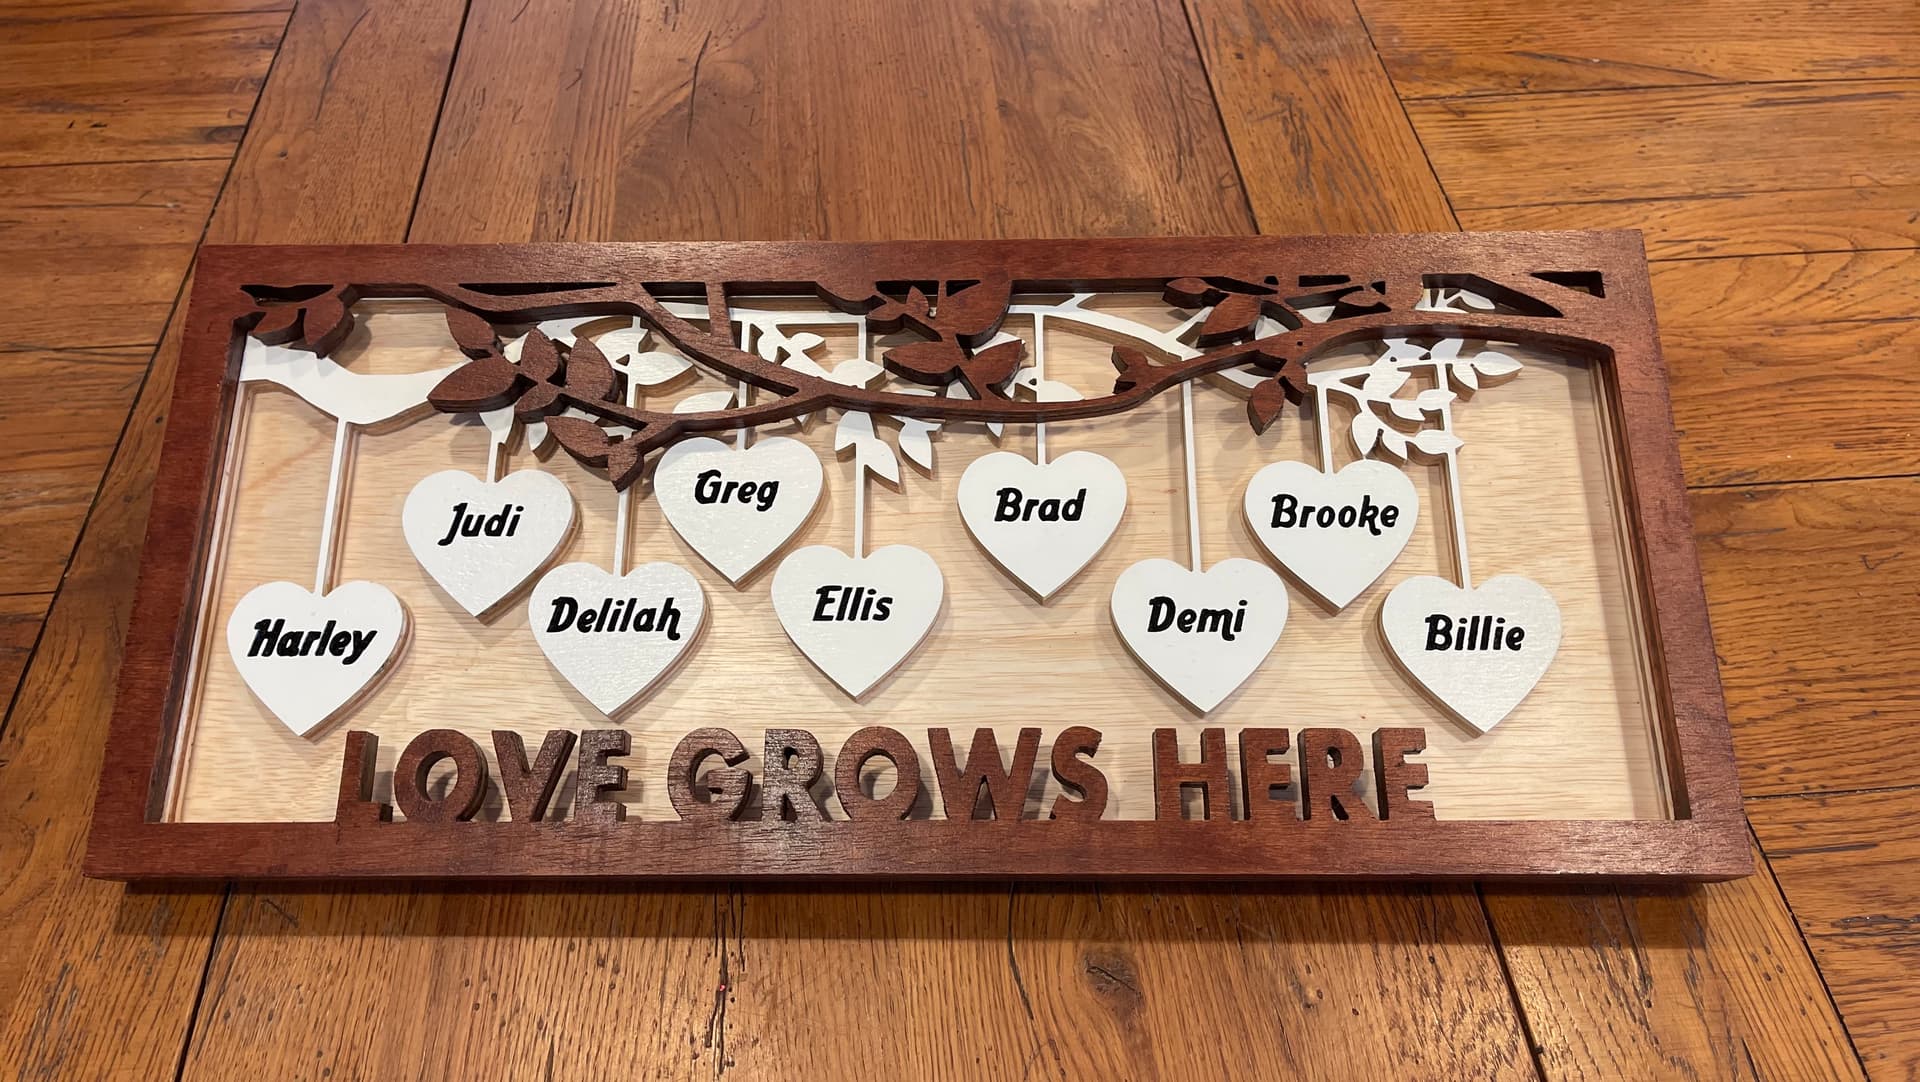
my first official sale! It’s not perfect and learned a few tricks along the way but i’m really happy how it turned out. onward and upward!
I like the layered look of your sign. Next time perhaps cover up the layers of plywood, though. The vertical inside walls would look better if my eye couldn’t see them, because my mind wonders why there are so many color stripes there.
It looks like your sign is made of two sheets where the hearts are carved out of the bottom layer and the background is just what’s remaining after the depth of cut. (You got lucky if it is that way, because the inner layers of plywood are fraught with defects.)
Perhaps paint the background and the inside walls the same color? They would be less visible that way.
Overall, though, I like it. +1
Thanks. He liked the look of the striped. He showed me something on Pinterest and said “I want that”. The back is a 1/8 inch piece of luan.
I thought about covering those inside stripes but it’s pretty intricate in most spots.
Next time ![]()
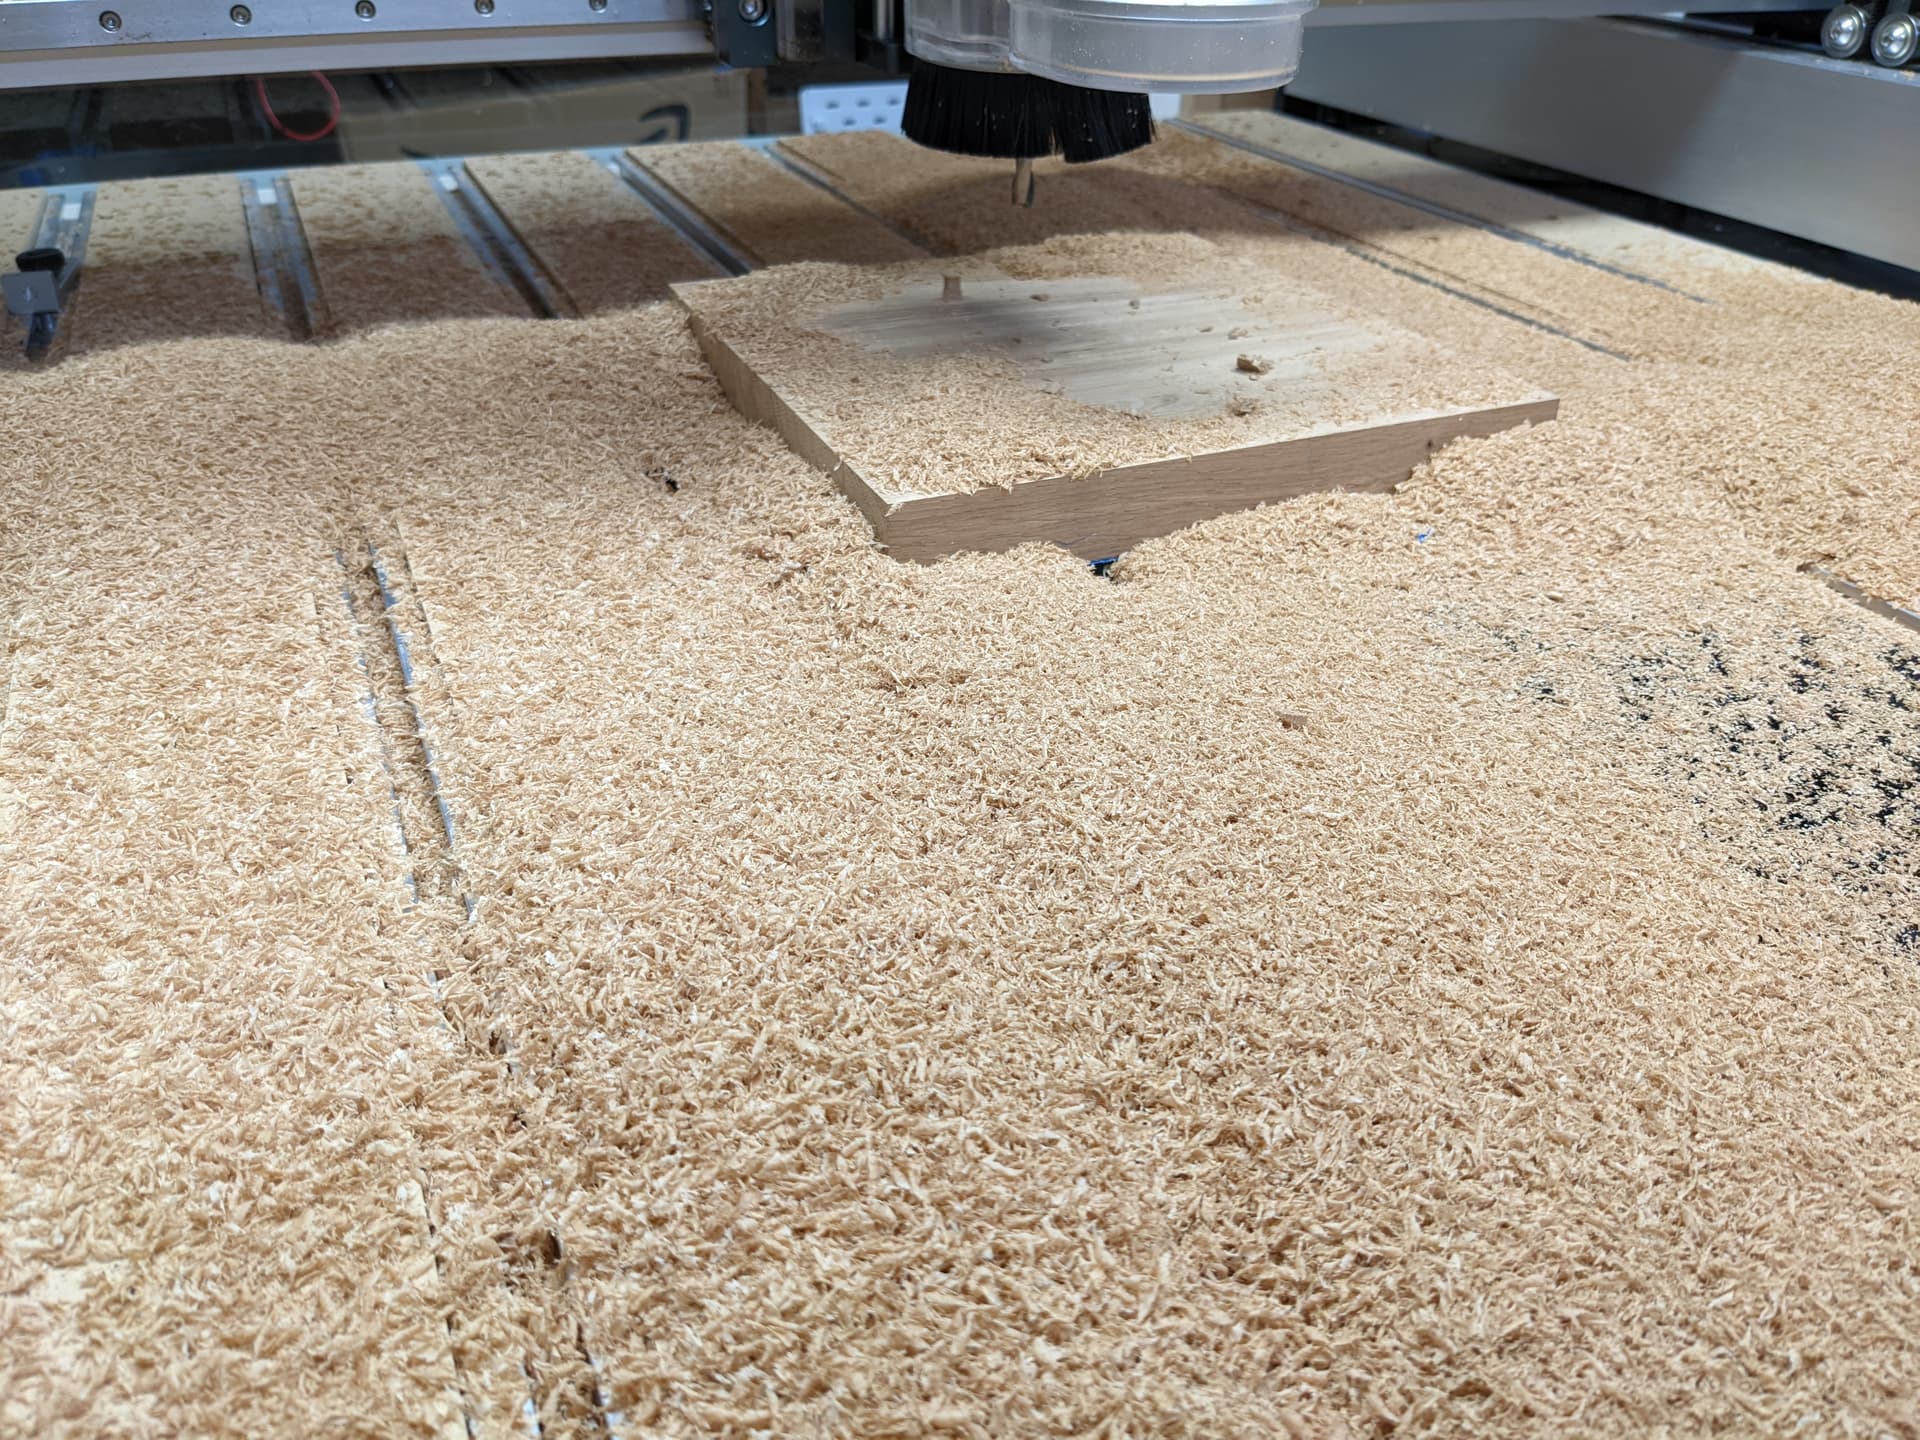
Today I practiced subtractive manufacturing using a 8mm endmill to obliterate some oak.
Oh the old drawing board.
This proves even a master can make mistakes. One of the signs of a master is admitting mistakes, sucking it up and charging forward lesson learned and remembered.
So, only the drawing board survived the rampage of CNC-ing ![]()
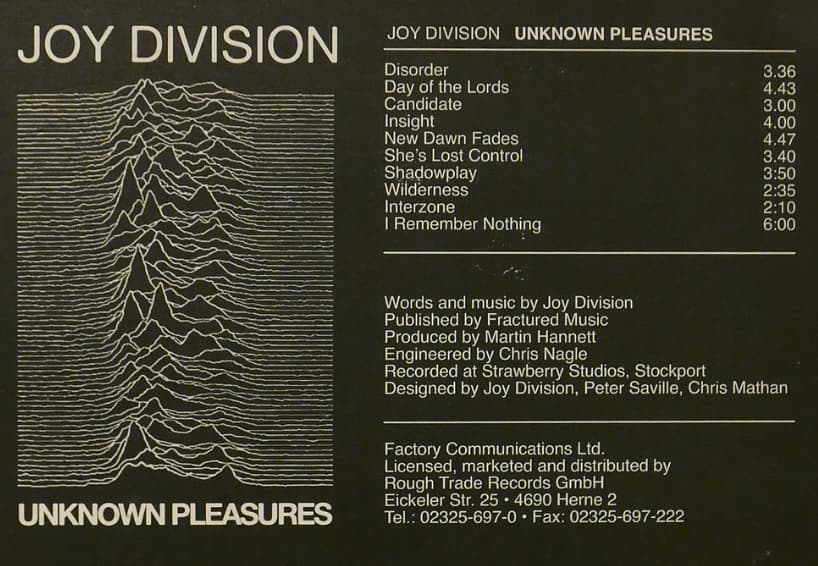
So in the spirit of “charging forward lesson learned”, I’m trying a new approach after the disaster shown above. In fact a friend of mine asked if I could make something based on the cover of that album he likes:
I searched the interwebs and found a 3D model of it on Thingiverse, and since 3D-carving it from a thick piece of oak failed and I did not feel like trying a second time, I chose a different approach, used the vectors to layout 2D slices, and I plan to stack them horizontally. I cut the first batch of 30 slices from black 2mm acrylic
40 mores slices to go. And then to find a way to paint the edges white, to end up with what I hope will be a thing that looks somewhat similar to that album cover, we’ll see.
In the process I also learned that this album cover represents radio signal pulses from the first pulsar discovered, CP 1919.
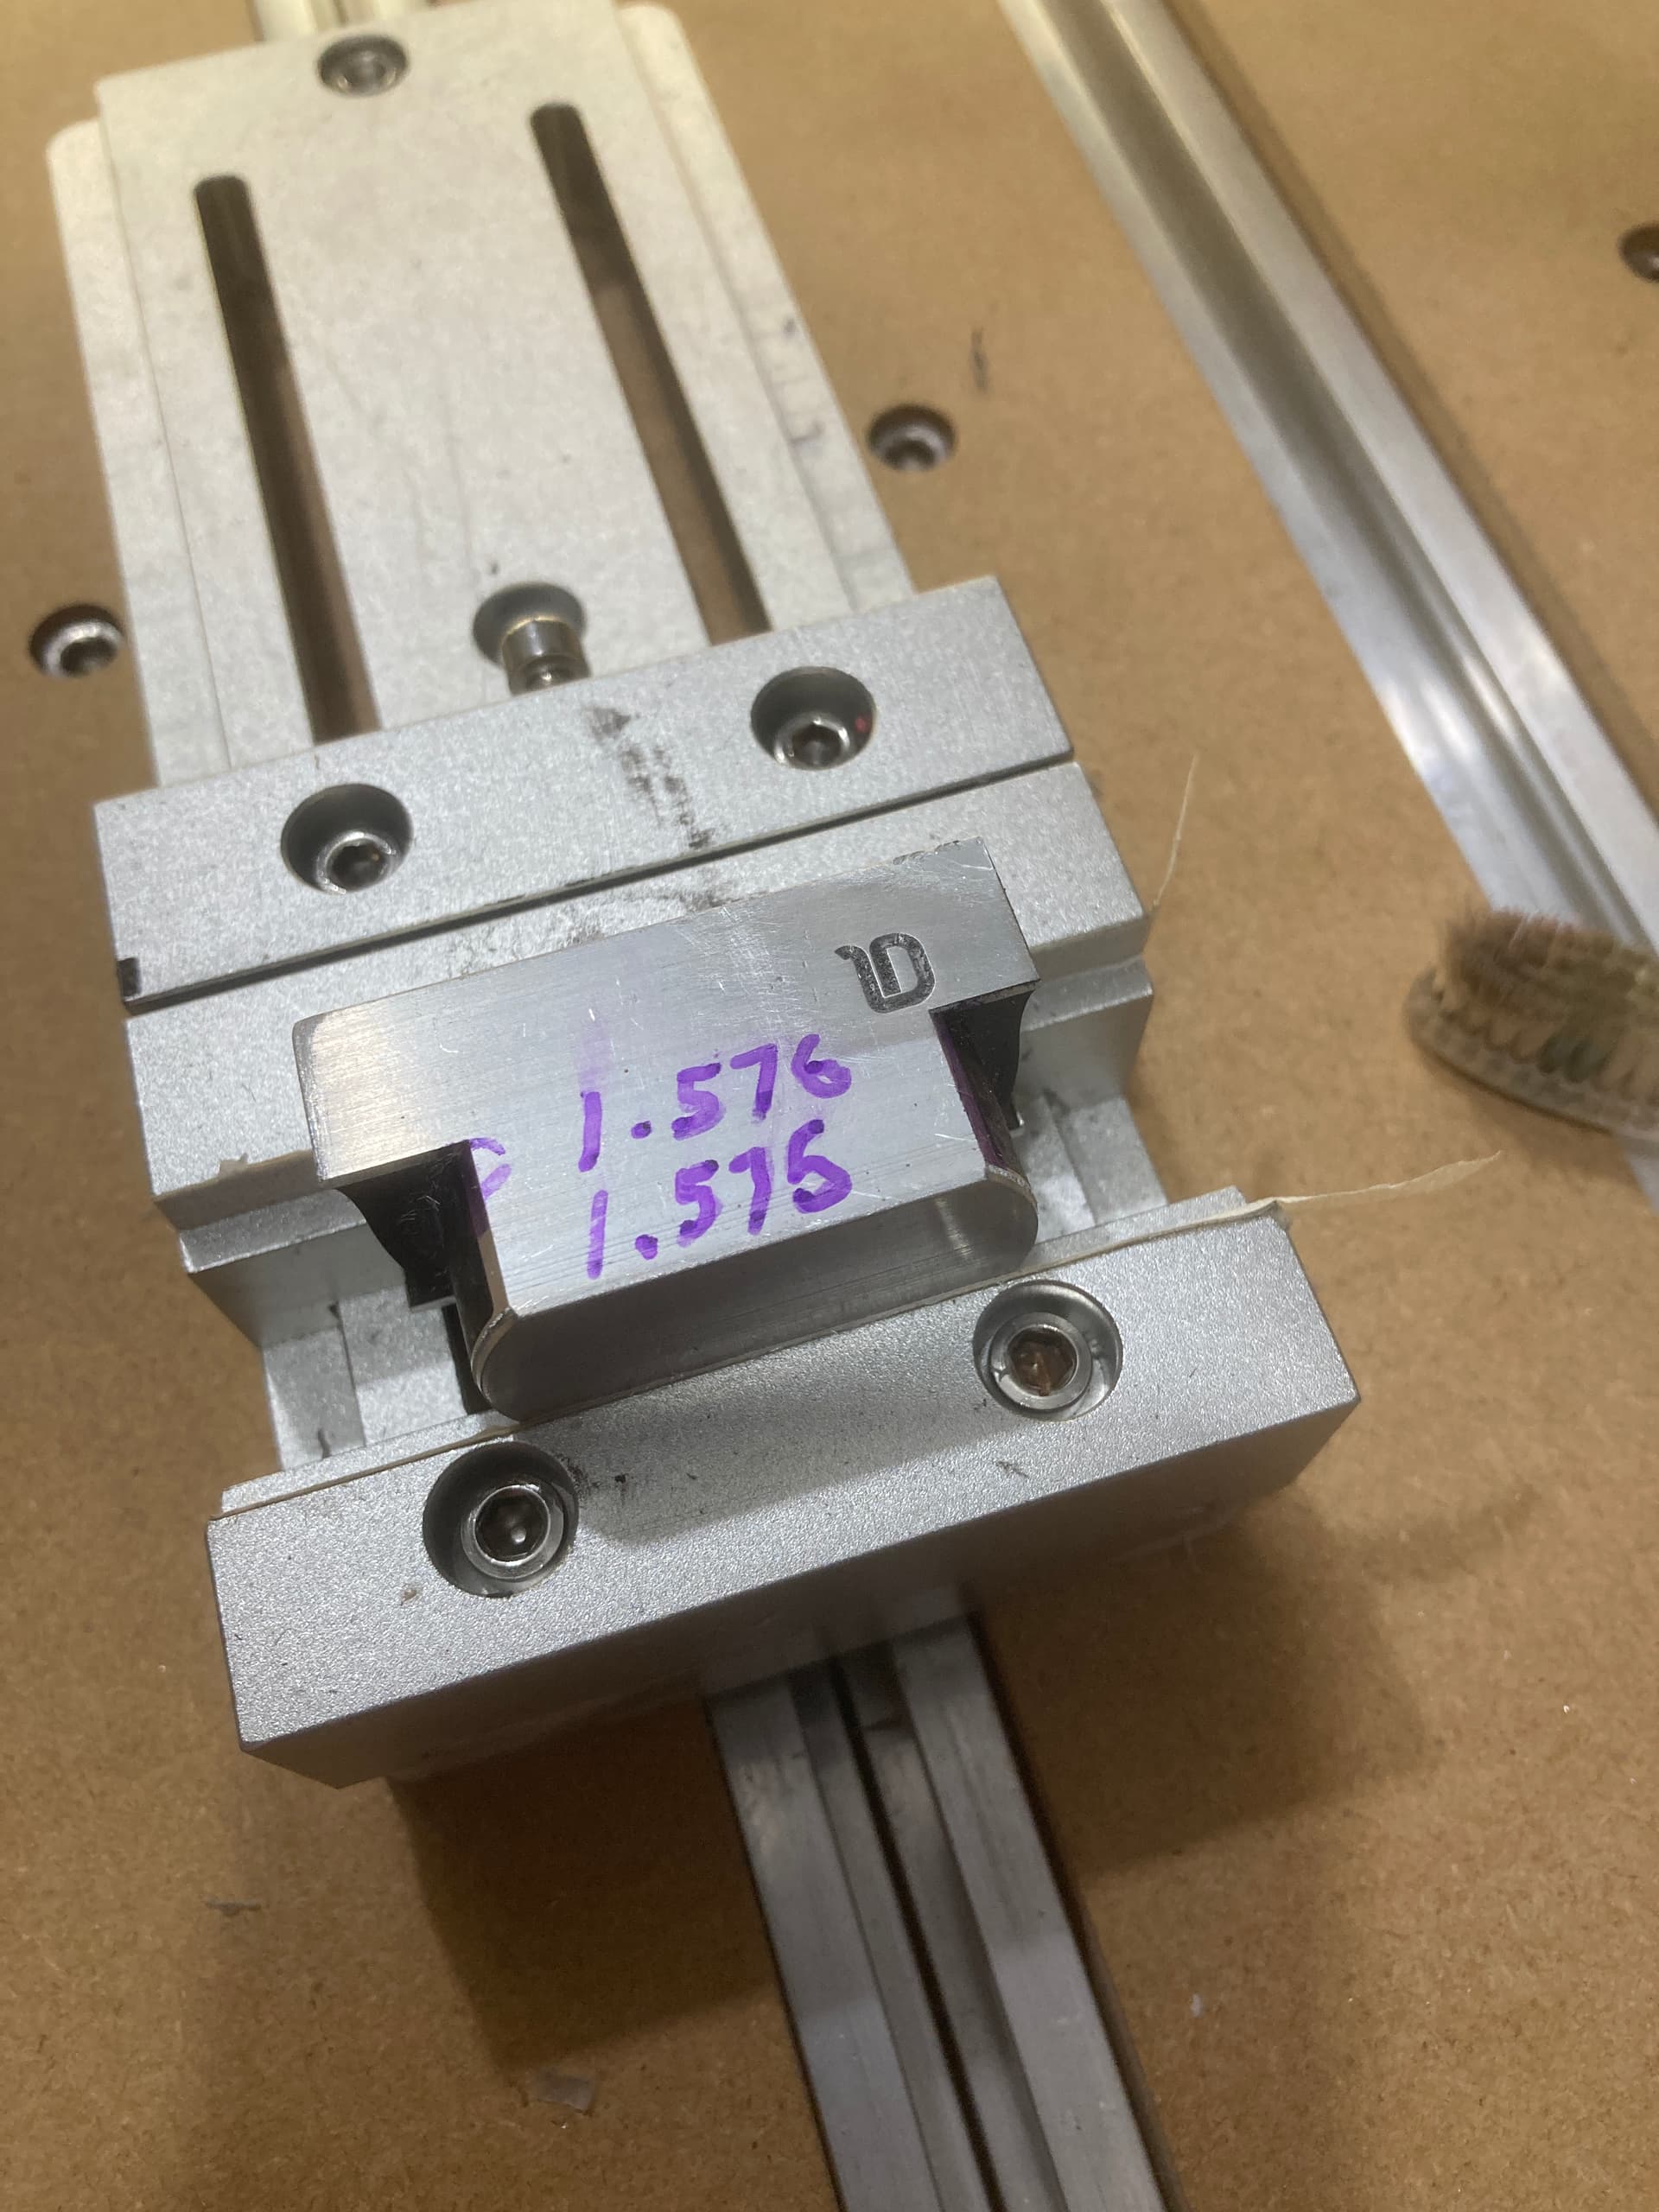
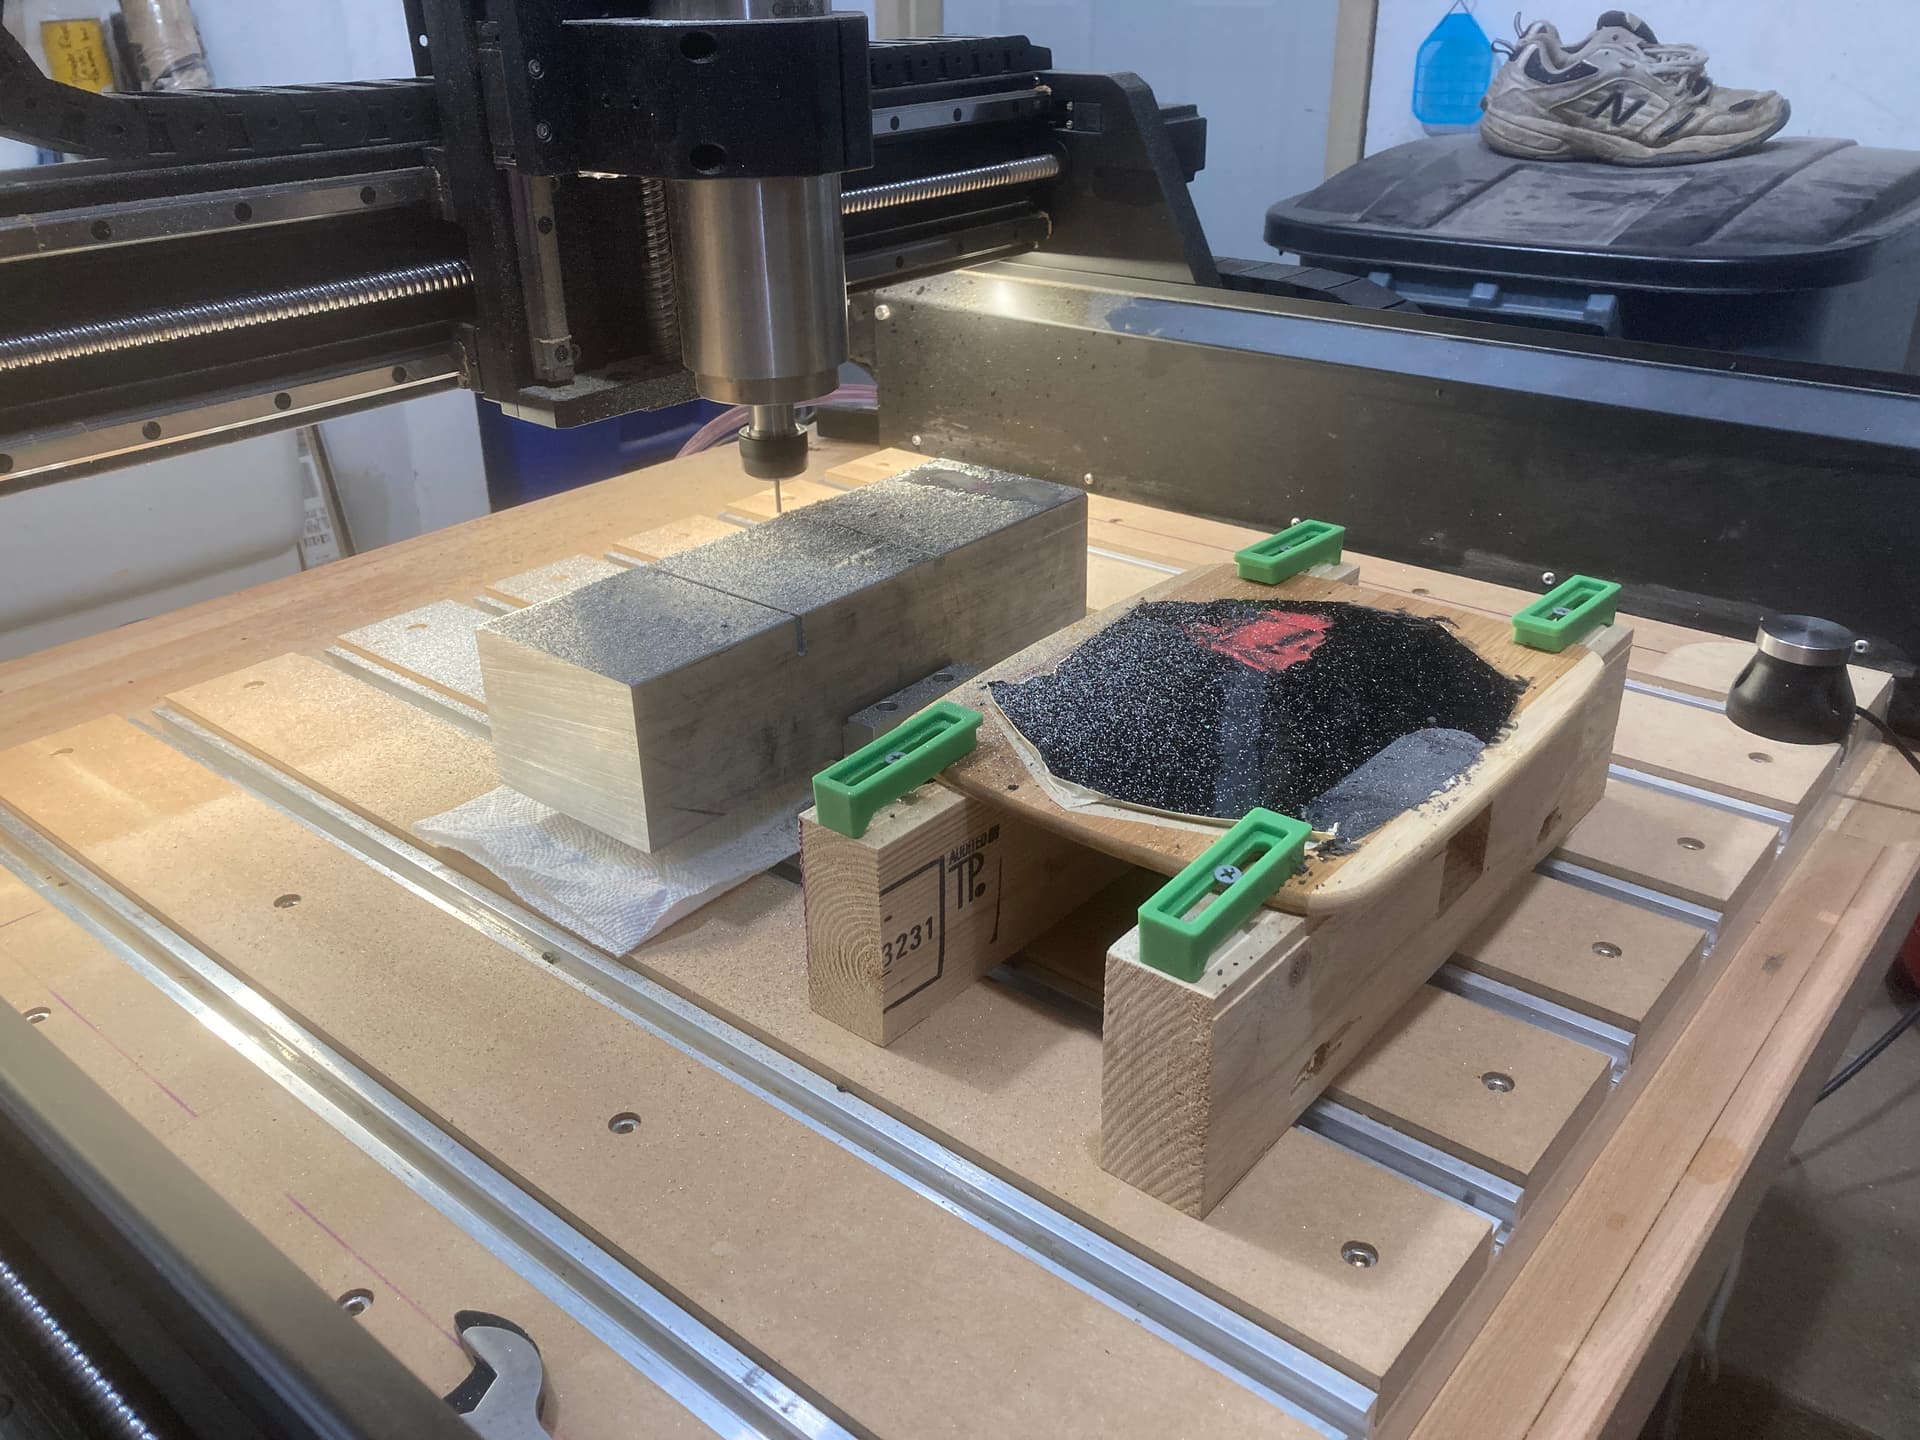
A go-nogo gauge for a project I’m working on.
The interesting part was dialing in the size. Since GRBL doesn’t support cutter comp,
I had to get creative. So I set up the postprocessor to output “M00 (Measure Part)”
when it sees Cutter Comp Off. Then created a path for a 1.574" circle, starting at 1.578 &
stepping down by 0.0004 (resolution of machine), and measure the part after each pass.
Then STOP the program when it hits the right dimension.
I’ll do the same with the part I’m using the gauge on.
Now that is some interesting detail.
Look forward to seeing the finished product too.
I look at that image, and I see a perfect image for diamond drag engraving on an “Absolute Black” granite floor tile.
Good idea, and I do have a few black tiles to spare, so I’ll give this a try if my current idea falls short!
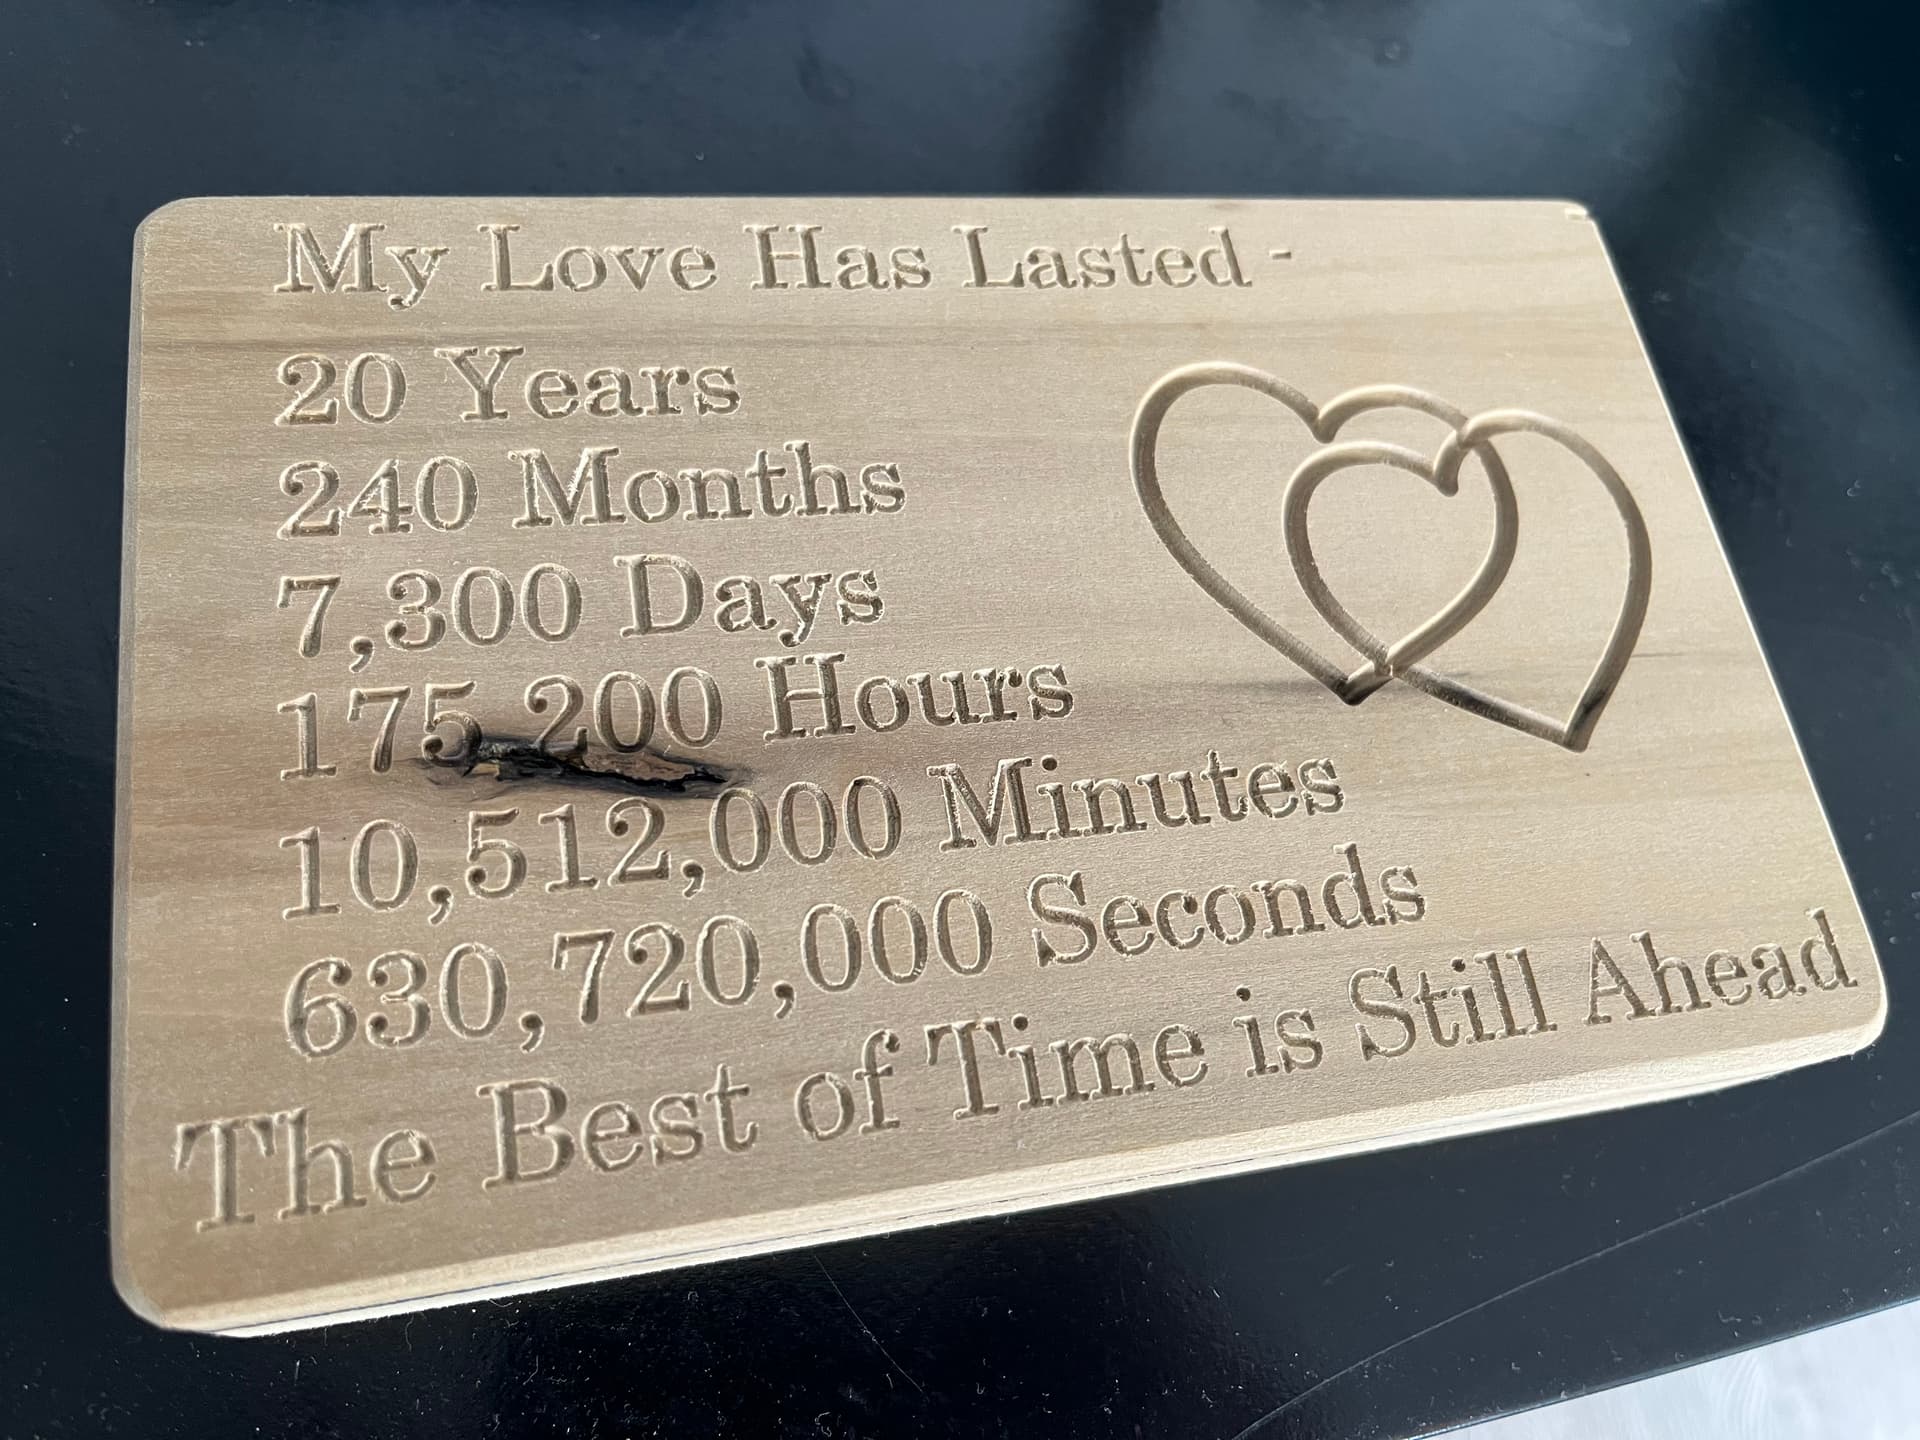
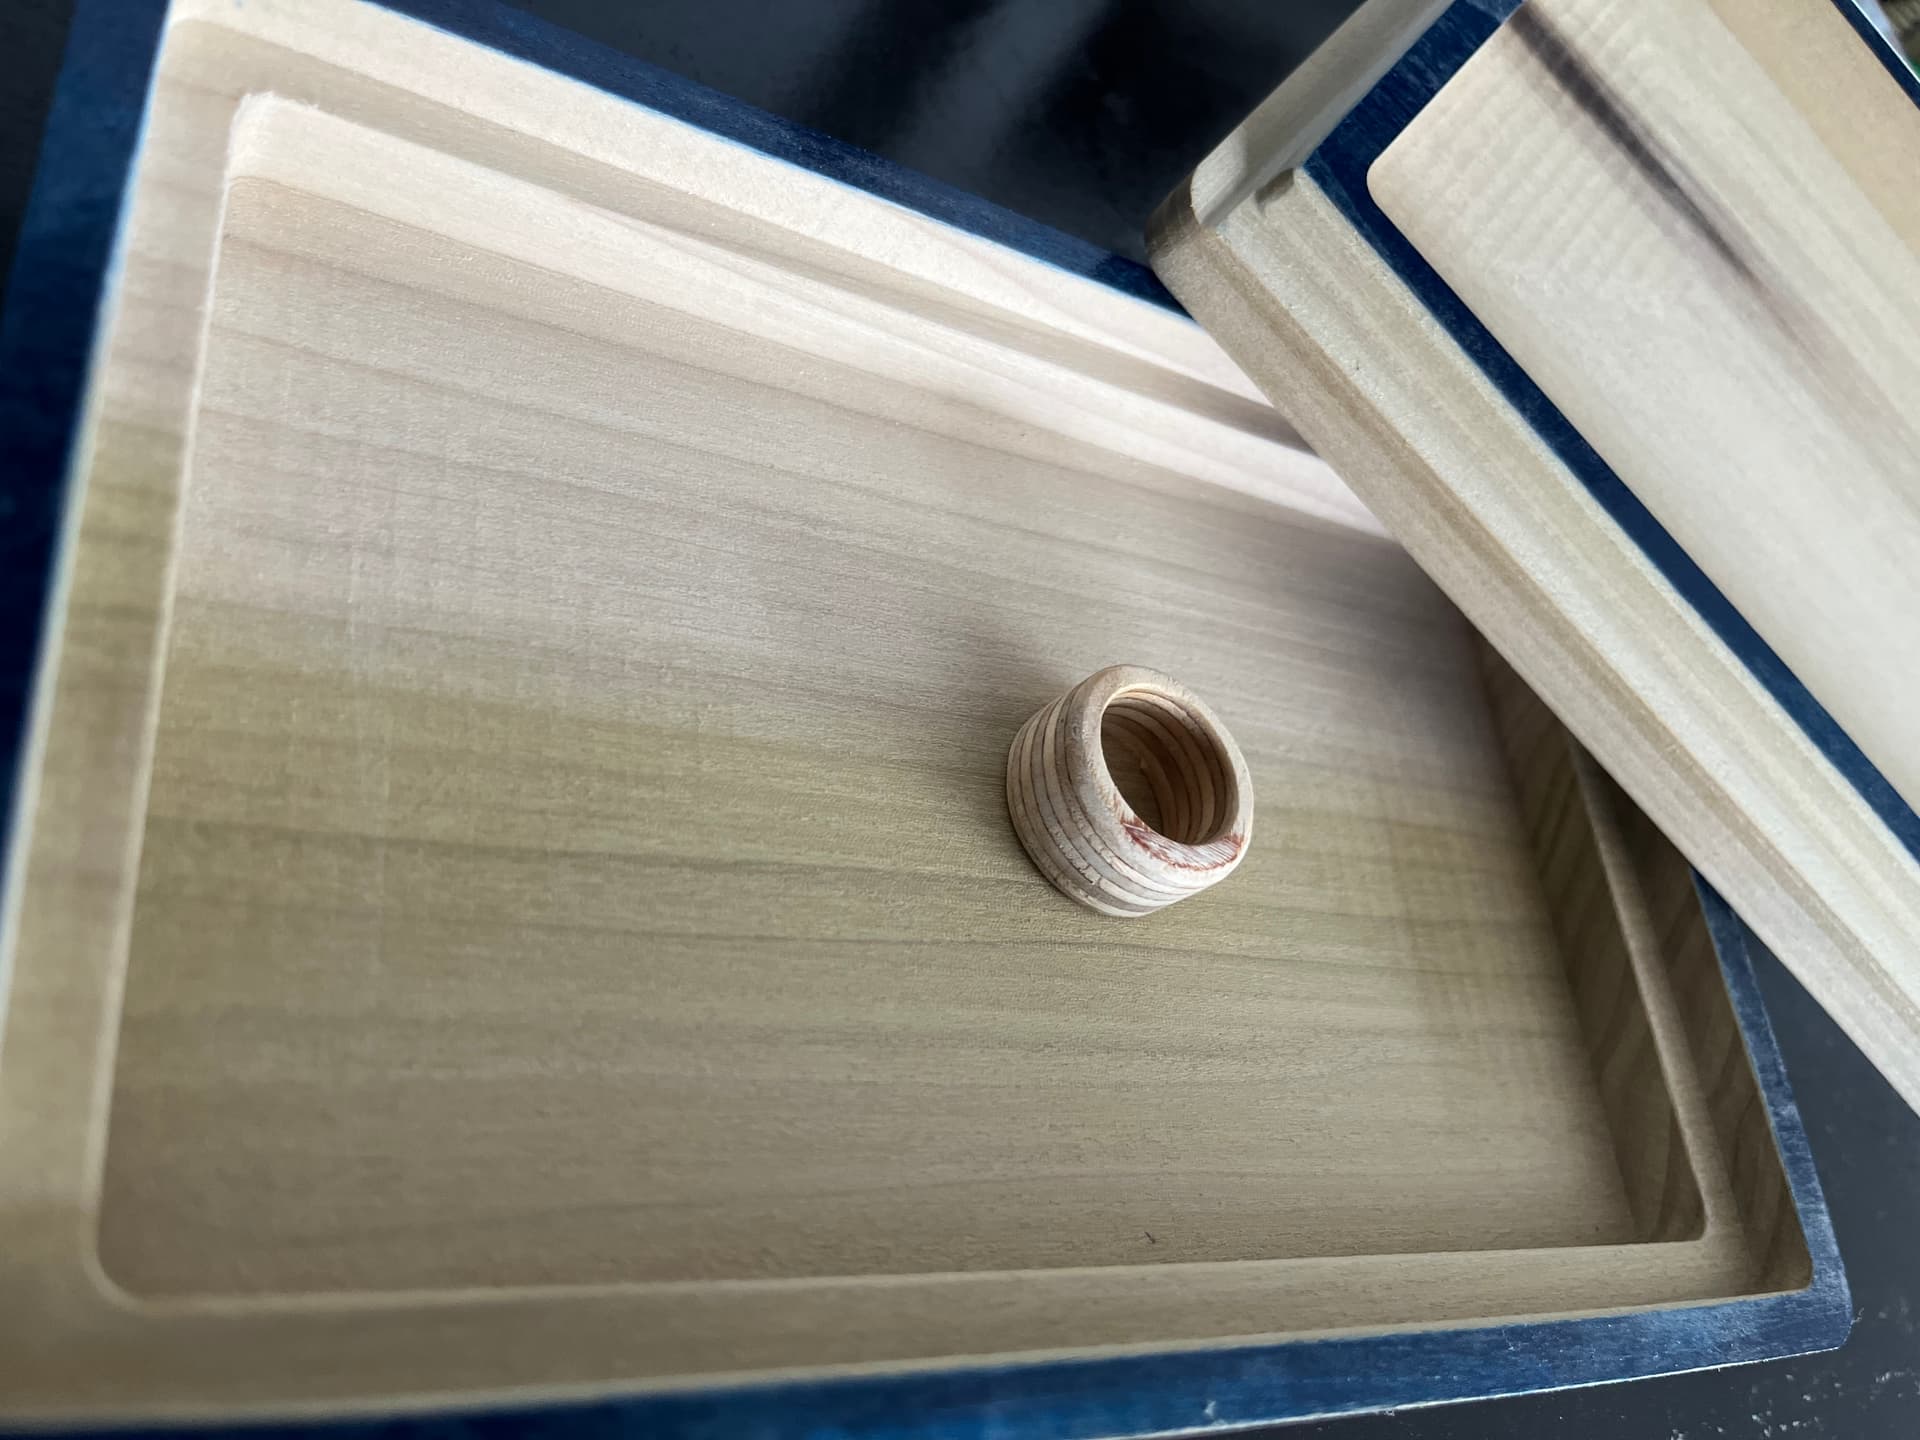
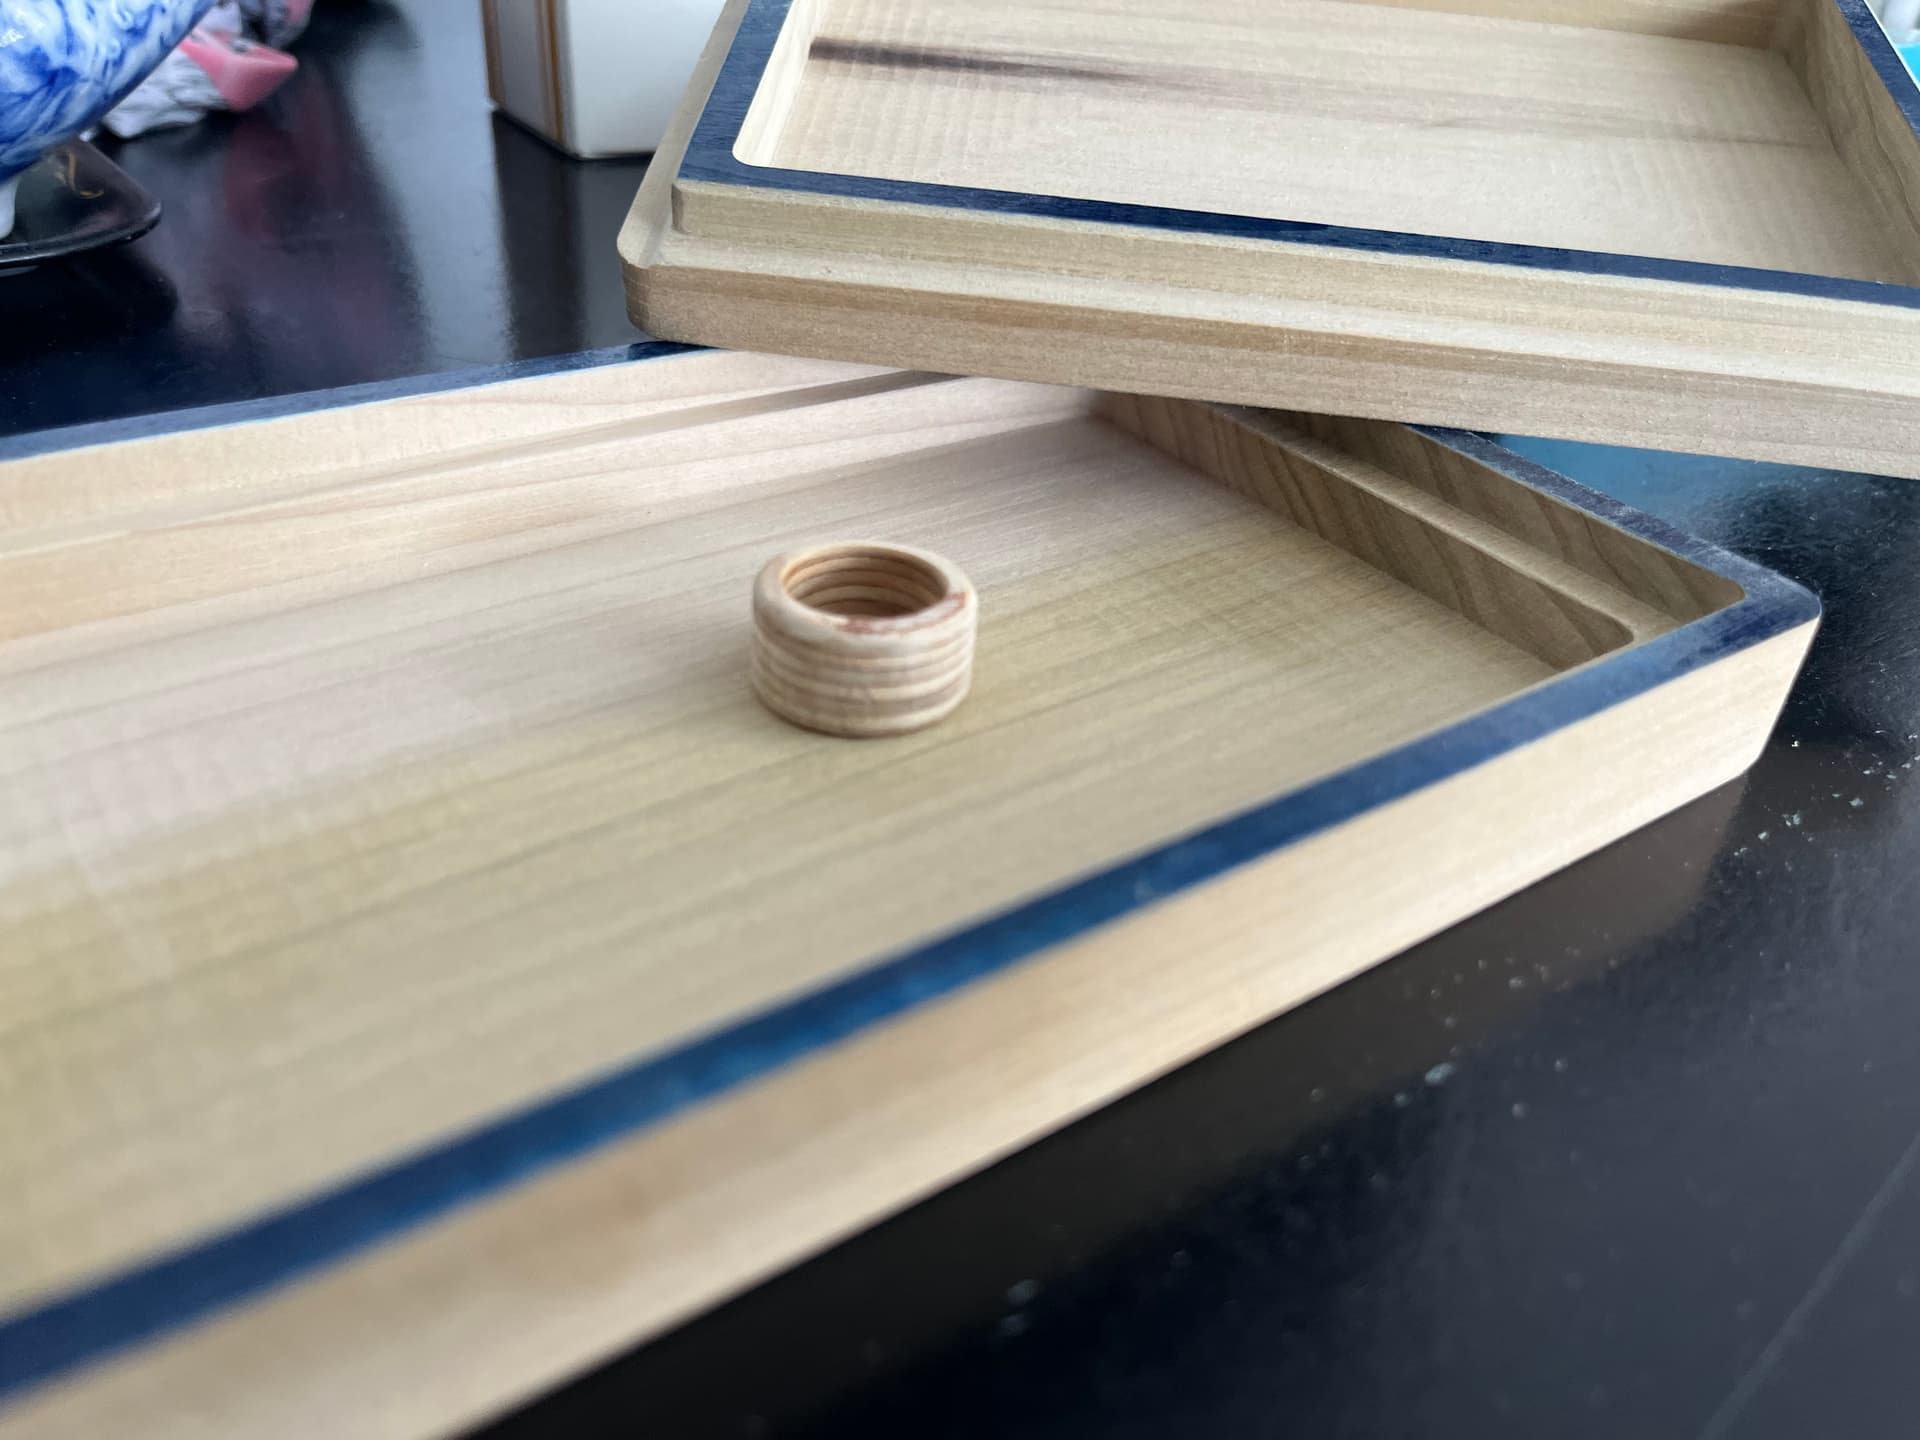
First box I’ve made. It now belongs to my wife of 20 years! And yes, that is a ring cut from plywood…
I apologise mentioning this for such a sweet gift, but I think you forgot leap years in your calculations…
I know… overly pedantic… but as a guide for next year’s box, a year is 365.2425 days or thereabouts. The relative increase for the other units will be welcomed next year, I’m sure ![]()
This response is a classic example of why engineers don’t get dates. ![]()
![]()
![]()
(just kidding Gerry… ![]() )
)
I blame Hallmark! ![]()
![]()
I actually looked up 20yr anniversary quotes and didn’t even think about the leap years… oh well, she didn’t notice!!
After 20 years (we’ve got to 50 years), no one’s counting!
PS. At least you didn’t carve all that in stone! ![]()