I turned my HDM into a lathe to surface my surfacer ![]()

16 Likes
Kids names? Kids and cats names? ![]()
Well done!
1 Like
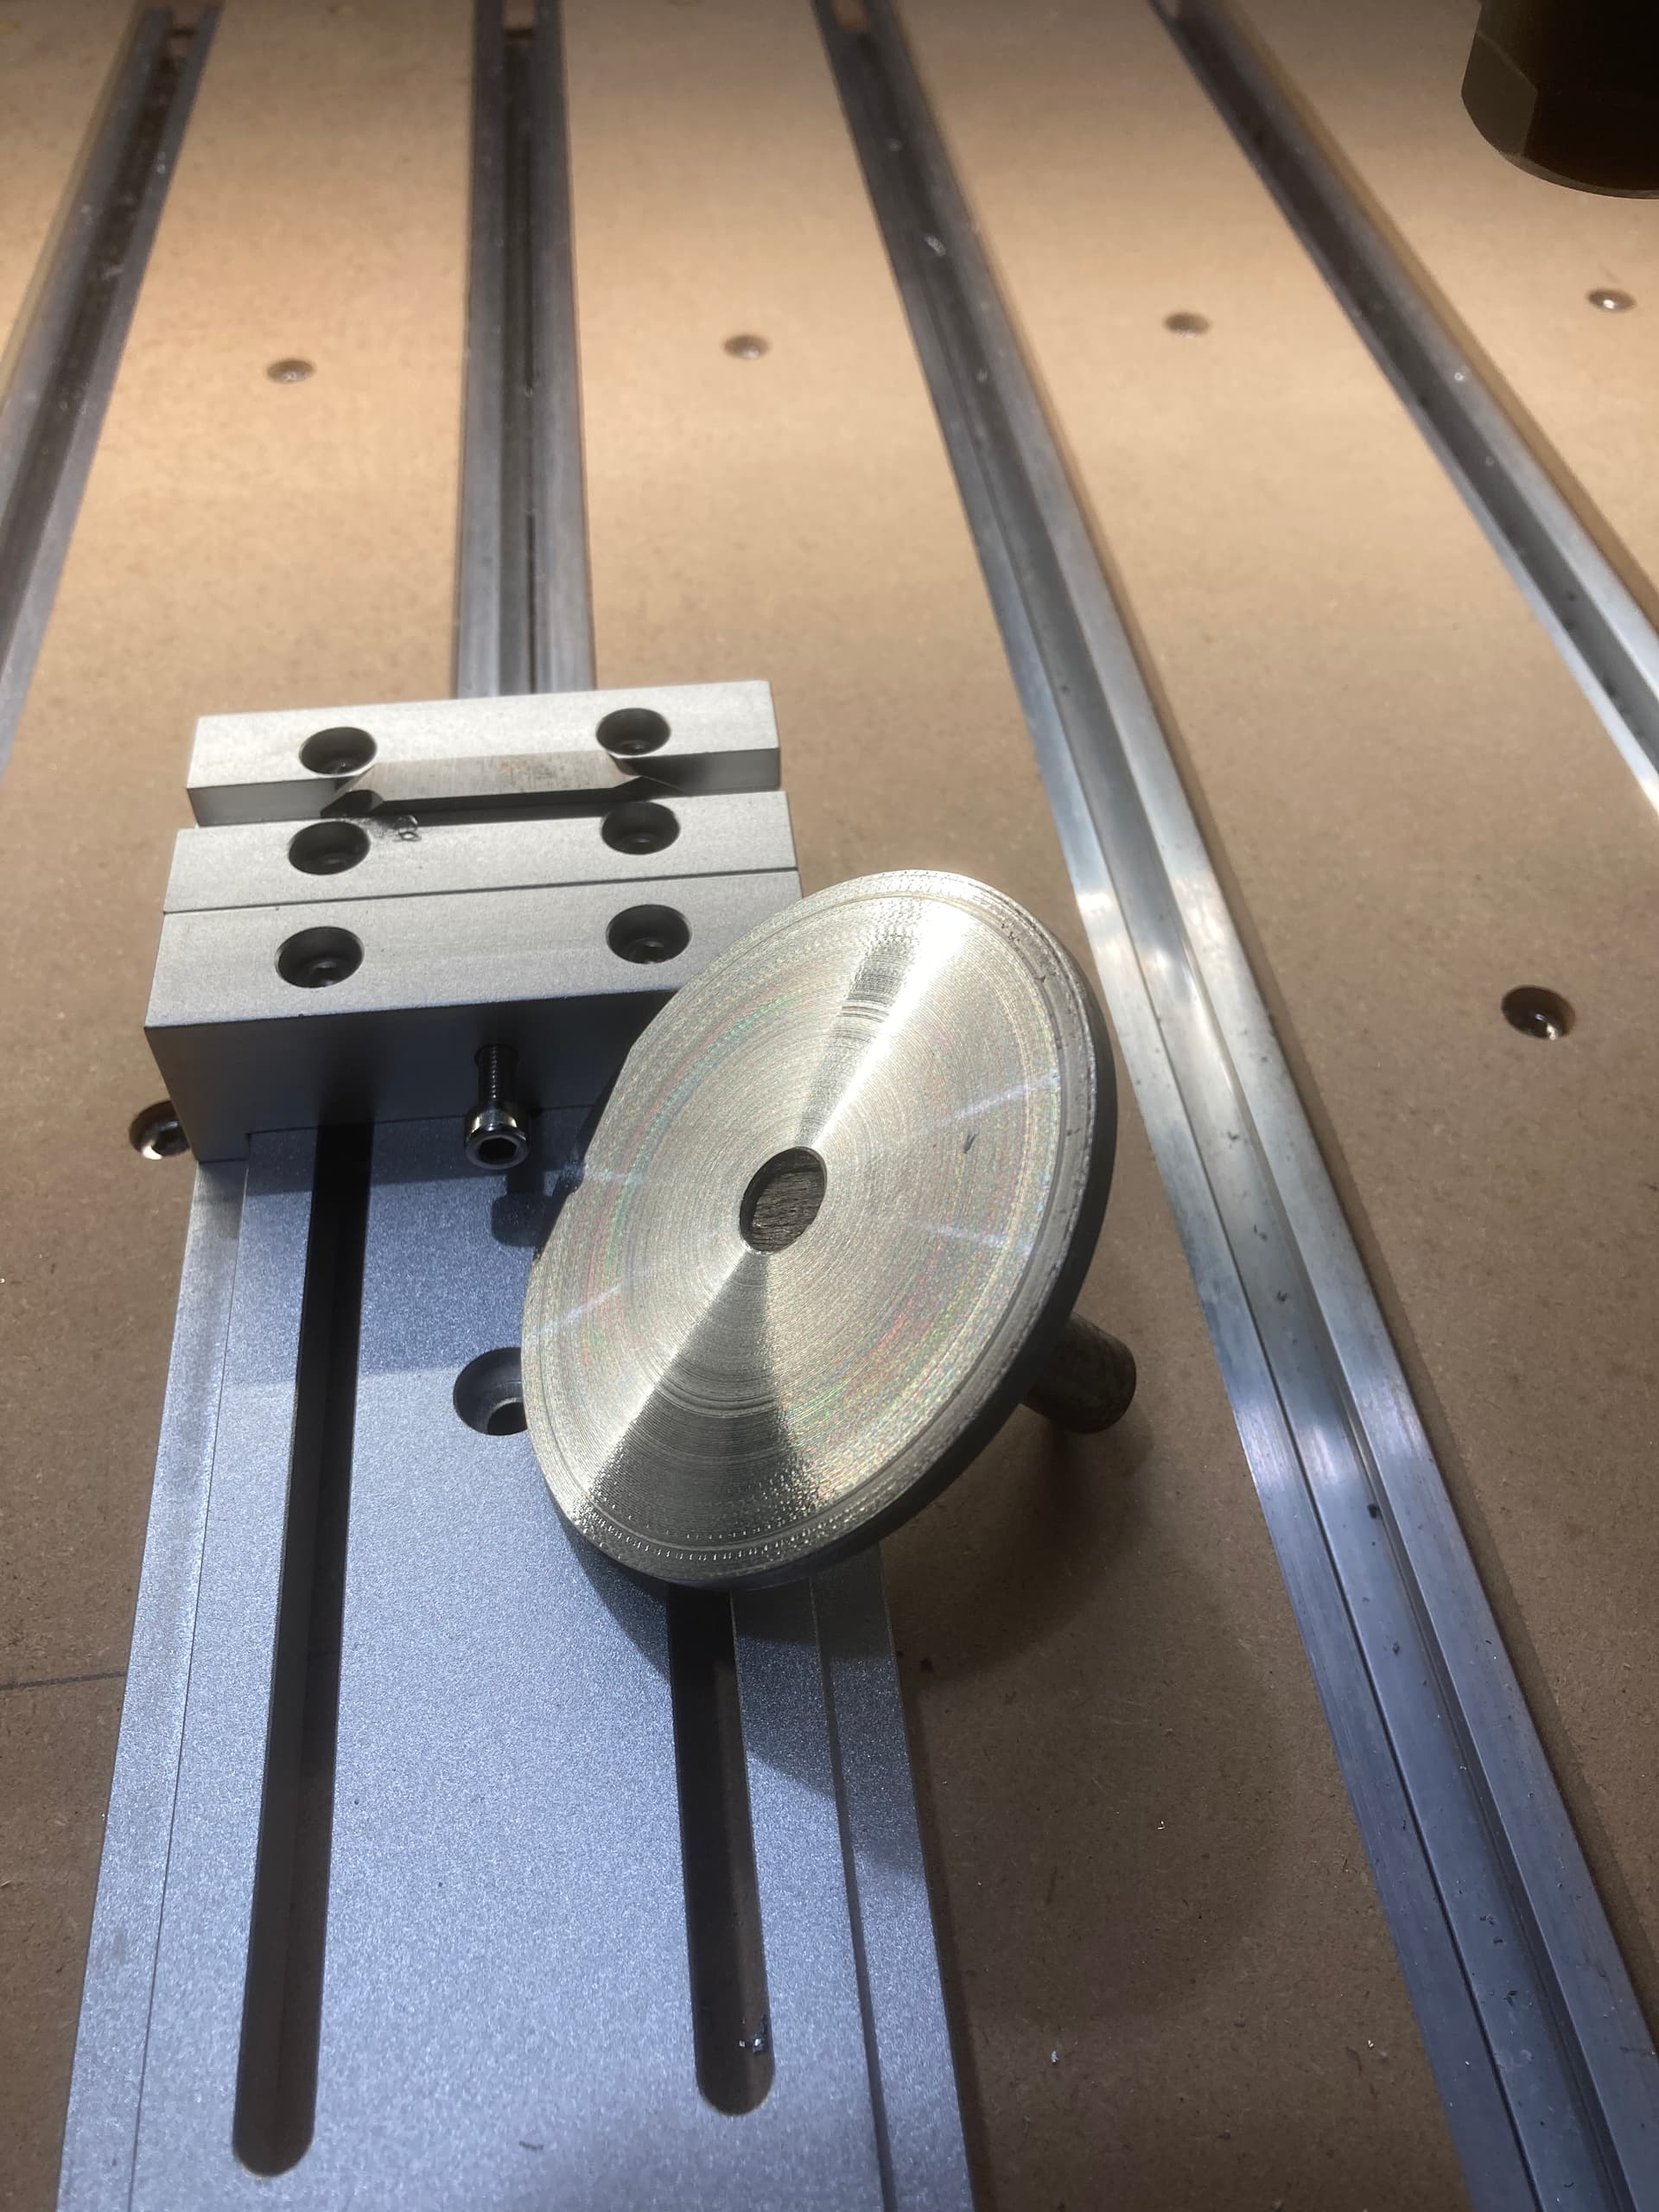
They certainly are. Although I already plan to modify mine. It only has one clamping screw in the center. I’ll drill & tap a couple holes on either side to help with parallel clamping. And I already stripped one of the tiny little ‘T’ nuts & replaced it.
But for cheap, it works great.
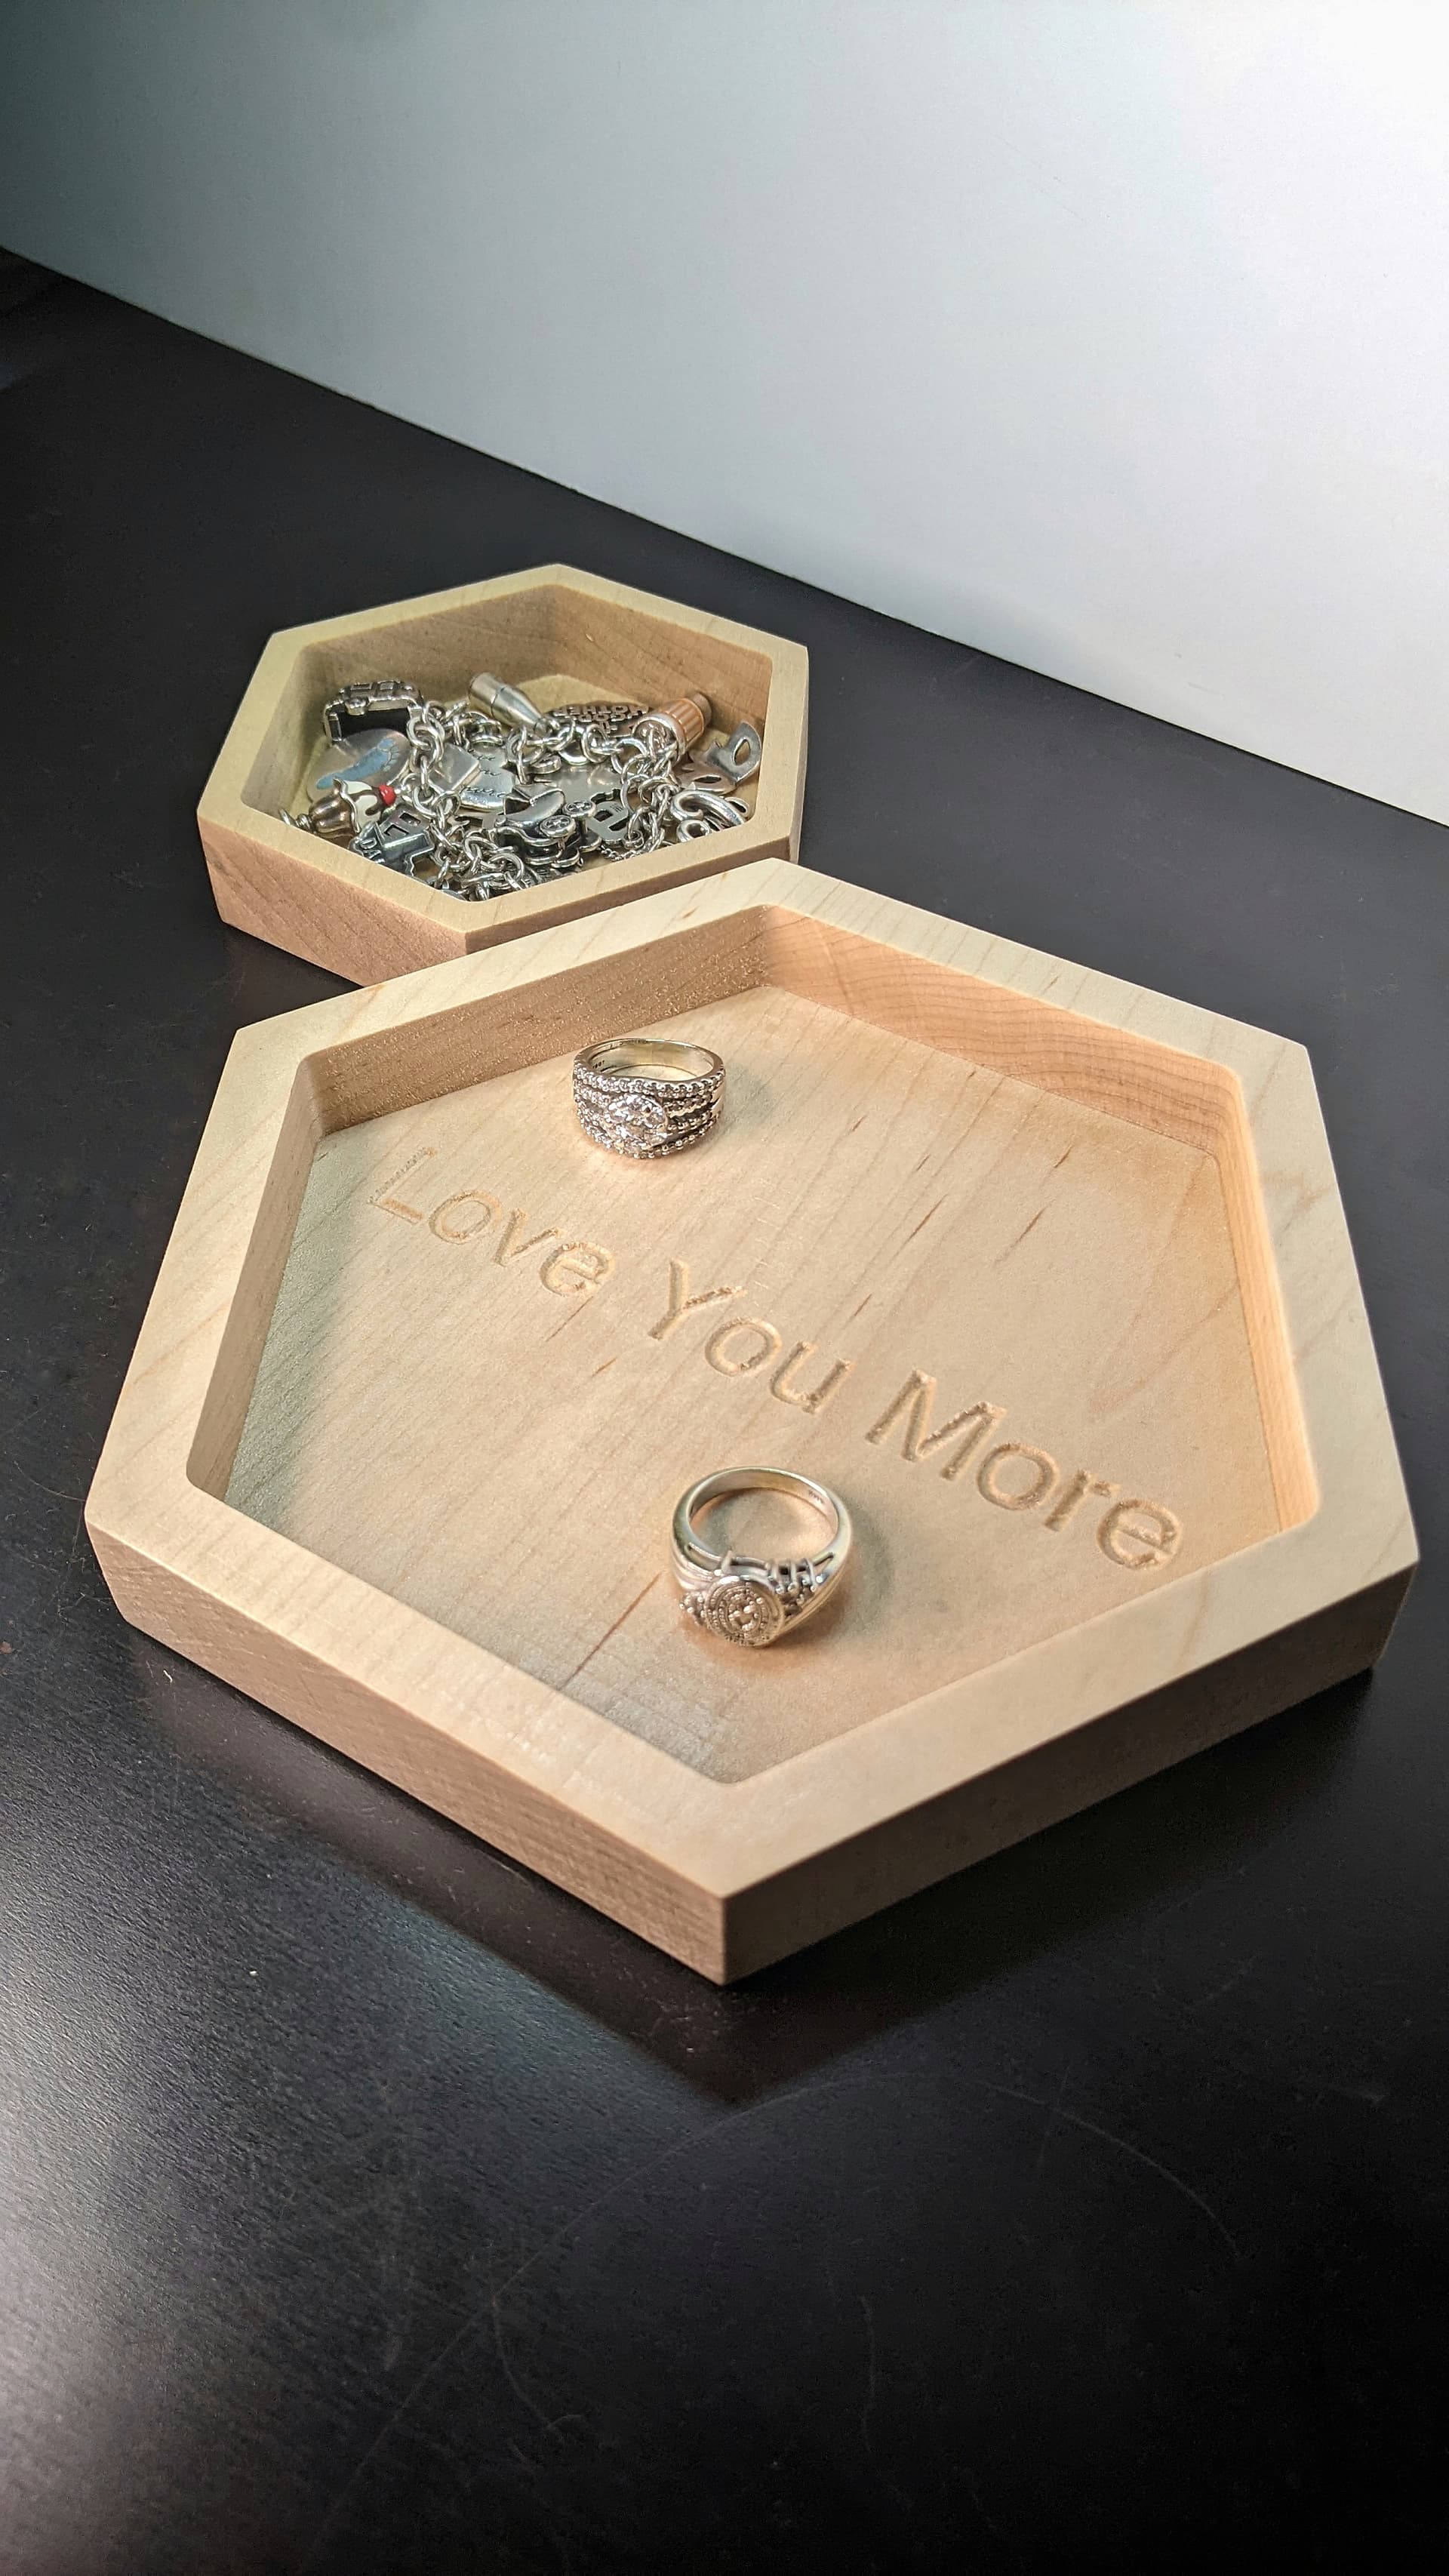
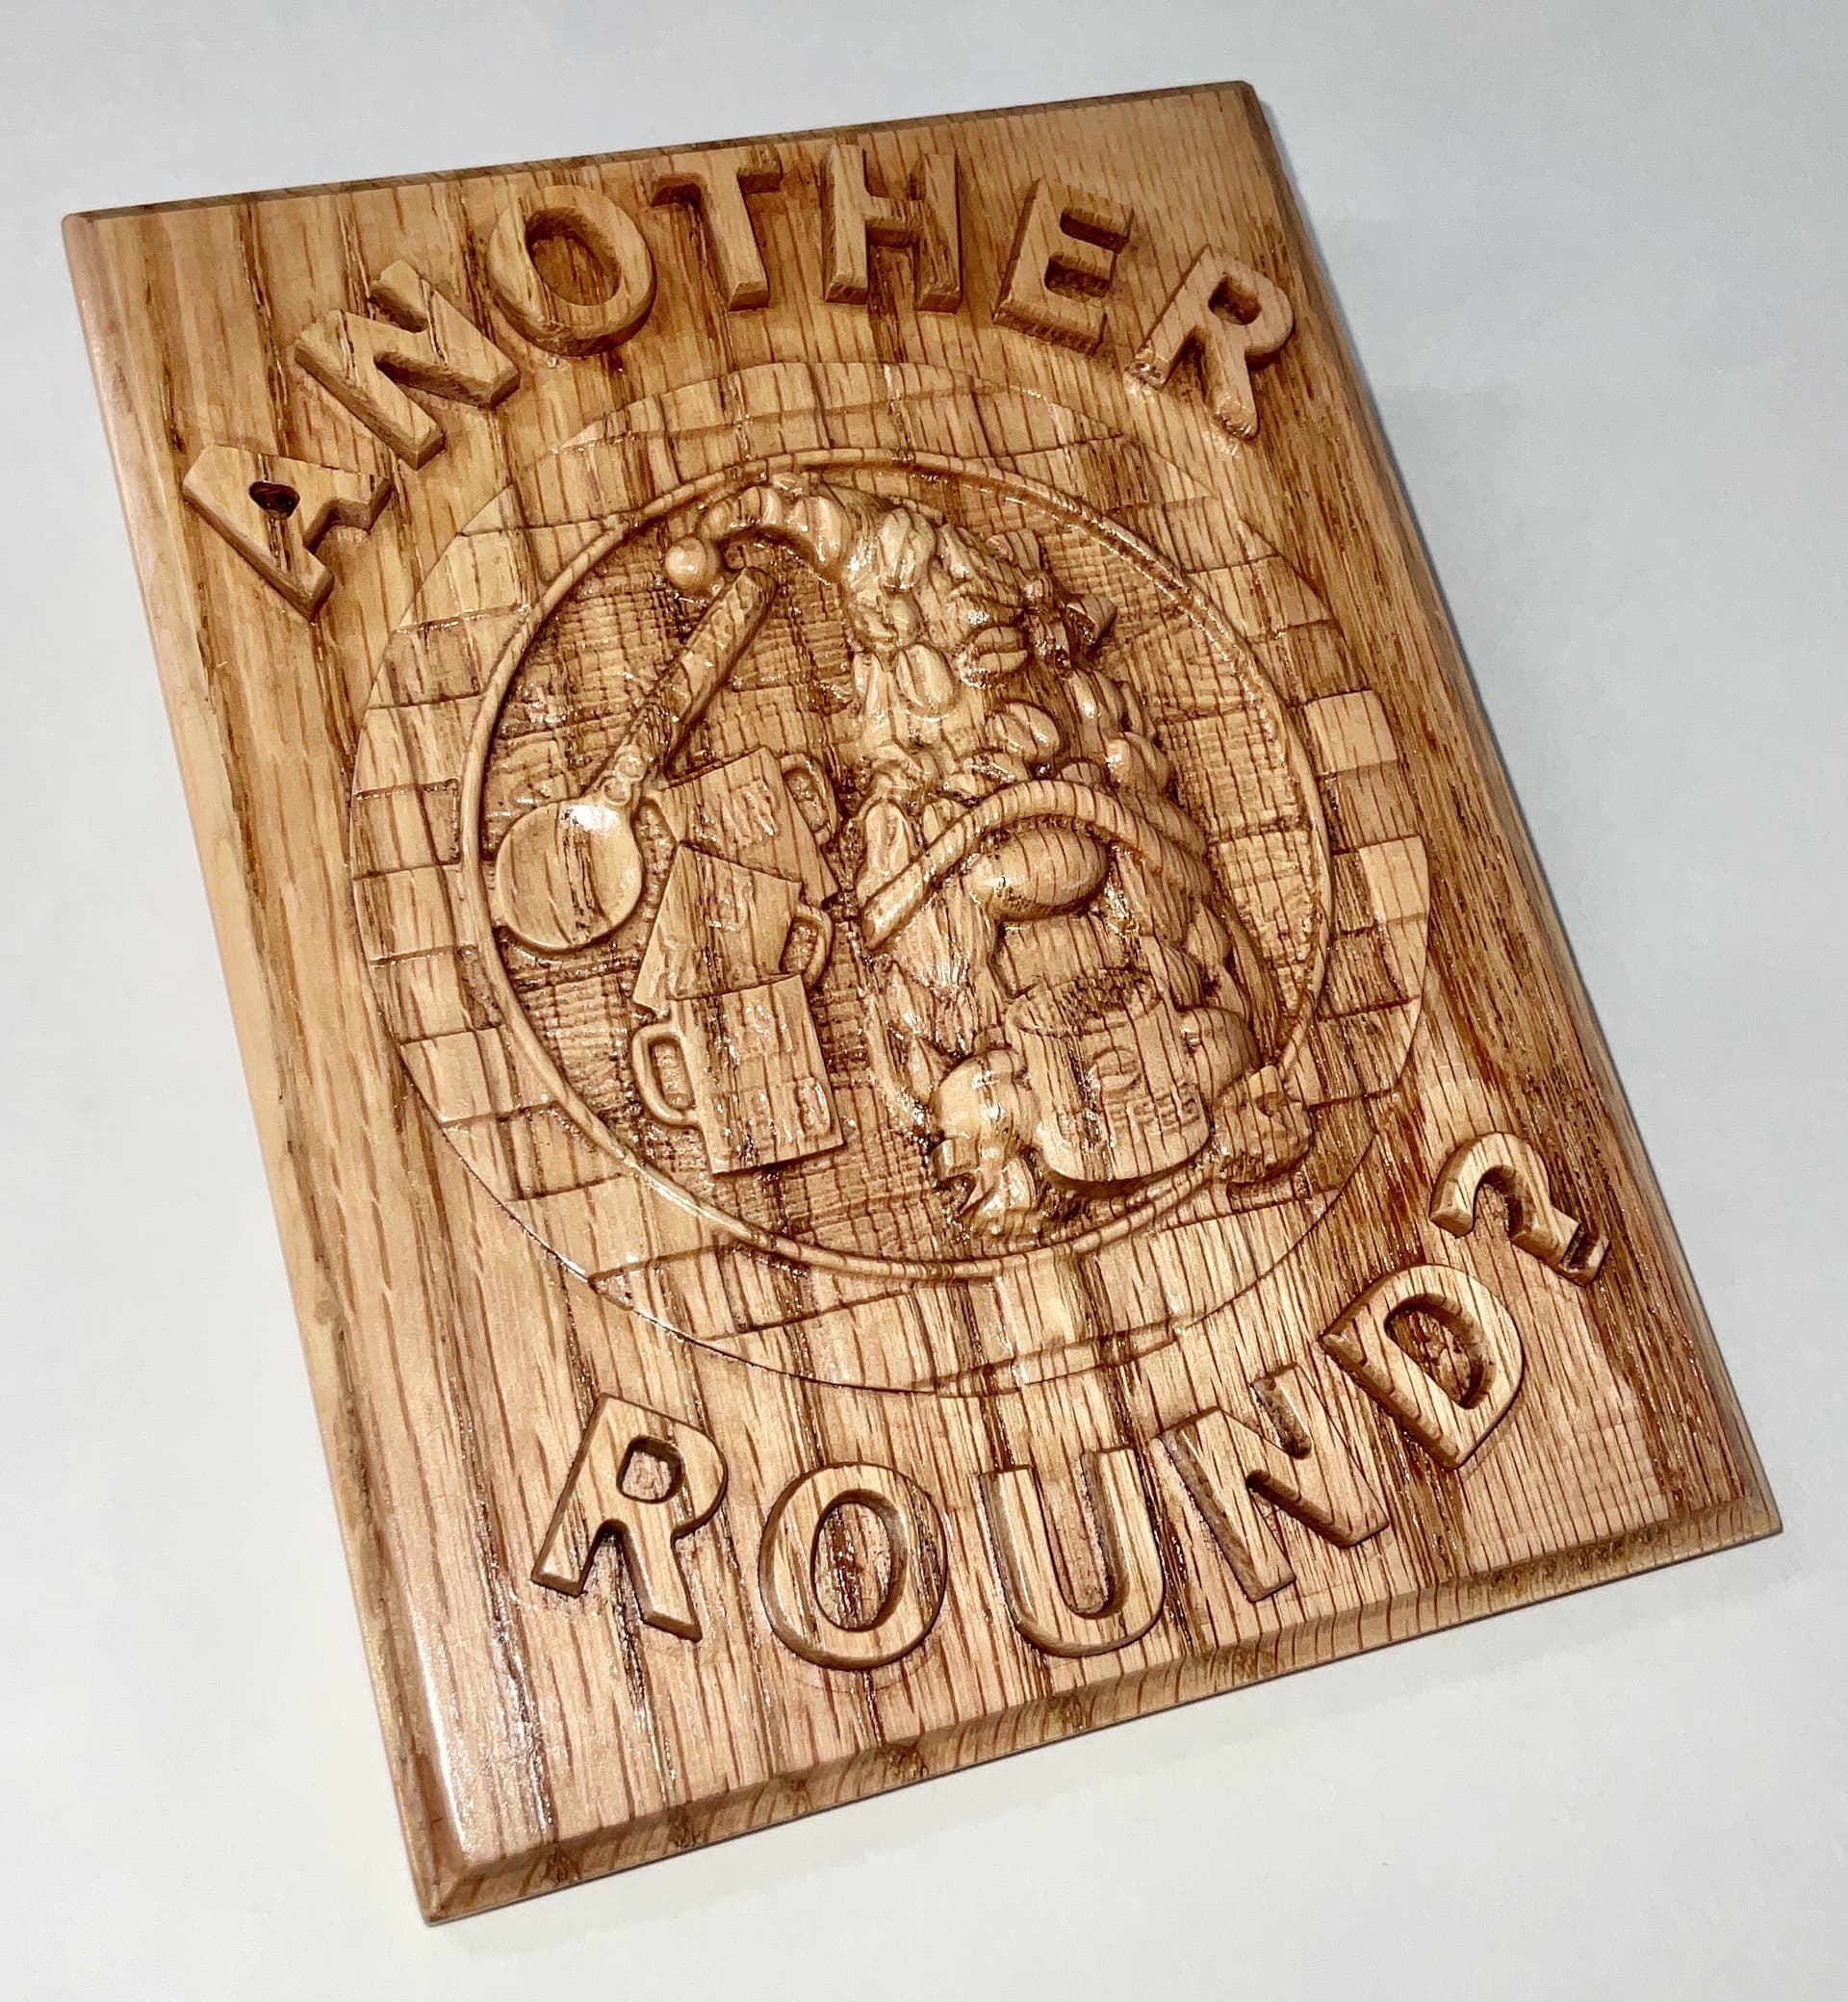
Mother’s day gift for the wife. Thanks to everyone on here that helped me with the process, this was my official first project on my CNC.
15 Likes
Following the “hexagons are the bestagons” theme I see. Always great to see first projects.
1 Like
So, I was wondering about max resolution I could get from Sapele cutting small, detailed designs.
I found a stl on Etsy that struck my fancy,

imported into VCarvePro, scaled to 2 3/4” and set up two 3D Finish tool paths.
First used a tapered ballnose from Jerray (Amazon) 1/4” shaft, 3.9 degree tip, diameter .04”. 2nd path utilized another tapered ballnose, also from Jerray, 1/8” shaft, 5.09 degree tip, diameter .0098”.
Not too bad, if you look close you can see the antenna of the praying mantis on the Wizards left mustachio. The ‘shrooms and weeds look pretty good too. For no particular reason the figure is inset O.6”. The first toolpath was full depth running at 150ipm. The second utilized a stepover of .002” to bring out the detail. It took about 2.5 hours to complete.
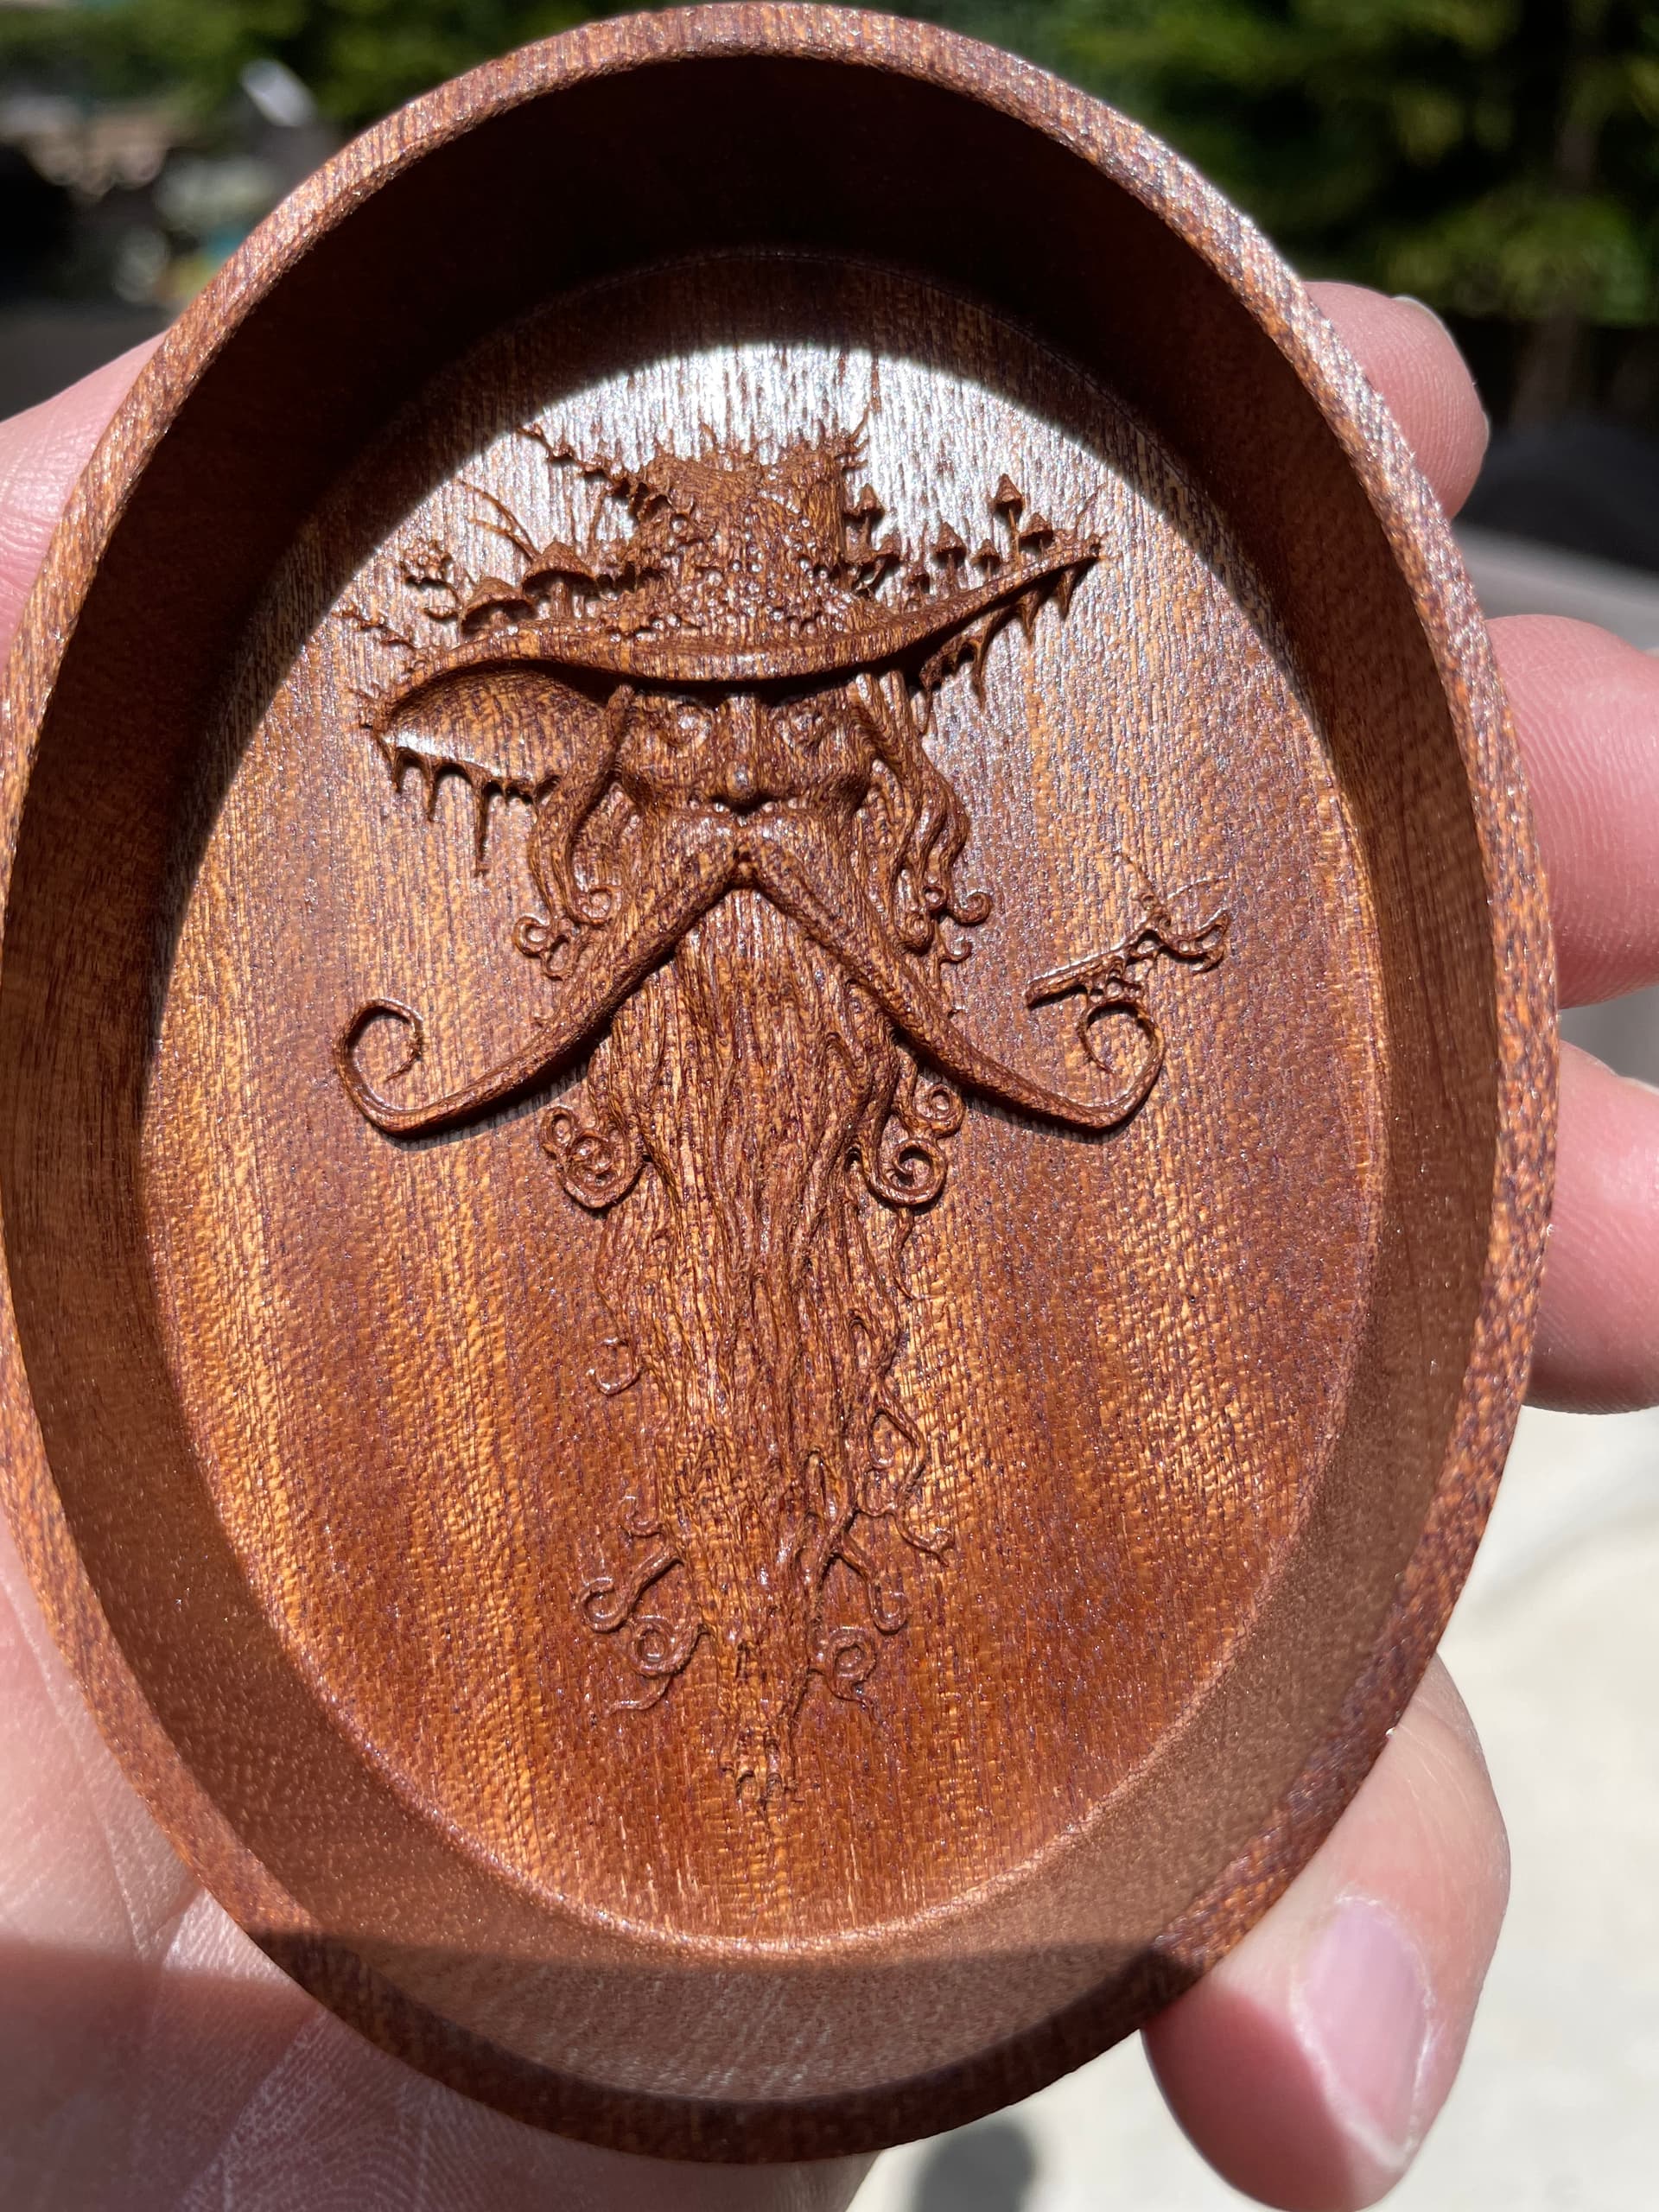
Think I’ll shrink it down a bit and try another. See I can optimize the time too.
33 Likes
Griff, you captured most, if not all, of the detail. I’ve done one like that, but the grain of the wood kind of masked some of the detail. I wanted to try purpleheart to see if the hardness and grain help.
+1
1 Like
I bet purple heart would work well, nice tight/even grain. Show us what you come up with.
1 Like
Here’s one that grossly shows the grain in red oak obfuscating the details. Finished with a simple shellac and poly finish.
I used a pair of 1/32" and 1/16" tapered ball nose bits on that one. Had to give it away and remake.
15 Likes
It still looks pretty good from where I’m standing.
I have so much red and white oak, do you have any preferred use cases since the grain can be problematic?
Maybe try making the center part from walnut or sapele or maple then inlay into the plaque? I’ve made a few things like that, nice contrast between the woods and good detail in the carve. Plus, you can inlay to match the surface, below surface or proud of surface.
2 Likes
I use the red oak typically for vcarving lettered signs and laser burning.
In this case, I thought it would be better to hold the raised lettering without chipping them out. And so it did, but it would have looked better if I had painted it! ![]()
1 Like
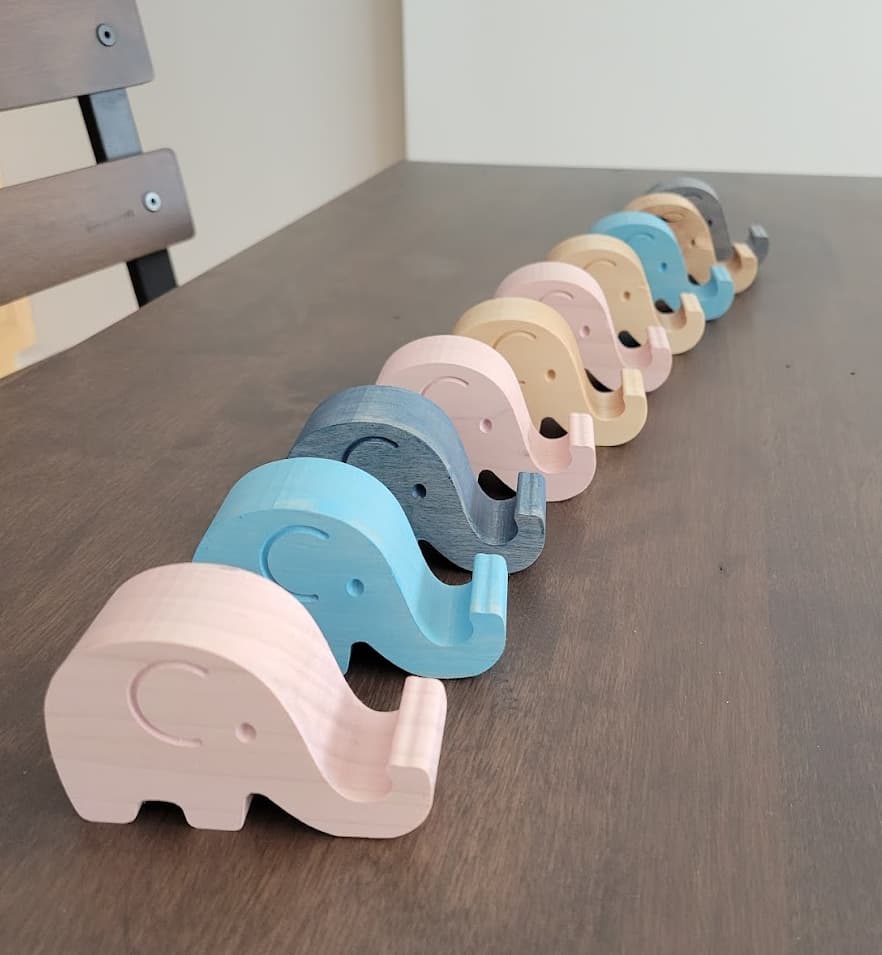
Cell phone holders in maple with various stain/finishes.
New spindle is great so far!
No disconnects despite the visible static, which is another point for the camp I sit in (static != EMI)
13 Likes
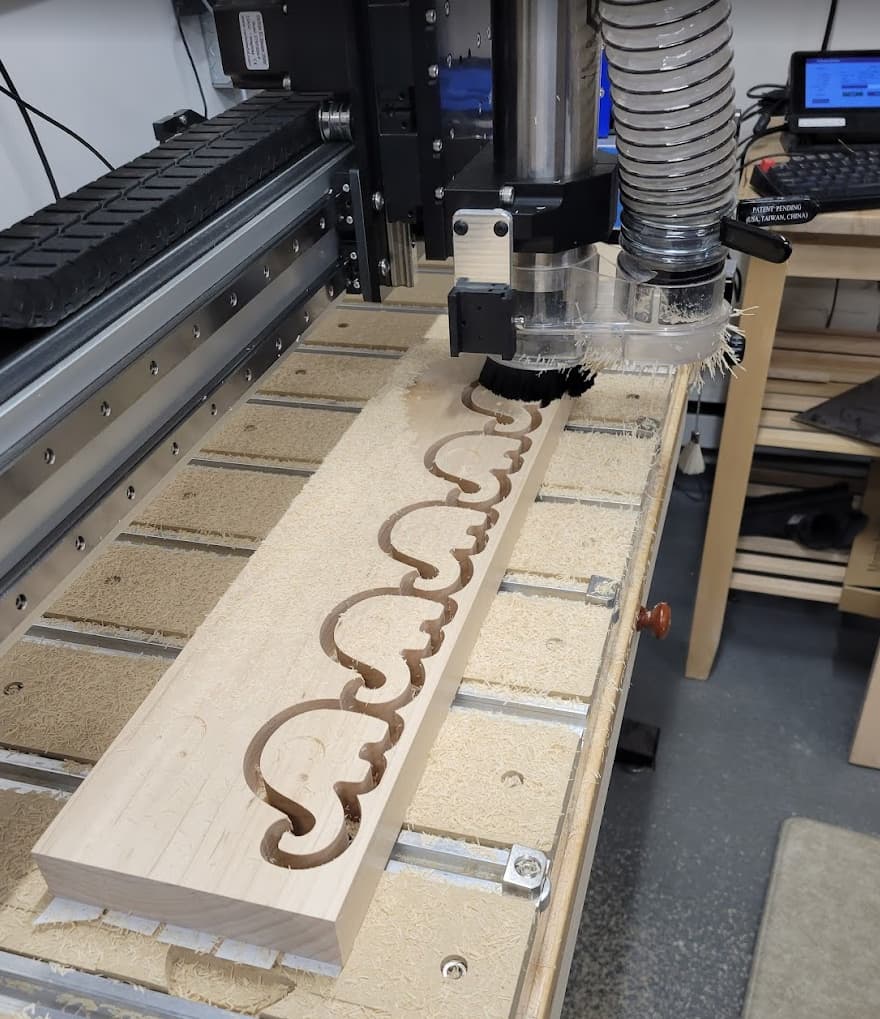
Neat! Couldn’t you space them more closely by alternately rotating them 180 degrees?
1 Like
I think so. I wanted to first get this proven before optimizing. I’ve had issues in the past, some tense moments ![]() Next will be optimizing the layout to reduce wastage. Could maybe nest the trunks.
Next will be optimizing the layout to reduce wastage. Could maybe nest the trunks.
I’ll try to upload this to cutrocket for fun!
1 Like
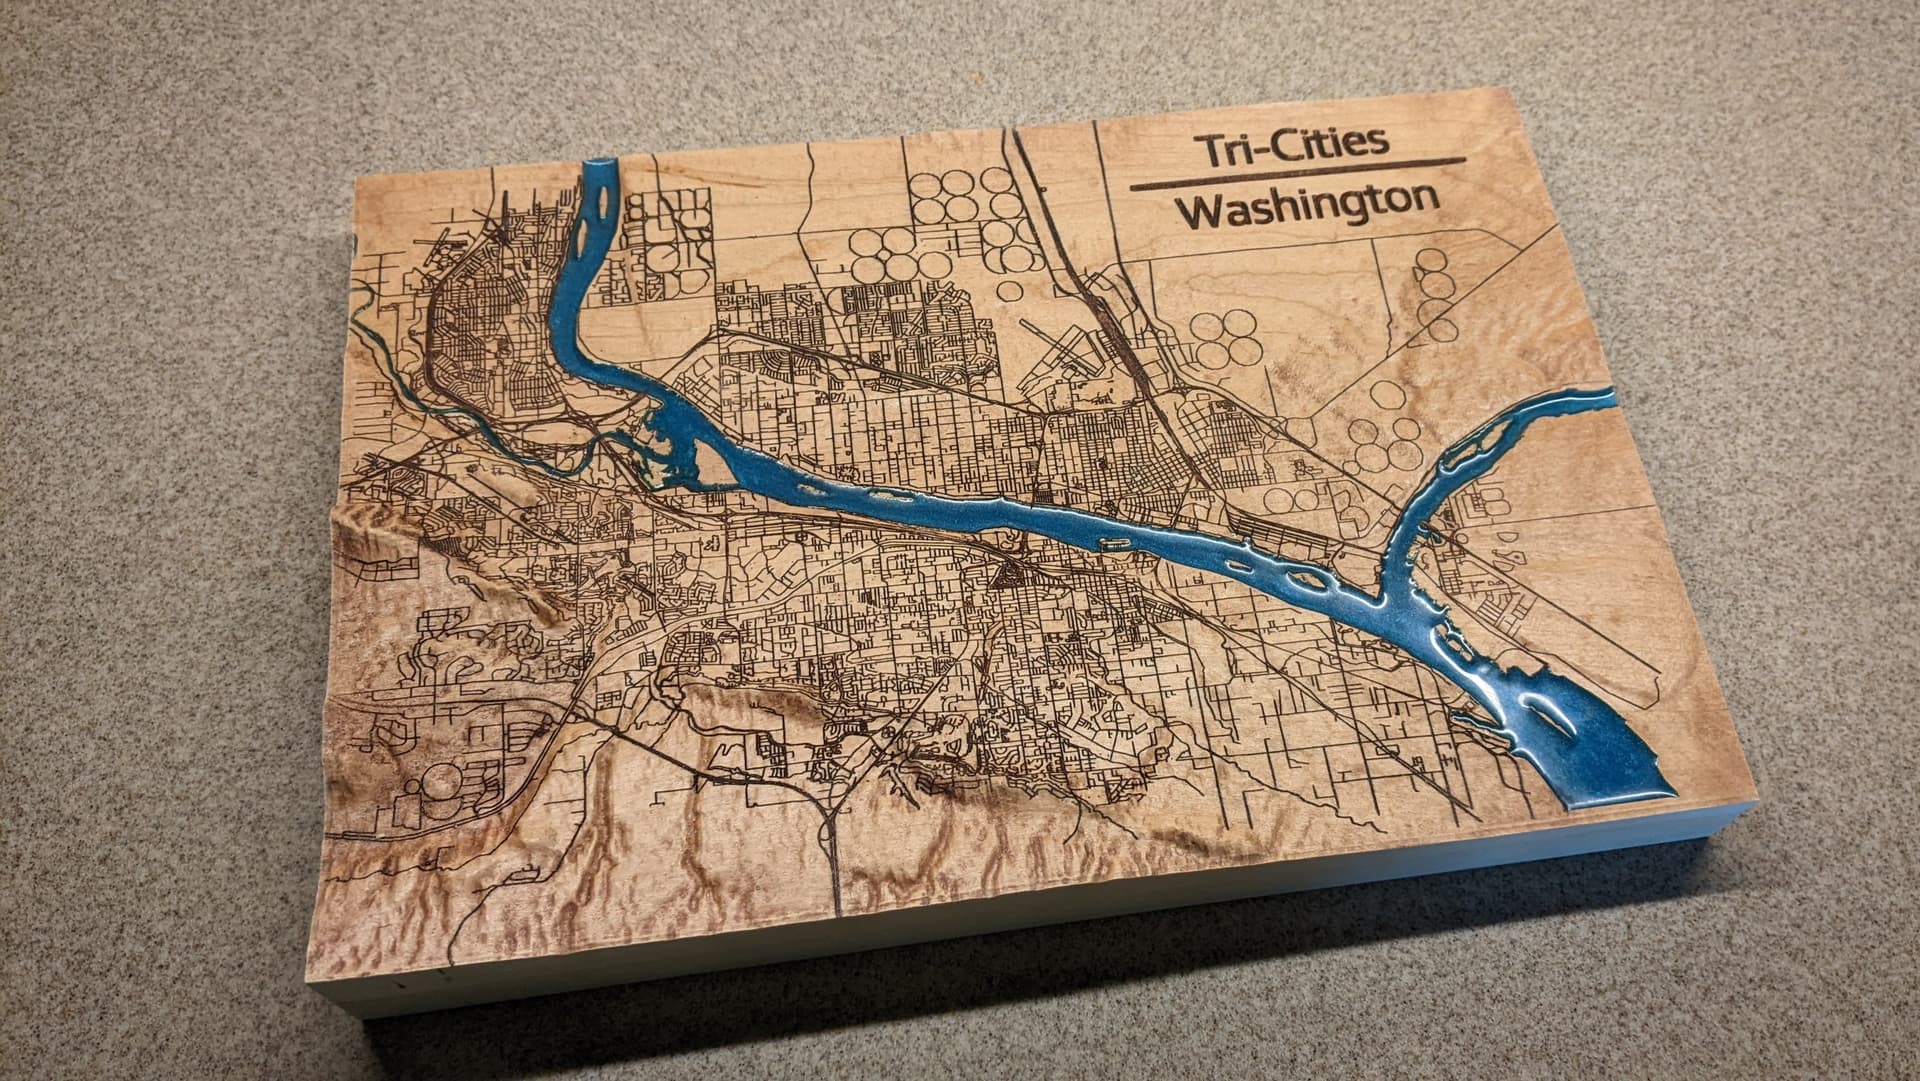
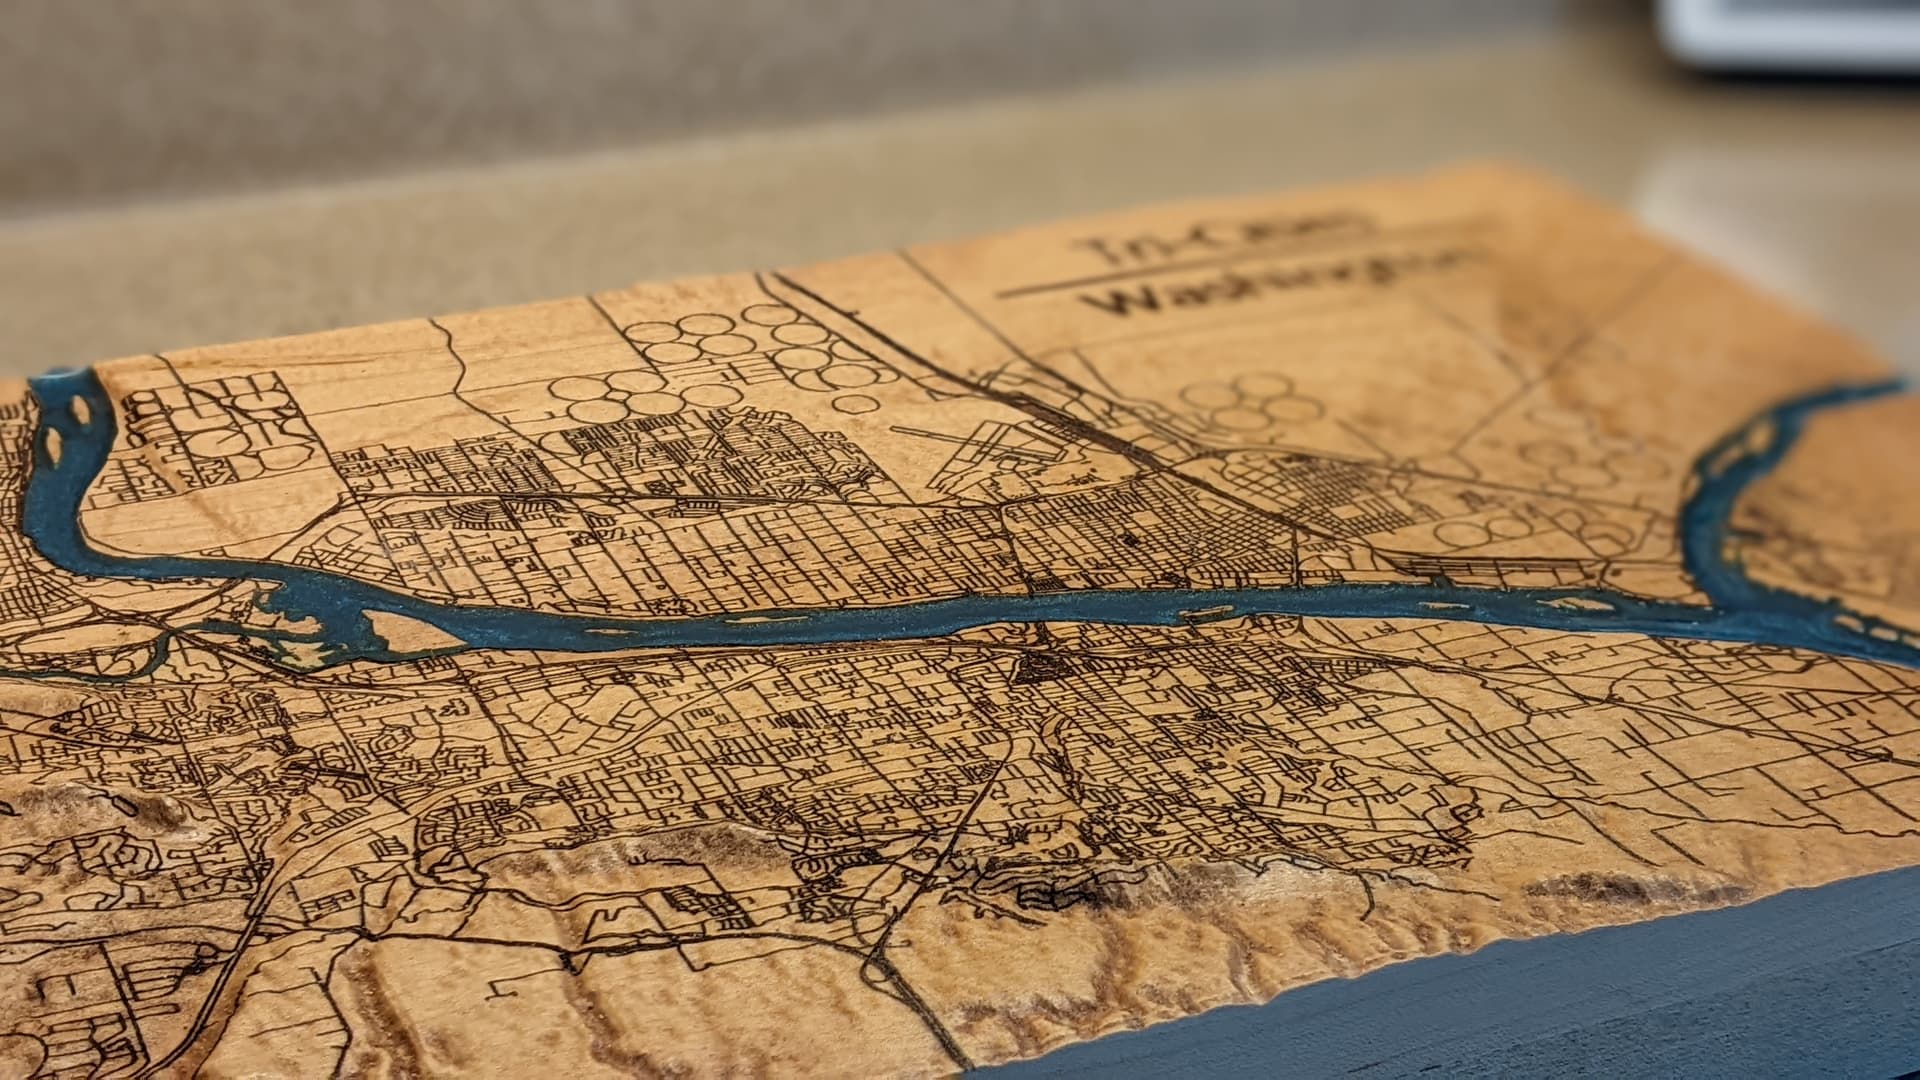
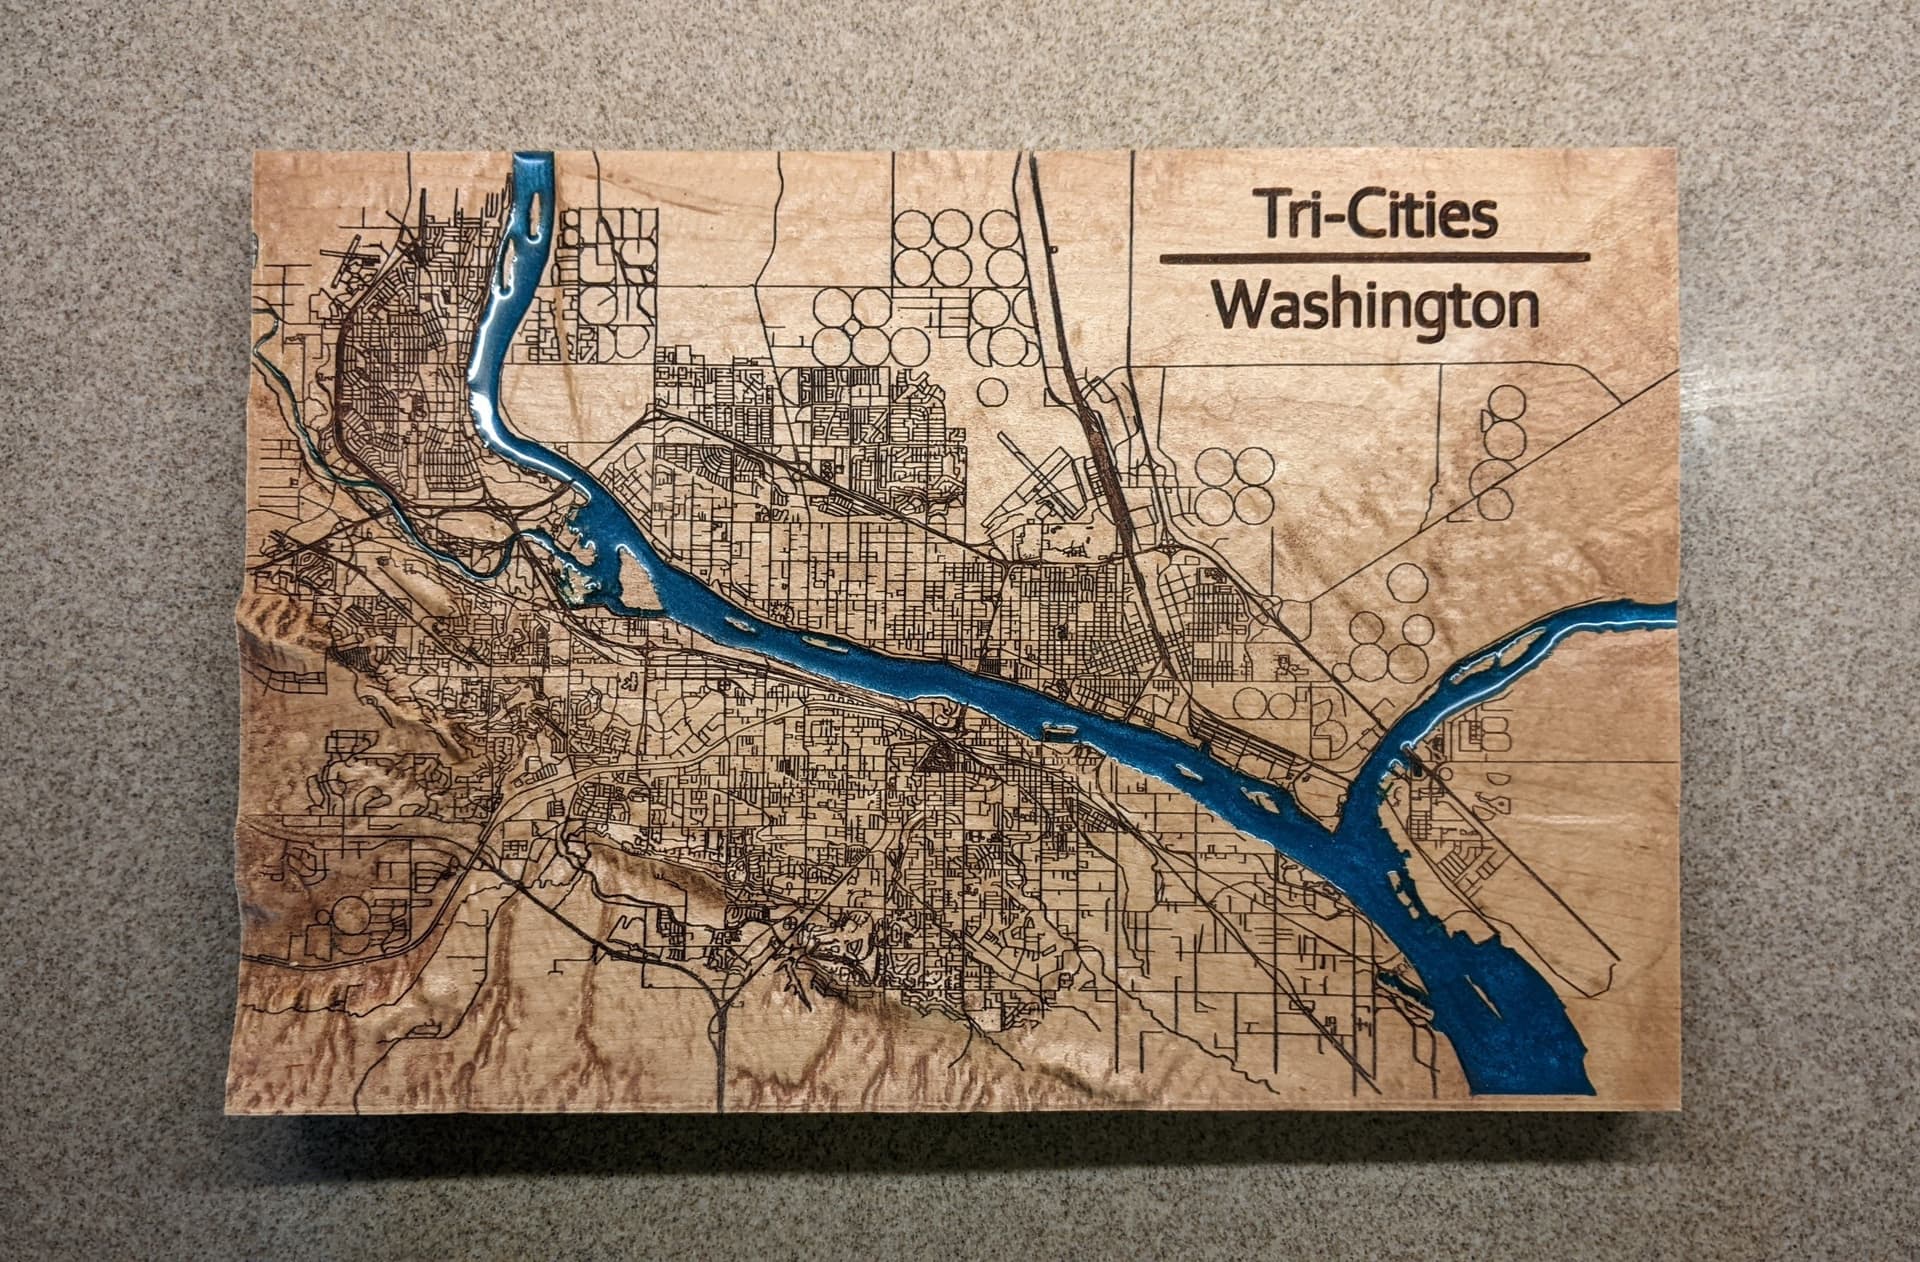
I finally finished this multi-day project which had many design hours in it as well. I created a relief map and added a layer of streets. This is where I live. I used VCarve. 11 x 16" maple. I did a rough and fine relief cut with .25 in endmill and .125 ball nose end mill. Then I did several coats of lacquer. Poured resin. Continued with the streets with a 30 degree vbit with a depth of 0.02 in. I ended up adding 2 pieces of paper under my piece to create an added depth to safely adjust the depth of the street cut. Once finished with all the machining I added a dark stain and then quickly rubbed off. The stain took well to the cuts and wiped off easily due to the lacquer finish.
29 Likes
It is hard to tell in the picture but did you over fill the river and surface or just pour enough to fill the trench? The lights show like the river is slightly U shaped.
Nice Work.
I used OpenStreetMap.org for the vector file for the roads which also had the rivers as well. I had to join a bunch of open vectors to get a closed vector of the rivers. I did a vcarve using a 30 degree bit with a depth cut of .15 in. I then did the resin pour. I did the resin pour before the doing the cuts for the roads. My next one I will do the resin pour last. This way I don’t have to remove the workpiece from the Shapeoko…The slightest movement of the workpiece can mess up the depth of cut on the roads.
1 Like
Nice. Drive thru there once in a while.