Video shows as private currently.
I’ll fix that hold on.
Try now!
Wires held in by swing tab. Swivels to free up for use.
Nice! That looks great! Well done.
I really need to step up my organization game.
My current strategy of my work area looking like a 3 year old came in and moved stuff and whatnot I don’t think is really working out.
Why do you think I only was showing that small area of my CNC? LOL!
![]()
2 Likes
Organization of your shop is a paramount safety issue. If you leave clutter laying around it is a trip hazard. Leaving tools scattered around is a big time waster. For years I had way too much stuff in my garage shop. Finally I took an ax to all the things that were “good” but not used and got rid those things. I would keep “good” stuff that I was not using. That cluttered up my shop and made it hard and dangerous to move around my shop. Now you dont have to throw the stuff away but move it to a more remote location so you have room to move around without tripping all over everything. If you have not used something for a year you likely wont be needing it in your immediate work area.
You always need to make a safety assessment of your work area periodically. Where have you placed your fire extinguishers and first aid kit. If you need either of those things you dont want to be hunting for them when REALLY needing them. What is your escape route if required. Do you run into the house or open the garage door or WHAT? You have to think about these things before hand and actually practice. Repetition is the key to what you will actually do in an emergency situation. Hopefully you will not need to actually implement escape but you should be prepared.
Do you have volatile chemicals sitting around on your work bench? If you are using them leave them out but if your are through you should put them away and hopefully in a metal cabinet that you can lock to keep little hands out of. Have you swept the floor lately or left large pieces of scrap laying around waiting to trip you.
This may sound like I am preaching but it is really important that you address your safety issues BEFORE it becomes a disaster. Maybe you have a messy shop but it is an accident waiting to happen.
Take care of the shop and it will take care of you. Move unneeded items out and keep your walkways clear and clean. Keep a couple of fire extinguishers around and get a good descent first aid kit hanging where it is easily accessible. The shop is usually a one person operation but be sure you talk to your significant others about where the safety equipment is and where the first aid kit is.
A lot of you are weekend warriors or working at night in your shop. So at the end of your session leave enough time to pick up and tidy your work area. Leaving it will only make it worse when you decide to clean up. Put your tools away and give a little cleaning to your work area.
Everything should have a place and place for everything.
Be safe not sorry!
2 Likes
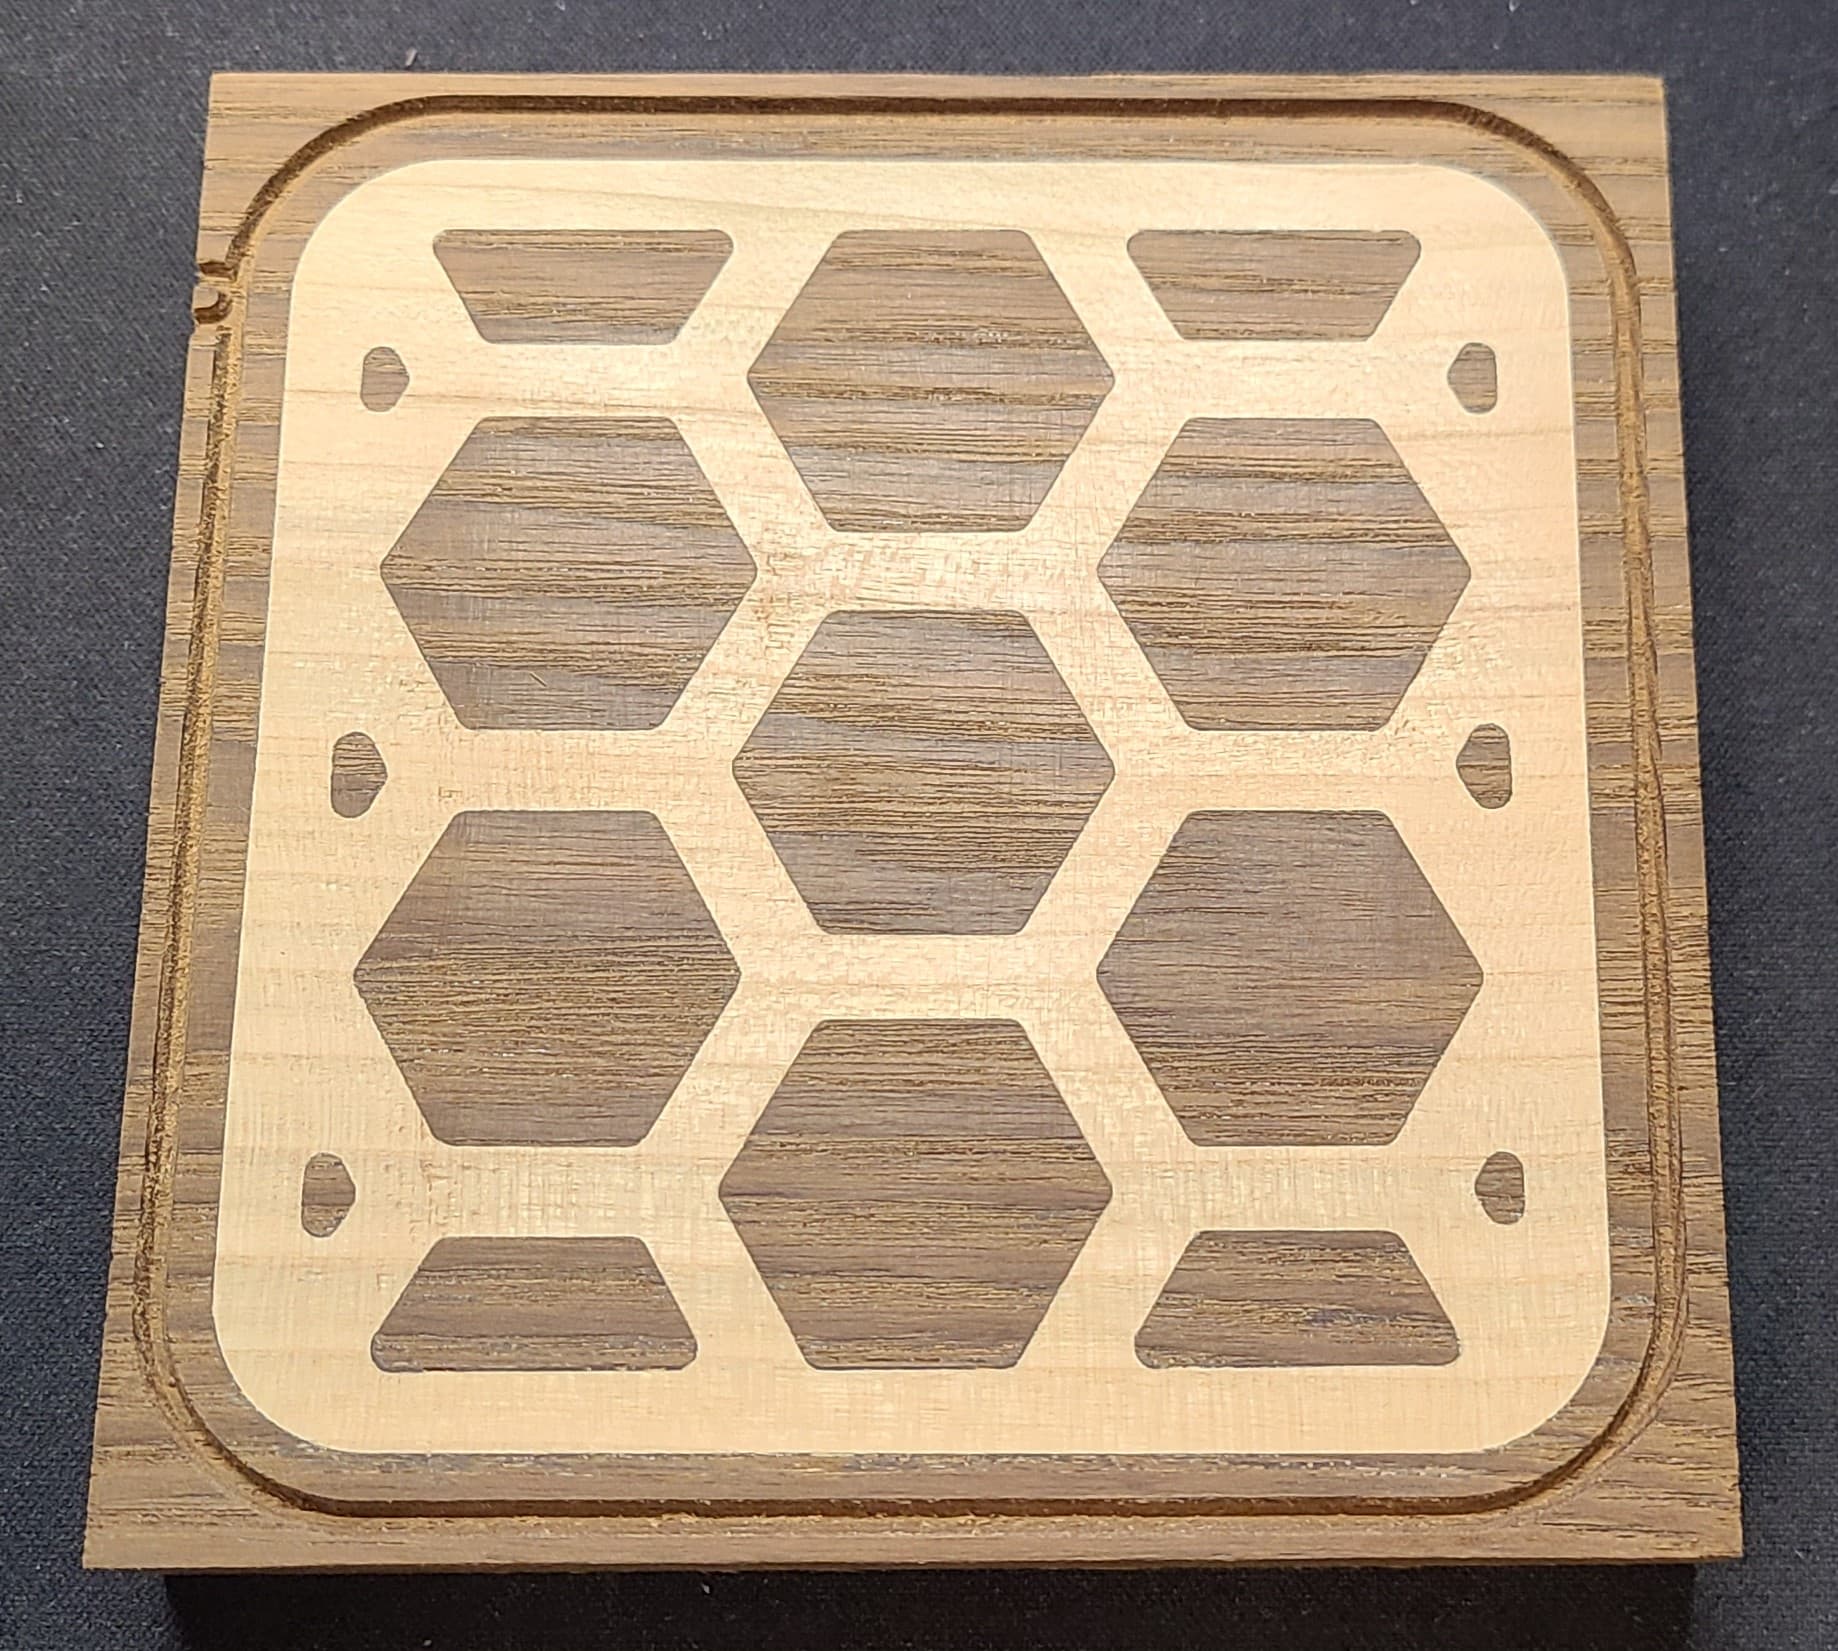
Finished product will eventually be drink coaster but this was a big milestone for me… First attempt at wood inlay done on the CNC. I think I’ll need to adjust the overall depth of the inlay and add a little height for the glue pocket, other than that I am pretty pleased with the outcome. Now let’s see if I can repeat this again or if this was just a lucky first go at it.
20 Likes
Really nice job on your first inlay, something to be proud of!
I wonder about this [quote=“Caffein8ted, post:1422, topic:31274”]
glue pocket
[/quote] though.
The glue pocket mentioned in virtually all the inlay tutorials is something that has always puzzled me, a longtime woodworker and glue user.
Glue, by itself, has very little strength and is a poor gap filler given that it shrinks. So why, when one is capable of making highly accurate repeatable cuts with a CNC would one purposely undersize a piece in order to create what will result in a void beneath it when the glue fully cures?
This is just me wondering and is by no means a criticism.
4 Likes
100% agree with this comment and when I say glue pocket I’m talking about 0.5mm. I thought the benefit was when gluing and clamping it would allow a little more wiggle room make sure ample pressure is applied against the 60 degree side walls to assure a better bond as well as avoiding gaps between both materials at the surface due to tolerances (ie. if slightly off very small gaps may appear and see the glue seam). I’d be curious to do a quick test and once glued then do a cross section and see how much of that 0.5mm actually remains.
Have you done inlay’s with zero clearance (ie. no glue gap/perfect match)? If yes then I’ll have to try that out as I agree the bond would be better. My only concern would be when manually zeroing the 60 degree cutter and if they are slightly off (between zeroing on project vs. inlay) that the parts may bottom out before the edges (60 degree side wall) fit snug/tight.

1 Like
That’s a good target I’d say, Much less then is suggested in most tutorials.
I spec for .005" (.127mm) for my inlays. Learned that from this post back in '17. vCarve Inlay, Redux - Vectric Customer
Not zero but close i.e. .005". I’ve occasionally screwed up an inlay at a latter stage of the process and cut through several sections of the inlays out of curiosity and observed no gaps.
I use Titebond III exclusively, for no particular reason other then convenience. I zero off the machine bed for most projects.
The theory that I’ve always heard is that the “pocket” is for glue squeeze out from the beveled edges.
The thinking was that once the inlay started being pressed in there was some hydraulic action forcing glue out at some other joint of the inlay.
Thus, the “glue pocket” wasn’t for anything more than storing excess glue.
4 Likes
And preventing the bottom flat on the male insert from bottoming out before the angled surfaces are as tight as they can be.
1 Like
Sure, but that would only be a small tolerance solution (as some now are using it) and wasn’t the source for the misinterpreted term “glue pocket”.
I believe that is the primary reason for it. Glue or epoxy, unless it’s really fast setting should find it’s way out under pressure. The term “glue pocket” may be intrinsically misleading. Glue will collect there, but any excess glue should get squeezed out to the gap on the top.
Discrepancies in the surfaces that are assumed to be planer, especially the top face when machining can prevent the inlay from seating fully on all angled faces. Even when surfaced flat, the wood can move while machining. The depth of the gap should be a little bit more than the tolerance you can achieve.
1 Like
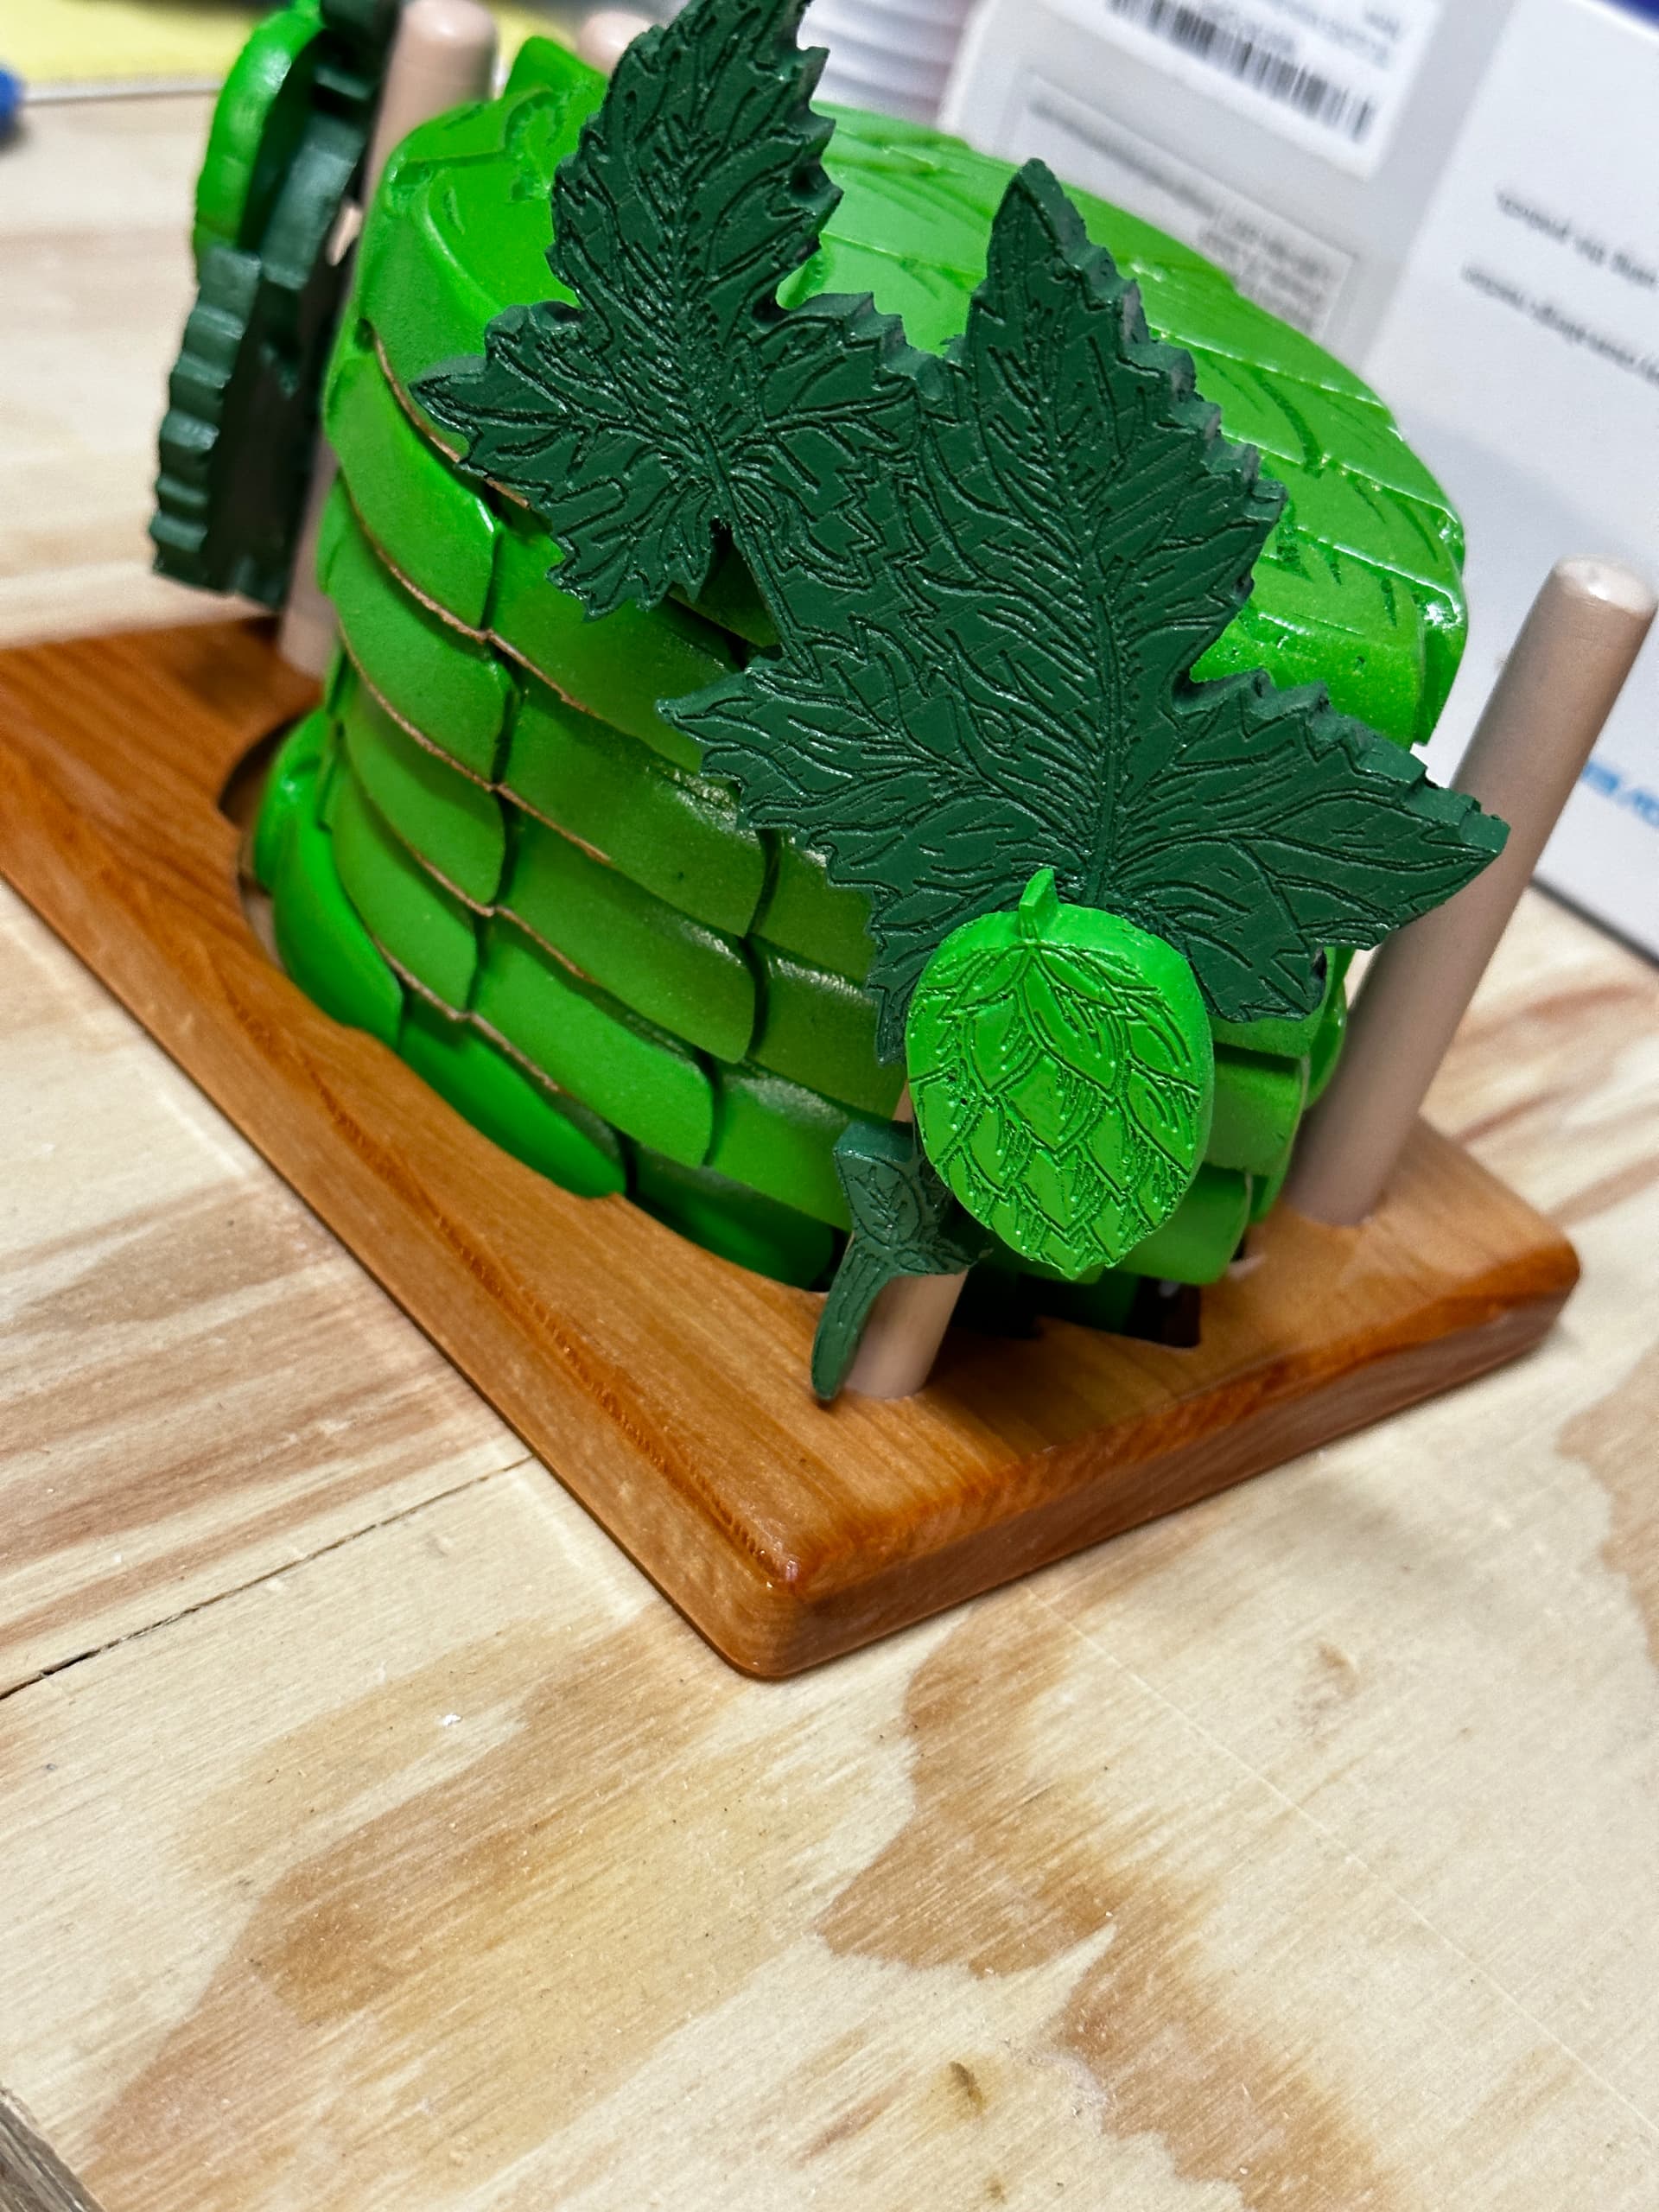
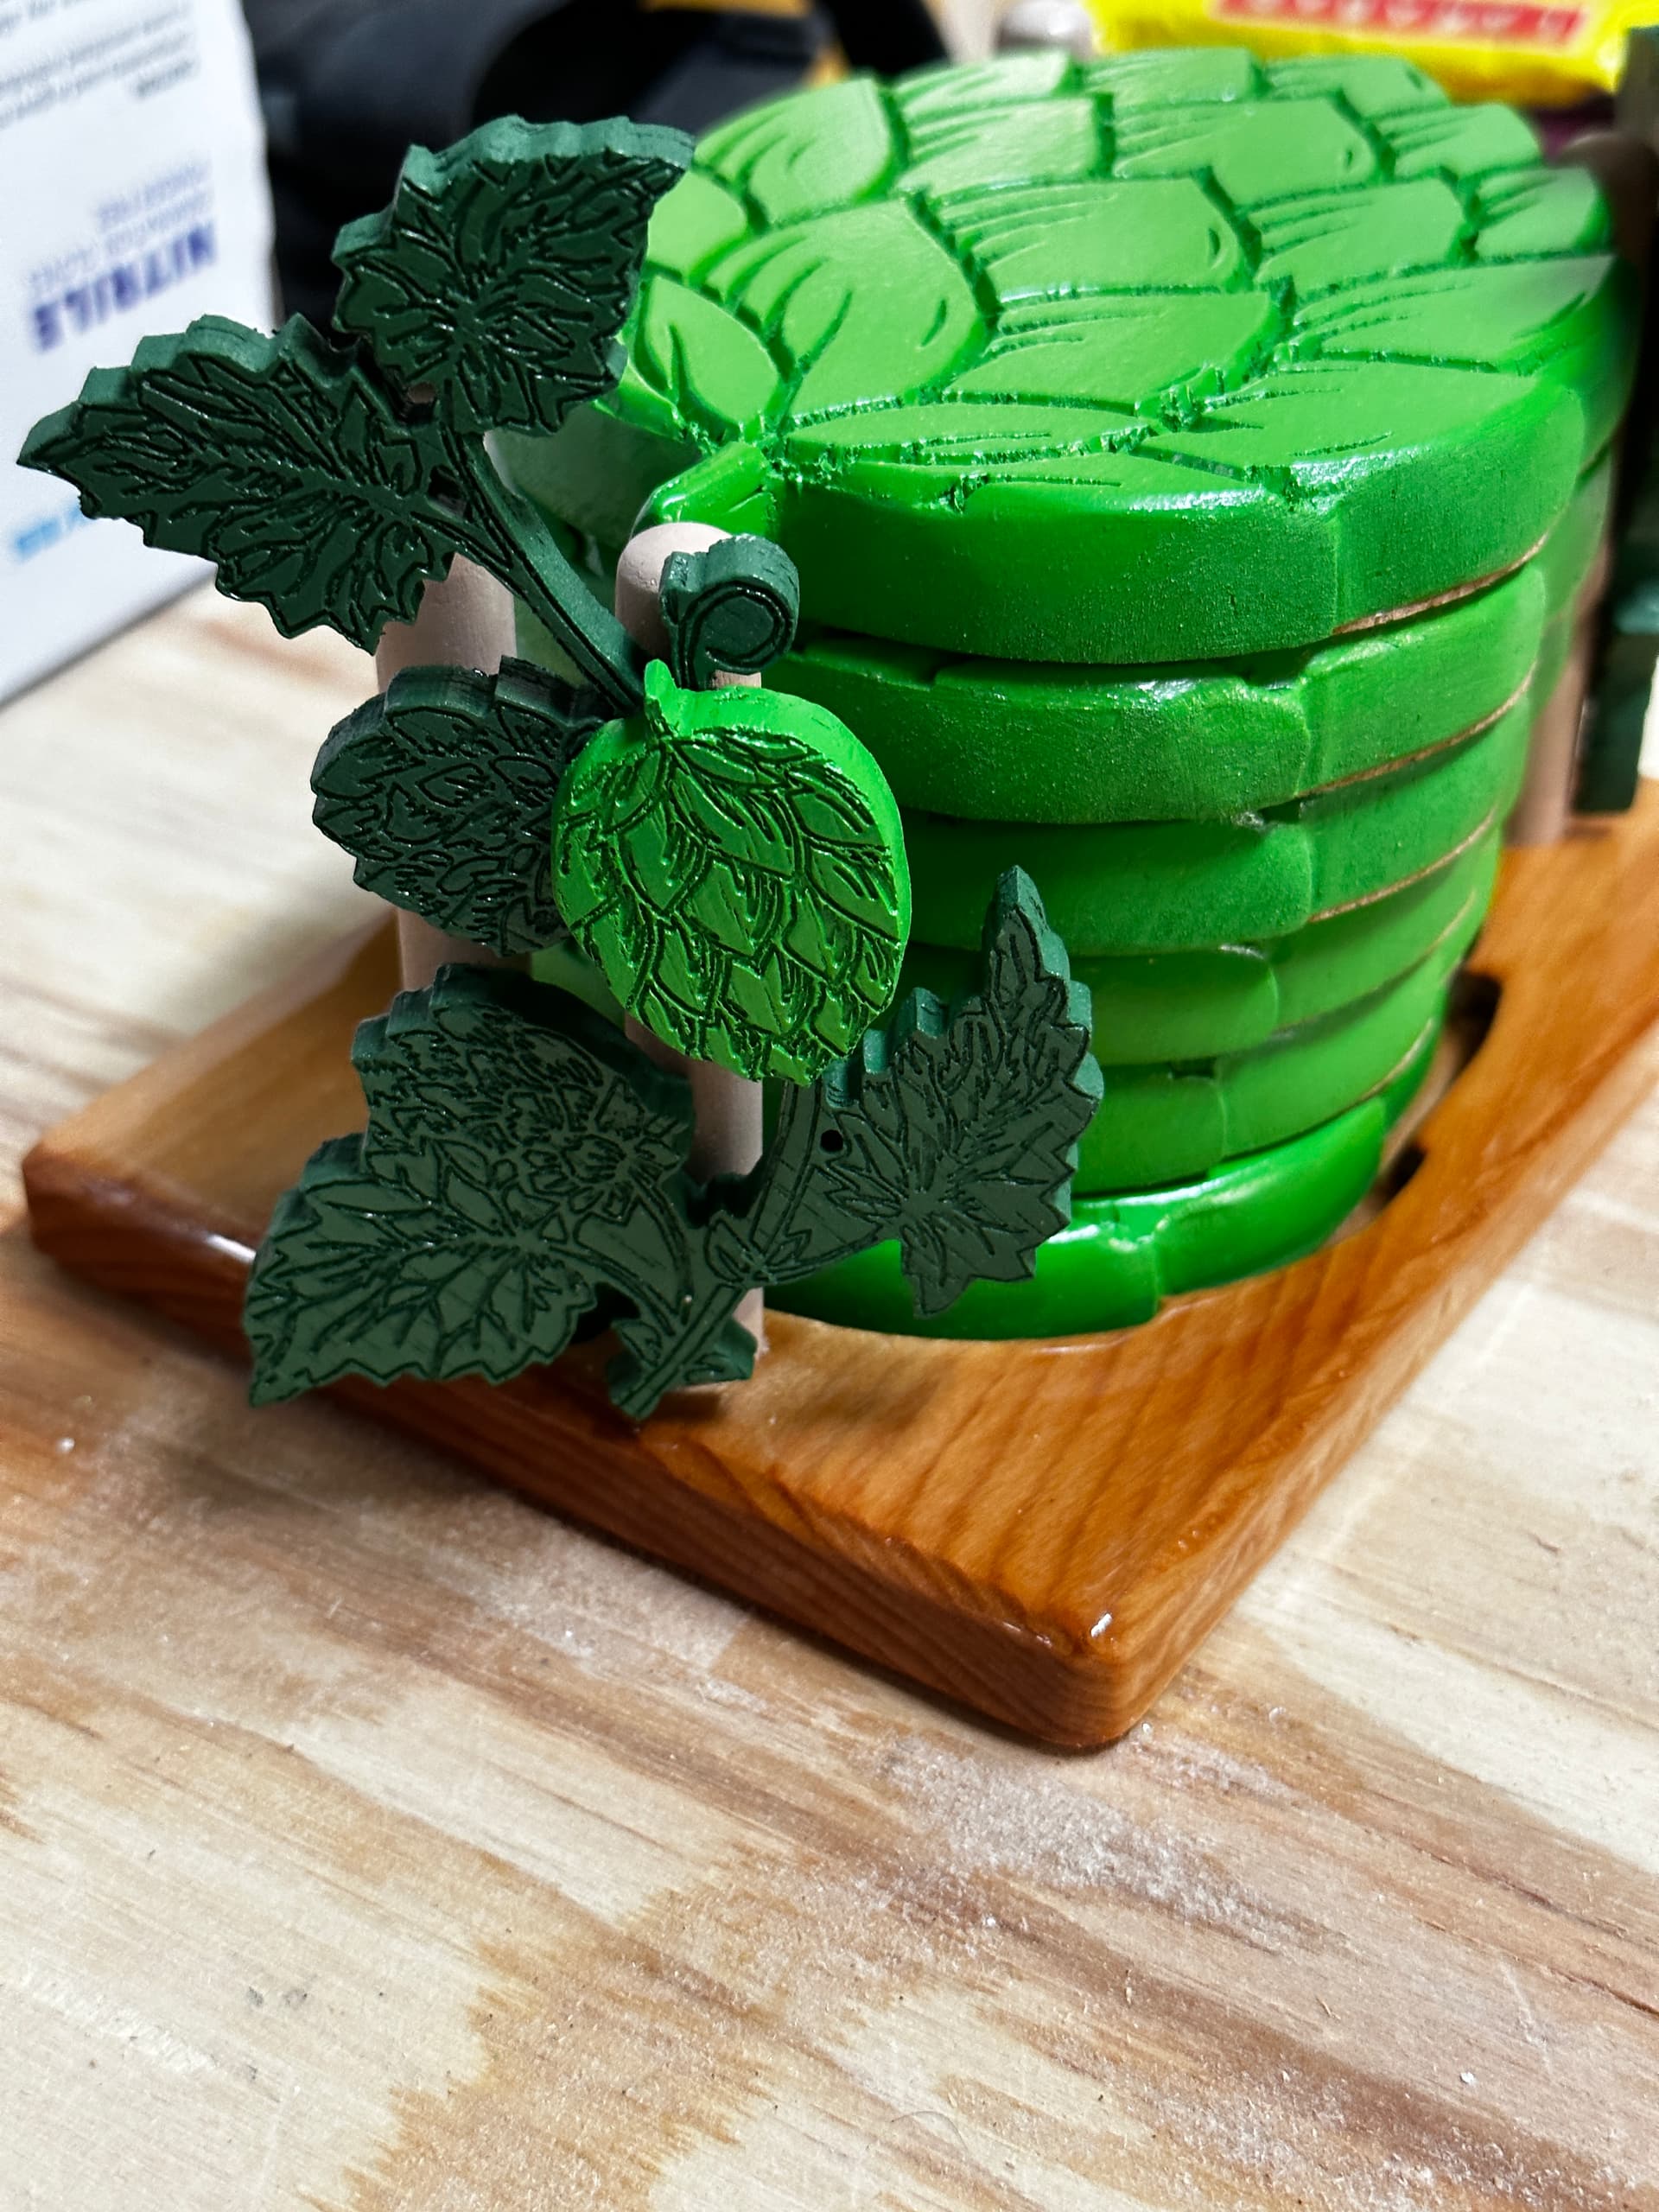
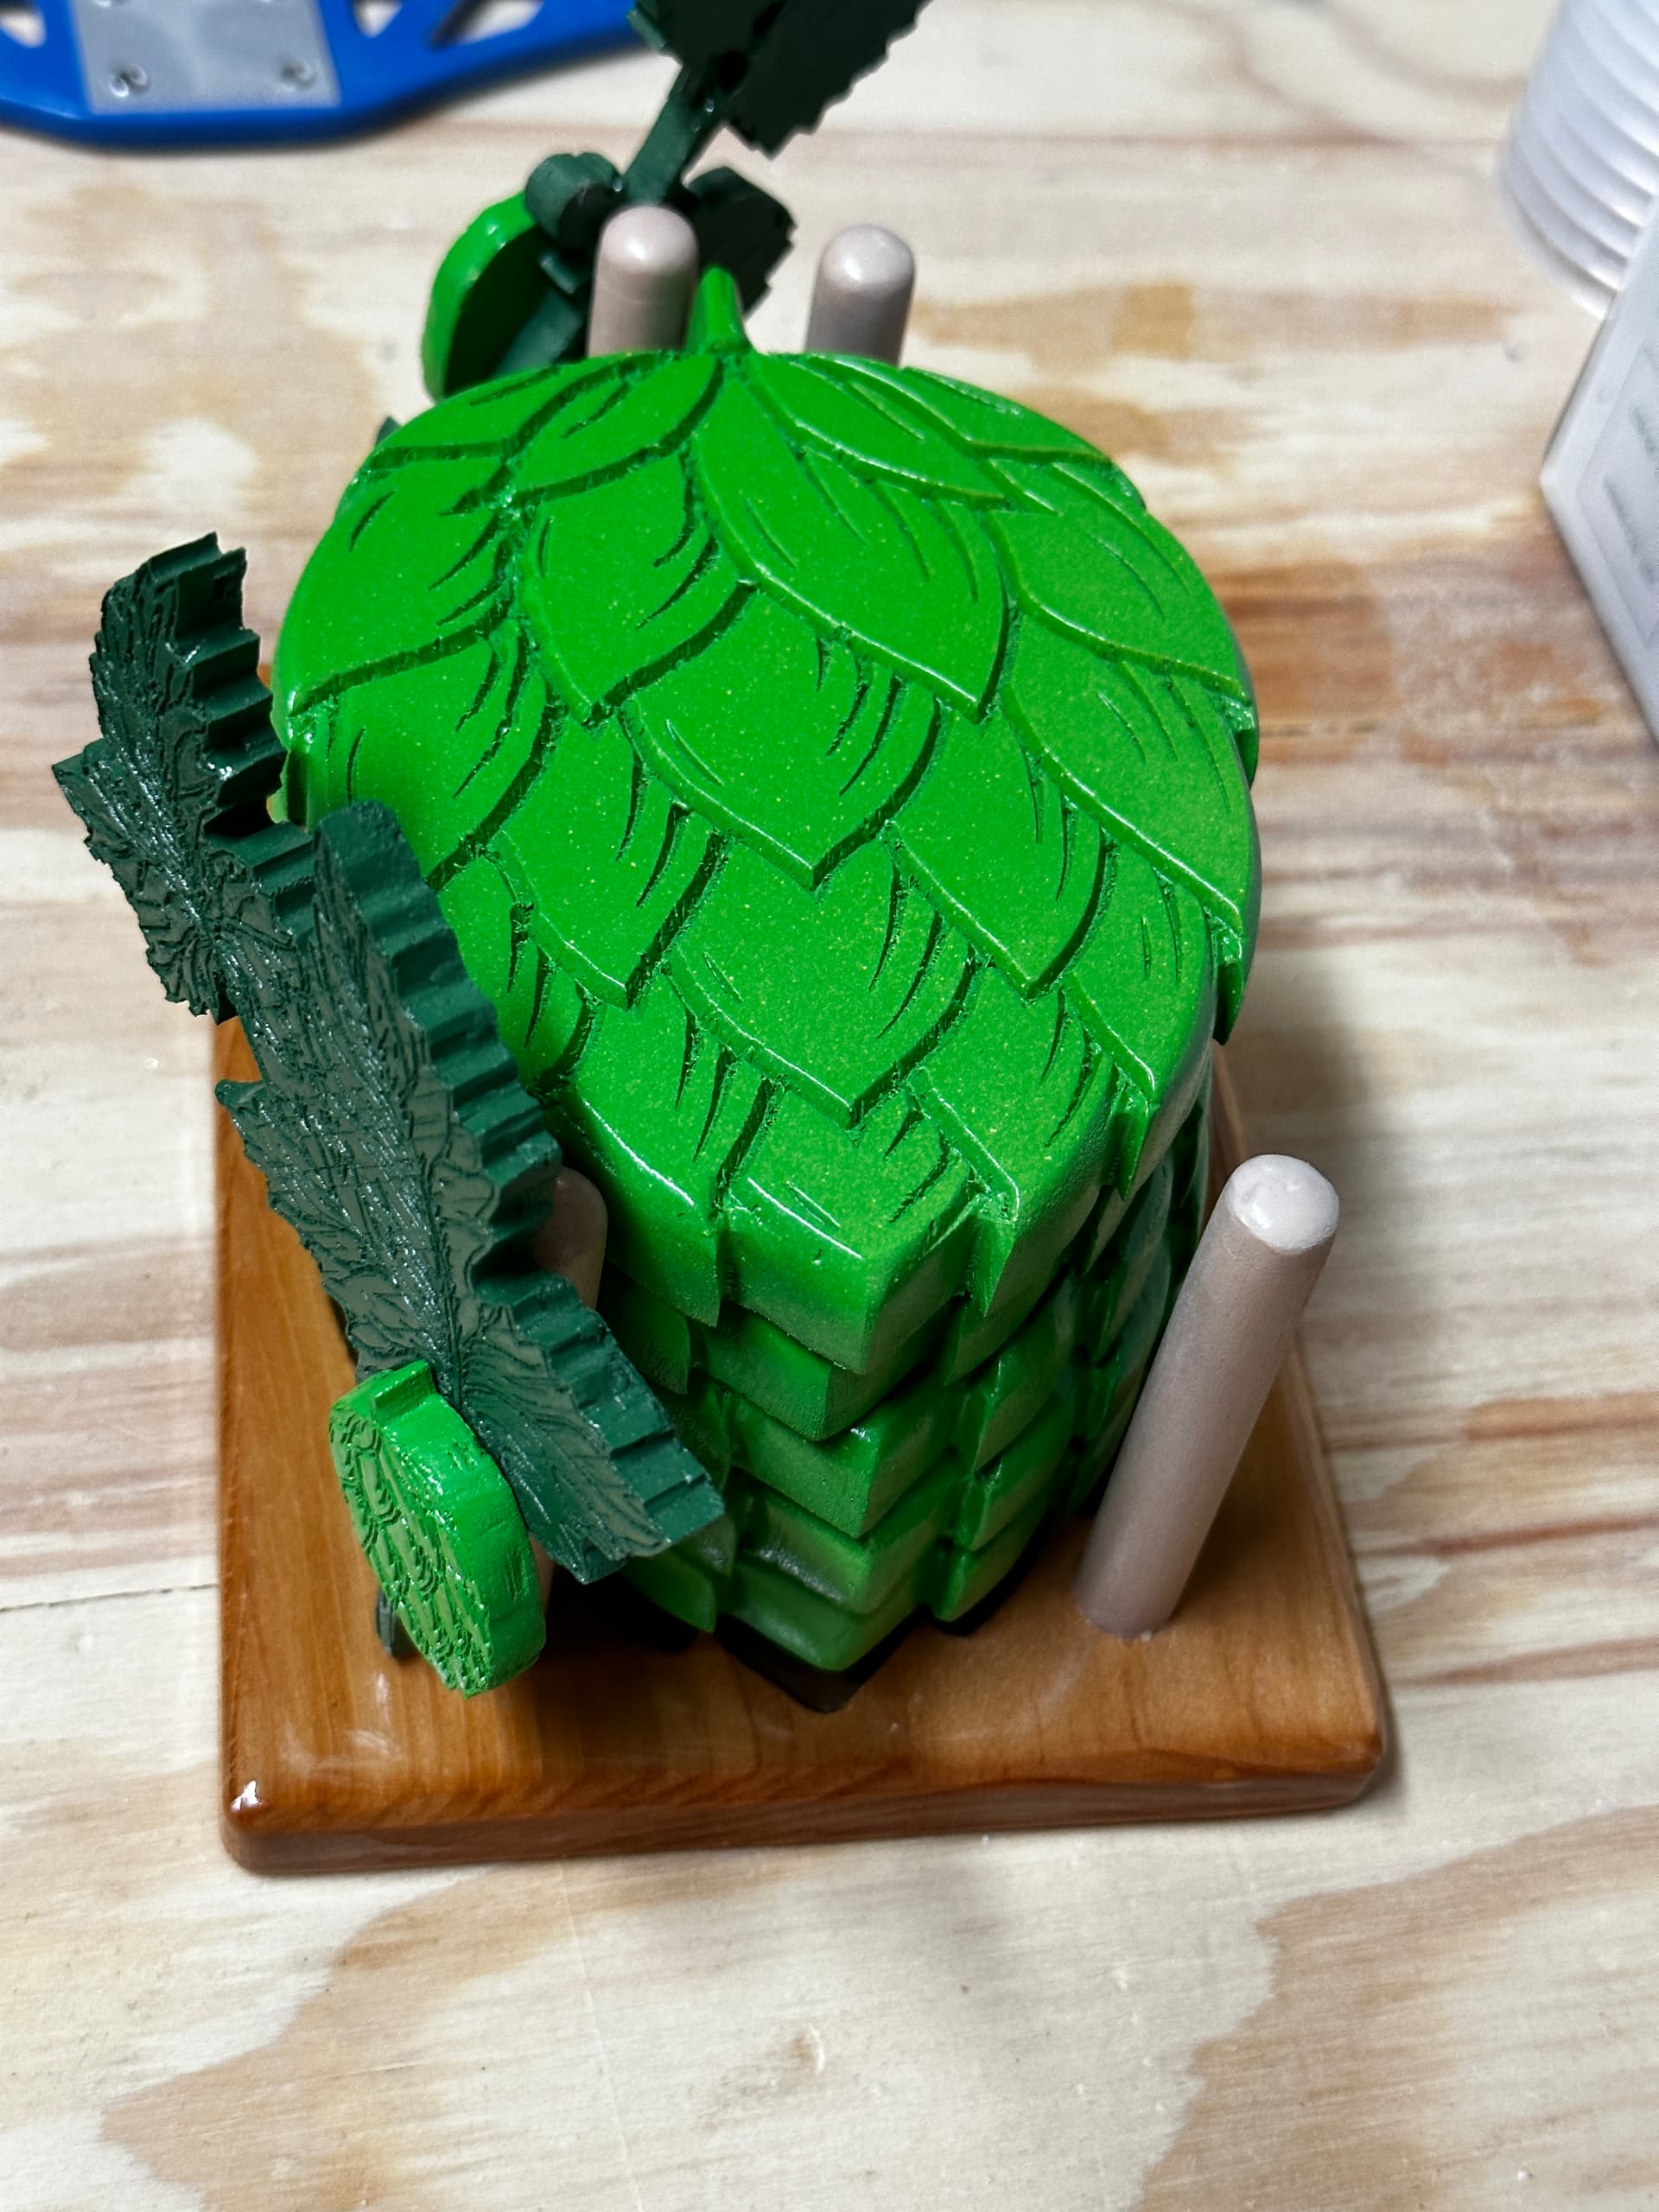
A much less technical ambition than above, and maybe worse, it’s another coaster set, but it’s a gift for a buddy which gave me another excuse to mess around with Adv V-Carve and resin and learn how to work with them better.
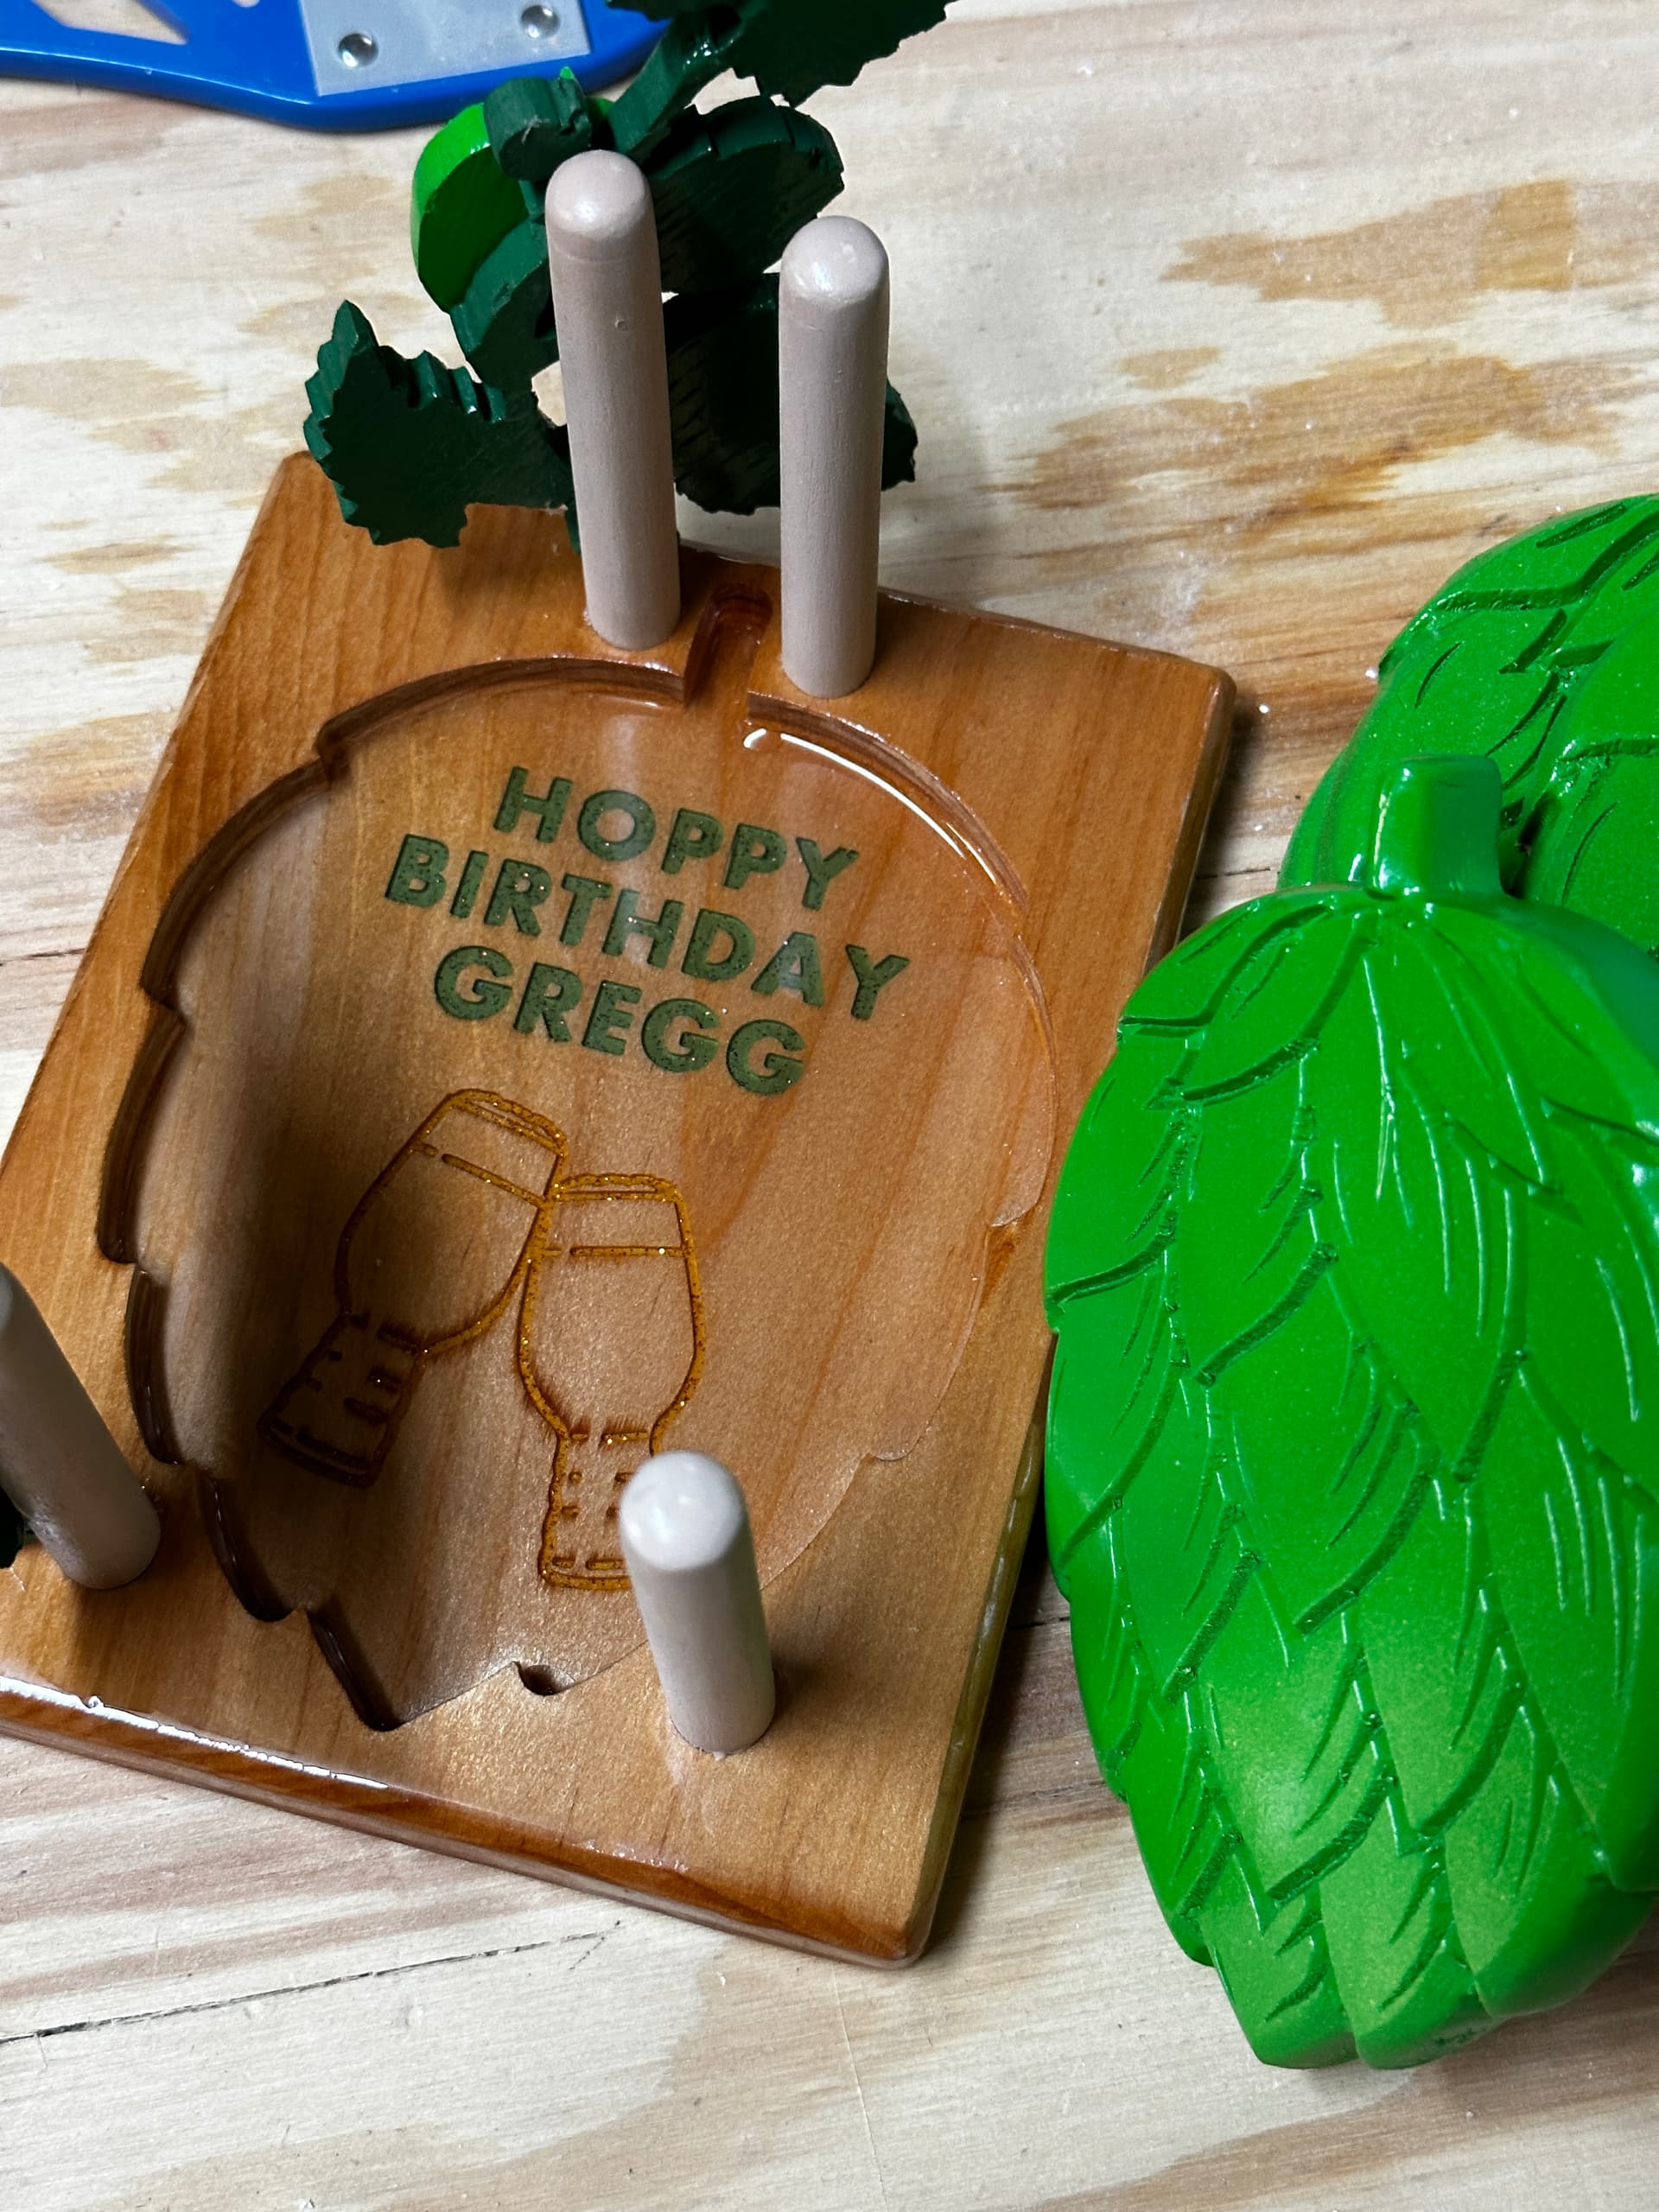
22 Likes
I have to say WELL DONE! I personally like what you have done and am impressed.
I look forward to seeing more of your work.
1 Like
Thank you! Much appreciated. ![]()
I have seen a bunch of youtube videos lately using the honey comb design. It is an interesting design and always popular. It is funny that a tiny little honey bee keeps our world going. Without the honey bee we would starve. In the past few years honey bee production has been on the decline for a variety of reasons. African strains, disease, pesticides, and many other environmental factors. If you have room make a pollinator area in the yard for bees and butterflies. Help mother nature out and it will take care of you. Plus you get some pretty flowers to look at after a long day of work. Always take time to smell the flowers in life.
8 Likes

Very cool!
Do note that it’s going to be brutal to your cutters though and that dust created is a special kind of “reeeeally bad for you” ![]()
3 Likes
Definitely not a regular task for me. Just a one-off