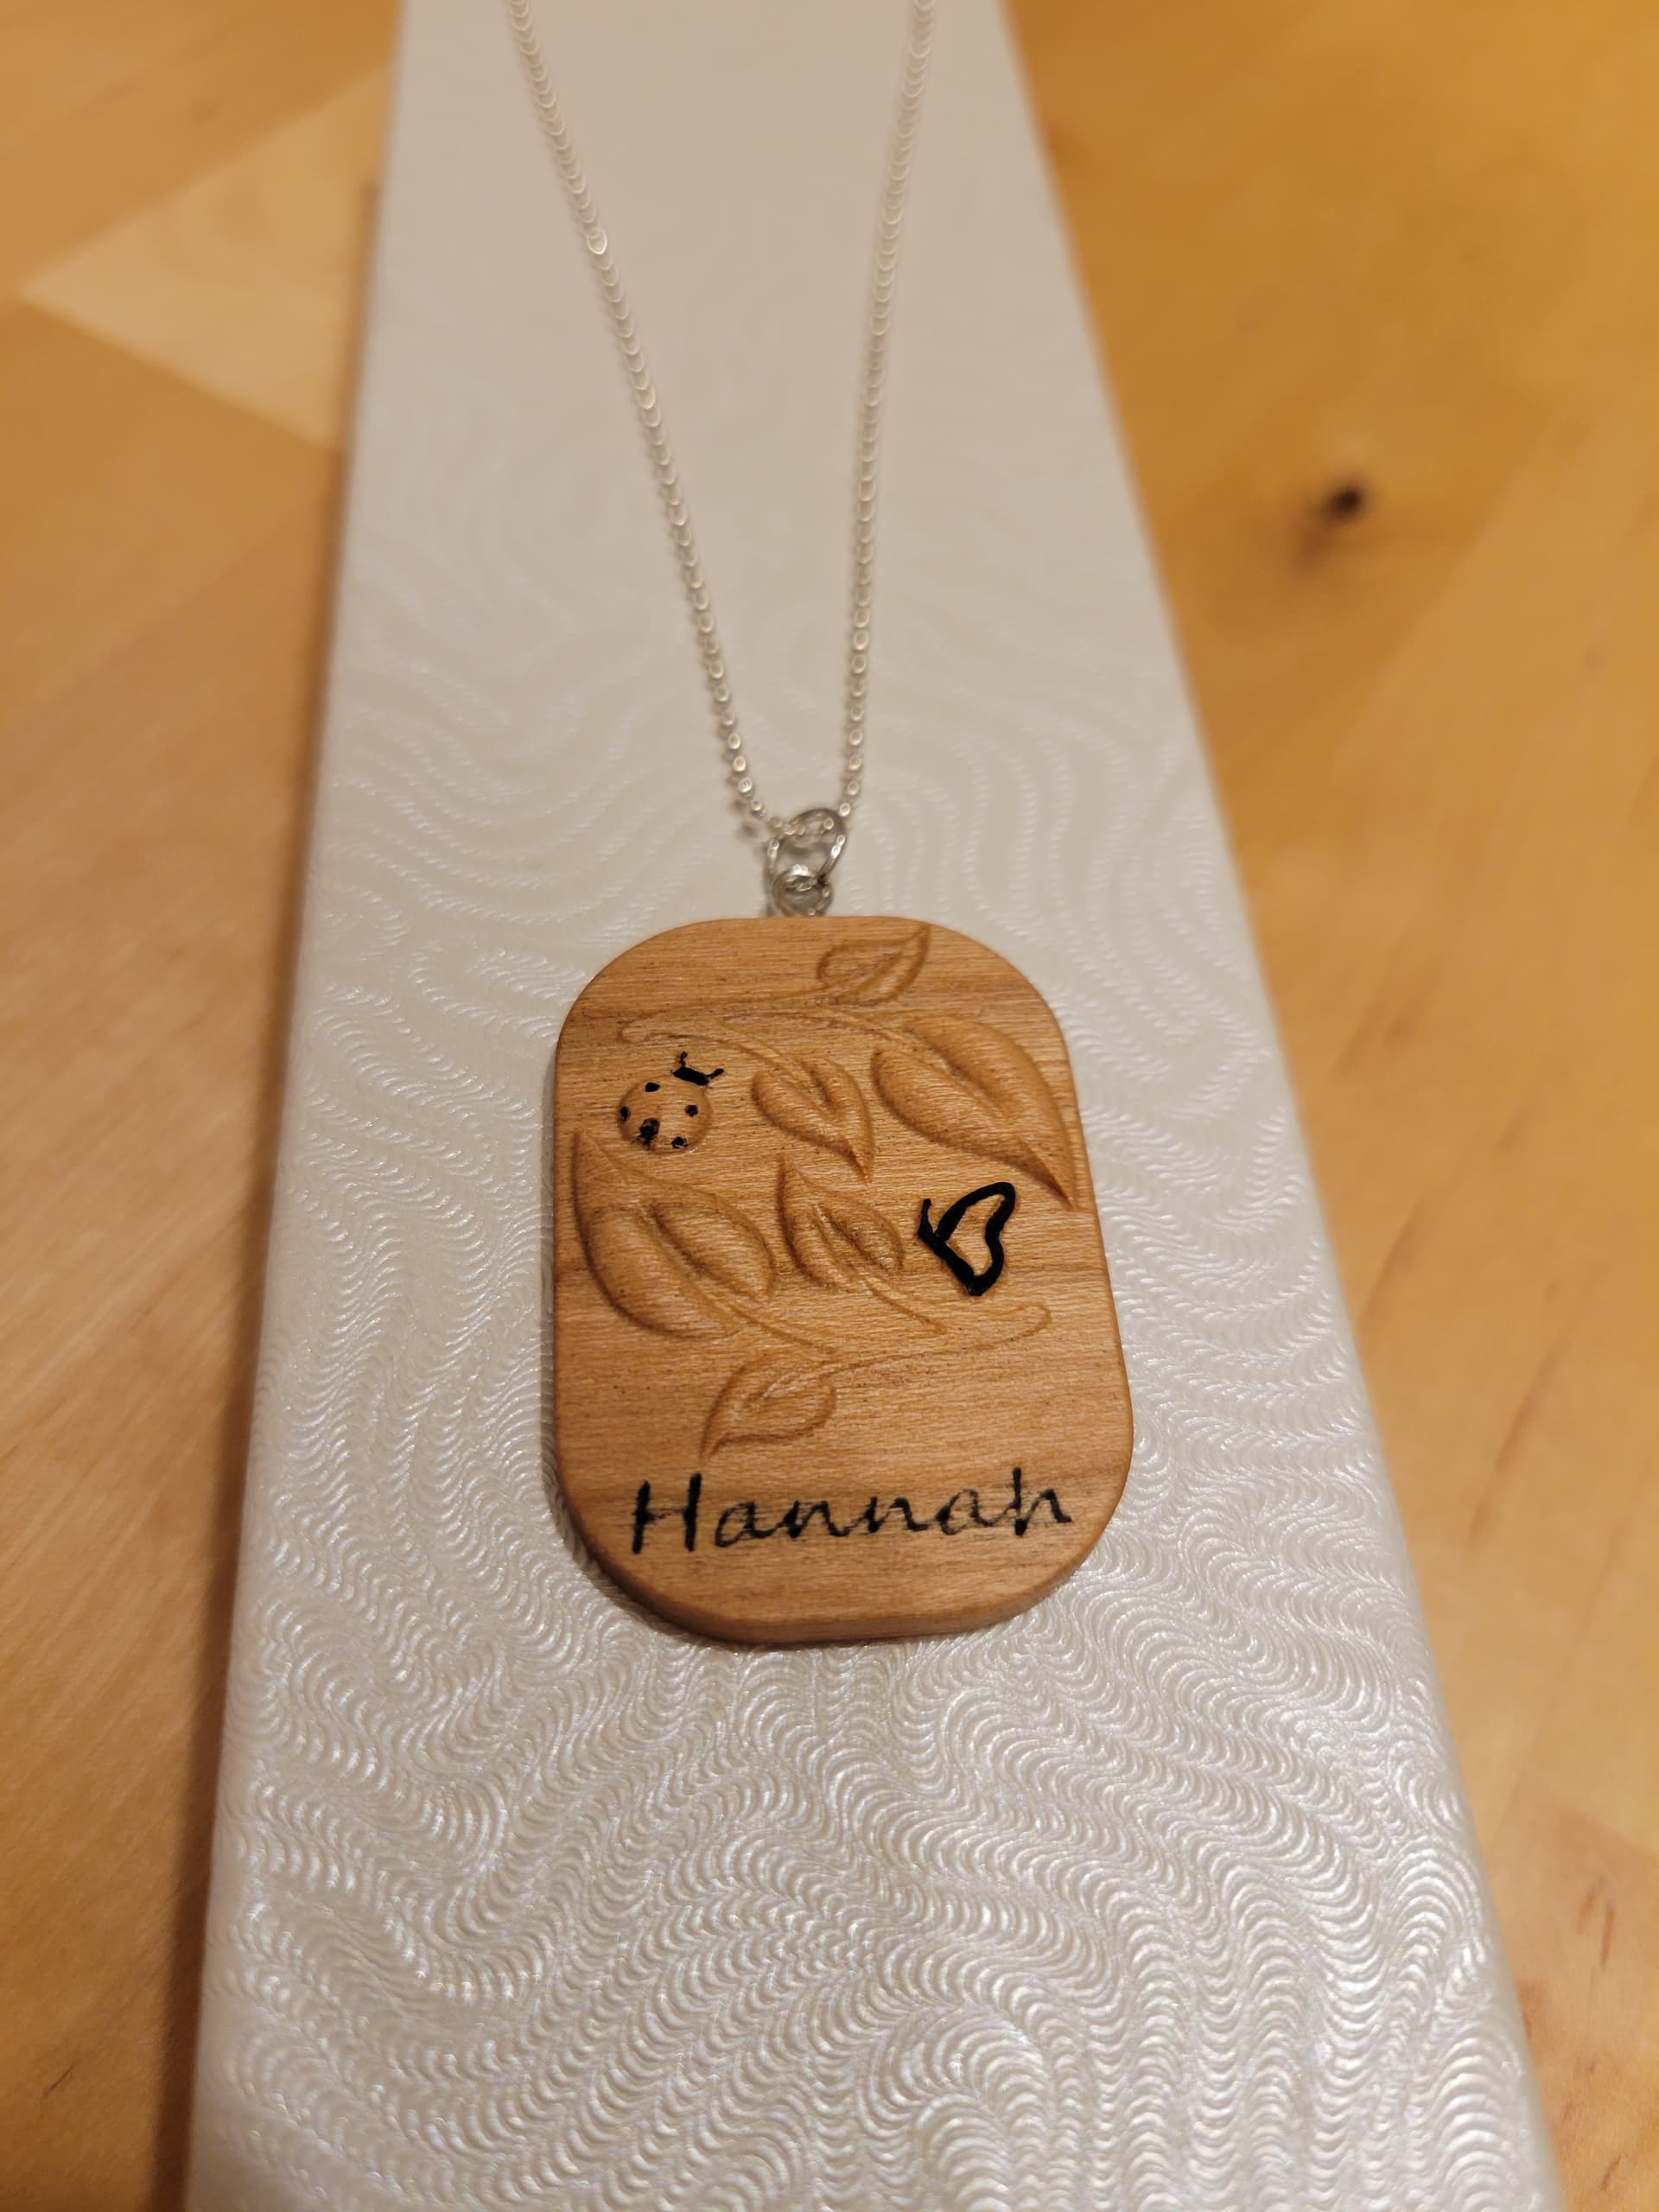
Converted design into necklace for niece for Christmas
23 Likes
Very nice!
I really like the step down around the large letters.
1 Like
Now that looks really cool!
1 Like
Beautiful. What wood is that and is it just a blue dye?
1 Like
Classic.
Hmmm… interesting.
Wait… What?! Please explain.
2 Likes
Thank you. Just Blue Box water based stain.
The surface, visible part is all epoxy. Finished off with a coat of clear epoxy.
So I cut each color into the PVC, filled with epoxy, then surfaced off when done. Took 4 days letting each color completely harden before cutting the next one.
6 Likes
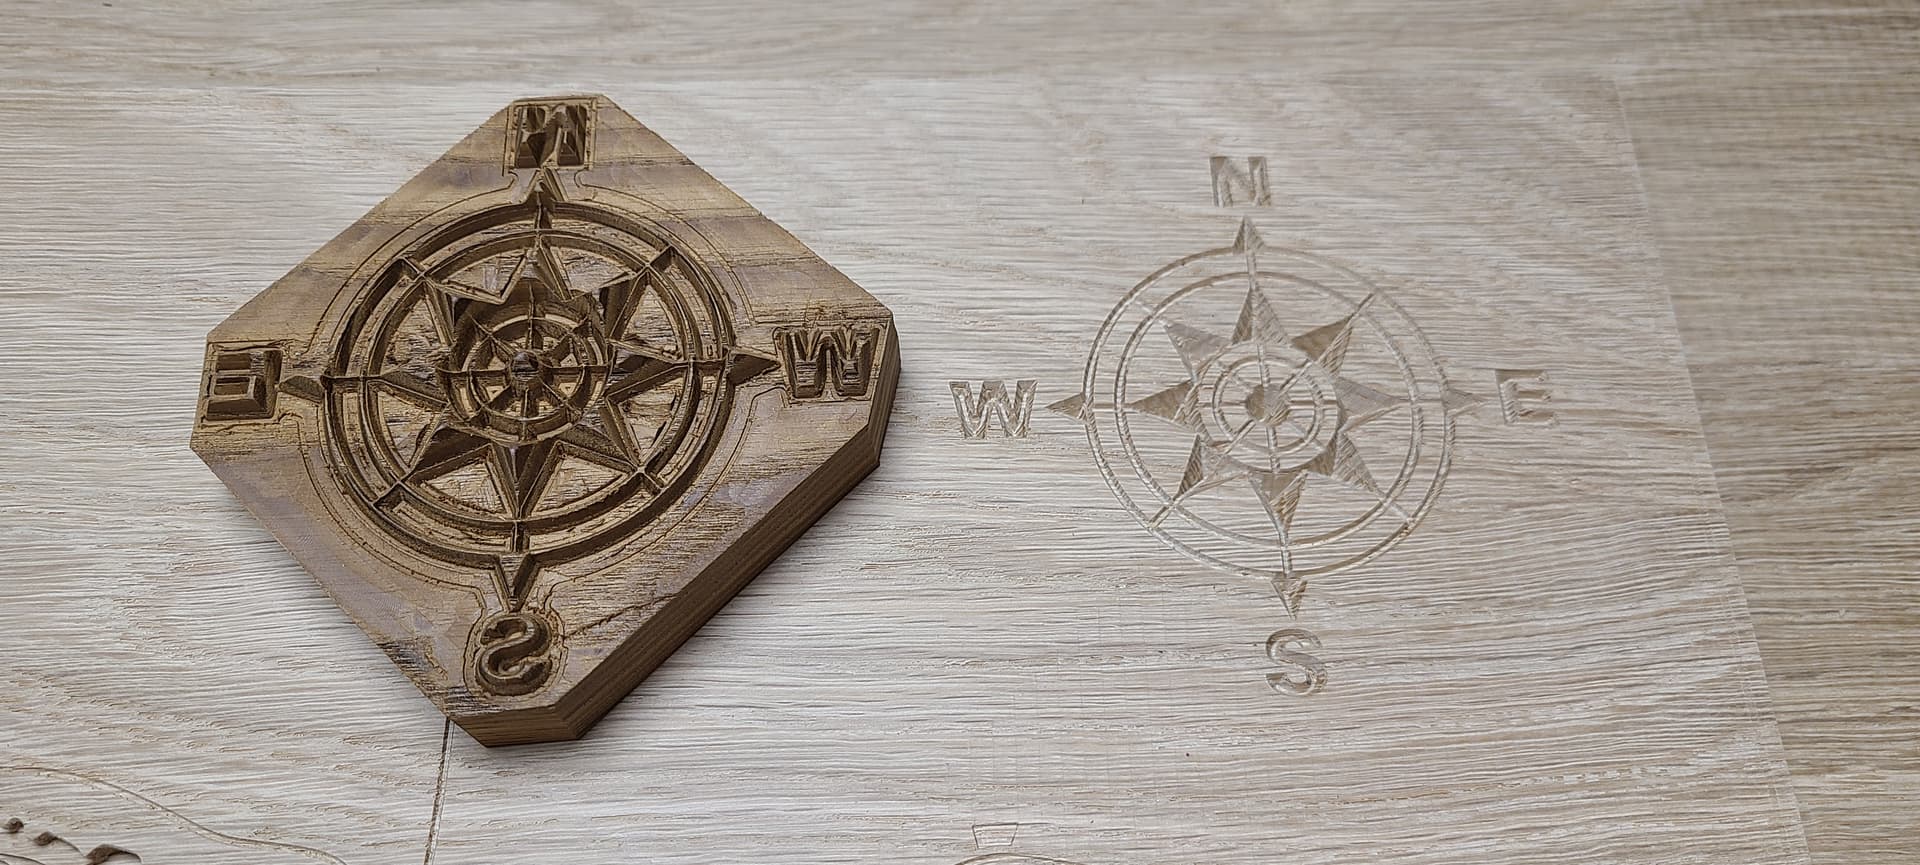
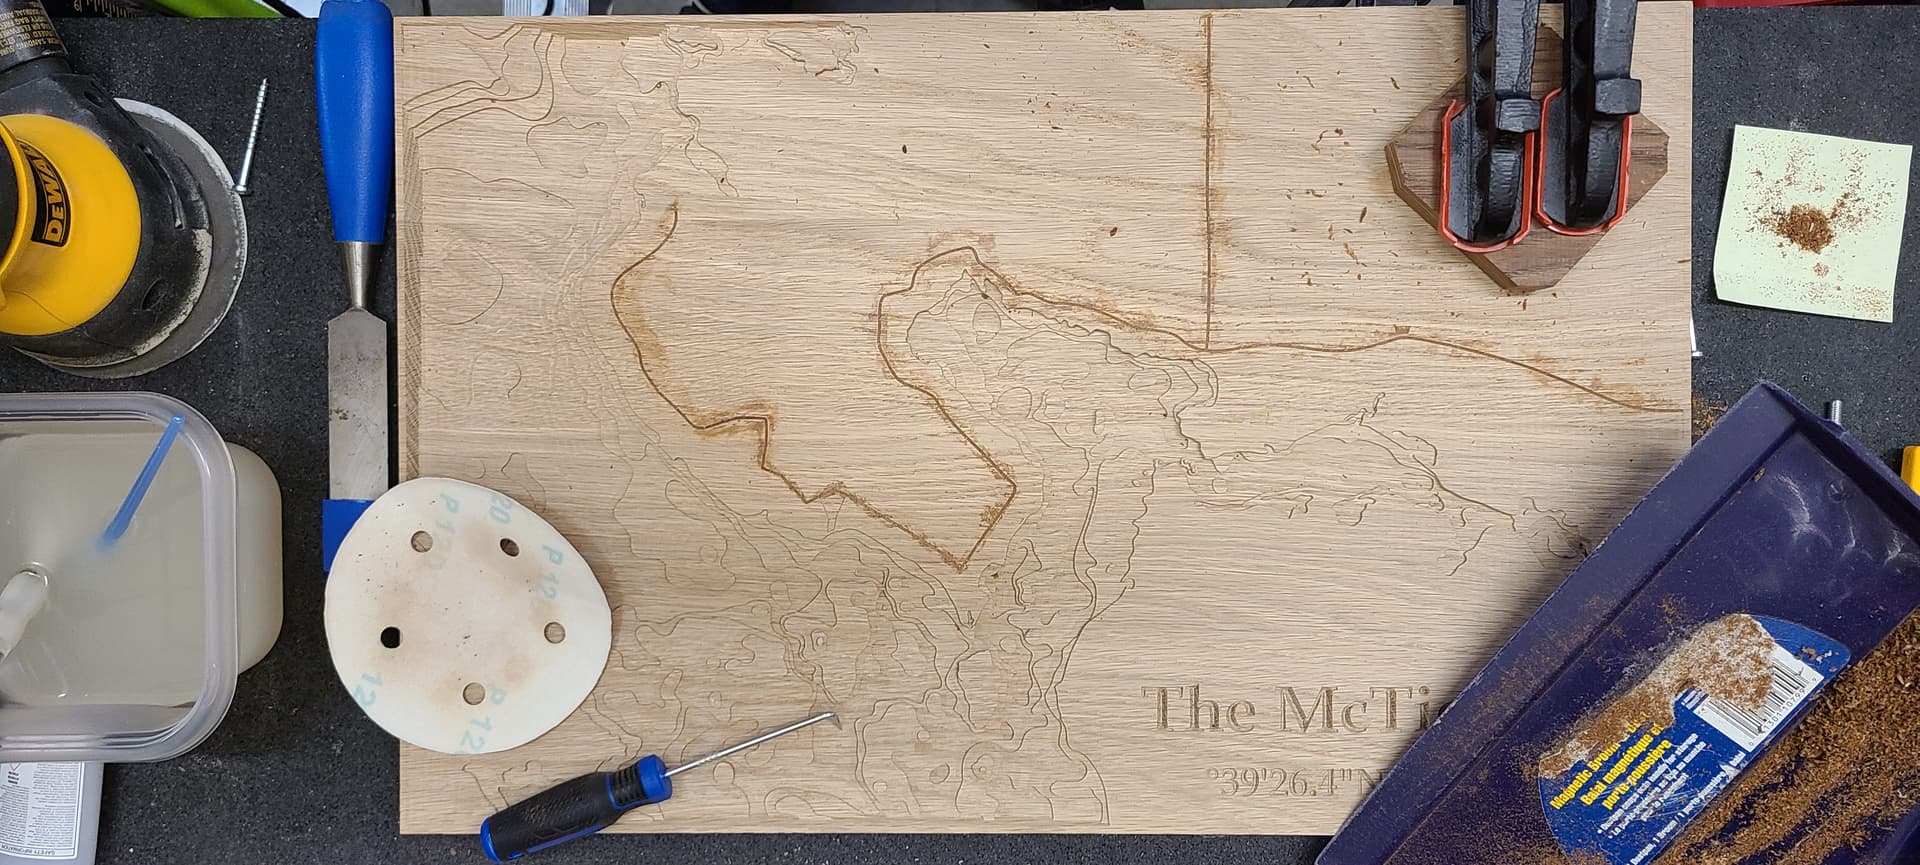
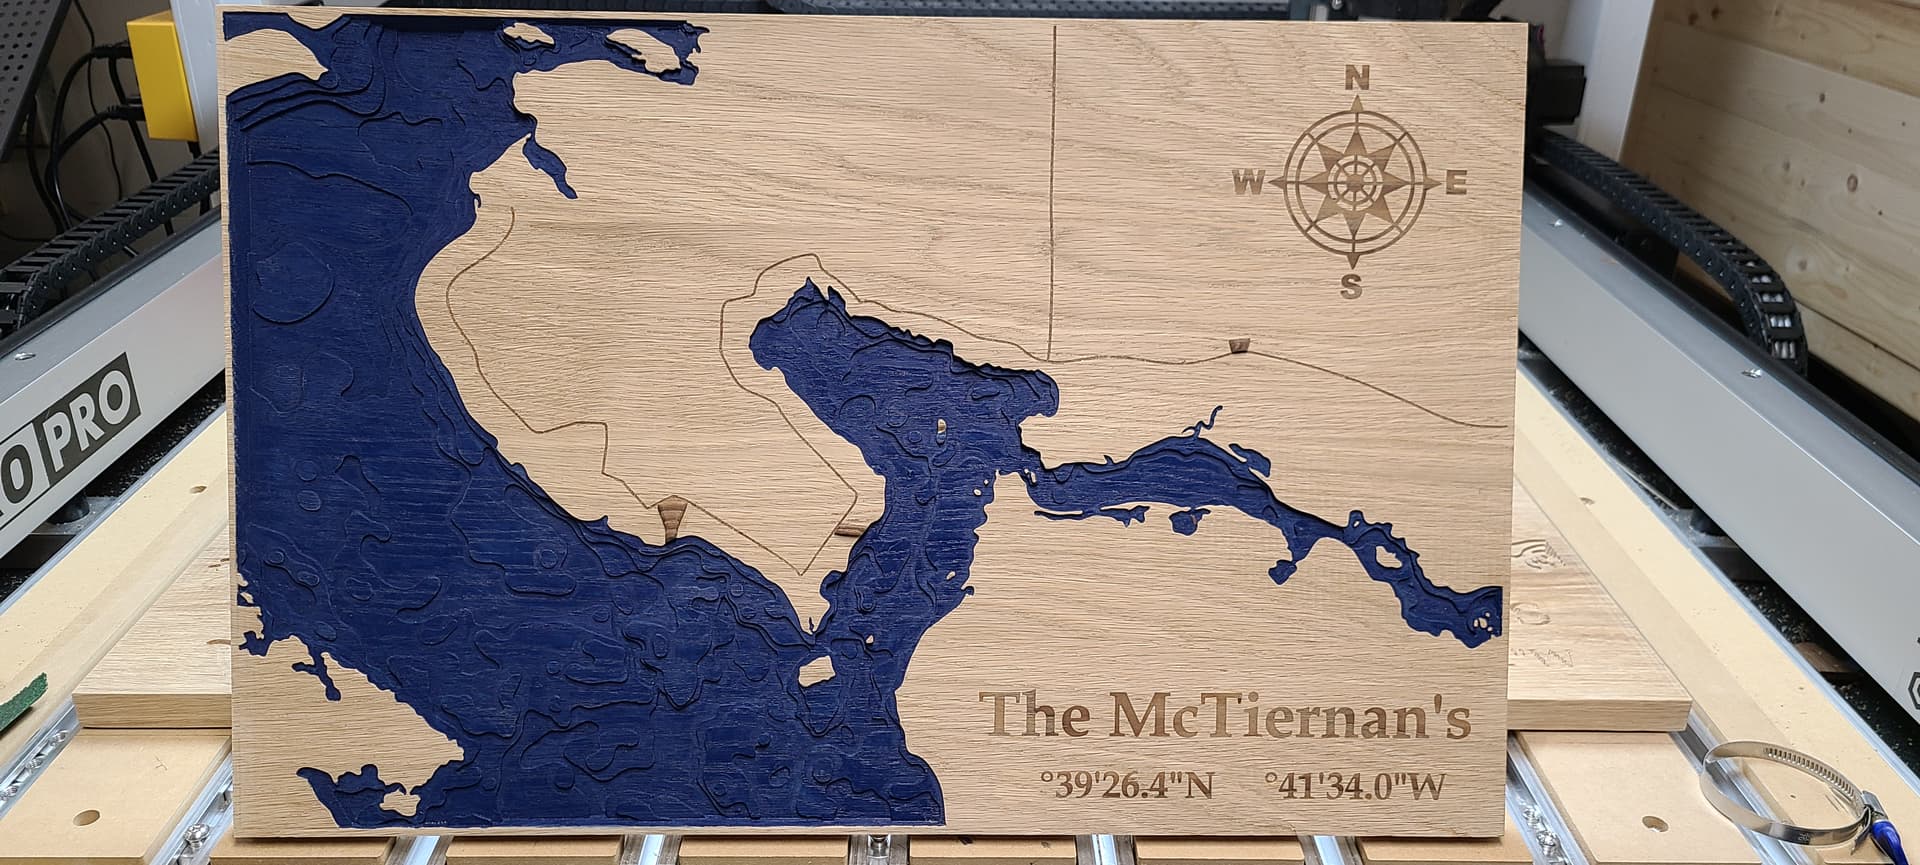
Haven’t posted in a while but not because I wasn’t busy with the Shapeoko, I still have a clear coat to add but almost there. After this project for a friend/client I’ve definitely come to the conclusion I need to add epoxy into me repertoire or techniques in the shop but likely more of a spring/summer adventure when I can keep the garage door open and get comfortable with the process so for now it’s blue stain for the water. The plan is we can always epoxy fill it later and before someone says there’s something wrong with the GPS coordinates I edited the image to conceal exact location.
Edit: inlays were tricky as some of the smaller details we’re just over 1mm wide and some tear out occurred on the plug side of it. In Fusion 360 I ended up going with a ramping contour toolpath using a 60deg Vbit making multiple passes followed by an engrave toolpath same vbit to get the perfect match to the carving in the map (female part of inlay). Then smaller flat bits to cleanout remaining stock. This gave me great results but time consuming, would be interested in others strategies.

23 Likes
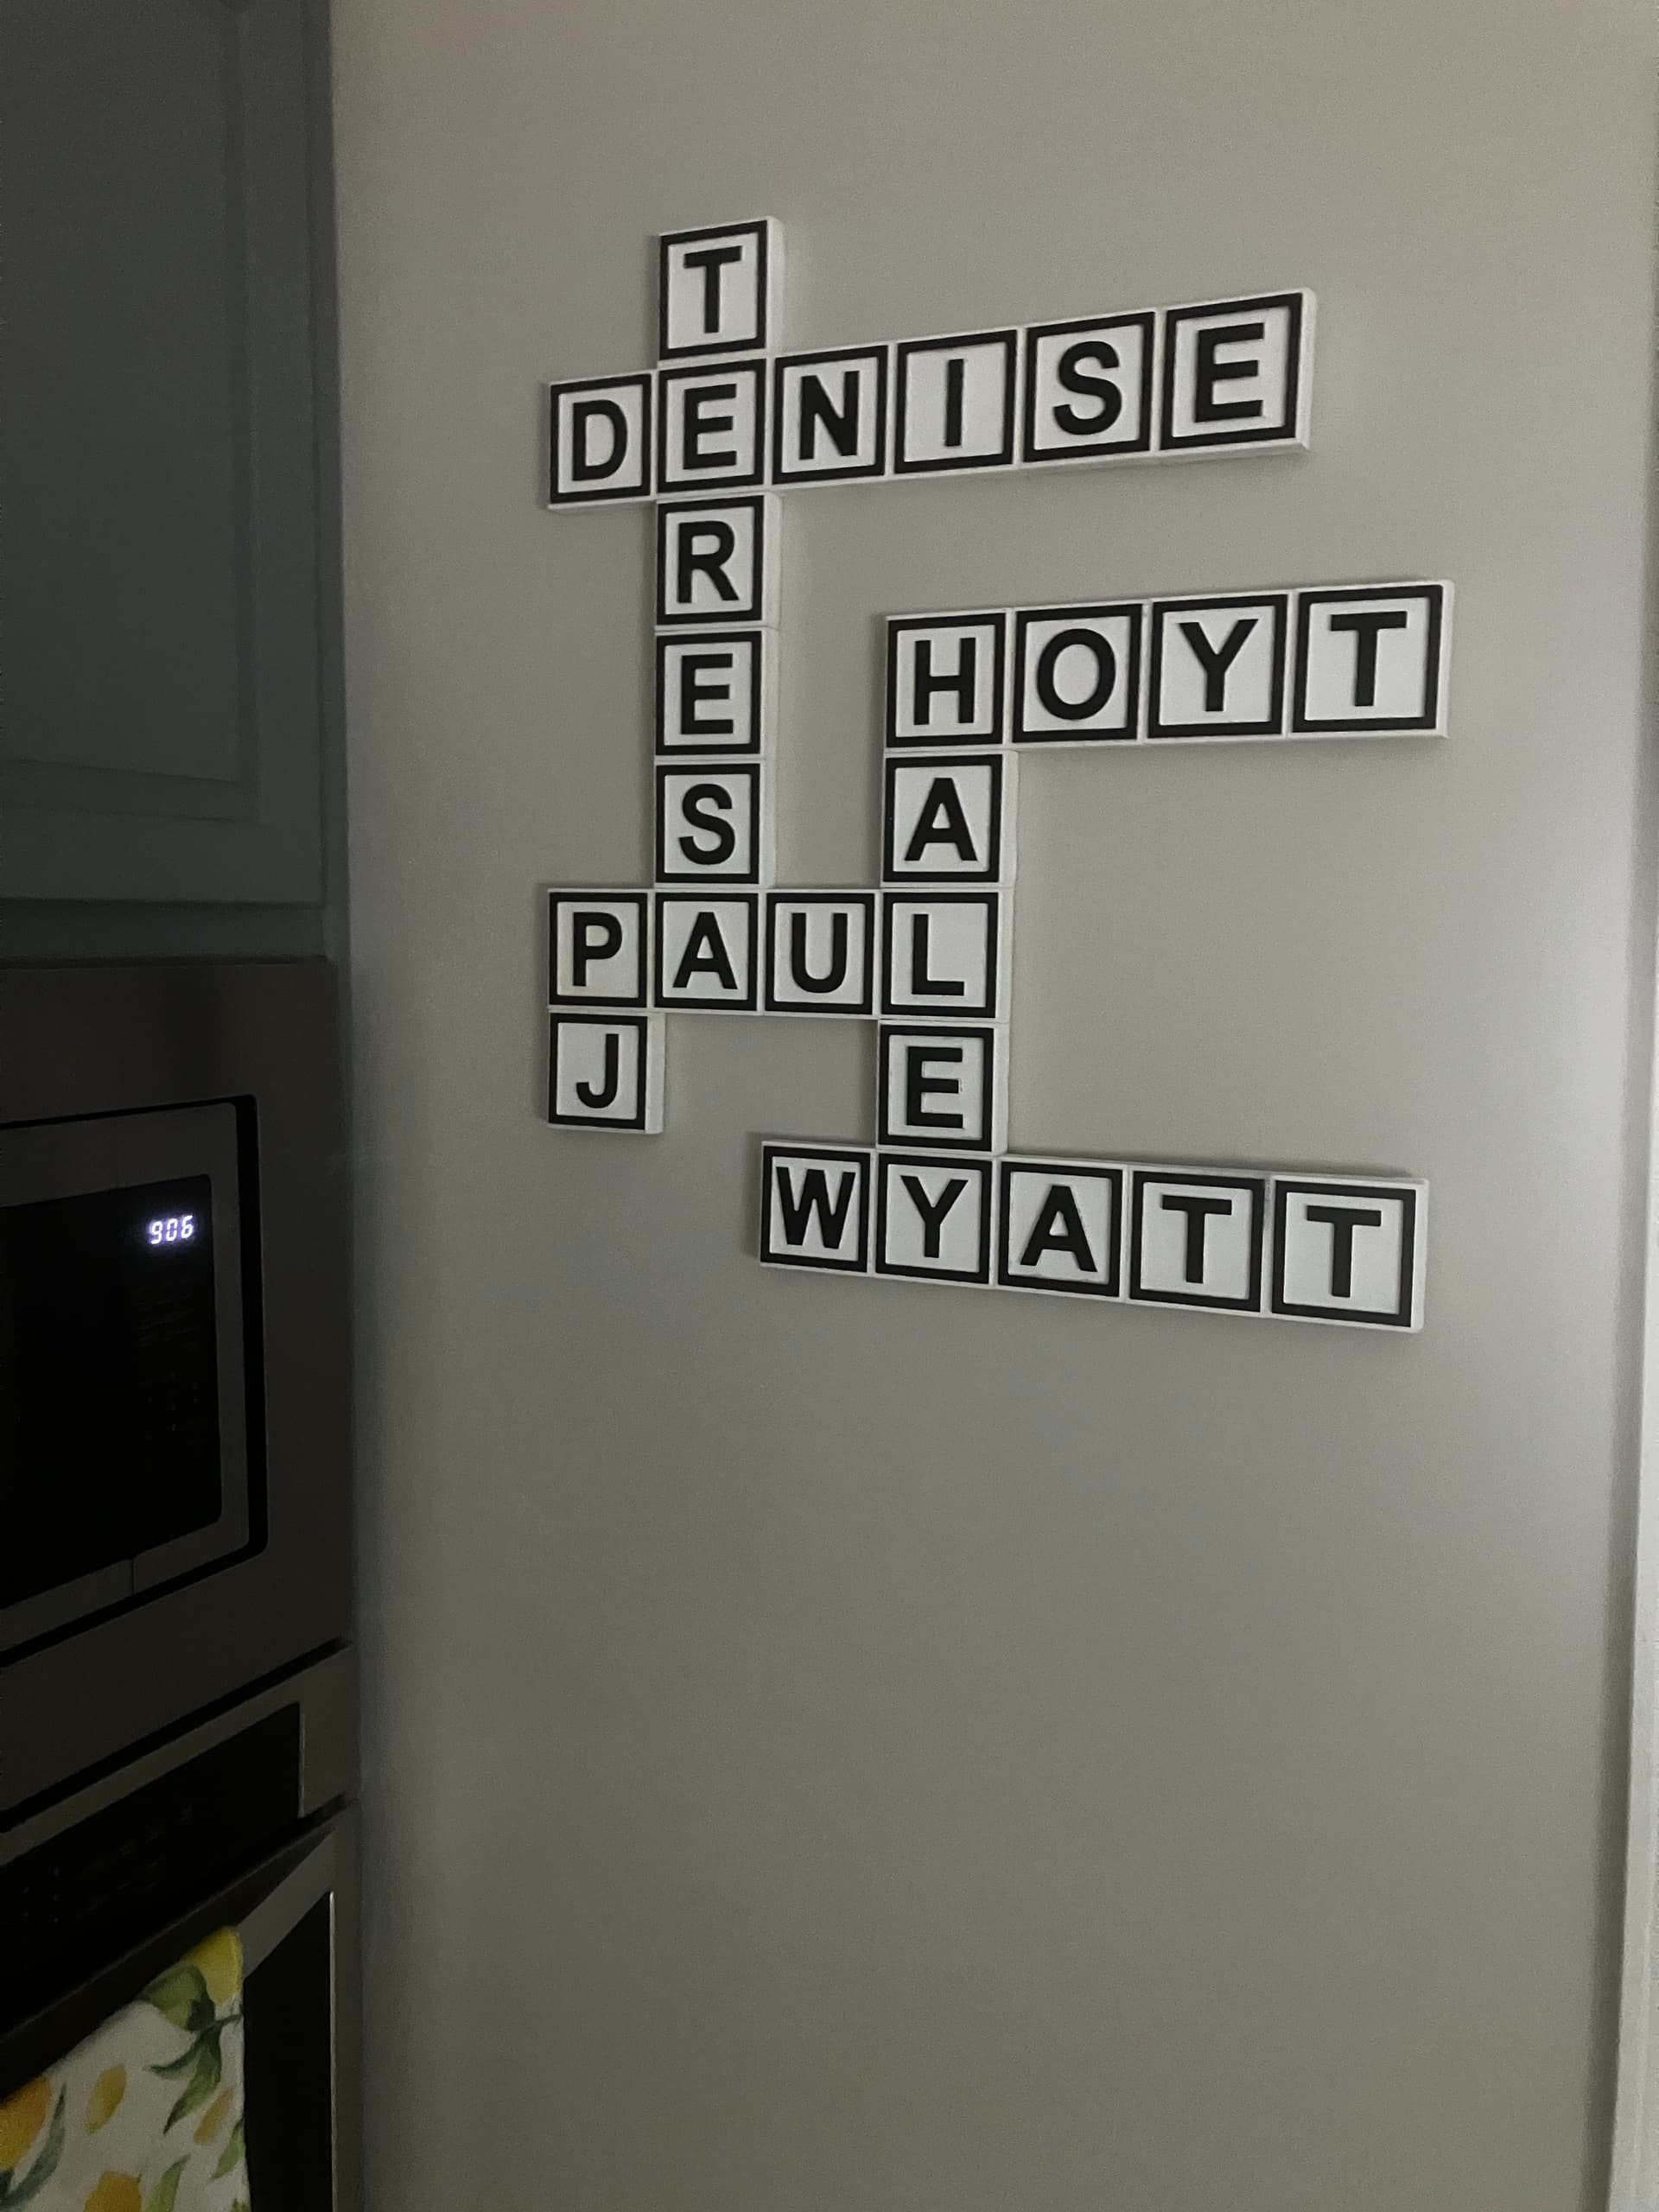

Did you do a grid and separate them, or cut individual blocks?
Stumbled on this site after I cut mine. Type in your names & see what they would charge. ![]()
I arranged mine manually, but I like my layout better anyway. Closer to a rectangle.
2 Likes
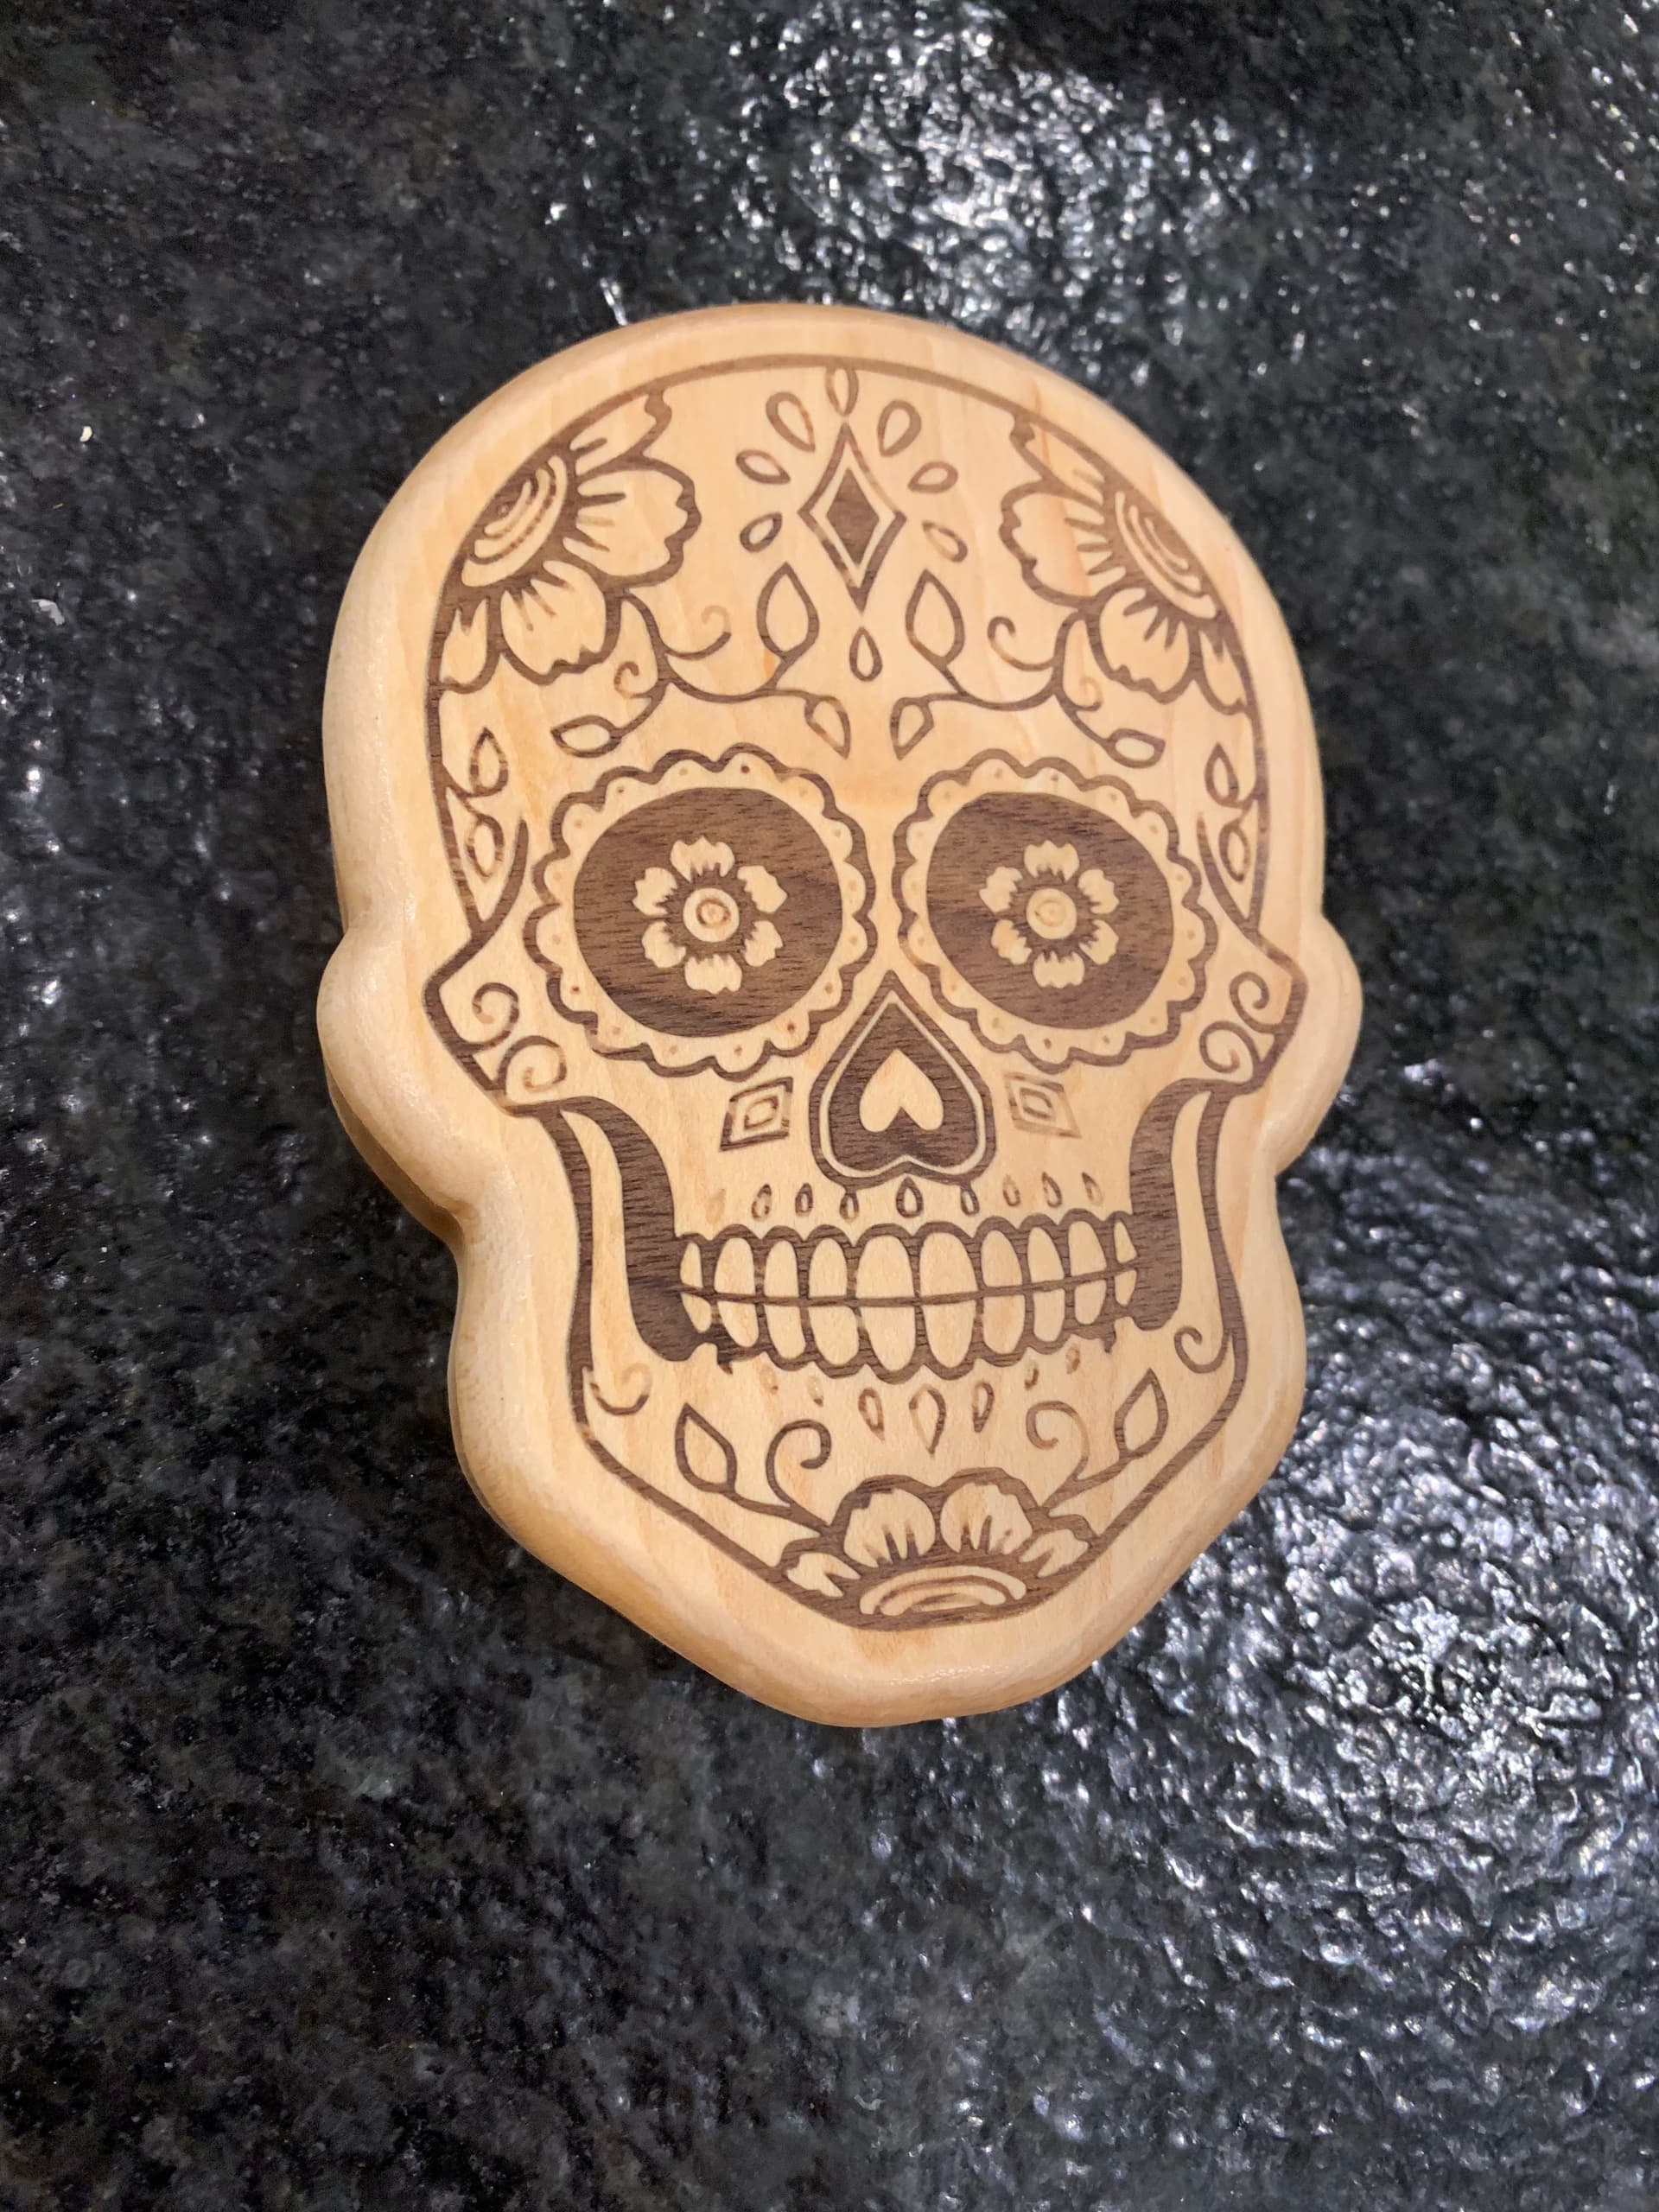
Thanks, Mark. I mill maple down to 5/16" and prestain with Minwax clear base water stain. Use a coat of lacquer before carving, then finish with spray poly. Use lacquer again before poly to keep poly from yellowing white.
Just whipped this out for a friend whose son is on the local PD.
Gotta warn the neighbors cause I’ll prob have a few cruisers stopping by to place orders! Lol
Always welcome! I support the BLUE.

Gonna go with gold background all around. Love the “raised” letters. Ill post finished…
4 Likes
Redid the sugar skull but as an inlay this time with maple and walnut. It was my first inlay and my first time cutting hardwoods! There are some small details missing but I’m happy with how it turned out for my first try, in particular considering how many small details there are… I found I had to do the v carving much slower than my first try to make sure small features didn’t chip out. The walnut female part I cut slowest and it turned out well, so I think if I just use the same slow feedrate for the male plug I’ll lose less small details next time!

17 Likes
That’s incredible. One of these days I want to try inlay. Pretty sure your work will be the standard to go by!
1 Like
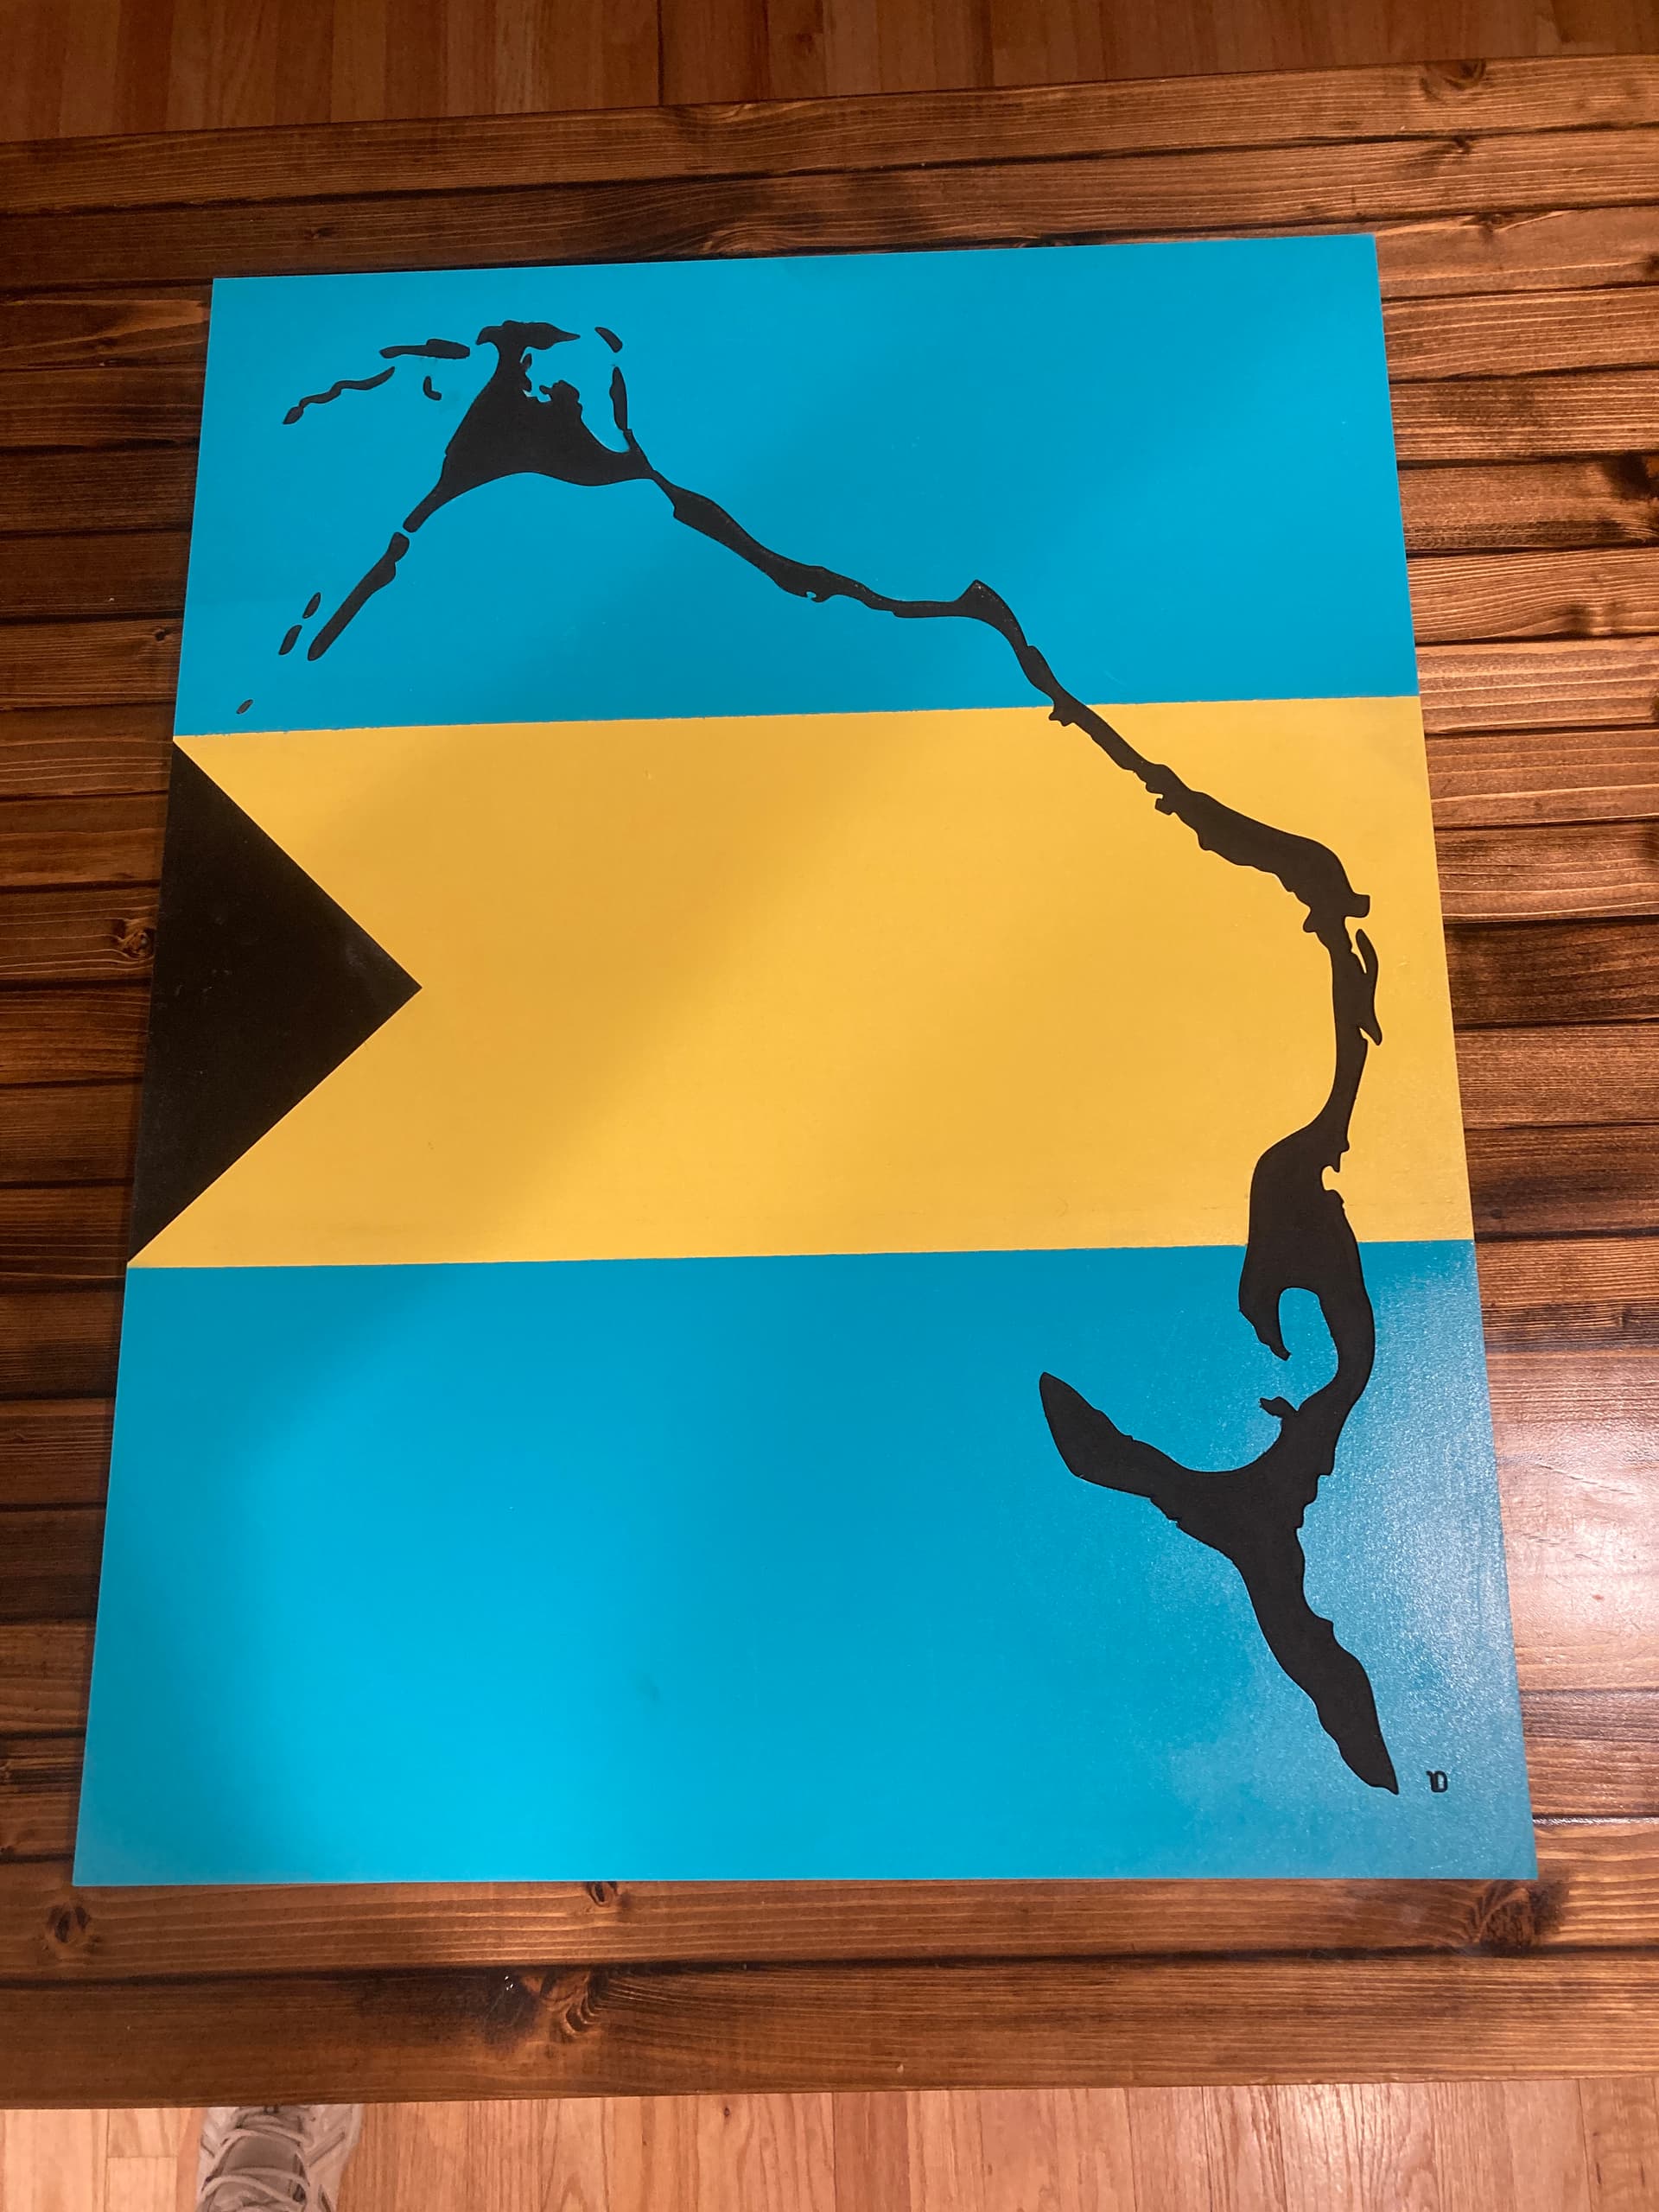
Not too bad for my first big project on my new machine.
24"W x 32"H
3/4" cedar edge joined boards
Finished with tung oil and matte lacquer
14 Likes
Well, there you are.

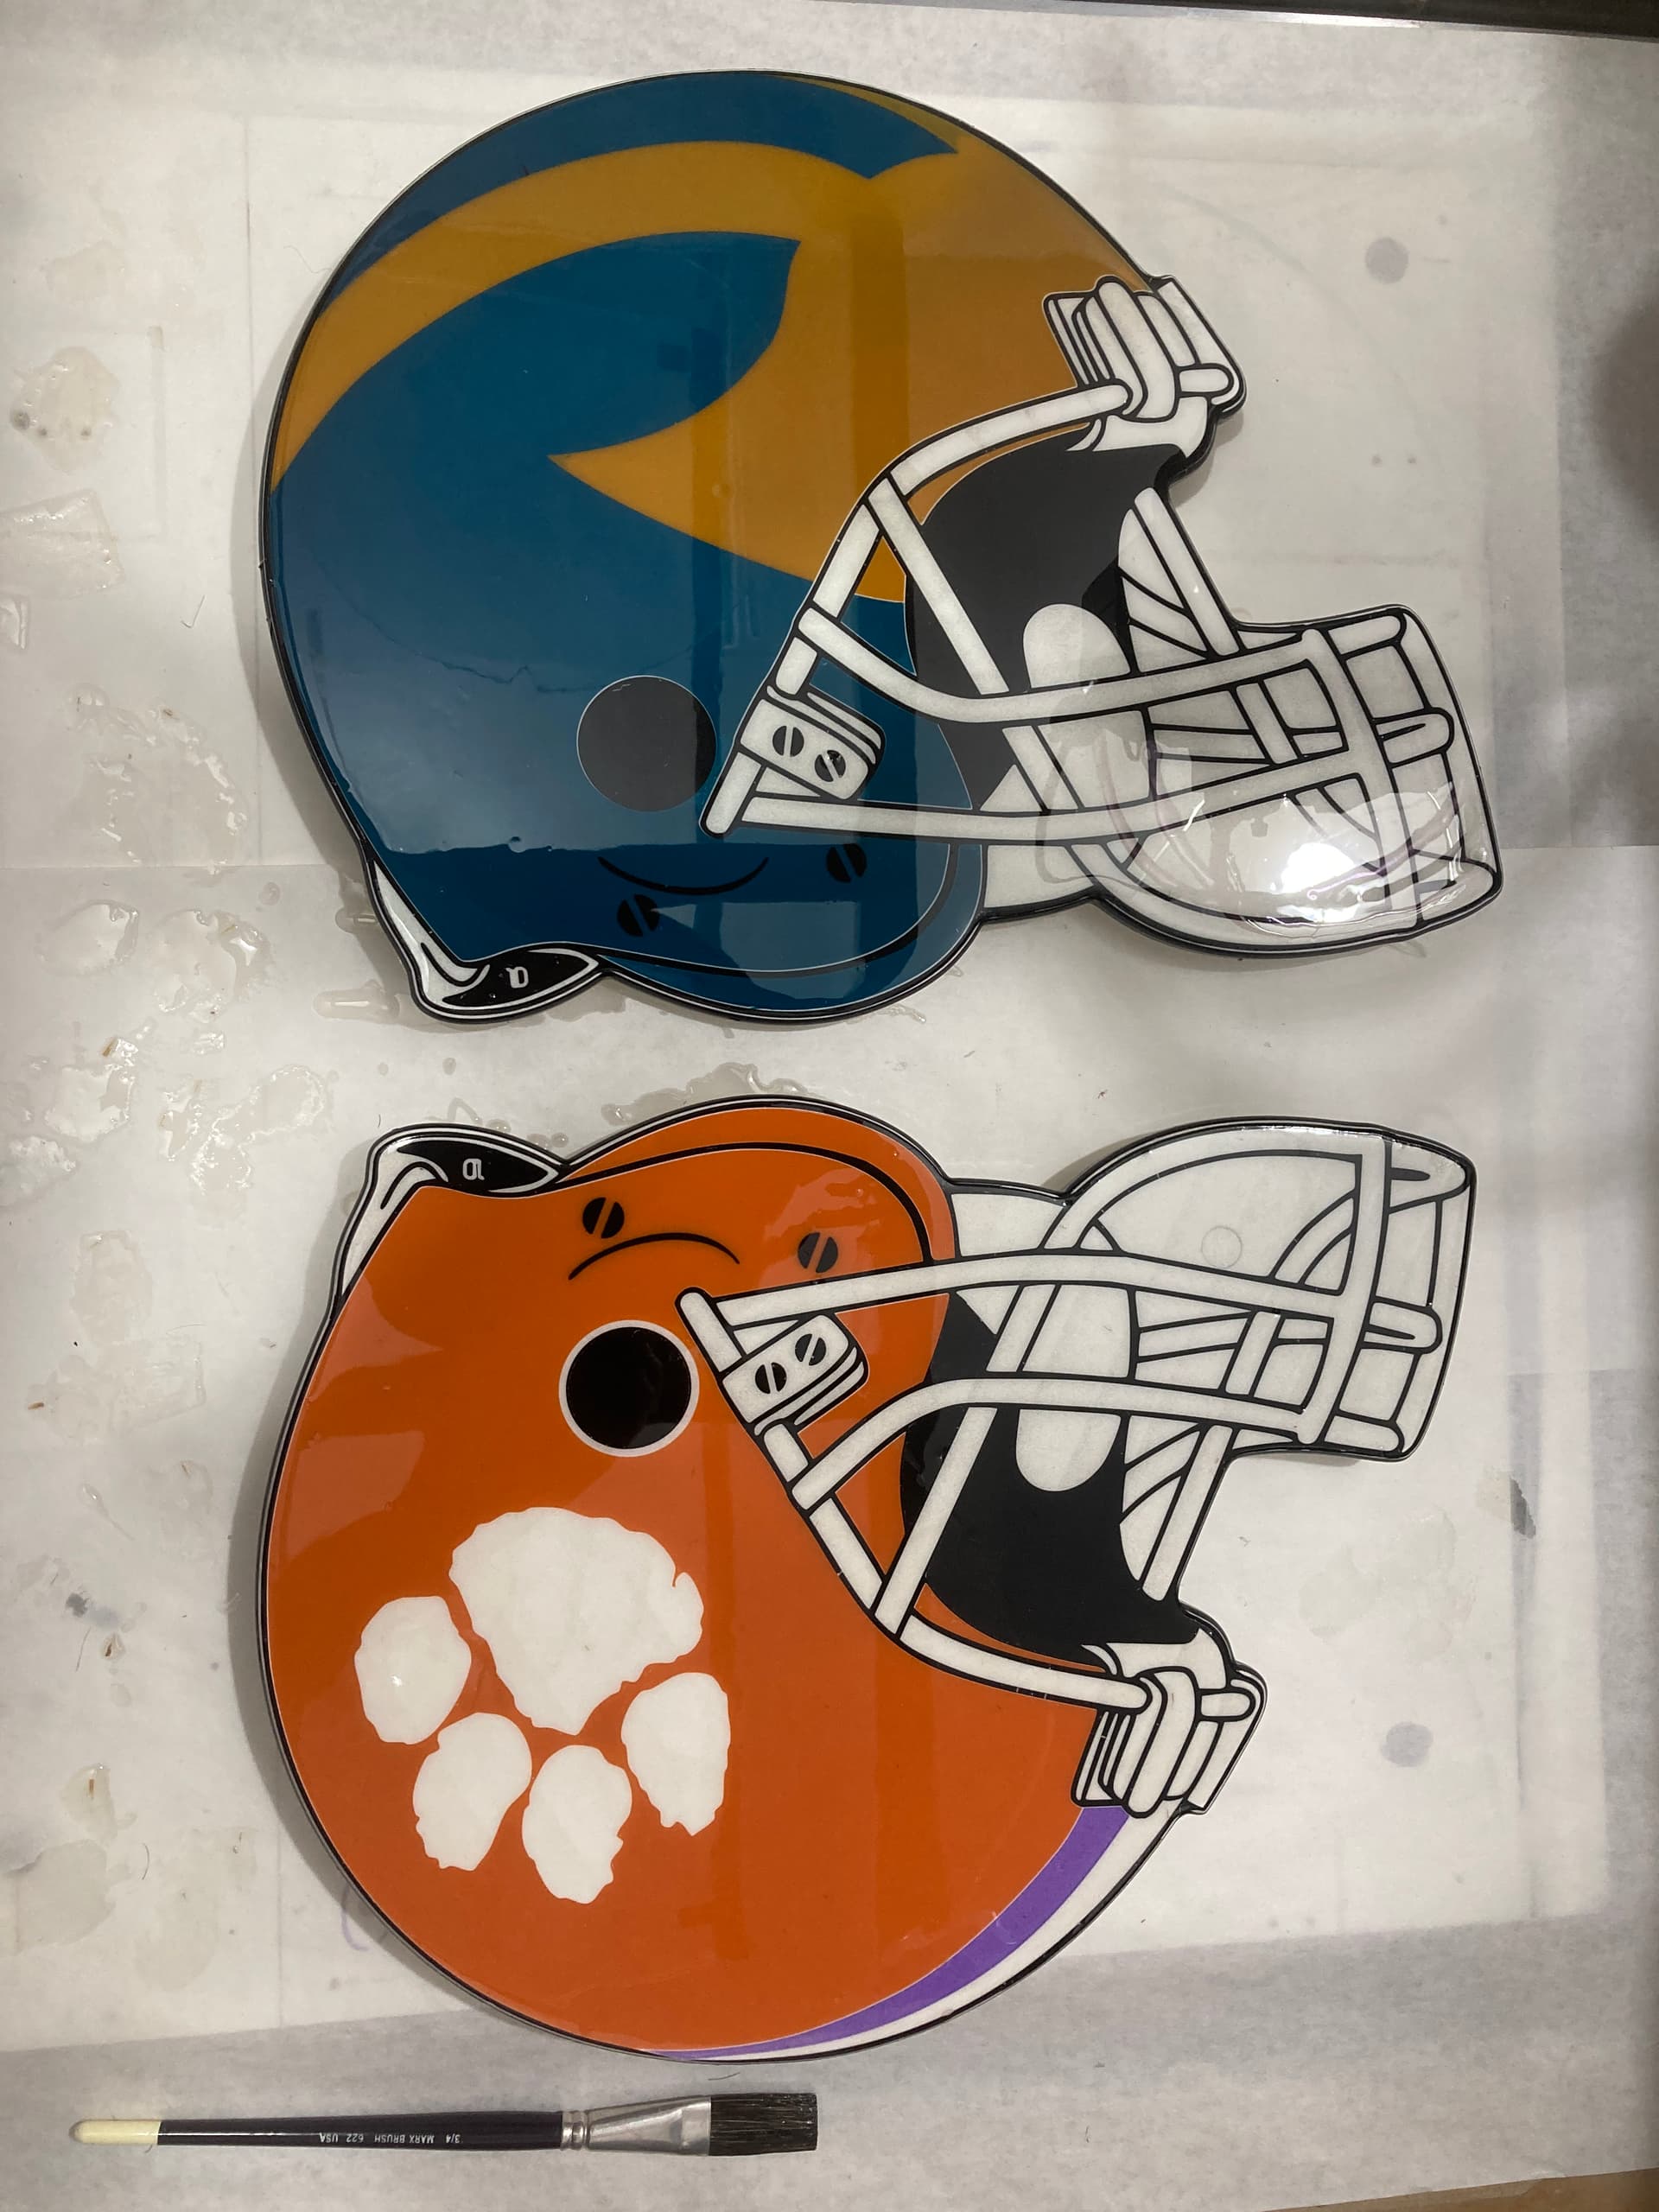
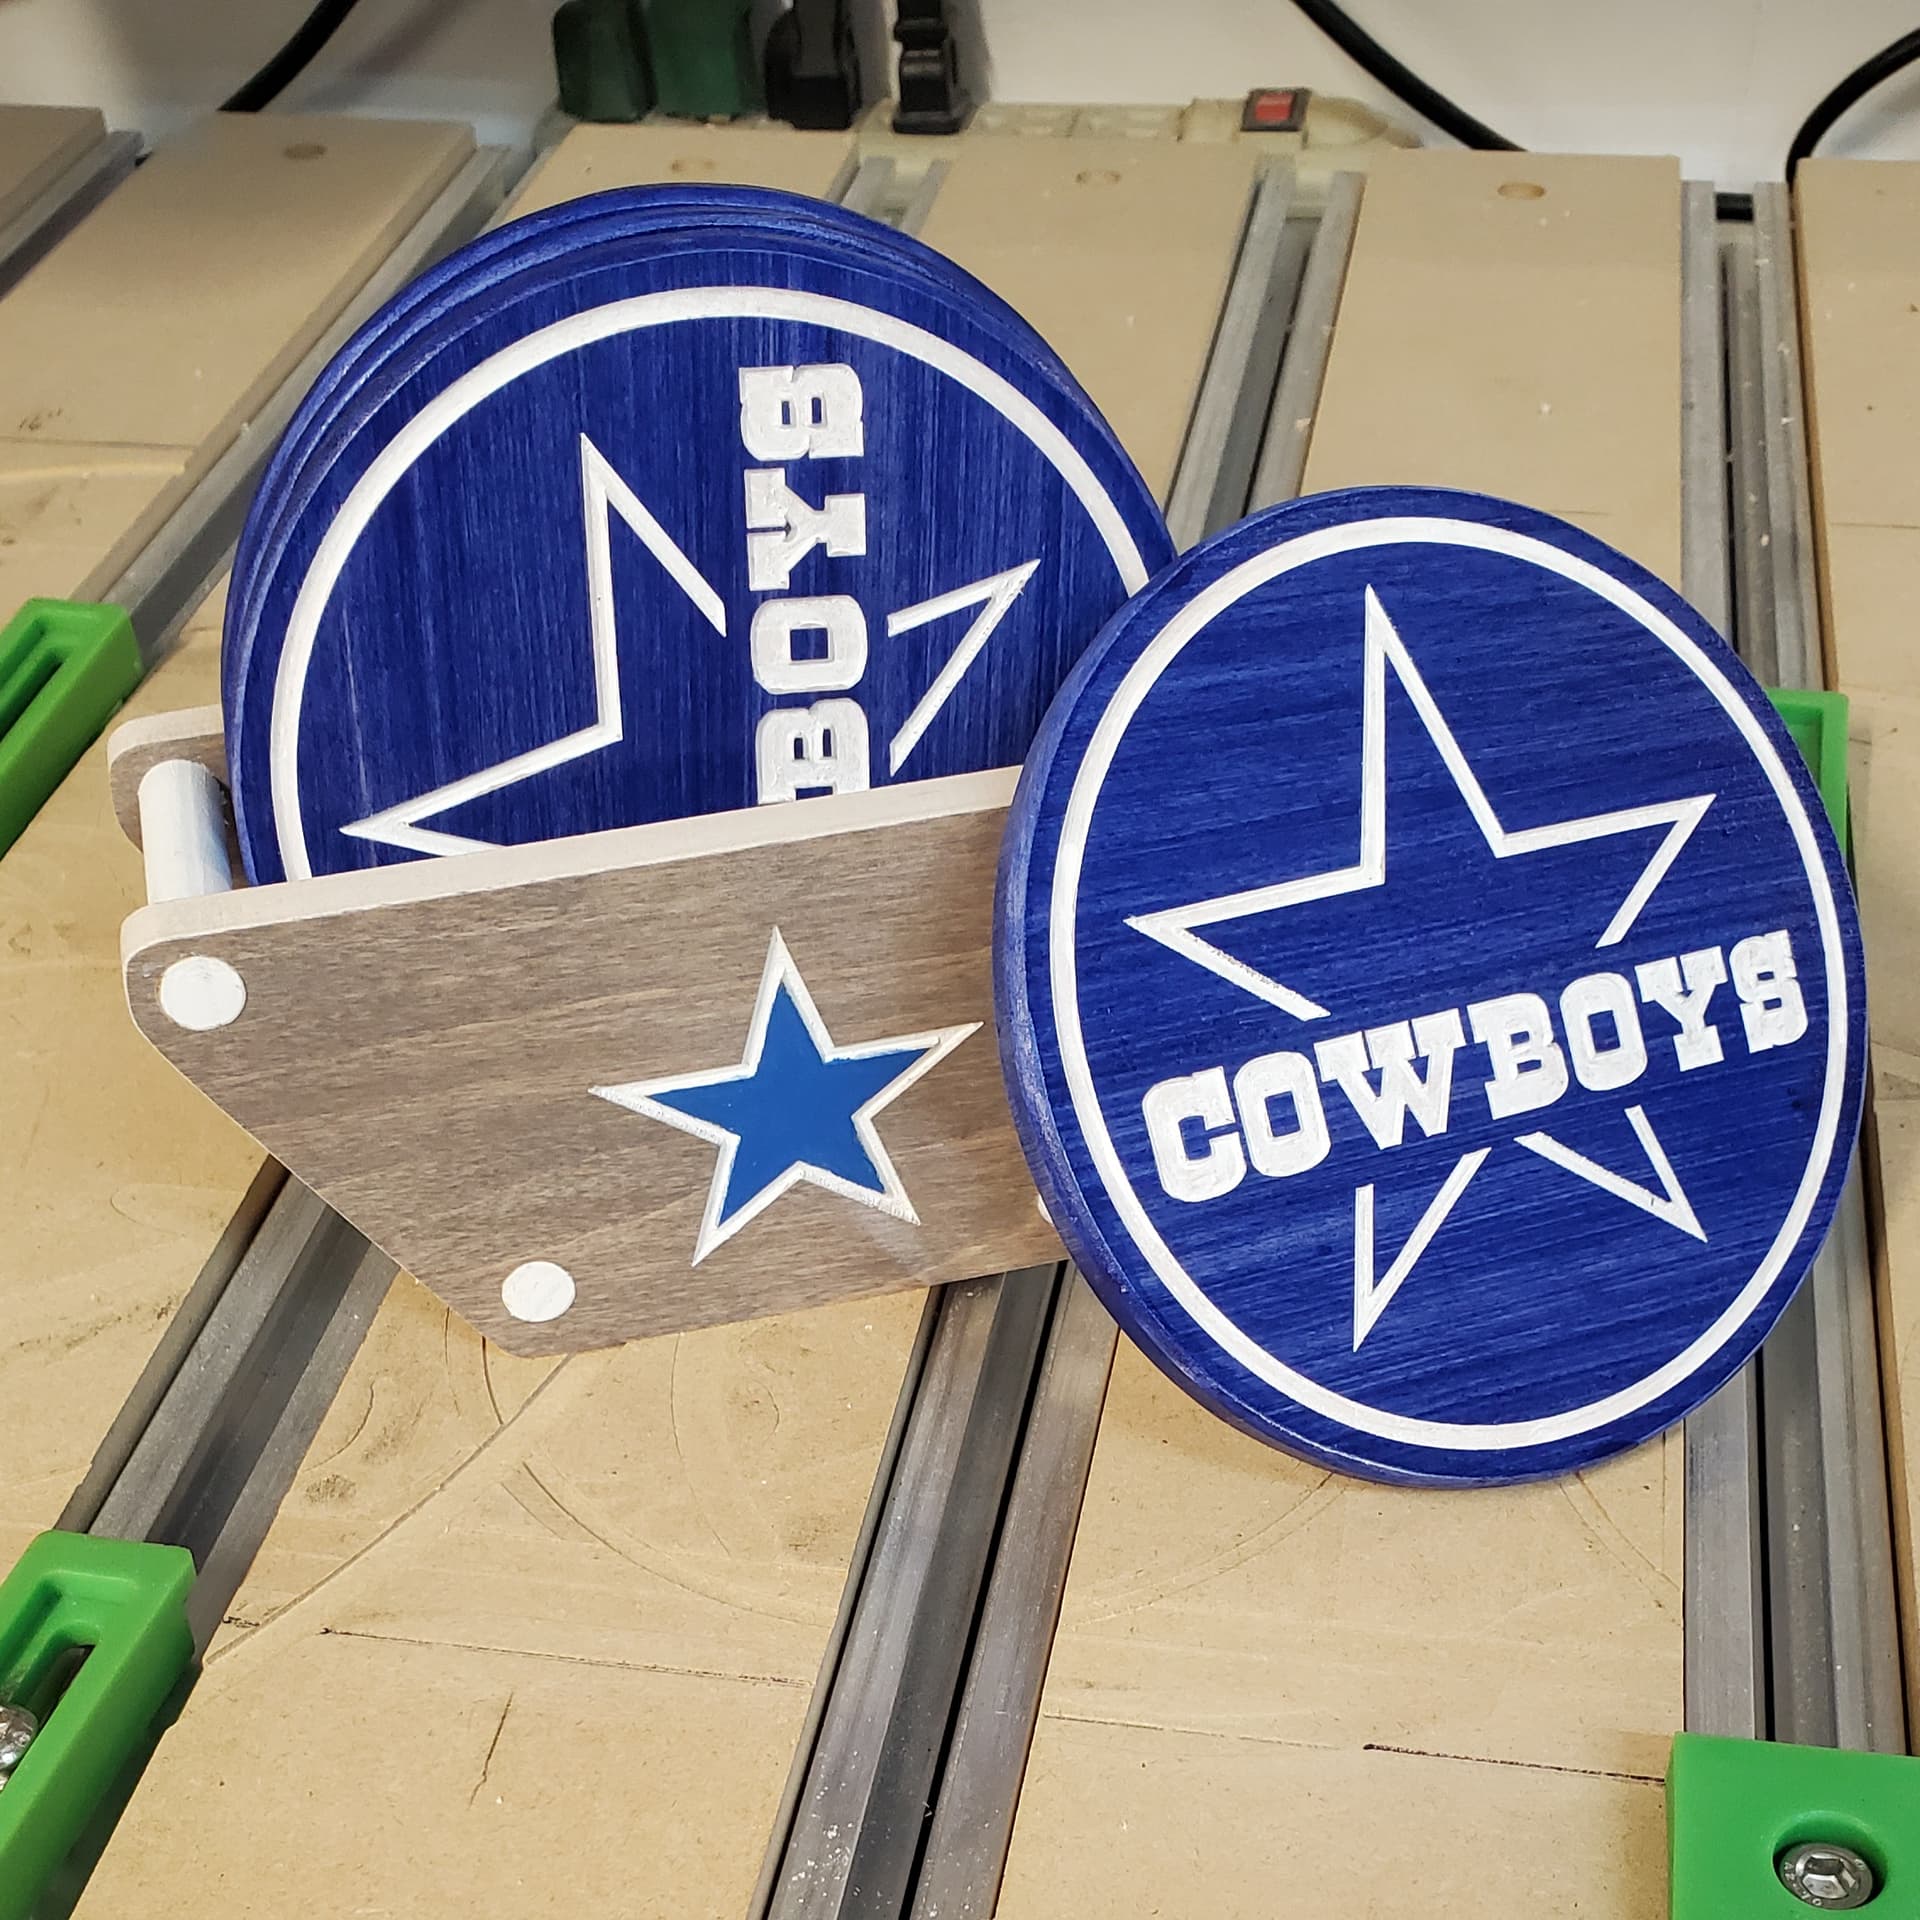
Folks love these coasters. Nice to have a little bling for your “coffee” mug to sit on.
9 Likes
That would make a cool box, too.
1 Like