Where the pine tree is on the right about half way up the tree is right about where I live. Just north of me the border between Texas and Louisiana goes straight and I live where the border starts to follow the Sabine River now called Toledo Bend Lake.
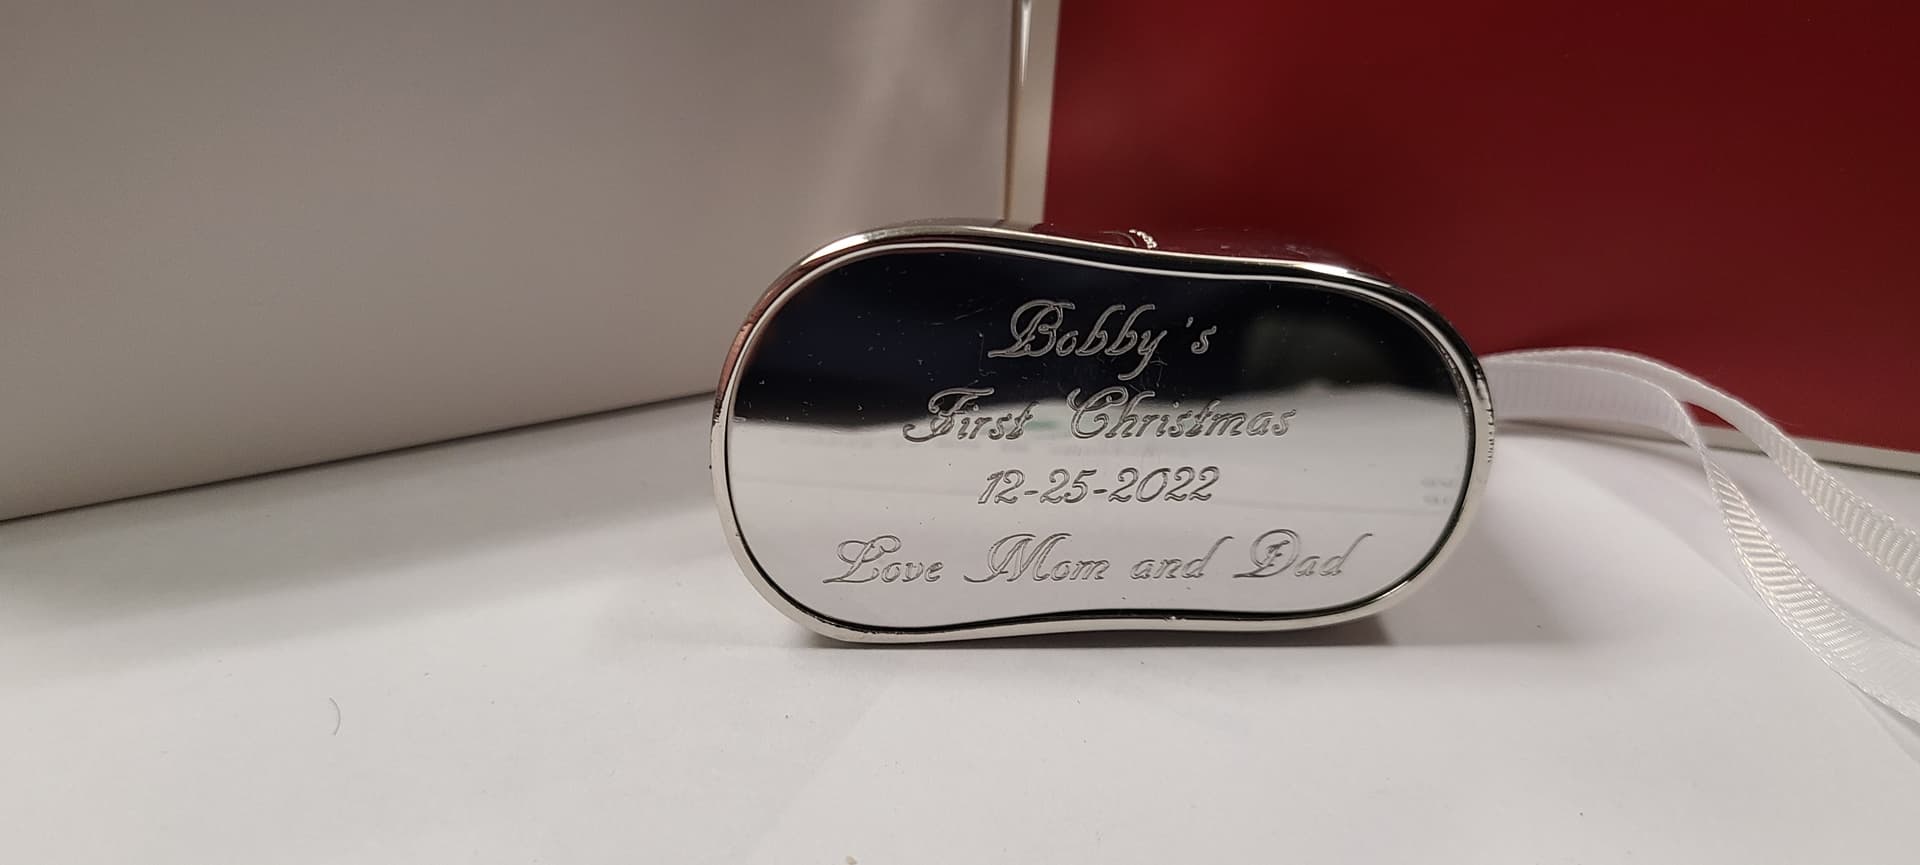
My Daughter bought this Christmas ornament from a store that was going out of business and could not engrave it. It had a plate that gets engraved and glued to the bottom of the shoe. I scanned the plate and then traced it in CC, made a pocket in a piece of scrap wood to hold it in place and then used a McEtcher tool to engrave it. First time I have tried this, I was surprised at how well it came out.
Griff
(Well crap, my hypometric precursor device is blown…)
1823
When I made my first hinges a month or so ago I was using some brass I had on hand 1/2x3/8 I think. Easy to set up in mod vise but required 2 sided machining to remove the waste.
Since I’ll be making a number of these, plus I’m a cheap b***ard when I can be, I decided to see if I could come up with something better.
Back to my old favorite workholding, tape and ca, Same feeds and speeds as the vise work. Cut materials cost by 1/2 and time by a third. I’ll take that any day.
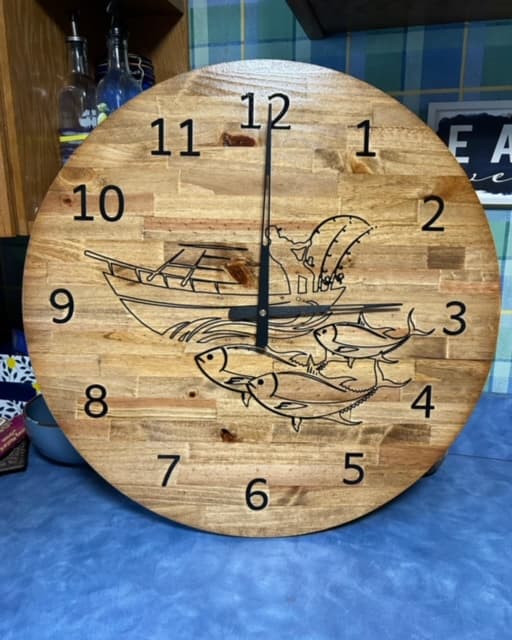
I just finished this 24" clock for my father-in-law. I used epoxy cast resin for all the engraving and minwax for the stain and poly. I found the clock mechanism on Amazon. It’s silent movement so you don’t hear the ticking noise.
Yes, I do it on every board I make that has epoxy. Biggest issue is changing out disposal of chips. I usually burn my sawdust and chips, but I won’t burn epoxy.
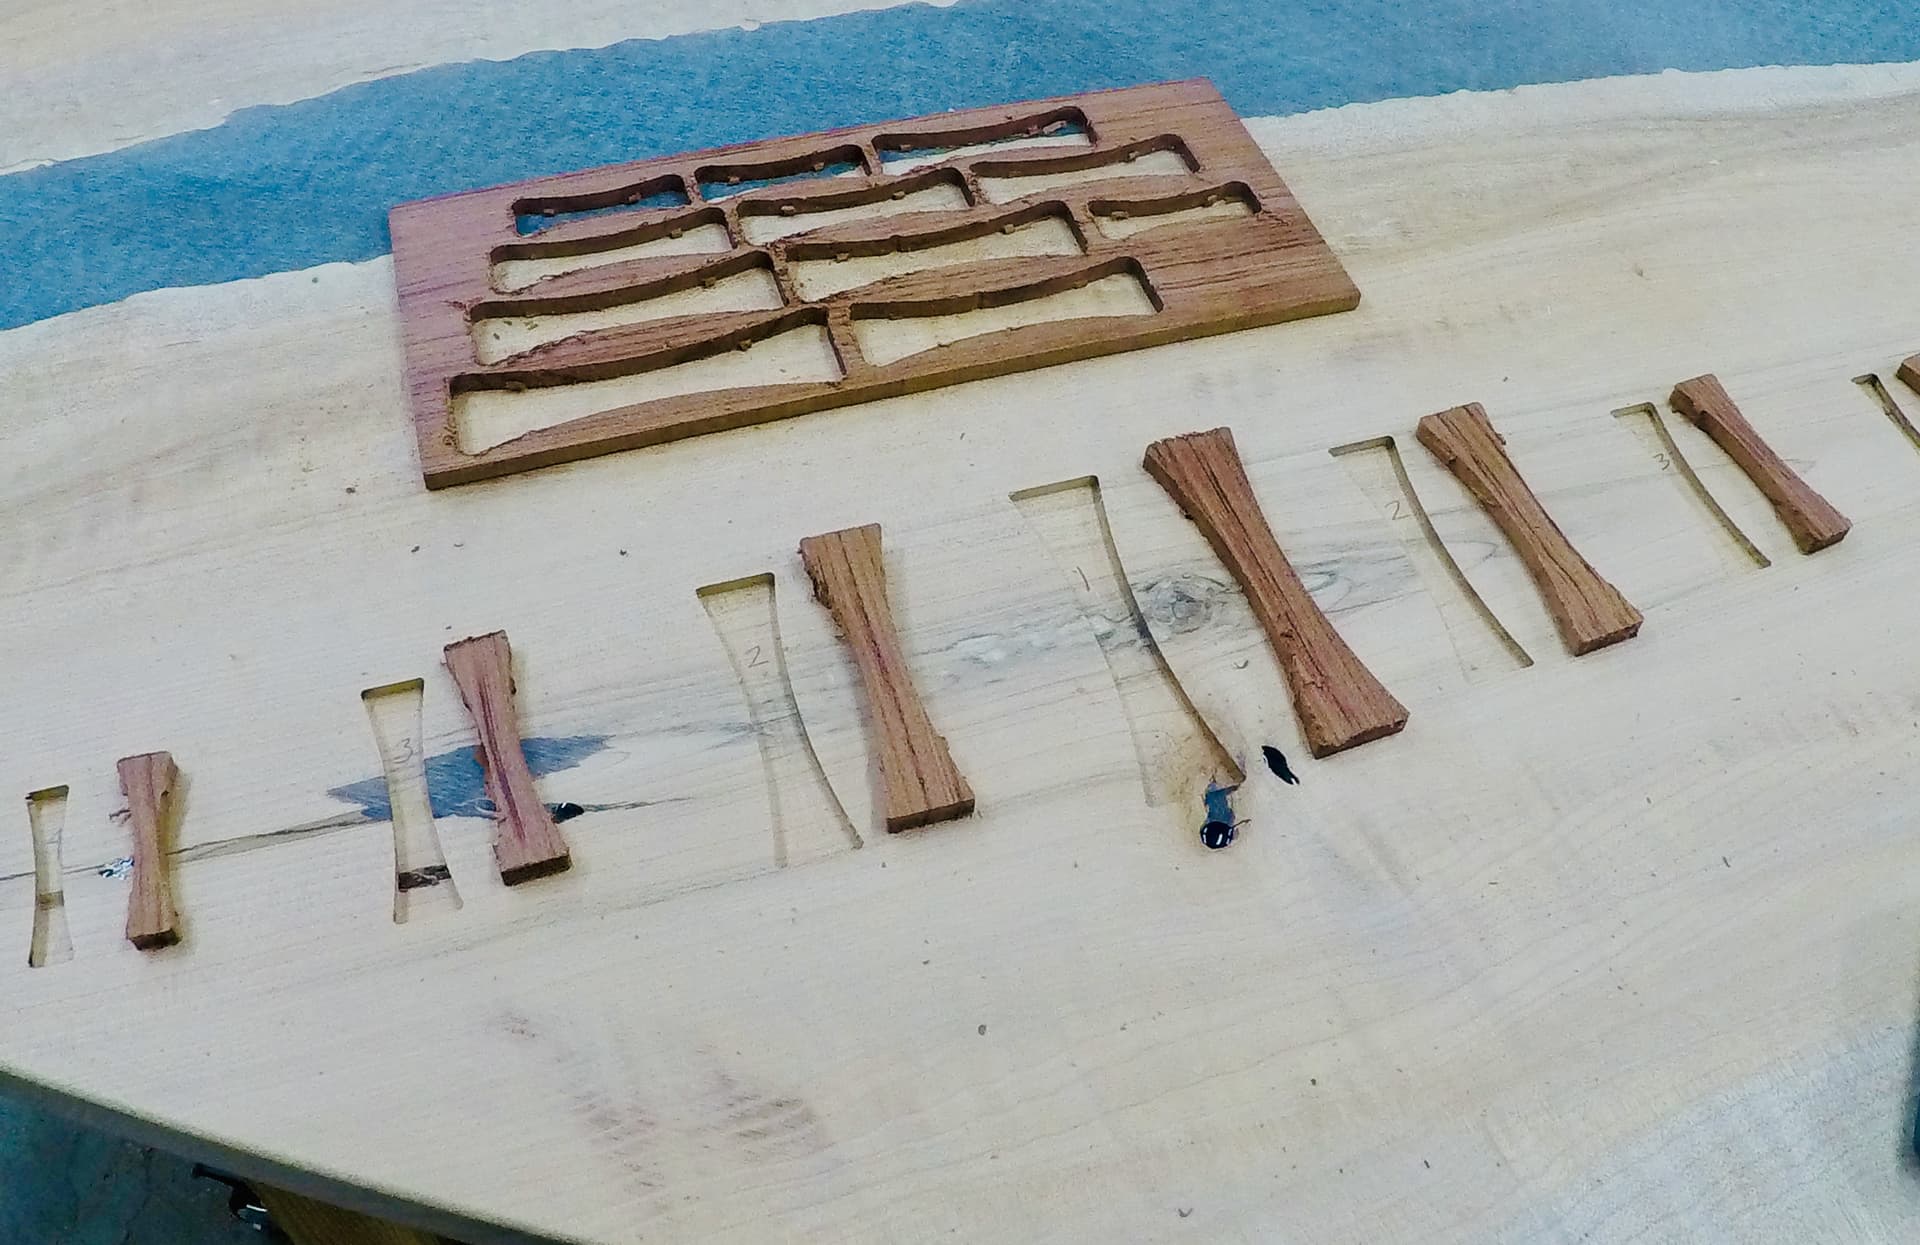
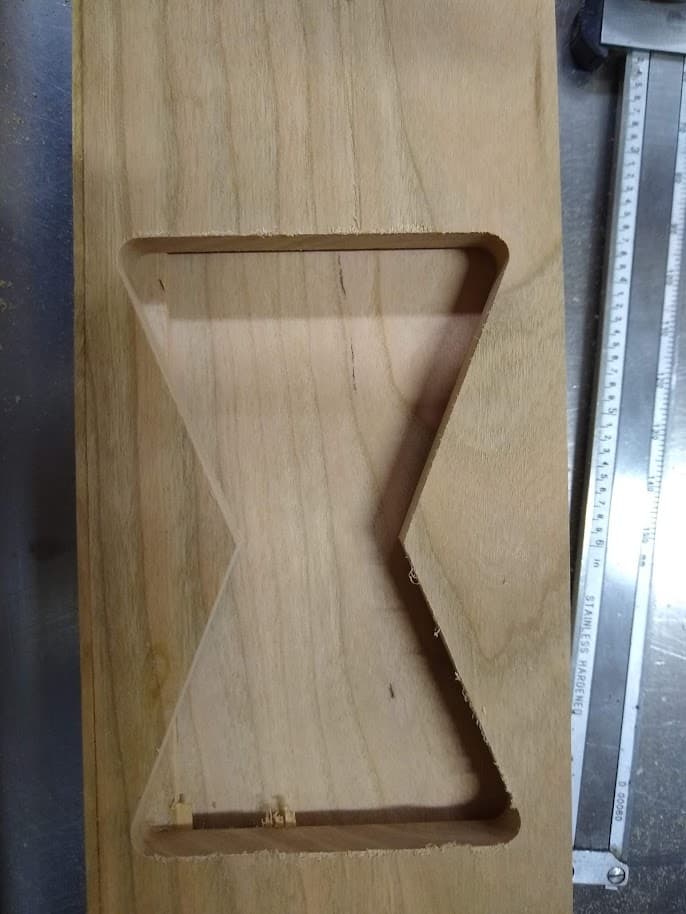
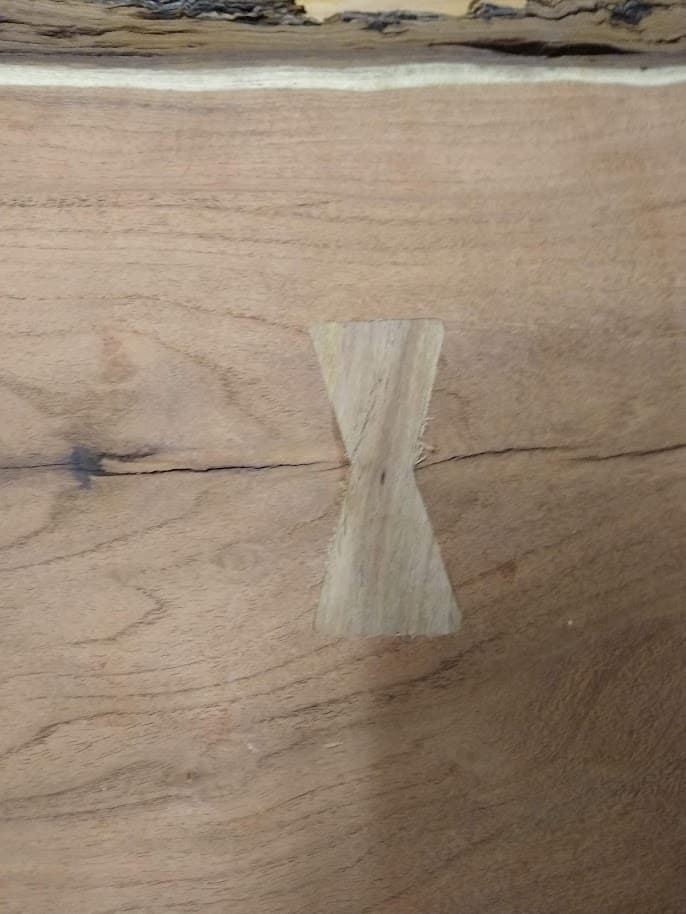
Agree also. I’m just finishing up a river table for my nephew, and it is mostly standard woodworking. But I used the Shapeoko to mill precise templates for the curved ends, to engrave a nameplate, and to make the bowtie keys and the corresponding template for the mortises
I had an existing router bit and collar to make the bow tie inlays. I could not find the template anywhere so I made one on the Shapeoko. My project was a little bit too big to lift up on the Shapeoko so I still used my router bit and collar with the handy template I made.
Looks awesome, Griff! I’d like to learn how you were able to use only a finishing toolpath? I would’ve expected to stall the CNC carriage without a rough cut first. Maybe the sloping insides of the box gave enough “introduction” to the bit?
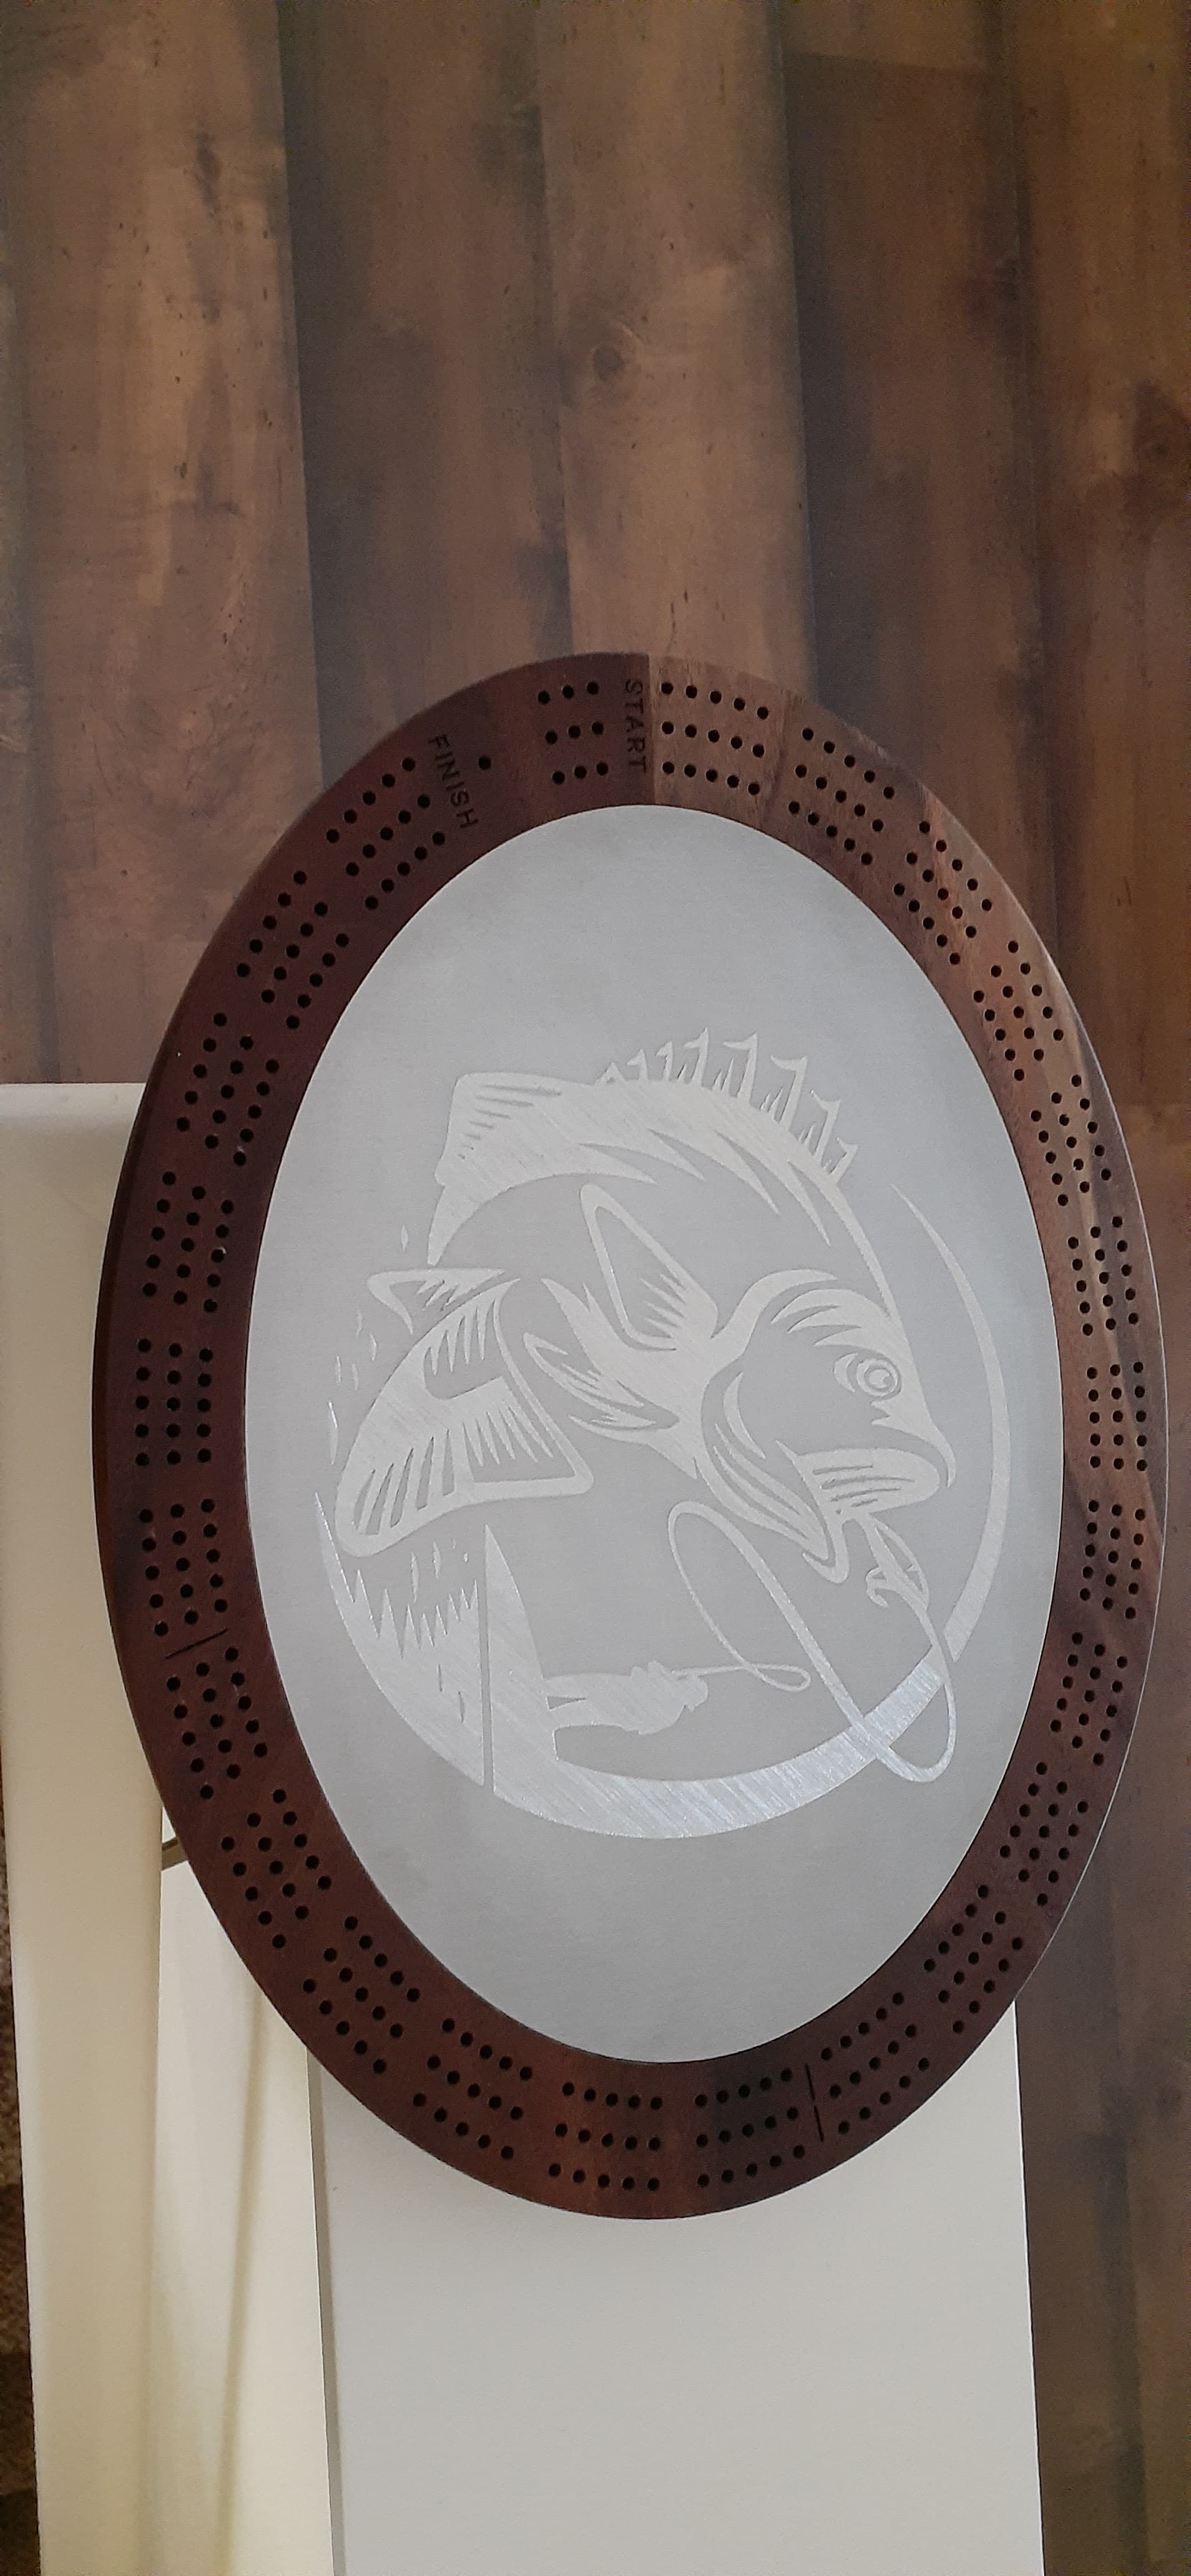
Did my second 3D carve and got it finished. This time it was a tree of life topper for one of my cribbage boards. Sapele base and a Maple topper. Really love the detail and the contrast. I think I might run another finishing pass on my next one though at a different angle or with a tighter stepover on the 3D. I like the way most of this looks but a few of the tighter spaces have a little left over still.
Second, I used an HDM w/1.5 kw spindle. Nice and rigid, plenty of power.
Third, excepting the initial plunge, cutter engagement is very light. Stepover is only .004”. Max height of model is .93”. So once the edge of the model is reached the DOC to clear the rest becomes .93”. Again, since the load is so light you can run deep and fast. And still take 5 frickin hours to complete. Zero sanding though. I hate sanding more than @Julien
Here’s the Wiz stained, 2 coats poly.
Obviously this is not the most efficient way to accomplish this. Cutting all that empty space with a tapered ball nose at .004” stepover is silly. But the requester wanted the shadow box effect. I had other things to do and didn’t feel like messing with toolpaths at the time, the machine was idle so…
Great approach, thanks for the info! A rough cut would’ve probably added time, since the tiny stepover made sanding unnecessary. And I suppose if the initial pass is too deep (like it would be for my finish router), an initial roughing toolpath clearing out just the first quarter-inch slot would solve it.
I have been making gifts for family and friends for years. The hardest thing about making handmade gifts is giving yourself the time required to complete a gift before the date required. I start in September planning and gathering the material needed. Even starting early I am usually jammed up getting things ready for Christmas and spending late night hours in the shop trying to get things completed. Finishes do not care about your schedule so be sure to schedule the time required to apply, dry and cure a finish. A dry finish is not cured. Many finishes take 1-2 weeks to fully dry and cure.
So start early in the planning and execution and try to finish everything by December 15 so you can enjoy the Christmas season and not be stuck in your shop with no elves helping like Santa Claus.
Its for 2022. We were out of town so family is doing xmas gifts this weekend. I had it done before we left, just took the protective vinyl i had over the aluminum piece off and cleaned it up.
Sabin River Basin
Toledo Bend Reservoir is “the largest man-made body of water in the South by surface area and fifth largest in surface acres in the United States” .