Also, consider adding the ability to scroll through the different fonts by pressing the up or down arrow keys on the keyboard instead of selecting from the drop down list each time.
Give 459 a shot at:
https://carbide3d.com/carbidecreate/beta/
Lots of edge cases to consider when you’re just the limit of changing from a traditional vcarve path to a small pocket.
2 Likes
yup that fixes it.
sorry about giving you that cursed test pattern… it’s on the evil side of things somehow
@robgrz: I just downloaded it and tried an advanced Vcarve toolpath
- thumbs up for this feature! game changer for CC Vcarving.
- but it does not seem to honor the “MM vs Inches” setting from the setup menu, for the start depth & max depth ? The metrically-inclined among us cringed

- are positive start depths not supported yet ? Sorry if it was mentioned and I missed this info.
1 Like
if you’re in the mood for corner cases, another test pattern shows something that looks like a corner case in 459… it shows it both in the simulation and in camotics (at ‘very high’ accuracy setting) so I doubt it’s a visualisation artifact.
In the file below, if you zoom in between the “a” and the “r” at the bottom of those letters, there is something taking a bite out of the letter that should not be there
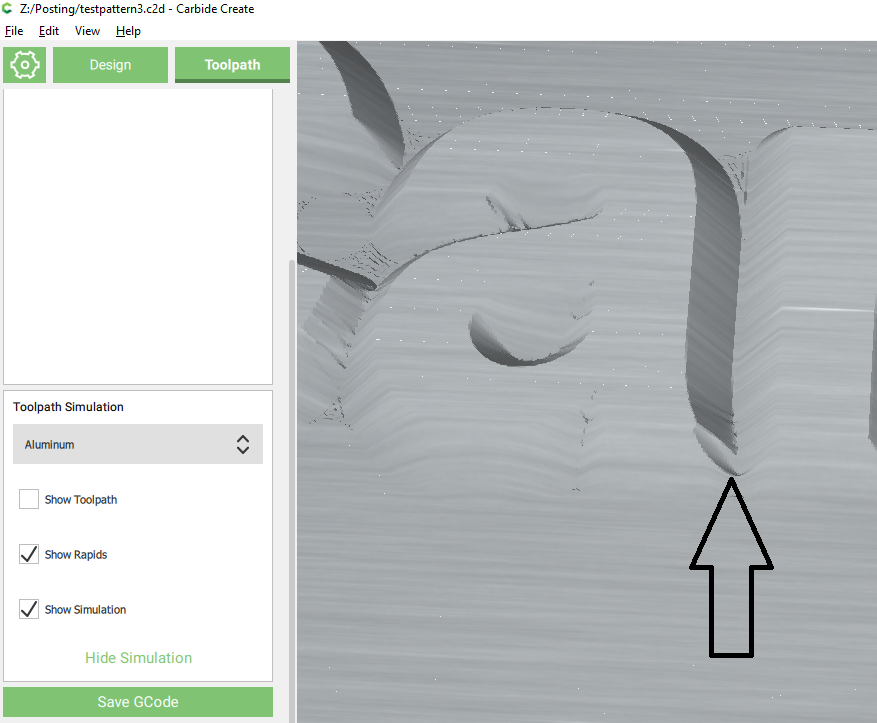
C2D file: testpattern3.c2d (490.1 KB)
1 Like
Sorry, it’ll be fixed in 460
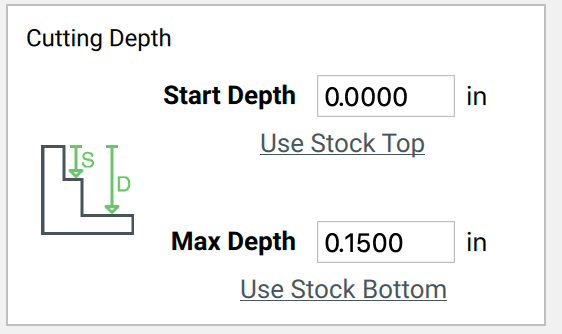
All Start Depths are a positive dimensions repsenting the depth below the top of the surface to start the toolpath (Image to be added to dialog box). Negative start depths are actually above the top of the stock and are not supported.
I can duplicate it here in Cutviewer so I’ll see what I can find out about it.
3 Likes
I just realized why I couldn’t pocket inside of a pocket. the toolpath wasn’t changing no matter what number I put in the start depth. Apparently the max depth is not measured from the start depth, so your start depth has to be added to the actual depth that you want to cut when setting max depth.
So if a make a .125" pocket and I want to make another .125" depth cut in the middle of it, my max depth for the second cut actually has to be set at .25 and my starting depth has to be .125.
Perhaps this process would be more intuitive if the max depth was the max depth of cut starting at the starting depth for that particular operation rather than it being the max depth from stock top even when your starting depth isn’t stock top.
If I want to cut 1/8" deep in an operation, i should be able to set the max depth to 1/8". If I want to cut 1/4" deep in an operation, I should set the max depth at 1/4".
Correct - Max Depth and Starting Depth are both measured from the top of the stock
1 Like
this is different than other places in carbide create… and will be confusing. might want to be consistent with how you specify pocket operatios
If it’s different then we’ll definitely change it before release. (And add a picture)
I just checked the contour op and this is what we do:
2 Likes
Climb and conventional milling options?
Some small refinements:
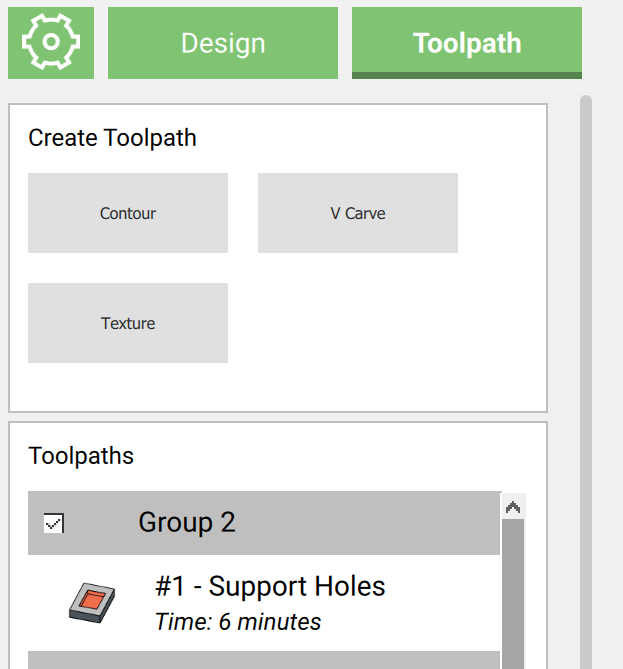
- Tooltip on a tool path that shows a summary of the toolpath (tool parameters plus start/max depths)
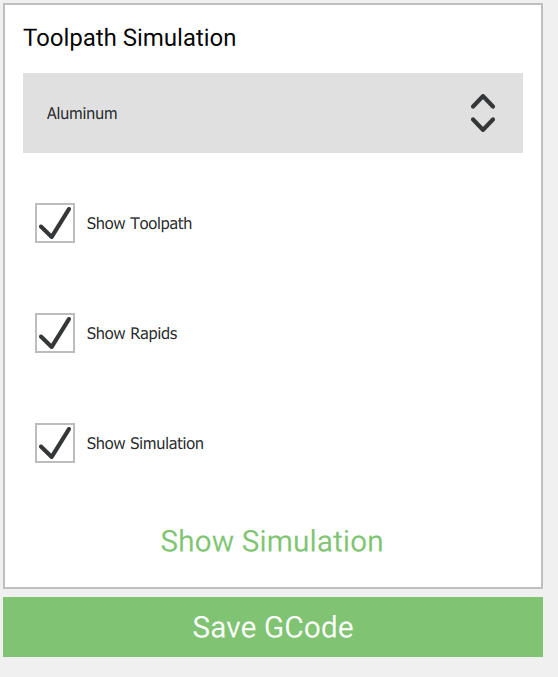
- Option for smaller fonts, buttons and icons on 4K screens, or at least some changes to make things more consistent. Thing are both huge and tiny at the moment.
1 Like
Fixed in 460 at Carbide Create Beta Downloads
We managed to reduce this to the bare minimum case and it seems to be a gouge deep in the vcarve algorithm. I think this will take some time to figure out.
Hi-Dpi support is a nightmare right now in Windows. Part of the problem is that the implementation seems to be vendor dependent, a program on a Microsoft Surface might look very different than a Dell. It’s not surprising but we’ve found that Surface devices seem to do the best job.
The other part of the problem is the Qt QML framework that we use for the GUI in Carbide Create, which is the biggest structural mistake we made on Carbide Create. We’ll be moving away from QML and into the standard Qt library since it’s faster to develop and it seems to have fewer Hi-Dpi quirks. (The new tool library and the advanced vcarve dialog no longer use QML).
This is all a long-winded way to say that we’re going to be migrating the UI into a newer codebase that should have a lot fewer UI quirks.
3 Likes
Thanks !
I would not be very surprised if performance (and memory usage) improved in the process as a bonus. Sounds like a good call.
1 Like
oops… well makes me not feel as bad that this file costed me a lot of time fixing bugs in my hobby project… it’s cursed file #3 for me.
(on the plus side you now have a small reproducer)
glad to see QML on the way out… still remember that monster from when I worked on Meego with our friends at Nokia… it was great to get quickly to a prototype but insane hard to get to a quality product
2 Likes
Post deleted due to error.
I spent some time over the weekend playing with 458 (and subsequently 460) and the new advanced V-carve. Overall, I love it, especially with the bitsetter!
Will it be possible to use it without the bittsetter? I didn’t try turning mine off, but will the user get a chance to re-zero between tools? Before I installed the bitsetter I couldn’t do this if I had multiple tools in one g-code file…
Also, (and related) it would be really nice if there were a way to split out or merge the toolpaths for the different tools. I was working on a design that had multiple contours and I had to keep switching between the clearing bit and the v-bit. It sure would have been nice if there was an easy way to group all the ‘clearing’ toolpaths together and all the ‘v-bit’ toolpaths. I couldn’t really see any way to do this since the ‘advanced’ toolpaths have two tools in them.
What is the intended purpose of the “Replace with the current selection” button in the edit dialog? After playing with it, I can see what it does, but I don’t know why I would use it, and I was initially confused by it. None of the other ‘edit’ operations allow you to do this…
Finally, this is not a CC comment - it sure would be nice if CM would put the tool number in the ‘change tool’ modal dialog that pops up when it is waiting for you to change tools. It shows on an earlier dialog but that one is no longer visible when it is waiting - I had one toolpath where there was no clearing bit and I ended up putting in the clearing bit instead of the v-bit…
Still, this is a great addition to CC! Nice work.
to turn this into something more actionable, it would be nice if (for the no-bitsetter folks) CC just puts a suffix on the filenames for the various tools, so either
foo-102.nc
foo-301.nc
or
foo-1-102.nc
foo-2-301.nc
where the 1/2/… are sequence numbers. For the human the later i nicer, but to determine the order is more tricky (suggestion for sort, flat endmills first, order descending by diameter, then ball nose, then V)
(and no way will I give up my bitsetter… that thing is a HUGE game changer)
1 Like
Thanks. It does seem like a post-processor would be the way to deal with the multiple tools, although I would have to think about the sorting issue (I think ideally you would want to clear first, then vcarve, although maybe it doesn’t matter here.)
I looked at the G-Code and while there is a comment before the M6T102 command, but it does not specify the tool number. The toolnumber is in the M6 command, tho…
And yes, I agree, the Bitsetter is awesome and I also would not give it up!
In the 400 series, no. We need to make some attempt to keep a UI constant with all of the new folks getting into Shapeoko and whole new multi-tool workflow would be a support nightmare.
For now, consider the Advanced VCarve feature to be a “Preview” feature in V4. We’re going to lock down the 400 series, or V4, relatively soon and then start working on V5. Once we can work on V5 without concern about UI changes, we’ll revisit the multi-tool workflow.
I don’t know where it’ll go but that’s the plan for now.
3 Likes