Does anyone have any suggestions that might help to reduce wood splintering? I try to avoid using oak, but it just happened to me with a nice piece of Purpleheart and ruined the project. I was pocketing at the time.
I try to avoud cutting with the grain but there are times when it can’t be avoided.
Does a smaller stepover or depth of cut help. My bits are very sharp.
There are several things to keep splintering/fuzzies from happening. One is to put a coat or two of dewaxed shellac on the surface (Zinsser Universal Sanding Sealer). That hardens up the surface better than just plain wood.
Use a down cut bit to start a pocket/contour to a certain depth and create another toolpath with an up cut to finish the pocket/contour. That is a pain but a down cut gets a better top cut and an up cut gets a better bottom cut.
Clean your bits on a regular basis. Dirty bits can seem dull and cause more chip out than a clean bit. Make sure your bit is sharp.
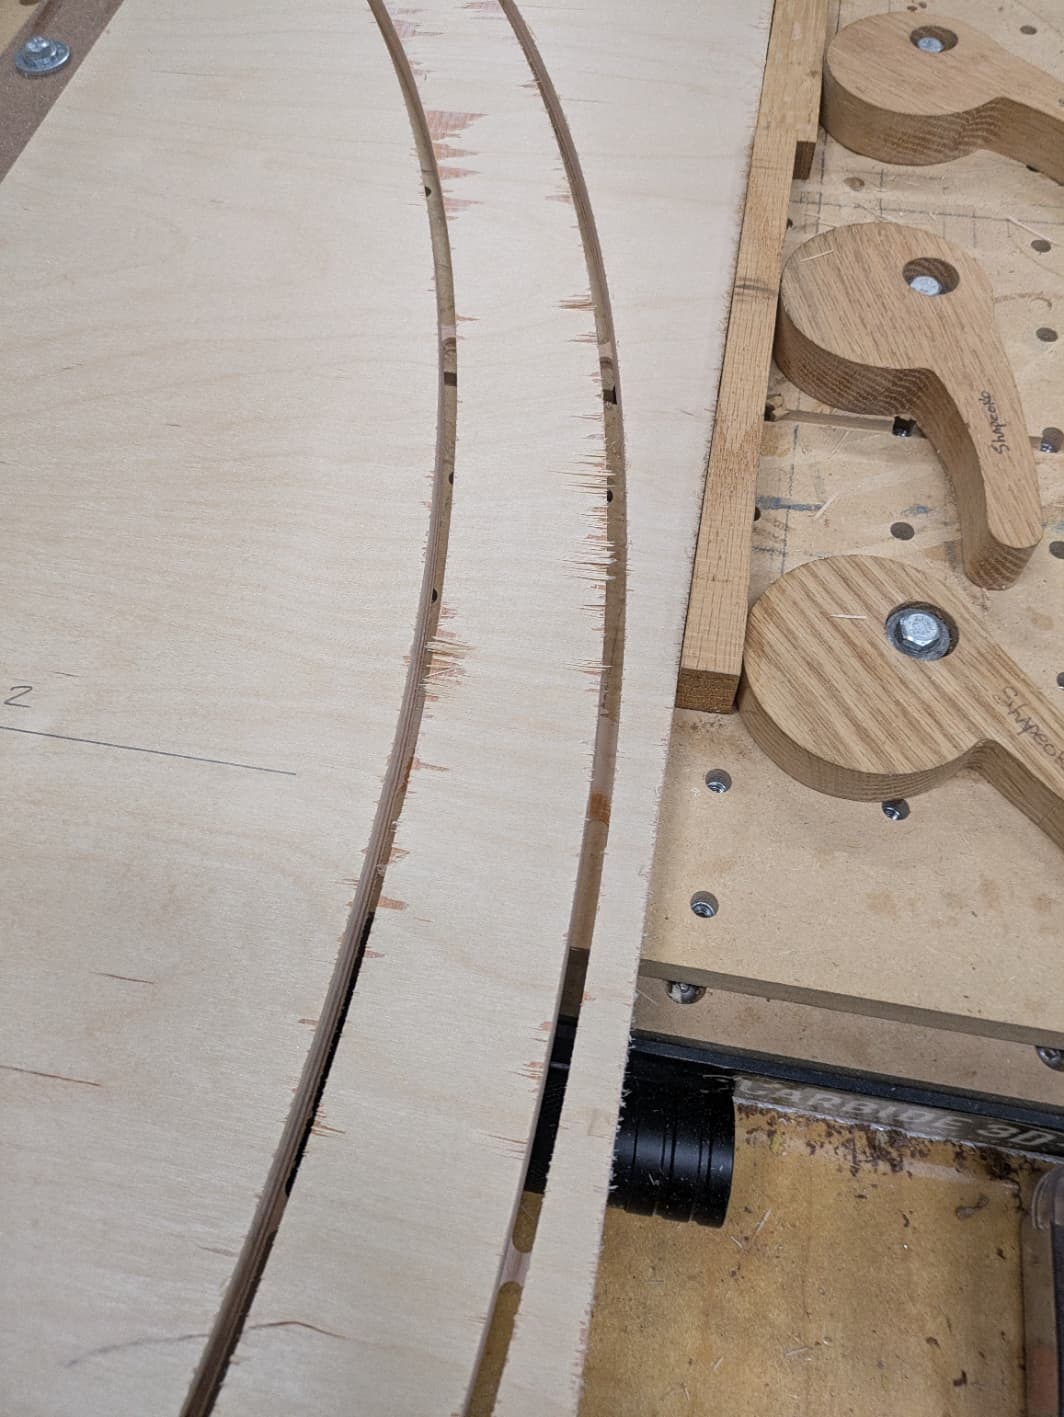
Here is an example of cutting plywood with a #201 bit. You can see at the bottom half of the cut there is very little chip out. But on the top half there is a lot. On the bottom half the bit is cutting with the grain and on the top half it is cutting against the grain of the veneer. Same plywood, same bit but different results.
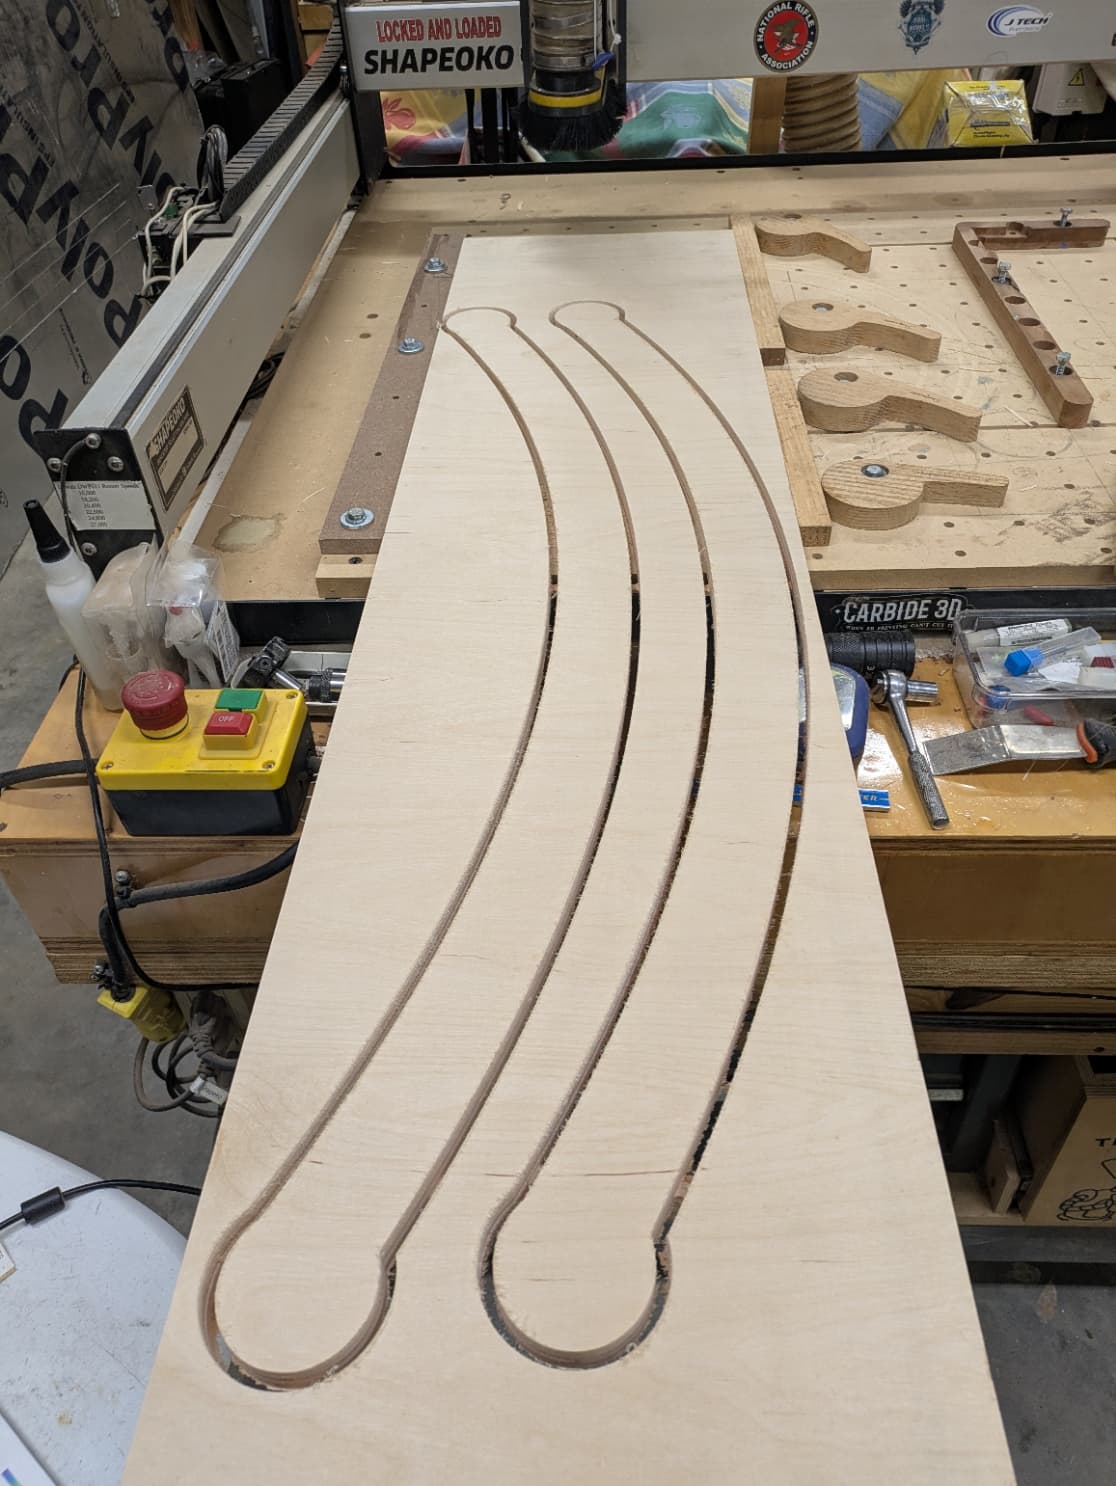
On the second cut the bottom had some chip out but this will be a template to router out some 2" thick rockers for a chair. So the router bit will run on the edges of the template. But had I wanted a good edge on both sides you could have started with a down cut bit and finished with an up cut bit.
This plywood is made in Indonesia and is birch. It is very light in weight so cheap plywood acts like cheap plywood. I dont not use plywood very often and prefer solid wood but this was a request from a friend.
Because different woods react differently and depending if you cutting with the grain or cross grain you will get different results. Some times you just have to plan on rounding off the edges of something that can be for your design on a router table but as far as the CNC mitigating chip out there is not much you can do because usually you are cutting both with the grain and against the grain at other times in the same project.
In milling, “climb milling” refers to a cutting technique where the cutter rotates in the same direction as the feed movement, essentially “climbing” into the workpiece, while “conventional milling” is when the cutter rotates opposite to the feed direction, meaning the cutter cuts against the material’s movement, which is considered the traditional method; climb milling generally provides better surface finish, reduced cutting forces, and longer tool life due to improved chip evacuation, while conventional milling can offer greater stability on machines with backlash due to the force pushing against the table feed direction.
Key differences:
Cutting direction:
In climb milling, the cutter rotates with the feed direction, while in conventional milling, the cutter rotates against the feed direction.
Chip evacuation:
Climb milling tends to have better chip removal as the chips are pushed away from the cutting edge, leading to a cleaner cut.
Cutting forces:
Climb milling usually results in lower cutting forces due to the “pulling” action of the cutter, which can reduce vibration and improve stability on well-maintained machines.
Application:
Climb milling is often preferred for finishing cuts due to its superior surface finish, while conventional milling might be used for roughing cuts or on machines with significant backlash where the force against the table is needed for control.
Thanks for that information. Looks like i could create an inner offset inside the perimeter of my project, do a contour climb cut, and then pocket out the rest in the usual fashion.
I have CC Pro but I think that climb cutting is a Pro feature and in the free CC version. I could be wrong but you may have to get the pro version for climb cutting.