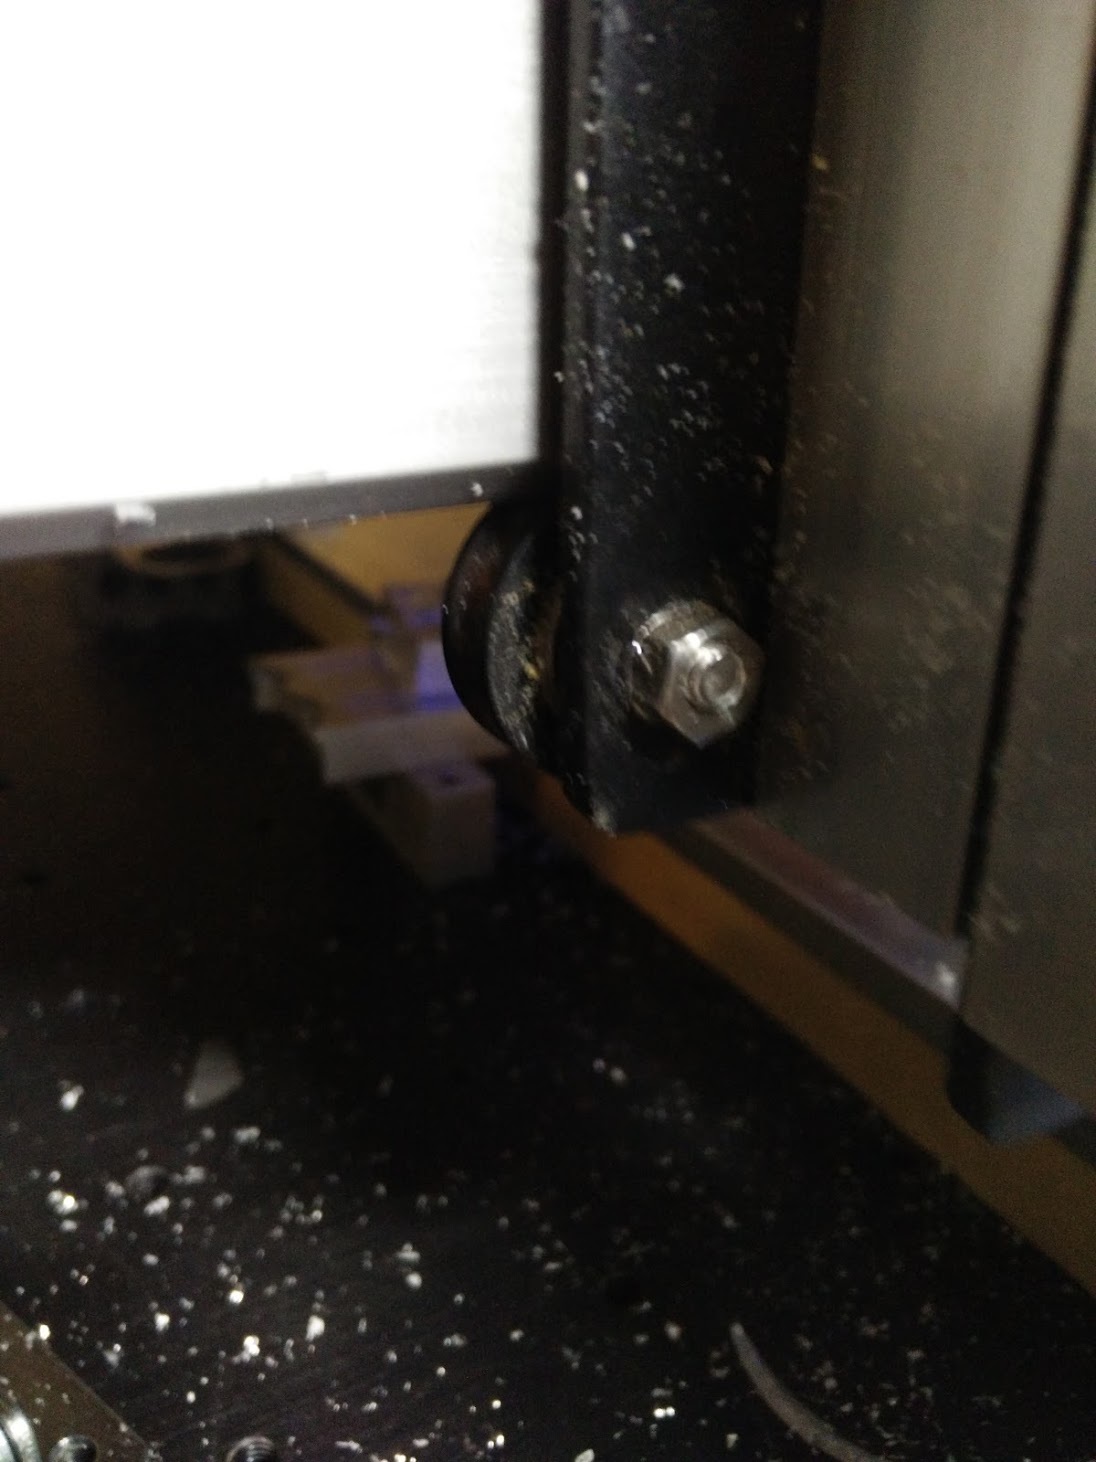
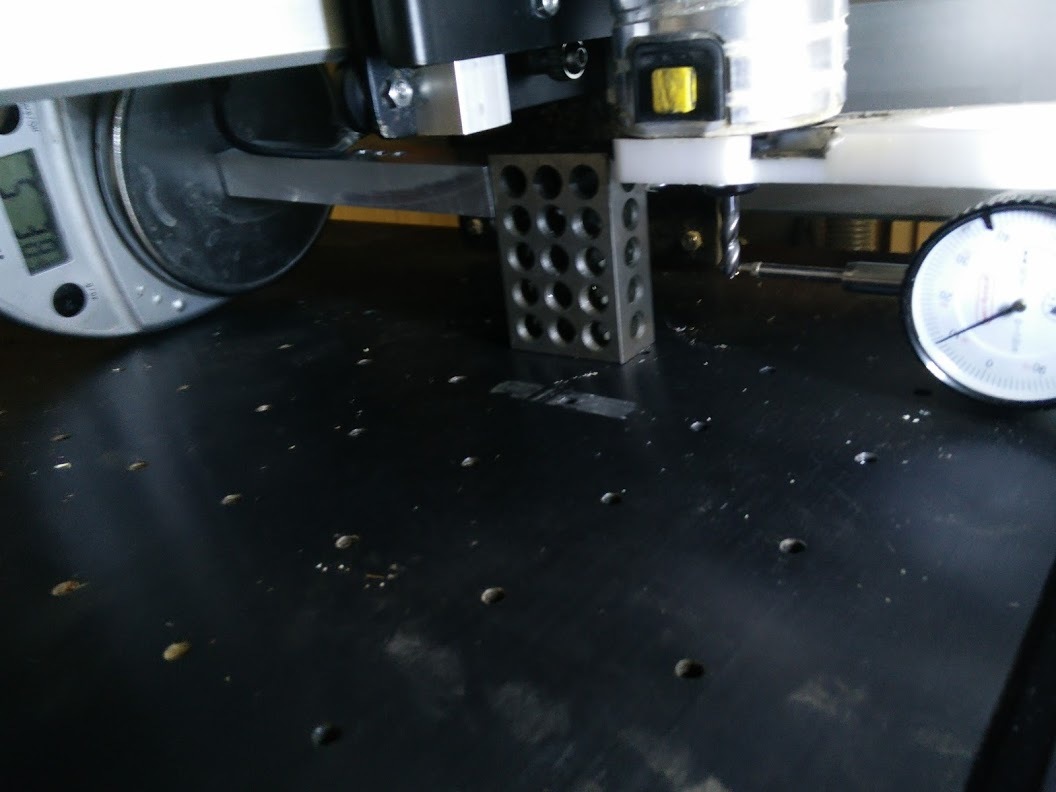
I think this is more of an issue with my bottom set of v wheels then anything. Normally I only use the machine for wood, but have been starting into aluminum. I was trying to mill some clamps, but as you can see by the photos there is too much play on the X axis rail (Y± direction). Has anyone had an issue where the two ec nuts are tight, but the bottom v wheels will still freely rotate? Perhaps like @twforeman this is an out of spec V wheel issue.
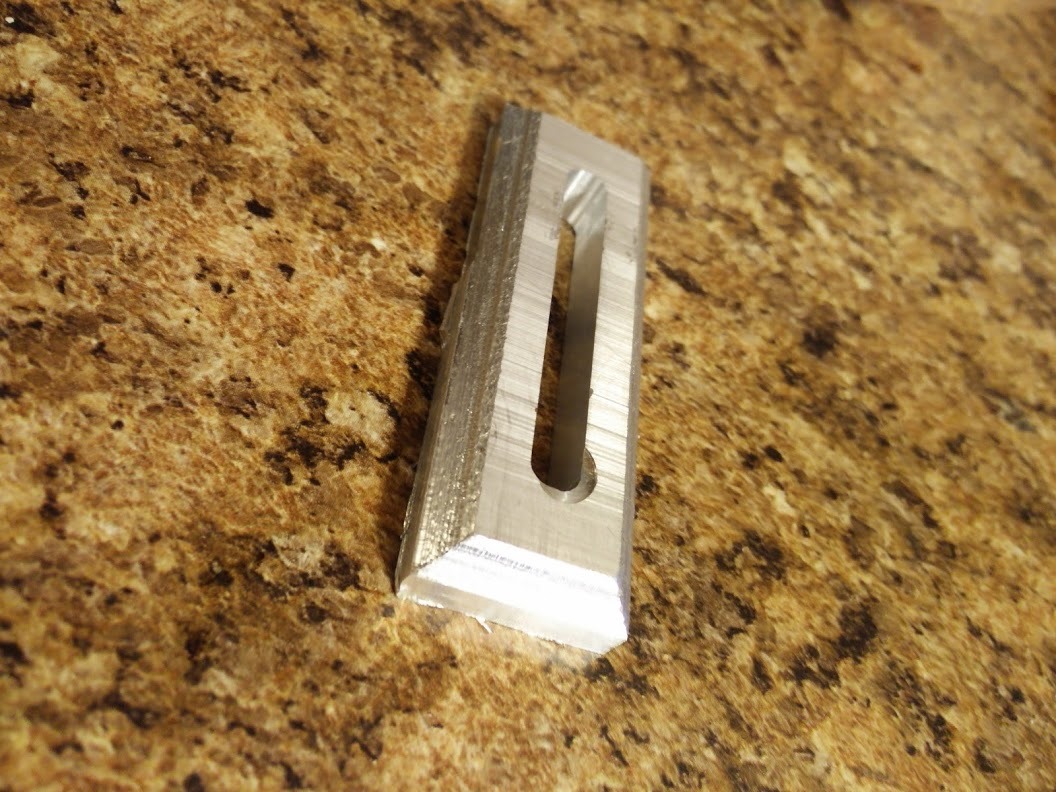
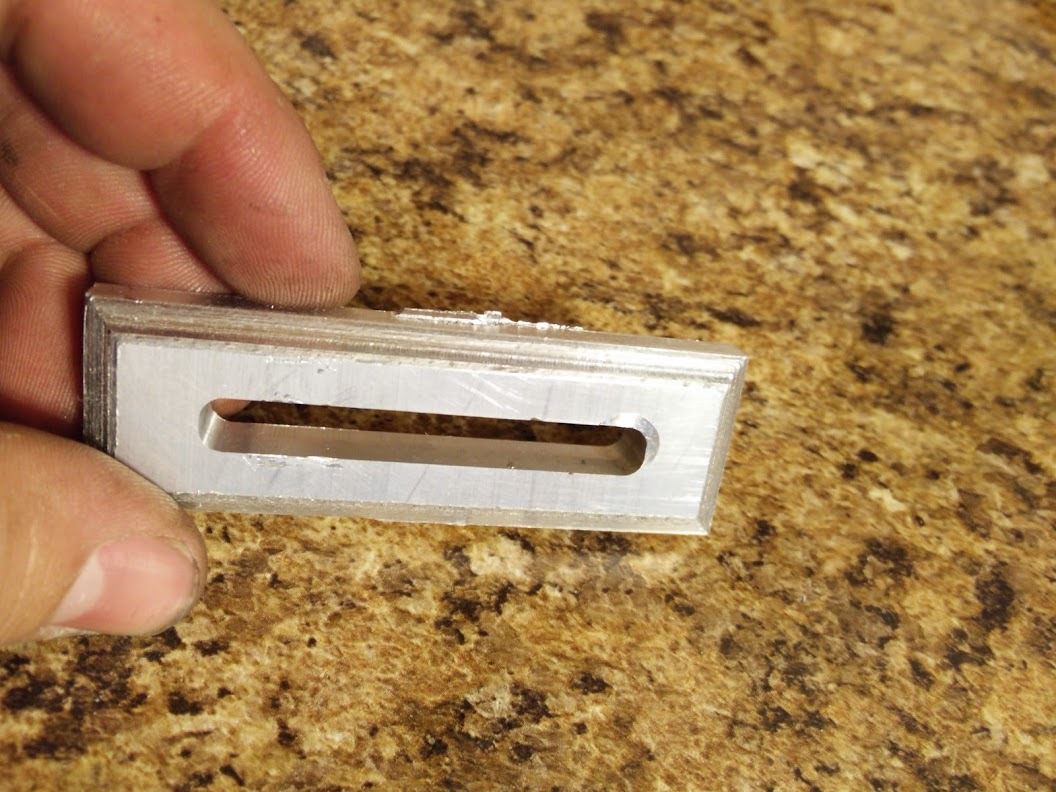
Finish is terrible, you can see where the machine moved up for the tabs in this 3/8" stock.
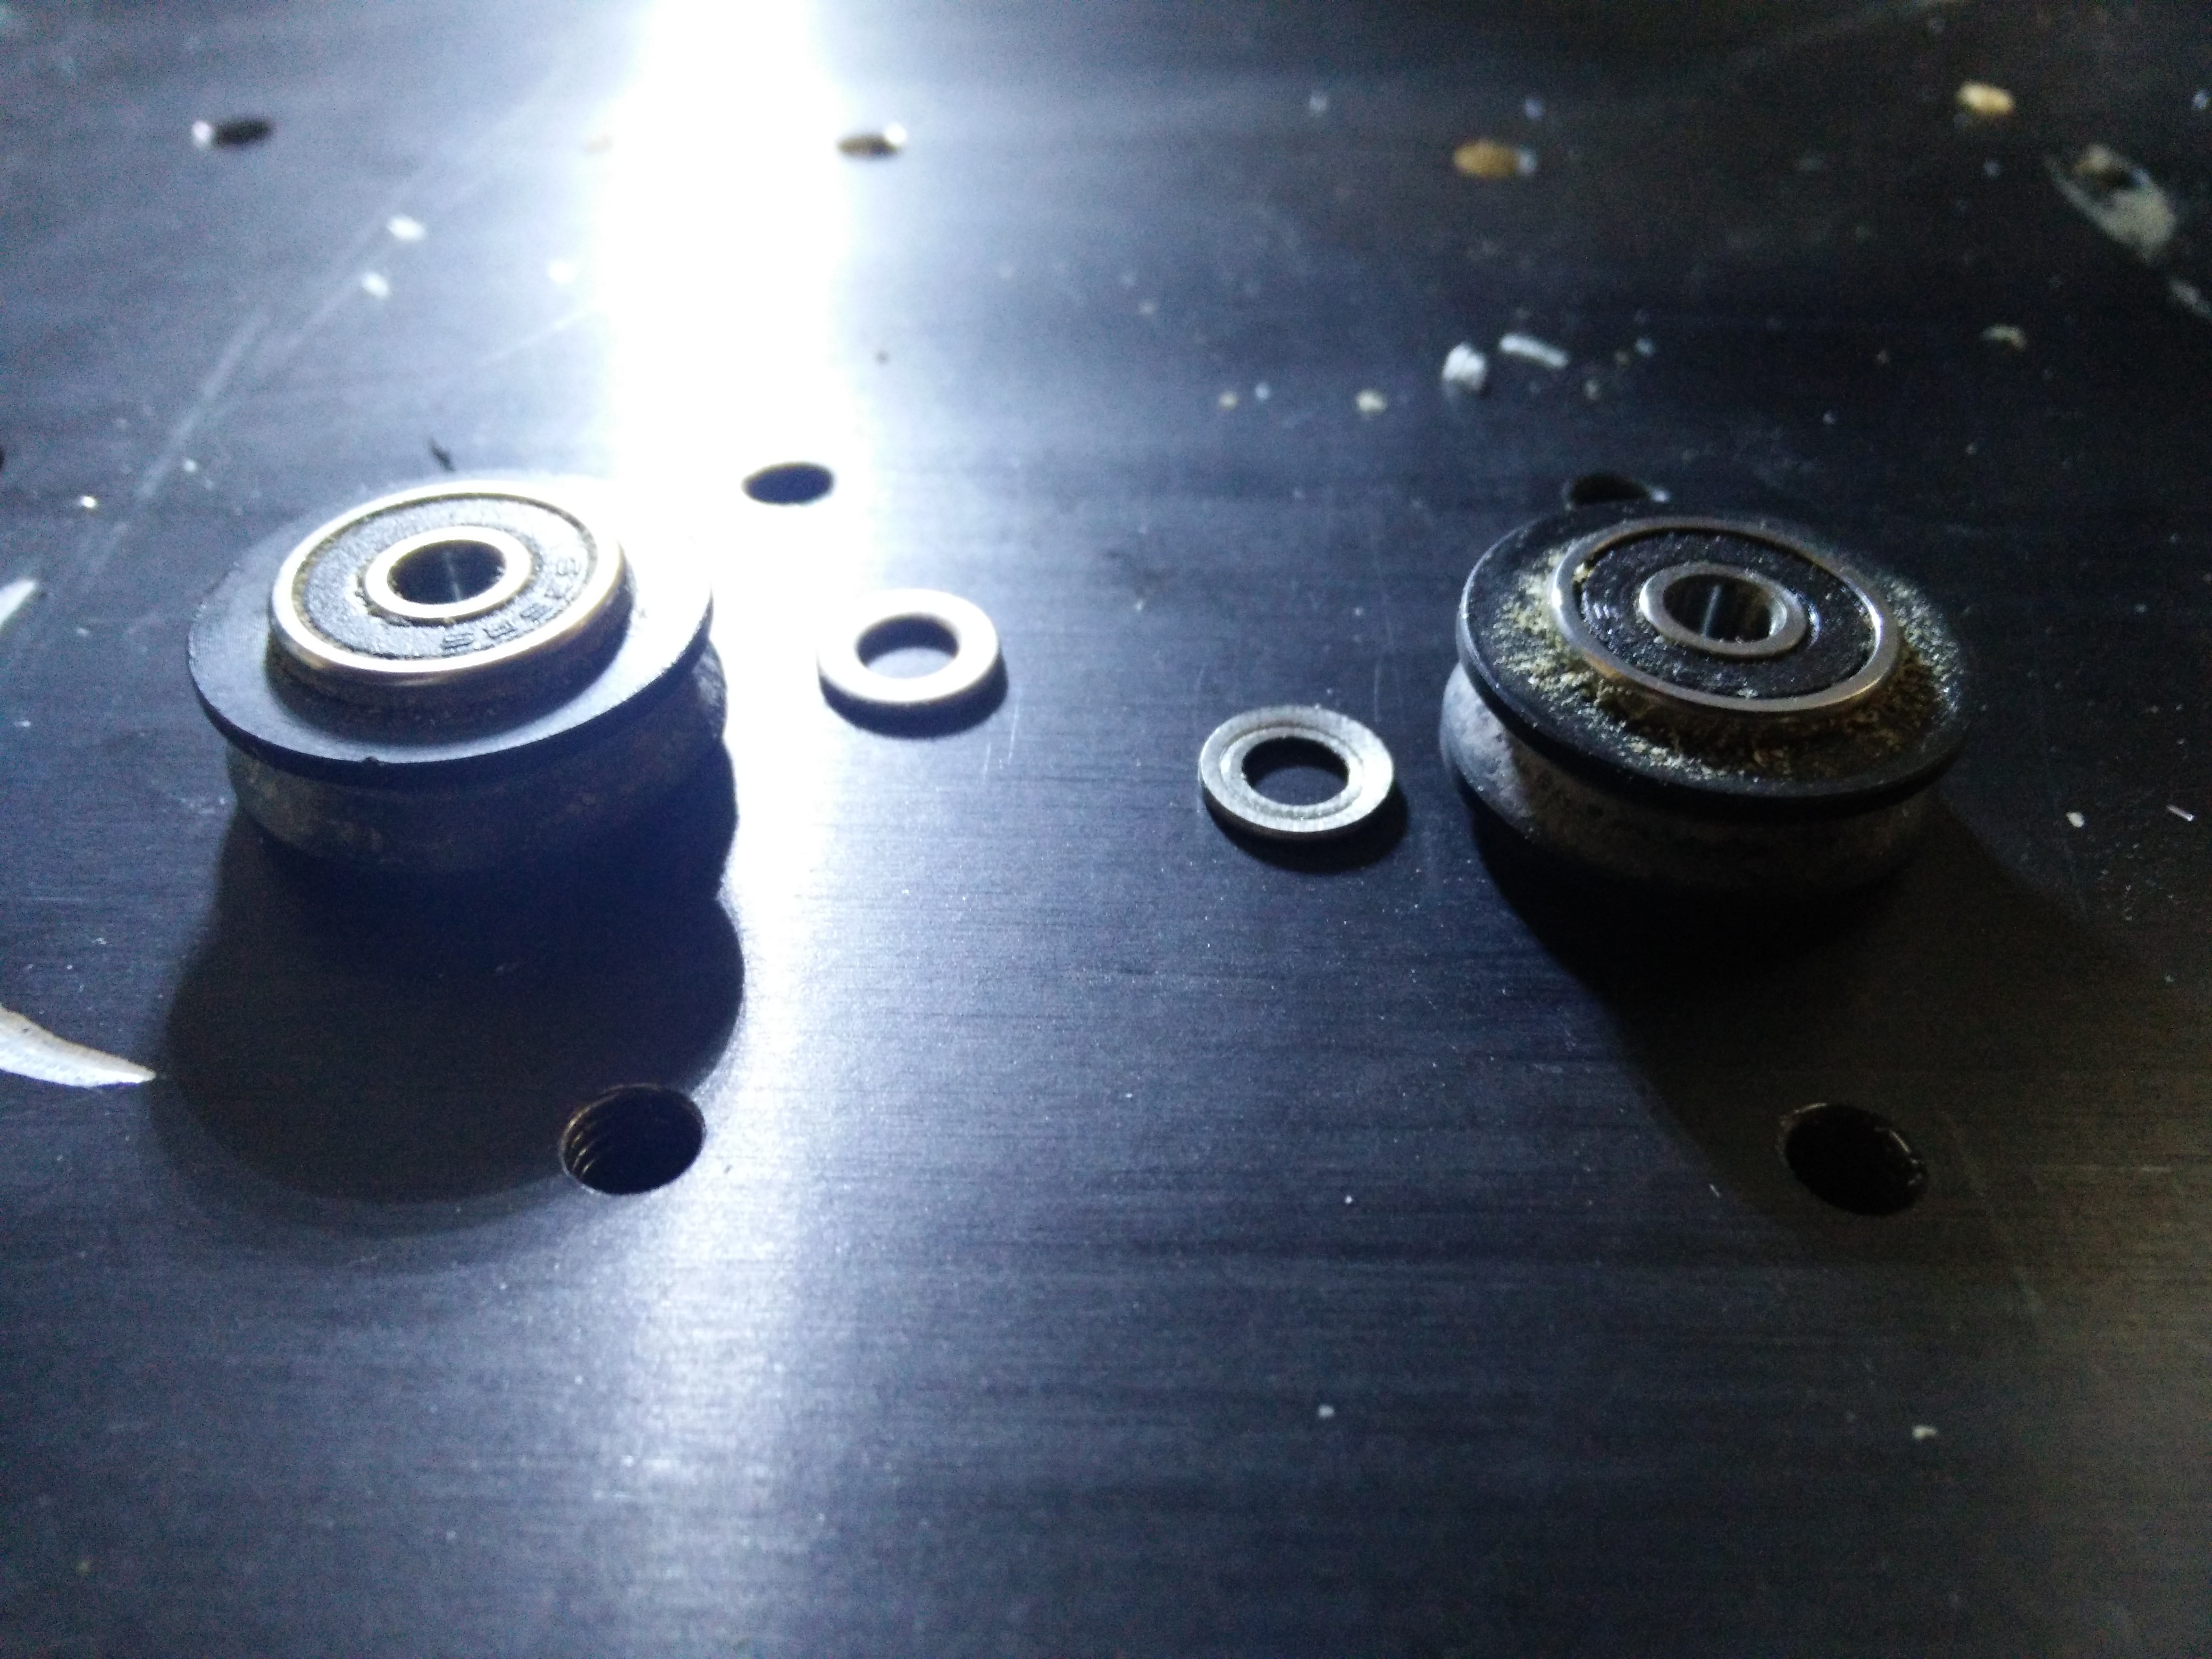
You will probably need to replace the wheels, you can try to move the upper wheels to the bottom of the hole thru the X-axis plate. I just rebuilt my machine after a year of moderate use. I used Openbuilds wheels and replaced bearings which were leaking oil, everything is much tighter now, also ensured I did not have any washer thickness issues causing movement. For the record, all of my washers were within acceptable tolerances.
Openbuilds wheels are the same diameter as the ones which ship with the machine but are wider and the bearings fit mostly in the wheel. The only issue I encountered was the wheels hitting the belt clips so I had to adjust where the belt clips were mounted for clearance on the wider tire.
Perhaps it was caused by the mushroomed precision washer. I’m not sure if they make an eccentric spacer that would fill the hole in the plate to prevent mushroomed washers.
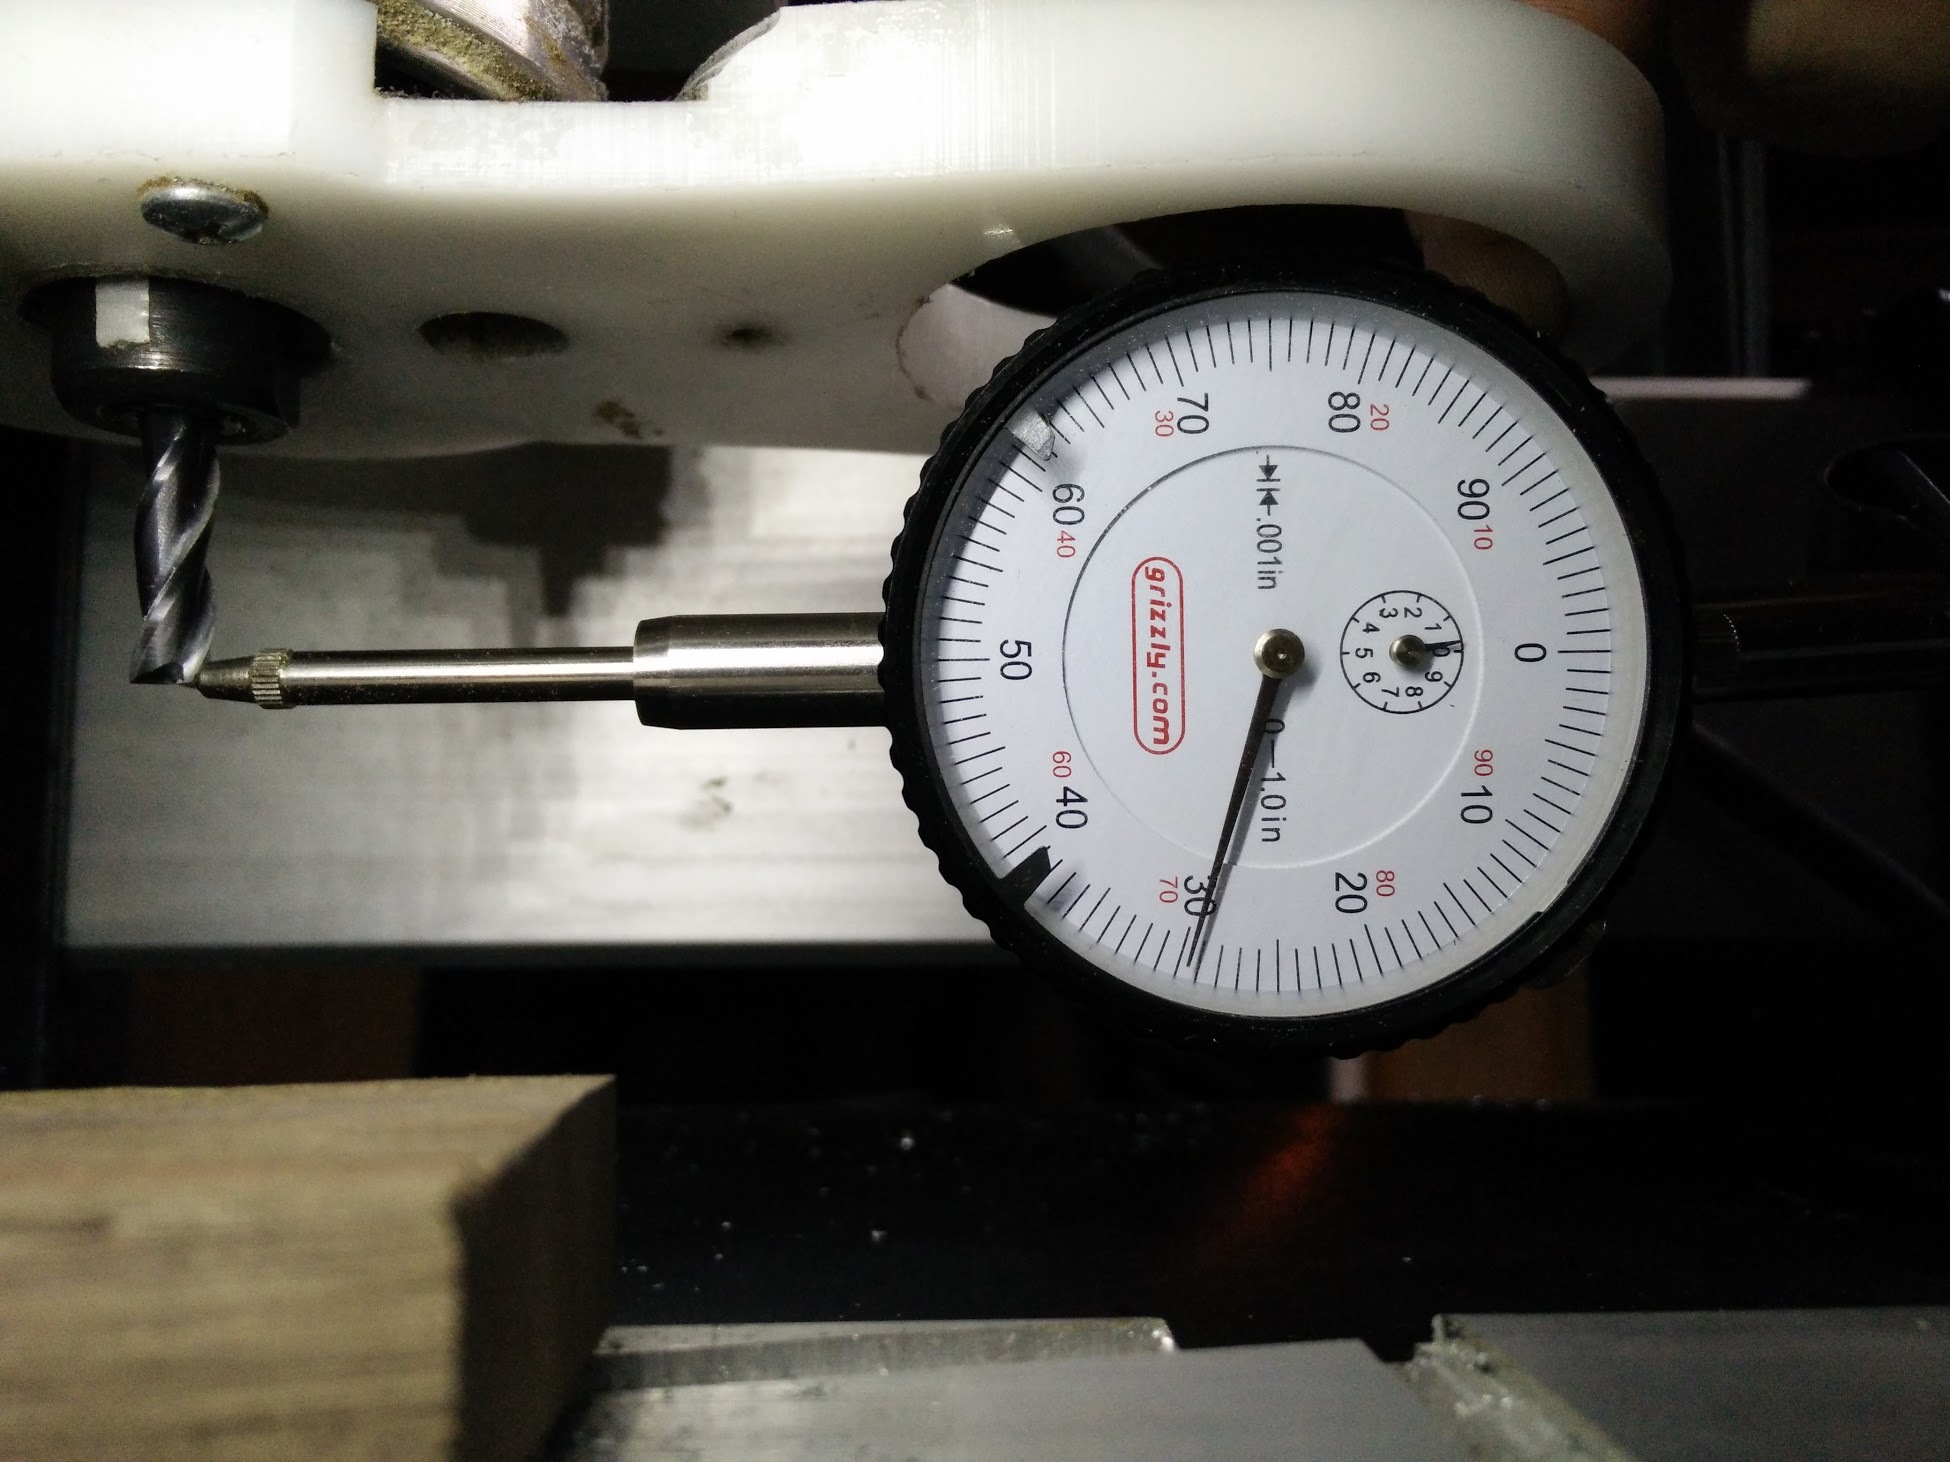
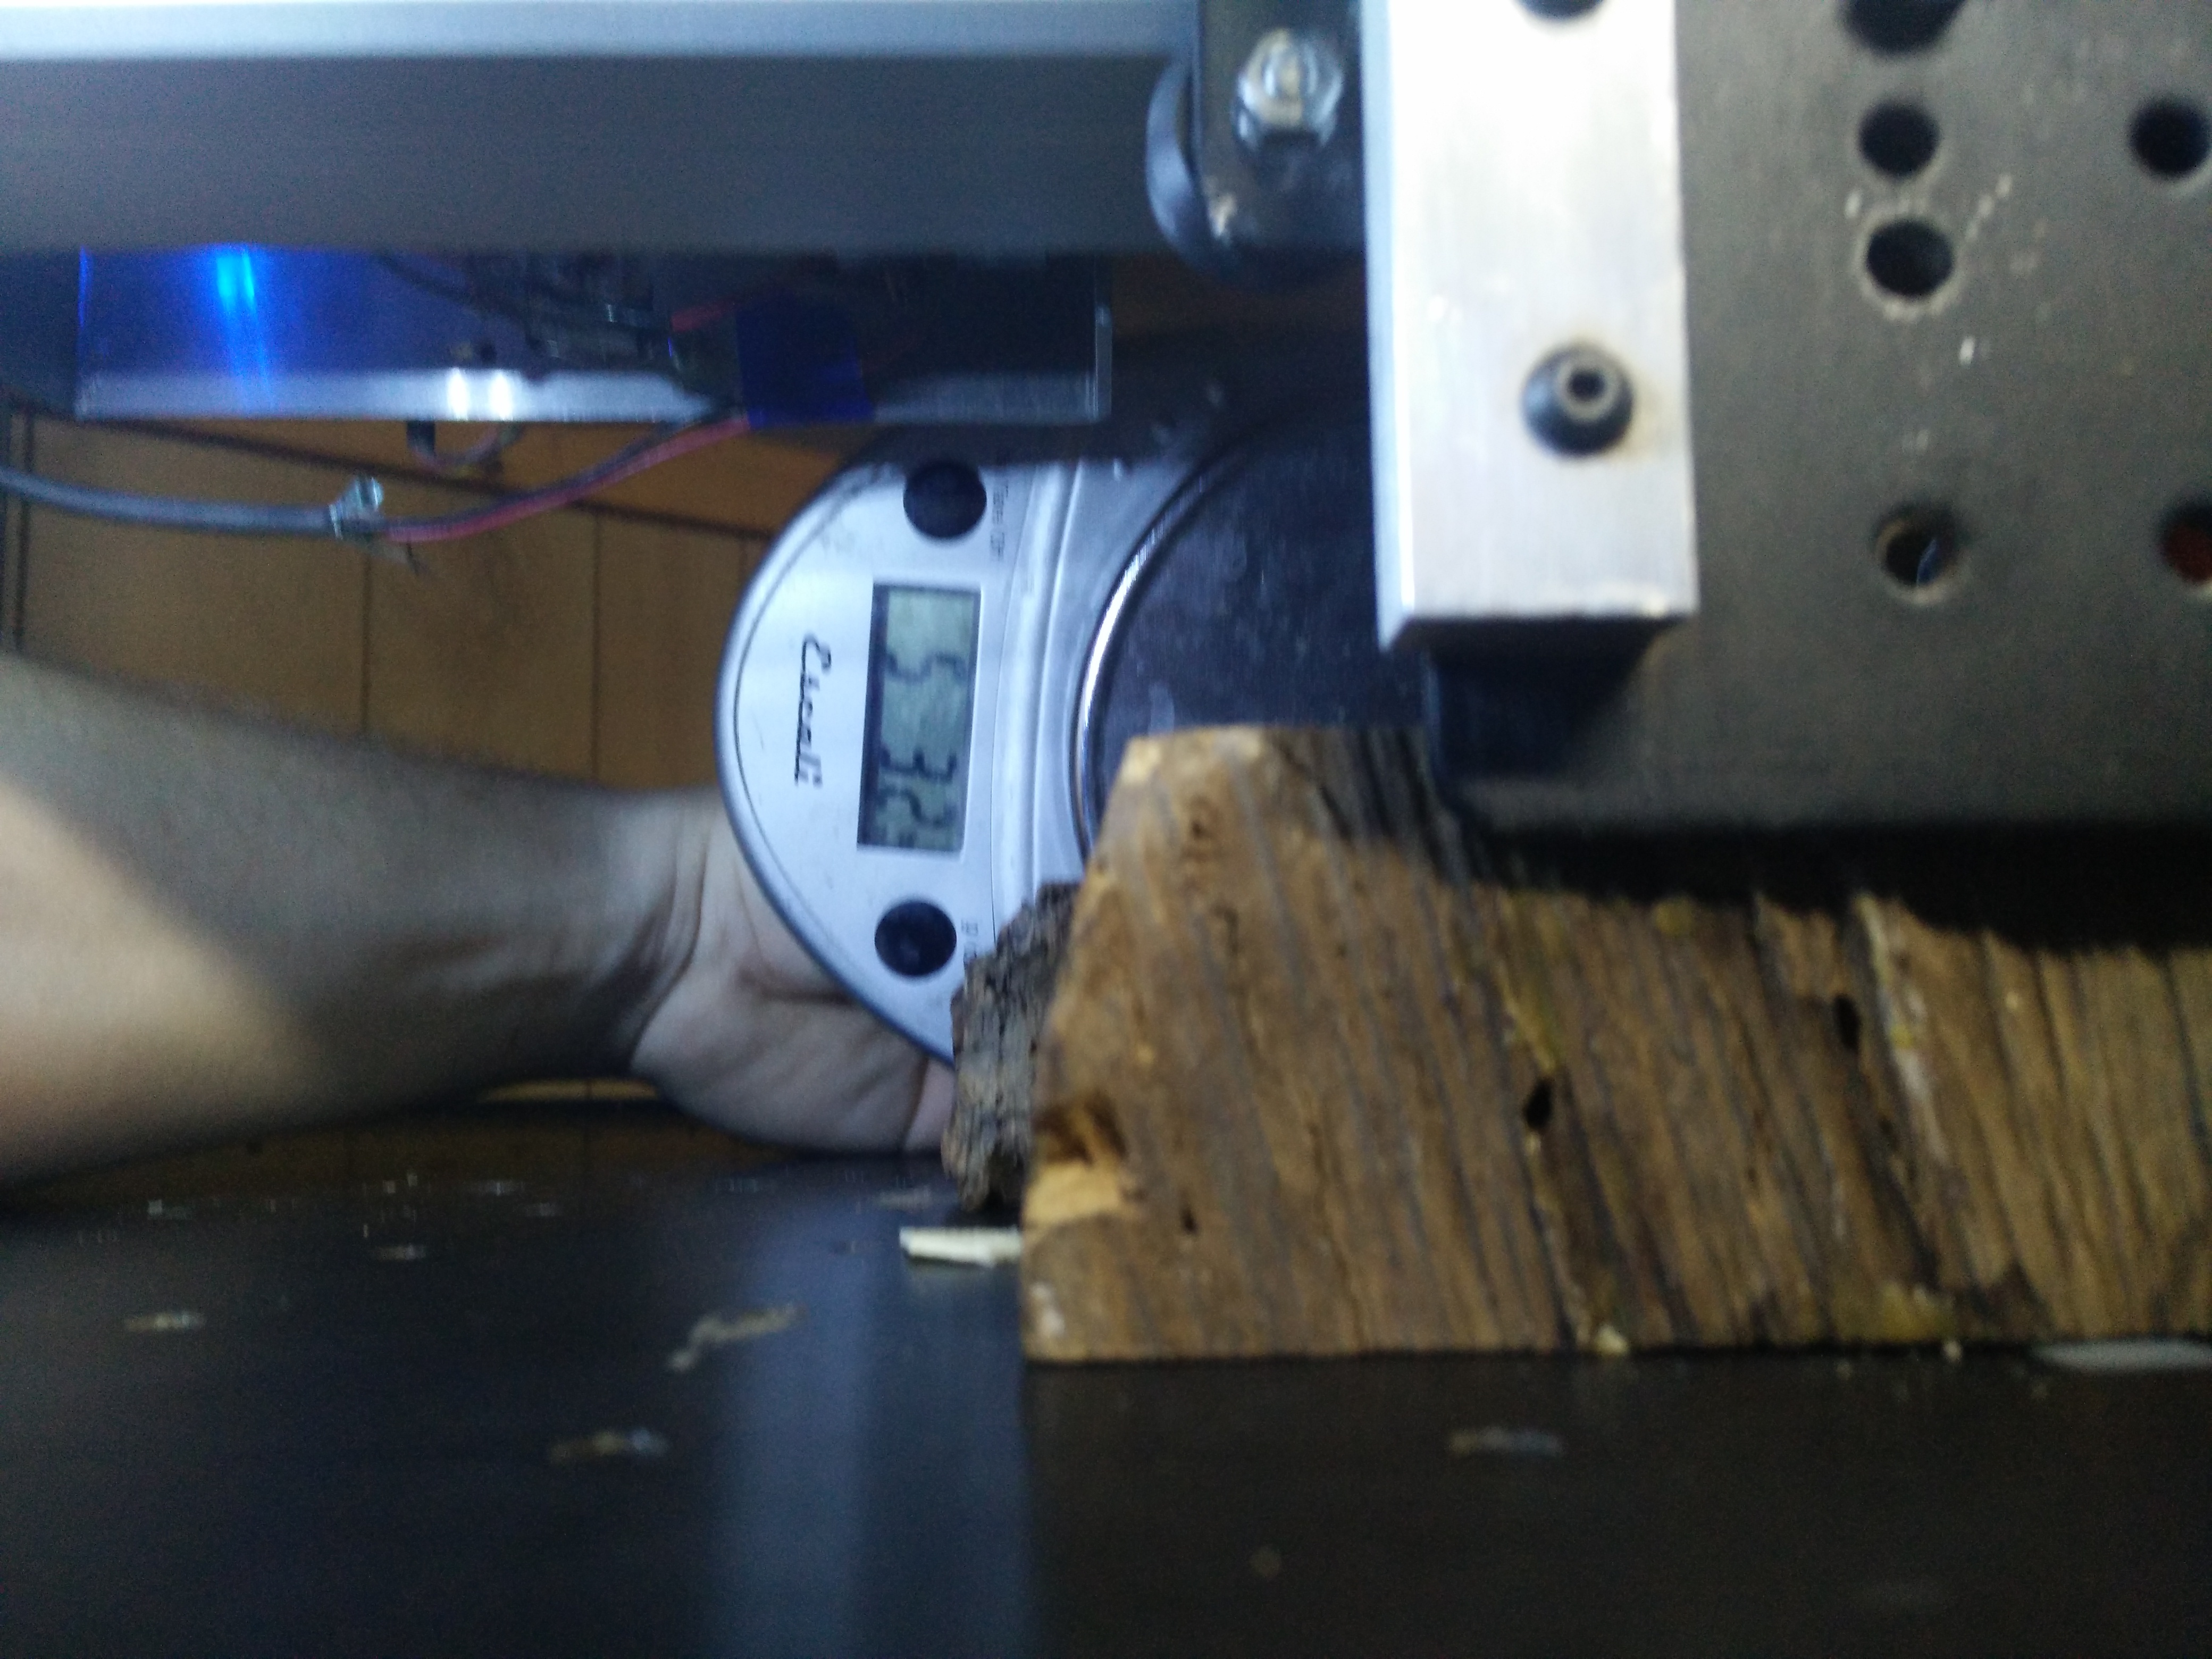
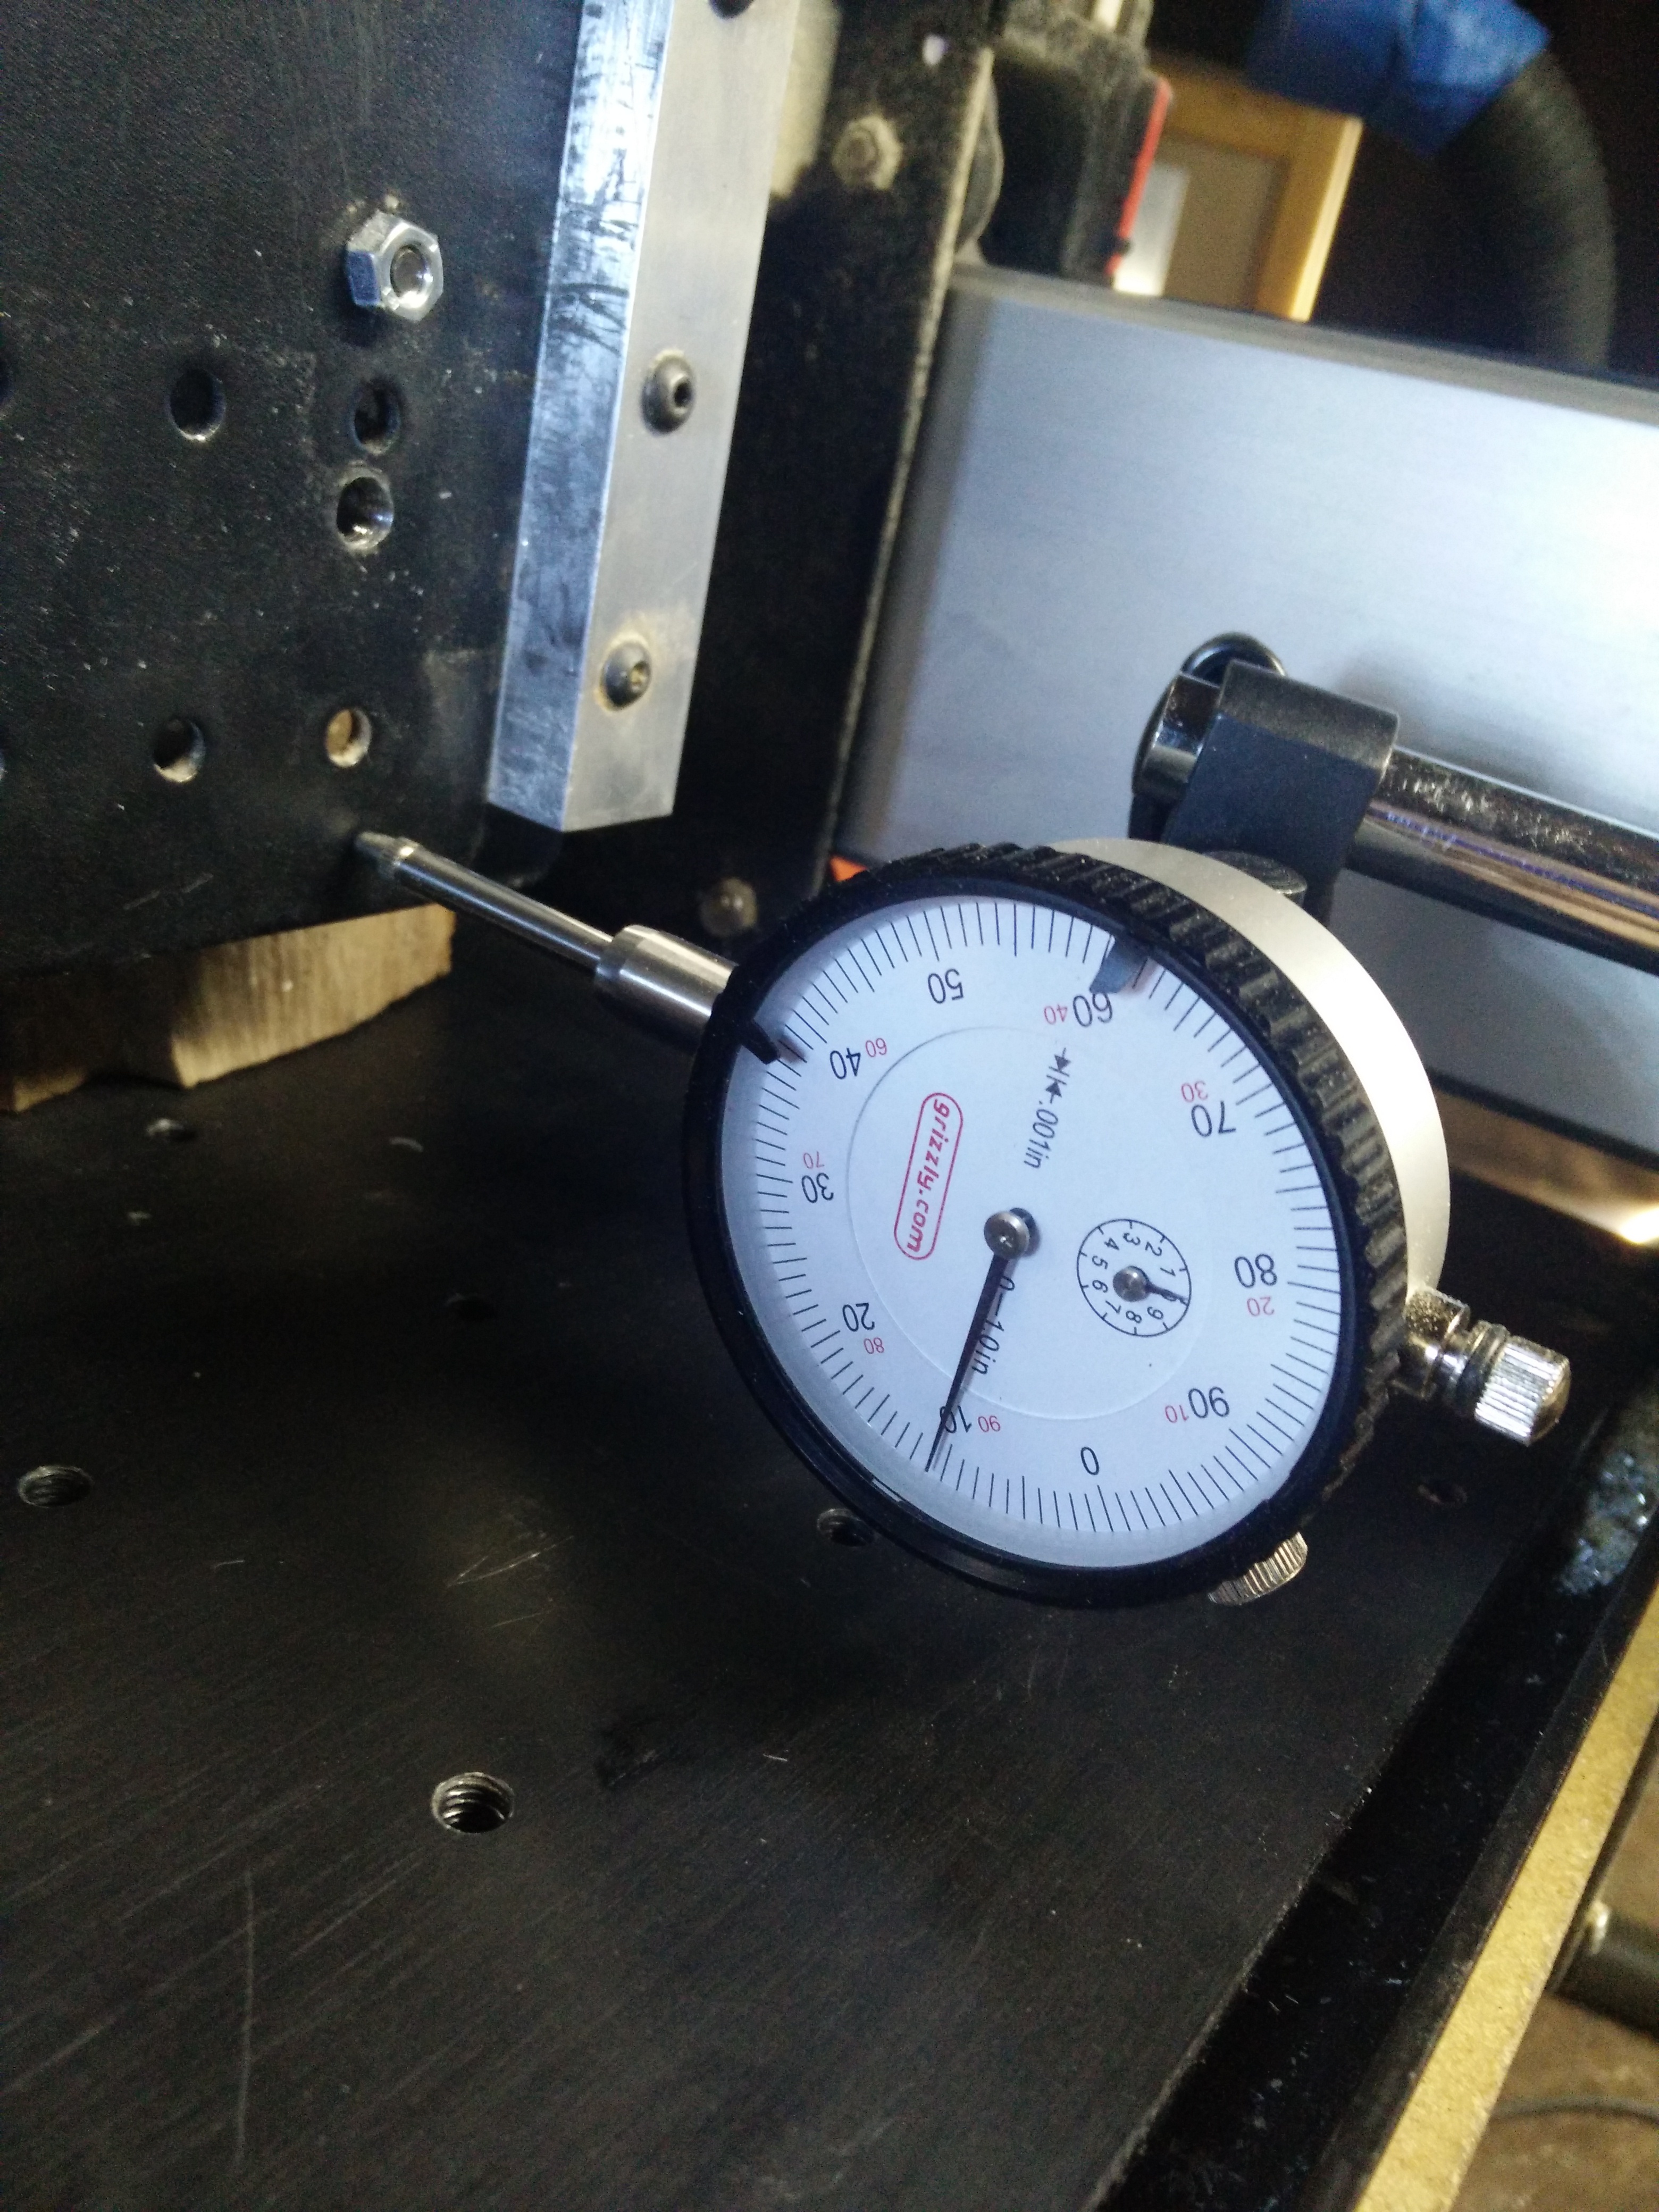
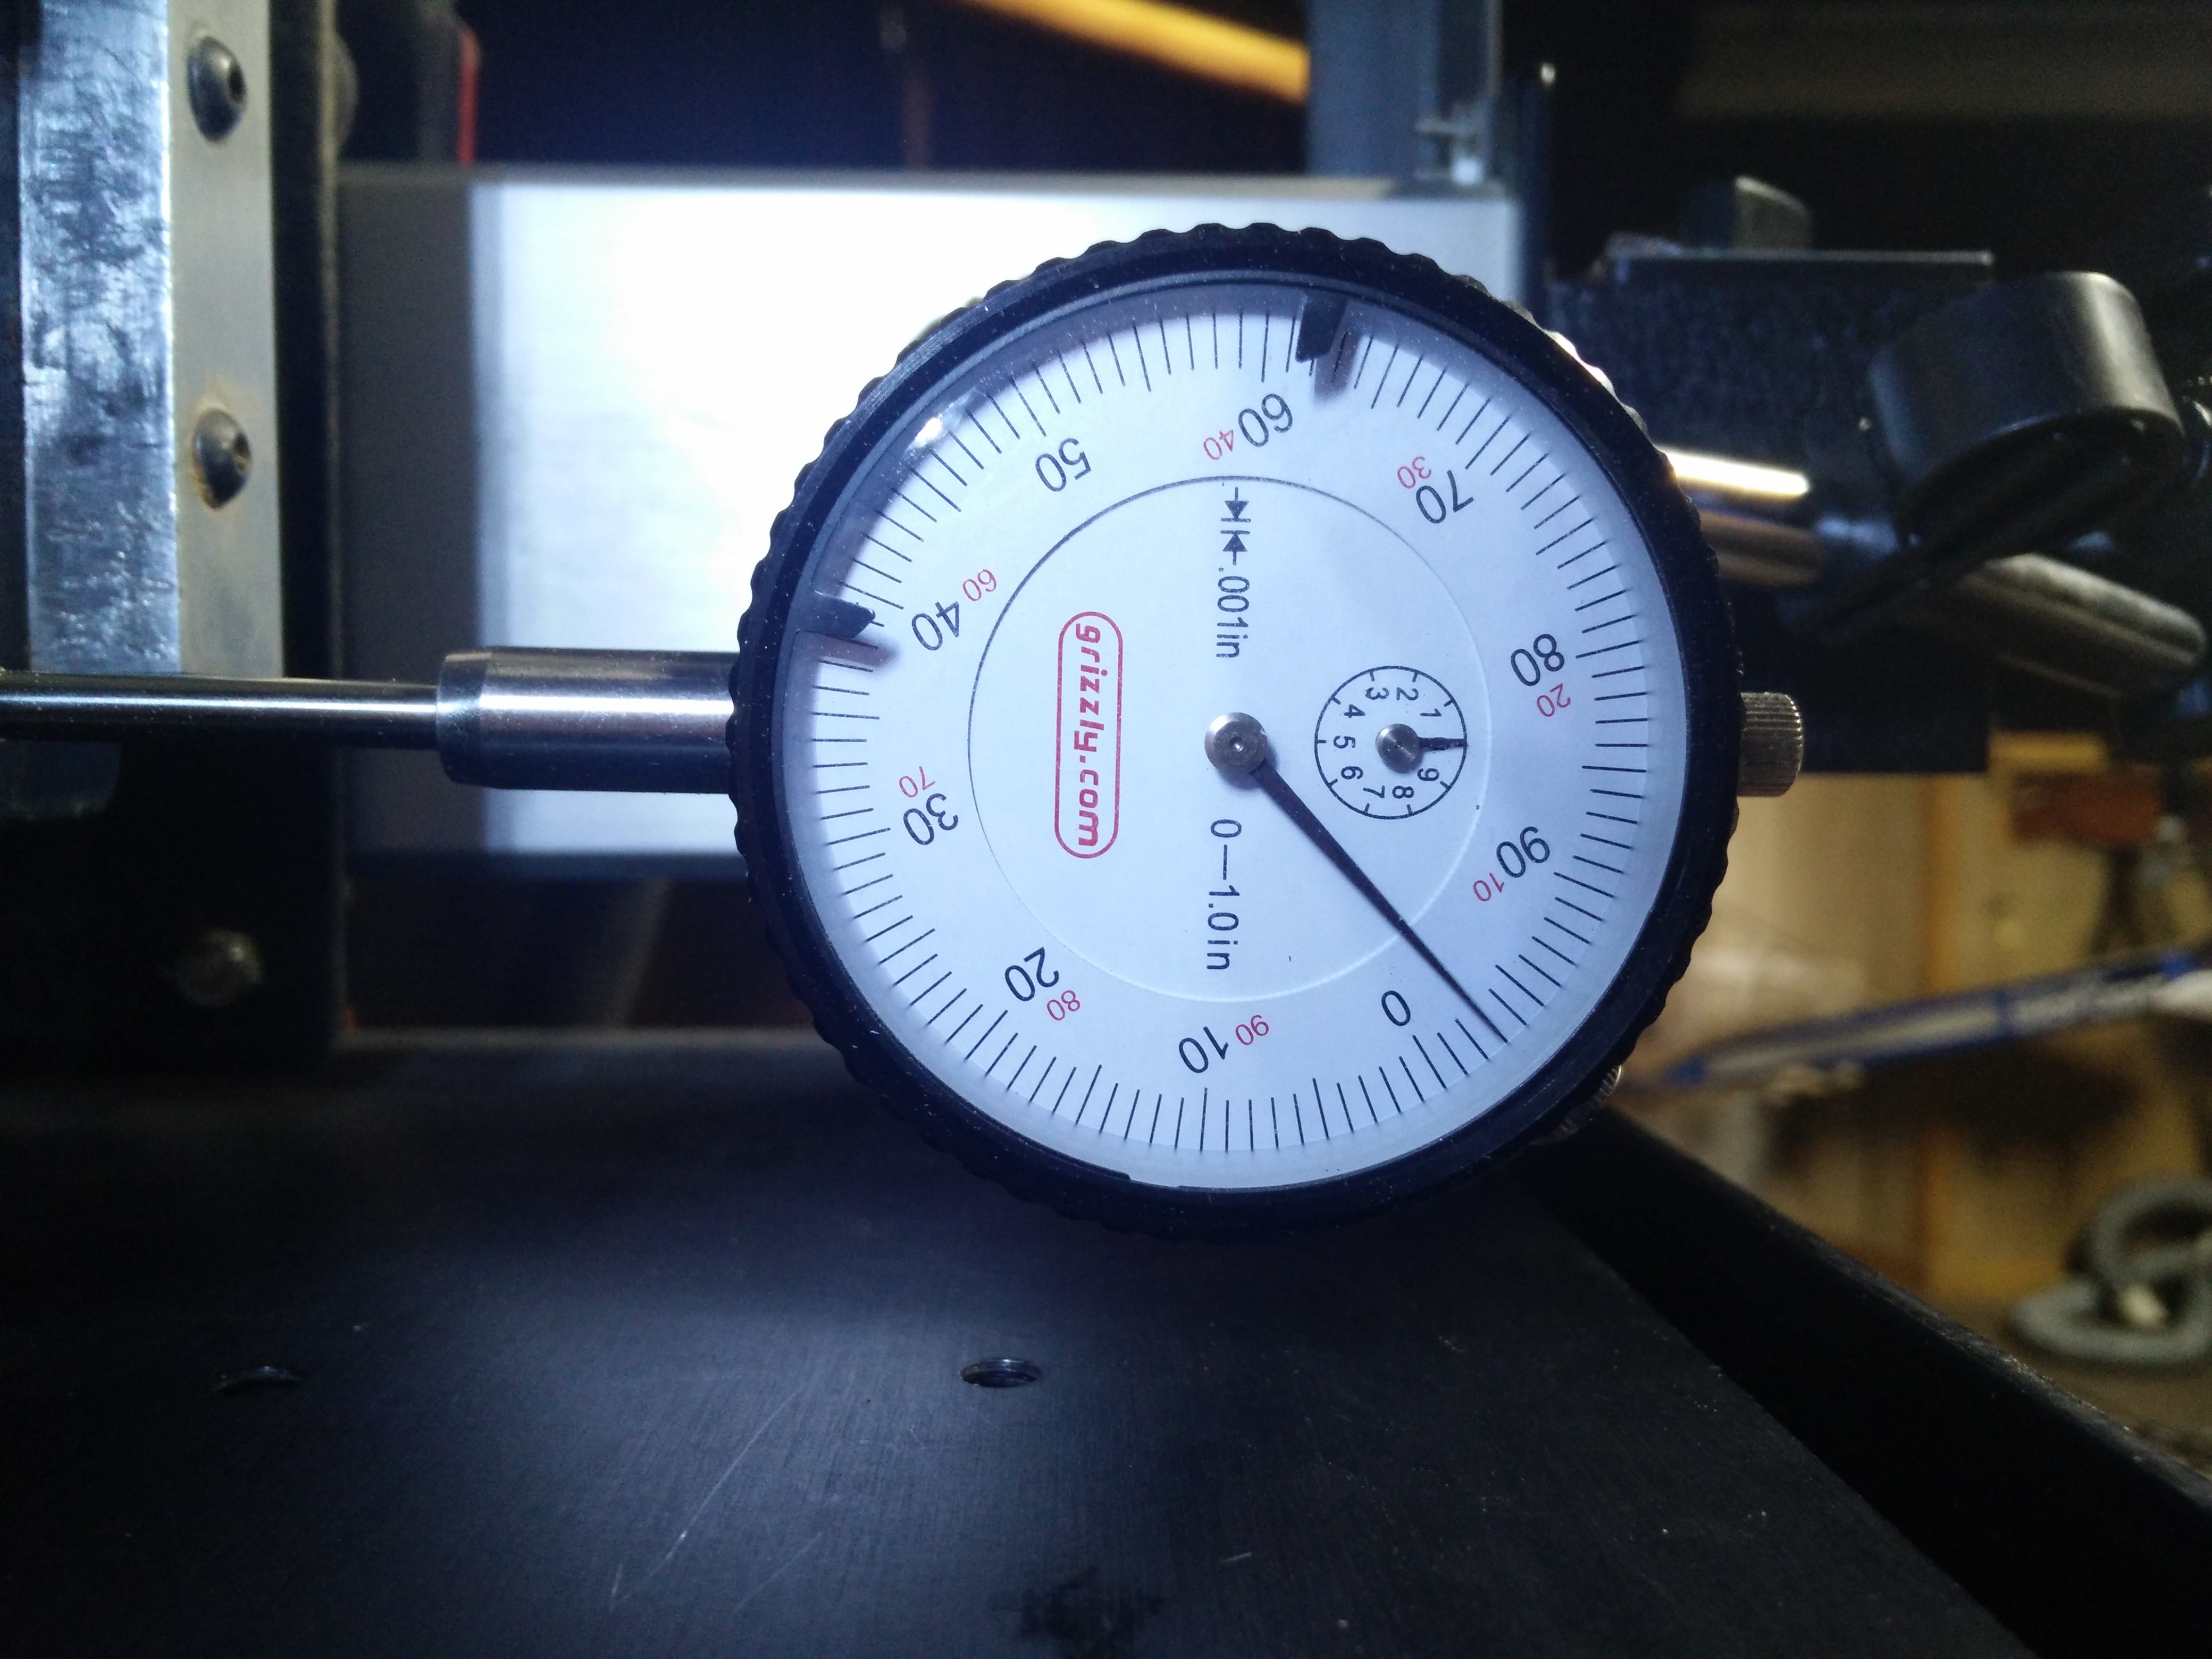
Under 5lbs of force I have .012" of deflection. I used a kitchen scale to try and measure this.
Those mushroomed washers definitely may have an impact. Did you happen to measure the thickness to make sure they are 1mm thick? I don’t recall any of mine being mushroomed.
Were any of your bearings leaking oil? .015" deflection still seems like a lot of deflection.
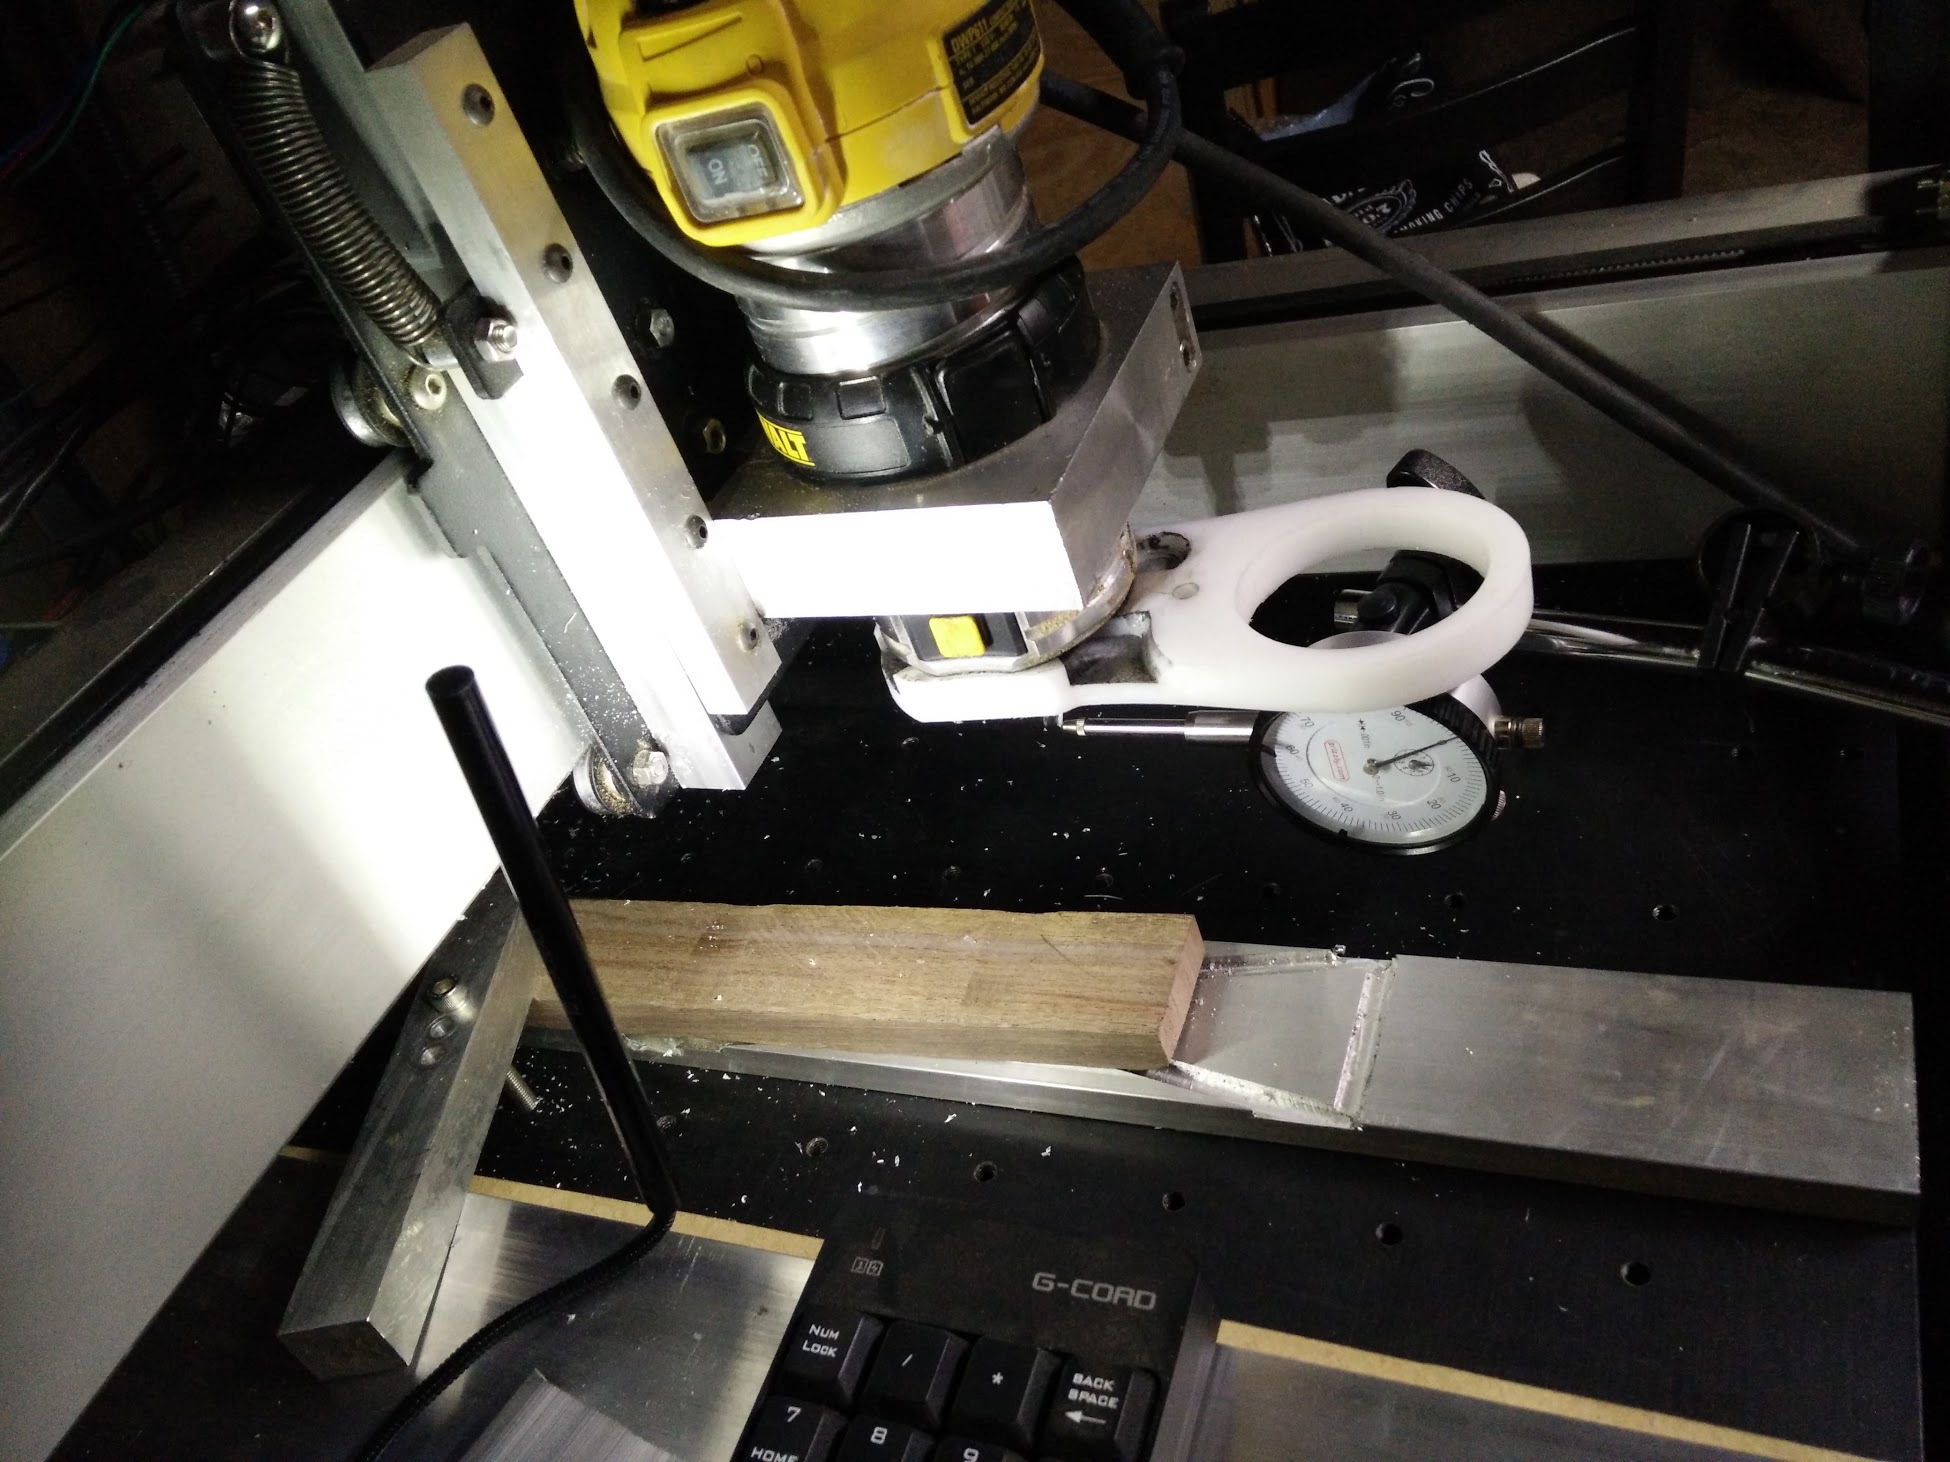
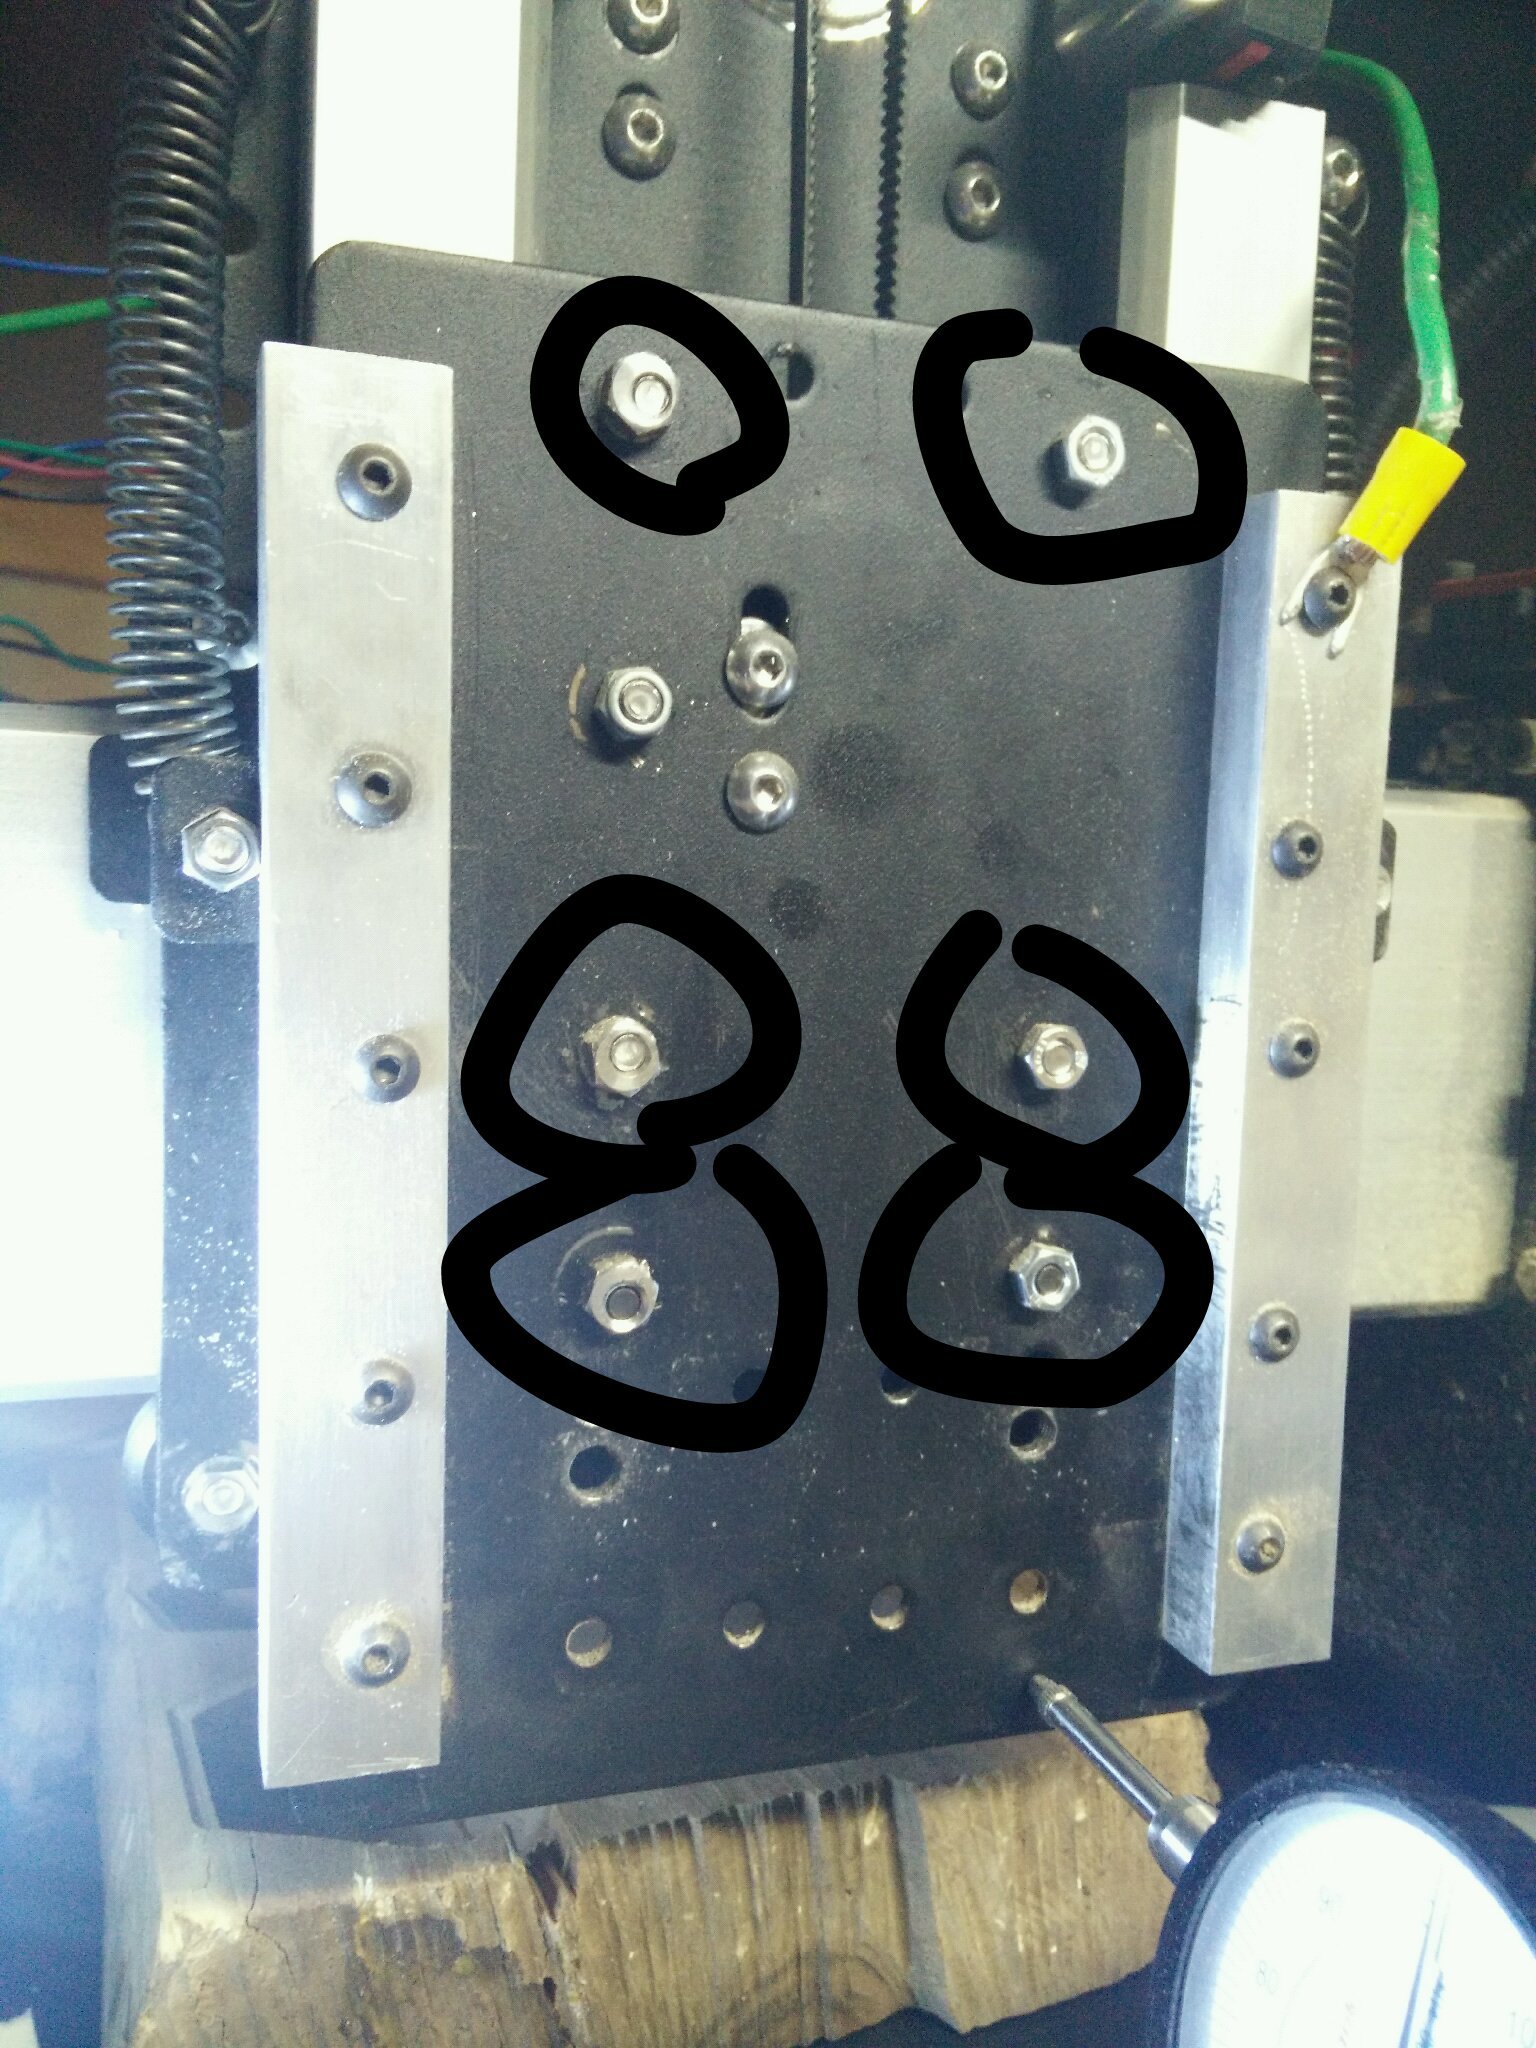
I replaced all the washers between the wheels and plate with precision ones from openbuilds. They were all the same thickness. Even with the new wheels; I’m not sure if you can make it out from the photos above, but the eccentric nuts are still fully tightened to keep from spinning by finger pressure.
@Lewscrew “Were any of your bearings leaking oil?” Maybe, it was either oil or WD40 that got sprayed up when milling aluminum. New bearings in bottom wheels. . . . Is there a easy way to test the top ones?
I’m not sure how to check runout on bearings this small. My guidelines are if a sealed bearing is leaking, replace it.
You’re eccentric nuts top & bottom appear to have about 45 degrees more adjustment. I typically adjust them as if I am tightening the nut on the bolt so it maintains the same torque on the bolt. If you can’t get the eccentrics tight enough, try to decrease the distance between both Z rails by 1/2-1mm.
Nice result. What feed, cutter, and speeds did you use? Looking to mill some aluminum next week.
Just curious did you try to cut with the old plate after your wheel replacement?
If I understand the measurements correctly, there is only .002" difference in deflection after changing your wheels with your reinforced plate and new plate design?
I can do much better. Here is the whole file. I think you can take deep cuts on the .25" contour. I kept the dewalt around the 3 setting for that cut. I’ve taken .04" stepdown with a .25" endmill before with the router closer to maxed out.
I did not get a chance to run it with the old plate after the wheel replacement. Too busy laser engraving items. Correct the .002" was the difference between the new plate design and the old reinforced plate with an additional set of V wheels.
For those of you with a laserink, the new Z plate does not have a way to mount it. If I get one designed this week I’ll post it to my Fusion Gallery.