Y Axis Going Wild In The Middle Of Advanced V-Carve

Hello everyone! I just got a Shapeoko 4 XXL two months ago and have been slowly learning how to use it via trial and error.

After screwing up a lot of complicated projects, I figured I’d cut something easy - a sign for my house.

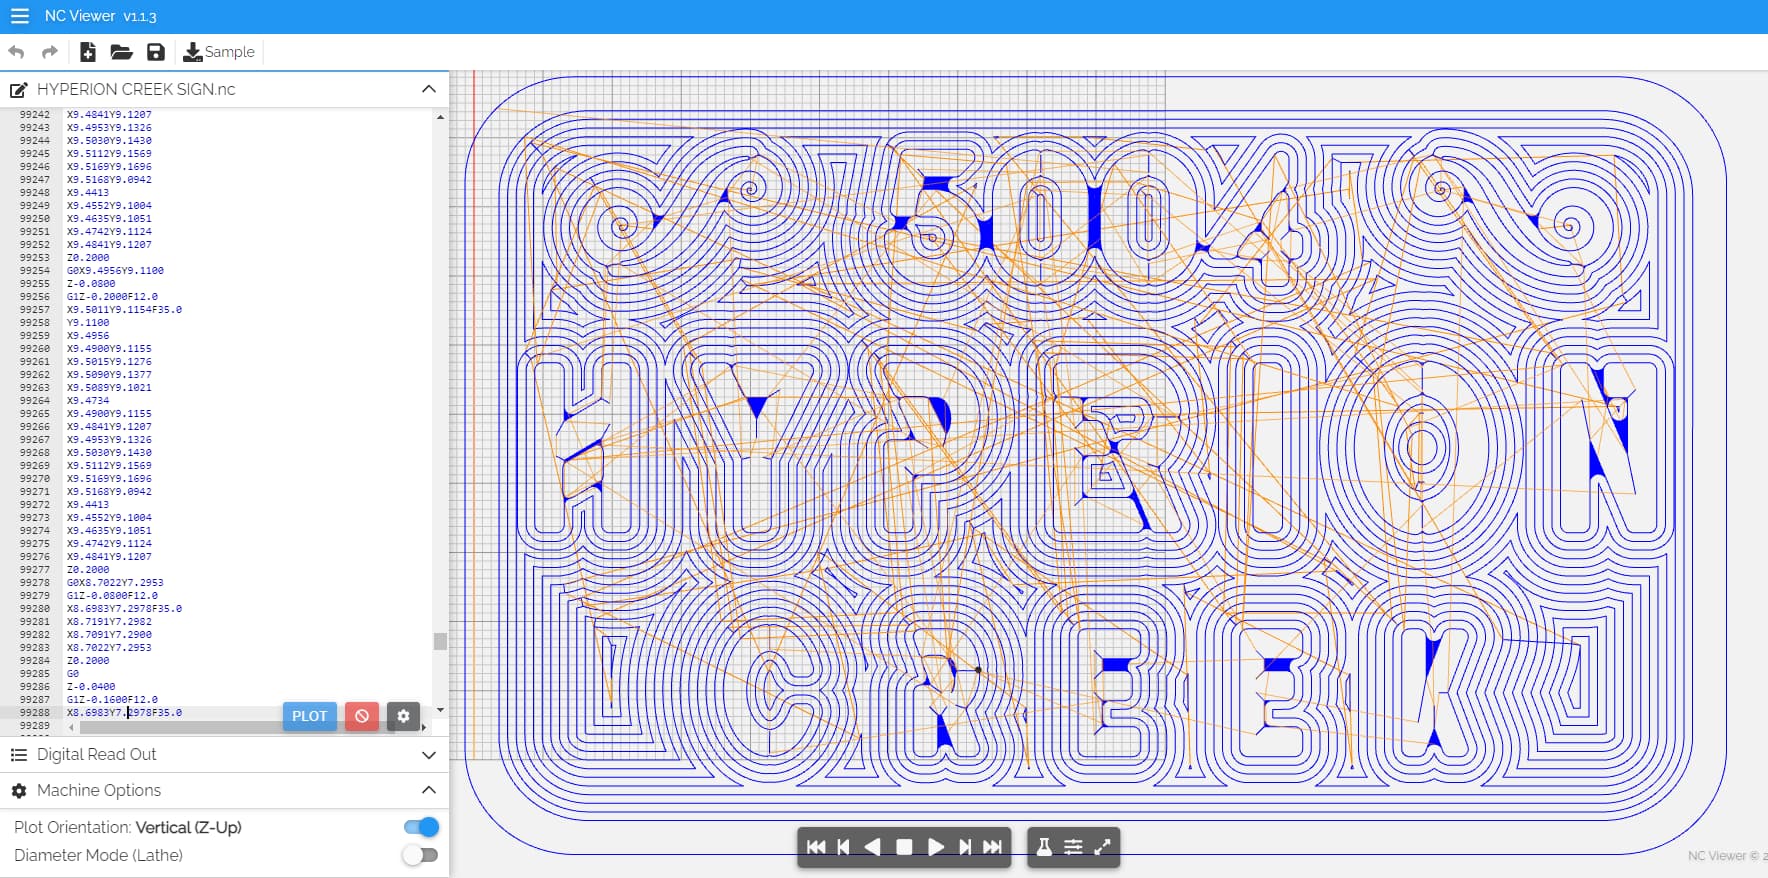
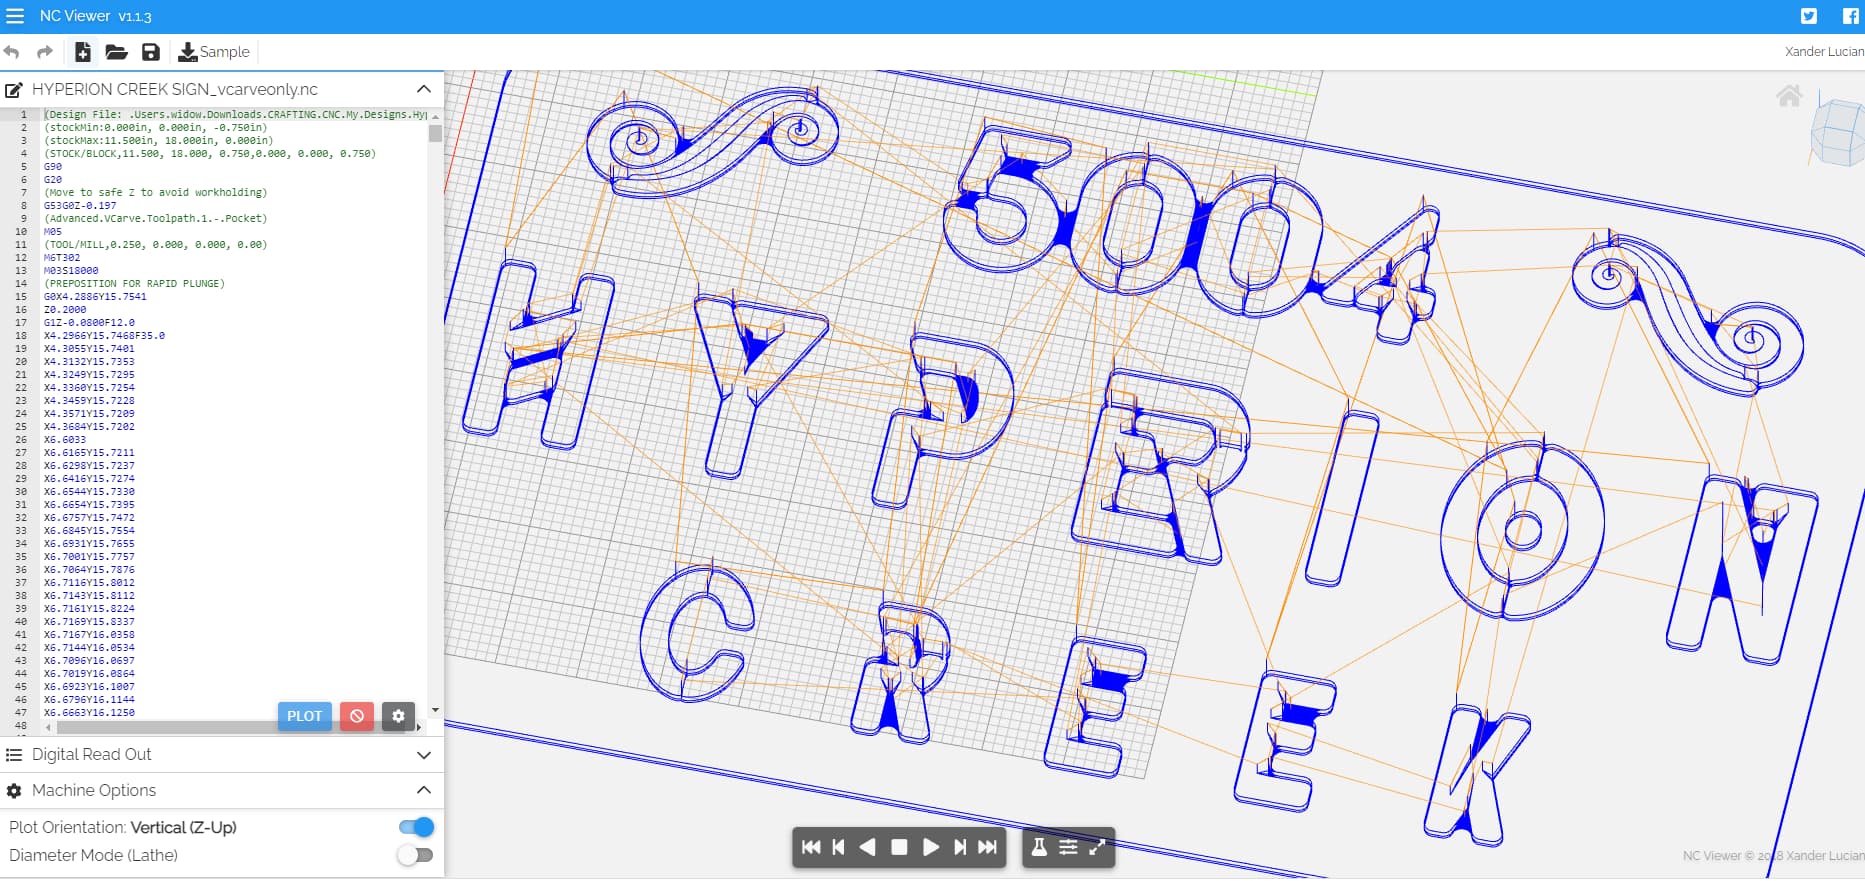
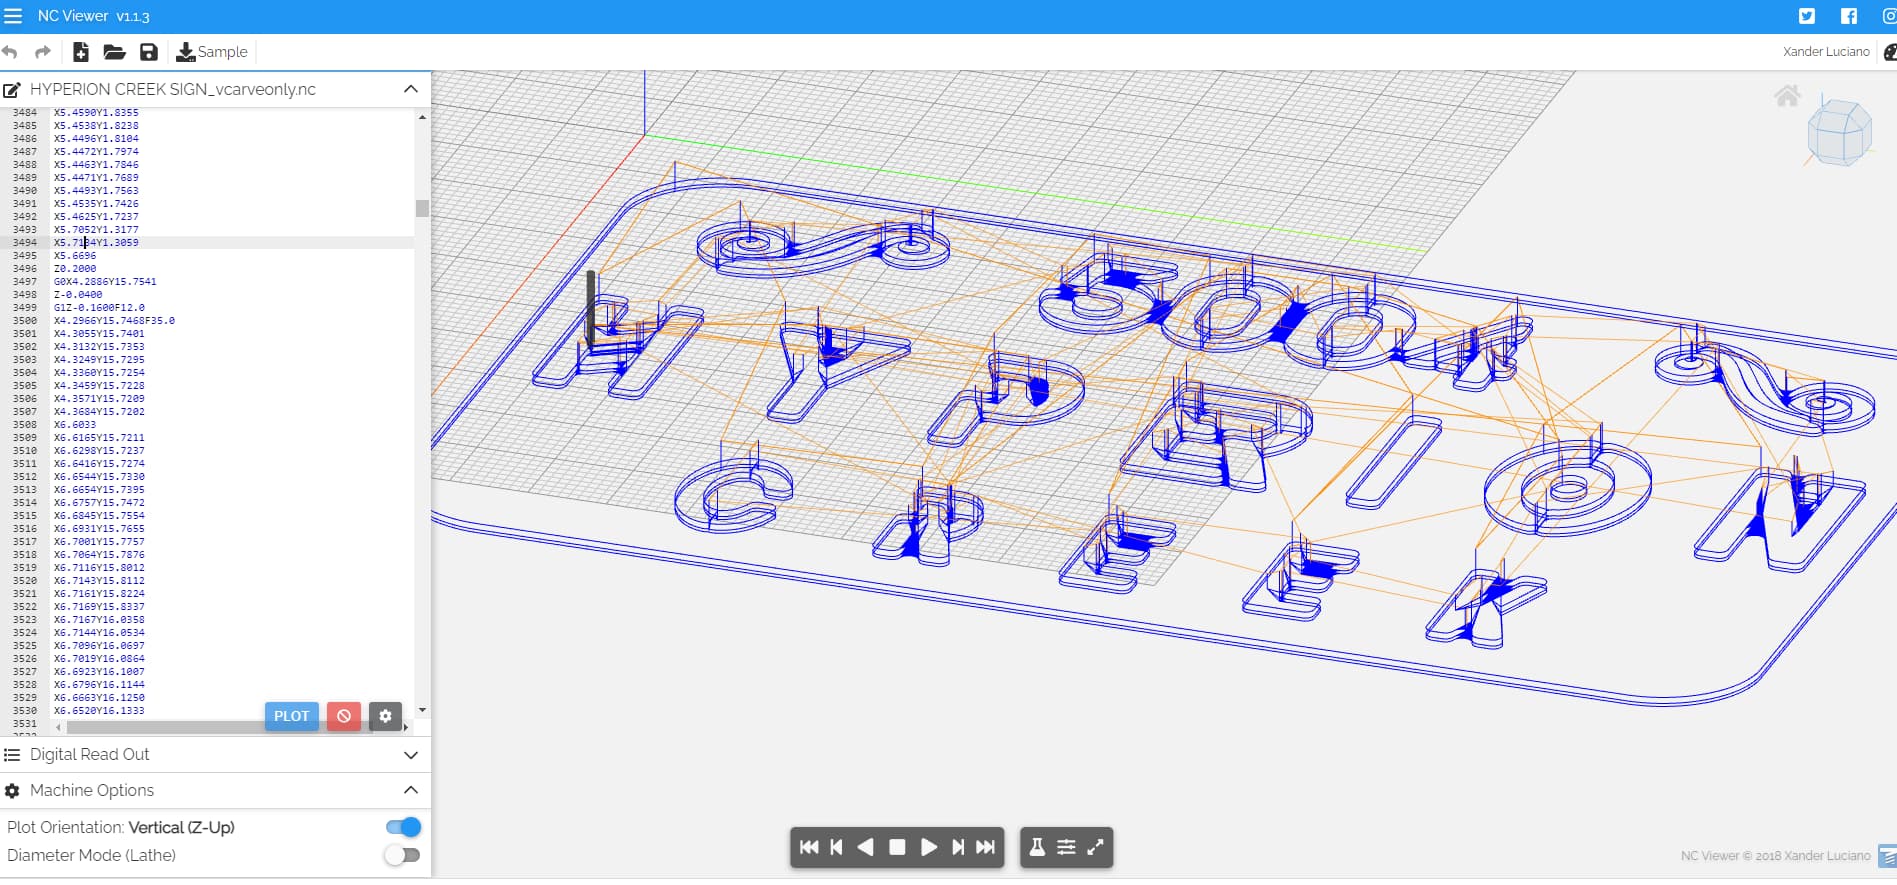
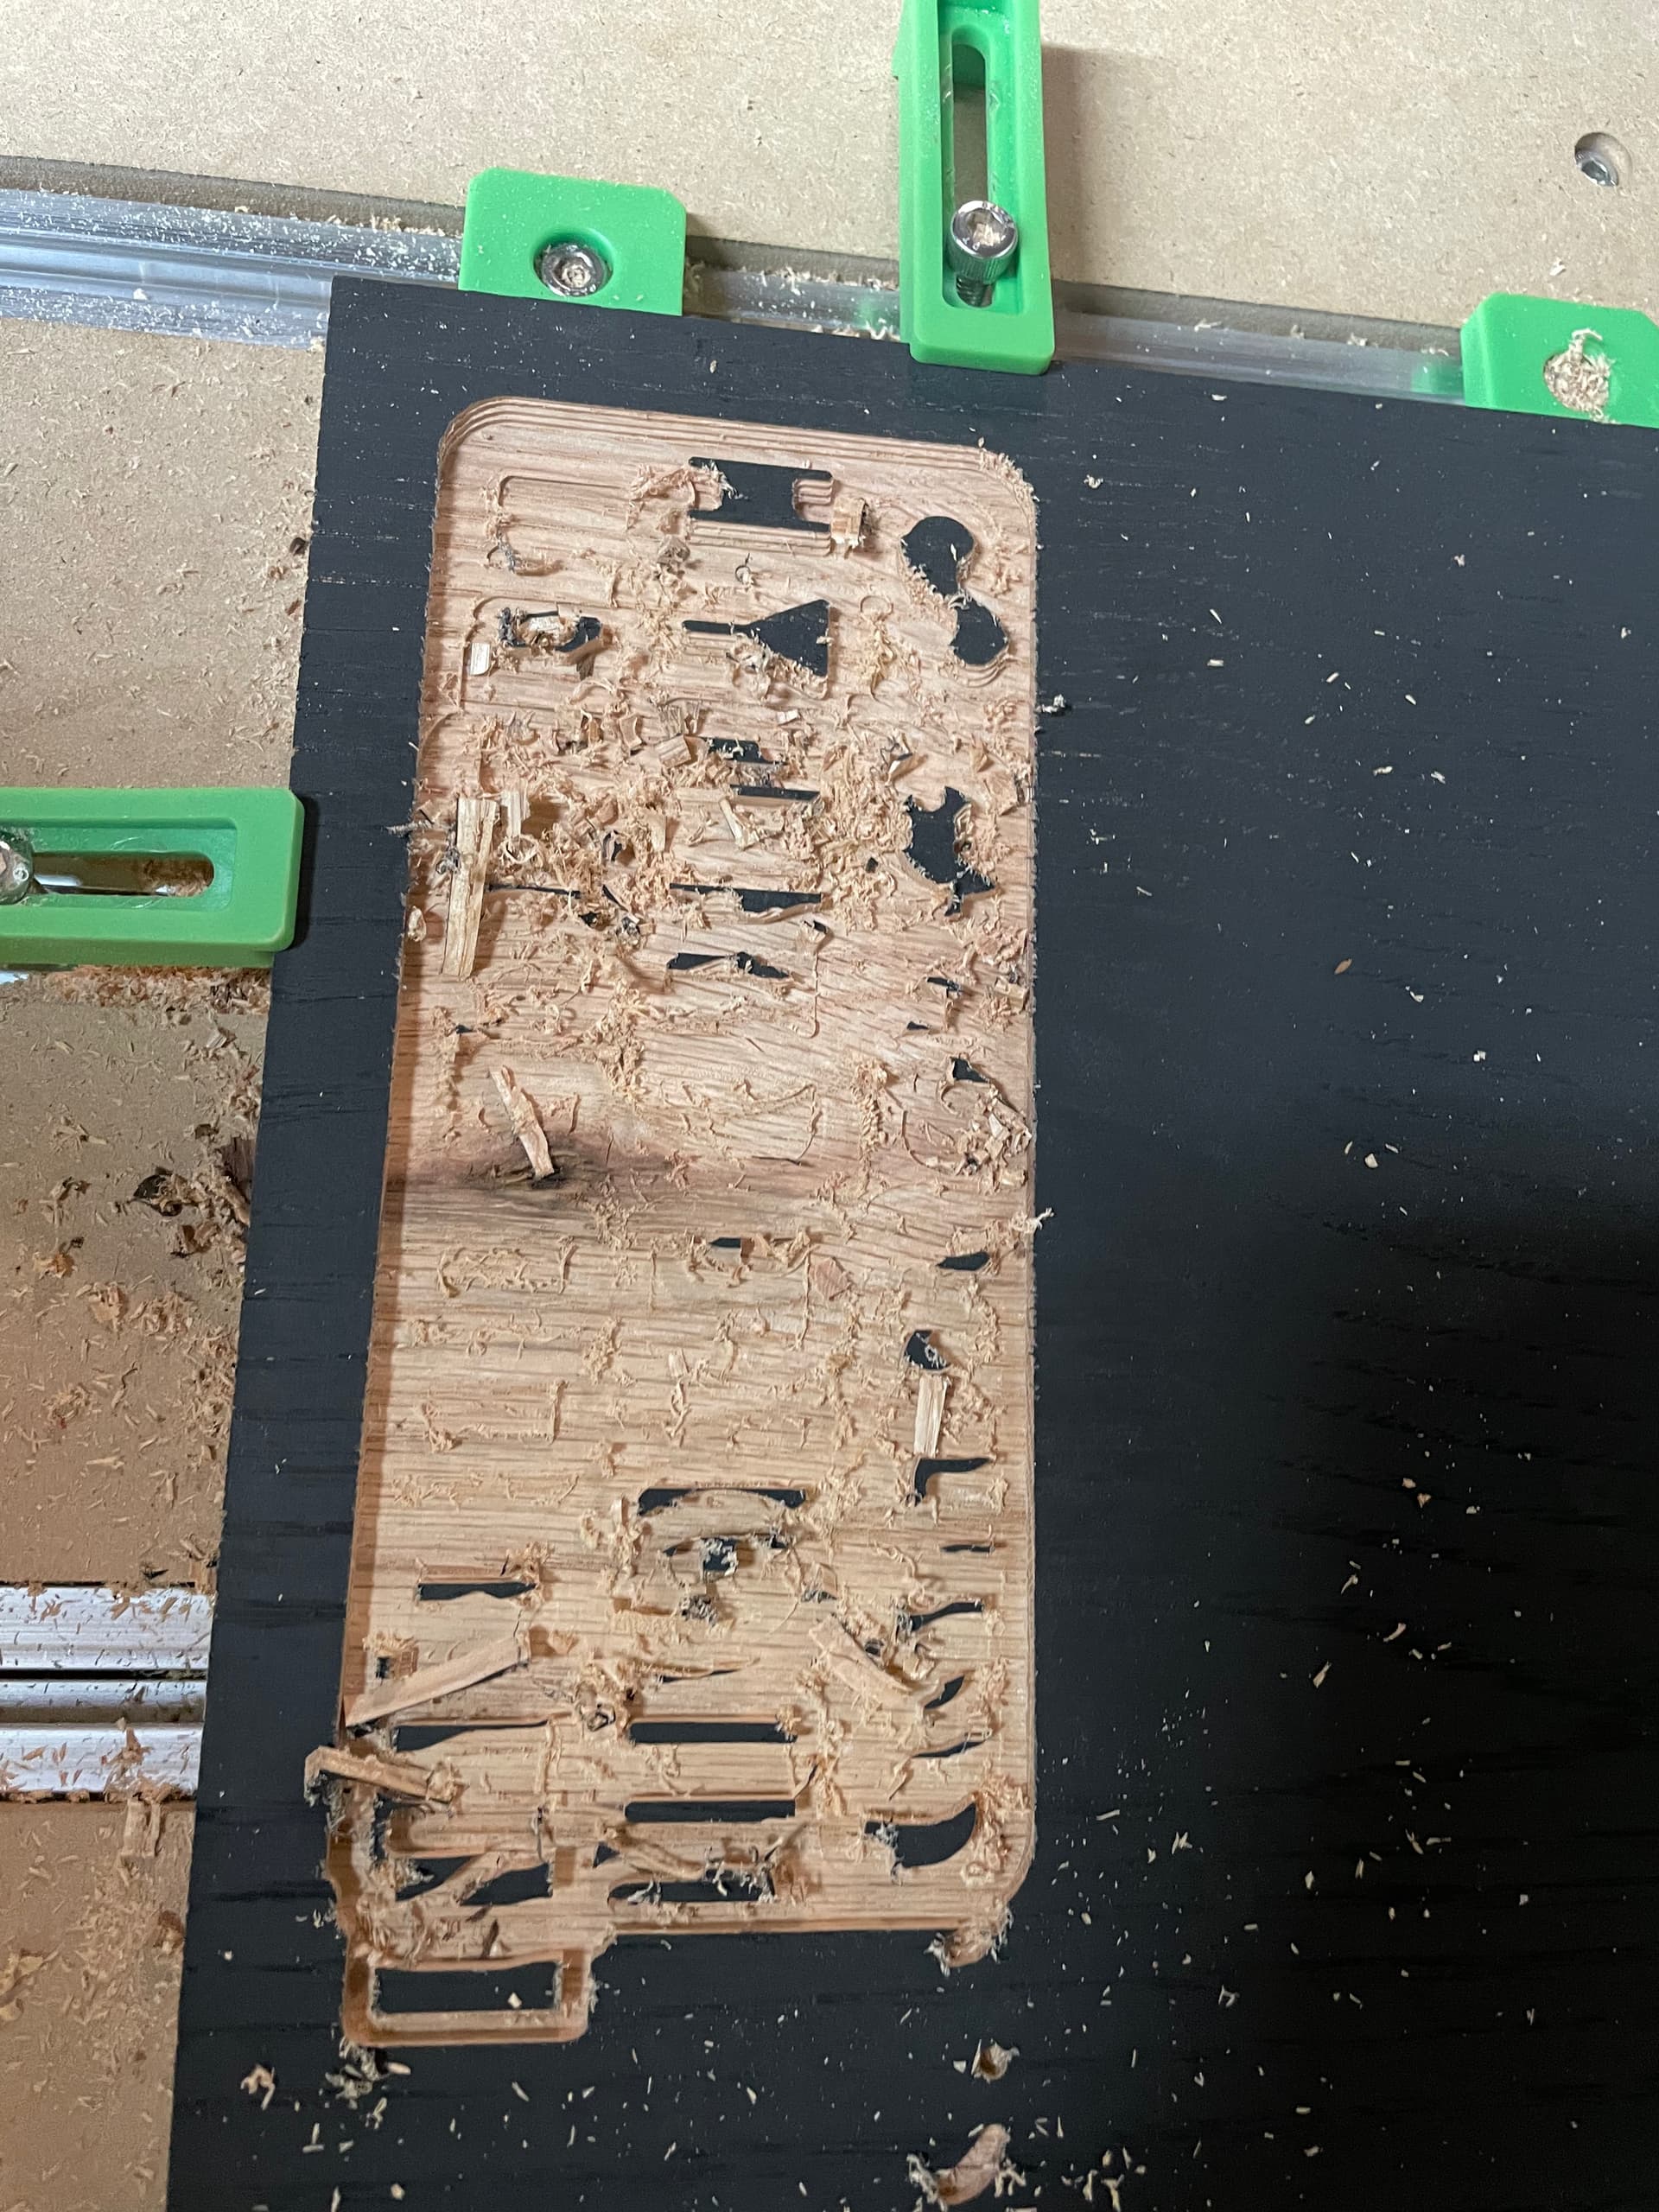
The project only has an advanced V-carve and then a contour cutout, which I figured would be simple. However, I have tried cutting it three times now and every single time the 1/4th end mill cuts everything perfectly, and the first V-bit pass is fine, but after the first pass the V cut seems to suddenly adjust the Y axis by almost two inches, slicing letters and the frame and messing everything up.

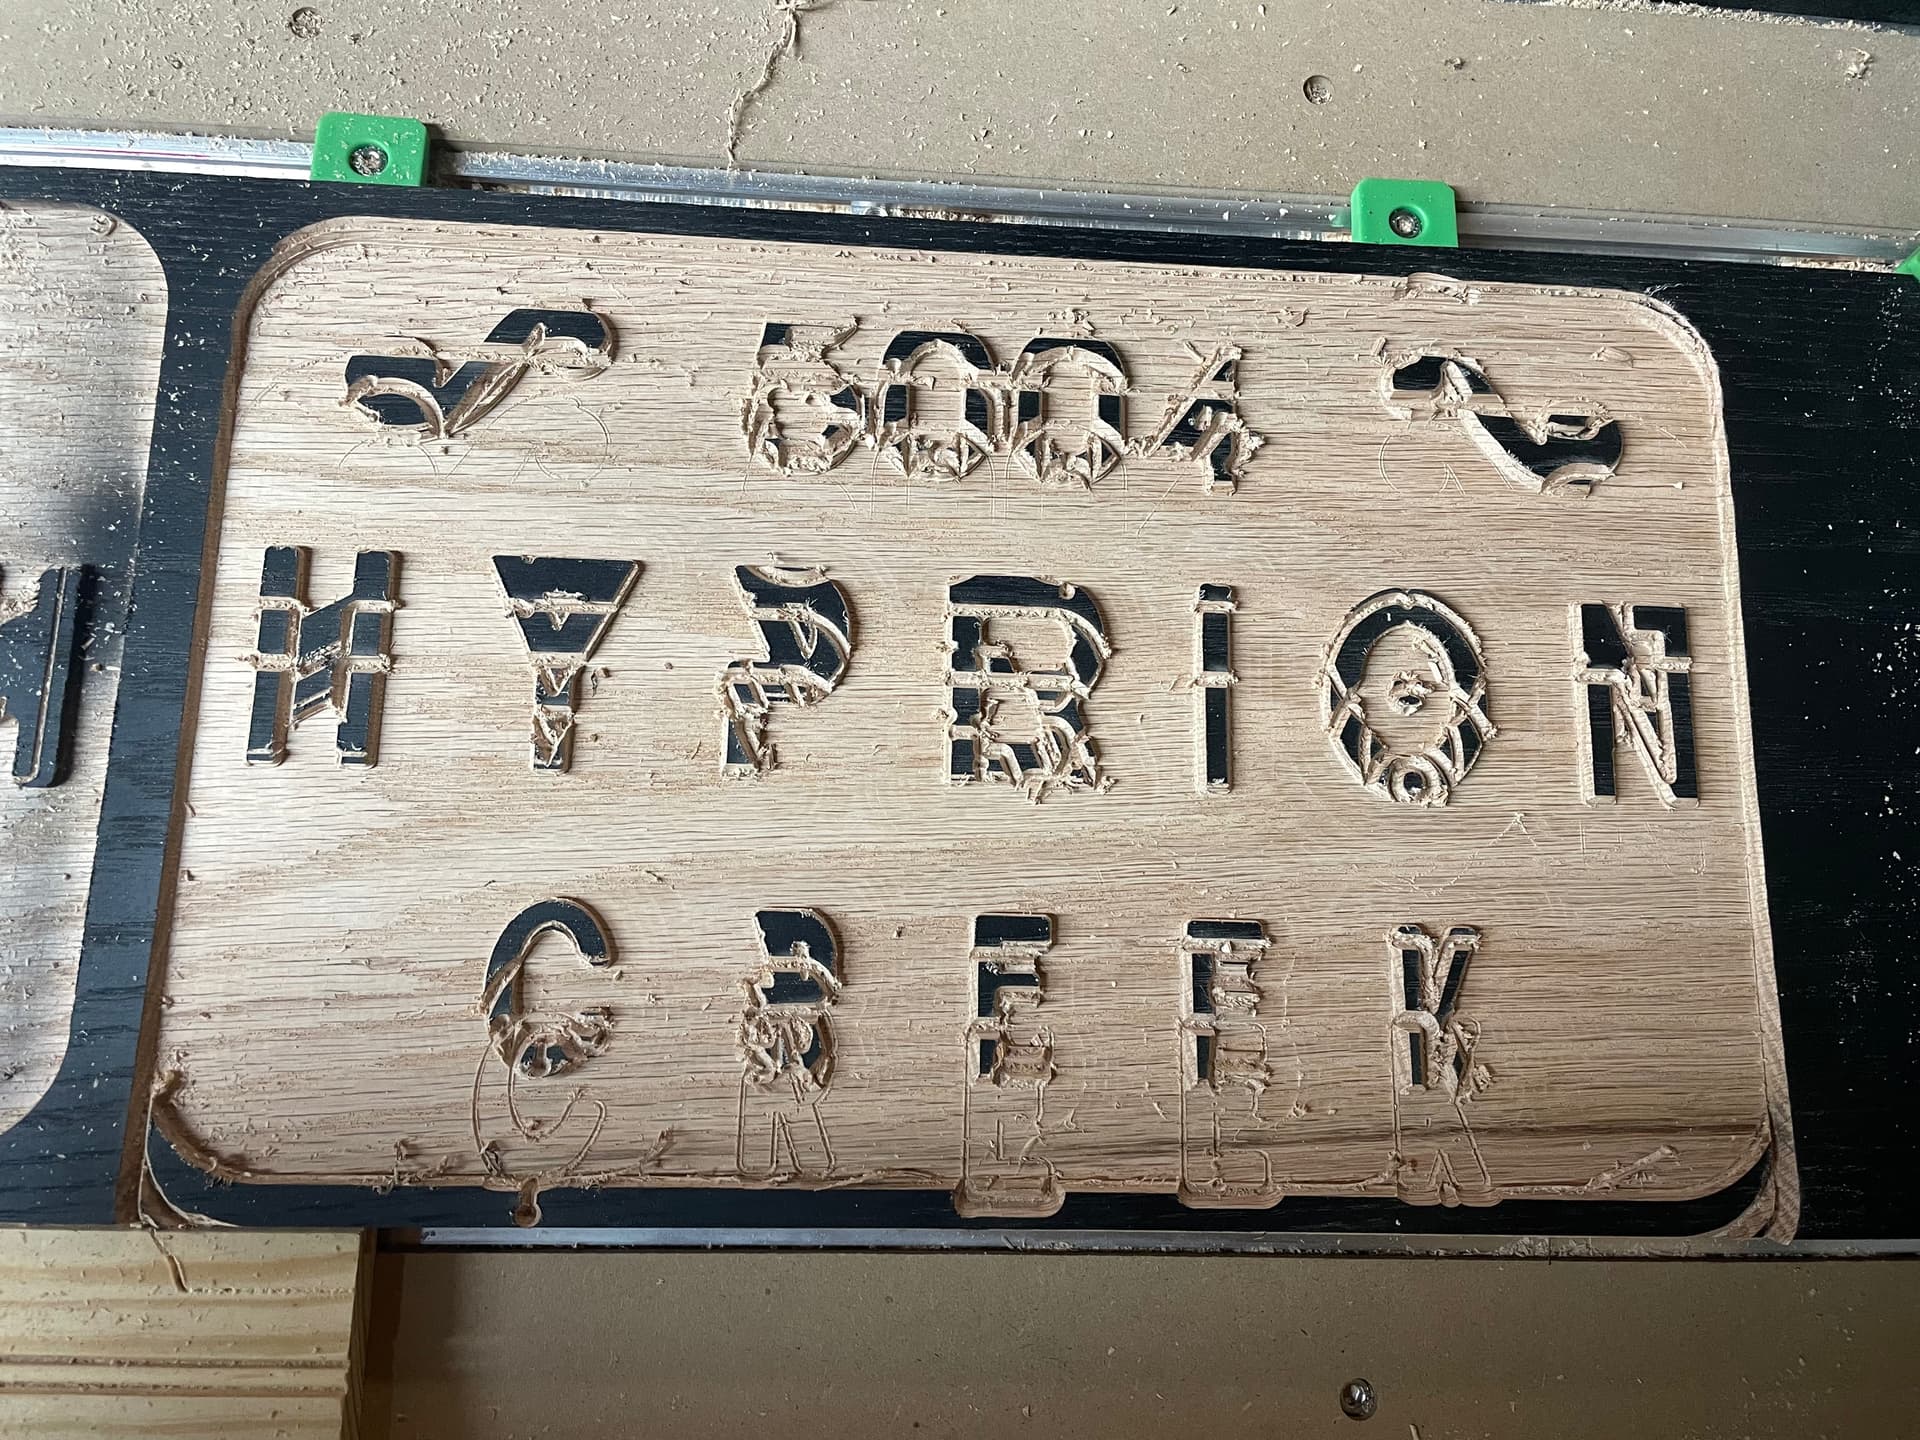
I can’t even remotely imagine what could be causing this. All the wheels are tightened enough, and when I reset the machine it goes back to the old zero spot on, so the actual zero doesn’t seem to be adjusting. The machine isn’t running into it’s max length either (which was an issue I had before).

Any help would be greatly appreciated. This is day four of me trying to figure this out and I’m getting really discouraged :frowning_face:

Here’s what the sign is supposed to look like

And here’s the G-code

HYPERION CREEK SIGN.nc (1.6 MB)

Hi @JustinPhillips8,

What would have been interesting is checking the zeroes right after the problem happens, without re-homing/initializing (which by definition will reset the machine position such that when you job back to the previously set zeroes, it will be spot on). If something slipped (and it did) you should have your zeroes shifted by the same amount at the end of the failed job.

if I read the first picture correctly, the shift happens along the X axis, correct ?
The most likely culprit for this is a slipping pulley on the X motor shaft. Go and inspect that, make sure the two setscrews are still nice and tight, and that ideally one of them is aligned to the flat on the motor shaft.

If the problem is reproducible, you may want to draw a line across the pulley and shaft with a black marker: if the shift happens again, inspect the marker line and see if it’s now unaligned between the pulley part and the shaft part

4 Likes

Thanks for the response!

I checked all the screws and wheels right before I tried it the second time. The offset happens at the exact same point in the project every time, right after the vbit does it’s first pass. That’s why I’m wondering if it’s some issue with the code.

I didn’t realize you could recheck the zeros before initializing again. I’ll try that, though the initial cuts take around 2 hours before the error comes up and this wood is expensive so I’m a little hesitant to let it go through a failed cut again :confused:

Sorry I forgot to mention that I had checked the gcode file and did not find anything weird there.
The overall file looks ok,

And the vcarve part itself too:

so it’s not the gcode itself

That position at the end of the first v-carve pass is in the middle of the “H” there,

and the next move to start the second v-carve pass is at the top of the “N”,

So assuming the shift happens exactly between the first and second pass, this is the rapid move where it all happens. Except I have no clue what can possibly happen, it’s not a collision or it would have happened during the first passes, and it seems to be only X steps loss, nothing on Y (and that rapid move is mainly along Y)

There is nothing special in the gcode at that moment either.

It could be an electrical glitch, but it’s very very unlikely considering it happened twice at the same time in the job.

It could be a slipping pulley as I mentioned, but it would also be very surprising that this happens exactly at that moment.

If you don’t want to retry that file on wood, you could try an air job, let it run through, and check if the zeroes are still where they should be at the end. This will likely be inconclusive, but I have no better idea/hunch right now.

And just as I am typing this I have another idea: what kind of dust collection are you using ? if you used a dust shoe, how low did you set it? Did you have top clamps holding the stock ? Is it possible that the side of the (hard part of the) dust shoe cleared the clamps during the first vcarve pass, but collided with a clamp once if went to the depth of the second vcarve pass ? It’s a long shot, but…

1 Like

Ahhh the clamps is a great guess, and for a second I was thinking that might be it, but then I remembered that the second time I tried the cut I specifically watched the V-carve happening, and it never hit the clamps. It just did the first pass and then, without a care in the world, proceeds to butcher that pass.

I’ll export the advanced Vcarve without the pocket (cause it has the same issue regardless of whether the pocket is checked, I tested) and run an air job and then see where the zeros are.

I just tried to do this and realized I have no idea how to stop a job without re-initializing. I tried running the first 20 minutes of just the vbit gcode file, and as soon as I hit stop it automatically reinitializes. Is there some setting I need to change?

Sorry, I may have mislead you there. I’m not using CM much these days and I forgot about that behavior.
If you let the job run to completion does it auto-home or just move the router to the back?
As far as I am aware there is no setting to change that behavior I’m afraid.
@WillAdams can probably correct me on this.
It’s a bit much to ask you to (temporarily) install and use a different gcode sender just for the sake of investigating that issue…
@WillAdams may have another idea to check for X slippage after a job?
Maybe add a dummy rectangular contour toolpath after your vcarve toolpath, with one corner set at X0,Y0, and visually check if it is shifted when executed ?

Carbide Motion requires re-initializing after stopping a job.

Easiest way to determine if an axis slipped during an operation is to go to a known point (say the origin) and check the position there — one way to do this is to:

  • go to the origin
  • click on “Position” so as to switch to Machine Position"
  • note the dimension values
  • re-zero using the same technique as before
  • check the dimension values to see how they compare.

So I checked the belts and the Y axis one had loosened. I tightened it, thinking it would solve the problem… ran a different project on the machine, and it still adjusted the Y axis zero by around an inch halfway through.

This was on a different position on the spoilboard, right in the middle to make sure it wasn’t knocking against anything. Also a different project, much smaller, using a 1/8th endmill.

Isn’t this side-to-side? If so, the problem is w/ the X-axis.

Oh my machine is sideways, so the side to side is actually the Y axis.

This topic was automatically closed 30 days after the last reply. New replies are no longer allowed.