Does anyone know why the Z assembly might crash going up when initializing the machine when I have verified for certain that the Z-limit sensor is working and activating. In fact I could see the Z-limit sensor red light on as it was pushing into the Z-motor and then homing fail warning came on? It took two tries of turning the machine off and very carefully and slowly moving the z-assembly down manually to get it to stop doing it. Now everything seems fine but it is scaring me. I have the Shapeoko Pro XXL.
What is your safety/retract height set to?
Have you checked the wiring connections for the Z-drive, at each end of the chain and at the board?
2 Likes
I removed the connectors on my Pro XXL, except at the board, after all the unexpected crashes.
No more crashes.
2 Likes
Check the limit sensor pins on the connectors for any pins that may be pushed out or damaged and even look at the back of the pins to see if any moved when the connector is connected. Even if the light is on you may have a problem. Check from the limit switch to the PC board connection
Anthony
1 Like
My retract height is set to 0.3inches on the job setup page.
Are you saying you removed the connectors and hardwired them together all the way up till the control board? If so how did you do it? I had that idea before but was afraid to do it.
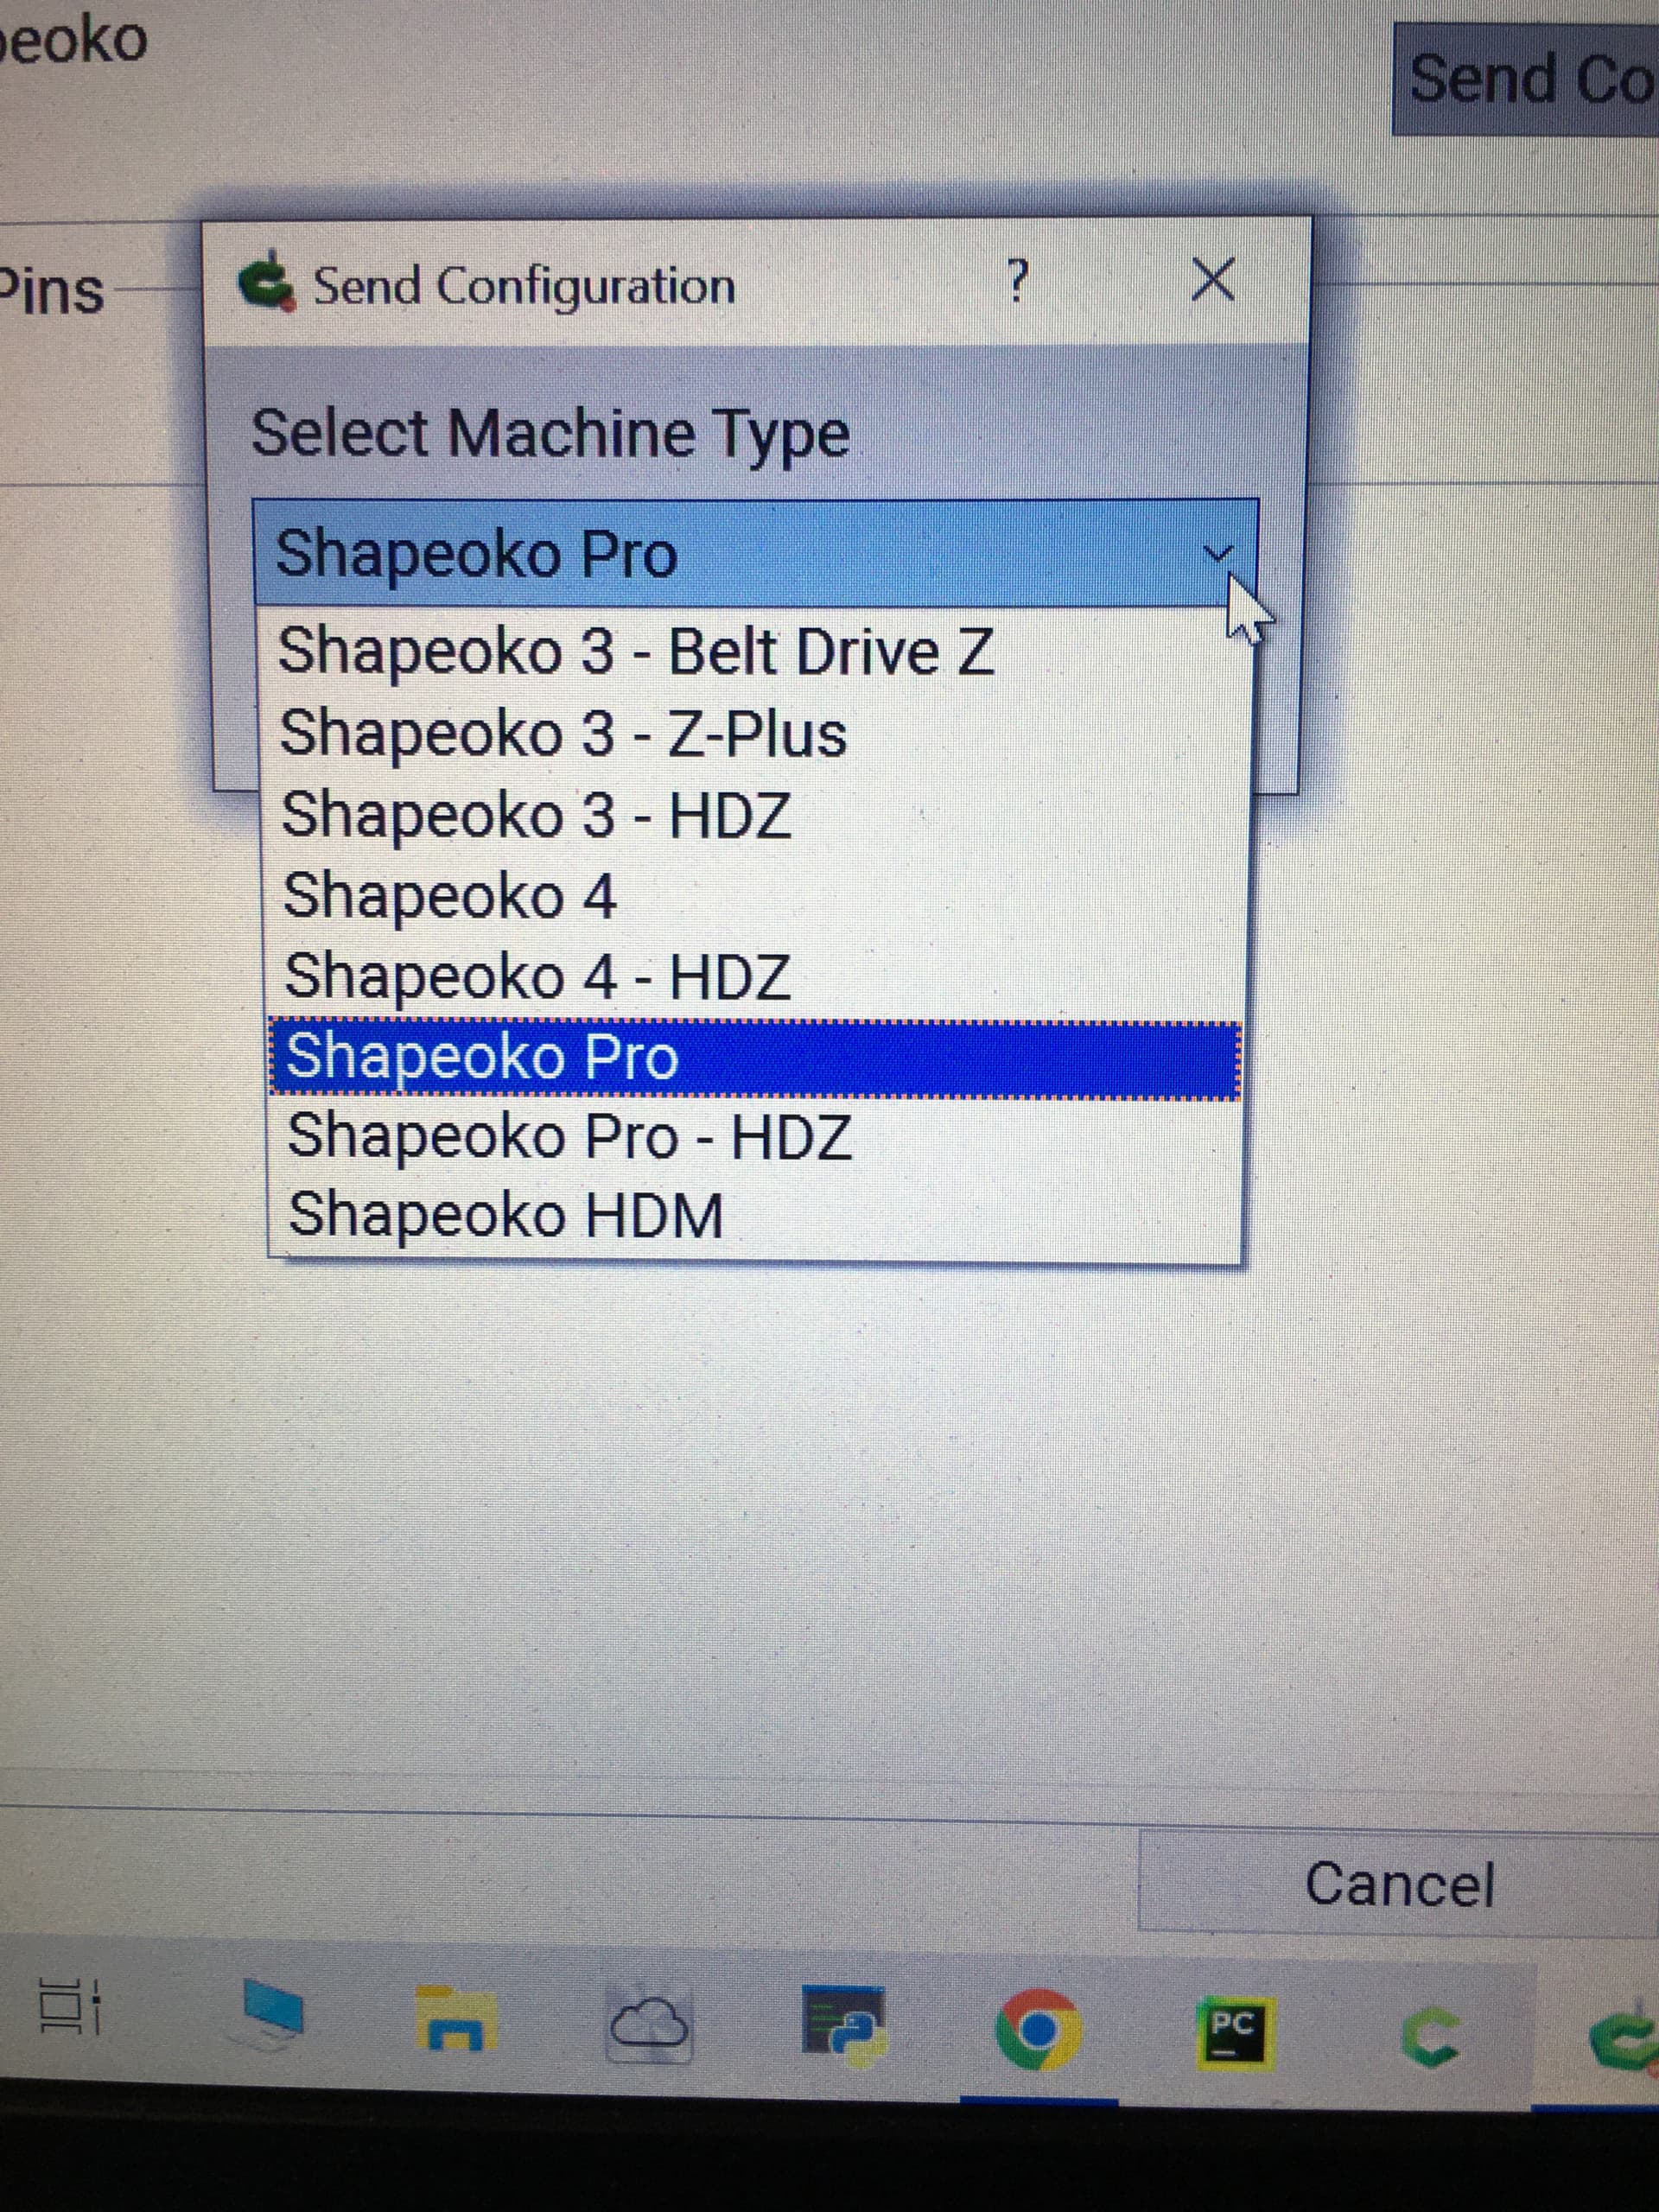
Please verify that you have the correct Z-axis configuration — if that is correct, post a .c2d file, generated G-code, step-by-step notes on how you are securing your stock and setting zero relative to it and managing all tool changes and a photo showing an attempt at cutting still in place on the machine.
I left the connectors alone at the board. It was all the others that I cut, and spliced together. heatshrinked each splice, and then one larger piece of heatshrink to tie them all together. If soldering not your forte, appropriately sized butt splices will work also.
Okay stupid question. How do I check for correct Z-Axis configuration?
This is the file I was trying to run. The file ran fine once I was able to get the machine to initialize and home correctly. It was during the homing cycle that the Z axis crash happened.
Oops Wrong C2D file. Here it is.
HSH V2.c2d (352.5 KB)
I use the carbide work holding clamps and the version 2 probe for setting zero. I also have the Bit setter that came preinstalled on my machine.
Hey! Thank you for your time by the way.
Okay I might try that just because I think the connectors are a weak link anyway. I wanted to solder but I am a mechanical guy and not a electrical guy and didn’t know if the solder would change the resistance in the wire somehow that would damage the controller. Maybe that is crazy thinking.
Connect to the machine, open the Log, go to the MDI, and send $$, then check what is set.
See:
Hi Will.
It’s dinner time here for me. I am going to check this in the morning and report back. I have a small job to run in the morning. I will setup my IPhone camera and video the initialization just in case it happens again and report back.
1 Like
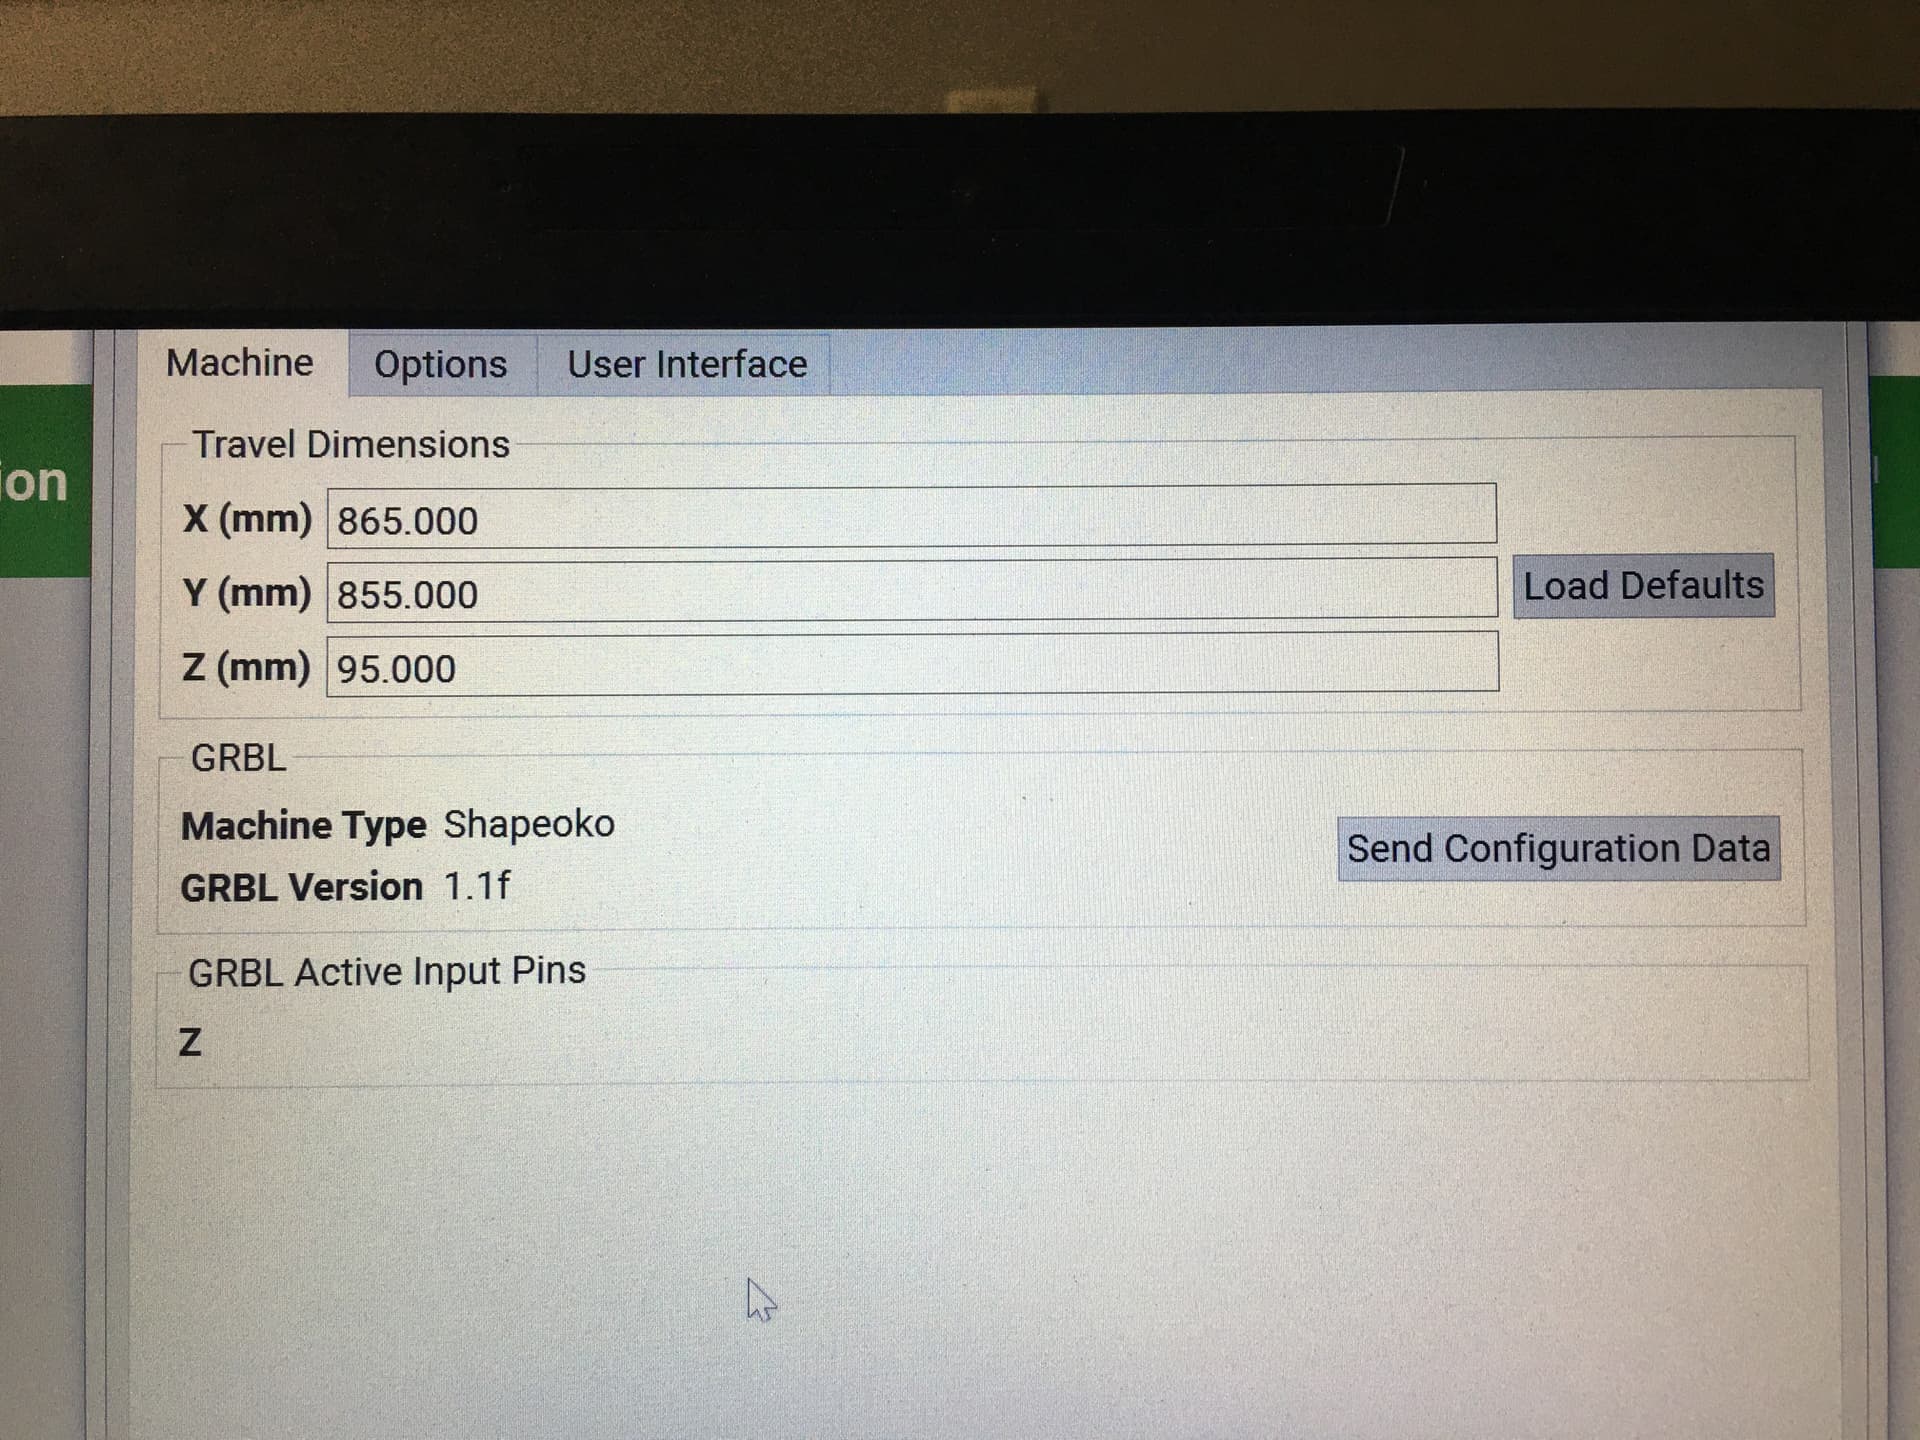
I have not had the opportunity yet to check the settings. I remember going through that process when I first setup my machine via the instructions. I just set for default. Out of curiosity what would happen if I changed the Z default grbl to 90mm and conversely what would happen of I changed the Z default grbl to 100mm?
Increasing the Z-axis travel dimension will allow for greater movement and create the possibility of running the linear blocks off the bottom of the rails (or at least trying to — there are mechanical stops on the more recent Z-axis revisions).
Hi WillAdams
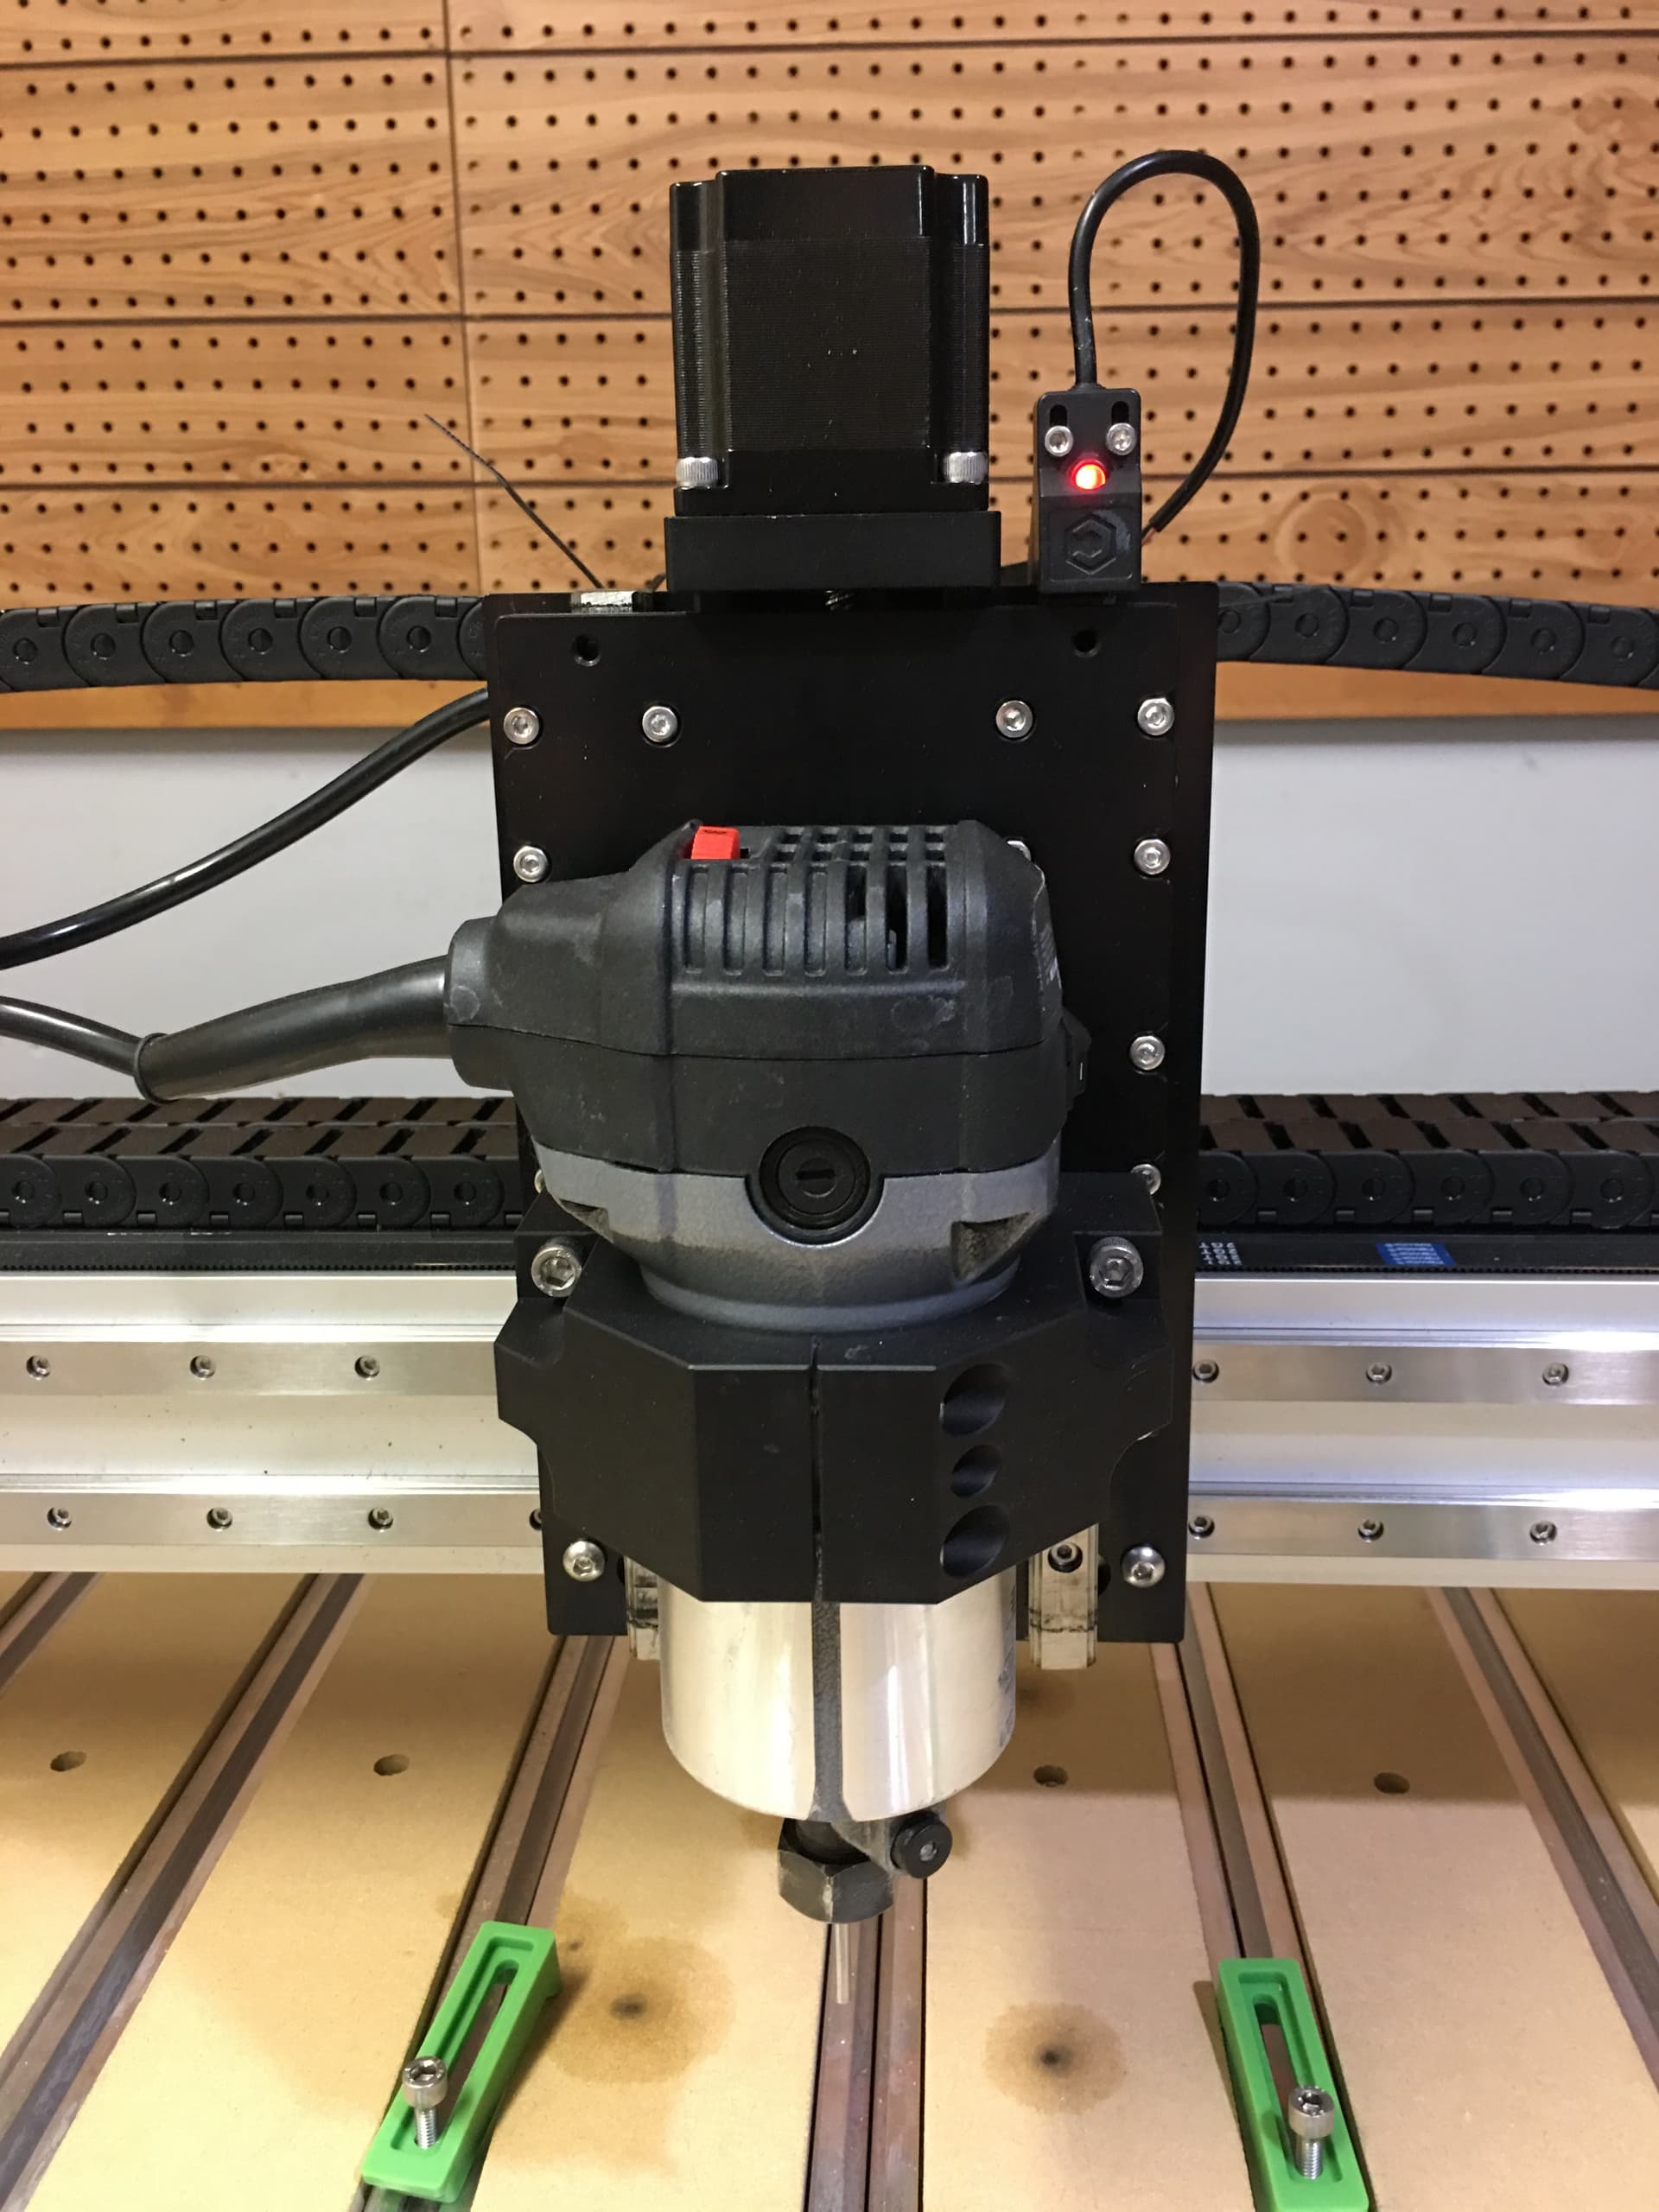
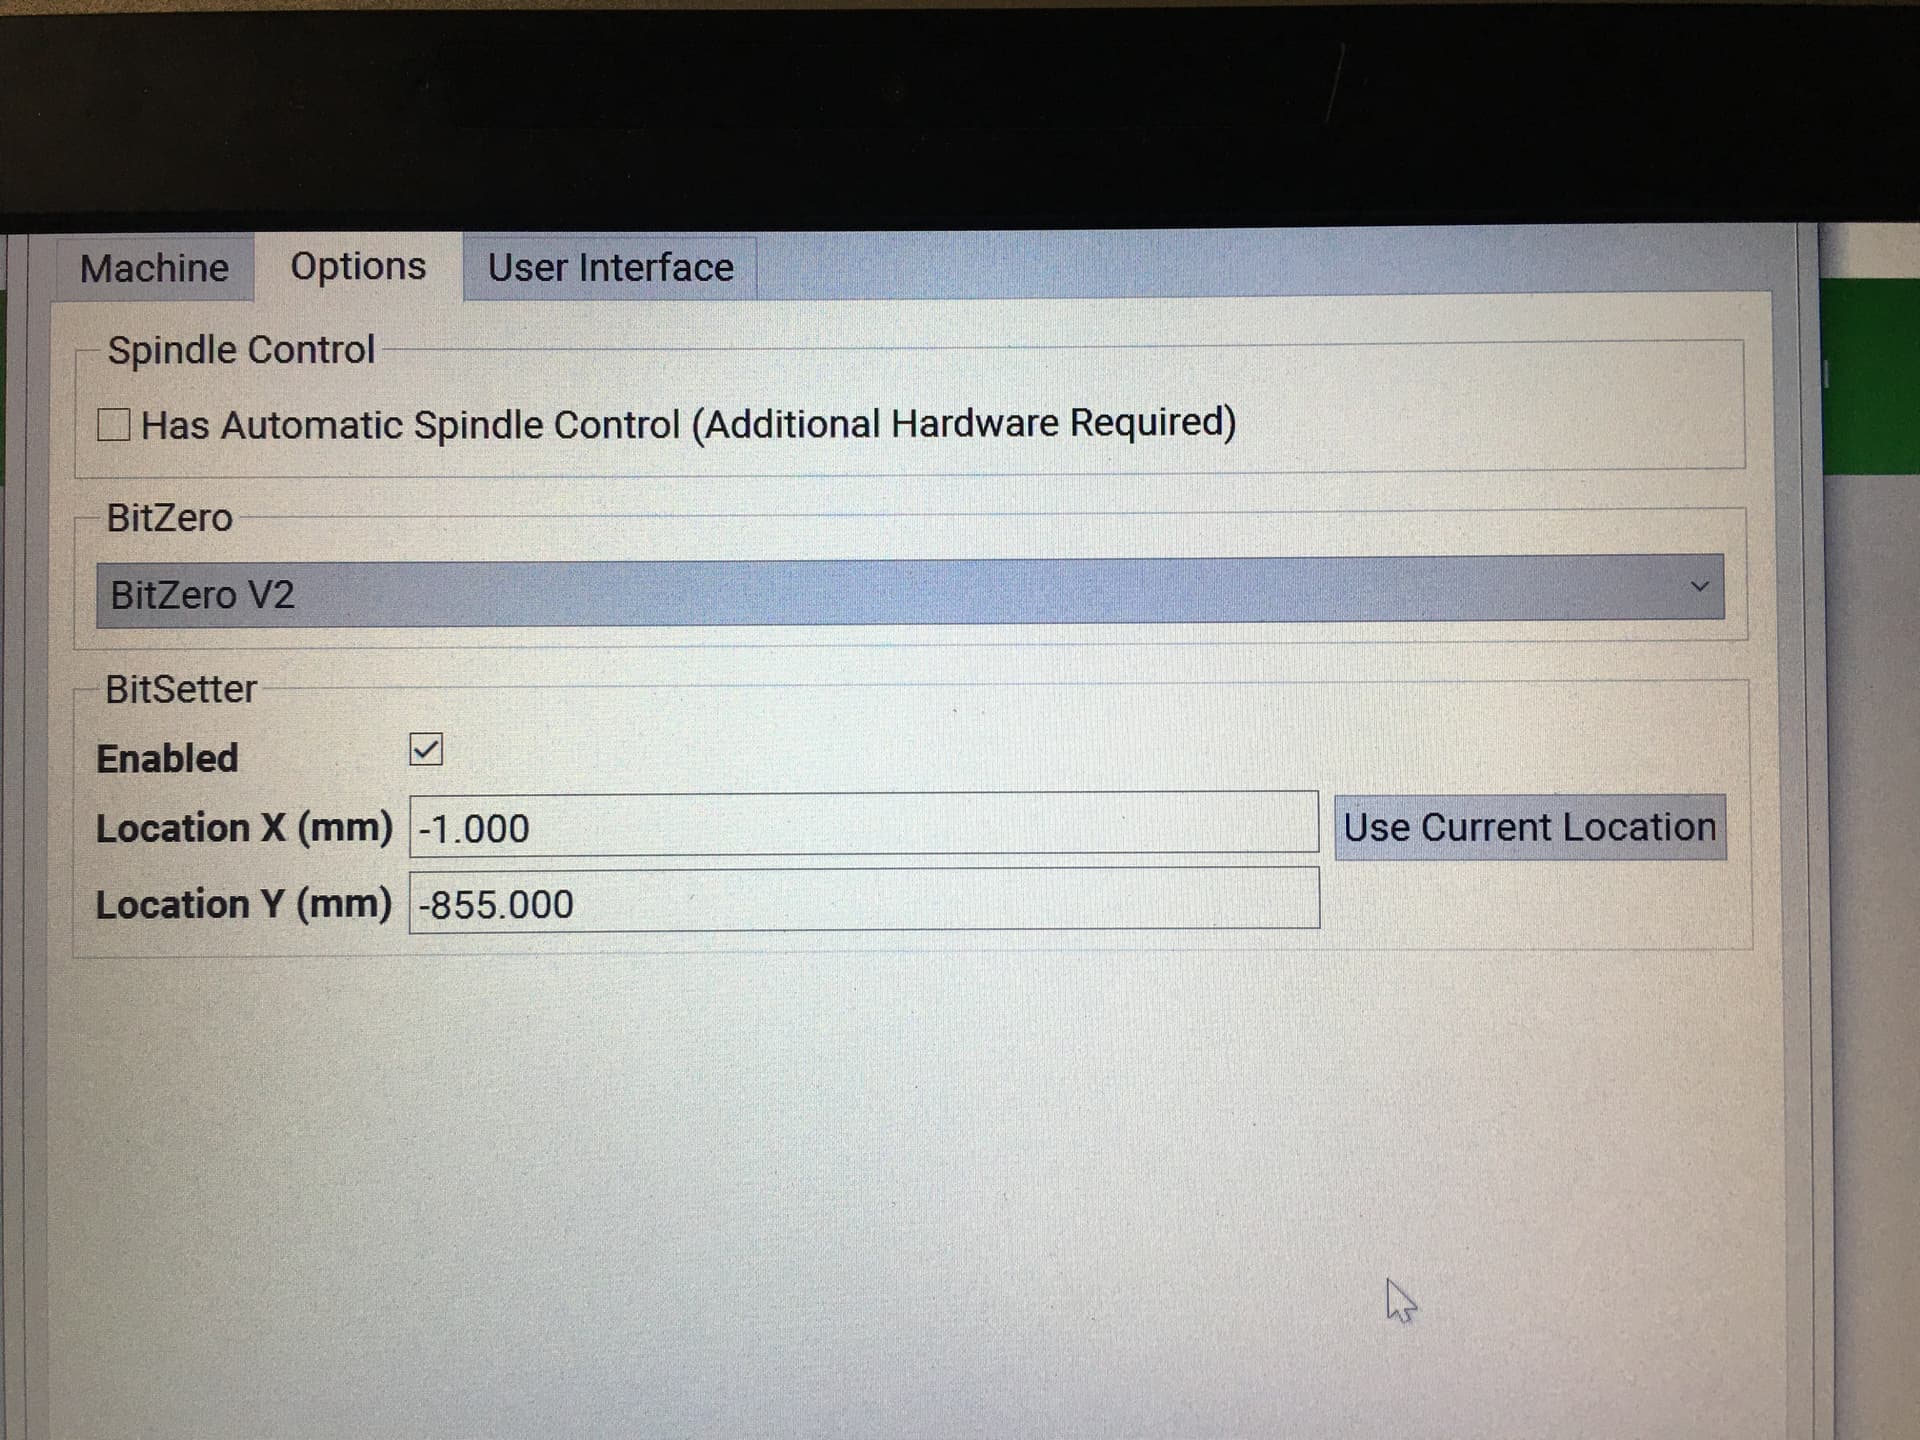
Today was the first day I could get back to trouble shooting since my last post. It is still doing it and I am sending a few pics. One shows the Z Crash with sensor light on indicating that it is working. This happened when I initialized the machine. The other 3 pictures are what I see when I open the settings in carbide motion. I didn’t change anything and I assume what ever is showing highlighted is what it is currently set at. When I first setup I used the defaults. The only thing I changed was the Y travel because it would not make it all the way the Bitsetter on the front right of the machine. The change was small. Should I just go through the setup process all over again as if I just got the machine to see if it fixes it? To refresh your memory I have the Shapeoko PRO XXL with the preinstalled bitsetter.
What happened before the crash?
Please let us know step-by-step:
- what you did
- what you expected
- what actually happened
also note which version of Carbide Motion and Carbide Create you are using and post the .c2d file and generated G-code.
I’d recommend updating to the current stable versions:
Carbide Create 652:
https://carbide3d.com/carbidecreate/download
Carbide Motion 566:
Mine had an episode shortly after getting it… I found that the bolts holding the Z axis plate had worked loose and the one stuck out just far enough to limit the travel. Tightened everything up and it worked fine.
just a thought
1 Like
Possible cause if you use a bitzero: Make sure you put the bitzero ON TOP of your stock if you set Z separate from X and Y (rather than all at the same time by nestling the bitzero onto the corner).
I kept crashing with a 6mm offset error until I realized you have to place the bitzero differently when you want to set only the z offset.
1 Like
WillAdams
My Apologies. I will try to explain better. This is not happening while trying to run a job. This issue just started this past two weeks. This is happening when I first turn on the machine, connect to cutter, and initialize for the homing cycle. The Zassembly is crashing at the start of the homing cycle and I get a grbl warning. It is crashing even thought the sensor light comes on indicating that it is working. I cannot currently even get to the point where I can run a file. I have the updated programs. In fact if memory serves me correctly this started happening after I did the update.