Lately been having problems zeroing my Z axis. So this is what has been happening. I turn on my Shapeoko. It prompts me to connect to my Shapeoko.
It then prompts me to initialize the machine.
After it initializes it moves to front center position and prompts me to insert a new tool.
I do and click on resume and it moves over to my bit setter and does its thing.
Then moves back to front center.
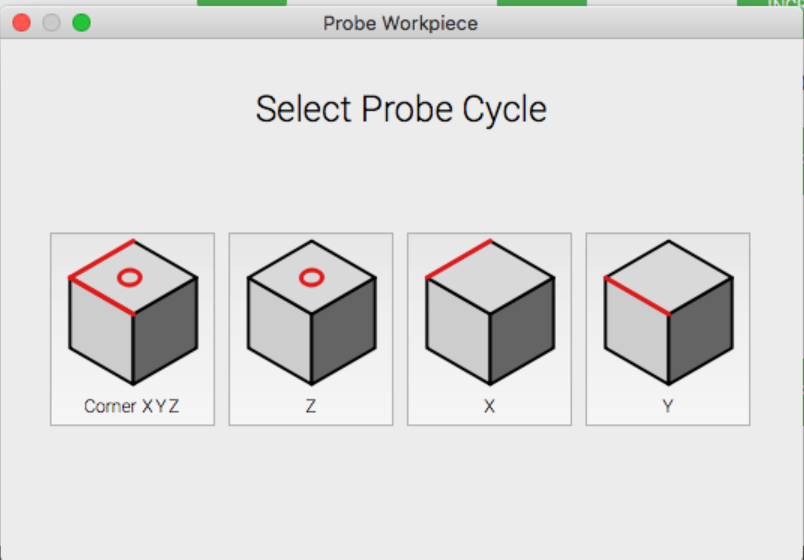
At that point the machine is prompting me to load a new file or a new tooI. I still have not zeroed my X,Y or Z axis so I do that first using my Bitzero V2. I select corner first. For some reason the machine does X,Y then moves to the top and does Z. Now the tutorial I watched for the Bitzero V2 says to zero the Z axis the Bitzero V2 needs to be sitting on top of the material so I move it there and click on the Z zero option and the machine then probes for Z. After its finished I check Z zero with a piece of paper and it reads +0.094 when with a piece of paper I have the end mill at Z zero.
After that I load my file and if I click start it will prompts me to load a new tool then it moves over to the Bitzero.
What I do at that point is re-zero the Z axis with a piece of paper then start the job.
Does any one have any idea why my Bitzero is off everytime?
UPDATE: As mentioned above when I have my Bitzero V2 probe the corner of my material it then moves to the top of the material and probes for the surface. Now I was positive that the tutorial for the V2 Bitzero said that you have to lift it of the corner and place it on top of the material to probe for Z zero but I just noticed that that Z zero is correct when I let it probe for all three axis When its still on the edge of the material. I guess I need to watch the tutorial for this thing again.
For probing x y and z the BitZero sits over the edge. For z only it sits over the material. When you choose z only cm compensates for the BitZero height difference.
The label and picture for the button in Carbide Motion for the probe is incorrect and misleading. It suggests that you are probing X and Y only, when in fact you are doing all three (X,Y and Z).
That’s true. I think the incorrect picture along with the tutorial for the Bit zero stating that to zero Z the Bit zero need to be on top of the material came together to make the correct procedure more confusion.
The fact that it does all three axis in one step is a pleasant surprise.
I still check the Z axis for zero every time after using the probe because I find sometimes it gets thrown out after I click on start job which prompts the machine to use the Bit setter. After the Bit setter does it’s thing and the machine starts to cut it sometimes cuts air because Z zero is off.
It doesnt do it all the time and it only happens the first time the bitter setter is used but I keep eye out for it each time because I’m not confident it will be correct.
One more question not directly related. In Jog you can rapid to the current zero X,Y or Rapid to current X,Y and Z+6mm. What is the purpose of Z+6mm? I here people mention this in other threads but i dont know what the need or purpose of this featues is
It’s just a safety margin above the actual Z0, because moving to exactly Z0 would likely scratch the stock surface and be scary too, because you would have to trust that it will stop exactly there (sometimes just moving 0.2mm too deep matters). It’s also useful to move to Z0 + a few mm, when you need to dial/fine-tune your Z0 again (for example, swapping to another piece of stock that is theoretically the same thickness, but actually slightly different)