A number of folks have recently jumped into the world of inexpensive 3D Touch probes, myself among them!
We found that to really leverage the probe and build out the routines/macros, we’re probably better off with a gcode sender other than carbide motion (though there will be a different thread specifically for unofficial carbide motion 3D Touch probe support)
As a collective it seems we’ve landed on gSender as the third party sender. It seems to be pretty robust and it’s overall just a nice experience.
Anyway, this thread is going to be dedicated to discussing, developing, and implementing 3D Touch probe support in gSender (with a slight bias towards the nomad 3 specifically…)
3D touch probe: CNC 3D Edge Finder, Professional High Accuracy Universal 3D Sensor Probe, Waterproof Multifunctional 3D Edge Locator with Tungsten Steel Tip for X, Y and Z Axis, for Mach3, for GRBL CNC Equipment Amazon.com (any normally open probe should work)
3 pin mini xlr female cable: XLR Male to Mini XLR Female Adapter Cable, 3-pin XLR Male to 3-pin Mini XLR Female Adapter Cable, 1 Feet - JOLGOO https://a.co/d/6XTgM1R (This allows you to plug into the bitzero port on the nomad, clever carbide folks)
The bitzero port expects a NO (normally open) probe.
the bed of the Nomad 3 is grounded. This makes probing conductive stock interesting though it should not impact the touch probe.
The door open sensor on the nomad sends a hold feed and a door open signal to gsender. This means we must clear the alarm by entering a “~” in the console before resuming functionality.
I’m sure some stuff is either missing or wrong… either way let me know
P.S. there are no affiliate links here
FWIW, I have my own set of macros that were derived from Neil’s:
There are macros to probe the middle of an object, the middle of a hole and the tool probing is consolidated into a single macro instead of having an initial tools and a separate tool change macro.
If anyone wants to try building their own version of gSender or are interested and want to comment on it, I created a patch for gSender which adds the ability to automatically run a macro when the gcode pauses for a toolchange. I opened an issue to talk about including it and got very little interest:
With this change, you get an experience that is closer to running carbide motion. It pauses the gcode, prompts you to enter a tool and then probes before finally asking you to resume. If you are using a router, you do still need to remember to turn the router on and set the speed.
However, if you happen to also be using Fusion 360, you can use my post:
which has an option that you can enable to pause the gcode for spindle speed changes. With this post, it is very much like running carbide motion. After running the tool change and resuming it will then prompt you to set the spindle speed and resume.
I’ll have a look around what you’ve done there. I am interested in getting the bitzero v2 officially supported in their probing options.
That likely means I’ll have to dive into building it myself at some point.
I’d also like to support a similar interface to the probing tool diameter somewhere down the line. Where you can set some input to be used in the selected probing routine. Could be really nice for entering rough dimensions before an advanced probing routine.
The current bitzero macros on the github seem to work well.
I’ll convert the XYZ macro into a center hole macro and skip the Z entirely.
The only thing that really needs changed is to generalize the retract distances from the side walls of the hole.
We want the retracts to be relative to how much the probe has moved instead of a hard coded distance. This will prevent potential issues when probing small holes.
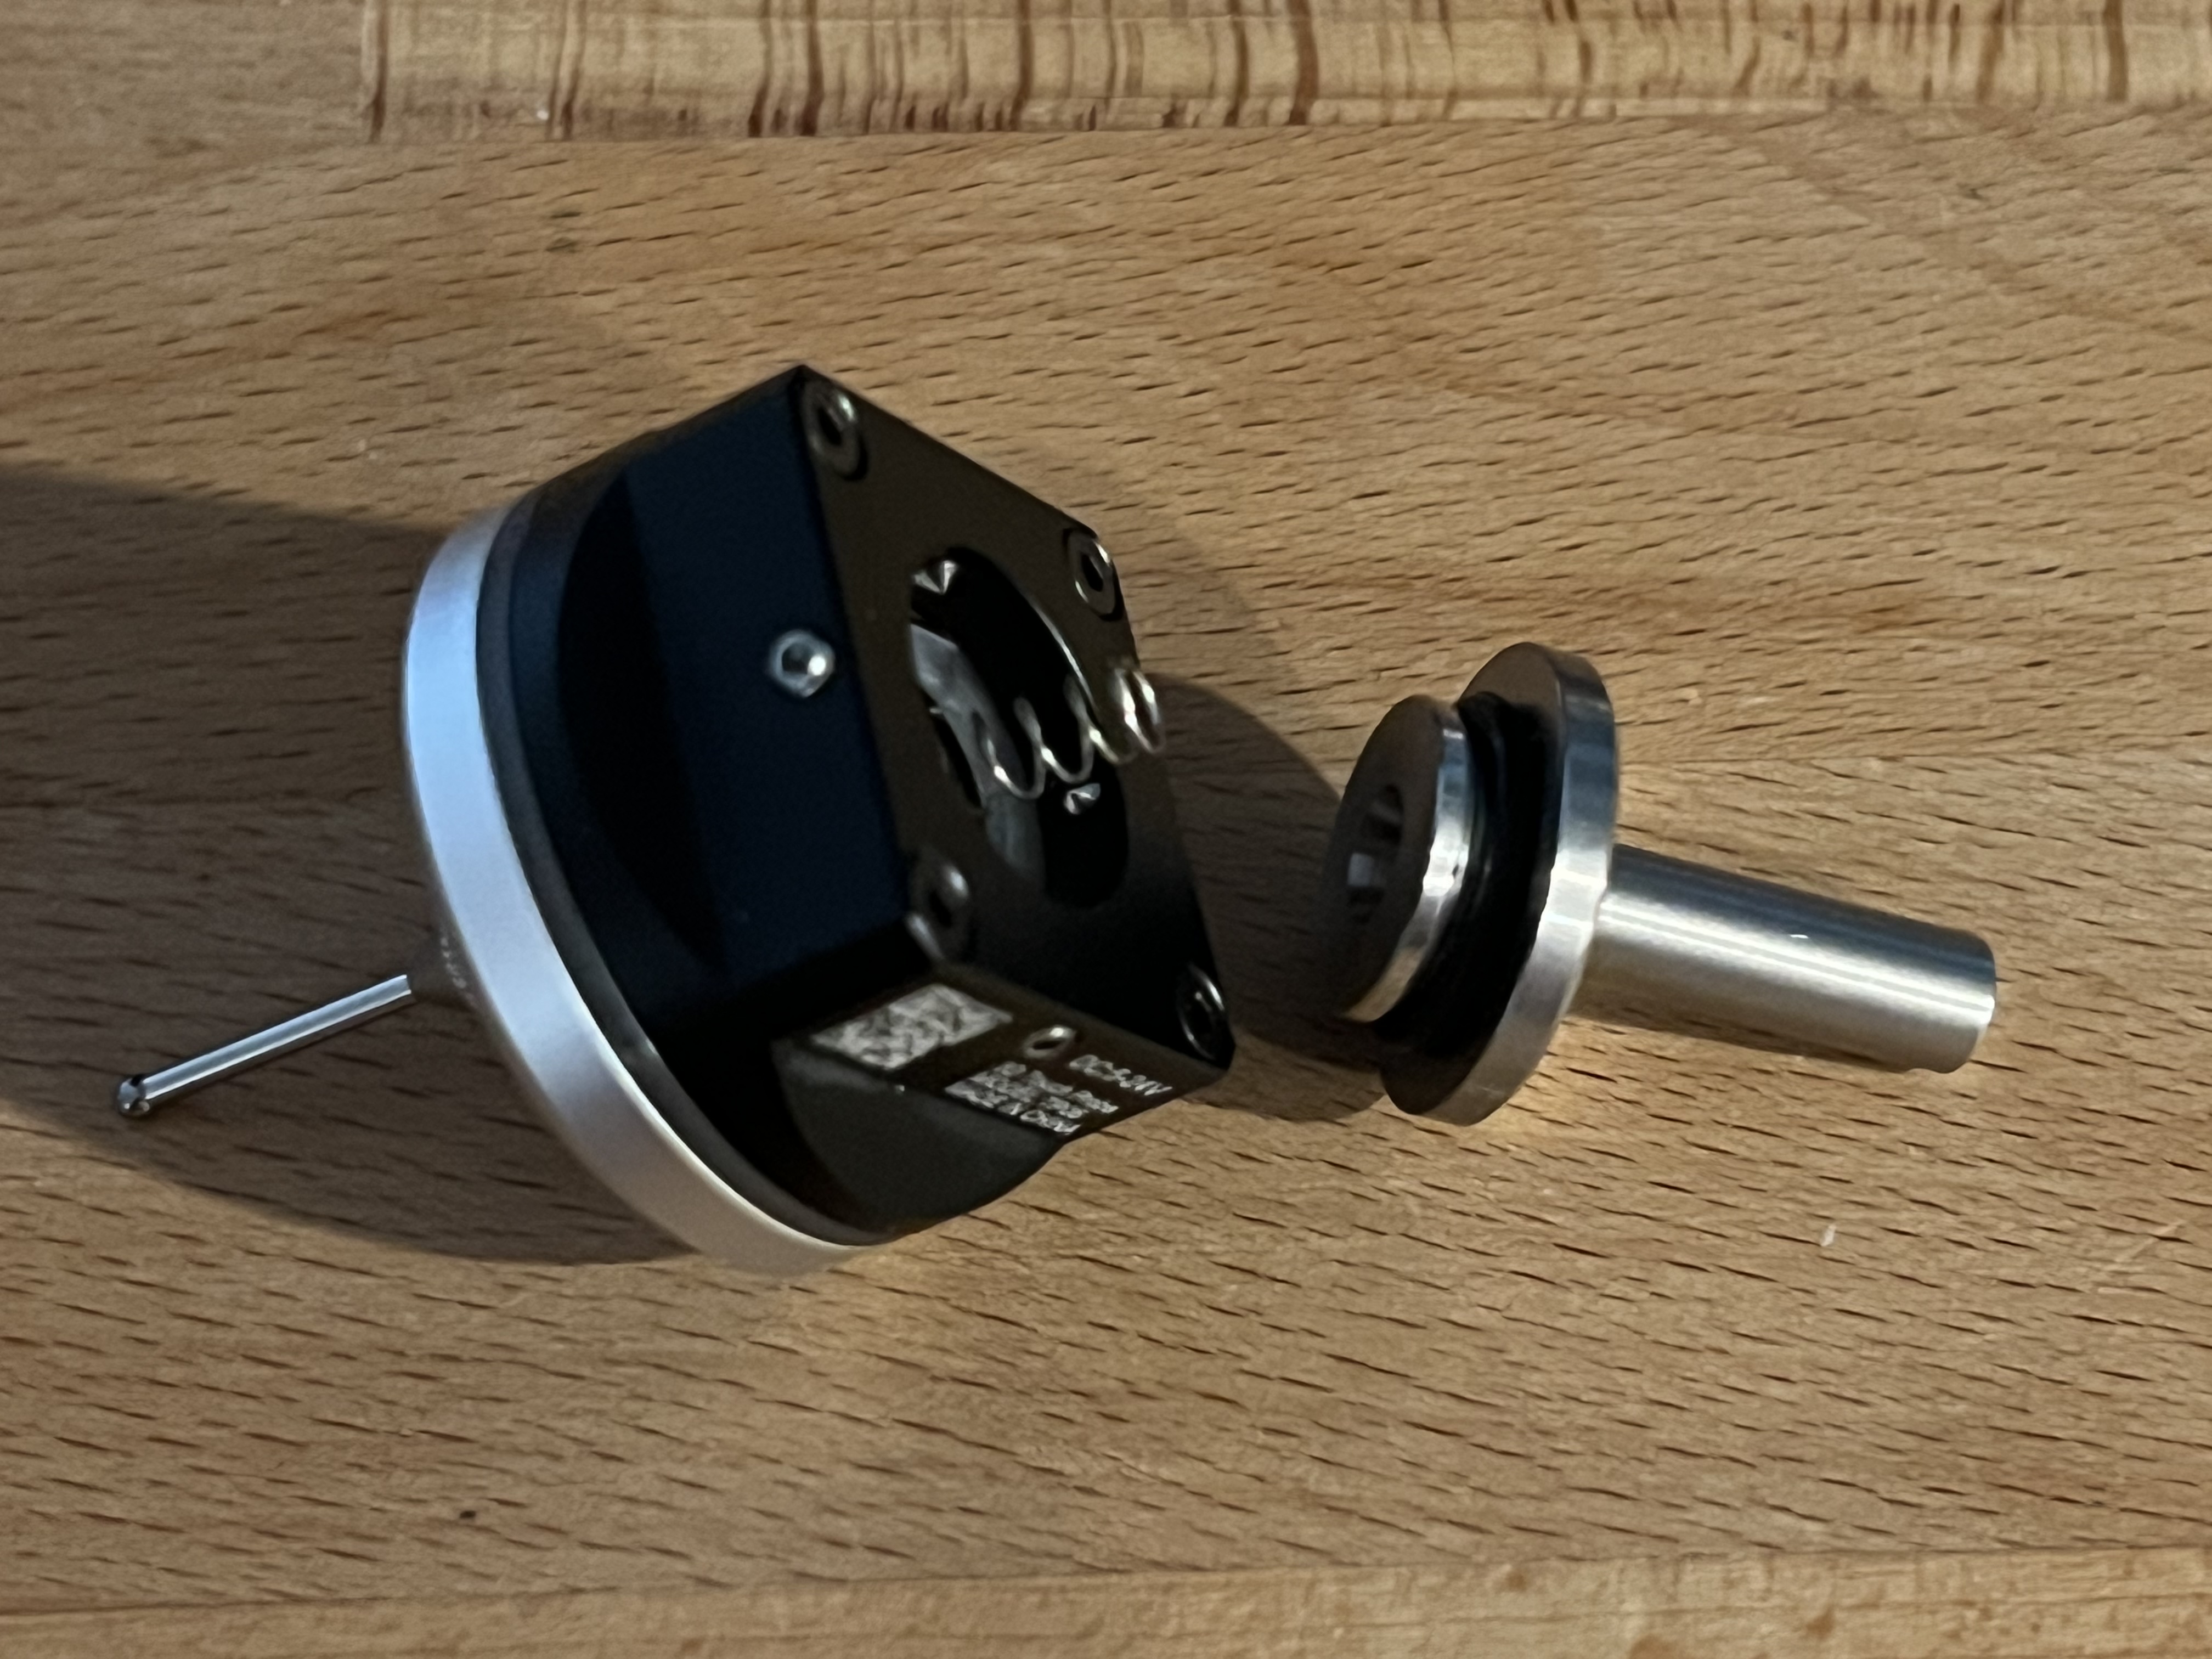
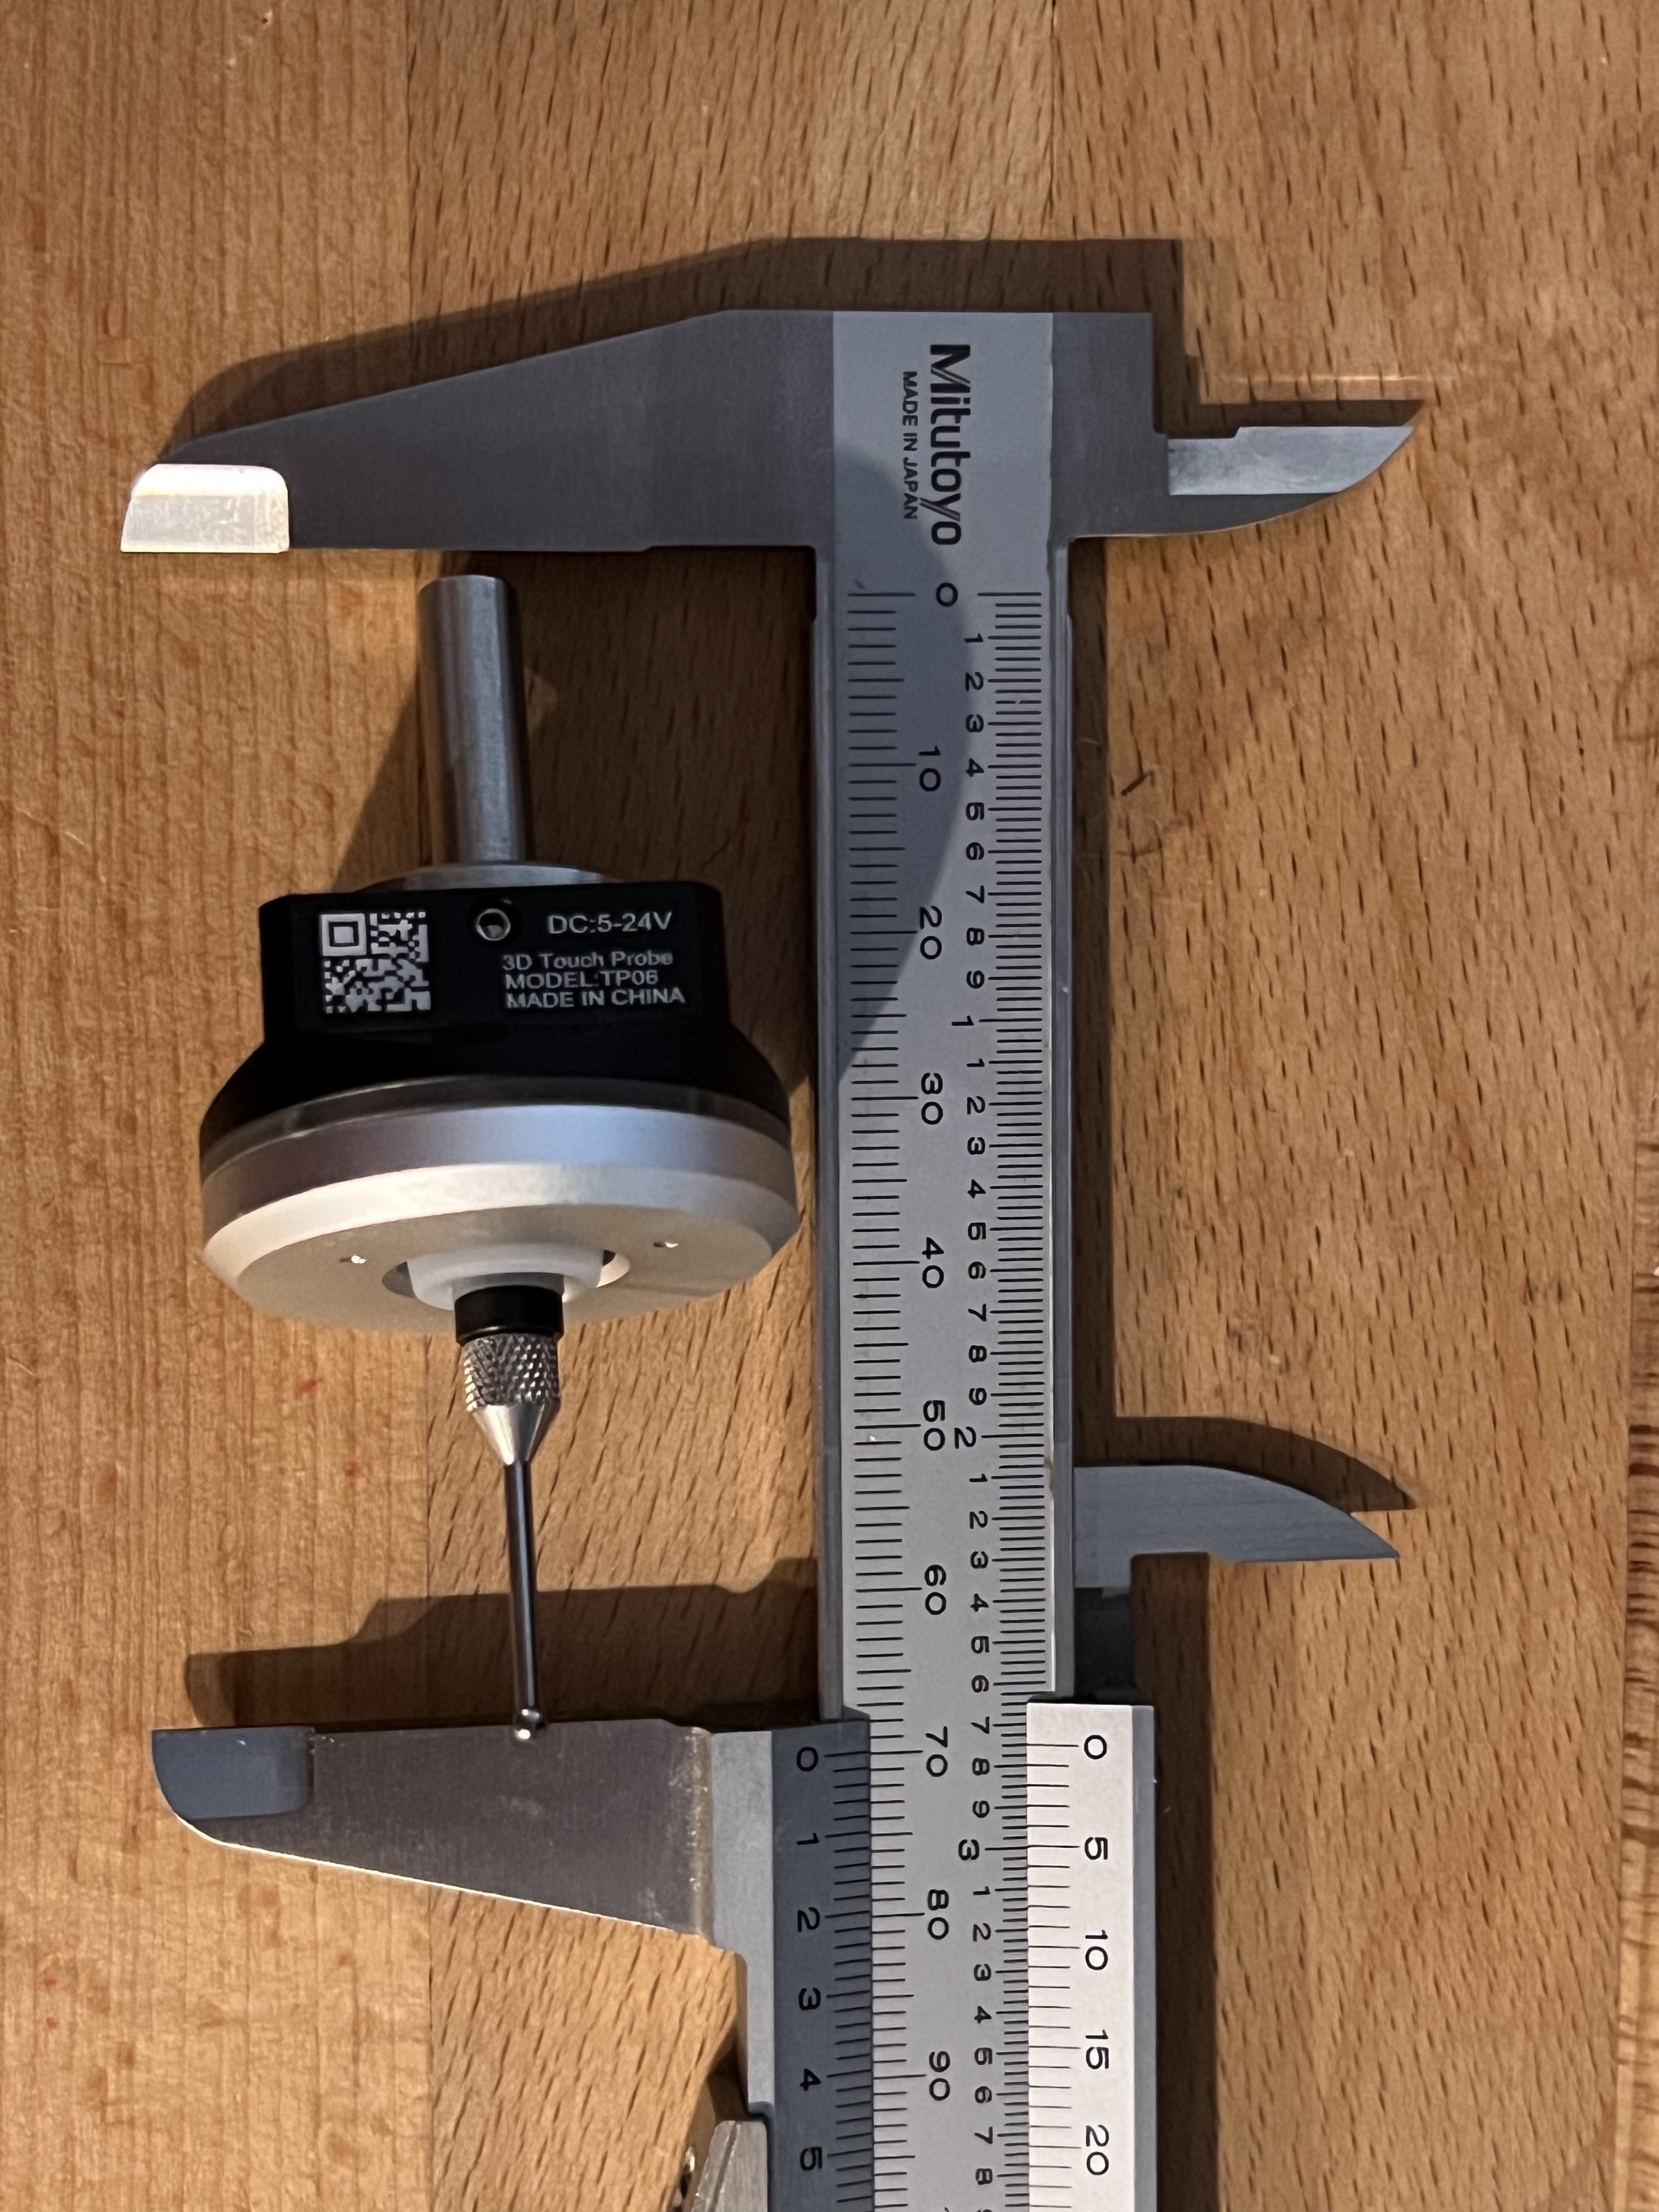
Probe came in today, it really is a cute little device. I’ll have to get the dti out before reporting on any real accuracy or repeatability.
One thing I was really curious about was the shank, I’d like a touch probe with a 3mm shank as most of my tooling is for micro-machining. This means I’d have to swap collets after every probe routine. No bueno.
So the first thing I did was take it apart so I can model up a 3mm shank. (Or have this one turned down, we’ll see based on cost)
Anyway, here are some photos. I’ll report back when I’m up and running.
Ok so, the annoying thing about the nomad is that the bed is grounded. This makes probing conductive stock annoying… you have to isolate the workpiece ORthe probe!
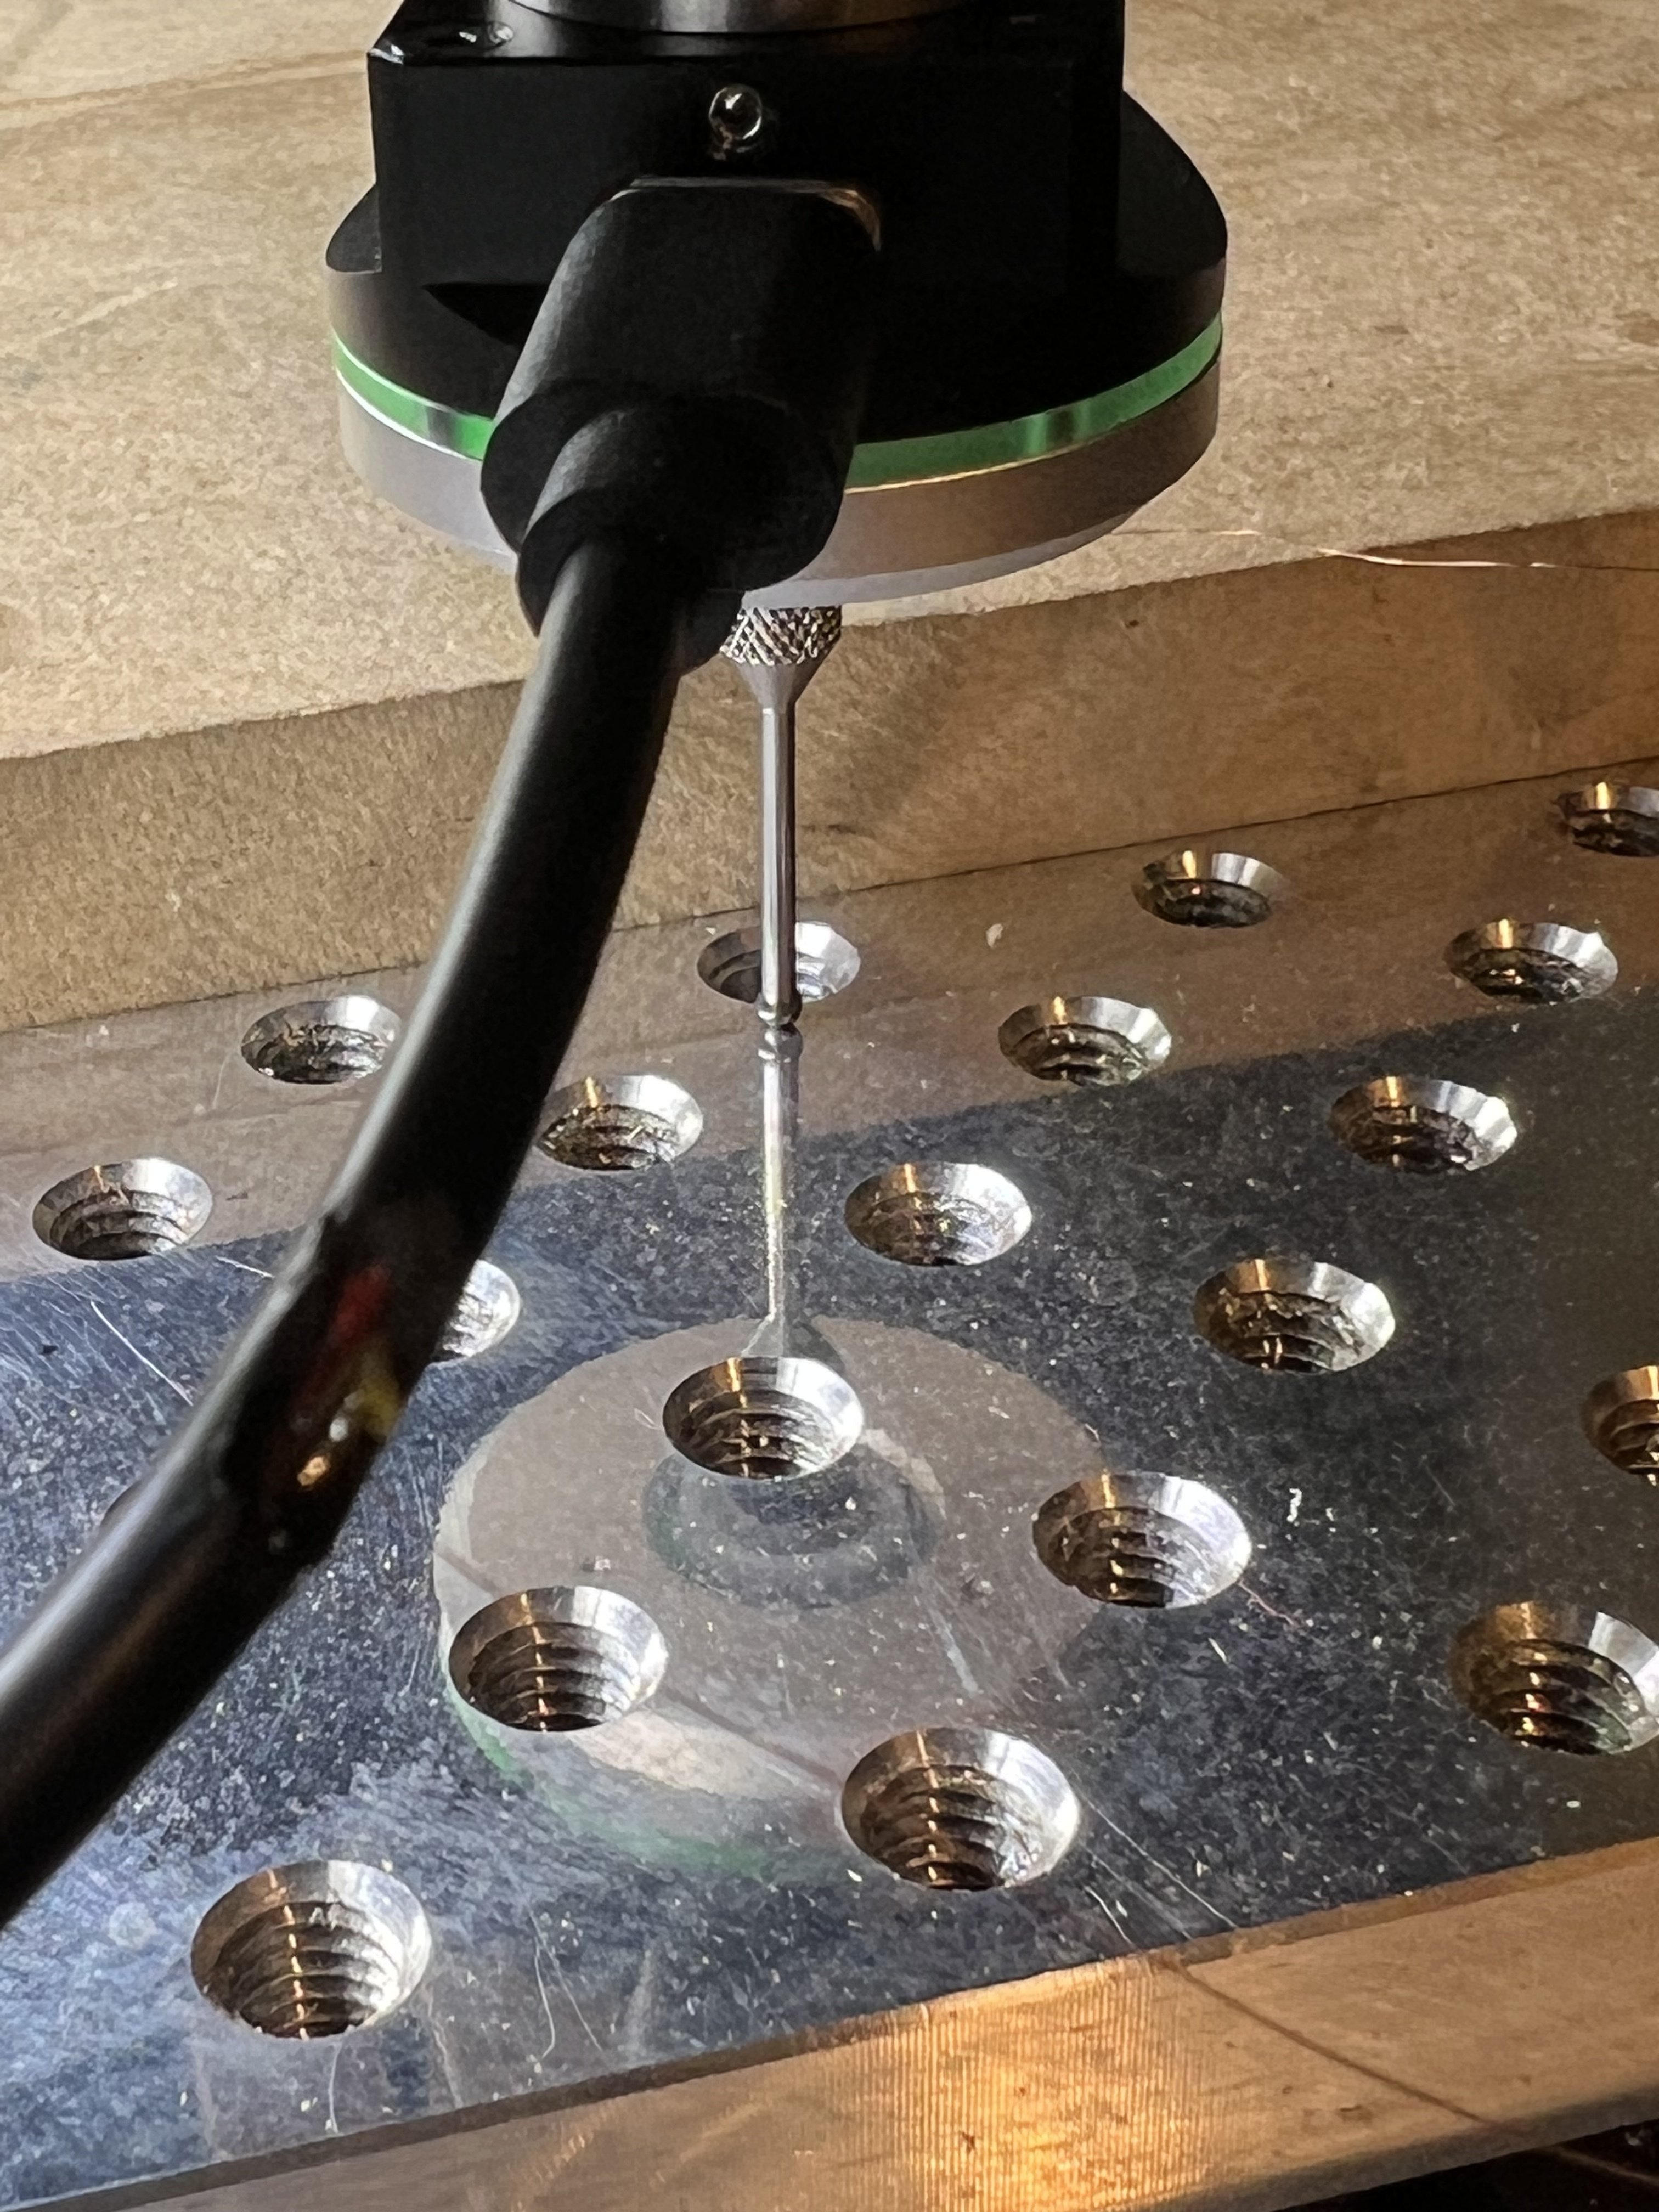
Today will be dedicated to finding the center of a cylinder with the conductive probe.
I want a macro that takes the rough dimensions of the cylinder (in my case, a 40mm coin) and probes to find the center and z height.
Shouldn’t be too terrible considering most of the work is already done in the center hole macro… just tweaked a bit.
Another fun one will be calculating the point of a pyramid. gSender says i can use javascript math functions so projecting the point of the pyramid should be easy… right
So if my understanding is correct, in its “stock” form, the probe is a touch probe, meaning the tip needs to run into a piece of stock, and trip the (i assume) piezo sensor, which closes the contact, and when connected to the nomad, lets it know that it should stop probing.
You turned it into a conductive probe by taking the yellow data wire, and jumping that to the probe tip so that when it hits a piece of conductive stock, it closes that same circuit.
in this second case, I assume your work piece is isolated from the Nomad’s bed/table because it is grounded and any conductive stock would also be grounded, thereby immediately telling the Nomad it already hit something.
We’ll address a few points:
Your understanding of the “stock” form is correct (Except it’s not a piezo, it’s 3 cylinders sitting in 6 balls…I’ll rip it apart and get a picture here soon)
Your understanding of how it is turned into a conductive probe is also correct. An important note is that the probe tip is actually isolated from the spindle. The tip screws into a plastic threaded piece.
Because the probe tip is isolated, we do not need to isolate the workpiece. You are correct in that the nomad bed is grounded, and so any conductive stock would also be grounded. So it’s pretty convenient that the probe is isolated
(I used to wrap a piece of cellophane around a tool to isolate it from the spindle when probing conductive stock…That can’t have been good for the collet )
Ah yes, i forgot the probe is isolated. that does make that much nicer. It uses a USB C connection at the probe right?
In that case, it should be relatively easy to solder a custom cable that provides an connector so you could remove a small alligator clip jumper to enable probe mode when you wanted to, and when removed it would just act in its normal probe mode.
Yeah, making it easy to “turn off” is something I’ve thought about. Realistically though, I can’t think of a situation where having it off would be necessary or better.
Having the really sensitive conductive probe is going to be more accurate on conductive material. If the material is not conductive, it will still trigger the “stock” touch functionality.
But if we did want to turn it on and off easily, it should be trivial.
I want to design a little adapter to connect the bitzero and this probe at the same time without modification to either. I think it’ll make adoption/interest quite a bit higher…plus it will save a collective boatload of time If I can spend an hour to save 10 other folks man hours…that’s quantitatively a benefit to humanity right
all you should need to connect both of these at the same time is 1 mini XLR female connector, and 2 mini XLR male connectors, and then wire the female to both of the males, essentially making a Y splitter, as long as the Bitzero v2 is in a holster so it doesnt close the circuit you could leave the cable for the probe coiled and ready to go when needed.
that is true, i guess you wouldnt really ever need to bypass it since like you mentioned non-conductive stock will just trigger the touch function, if anything just having a collar that could clamp onto the probe tip, with a hole & set screw to clamp on the data wire would just make the connections a little neater/robust.
Yeah, I’m not too worried about it. The probe and y cable will be around $100 which is a hell of a lot better than the alternatives!
And based on the playing with carbide motion quick actions, there’s going to be a big incentive to make the gSender setup as seamless as possible. Should be fun.