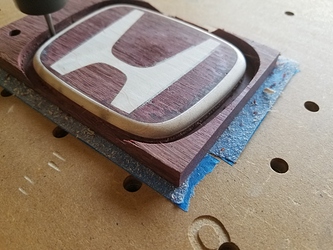
I used this “trick” in the recent contest but didn’t call it out and @MikeG suggested it was perhaps worth mentioning. Here is a summary which the community may fine helpful.
I’ve only recently tried flipping parts with locating pins, and purely with the intention of minimizing the swiss cheese effect on my wasteboard, I came up with this method (at least I’ve not seen it before).
-
For this to work, the dowel must be able to be held in the collet, so either get some 0.25in dowel pins or a 0.125in with the collet insert should also work.
-
make locating pin holes in your wasteboard and know the spacing. I have some in both x and y, spaced 50mm apart (spacing arbitrary)
-
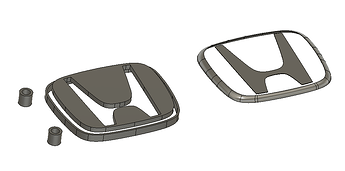
incorporate the holes into your design. Sometimes I have room to put them in the part model itself, but other times I include them just as cylinder bodies off to the side. Here’s an example (0.25in ID with 50mm center to center spacing in y, matching my wasteboard holes):
-
for any operations that will occur after you remove/re-locating the part, use the bore as your xy origin in your setups
-
bore the holes at some point during an early operation
-
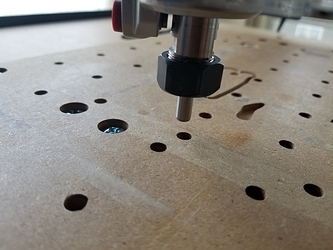
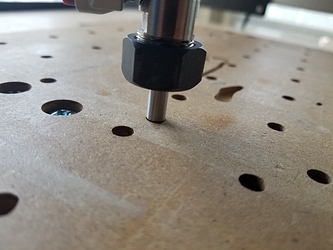
after you’ve pulled the piece off and now want to put it back, loosely tighten a 0.25in dowel pin in the collet and manually jog over close to the hole
- keep jogging in successively smaller increments until you can see the spacing is equal on all sides, gradually dropping it down in z as you do so. My dowel pins, and probably all of them, have chamfered ends, which lets you get started into the hole and continue to fine tune over ~0.5mm as you drop down. Basically, micro-adjust until everything looks even all the way around.
-
I’m pretty sure my Makita collet assembly has some runout, so once it’s in the hole I will also fine tune just a bit within the hole, rotating the collet a few times to see what the “wobble” looks like as it rotates. This can let you know if x and y are definitively centered (e.g. when you see it’s at the tightest on the left, after you rotate 180, it should be that tight on the right).
-
zero x and y in your gcode sender (I’m calling this out specifically as I’ve done the above, then jogged away without having actually zeroed!)
-
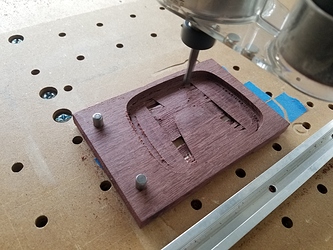
jog the z carriage out of the way and place your part using the dowels to locate it, holding down however you want (tape and glue trick in this case)
- zero your z
My wasteboard holes have some wiggle but this has still worked GoodEnough™ for me. For what it’s worth, on my contest project I used this method to remove and re-place the badge 3 times. The final contour machined what amounts to an epoxy backfilled wooden “shell” that was 0.4mm thick around the rounded top edge in order to let light shine through the wood.
When I installed the light, I could just barely see some brightness variation (a hair lighter on two opposing corners, a hair darker on the others, which means there was some variation in wood thickness). I think that’s evidence that the method worked quite effectively, and I chalk the variation up to my locating holes that let the pin wiggle a bit, not the method itself.
Final caveat: I’m no production efficiency expert and don’t even think like that for this hobby. I’m putting in ~3min to do this trick when I need it to avoid accelerating the eventual time required to install a new wasteboard. Feel free to do the calculation of “3min times n operations over time” vs. “swiss cheese my wasteboard and need a new one in n months” to see which is the bigger time suck. 
In other words, I don’t claim this is smart or economical on time… but it works!
