Best advice for a hold-down clamp system?

I’m kinda new, but I have some holiday gifts planned. Some of the stock I’ll be using will be smallish – 3"x6" range of varying heights. What hold-down methods are you using? I’d prefer to not use double-sided tape unless I have to.

I’d love to hear from you guys/gals what your favorite hold-down clamps/solutions are. Preferably with links! Photos are nice too =)

From what I understand, they recommend four points of contact for workholding but that can be tough with small pieces. When I bought my SO5Pro, I ordered the C3D “Get A Grip Workholding Kit” here:

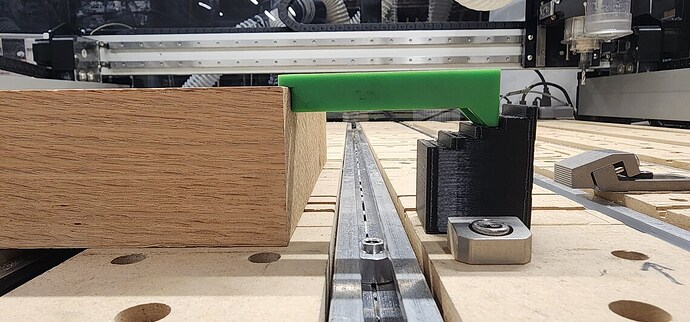
Even for larger pieces, I just use the rectangle stops on one side and two of the essential claw clamps on the other side. The compression on the tiger claws holds the stock in really well.

With the hybrid table on the SO5Pro, these are easy to setup. Not sure on other C3D machines.

Also, if you have access to a 3D Printer, C3D has generously produced a library of items, including workholding, that you can print here:

https://carbide3d.com/3d-print/

2 Likes

@MadHatter I just found this nice post of yours: Clamps, Clamps and Clamps!. Here you mentioned you were 3D printing them. What sort of material and settings are you using? I’m guessing, maybe PC with 100% infill? I have some PC-CF, perhaps I’ll give these a try. I’m working with hardwoods. Also, thank you very much for the 3D models!

1 Like

Thanks for this… I’m working with hardwood stock up to 3 in thick. I need something with more leverage (perhaps I should have put this in my post, sorry!)

1 Like

Can’t you just use suitable cauls to afford the wanted leverage?

See:

3 Likes

Yes. I could use that “Get a Grip Workholding Kit”, but I’d need to also source some much longer M6 socket-head machine screws, as long 80mm. I see there are some other solutions out there and I’d like to hear/learn about them. :upside_down_face:

2 Likes

For a lot of people with small items the painters tape and super glue work best. On the newer machines with the hybrid table that works but the spacing of the t-track can be problematic. I have a long L bracket I use on my mdf spoilboard to set material up square to the router. I would recommend maybe making a small supplemental spoilboard you can clamp to your hybrid table top and use the super glue and painters tape. By making an L bracket to go on top of your supplemental spoilboard you get material that is square to the router. You put your L bracket on the supplemental spoilboard and jog the router over and touch one side of the L bracket then job and line up the other end. You jog back and forth a few times to get it square and then screw or brad nail it in place. Then you just put your material on and secure it and machine away.

I have an SO3 with a supplemental spoilboard with 1/4-20 tee nuts and I use cam clamps to hold my material down that secure it. The L bracket works if you are going to cut through the material and the L bracket by making it removeable. You put your material in place and super glued down and then remove the L bracket. If you are not going to cut into the L bracket you can just leave it in place.

long_L_bracket.c2d (296 KB)

You can modify my bracket to fit your spoilboard spacing.

5 Likes

PC? PC-CF? What!? You think I am some high-falutin’ guy with that kind of esoteric filament laying around? :slight_smile: Actually, I don’t print with those filaments because I am too lazy to try to deal with them. I printed the ones I use out of PLA. They do have some flex, but I mainly use them for engraving, where the forces are almost nothing. I use aluminum clamps for cutting.

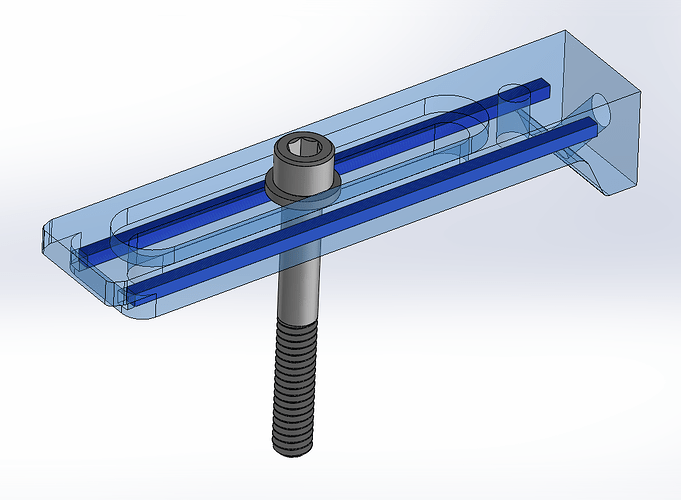
I designed a set with a hole all the way through it so I could run some small 3/32" key stock through the entire thing to give it some rigidity, but things happened and then I lost interest. McMaster-Carr has 12" lengths of the 3/32" key stock for $0.81/ea. Next time I order something, I’ll probably throw a couple of those on the order.

If you are interested in that model, let me know and I’ll throw it on my Google Drive as well in a couple of formats like the other ones.

1 Like

PC-CF: PolyCarbonate infused with Carbon Fibre =) I’m literally printing one right now on a bed-slinger (Prusa MK4) fitted with a hardened nozzle with nothing but a draft-shield to hopefully prevent it from warping. I chose 100% infill. Will let you know how it turns out. =)

Your key-stock thing is a good idea. Rather than make the hole all the way through, design it with a negative space where you want the key-stock to be, then, set a “pause” in your slicer at the layer just before it covers the hole. Insert your key stock and continue the print.

HOWEVER, I kinda think the benefits of using Plastic is that if you do have a mill-crash into your brace, it won’t mess up your mill. I would think the key stock would probably do a number on any mill that wasn’t expecting it.

1 Like

Yeah, the key stock would do a number on the bit (and more) but it’s not carbide, so I expect it wouldn’t be too much worse than hitting the 18-8 SHCS or washer.

I’ve considered picking up some PC or PC-CF, but I choke every time I see the price. When I got my MK4, I kept my Mk3S because I planned on using both, but I rarely use the Mk3S now.

Maybe I’ll sell it and get the enclosure for the MK4 to print some of the filaments that need to be enclosed, like ASA and PC.

Definitely let me know how rigid it is with the PC-CF. You’ve got my attention now.

First of all, you have a CNC and a 3D Printer, and you’re obviously skilled in SolidWorks. Why would you buy an enclosure? Get a few sheets of acrylic and design your own! Makes for a nice project too =) I bought an acrylic one about a year ago and I’m really happy with it, but now that I have a CNC, I likely wouldn’t buy another.

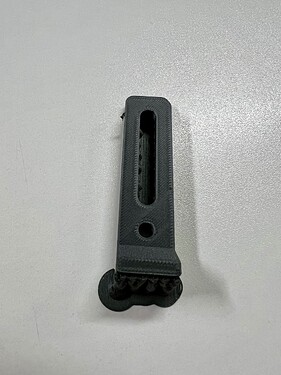
Anyway, the print came out gorgeously. Prusament PC-CF prints like PLA, albeit at a high temp. There is risk of warpage on larger parts, but for parts this size, it’s unlikely. I did use a draft shield, just in case though.

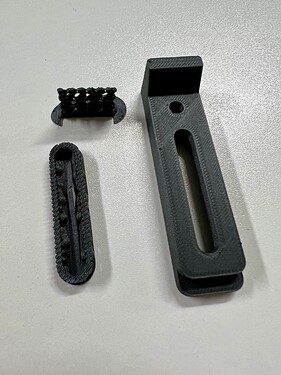
Here it is hot off the build plate. No warping at all. You can see the organic supports I used to support the inner ledge and, apparently, some of the gator teeth.

Both supports popped off with almost no effort

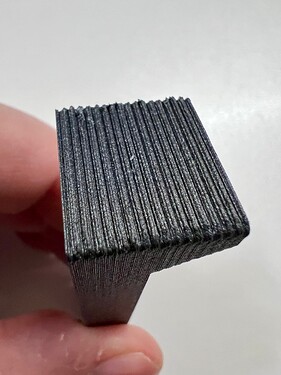
Close up of your gator teeth

Note, this model was re-designed (and likely poorly interpreted) from your PDF drawing in your shared drive. I didn’t bother with the hole through the teeth as I didn’t see a need for it for my use, and, if I decide otherwise one day, I’ll print some new ones =)

The teeth would have come out better if I had used a smaller layer height. TBH, ideally, I would change the pitch of the teeth to be a multiple of whatever layer height (or vice-versa) I was using to get more consistency in them.

It seems really rigid. If I attempt to bend it with my hands with everything I have, it yields maybe a millimeter.

Not sure how accurate this chart is: https://help.prusa3d.com/materials, but according to it, the Prusament PC-CF has a better temperature resistance, impact resistance, and tensile strength than PLA, which is already pretty strong. Of course, it’s also much cheaper than PC-CF, but, the main reason not to use PLA for an application like this is that it slowly, and permanently deforms under force.

With the supports and the draft shield, this print required 17.95g of filament and at ~$75/kg, this comes to about $1.63 to print. Using an enclosure would let me drop the draft shield and I would save 4¢ (lol). Interesting to note that it looks like the green ones we get from Carbide3D are injection-molded PA-GF of some sort. I don’t know specifically which blend, but, by all accounts, that material probably isn’t as strong as PC-CF. The Carbide3D ones are injection molded though, which, as they say on their sales page, probably does eliminate breakage at 3D printed layer lines. All said and done, I’d say printing your model with PC-CF with 100% infill and a decent printer will probably be as good as the green ones, which, are priced about the same anyway, so, the real advantage is not cost, but being able to print one up on demand and to your exact specifications.

Anyway, Perhaps I’ll carve up some stair-stepped wood blocks to make using this useful for even taller stock, and see how it works out. I do appreciate your model and willingness to share!
3 Likes

I use the Essentials. For the price they charge, you can barely make them yourself thru any method. :smiley: Seriously, order $50 of them to get free shipping and you’re covered. If you mow one down…no big deal. They are also stronger than printed ones. I 3D print a lot, so the process is very familiar to me. 3D printing works great for a lot of stuff, but hard to be optimal for a toe clamp.

I got longer M6 bolts and have a large assortment of lengths. Your local hardware store might have some M6 bolts, if not, Amazon and McMaster have you covered. I also have step-blocks I designed, make, and sell for the back side of the clamps. But you can always use scrap pieces of whatever you have around.

3 Likes

I like the idea of printing my own to suit custom needs, not necessarily to save money. I did already hit-up my local Big Box store, but the longest they had was M6x40 and I cleaned them out of the 3 that they had =/. I’m going to order some longer ones from McMaster-Carr.

I do like your 3D printed (?) step-block… I’ll print up a few of those too =)

2 Likes

This is exactly my attitude. I love being able to design and print exactly what I want /need instead of having to “make do” with something made by someone else that was not exactly what I wanted / needed.

Regarding the building / buying option for the heated enclosure… If I haven’t mentioned that I’m lazy, I’d like to mention it now. For this application, there is a solution - made by the manufacturer of the printer - that works great - and that I think looks good. If there was not a Prusa enclosure, I would definitely design one. But seeing as there is… I’m gonna buy it. :joy:

Also, that print looks great! Man, I am really going to have to get some of that filament.

1 Like

Regarding the serrated face of the clamp - when I got around to cutting one out of aluminum, I planned to get a checkering file with 40 (or so) TPI to put the serrations on that face.

1 Like

I often find myself wishing that the essential clamps were 1/2”-1” longer. Something to consider for those of you with printers. I have to get a buddy print a few for me.

2 Likes

I do that frequently with captured nuts in my designs, but for this design I think that making the hole so that the keystock is an interference fit would be preferable. For the “pause and put in part” to work, there would have to be some gap on the sides, so you don;t have to push too hard to get the keystock to seat in the part. Also, there must be some gap between the keystock and print head, to prevent a collision after it is inserted. This will cause the keystock to not be able to react for the first bit of bending moment. It’s probably trivial, but I prefer to design the slot such that the keytstock needs a slight chamfer on the inserted end, and a bit of force to get it into the channel, so that it can begin supporting the bending moment immediately.

I dropped the file in a couple of formats on my Google Drive folder in case anyone wants to try it out before me.

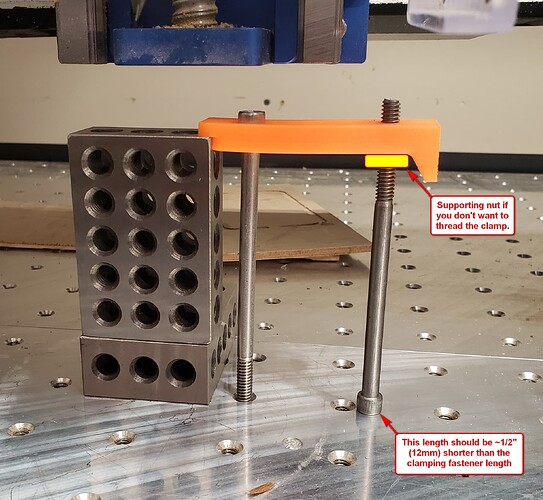
If you already have the threaded fasteners, you could thread the hole and use a threaded fastener for the standoff instead of a step-block. Just use a fastener 1/2" (12mm) shorter than the one you are using to clamp your stock Or oversize it so the standoff fastener can pass through and then you can put a nut under the clamp on the standoff fastener. The hole is 0.201", which is the tap drill size for 1/4-20 threads. The tap drill size for M6x1 is 5mm, which is 0.1969", only 0.004" (0.105mm) oversized, so it should work fine for M6 threading as well.

2 Likes

These are my favorite. I bought them when I got my first SO3 in 2019. Just be sure not to hit them with your toolpaths. I have the aluminum units, and yes, I have hit them.

2 Likes

I actually did use a 6mm tap to tap the hole in your design. It worked really well. I don’t know how much force it would handle, but it felt like a good tap.

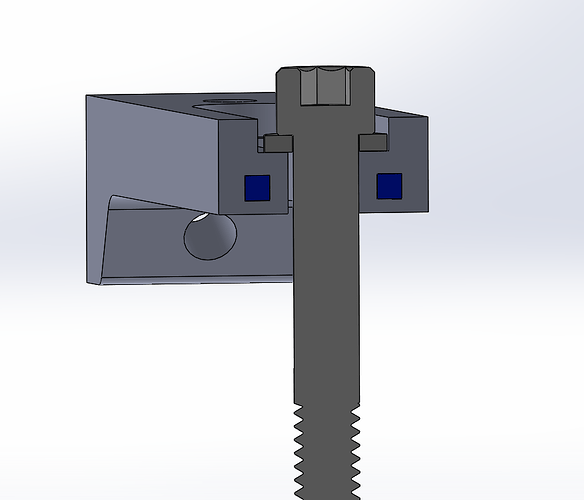
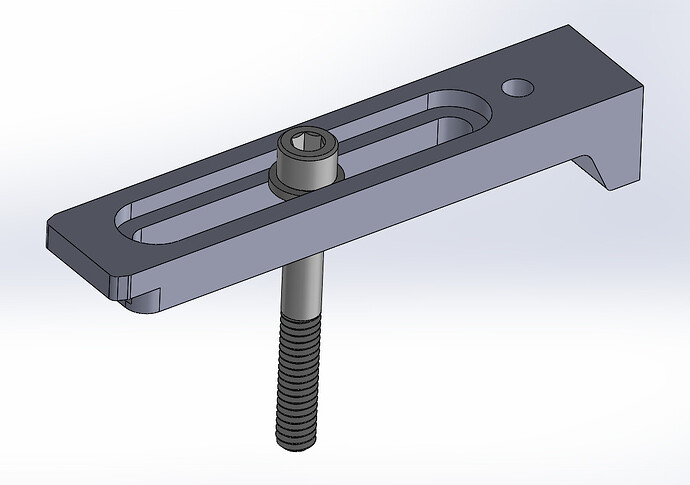
I ended up designing a part without that hole though. It’s essentially the same structure as the green ones that came with my SO5P, but does have a re-worked set of teeth on the end. The design of the green ones has vertical ridges on the top and bottom, which gives it a bunch more strength. The other change I made is the move the outer tongue/toe up from the bottom about 2.5 mm so that when using it upside down as intended, there will be a few layers of material between where the screw pulls and the tongue. You should consider this in your design too.

I posted it on printables . com: CNC Table Toothed Toe Clamp

I’ve printed 4 of them and I’m really happy with them. =)

1 Like

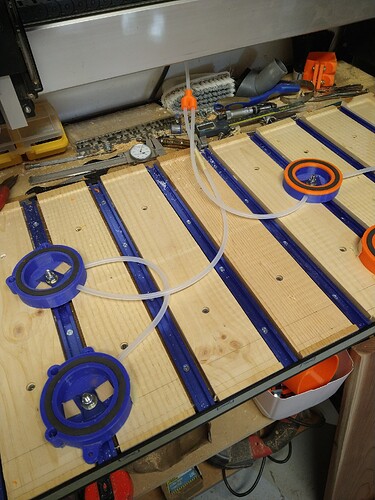
My input might not be best for your holiday gift time frame. Up till just recently I only did V-carving and use my own vacuum pods from my 3d printer. Honestly I haven’t needed and edge clamp until just recently.

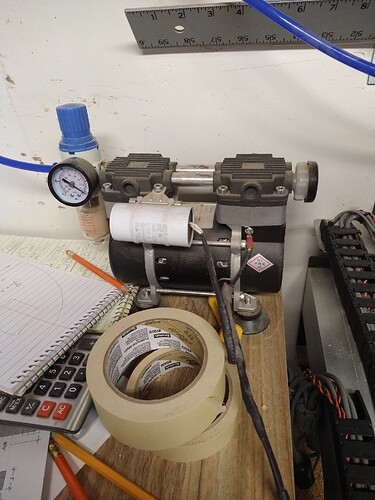
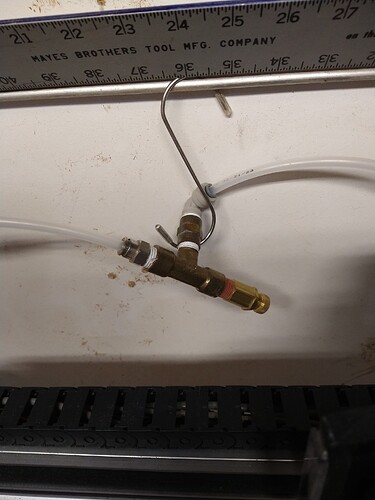
I move them around via T-Bolts (PowerTech Amazon). Tried 3 different vacuum pumps, found one that has really done the job for me. With a small brass relief valve plumbed into the mix I pull all my wood strong and fast.


But I have to say that my 3d printer is key to most if not all of my current hold down solutions. I paid some on-line dues via YouTube and Lars Christensen over two years ago. Lost count of all the gadgets and fixtures and even some parts I’ve created even before I started with a 3d router. So if after the holidays you get a 3d printer and learn some CAD software you will solve a lot of your fixturing challenges.

Don’t discount masking tape and crazy glue. I used it the other day to cut out a test avionics panel for a friend. I crazy glued down a chunk of water proof shower paneling onto a 3/16 piece of plywood (that was the spoil board) and pulled the whole thing down with my vacuum pods. Worked perfecting.

If your machine doesn’t have some T-track it might be challenging not to use the masking tape crazy glue method. Or some sort of modified spoil board with some inserted nut plates for bolts. And lastly you can always use some countersunk screws to hold down your stock.

1 Like