Chattering, Shuddering and Snap! Oh My! My Adventures in Trying to Cut Aluminum

So, I have cut 1/4" 6061-T651 plate aluminum with a 30deg V-bit and a cheap 1/8" single flute cutter, and it went okay. No big issues to speak of. I used 99% IPA for lubricant and blew away the chips with low pressure air. I have a misting cooler / air blast that I bought on recommendation from someone here - I forgot who, sorry.

But I am now trying to cut some simple clamps out of some 1/2" 6061-T651 plate I bought. No, I don’t need the clamps, but they are simple and I can learn how to cut aluminum on a simple part, and if they work - I have more clamps. On to the problem. I used a Kodiak 1/4" 2 flute AlTiN coated bit to cut the aluminum, and it was quite a different experience than when I cut with the 1/8" bit. My Feeds and speeds were:

Feed: 50ipm
Plunge: 30ipm
DOC: 0.05" for one 0.01" for second
Speed: 24K RPM

After these two failures using that bit, I went back and actually looked up the feeds and speeds for aluminum. Yes, ladies and gentlemen, I am that guy who doesn’t actually look up info and learn from other peoples’ mistakes. So, now I know that I should definitely slow down my plunge (it did seem a tad bit fast) and slow down the feed a bit, I can finally get to my question:

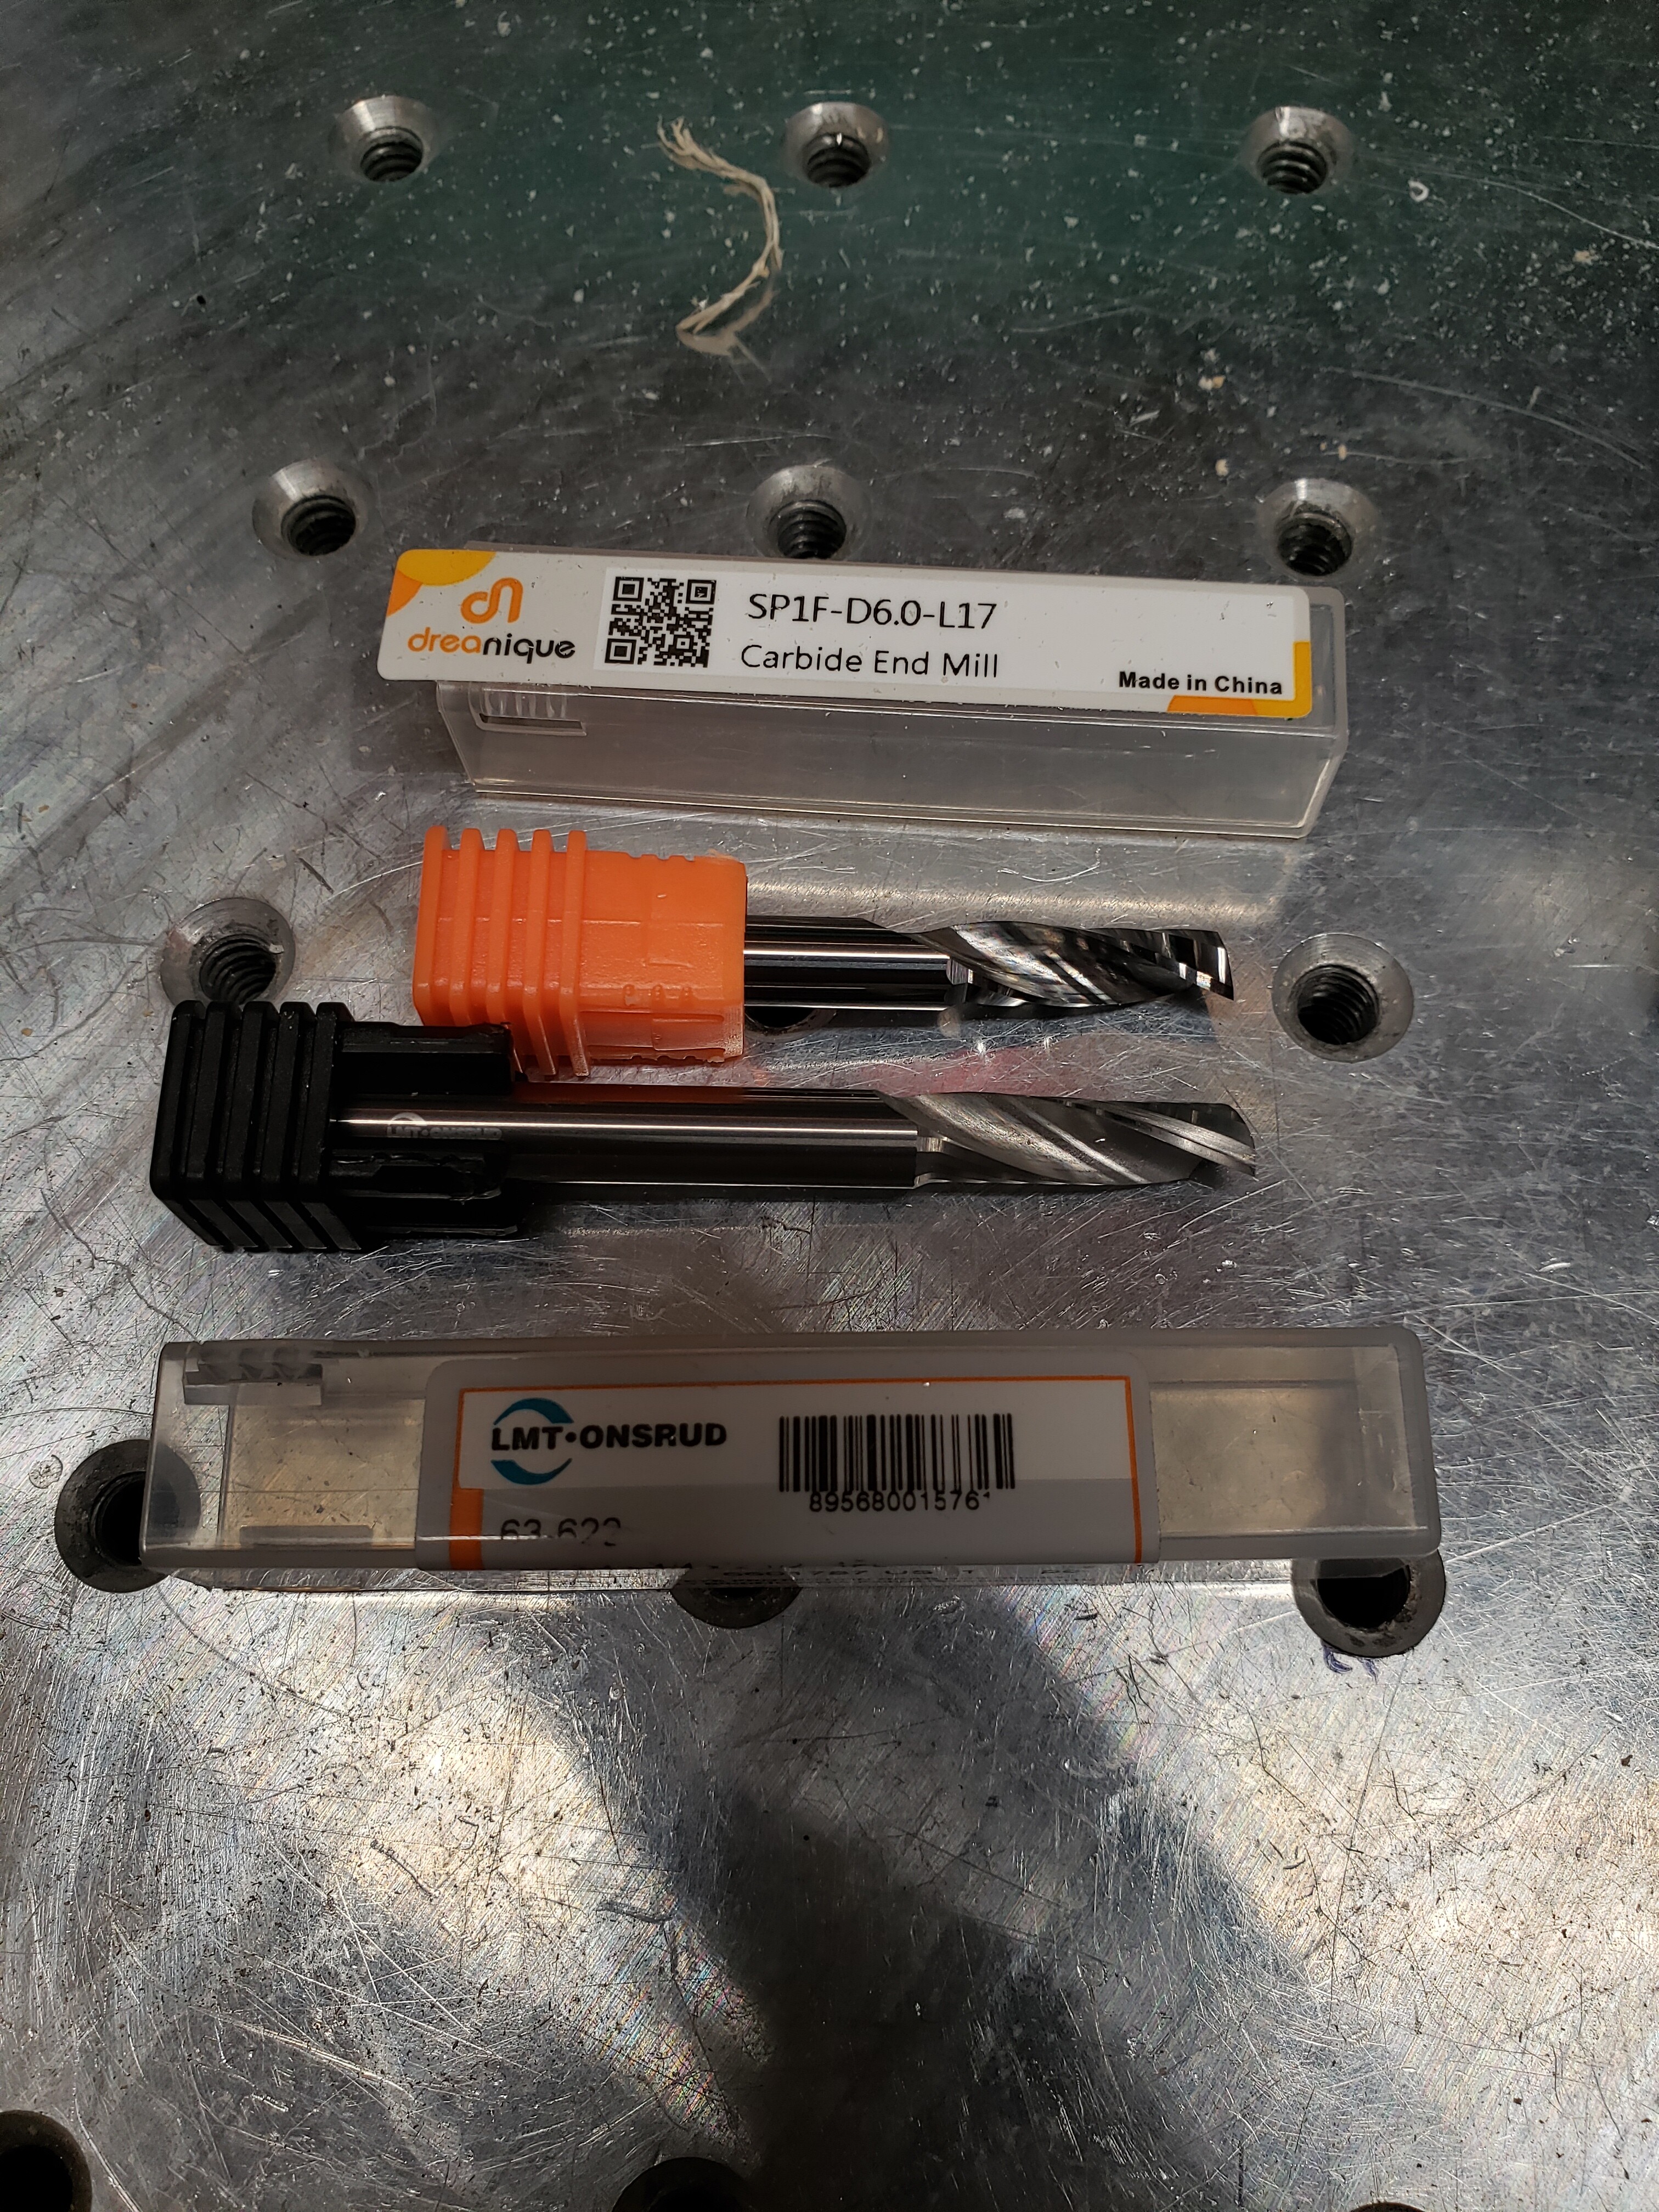
Is the $40 single flute Carbide (or Amana) bit worth it? I mean, the crappy $15 two flute bit was terrible, and when you see the pics, I think you’ll agree, and the cheap (About $1/ea)1 flute 1/8" bits I used worked great, so - Who has used a crappy bit and then switched to one of the “made for aluminum” single flute bits and thought it was totally worth the cost. Because if it is worth it, I’ll buy it, but if it is like “Yeah, it was better, but. . .” then maybe I’ll work on other things.

EDIT: The reason for the “Snap” was I tried one more bit, but it was an “extra long” bit and it chattered really bad - like a lot more than the stub bit I used the first time, and then it snapped. Something I was not expecting. And it also damaged my collet - something I did not think possible. So, now I have a new 1/4" ER-11 collet on order.

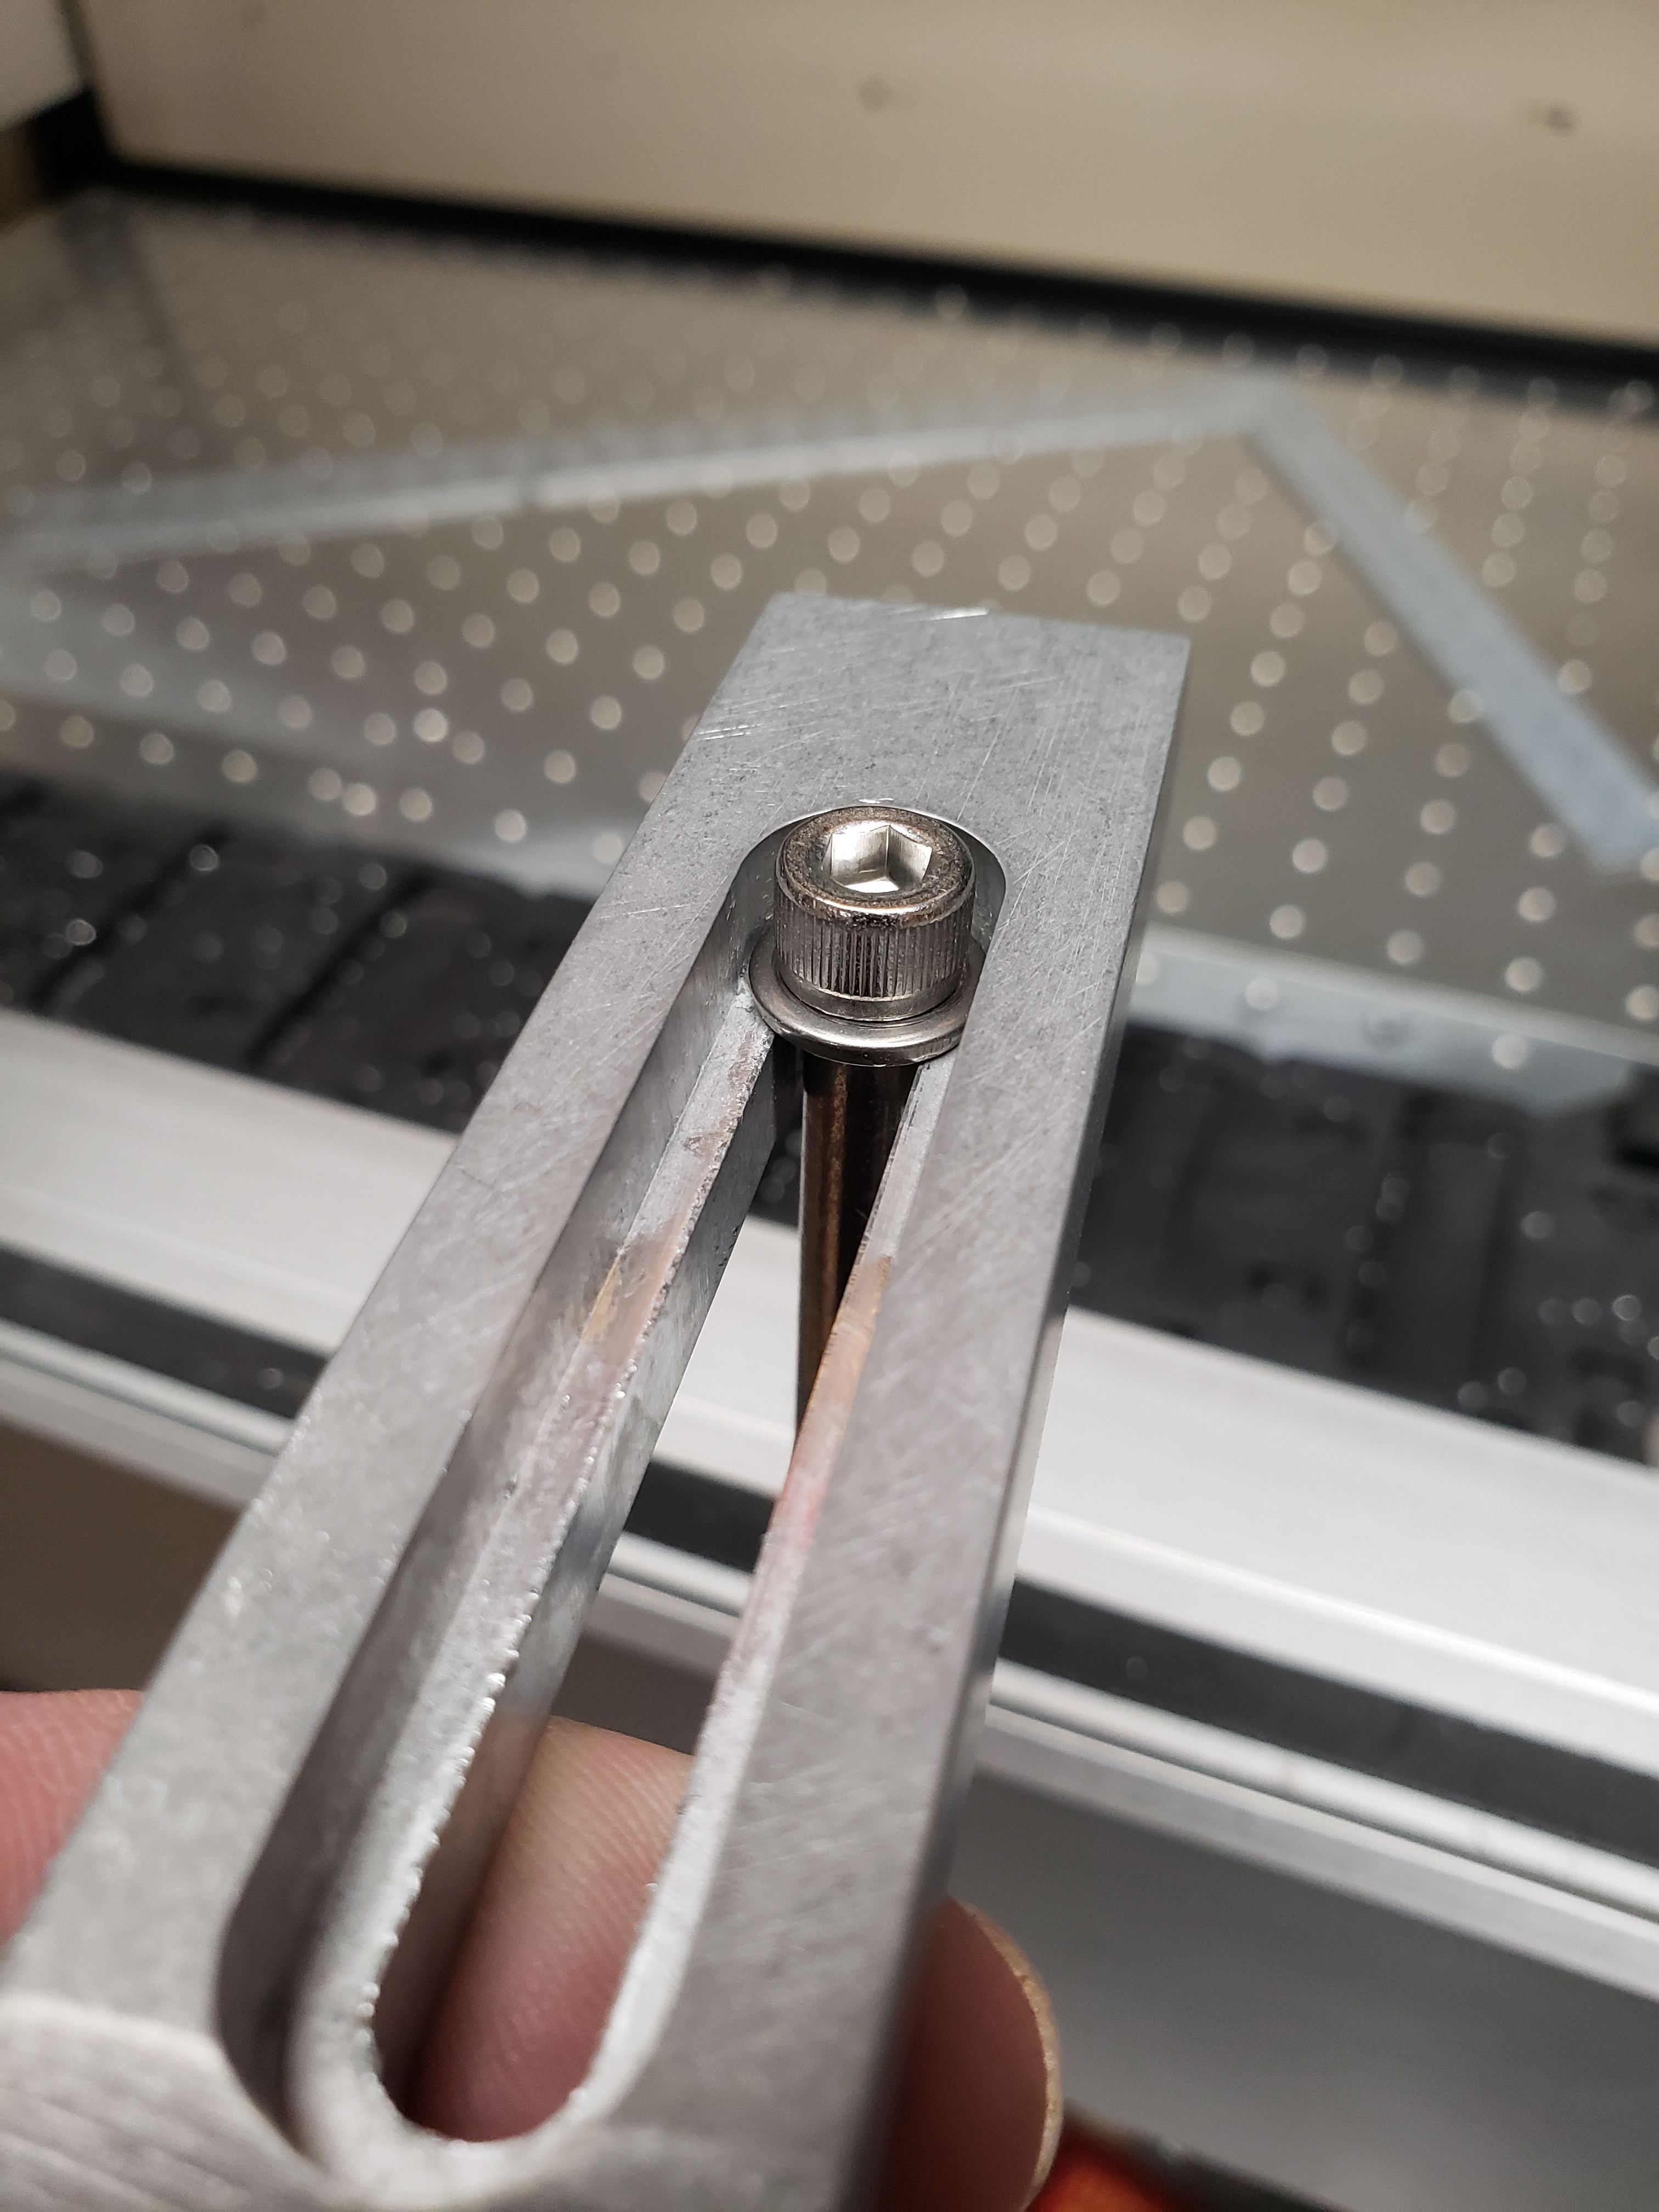
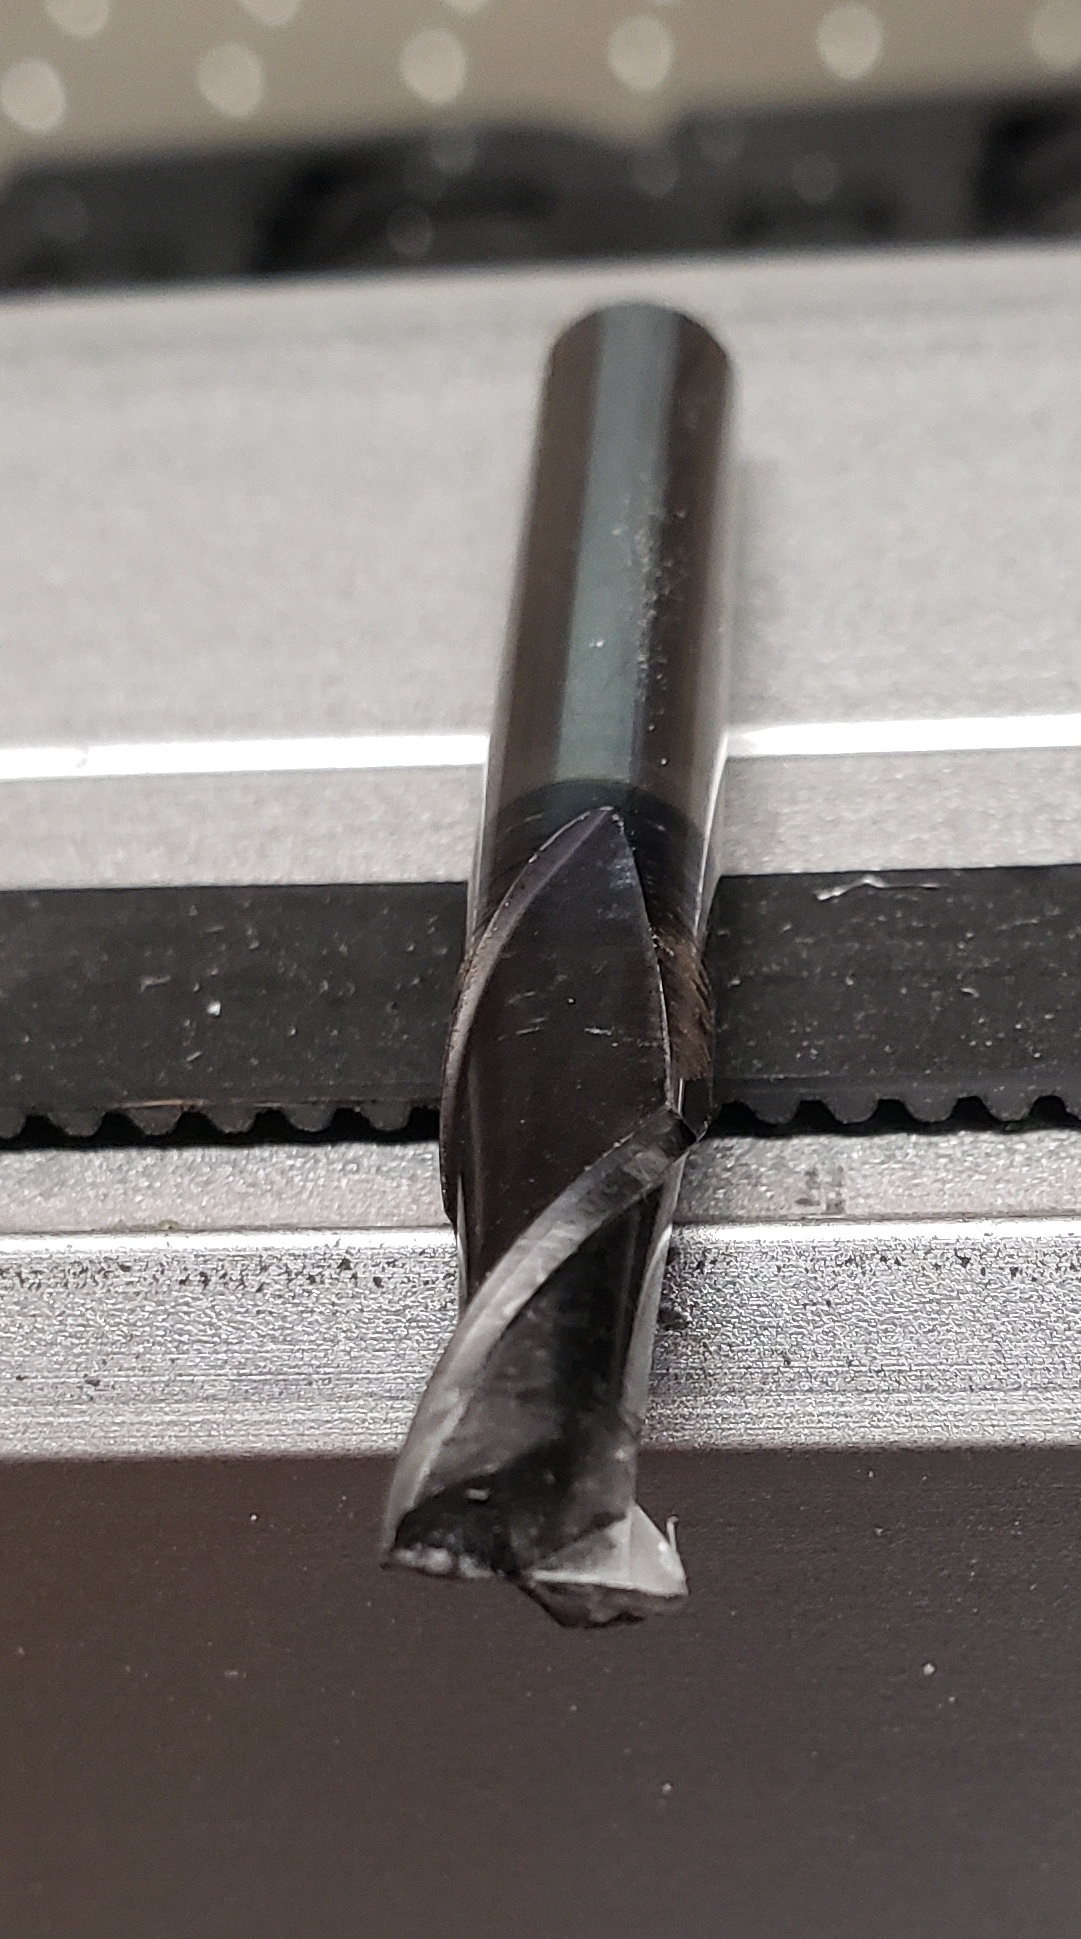
On to the horror show. Here’s the bit I used:

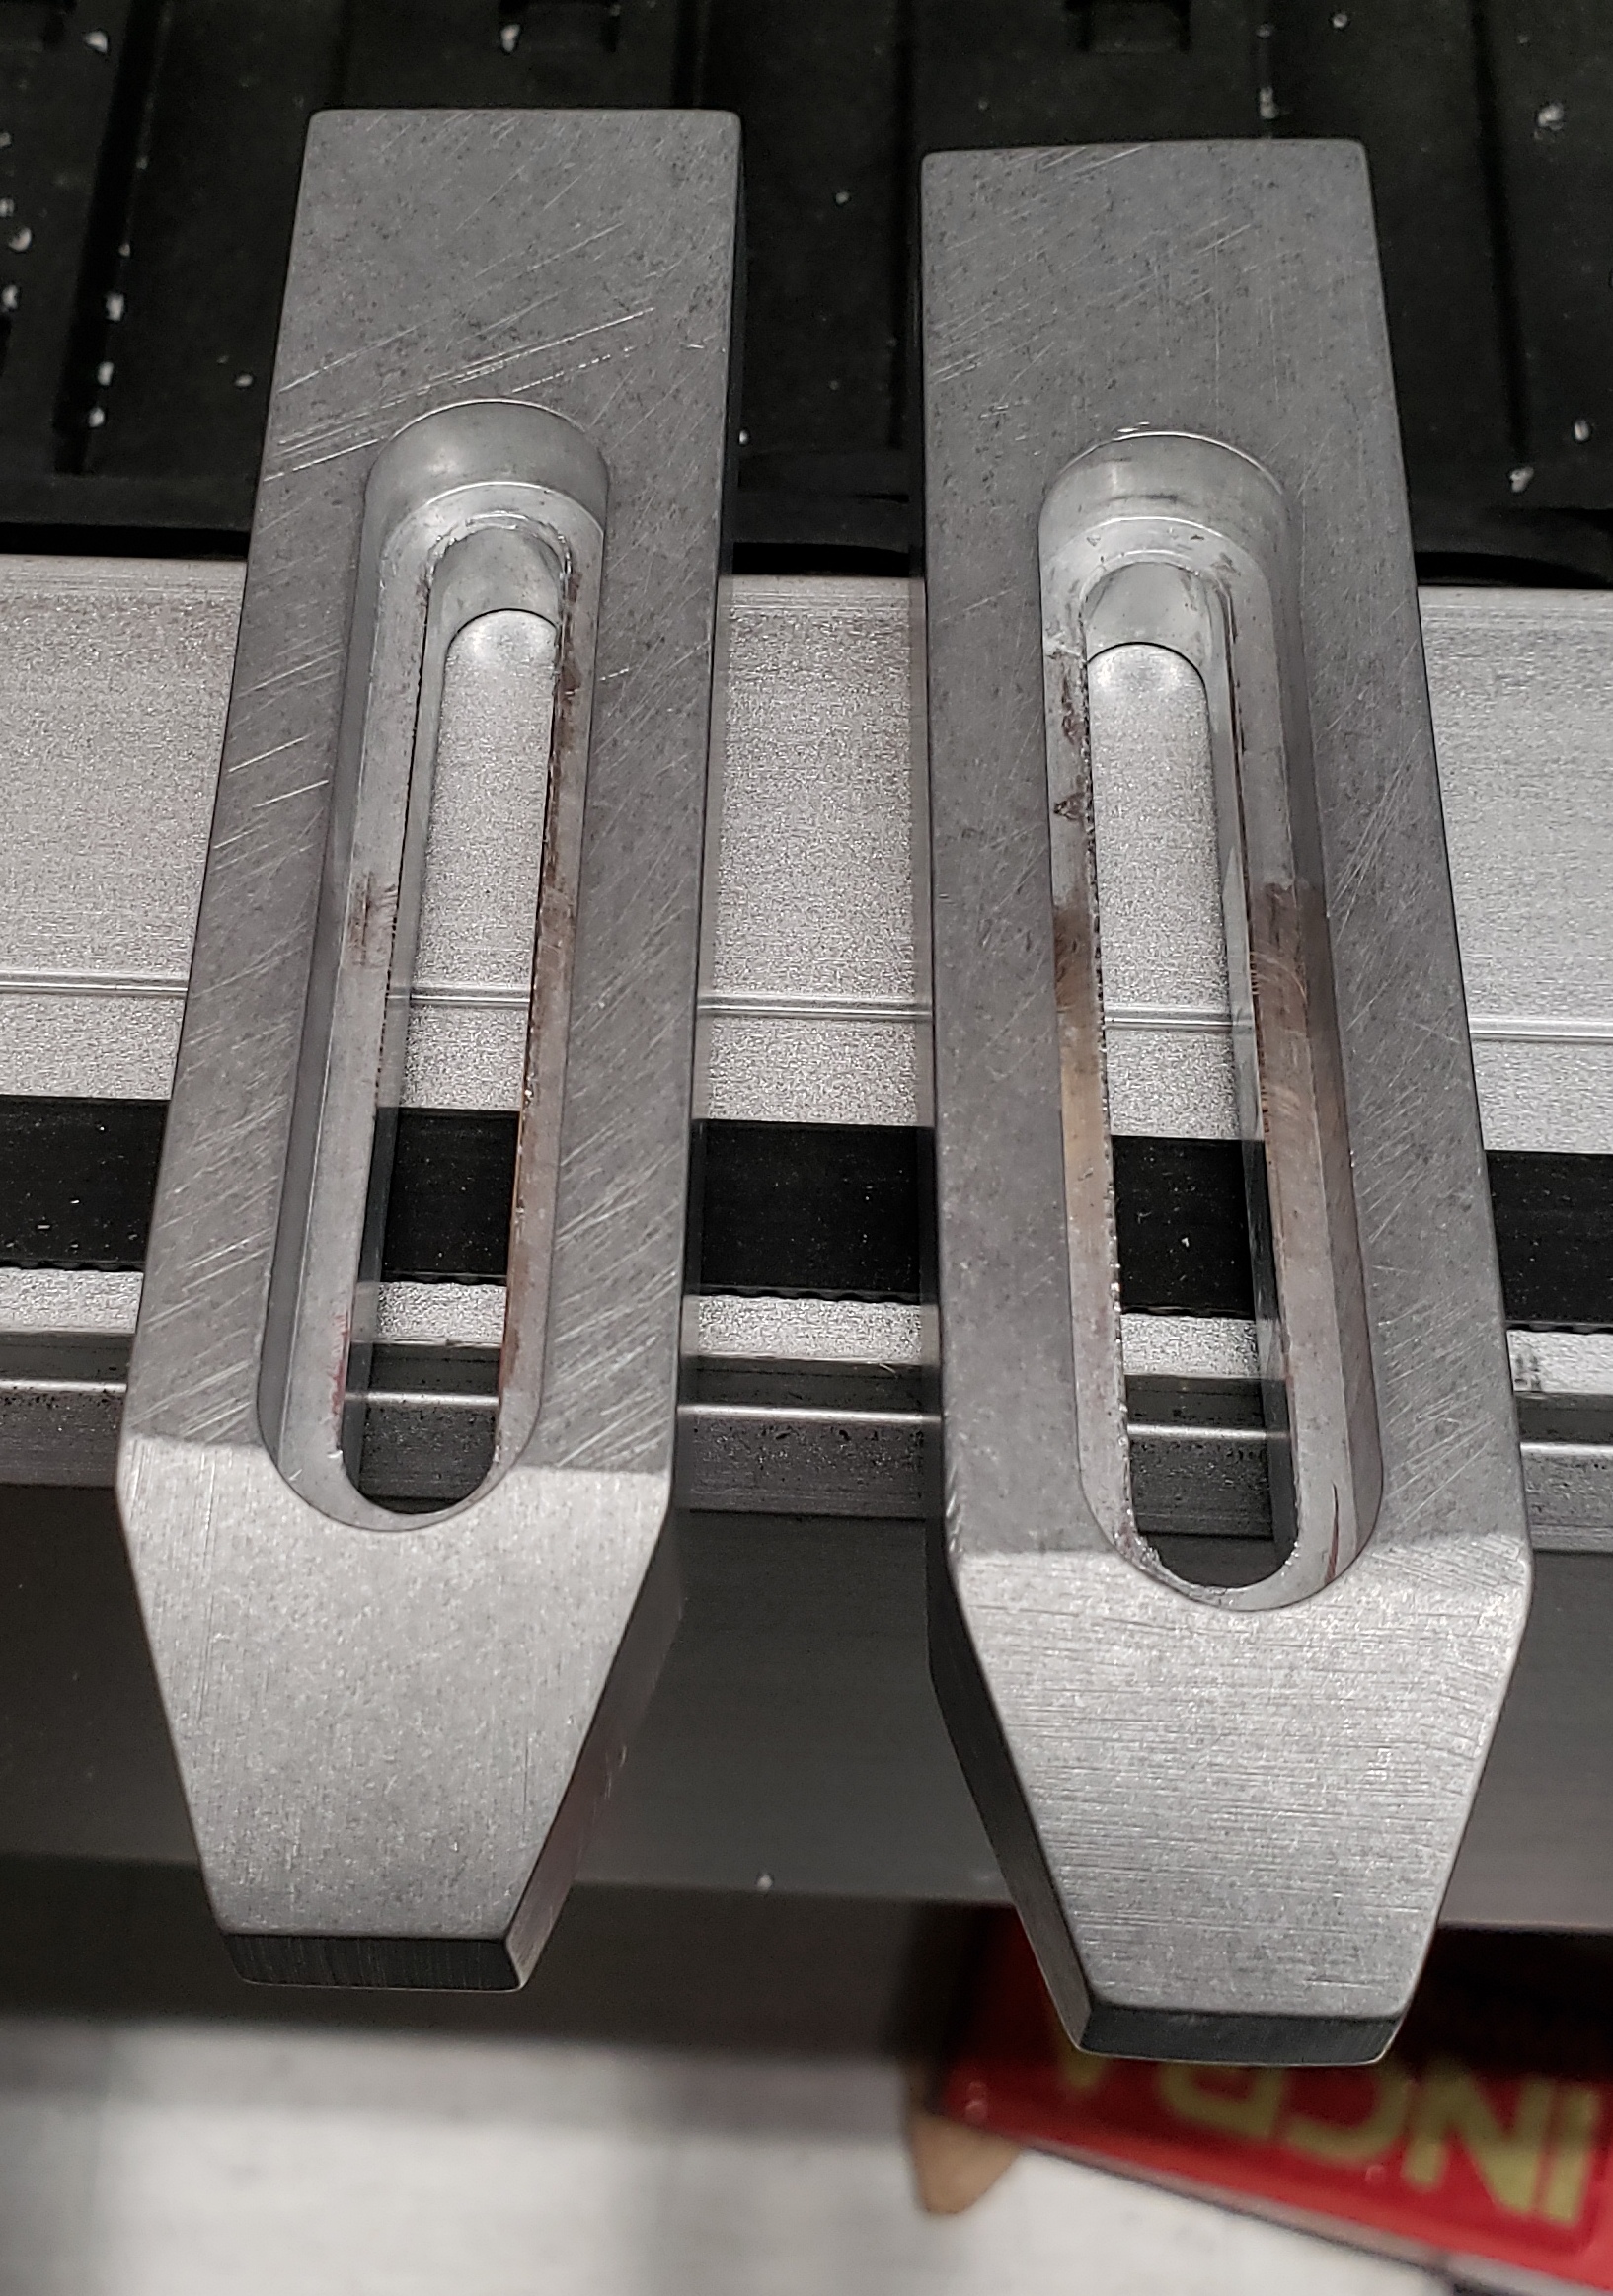
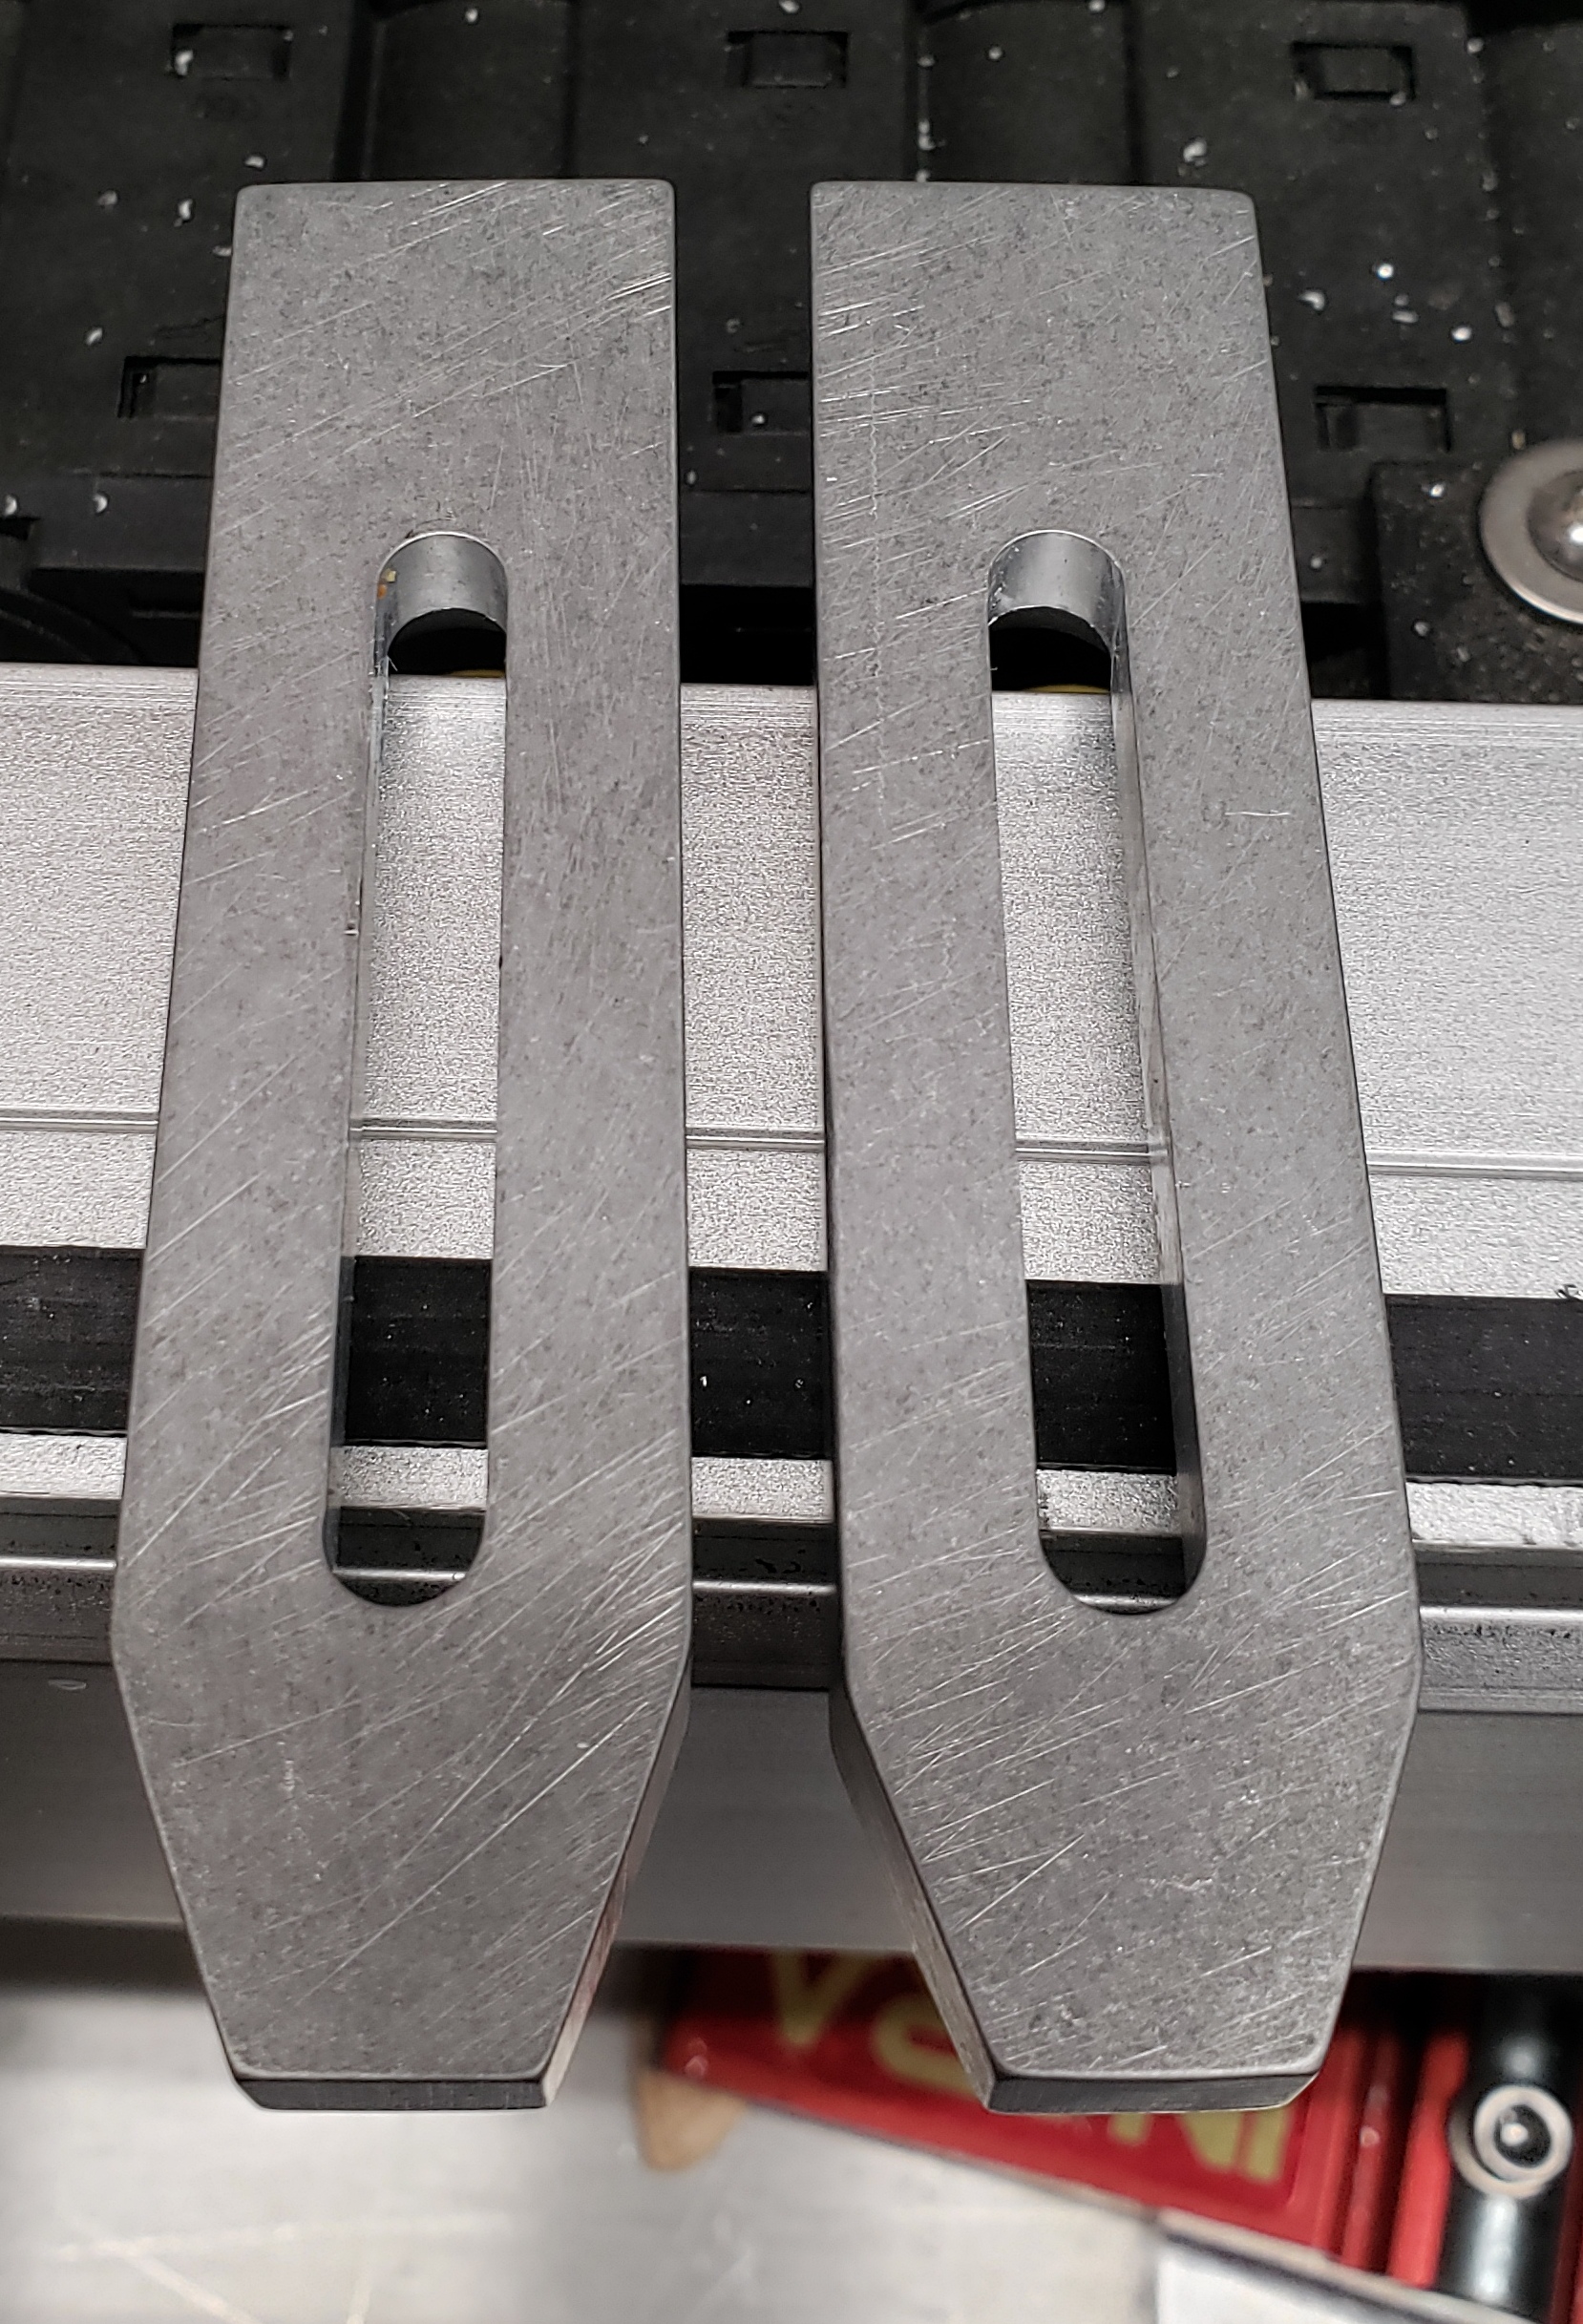
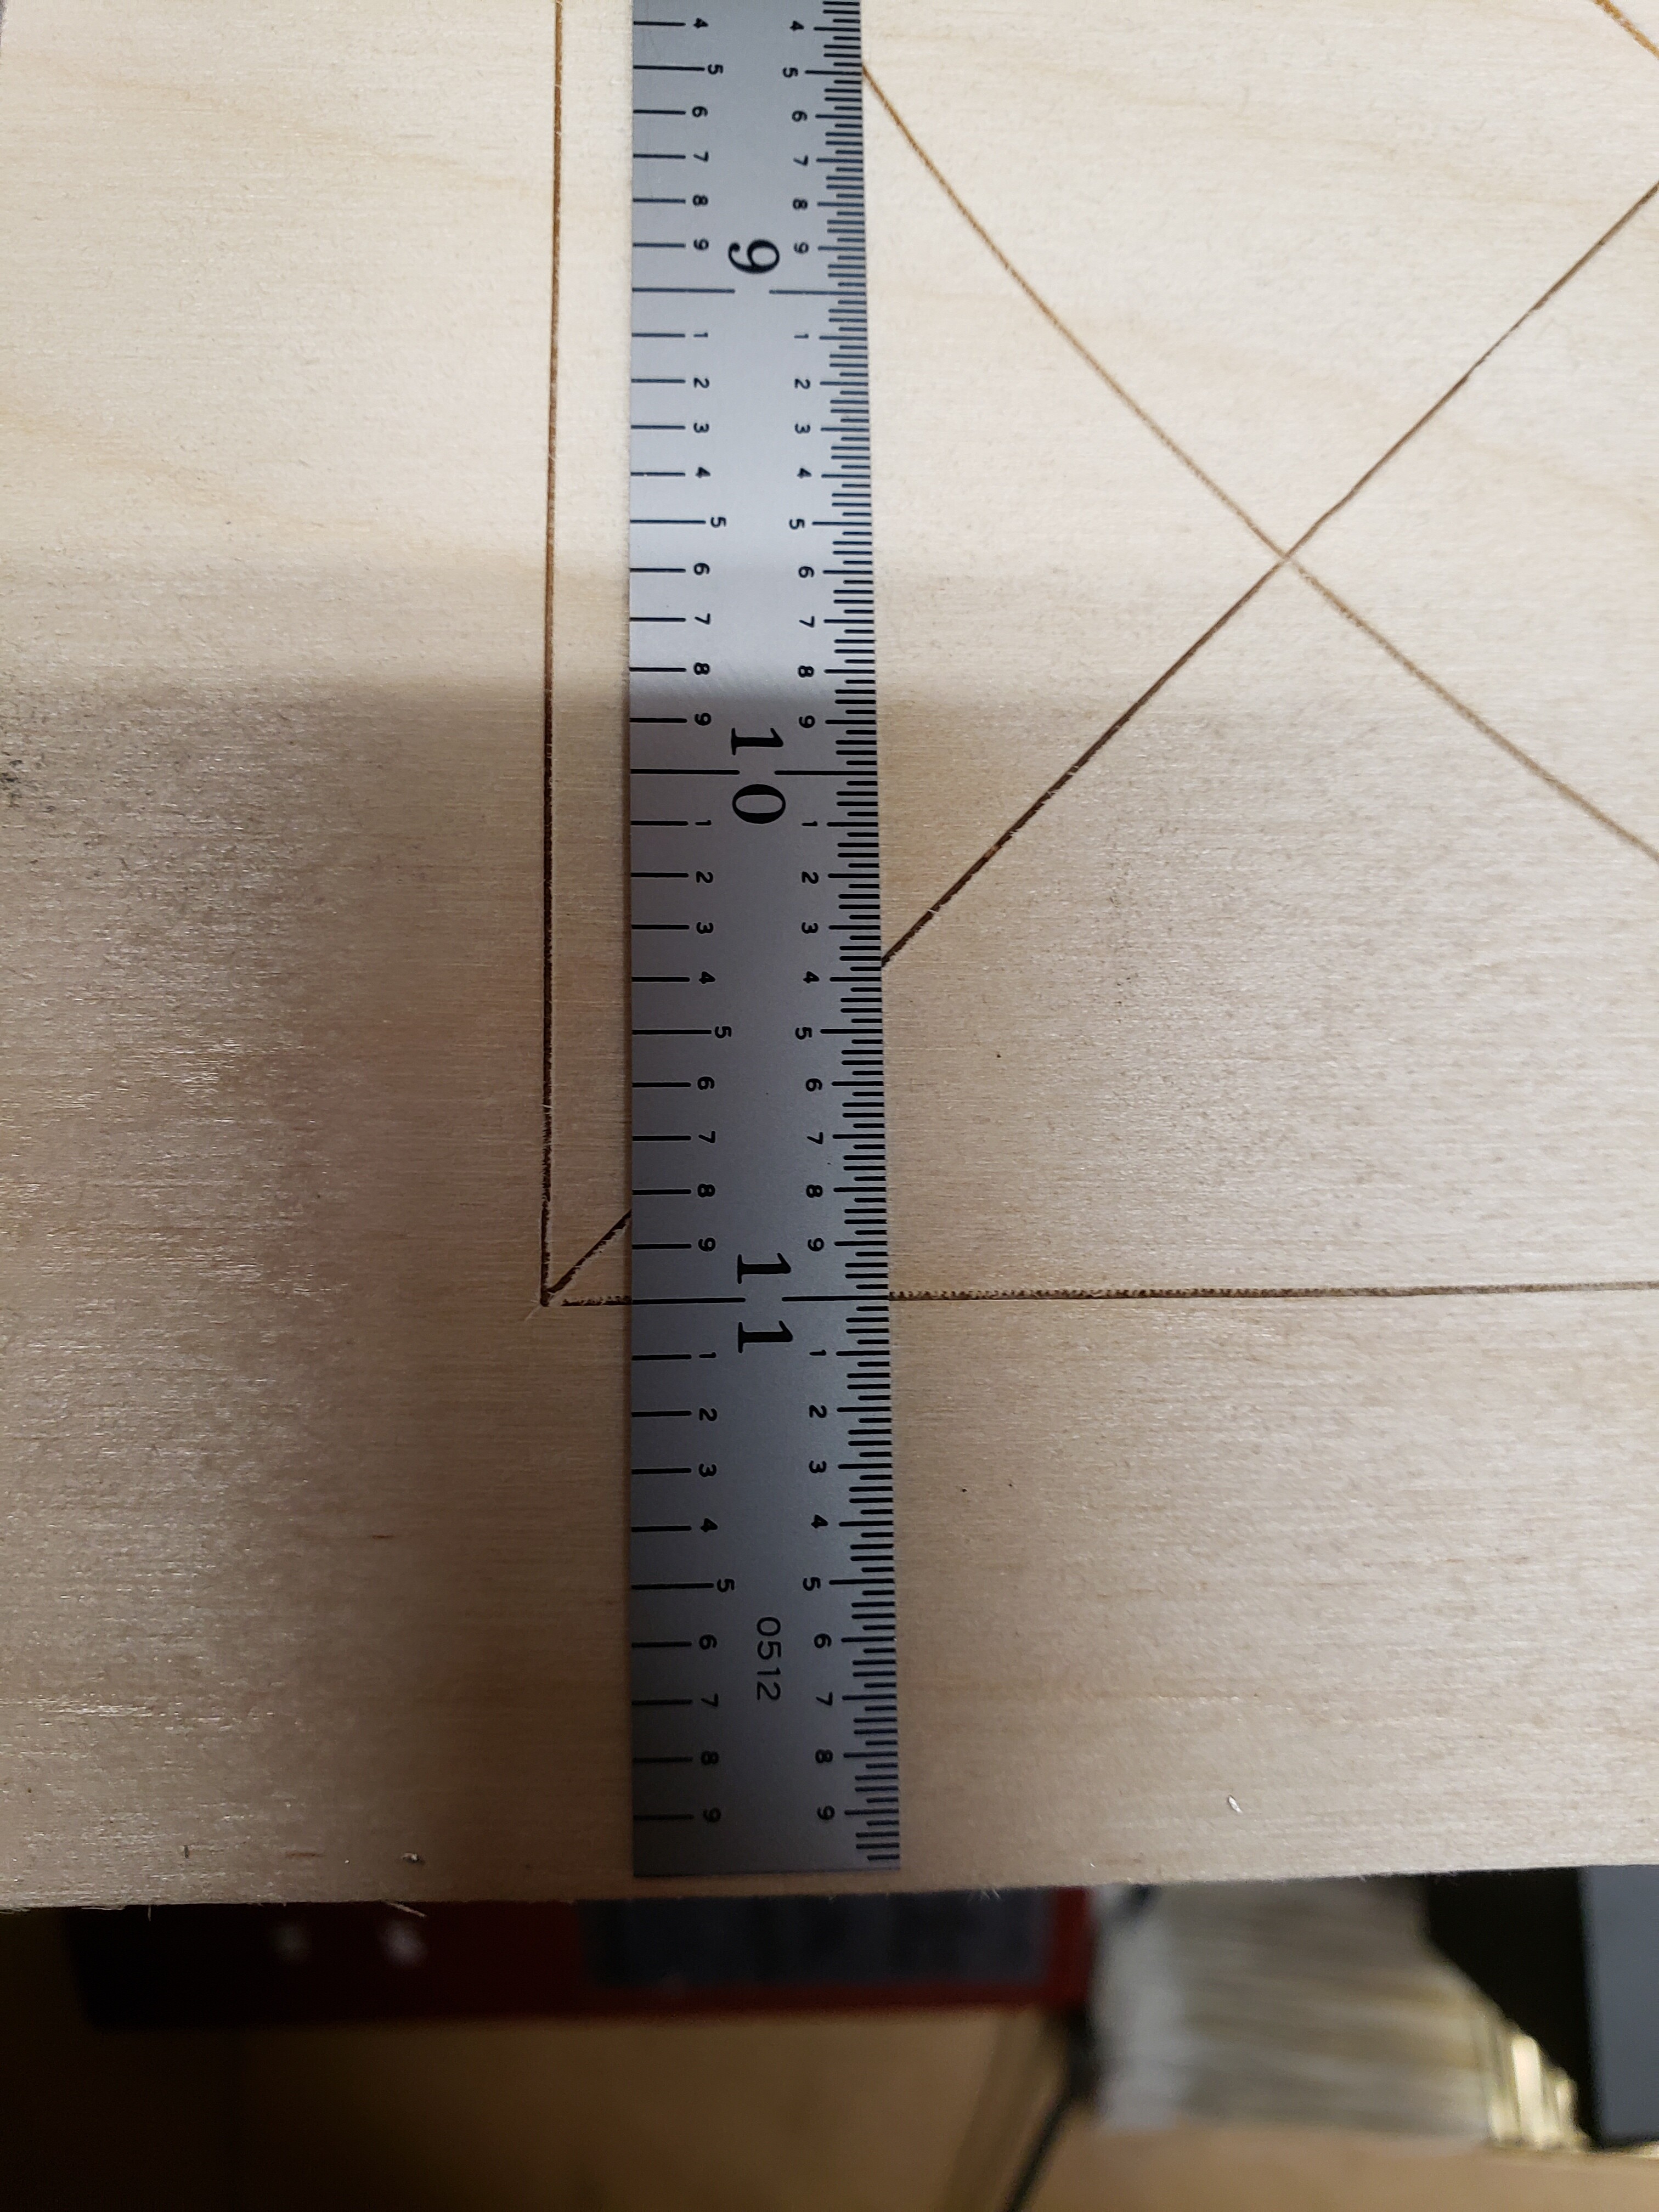
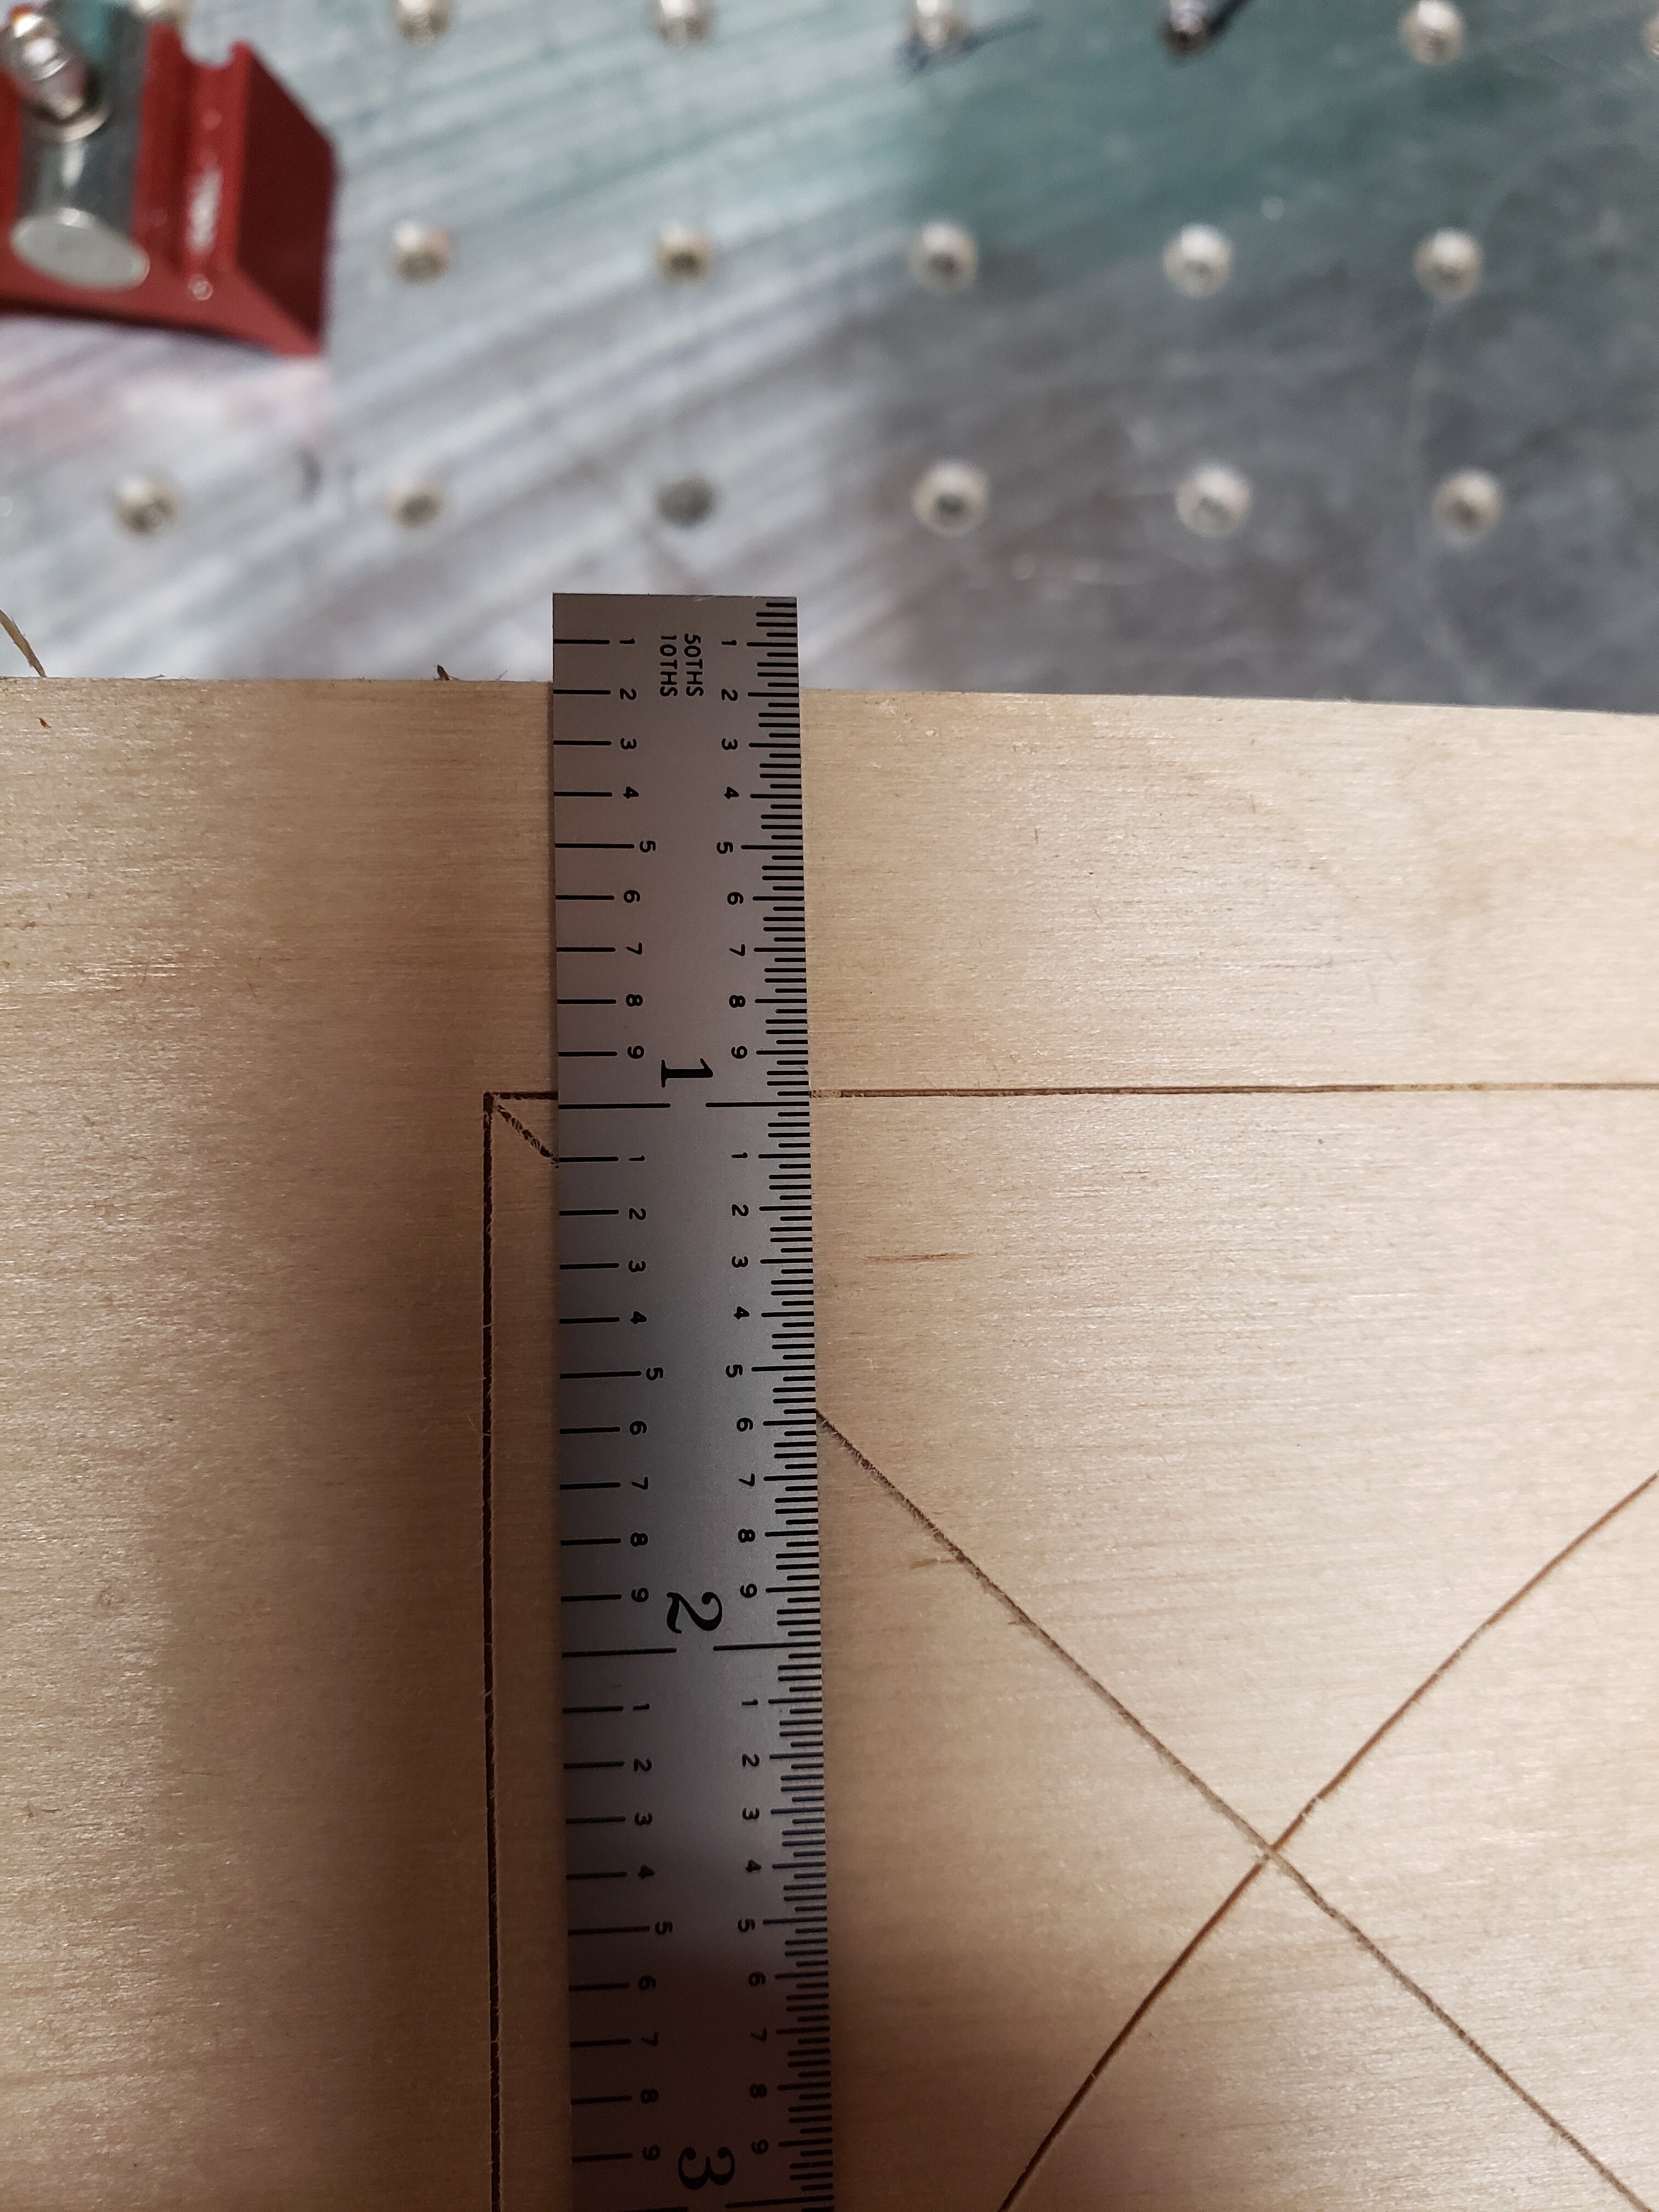
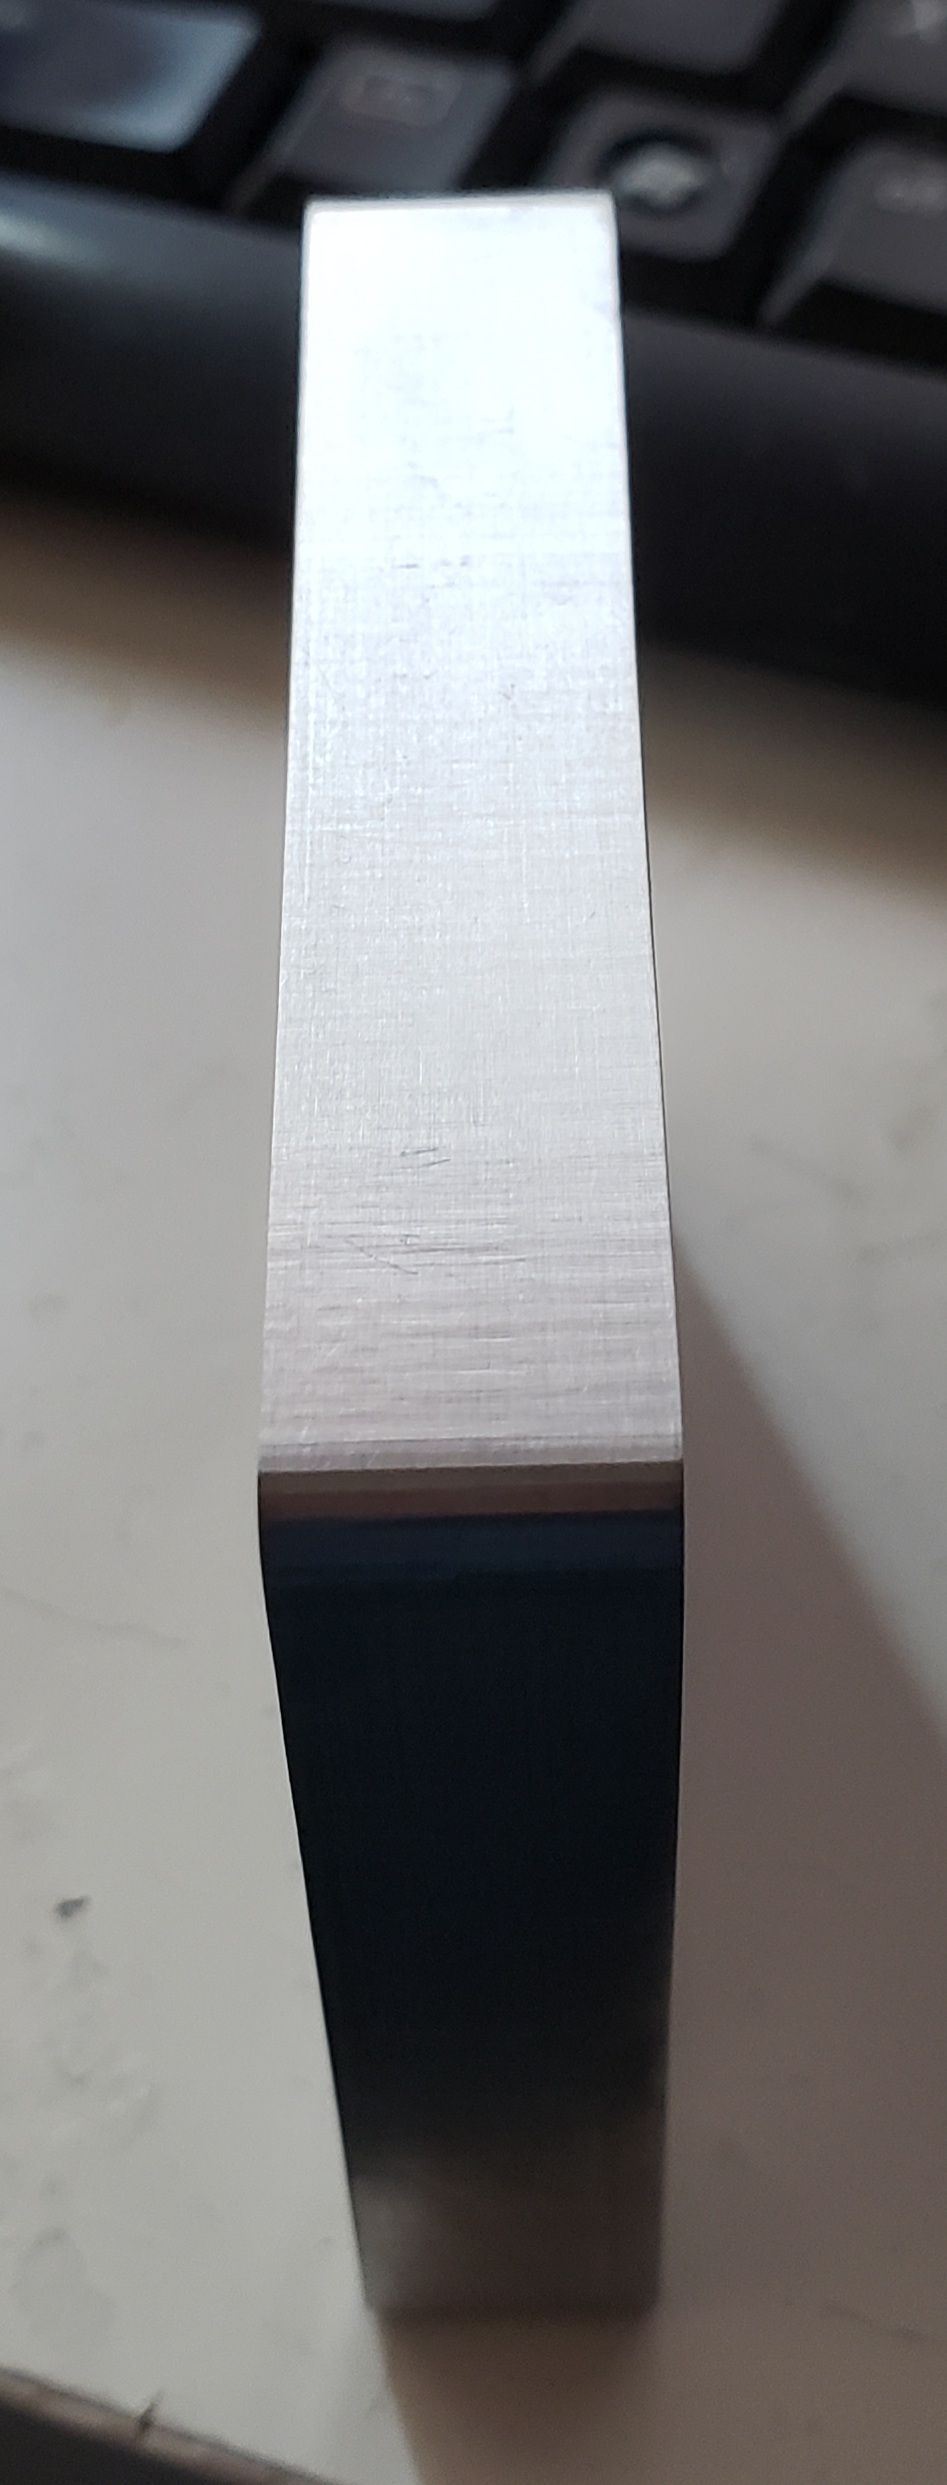
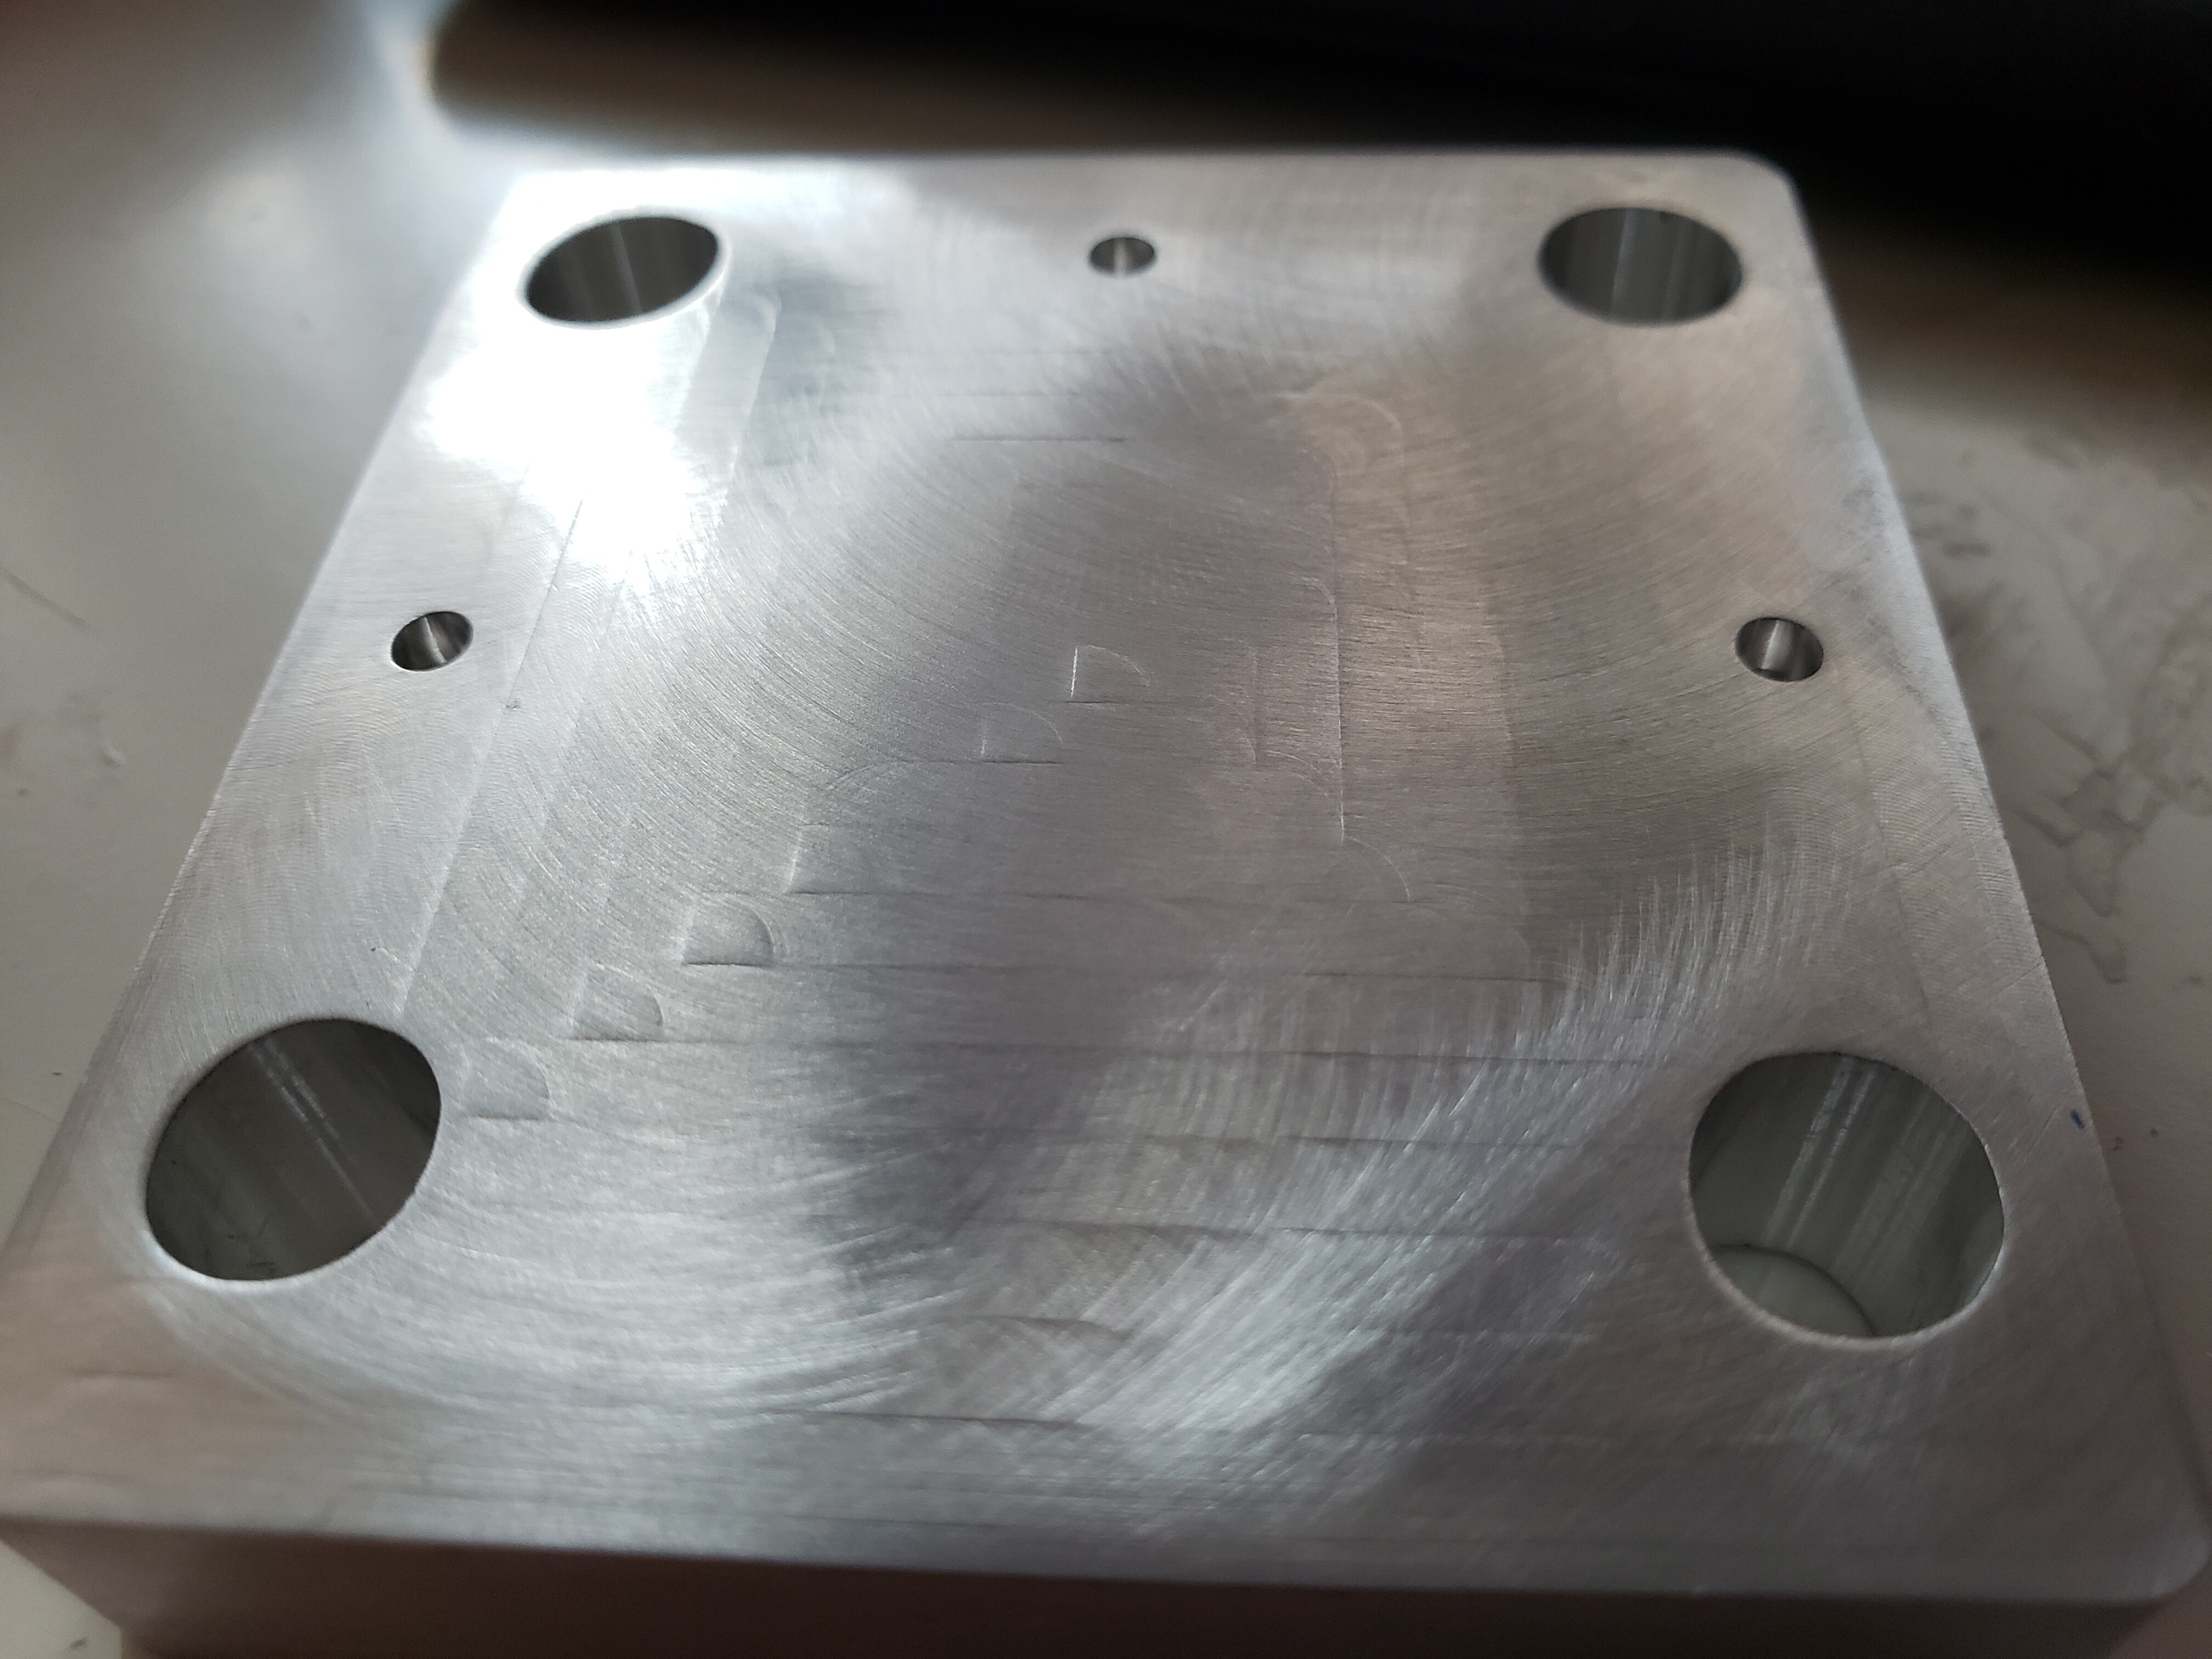
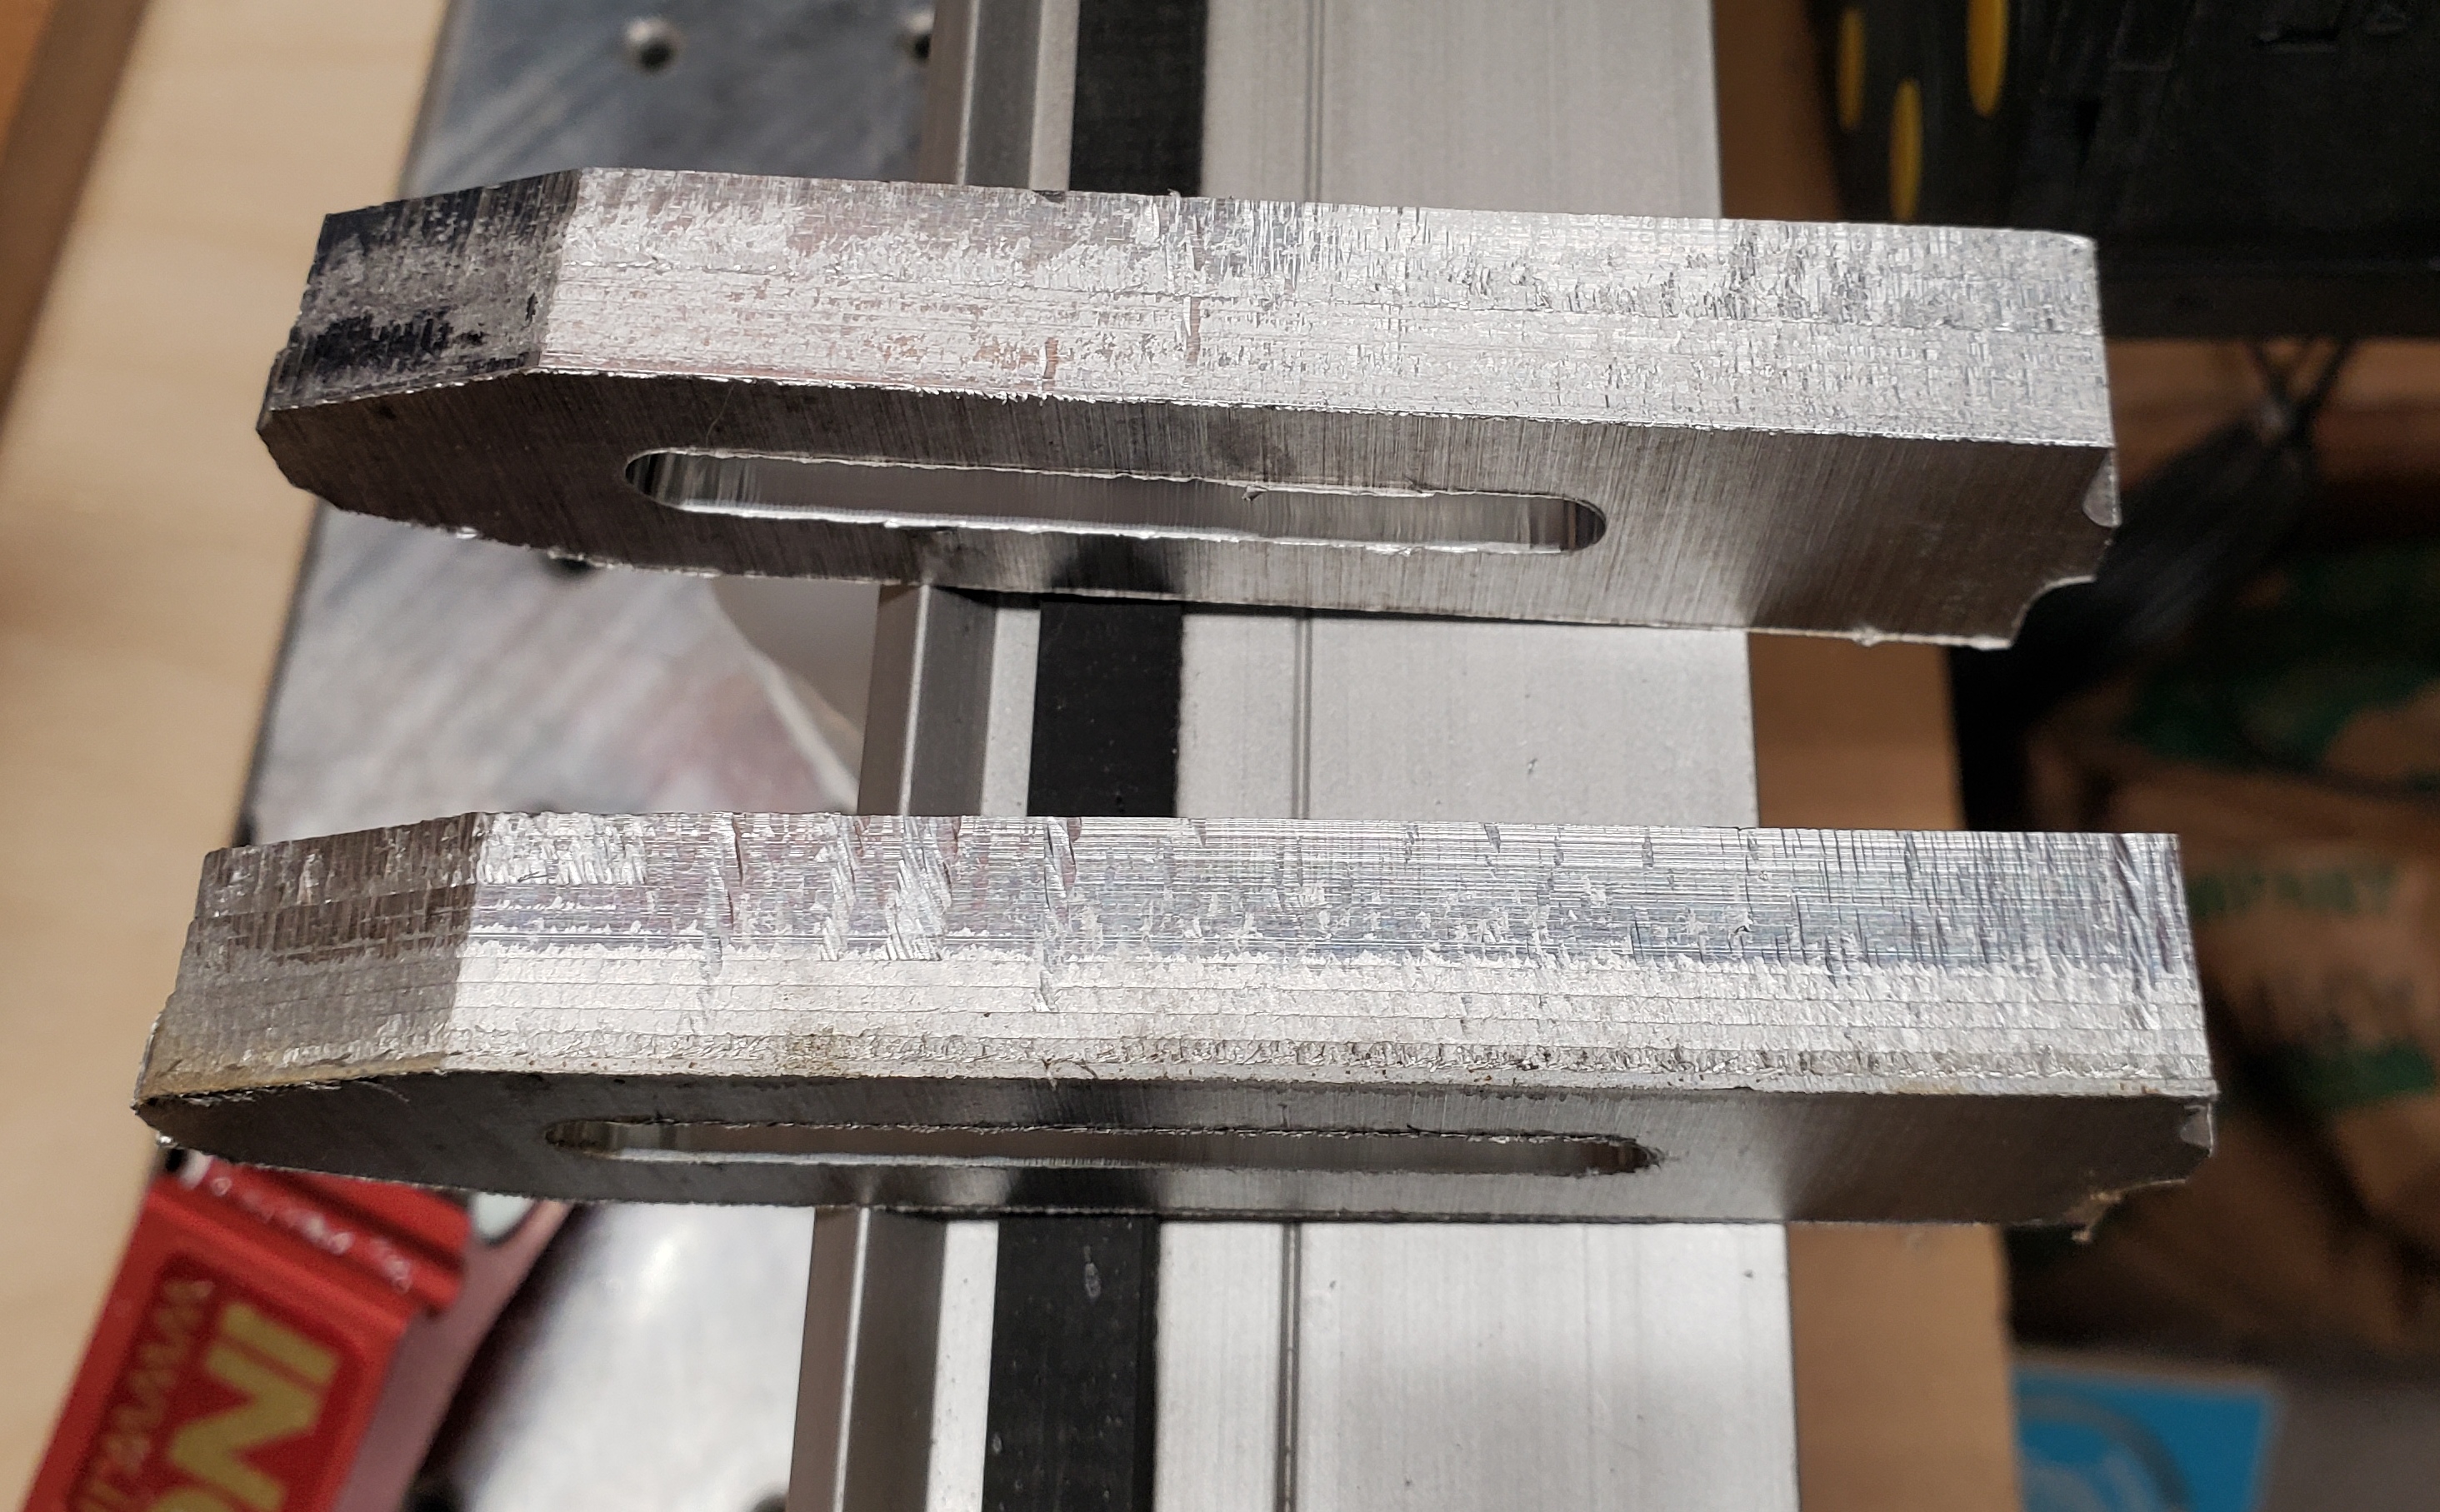
Here’s the carnage: One is cut at 0.050" DOC and one at 0.010" DOC.

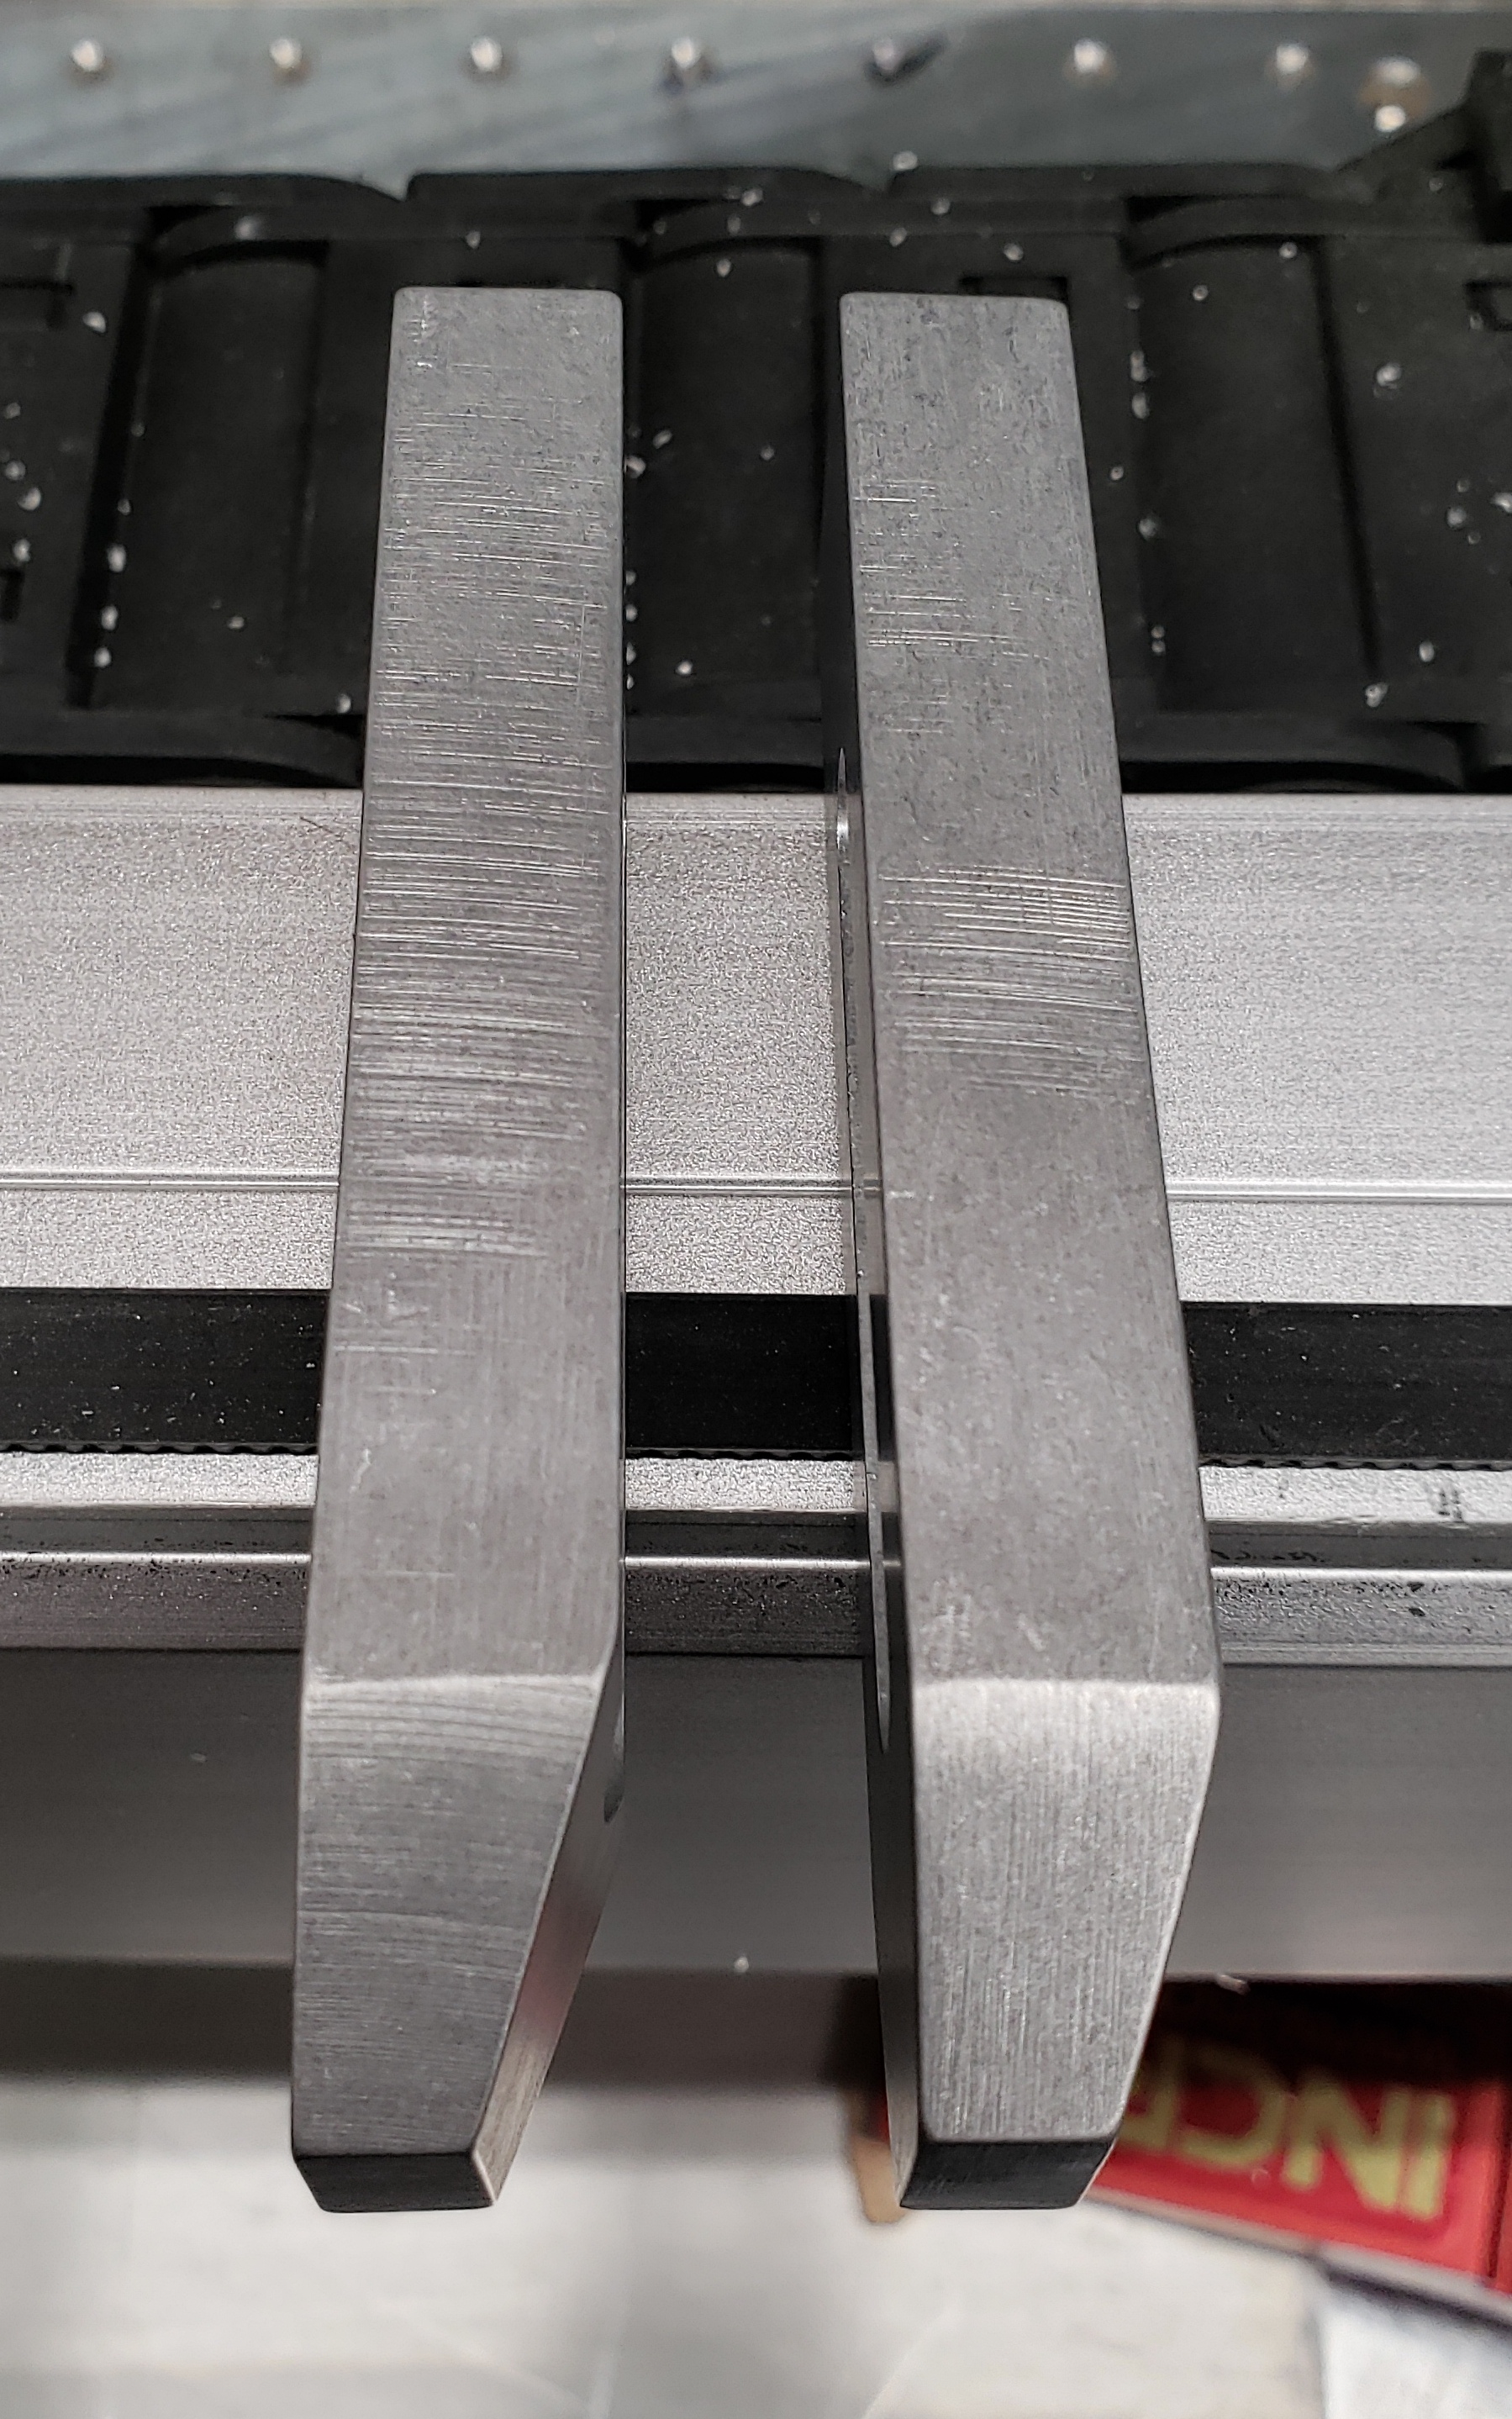
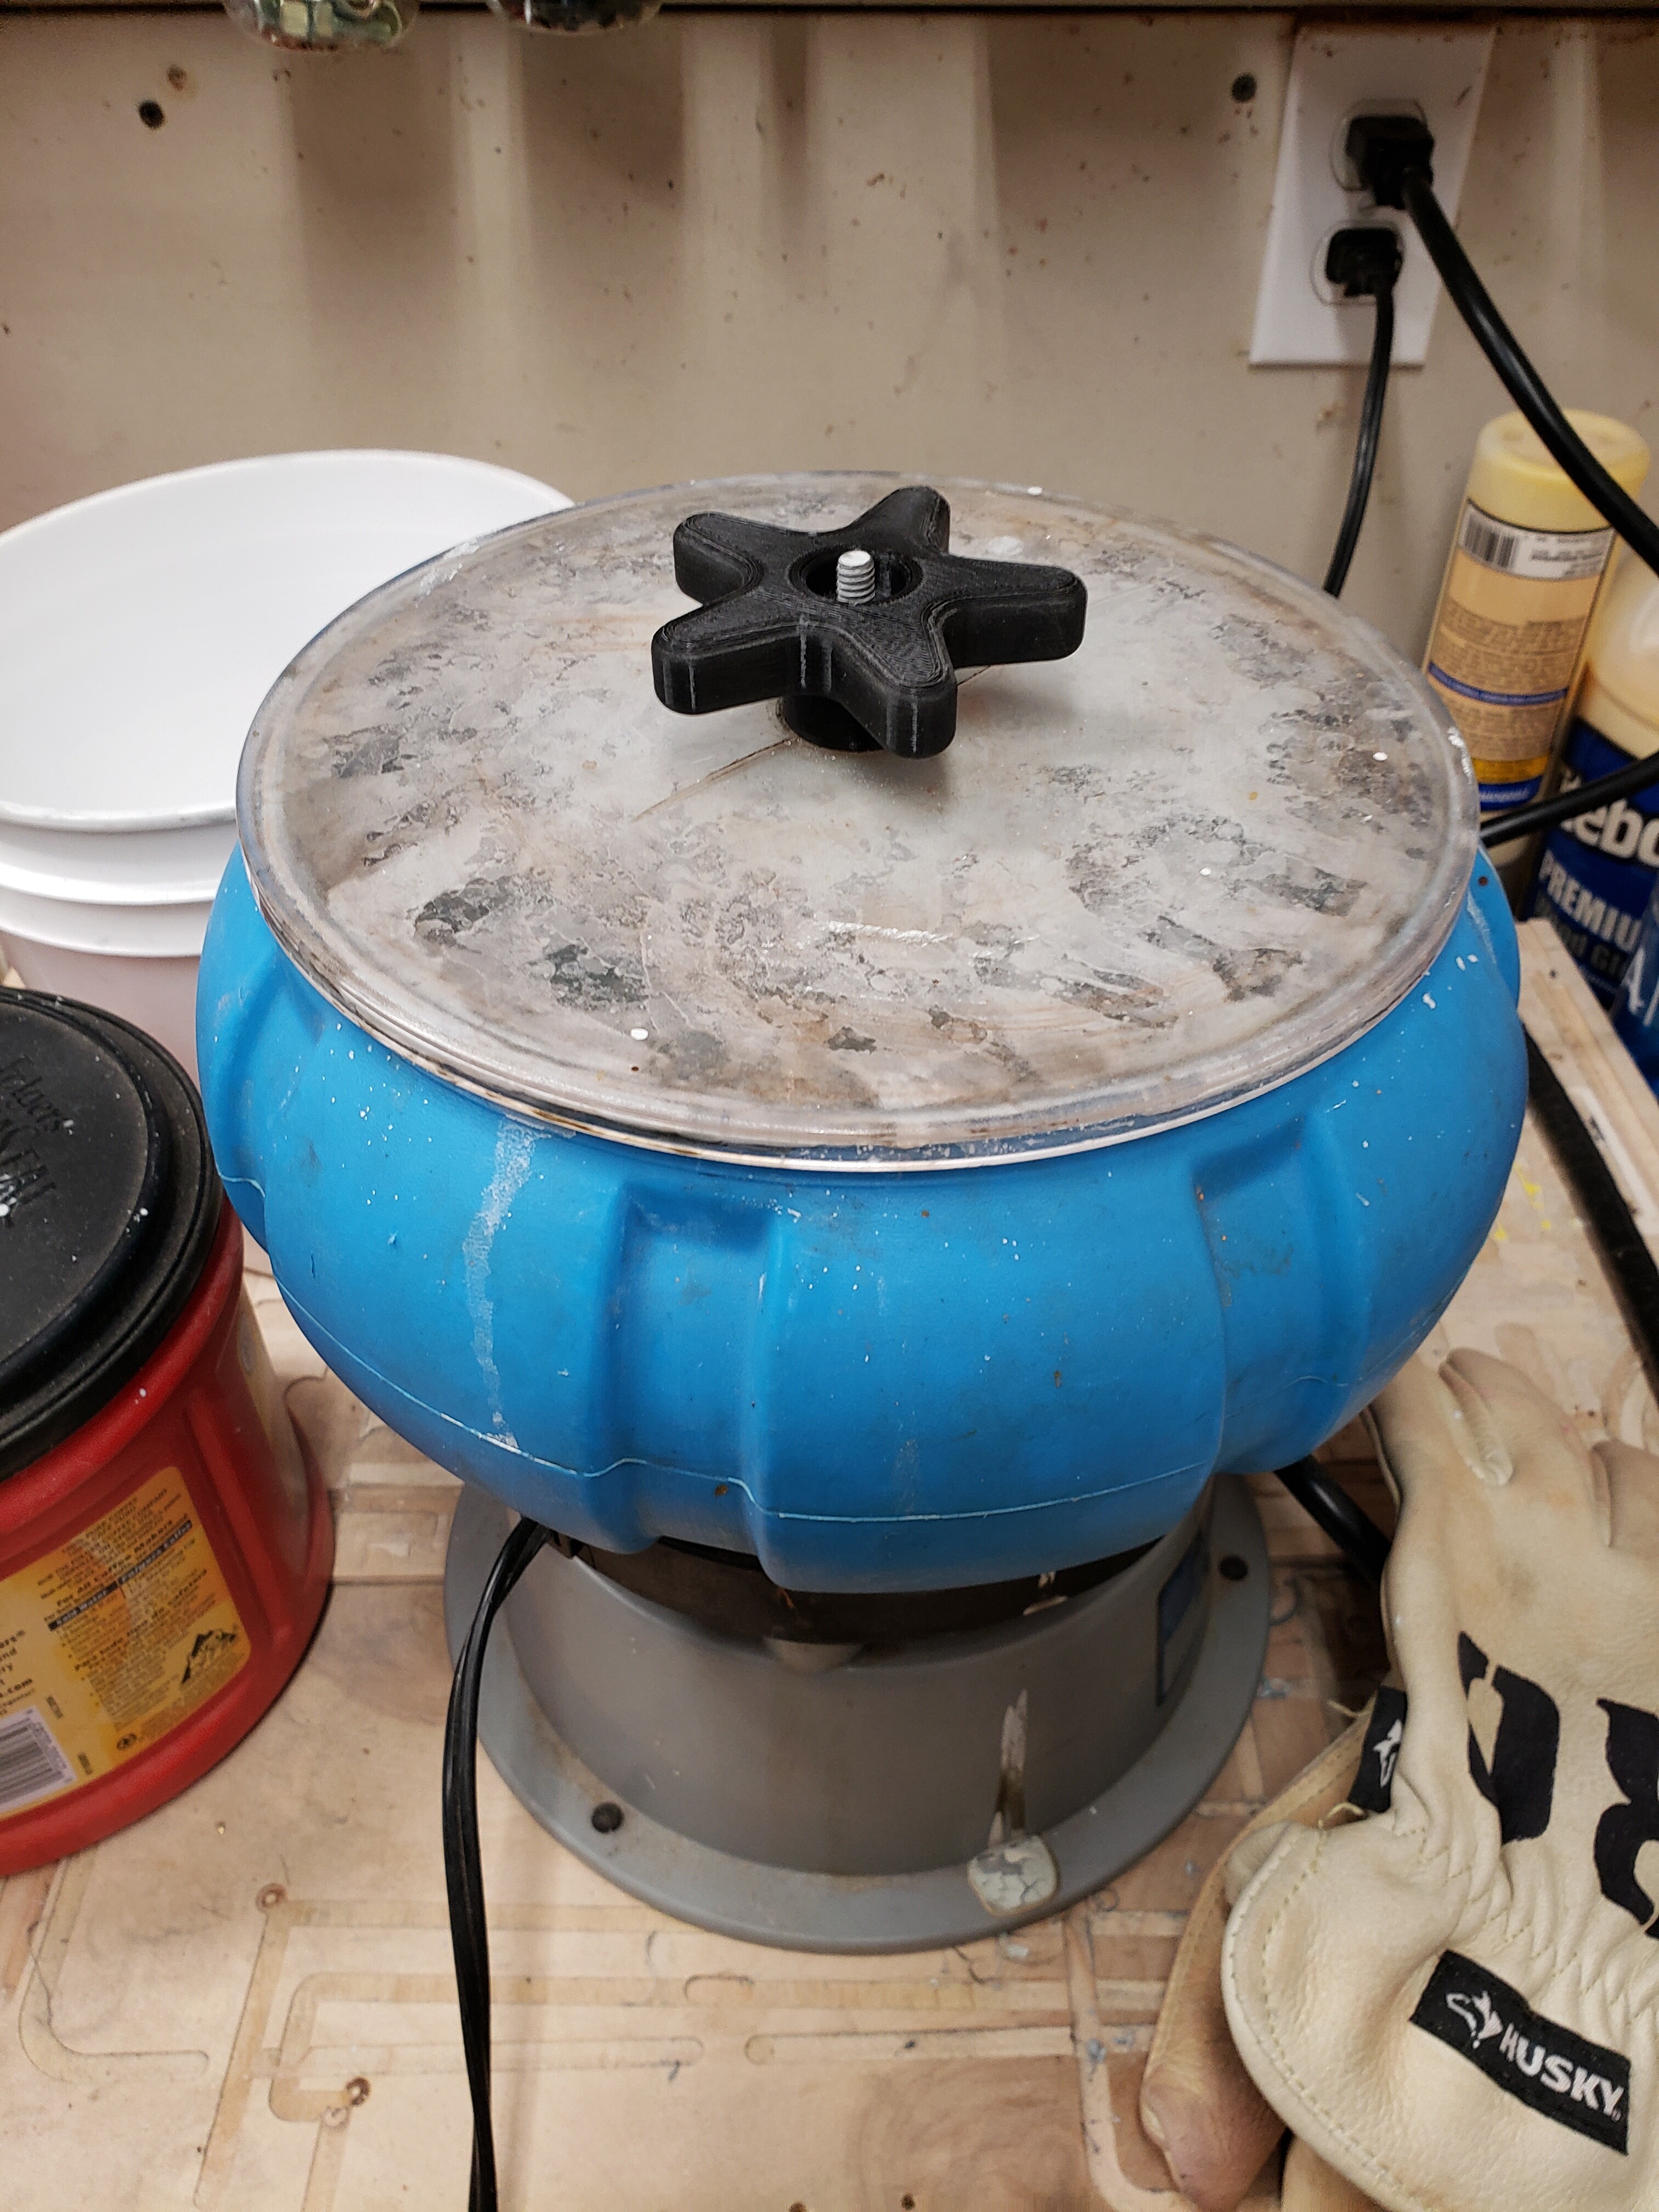
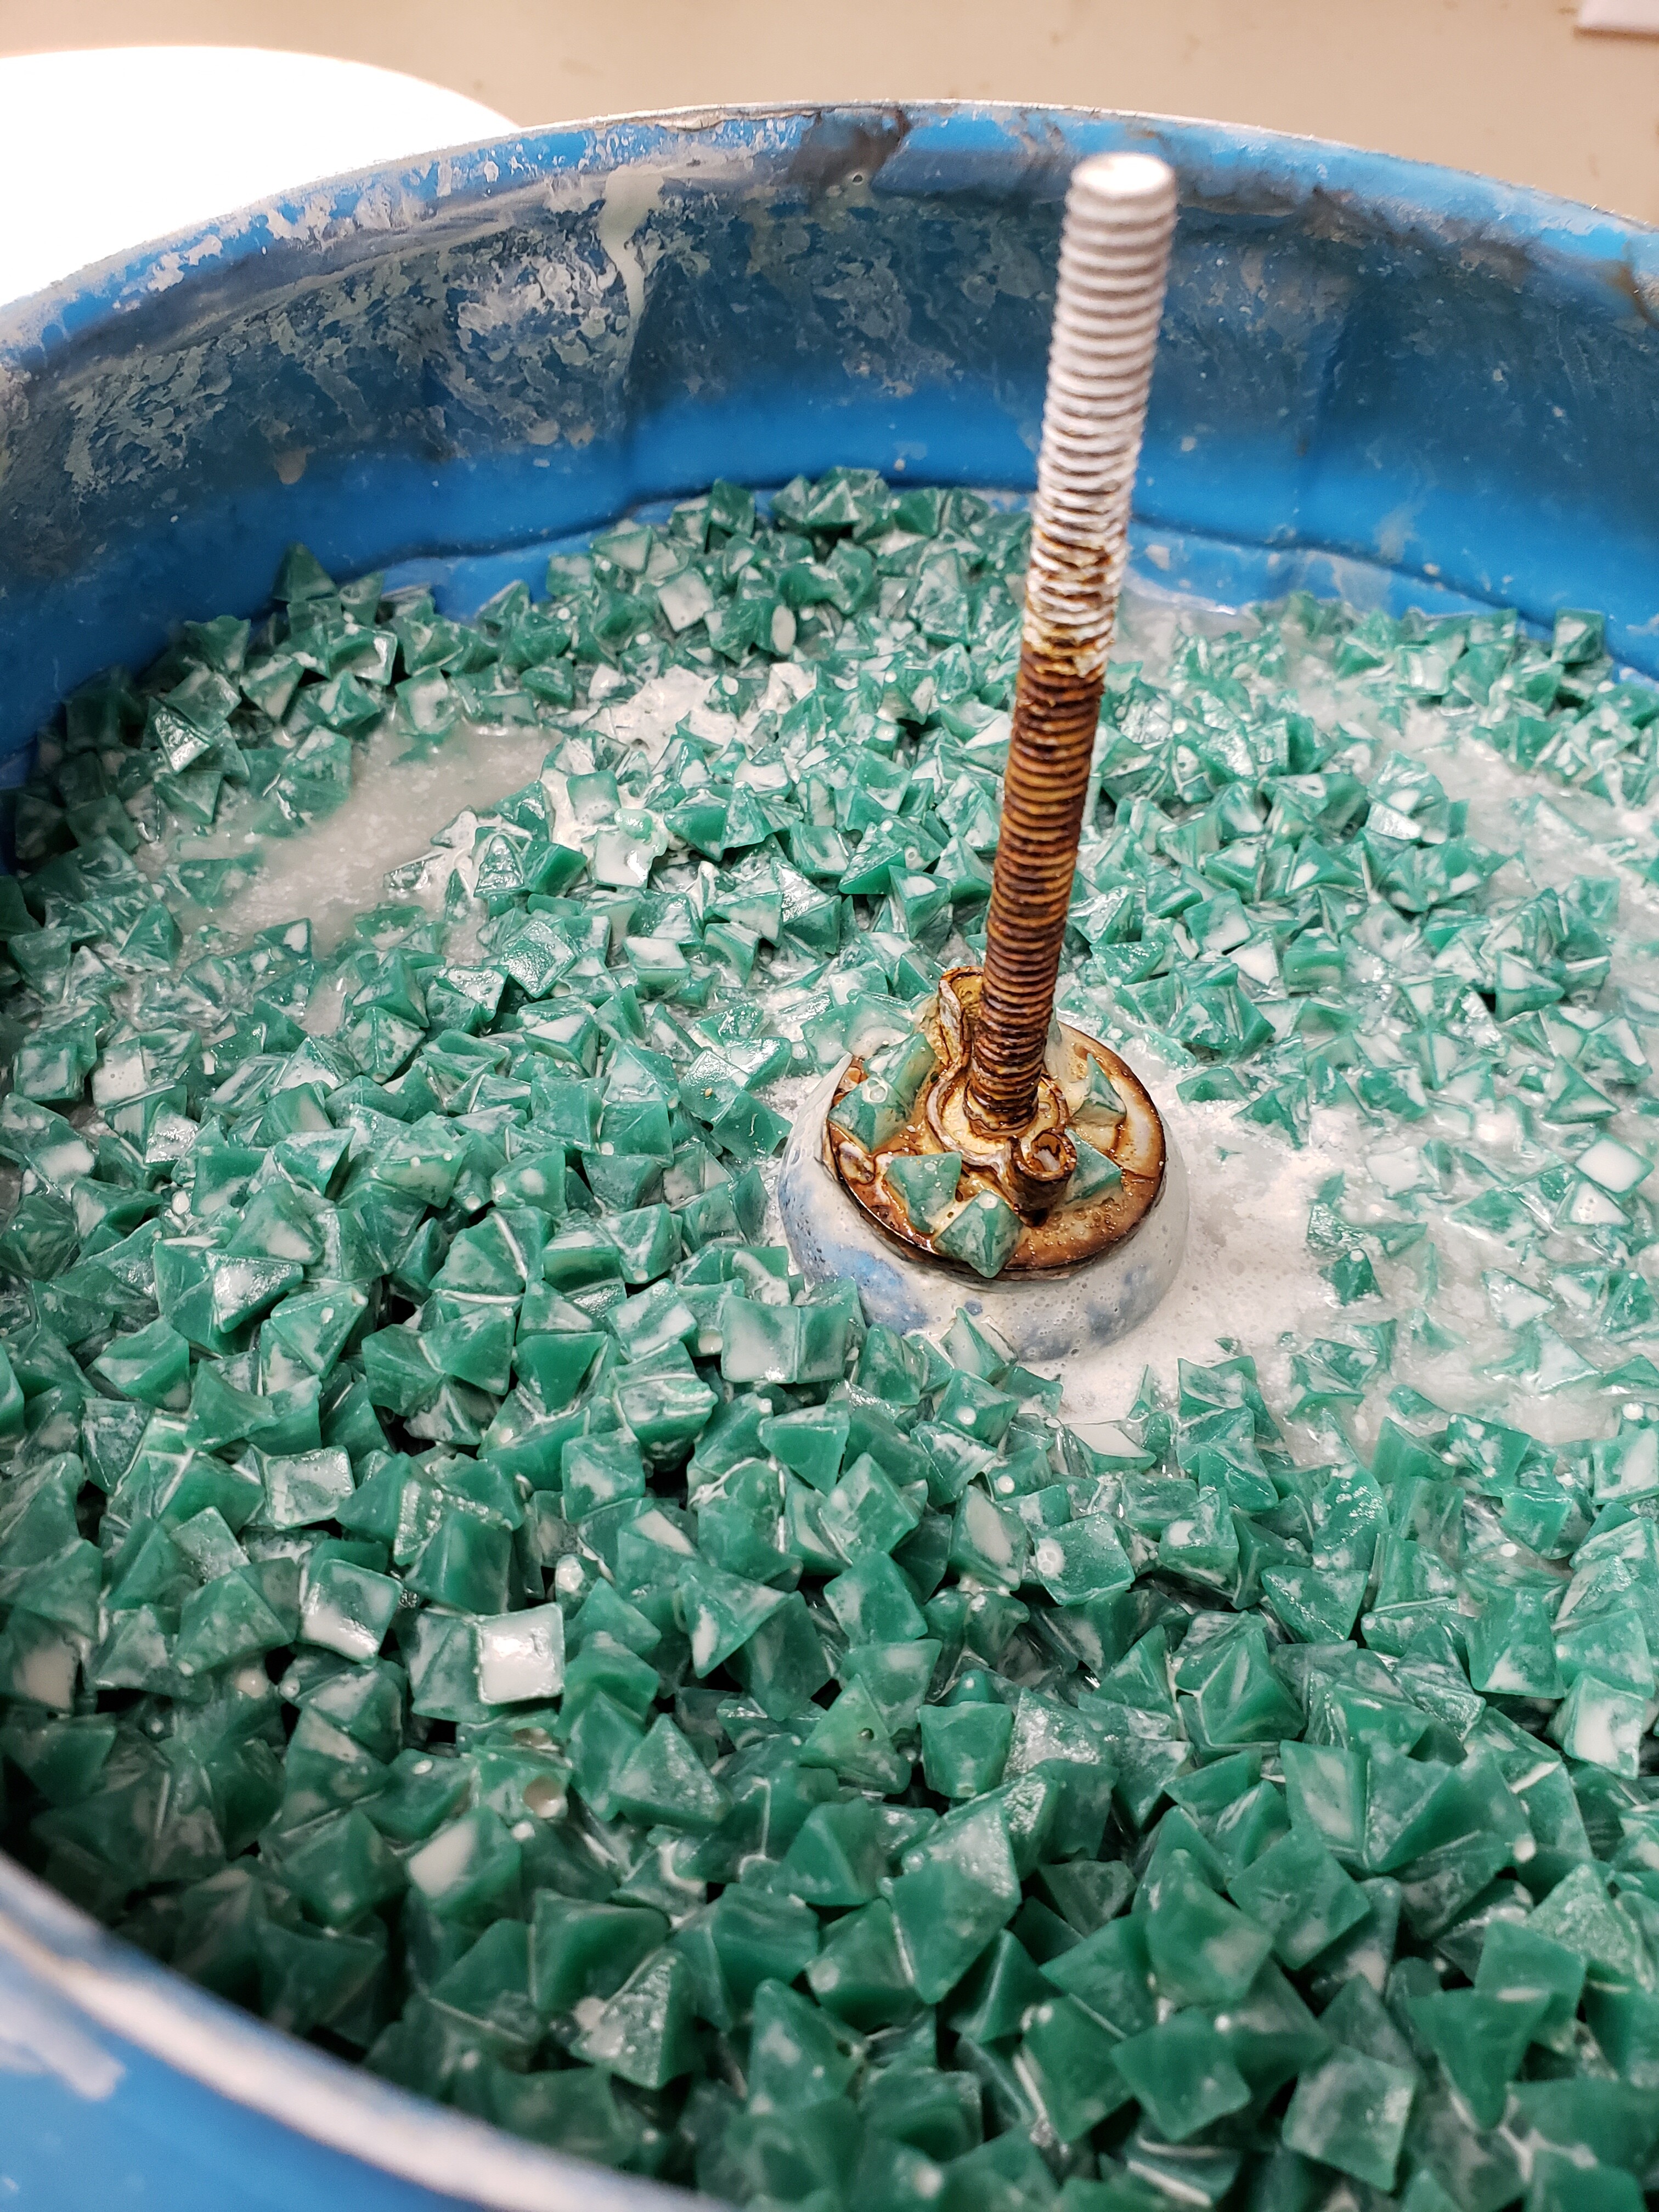
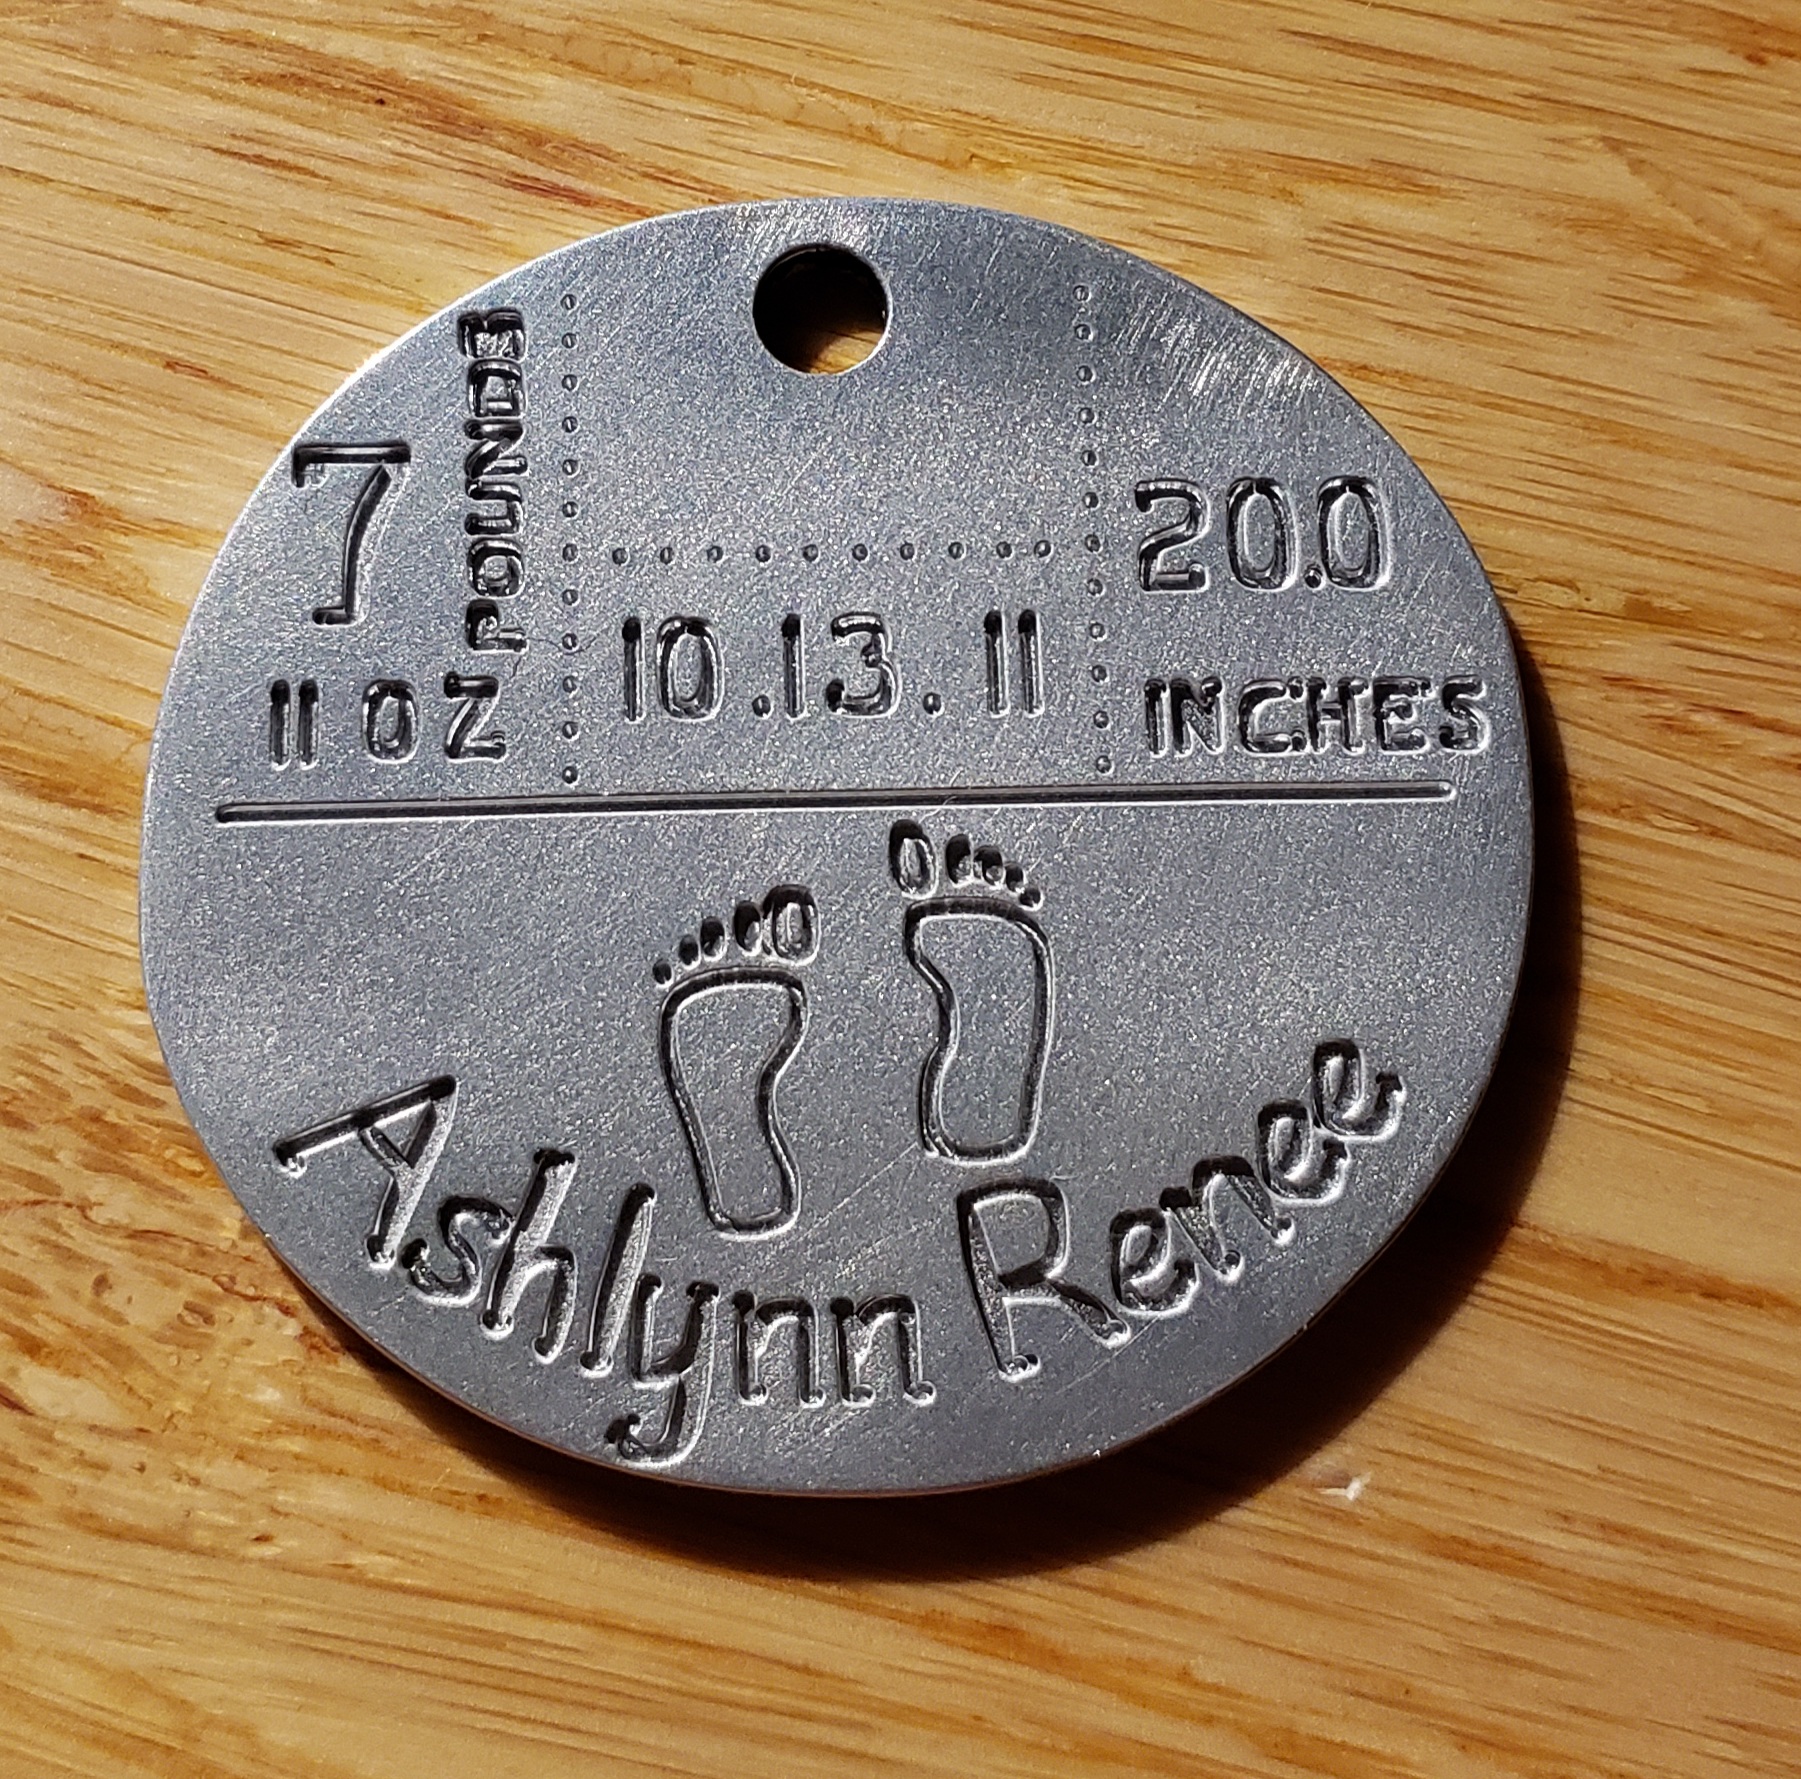
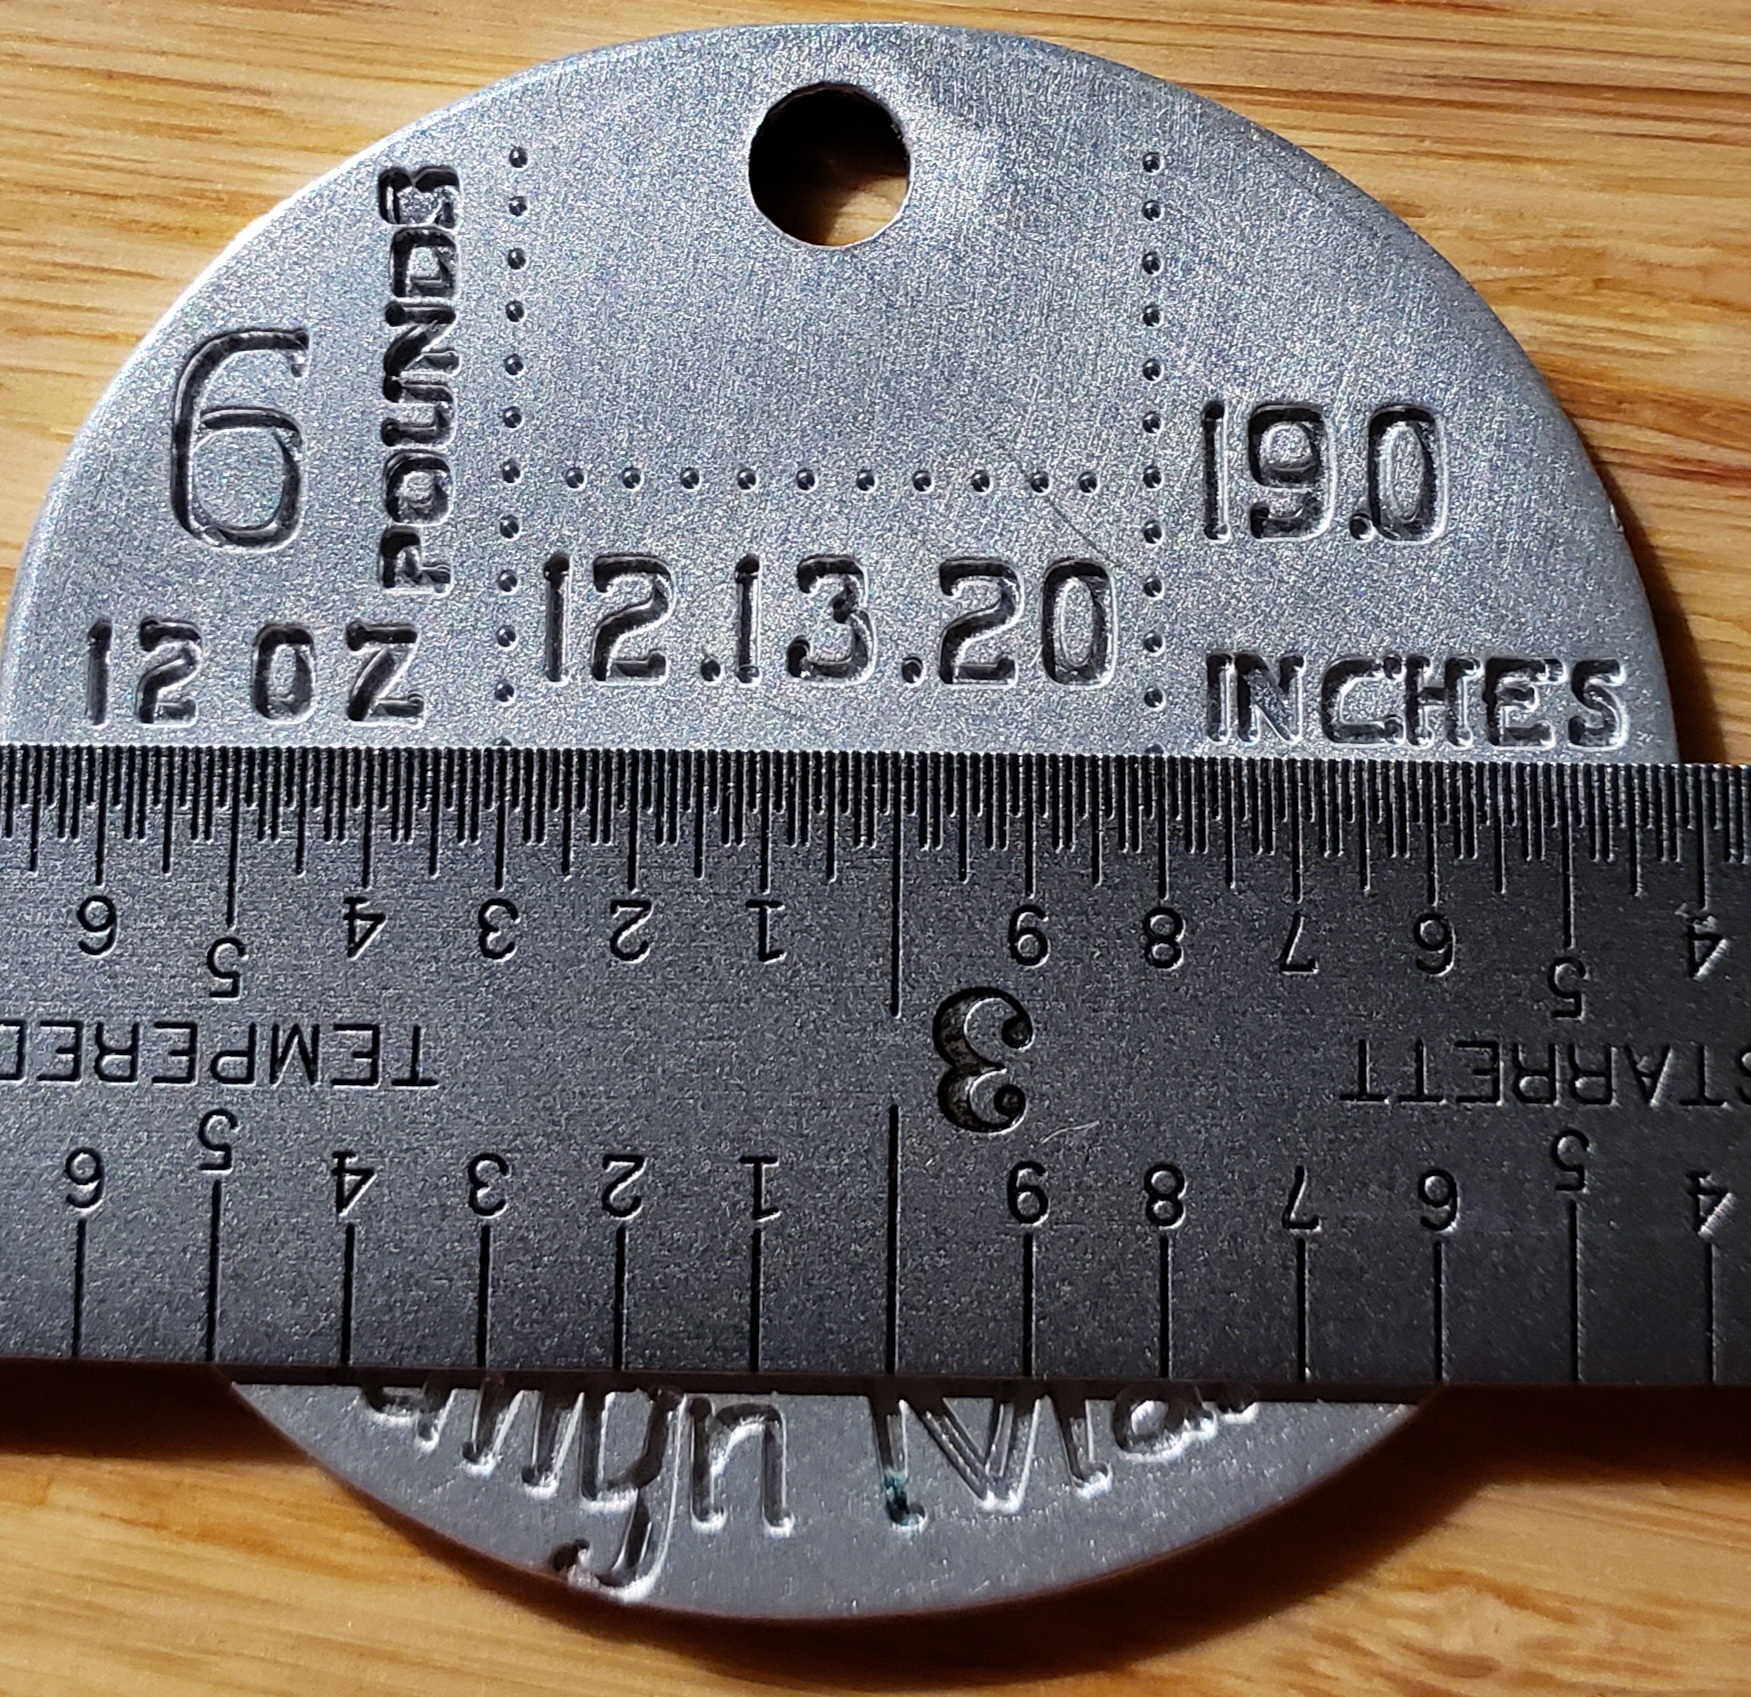
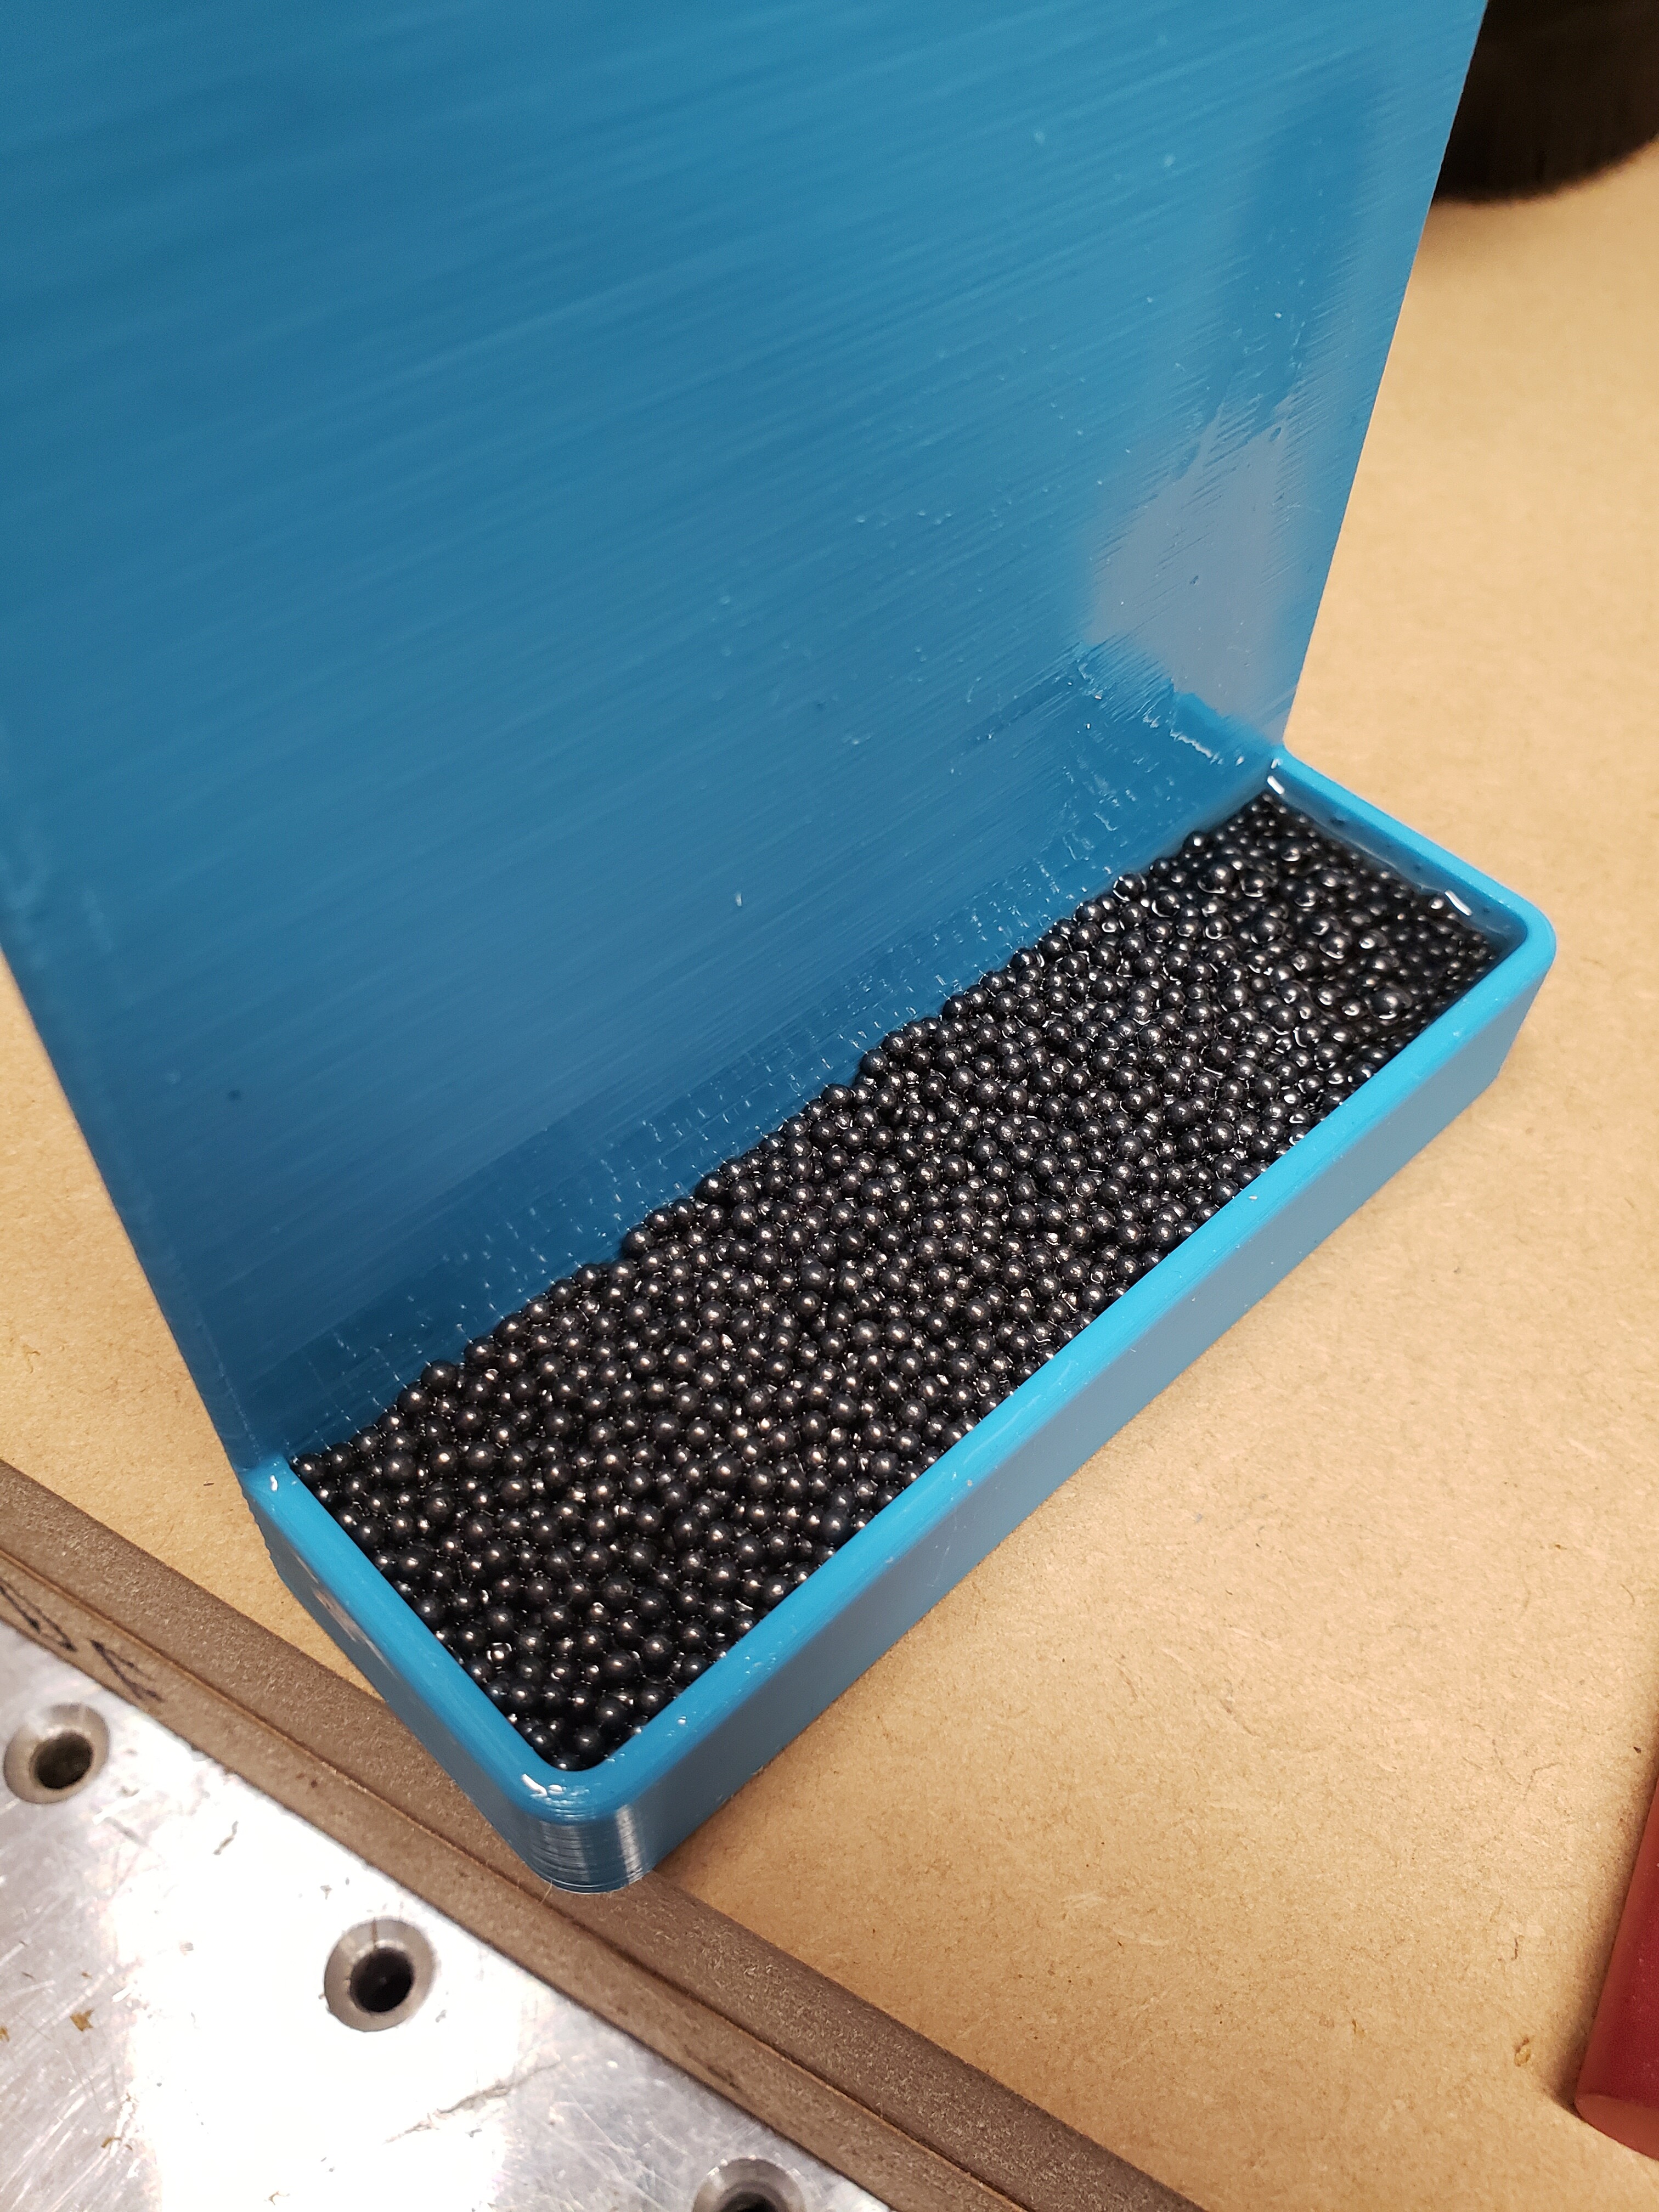
On another note, after using my disc sander with 60 (or 80) grit (I can’t remember) and putting them in a vibratory cleaner with some abrasive impregnated plastic pyramids for polishing aluminum, they have a nice matte finish.

They still look like crap because I learned what not to do regarding the cutting and the sanding job was just a quick clean-up to get rid of the ugliness. I am still going to clean them up a bit more before I throw them back into the vibratory cleaner to go at it again. If the part is sanded to120-220 it should look nice, but where the aggressive sanding disc striations were missed with the 120 grit belt sander, it still looks ugly.

2 Likes

I cut almost exclusively aluminum and I only use Amana or Carbide 3D ZrN coated single flutes. From experience, I can say it is the most reliable way to cut without having to be absolutely perfect with your tool pathing and feeds & speeds. Winston explains why single flutes are a really good option for desktop class CNC’s when cutting aluminum.


The short explanation is this:

  • Single flutes are incredibly hard to clog with chips and start smearing aluminum rather than cutting it
  • There is less tool pressure when using a single flute vs a 2 or 3 flute. This means less power and rigidity is required to get a good cut.

Cutting the shiny stuff is very doable on the Shapeoko 3, there is just limited room for error. I avoid slotting at almost all cost and make heavy use of adaptive tool paths. If you break a tool while cutting aluminum, I can almost guarantee it was because of chip welding. @Vince.Fab made a video over on NYC CNC that is longer but is also very good:

4 Likes

The end result looks nice!

Part of your initial problem may be that AlTiN coatings are not recommended for aluminum, due to the aluminum present in the coating, it leads to an increased chance of self welding… But i have no direct experience with this phenomena, just what i have been advised…

2 Likes

I realized that I missed it when you said that the cheap 1/8th single flutes worked great for you.

If it is working well, keep doing it. I push my machine pretty hard and I have found that the cheap single flutes break too easily for me. I get excellent life out of ZrN coated tools which justifies the cost for me.

1 Like

Thanks for that! Somehow I missed that video. I’ll have to watch it tomorrow.

1 Like

This topic was automatically closed 30 days after the last reply. New replies are no longer allowed.

WARNING! There may be something educational in here, but really it is me just “talking out loud” about what I have gone through in getting my XXL to cut aluminum.

So, it’s been a while and since I am just getting into aluminum after cutting wood for 5 years or so, I keep learning how different they are, and how much even the smallest thing really matters when cutting aluminum.

But before I get there, let’s go back a couple of weeks, where I cut some completely horrendous aluminum clamps using a two flute 1/4" AlTiN coated bit… That is when I found out about the AlTiN coating being just about the worst coating you could have on a bit and cut aluminum. The AlTiN coating is good for cutting steel, stainless steel, and cast iron, which I have no intention of doing.

I looked around and found an Onsrud 63-622 1/4" single flute, upcut O flute bit from an ebay seller, and picked up a couple for $29/ea. I thought that was a steal, compared to any other website that was listing them for $42 - $52 so I bought four. And I also bought some carbide 6mm single flute bits from AliExpress as well for about $6/ea just to see how they performed.

While I was waiting for those bits, I ran a 10" calibration square using an 0.0150" bit (since I never really did any calibration because when I was cutting wood, it wasn’t a big deal if it was off 0.01" anyway).

Well my X steps were spot on, but my Y steps were just a bit off, so I adjusted them. You know, come to think of it, I never checked for square! As I am typing this up, I realize that I Was supposed to check for square, but got carried away with adjusting the steps for the Y axis. I guess I know what I am doing tomorrow.

Back to the bits. . .

Well, when the bits came in, I gave the Onsrud bit a shot. Man! What a difference. It sounded so much better, and I could immediately see how much better it was cutting, but there was still a bit of chattering. After the clamp was cut, I took a video to show what the edges looked like, and you can see that my machine was not cutting the way it should have been.

So, (a week later) I started to check the machine and noticed that while none of the V-wheels could be turned by hand, I was able to grab the spindle and ever so slightly get it to move when I pulled / pushed on it while the stepper motors were locked. I adjusted the eccentric nuts, and tightened them on my HDZ and decided to try another cut.

I should have run the same gcode with the same Onsrud bit to see if the adjustment of the eccentric nut helped, but I wanted to try out the AliExpress bit, and I’m impatient. Well, I put in the $6 bit and cut a new part, and it also cut very well. In fact, it sounded better because there was none of the chatter that existed before I adjusted the eccentric nut.

I still have a slight tramming issue, and I ordered the Mini Pro Tram System and I will finally be able to get my spindle properly trammed.

Also, here is the vibrator and media I used to put the matte / satin finish on the clamps. It started its life as a tumbler for brass cleaning for reloading, and I bought a bucket of the wedges specifically for putting a satin finish on aluminum. The “milk” is just water with a small dash of dish soap to break the surface tension and fine particles from them rubbing against each other and the aluminum. When I get tired of looking at the rust, I’ll replace the parts with stainless and keep going.

6 Likes

Well, tightening the V-wheels definitely helped with the chatter and helped with the surface finish of the side of the cut piece. I only hit it with a blue imitation Scotch-Brite disc to soften the edges, but I did not use sand paper or a file to clean it up.

And After seeing the top surface up close (and after hitting it with the blue Scotch-Brite pad as well) I saw that I needed to tram my machine, so, as I wrote above, I bought the Mini Pro Tram System and went out this morning and trammed my spindle. It was definitely off, as you can see from the cutting below. It was off by 0.014" front to back, and 0.012" left to right. Using an online triangle solver, I calculated that it was off by 0.267deg front to back and 0.229deg left to right. Not too big of a deal when cutting wood, but big enough when cutting aluminum.

I’ll have to get something set up and cut to see how much better it looks now. Stay tuned.

6 Likes

As a side note, here’s some of the fun I have been having in my learning about cutting aluminum.

#1 and #2 are my first attempts at making a simple clamp from 1/2" plate 6061-T651 I bought. I designed it in Inkscape and used MakerCam to create the g-code. I ground the bevel on the top of the clamp with a disc sander because I didn’t want to have to create a bunch of individual steps to cut it down.

#3 was designed in SolidWorks, and I broke down and bought MeshCAM (excellent decision, since I now can design things in SolidWorks and create g-code to cut them as well as 3D print them! Now I can 3D print a test article before I cut it.) Regarding the design, I got too excited and forgot to include the space for the threaded hole, and made the tapered end length too long. Also, I just assumed the thickness of the aluminum plate was 0.500" thick, and it was not. It is actually 0.530" thick, so that is why it did not cut all the way through.

#4 is finally the one I plan on making a few more of. It has the right dimensions I want, I re-shaped the tapered end to allow the channel to not encroach on it after leaving room between the 1/4-20 threaded hole and slot. The only issue I made with this one was the g-code for the 1/8" pilot hole for the 1/4-20 threaded hole had one small mistake. Instead of a peck drill down 0.100", it tried to peck down 1.000" - all at once. What you see is the smooth polished end of the carbide 1/8" bit after it sheared off and was smoothed out. Good times. . . :slight_smile:

8 Likes

Here’s a slight deviation from my previous attempts to cut aluminum. A friend was looking for a keychain medallion with their kids birth date and weight and whatnot - like this:

image

But they wanted a double - sided one since they have two kids. They could not find anyone who would make a double - sided one, so my friend hit me up. Me, always up for an attempt at something new, took up the chance to cut something smaller than I have ever done on my XXL.

After buying a single line font that looked appropriate ( all the single line fonts I have are great for placards and signs, but too “boring” or “plain” for this key chain) and using Inkscape to lay out the keychain and then overlaying it on the photo I grabbed, I ended up with this:

Scaled down to the appropriate size, and with the line width the proper width that matches the bit diameter, I ended up with this:

I used MakerCAM to create the g-code for this, and that was pretty uneventful.

The bit diameter needs to be 0.0120" or narrower, or the text would blend together, and we can’t have that. So I ended up using 0.0118" end mills I had, because I had more of them than I did of the 0.0120" bits. I ended up breaking two of the bits while cutting the first one. Even though I put a layer of 99% IPA on the top surface to provide lube/cooling/material removal ,the 10IPM feed was too fast for the 0.006" DOC, so I broke the first bit about 2 minutes into the run. So I reduced the feed to 5IPM, and that worked well until I used a blast of air to blow away all of the IPA I had on the top surface to lube/cool the bit. The bit snapped almost instantly. I learned my lesson and the second bit made it to nearly the end, until I missed one feed speed and it broke when it hit that 10IPM feed speed. Oh well.

The second side was uneventful - if not a bit nerve wracking - since I had already broken two bits. I just kept the top covered in IPA and everything went well. A little sanding with 600 grit, then a bit of polishing - but not too much. Trying to keep a somewhat textured surface.

Yes, this is definitely a job for the Nomad, but I think that the XXL handled it very well. The C on the “Callyn” came out weird, and it looks like it was the last thing to be cut, and I wonder if the blue tape de-bonded from the MDF it was adhered to since I had been flooding it with 99% IPA the entire time. The g-code looks good, and the rest of the letters didn’t have this issue.

Here’s the engaving with a ruler with 1/100" increments on it.

Video of it cutting.

10 Likes

Well, I finally got a video of my XXL shuddering. I am surfacing a block of unknown aluminum, but it cuts really nice like the other 6061 I have, so it may be 6061.

Turns out, it was not the V-wheels on the Z-axis like I originally thought, but the GT belt was just too loose. I loosened the V-wheels a bit (they were too tight because I thought they were the culprits at first) and then tightened the GT belt a tooth or two. It was actually a pain in the a** to get the belt to stay at the new location.

What appears to happen is the little steel angle bracket that holds the belt gets bent to less than a 90deg angle on install, which is fine, but when you go to try to take up some slack, the (now less than 90deg) angle piece does not hold the GT belt while tightening it. I tried two or three times to get it to stay with no luck - until I used my pliers and bent it a bit and made it about 100-110deg.

Then, with the bracket bent, it presses the GT belt against the aluminum extrusion while being tightened and holds it until it is tight. I don’t have a video of it after tightening, but it does not bounce anymore. I may now re-sun that little key chain from above. I knew my machine could do better than that.

Also, when cutting aluminum, the chips go everywhere. I prefer them to be not shot off the front of my machine, so I designed and 3D printed some little stackable barriers, and filled them with lead shot and epoxy. I just need to put a bit of neoprene foam on the bottom to make them non-skid and they’ll be done.

If anyone likes them, I can throw them up on Thingiverse to print.

8 Likes

Been there, more V wheel tension means more backlash, nothing is free…

I suggest you re-check your X and Y calibrations now that you’ve tensioned the belt.

You can measure and level up the belt tension quite easily with a phone app.

I found that just pressing down with a finger on the overlapped belt would let the teeth engage well enough to get me the target tension. It seems to be a bit harder on the XXL axes as you need to pull the belt twice as far to get the same extension and therefore tension on the belt.

1 Like

This is exactly the reason I went for a guitar tuner to tighten the belt. This is still in place, required no modifications, and actually works perfectly. I’ll be putting a more slimline version on all belts.

1 Like

I’m keen to see how that evolves.

Looking at your videos on chatter, the early ones are almost certainly due to the very long cutter you were using.

Really? The bits were just 2-1/2" long, with 3/4" in the collet.