I’ll try and write something up a bit better, but here’s the code. Beware, this is really really really really really bad code written at the workbench that was the definition of “keep throwing stuff at the wall and see if it sticks”. I really need to refactor.
Also, happy to collaborate on this if anyone is interested. @Julien I took some inspiration from your pendant code to get this thing running!
My prototype setup has a joystick and an MPG connected to an Arduino Pro Micro. You either use one mode or the other. There’s a button and OLED screen to change the axis for the MPG and step distance.
I find myself using the Joystick to get roughly where I need and then switch over to the MPG to quickly dial it in.
Entrypoint (mainly for processing lines over USB from the Arduino):
Joystick Code:
This method doesn’t use \x85directly from the pendant for cancelling the jog, it uses a custom cncjs jogCancel command that is sent only after cncjs’s feeder is empty:
This statement should be in the header of pretty much all the code I write
Also the “I really need to refactor” is my favorite self dilusional thought too
Great job on the prototype ! There are a few more things I’d like to discuss, so I’ll fork this thread to stop hacking Dan’s
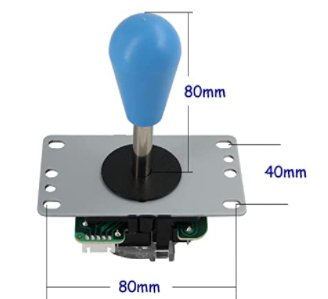
so @mingle or @theworkshope, would you mind sharing the reference of that joystick you got ? My local Amazon search came empty. I have a few spare ones like those,
but yours looks like it’s much better (and does not look like an arcade button)
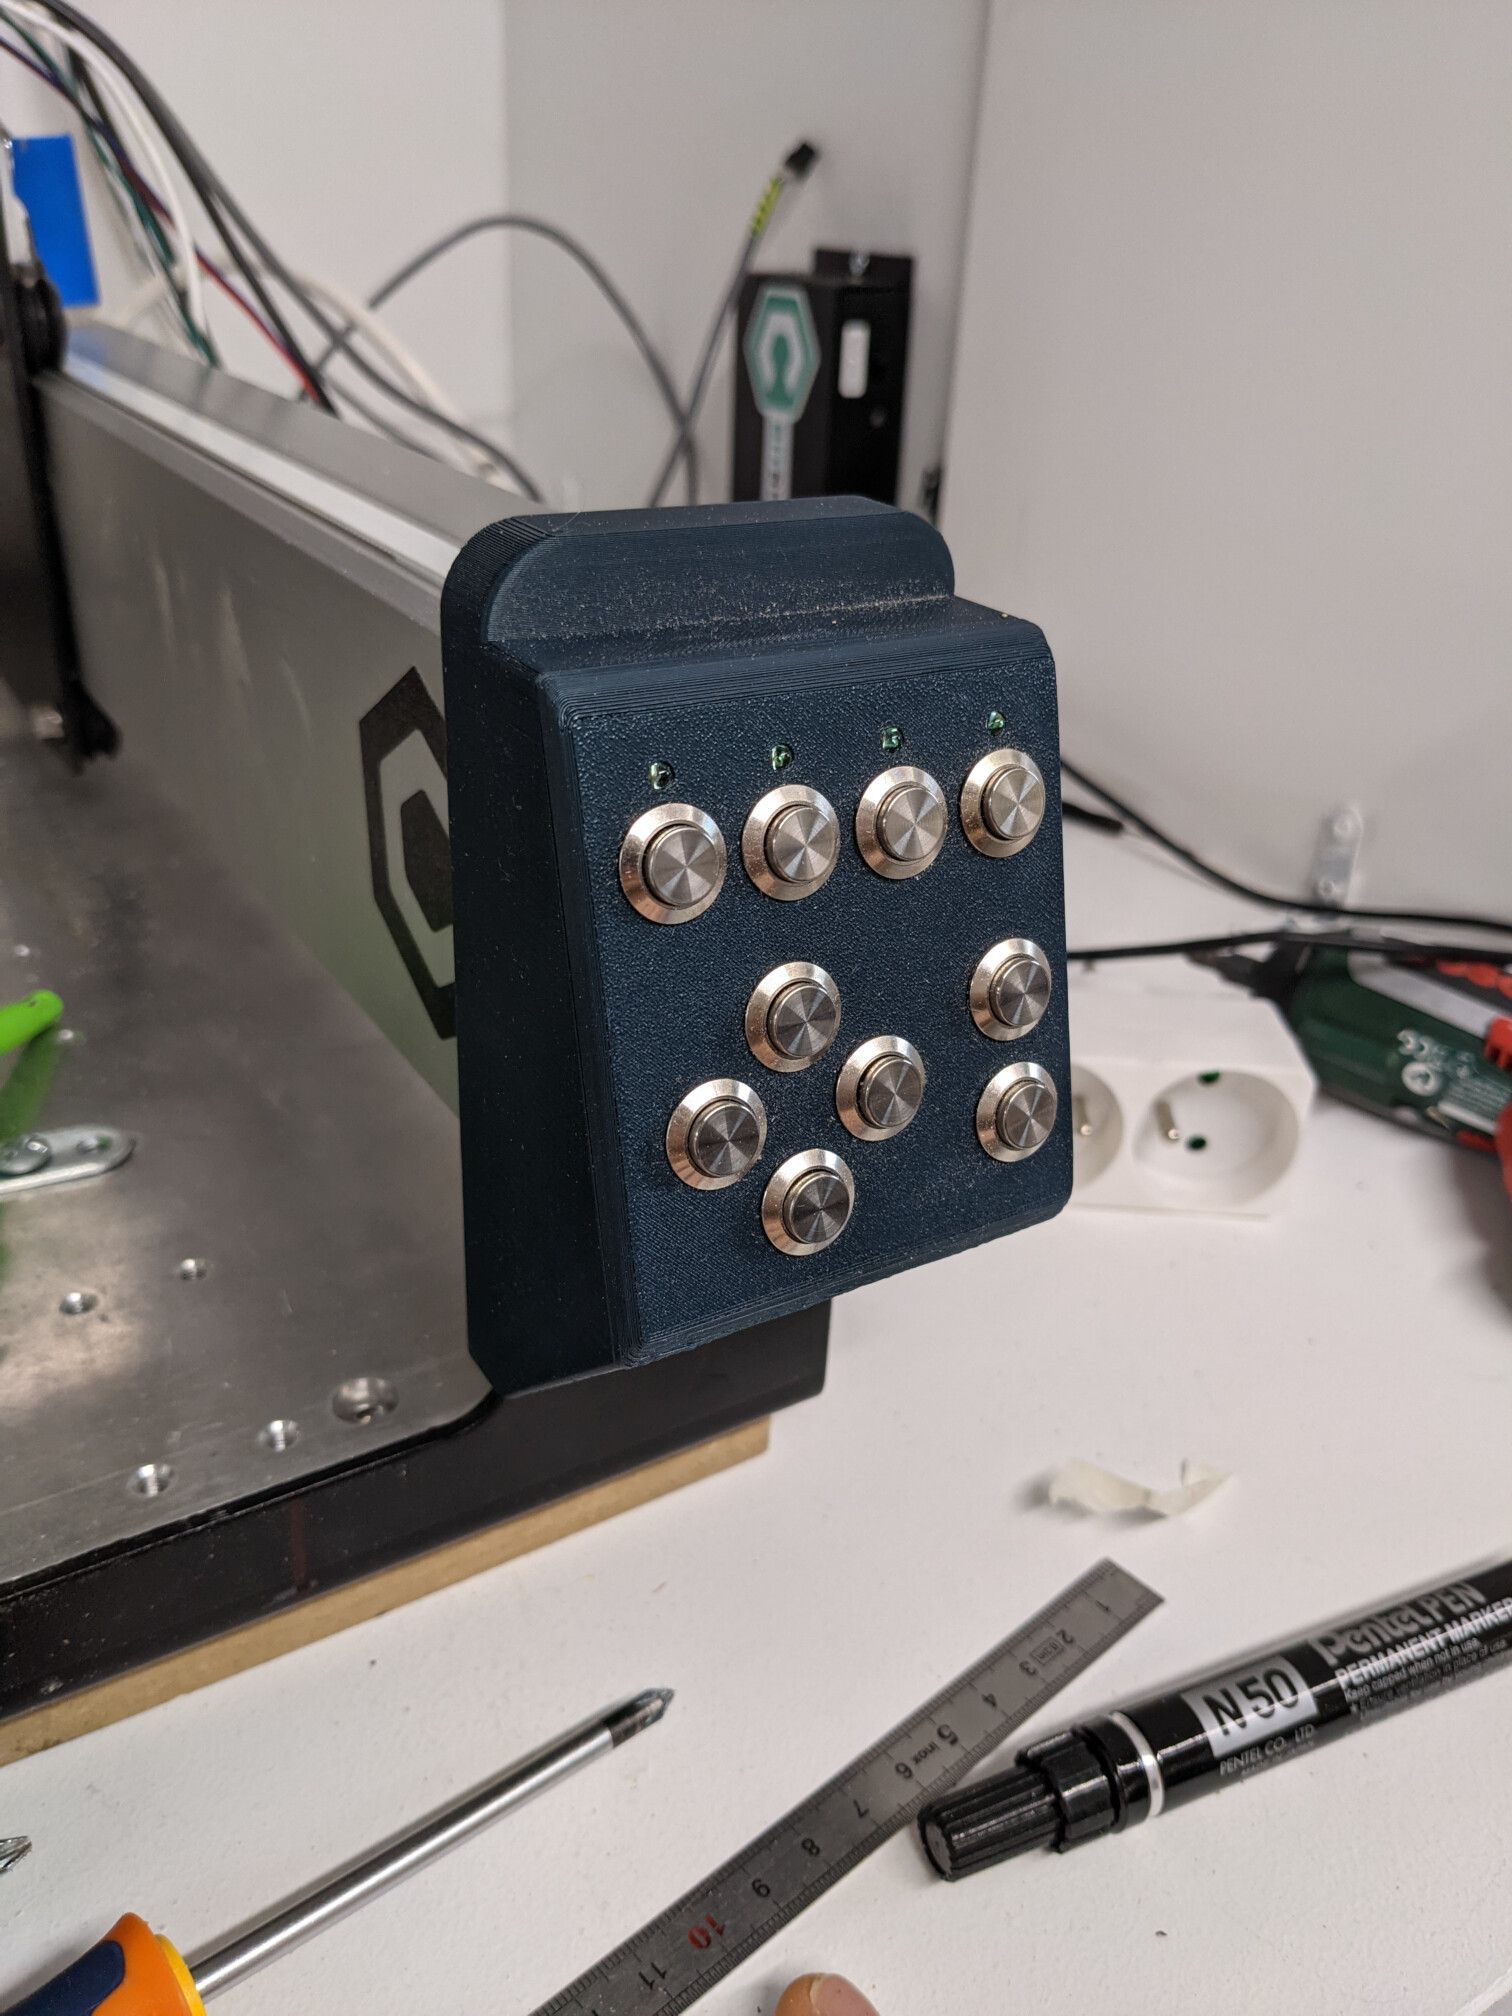
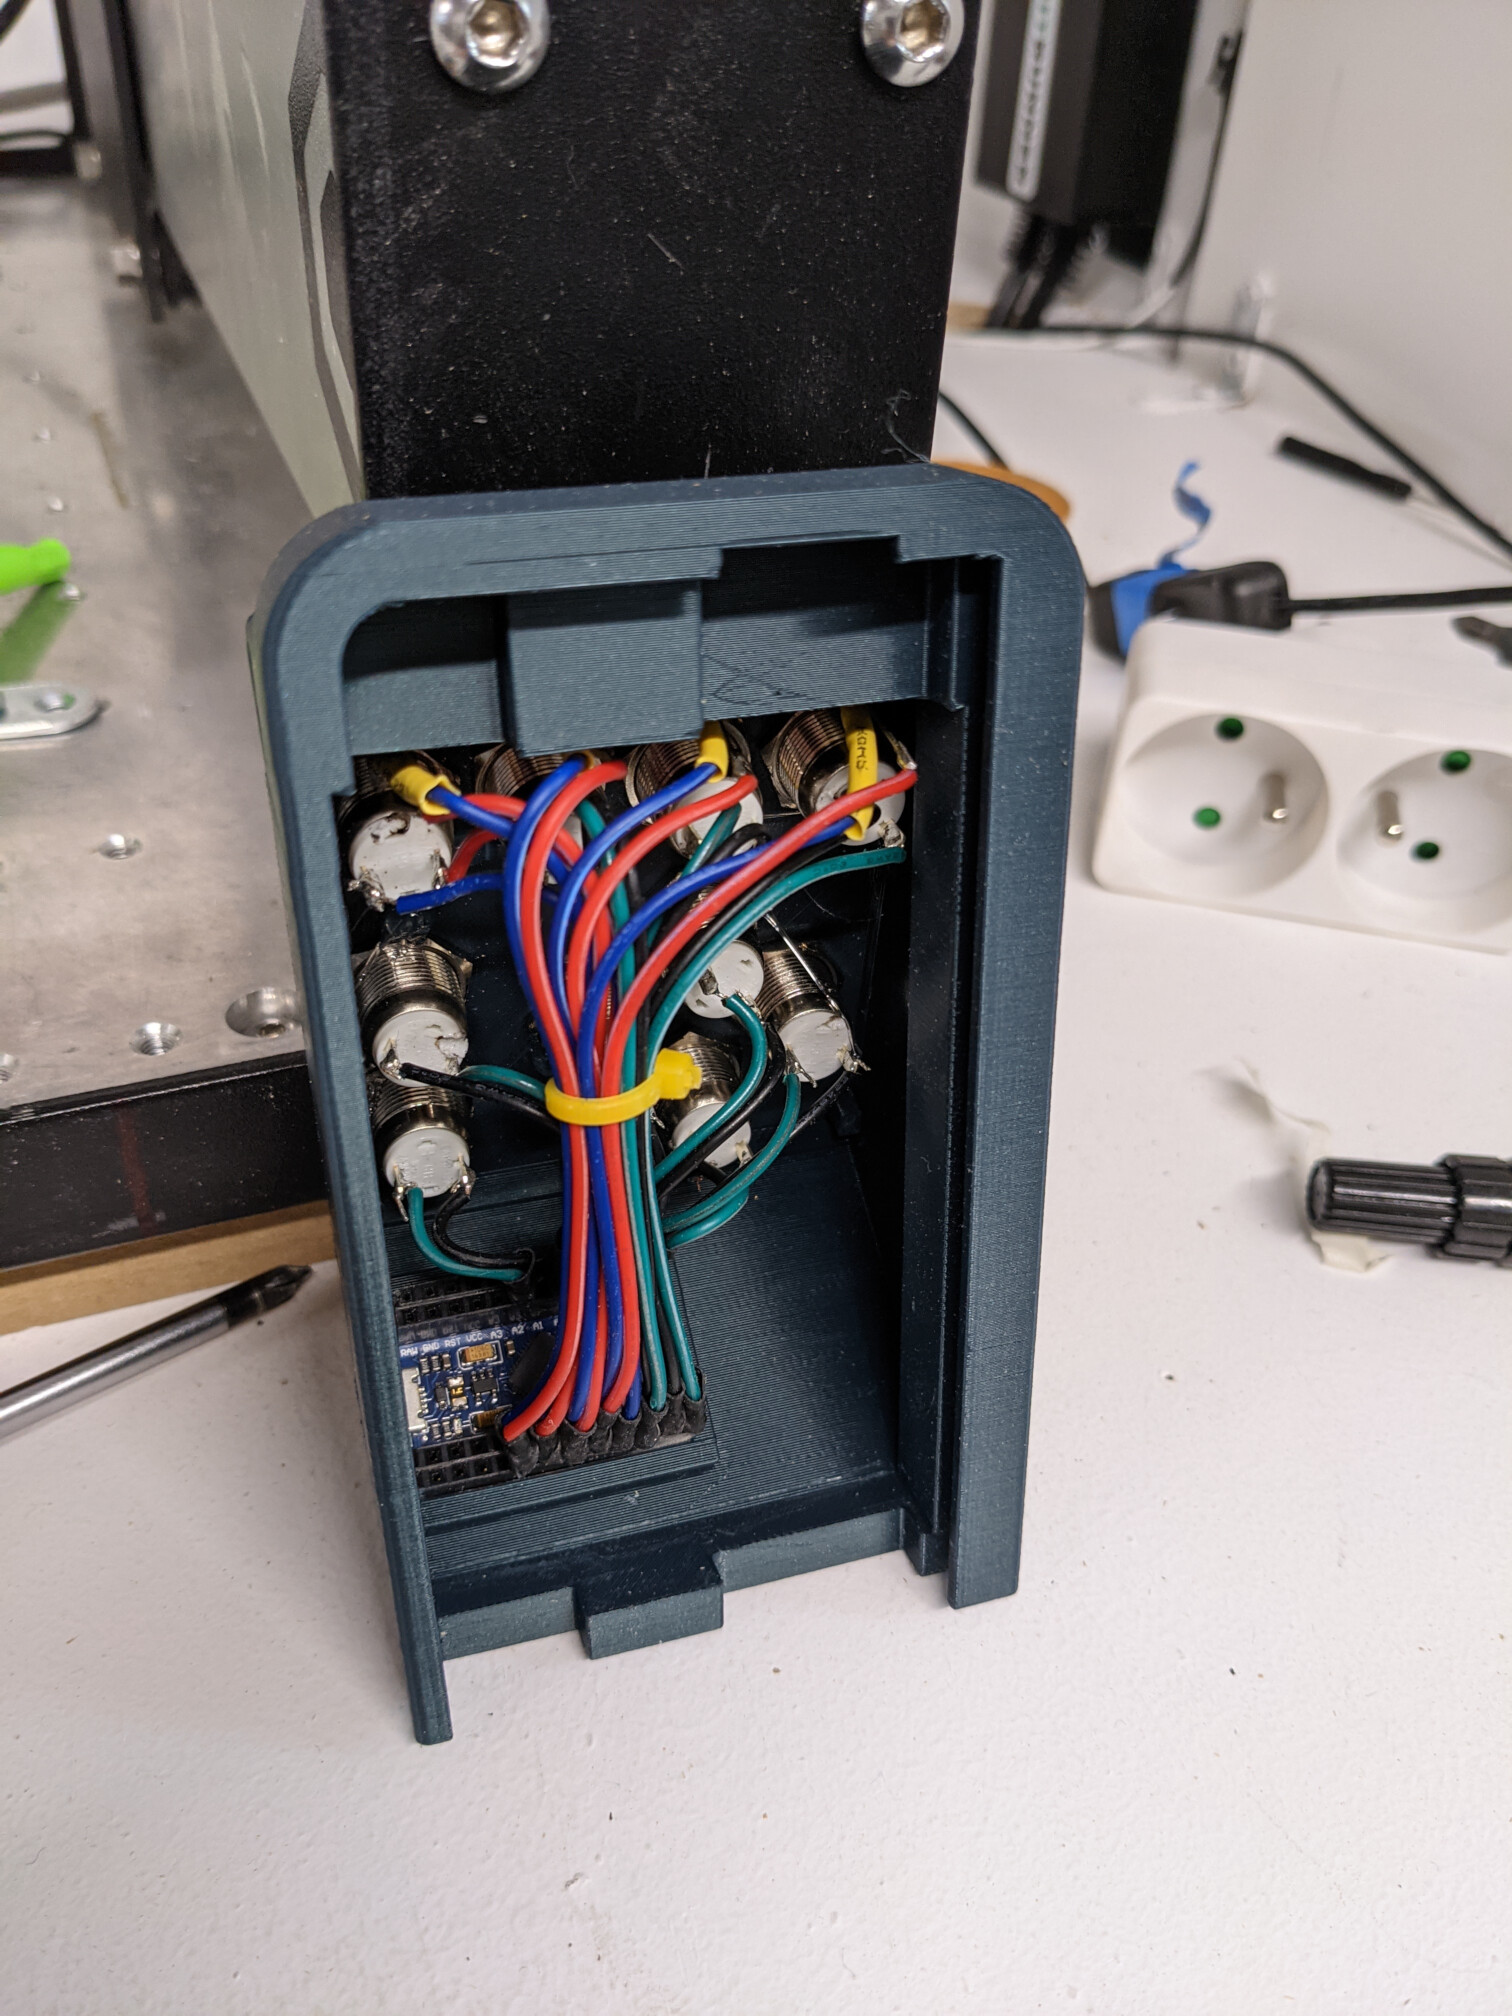
Gotta love the Pro Micro and its ability to emulate a keyboard. Sometime ago I did this prototype:
The 3D printed case is still not as snug against the plate as I’d like it to be, wiring is a nightmare, pushbuttons are too tall, but I think that I have found the location for controls that I feel comfortable using. I have tested a variety of joypads, keypads, sitting next to / in front of the machine, and for me it does not feel quite right and I ended up concluding that I want my controls on the machine itself.
Anyway, @mingle thanks for sharing the code (Arduino + pendant), as soon as I start working again on that keypad there is a good chance I’ll reuse some of this.
I used the JH-D400X-R4. There are others with fewer degrees of freedom that will come up with similar numbers, about $12-20 USD seems to be the going rate.
It’s the simplest microcontroller out there really, so if you decided to go down that road, it would boil down to downloading the arduino software environment, connect to the arduino over USB, load a program, flash it, done. Actually writing code is a bit more involved, depending on your skills, but still really easy
Mmmmm!!! But what if I made my enclosure look like an old school Arcade… then what??? Dress it up with decals and retro art… Ok I need to stop before I talk/think my way into this idea.
what would it take to make it work? the joystick? and what else?
if I’m going to do this, I think I’m going to need some advice, but I want to learn. @Julien are you ready?
Just checking, are you using CNCjs ? (asking the obvious question as this is a CNCjs pendant after all)
It depends if you’d like to replicate @mingle’s fancy control box, with jog dial, integrated display and all.
For a simpler prototype, just the joystick, an Arduino Pro Micro (not any other kind), and possibly some breadboard for prototype wiring.
As long as you don’t tell anyone I pushed you down that rabbit hole, we’re ok and I’ll support you along the way
Arduino is seriously fun, so don’t go complaining if you end up spending 3 months of your life hacking little arduino blinky LED projects rather than milling parts
If you do start from scratch and experiment with this, this could be the opportunity for a nice little tutorial thread.
I don’t use CNCjs at the moment because I don’t want to use it. But now, it can be interesting to start using it.
I don’t think to make a complicated dashboard, a joystick is the main part, to be able to move the machine on the three axes. It’s easier than with a keyboard or on my touch screen.
after I don’t know if I need buttons to differentiate the axes… or different speed settings…
I’m novis on cncjs and with arduino, so why not create a tutorial, but you have to learn and understand already… but with help…
Allright. I just did not want to push you even further away from your current CNC process
Me, I have come to the conclusion that I like buttons replicating the different speed settings. I’ll typically need “fast” speed for the initial jog, then “1mm” to close in on the zeroing spot, and finally “0.1mm” step to manually set zeroes (whenever I do that)
Yeah, I meant we could contribute to a thread together where you ask for support along your learning path, we discuss it as you go, and it may be of interest for other folks who always wanted to try their hand at Arduino but never dared to jump in the water.
Just a minor correction, you can also use an Arduino Leonardo it’s just physically larger. The important part is anything with a 32u4 for the HID features (special processor needed for appearing as a keyboard or joystick etc).
A tutorial would be fun to put together. I guess we’d be targeting limited starting knowledge.
That’s the great thing about software, if you are okay with a little bit of ambiguity about operating mode, you could do it all with a joystick. Basically:
a) joystick in the middle, do nothing
b) start to push joystick forward, go into slow mode and start spamming the drive in that direction button
c) push stick further forward, temporarily hit button to go into next speed mode, and then resume spamming the drive in that direction button
d) repeat process for the three or four speeds possible
e) releasing the stick at any time stops spamming the driving direction button and thus motion stops as well
You can use that logic and also the speed ramp down complement of it for each axis. The only thing is I’m not sure if you can combine directions if you’re just emulating a keyboard versus actually sending g code commands. The safe assumption would be that you are controlling one axes at a time manually, which would work even in carbide motion afaik.
thank you, I understand better. Even when adjusting one axis at a time, it is more “fluid” than with a mouse, or a touch screen.
and as @Julien imagines, the best is to have the joystick on, or near the cn.
@theworkshope after your experience, what do you recommend as joystick, arduino board, button …
Correct, for CNCjs it would be a better experience, for Carbide Motion it would be the same as a keyboard, but with a different tactile feel. All the “smart” stuff happens in the Arduino, aka behind the scenes. The target software just thinks it’s receiving manual keyboard commands.
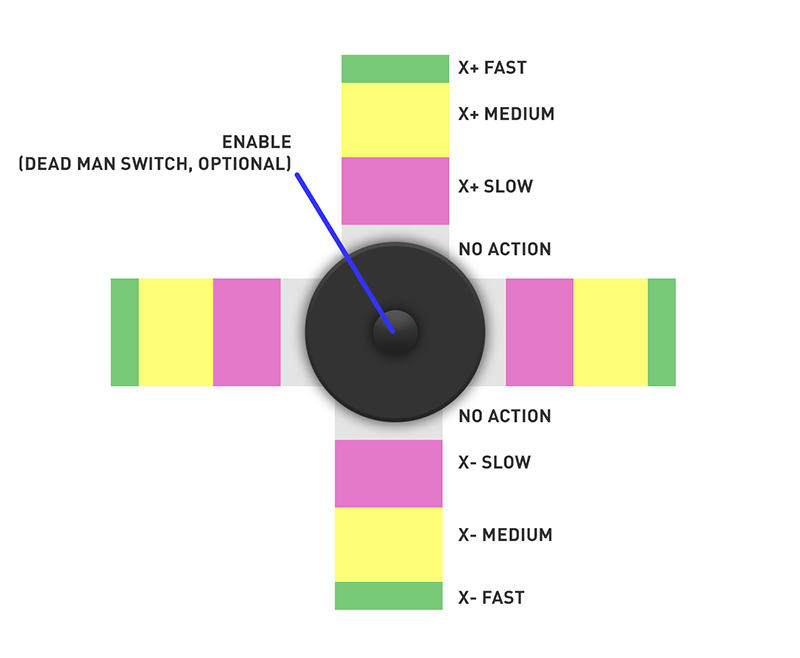
What I mentioned earlier, but graphically looking top down on the joystick. This is one way of making both the axis (is X active or Y exclusively?) and speed decisions. If you’re in a colored area you are broadcasting that axis direction at that speed only. Moving into a different color means a transition behavior happens in the code where a new speed/step size is sent, before resuming direction keypress. Only one axis is sent at a time for smooth driving.
If you push the stick into the white areas, nothing is sent because you haven’t clearly chosen a particular axis. I did some other things here like making the slower speeds nice wide regions of joystick motion, and the fast speed tiny so you don’t accidentally trigger it. You have to mash the stick to the extreme position to get fast motion (which is satisfying anyway )
You can do Z the same way, but given the shorter travel distance might constrain it to only 1 or 2 speeds.


 )
)