It’s been a few months since my trusty SO3 found a new home (at my nephew’s) and a few weeks since I upgraded to the XXL Pro, I figured I would share a few thoughts and pics with the community, just because.
(TLDR; I enjoy the XXL Pro a lot)
- I don’t quite qualify as a newbie anymore, but the excitement and the fun I had building the machine were the same as on day one.
- The assembly reminded me of when I built my Prusa Mk3 3D printer, with each step conveniently coming with its own box and labelled bag. Only the gummy bears are missing, but it took a shorter time to assemble the Pro XXL than the Mk3, so sugar levels did not have time to drop anyway.
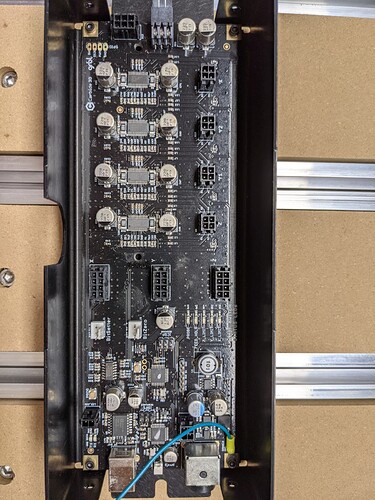
- I like the controller, I initially thought “that’s a lot of PCB real estate” but when the moment came to plug everything in there, it made a lot of sense to have large clearance between connectors for my clumsy fingers. My one grudge would be the Z limit switch connector location, the lock part of the connector on the cable side faces the enclosure wall, so it’s not easy to UNplug the connector (not that one ever has to, but I couldn’t resist a little mod, more on this below)
-
Squaring: after following the assembly instructions carefully, my machine turned out to be perfectly square, no further adjustment needed. Machined extrusions did their job, and I sure don’t miss the old SO3 steel plates.
-
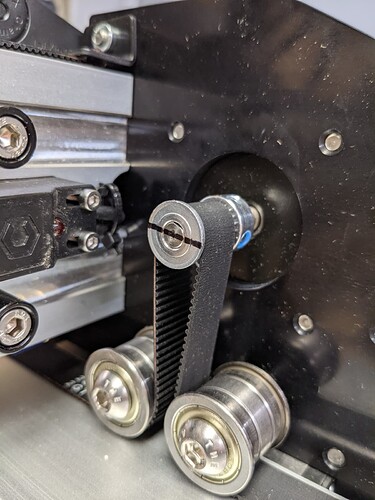
One cannot spent time on this forum and not become a little set-screw-paranoid, so of course during the assembly I checked the three pulleys, made sure the setscrews were all aligned correctly, used loctite and (re)tightened them, and then used a marker to make a ProSlippageDetectorDeluxe2021™
(yes, that’s about 10x more blue loctite than I should have used, but that set screw is not going anywhere  )
)
- Surfacing: I did not grab pictures but basically I used a variation of @SLCJedi’s method:
- number the 10 slats
- remove all slats
- install slats 1 and 10 side by side in the center slots.
- run a surfacing toolpath covering the full width of the two slats, half the length, down to almost the level of the aluminium rails. 1 and 10 will be the extreme left and right slats, so they need to be thinner/lower than the center ones
- flip the two slats front to back, rerun the surfacing job to do the second half.
- reinstall 1 and 10 in their slots.
- reinstall 2 to 9 in their slots
- draw pencil marks all over the surface of 2 to 9
- run a surfacing pass across half the length of 2 to 9, just enough that all pencil marks are gone.
- flip 2 to 9, rerun the shallow surfacing pass on the remaining half.
- profit.
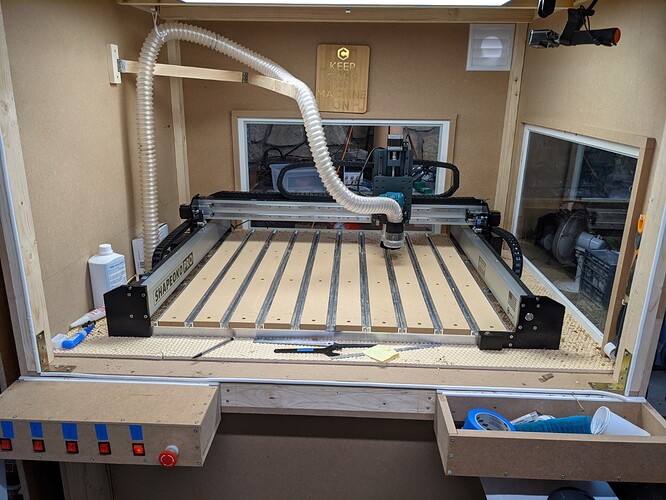
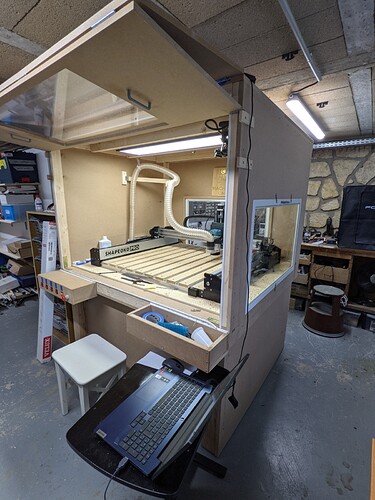
While waiting for the Pro to arrive I built an enclosure, using the lessons learned from building several ones earlier and failing in various interesting ways.
-
150cm wide, 130cm deep, which is as large a footprint as I could accomodate in the shop, and after using it for a while it turned out that this is the perfect size for me, just enough clearance on the sides for easy access, and enough clearance on the front that the front of the dust shoe will never collide with the front door (if someone never made that mistake, I’d like to meet him)
-
custom torsion box, mounted on HEAVY feet, braced all around. This time around I figured my old “use an Ikea kitchen table and bolt it to the wall” trick would not suffice. I can stand on the table and not feel it move/bend at all, so that should do it. Anyway, the Shapeoko’s hybrid table goes a long way to minimize the requirements on the sturdiness of the underlying table.
-
100cm tall (above the table), again I made it about as high as the ceiling would allow, I know from experience that the ceiling of an enclosure is NEVER high enough. Since I still use tape & glue as my main workholding method, for large pieces I now tend to get on top of the stock, inside the enclosure, to apply firm pressure. And no, you won’t get a picture of me doing that

-
Large (and powerful) LED panel mounted on the ceiling, better than my previous LED strip mess.
-
Removable window panes on the right side and back side of the machine. Oh boy am I happy I did this, this turned out to be VITAL both for visibility and maintenance/clean-up of the machine. The removable back window will also be necessary for tiling projects, this is also why I did not put the back of the enclosure against a wall this time.
-
control boxes are WIP but I found a layout I like:
- Power control on the left (Estop, switches for light, CNC, router, dust collection, and air blast)
- (future) jog panel on the right, more on this below
- NOTHING in the middle, to preserve access to the machine
-
Folding doors that open vertically, and park high enough that I can still walk under them without banging my head. I don’t like regular doors, they seem to always be in the way of where I want to go
A minor fail was that I did not really anticipate how heavy two large panes of 18mm MDF and acrylic window would be, so the folding doors double up as a fitness machine to work on my upper body strength…
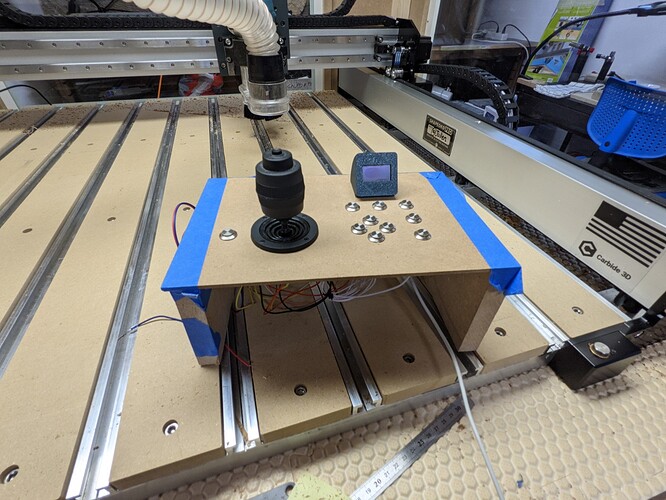
- I started working on a joystick-based jog panel too (technical details in this thread, I’m basically forking @mingle’s code). Ugly prototype below, eventually this panel will go on the front right of the enclosure.
The button on the left of the joystick will be used to trigger hardware feedhold. I procured a prewired microfit 3.0 pin, inserted it in the right slot (“F”) of the Z limit switch connector, plugged the GND wire in a nearby pin header, and it works as expected. Feedhold button is the nearest one to my right, and E-stop is the nearest one on my left, when sitting in front of the machine/computer. And yes, it’s only been a few weeks but I already had to smash that E-stop button once. I called it a “validation test” obviously, rather than me doing something silly. PSA: V-carving does not work as well when the router is not started…sigh.
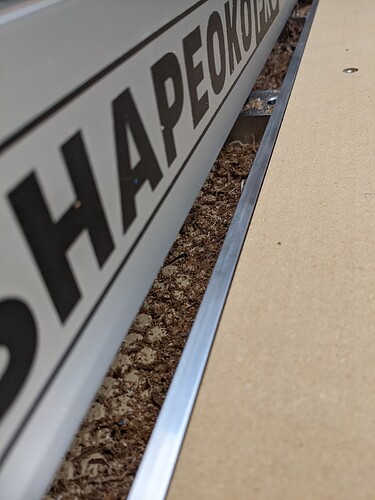
One thing I think I’ll do next is add side fences, because the chips that fall in there are not easy to vacuum:
In most cases the Sweepy will prevent this from happening anyway, BUT recently I have been milling thick stock with a long endmill (more than 2" stickout), and in that situation the Sweepy cannot be lowered enough to be efficient. I hope @Luke will come up with a Z-independent dust shoe to complement the Sweepy.
Overall, you all know I am positively biased but it’s been a blast building and operating this machine so far. I had some doubts that the XXL format would be almost “too much” for the projects I usually do (no trivet-related comments please  ), but instead I find myself making larger and larger projects with this newfound capacity. The HDZ is just as great as it was on my SO3. If I’m being honest, I really could have stayed with the Z-plus, but it’s one of those things where once you have had a taste of something great, it’s difficult to downgrade. Like using a trim router again when you enjoyed the quietness of a water-cooled spindle. I know what’s on my list for Santa this year…
In the meantime, I’ll try and fill as many bucket-o-chips as I can, to catch up on my very long list of projects I had on the backburner.
