First, I categorized this in “How to”, I think most of my statements are “How not to” and looking for advice ![]()
I am trying out King Plastic Colorcore to make some tiles with lettering for an educational aid for the chemistry classes I teach in the day job.
Colorcore is a three layer HDPE plastic with thin layers (~0.075 inch) on a different color inner core. I am using the nominal 1/4 inch thick (Has a a bit of variability in the thickness).
The parts- These are ion tiles to help show students how to form ionic compounds from the constituent ions. I have made a couple of small sets in wood, (and some experimental large ones to add magnets to in order to put them on a whiteboard in class).
The small sets are about an inch high with the ions engraved in them. The large sets are 3 or 4 times larger (I’m blanking on those dimensions at the moment).
First thing is a design issue-I am trying these in Vectric Desktop rather than CarbideCreate because I figured a way to fake out Vectric to get the superscripts and subscripts (unicode super and sub scripts but having to find the fonts that have that implemented those characters). I guess this would be a feature request: Could Carbide Create have support for superscripts and subscripts in the text function, and being able to mix fonts in the same text block would be nice as well.
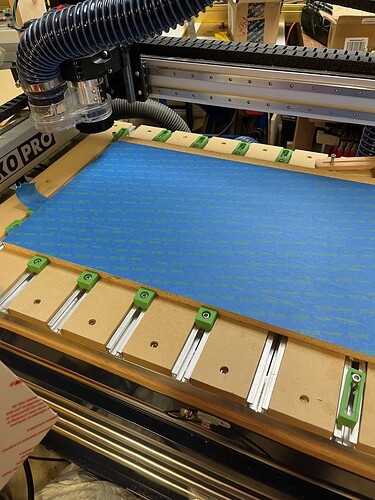
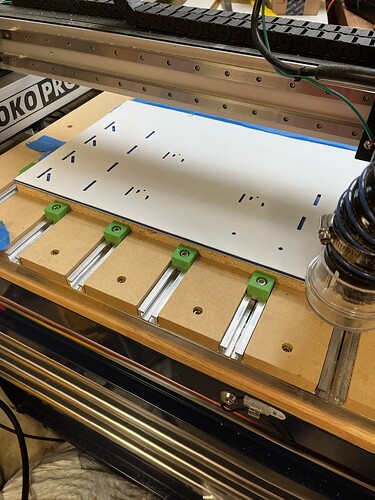
Item two Work Holding - I picked up a piece of particle board at Lowes and cut it into 24x16 pieces. Surface seemed nice and flat when I checked it. I put down the painters tape on both the particle board and the colorcore.
Cyanoacrylate glue on the particle board side, accelerator on the colorcore. Due to the flexibilty of the 1/4 inch colorcore, I didn’t get all the super glue in contact across the whole sheet.
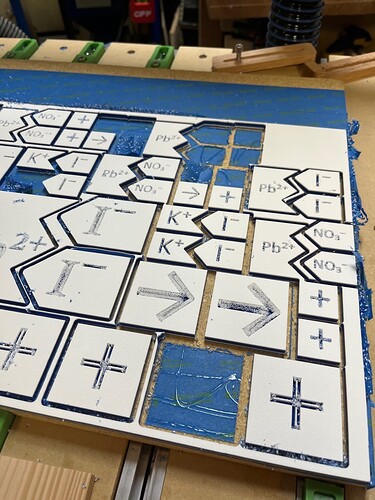
I made the assumption that I could cut all the parts out (without tabs) and really on the superglue/tape combo. As you can see that was not the case.
A number of parts were not in contact with the glue. You can see the untouched glue under the parts that spontaneously detached. I am guessing I need to do tabs for the parts and resign myself to a bit of cleanup. It was also clear that the thickness of the material varied a bit (I tried to set the material thickness to the minimum I measured.
Item three Cutting Small Text in HDPE - Fuzzies and other issues
Tool paths used were Vcarve with Amana 51411-K for clearing (18000 rpm, 60in/min), and a 30 degree Groovee(23000 rpm 60 in/min)( (I figured it was probably the sharpest V-bit I had. And then a perimeter cut going back to the 51411-K
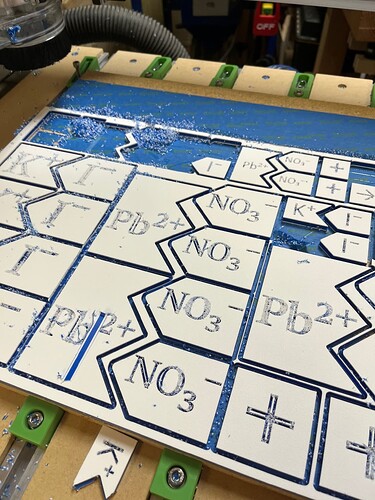
It actually looks pretty good with the O flute (single flute) clearing. But when going to the Groovee I got a lot of fur (fuzzies or whatever).
The Groovee I realize is a three flute (down cut I think) and that might not be optimal for plastic. I did have some dental picks that pulled some of the debris out, but a lot was still in the grooves as you can see from the earlier photos. I did try recutting with a two flute Kyocera 30 deg bit. but it didn’t improve much. (though the problems from the Groovee might have been difficult to fix). So the question is how to fix this without have to have a lot of post processing. A fat font that supports subscripts and superscripts so I can just pocket the text rather than Vcarve…any suggestions? Any recommendations on finer diameter plastic cutting bits? I did look for a single line font thinking that might be the route, but I couldn’t find one that supported the Unicode for super and sub scripts. (Oh I guess I also have issues with setting up the vcarve to clear things out completely)
John


