I really love this theme of puzzles trying to understand and conquer a difficult set of sequences or principals. I have been toying with puzzles for quite some time and have built a few by hand a couple years ago pre CNC, so I thought I would give it a go and design a puzzle for this contest.
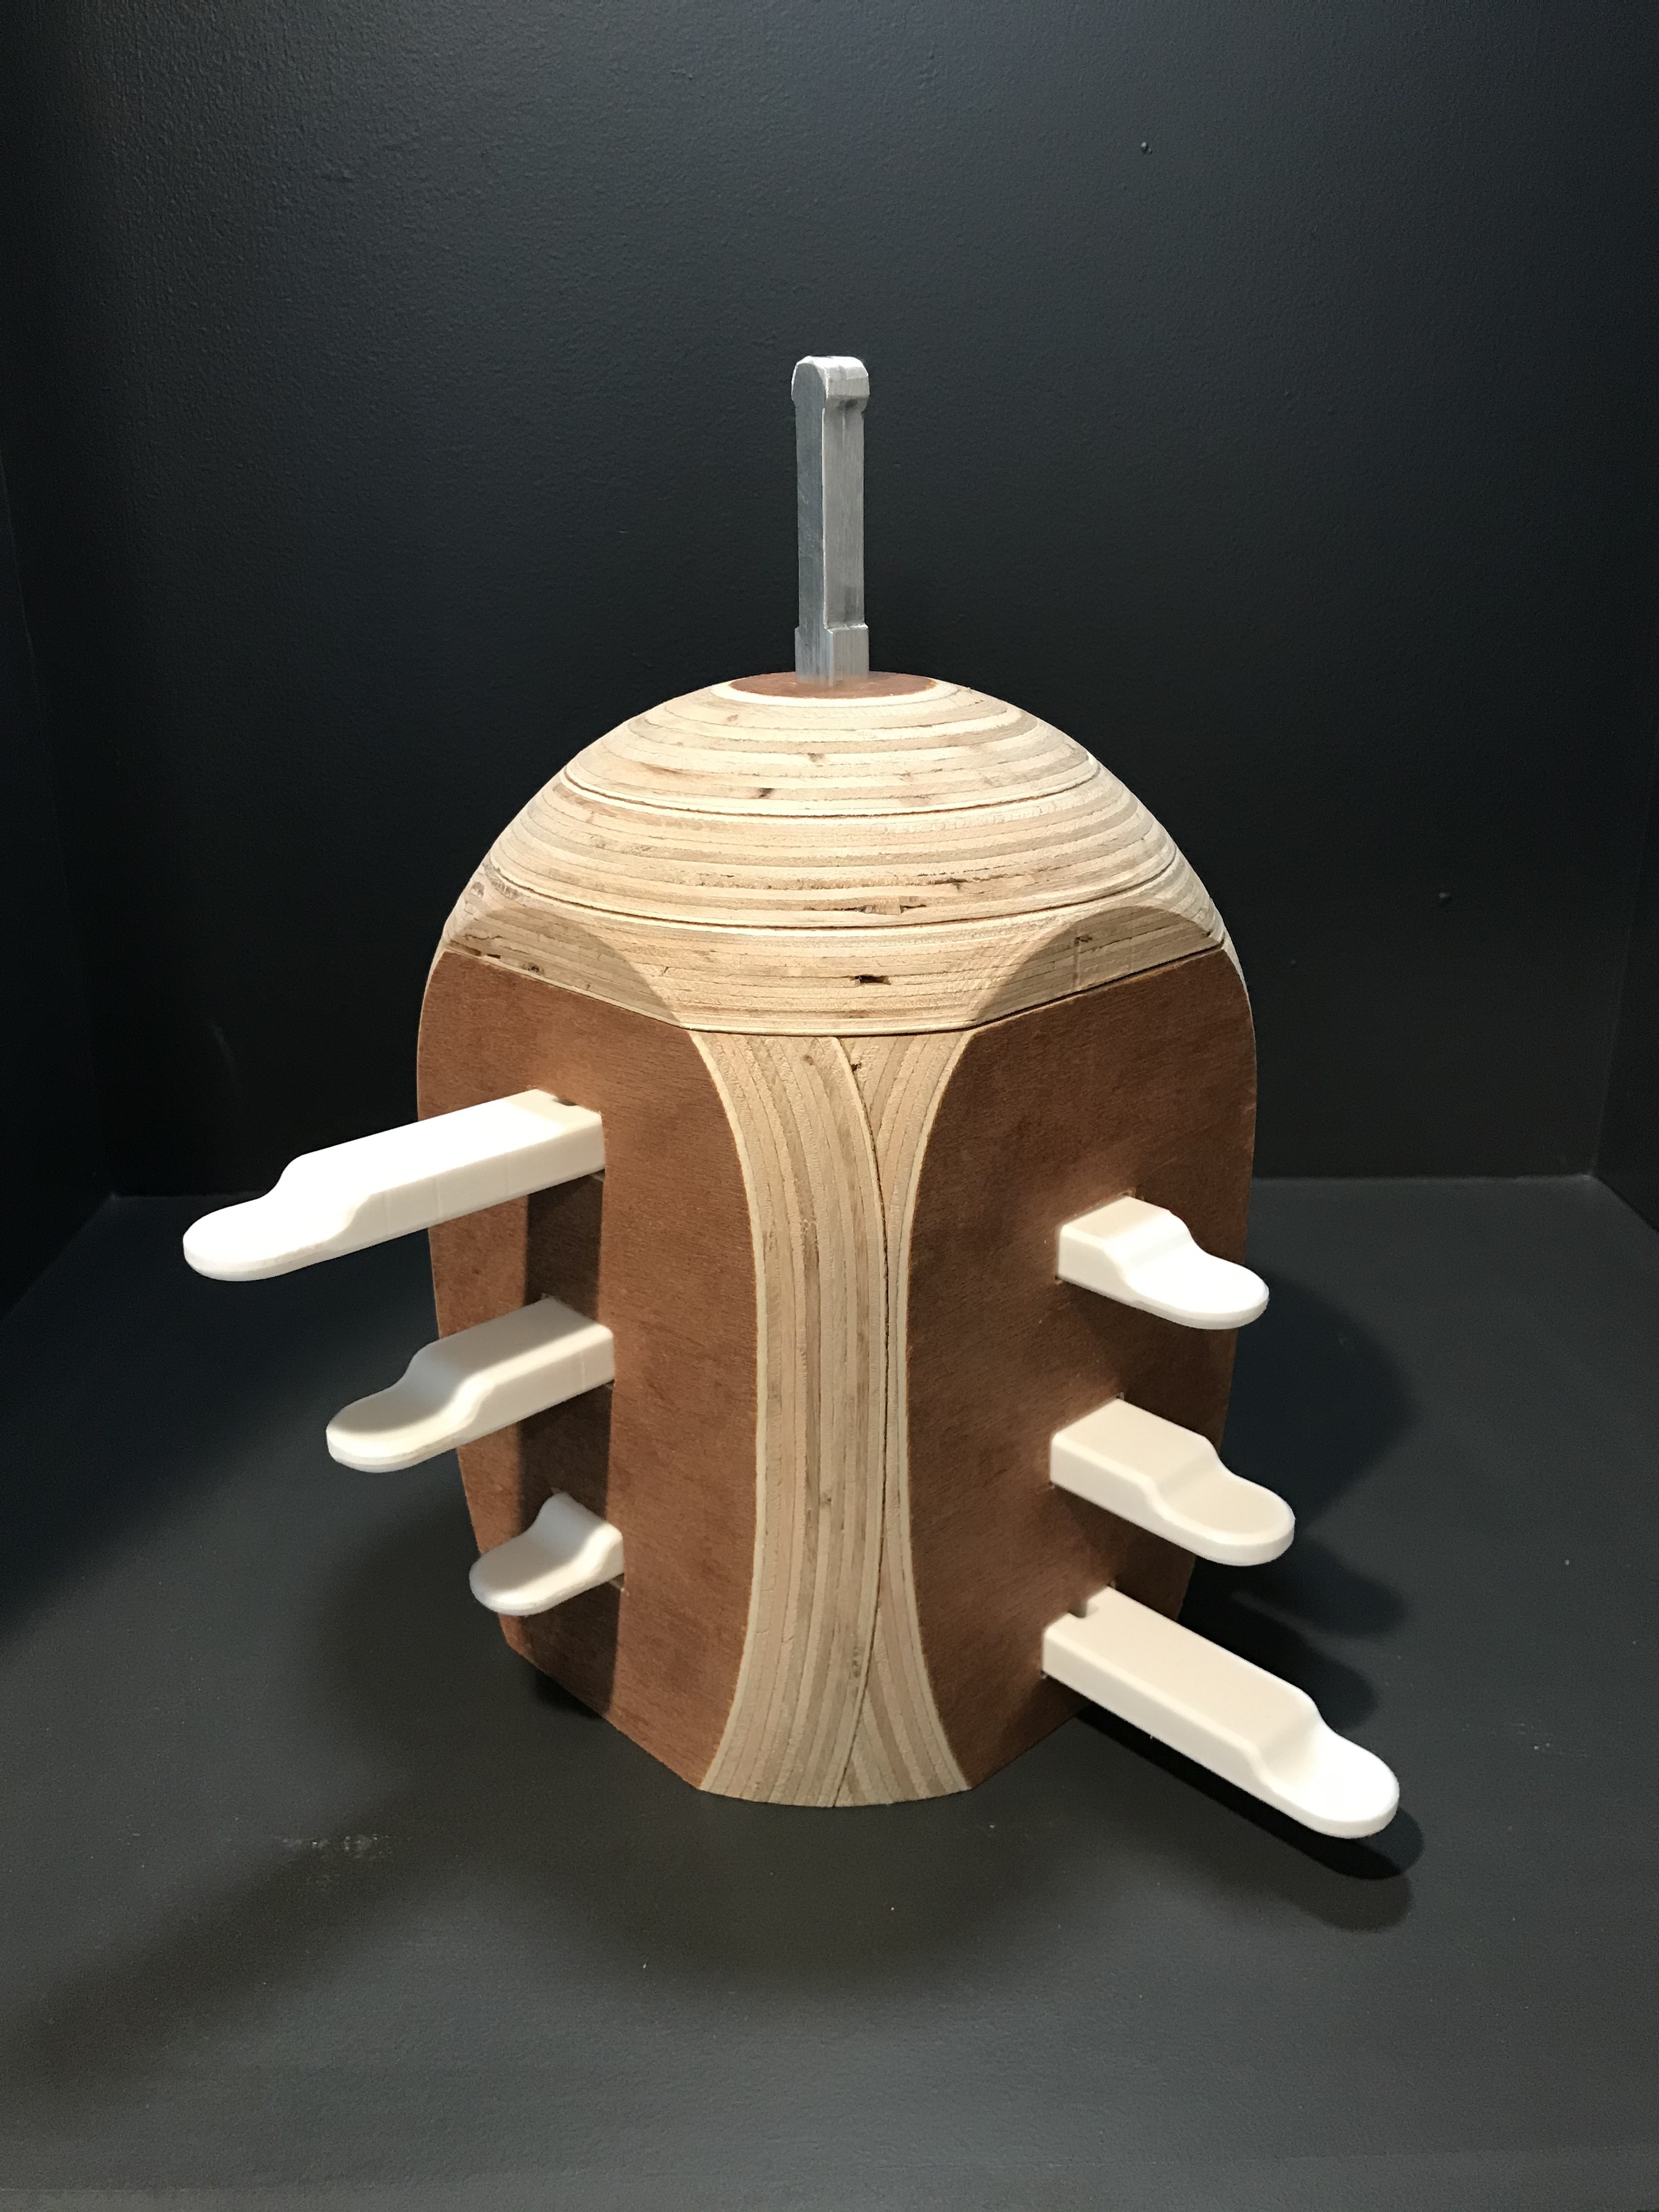
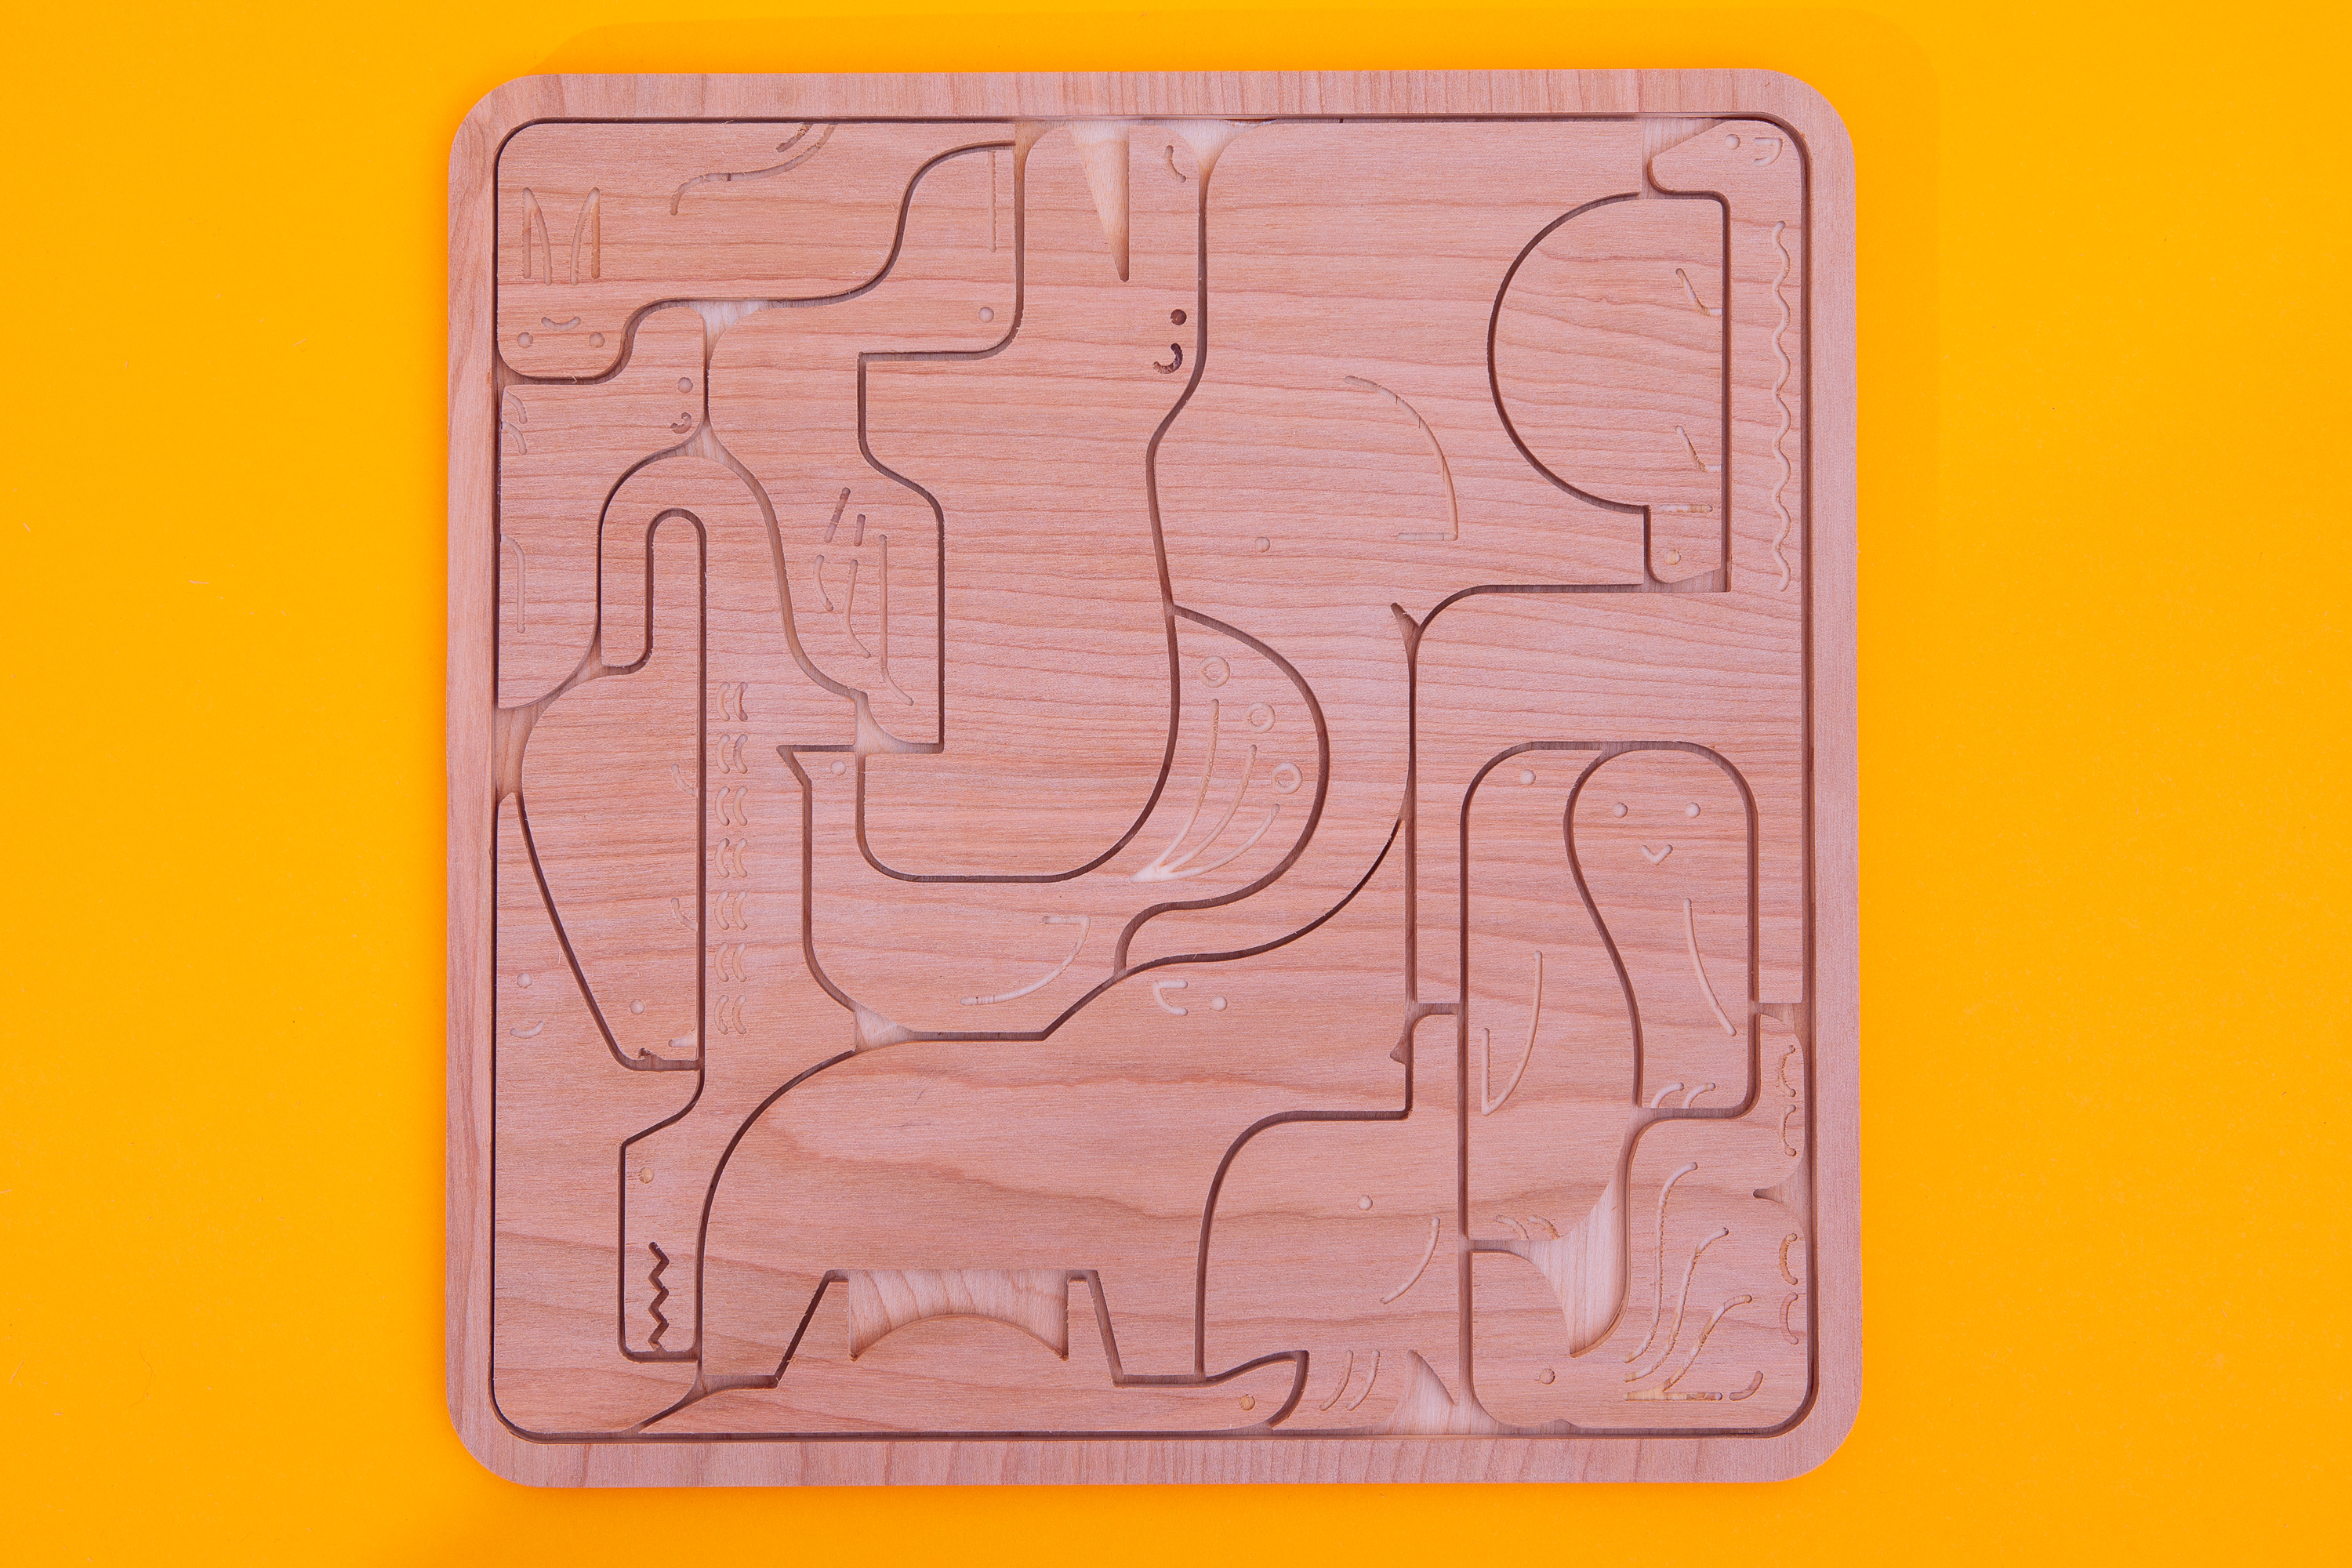
I would like to present “In-between a Rock and a Hard Place!”
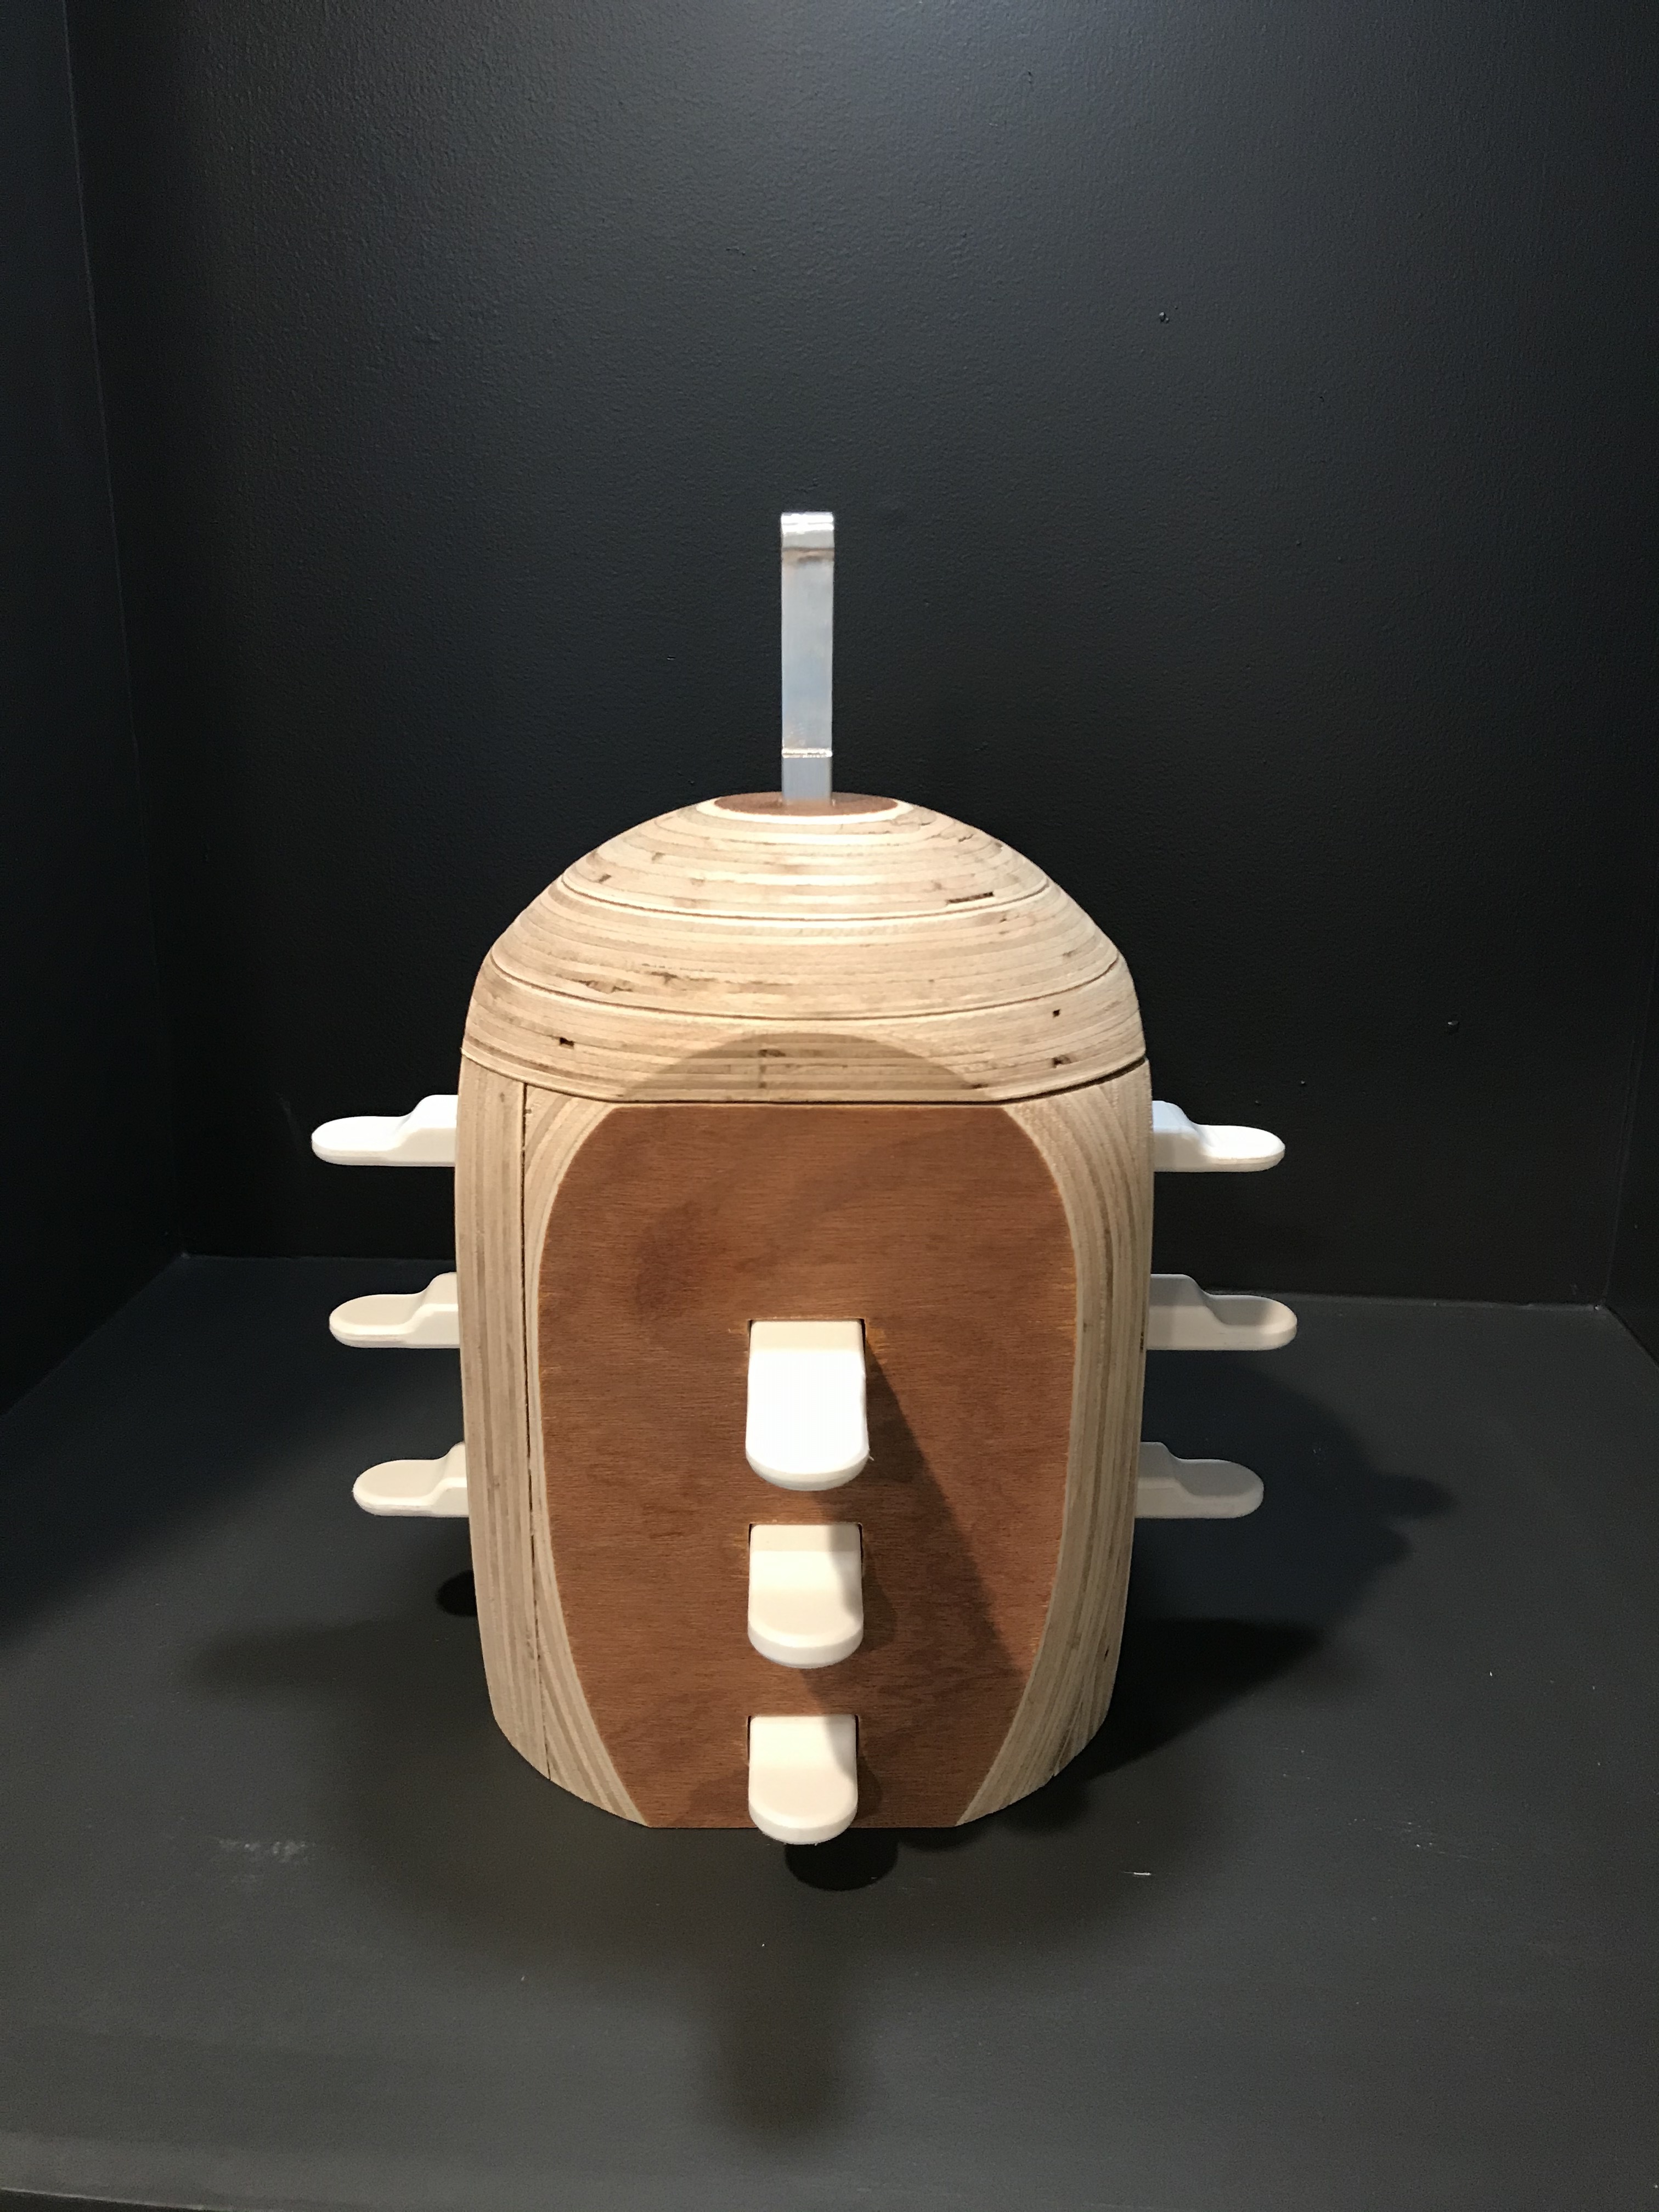
The object of the puzzle is to remove the Key from the stone like Excalibur, by aligning the sliders in the right configuration with a little twist at the end  Check this link for a video to see it in action.
It’s a relatively simple concept although you need to spend some time with it to develop a “feel” for how the sliders move and when they fall in place. It’s kind of like you are controlling the tumblers of a lock to release the key, it also feels like playing jenga too when you are hunting for the block with the least resistance. Once you have aligned the sliders the key will be able to be removed one inch; at which point the key will become stuck again. Then you have to twist the key and the whole top of the puzzle and BOOM the key is able to be removed completely. I love that It makes a really satisfying sound when you remove the key. All of the sliders can then be removed and mixed around to create a new sequence. I also like the fact that once you solve the puzzle you get to see in greater detail all the machining I did on each piece.
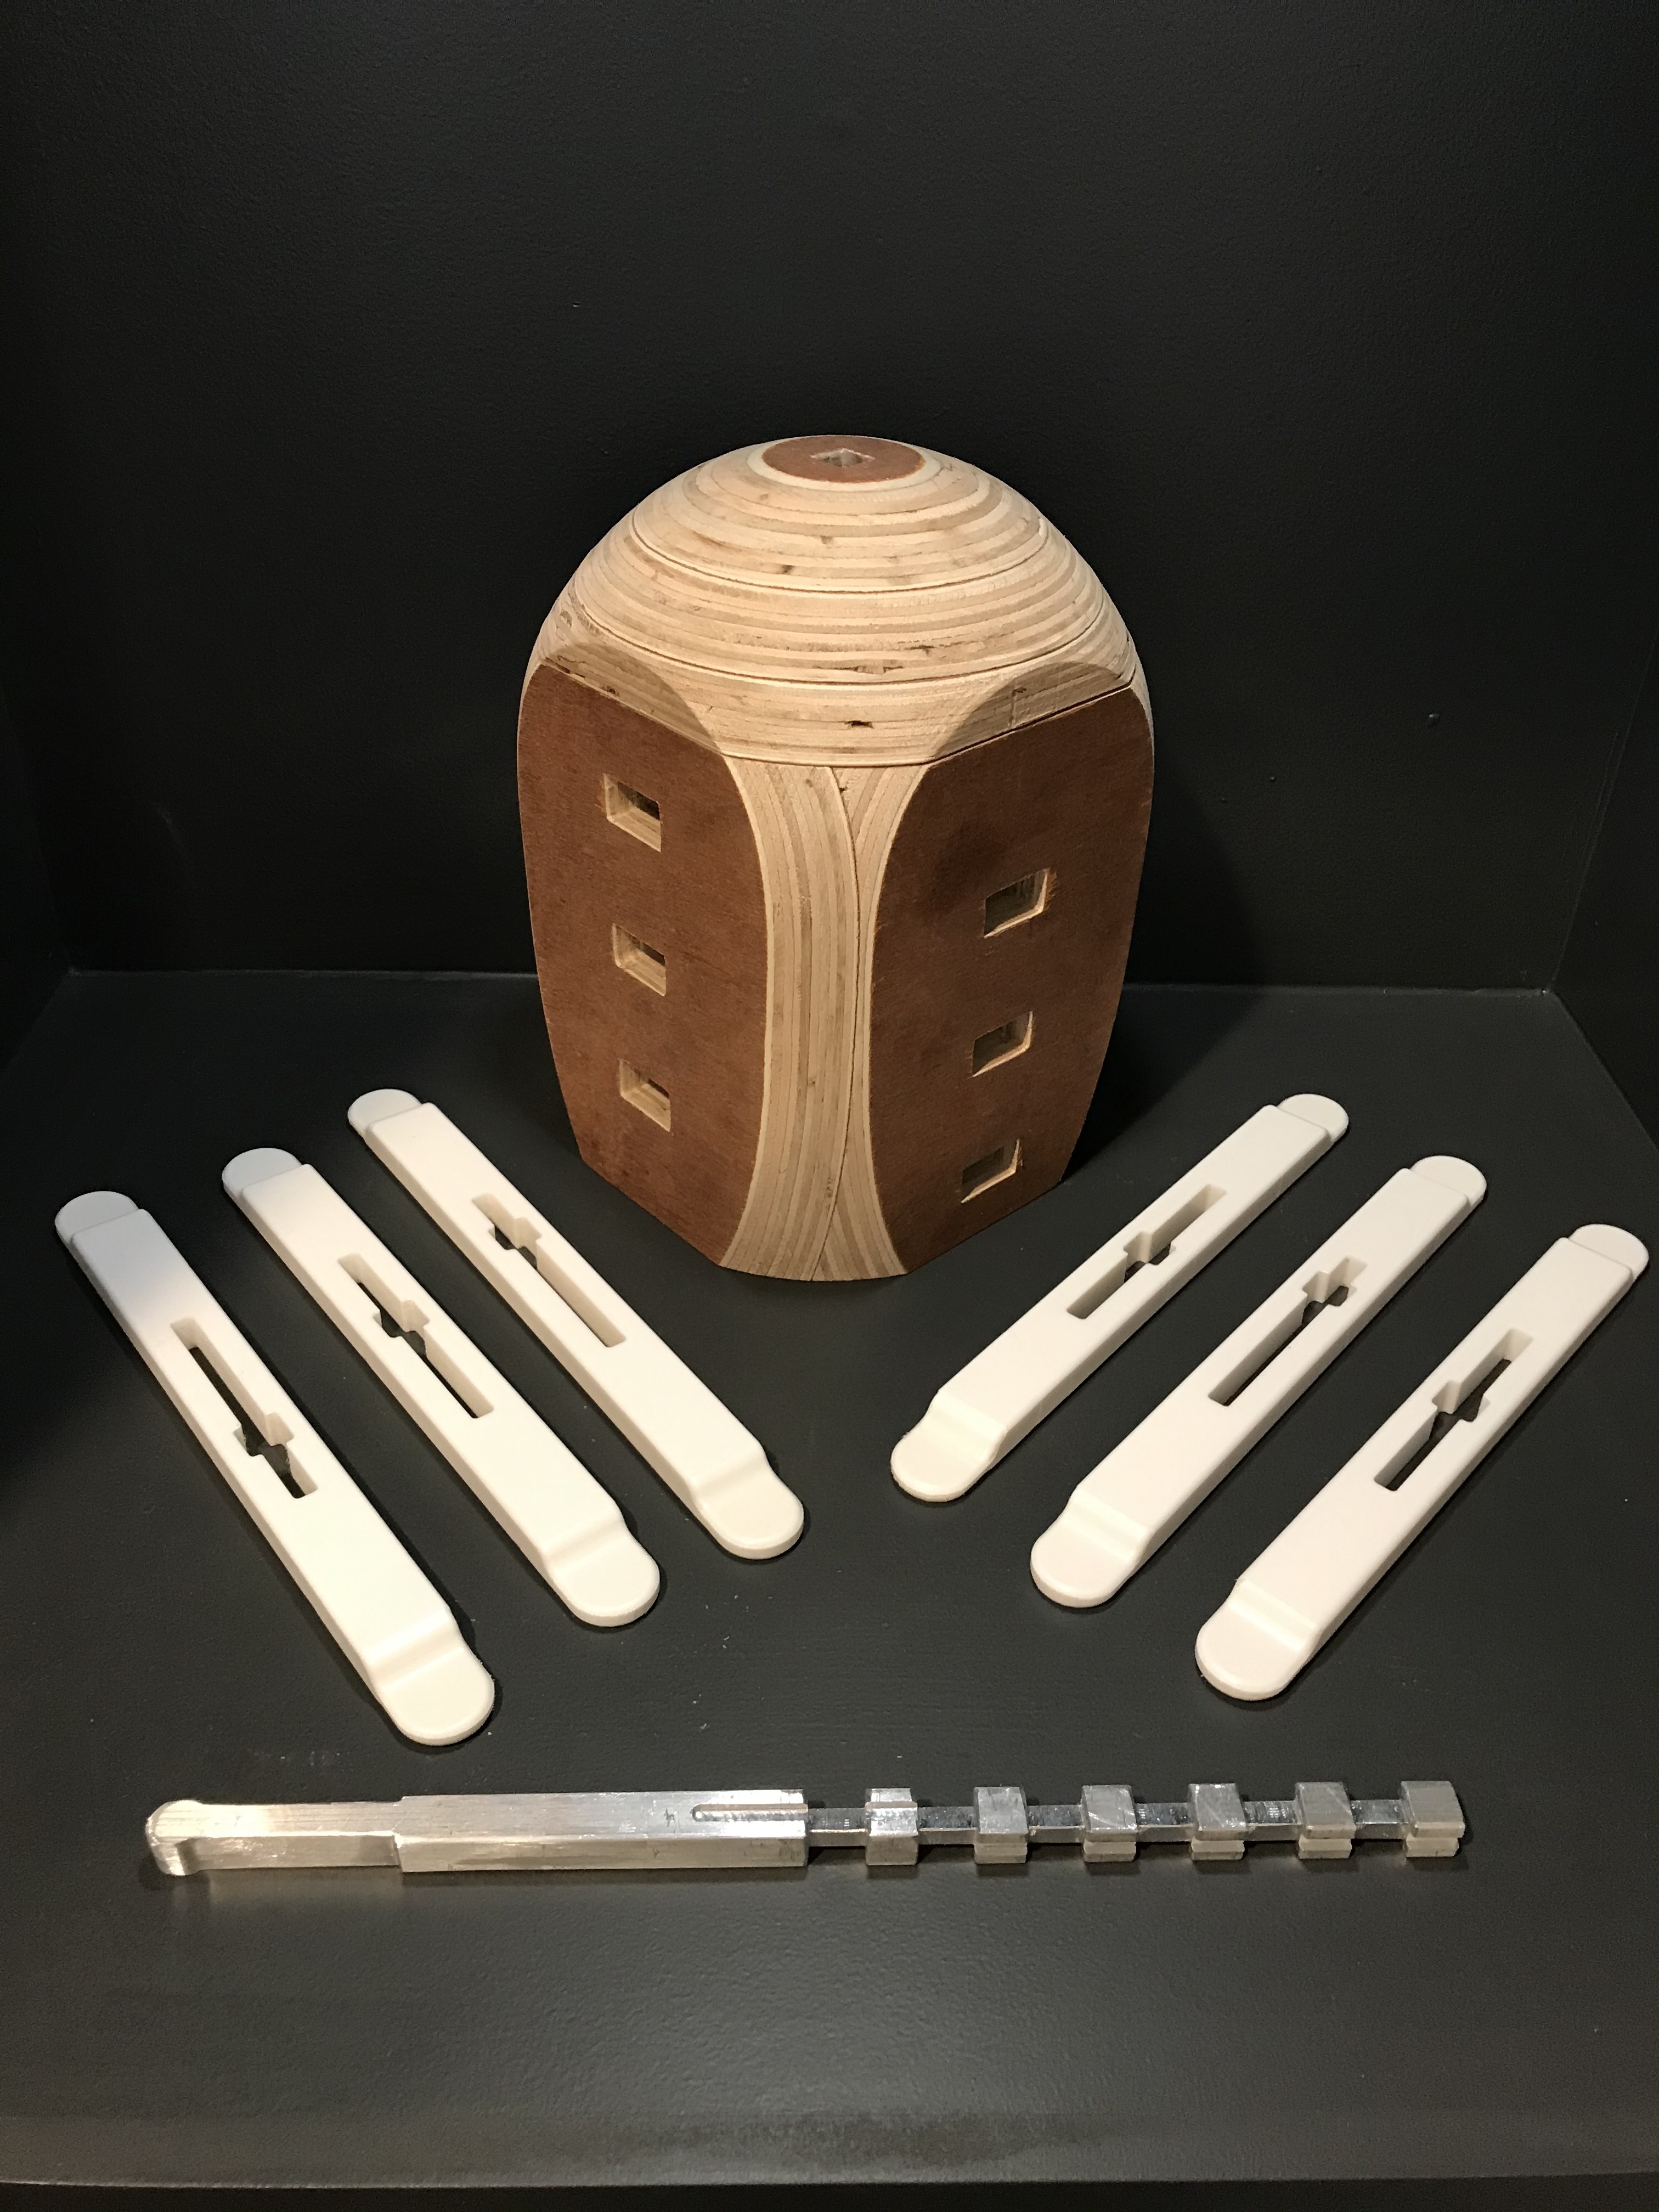
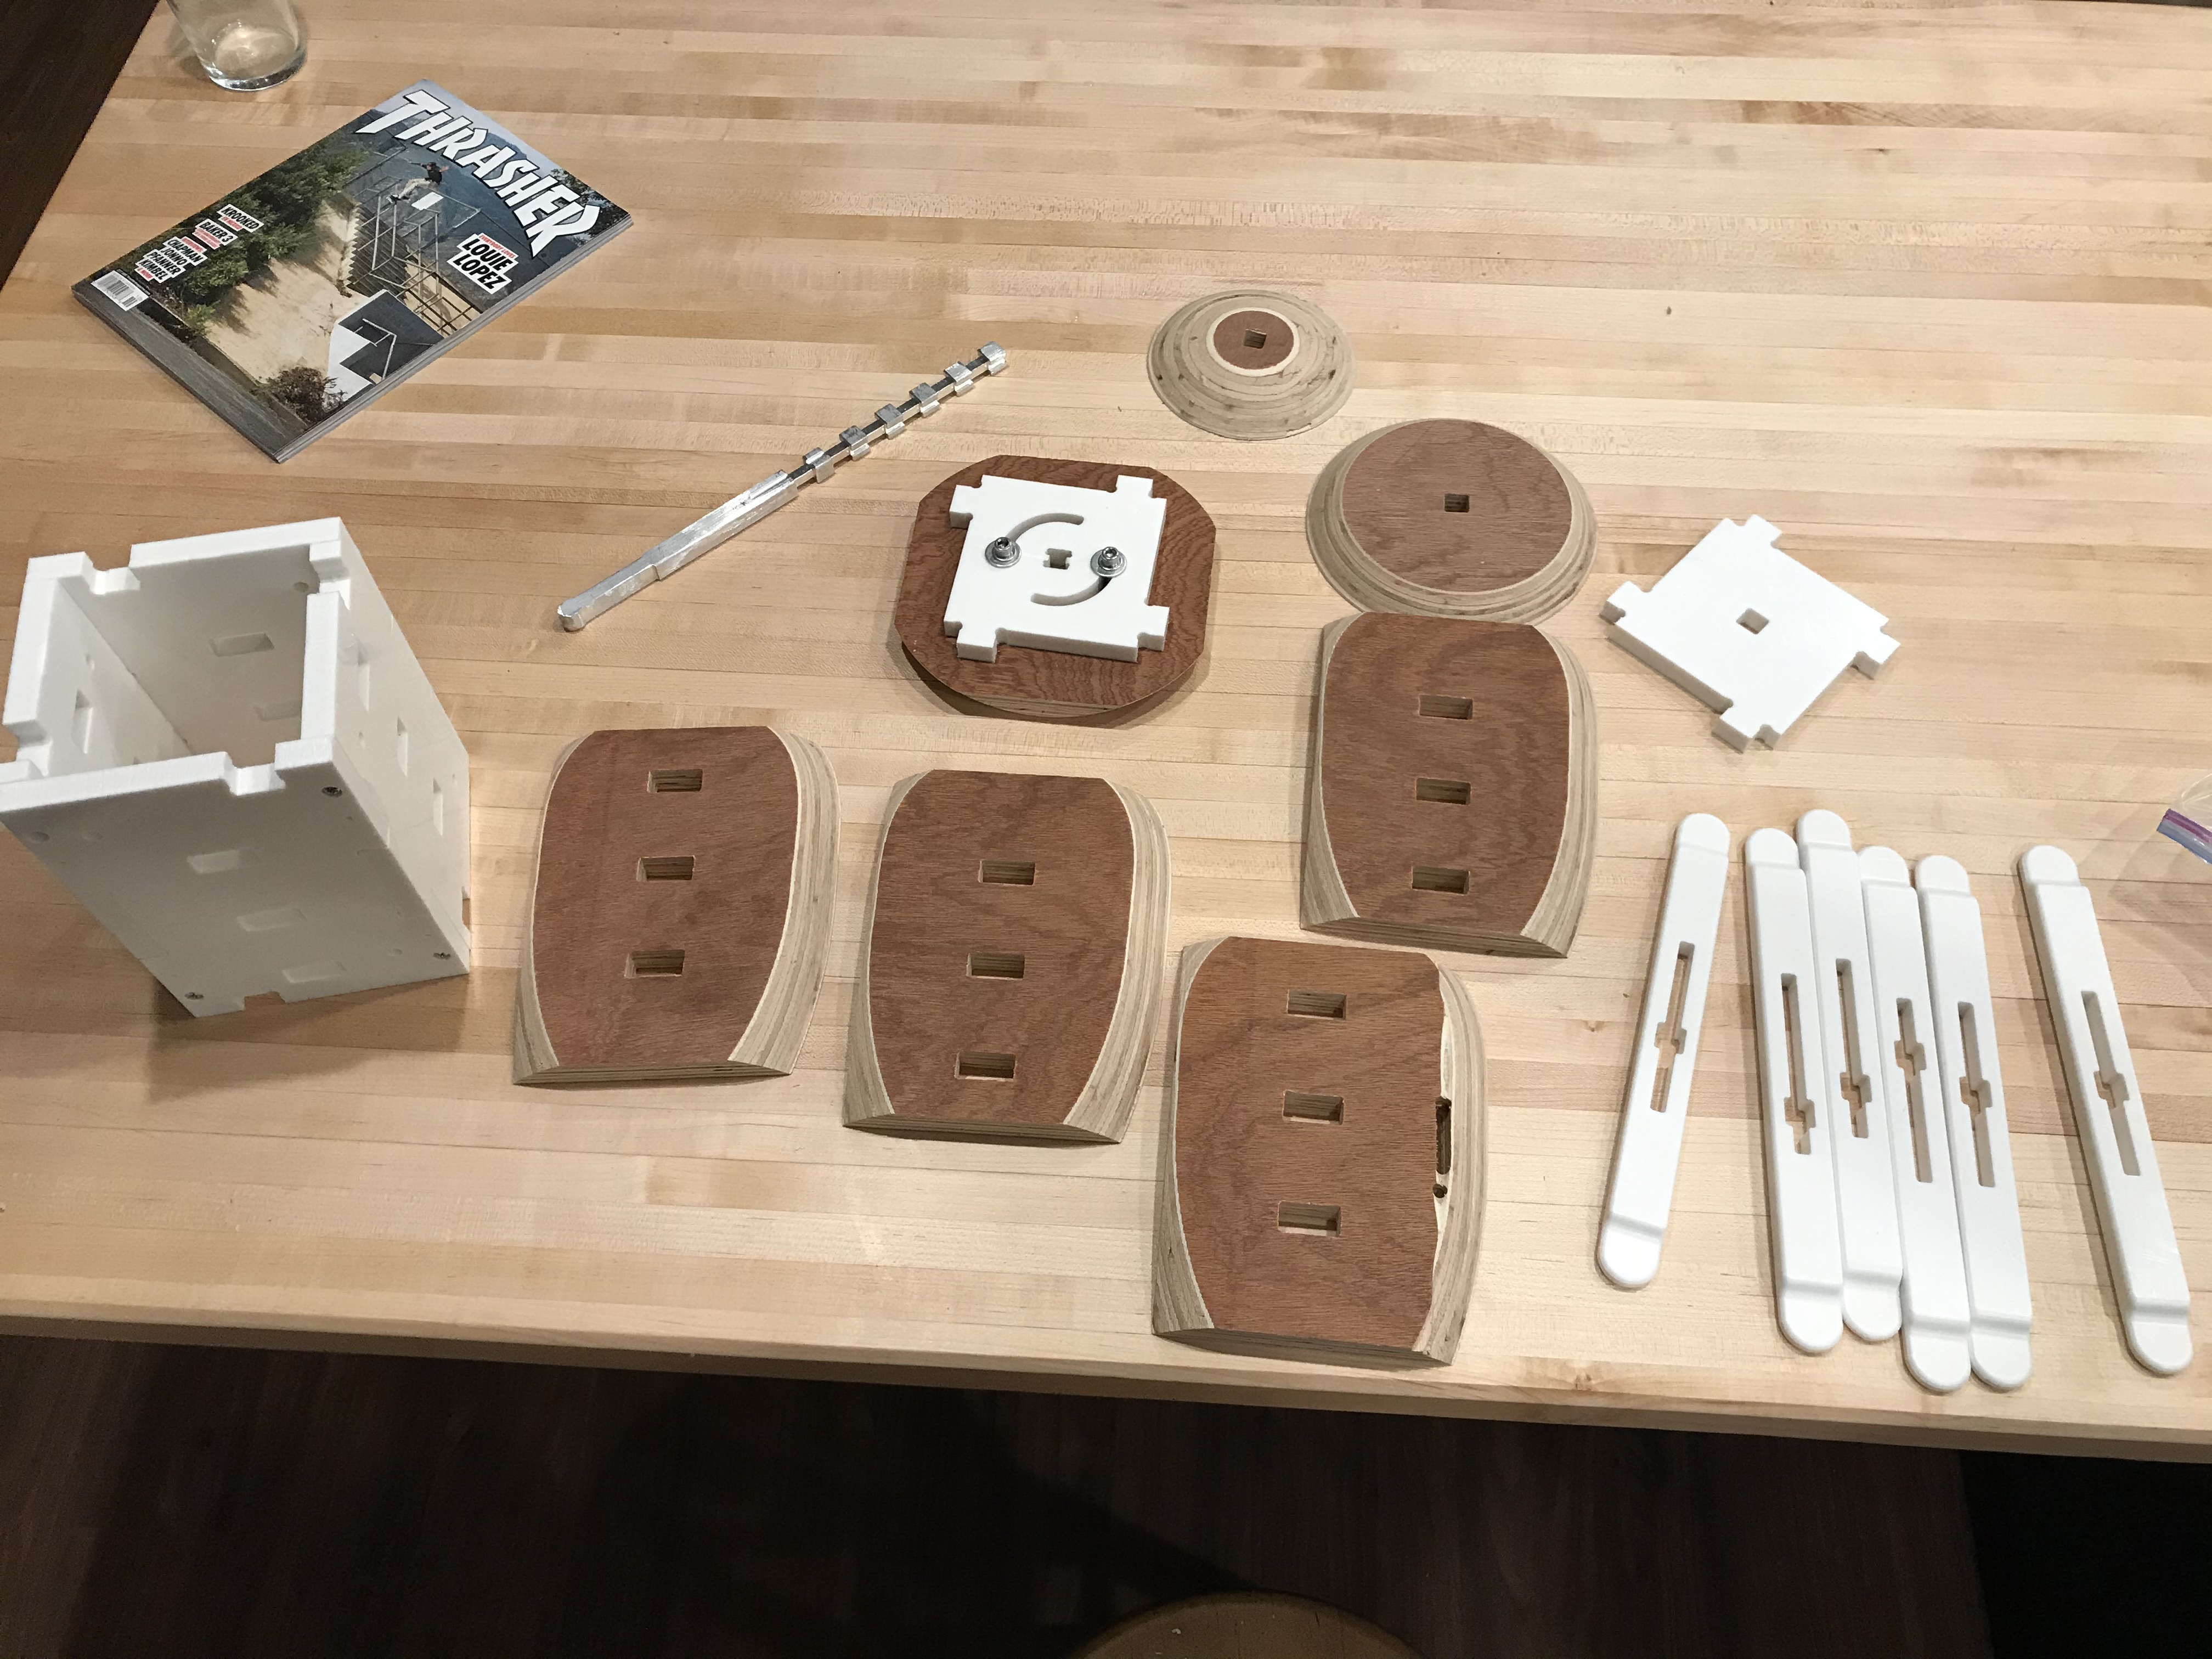
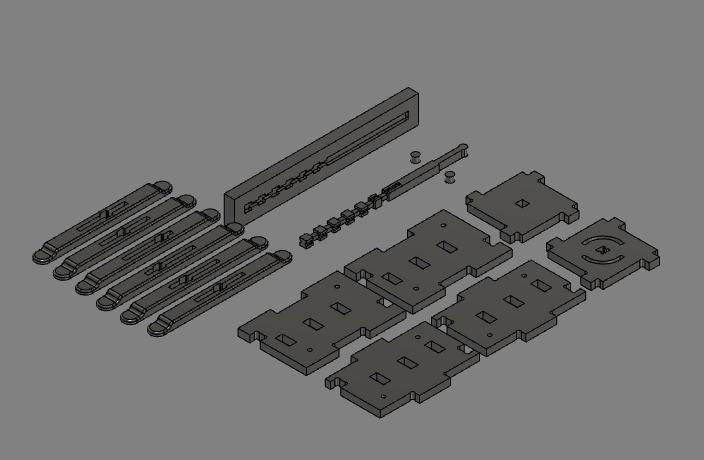
Here are the components involved,
!
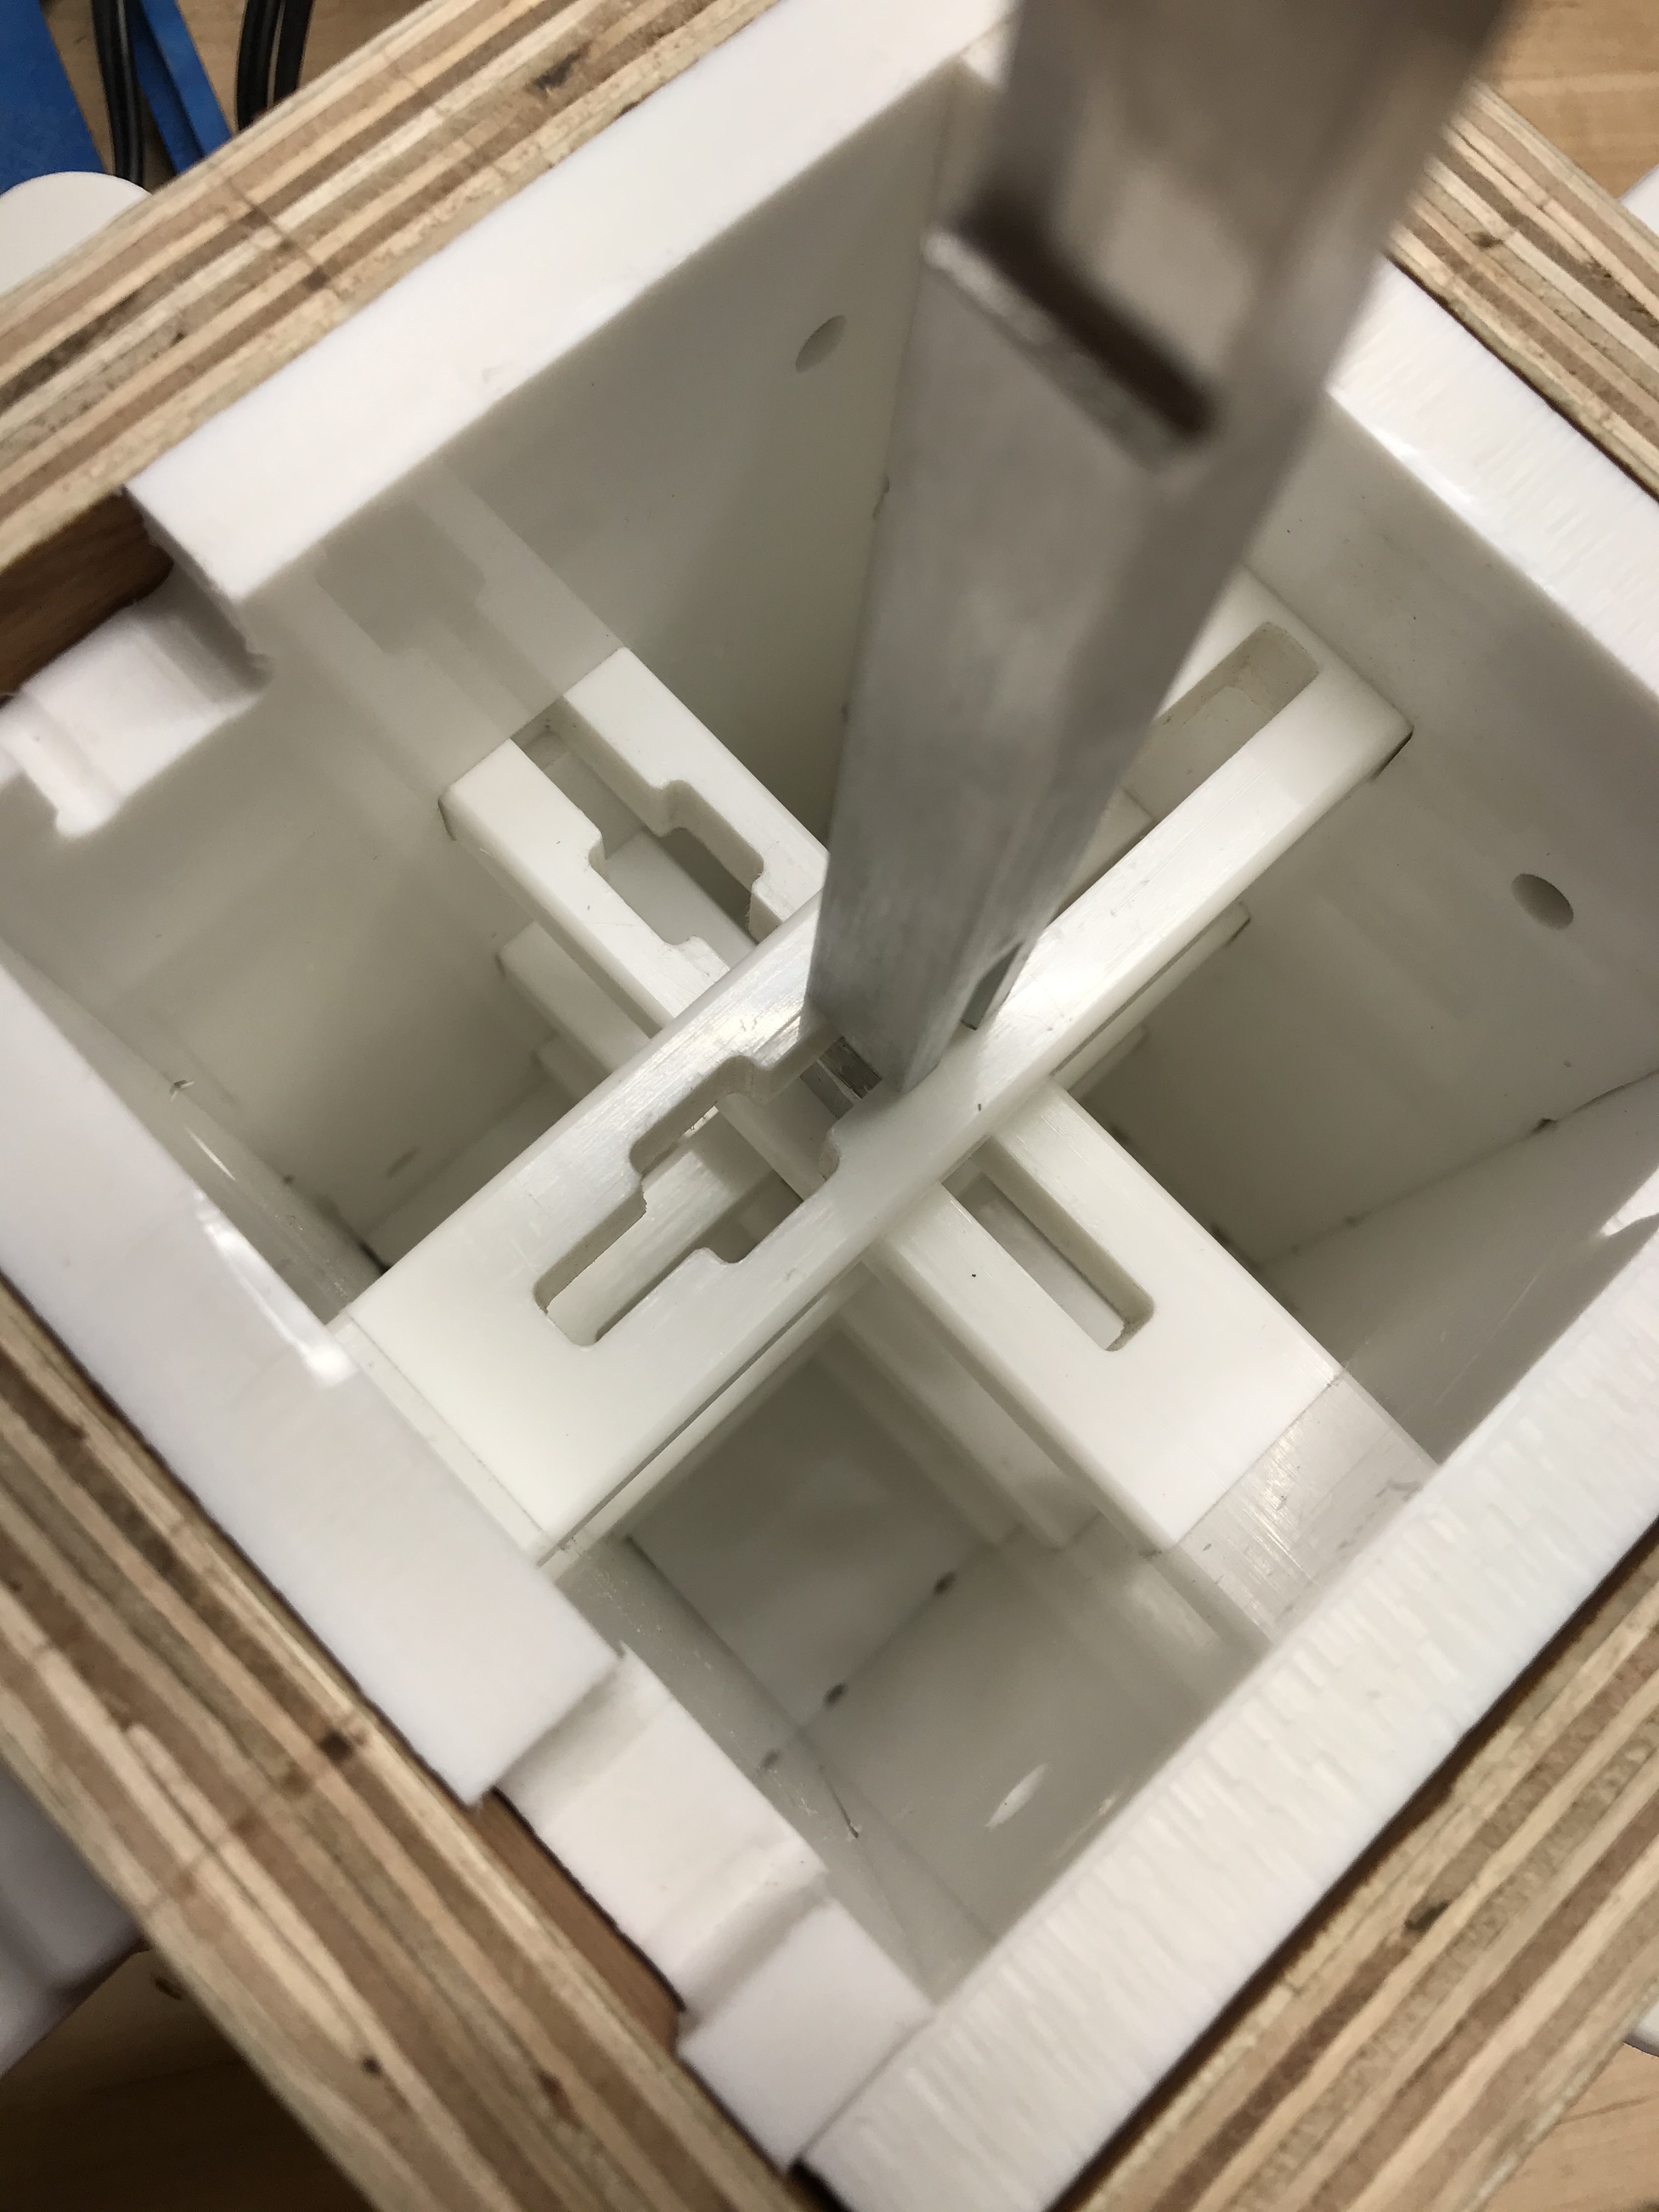
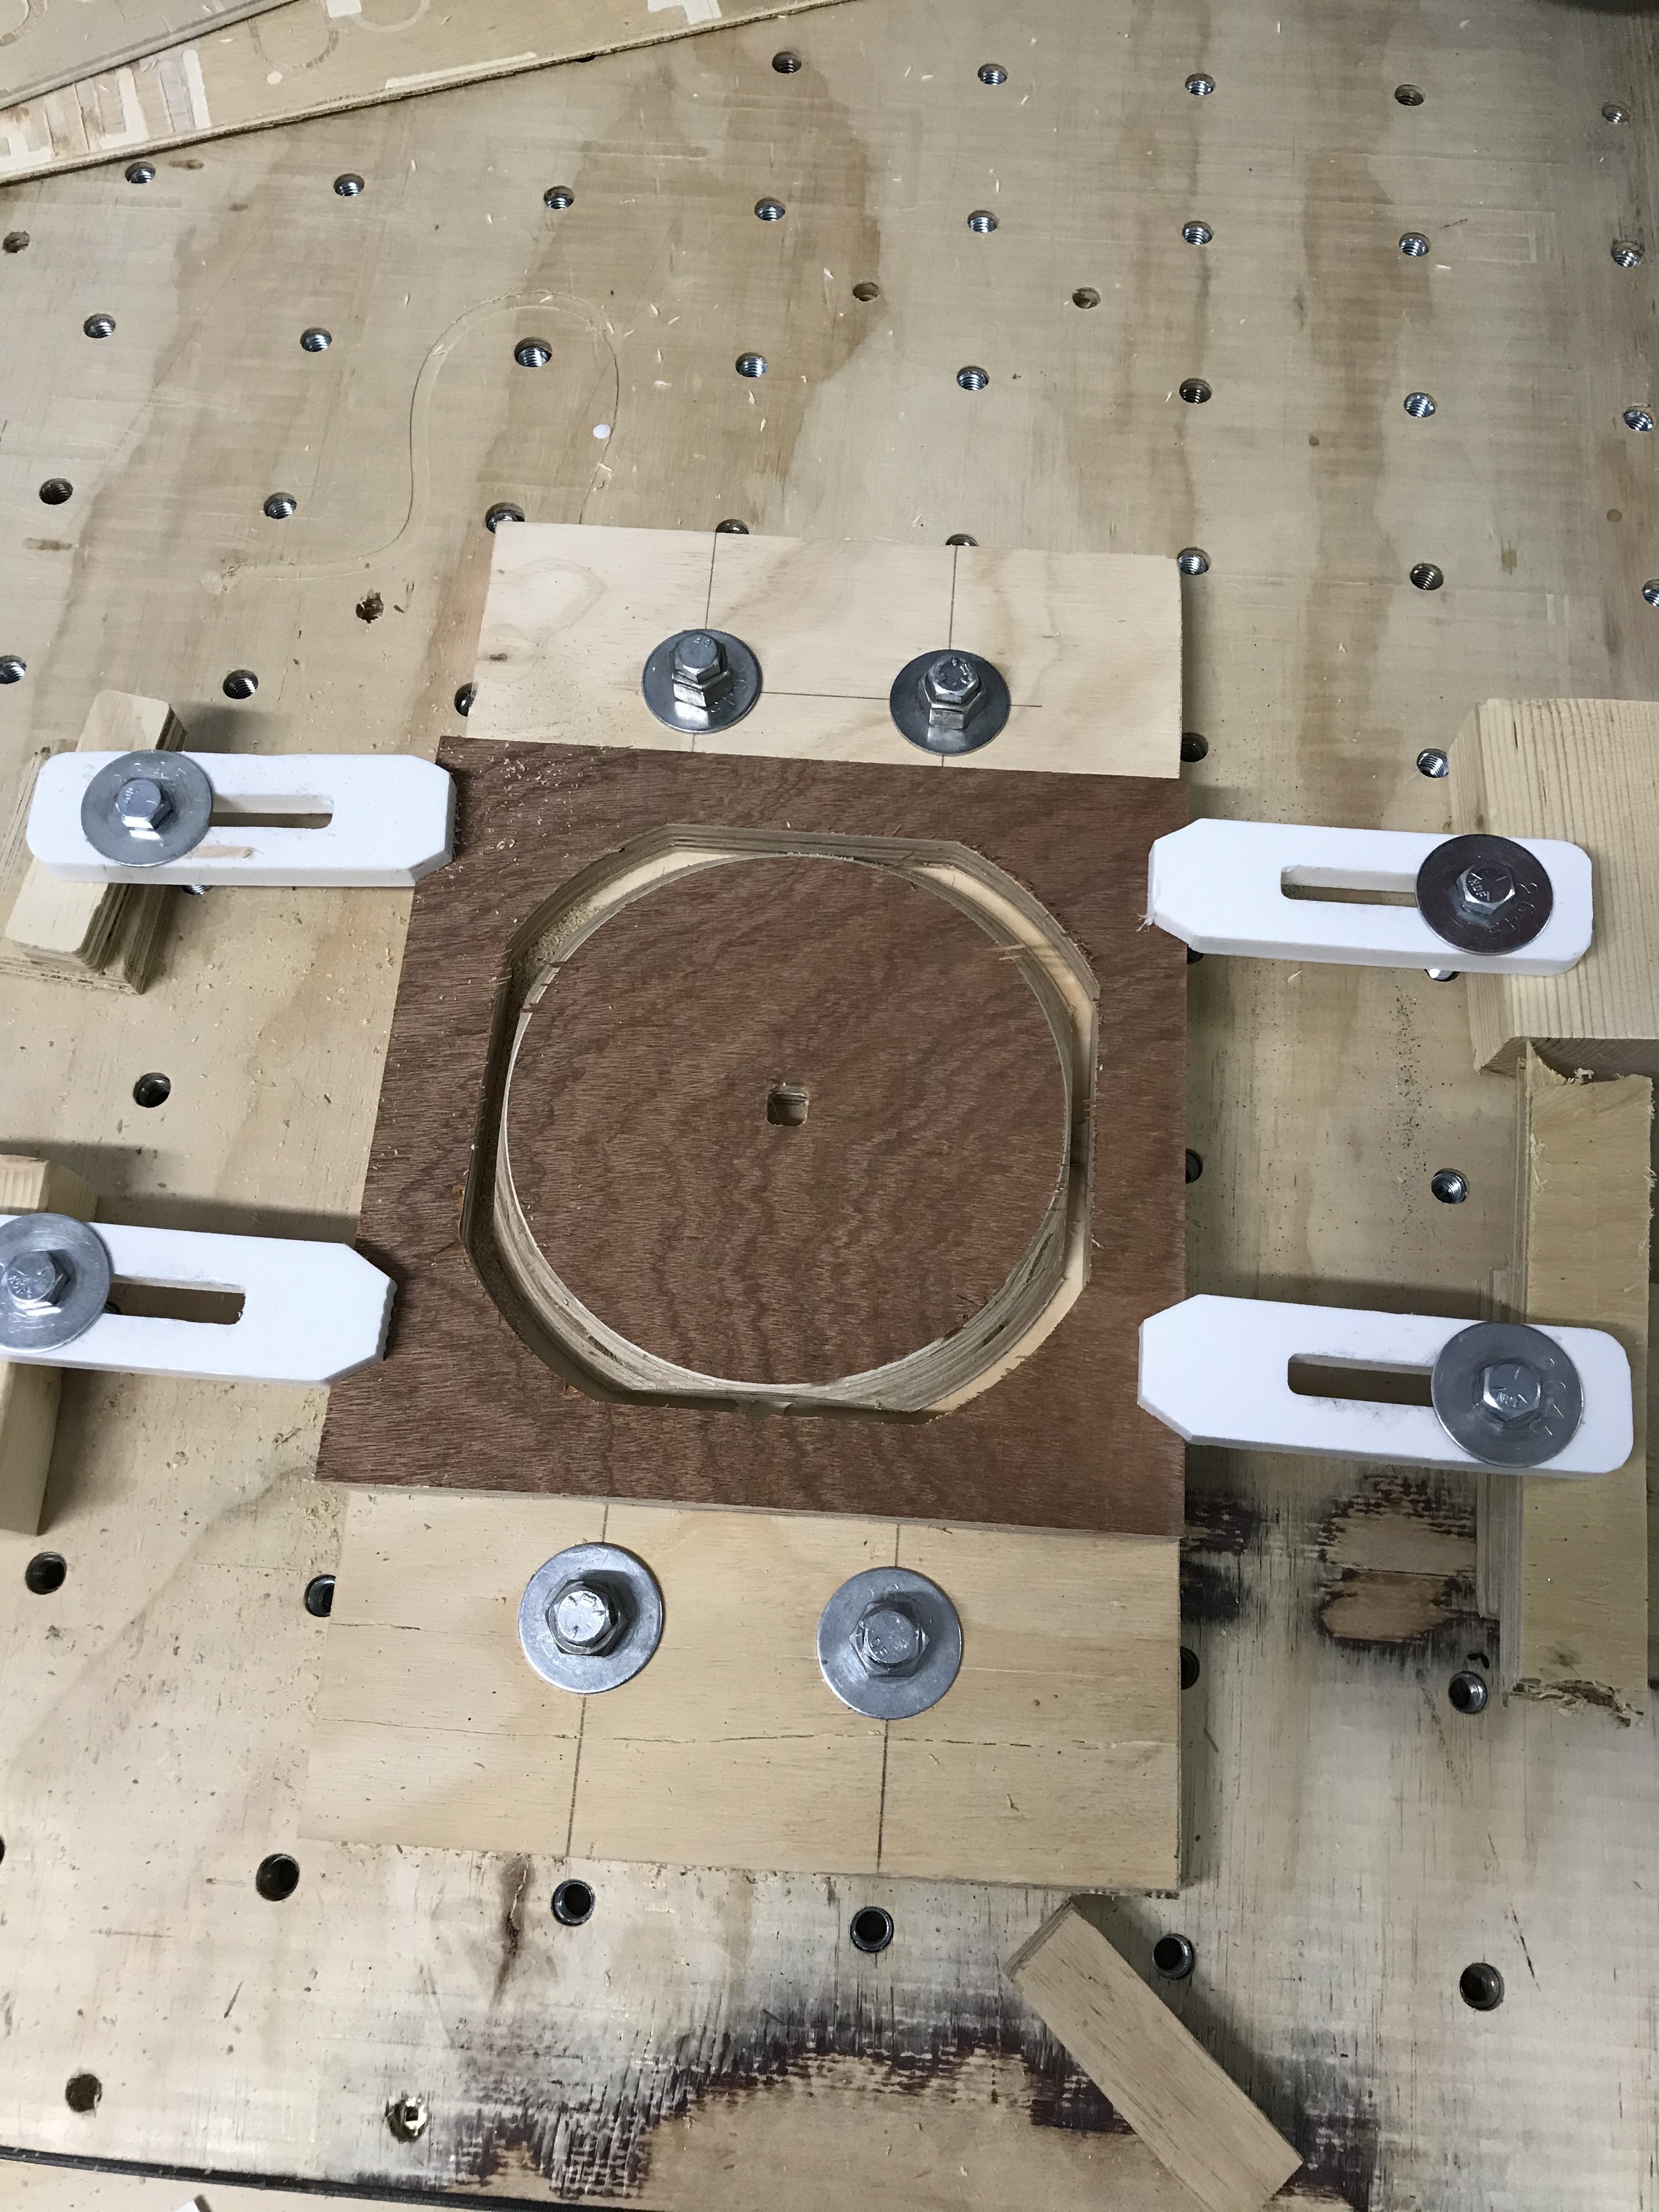
You have what I call the “Inner Sanctum” which is made of HDPE and serves the purpose of structural integrity, and an accurate core for the workings of the puzzle. The Inner Sanctum is crucial for the final Twist. It also fills out the overall shape of the puzzle so it’s not just long and skinny.
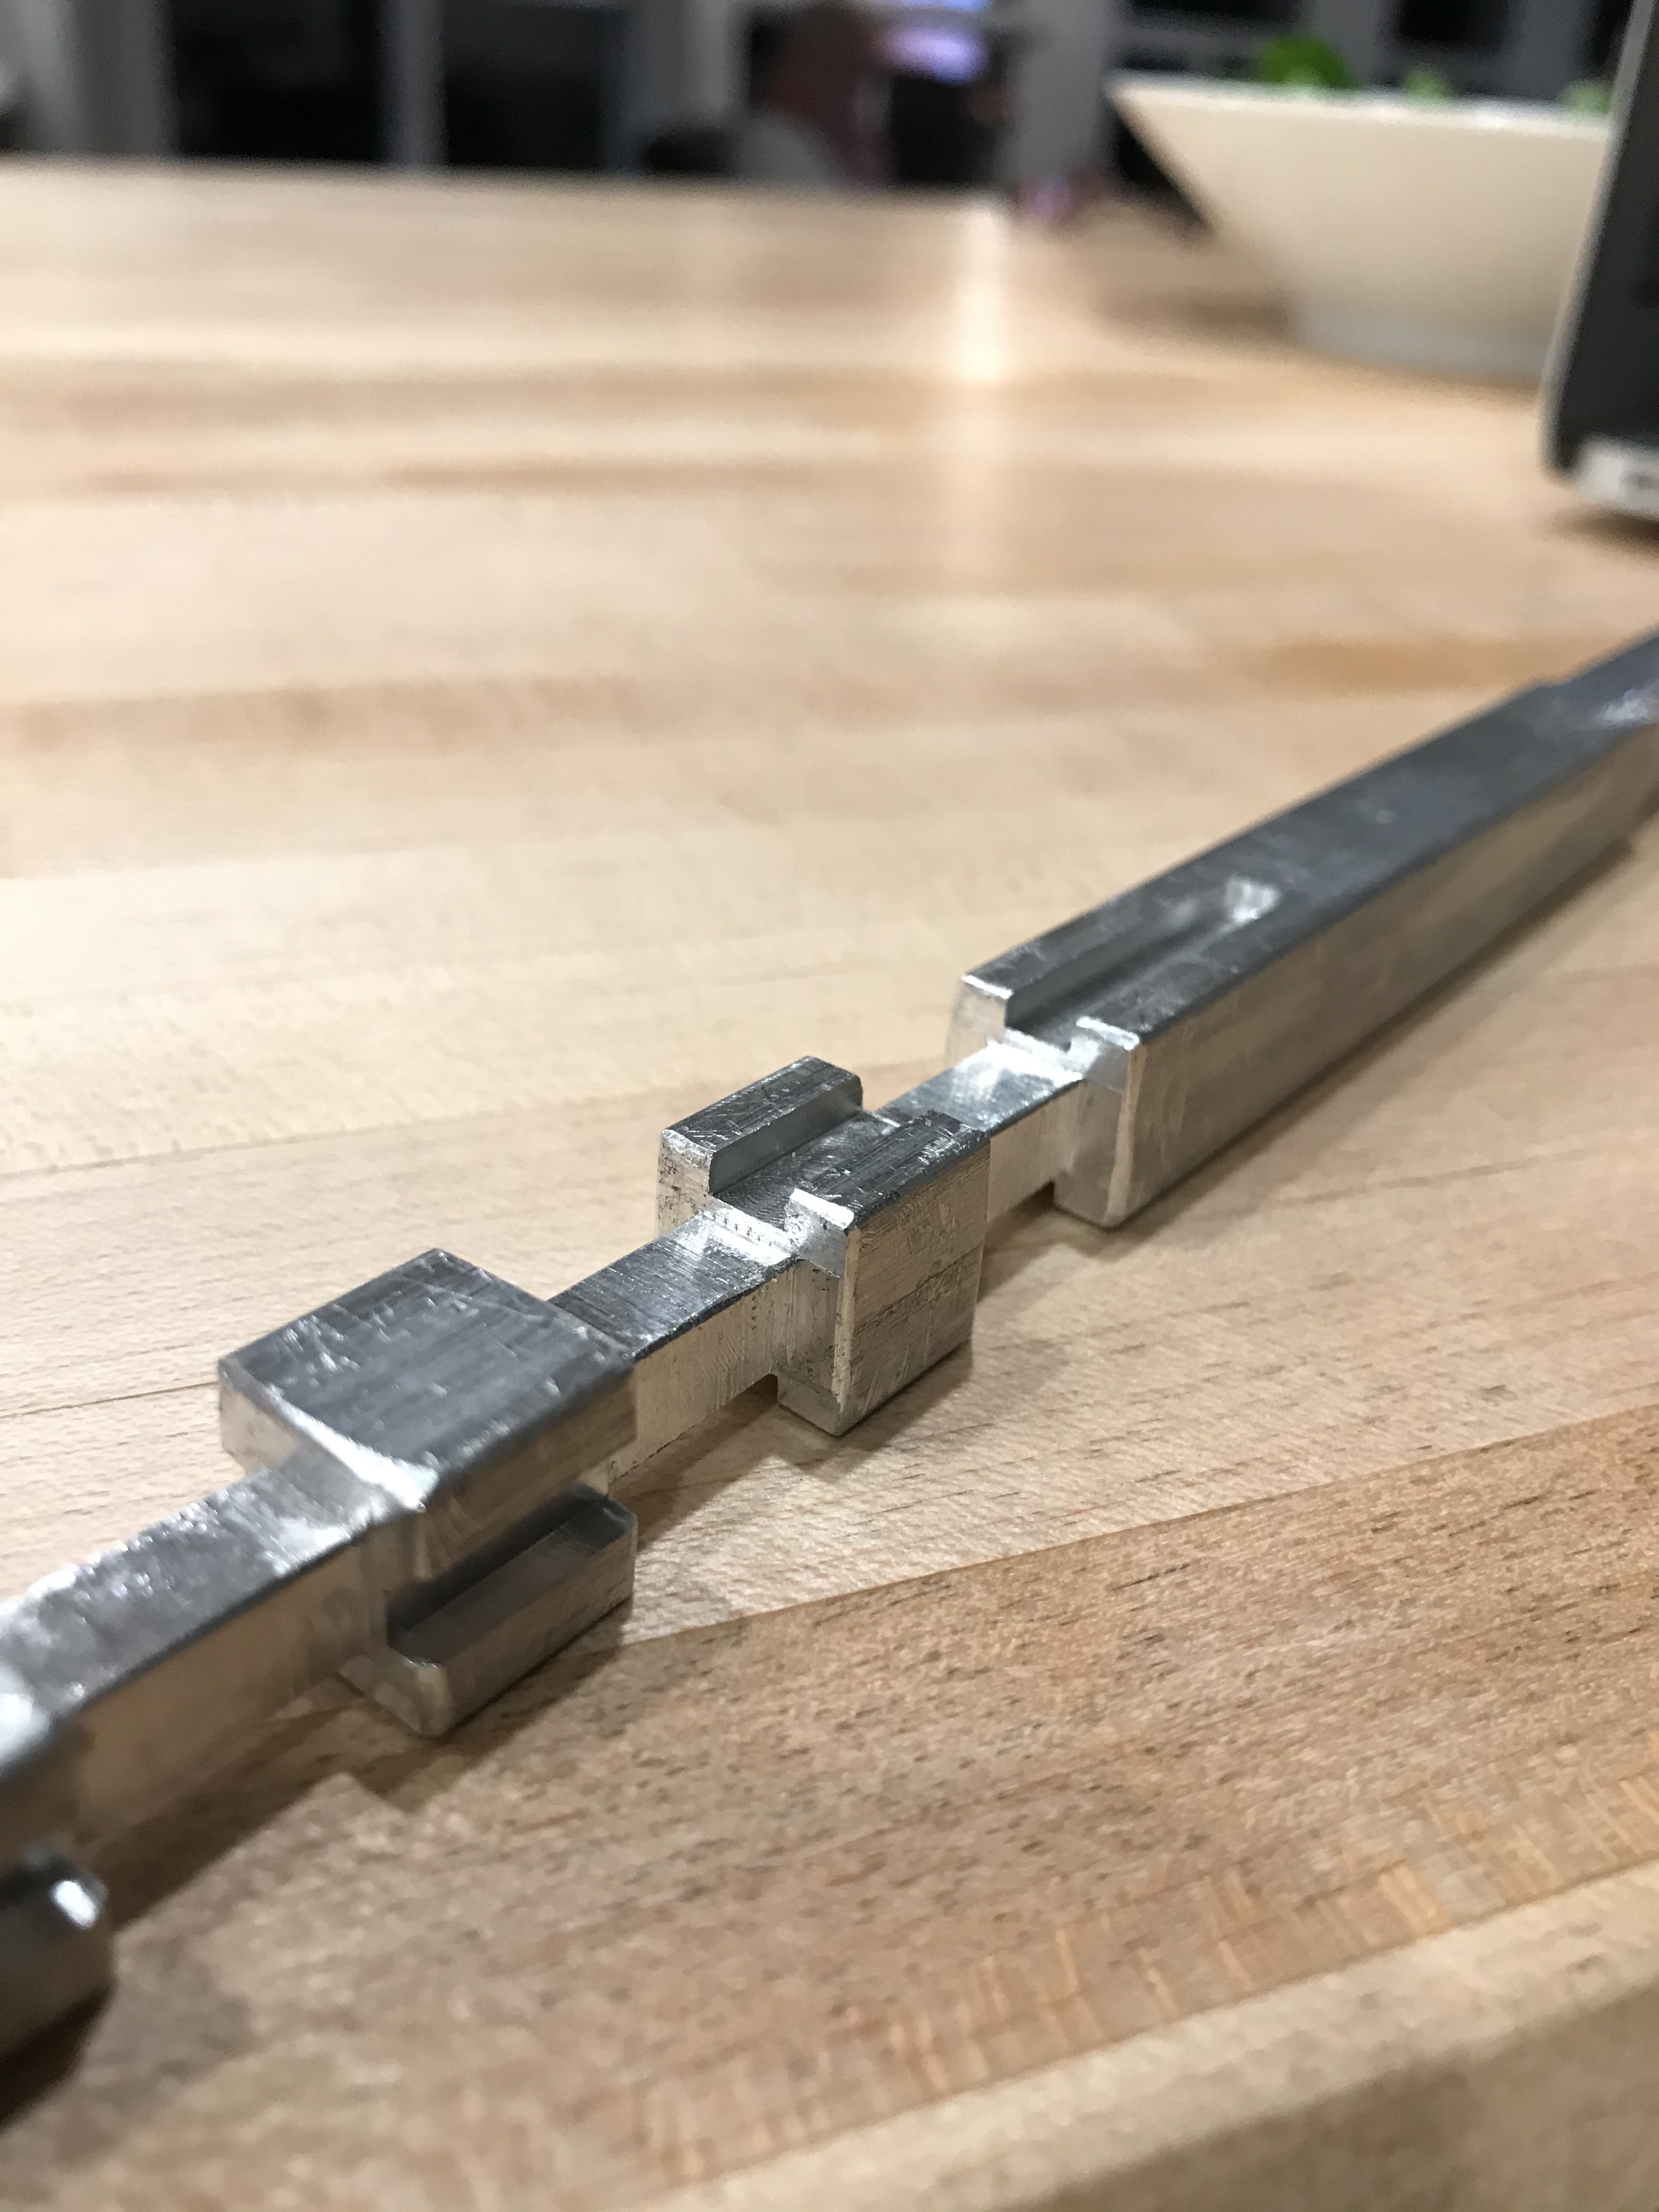
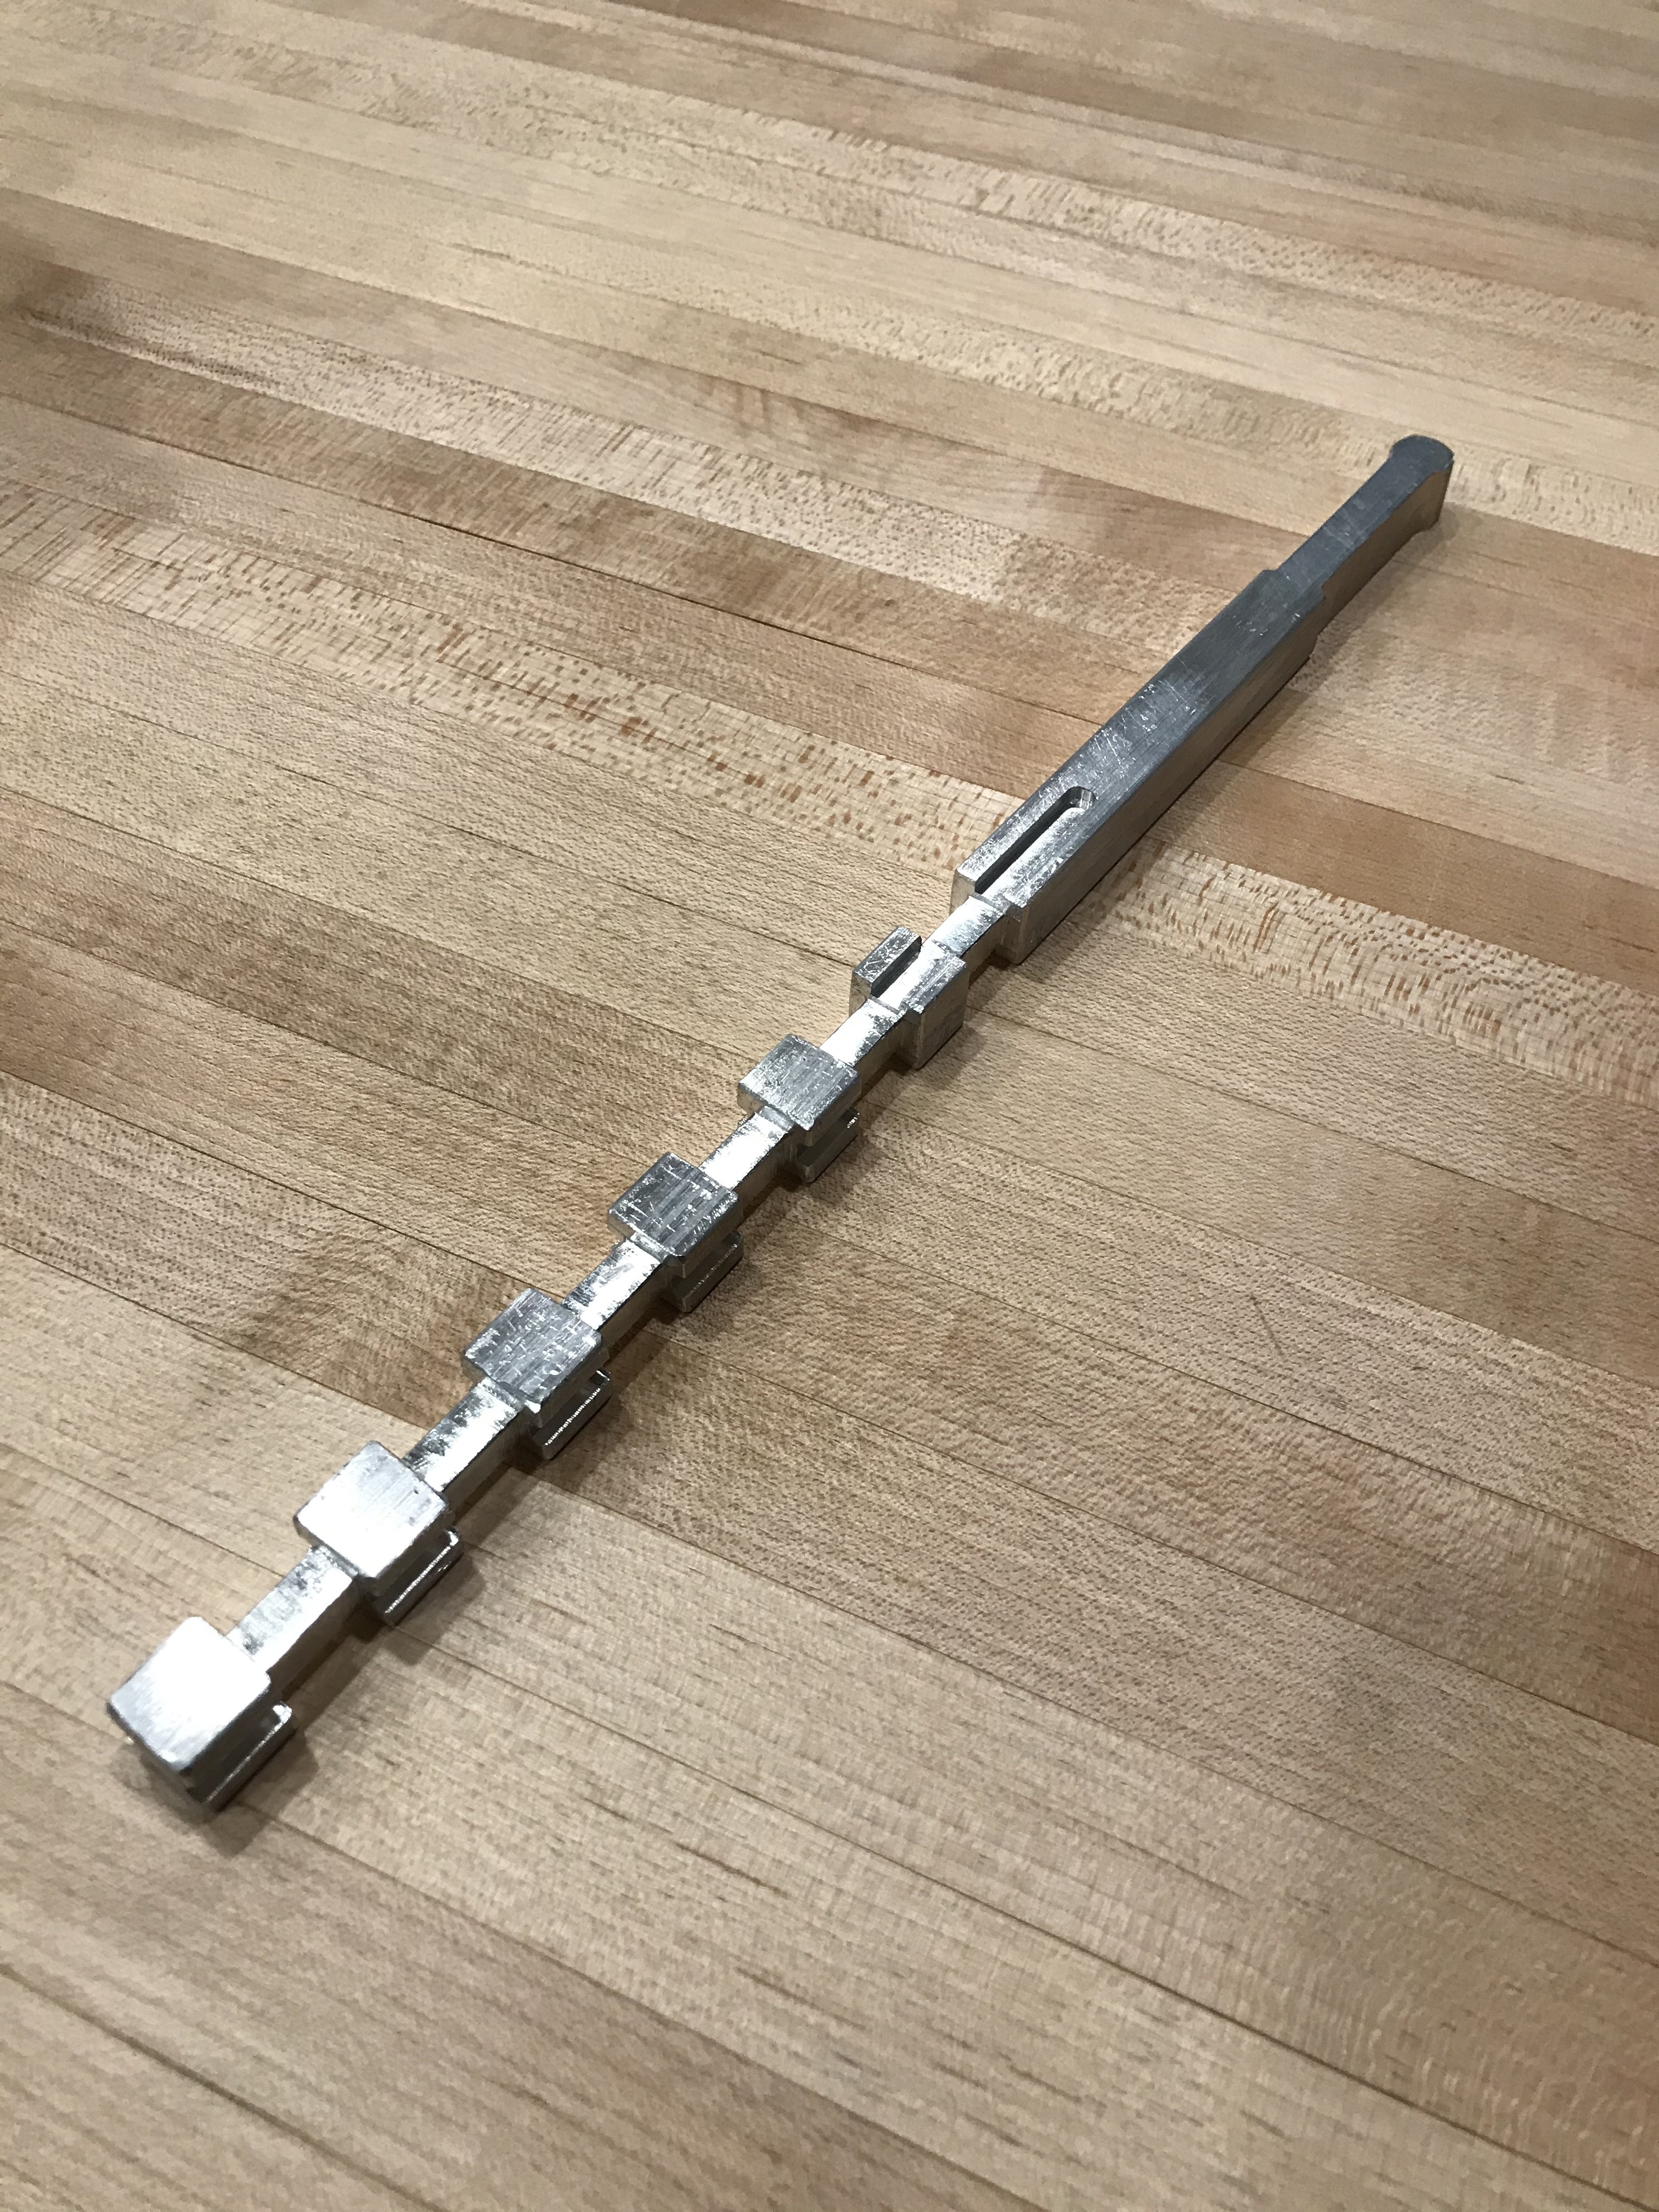
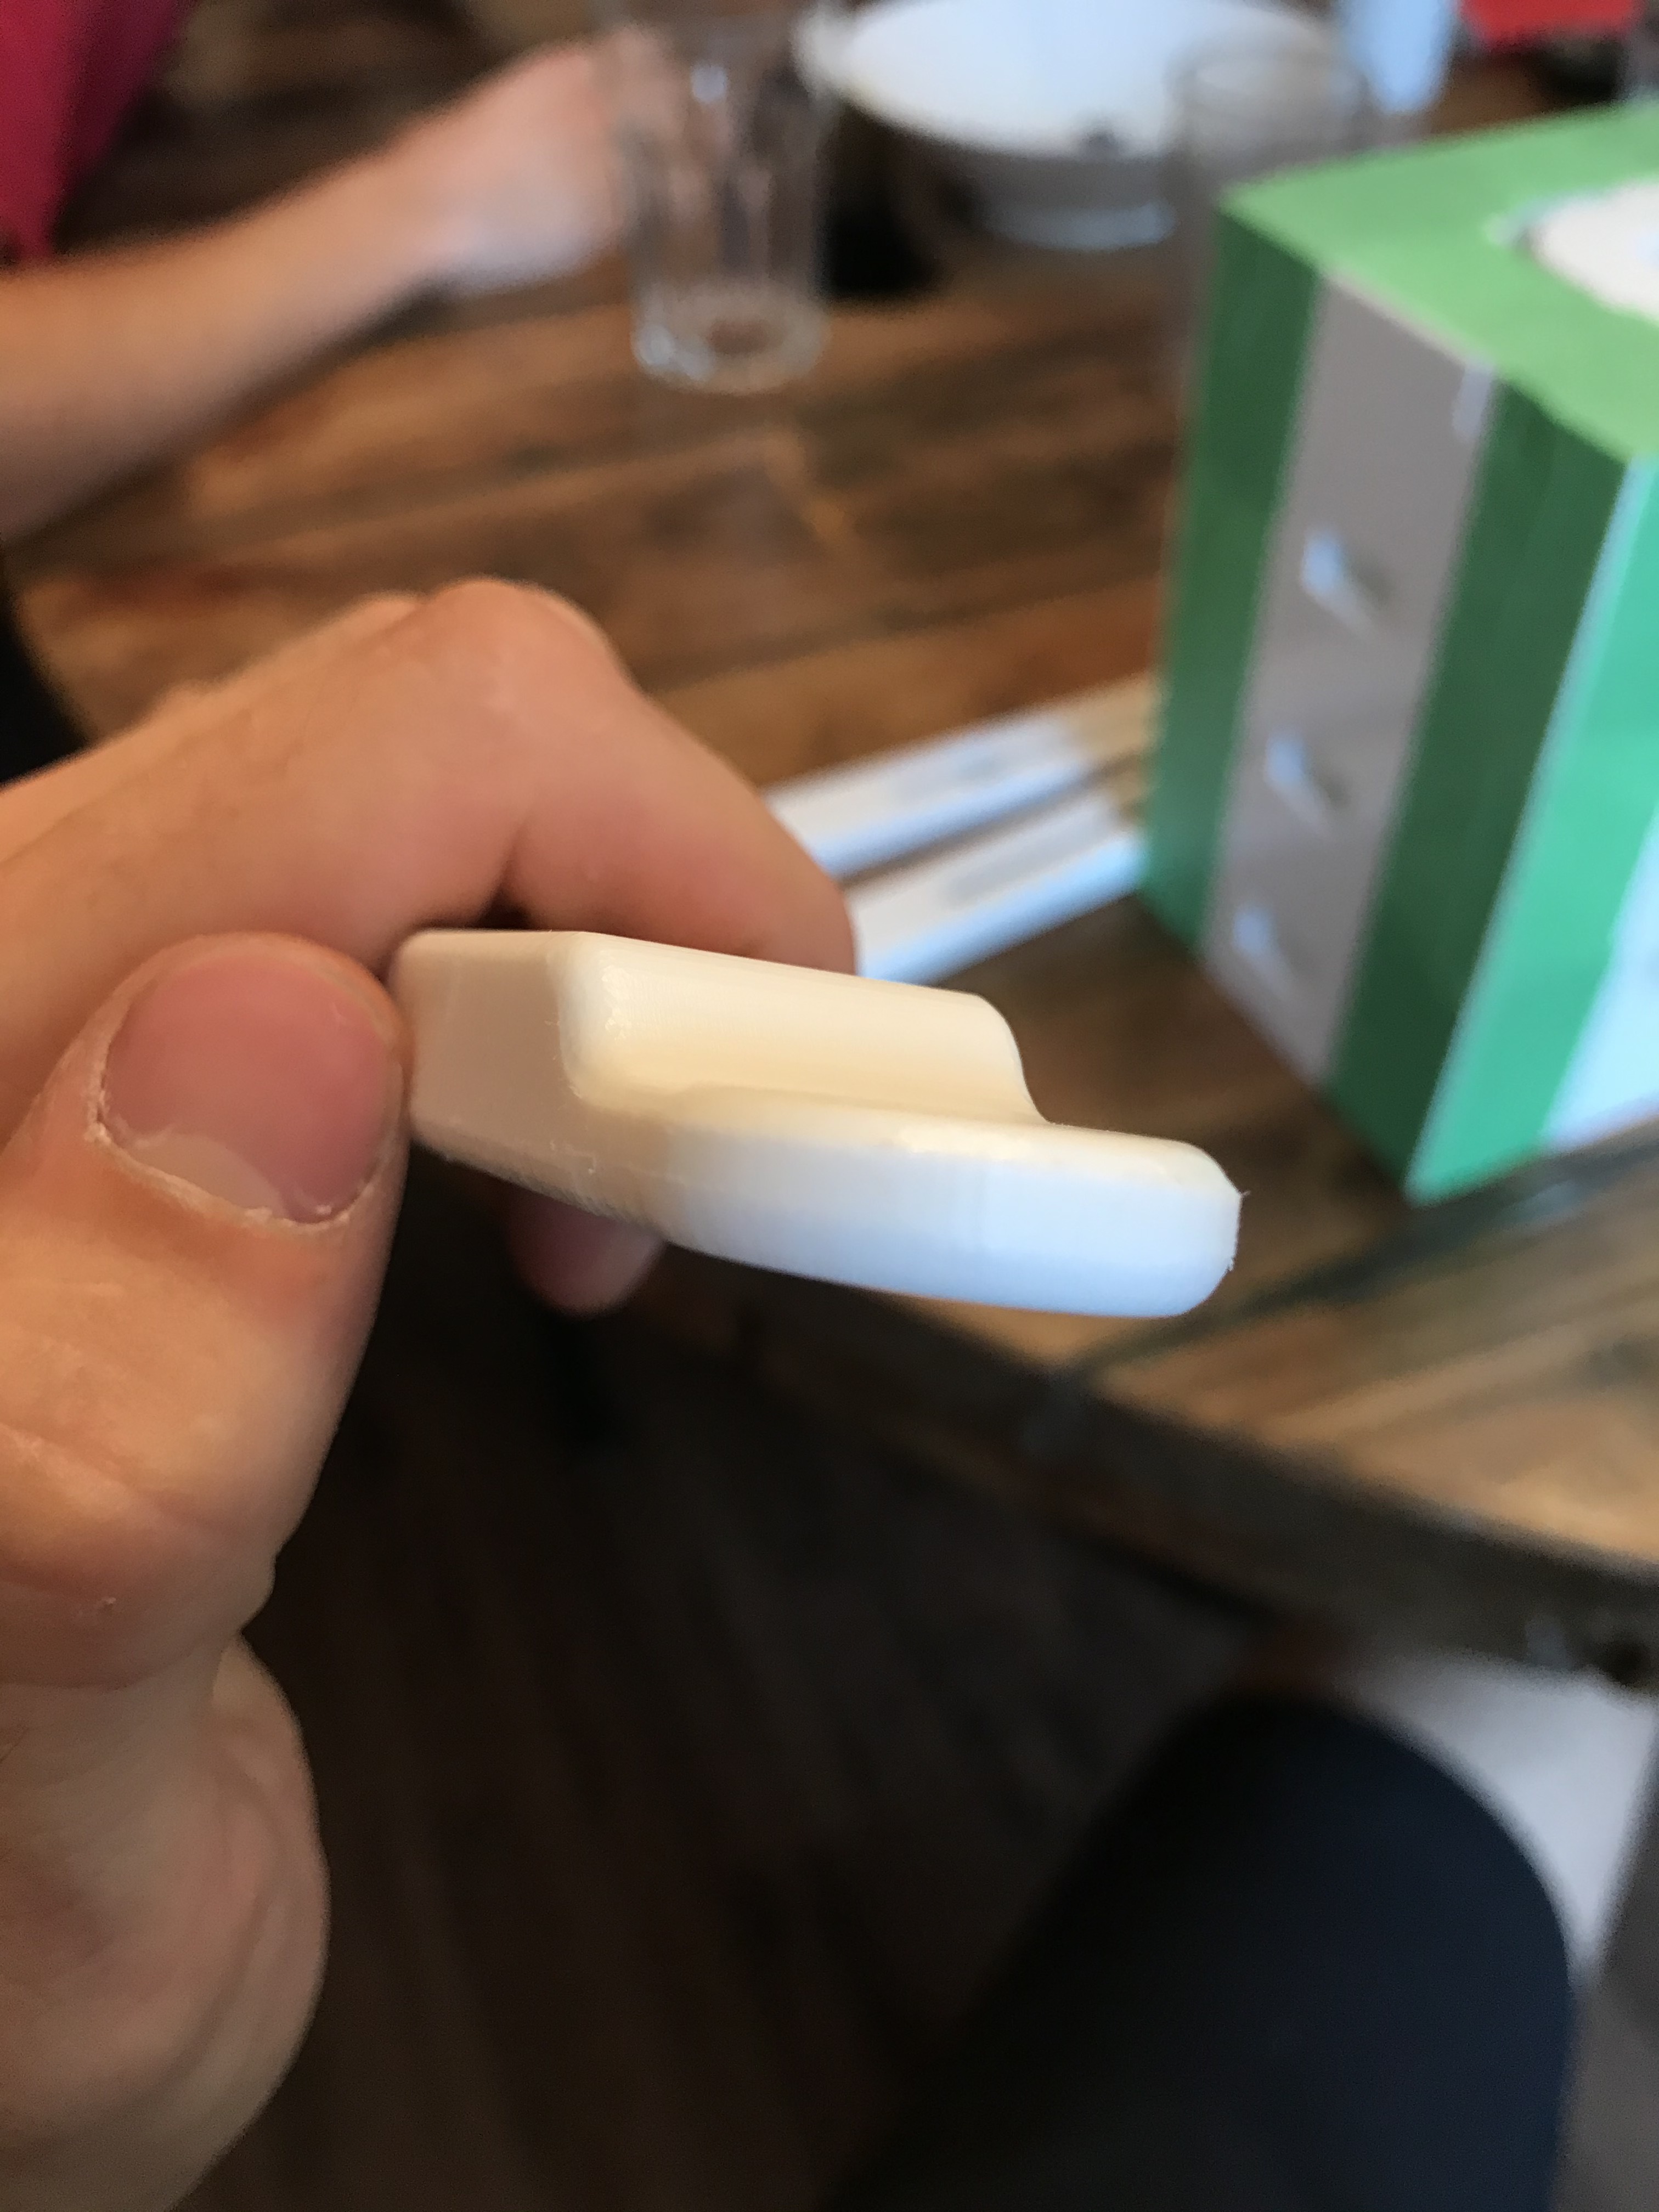
The prize of the puzzle is the aluminum key. Only the bravest and most patient puzzler will feast their eyes on this mystical object.
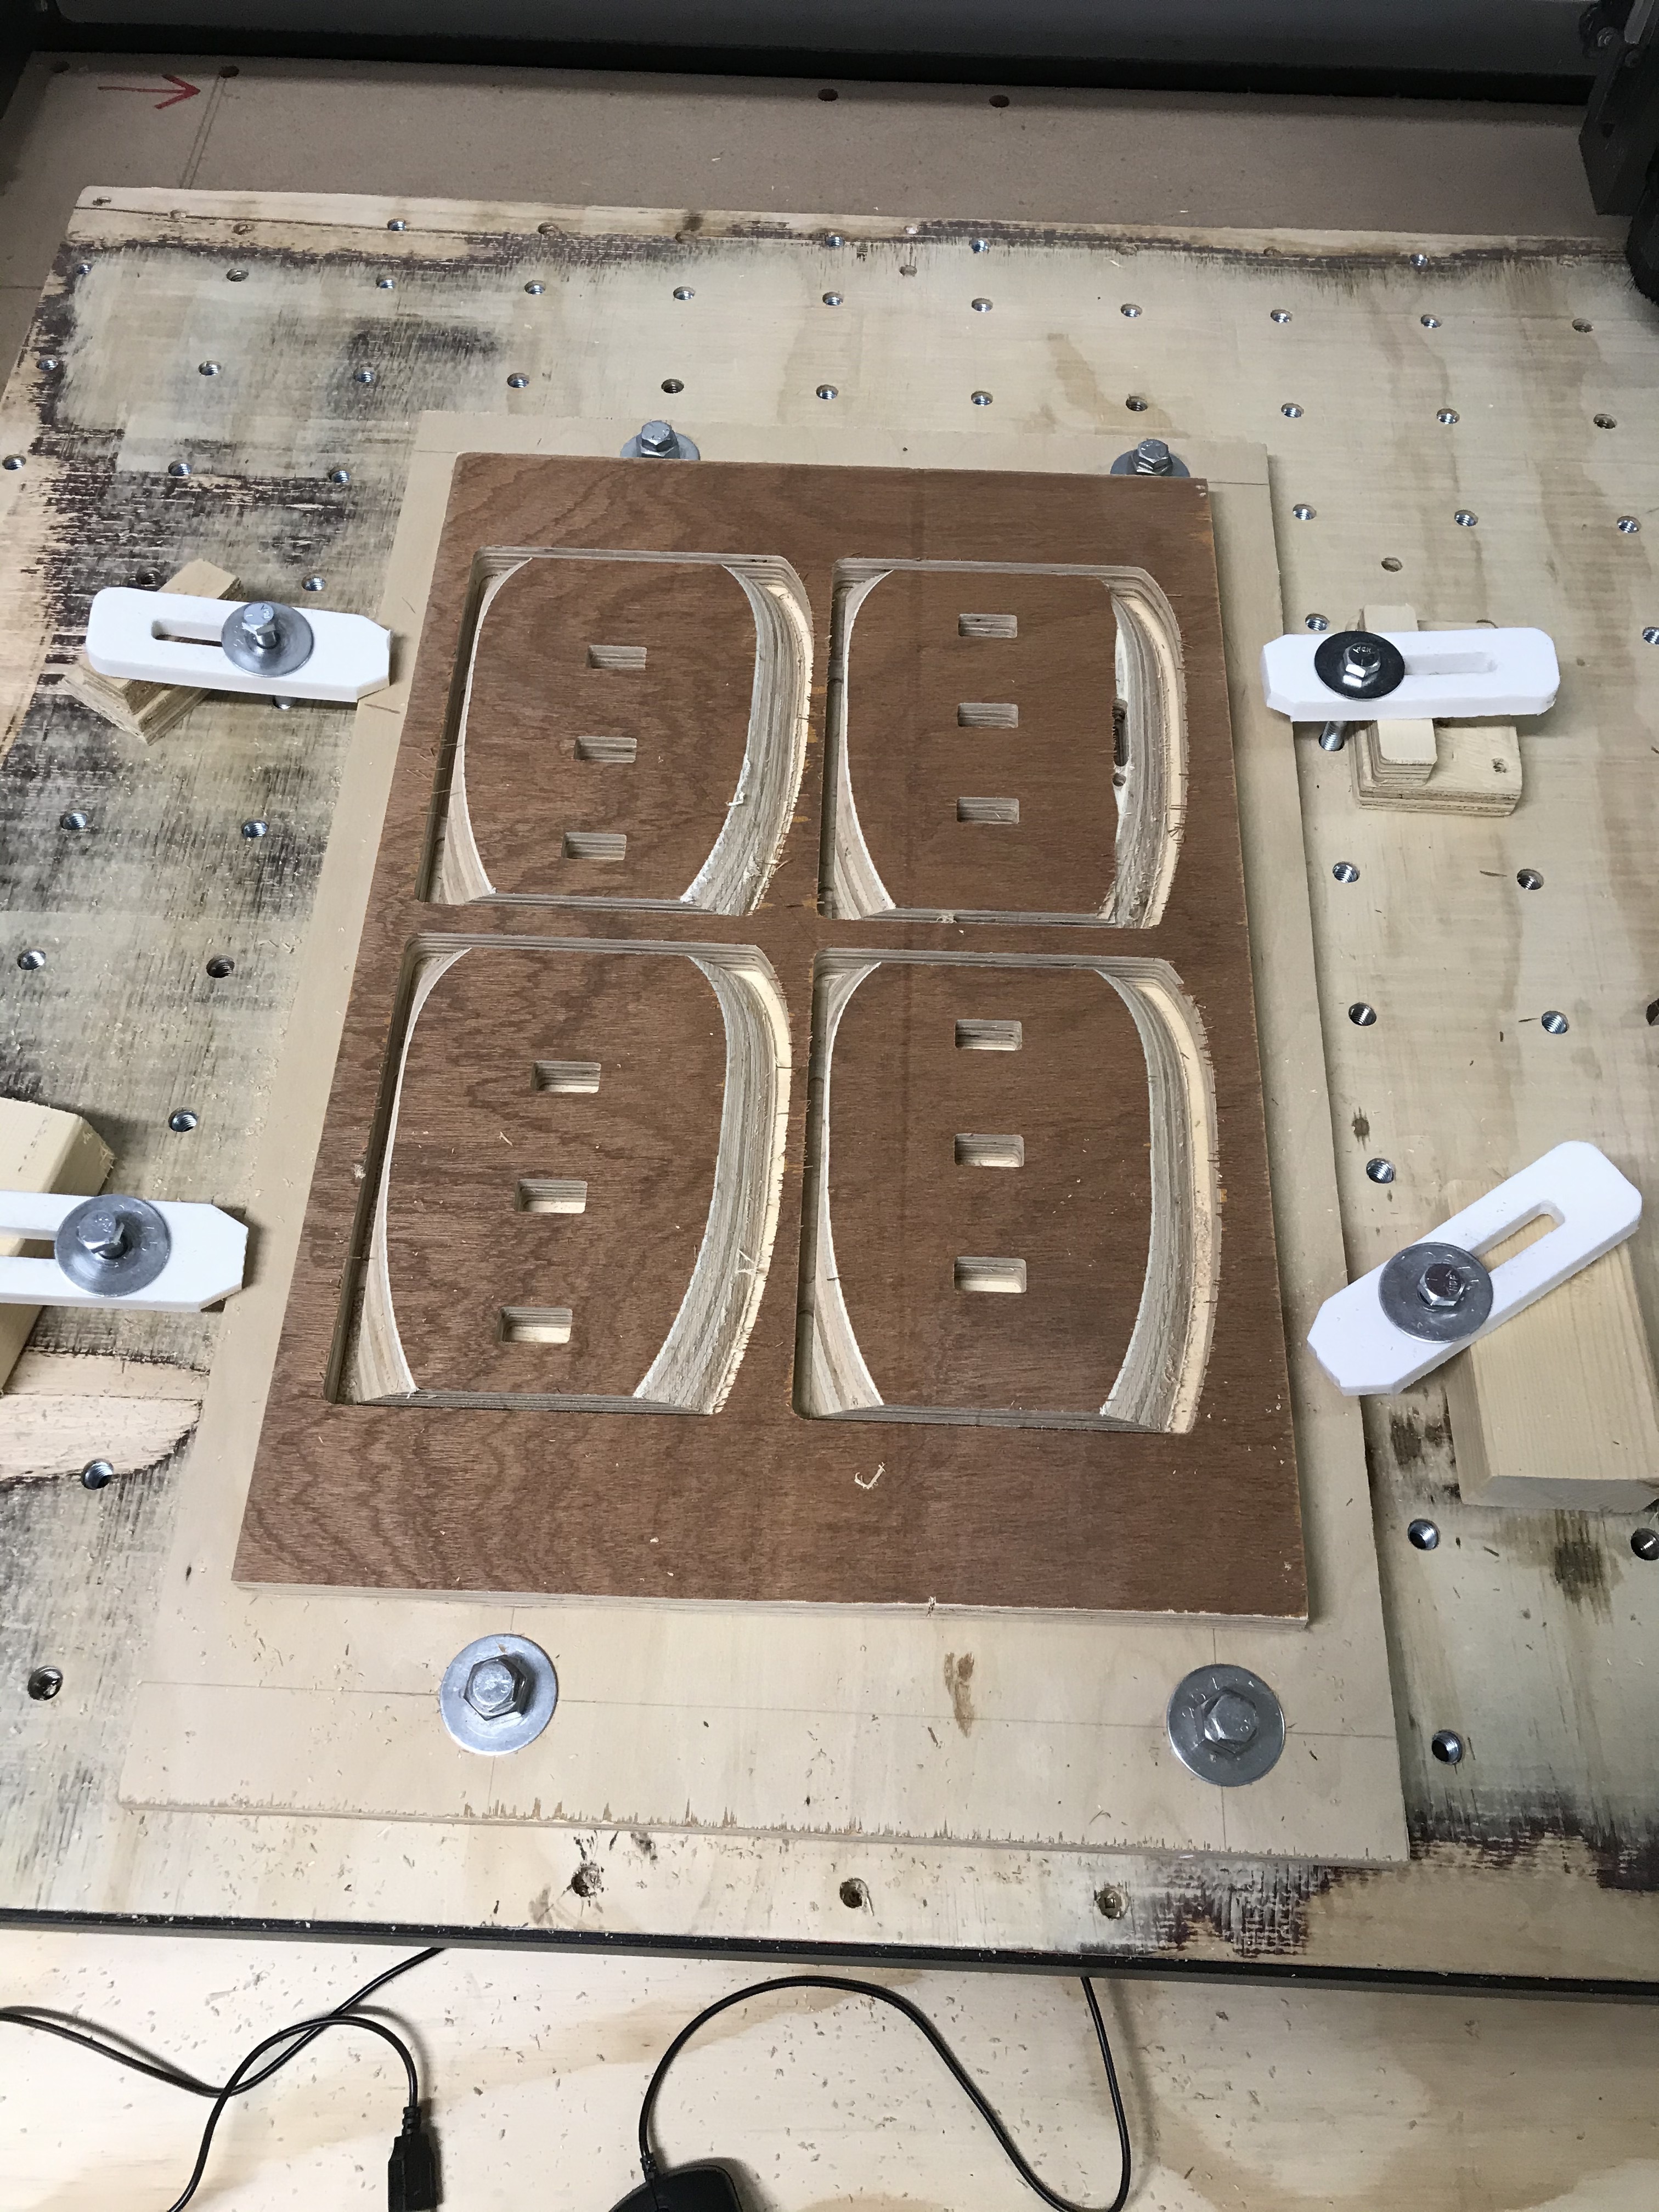
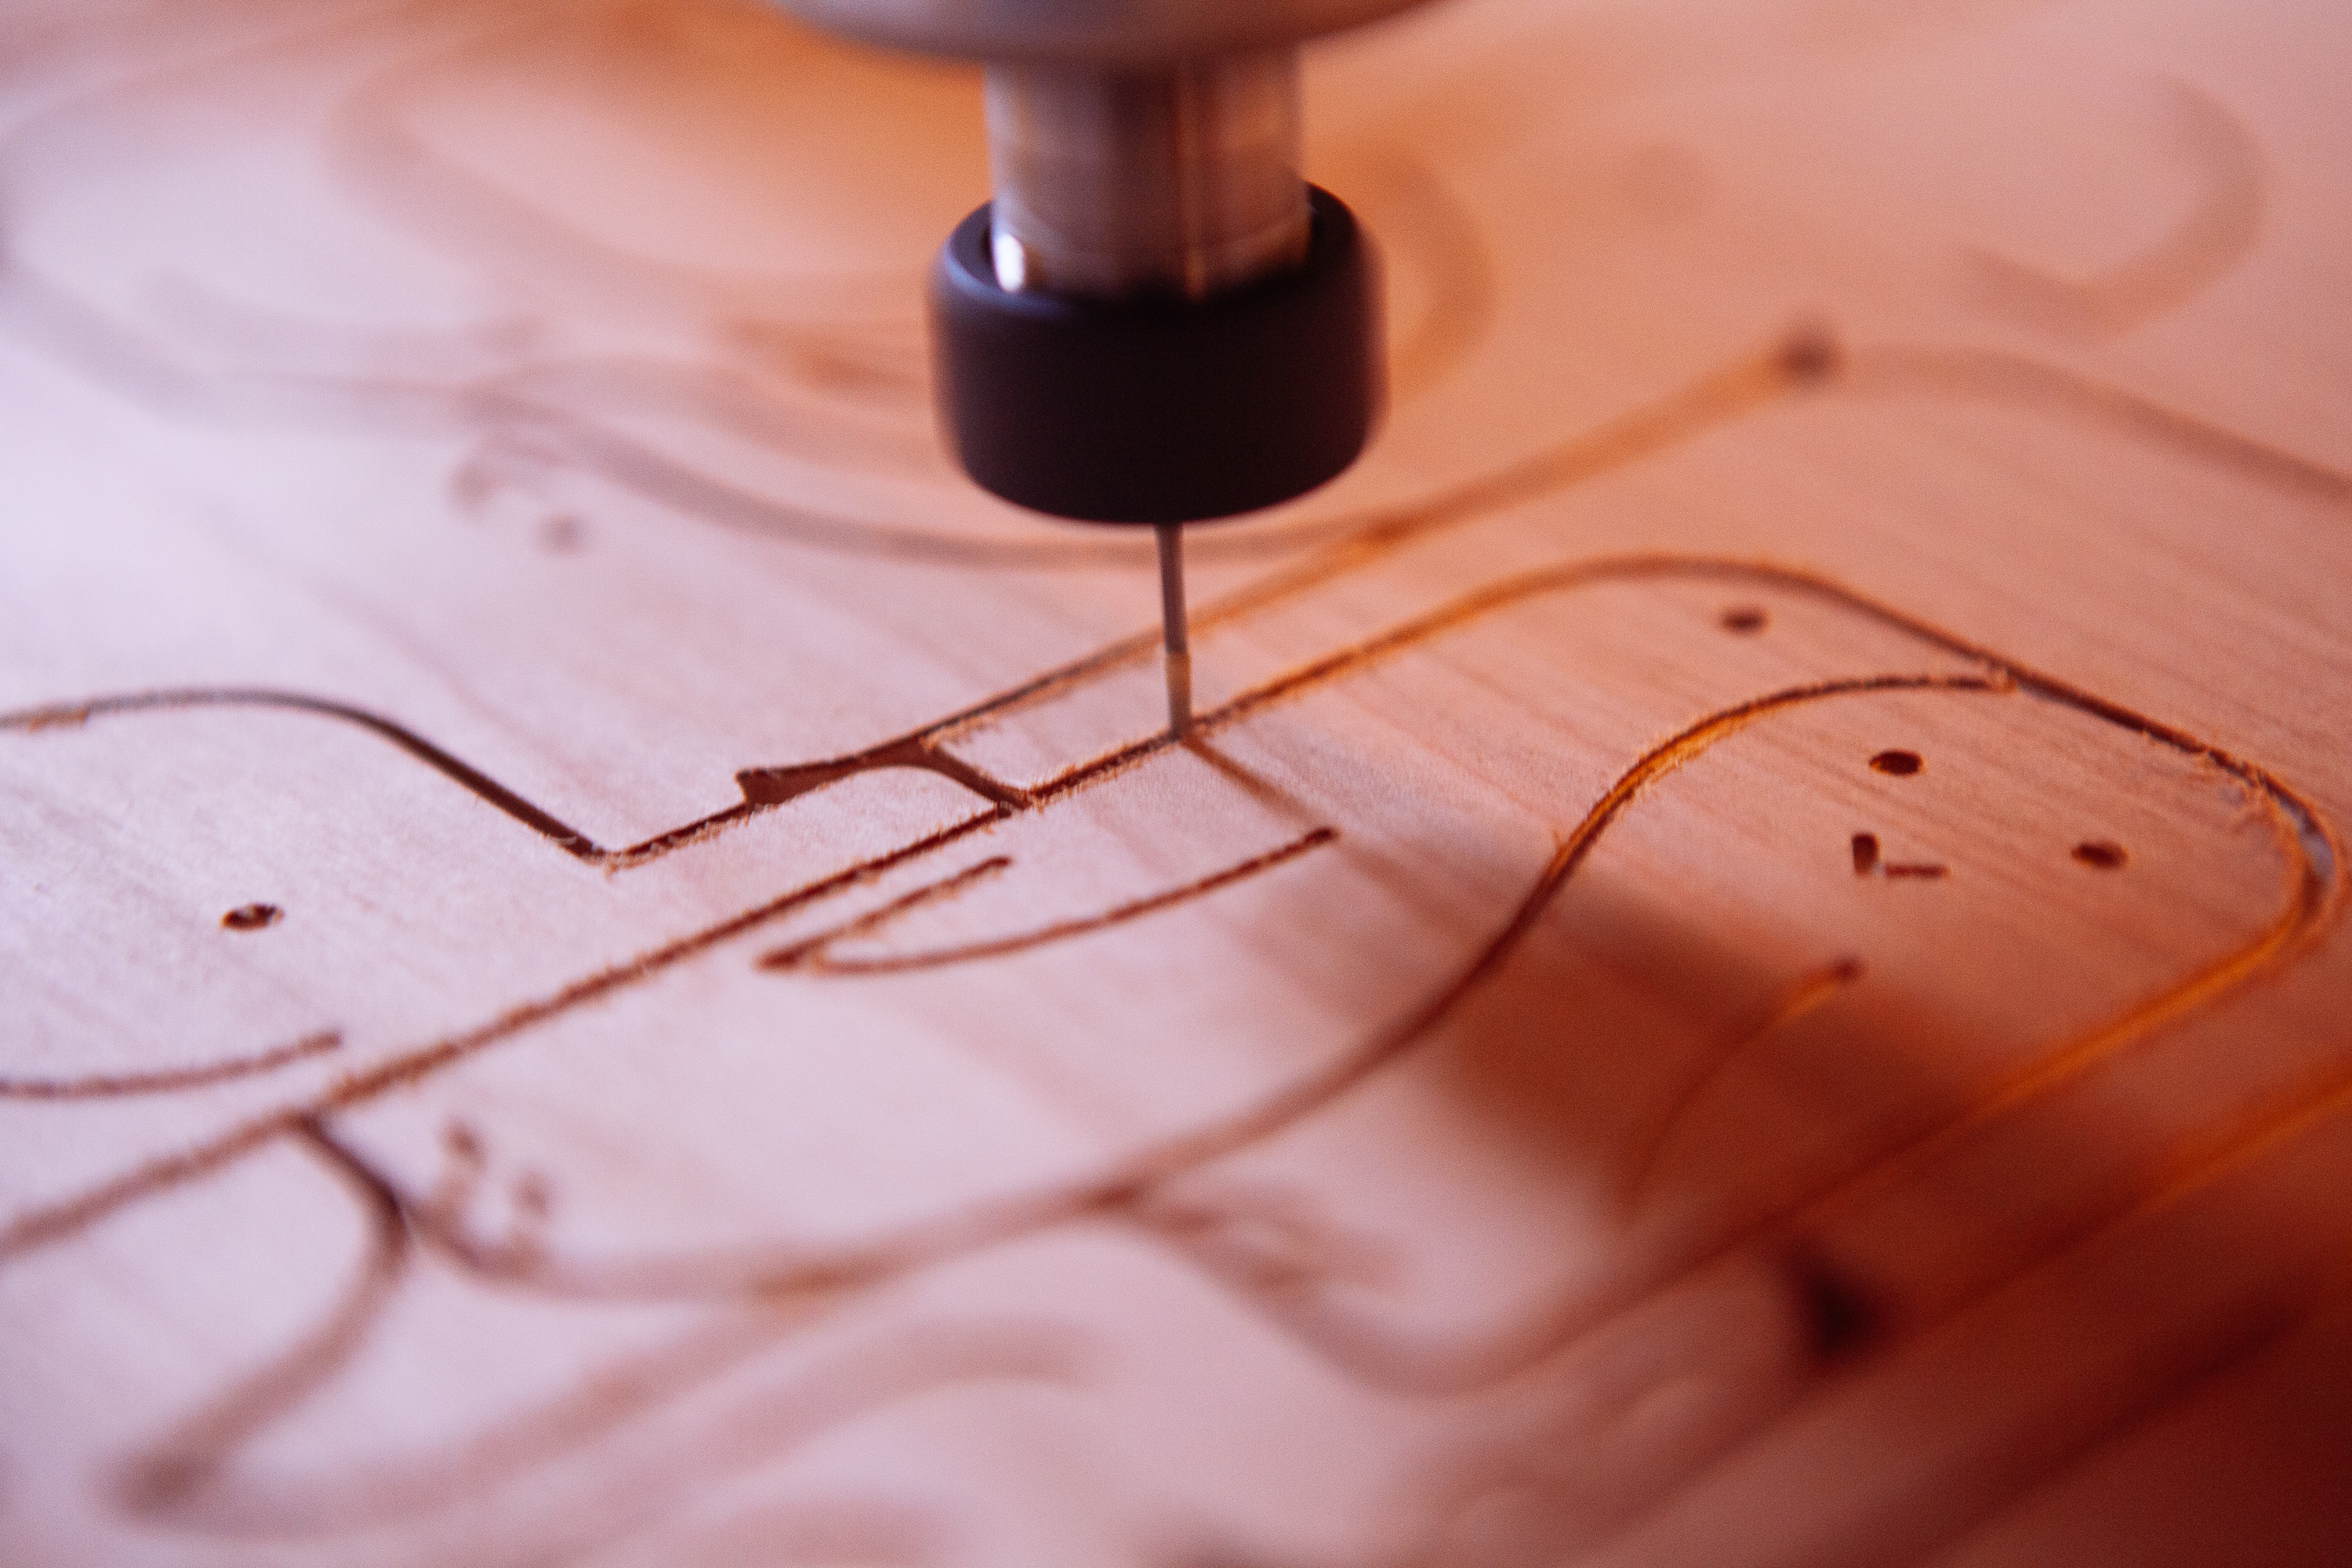
And last but not least the outer shell. Made from cherry plywood added on to spice up the look of the puzzle and to give it some nice smooth contours. It also hides the slider tracks so you can’t see where the holes are. I would have loved to have made this out of black walnut but I never found the time to run to the store and get some because of all the problem solving I was doing hahah. Although to be fair I really like the look of the plywood end grain criss crossing on the sides.
This project was a huge learning curve for me, I think I have tried each of these machining principles in the past in one form or another but I have never done them to this scale or with the needed accuracy as this project demanded.
Here are the notable machining feats.
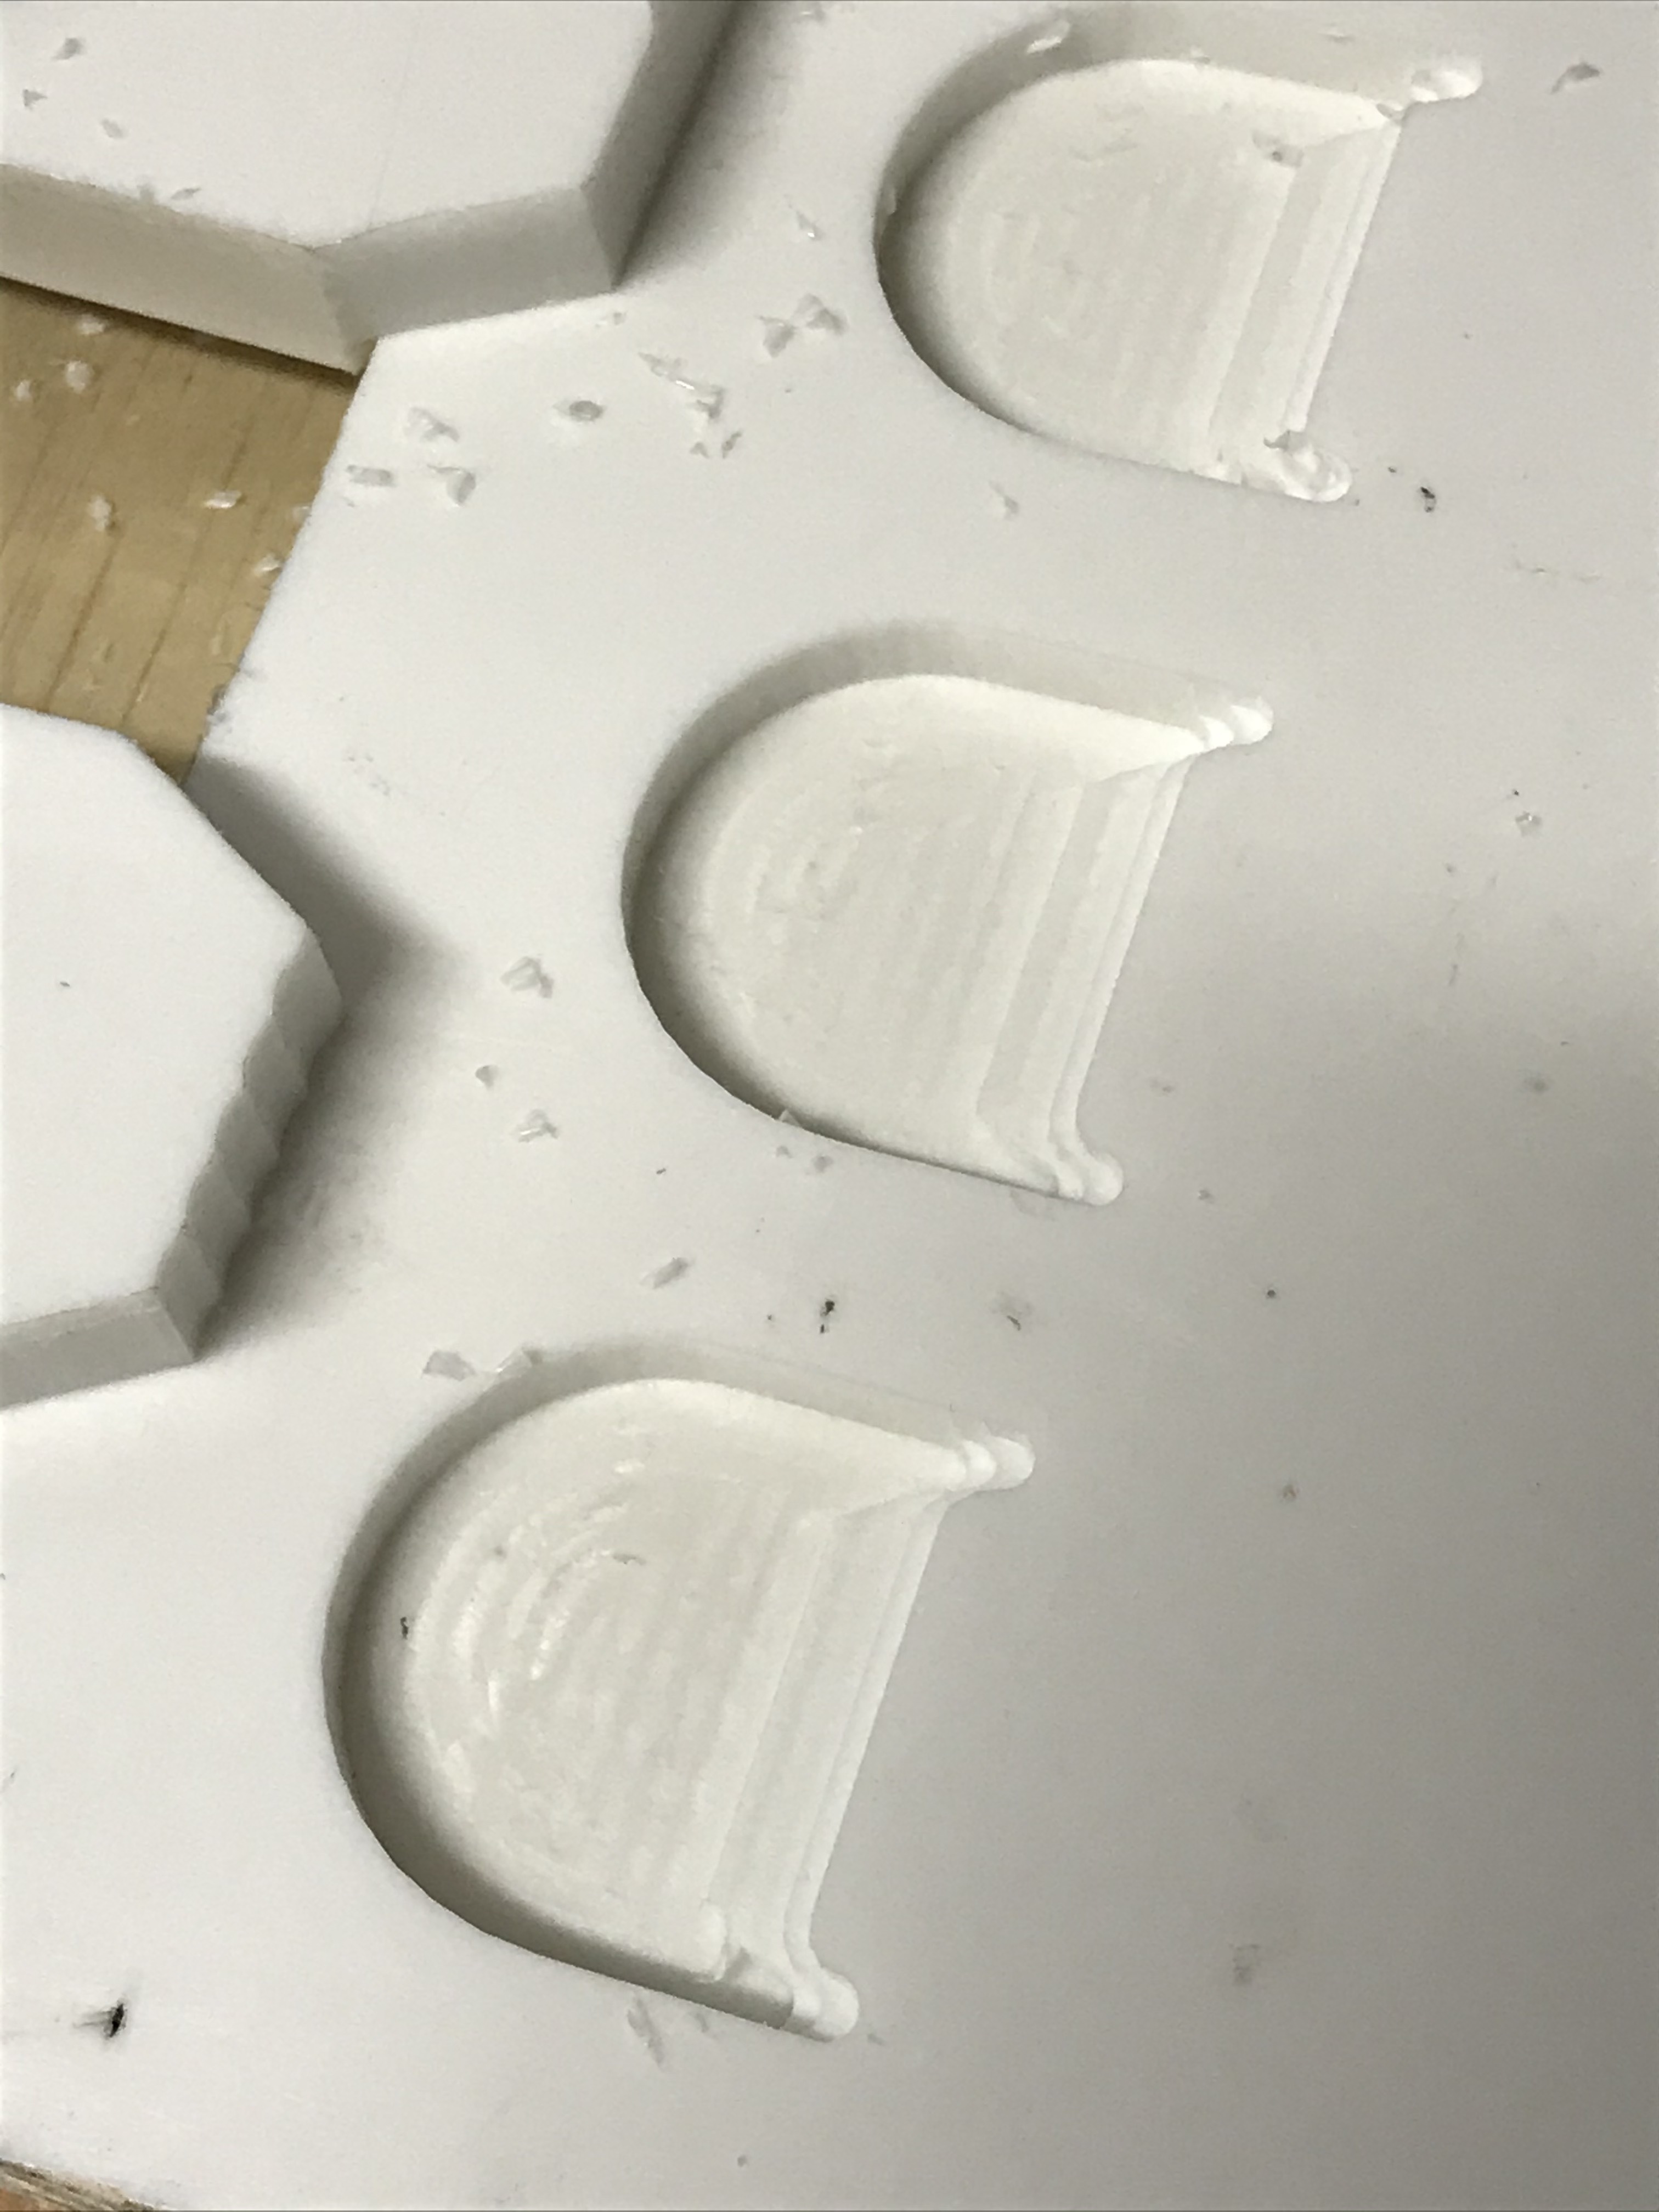
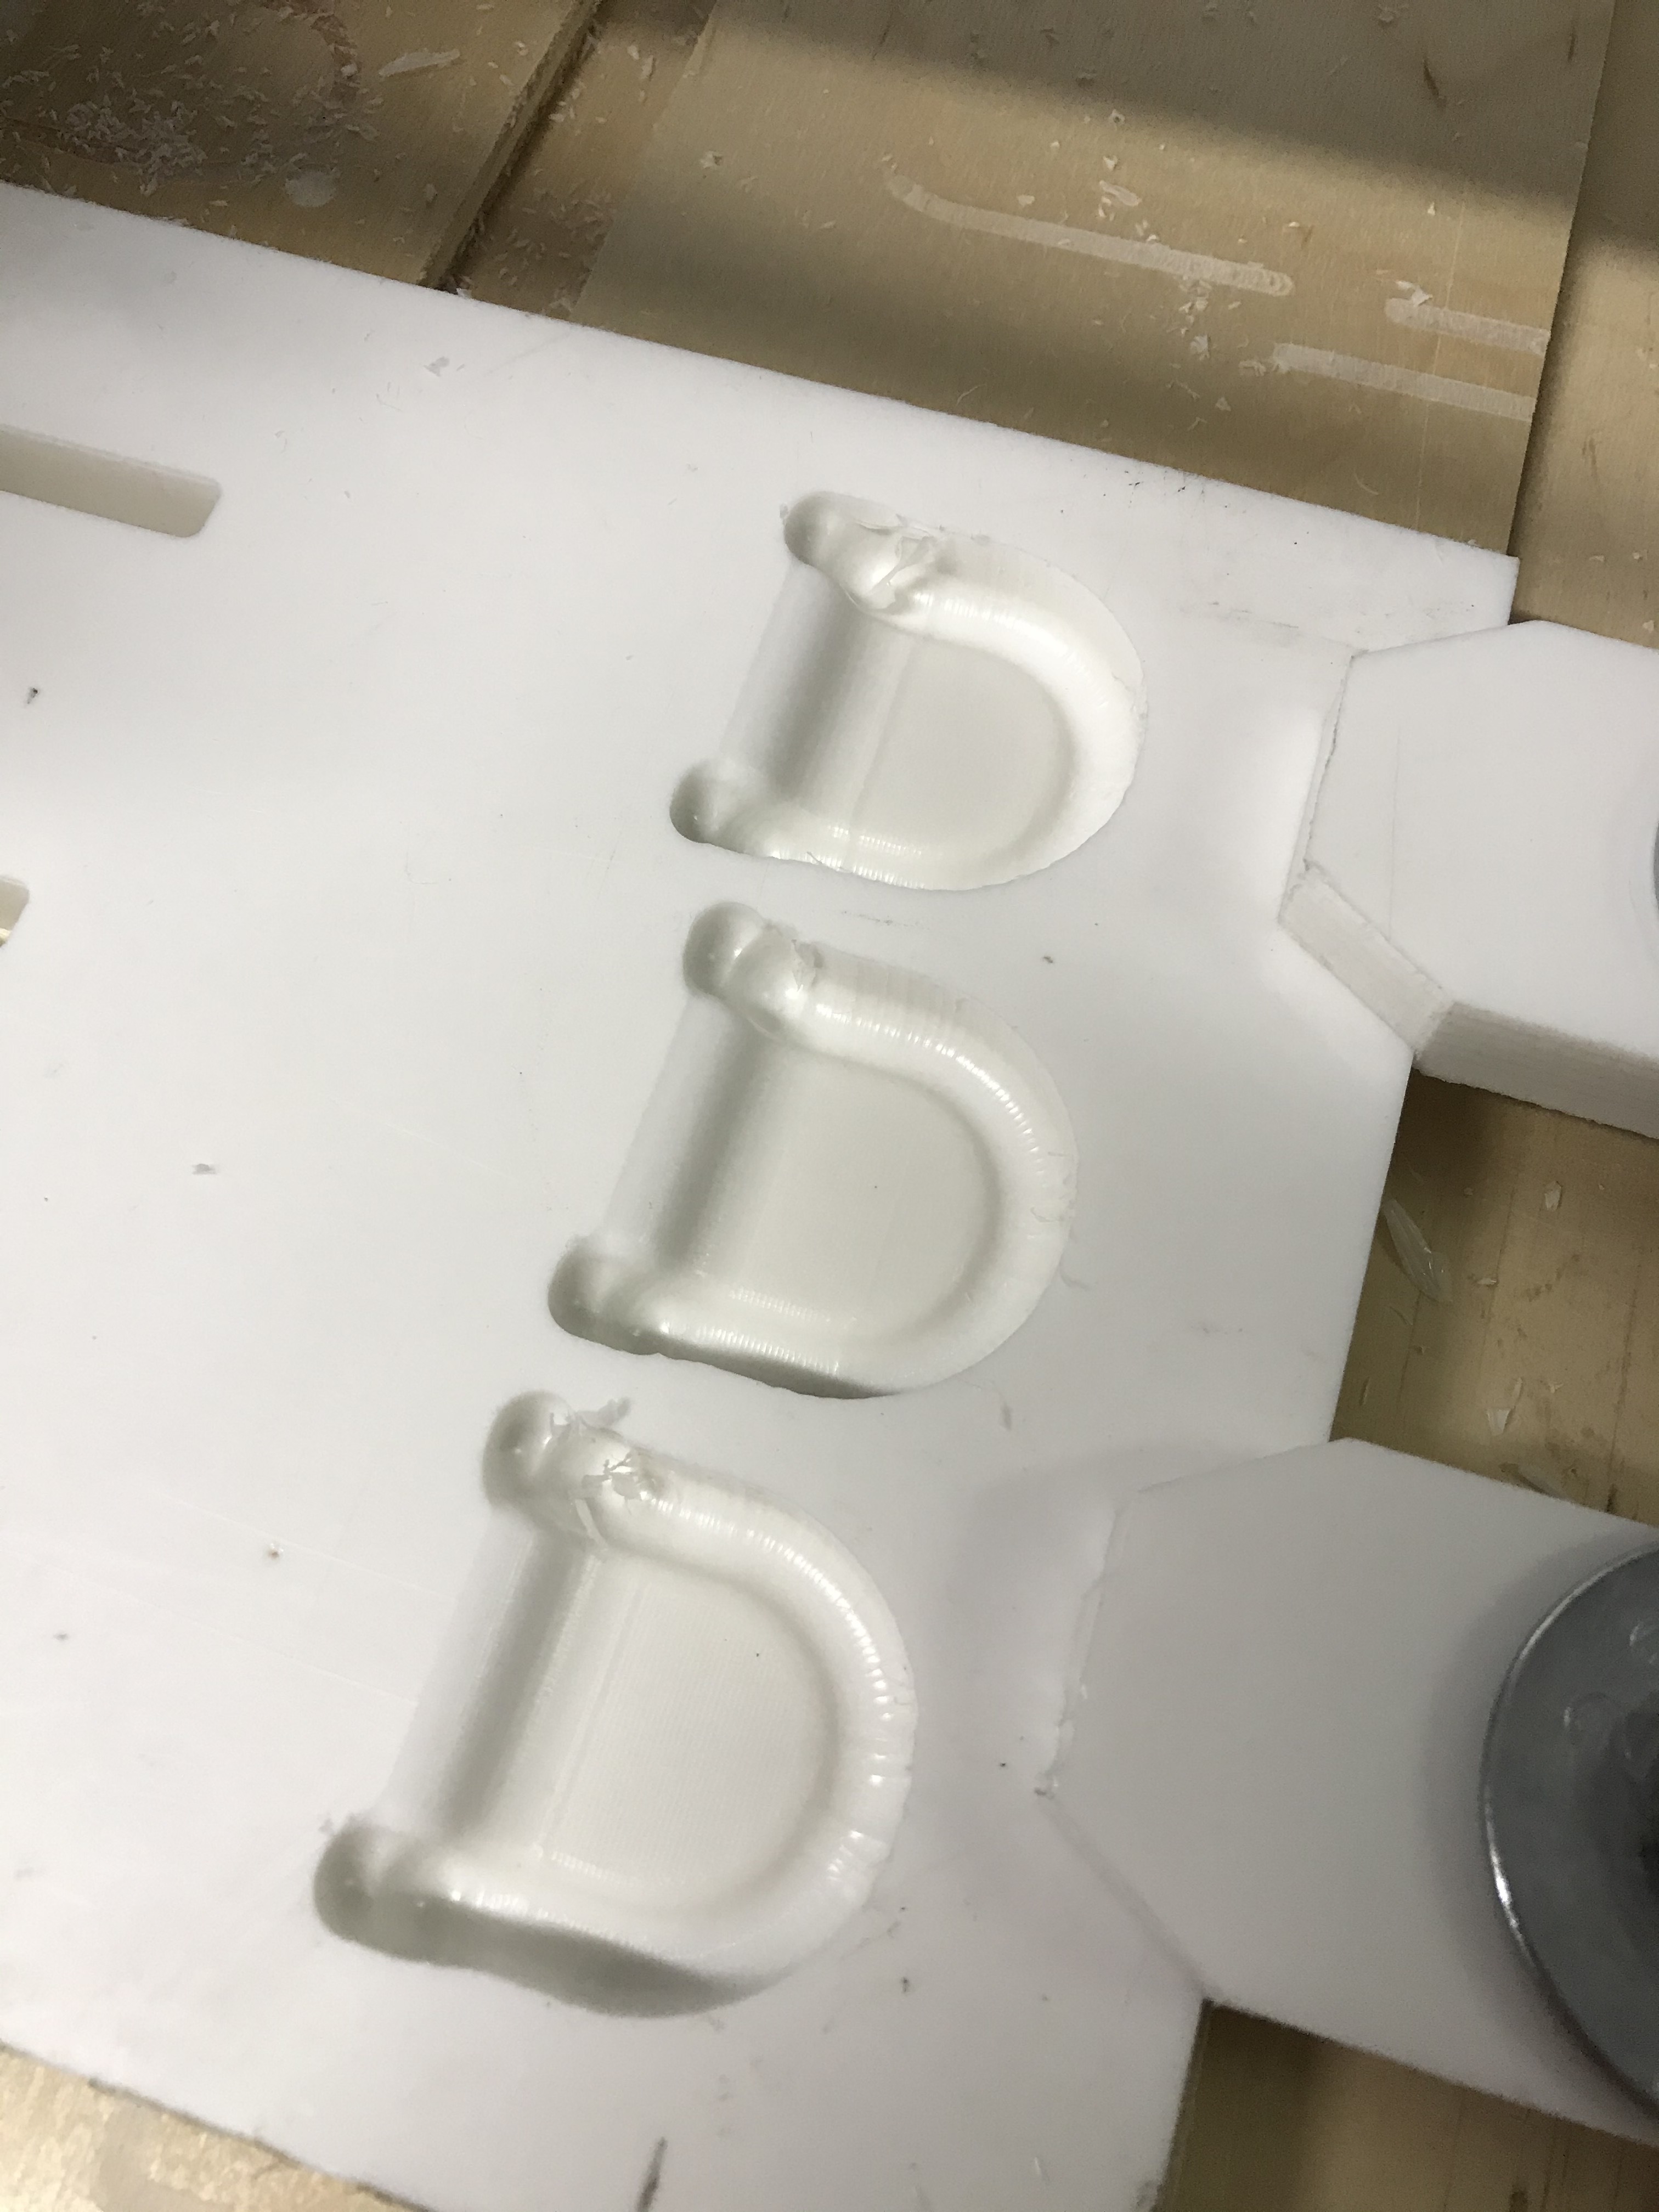
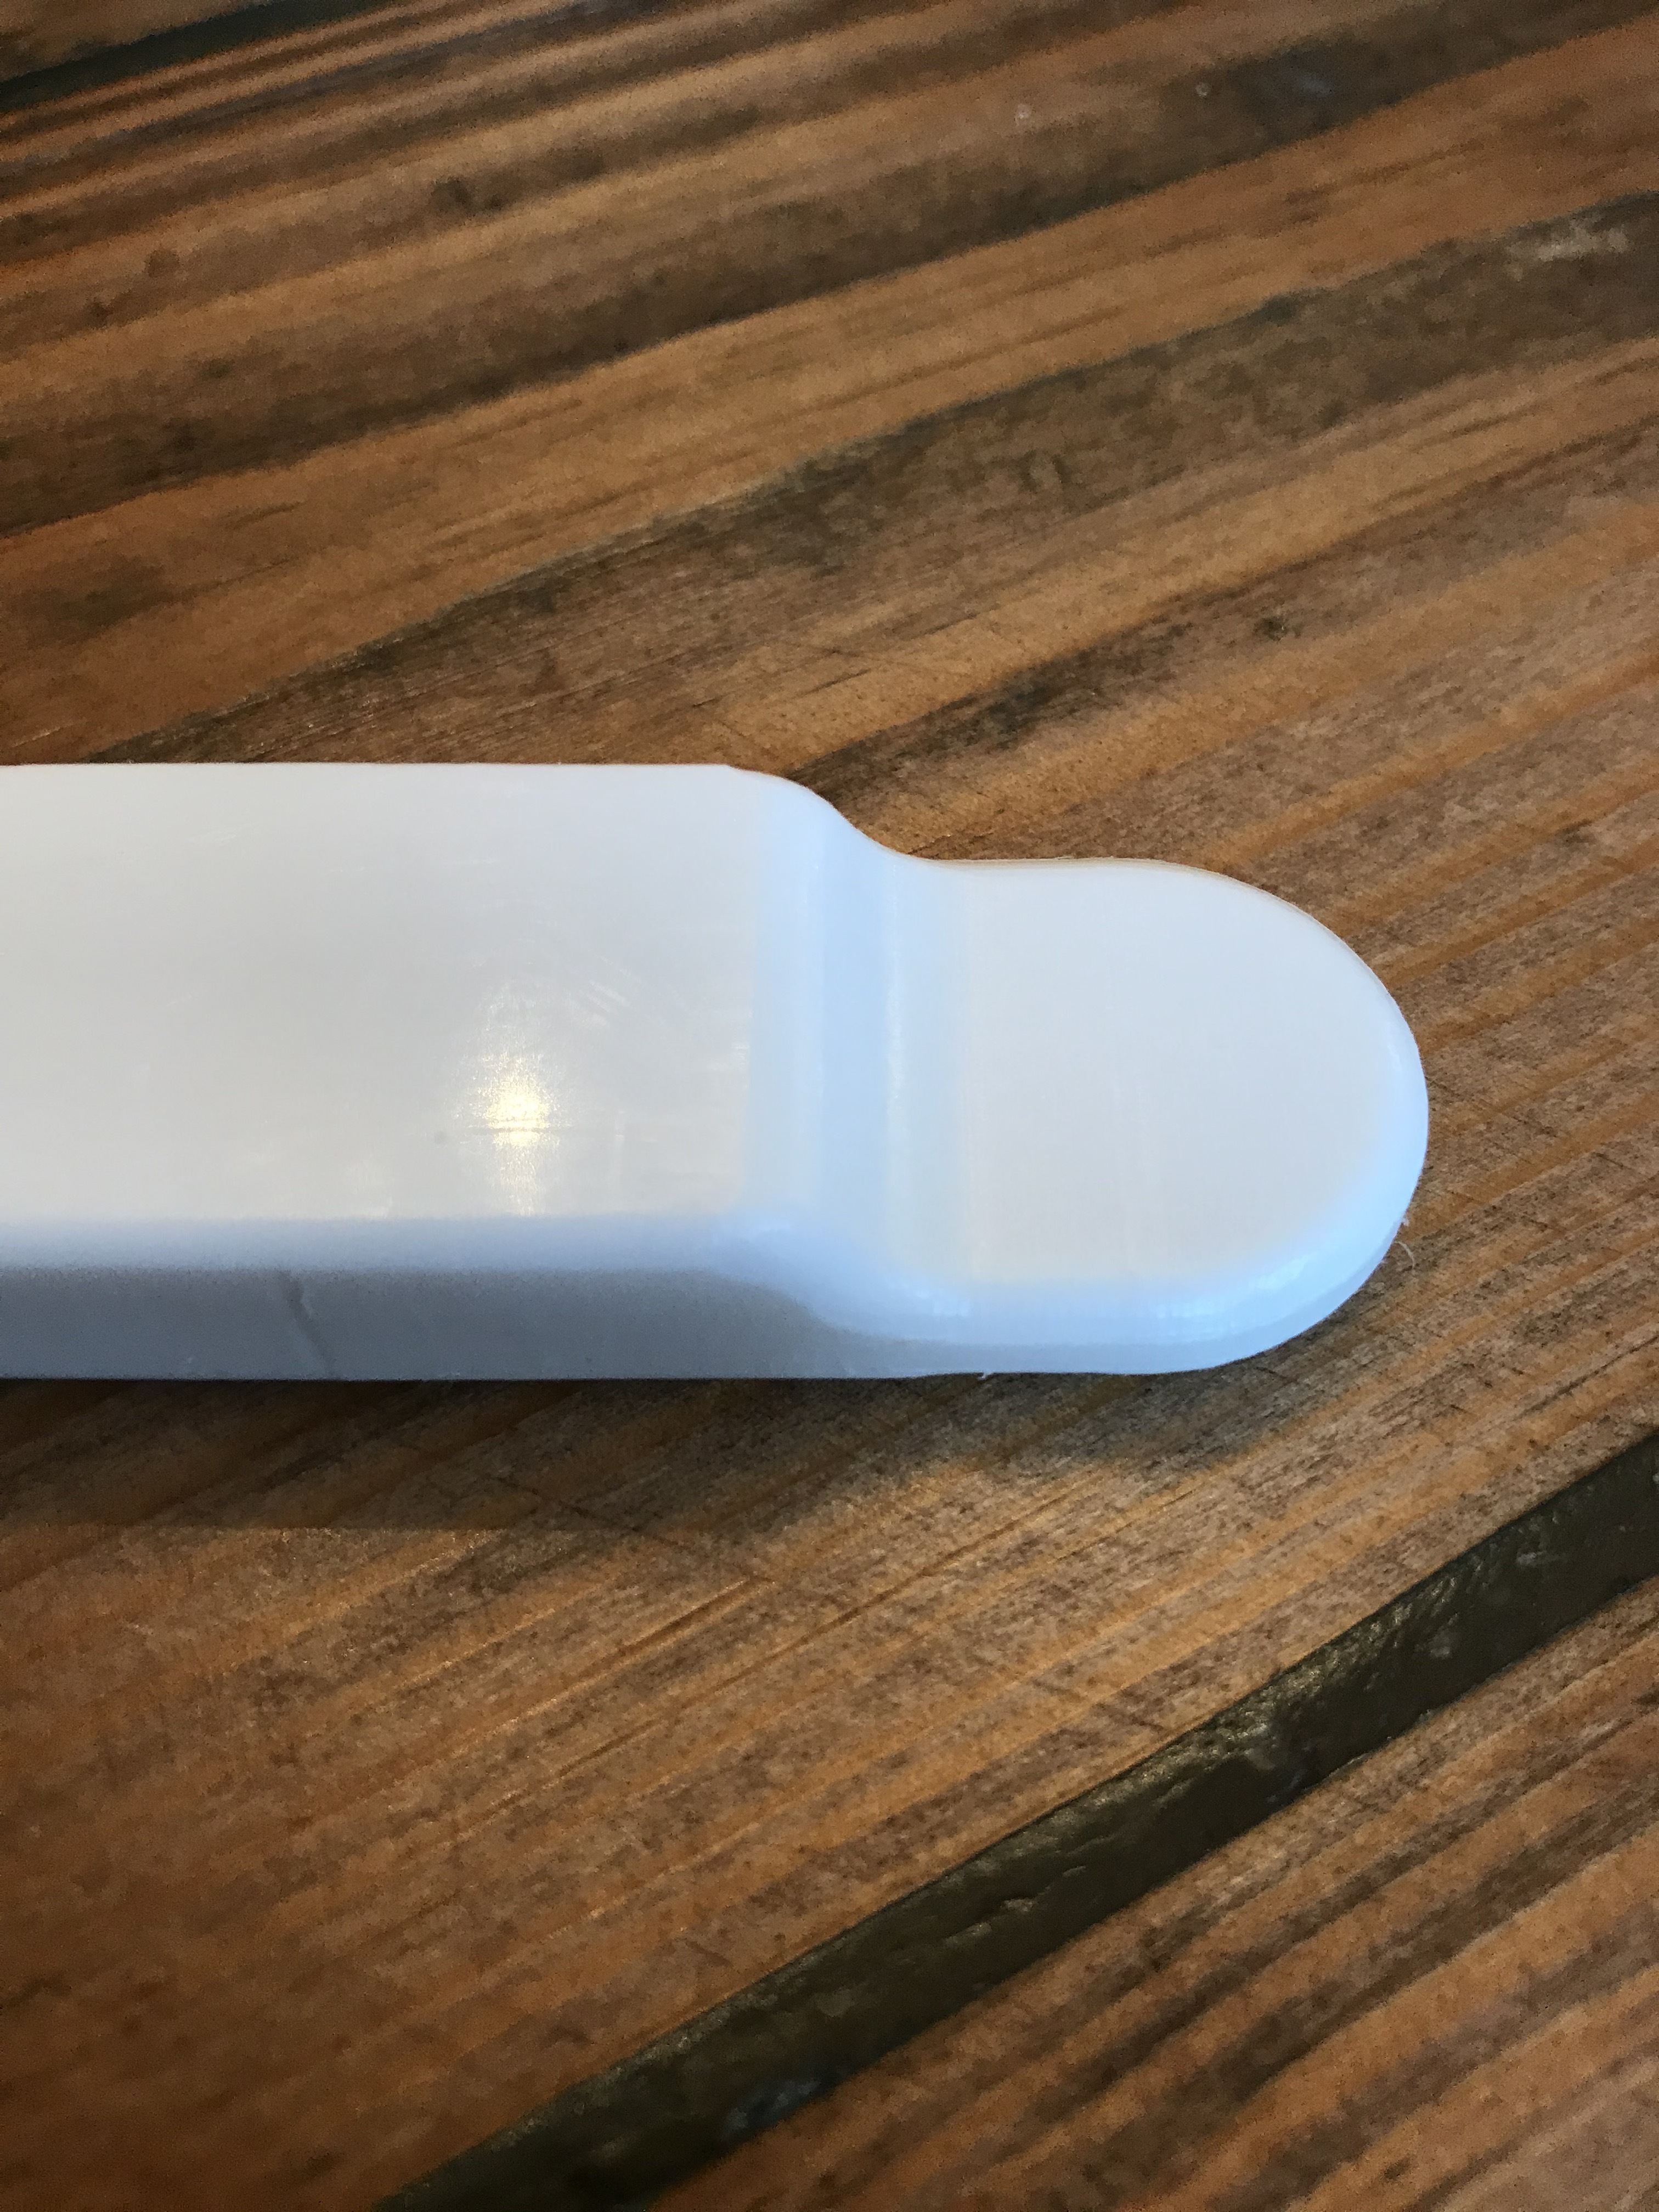
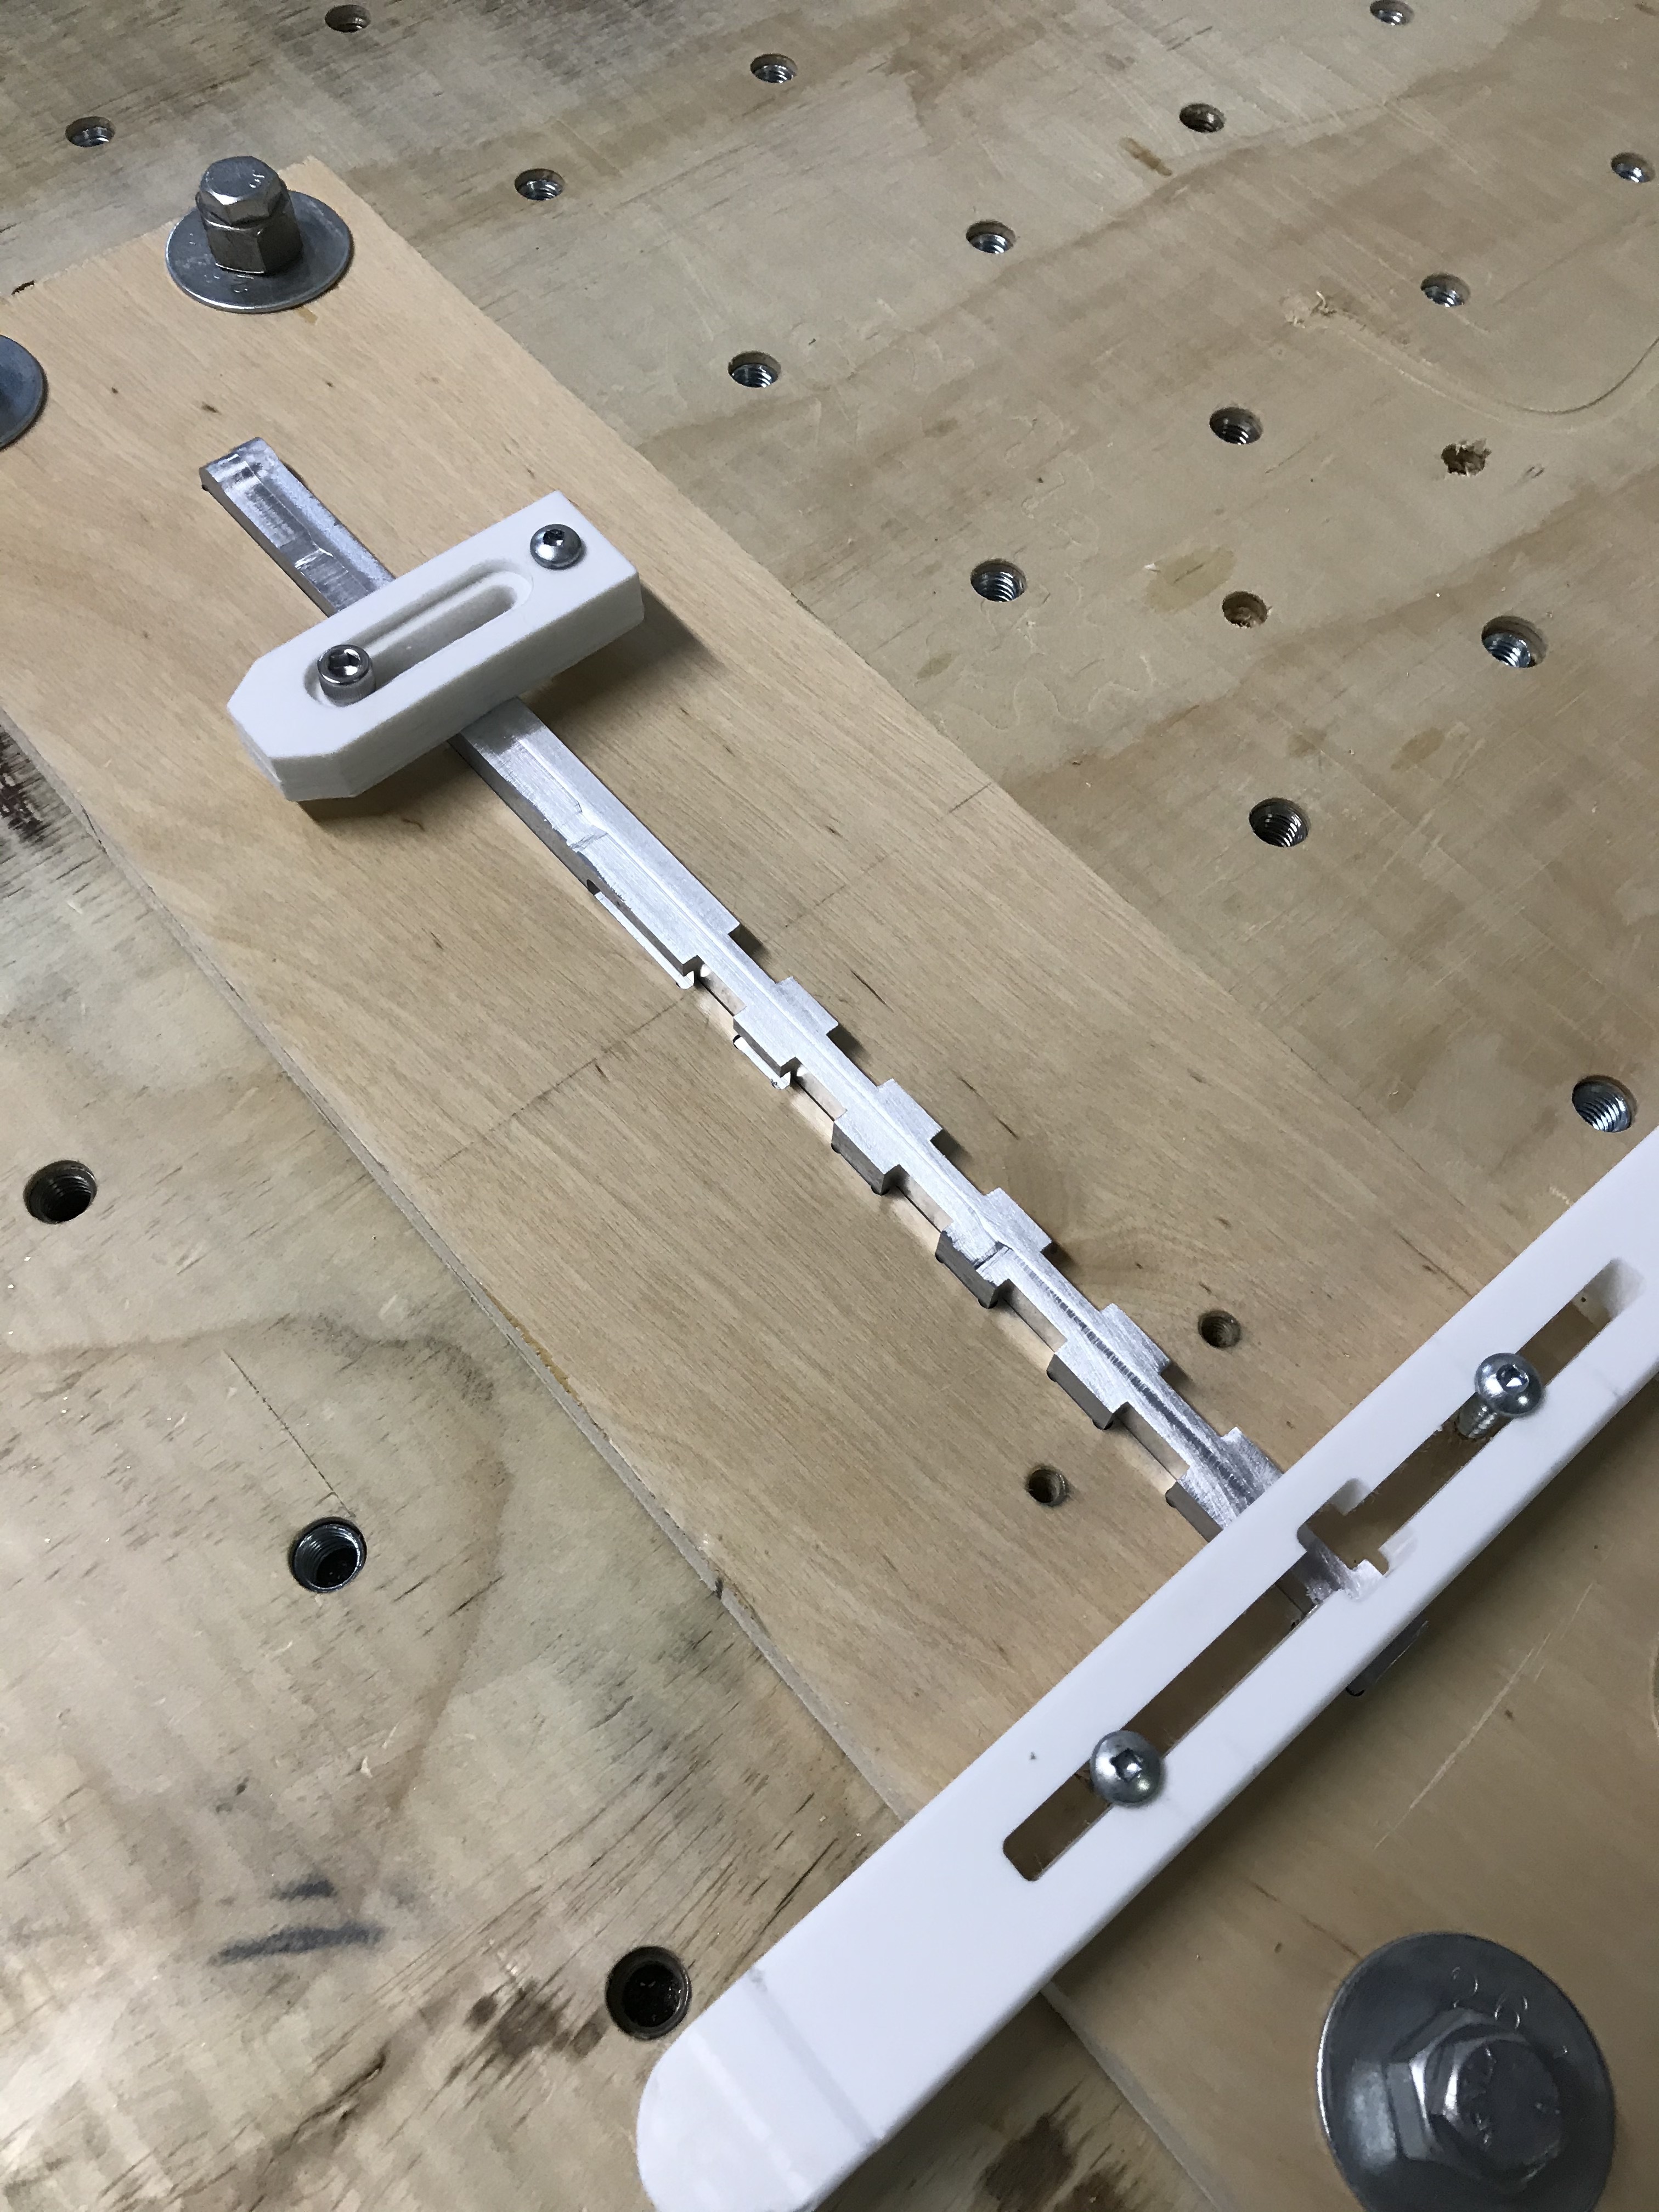
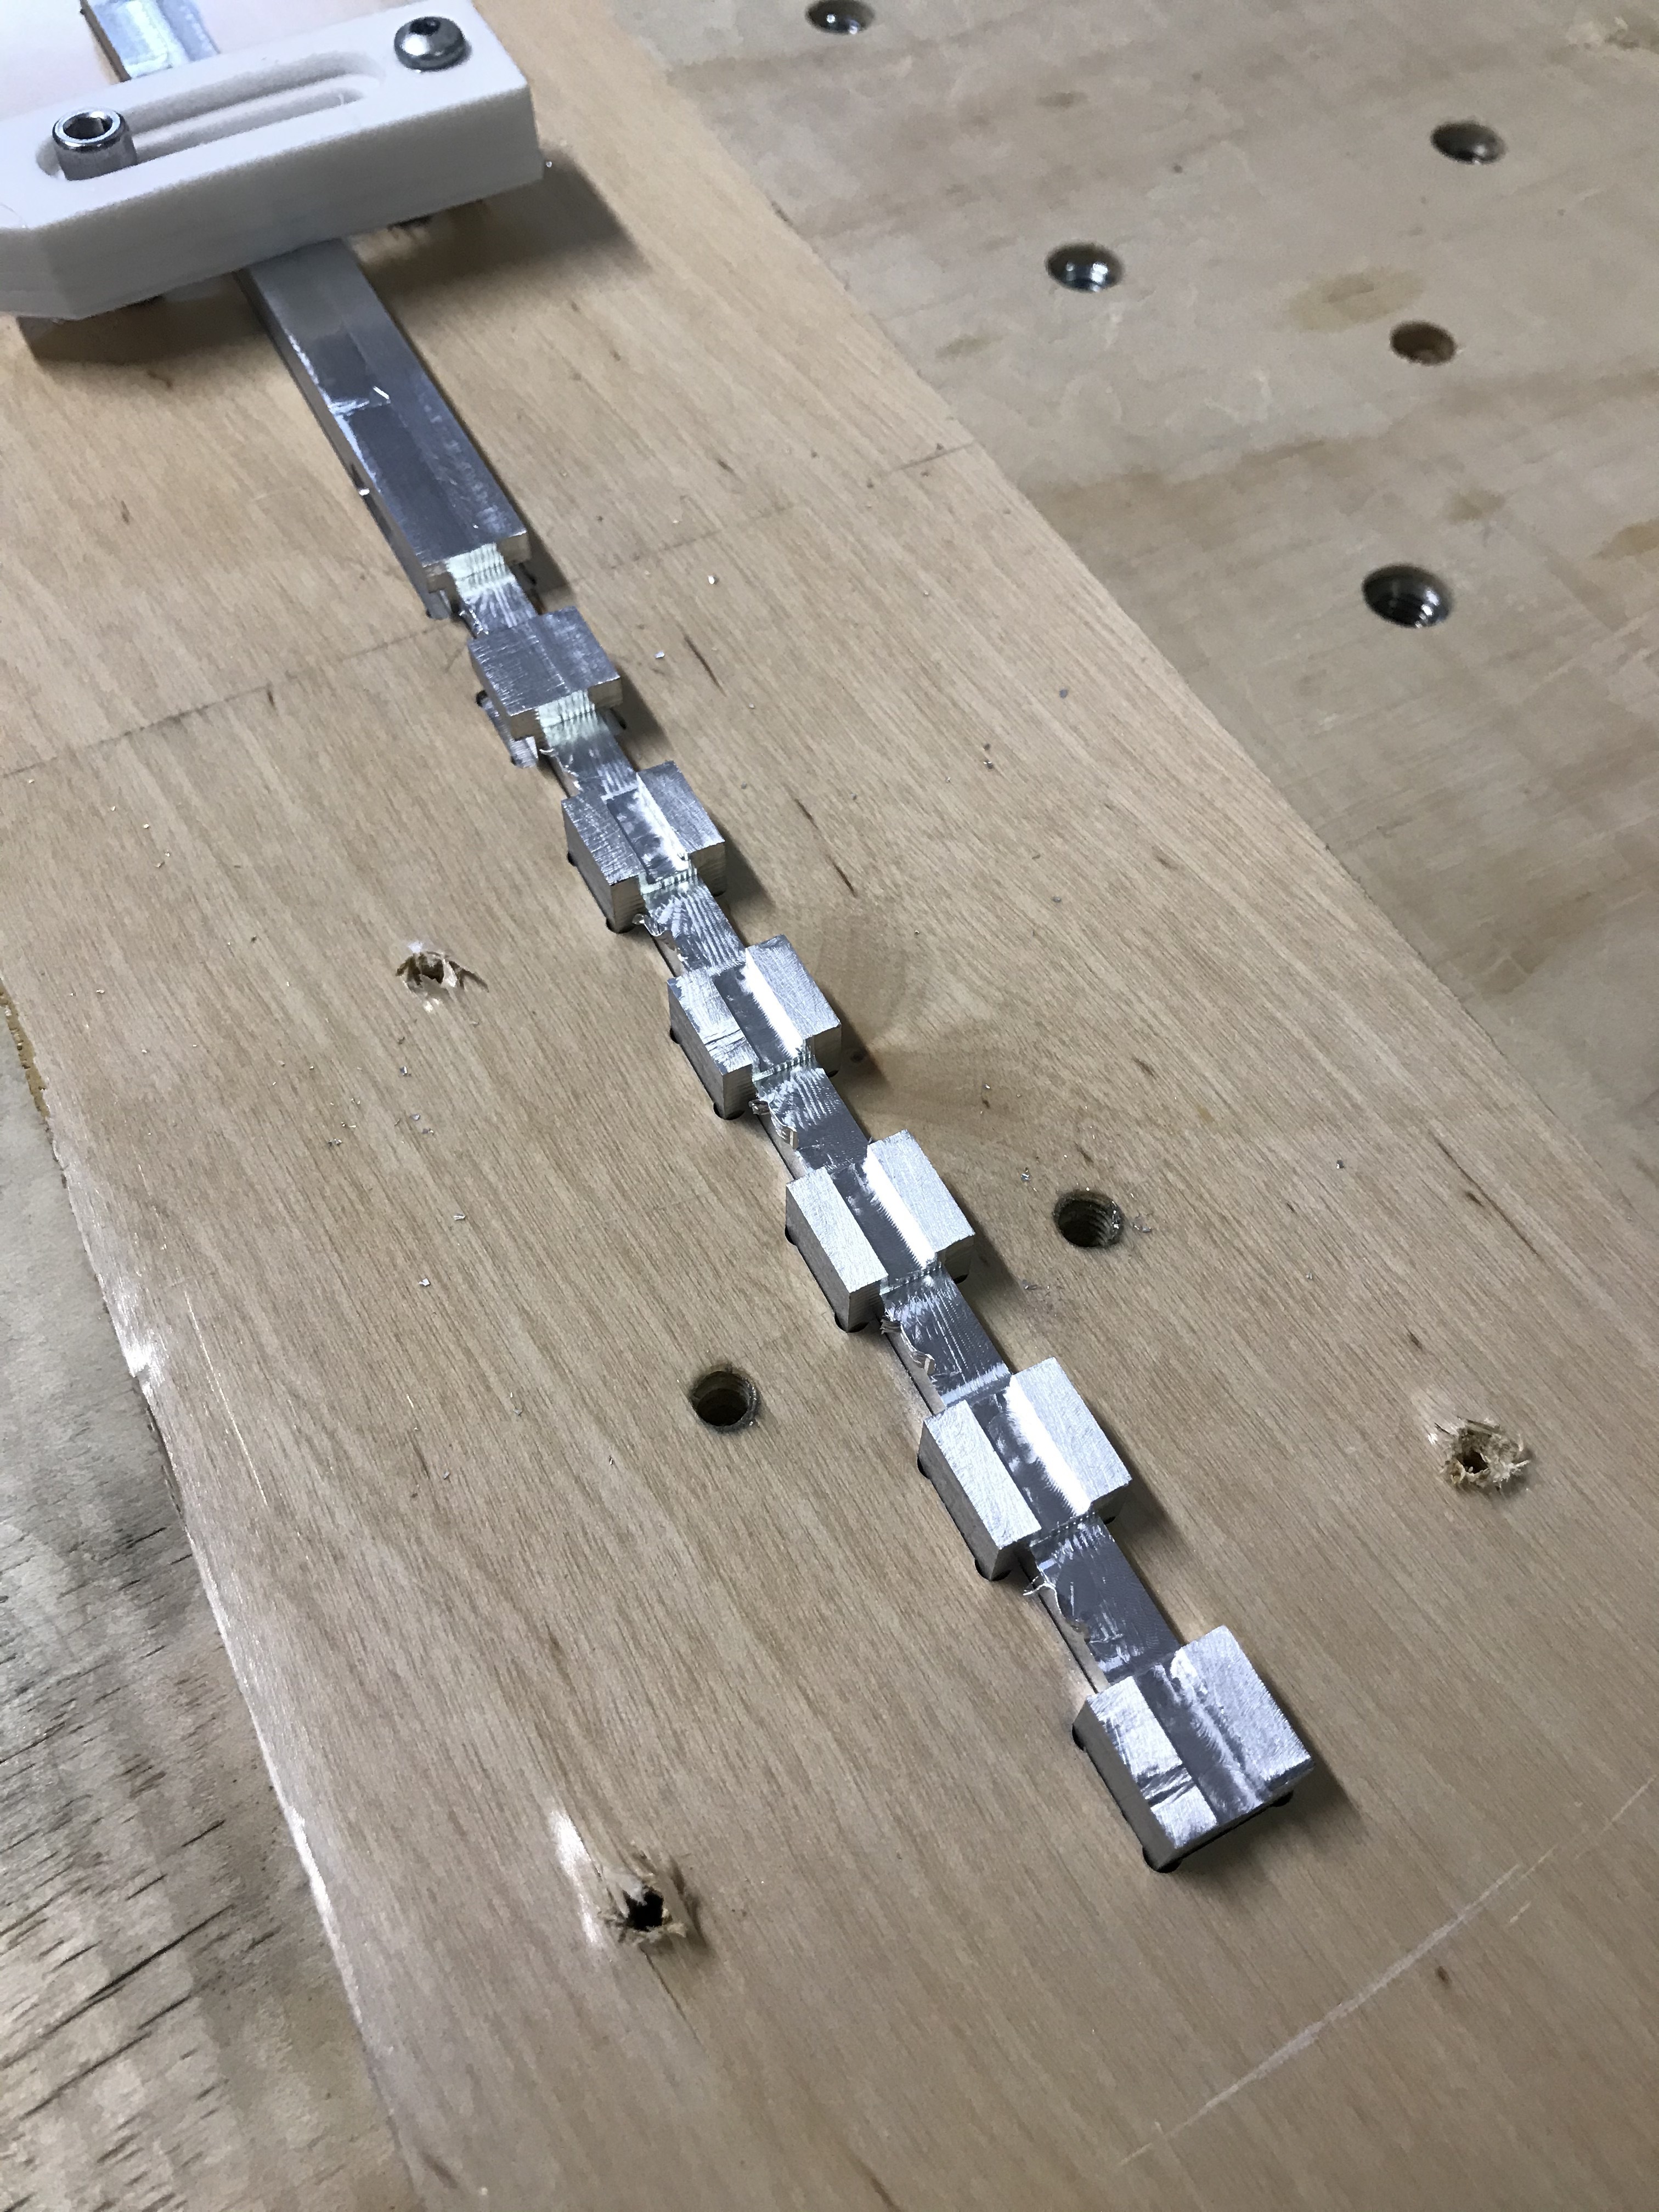
The slider handles came out great! With smooth fillets rolling into each other and a near mirror finish, needless to say I am very pleased. I used a roughing pass with a .25’’ upcut bit and then a ball nose bit with a .25mm step over. It took me a couple tries to get the step over and I realized after the first go that I could also machine the .125’’ round over on the edges.
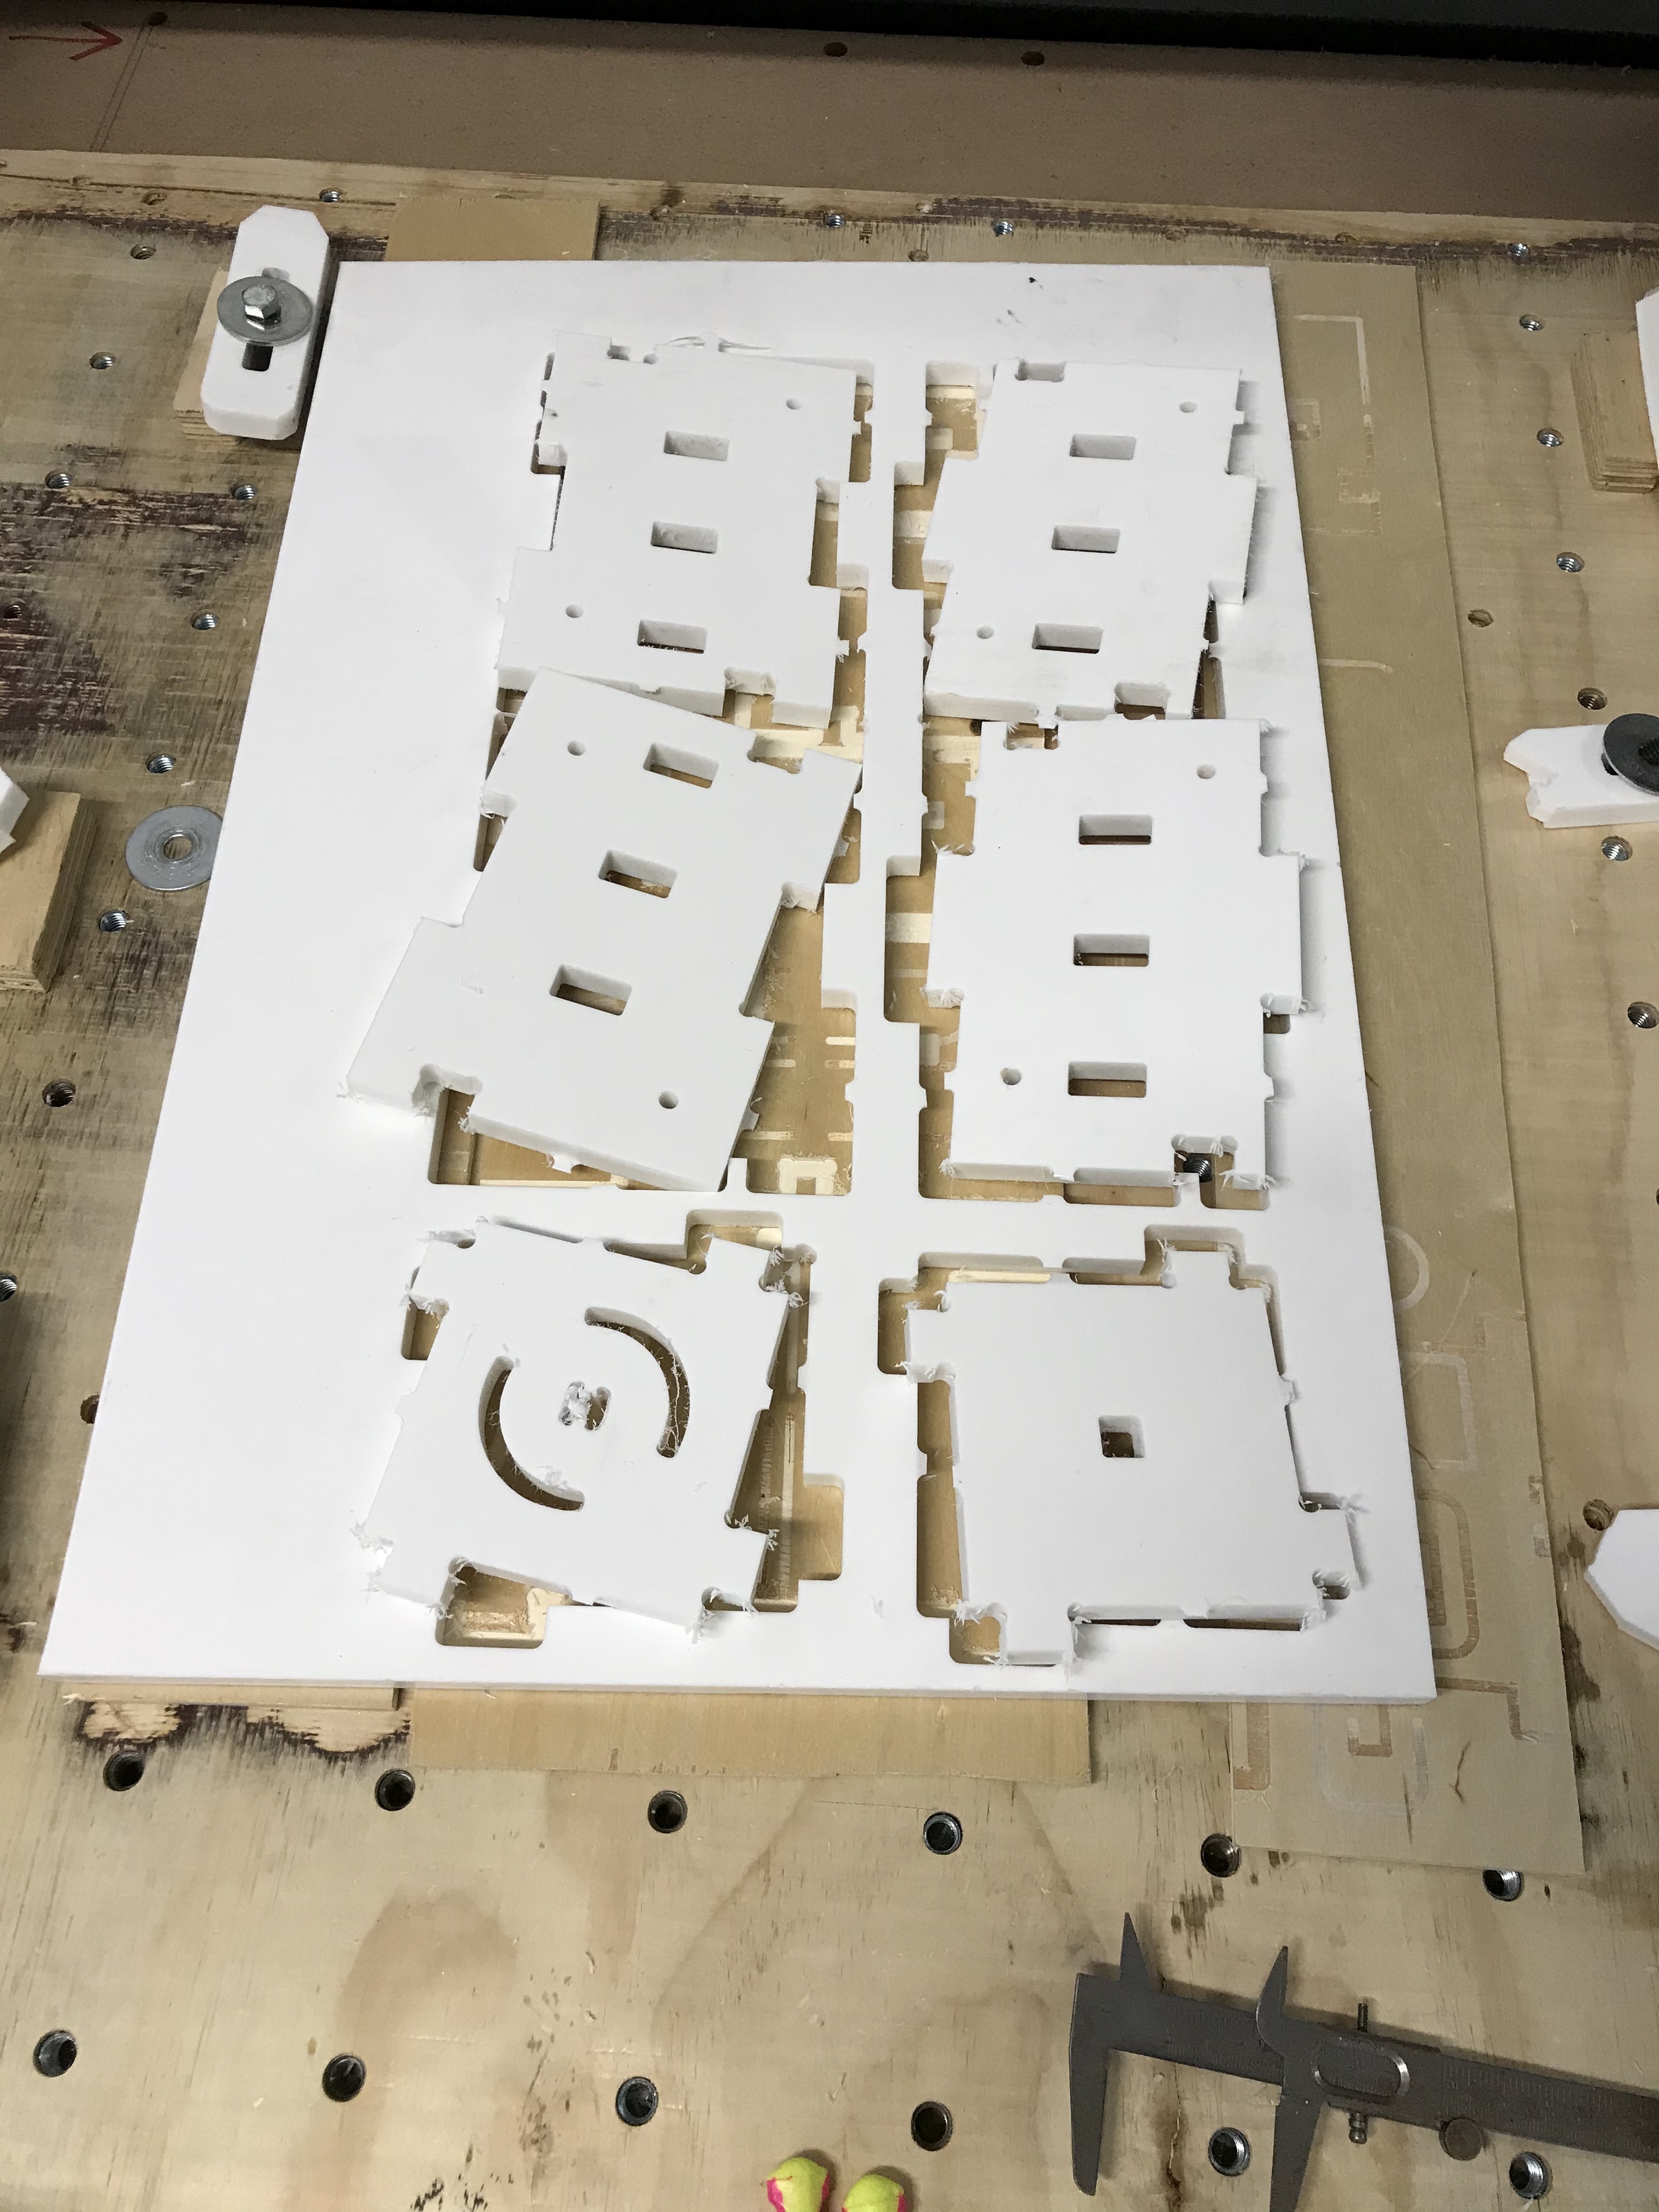
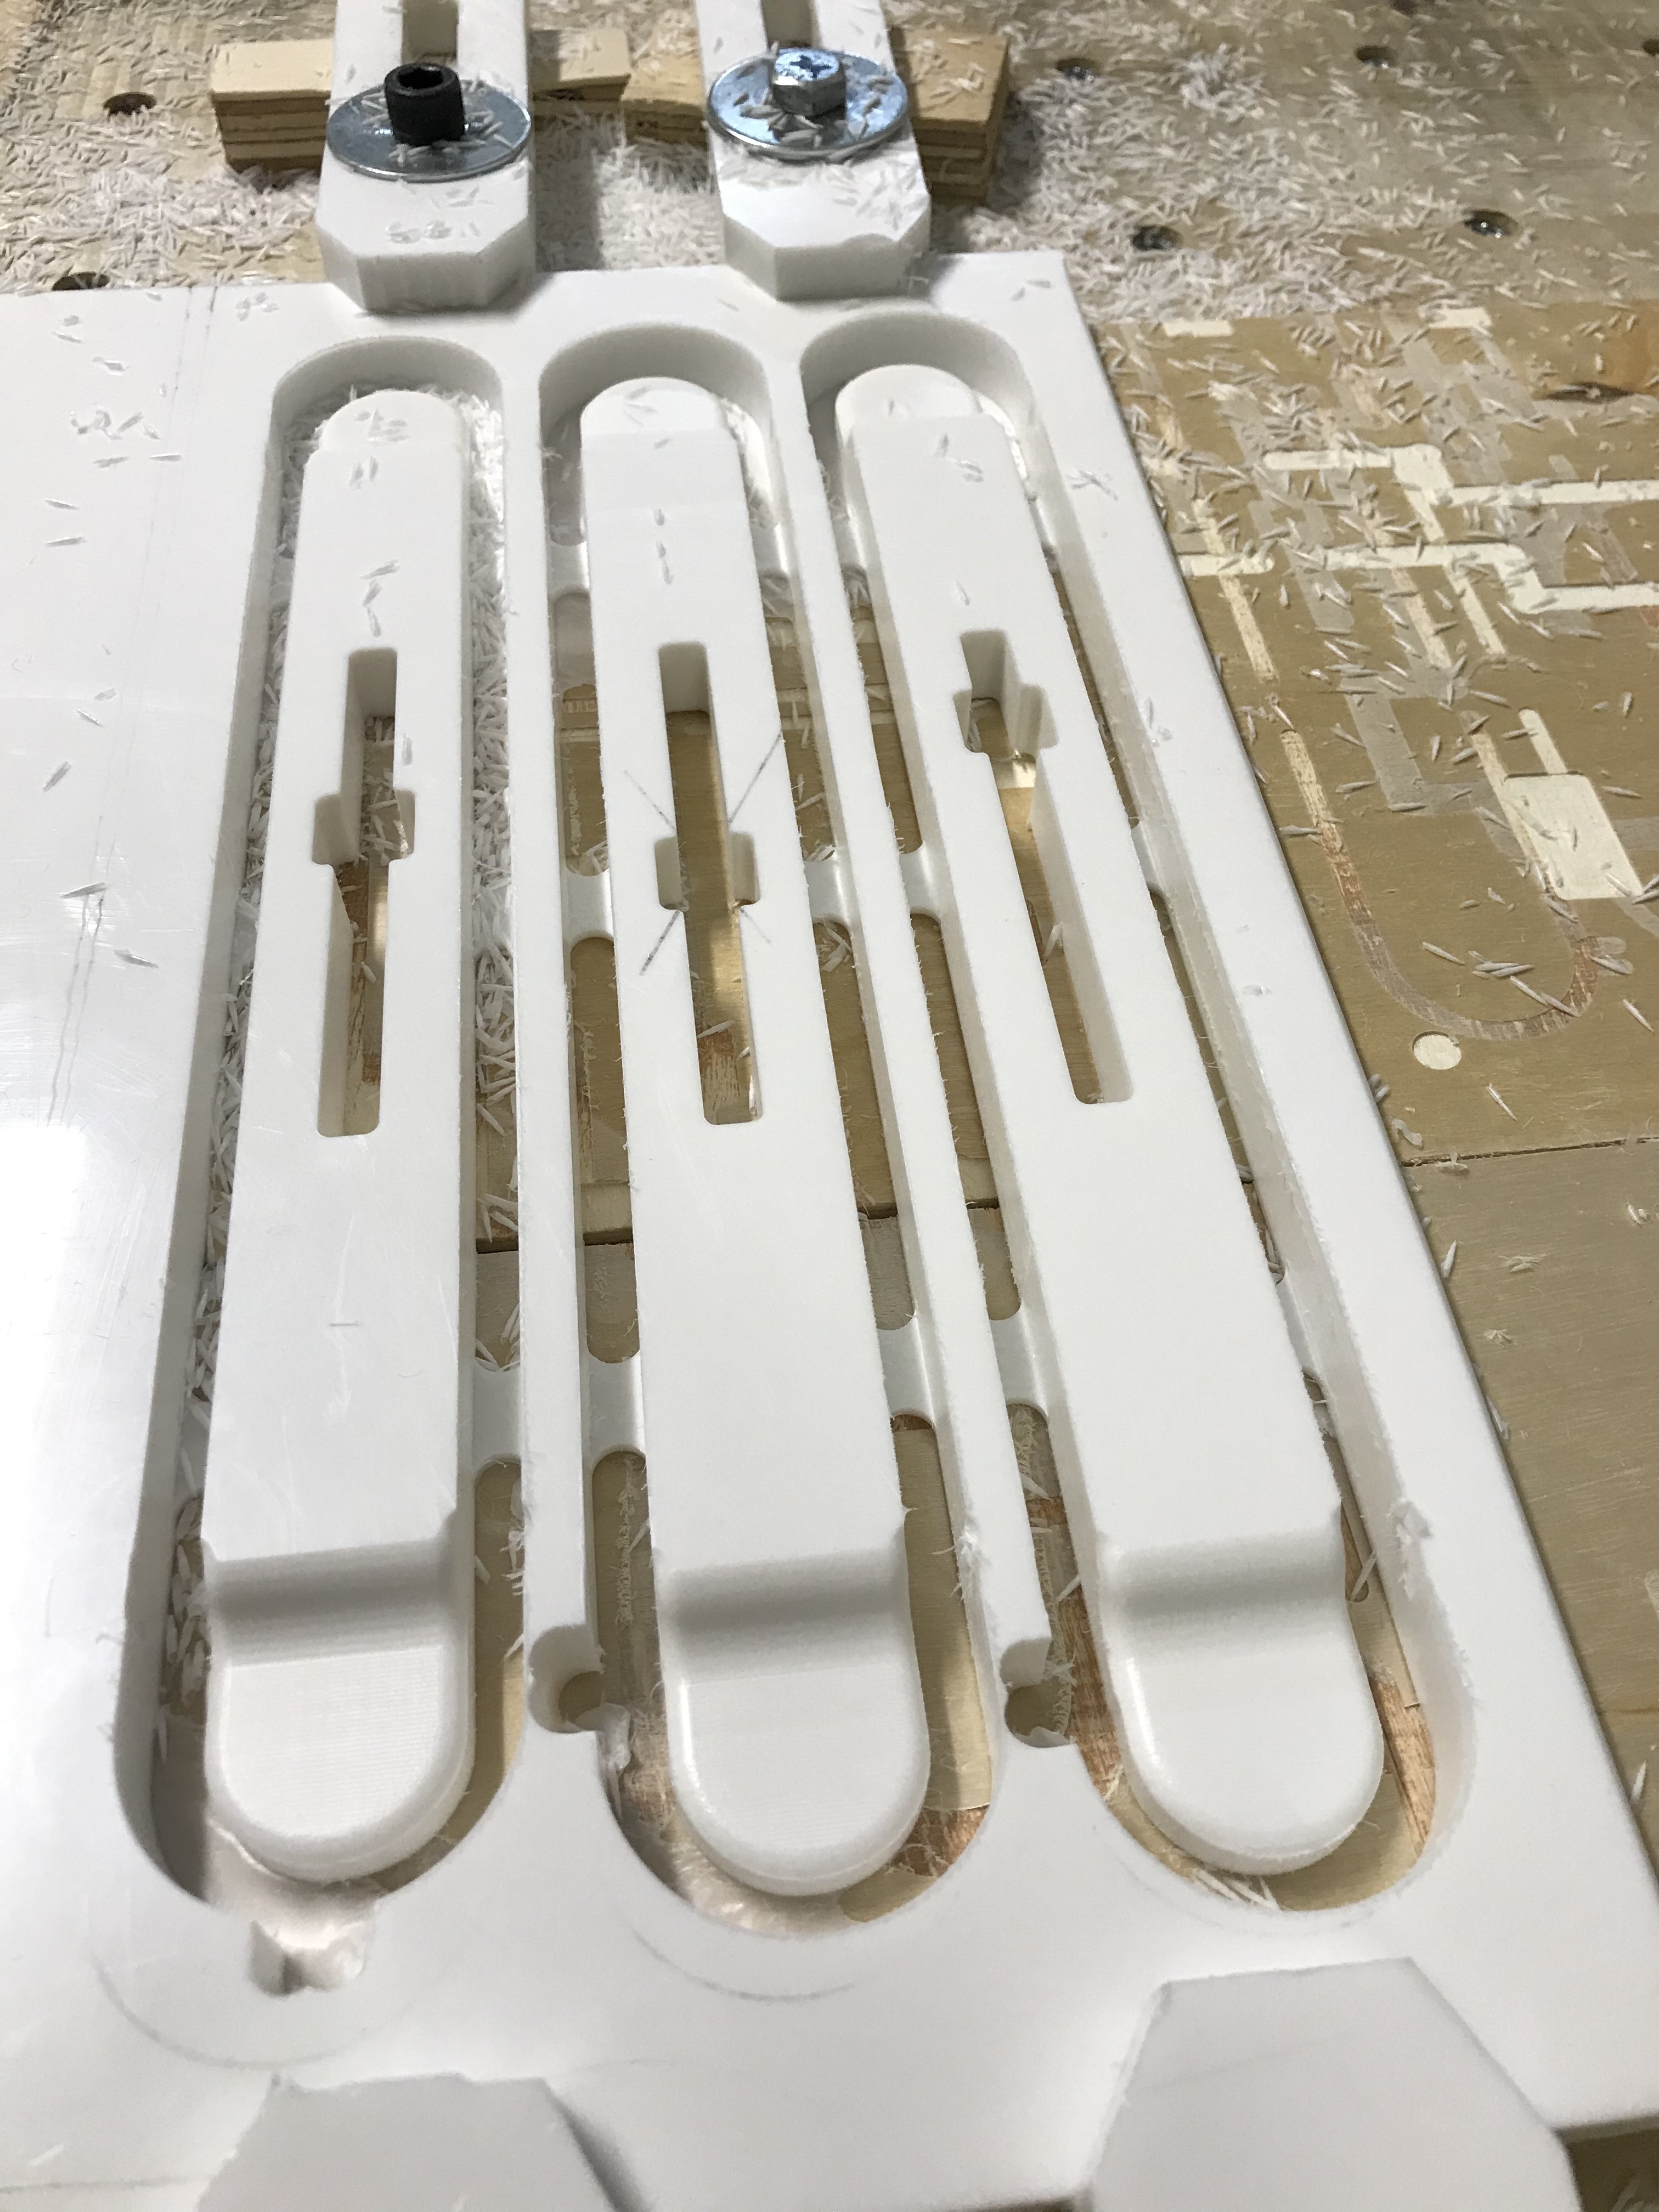
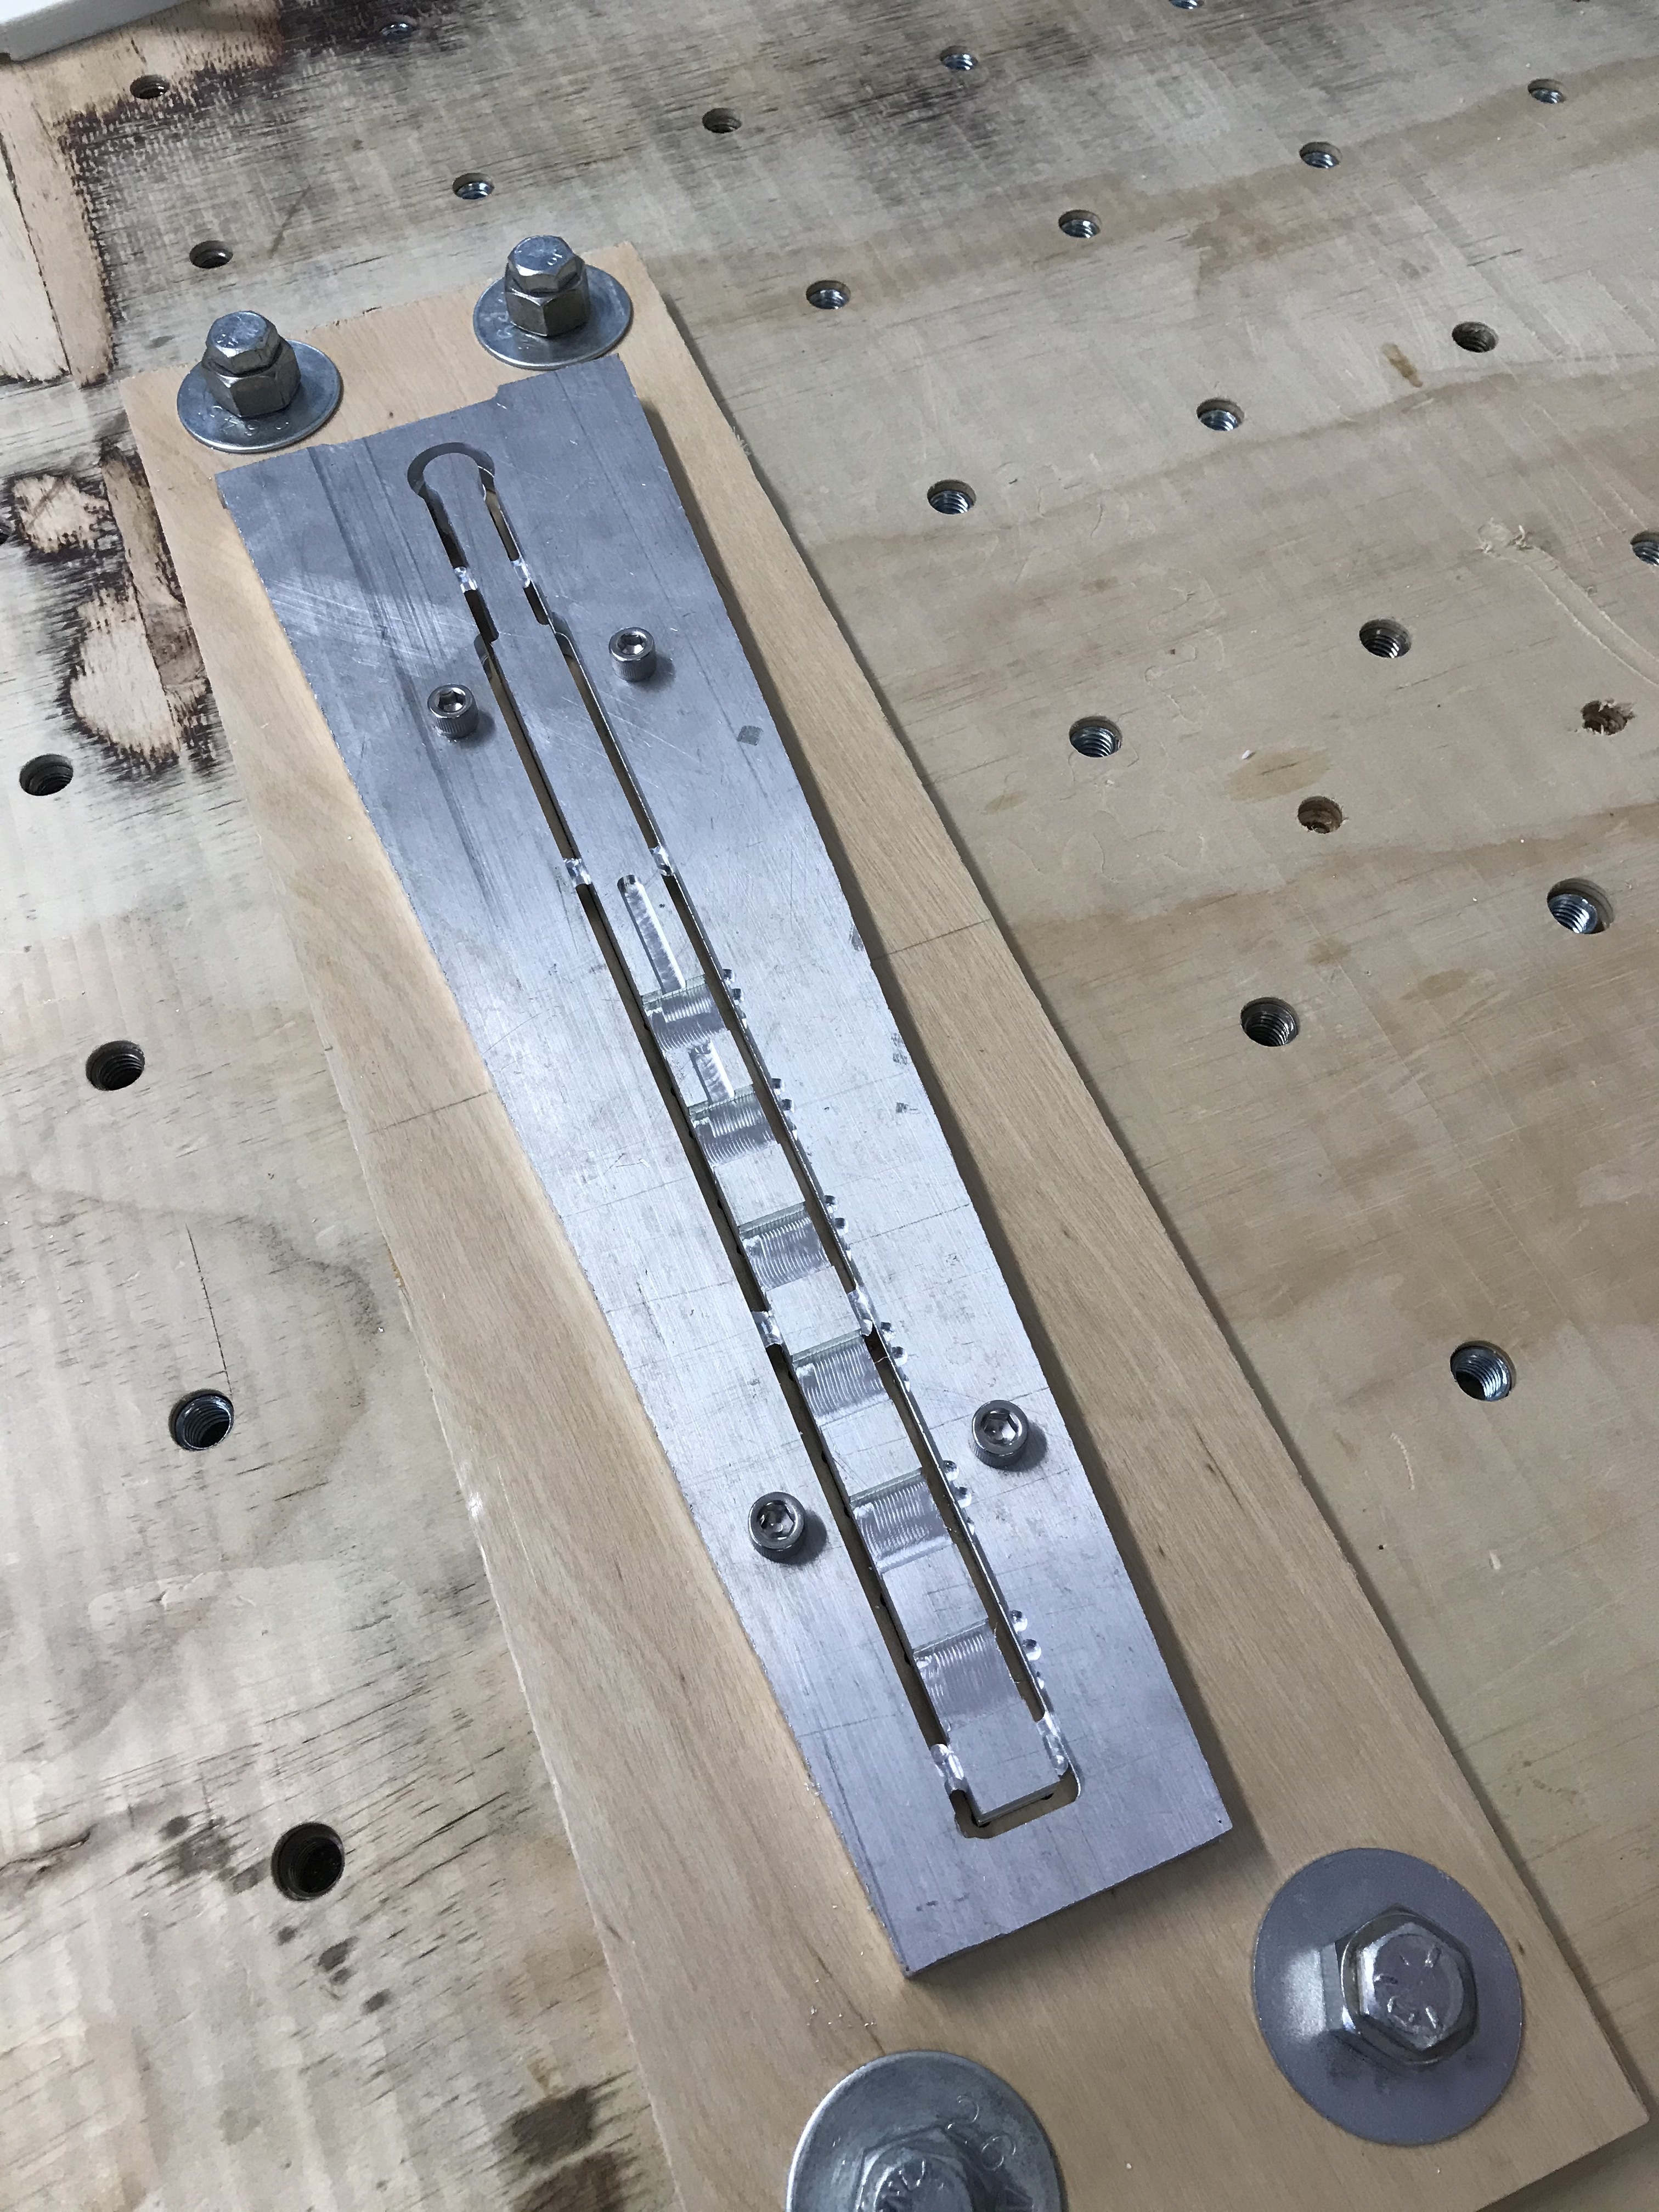
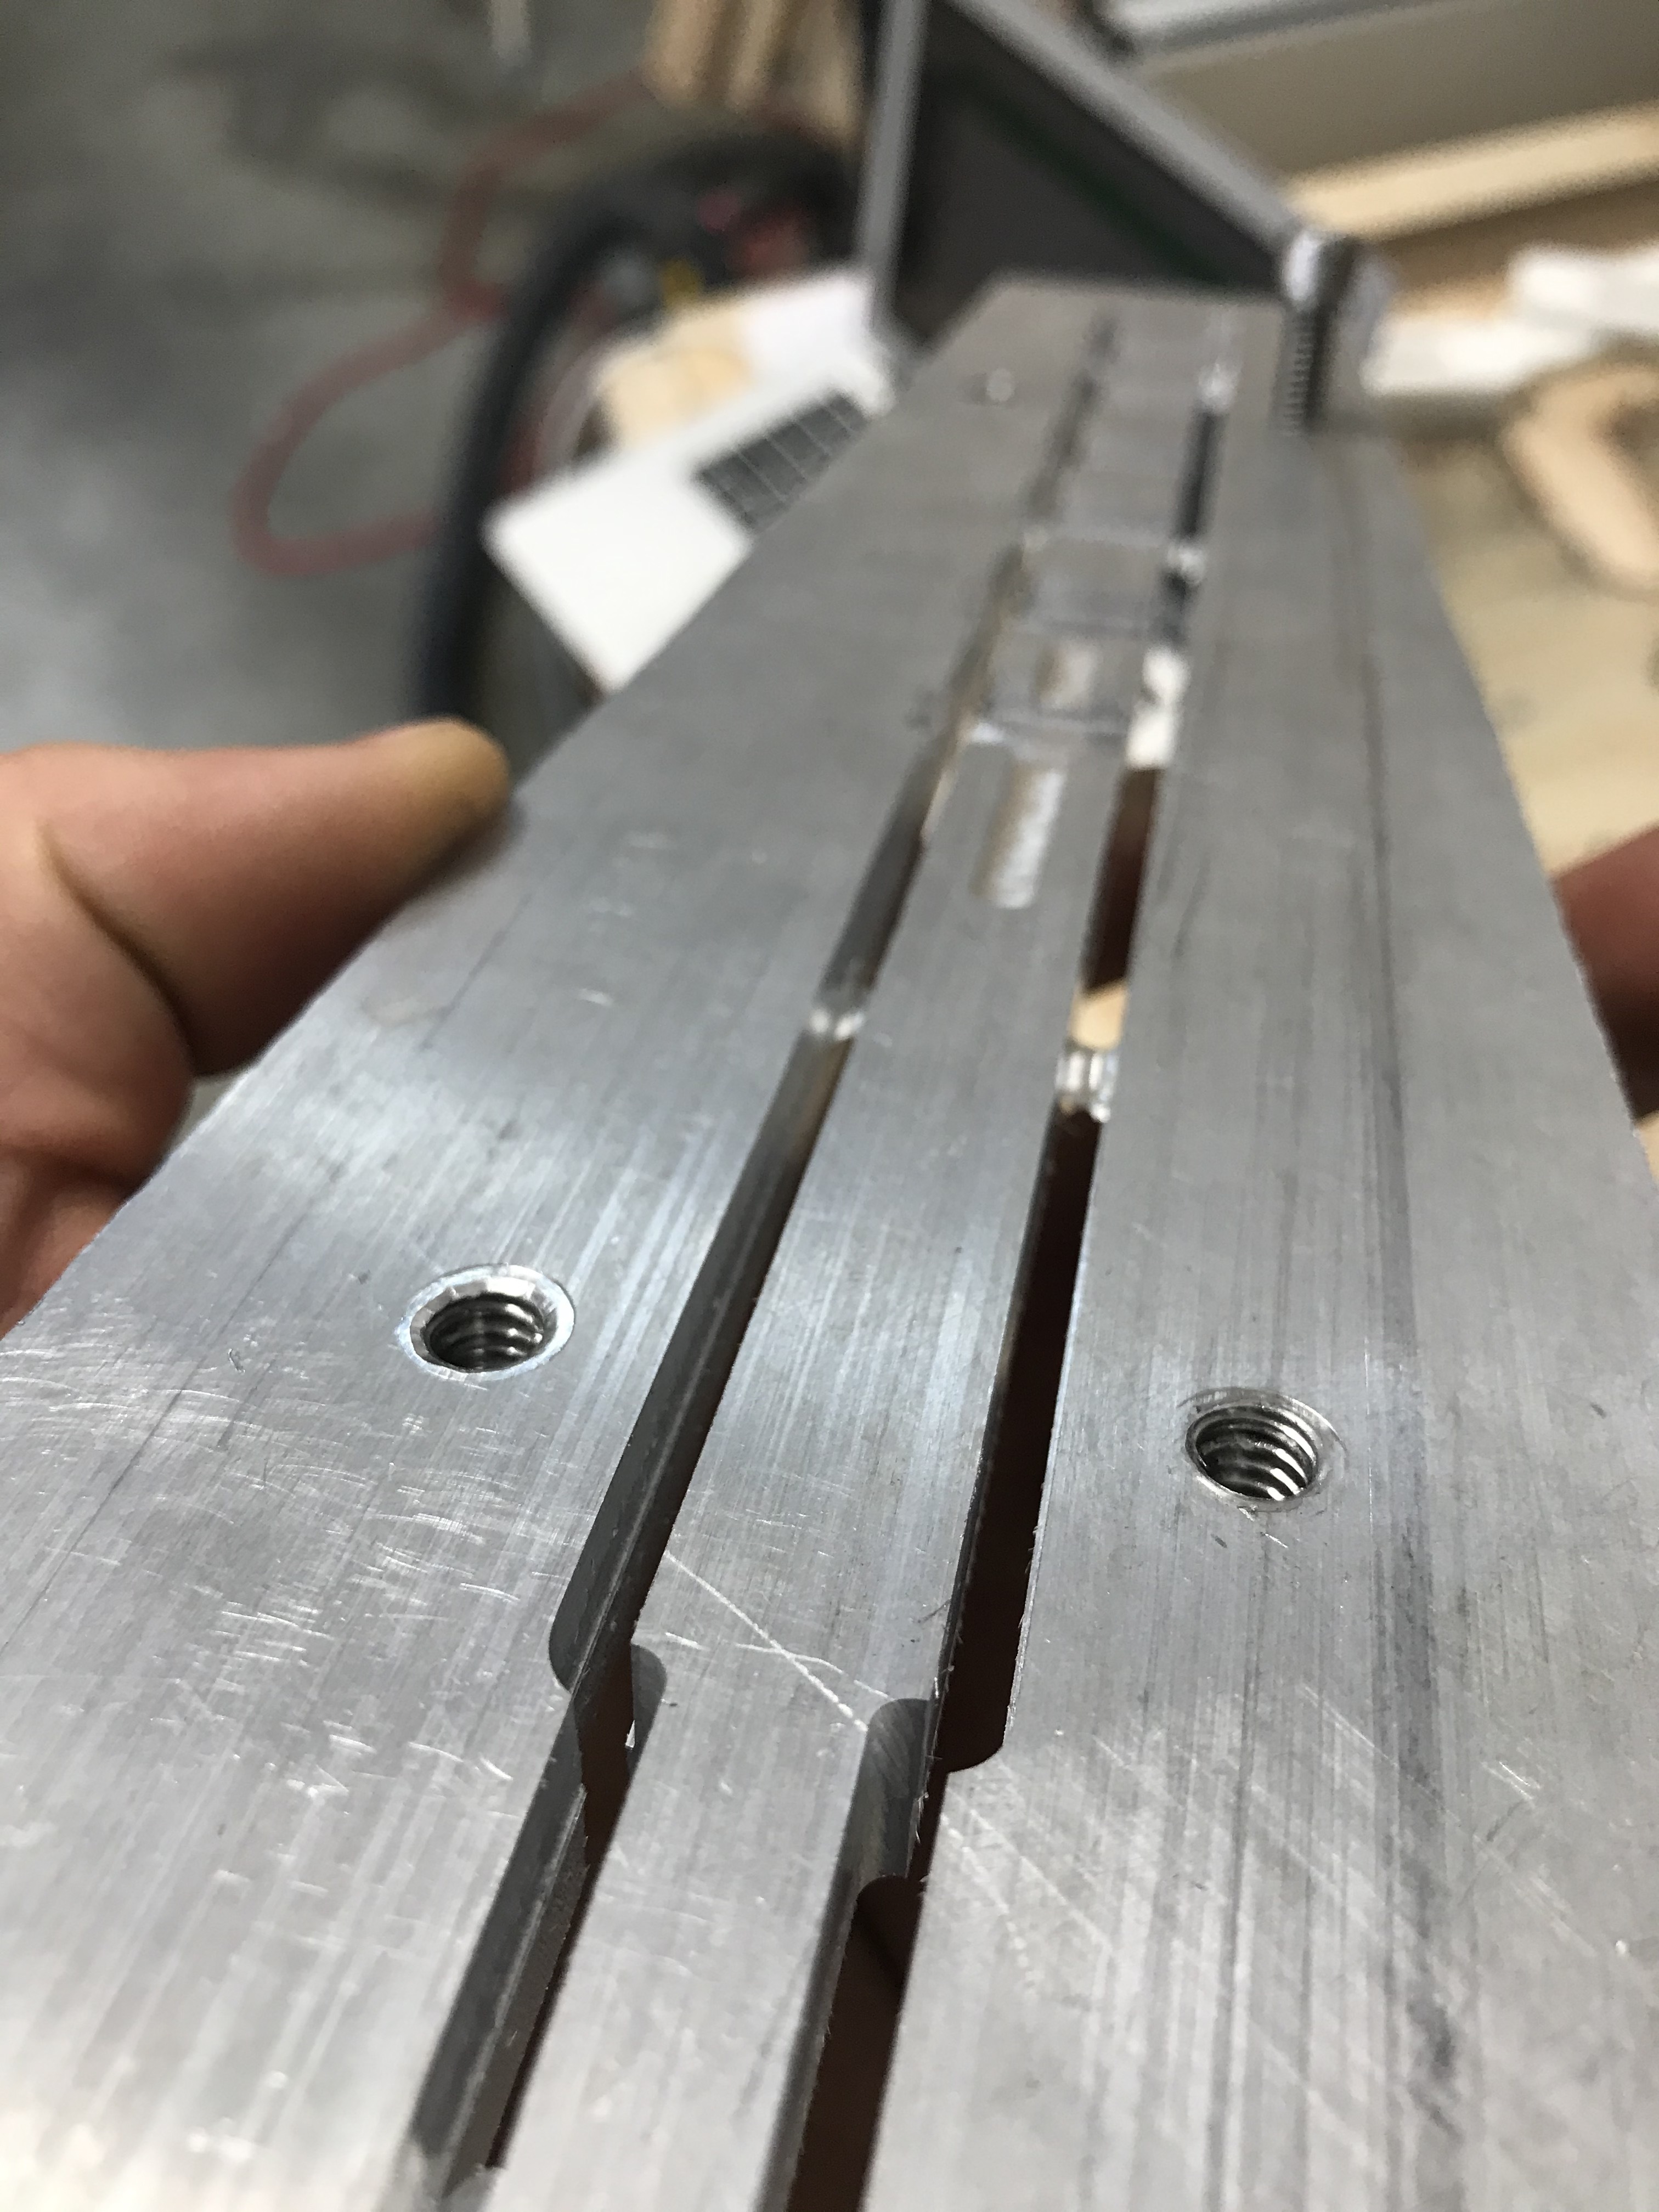
The HDPE Inner sanctum was pretty fun to machine, HDPE is like cutting hot butter. Tolerances were the big issue for this part. The inner rectangles where the sliders run through needed .005’’ of each side so the .5x1’’ rectangle became .51x1.01’’ thought that .005 would do the trick on the box joints but there ended up being considerable slop in the joints. Therefore it ended up being no tolerance at all!
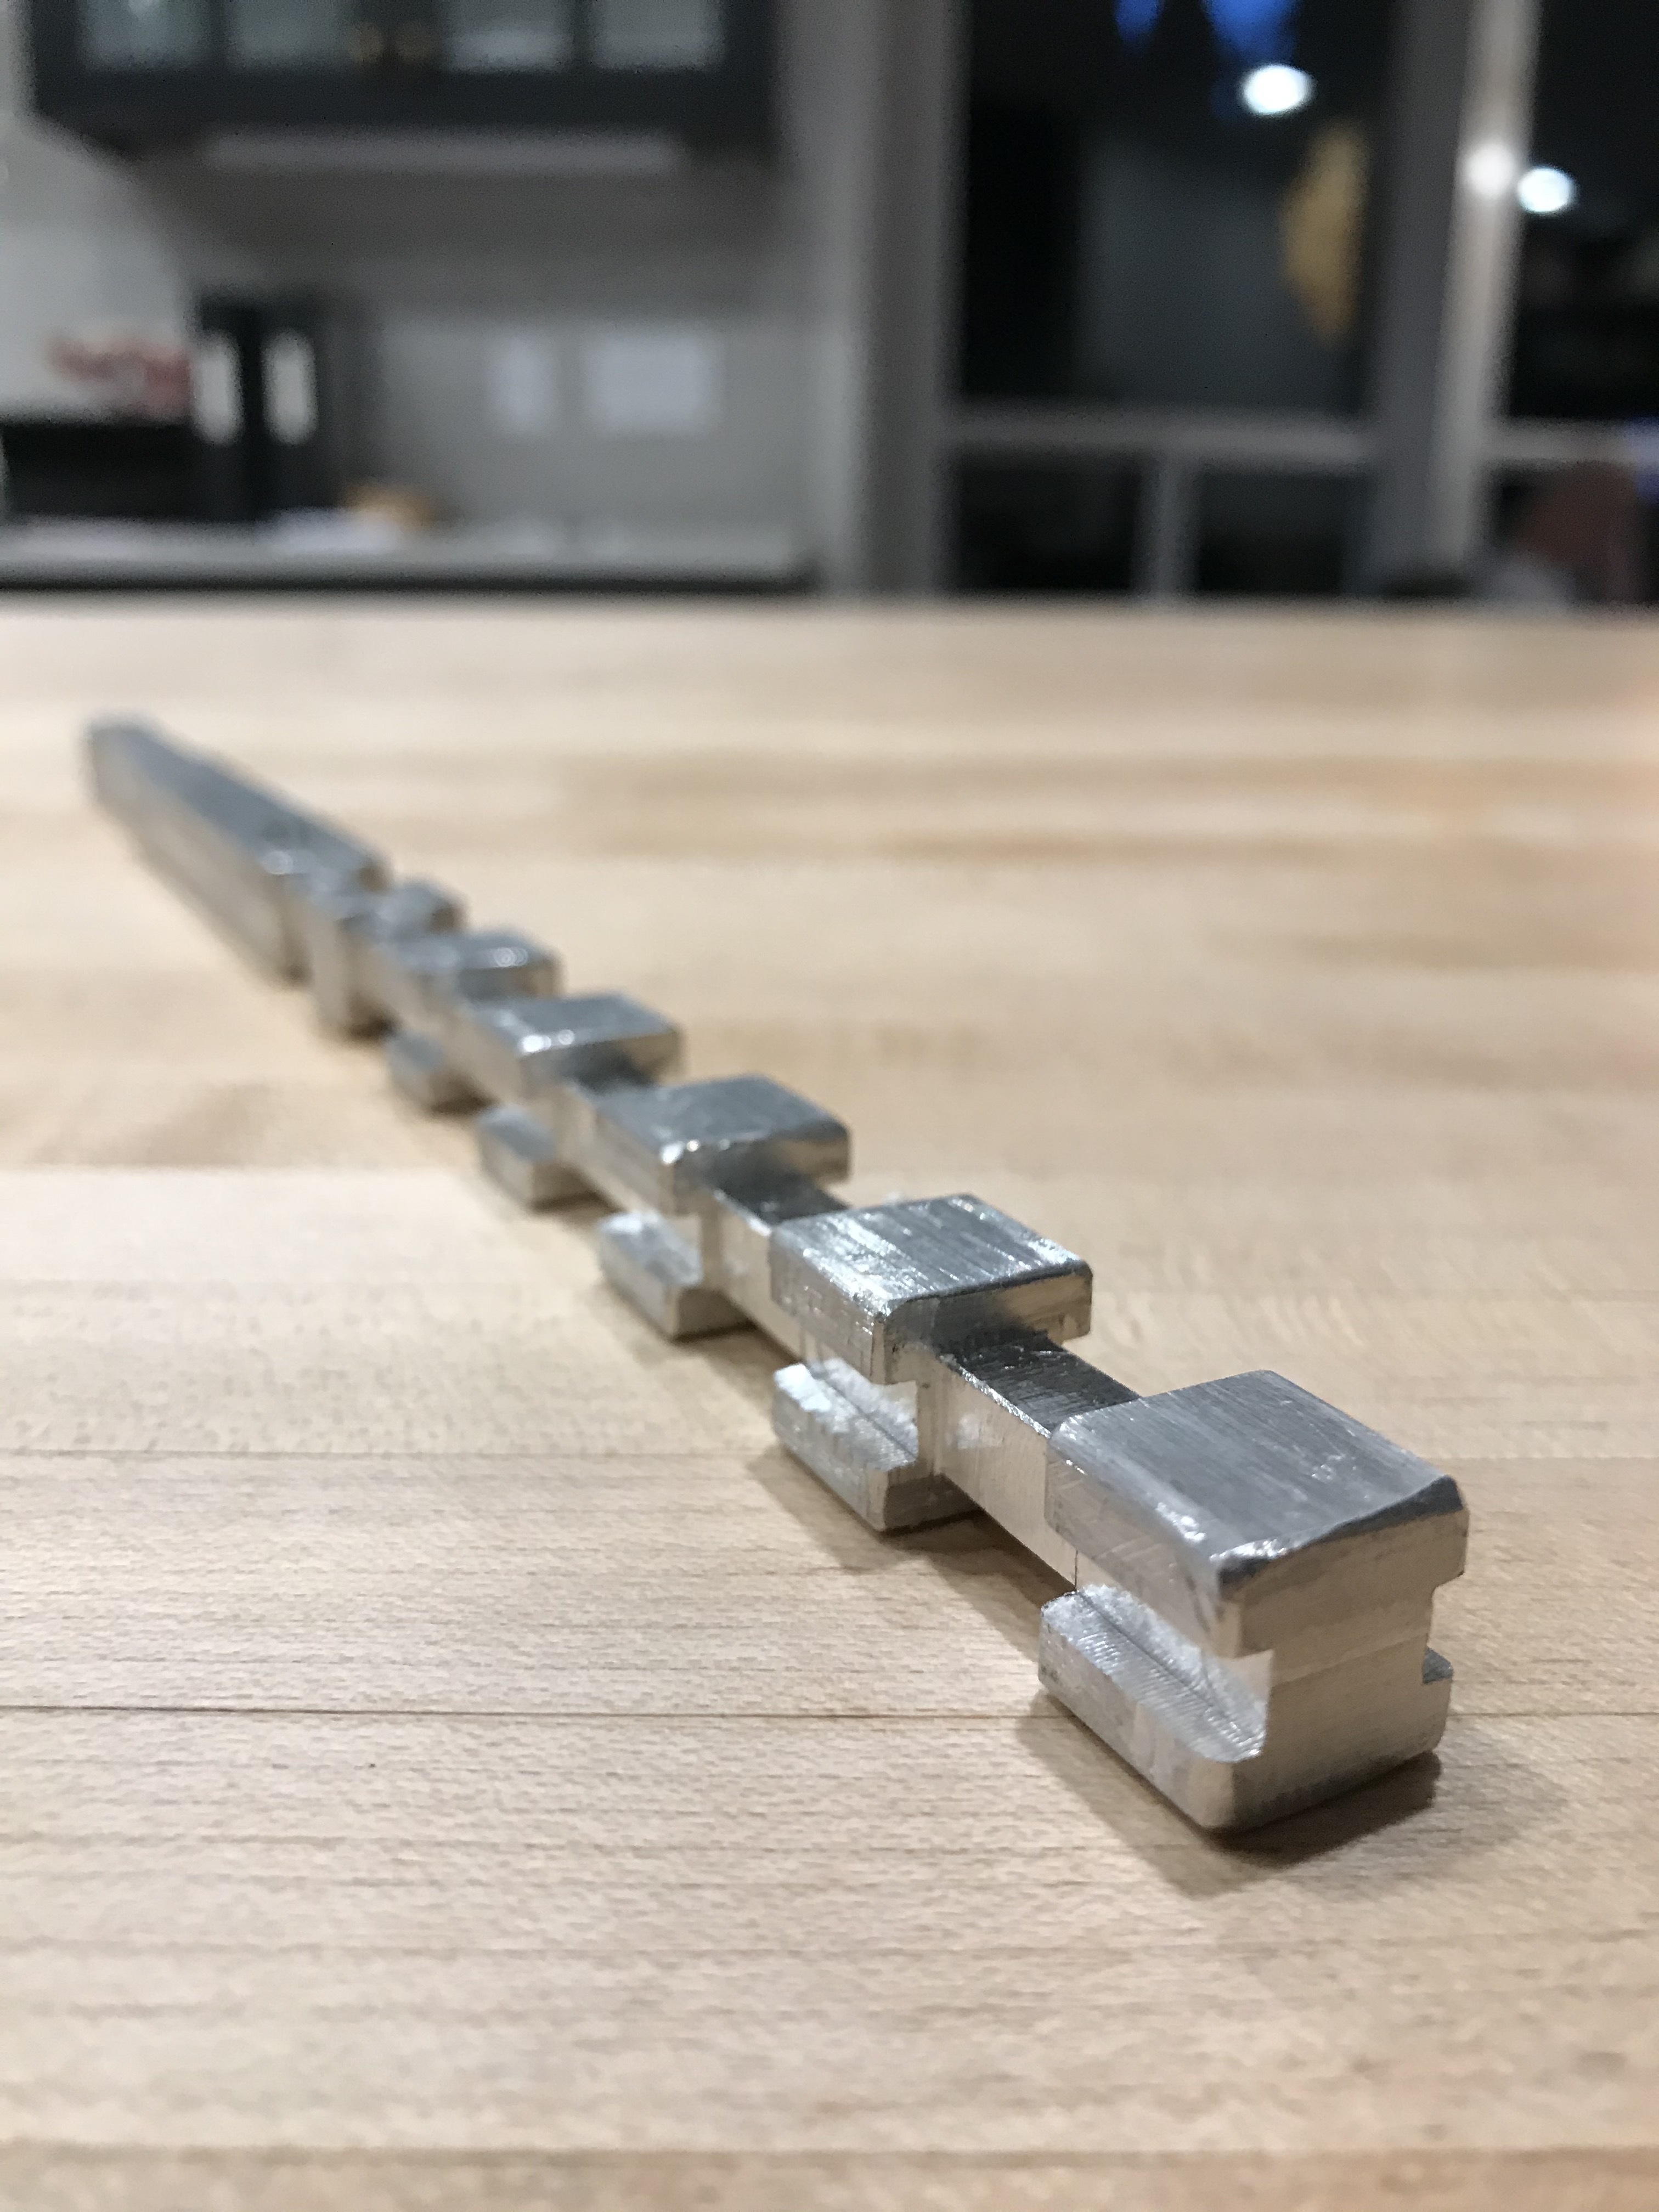
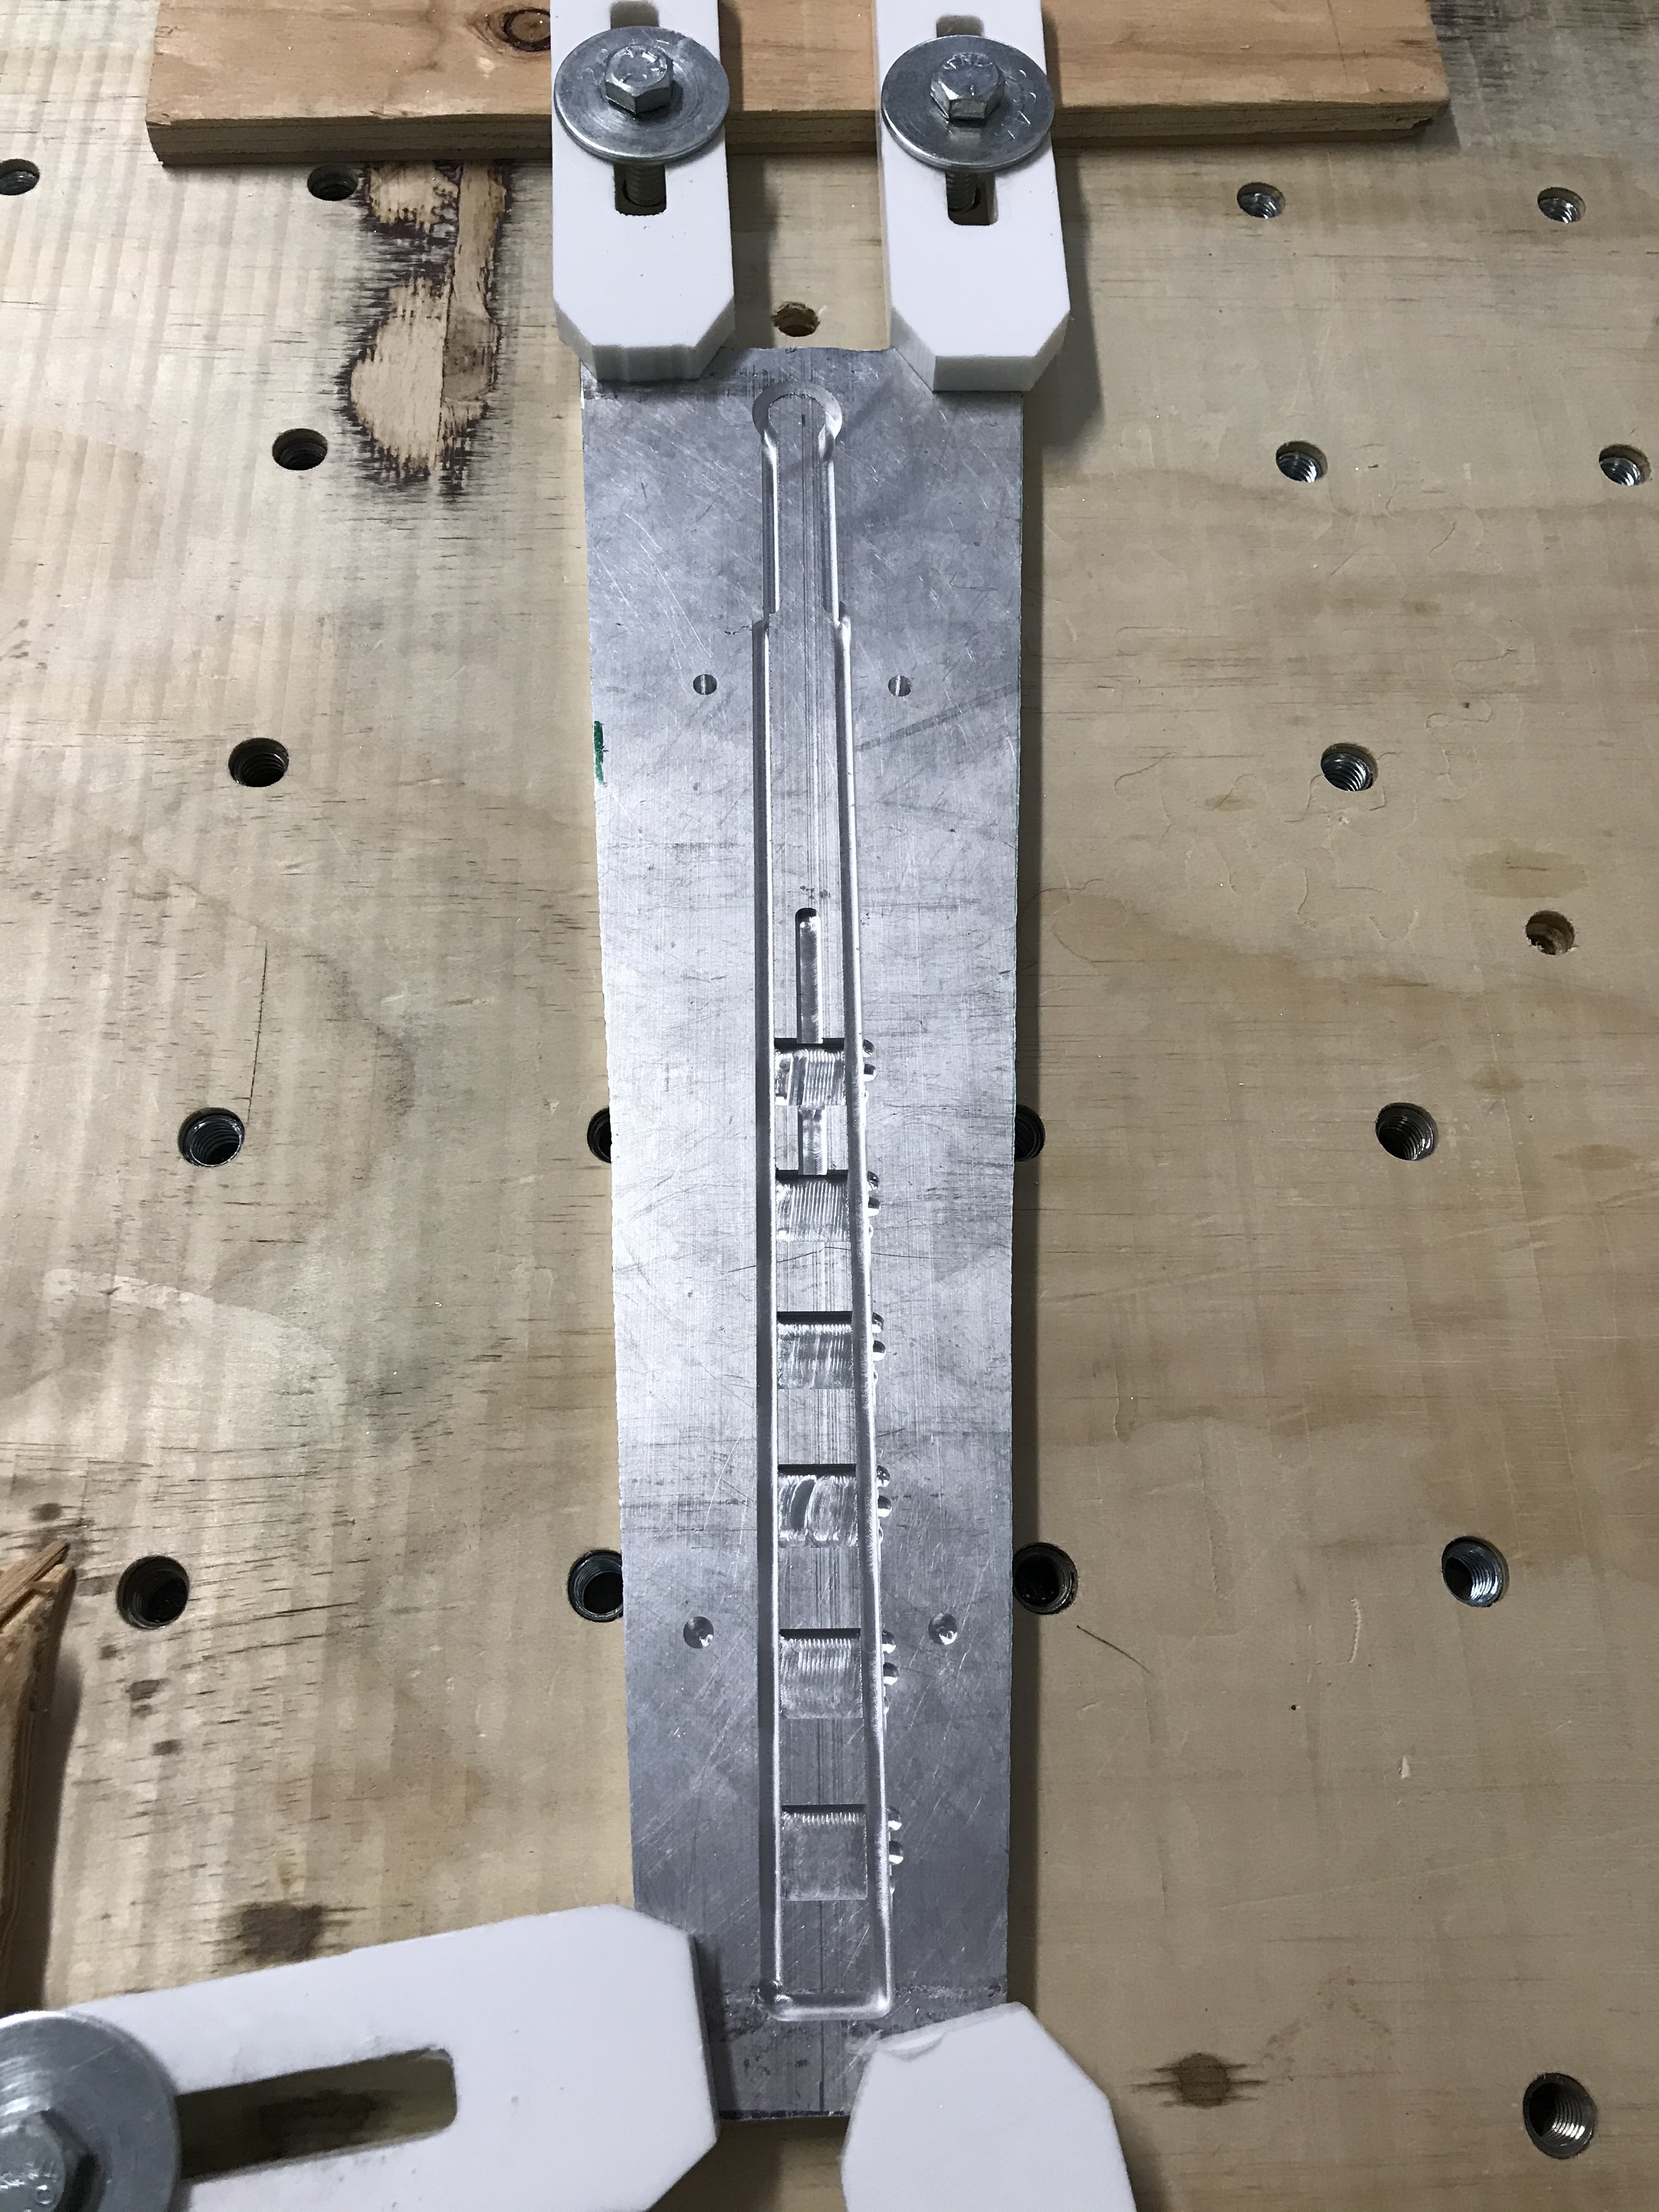
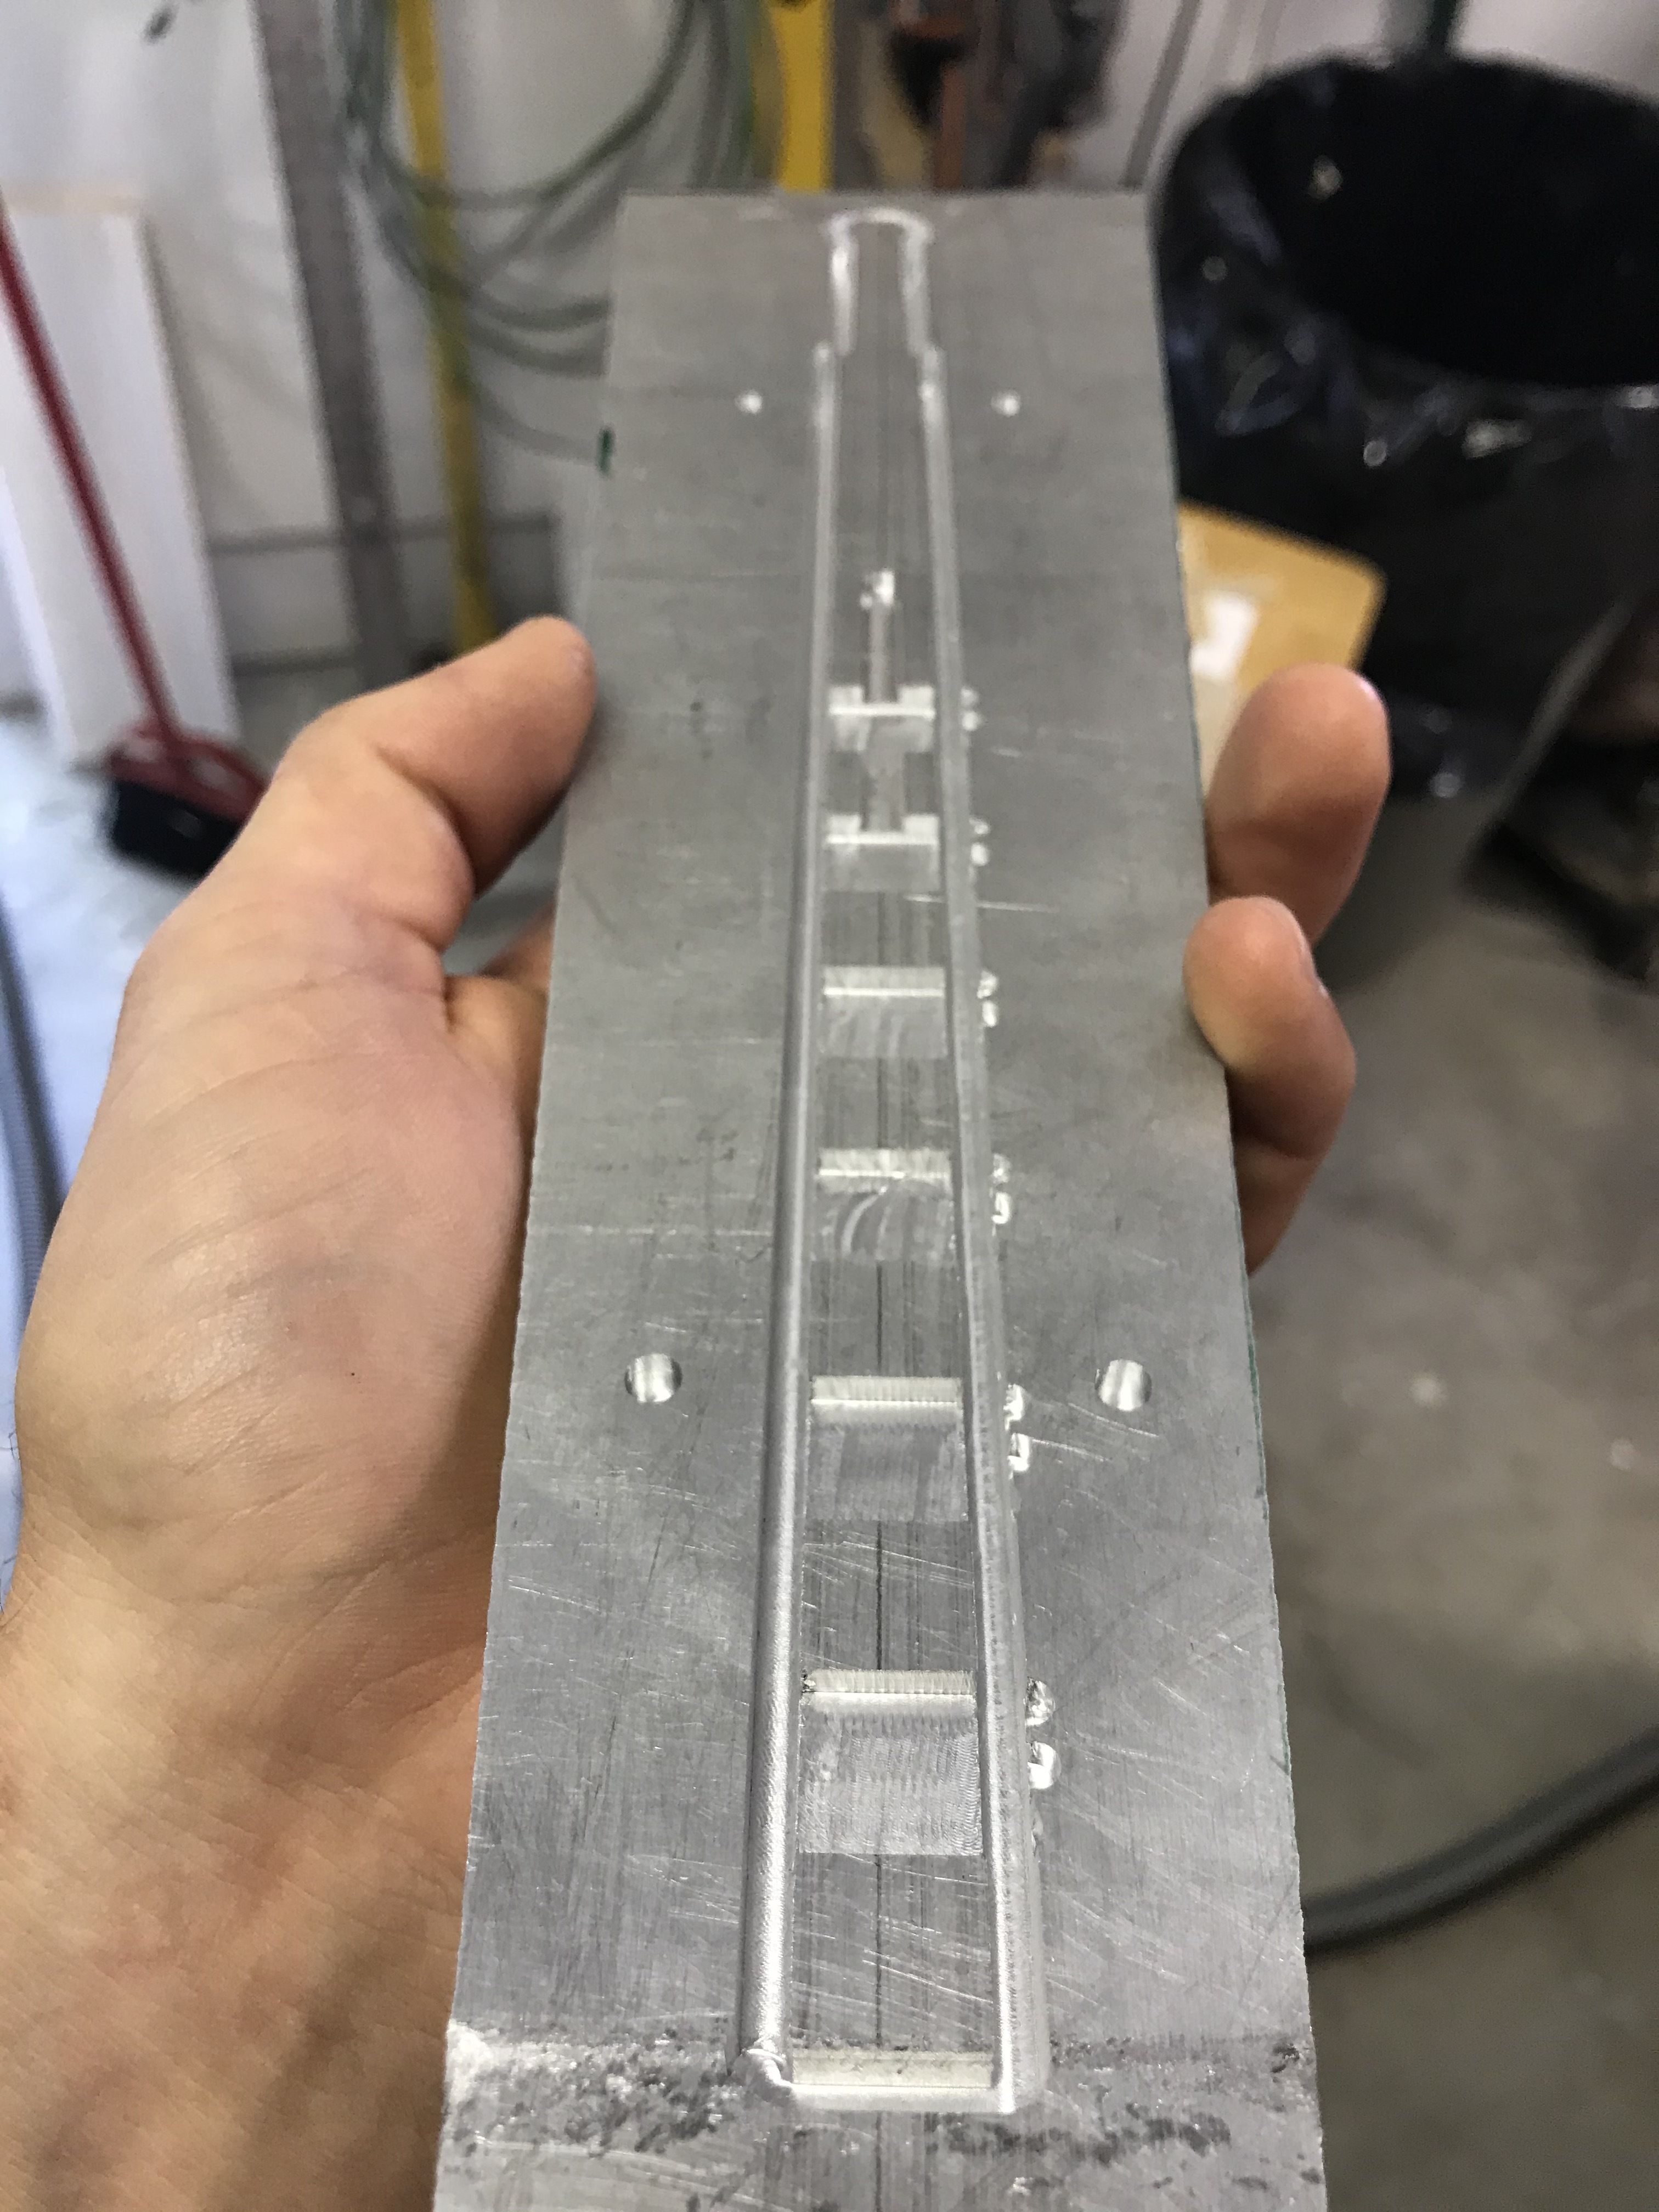
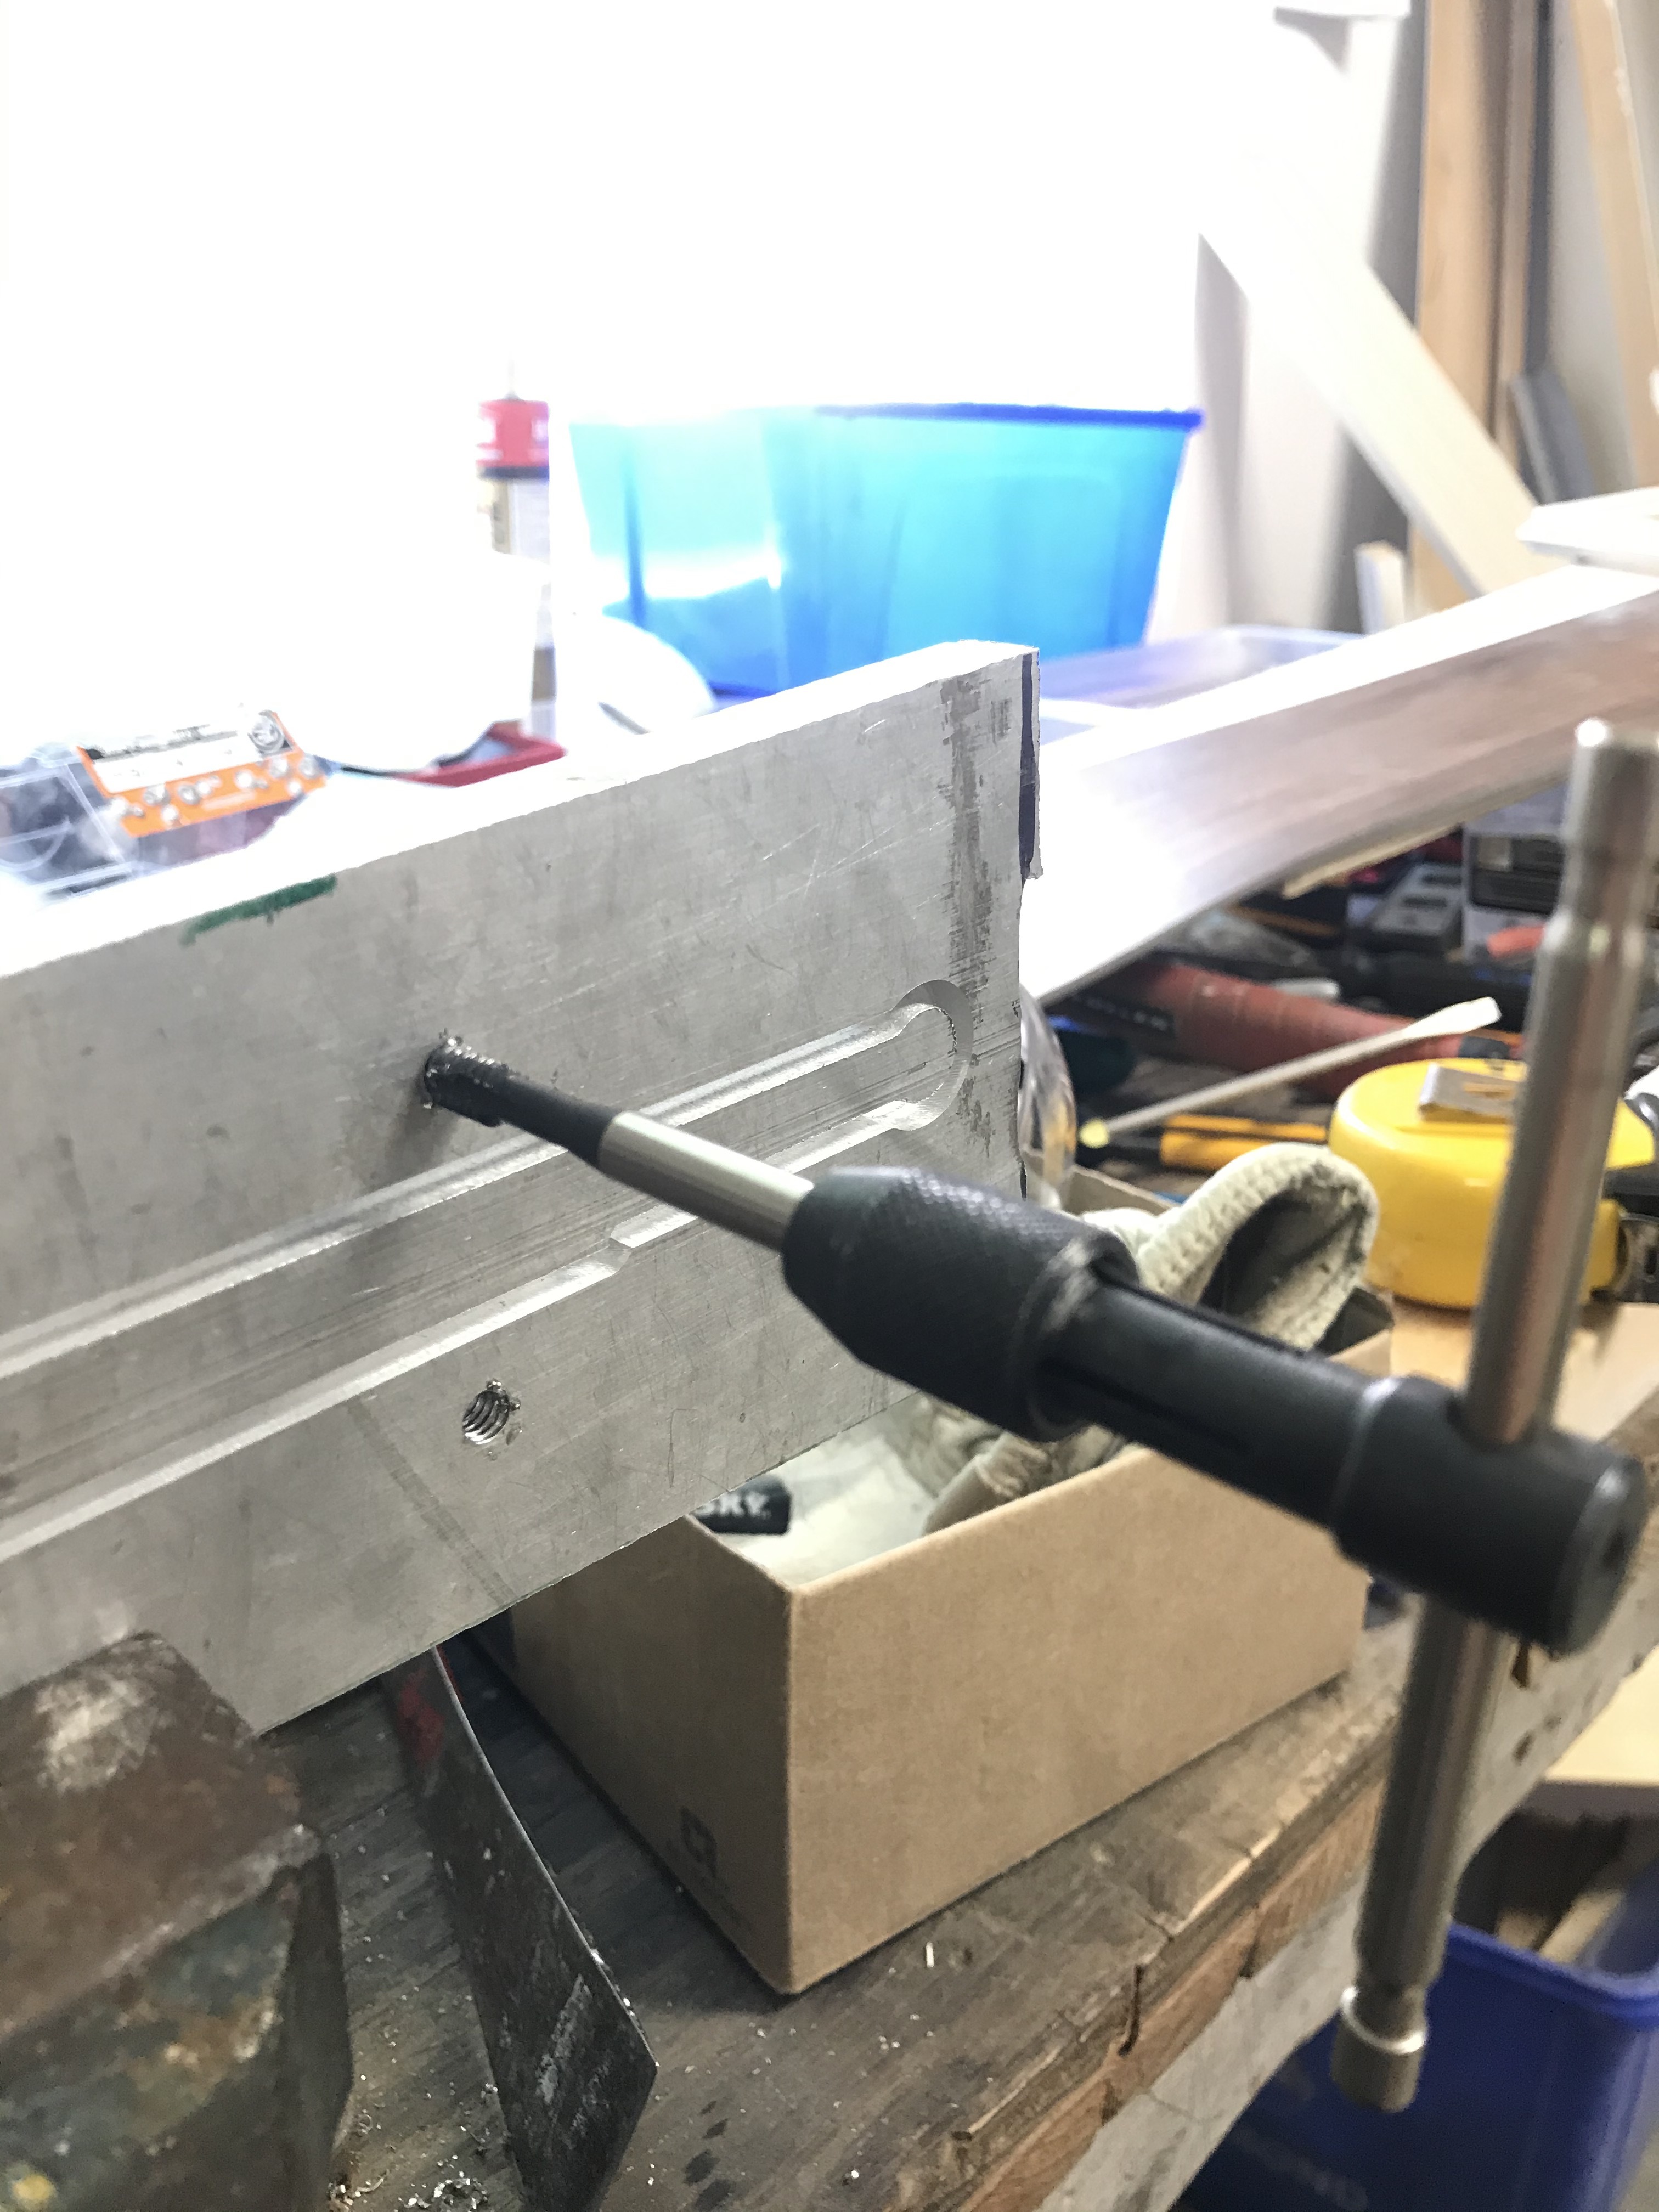
The Key required 4 sided machining, taking my aluminum experience to a new level. The key needs notches cut in on every side to make the puzzle work and to do this I followed a standard procedure for double sided machining. My bit was not the right length so I had to contour out the piece from both sides which wasn’t my original idea, but hey a plan never survives first contact with the enemy. I had to do some additional modeling for the key so I could get the machining to do what I wanted. I’m sure there are some fancy CAM settings I could have used but I could not figure it out. I was not a hundred percent accurate on my flip not sure where the errors came from (still haven’t figured it out) but it was acceptable, and I only had the one block of half inch aluminum to work with.
To do the 3rd and 4th side I made my very first fixture! This worked very well. I tested it once and got a perfect fit on the second go I took off .005” from only the horizontal sides when machining to allow the part to click into place. I was surprised at how sturdy it was and yielded an excellent cut.
The plywood exterior was pretty straight forward work on the cnc. Modeling it was pretty fun and again TOLERANCES changed because wood is different than HDPE. not surprisingly. I took off .03” of where the sliders came out to give it good action.
I made countless errors with many facepalm moments but it was a huge joy to design and build this. I have to say the time limit stressed me out a bit. It feels like I havent had to build a project on the clock since high school. I haven’t yet sealed the wood, but i’ll get to it real soon and post pictures.
My files are pretty messy and I will get to posting it on CutRocket soon but I need to consolidate everything I learned into singular files. Is there any way I can post my files now to make the dead line and then clean it up later?
I posted all the Gcode into a dropbox, does that qualify? heres the link. https://www.dropbox.com/sh/s8jynke7yjracbk/AACY4OmK-_bTTQX4_Ajb8ImGa?dl=0
Feel free to drop some questions about the process!