Community challenge #12: Puzzles (closed)

I did not pay attention, it was a bit longer than that, around 30min total I would say, those retracts slow things down and I did not bother optimizing them.

The endmills…well I just got the one with the longest LOC available (30mm / 1.2") from my usual local supplier, it turned out to be a 3-flute 1/4" with a steep helix, normally intended for cutting aluminium, but bamboo is so well behaved that anything sharp will work.

One interesting note is that I initially generated the toolpath with “two-way” adaptive to reduce cutting time further, and got a very clean cutting sound during the climb moves, but high-pitch (not chatter) intermittent whine when doing the conventional moves, which must have been some kind of resonance with such a long stickout (a good 1.75" I would say). Not sure why I would get it only when cutting conventional, anyway, I stopped the cut and regenerated it with one-way adaptive, increased the optimal load by 30% (just because I did not want to increase cutting time too much, and I felt like I had some margin left) and ran that. Nice brrr-brrrr-brrr cutting after that.

4 Likes

Nice!
Looking forward to seeing that metal puzzle, I commend you for trying aluminium AND tight tolerances :slight_smile:

3 Likes

Turns out using a super long 1/8" square endmill for finishing instead of a ballnose, on a non-calibrated machine, with a flaky G-code sender setup did not yield great results (who would have thought…). I edited my post in the spirit of transparency and showing what not to do, and I’ll try again! That is, if I can find a long enough 1/8" ballnose.

5 Likes

This was fun. I actually bought my Shapeoko to make puzzles. ‘Trap’ was last years Christmas puzzle and ‘Grip’ is a similar puzzle from the same designer, Tim Alkema, who graciously gave me permission to use his designs in this challenge. Grip which was done from scratch for this challenge (well, at least from the significant learning of previously building Trap) and Trap was slightly modified adding 6mm in height to make a matched set with Grip.

I like puzzles that appear to be simple with only a few pieces, but are not so simple in practice. Trap, with only 3 pieces, is a level 12 puzzle, meaning it takes 12 moves to remove the first piece, but it doesn’t seem quite as hard as that might imply. Grip is a level 15 puzzle and seems much harder with its two unseen marbles that must be manipulated to remove the pin.

Design information for these puzzles (and many others designed by Tim) can be found at: http://puzzlewillbeplayed.com/-/designer/Alkema.xml. Here you can visualize the paths and obstructions internal to the boxes.

Trap: box.c2d (180.5 KB)

Grip: box.c2d (173.0 KB)

CutRocket: https://cutrocket.com/p/5f43fe5ae7303/


Trap, left, & Grip


assembled

The parts are milled on an MDF fixture of about 400mm x 200mm; the design size in Carbide Create is 396mm x 204mm because those are the nearest even multiples of the 6mm grid used for this layout. The fixture has pockets for the pins and an outline for aligning the box blank (held in place with painter’s tape and super glue). All milling was done with a Yonico 6.35mm (0.25”) 3 flute downcut endmill.

BOXES:
Start with a blank about 275mm x 95mm x 18mm (only the 18mm dimension is critical). After the box sides are cut, they are rolled up into boxes and assembled using rubber bands for clamps and CA glue. Trap also requires a 48mm x 48mm x 12mm bottom (not cut on the Shapeoko).


PINS:
The pins are cut from blanks of either 60mm or 72mm lengths of 24mm square stock; cut in two passes with a rotation between. The fixture has space for 3 pins for Trap, but only 1 for Grip (this is not random, but necessitated by the shape of the Grip pin). The extra space included in the fixture is for extra blank stock placed to reduce tearout. I use a snug fit and a downcut bit to hold the pins in place.

CAD/CAM:
If you look at my design file, you may well conclude that I’m nuts. You may be right, but the design choices were made to reduce tearout and hand work to square up inside corners.

For my first attempt, I simply drew the shapes of the unfolded box sides with stepped rabbets at the corners; drew an oversized outline around all four pieces and created tool paths for pockets at 3 different depths. This wasn’t bad and would probably be a good approach for plastic; however, in wood there was tearout at each outside corner where the cutter moved from end grain to long grain (LL & UR with the grain running along X). So, my next attempt was to draw overlapping negative shapes and mill the end grain areas before the long grain; this worked well enough, but further optimization by moving some shapes near the corners from one piece to the adjacent piece reduced the hand work required on inside corners and that is the version included here.

Speeds & feeds are 12000-15000RPM & 1500mm/min giving a chipload of 0.035mm (0.0015”). Depth & steps evolved as I went, ending up on 6mm & 1mm which results in significant chip thinning that was not compensated, but the latest cuts were in cherry with no burning and are probably adequate. It was still cutting chips.

.

Apply your finish of choice; add 22mm marbles; and have fun!

thanks,
David

And, thanks again to Tim Alkema.

16 Likes

As time runs down, I should at least START the post for my entry.

It looks like it COULD be complete at this point, and is actually a rather tough puzzle for most people presented in this form, but there is more that I have yet to complete. I will add the design files later, but for the moment will leave a little mystery with where this is going, though I have no doubt that there are several of y’all that have a good idea. In the end, there is a twist, though.

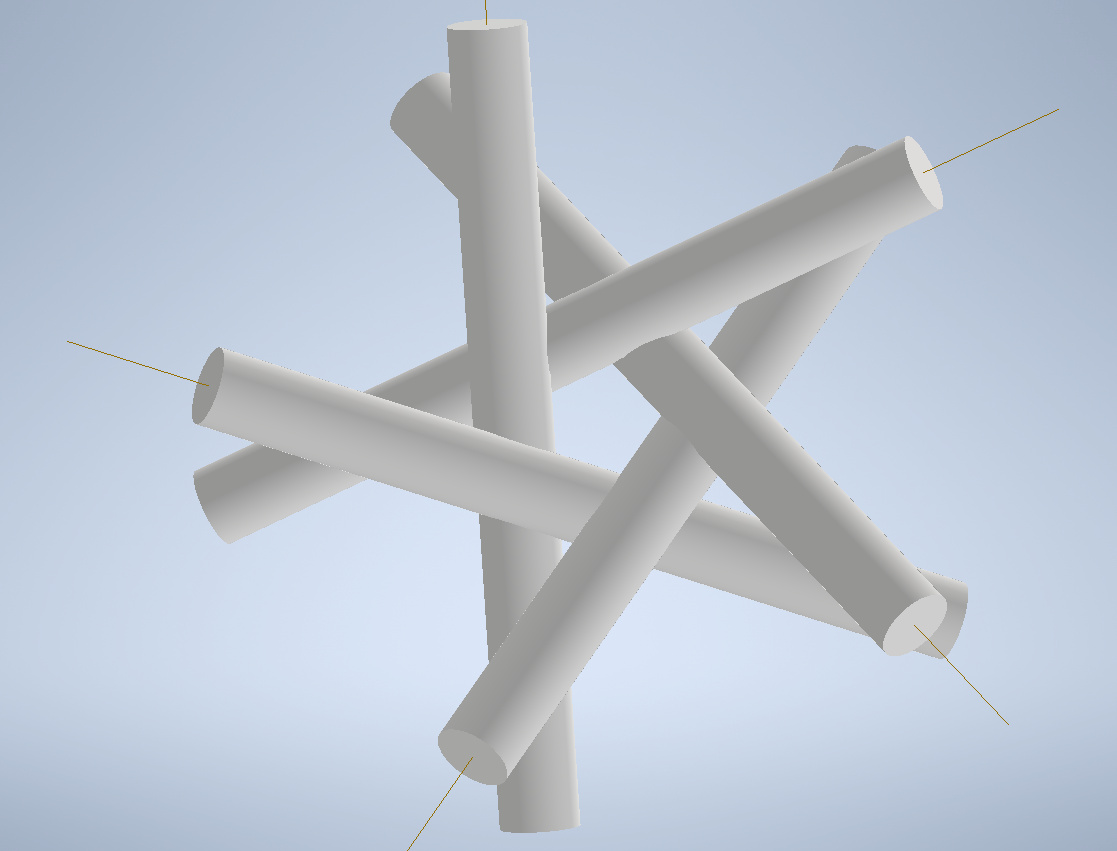
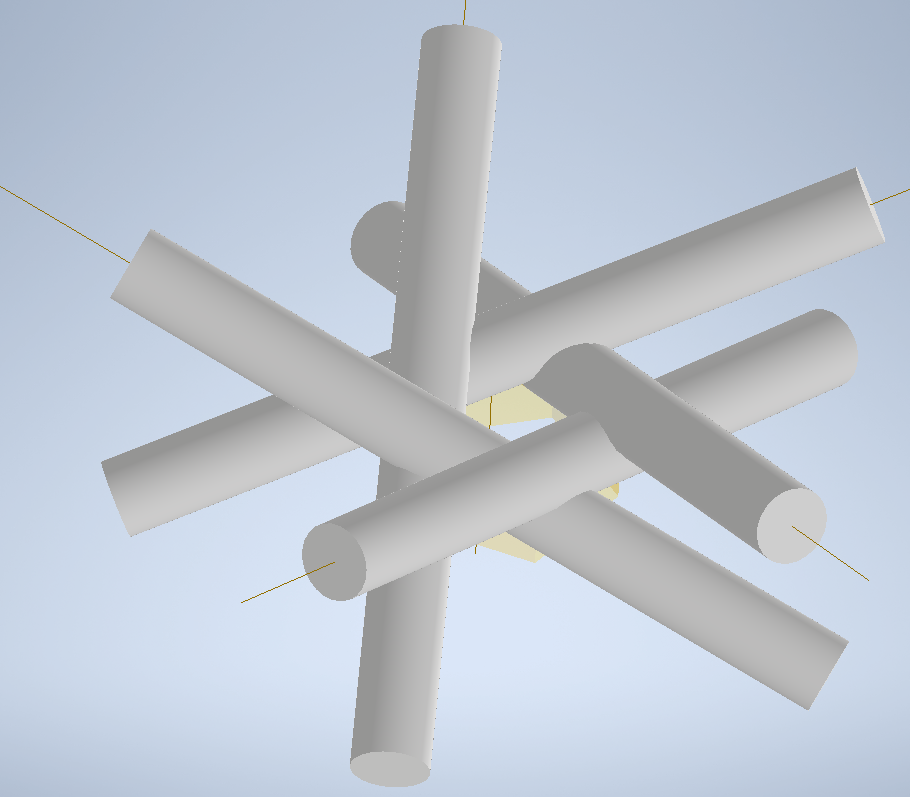
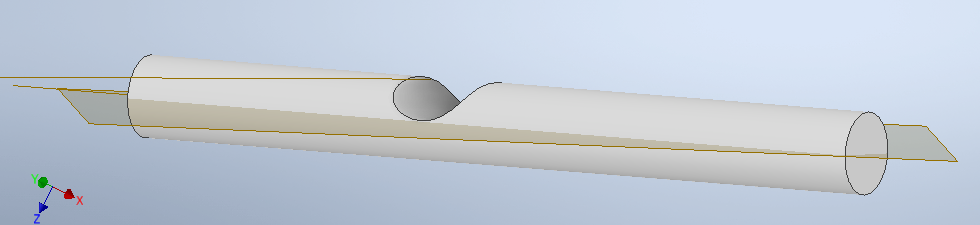
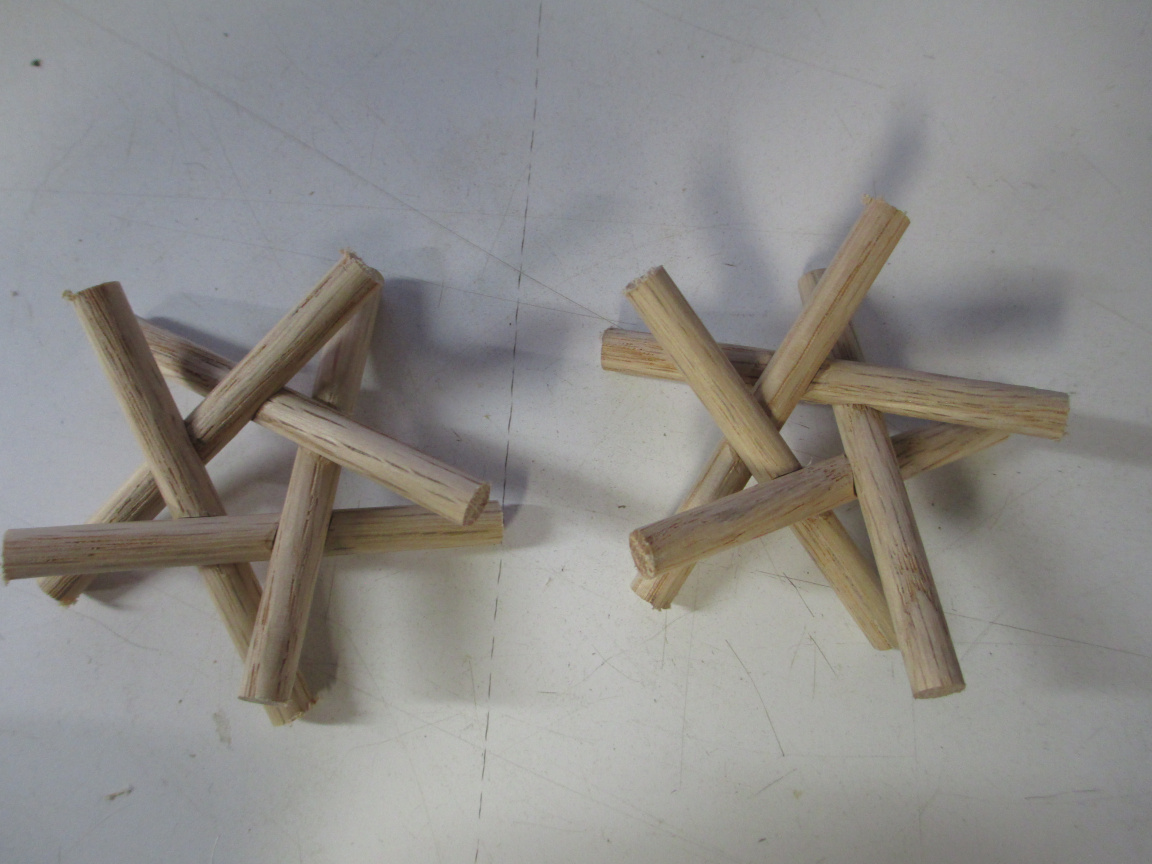
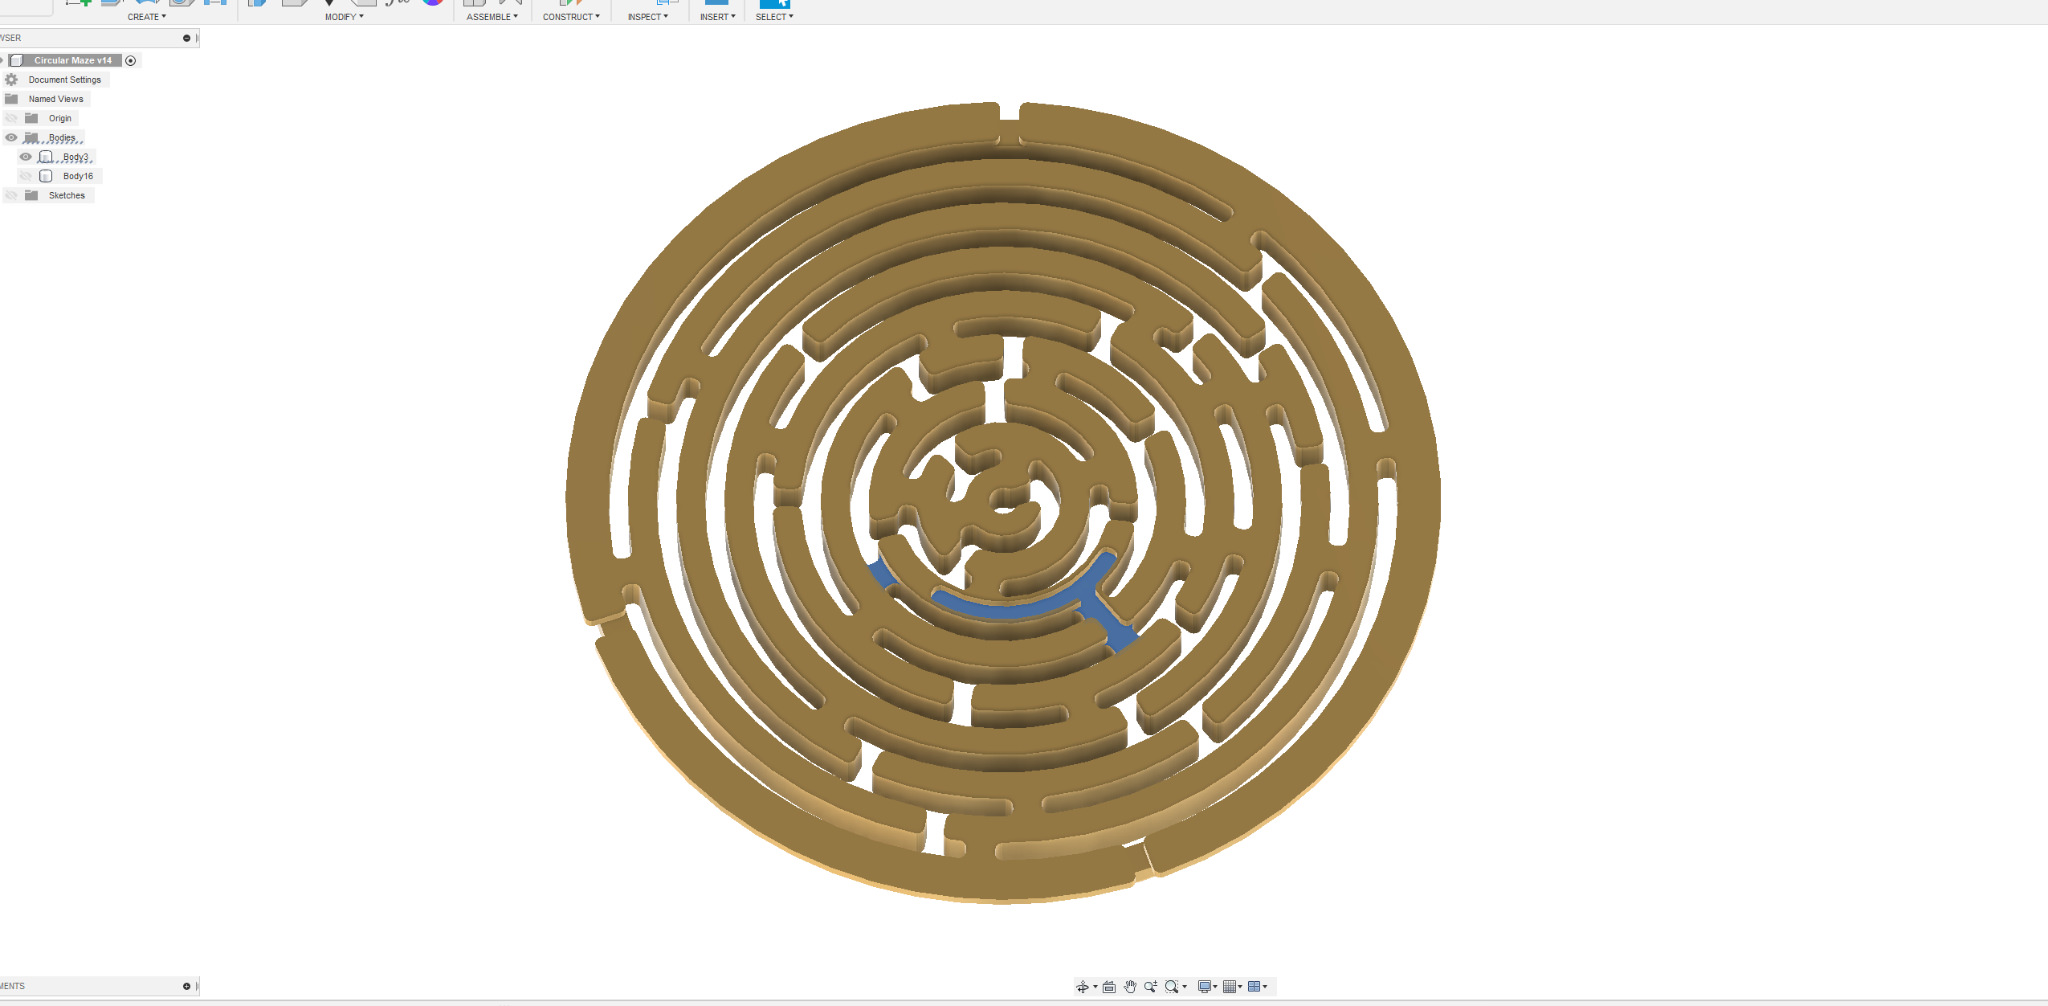
The general form is interlocking rods. I used oak dowels here, though the final version will be larger and aluminium. The tolerances on dowels are not great for this. The structure looks like


in CAD. The form is the rods half-through at each intersection, kind of like Lincoln logs, but to make the pentagonal structure, the notches are at compound angles. This made setting up the coordinate system interesting to machine.

\

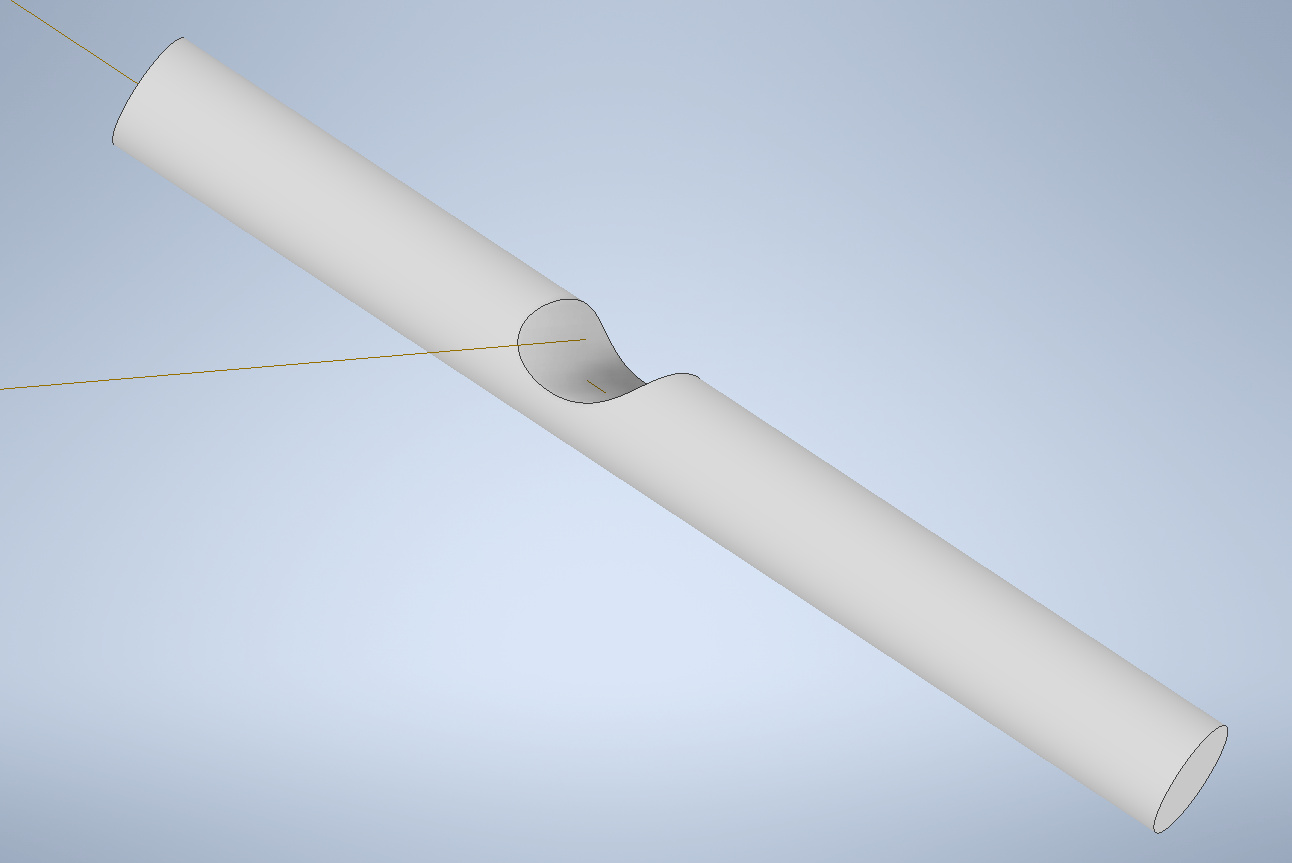
You can see that the rods have the notch, and that I left the axes of both.


And added a work plane ON the axis of the part being cut, PARALLEL to the axis of the intersecting rod. The origin in in this plane, on the axis of the part being cut, but this is not the center axially. This gives a really nice coordinate system to fixture the parts for machining, and allows the notch to have no overhangs.

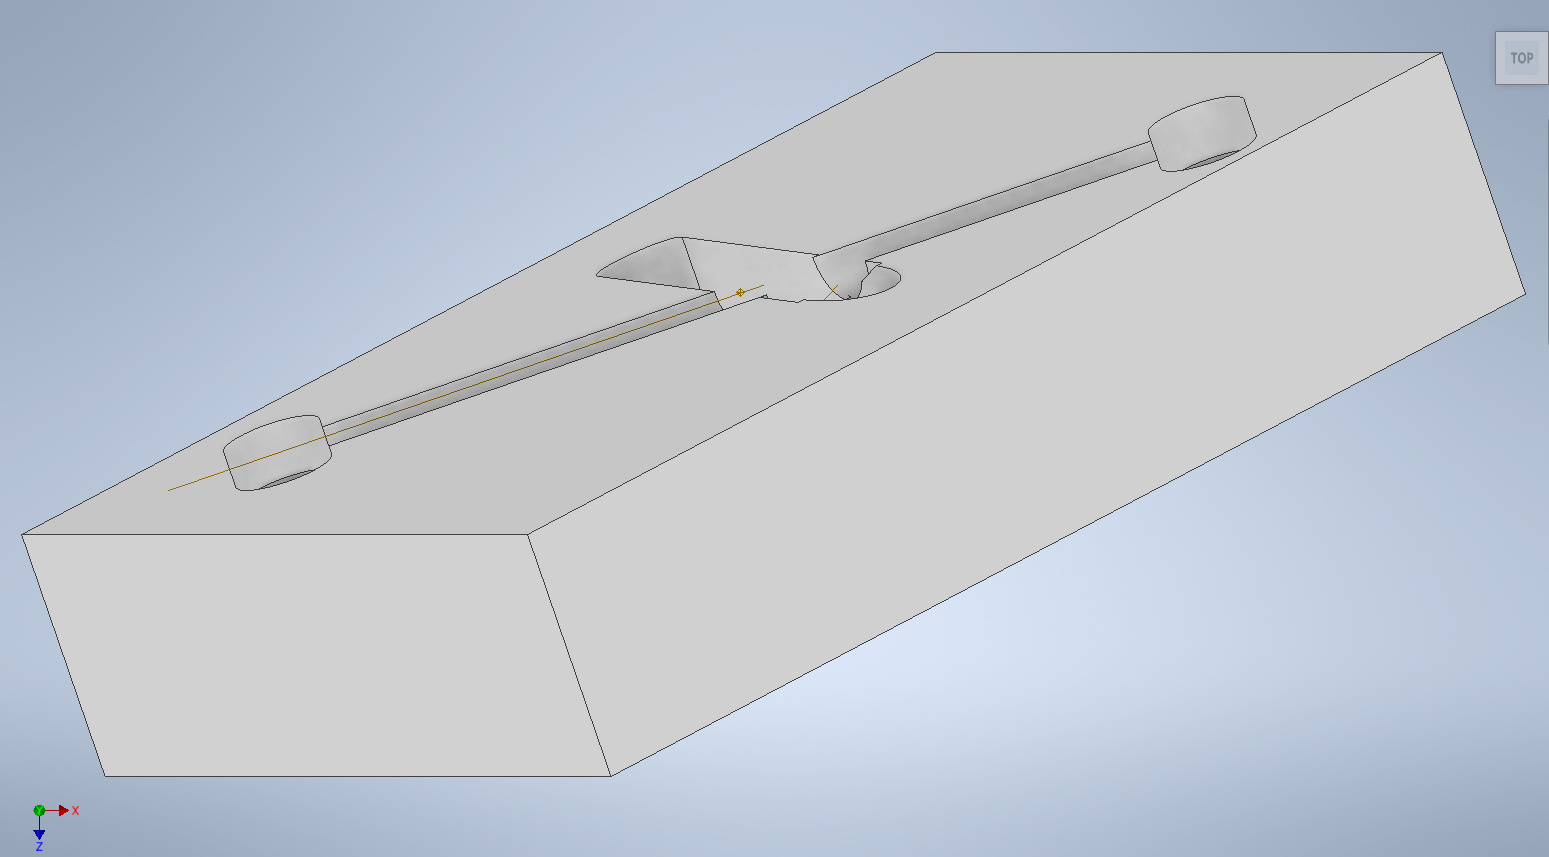
This means the notches will be machined witht he end of the tool, and the finishing will be multiple passes with a ball-end. Not ideal for a great surface, but the other option was fixture the part tilted up, making trimming the ends square a challenge, or requiring extra setups.

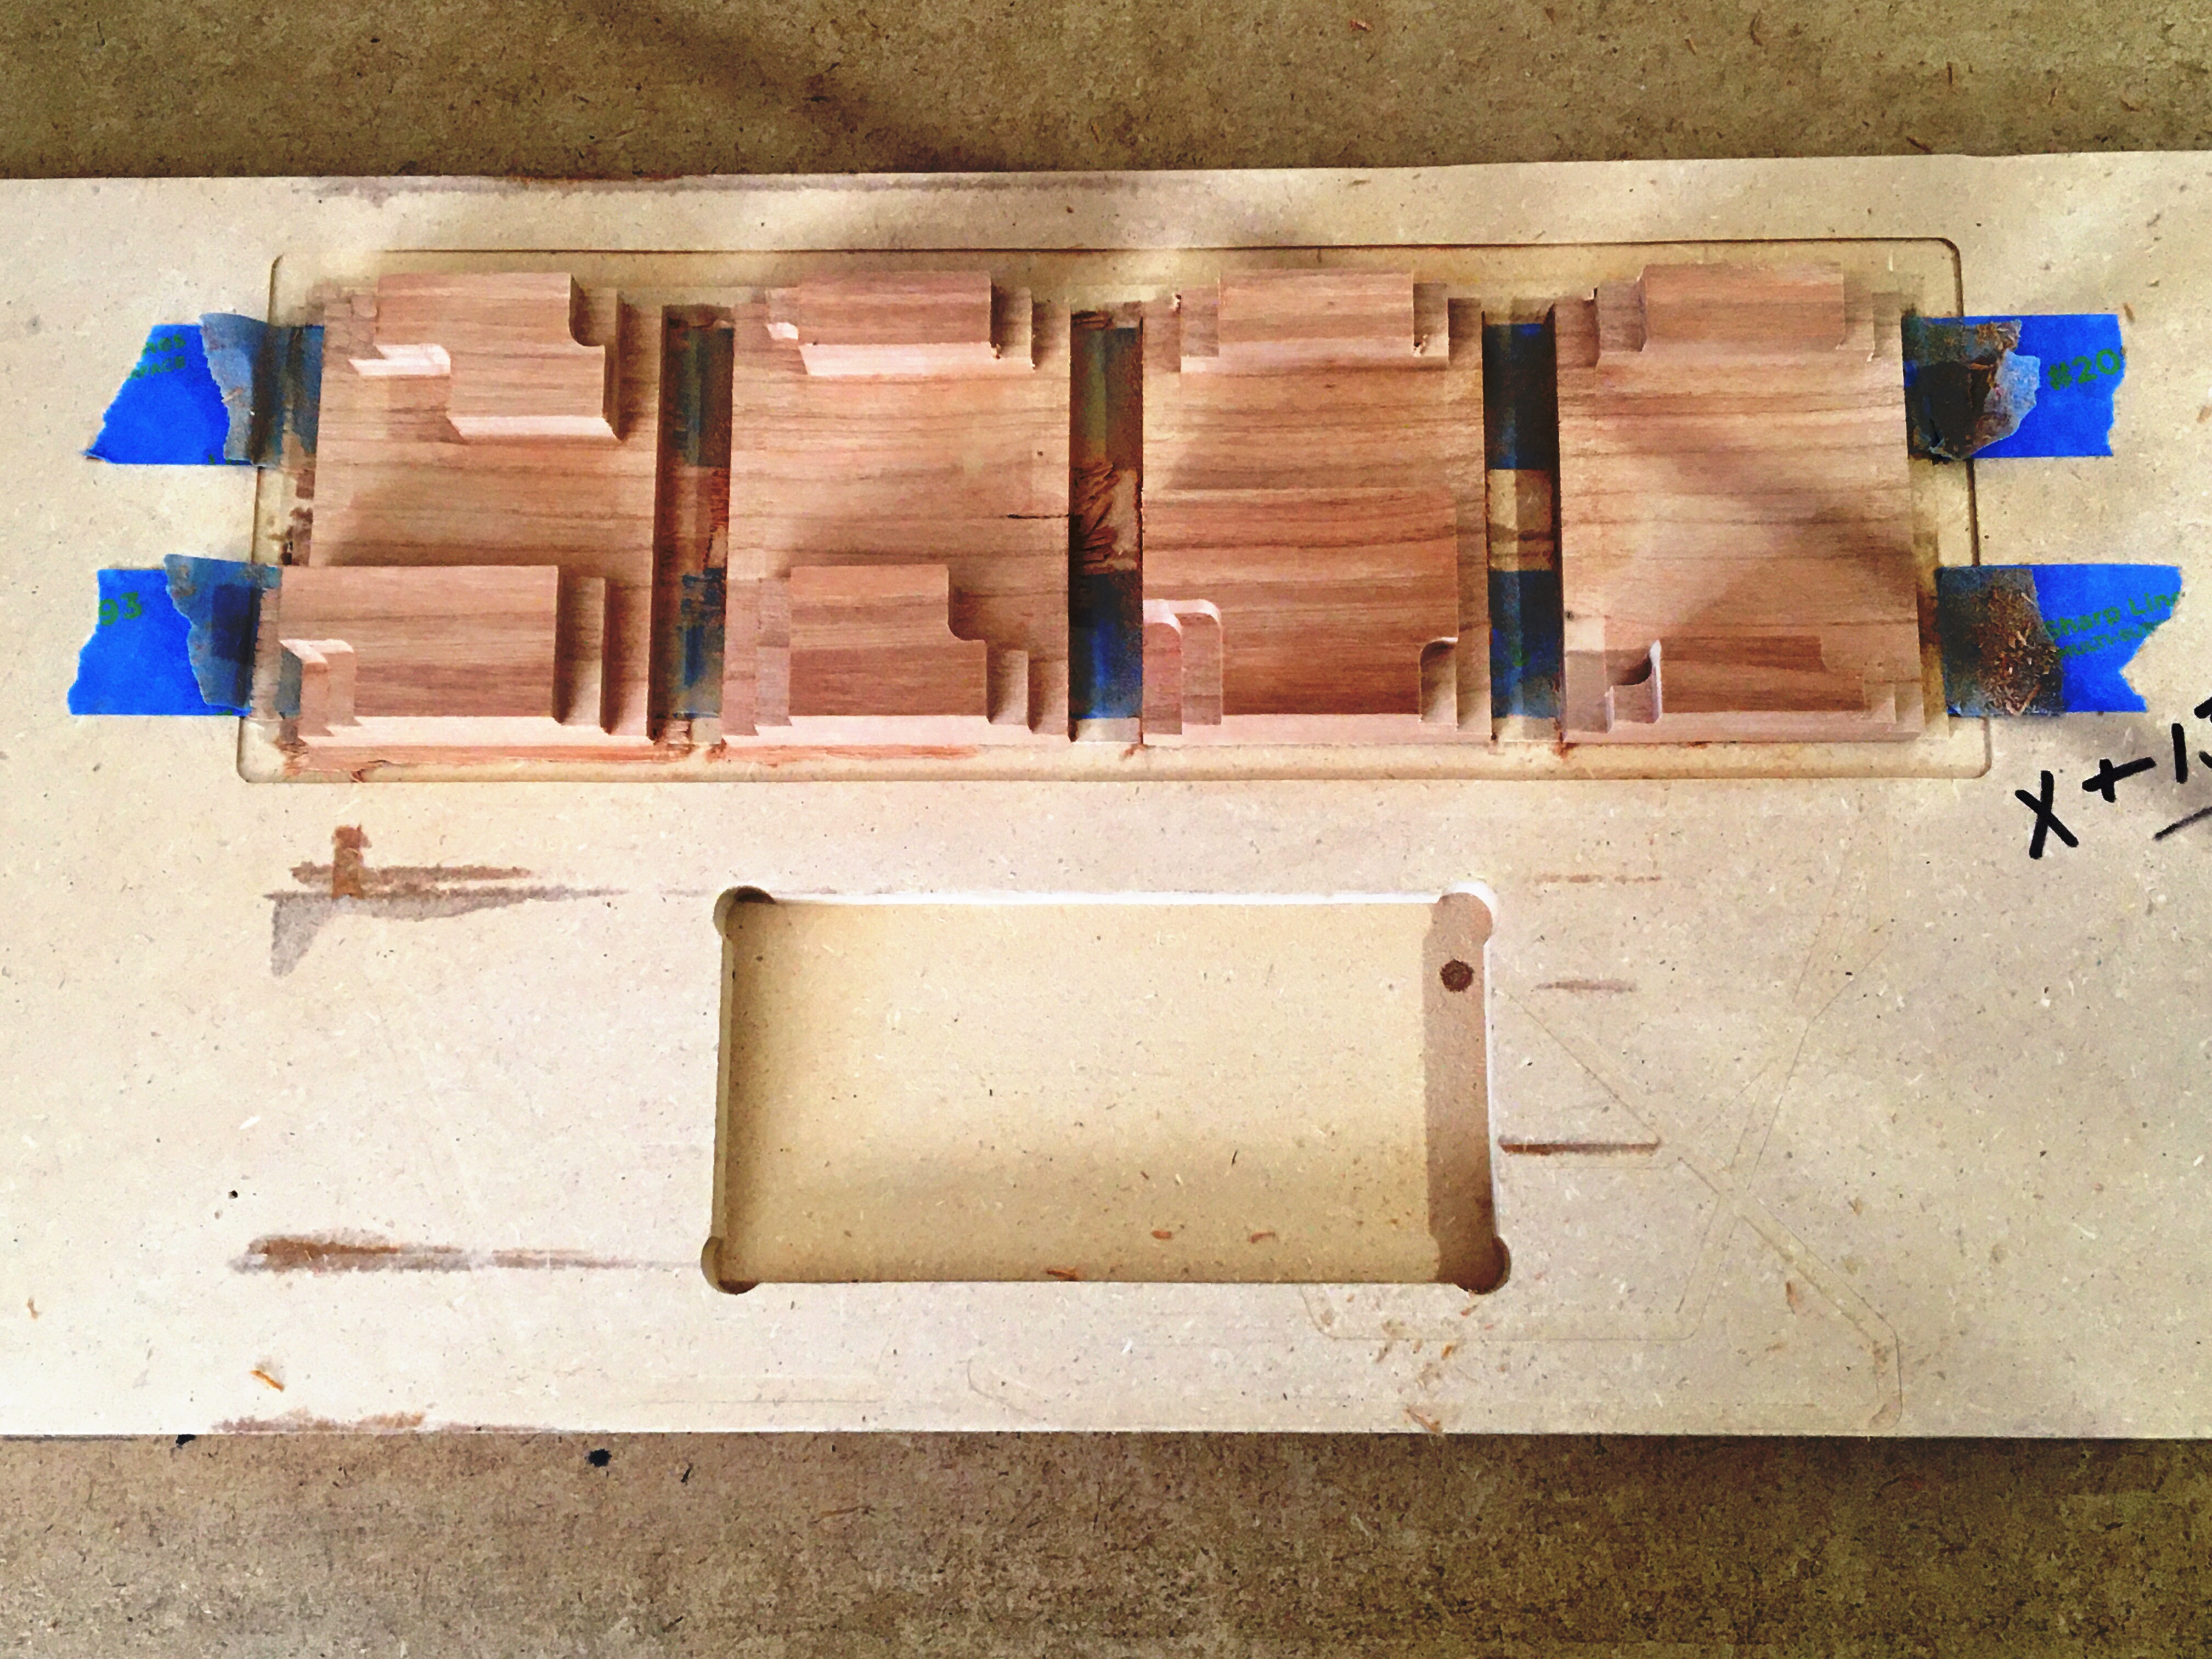
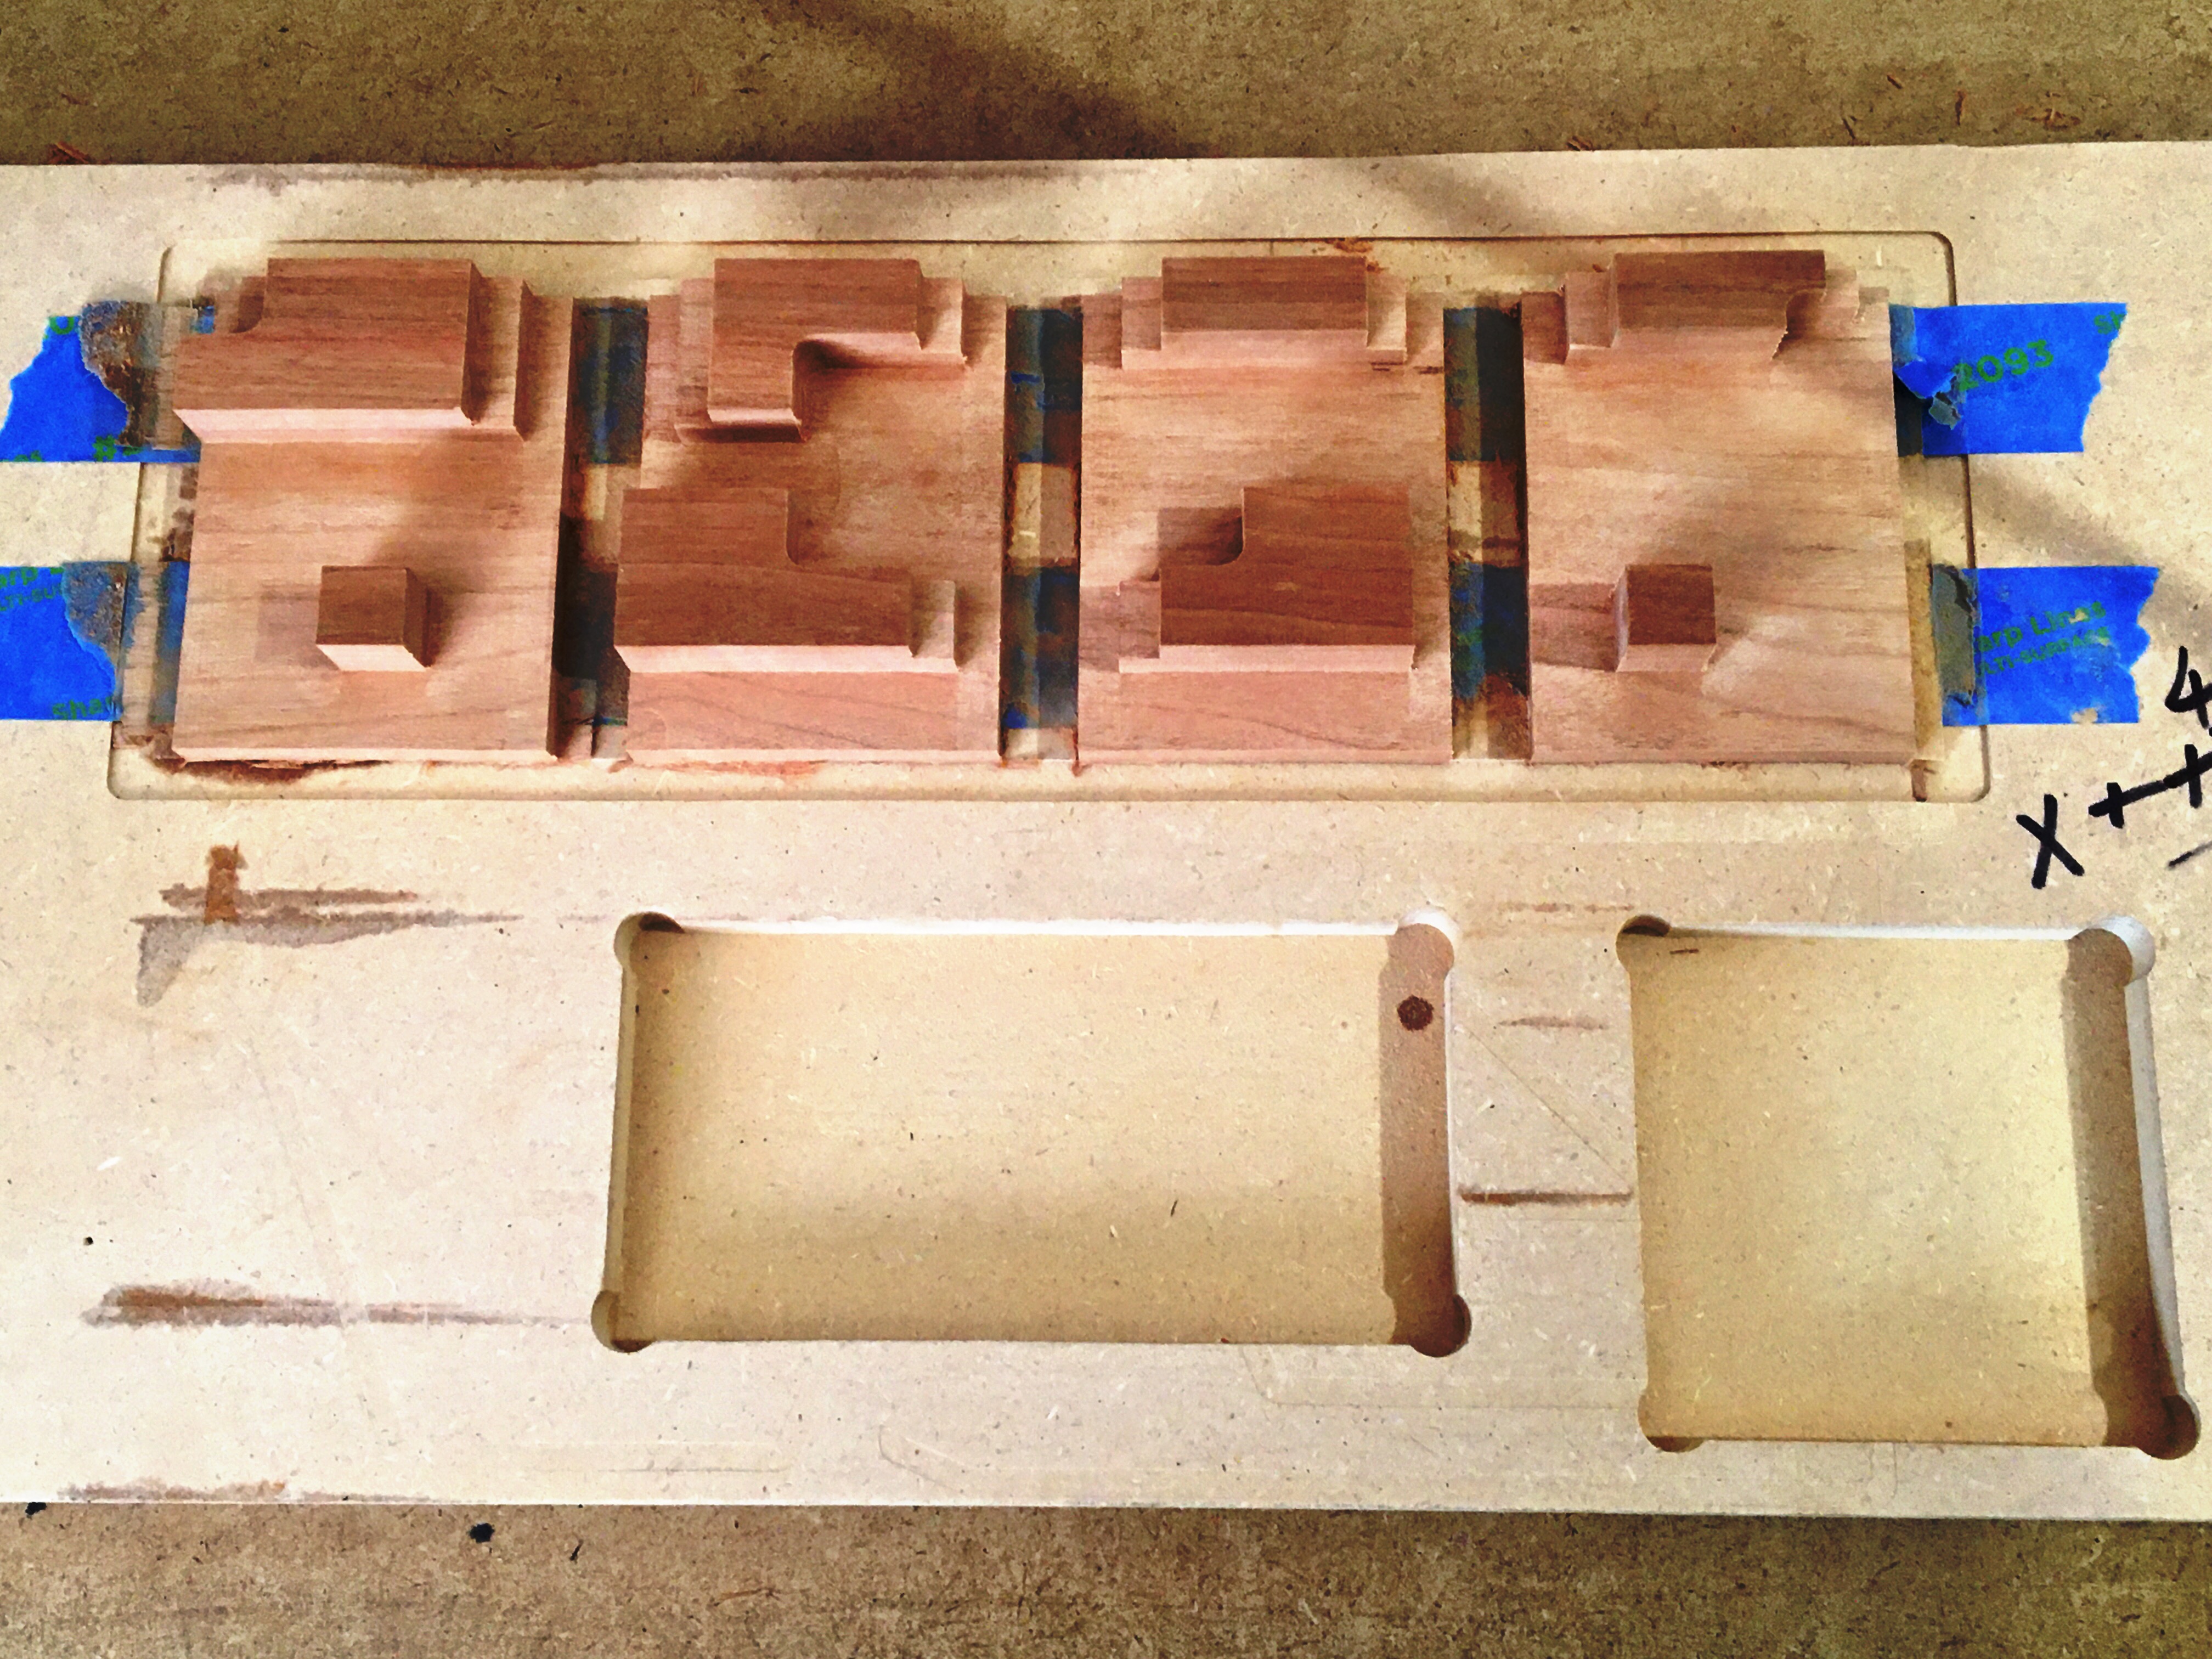
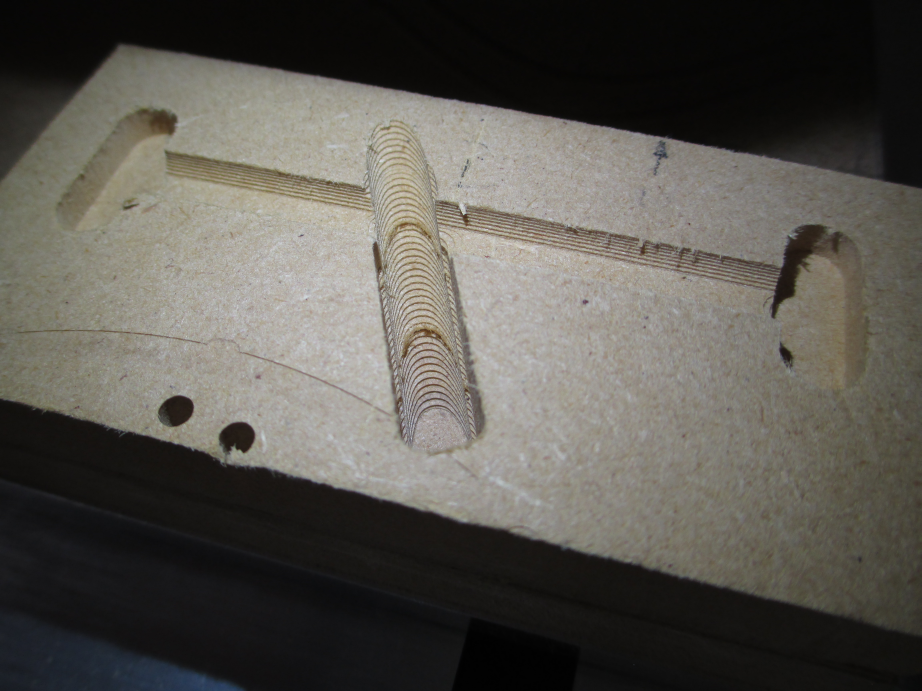
The wells at each end are for trimming to length.

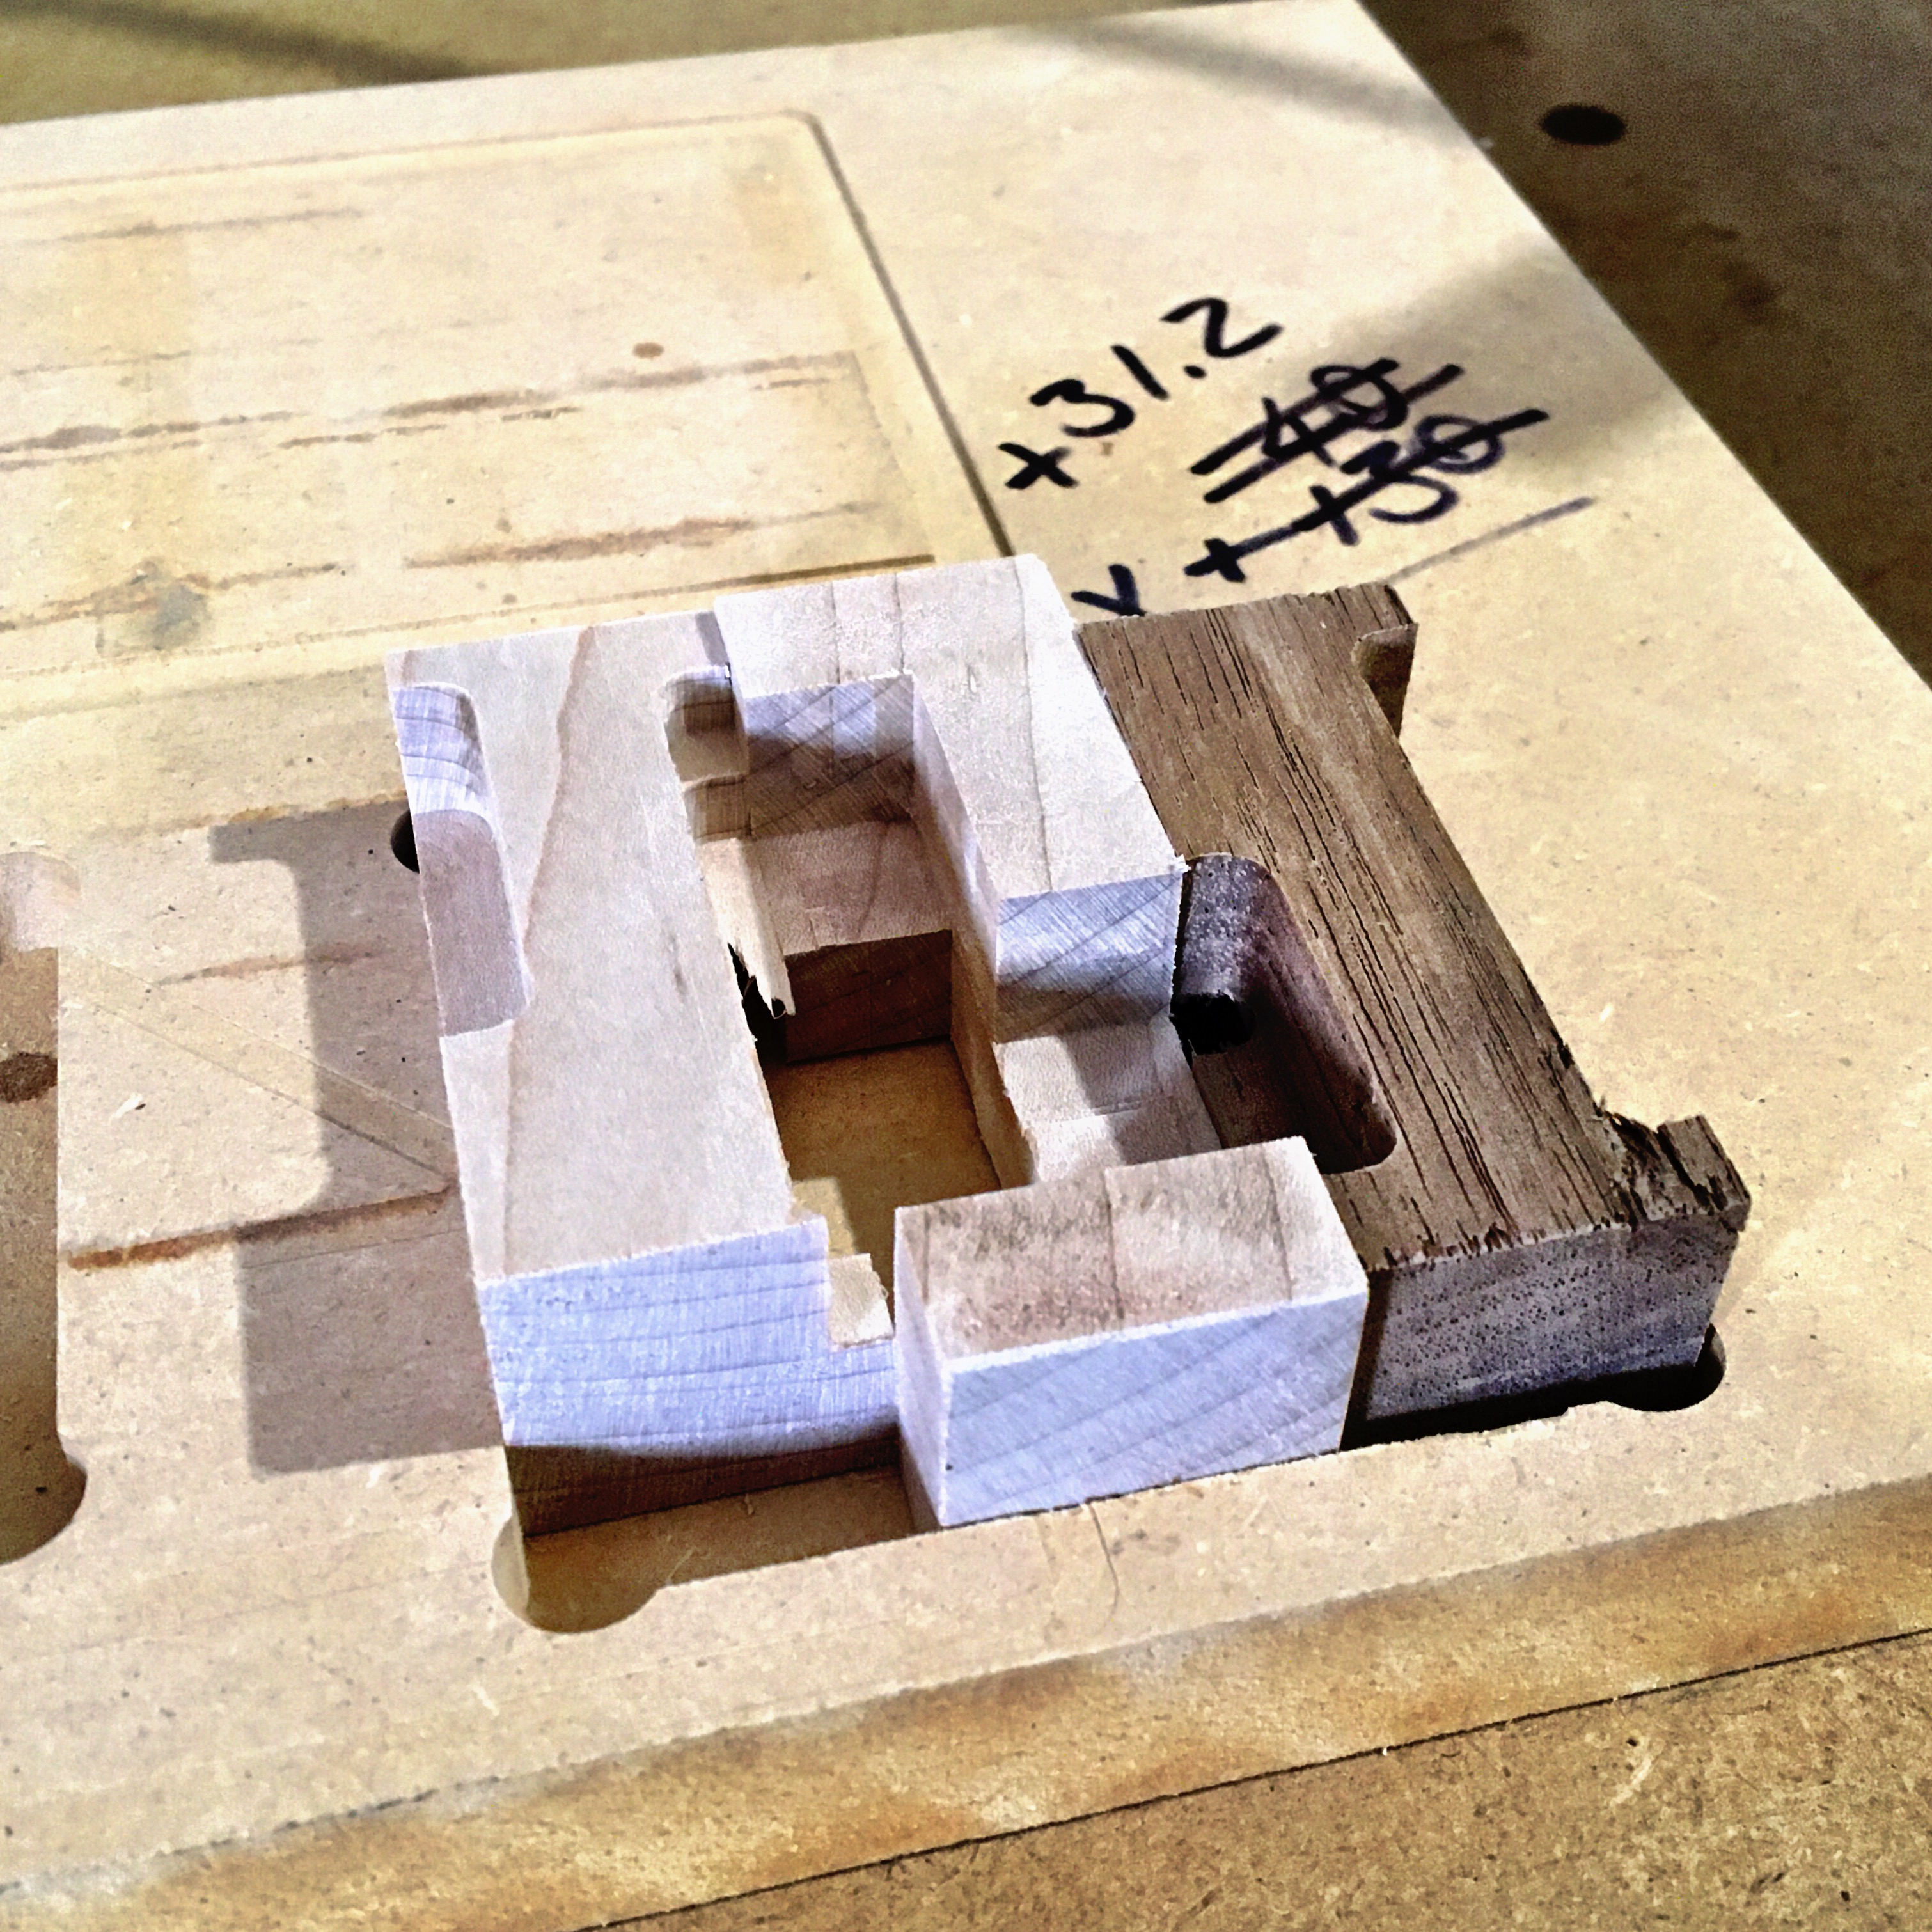
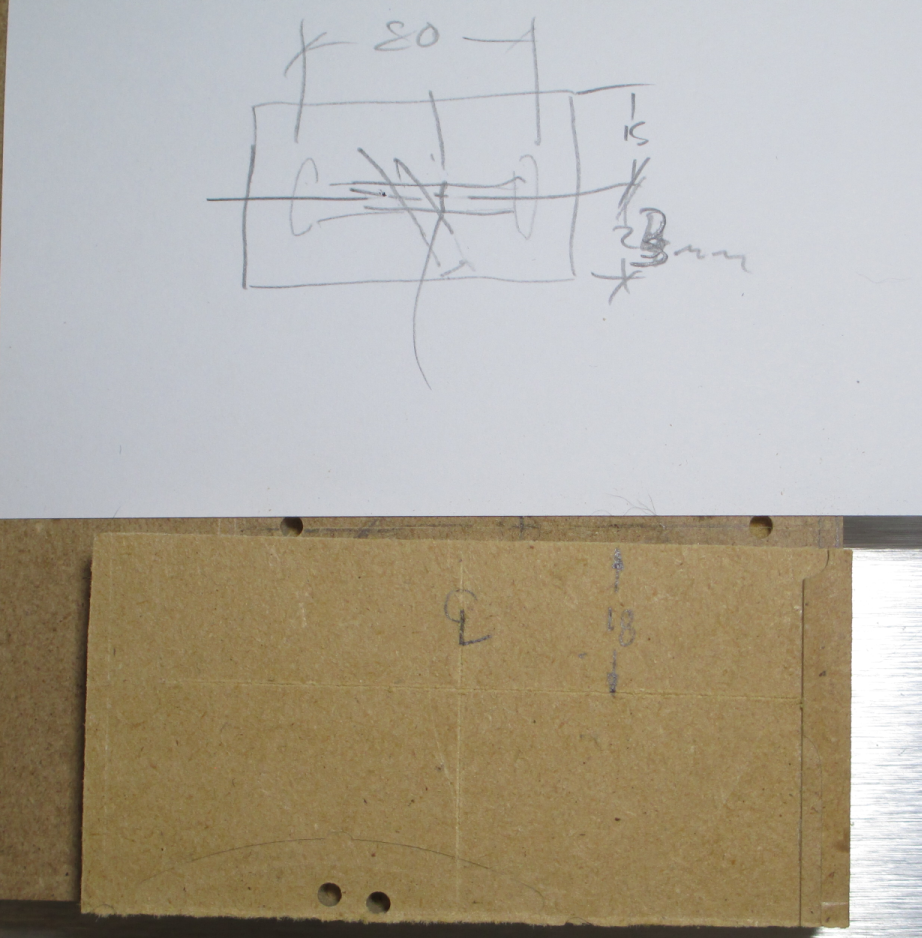
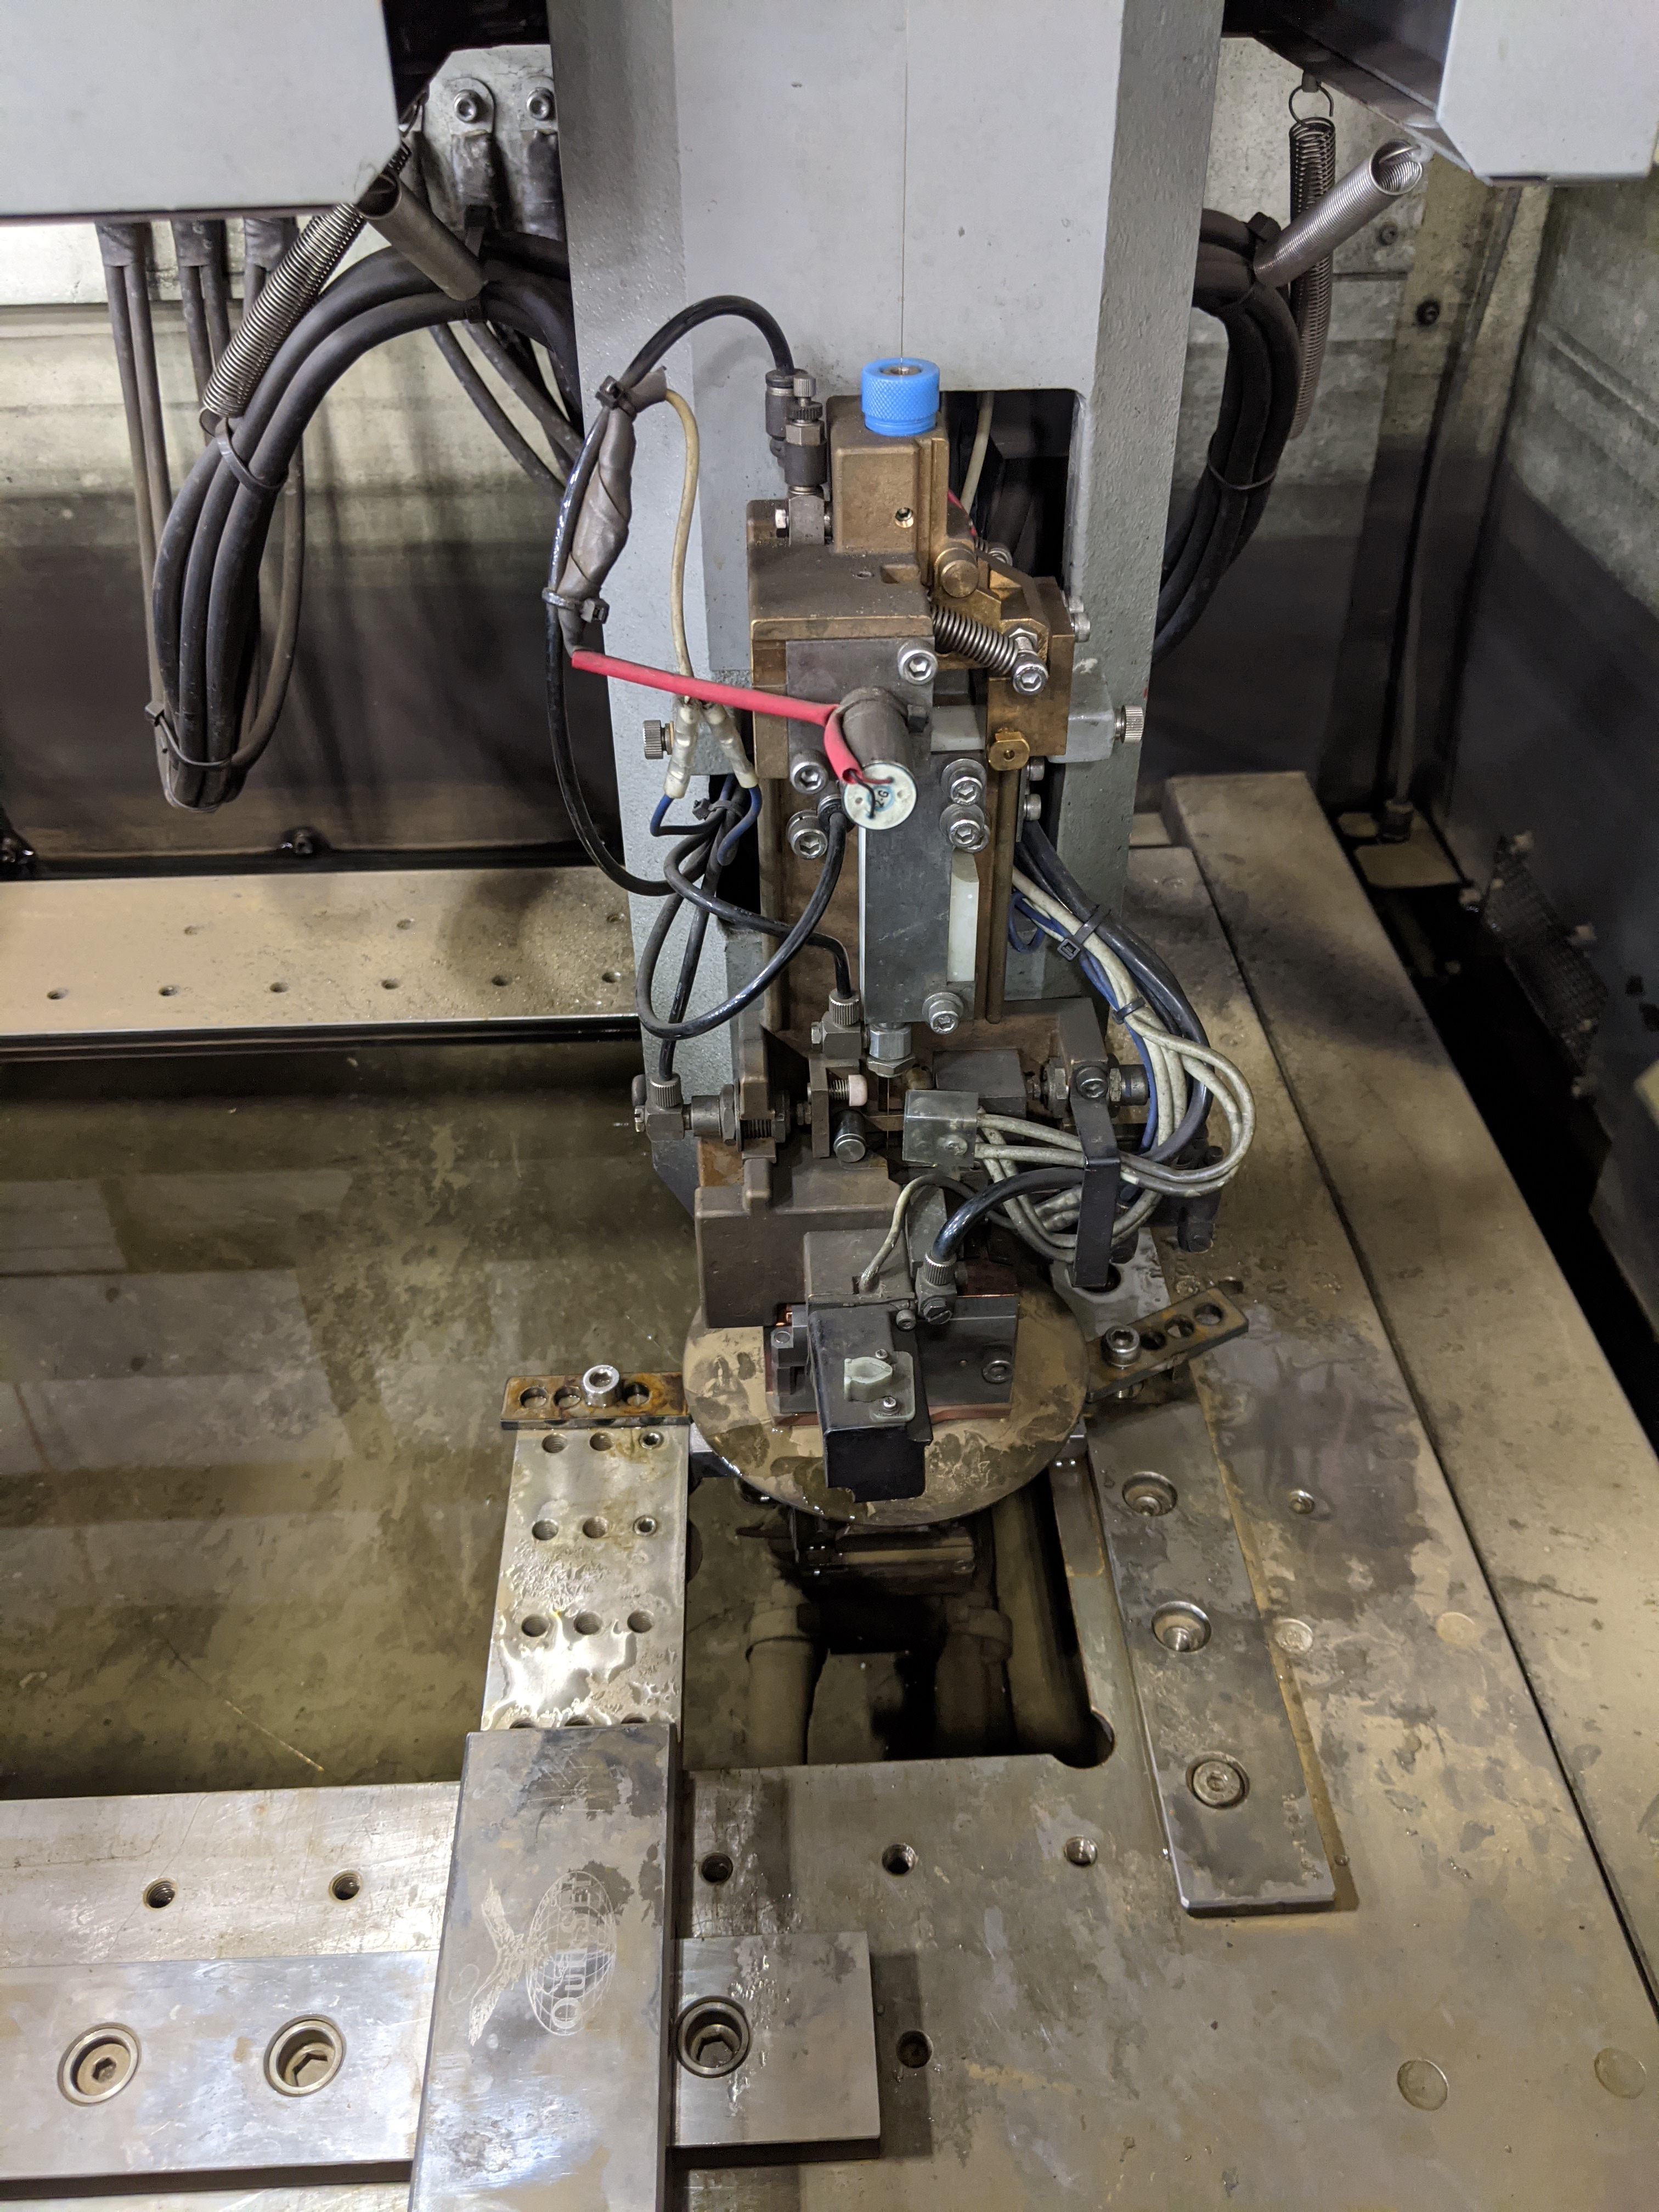
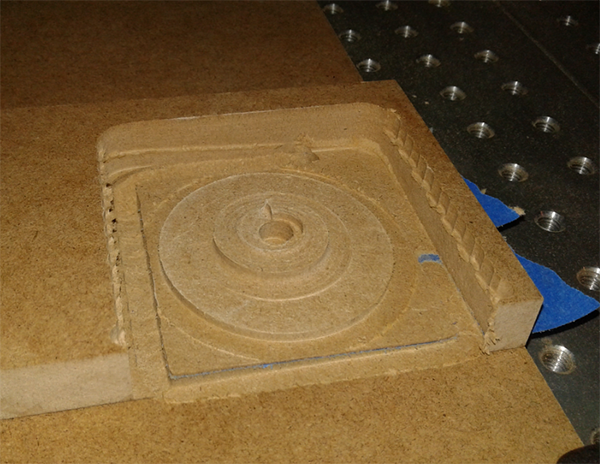
First, glue a riser piece onto the wasteboard (12mm isn’t enough thickness), locate the origin, deck it, and machine the fixture.


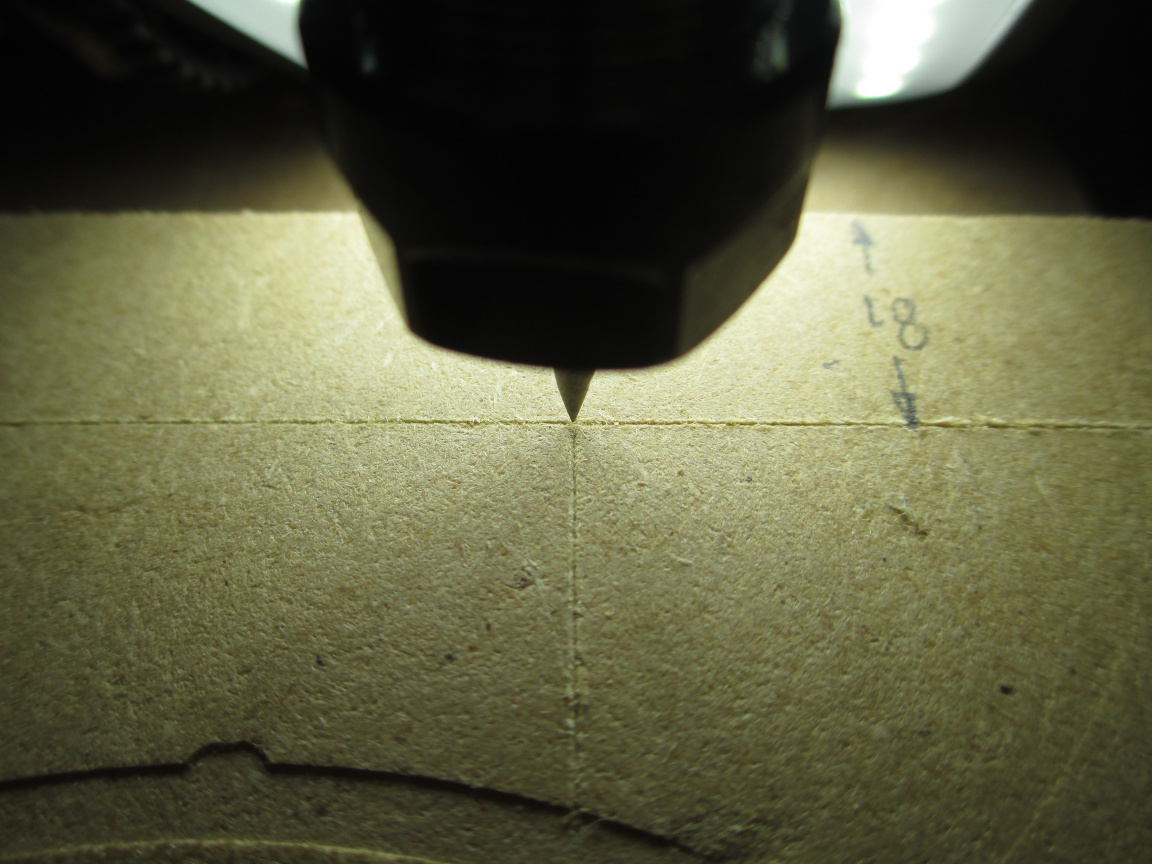
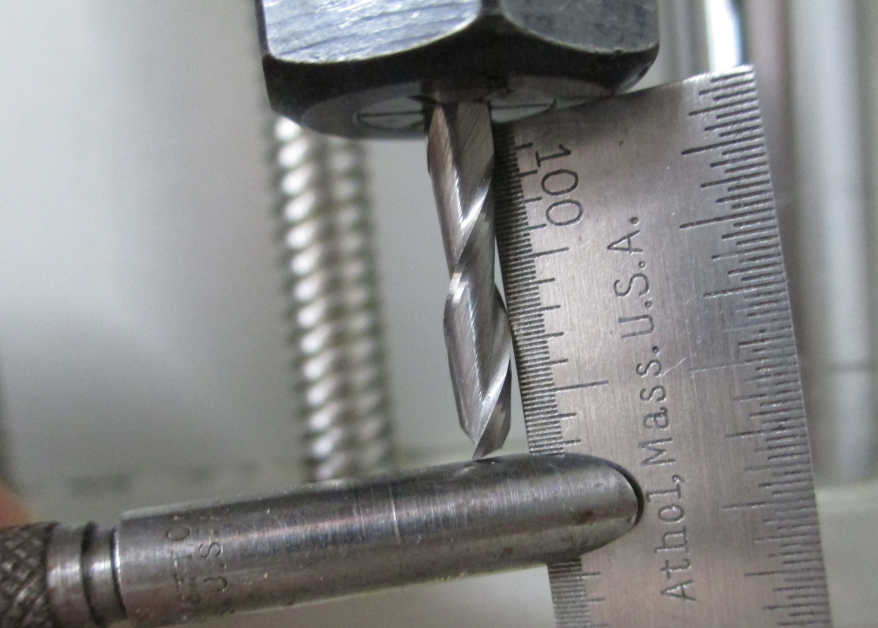
I set the tools to the minimum acceptable extension

leaving about 1mm between the surface and the collet nut
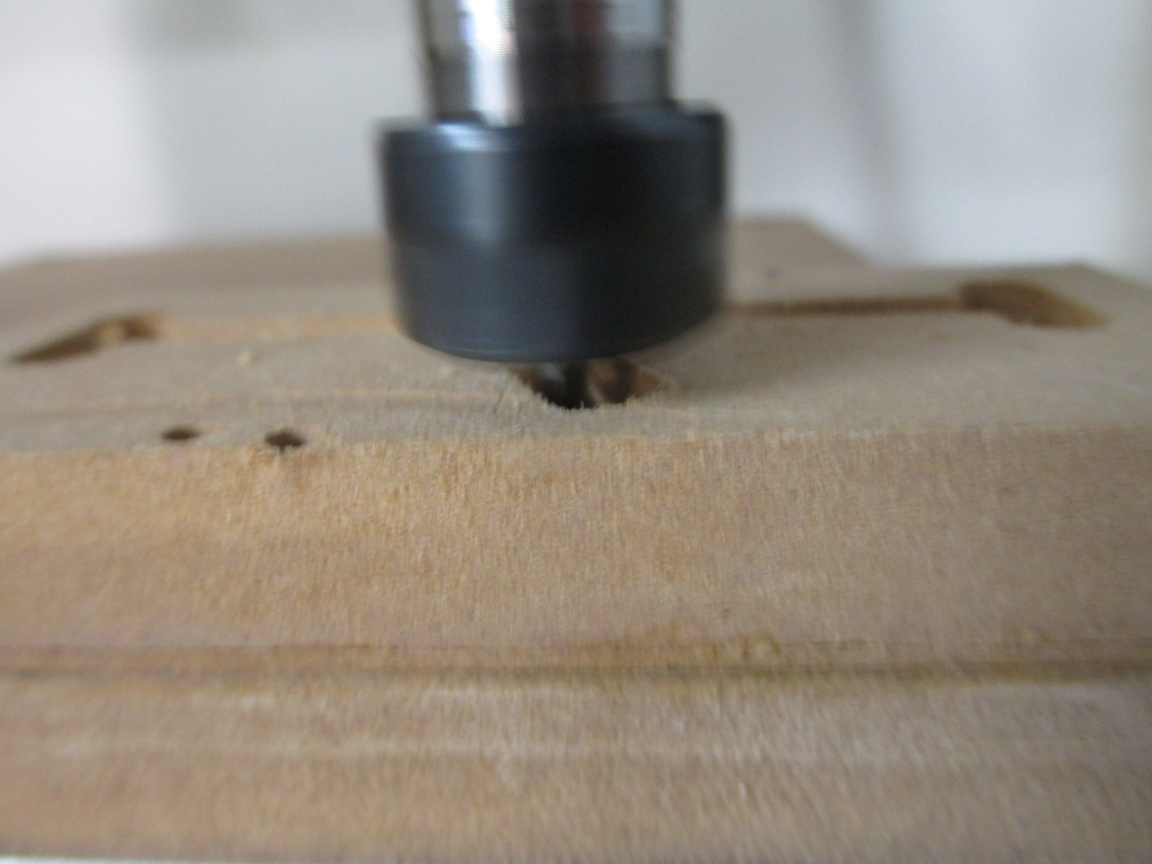
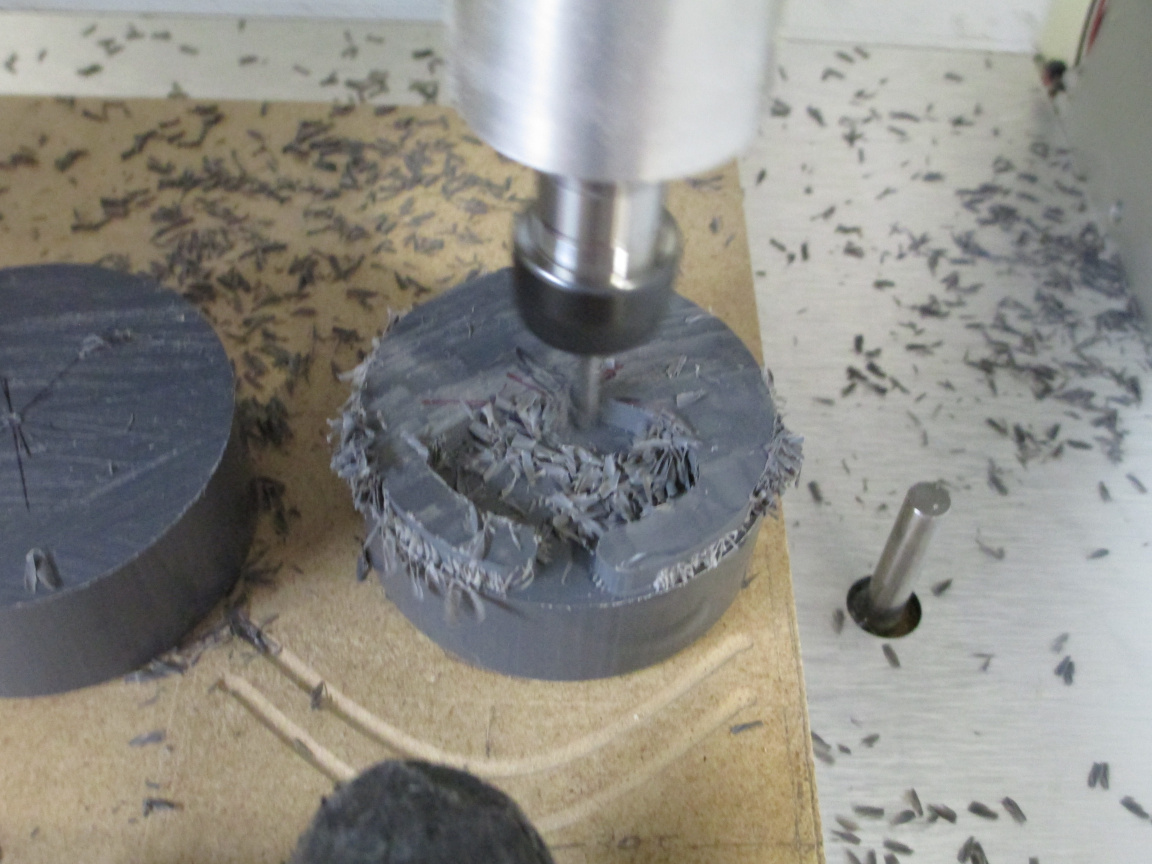
to get the rough-in

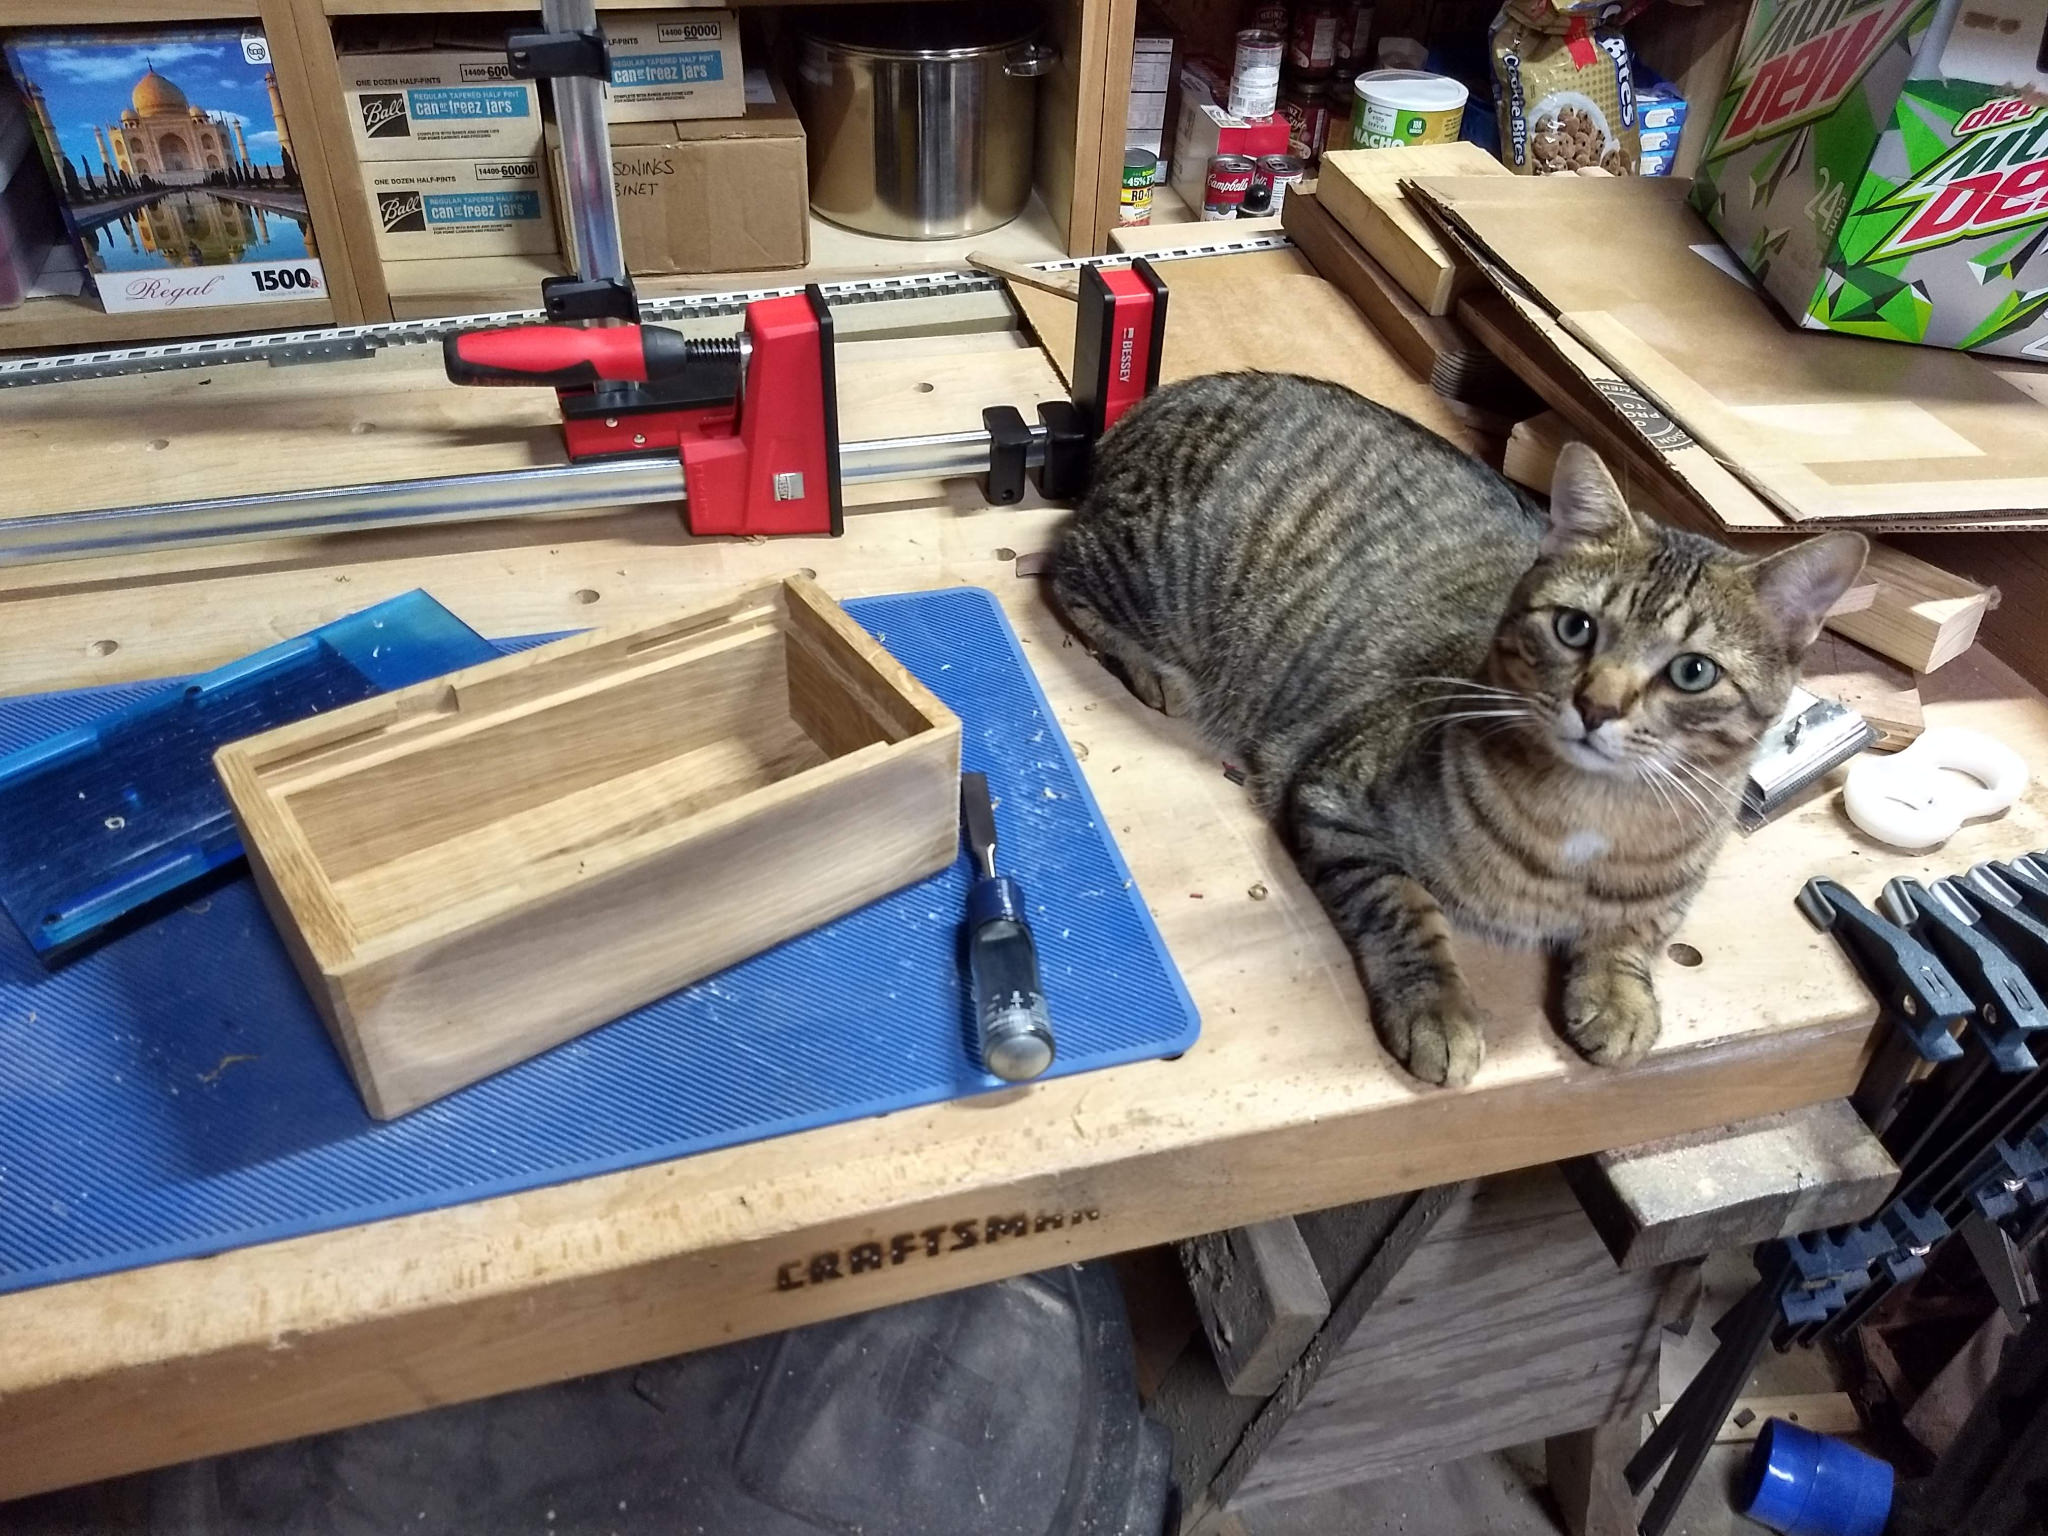
then finished uder the close supervision of the shop supervisor

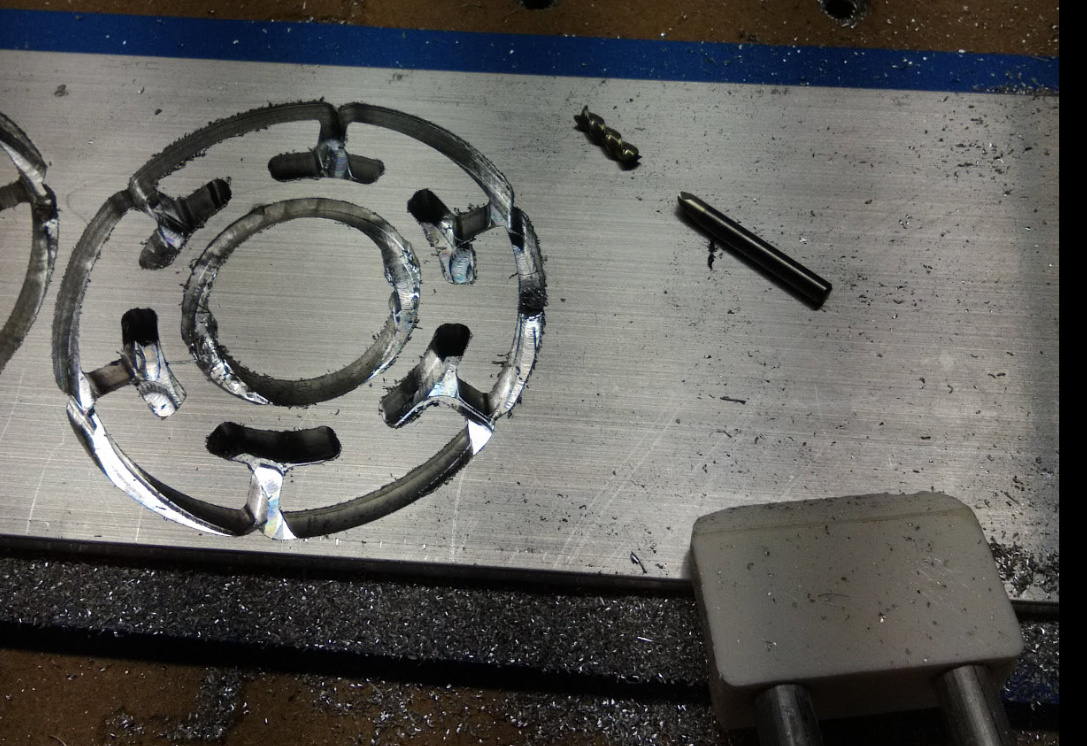
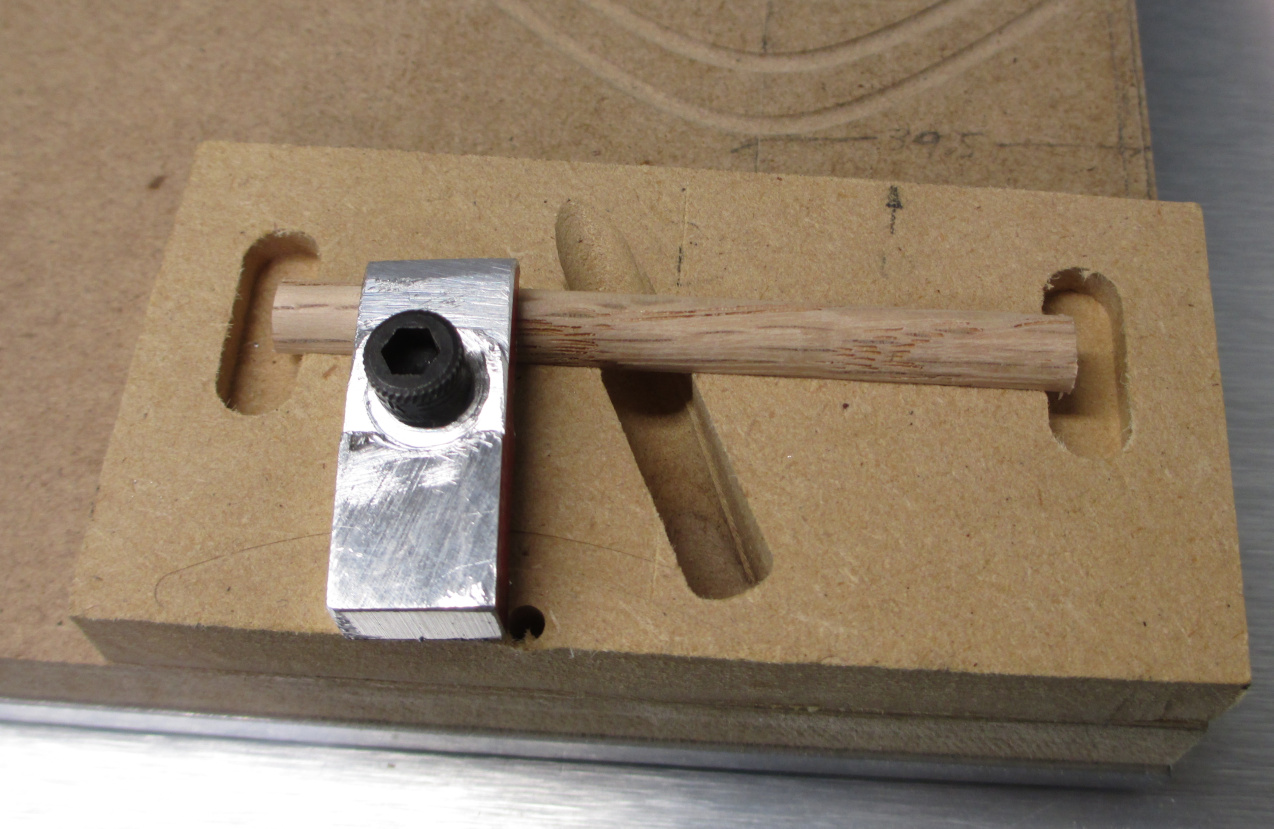
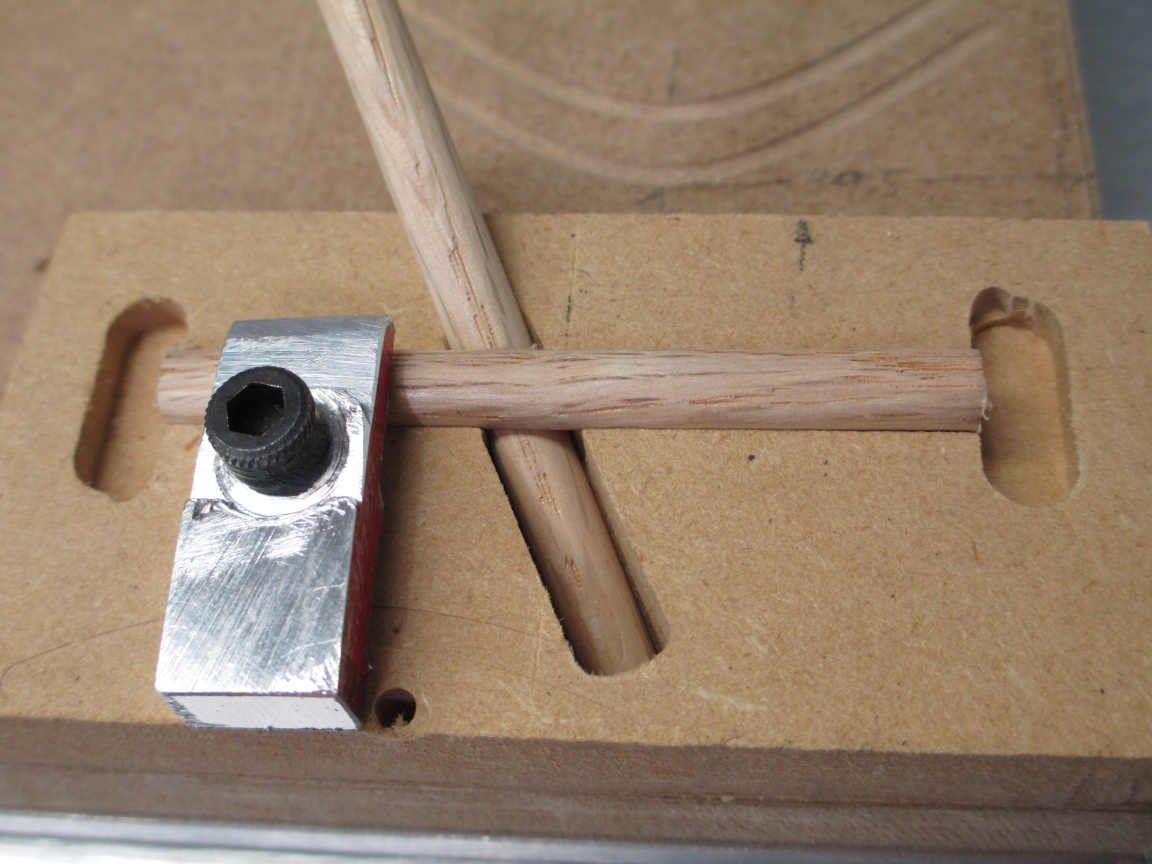
After finishing with the ball end, threading the hole for the hold down (you can thread MDF for machine screws. I usually get about 100 uses before the threads give out, by which time the fixture itself is usually done, too. MDF is not real rugged in this application, but it sure is easy) The first part was mounted


The clamp was made from a special work holding alloy known as “scrap bin aluminium bar” using the HWF process (Human With File).
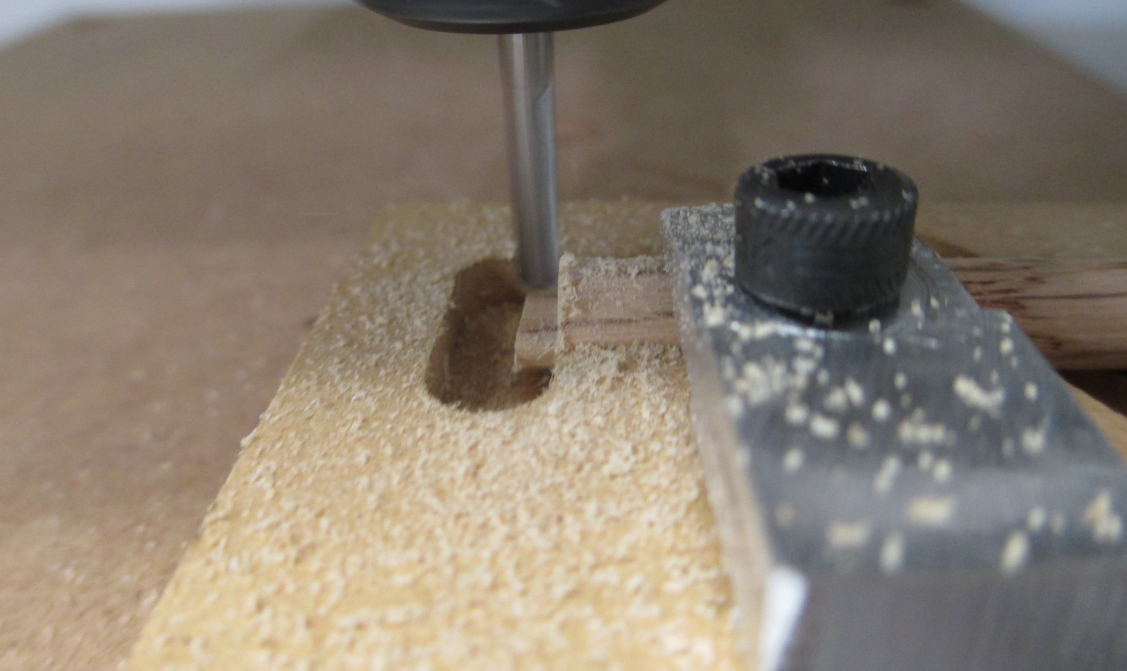
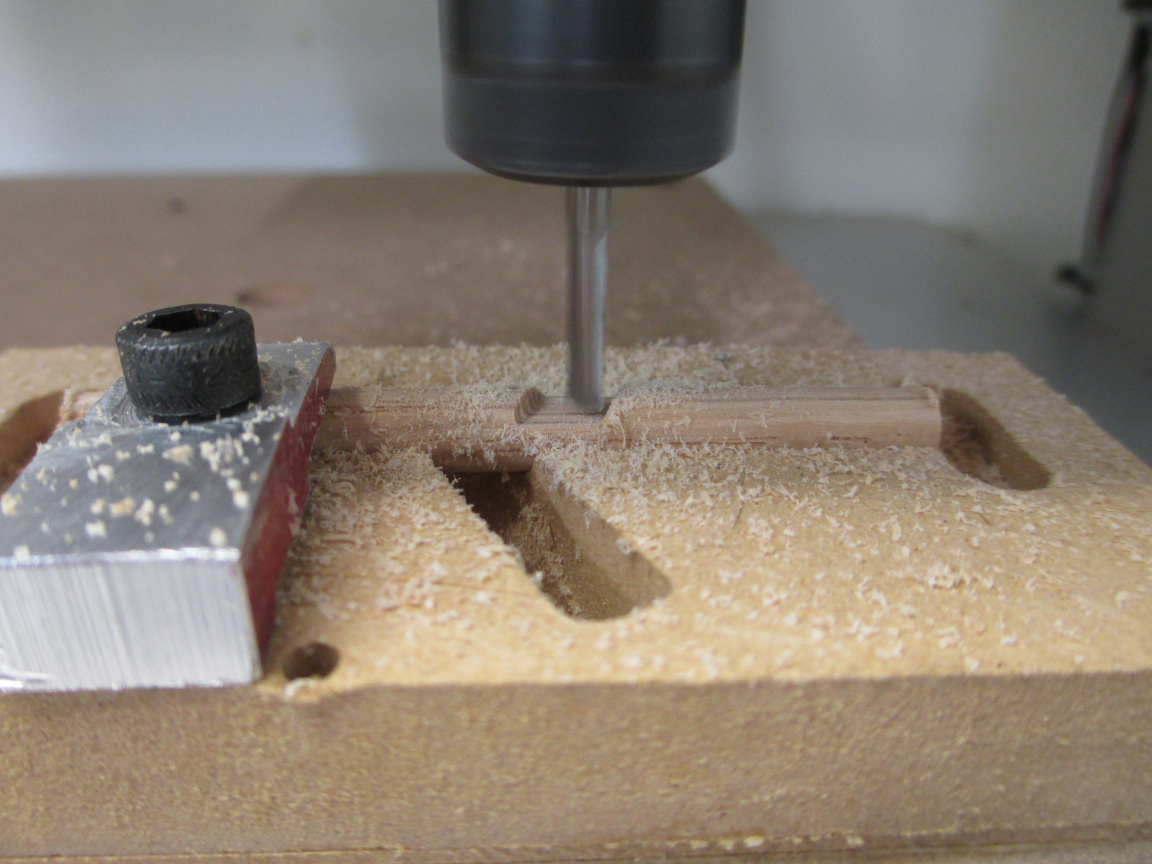
Cut to length


and notch

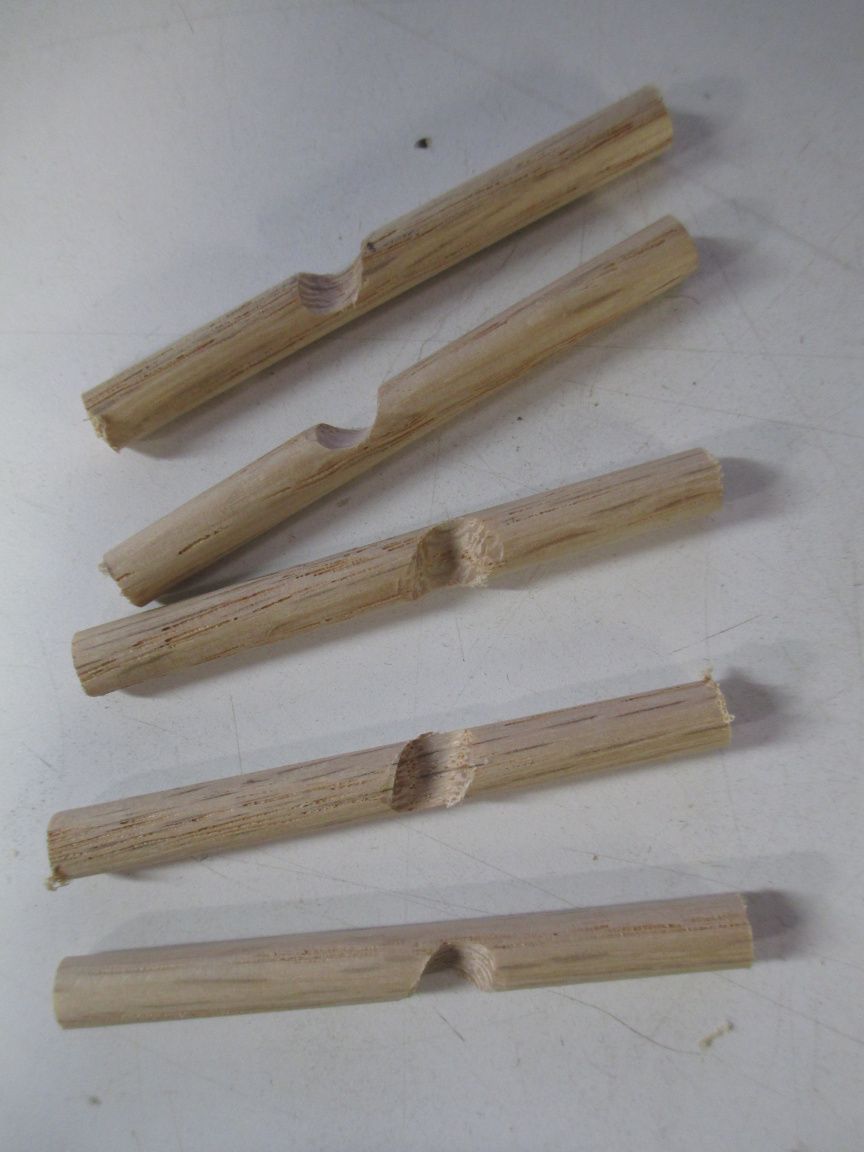
then repeat for all parts to get

which is surprisingly difficult for most people to assemble to get

This is a puzzle as is, but not much of one. There is more to come, if I can find time this week to finish the next part between all of the zoom meetings and online training (that would take two hours total in person, though it will be maybe 15 to 20 this way). The CAD is done, but I need to CAM up and machine it.

EDIT: Part 2
Had some time this morning. Meeting cancelled.

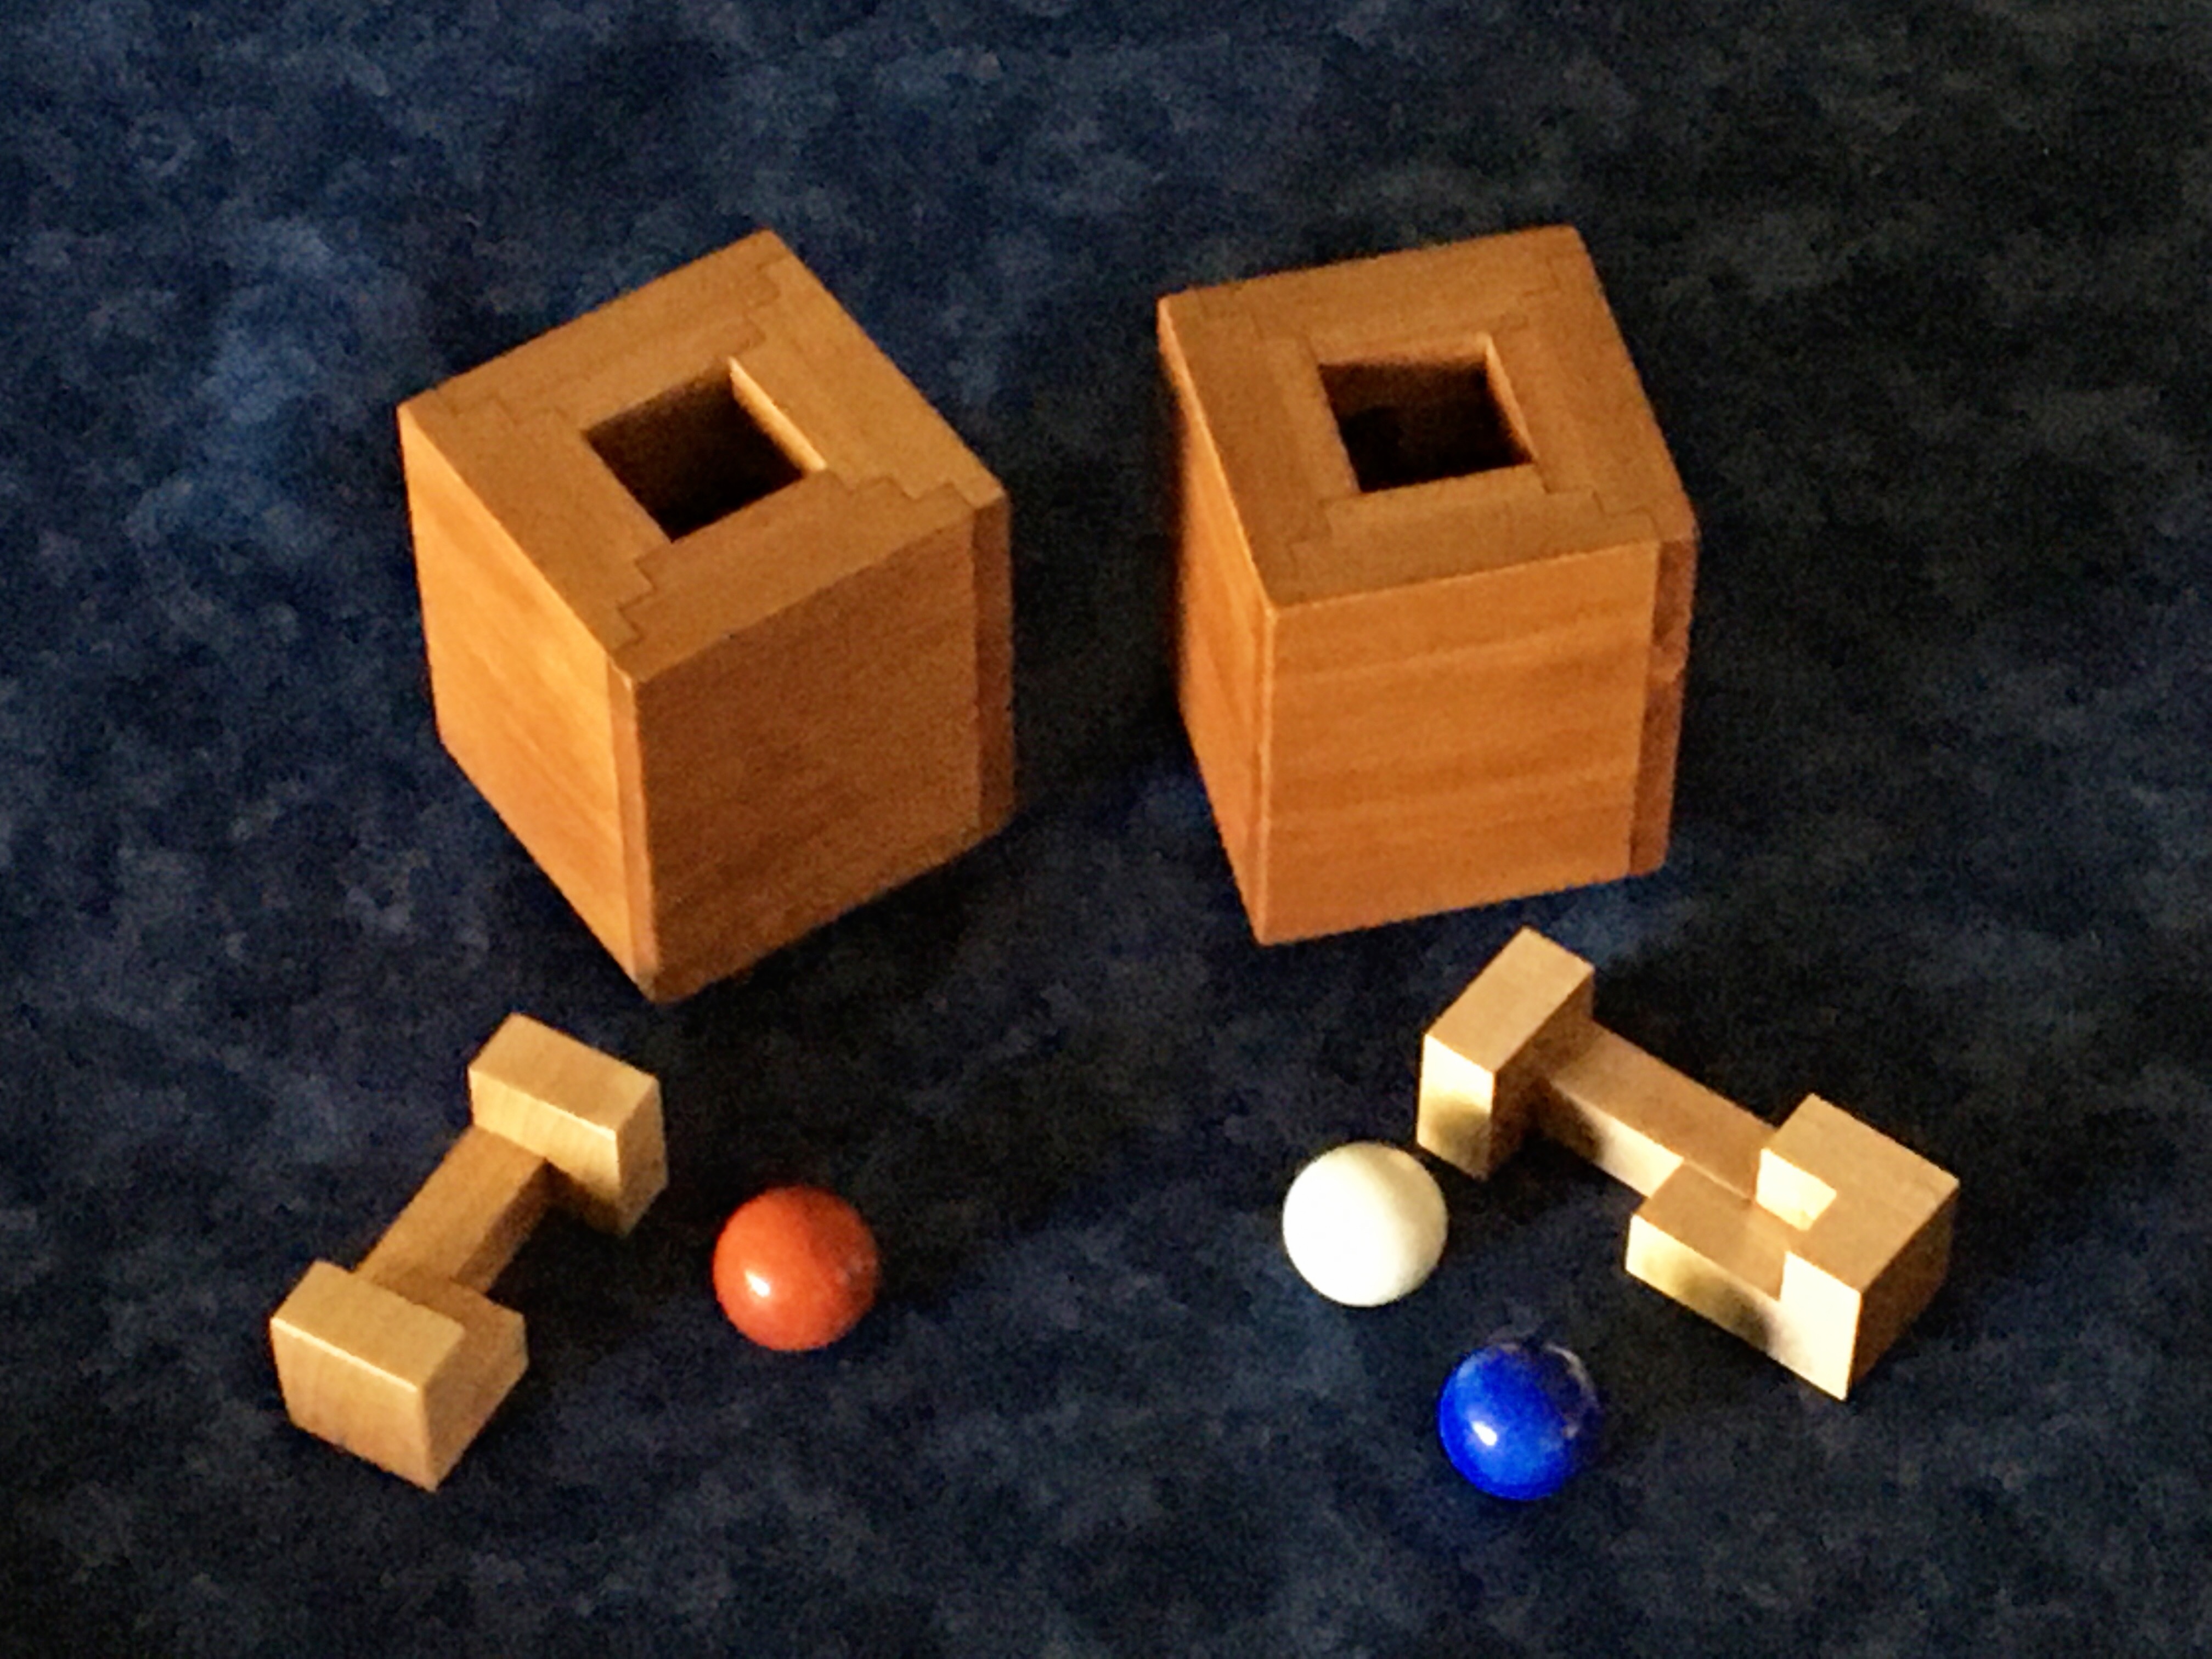
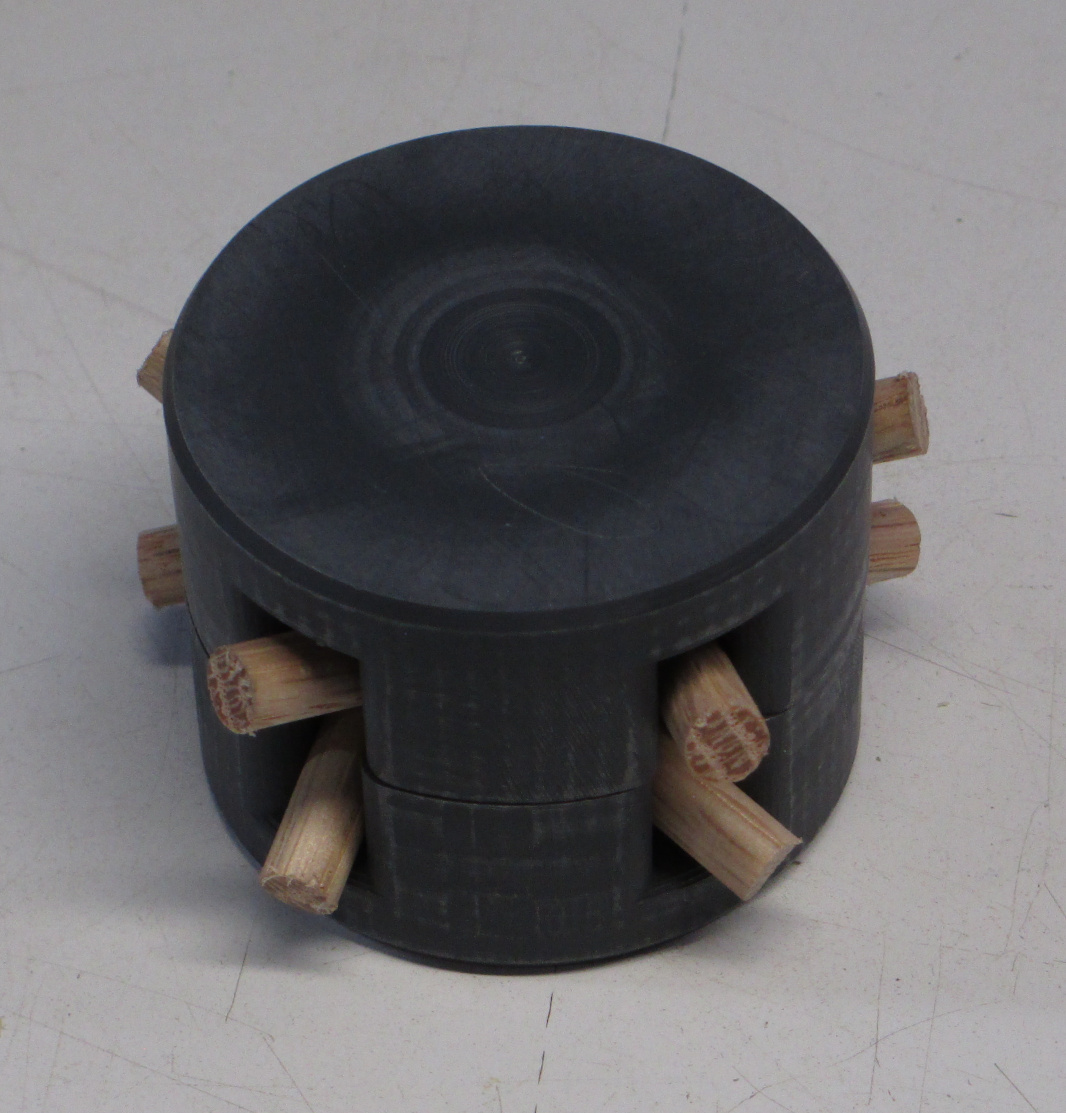
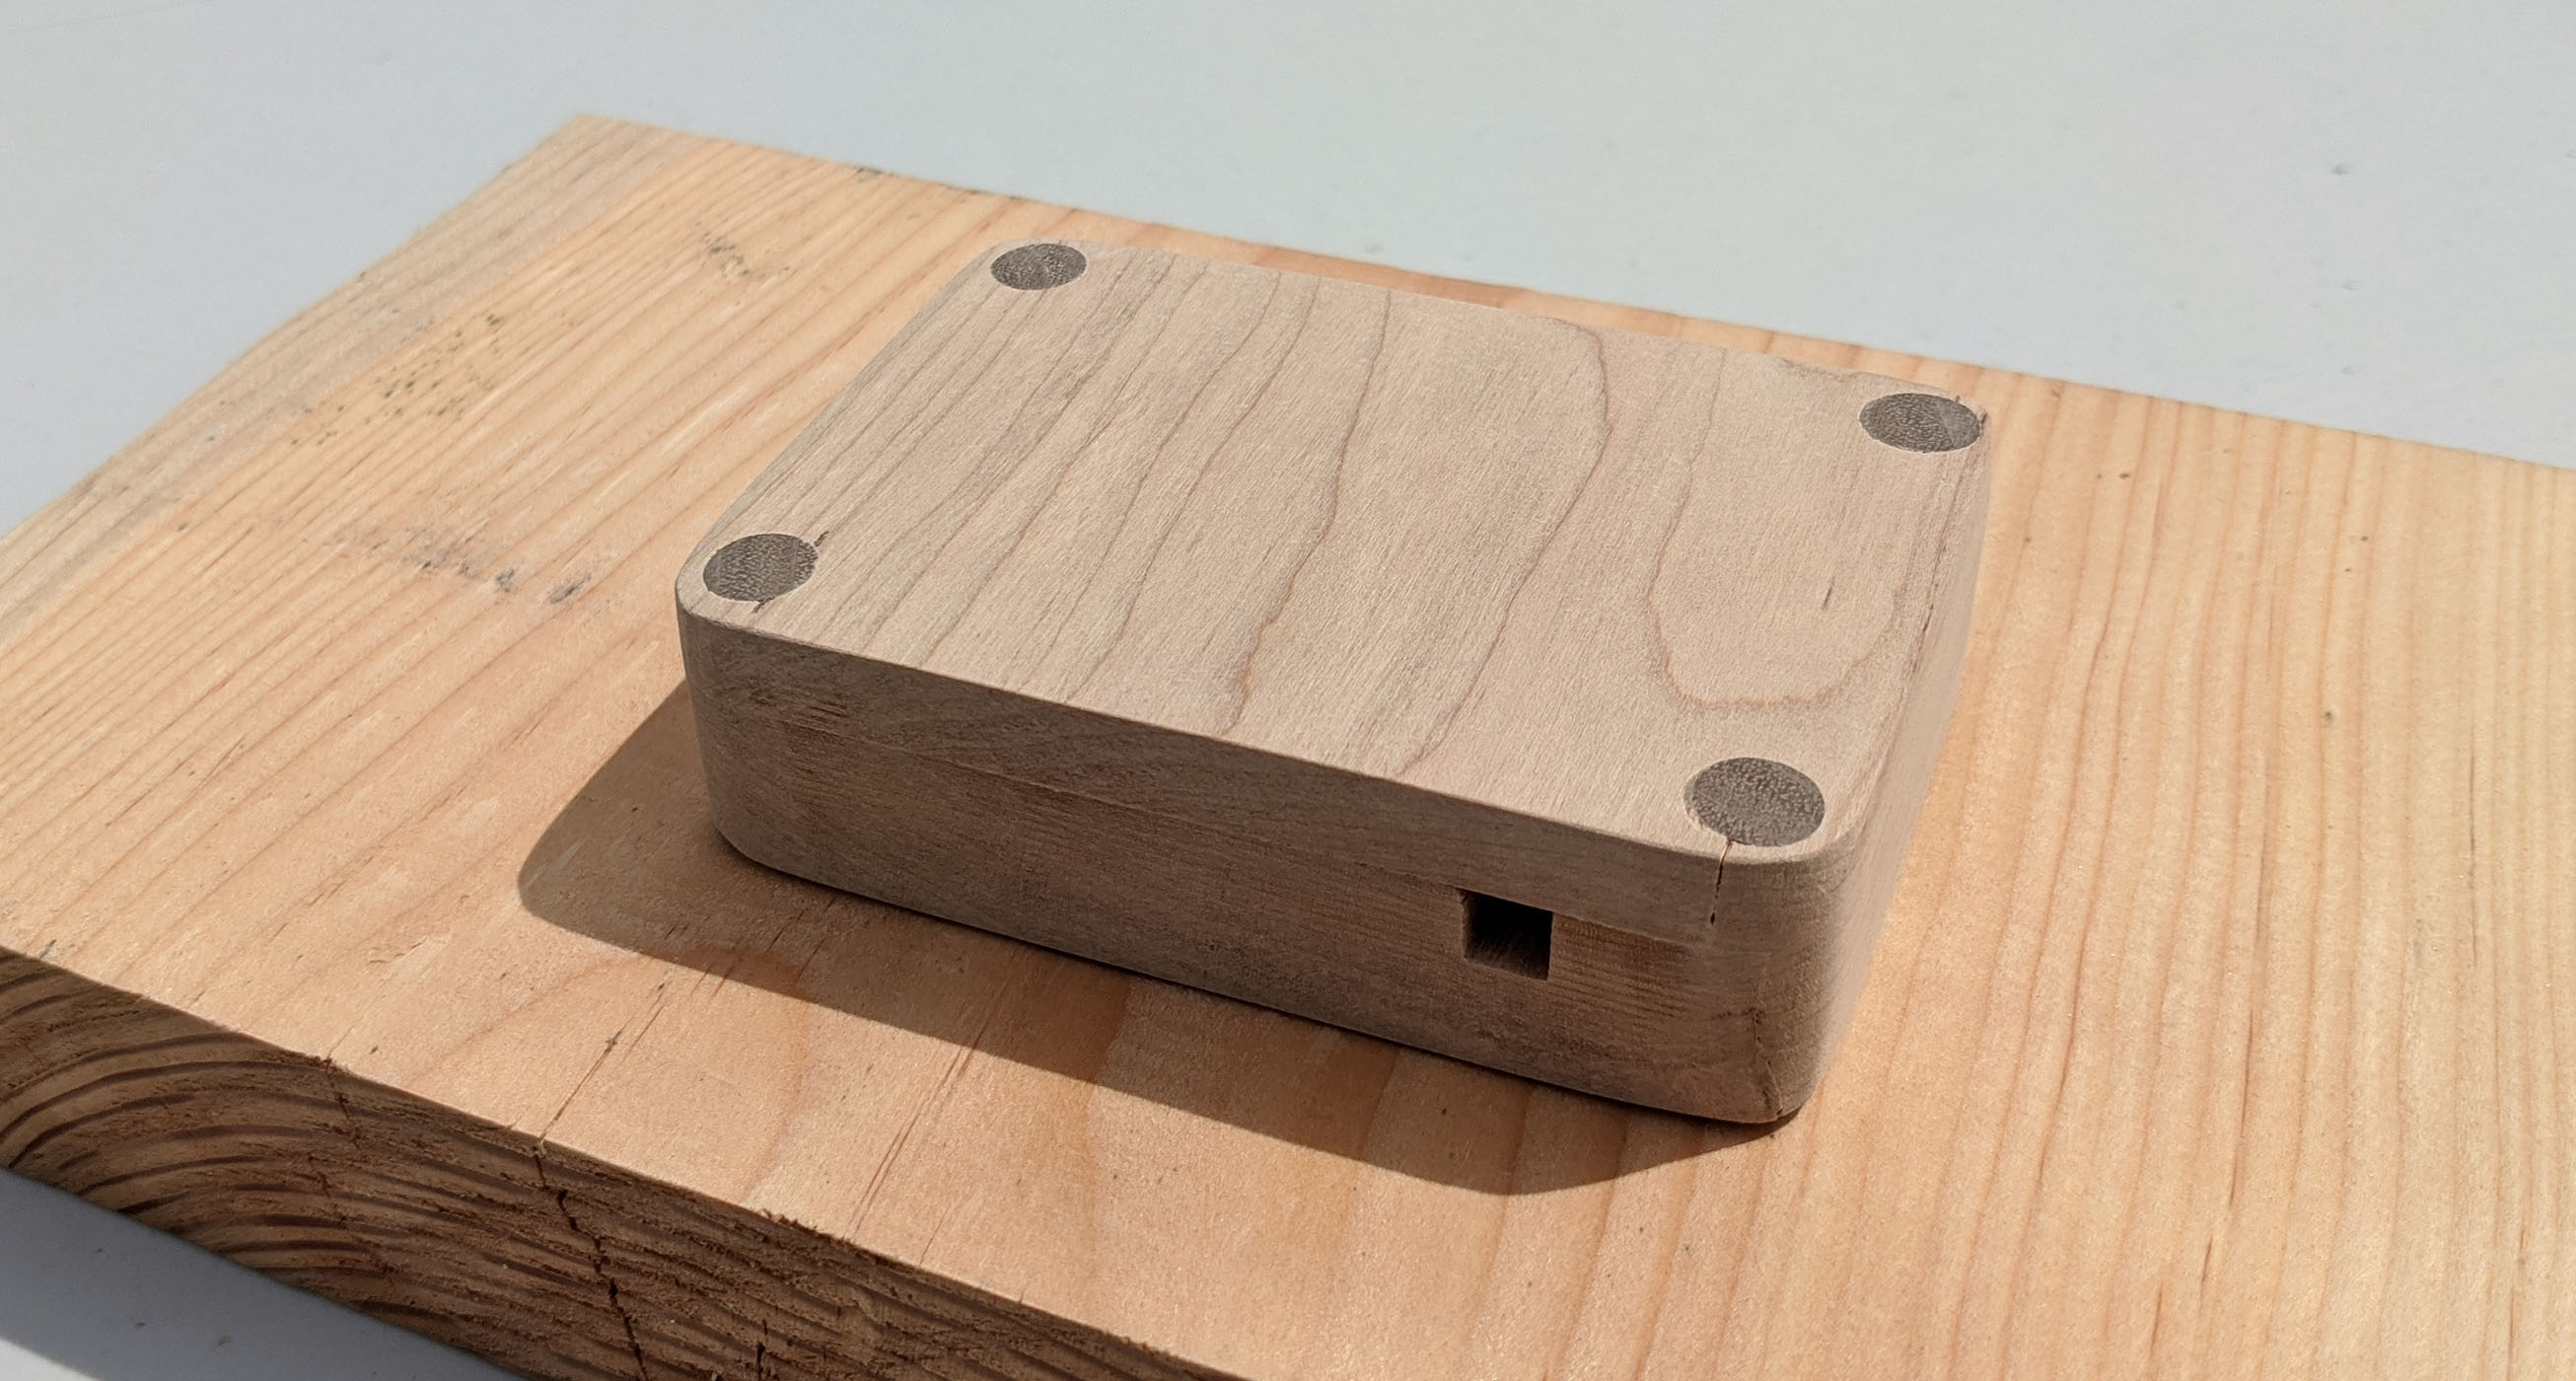
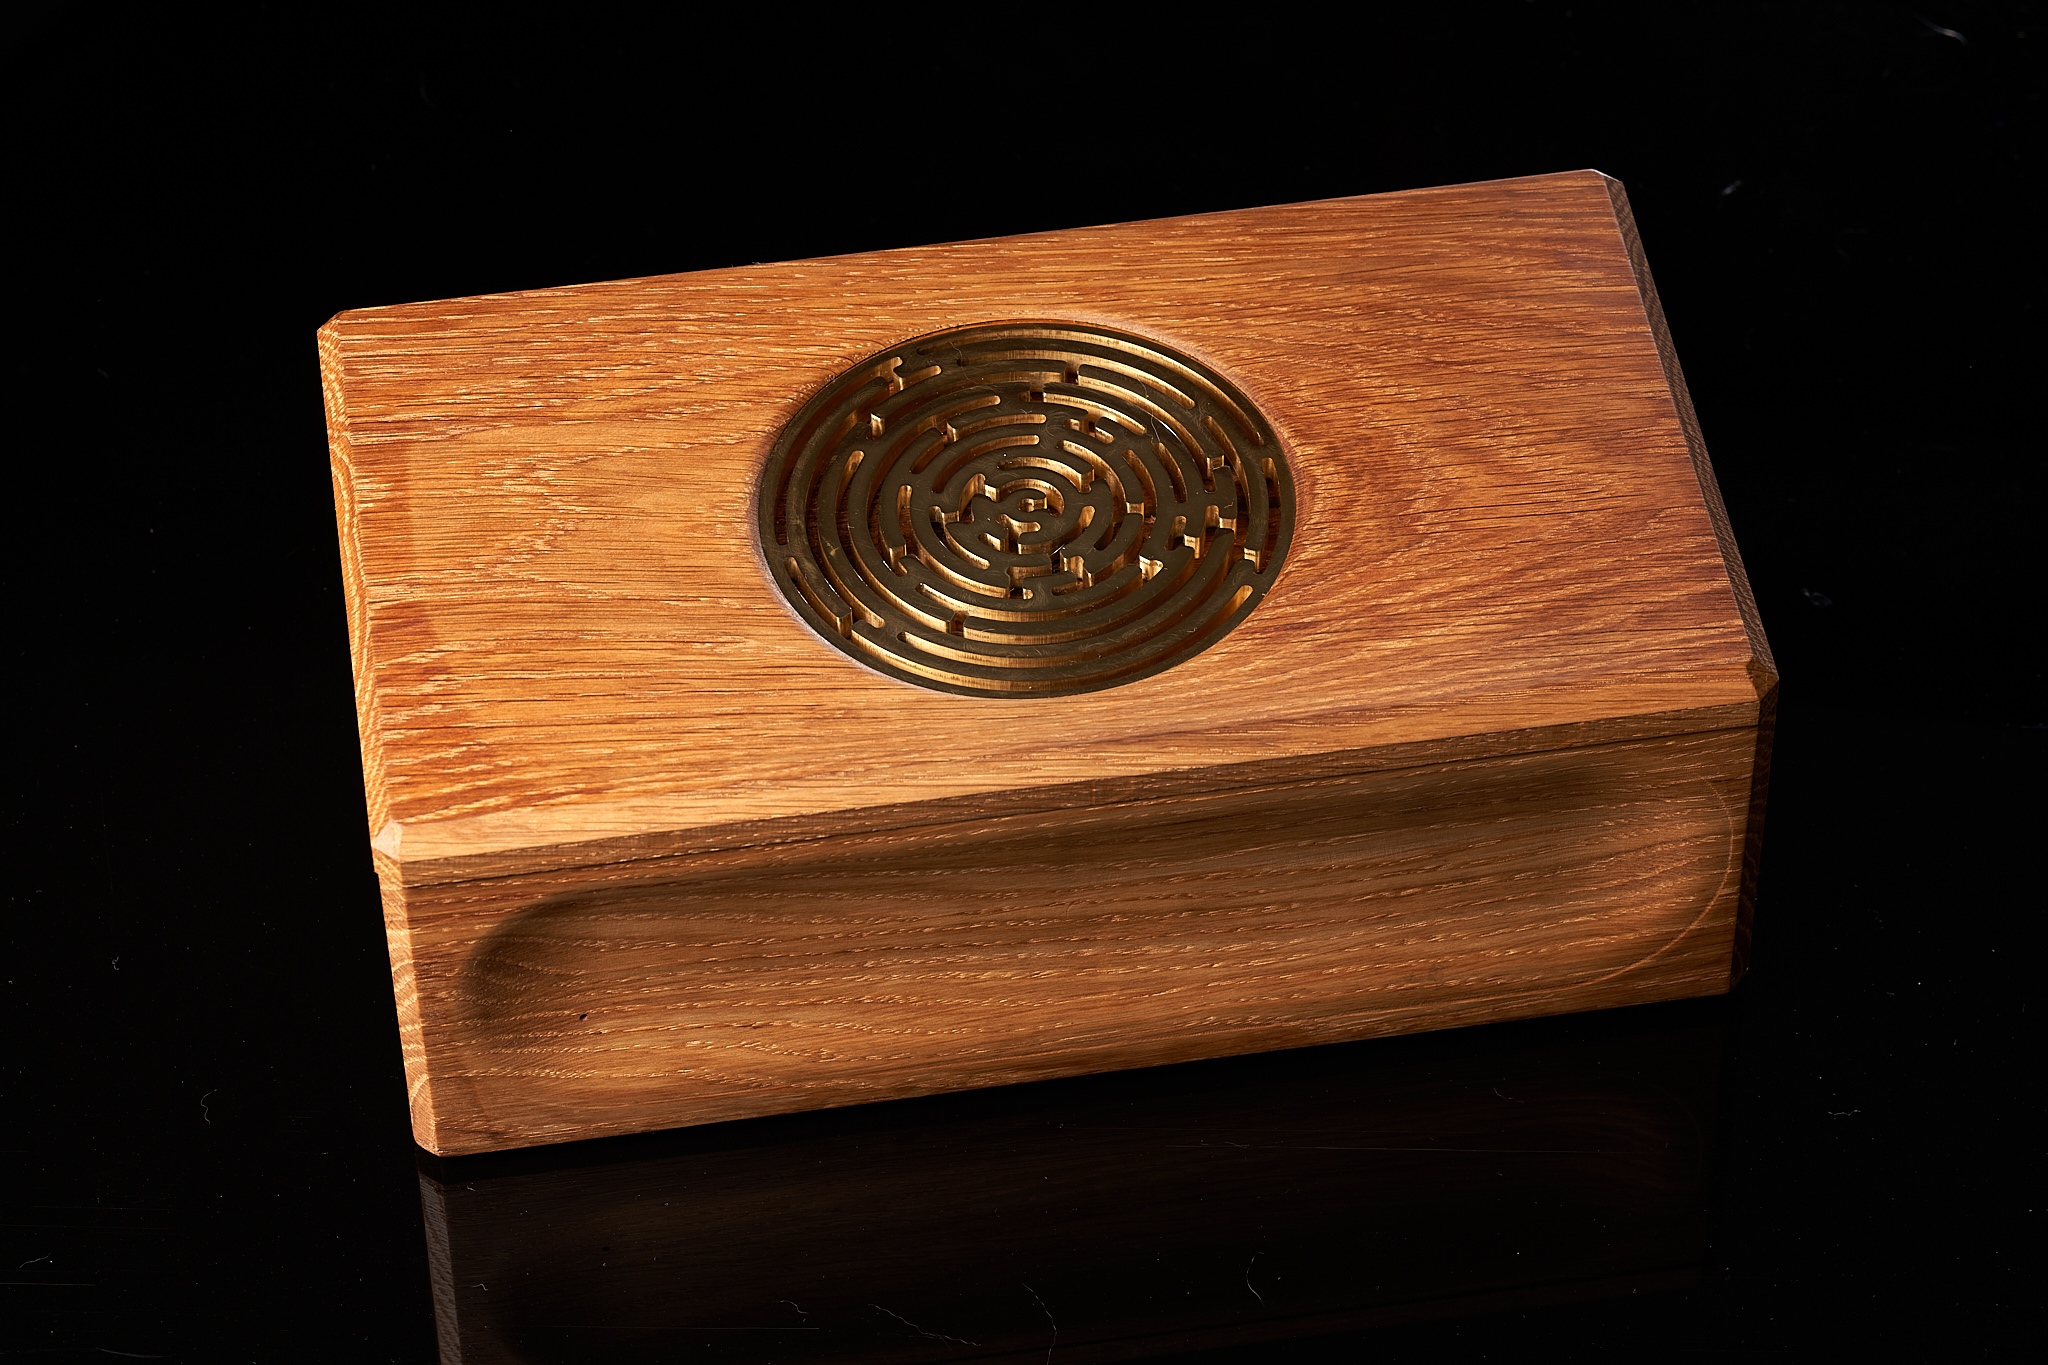
The actual puzzle is an assembly puzzle:

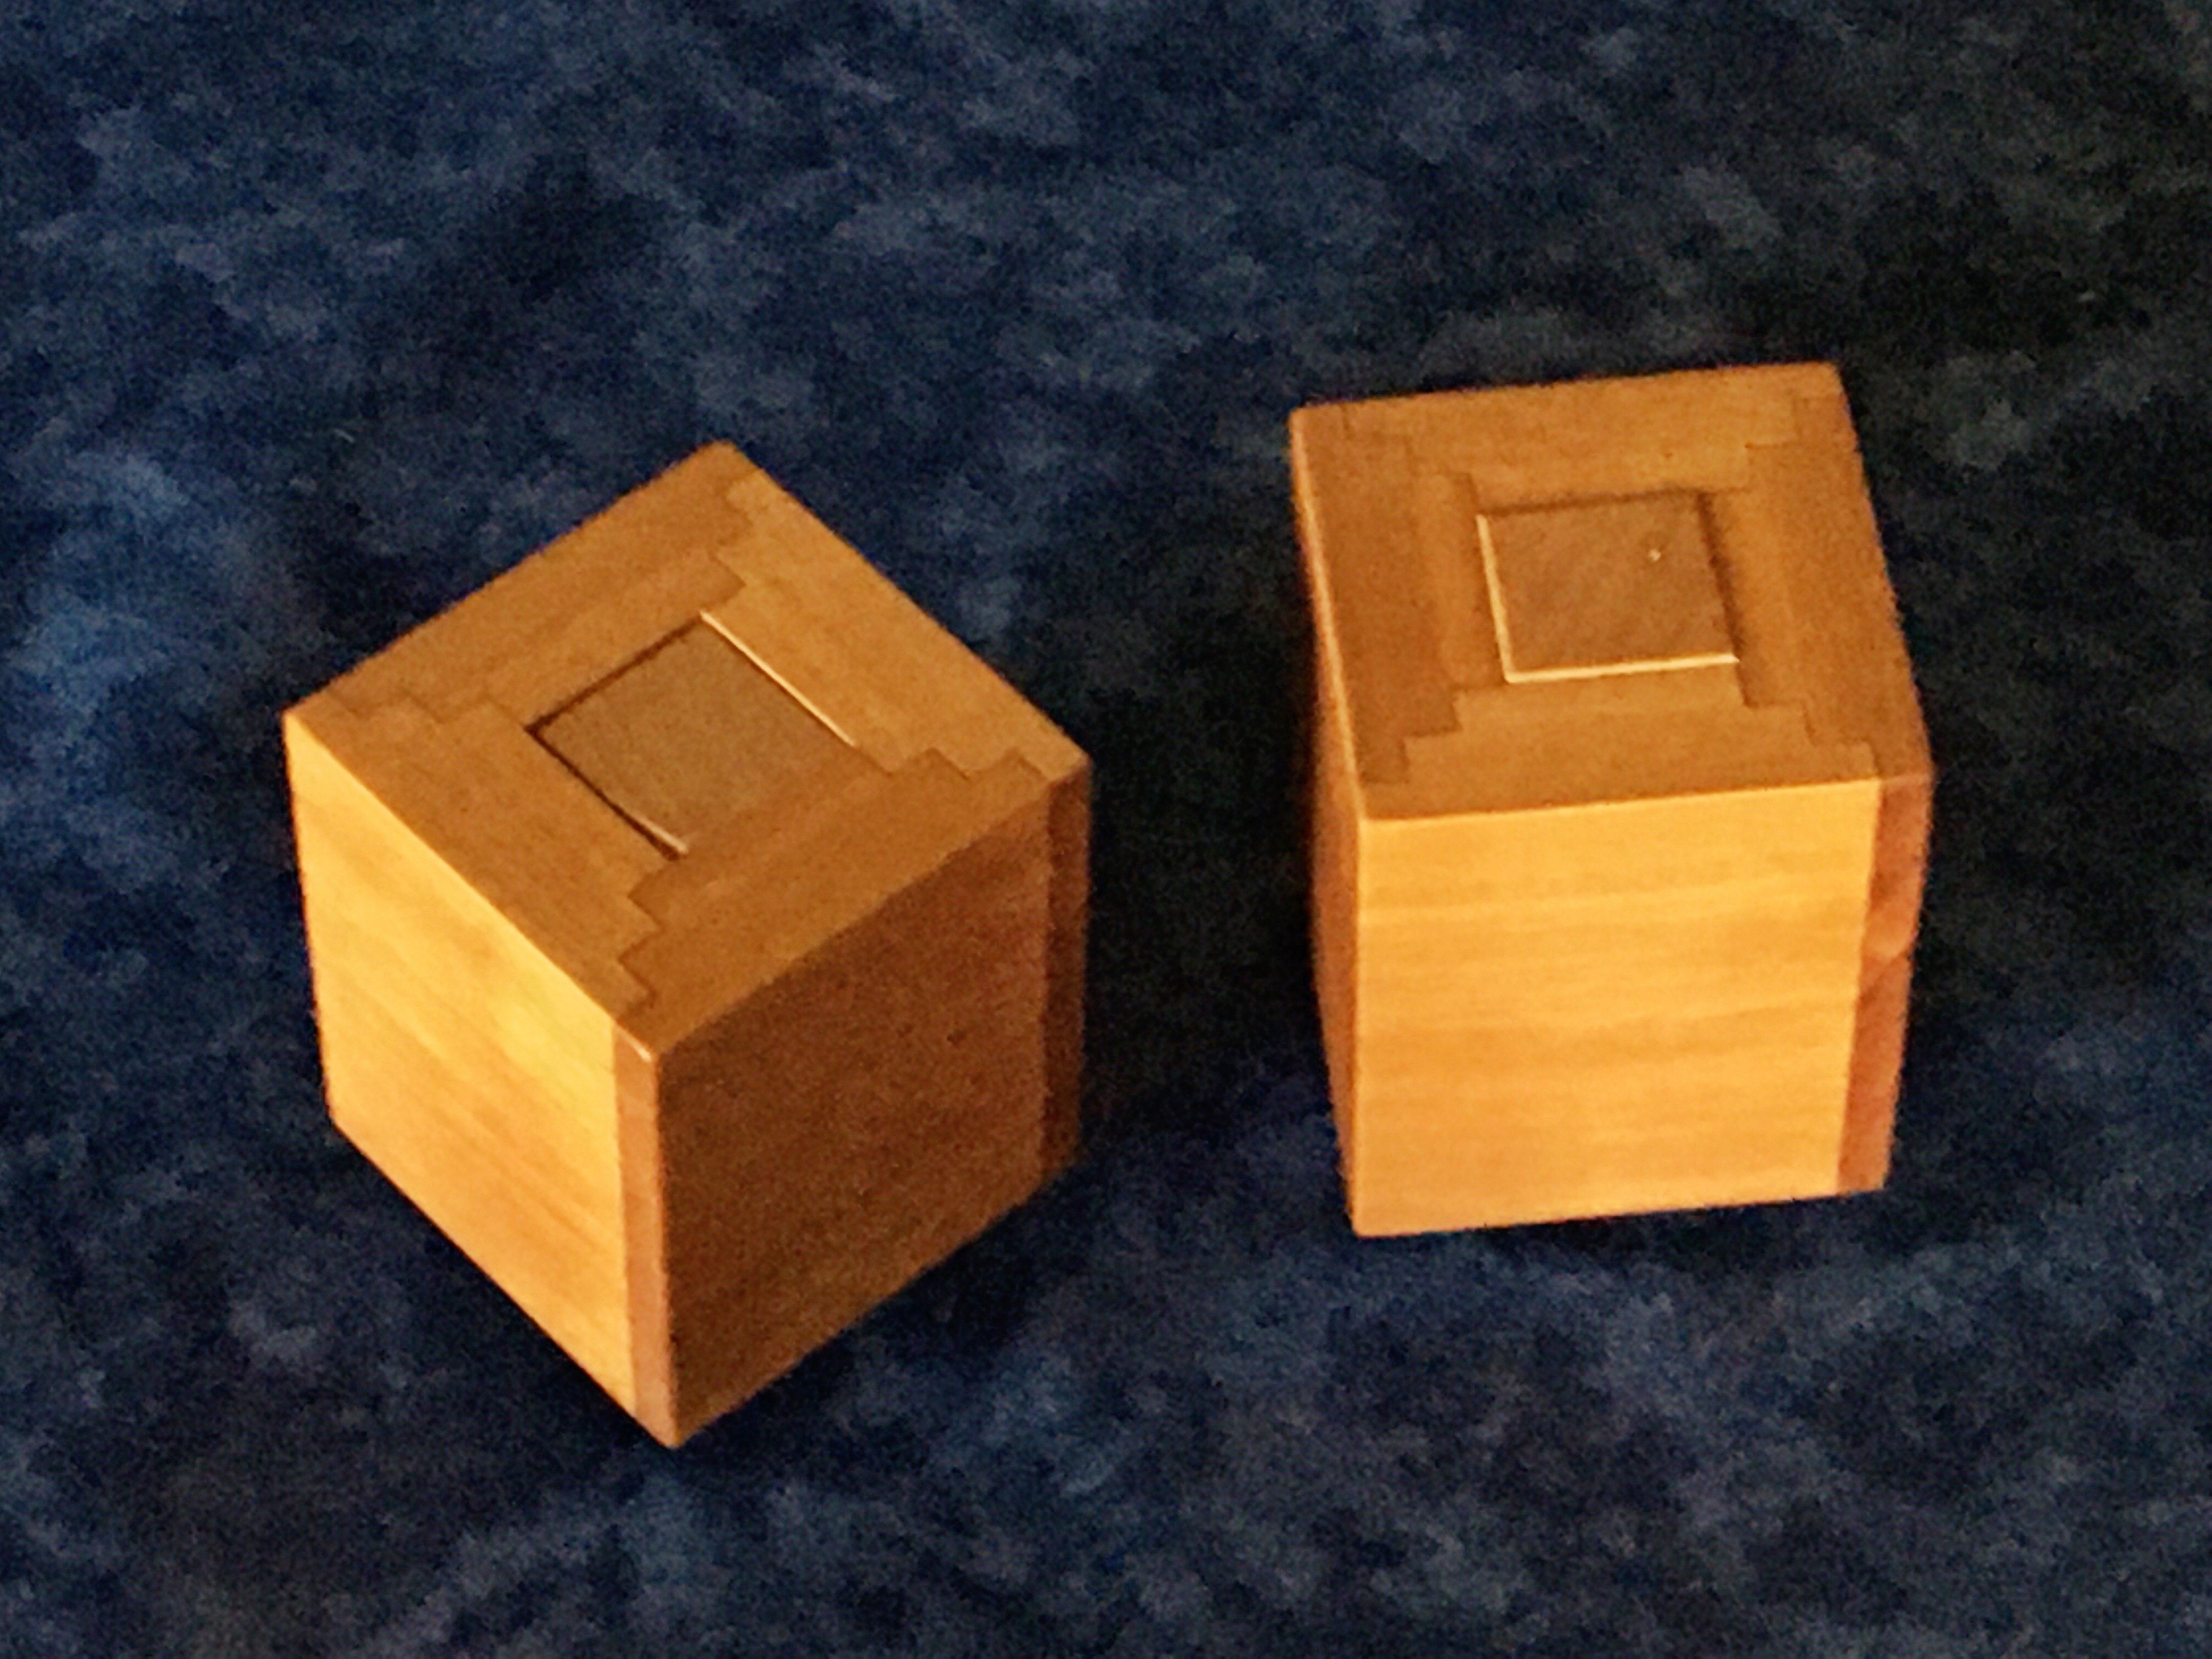
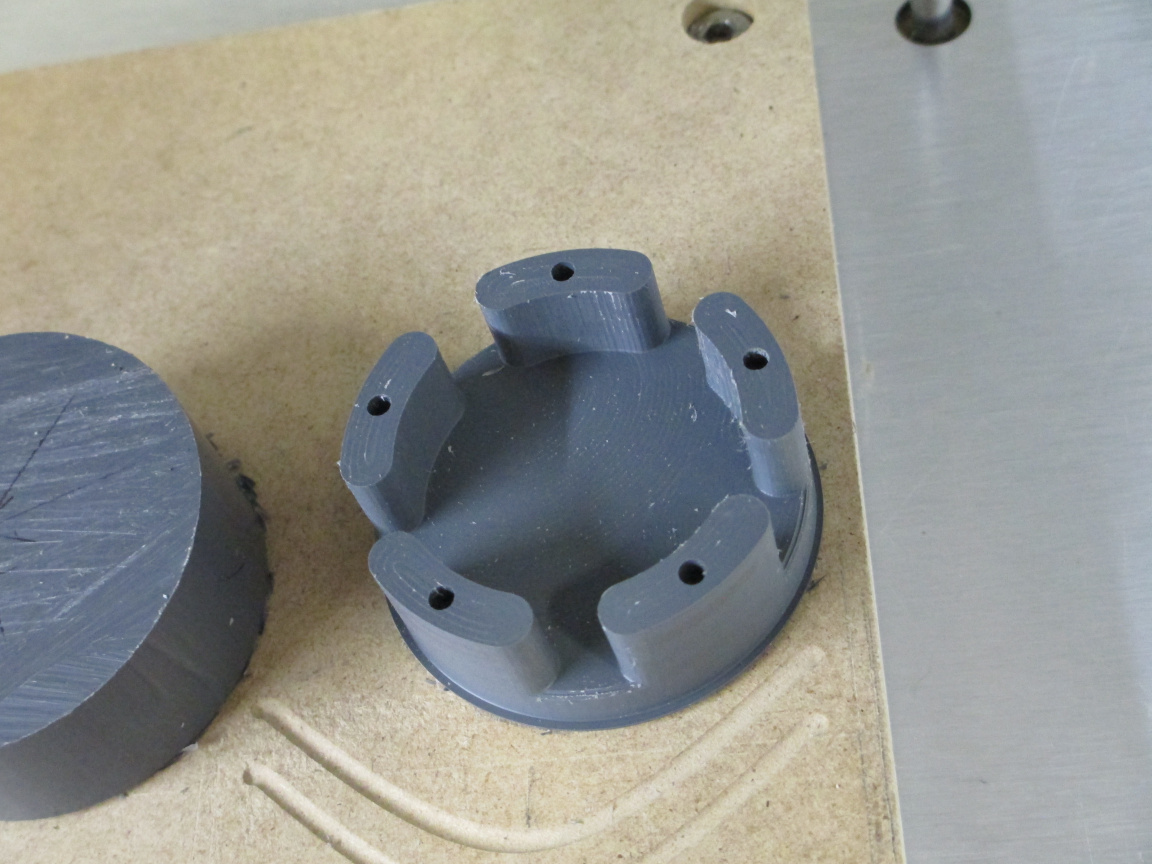
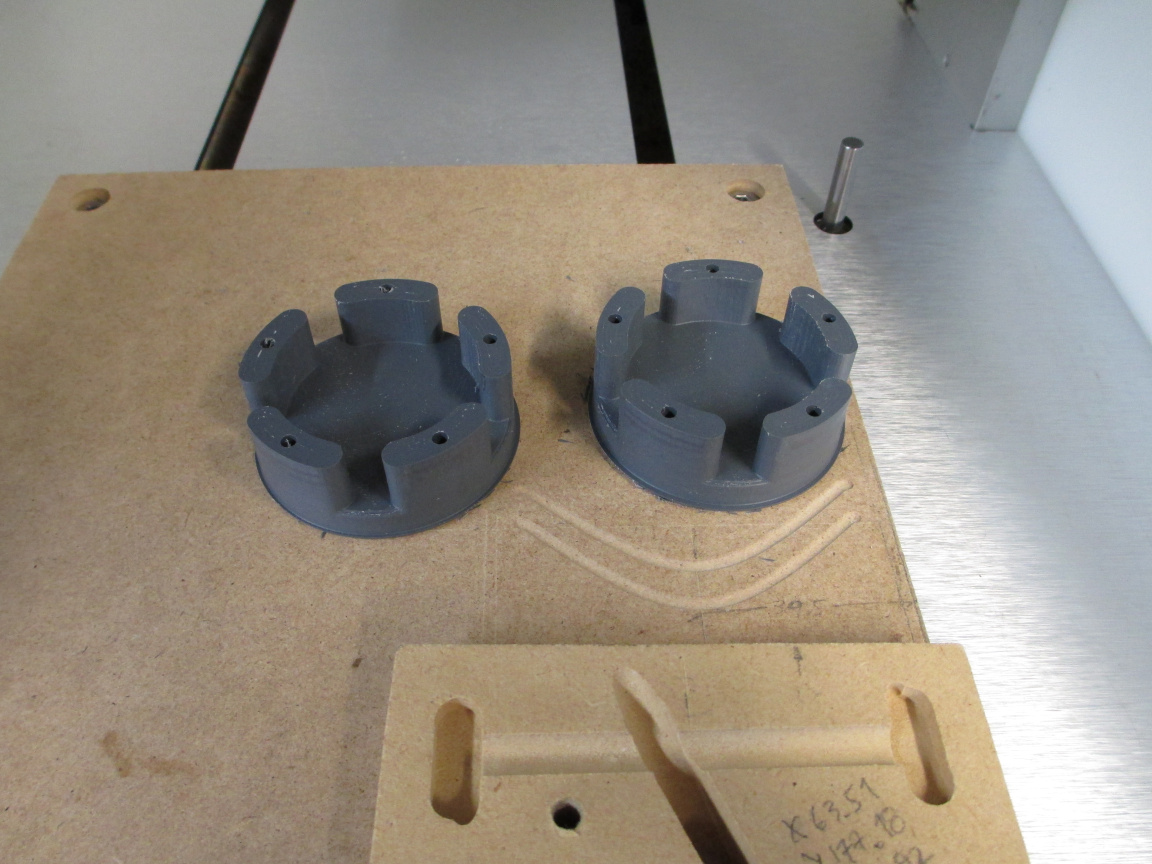
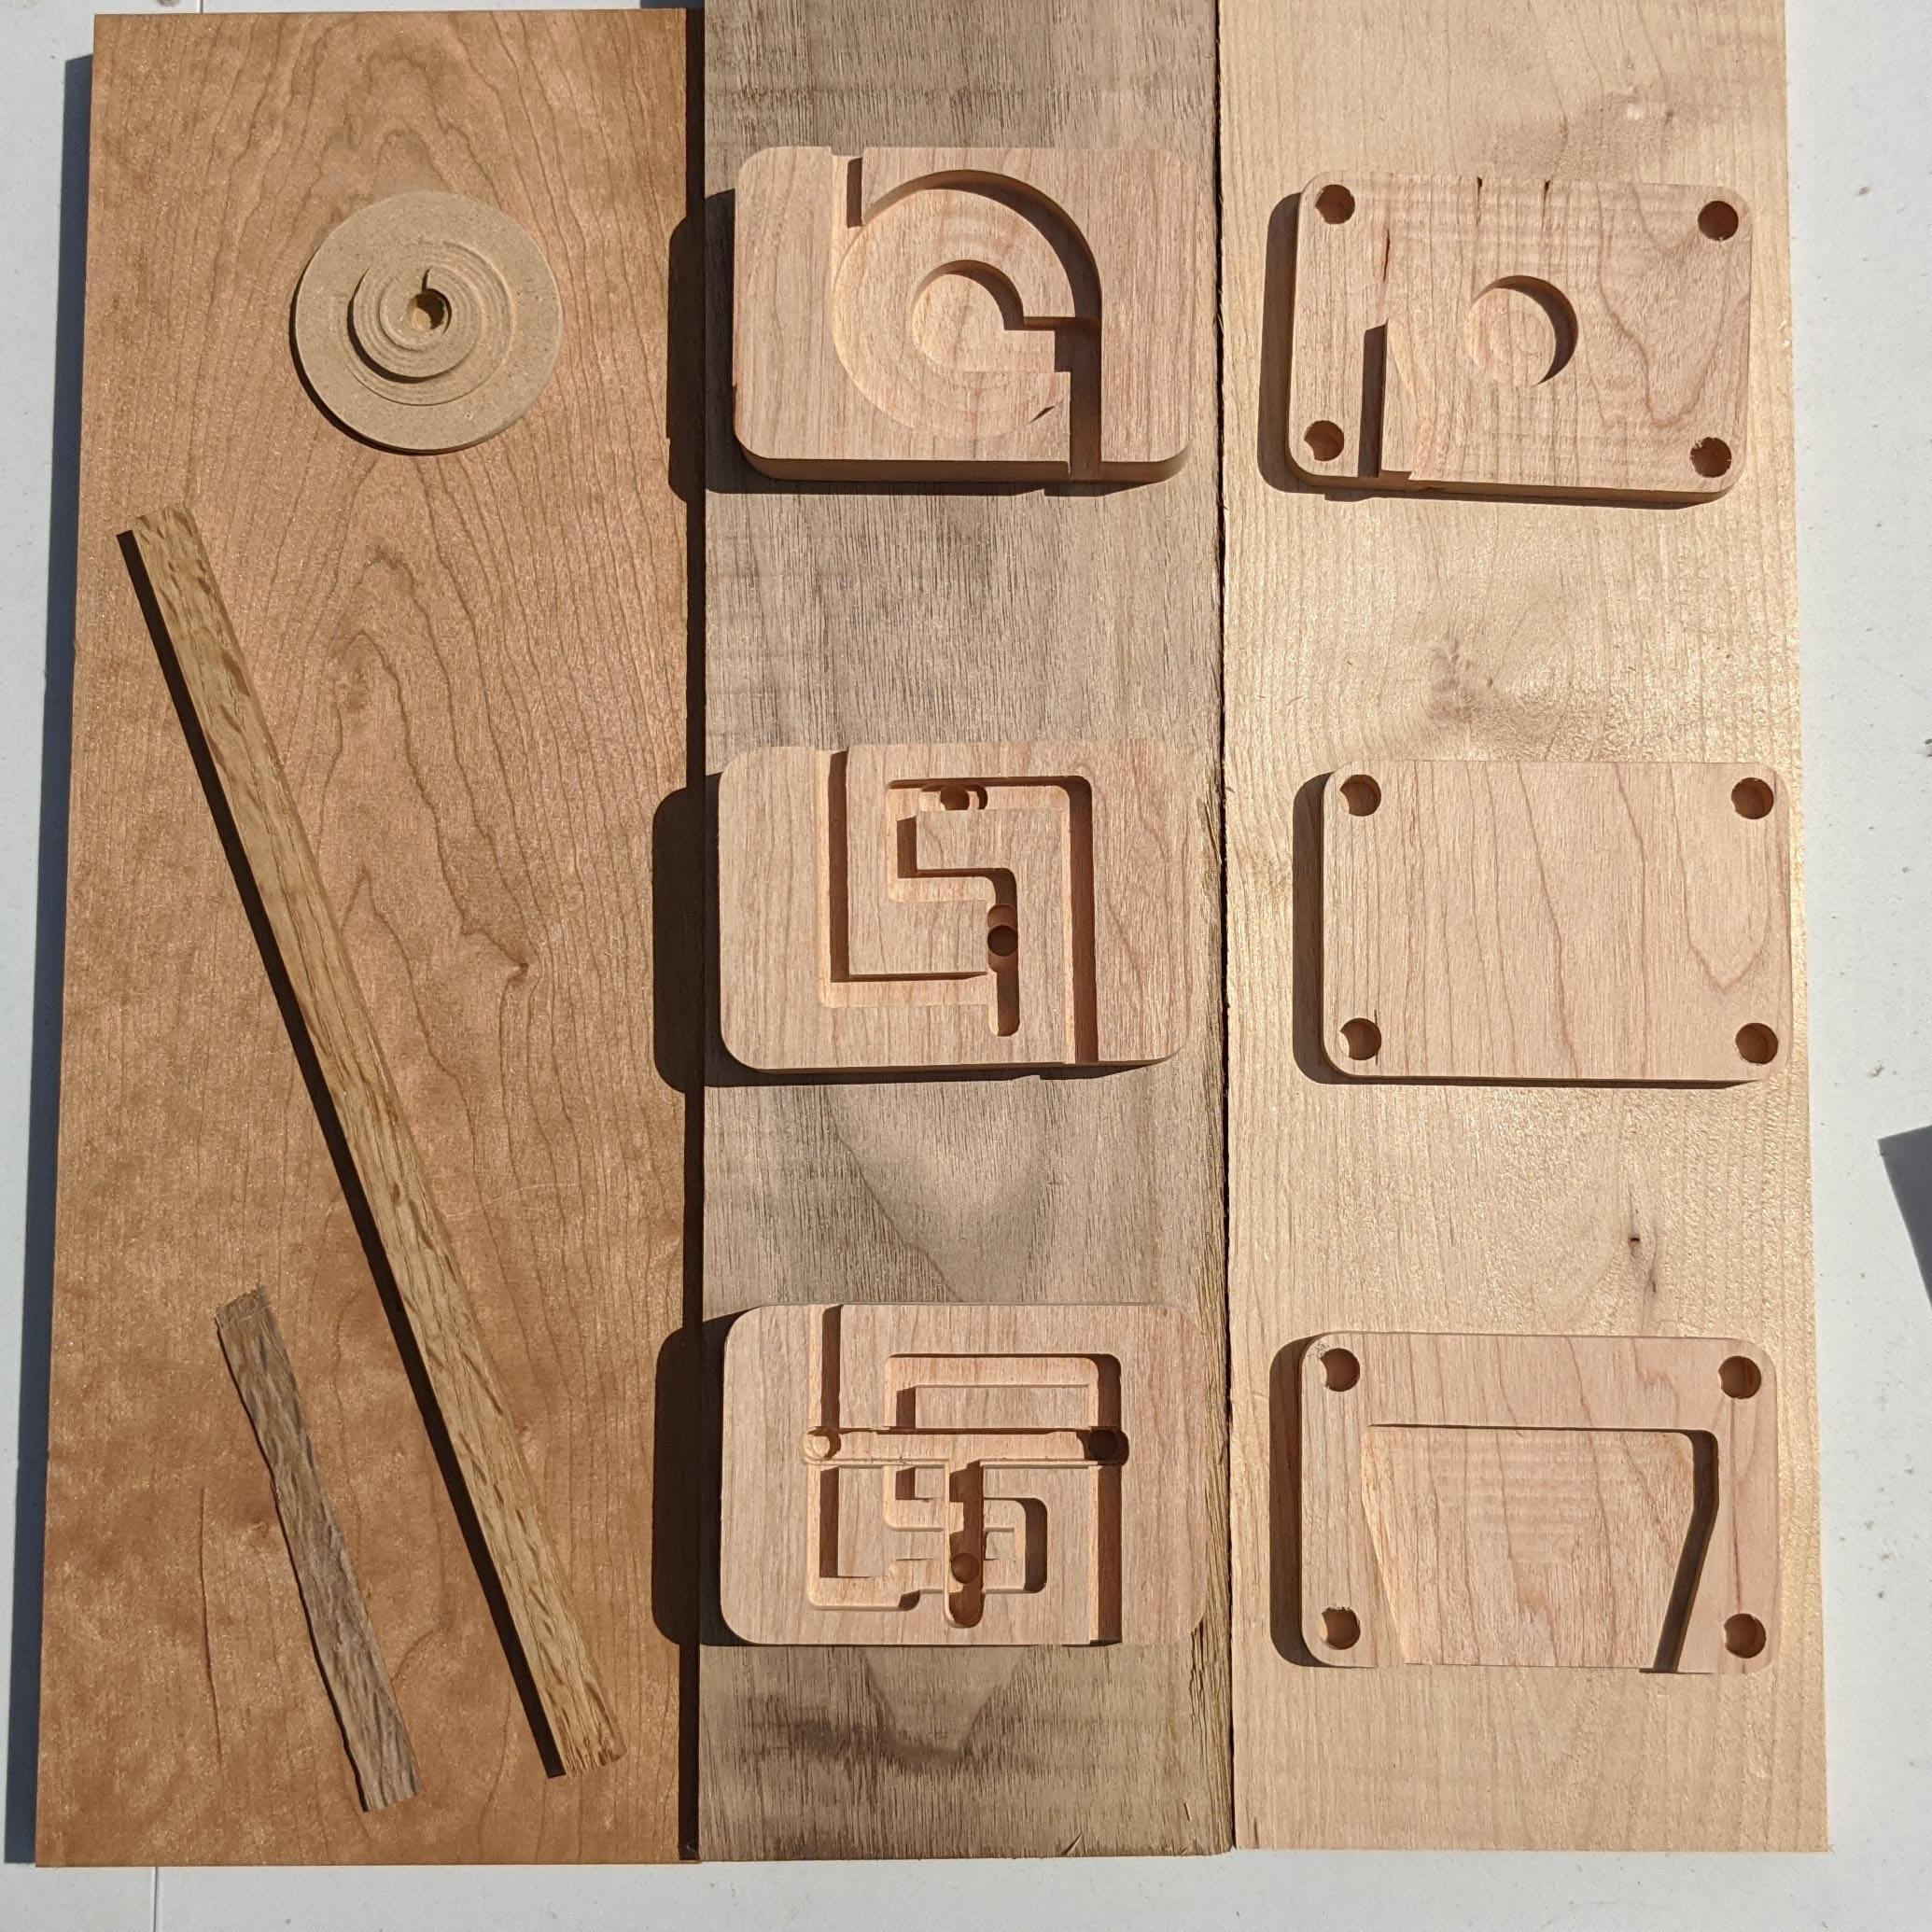
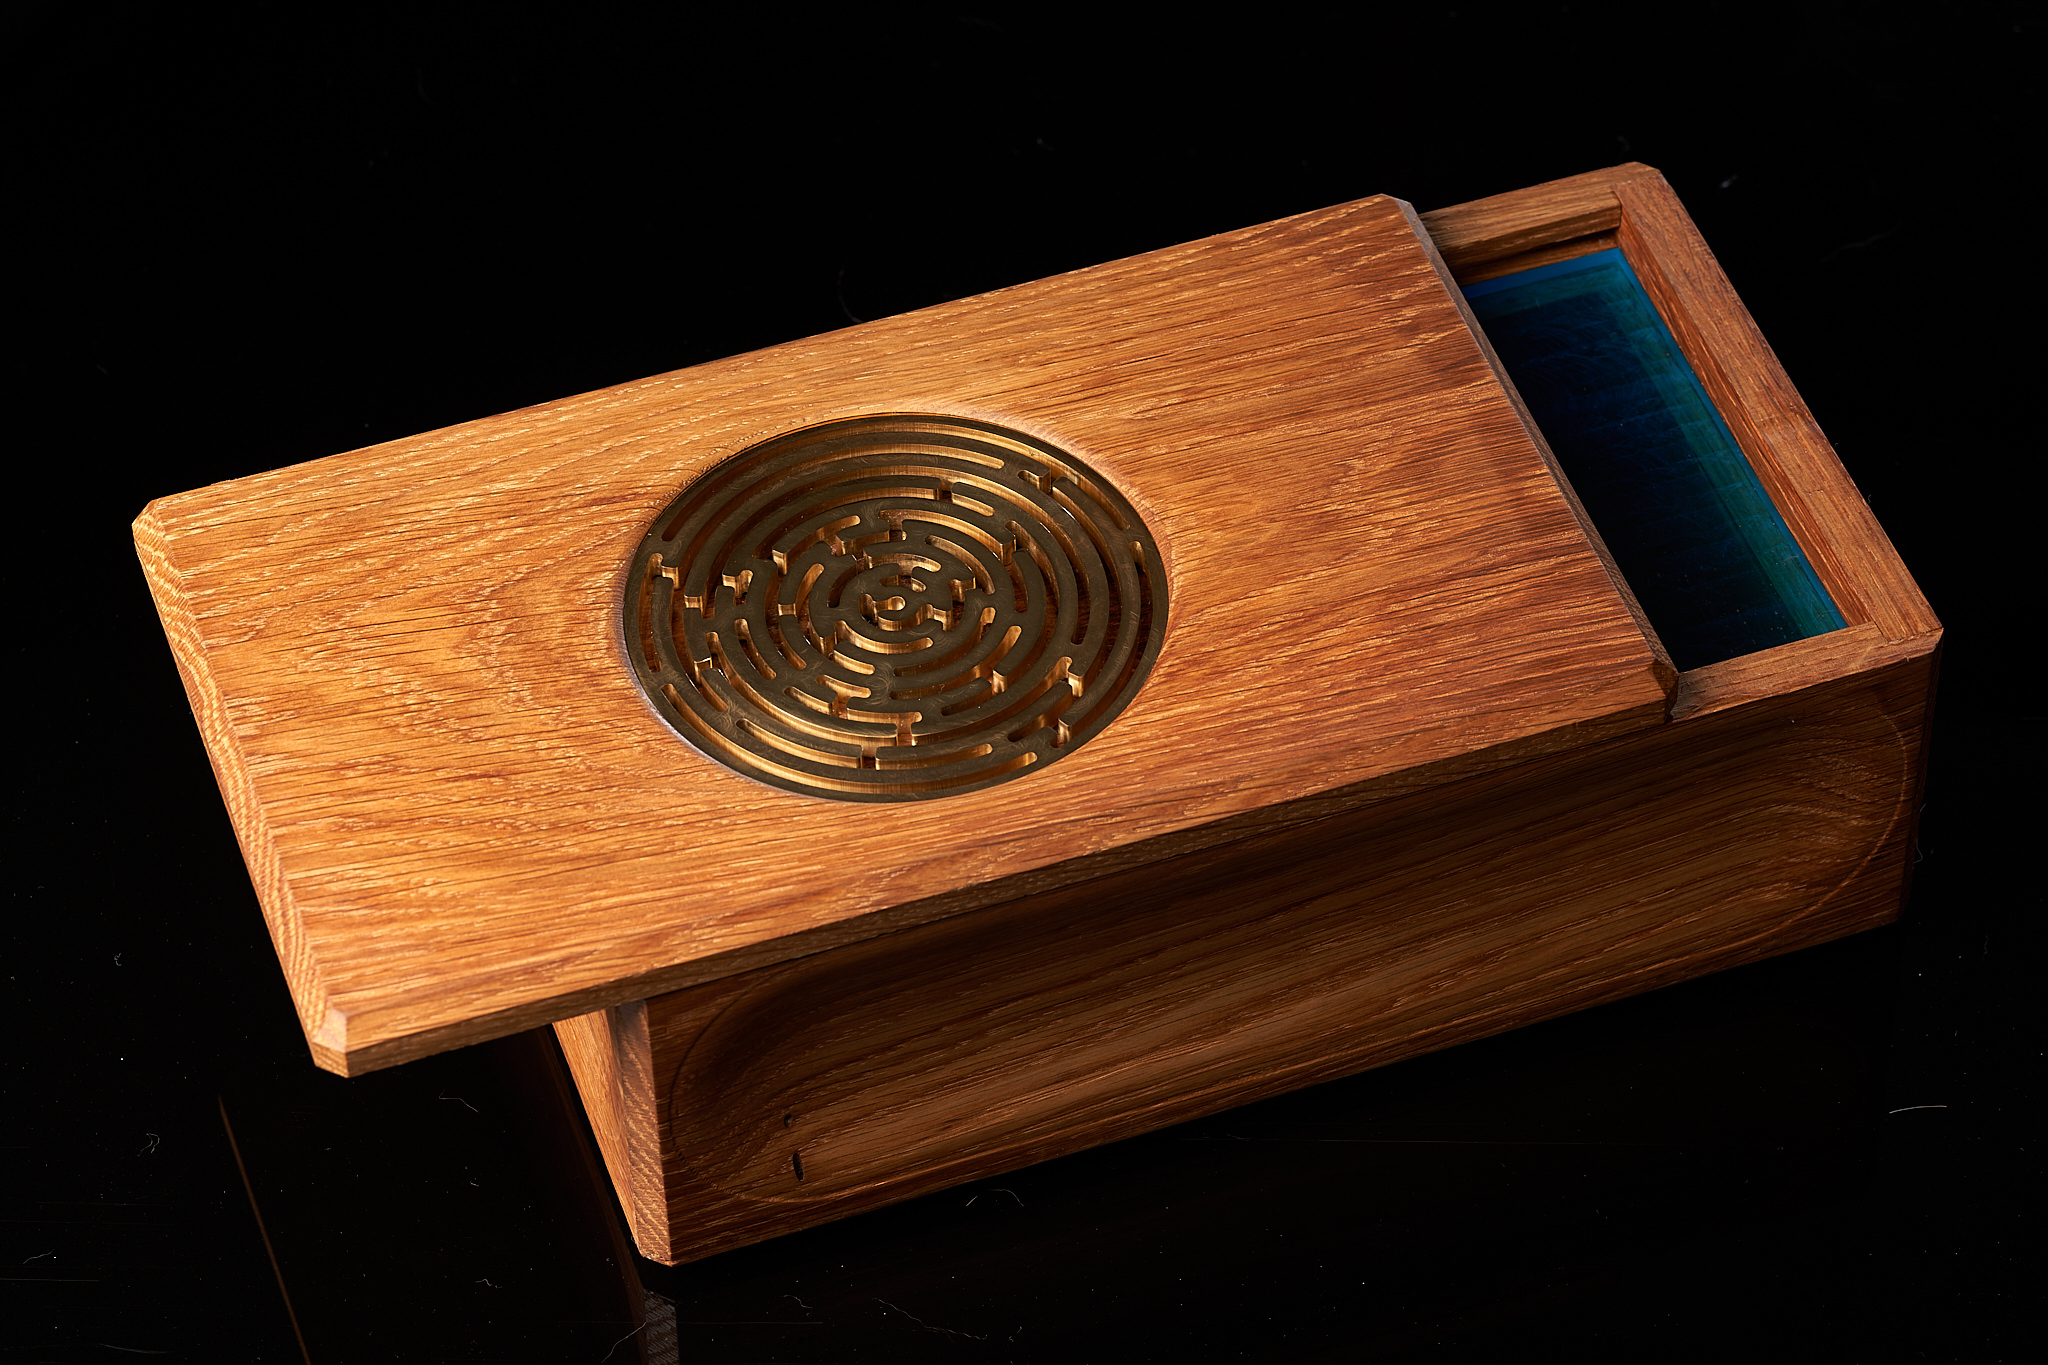
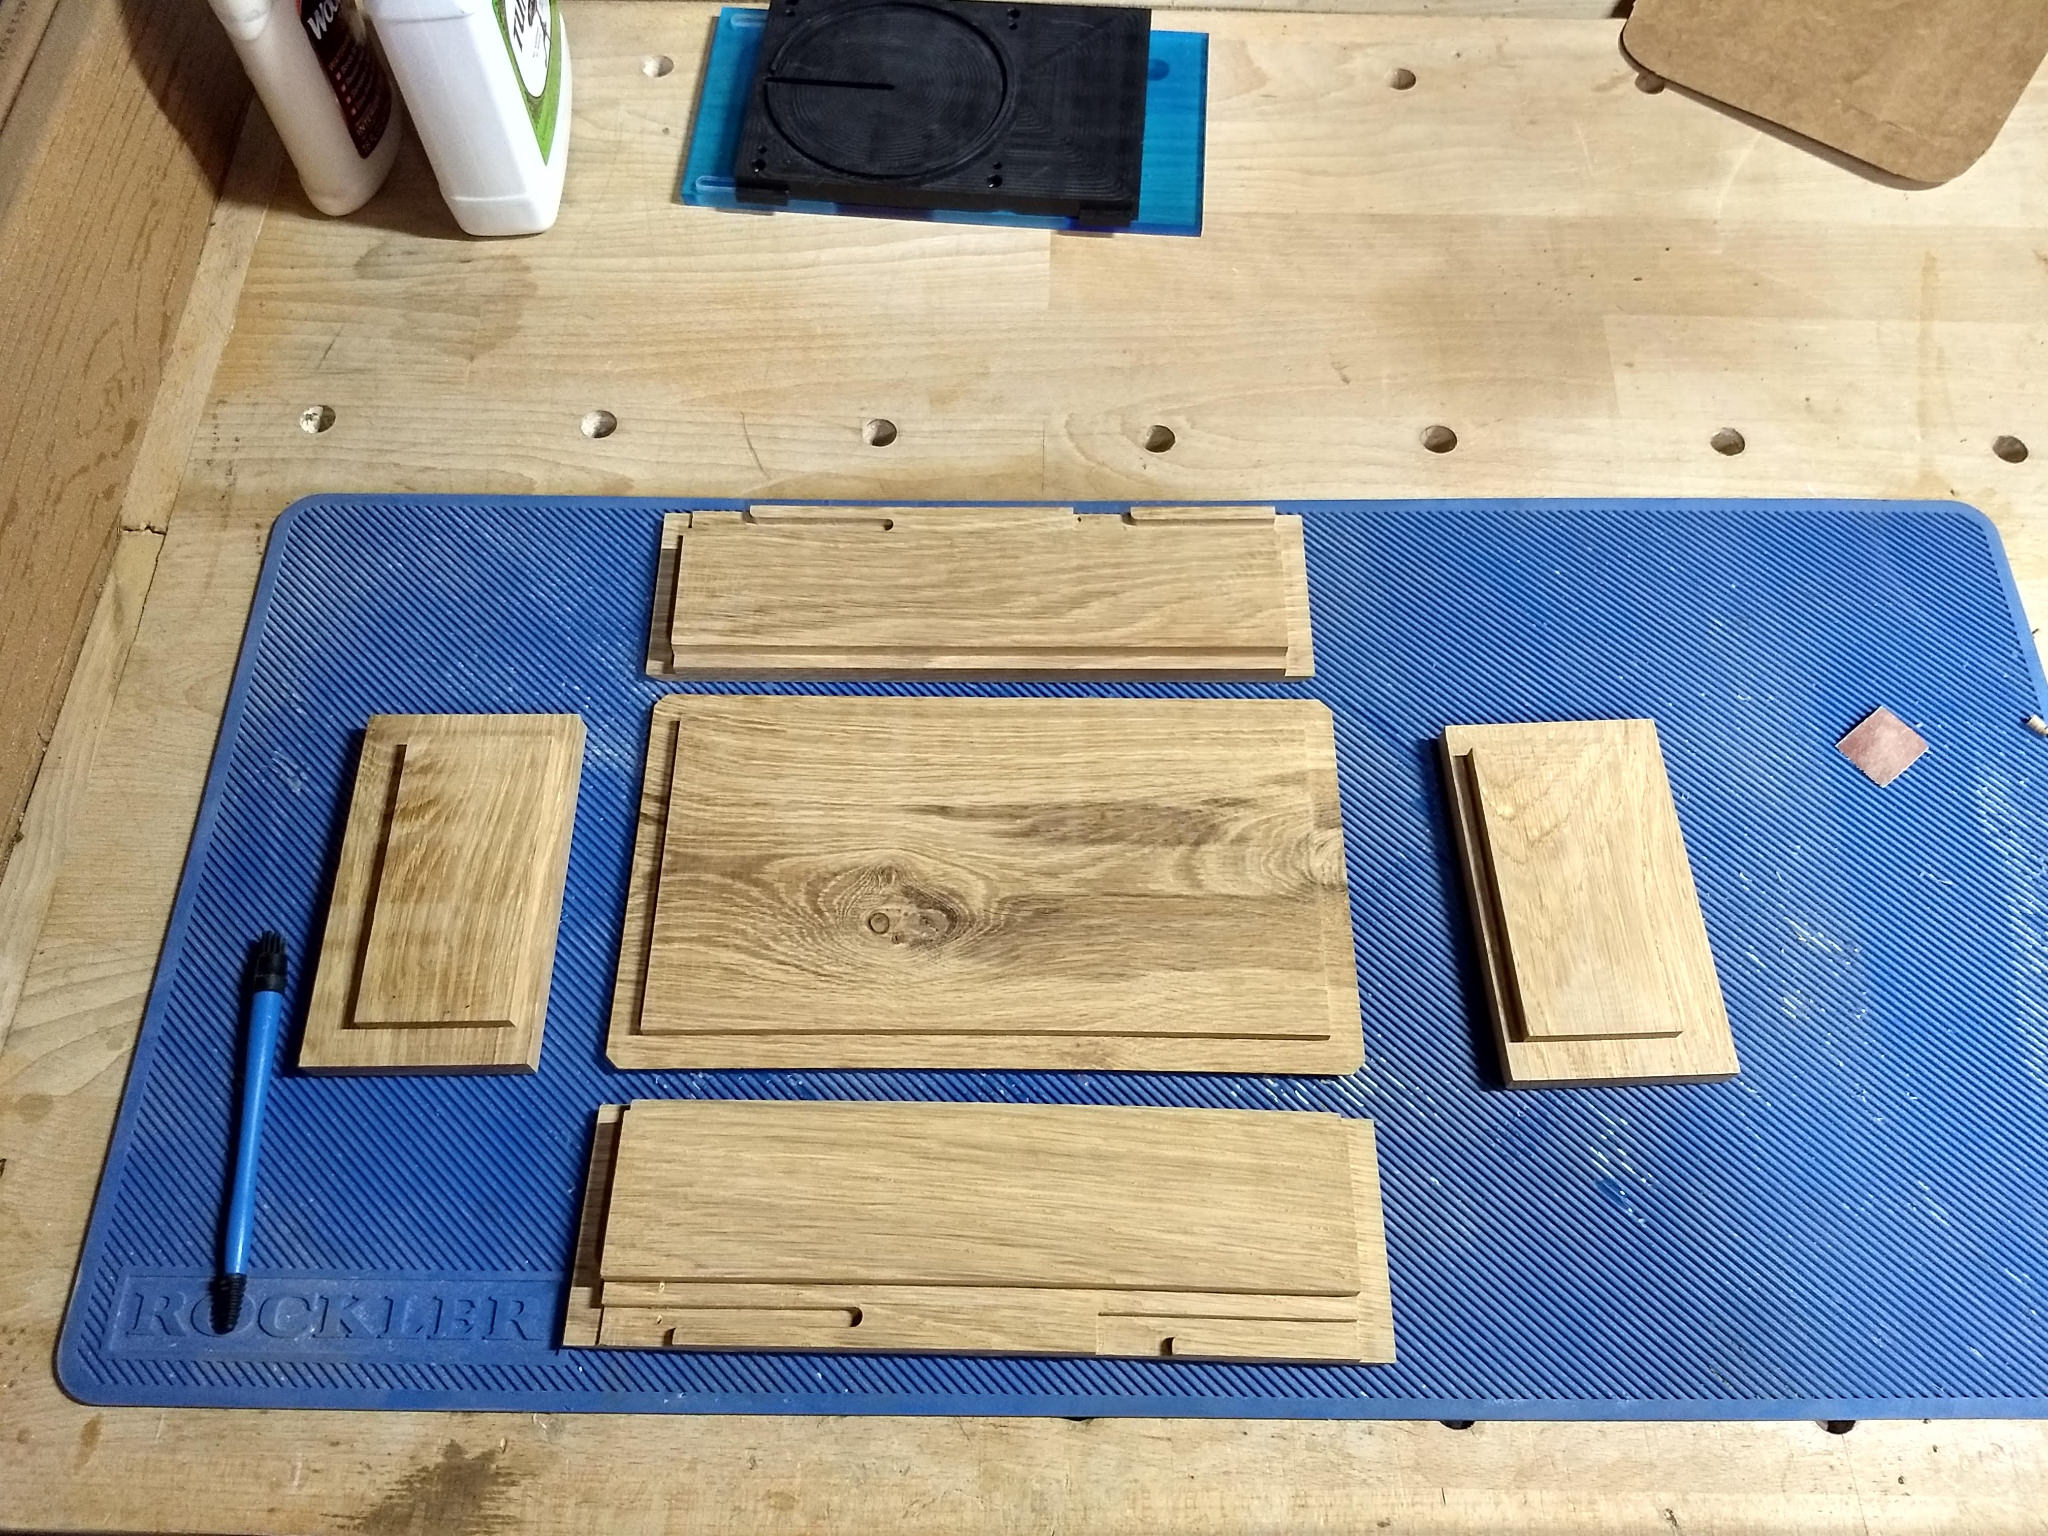
The five rods need to be assembled in the cage. The enclosure was machined in to identical parts, then assembled using dowel pins for alignment

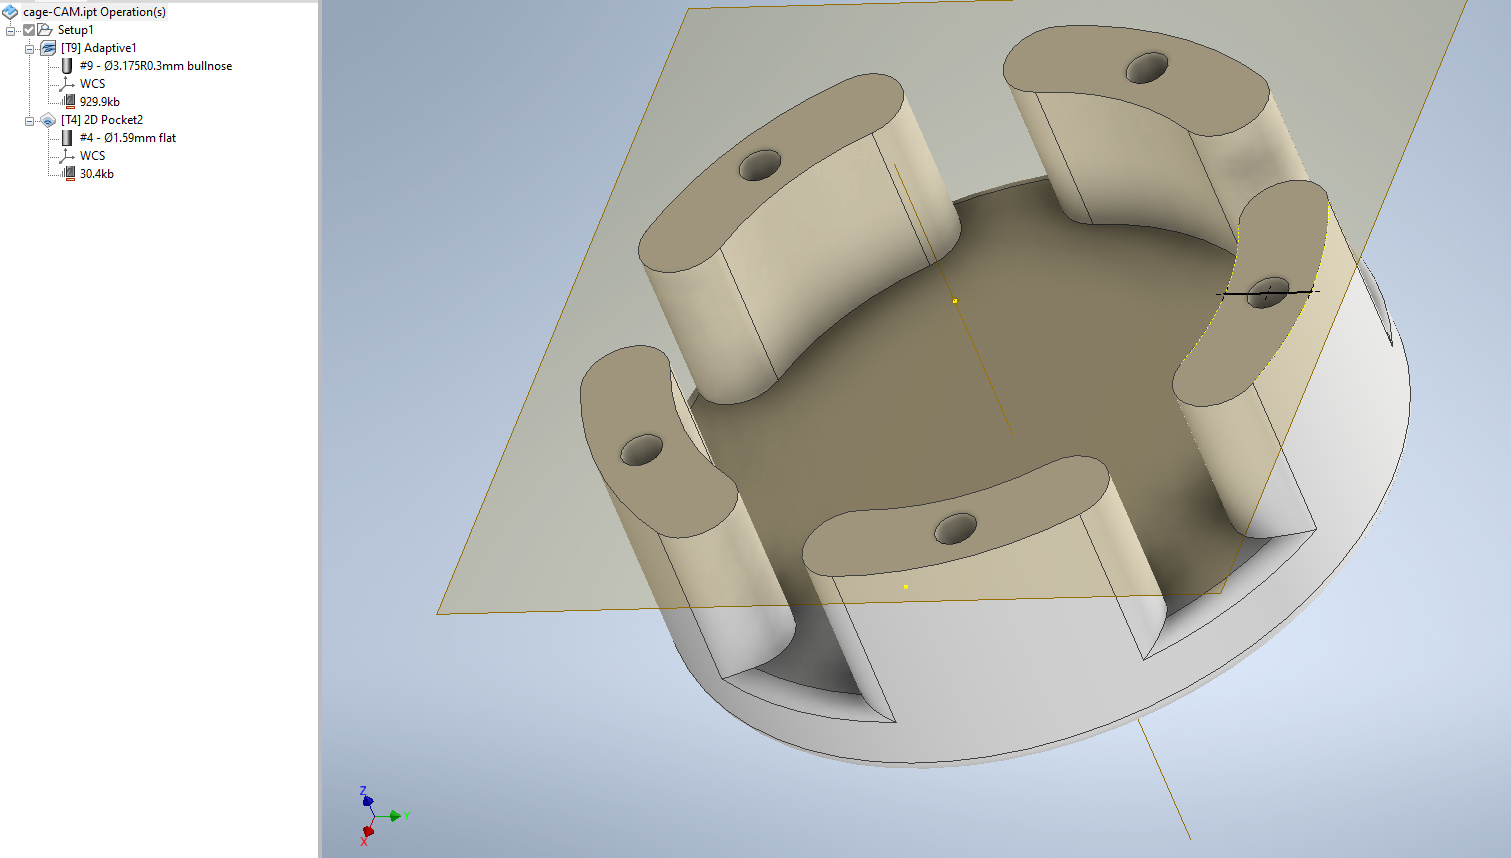
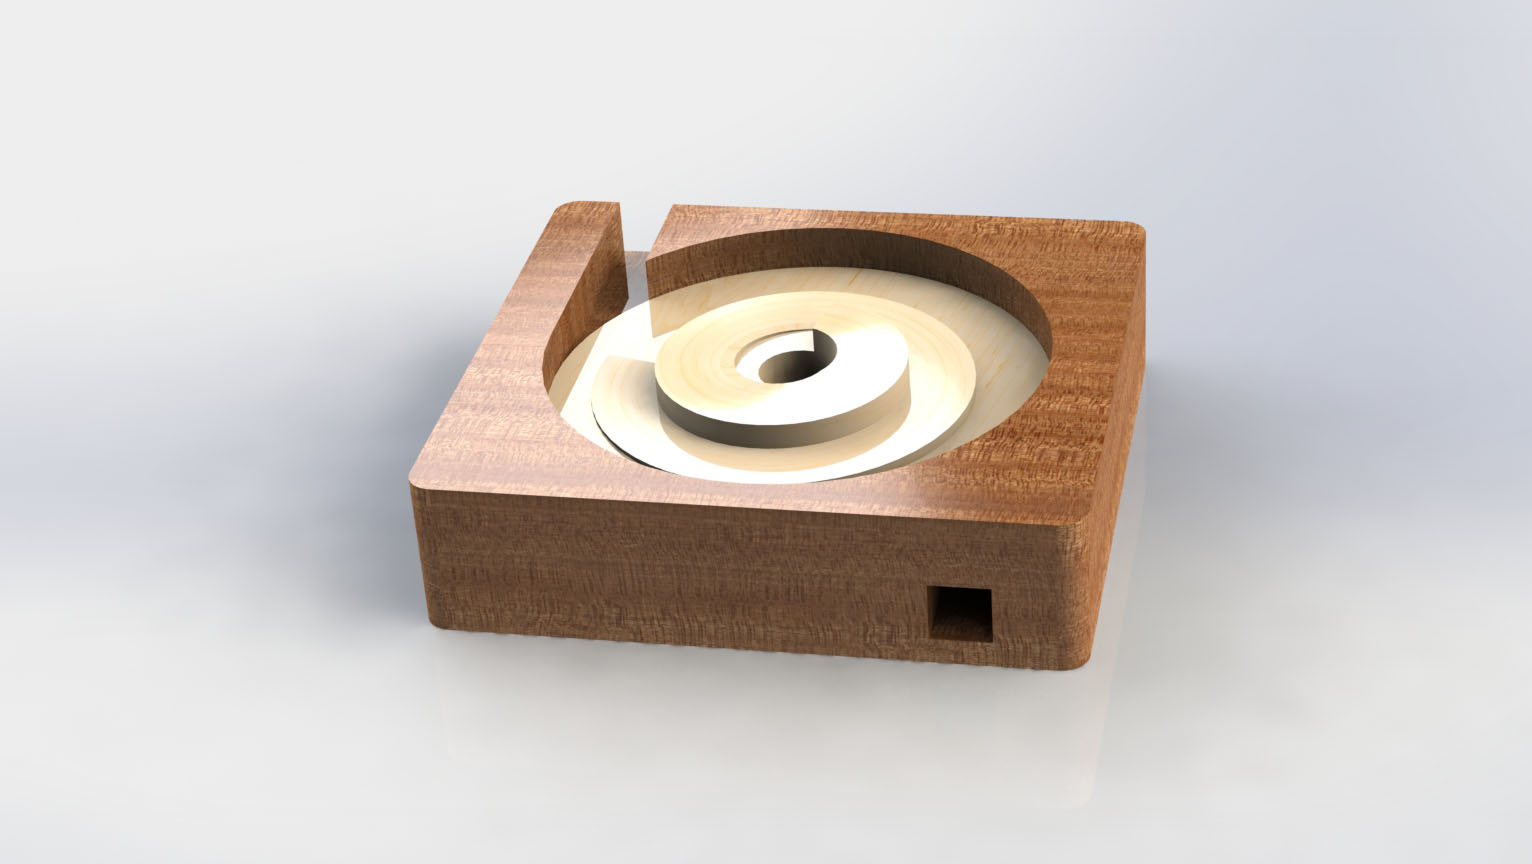
The model for each half

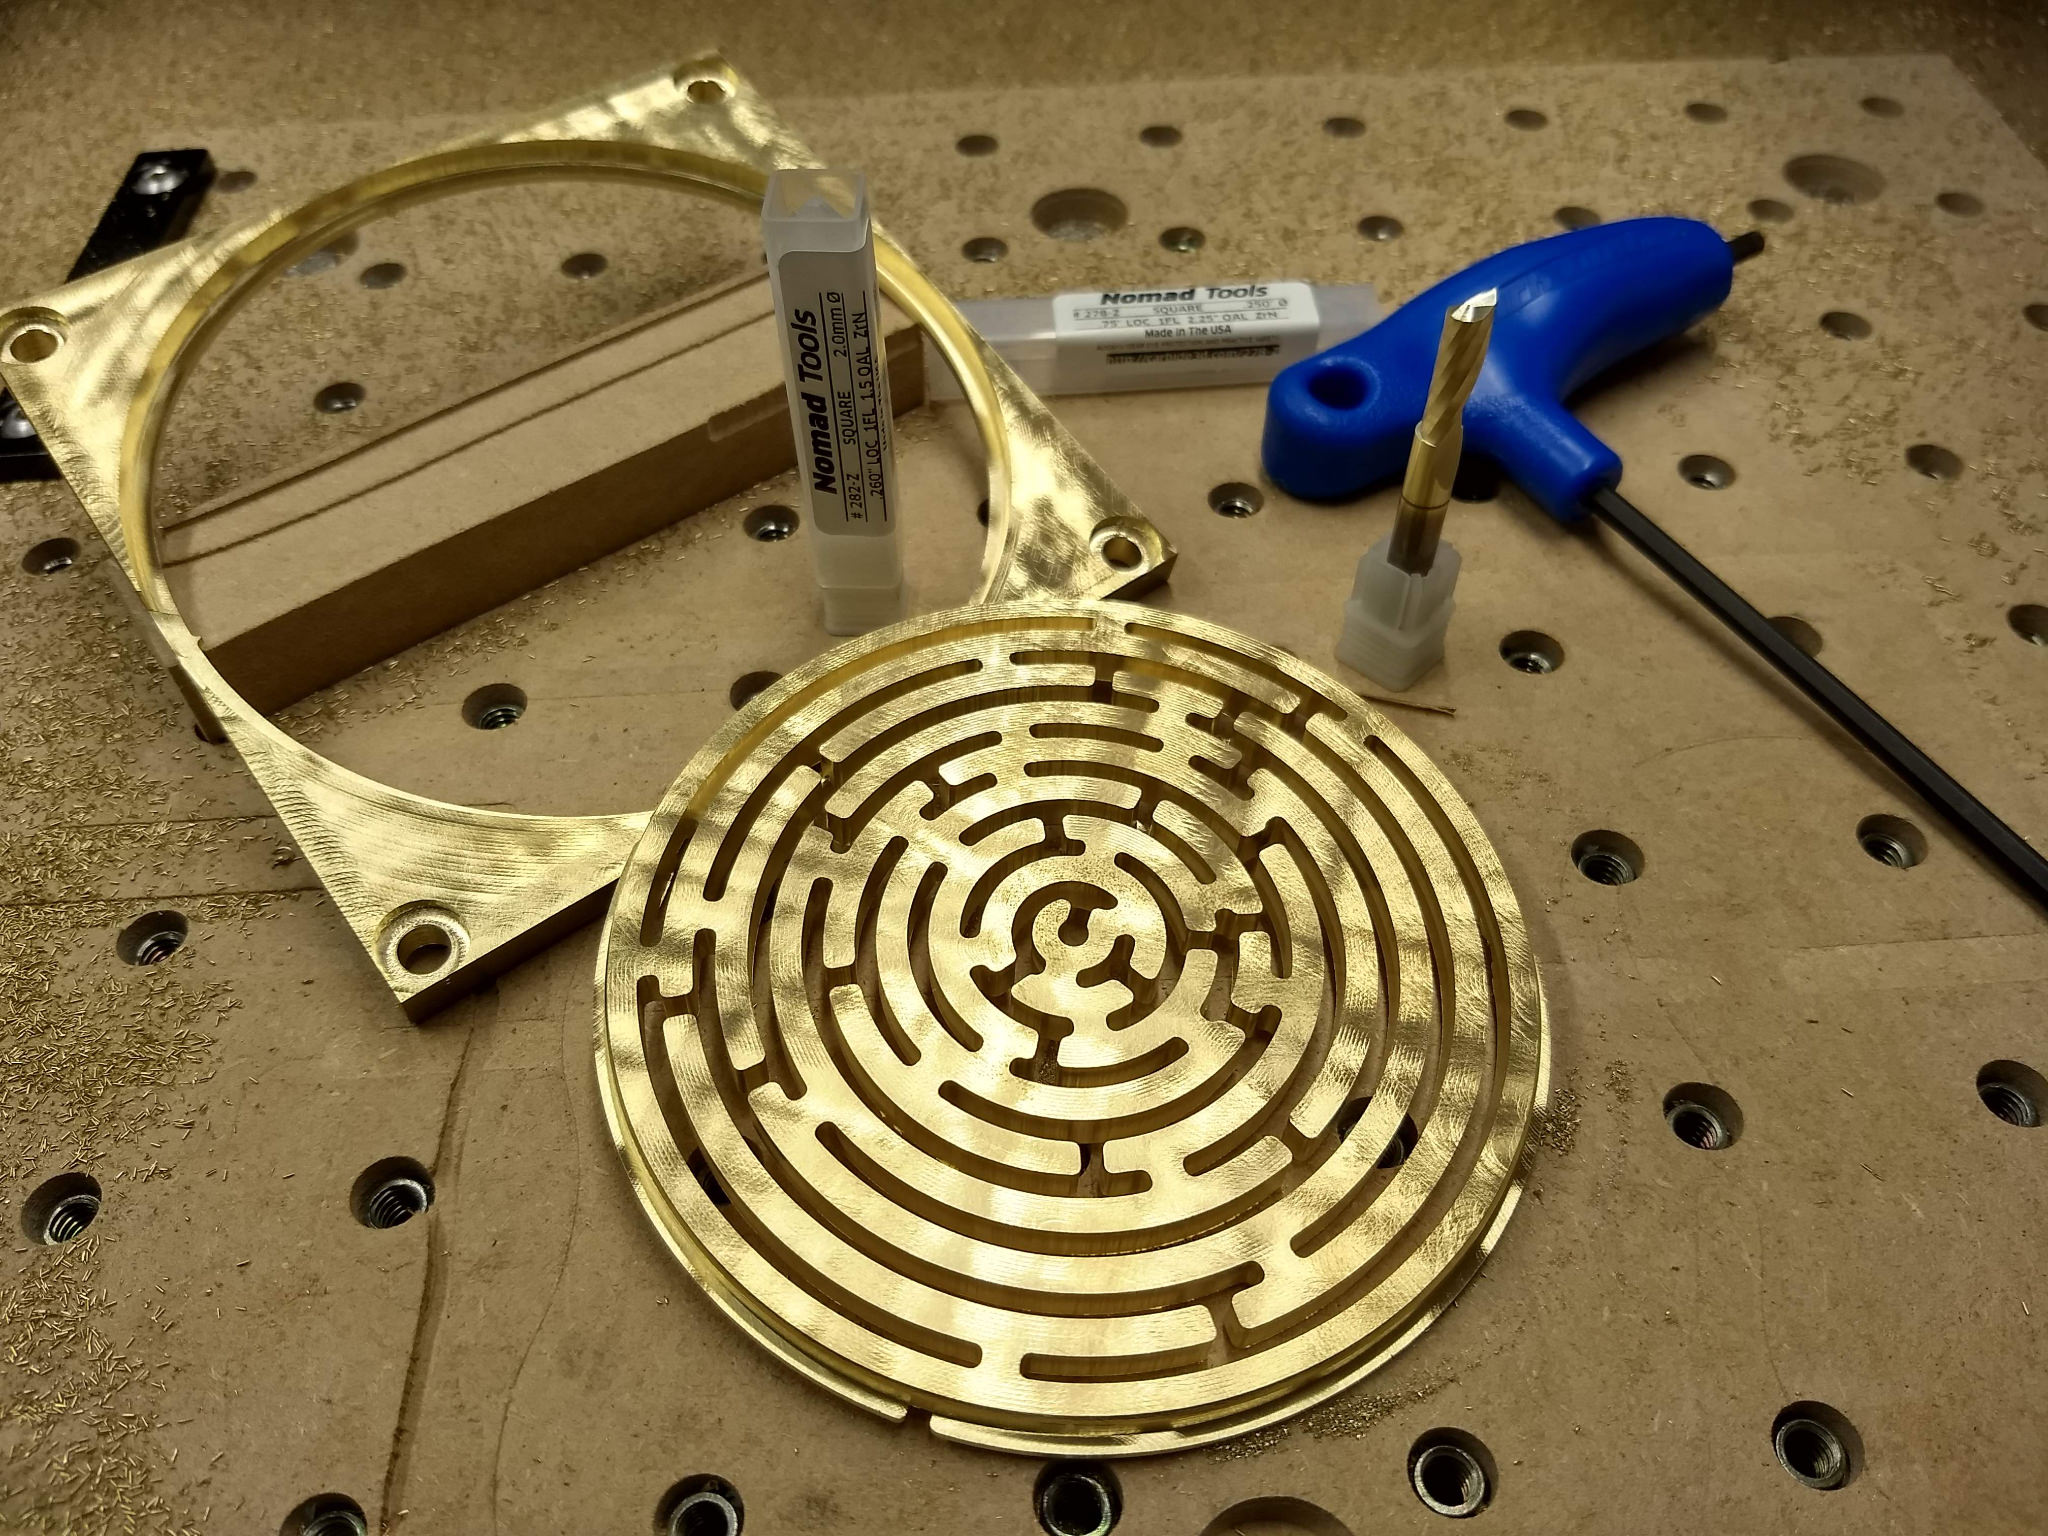
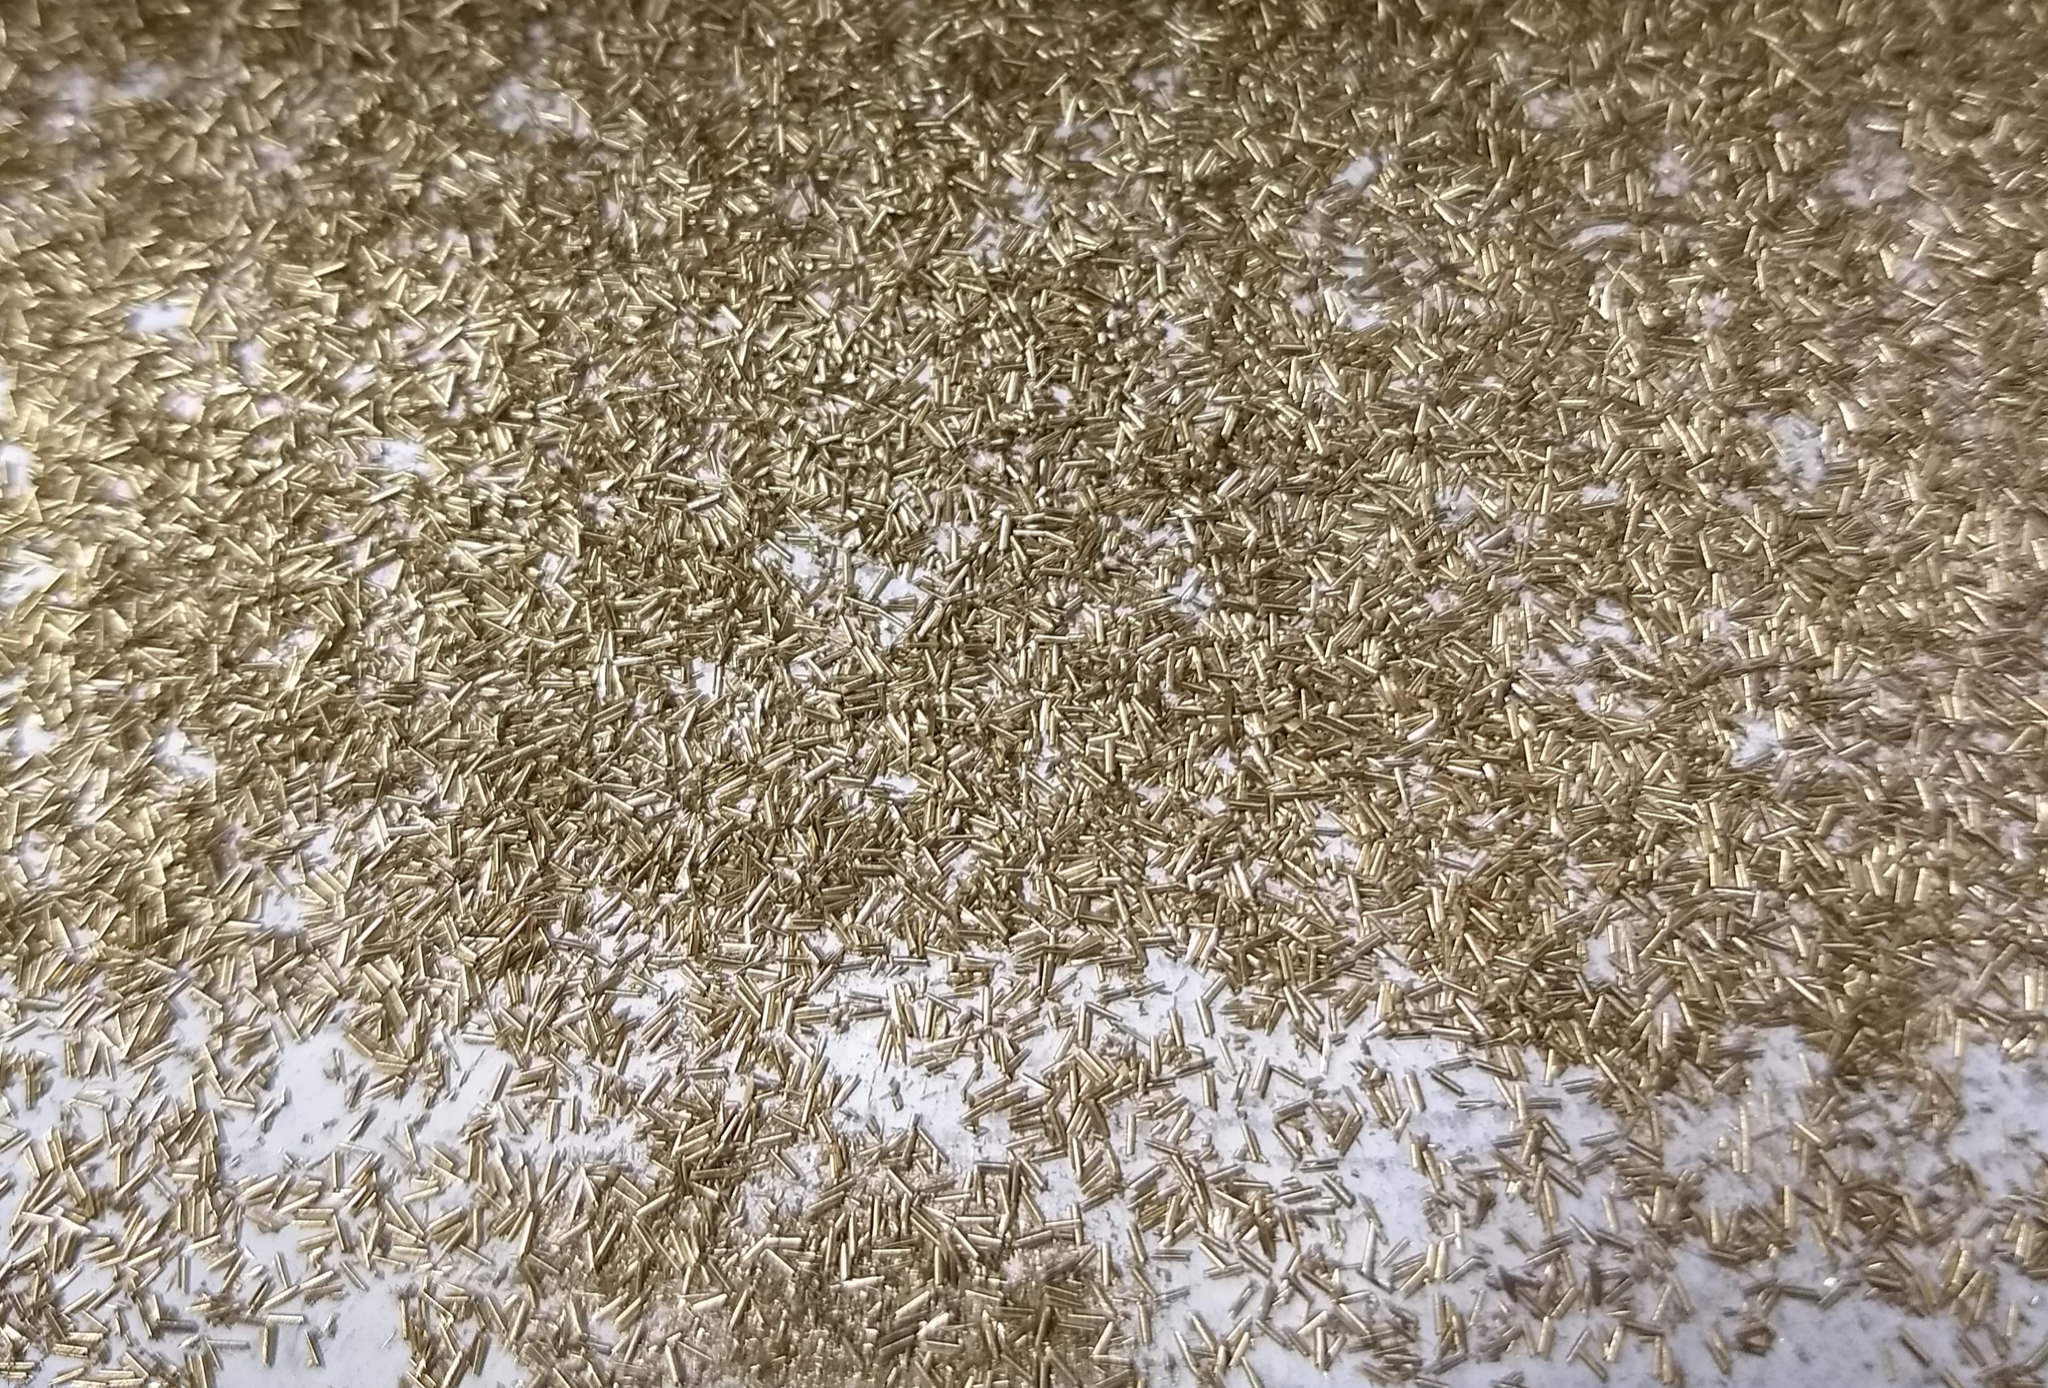
with both halves machined from PVC bar stock (because I had it on hand). The stock prep was done with handsaw, and then one end faced in the lathe to make a good surface to tape down. The machining was done with moderately aggressive parameters using a 3.2mm bull nose tool and a 1.6mm square end to bore the dowel holes. The 3.2mm tool was 1mm radial engagement at 5mm axial, 2000mm/min, 10Krpm. Nice chips


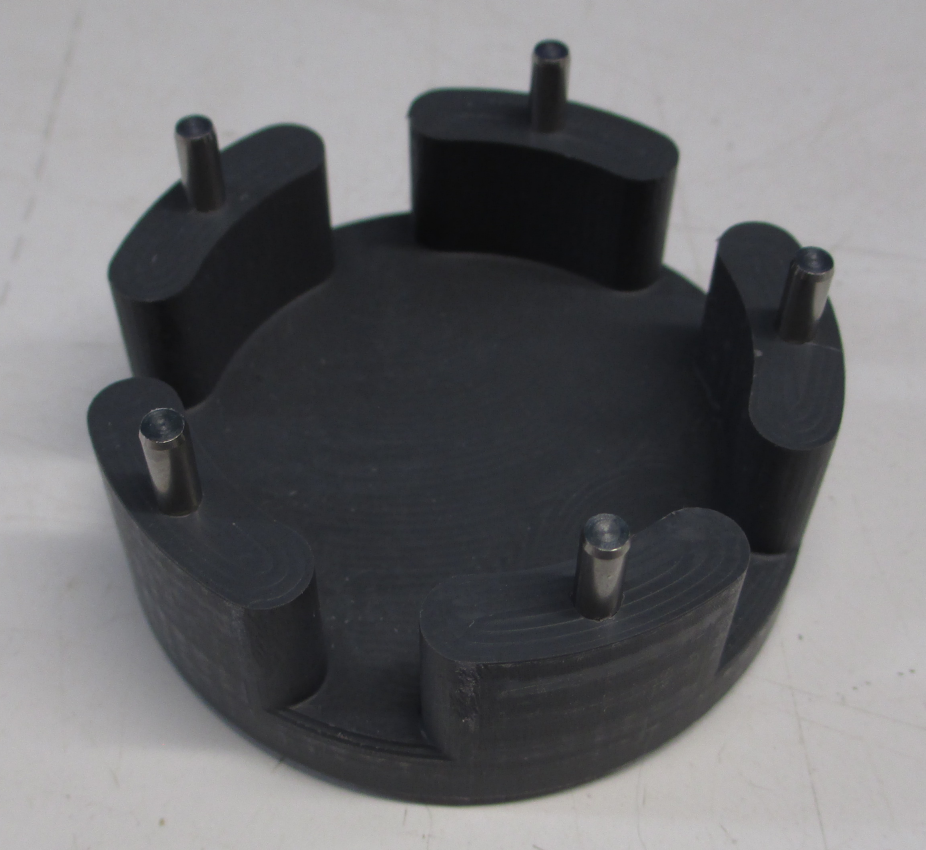
dowel pins in one part
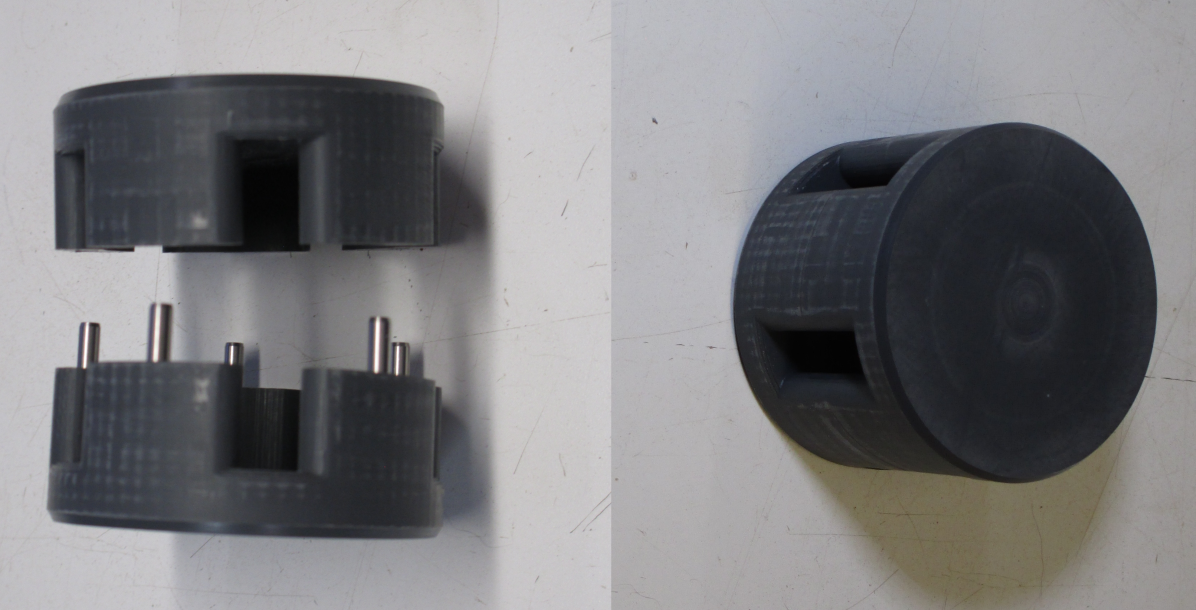

then assembled

The puzzle is, of course,assembling the rods in the cage. I have left out one thing, to this point. As shown to this point, assembly is impossible. This leads to the nature of slight-of-hand.

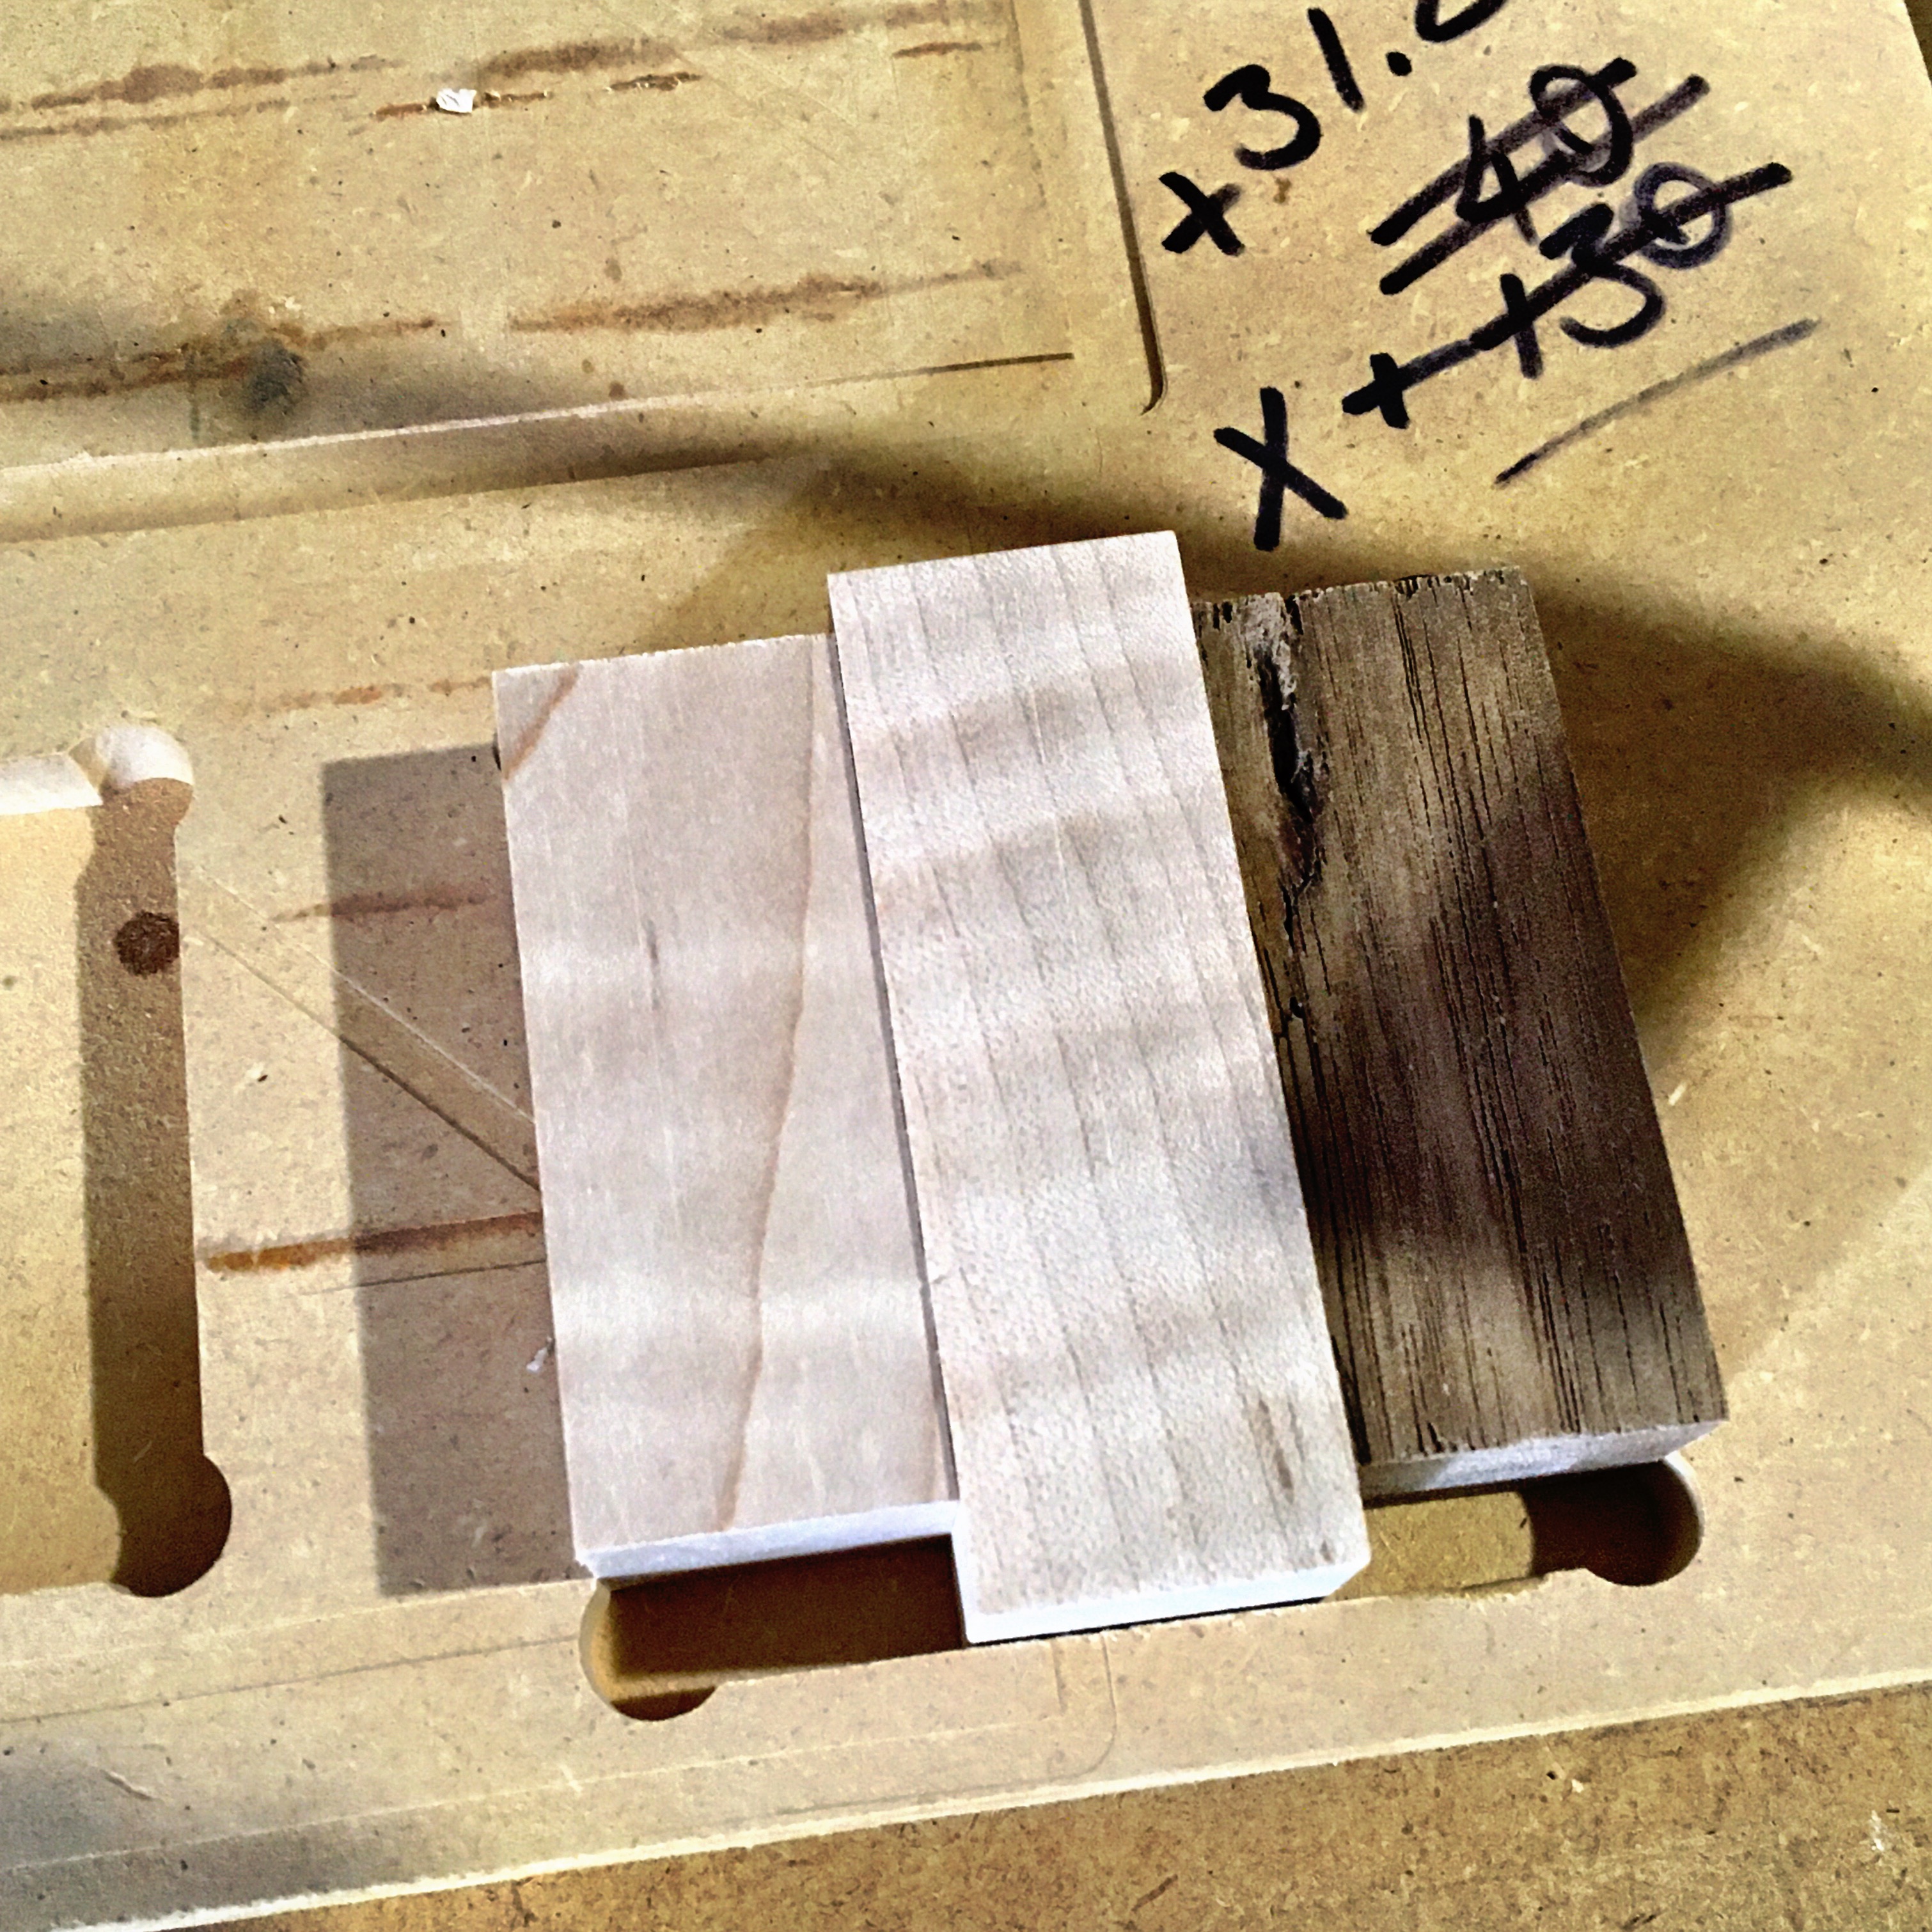
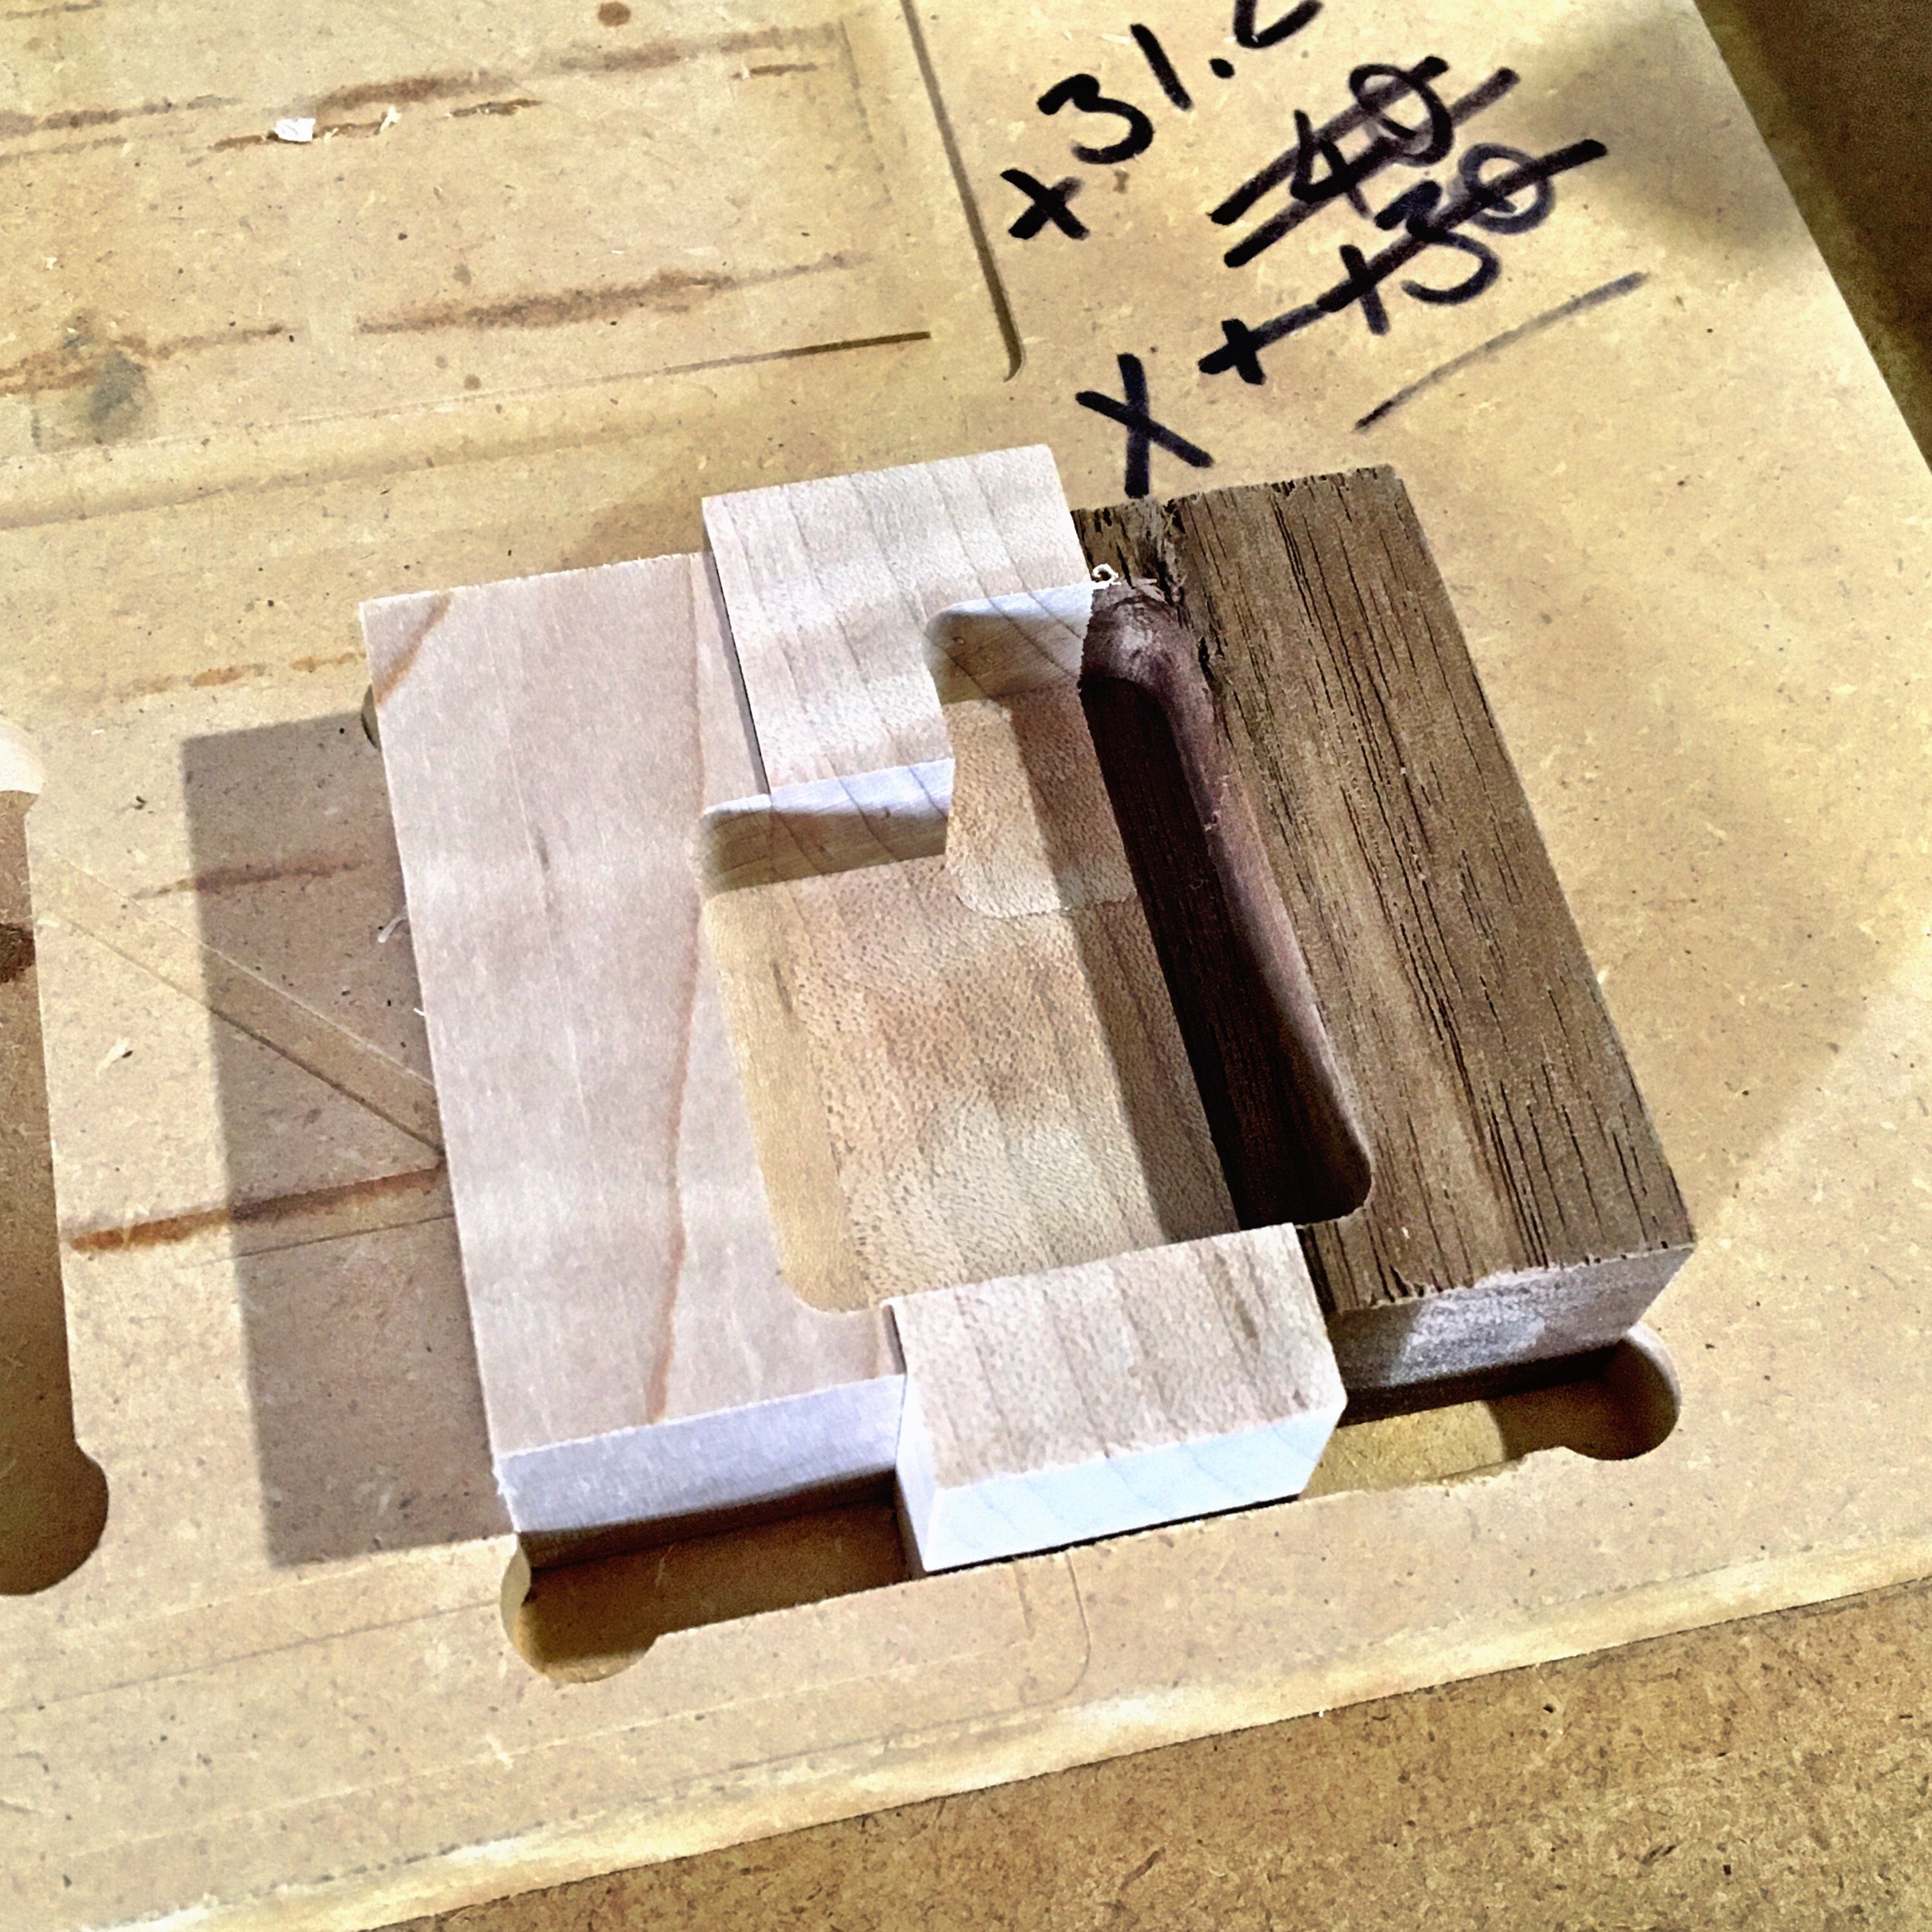
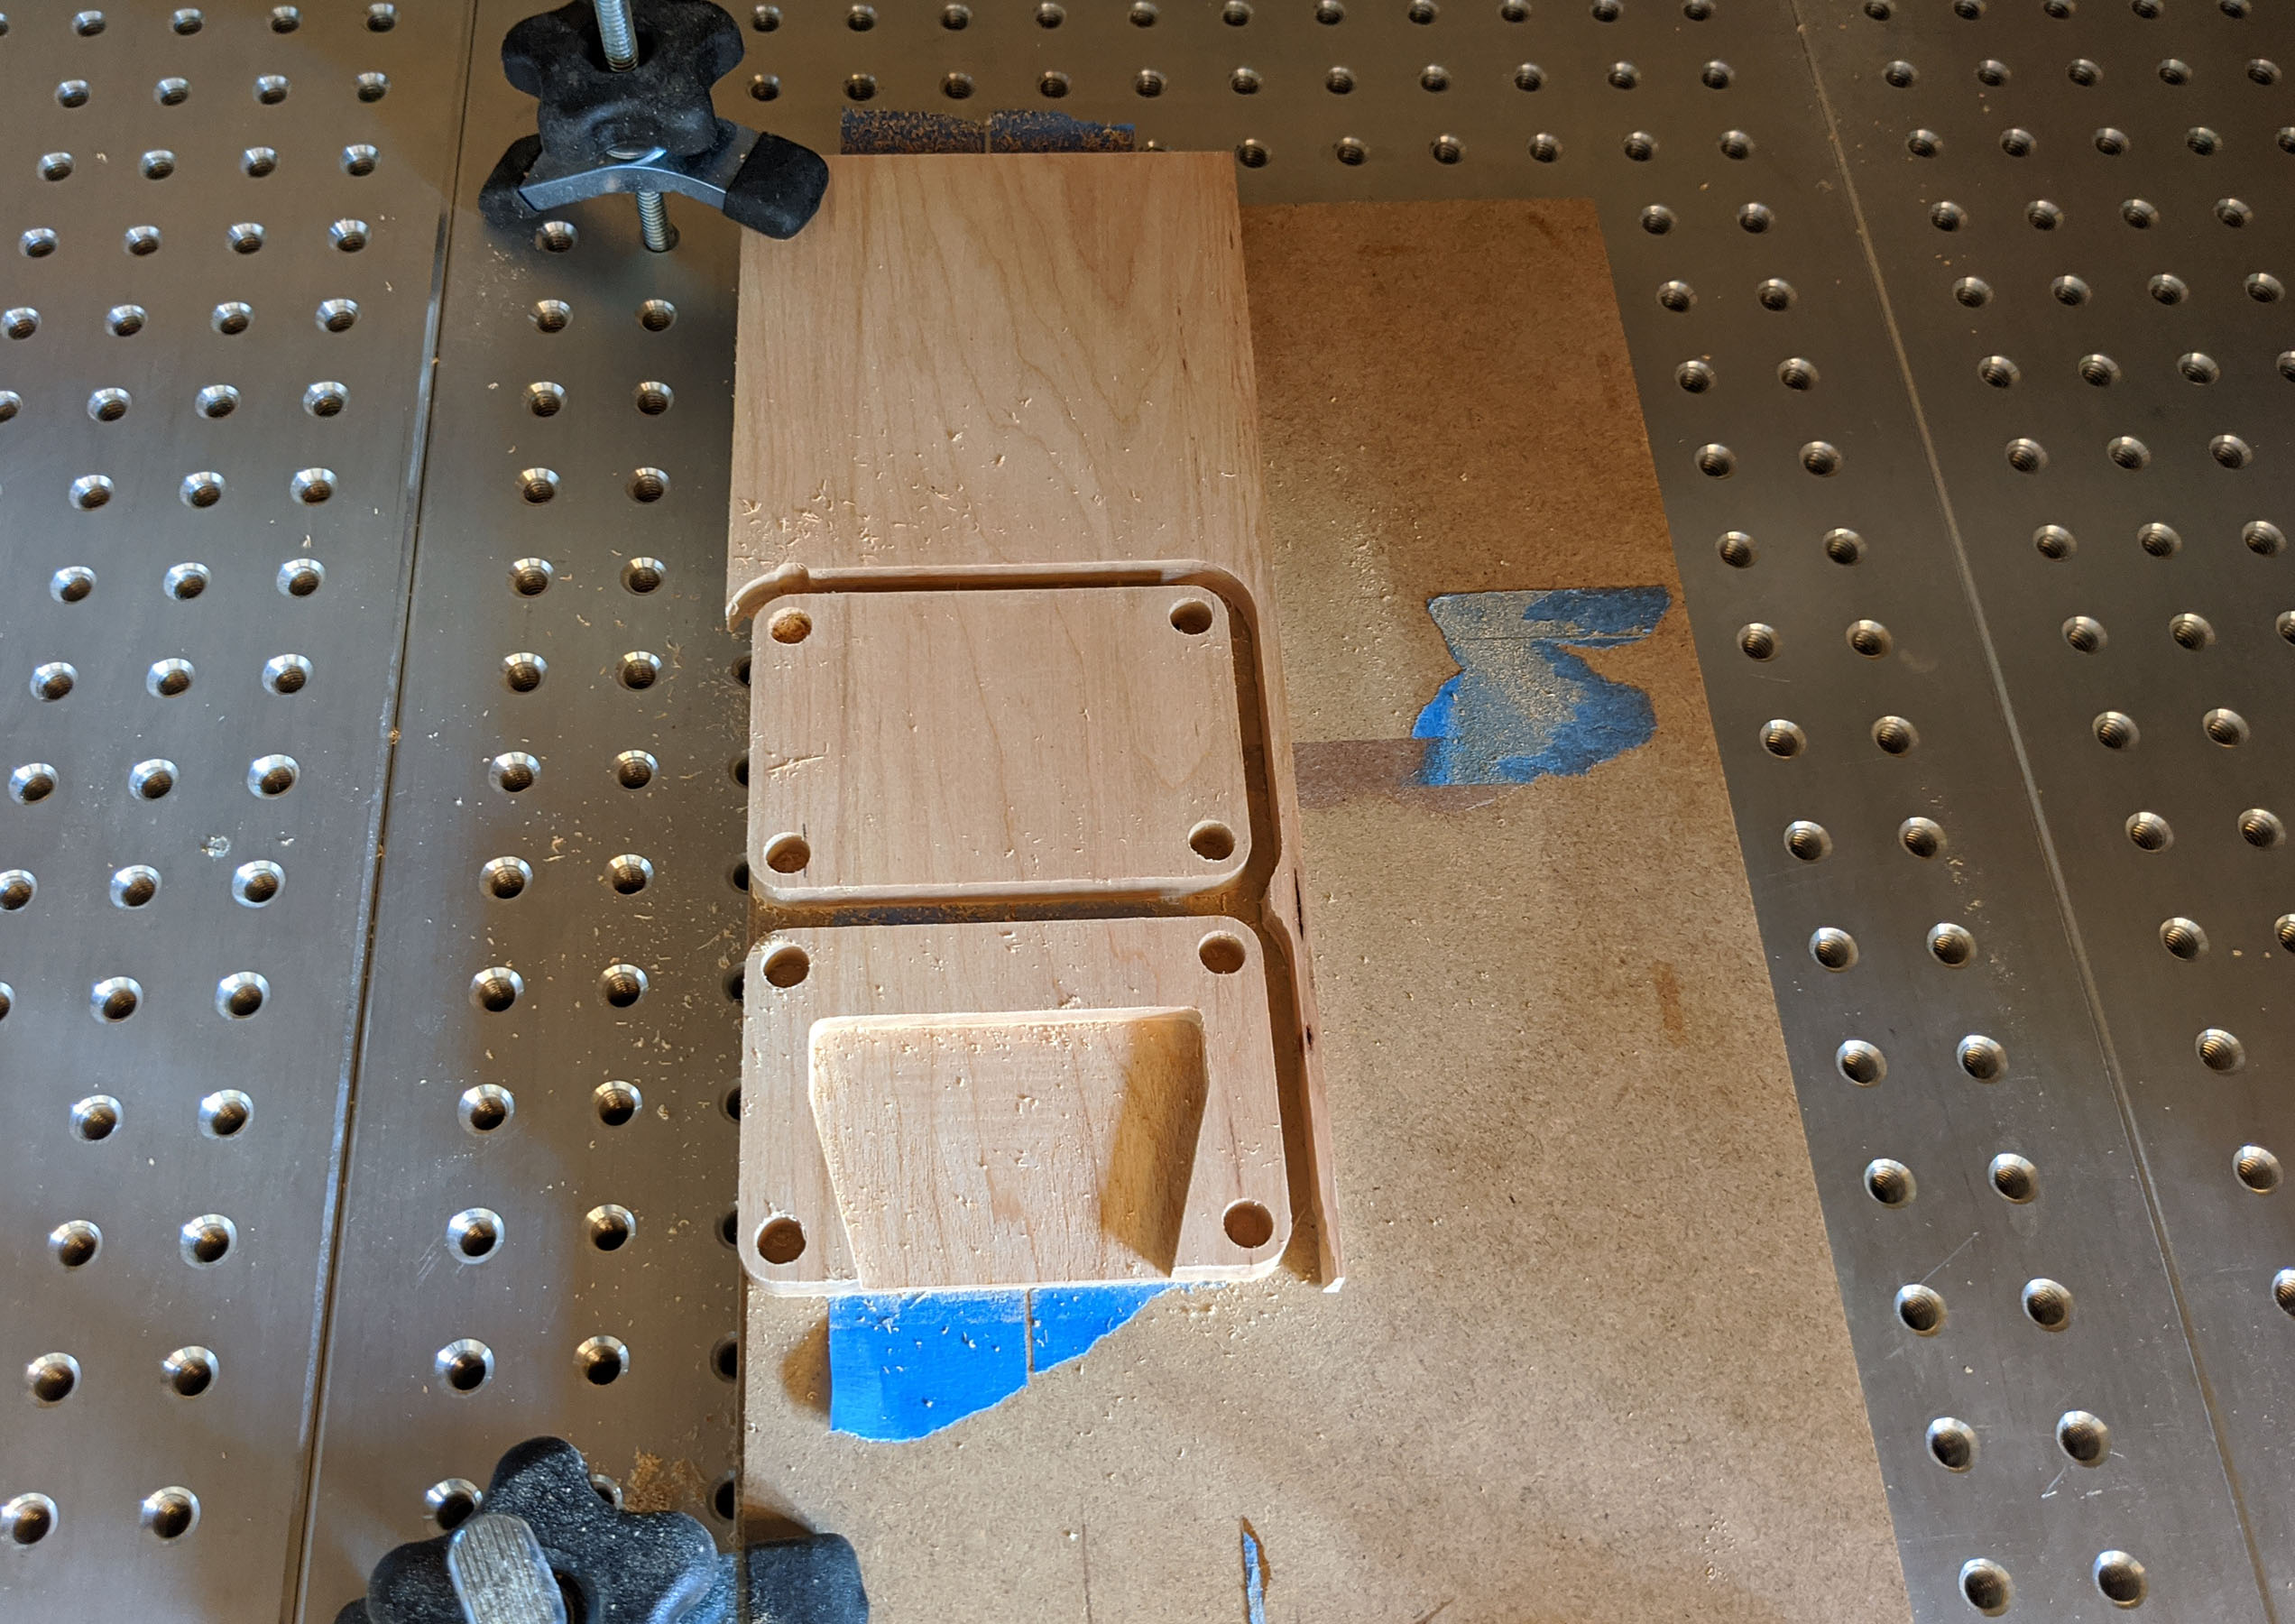
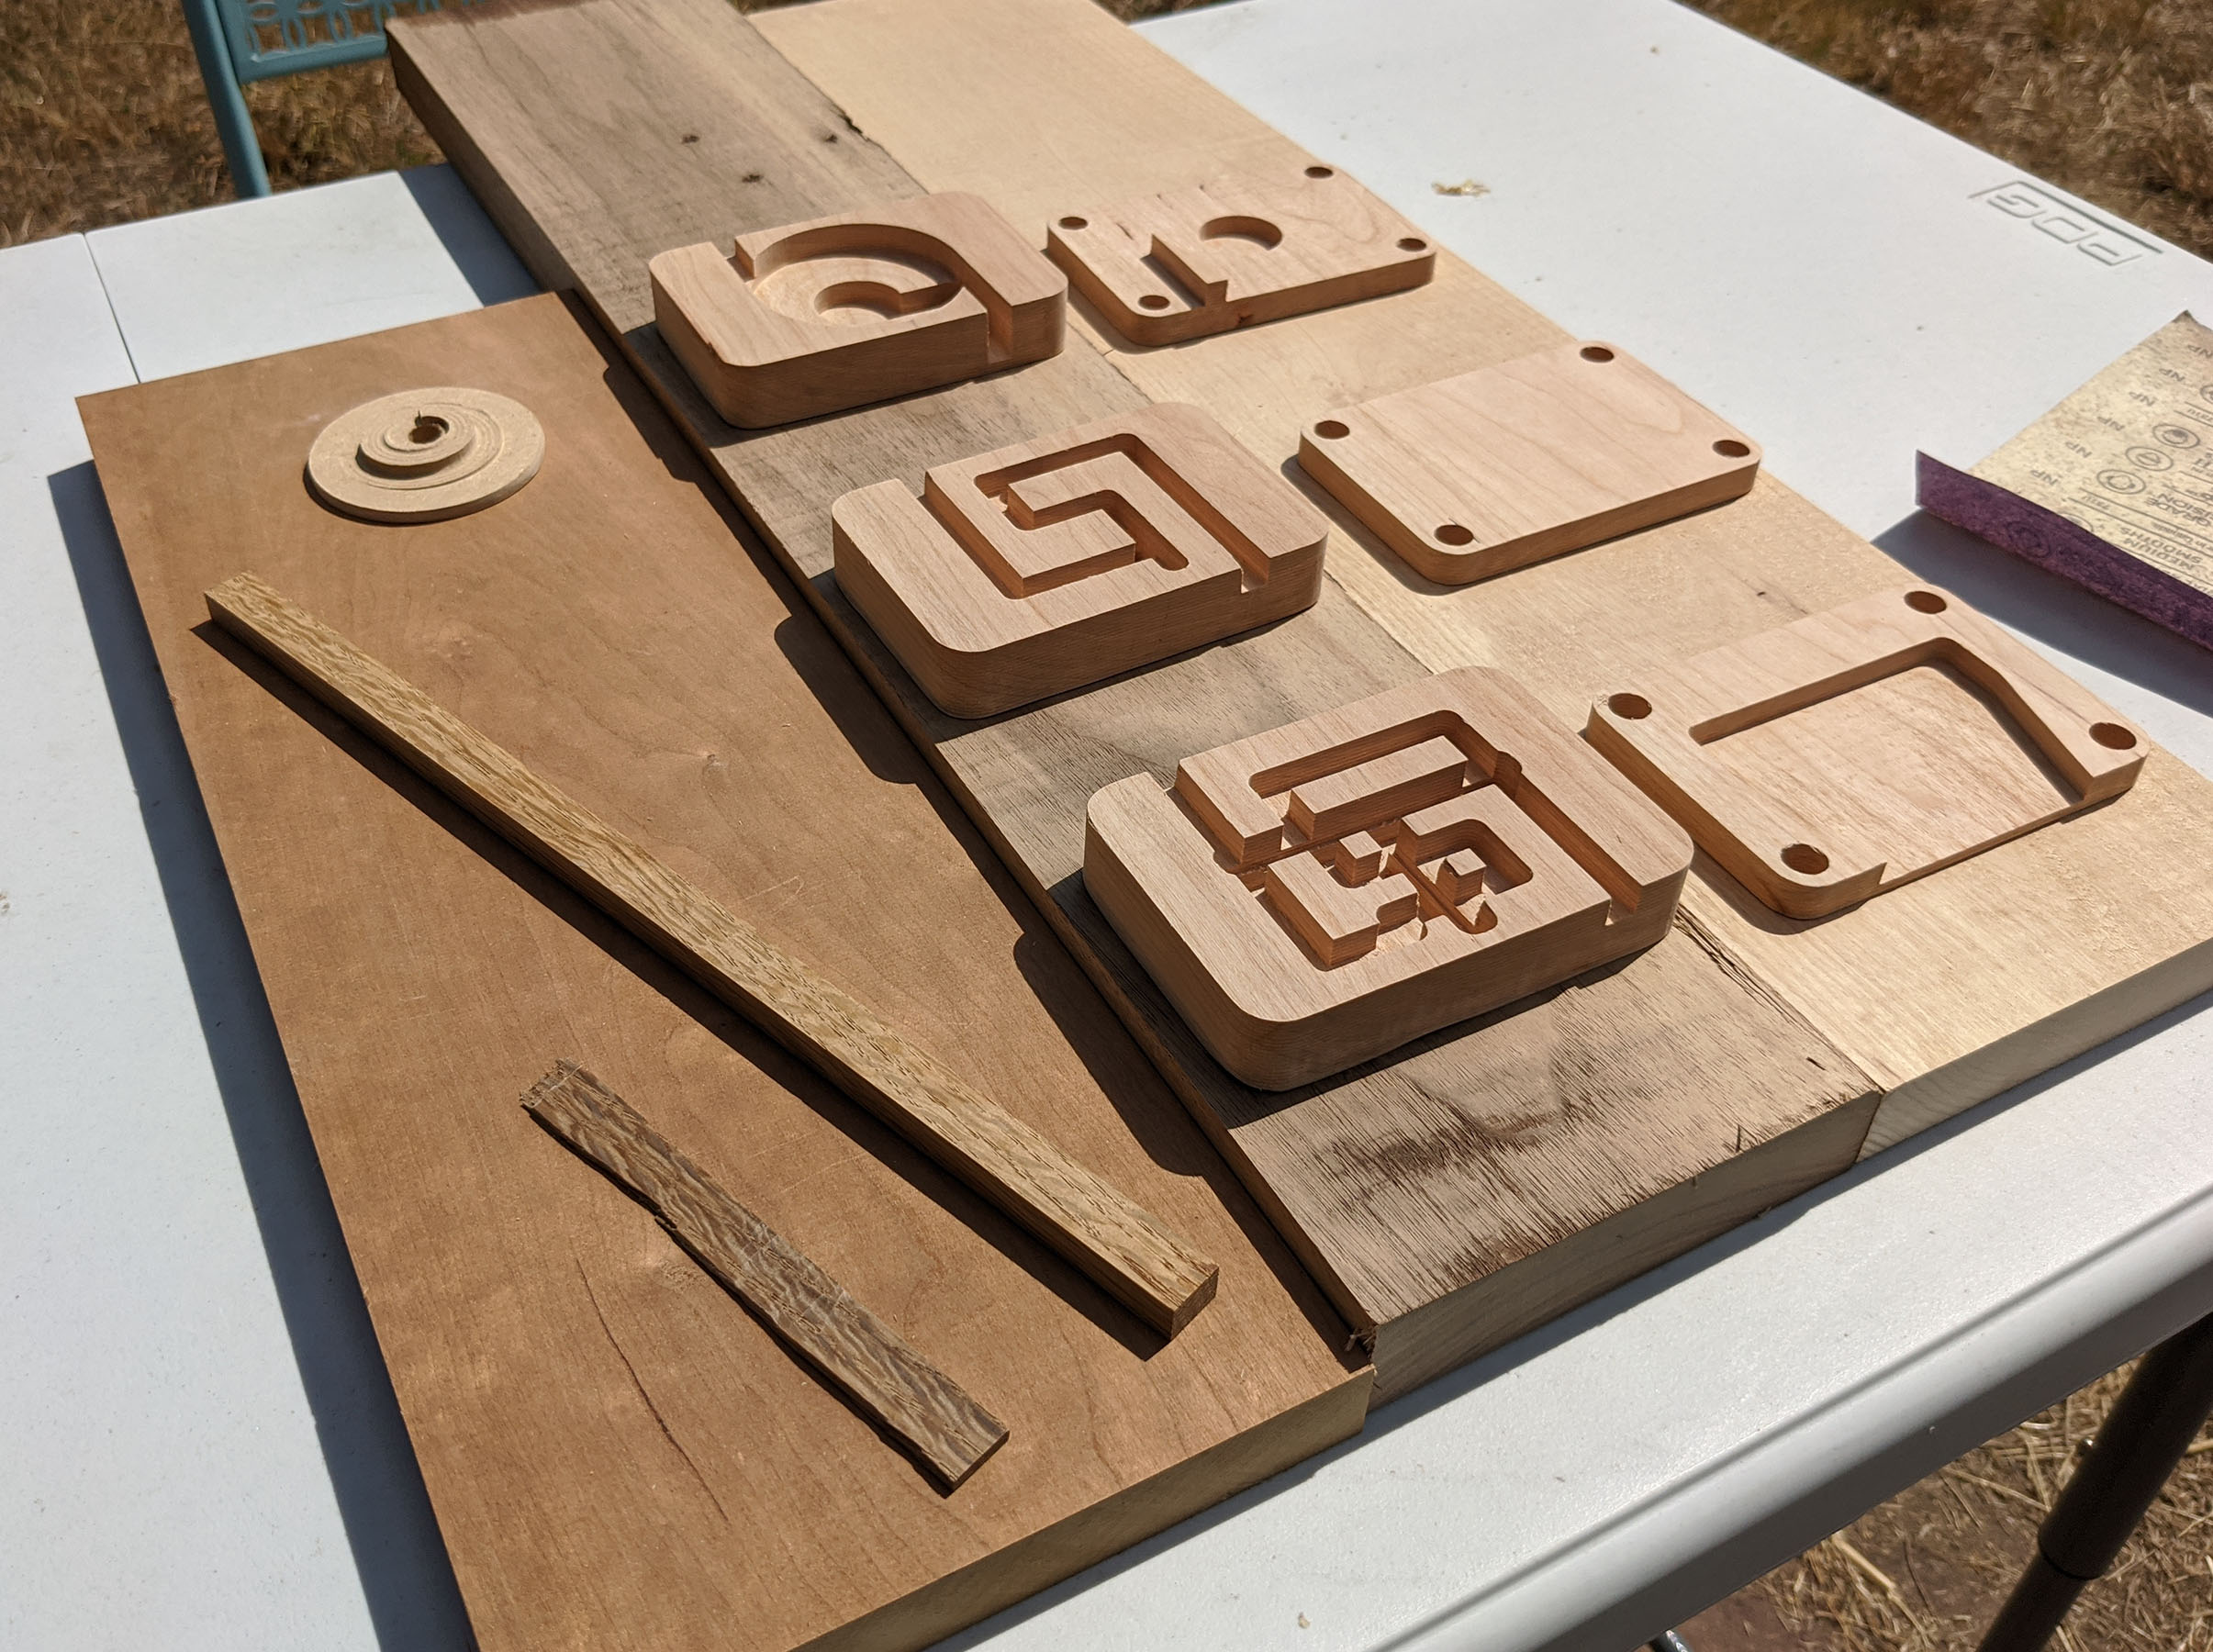
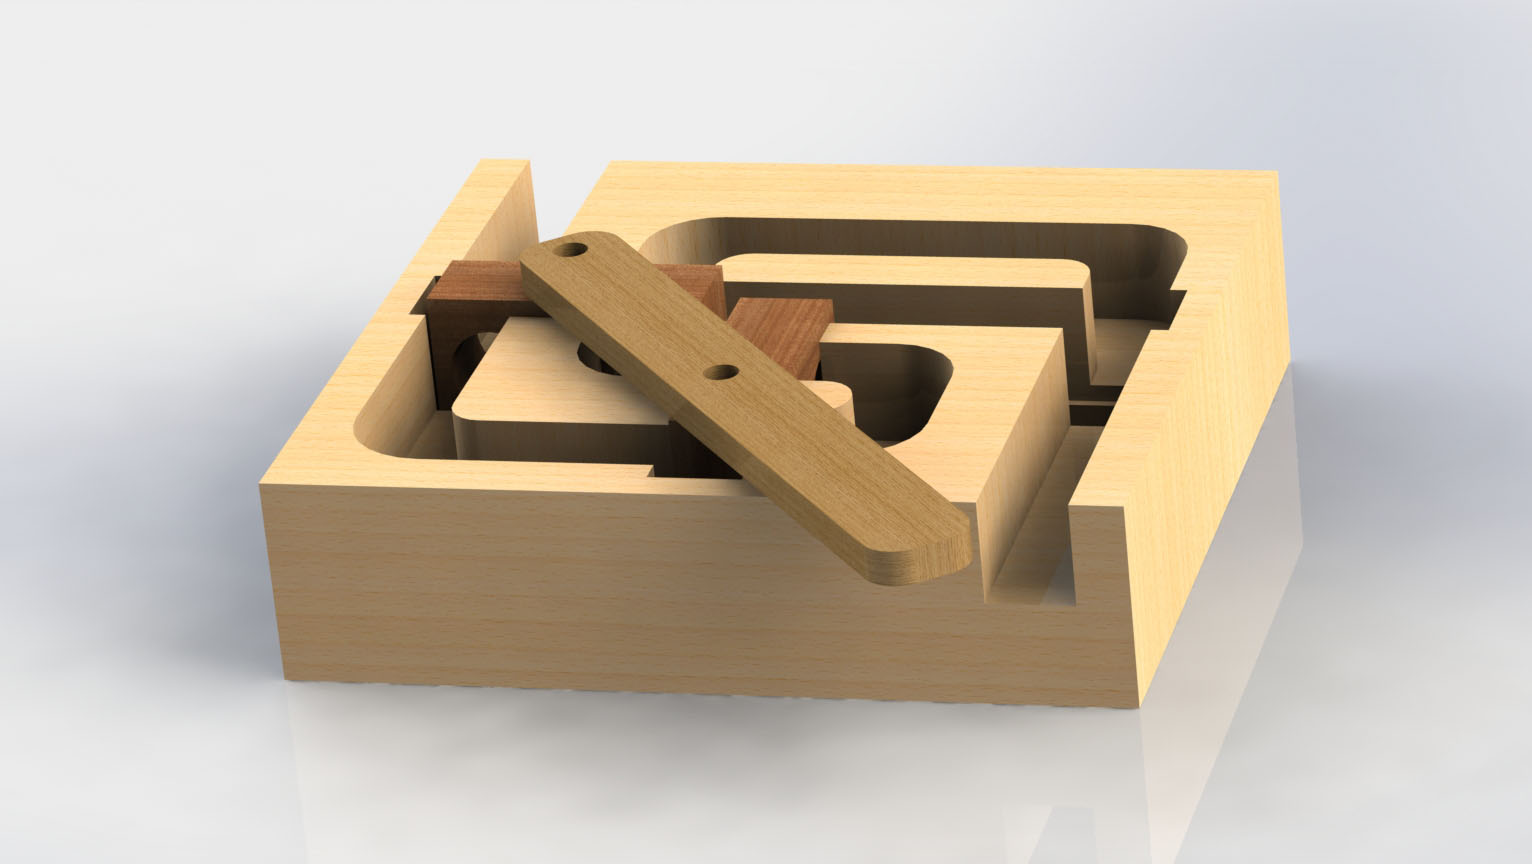
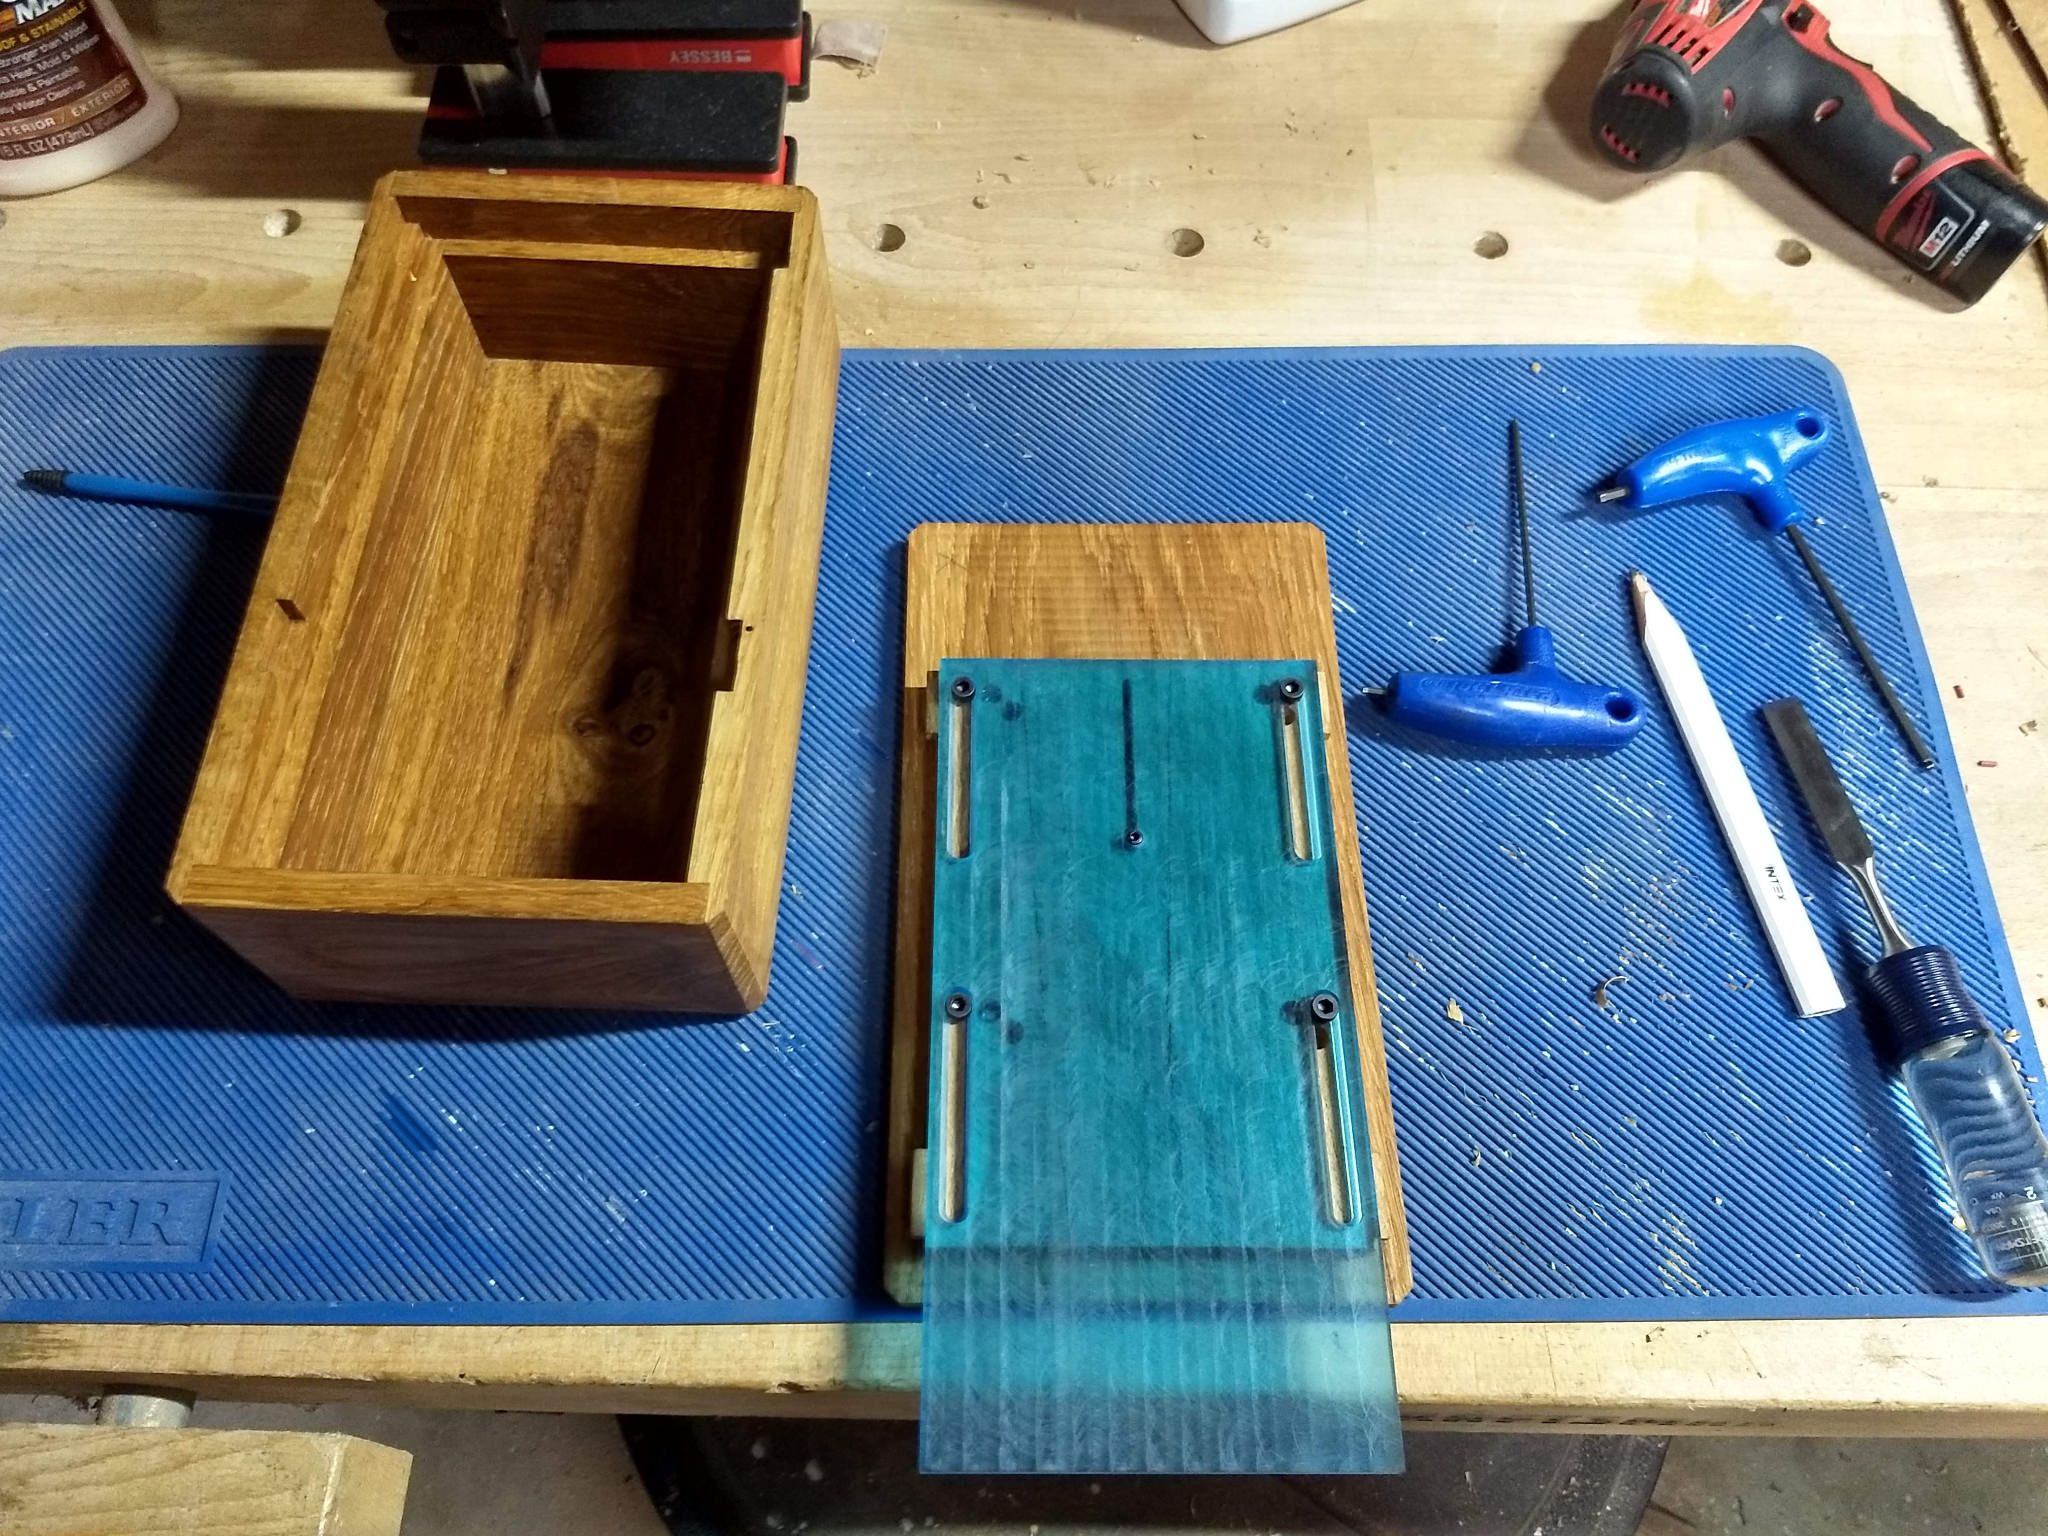
There are two more rods. One un-notched, the other with to notches, hence the fancy fixture:

The un-notched rod fits in the lower part of the fixture to position the other rod at the proper orientation for the second slot to be cut

With these two rods, the puzzle can be assembled in the cage. The slight-of-hand?

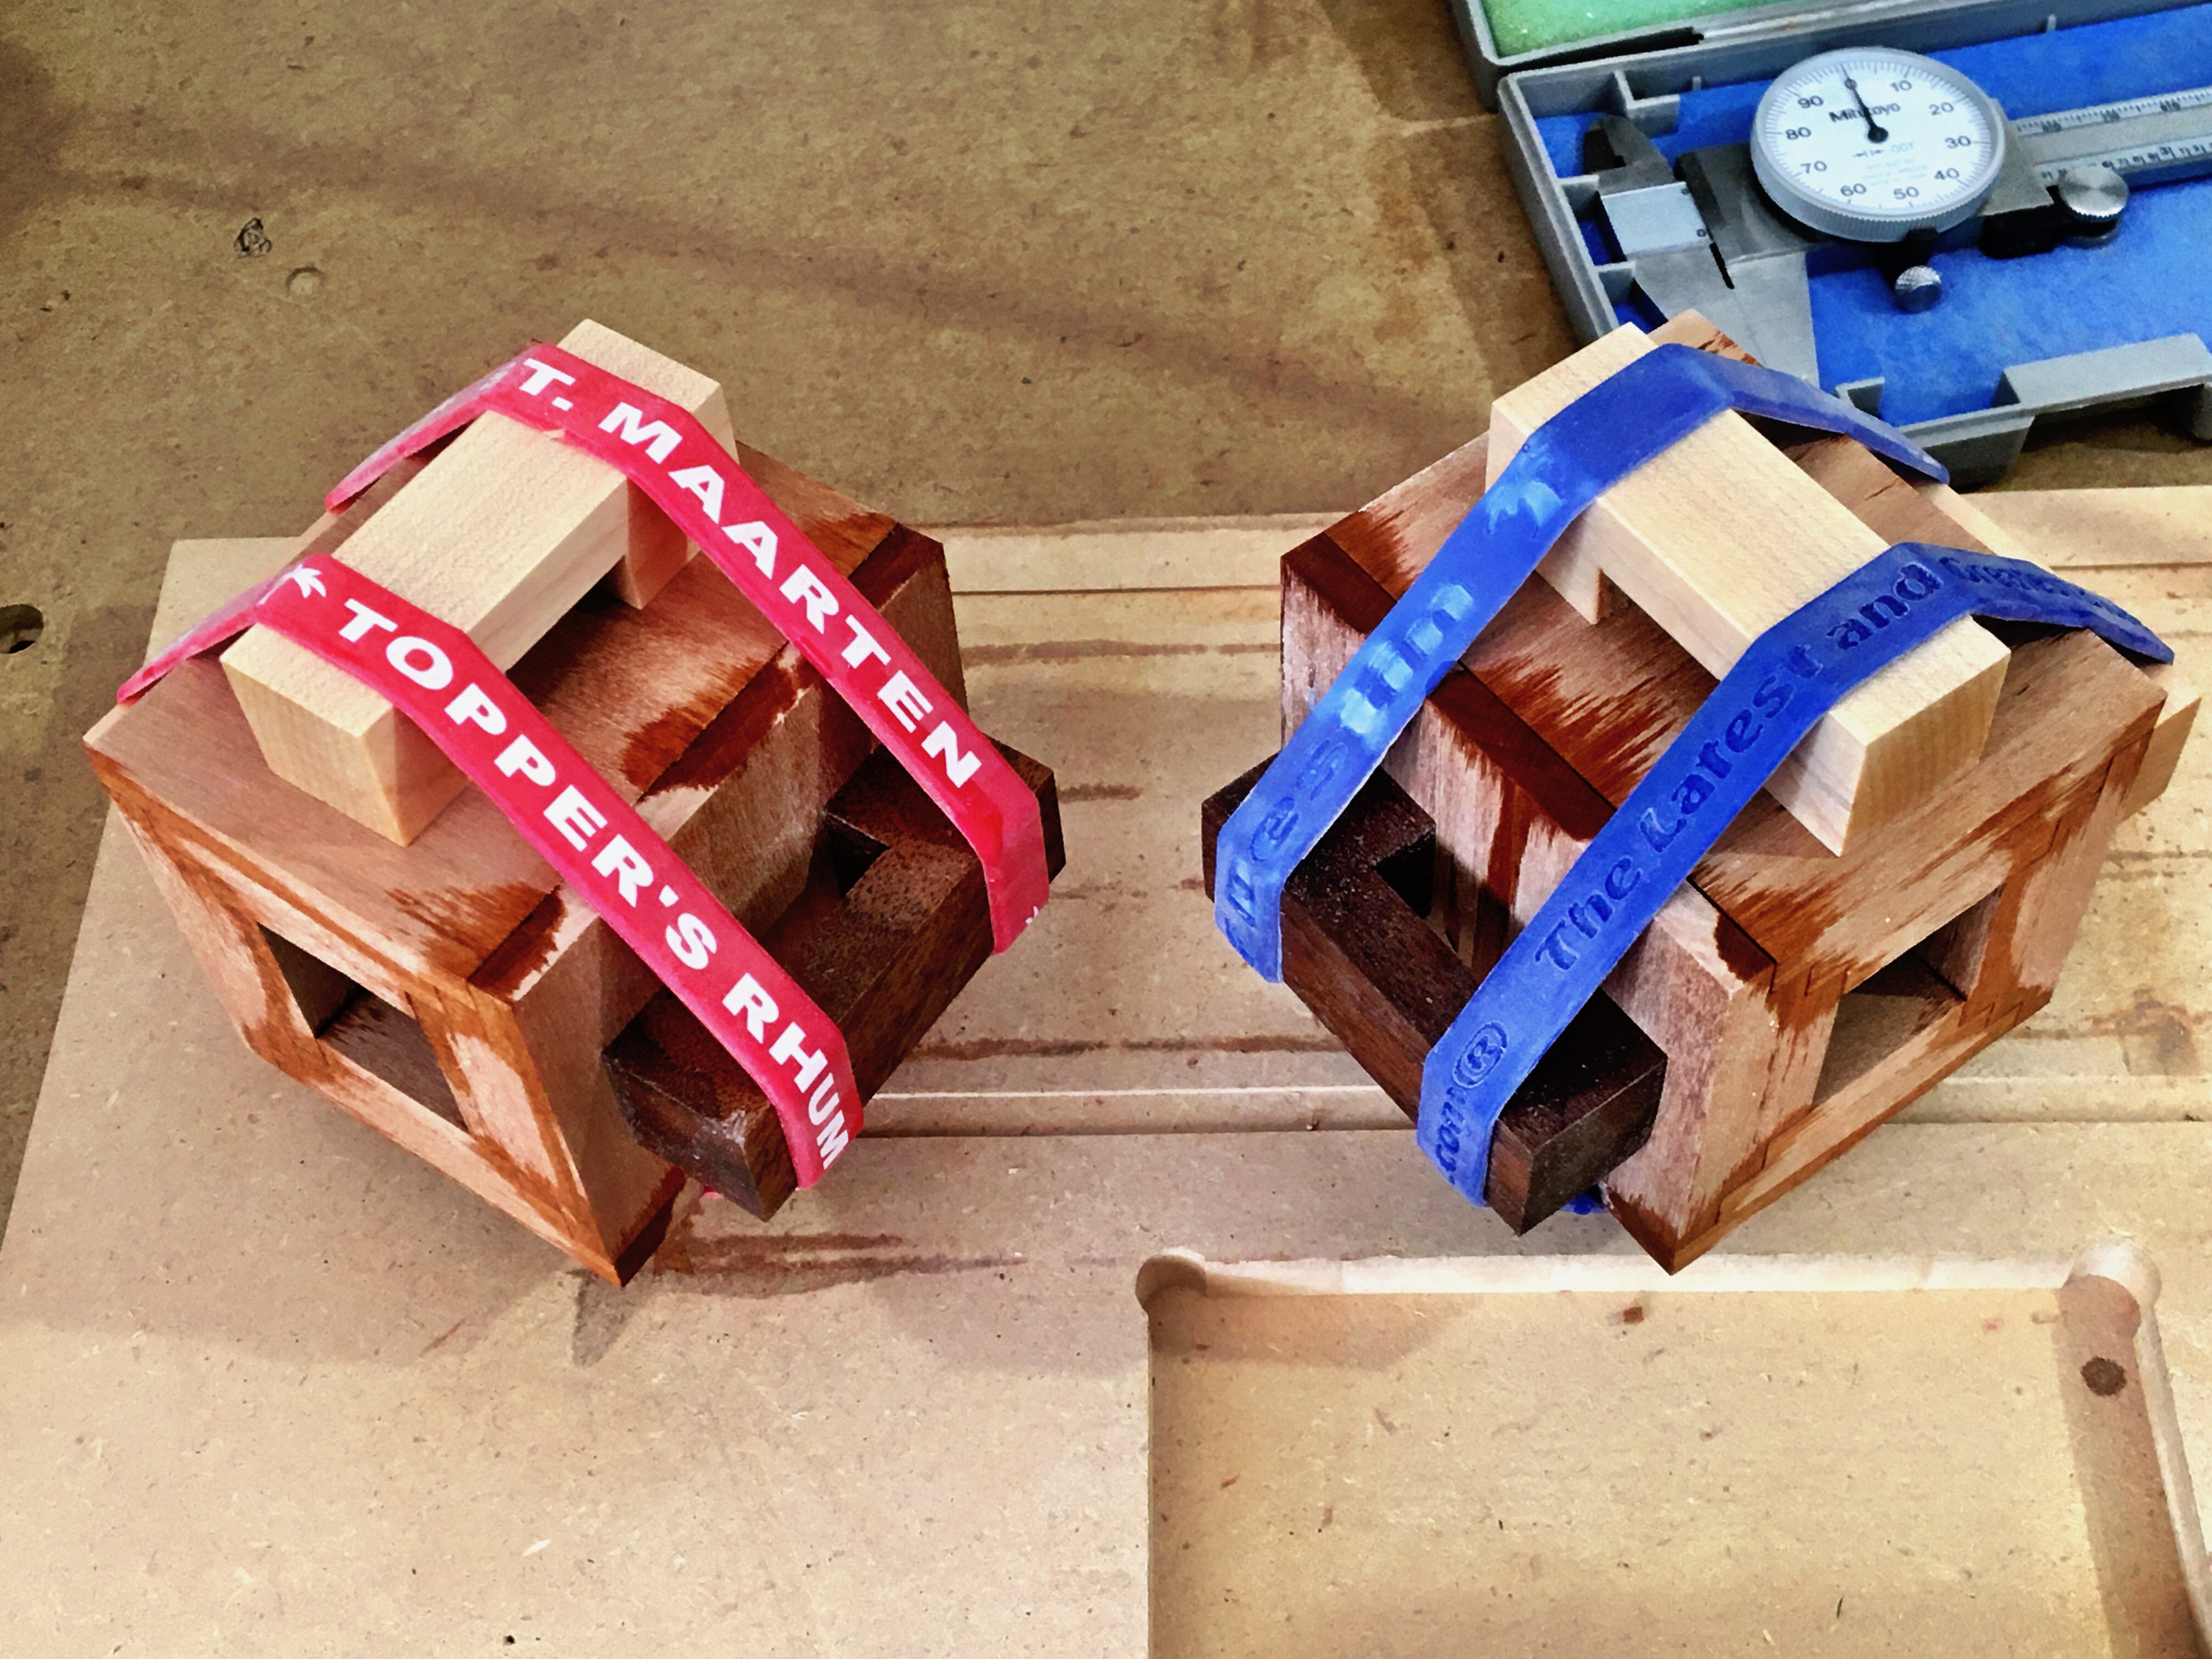
Show the assembled puzzle to the victim. Disassemble, and palm the un-notched and twice-notched rods, replacing them with extra one notch rods.

When the victim can’t do it, show them, again swapping the rods.

(This is an old puzzle, I think Adams solve a version back in the day, as well as many Hong-Kong sources. I bought two to make a single magic trick. Only good one I ever designed myself)

The Inventor models (from my education license):

pentacage.zip (489.5 KB)

(this is the minimum model set to make the puzzle. There are about a dozen models total to construct it and develop the CAM. The cage model will need to be cut in half with a plane to machine, and your choice of alignment method added-separate pins like I used, fingers and holes machined in, whatever- as the model is the full cage.)

15 Likes

I won’t have time for this challenge. :disappointed:

Anyone in need of a good idea, I was going to make this. :wink:

14 Likes

I don’t think I could make one of those! That inside corner looks to be 1mm or less and an inch thick. Also how to deal with taper? Please teach me :slight_smile:

1 Like

Wire EDM Shapeoko accessory?
That’s gonna be a funny looking Shapeoko when you hook this up to it. :stuck_out_tongue_winking_eye:

8 Likes

Teach all of us…PLEASE!

1 Like

Ha! Sorry to create the stir.

4 Likes

Sorry, I got all excited thinking you would be making this on a Shapeoko, per the rules :wink:
But it would be interesting to watch that process in action.

3 Likes

The Attribute Mazes have names based on guiding Dungeons and Dragons attributes. (Of course, any puzzle can be solved with enough Strength or Charisma). The objective is the same for all three mazes: guide the ball bearing from start to exit without turning the puzzle upside down. The bearing is 0.25" and the puzzle dimensions are 4" x 2.75" x 1.125".

  • WIS (Wisdom): a perception check; find the magnet to guide the bearing past the holes in a simple maze
  • DEX (Dexterity): a tricky spiral ramp must be navigated so the bearing can fall through the center and exit
  • LOG (Logic): a lever-activated double-trammel mechanism allows the bearing to avoid a T-shaped trap

Files:

I would like to continue making these types of puzzles with the attribute as a hint and puzzle names like WIS+1. I am especially proud of the trammel mechanism because I’ve never seen that in a puzzle before. I was inspired by the Trammel of Archimedes and wanted to figure out how to put it in a puzzle.

For each puzzle, the process was:

  1. Prepare stock at correct thickness
  2. CNC the puzzle base and lid (using only 0.25" end mill) using Shapeoko hardwood settings
  3. Create auxiliary pieces (ramp, trammel blocks, lever)
  4. (Drill dowel holes and) add dowels; attach lid
  5. Hand sand until satisfied (320 grit)
  6. Engrave puzzle name on lid with 60deg V-bit
  7. Finish with Danish oil and a coat or two of shellac


WIS

I had some fatal mistakes here in the final steps that have put this project into the “remake later” category. This should have been the easiest puzzle to make. The maze is simple but the ball will fall out the bottom if the magnet is not used. The maze must still be “mapped out” because moving the magnet in the wrong way will drop the ball. The magnet is hidden in one of the four dowels (with the other three glued in). Major mistakes:

  • I thought I could hand-drill a straight 3/8" hole through the bottom piece, guided by the top piece. I should have used a drill press or trusted the CNC.
  • My dowels are too thick for the holes; I should have taken the time to sand them down! I ended up cracking three out of four corners while hammering them in.
  • The first hole can be bypassed by quickly tilting the puzzle, giving the ball enough momentum. But I haven’t been able to build enough momentum to bypass the second hole, so I consider the holes well-placed.
  • I lost my magnets! They must be stuck to something metal because I can’t find them anywhere right now. Also, check your magnet strength before you put the lid on to make sure they are strong enough.


DEX

The trick here is to gently guide the ball up a spiral ramp and into the center hole, where it drops down and easily exits. I made the raised ramp out of MDF with the idea that it could be sanded and sculpted to make the task easier if necessary. My version is tricky even if you can see the ramp, so I will be adding a slight groove to the ramp using a chisel or carving tool.

  • In my first design I didn’t pocket quite enough space in the top piece to allow the ball all the way up. This was straightforward to fix with a chisel, but it definitely doesn’t look great.
  • A simpler design would probably be a better starter puzzle (for example, a round container with an internal, square wall and a single opening).


Progress1

LOG

The double-trammel design here means a single lever moves the two wooden blocks in a slightly confusing manner, but the mechanism is visible through the holes in the boxes. Each block has two holes to allow the ball through. A shortcut can even be used to bypass half of the maze.

  • Solidworks was useful for the initial dimensions because the constraints are easy to set and test. Fusion360 may work just as well, but I’m not very skilled yet.
  • I used cut-off nails with wide heads to hold the trammel blocks to the lever.
  • If you know of any other puzzle that uses this mechanism (especially with more than 1.5 tracks) let me know – I’m very curious what else can be done!


Animation|

12 Likes

It’s not much to watch. The workpiece is submerged in water with a splash guard over the top. all you really see is the wire feeding. https://photos.app.goo.gl/KZGRfkTMSidWxQGa8

1 Like

Does anyone else have fun with naming their gcode files?
image

Finally making some headway on my entry after settling on some adjusted dimensions to get the parts to “smoothly” fit. I had a heck of a time getting the small piece tweaked to fit in the bigger one…Fusion made it look simple with plenty of clearance :neutral_face:.

6 Likes

Optical Illusion are puzzles for the mind… and I’ve been wanting an excuse to try out @neilferreri 's F360 inlay technique from community challenge #5 for a while now… Albeit I wanted to give it some steroids.

Next, I wanted to find a less time consuming way of making optical illusion cutting boards such as these: https://www.youtube.com/watch?v=gliOZyHkdps&t=588s (careful this video will make your head hurt if you really think about the how)

End Product, End-grain Optical Illusion Cutting Board:
Valley?


Mountain?
Nah, just flat:

Process:
Identical to Neil’s tutorial with the exception of having to use 1/16" tooling because my .125" bits would not fit in between the sketch contours with the 30deg wall taper on the roughing/clearance steps.


Toolpaths / F360 file:
https://a360.co/32y4Z1b

Biggest Lesson Learned… Do the male side second. Whenever your remove the bulk of material from one-side of a piece of wood but not the other you introduce stresses that warp your piece. I did the male side first because I was afraid of messing up the engrain walnut block… but by the time I got to the female side the male side had warped such that it took the clamping force of a small car to get everything to chinch down (yes, there are “cauls” on the other side).

PS Public thank you to @neilferreri for hand holding me through several moments of “this can’t possibly work”.

16 Likes

@MarkDGaal NICE! That turned out great. I know I kept saying to “trust the math”, but I was nervously waiting to see the result.

You’re welcome…I’m glad someone took me up on it. So cool that you can do that from just a single sketch.

3 Likes

So first a brief history to give some context. My mum’s family used to wrap each other Christmas presents in such a way as to make it difficult/annoying to open. For example, imagine wrapping a pencil, as the gift, in a small box, then wrapping that with some plastic to waterproof it. Finally, pour cement around that to encase in an approximately 18”x12”12” block of concrete. This was their way of entertainment.

Once I heard these stories, I couldn’t help myself, so I ended up “wrapping” my, at the time, girlfriends presents in such manners as to make it difficult for her but entertaining for everyone else to watch. This went on for a few years until she asked for me to make them more like a puzzle as opposed to need brute strength and power tools to open. So now every year I need to come up with a puzzle/riddle/maze or some combination thereof to wrap my wife’s Christmas present. Needless to say this was definitely one of the reason for getting a Shapeoko in June.

Now that the history of why I do this is there, now lets talk about the project itself. For me, there are several firsts involved in making this.

-Machining metal on the Shapeoko, Thanks Winston/Carbide for the great S&F videos

-Designing parametrically in Fusion 360, at least initially, the design got a little messy towards the end after a few modifications to how parts interact

-Making an assembly with joints in Fusion 360, have only done individual parts or static assemblies before

-Finally, first time posting on this forum, been creeping a while though. And hopefully I can figure out how to post on cutrocket too . I think I got the fusion files posted to CutRocket

Finished product glamour shots:

Now to get into how I designed and made it. First off there were a few design considerations that I had in mind.

-The exterior just had to appear like a simple nice looking box.

-I wanted the maze section to be fully self-contained in the lid, so when opened it came off in one piece.

-I wanted the “start” to be hidden, so it’s not obvious where/how to start the puzzle.

-Finally, I wanted it to have a hidden path/wall, similar to top-down video games like Zelda.

The main section of the box is pretty self explanatory. Just a box with some fillets to add some design and aid in holding it while trying to solve it. The lid is really where all the magic is. To progress towards the center of the puzzle, the lid slides off to one side, and once you reach the center it can be simply lifted straight up revealing the contents.

But the pin that needs to travel through the maze is hidden off to the side underneath the top lid. So knowing where and how to start shouldn’t be abundantly clear. There are also 3 different start points to the maze, one of which is a dead end. As you can probably tell pretty quickly there is no obvious path to the center of the maze. This is where that hidden path I talked about earlier comes into play. In person, it is very difficult to see that the wall isn’t actually a wall, but if u just keep turning the maze, it will slide right on through the “wall”.
Photo highlighting the fake walls and dead end trap

Now the whole process of making the individual parts didn’t go perfectly, I had to make a few versions/copies of a couple pieces because of tolerances and or slight design changes to make everything function better. The wooden lid for example, when making the initial design the wood chipped out because there was such a thin feature. Which warranted the slight redesign to help lower the chances of that.
Once I was happy with how everything was dry fitting together I glued the box together and then I finished the Oak with Tung oil.


Luckily my cat was on hand to provide supervision…

Here is the box and lid assembly after it was finished with the Tung oil.

For how much I stressed out about cutting metal for the first time, I think it went quite well. Nice chips, quiet cutting, and pretty good surface finish right off the machine.

There are a couple things I may eventually fix up in a refined version.

  1. The brass maze has a little more flex in the middle then I would like, this could be easily fixed by tweaking the maze construction and adding a couple more walls.

  2. Change up the order of operations slightly when cutting the maze section to ensure perfect alignment when flipping the stock.

  3. Clean up all the small tweaks I made after the initial design so the box can still be parametrically altered.

  4. Designs other, more complex, mazes and hopefully figure out a way to program a random maze

Overall though I am very happy with the end result, now I just need to figure out what to get my wife for xmas……

I imagine I also glossed over a few things so if you have any questions, just ask away.

24 Likes

I knew you guys were preparing some fantastic entries !
:+1:
Also, I like the new trend of including pets in the project pics !

4 Likes

Life got in the way for me entering this competition but what a rip-snorter so far!!! Some incredible entries! Voting going to be harder than ever!

4 Likes

Nice work guys :fire:!! I agree voting will be difficult.
I just lost my last aluminum-cutting endmill (on a spring pass of all things :roll_eyes:) so I’m waving the white flag for my project…I’m starting to learn my lesson about procrastinating with these haha!

A fun challenge with tons of creative entries everyone!

6 Likes