For Carbide Create tutorials and didactic resources in addition to the videos we have:
http://docs.carbide3d.com/assembly/carbidecreate/userguide/
which has a list of tutorials
and I wrote:
For Carbide Create tutorials and didactic resources in addition to the videos we have:
http://docs.carbide3d.com/assembly/carbidecreate/userguide/
which has a list of tutorials
and I wrote:
Firstly…I am so jealous of your idea…looks amazing. As I look at it, I just think…how can you get rid of those nails?
So I thought maybe to use this
If you are worried about the strength, you could probably put a nail through it. And you may need to put two to get the right height.
Then there is the other circle, which might also work great

Again, these are just all unnecessary additions, because I love what you have done, but you did ask how you could take this to the next level.
Btw…The other option, would be to use Lego Heads as the pin to hold the spanner
Oh…and I agree with Julien…great workbench
MATRYOSHKA JEWELRY BOXES
NOTES
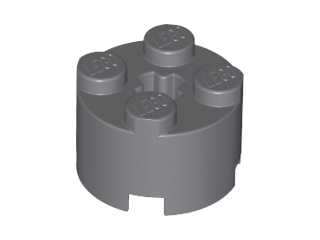
The smallest box is just big enough to hold one original LEGO brick, and each box maintains the proportions of a standard LEGO brick.
They are machined out of solid pieces of walnut and finished in Watco Danish Oil and a coat of Johnson’s Paste Wax. The interiors are flocked to give them a “jewelry box” look.
First step was to design the lid and basic dimensions. (Note that Box 4 never got built. I didn’t have enough wood, nor did I have an endmill that would reach deep enough to pocket this box):
Second step was a “build sheet”:
CONSTRUCTION PICS
Box 1 Bottom
DESIGN FILES AND CUTROCKET LINK:
Box 1.c2d (85.3 KB) Box 2.c2d (98.2 KB) Box 3 Base.c2d (75.4 KB) Box 3 Lid.c2d (75.7 KB)
Beautiful boxes. I assume some Lego enthusiasts might use them to store their favorite… Lego bricks.
Legoception…what a fantastic idea !
Nice job of flocking also…what did you use?
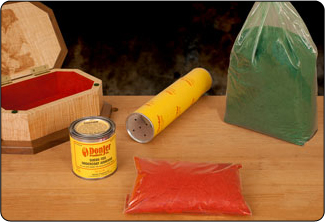
I used Suede-Tex fibers and color-matched adhesive. The company goes by two names -
Donjer and Flockit. Super easy - just brush on a generous coat of adhesive, blow on a heavy layer of flock, and don’t touch it for 12+ hours. Here’s a couple of stock photos:

I use Flockit…that’s what I figured!
Anyone rushing to submit a project? 24h left!

@Julien, you triggered me with this post. I hope you are happy 
Glue is currently drying. The evening will tell if I can submit something…
Okay, I can’t completely finish this one before the deadline, but here is my very space efficient …
Lego Spice-Brick
We recently got these flasks to store spices and tea, which finally lead to this idea.
I designed a simple box, with an elevated bottom, so that the top of the flasks (including the cork) would end just under the top of the box and glued everything together. I finished the round inside corners of the side walls and extensions of the bottom with a chisel to get 90° corners.
Glued 3 layers of plywood discs to the corks of the flasks, and that’s basically it. Initially, I had two layers, but the brick didn’t look right then.
Will have to do some trimming at the sides because I messed up measuring the thickness of the plywood  and then I’ll oil or spray color it. And @Julien, I’ll be perfectly fine if this isn’t accepted for vote in this unfinished state!
Files:
bottom.c2d (10.8 KB) discs.c2d (24.2 KB) sides.c2d (29.3 KB) top.c2d (18.9 KB)
Edit:
Decided to leave it as it is an just put on some oil.
Very creative! Definitely a valid entry, thank you.
It also doubles has a kitchen mini-game, “Guess which one is the pepper” 
That’s a really clever idea! What are you going to use to glue those corks on? I’d imagine they’re going to take a lot of torque in use and the glue will need to handle sheer-forces. Maybe a stainless bolt / washer / nut hidden in the lego?
I used regular wood glue for now. After two hours I was able to close the flasks and open them by grabbing the wood part and carefully turning and pulling.
The glue is supposed to be dry and at its full strength after 48h. Will see if it will stand a non-careful opening of the flasks.
Otherwise, your idea is definitely an option!
Or: You draw it, you spice your soup with it!
Just hope you don’t draw the “eye of newt” bottle!
I had to look that up, and learned a little Shakespeare in the process, thanks!
OH…I’m far less cultured than that! I learned it from watching the Munsters on TV as a kid! 
Voting booths now open, this way please.