I was ways fascinated by the taste and the methods of brewing pour over coffee, recently i have bought a shapeoko pro and asked my self why not use it to fulfil my coffee addition needs by making a pour over coffee stand :). In this post i would like to share the project photos and my experience with the community summarised in the below points.

Before starting any project i usually develop a list of Design consideration and objectives, below is what i have developed for this project:
- Eliminate the use of dowels by making grooves to fit the pieces together and for better alignment during glue up
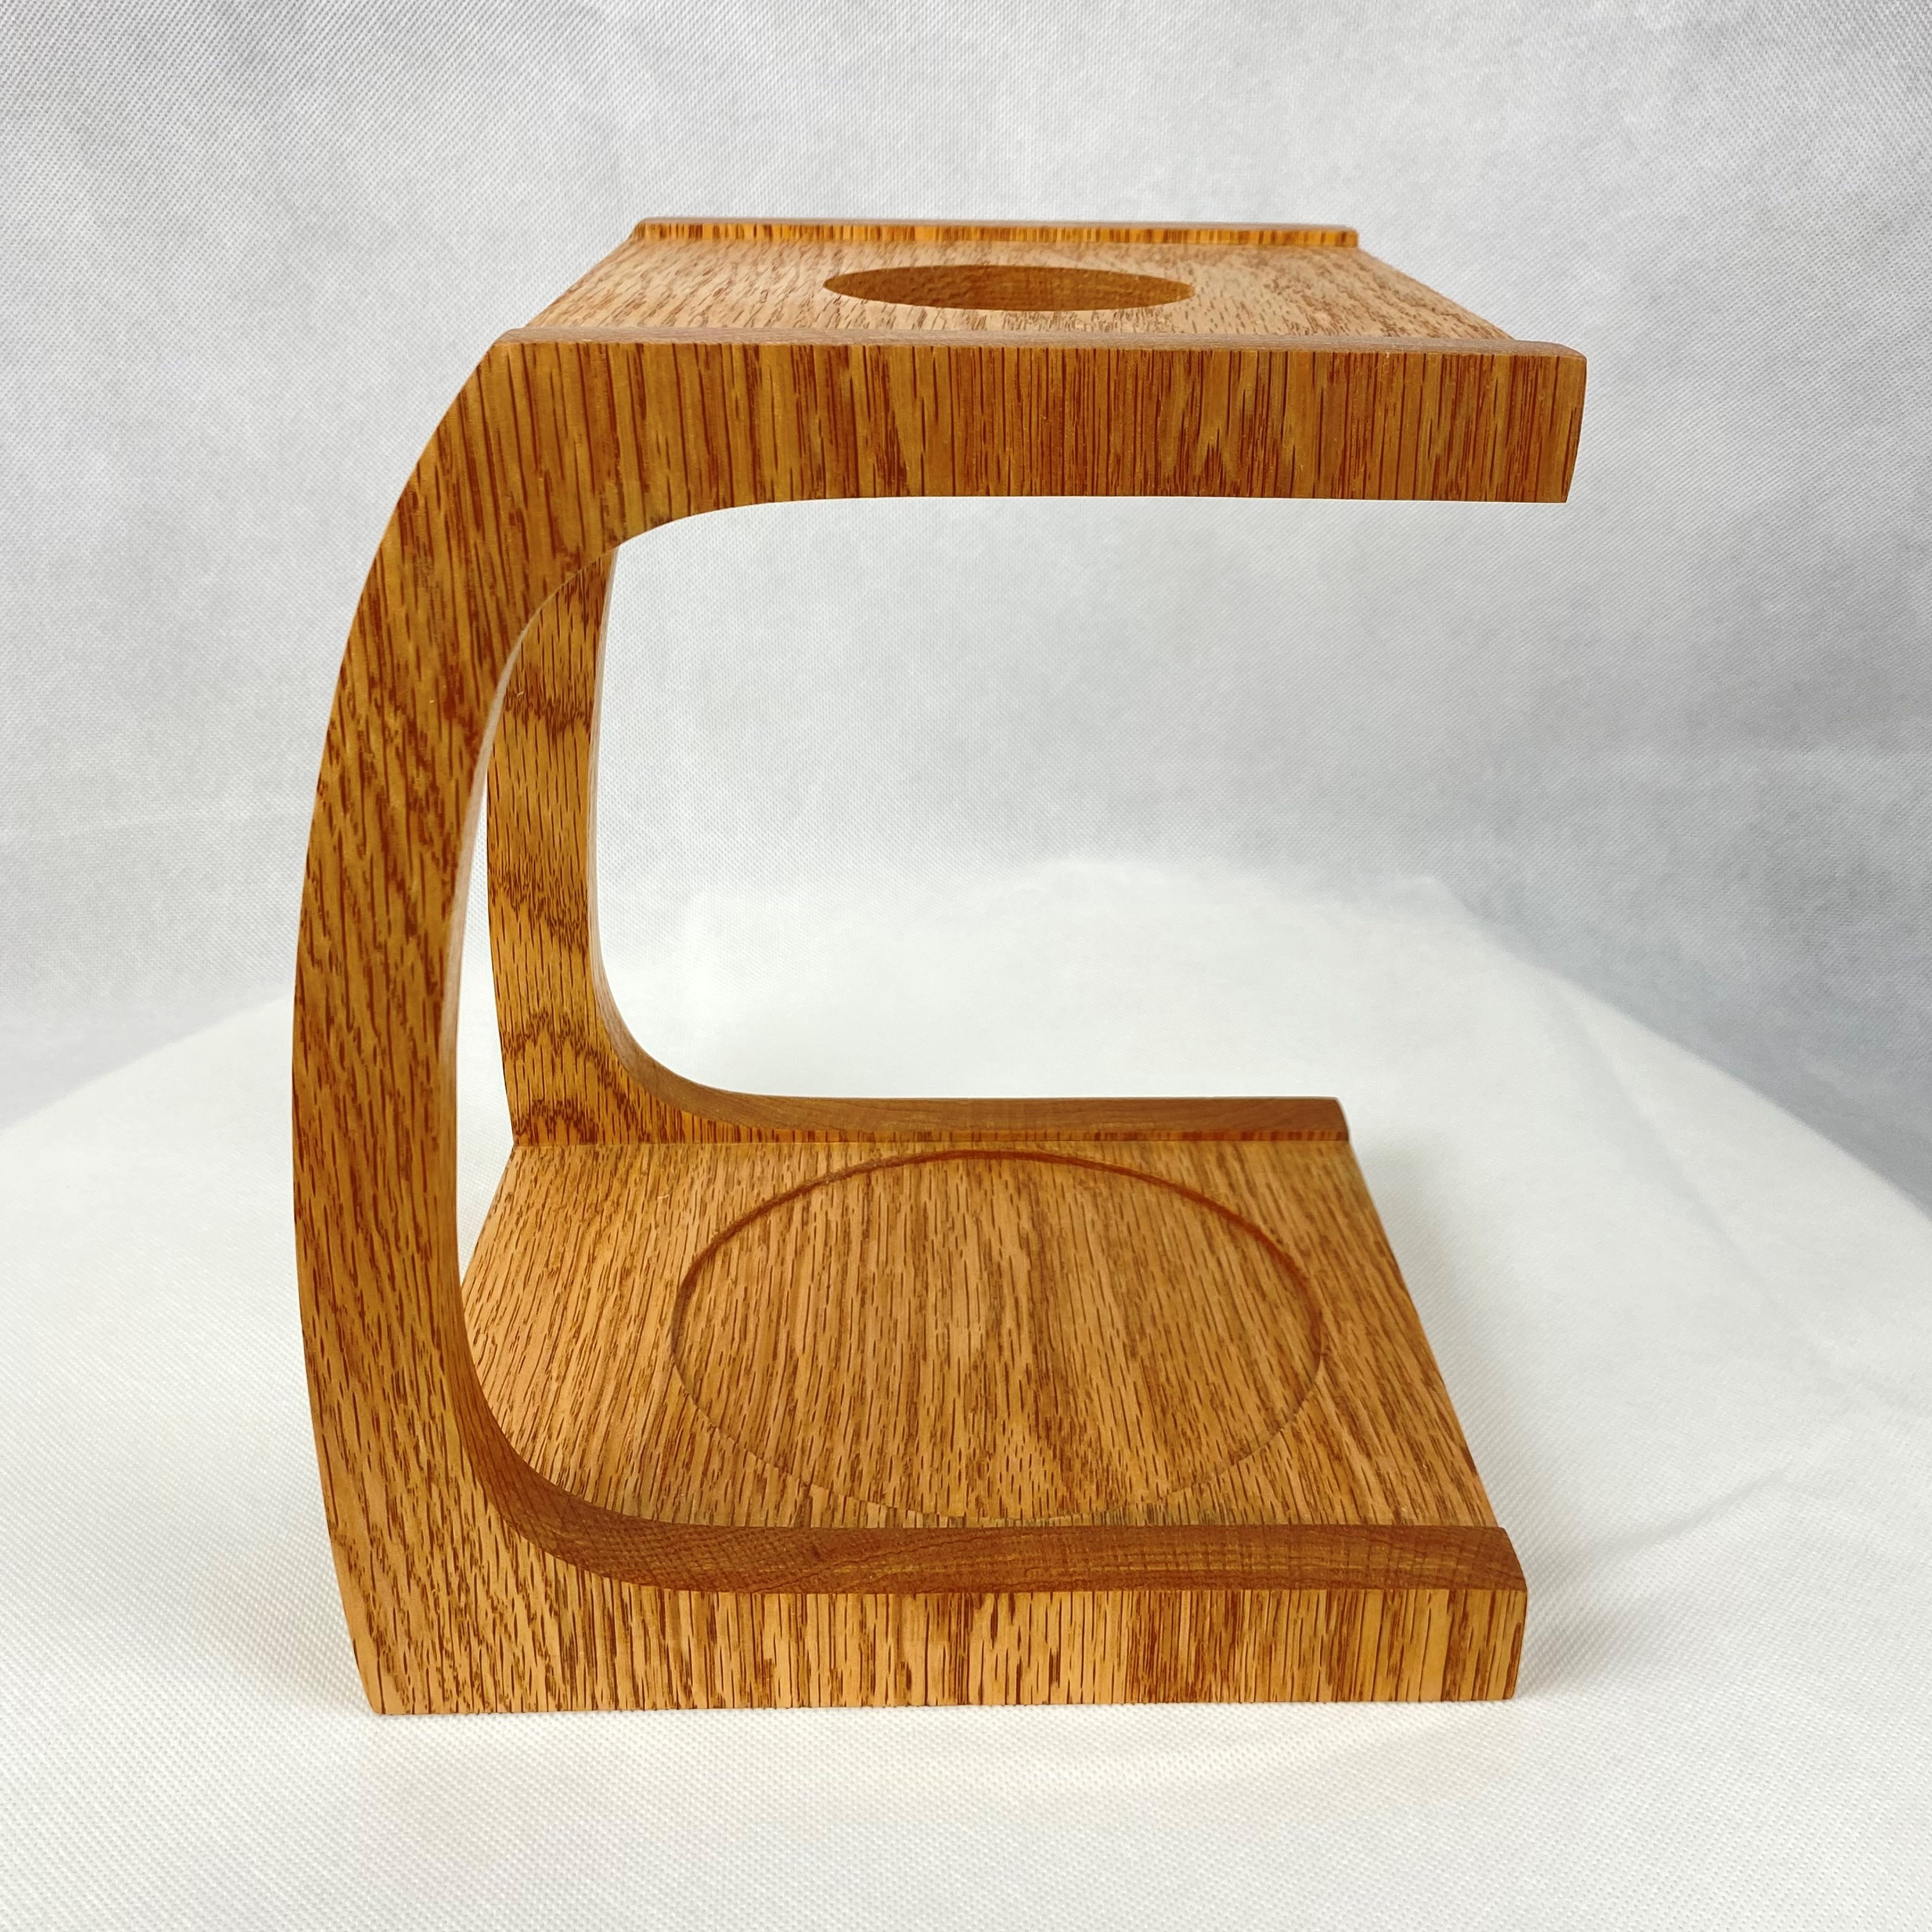
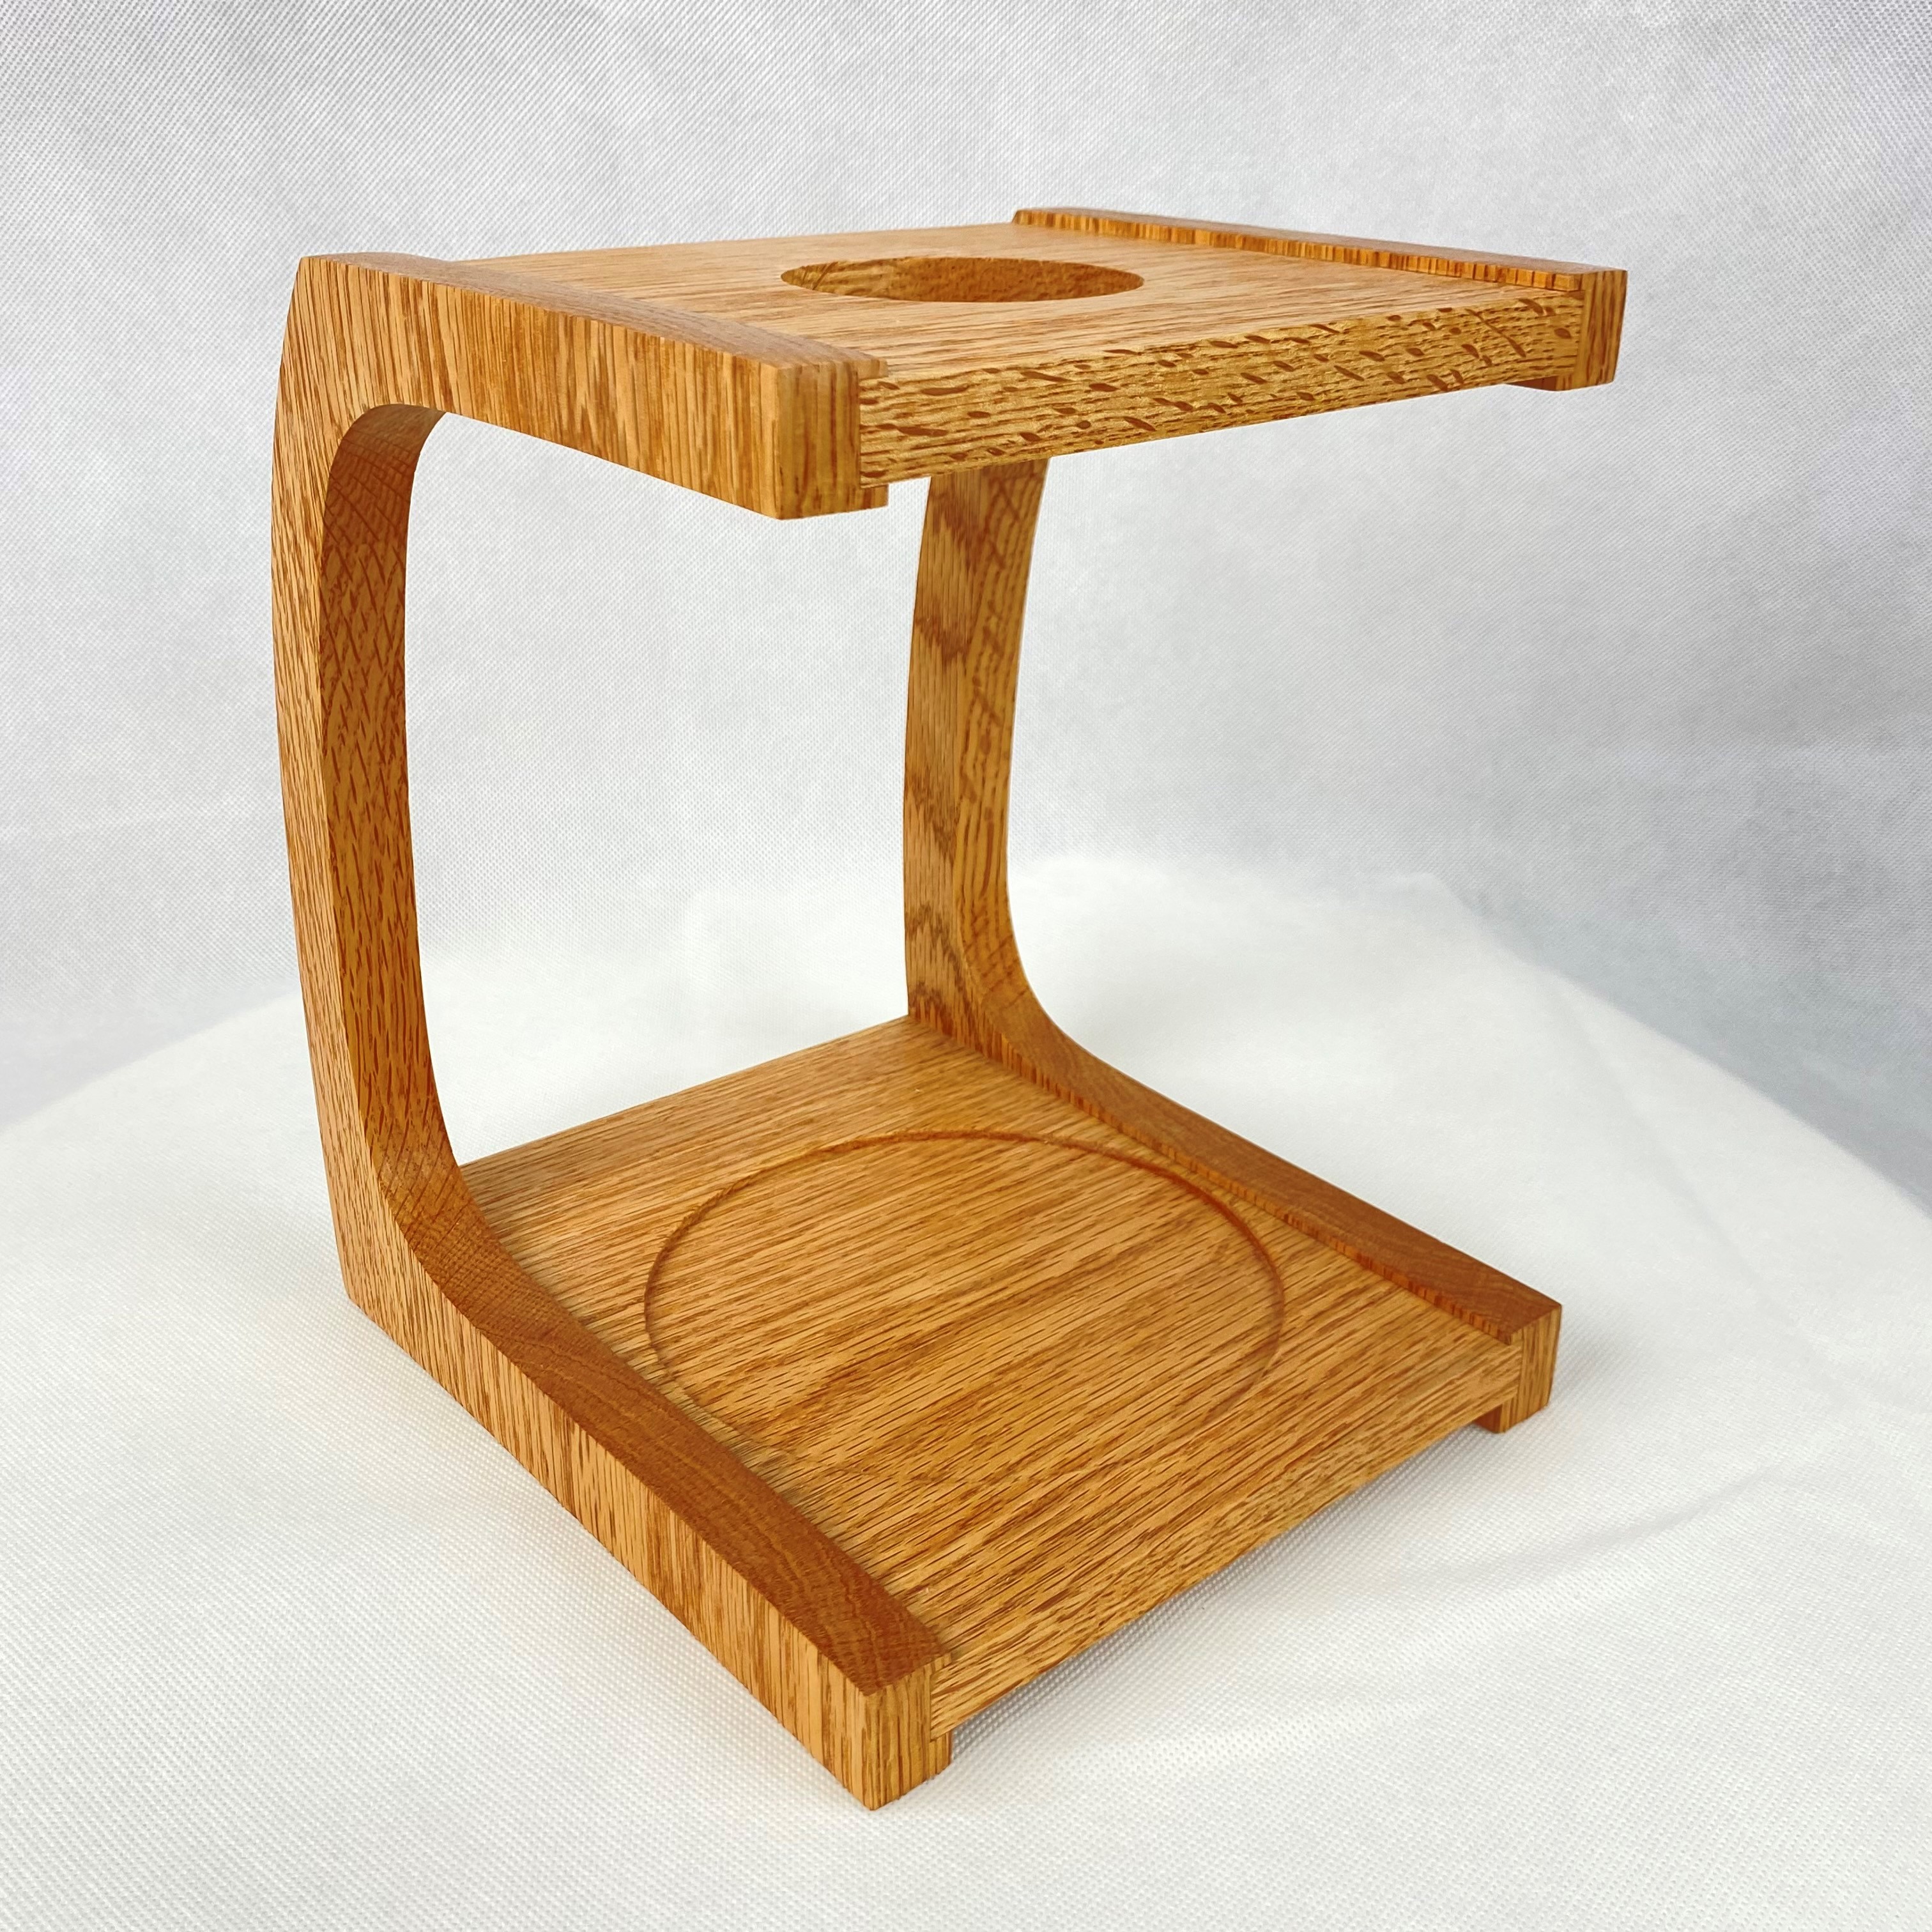
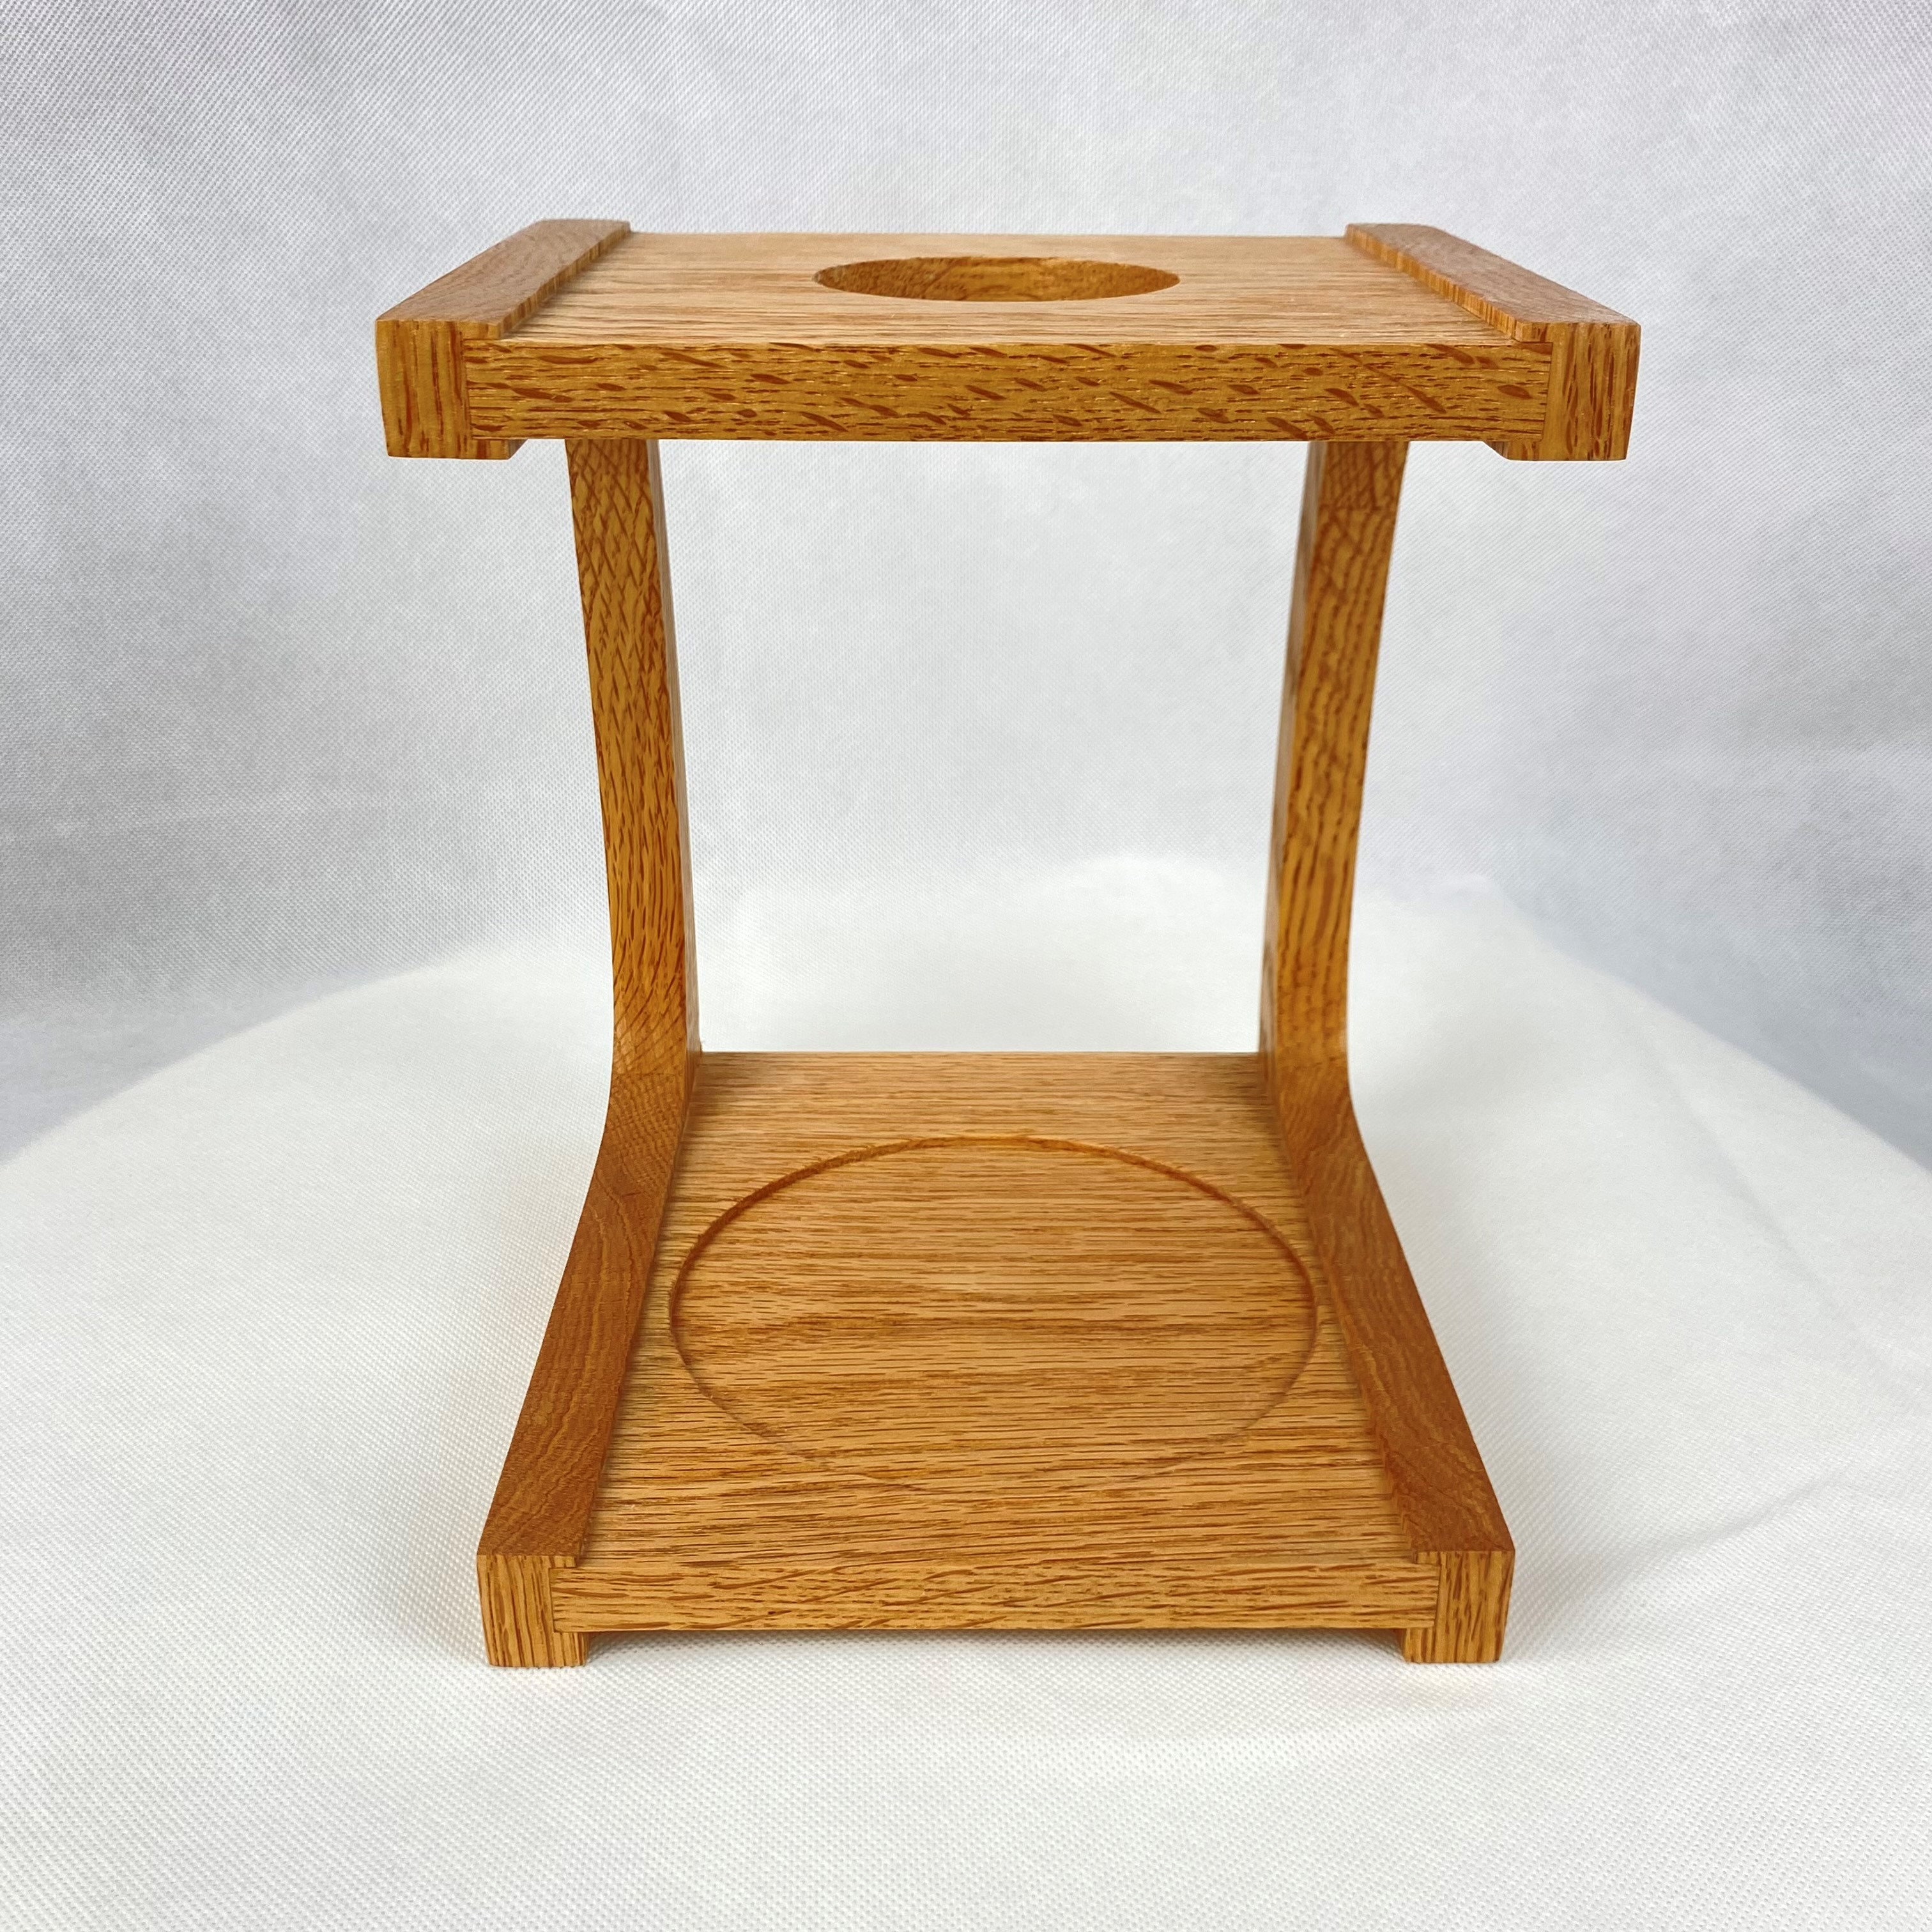
- Drip hole size to be compatible with various coffee drippers
- Make a recess to collect coffee droplets
- Able to fit a small measurement scale, to measure poured water
- Able to fit several types of coffee servers

Machining considerations:
- I had few failed attempts since i was cutting across the grain in some areas with an up cut bit which splintered the edges of the wood, i had to change the upcut with a downcut bit which solved the issue.
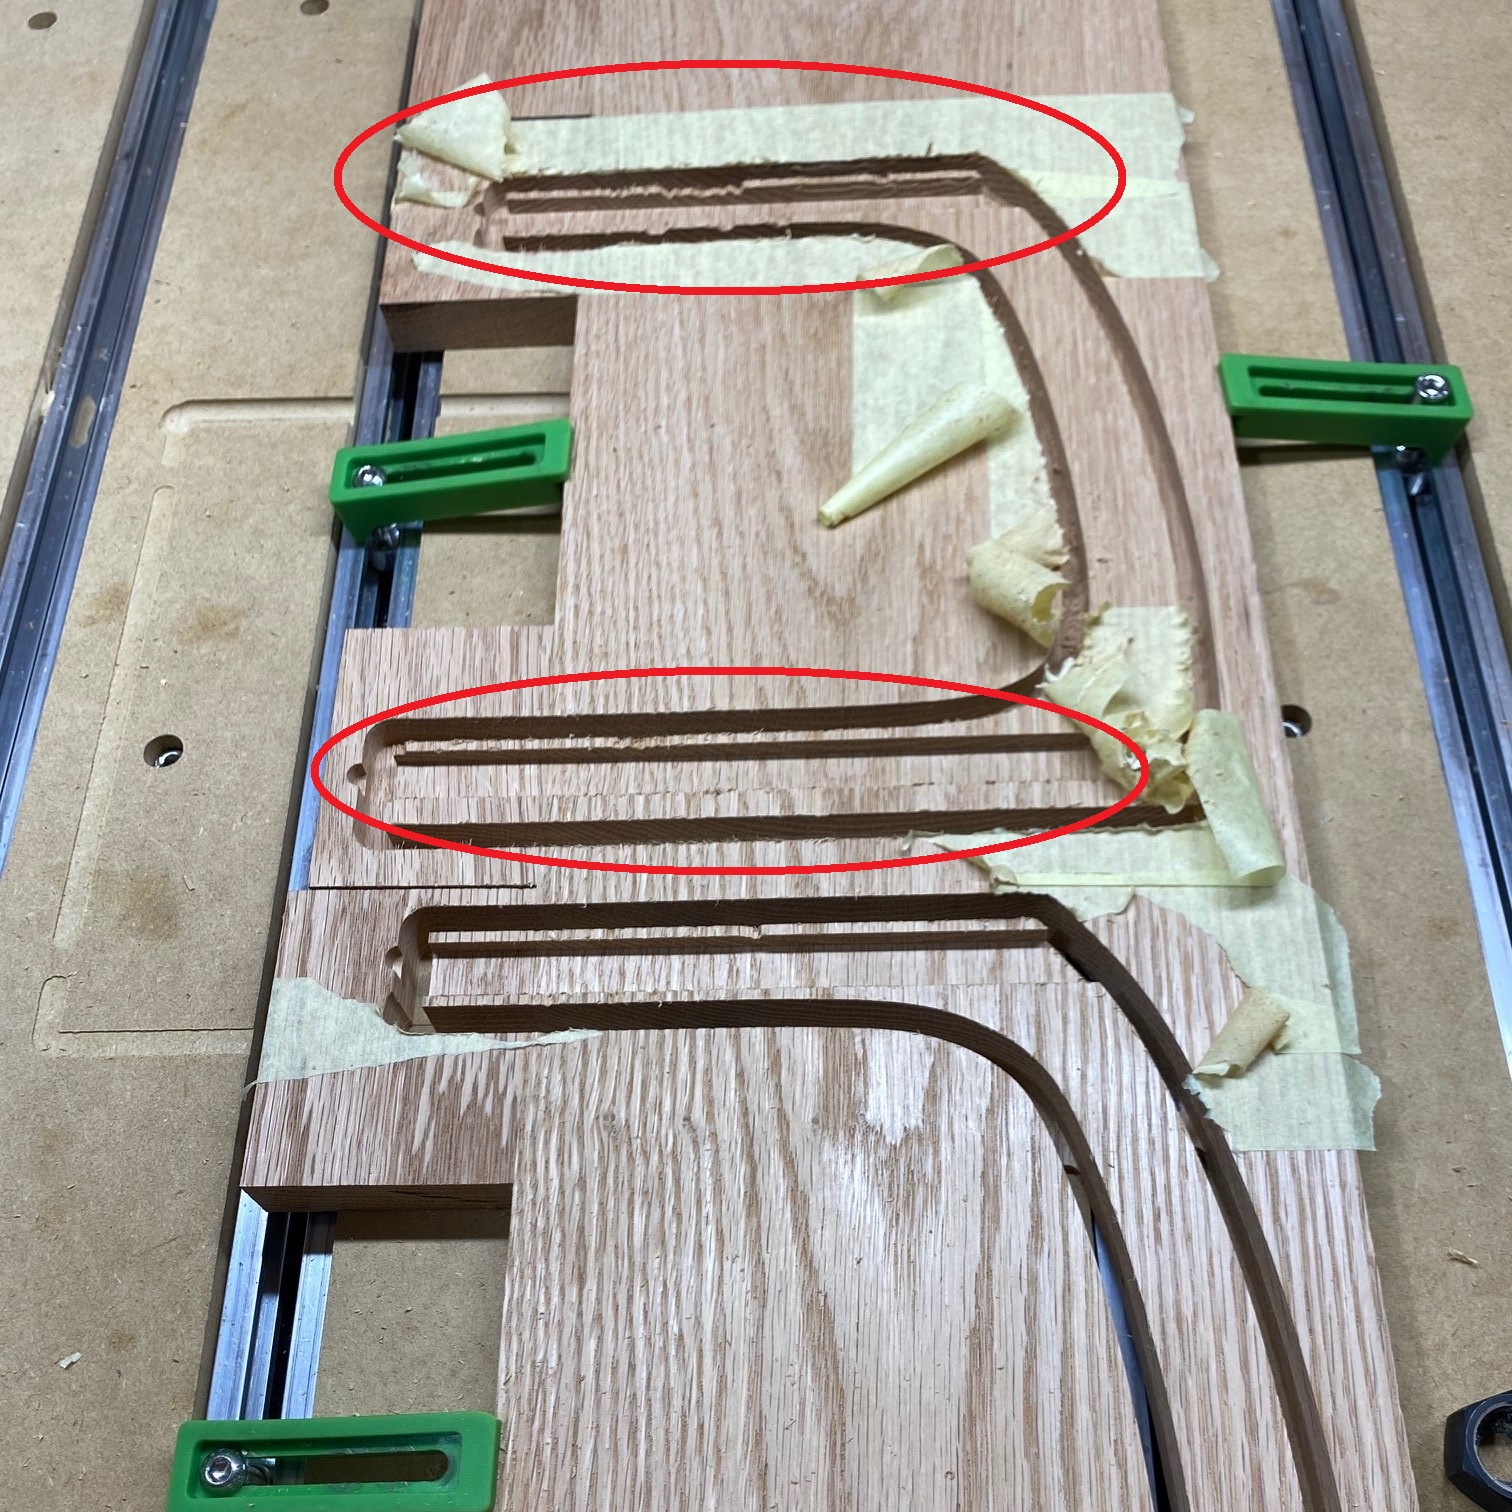
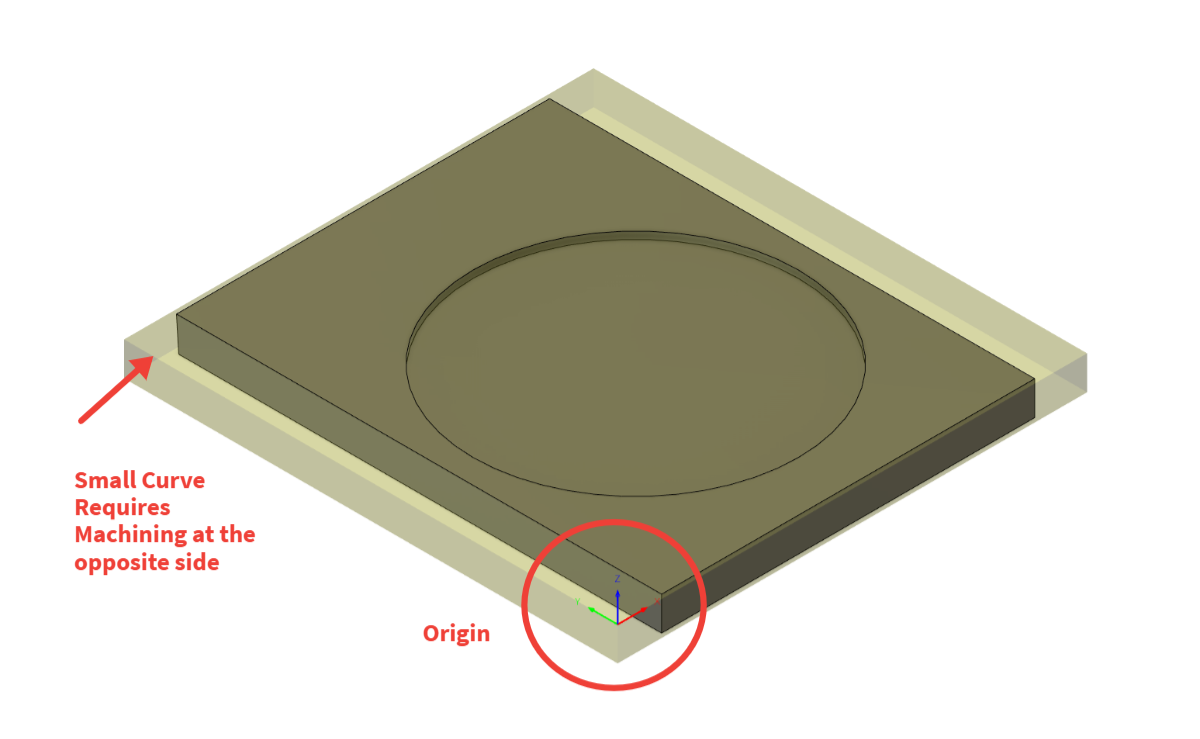
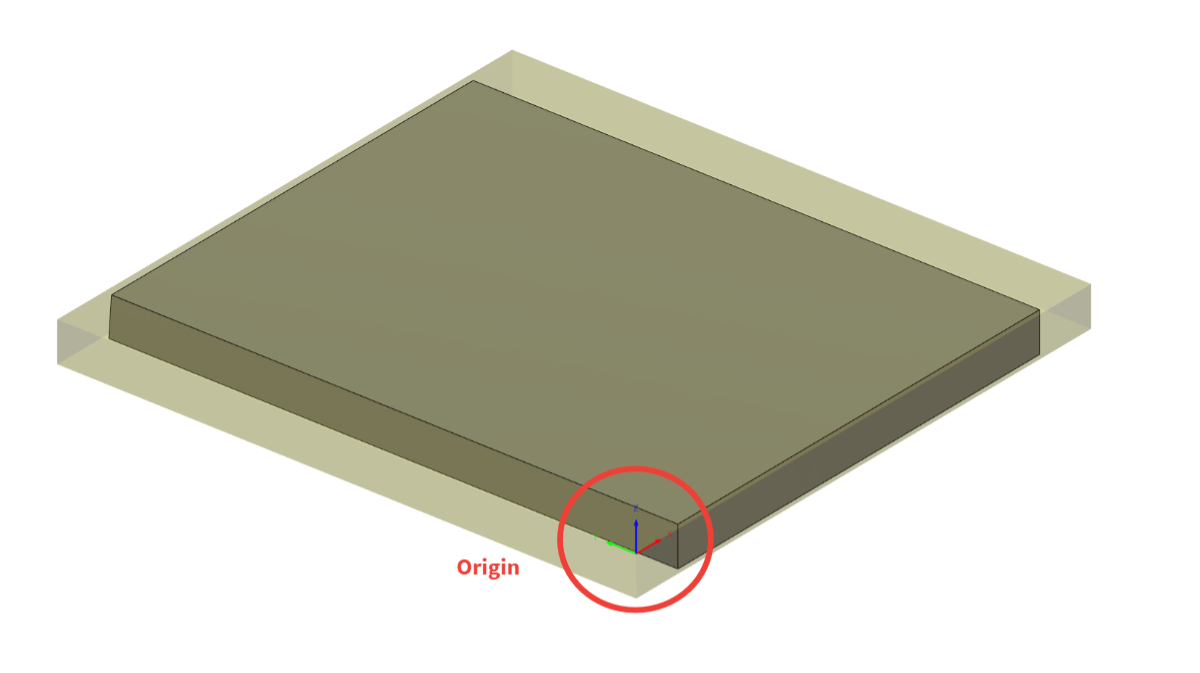
- Since some parts such as the lower plate required two side machining due to a curve at the edge. Therefore. I had to create two G-Codes in fusion 360 one for the upper face and one for the lower face. For this to work you need the origin point to be at the same location while maintaining a Z Axis perpendicular to the face that you will machine see below photos. After that all you need to do is to flip your stock before running the second G-Code.
- Parts were cut in two operations a roughing pass and a finishing pass to maximise the precision of cut parts, i left about 0.5 to 1 mm stock in the roughing pass to be cleared in the finishing pass.

Feeds & Speeds:
-
Majority of the parts were cut with a 1/4 inch flat up cut end mill, used a feed rate of 65 in/min at 18000 RPM. (Bit #201 supplied by Carbide 3D)
-
Curves were cut with 1/4 inch ball end mill, used a feed rate of 65 in/min at 18000 RPM. (Bit #202 supplied by Carbide 3D)
-
For grooves i used a down cutting end mill to minimise chipping with a feed rate of 100 in/min at 18000 RPM. (bit supplied by Amana Tool 46202-K)
Wood Finishing:
- Since i ran my stock (Red Oak) in a planer, sanding was reduced significantly. Therefore, I have used 120, 150 and 220 sanding papers consecutively. Then i have applied two coats of Danish Oil to expose the natural beauty of wood gran and for liquid resistance.