Community challenge #30: Gifts

I’m new to CNC and just got my Shapeoko 5 a few weeks ago. I grew up framing houses with my dad and he taught me how to use every kind of hand and power tool. I’m now in the software industry and enjoy combining my digital and tooling skills to produce physical things. While I’m new to CNC, I have a lot of experience with software development, 3D printing, and vertex-based modeling.

My parents built a cabin on a mountain in Wyoming in the early 2010s. In 2020 they retired and moved south. I have seen a few topo map cuts on social media and had the idea of making a topo map of the mountain where they built a cabin. This took quite a bit of research into data sources, GIS concepts, various ways of creating toolpaths, and physical testing.

First, here’s the “near-finished” piece, which was drying in this photo, hence the inconsistent sheen. I have a few more coats of oil finish and then I’m going to laser engrave the name of the mountain on the side, my logo on the bottom, and put little leather footpads on the bottom:

I started by experimenting with the most popular data source: Touch Terrain. It spits out STL files, which I am familiar with from 3D printing. While it’s a great tool, I didn’t end up using it because you have to do a lot of “hoop jumping” to get STLs into a millable format. But it’s worth mentioning for other users.

Instead, I used a data source called Tangrams which spits out grayscale heightmaps. I’m familiar with using heightmaps because I’ve done a lot of video game development and these are often used to create terrain meshes in video games. Carbide Create Pro can generate rough and final tool path passes from a heightmap!

I pulled various crops of the mountain area into Photoshop and other tools and experimented with how much area I wanted to represent and how much to exaggerate the elevation. I found that slightly blurring the image and exaggerating by about 2x gave me a good balance of distinct features that didn’t have too many sharp points or stepping due to the exaggerated Z.

With Touch Terrain, you can choose the exact exaggeration but in Tangram, you can’t. Heightmaps basically use the concept of “exposure” since the grayscale represents relative height not absolute elevation. Instead you have to experiment with the base height and absolute height. A little pro tip is to import that same height map like 5 times and increase the height by 1/16" or 1/8" each time and run simulations of each in the same file until you get an elevation that “looks right”. Then delete all the other heightmaps that you don’t want. Also, NAME THEM BASED ON THE HEIGHT. Once you hit “done” you can’t re-edit the heightmap in Carbide Create Pro (feature request: please allow editing). So creating multiple is a workaround. Note that I obviously care more about aesthetics than geographic accuracy.

Once I had figured out the data sources and tools, I cut my first test in cheap plywood. The biggest problem I had here is that my 1/8" ball mill has a really short shank and my router head kept running into the unmilled wood. On future cuts I would remove wood around the piece with a 1/4" downcut first to give the head plenty of clearance:

Despite the head crashing into the wood on every pass, the test cut turned out decent:

For my next experiment I laminted some cutoff walnut pieces together to create enough surface area to do a couple more. These were cheap tests but turned out nice enough to give as gifts to some of my other family that love this mountain… Notice on these that I milled away any wood in the rough pass that might hit the router head on the final pass:

Now that I had the process pretty much figured out, it was time to test it on the more expensive solid chunk of black walnut. I got this big rough cutoff from my hardwood supplier and flattened both sides with the McFly surfacing bit:

I oriented the wood so the finishing pass would be as aligned with the grain direction as possible, and so that the big divot in the side of the wood chunk would be milled away to a lower elevation area. Here’s the simulation (yes I took a pic of my screen because I was in a hurry)

It took hours to mill down the rough pass with a 1/4" downcut. Also I had to leave the vacuum pretty high so it didn’t hit the peak so it made a mess:

And the smoothing pass. For the distance between passes, I divided the mill diameter (1/8" ball end) by 4 and rounded that down to 0.03". It’s precise enough that I can see the original, raw sampling data so going more precise with your tool or pass width probably won’t improve finish by much:

To clean up the piece, I used a plastic brush to smooth toolpass lines and “fuzz” bits, and a green scratchpad to smooth it up. I am finishing it with Watco Butcher Block oil because I’m out of everything else and can’t get it in before the holidays.

So there you have it. I’m not including files here because my files were very specific to the place and this unique piece of wood. But hopefully I’ve given you enough information to make your own files and topo cuts of a place that is meaningful to you or your gift recipient!

15 Likes

This toilet paper tip is HAWT :fire::fire::fire:
Thanks for that!

2 Likes

I wasn’t sure if outbound links would get my post locked and I didn’t want all the stuff I wrote about topo maps to go away. So, if your google skills fail you, here are links to the two topo data tools I mentioned in my post above:

Touch Terrain

Tangrams

5 Likes

Well done! I really like the detailed tutorial with your piece. I’ve always wanted to do a Topography of my farm in Ontario but I may as well just plane a board flat and call it South-Western Ontario… Hahaha

2 Likes

Ditto for South East GA

Made for a customer who will use it as a gift.
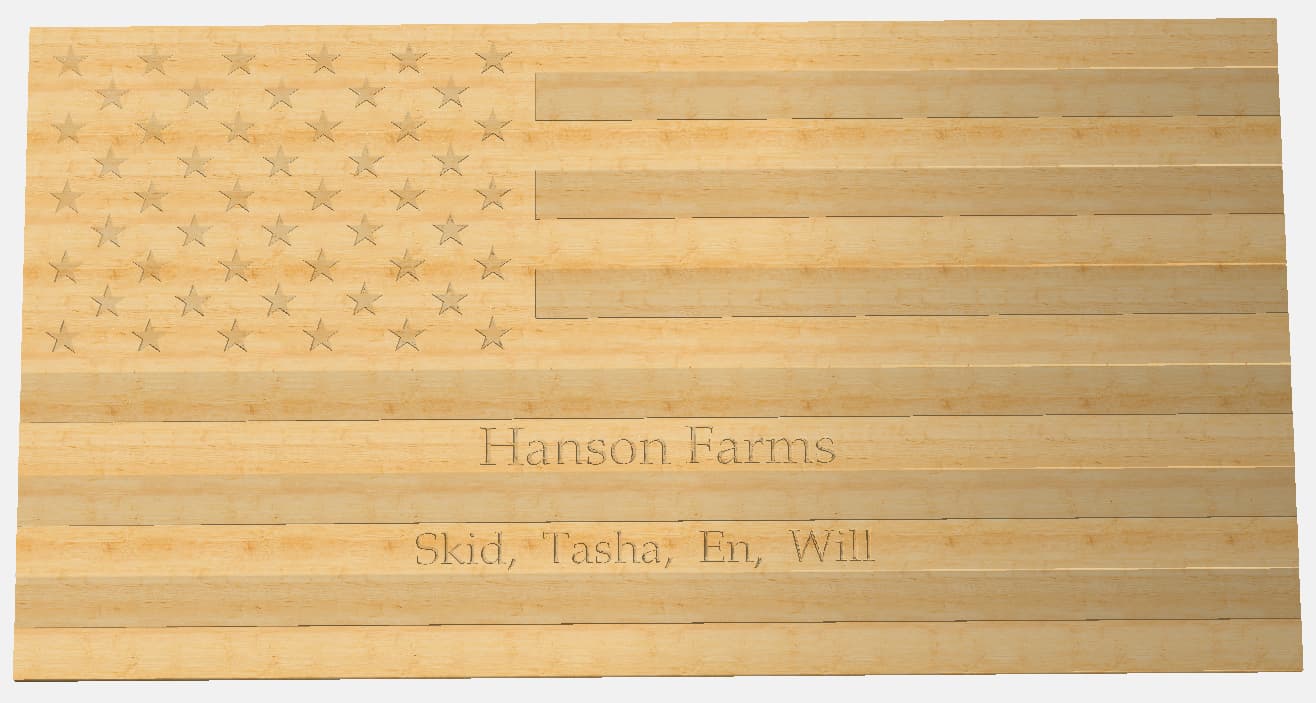
Original request

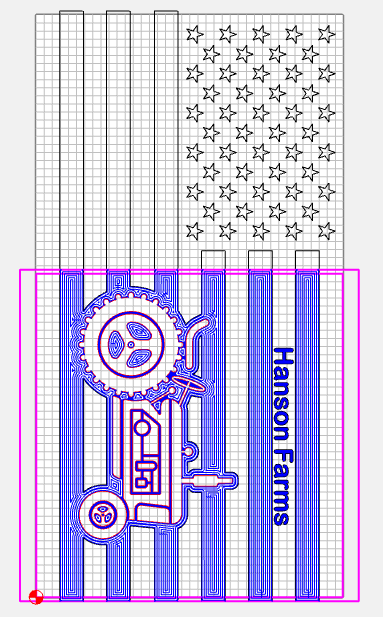
It went through several design iterations…

Based on the original request

image
image

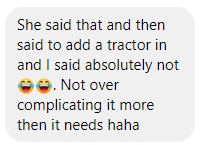
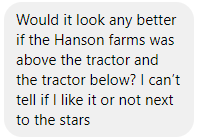
So I removed the names, and added a tractor

image

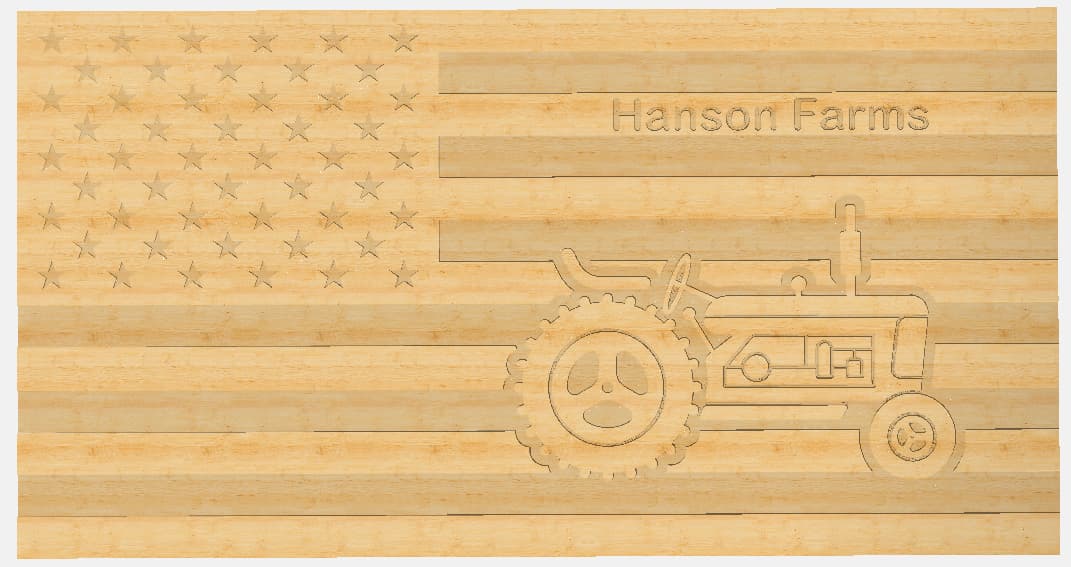
Final design approved.

19" x 36", so it’s going to require tiling. I did use the tiling feature, and set it at 20" so the overlap was between the tractor & the union.

I did a couple test cuts with the scrap to see how it cut, and decide what to do with the edges

On the machine

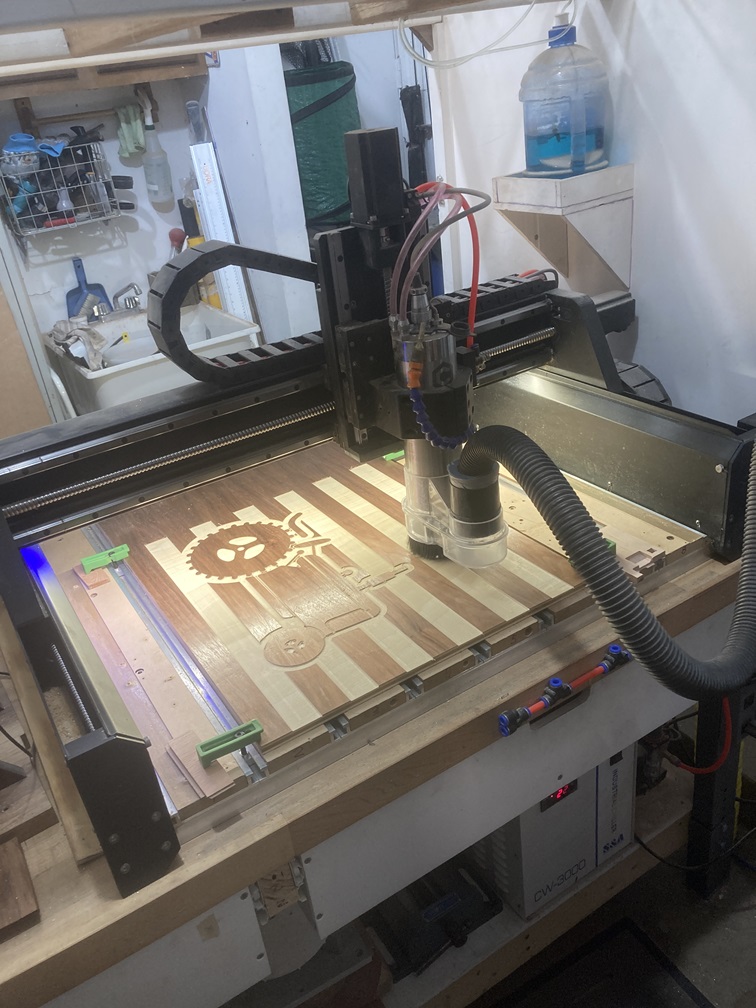
I did the first cut with the 1/4" endmill, then the 2nd with a 90° downcut V-bit.
On the 2nd tile, I left the V-bit in & cut that path first, then did the clearing path last.
I did get a slightly better result cutting with the V-bit first.
A good hard brushing with a stiff nylon scrub brush got rid of the ‘fuzzies’.

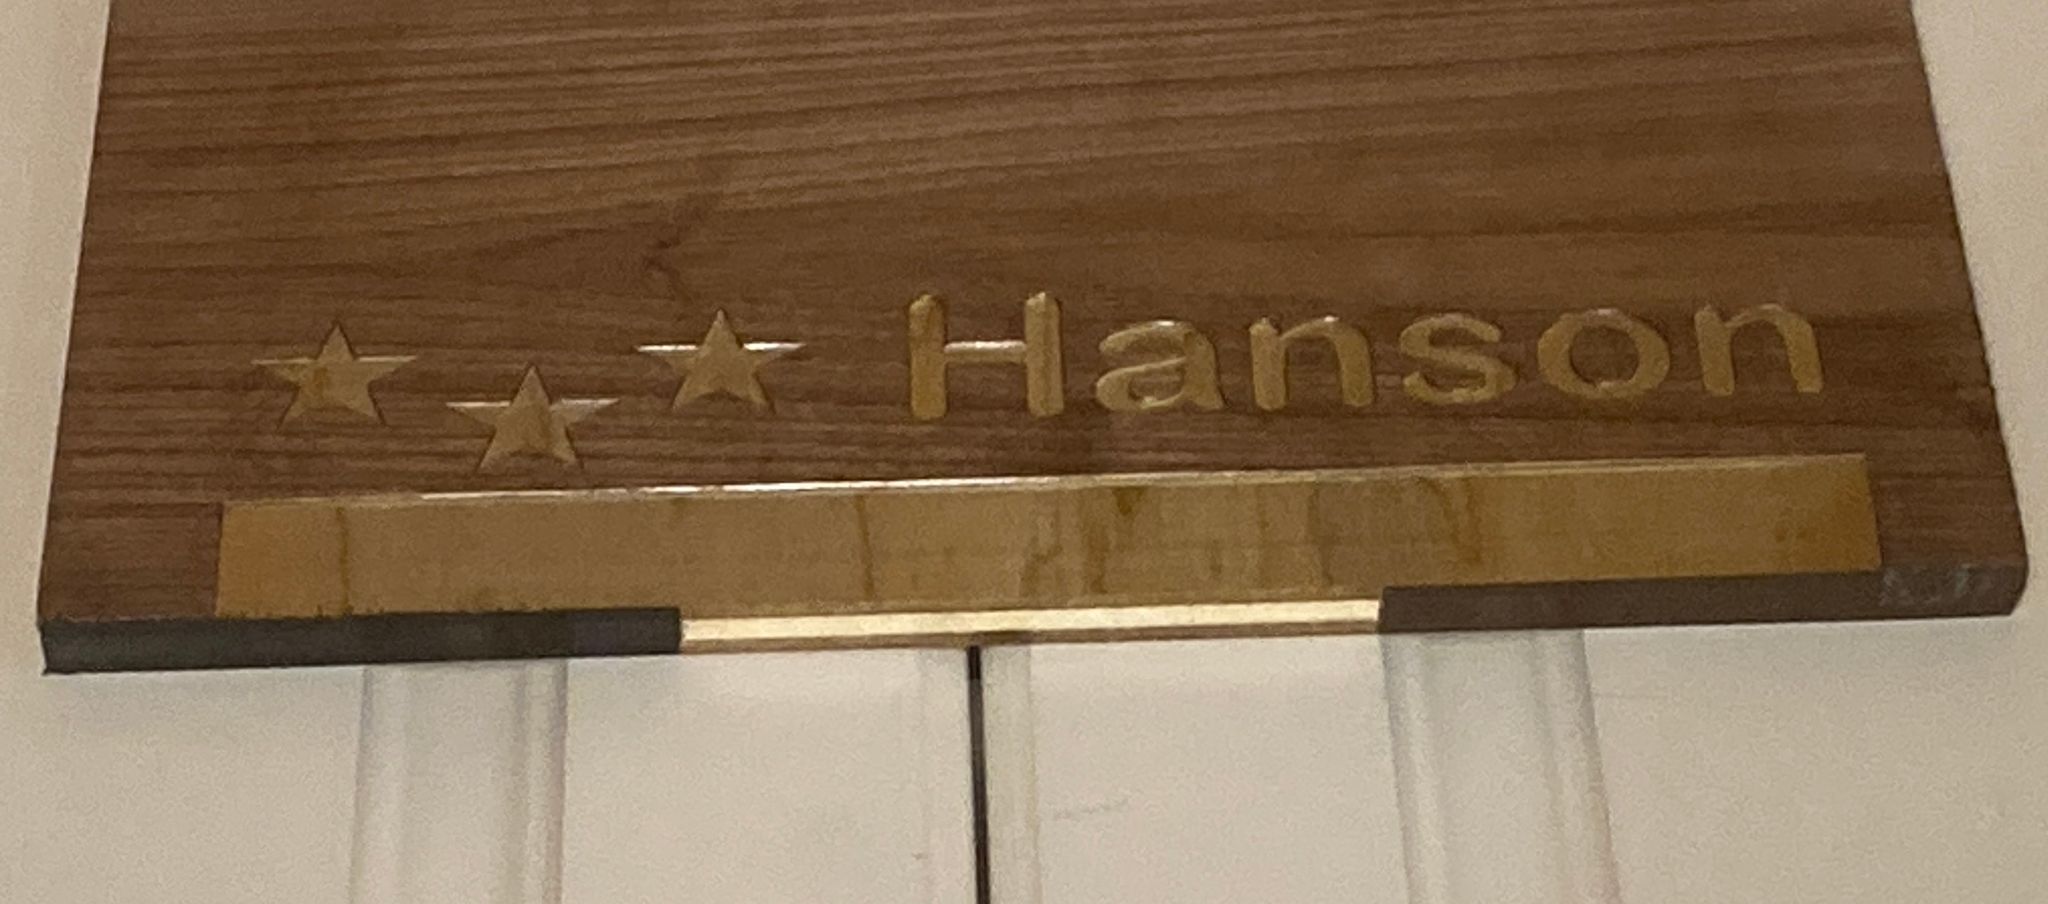
Finished product is 1/2" Walnut plywood with several coats of lacquer.

Chance_Wackerlin_Flag.c2d (484 KB)

14 Likes

Earlier this year my wife and I made a simple cutting board for ourselves and when my Mom saw it on a call she said she wanted one. We stepped it up a notch and made this one for her Christmas gift this year…I hope she doesn’t see this post before Christmas but suspect she doesn’t look at this site too often.

We started with a cutting board kit from Woodcraft and glued it up, planed it, joined the edges on the router table with a wide cutter and a shim behind one fence plate, then squared it up and had it all ready for the Shapeoko. The wood is Angelique (an African mahogany or relative of mahogany), Wenge, and Hard Maple.

We have a Shapeoko Pro XXL and I programmed up the cuts using carbide create and Shapeoko tooling with standard speeds and feeds for hardwood. I drew up the juice groove and minion-looking character with the cleaver in each corner. I happened into some luck programming by putting the little guy in one corner, programming it, then going back and patterning, then rotating the other three. The software updated the cuts to handle all four with no extra programming…thanks Shapeoko for that cutpath link checkbox! I made the juice groove by a slotting with the 1/4” cutter, then using the profiles for the inner and outer edges to run contour cuts on each one with a 1/4” ball nose. It came out great with excellent z repeatability between those cuts.

After it was all done I ran the vertical corners through the router table with a 1/4” round over bit, then put a 1/4” bevel on the bottom to give my Mom something to get her fingers under for picking it up. I sanded it up and applied some mineral oil. Here it is…


15 Likes

Our Shapeoko Pro and JTech laser attachment have been very busy this last month…as is standard when getting new toys! Saw some posts on laser forums about coloring kits that the kids can paint individual layers then glue together to make a scene, so I figured we’d give it a go. Made these for a friend’s 3 boys to paint over the break and it sounds like they’re going to be a hit!


10 Likes

As I said…our Shapeoko and laser have been busy! Wasn’t sure if I was supposed to put these as the same entry or multiple, so I went with multiple posts. I volunteer in our nursery at church and we wanted something special for them to do for the Christmas Eve service. We opted for ornaments they can paint and take home with them! Pretty simple design (necessary when talking about toddlers) made with AI - first design I’ve tried AI with and I’m pretty happy with the result! I used Carbide Create to edit all of the nodes then exported it into lightburn for the actual cutting. 1/8” wood, so nothing too thick or difficult to get through.


5 Likes

Last one, I promise! Designed and made this one for my son as a Christmas present. This one, specifically, ended up going to a friend who helped me add to / improve upon the design. 1/8” plywood with 3 different layers. Used a Borax solution to try and get the engraving a little darker, but the air assist blew around so much soot that I had to clean the engravings - still trying to figure out how to prevent that, so if you have any tricks, I’d love to hear it!


9 Likes

scolba Entry 1 - Ravenclaw Sorting Plaque

The Process
My wife’s side of the family does a Secret Santa style gift exchange amongst the siblings and siblings-in-law. So rather than getting something for all, we end up getting something for just one individual. Most of the time, this ends up being a better, more meaningful gift, because we spend more time on it rather than just hitting the Amazon wish list.

So this year I drew my wife’s sister. As described in a post here asking for help, she is a nerd much like the rest of us, but her and her family’s nerddoom lies with the Harry Potter universe. She had been "sorted’ recently, so I thought it would be fun to create a house plaque for Ravenclaw.

As I started to research it, I landed on other details like the Ravenclaw Traits, the year of sorting, etc. After several iterations of design, scouring the web for free fonts and vector birds, and with help from several forum members and the C3D folks, I landed on what you see in the images here. Don’t blame them for the poor finishing, though. Thats all on me. :slight_smile:

Mistakes and Lessons Learned
Oh boy. So this could be a long post. So having purchased my S3XXL on December 8th, I really jumped in doing too much, too fast. Though, the vids from @KevBarn14 really inspired me to just get cutting, and I sure did. This was the first real design or project that I have done, and the learning process took me into late nights after the kids were in bed, which no doubt compounded some of my issues.

Really these are the big take aways from this project, though there is some overlap with some subsequent entries as well.

  • 7.1875 != 7.375
  • If you are really close to the edges on your stock, make sure its positioned correctly in the file, or you are going to run off the stock.
  • V bits don’t need to be that deep to be effective for small details
  • V bits can’t do it all
  • I need more (bigger variety of) bits!
  • Correct measurements of depth of stock is critical
  • Spray lacquer isn’t a miracle worker
  • The videos from my.carbide3d.com are great and will save you a lot of time if you start there rather than just jumping right in
  • My planer is terrible
  • Plan on using more stock than you think…something is going to go wrong.
  • Plan Ahead - Big box stores, and even some specialty woodworker’s shops don’t have smaller bits available or in stock.
  • I have a lot to learn

Ravenclaw Sign_ConvertedText_Texture.c2d (1.1 MB)

8 Likes

scolba Entry 2 - Family Ornaments

The Process
This one was inspired by an early google search after I decided I can make a bunch of presents this year. I saw one (though I’m still not entirely sure how they did it) that was laser curt, and multiple layers with balls ornaments and names like these. I thought to myself, self, that shouldn’t be too hard to whip out in an afternoon. Ha.

I started with the design. I learned a lot about text from my other project, so had a bit of help with this one, converting to curves, then trimming the vectors.

I ended up going through several iterations in MDF, before trying other materials. I tried plywood first, but I don’t have any down cut bits yet, so that quickly became apparent it wasn’t going to work. Oak didn’t work, because oak. All my cherry and walnut is 4/4 and 5/4 and I couldn’t find any locally that was thinner. Ultimately I ended up resawing and planing the cherry down to about 3/8.

Mistakes and Lessons Learned
I really didn’t realize how small these letters and numbers had gotten. That combined with trying to jam them together, so they fit on a ball makes some of them nearly unreadable. At one point I was curing my family for giving everybody such long names. :smiley: My niece, Charlotte, is barely readable, and my nephew Callahan…is just Cal. So I guess I mean to say that my mistake and lesson on this one is…I shouldn’t get so locked into a form factor and make sacrifices because of it. If had done an oval ornament, or a tree instead of ornament as the decoration, it would have been more interesting visually. An added bonus is then I wouldn’t have to worry about if my niece is upset because her name isn’t very readable.

  • Be flexible in design. There are lots of great ways to accomplish similar goals.
  • Thin, raised letters are hard. I feel like this is a level 200 type skill that I’ll get eventually.
  • V bits can’t do it all, as in they have a lower limit to detail
  • I need more (bigger variety of) bits!
  • UNIFORM depth of stock is critical
  • Spray lacquer isn’t a miracle worker
  • Plan on using more stock than you think…something is going to go wrong.
  • Plan Ahead - Big box stores, and even some specialty woodworker’s shops don’t have smaller bits available or in stock.
  • New bandsaw resaw blades cut like a hot knife through butter. Stop using your old one because “it still has some life left”. Ask me how I know. lol
  • I have a lot to learn

2023 Ornaments - VCarve.c2d (980 KB)
*Pardon the angled ornament - I was trying to avoid a bark inclusion

9 Likes

scolba Entry 3 - Family Puzzle

The Process
This one is for my Mother in Law (all of these entries are for my Wife’s side because we are celebrating tomorrow 12/23. My side doesn’t celebrate until new years, so I have some more time for theirs! :D). I wanted to make her something that means something to her, and to me as well. This one sort of hit me in the middle of another conversation. Kind of a eureka moment.

She really enjoys puzzles. She isn’t the type to sit in one place for more than a couple of minutes. So she almost always has a puzzle out on their big island in the kitchen. And as she walks by from doing one thing to another, she will always stop and find a few pieces, and then move on. Well…turns out, I like puzzles too! I just didn’t know until recently, when she started bringing her puzzles back out after a kitchen reno there. So my enjoyment is directly from her, so you can see the tie in there.

So the rest is fairly formulaic, and seems like is an Etsy staple. Each family is a piece, the pieces fit together, etc. Originally it was going to set into a round base with a 1/2" pocket, that would have a keyhole for haning on the wall. Then I was planning on setting neodymium magnets in the base and into each piece so you could remove them. However after making the base, and cutting the pocket, it turned out to be scaled incorrectly. So it got scraped in favor of time.

I didn’t want to just buy and Etsy file and go nuts…though in retrospect I would have saved myself a lot of headaches if I had - but I also wouldn’t have learned as much as I did. I googled, found a suitable file, converted it in Inkscape, imported into CC, and then went through probably 4 different versions, and after a series of CC crashes, me not saving correctly, learning how to actually manipulate nodes, I finally had my files for my pieces and base.

Mistakes and Lessons Learned
This is probably my most frustrating experience so far. For design I made some stupid mistakes and didn’t save when I should have. For the cutting part…my machine kept disconnecting several times during the cut, and so I would have to start over. I had to start over 3 separate times. Additionally, the router was revving up and down like it was running super rich…and eventually would almost completely shut off before spinning back up. The TL:DR version of this story is…its not static (though I do plan on adding grounding wires), its not the brushes, it was what I thought was a good heavy duty power strip from Stanly. So the lessons learned for me on this one are:

  • Save Often
  • Use directly connected outlets
  • If cutting parts that are meant to nest together, print out paper versions of the plan first to make sure you scaled things correctly.
  • Don’t just add a chamfer without double-checking the text. (Facepalm)

Howie Puzzle Pieces Heart.c2d (644 KB)
Howie Puzzle Base.c2d (716 KB)


scolba Entry 4 - Love Multiplies

The Process
Ok last one for me, until at least next week! :smiley:

This one is for my wife. So we had our first kiddo 2.5 years ago. The little dude is just the best. As we found out we were going to have another one (surprise!) we had talked candidly with our families about how we were a little worried about another…we love our first kid so much, how could we possible love another one that much?! My wife’s grandmother had been asked that same question before and her response was, love doesn’t get divided. It multiplies. She is gone now, but the family choses to remember her with that quote. I don’t plan to point out many others have been attributed with it. :slight_smile:

So that’s the scope here…this is a representation of our little family, with that saying in a partial banner across the top.

So for this one, I don’t remember what inspired me to do it, but I was thinking about how cool it could be if you could undercut with like a t-slot bit for some different effects. I don’t even know if that is possible, but instead of going that way, I spit it into two parts. A textured pocket behind, and a contoured top.

I was hoping to use light wood, as maple is my wife’s favorite, but availability and time became an issue. My maple isn’t wide enough for the base I made first, and my thin birch plywood version just didn’t work - don’t have a down cut bit. So more resawn cherry it is!

Mistakes and Lessons Learned
I learned a lot with this one trying to get the different pockets to work. Even now as I look back at it after doing the puzzle project, I see how sloppy it is, and how much better it could be. The biggest challenge I had was trying to get the hearts to stay together for support, but still give them definition. I ended up using a vcarve bit on a contour pass, and then cut the negative space out afterward. It left something to be desired.

I actually screwed up quite a bit on this one, and it’s got a lot of blemishes (that are hidden in the photo!)

So here are my takeaways on this one.

  • My 1/8 single flute doesn’t go all the way through 7/8 stock.
  • A dull flush trim bit will cause tear out
  • BitZero is awesome, but it does not set the angle of the stock along the Y (for some reason I had it in my head that if my stock isn’t parallel to the beam, when I probe with BitZero it gets the measurement, sees the angle and adjusts accordingly. No idea why I assumed that, but there’s not enough data gathered there to even tell, and that assumption, and careless angle with slim margins cased me to go off the stock)
  • I need to get better at creating pockets along common pieces.
  • Adding some sort of locating pin or slot feature to the top and bottom pieces would go a long way to gluing them together.

sign font family.c2d (316 KB)
sign back textured.c2d (132 KB)

Btw - in case you are wondering, it does indeed multiply. Our daughter is 8 months now and is also, just the best. :smiley:

10 Likes

This piece is done on Shapeoko 3XXL with basic Carbide Create. Base is 3/4" MDF, and the layers are 1/4" MDF. After the barbed wire was cut, i used a pointed roundover bit on the edges to give it some detail. The perimeter side edge was hit in random pattern with angle grider to give it a distressed look. After it was all painted it was flooded with clear epoxy.

Cougar Ink / Brad’s Custom Signs

17 Likes

Nicely done, @brahau65, both the project and the video!

2 Likes

Made using my Shapeoko 3 XXL (with it’s OG belt drive Z axis and dewalt router)

The Process:
Poem was written by a friend who wanted to customize a project for her mom for Christmas. We came up with the idea of a small serving board that can be used for both display and using food-grade finishes (just in case) featuring her poem.

I designed the file originally using her own handwriting. After importing into Carbide Create and sharing the design, she was too critical of her own handwriting - so we opted for a handwritten font instead. And of course, the font she chose: Every single letter needed clean up (deleting and/or smoothing nodes) so that was a bit of work.

It was a 2 hour cut with a 60 degree vbit. Material used is maple. Then a simple #201 end mill for cutout.

Lessons learned:

I cut the board, and sealed with mineral oil - and as soon as I poured in the epoxy, I knew it was not enough to hold back the pigment and I had a ton of bleed into the surrounding wood almost immediately after pouring the epoxy. We originally had chosen black for the lettering but it was much too stark and harsh for the design.

Second attempt: using epoxy resin with mica powder only. I went with a bronze brown color to align with the warmth of the maple and it was a wonderful choice.

Very happy with how this turned out!


9 Likes

[Full Tutorial Video ](2023 Gatton CNC Christmas Challenge https://youtu.be/Pu0gCng4d_g)

Linked above is the tutorial video for this 3 stage epoxy light up Christmas tree I designed and build for my mom. This was also a submission to a different holiday contest I found for cnc users. Wish I knew about carbides before! Just found this post today haha

The file was made from canva then edited in carbide create. I designed and carved the back to fit the lights custom.

First step was to Carve and pour epoxy 3 times on the front side before surfacing. Then flip it over and pocket out the areas for lights and custom fired back cover. Tons of time in carbide create making all the vectors and toolpaths.

No major mistakes, but I don’t like how dim the lights are or how they are fitted. I would get stronger lights for sure next time.

6 Likes

A serving tray on which to present some treats for my father this Xmas. I’ll happily post the files, though design was done in Carveco Maker, so the designs are in .art and not an accepted attachment type. The toolpaths are in .nc (Shapeoko post-processor, mm), which will be attached at the end. Carving and shape cutting performed on my new-last-month Shapeoko 4 XXL.

My dad had a Brittany Spaniel when I was a kid and that dog went with him everywhere. His favorite dog, even 30 plus years later. He’s not very mobile and has some issues with his grip now, so a lap tray with easily grasped handles should also be useful for him.

The tray started out as an IKEA cutting board. The handles are from some scrap hard maple stock I milled down to 3/4" for this. I intentionally used the piece with a little extra spalting because I thought it could use the contrast.

  1. Trimmed the beveled edges and of course the IKEA logo off.
  2. Ran the v-carve using a 90 degree, 1/4" v-bit, 1/8" up-cut bit for roughing.
  3. Sanded back the original oil to clean bamboo, especially since these cutting boards are not very well-smoothed or flattened.
  4. Ran some maple over the jointer and cut to length, then surfaced the other side on the Shapeoko, using a 3-wing, 1" surfacing bit.
  5. Ran the profile cuts for the handles with a #201 (1/4" up-cut).
  6. Drilled 3/8" dowel holes into the handles and top of cutting board so no fastening was visible.
  7. Eased all edges of both the board and the handles on the router table using an 1/8" roundover bit.
  8. Sanded all surfaces to 180 grit.
  9. Glued handles to board with dowels and let glue set.
  10. Coated with food-safe mineral oil and let set for a couple hours, then wiped it down.

The main thing I learned on this one is that I have zero luck with Oramask. I intended to color-fill the v-carve, but my roughing pass shredded the masking beyond use. That’s both my main mistake and something I learned I need to find a better method for. No matter how clean thy surfaces I apply it to are, unless I am using only a v-bit, the stuff either pulls up or shreds on me.

I just realized I could reverse the tooling order on these. Well, I’ll give that a try for my next attempt using OraMask on a carve!

TrayHandles.nc (71.6 KB)
Spaniel_VCarve.nc (412.4 KB)

8 Likes

IMG_2602
my 3rd carving,

7 Likes

Made using my Shapeoko 3 XXL

The Process:
I found original idea I believe on this site many years ago and decided to give it a shot. They look nice and are perfect not just for newlyweds but also I am making some more of these for all my dear friends who have been married for a long time.

The longest time-consuming part is making re-creating the many long sweeping vectors in the big “illuminated” letter. Converting from a raster image into vectors, then painstakingly cleaning up extra vertices for the many curves in all the flourishes. Once its done it can be reused of course …one letter down, 25 more to go for other names!

Everything was cut using a 60 degree v-bit. Except for the final cut out. However its Ieft in place for the next and final CNC step , to flatten and remove epoxy. Same .25 endmill for cut out was used for final epoxy surface removal. More to come on that….

Lessons learned:

Making sure your environment is safe and stable. I tried to run another quick layer removal after a power failure due to overloading my circuit panel. I though I could get away with it since absolute zero didn’t matter for simple surface g-code boy was I wrong….TBH I think it was because I didn’t tighten the collet enough.

Second attempt: I was not watching when the next incident occurred, and I almost cried when I realized I lost one of my most cherished accessory mods for my Shapeoko….Not sure what happened but my suck-it dust boot became the next victim for this gift idea. So sad :frowning:

In the end it looks great and I cant wait to give this as a gift and see their expression on their face. Of course I cant tell them the pain it caused ! LOL


14 Likes