I made this for a friend who really seemed to like the little ‘This is fine’ comic strip by artist KC Green. It’s actually the first project that I completed on my new 4x4 Shapeoko 5.
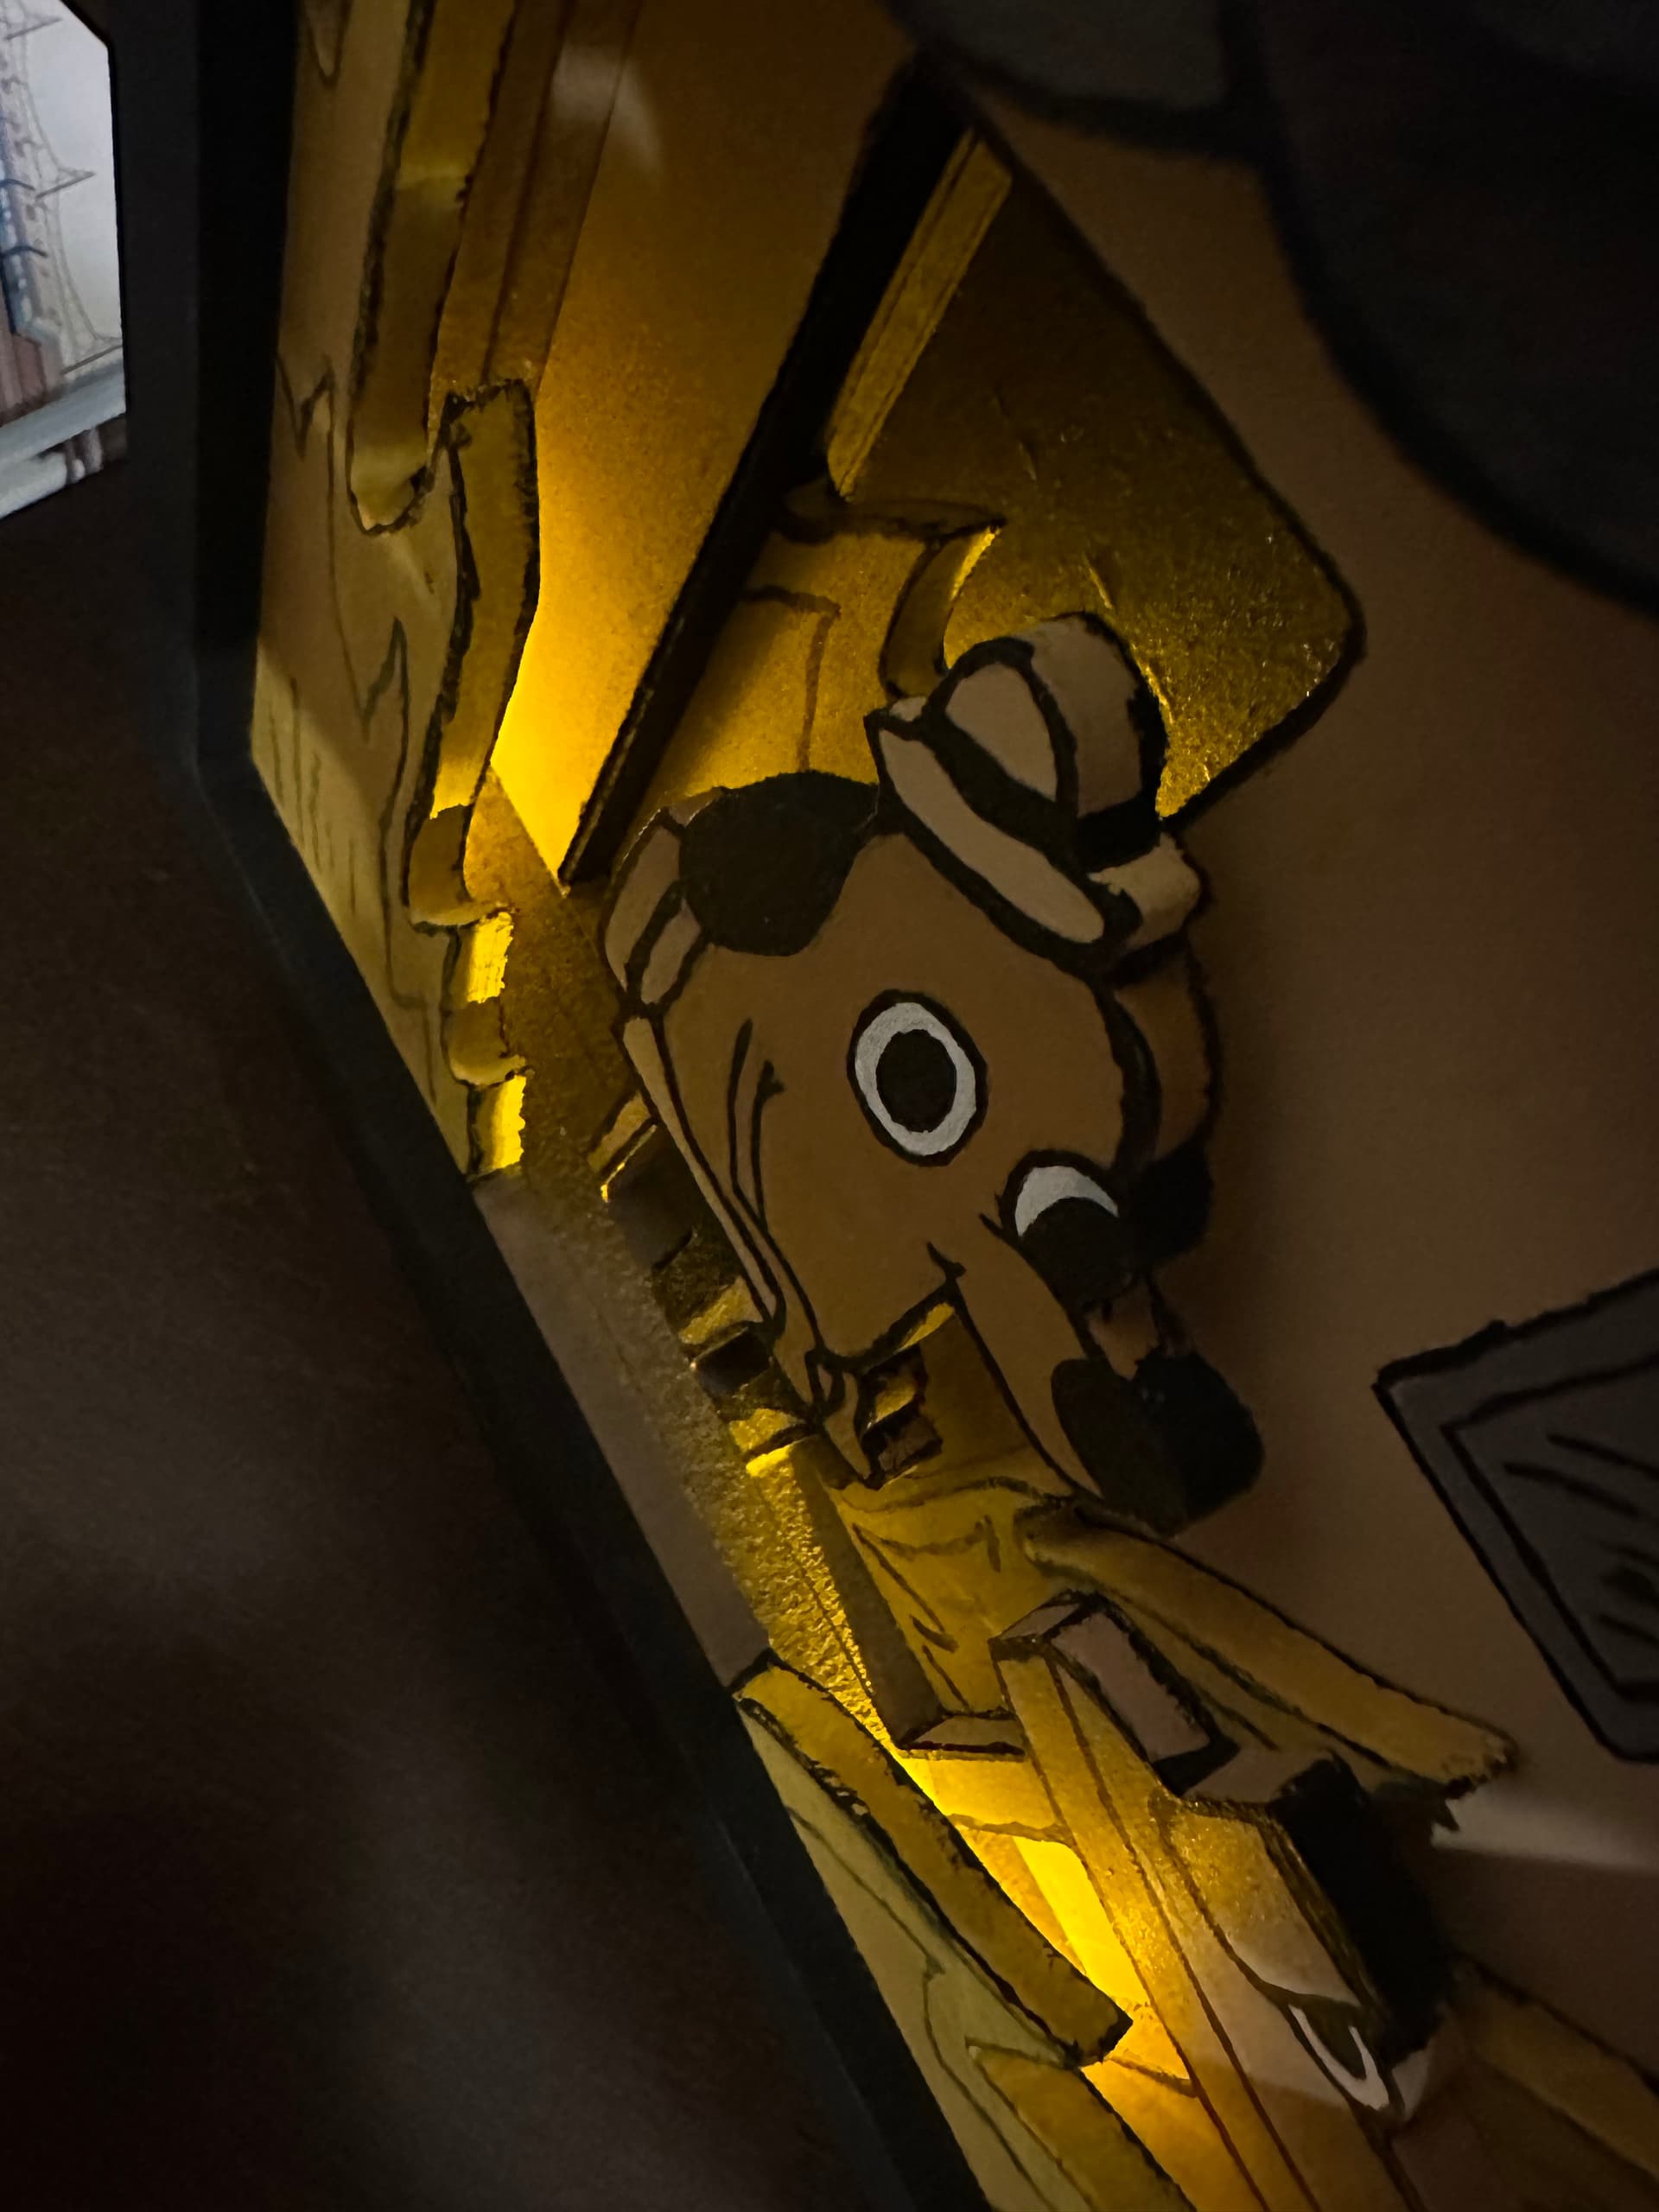
It’s made of 1/4" MDF that was hand-painted and then glued together afterwards. As a fun twist, though, I added some flickering LEDs to simulate the flames (here’s a link to a video of that).
I wish I had taken more pictures during the process of making this, but I didn’t know about this contest at the time and was kind of in a rush to finish it before Christmas.

The LEDs are pretty well hidden in there…
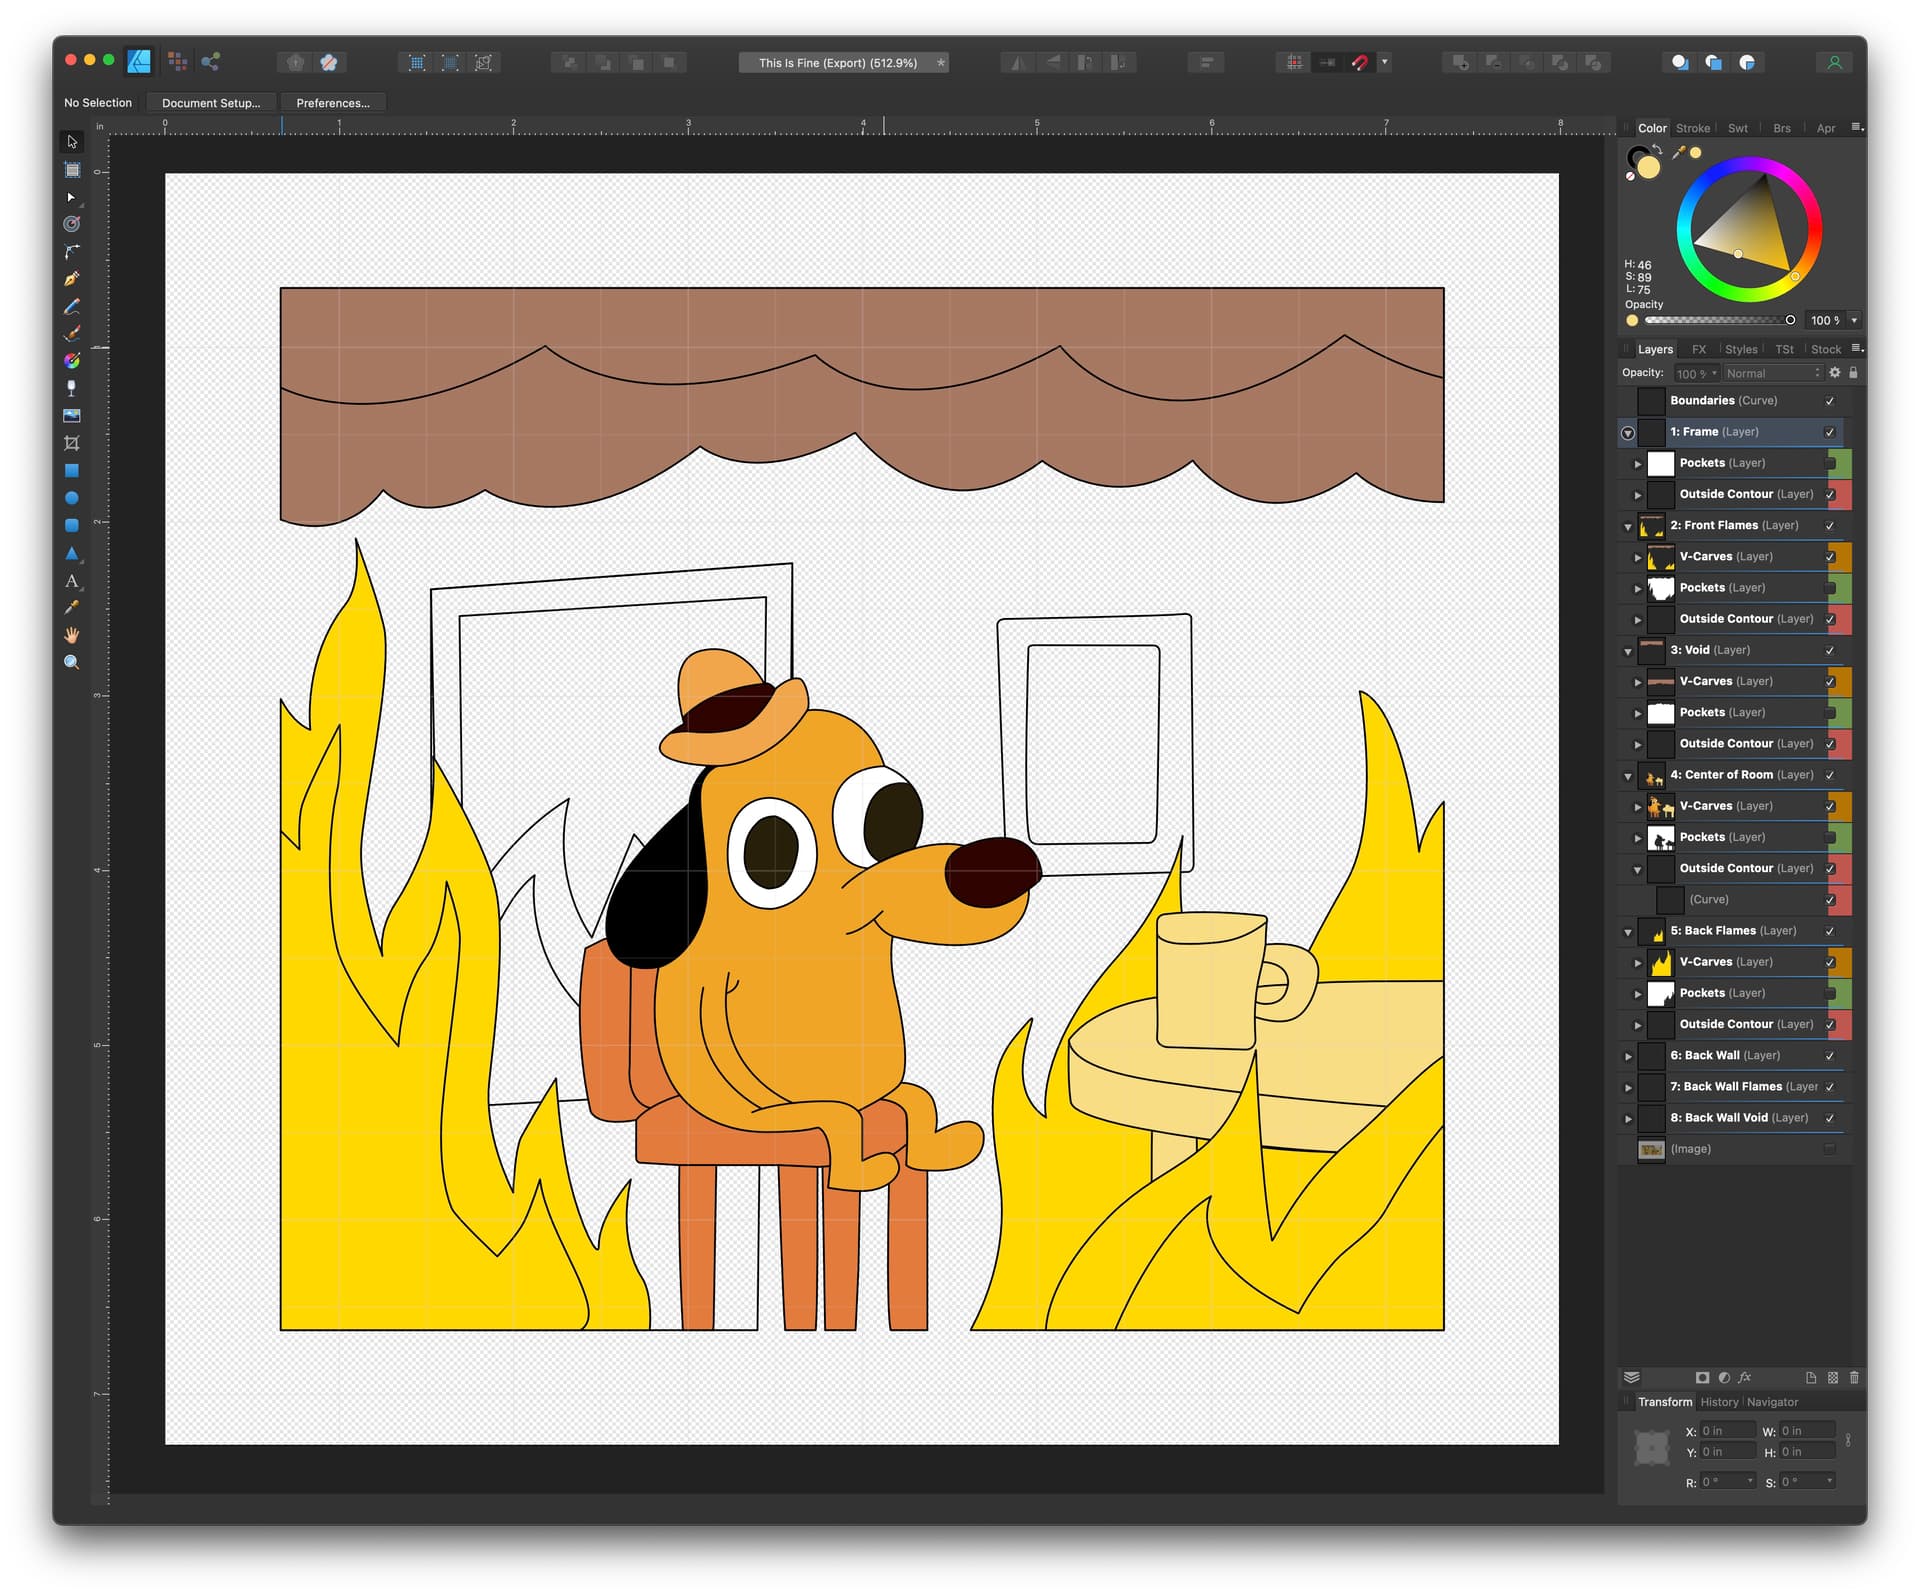
I started the project in Affinity Designer, where I replicated the drawing and then split everything up into layers for the cuts. I spent a lot of time organizing everything, which you can kind of see on the right side. I was also trying to think about how it would look in 3D because I couldn’t think of an easy way to simulate that.
You’ll notice that a lot of these lines didn’t make it in to the actual cut. I was thinking about doing some very shallow contours as a guide for painting, since I was nervous about free-handing it. I ended up abandoning this idea because I couldn’t get it to work right and didn’t have the time to play around with it. I think I did okay with the paint…mainly because the original art had a hand-drawn look to it anyway.
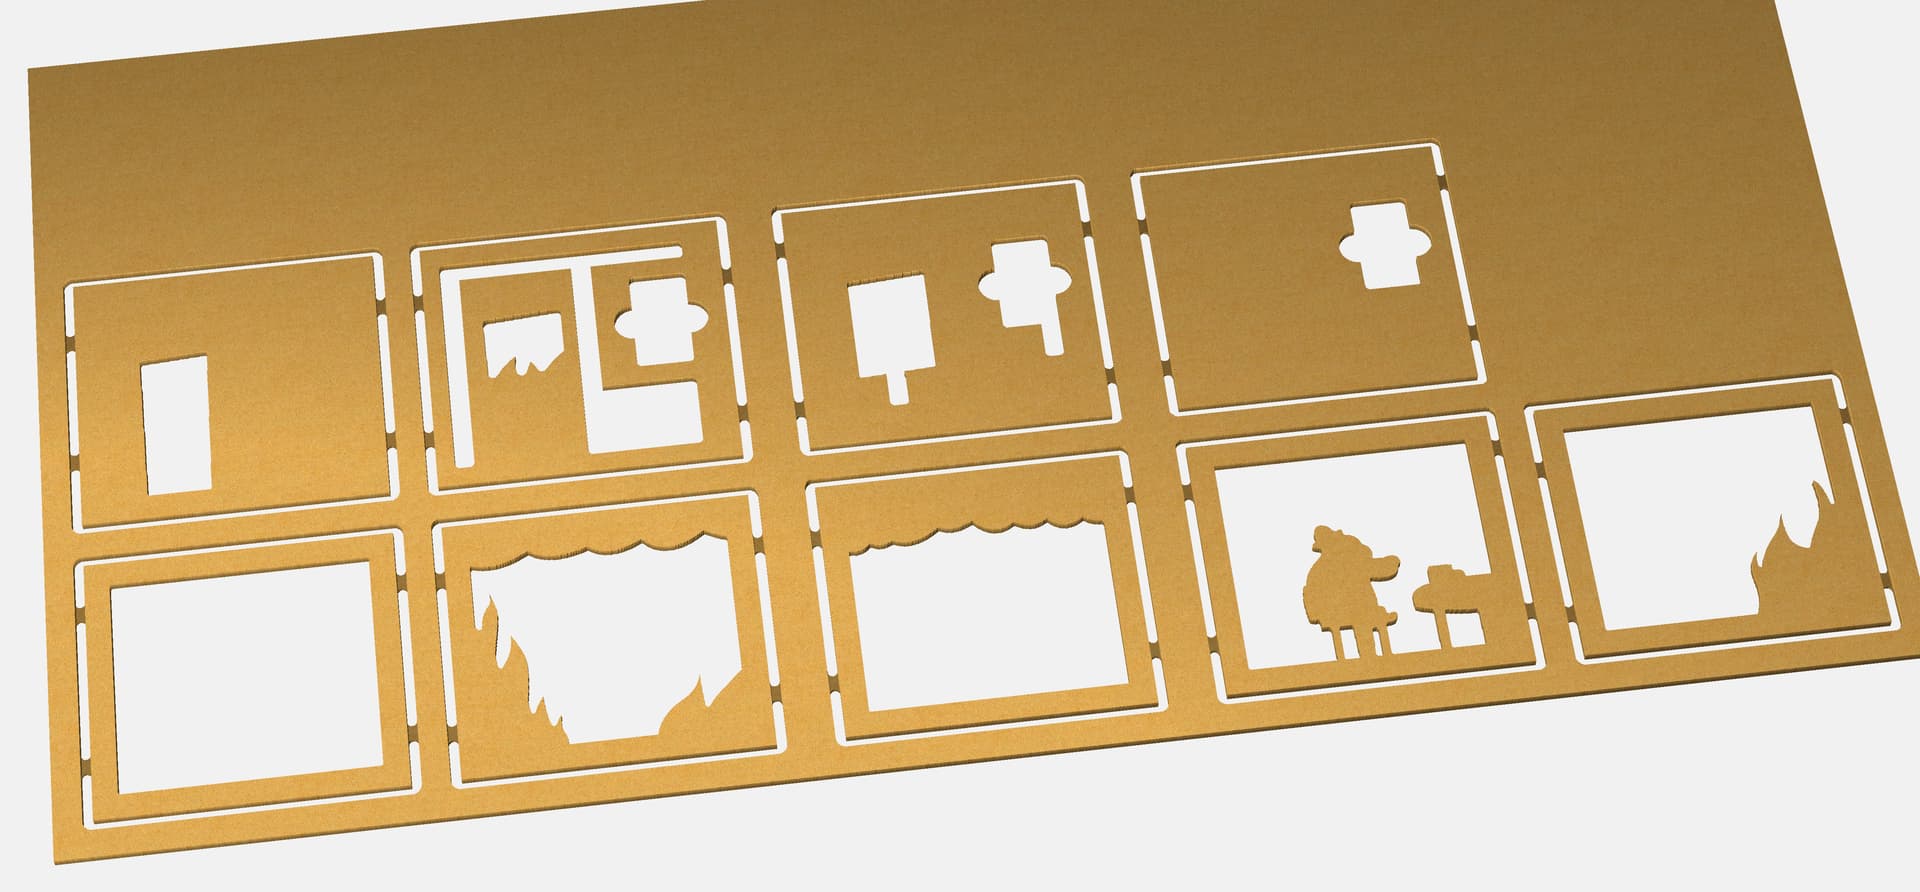
This is what the tool paths looked like on a 2x4x1/4 sheet of MDF. The last three panels on the top row have channels for the wiring and a cutout for a battery box.
I wish I had taken more pictures of the painting and assembly process, but I get hyper-focused on projects like this and always end up forgetting.
For paint, I just used some simple craft store acrylic…nothing really special about that.
I bought 100 of the little flame LEDs off of Amazon for $10. They were available pre-wired with leads, which I would have loved to have used, but the resistors they used were selected for 12V and I wanted to use 3V (2x AA batteries). I ended up using 47 Ohm resistors for that.
The picture below shows the mess of wiring. I made a mistake by gluing the back two panels together too early, which made it a nightmare to piece together the wiring and not have it get pinched or anything. I’m usually more particular about those things, but I was frustrated at that point and just wanted it to be finished!

For gluing everything together, I used wood glue but tried to keep it more on the outside edges so it didn’t leak into the design.
Once I had it together, I was really worried about getting the tabs off. I use a flush trim bit for my router, but the material was so thin that I couldn’t position the bearing and the cutting portion of the bit. I remembered that I had a band saw sitting in the corner, and that worked great since I could just clean up the sides all at once.
One other thing I did was to coat the sides in drywall joint compound to kind of hide the lines between the layers. Once that dried up, I sanded it all down and painted the outside with black paint.
I honestly don’t know how long all of this took me, since I did it gradually. If I had to guess, maybe 16 hours? Of course a lot of that was the design and me figuring things out, so I could do a second one quicker. I kind of wanted this to be a one-of-a-kind gift, though, so I doubt I’ll ever make another (also, since it borrows work from someone else I wouldn’t feel comfortable selling something like this).
If there any questions I can answer about the process, I’m happy to talk more about it. Also, sorry about the lack of pictures–will try to do better next time!
The Carbide Create file is below if anyone is interested.
ThisIsFine.c2d (552 KB)