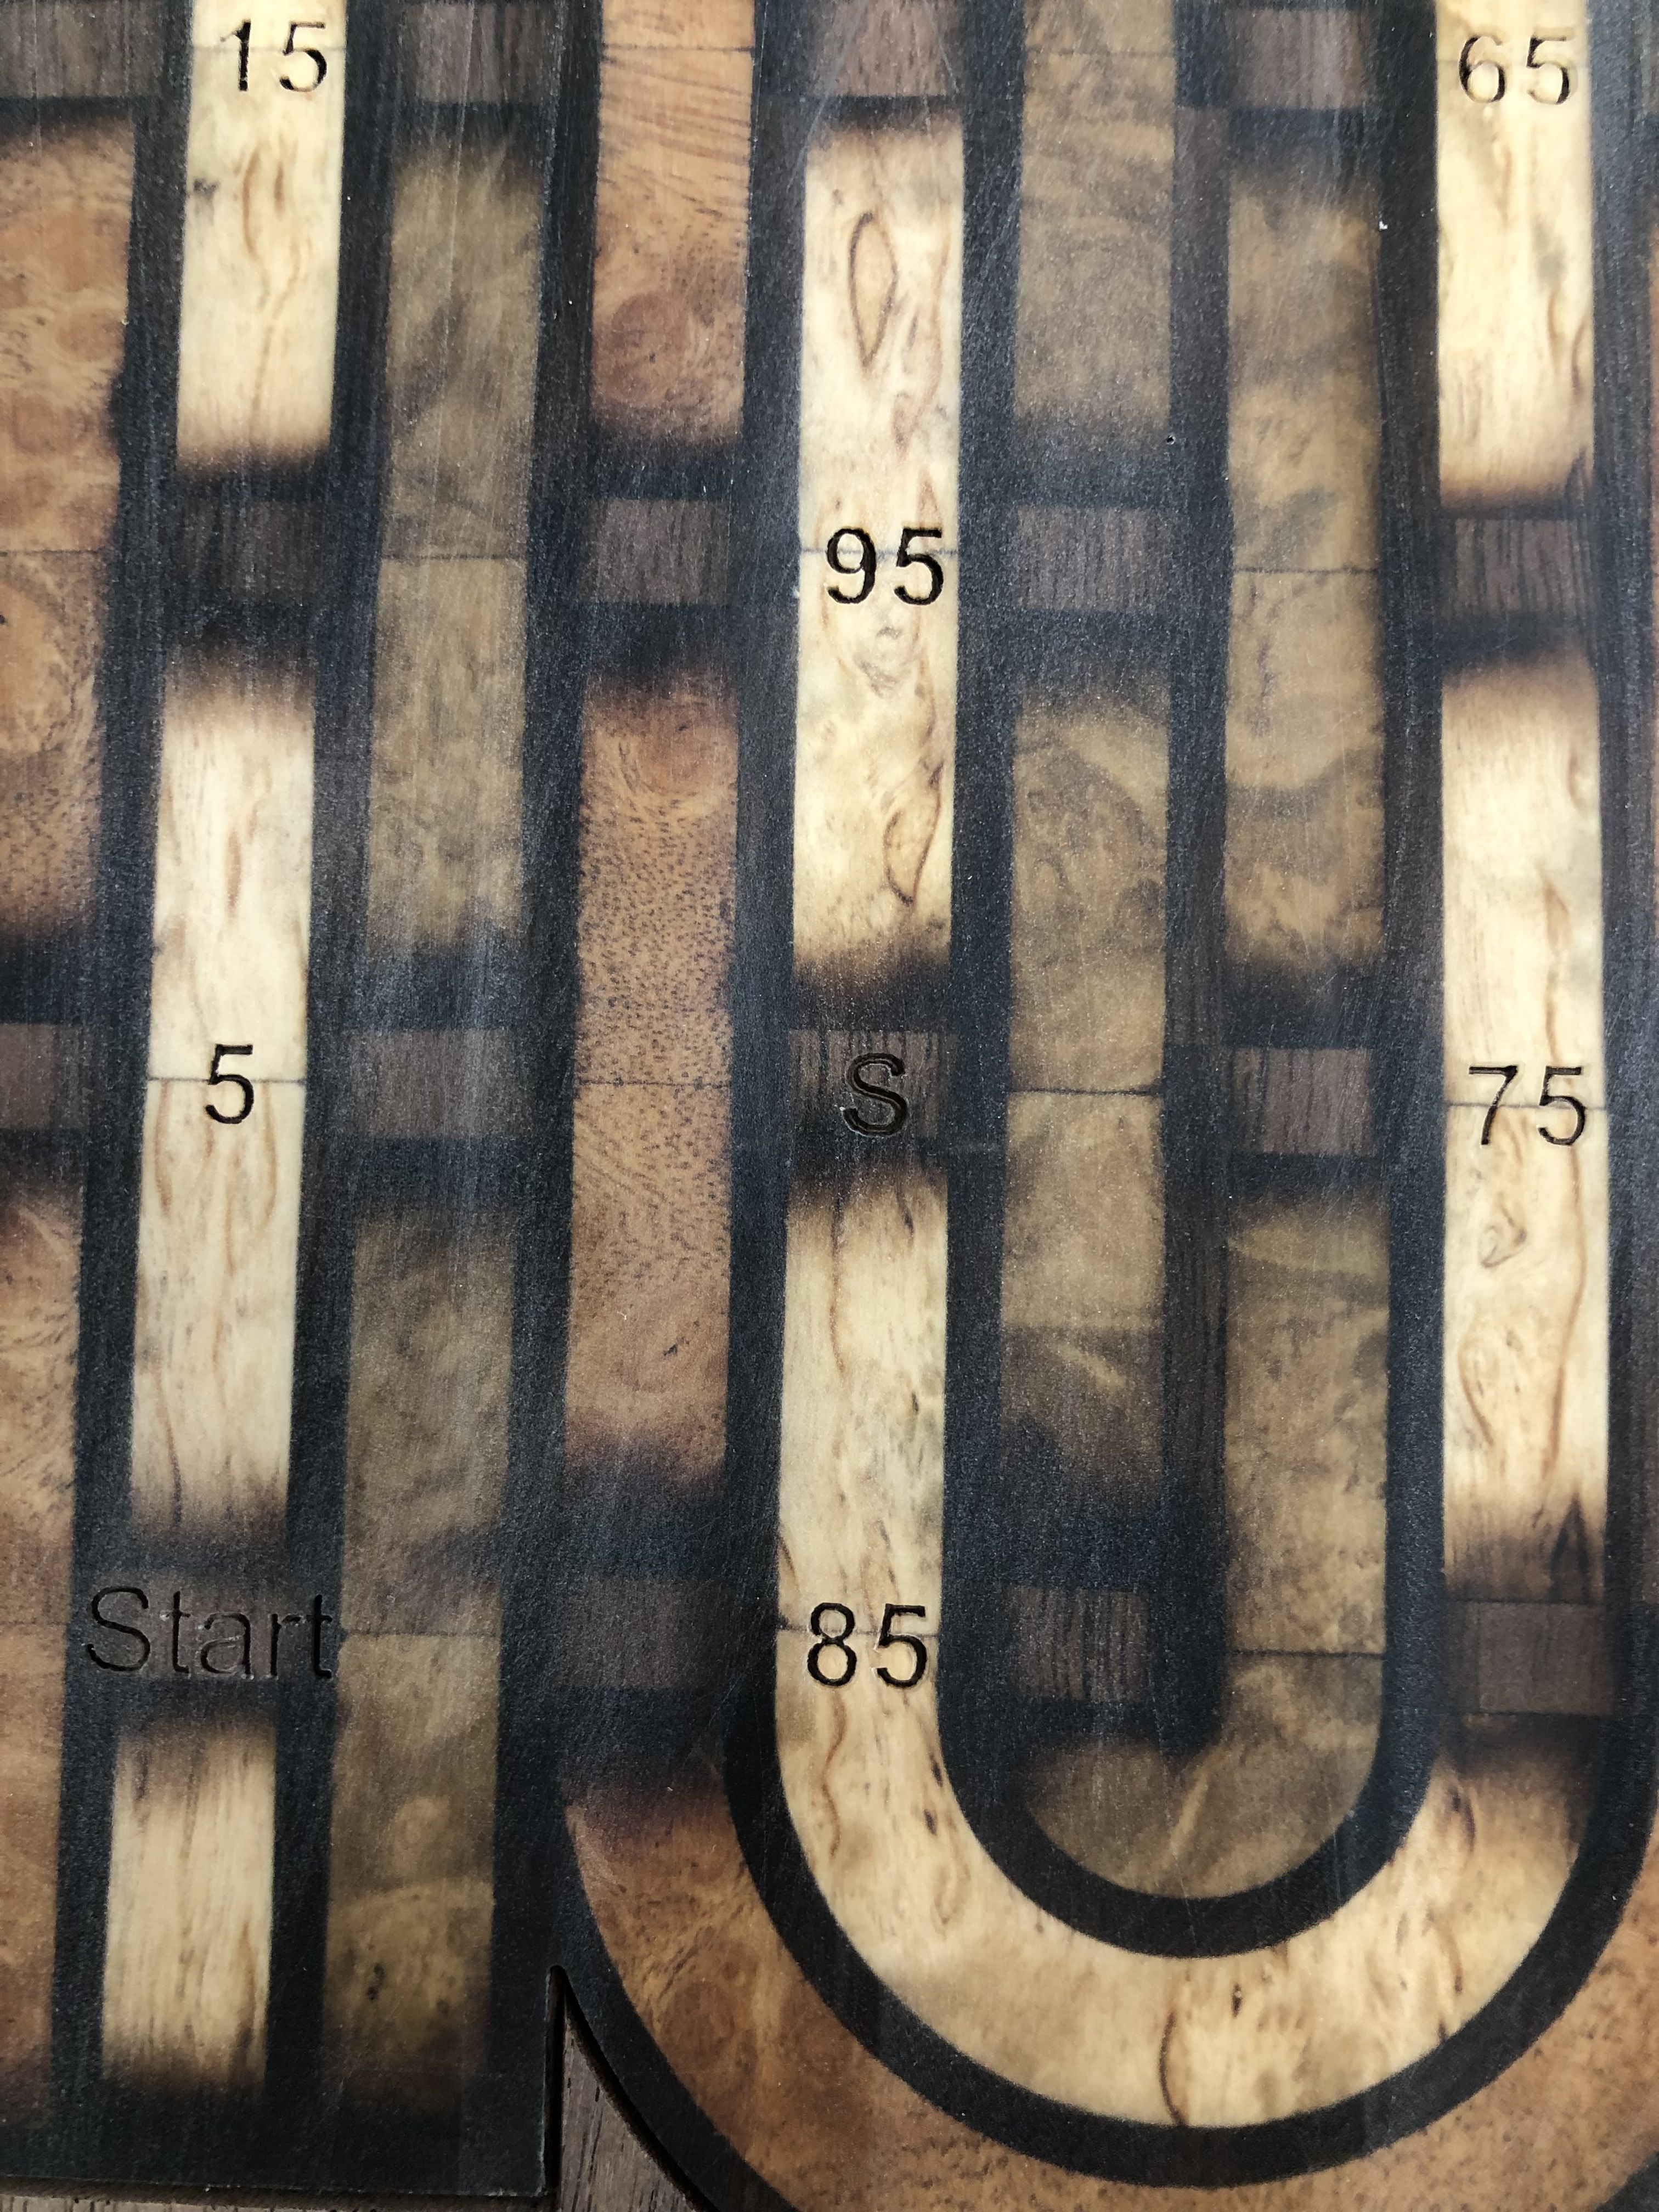
I played a bit years ago. As I got better at it I wondered why the numbers were there.
So I would leave it them off.
I played a bit years ago. As I got better at it I wondered why the numbers were there.
So I would leave it them off.
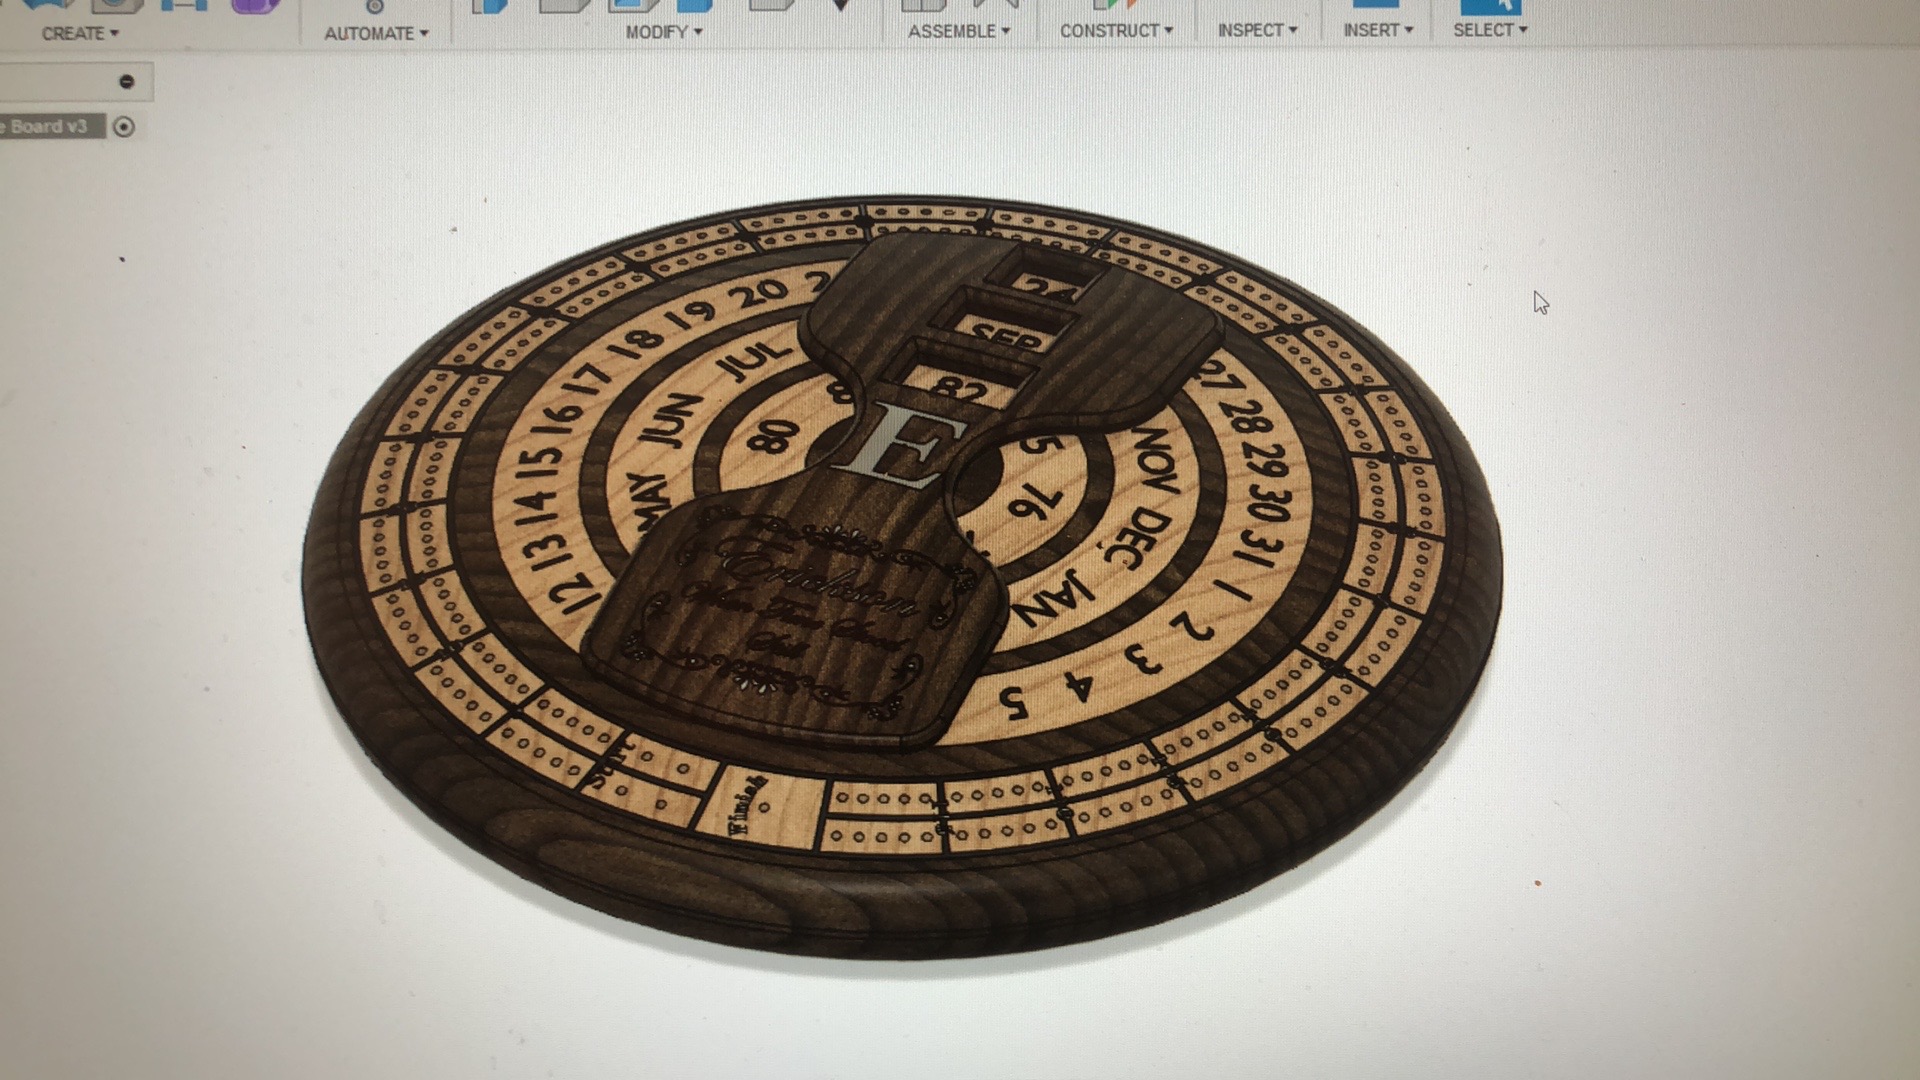
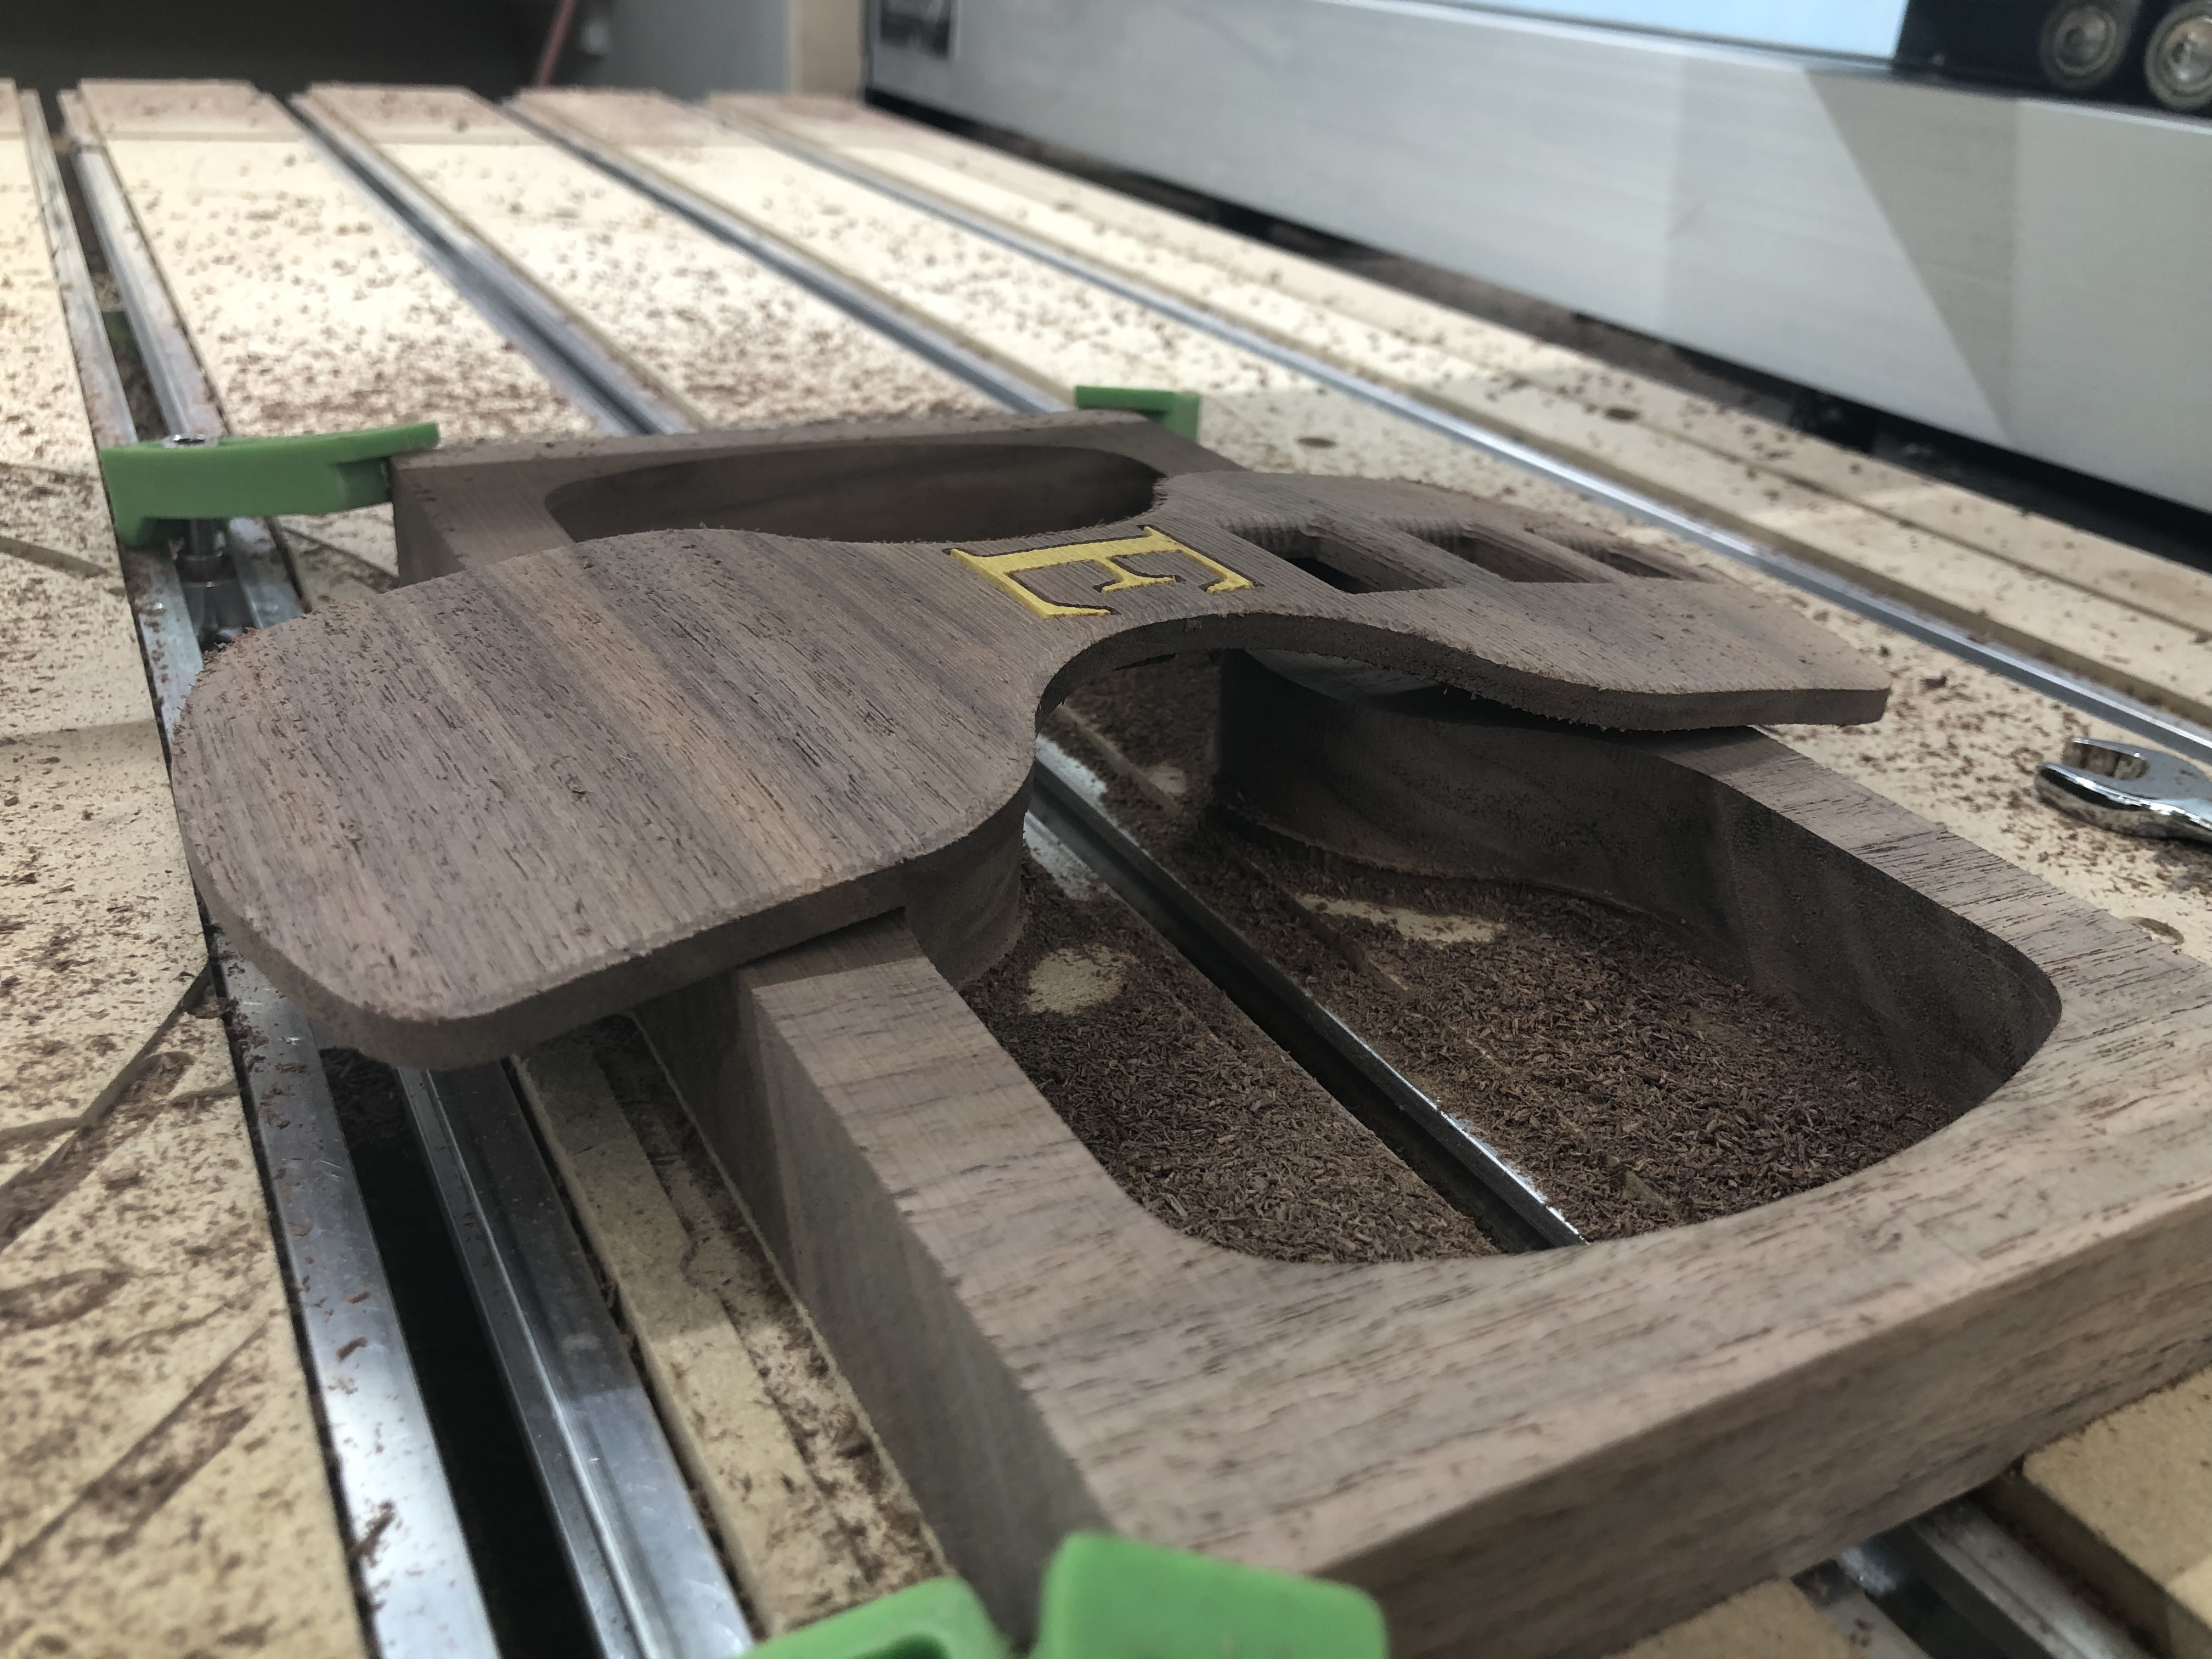
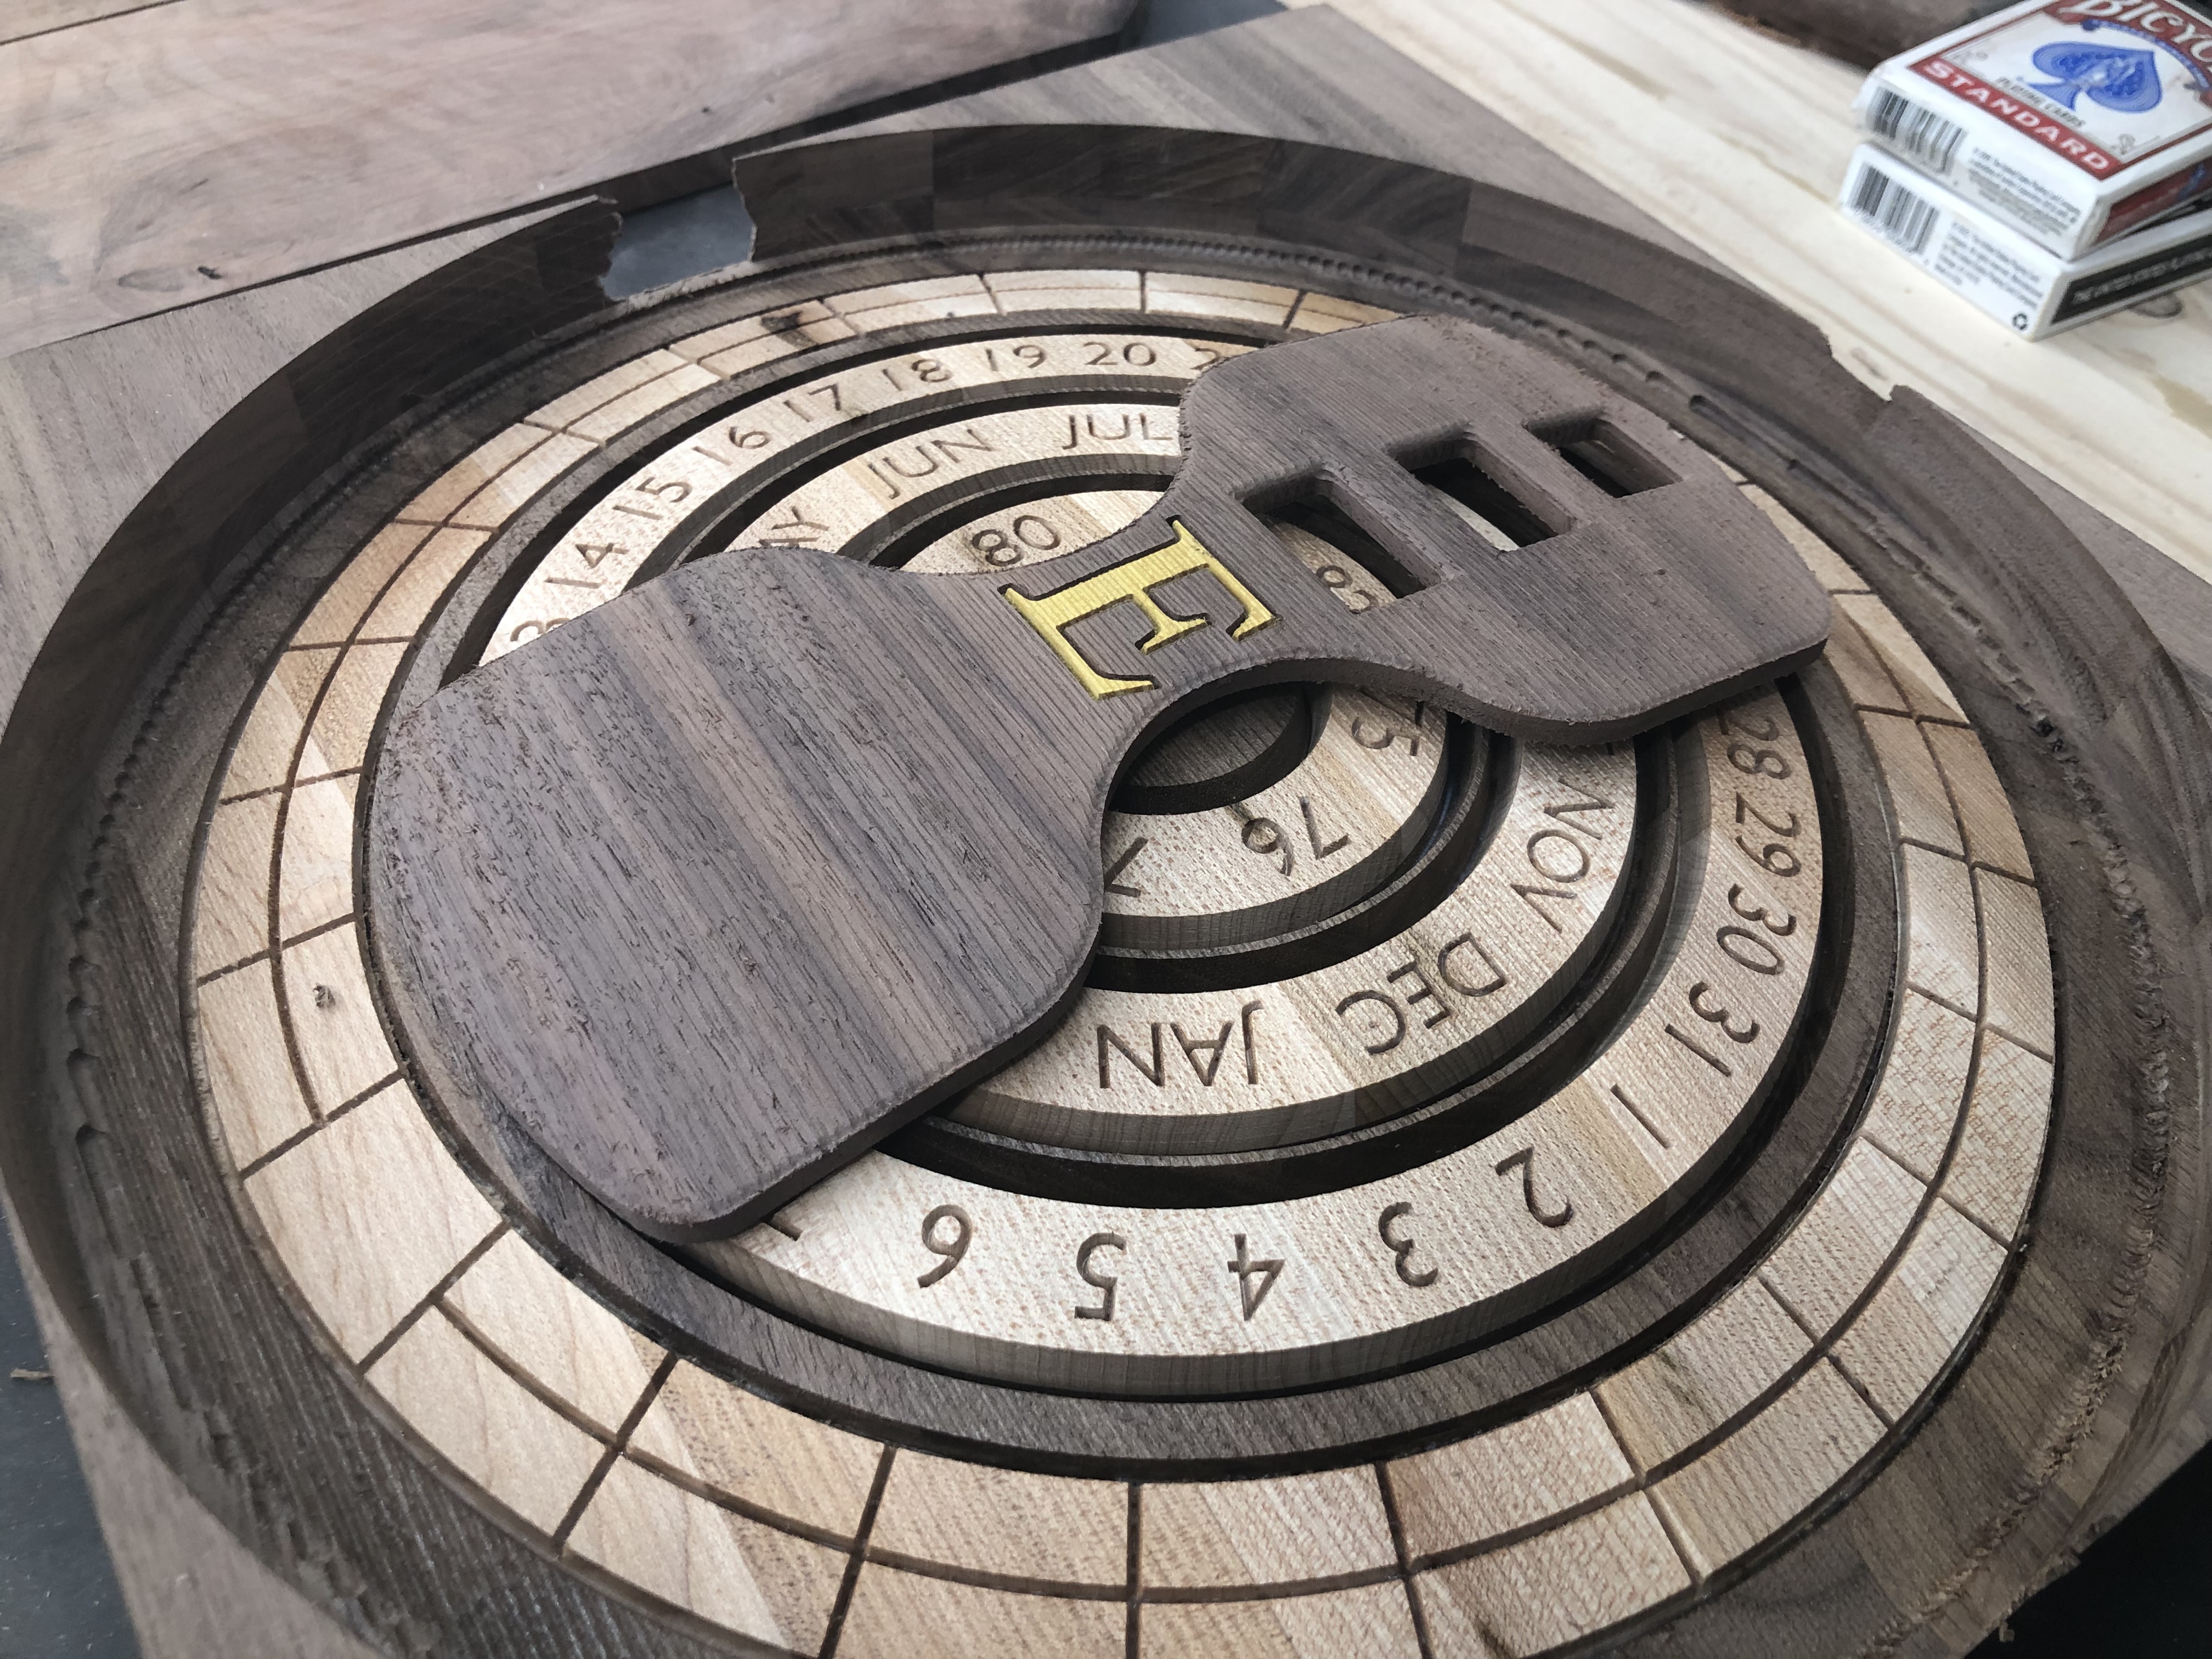
I couldn’t resist not putting the numbers and letters in. @Zman i thought about what you said and looking at all the busyness in this thing, figured the numbers would keep the users on track.
The carve turned out really good, I noticed the inlayed veneer is off alittle length wise, probably due to the shrinkage from the heat.
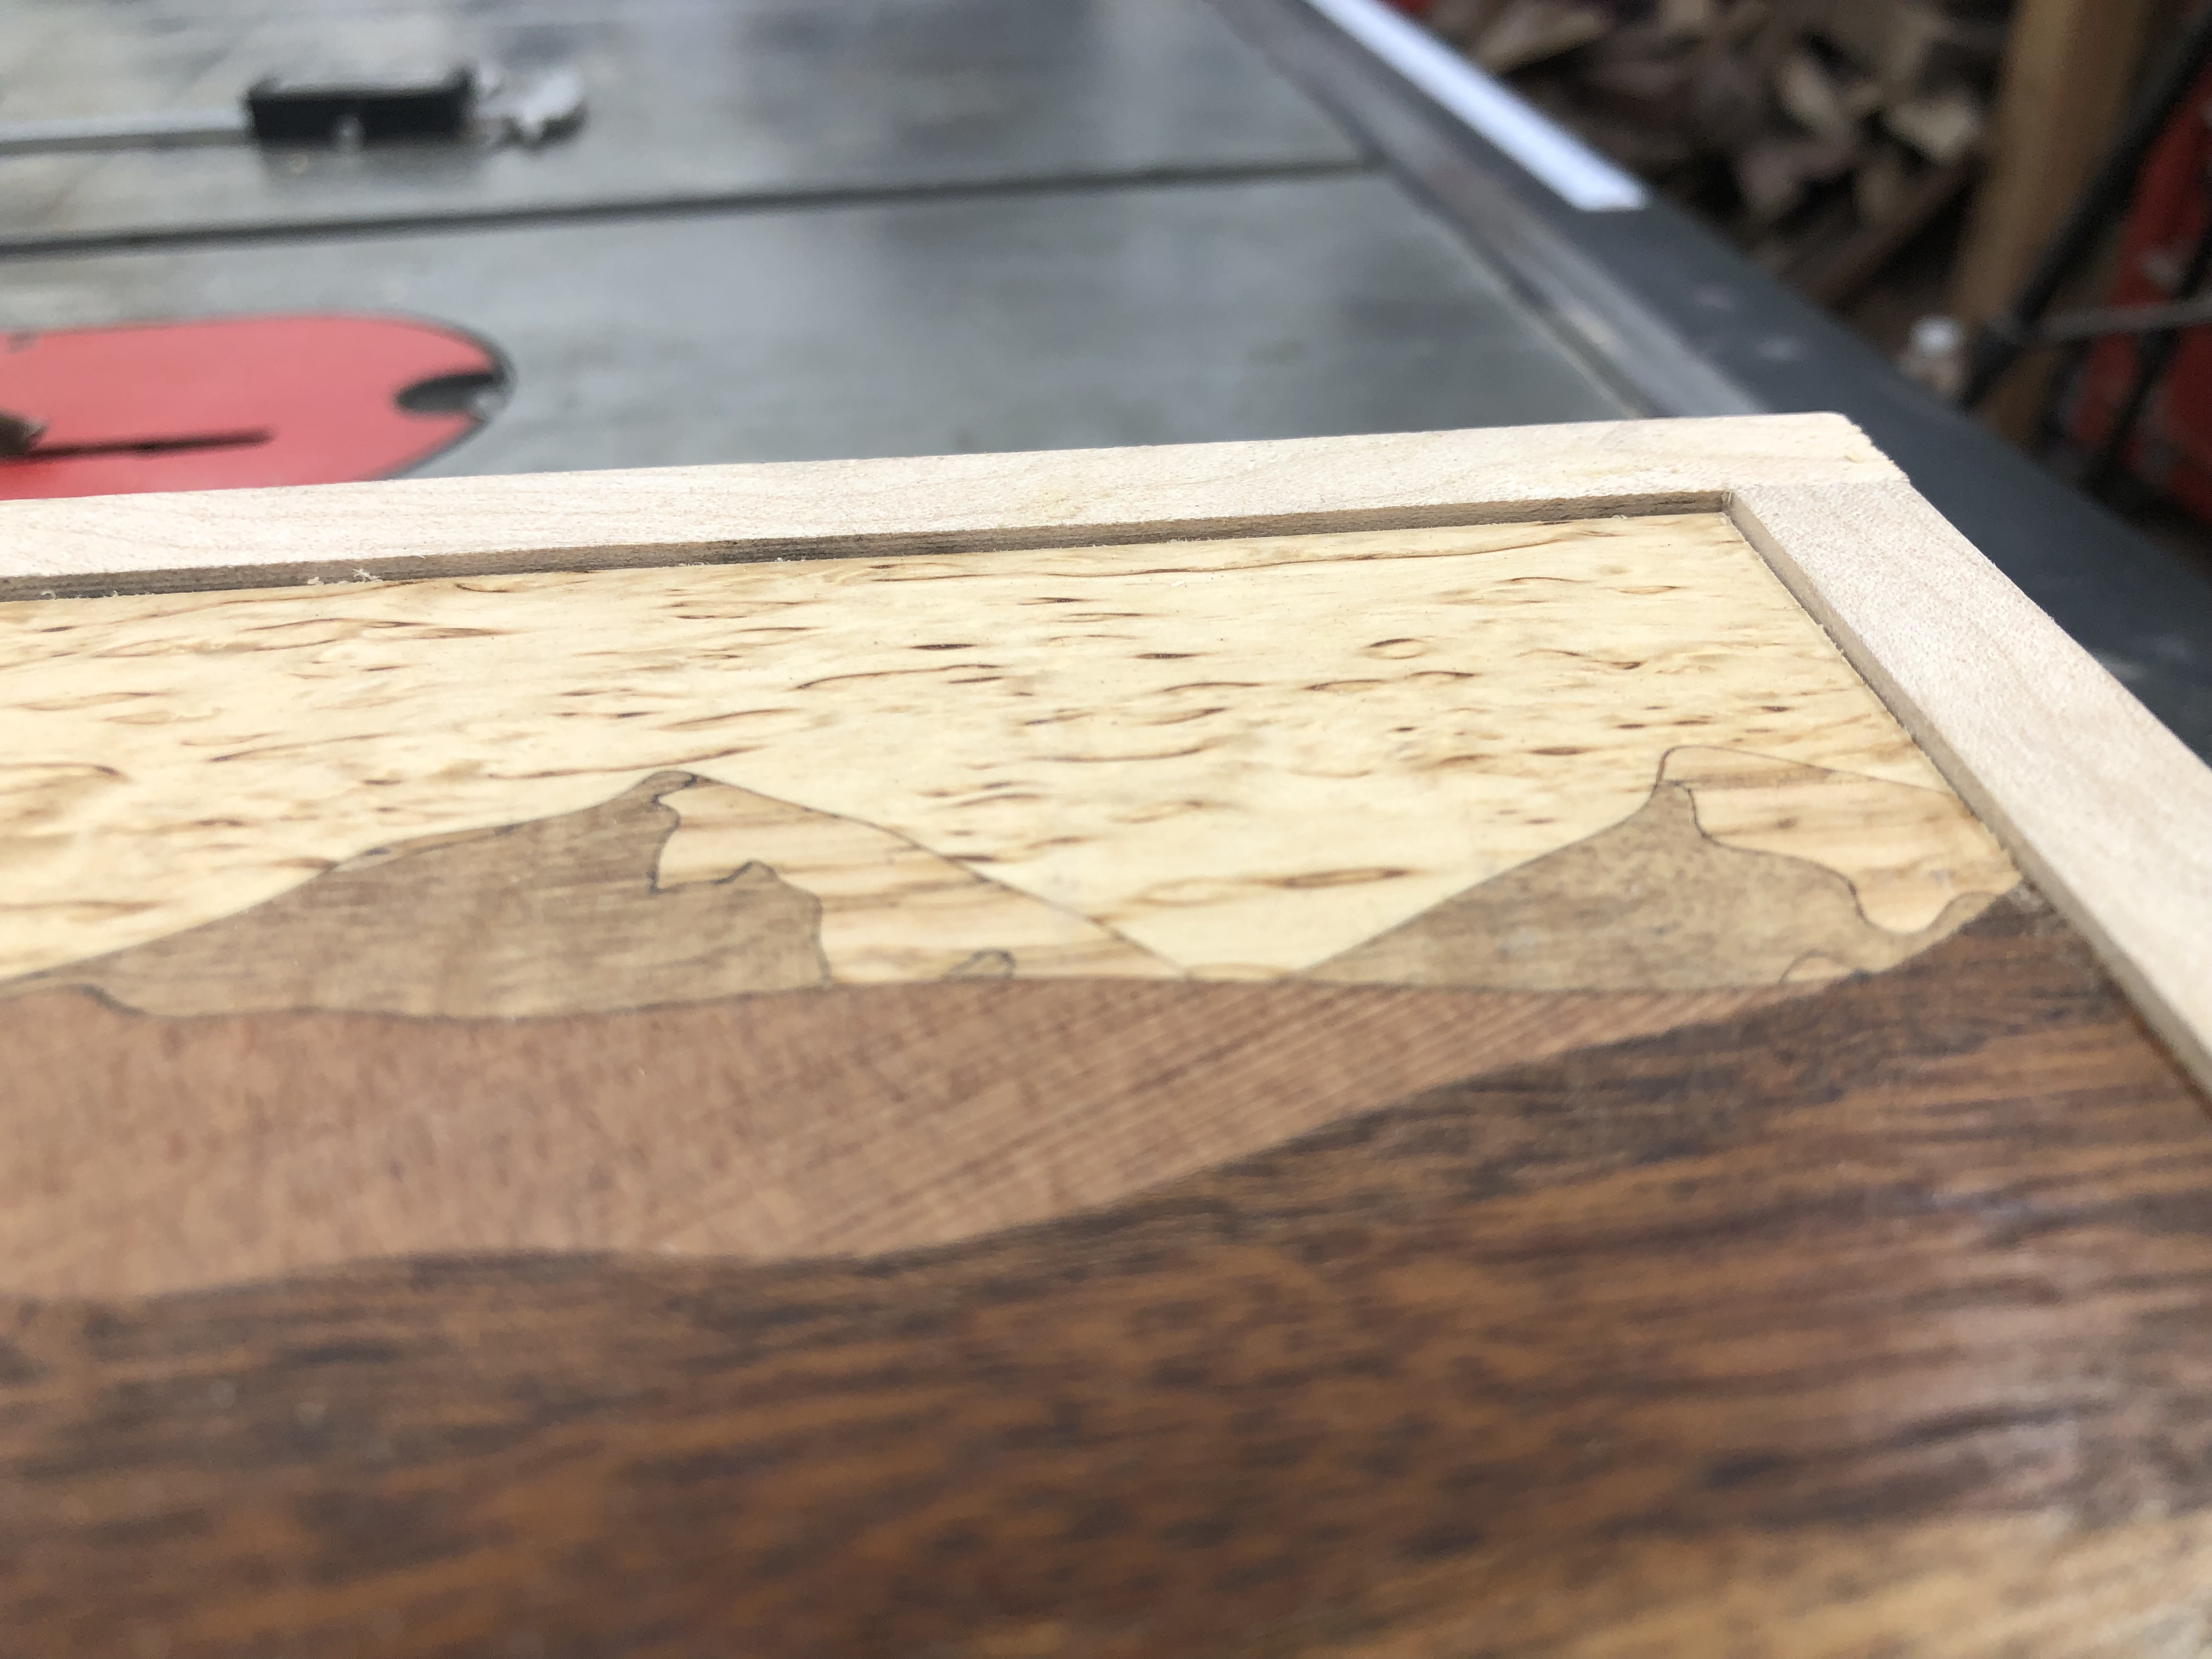
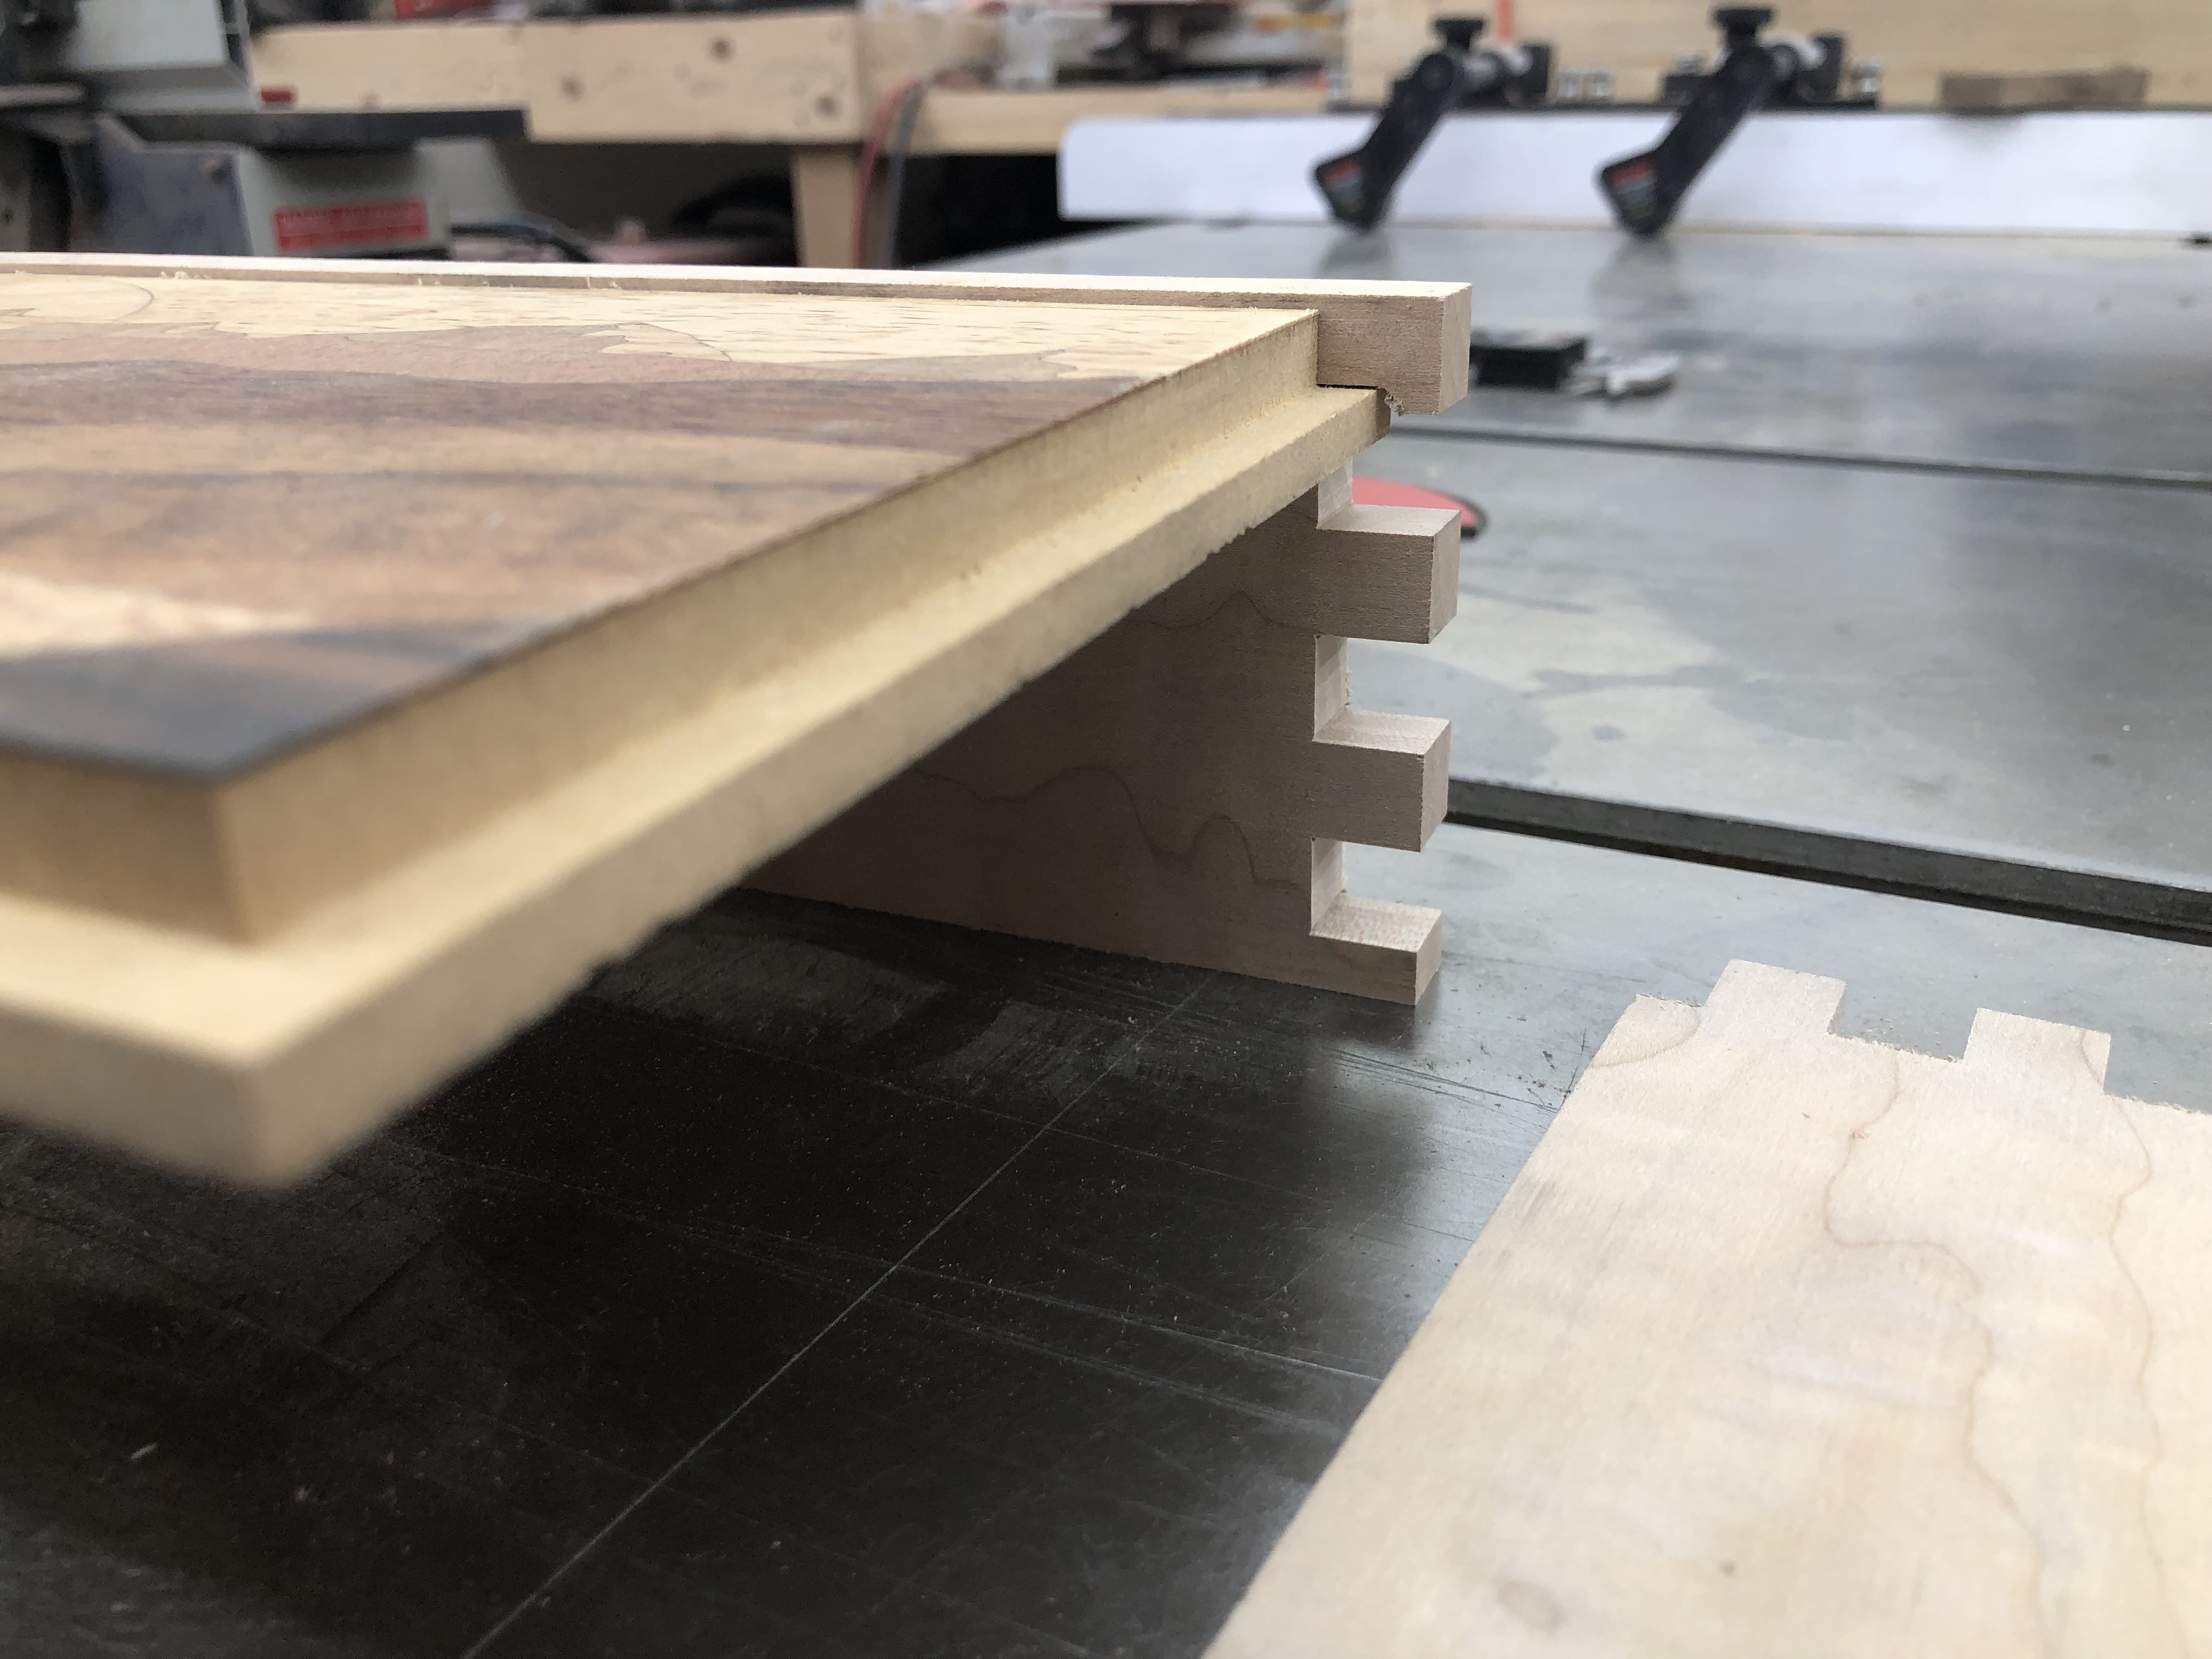
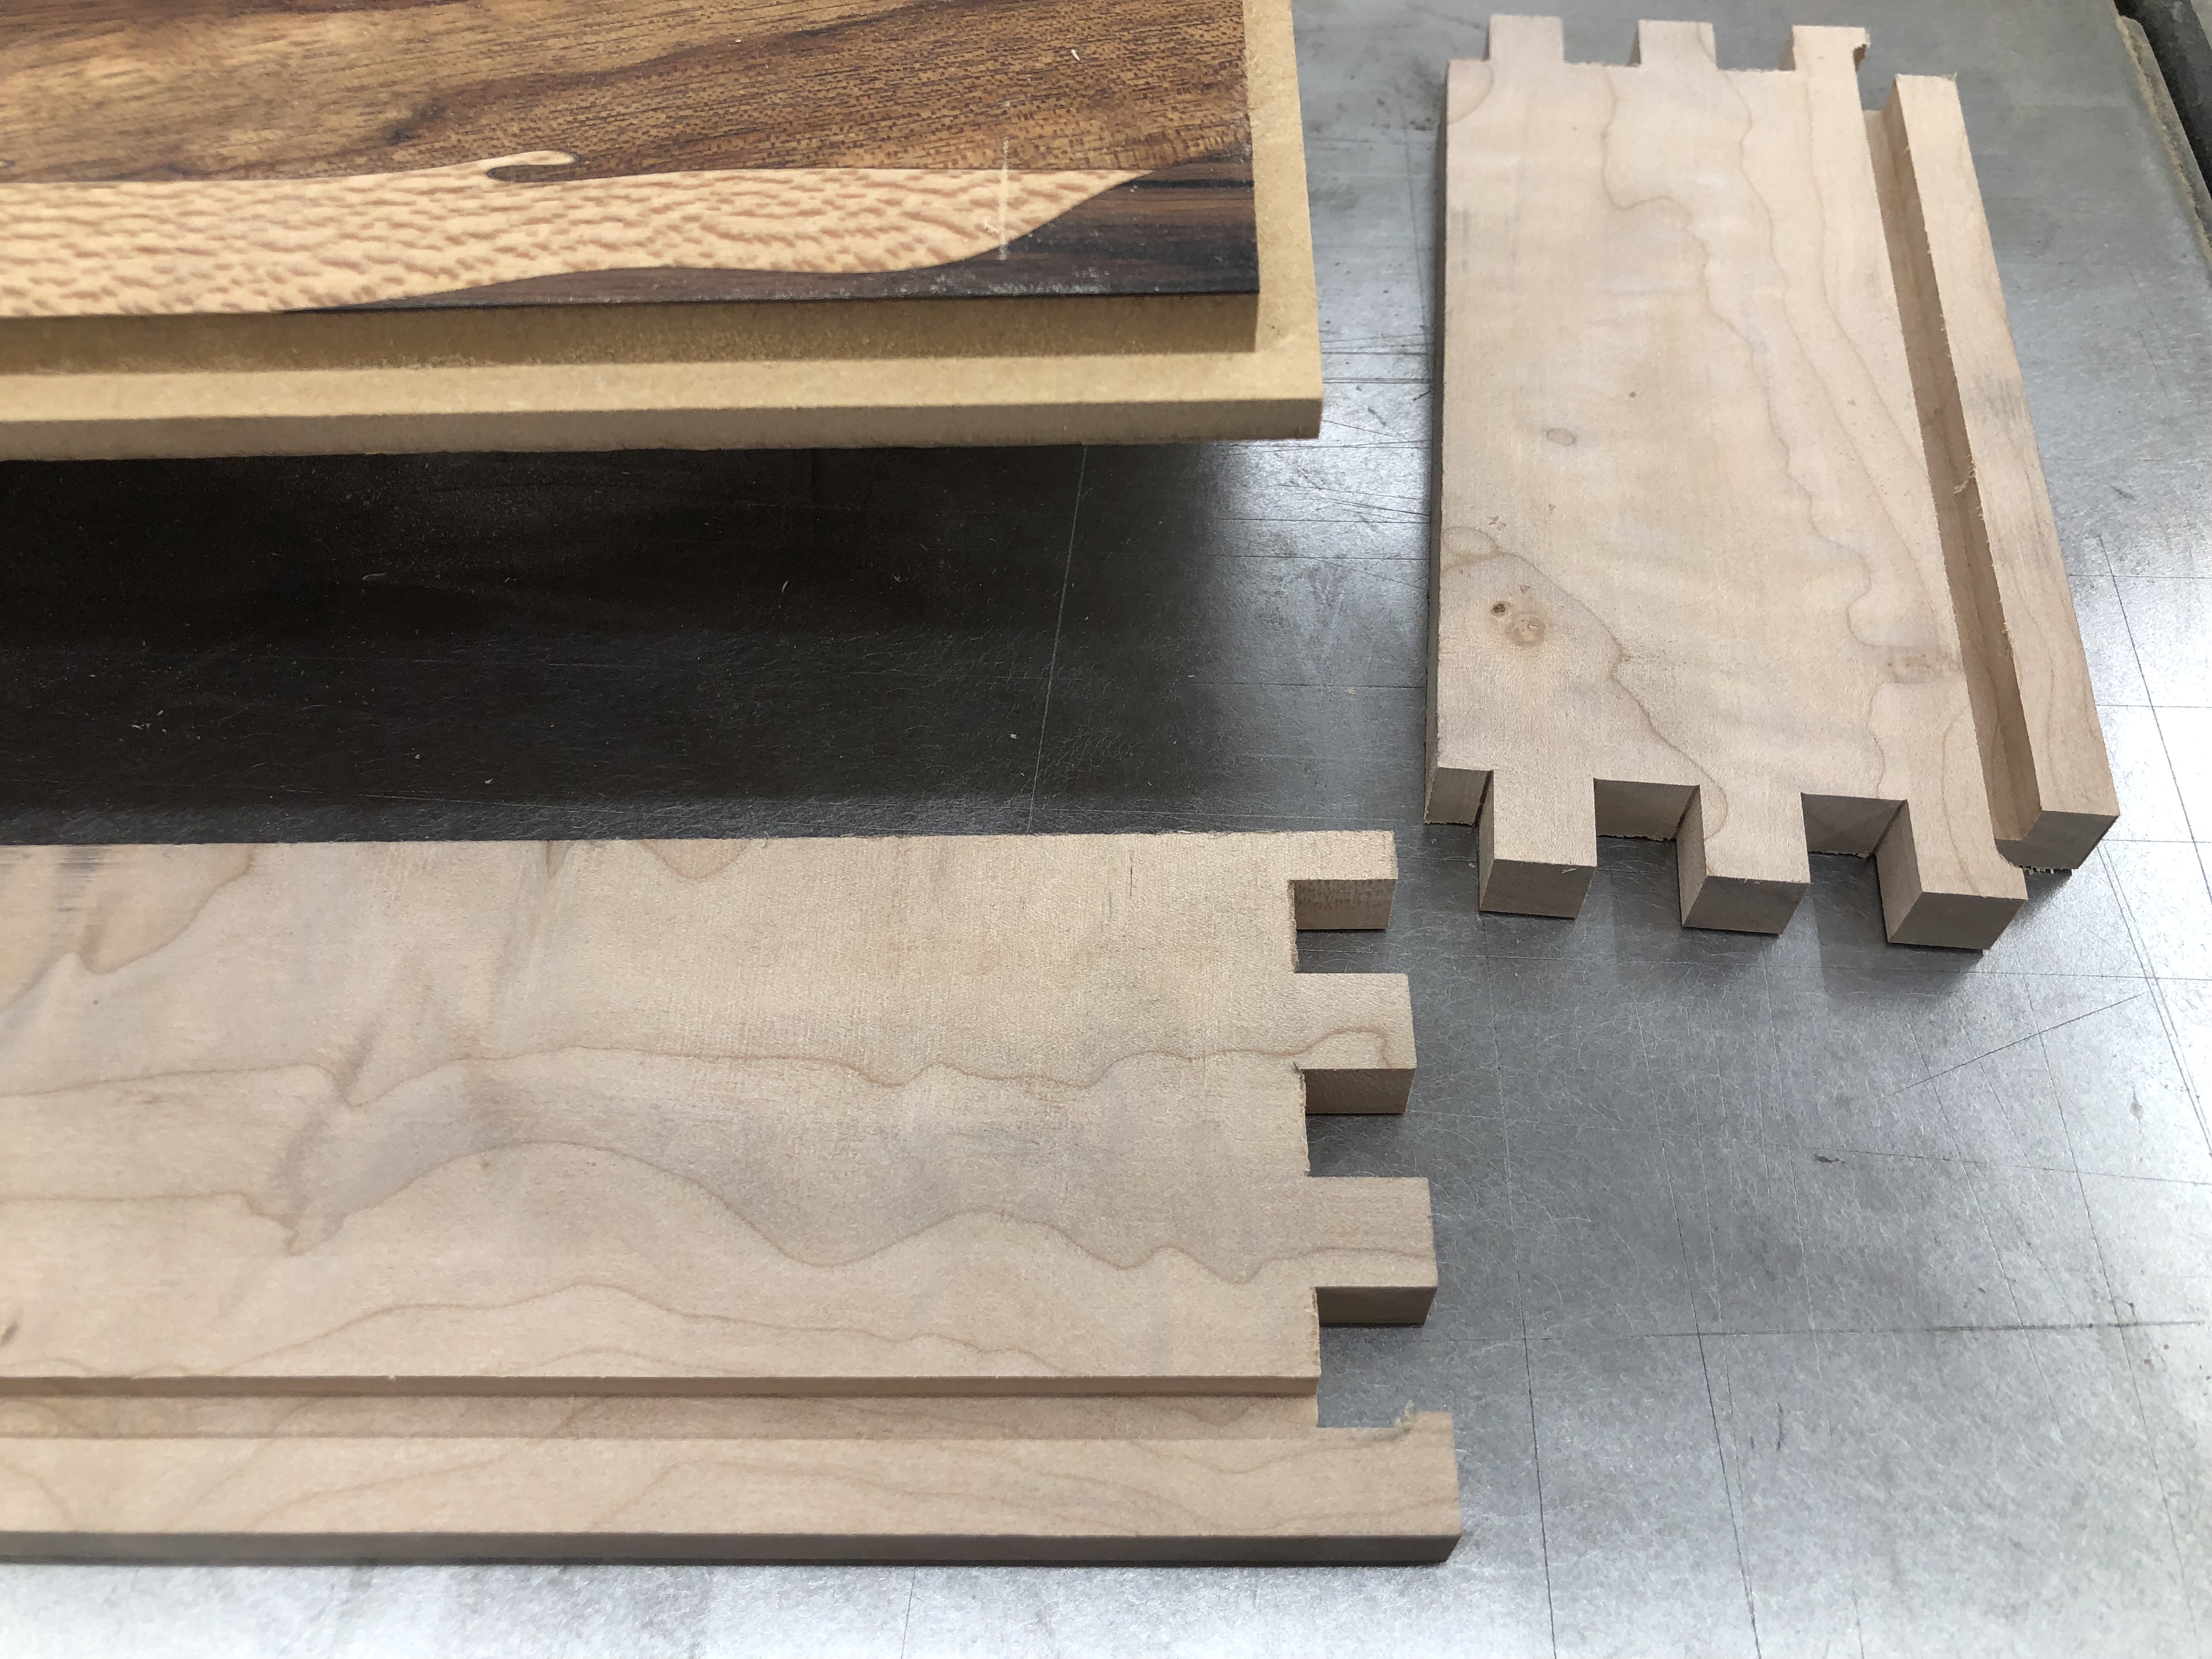
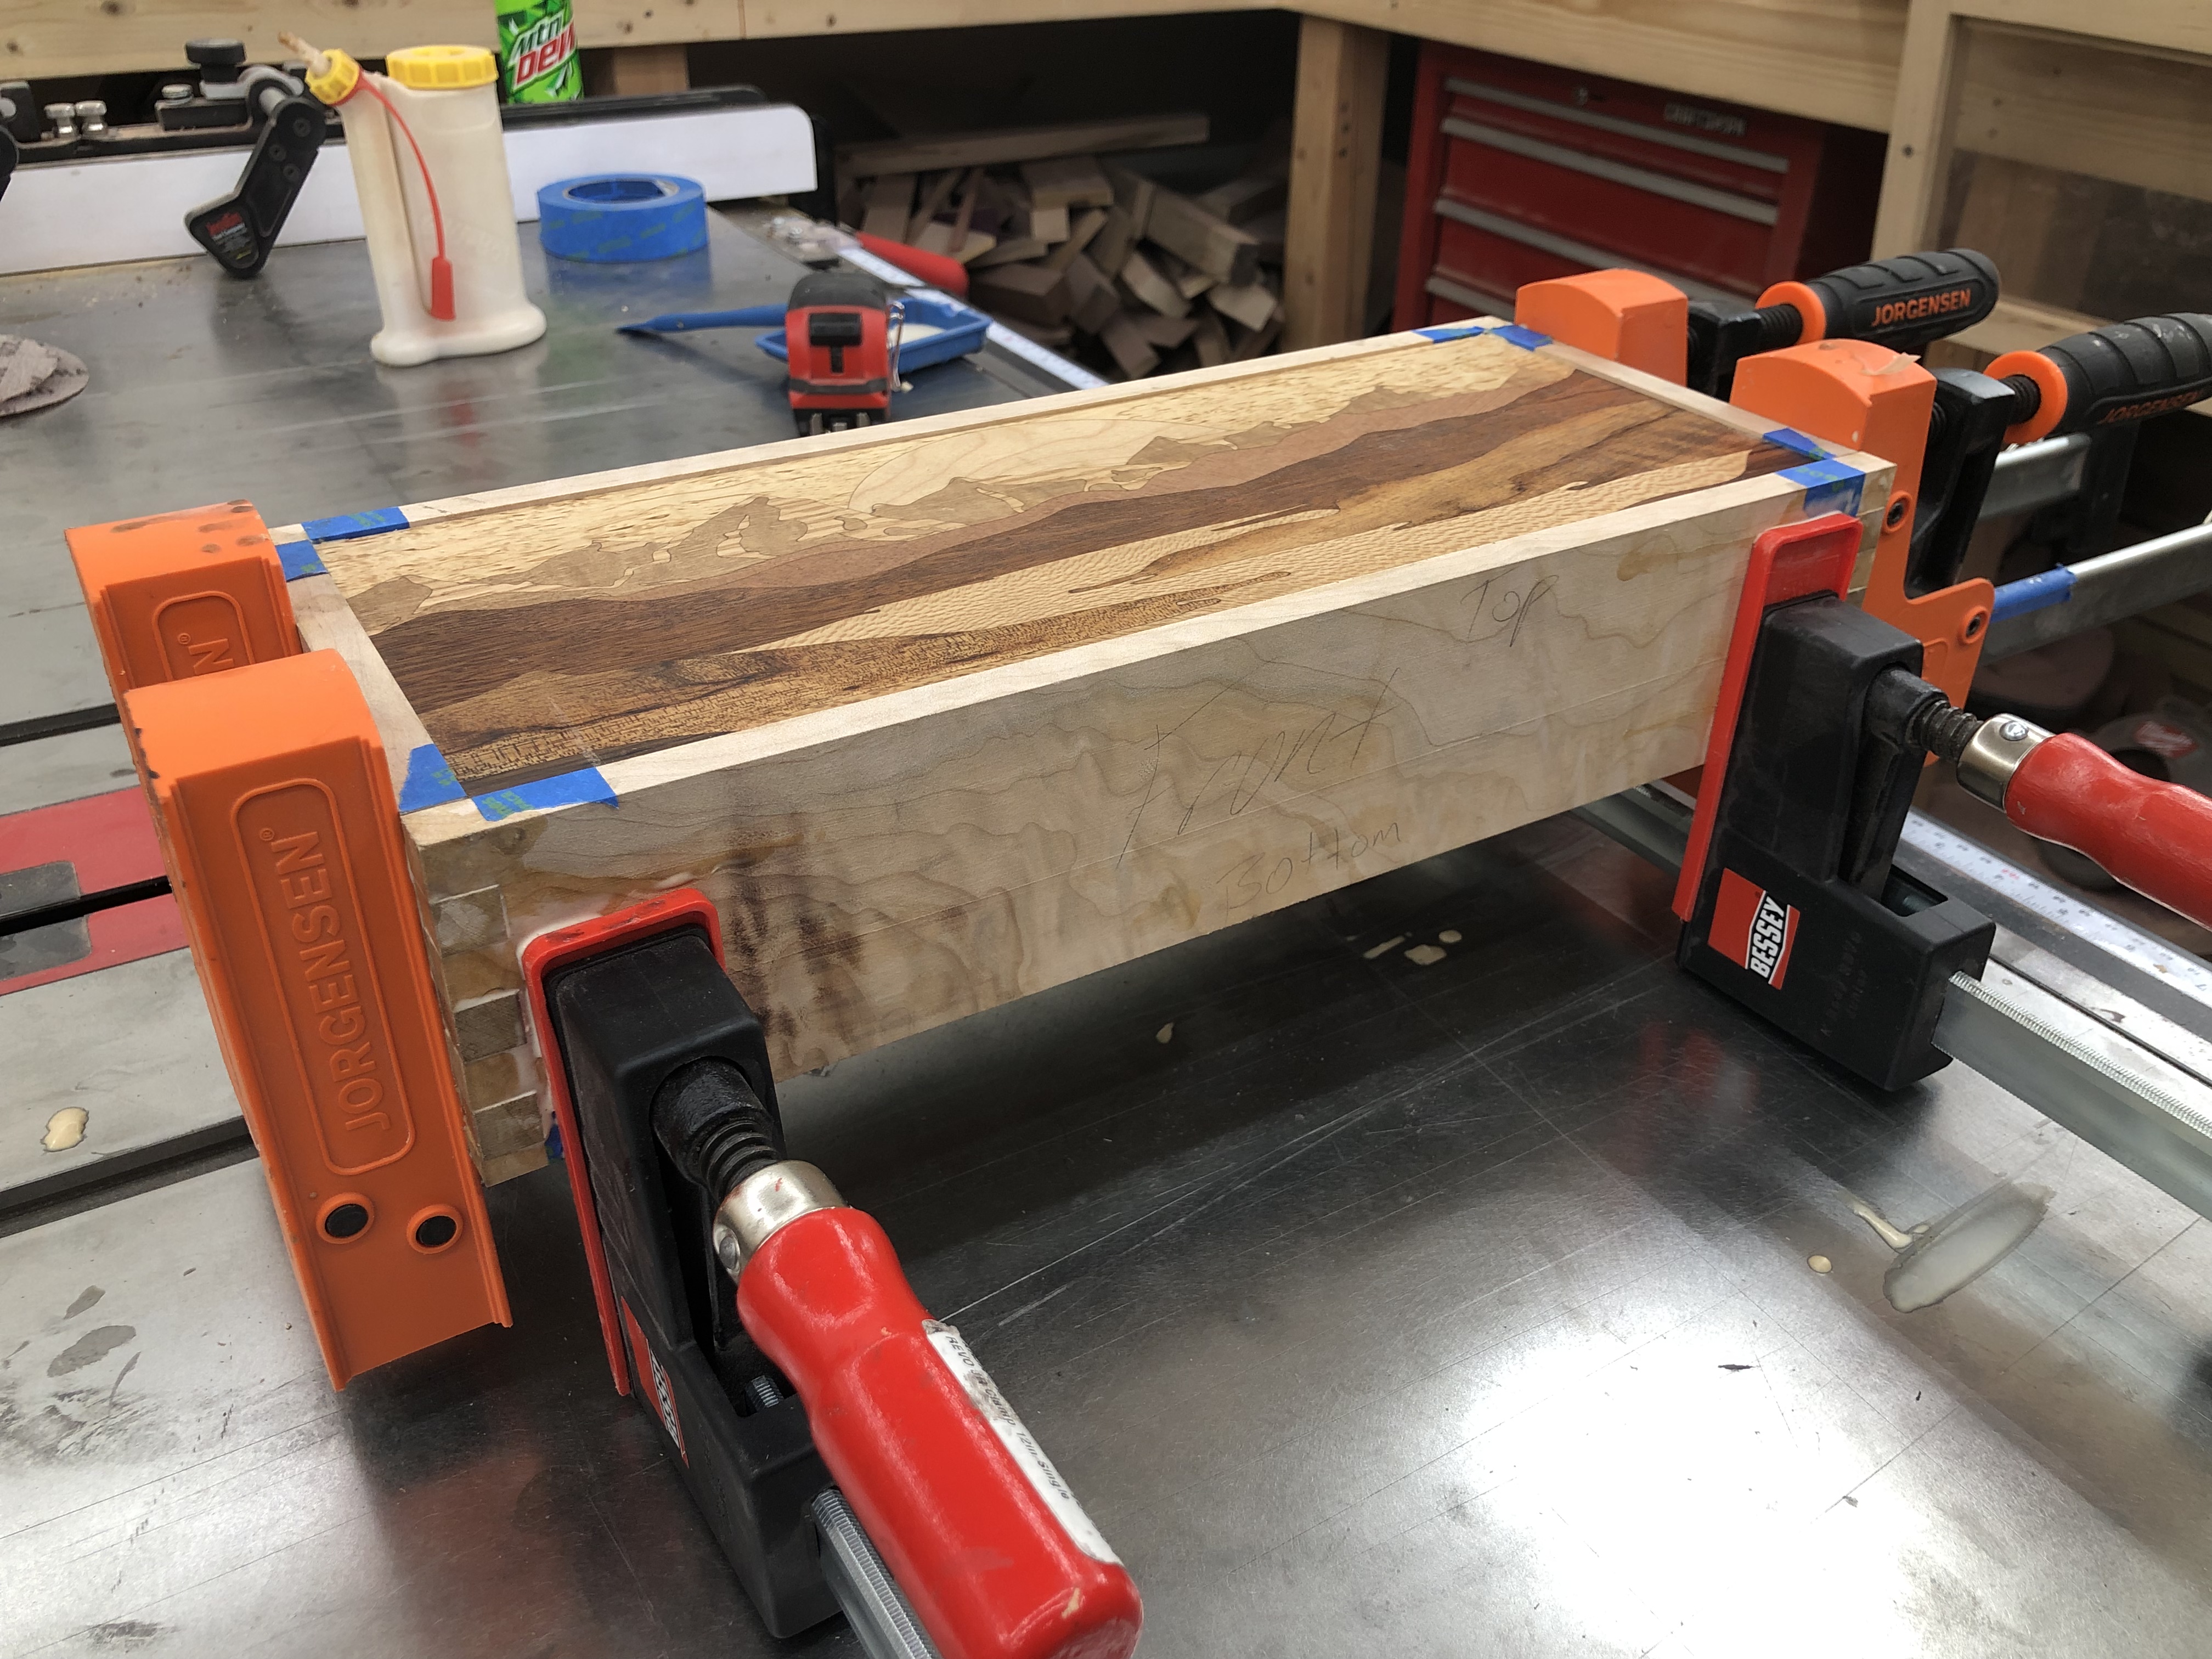
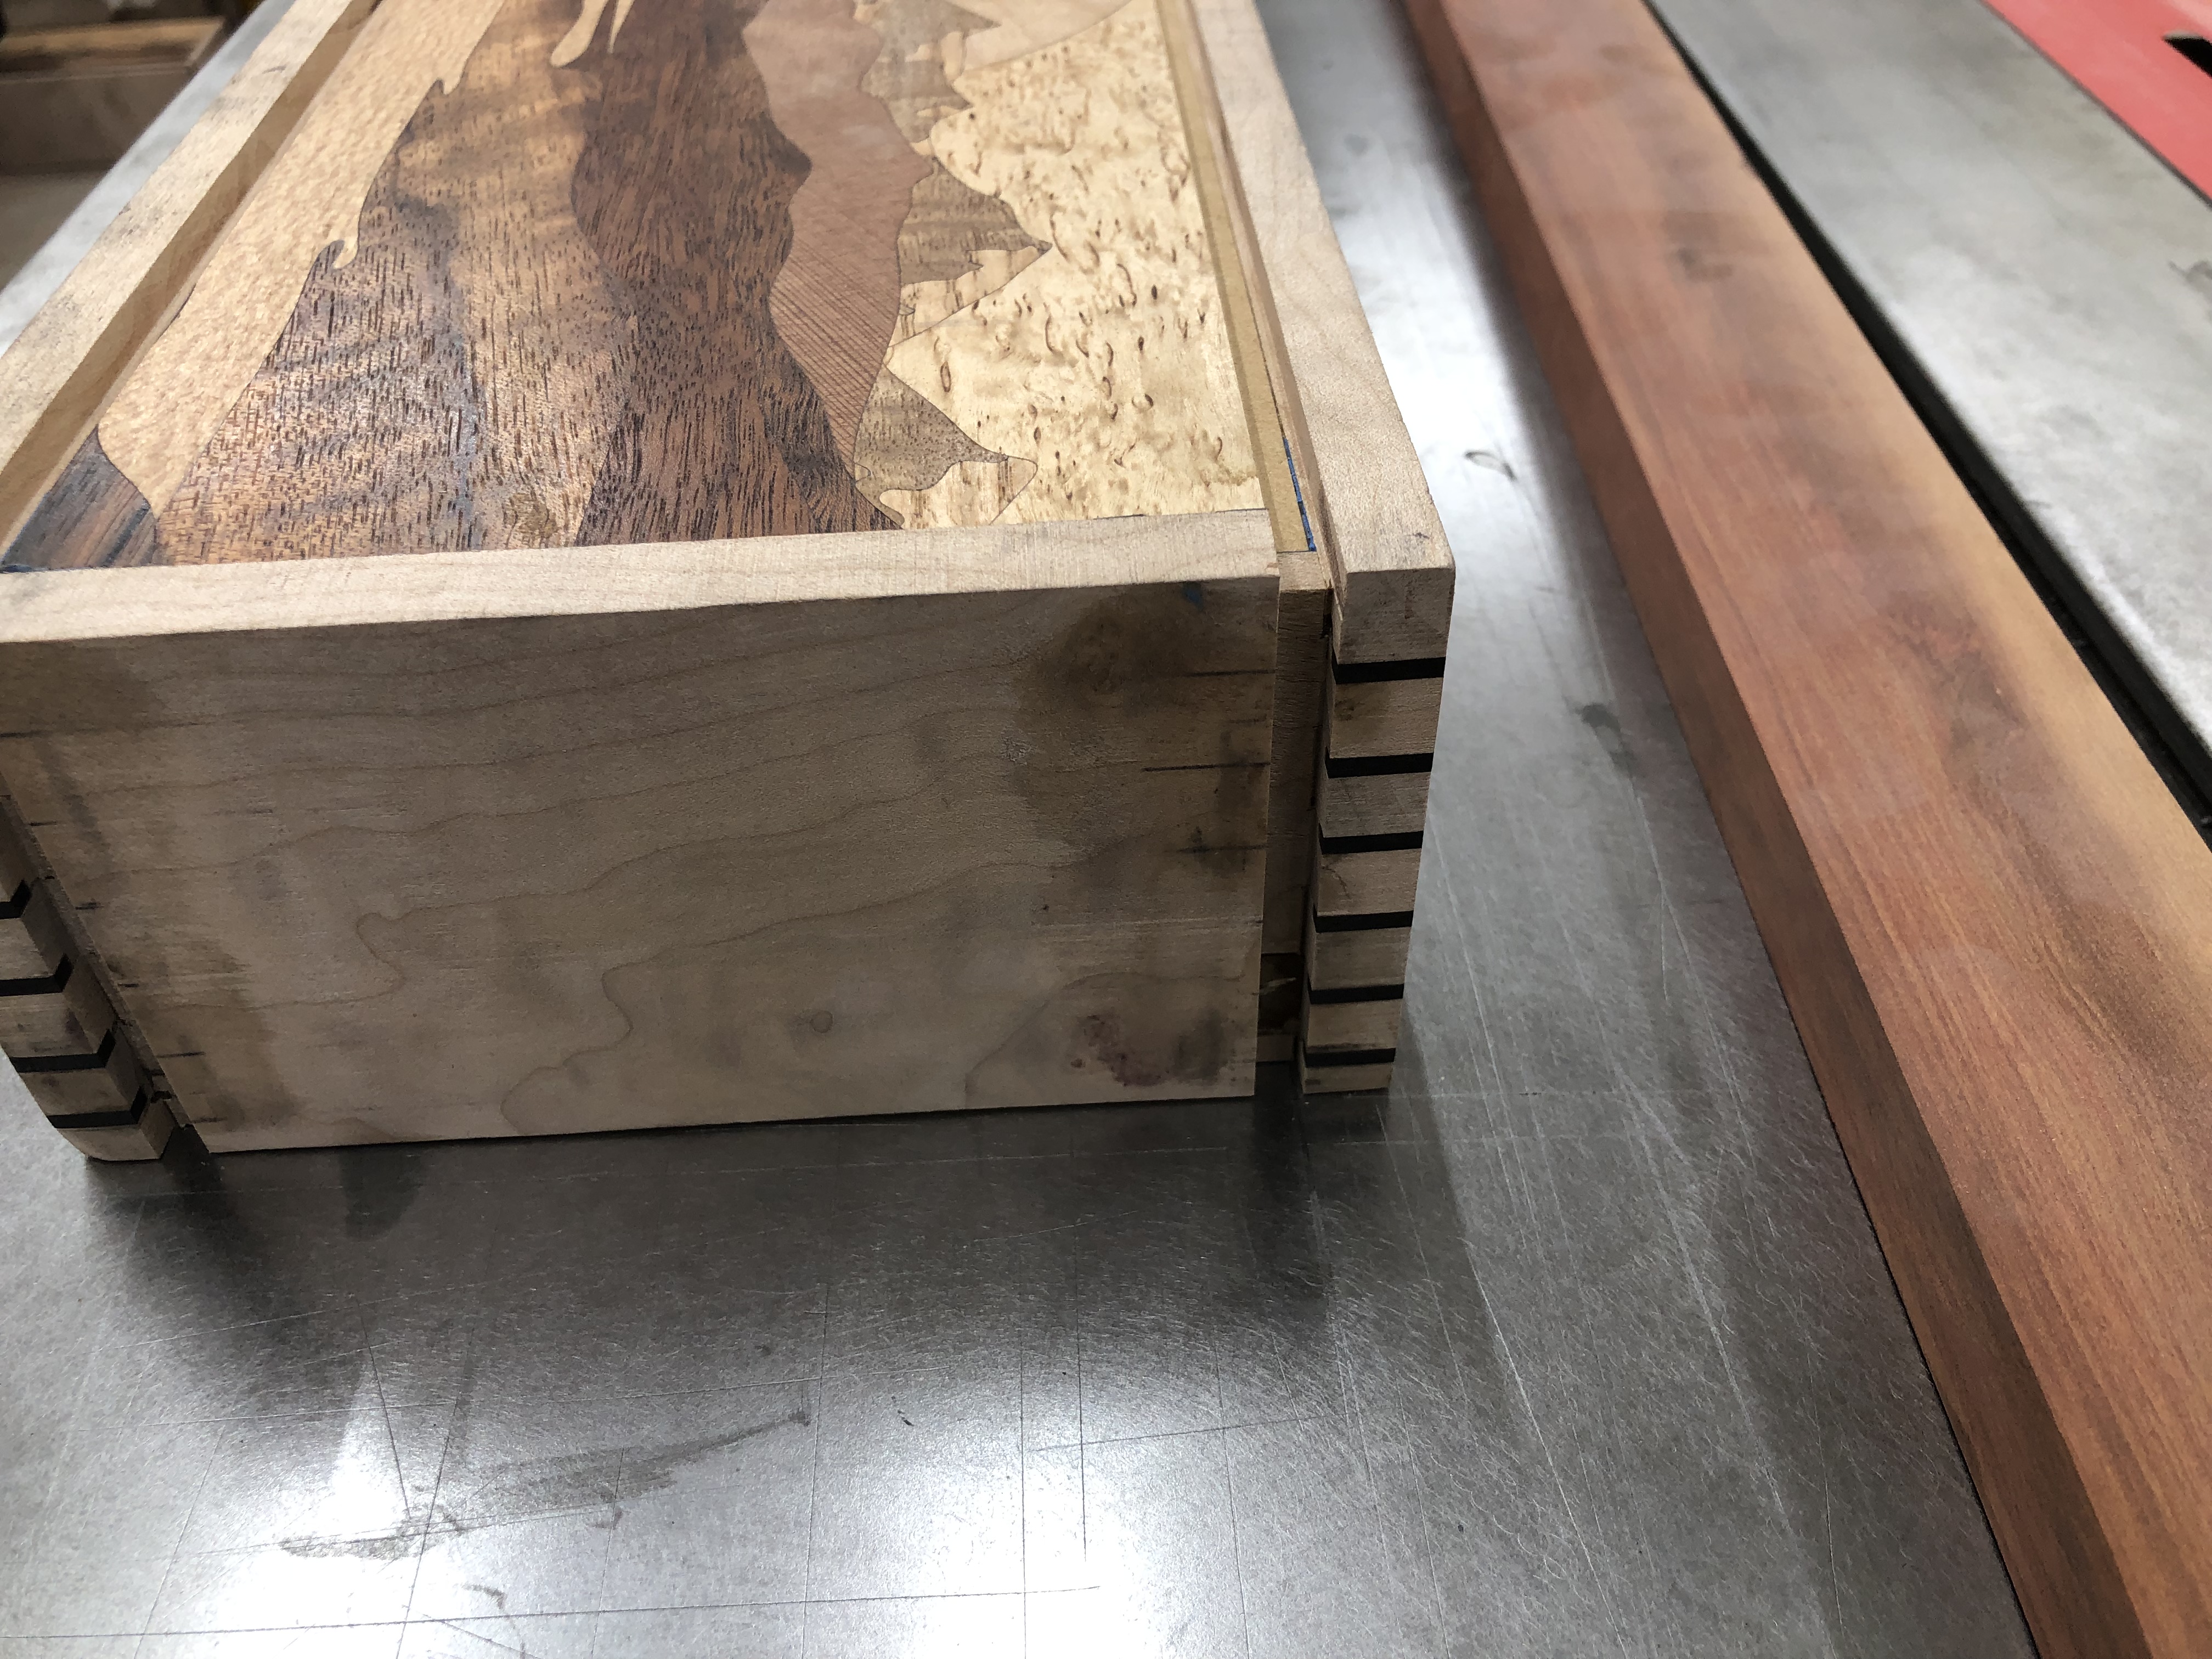
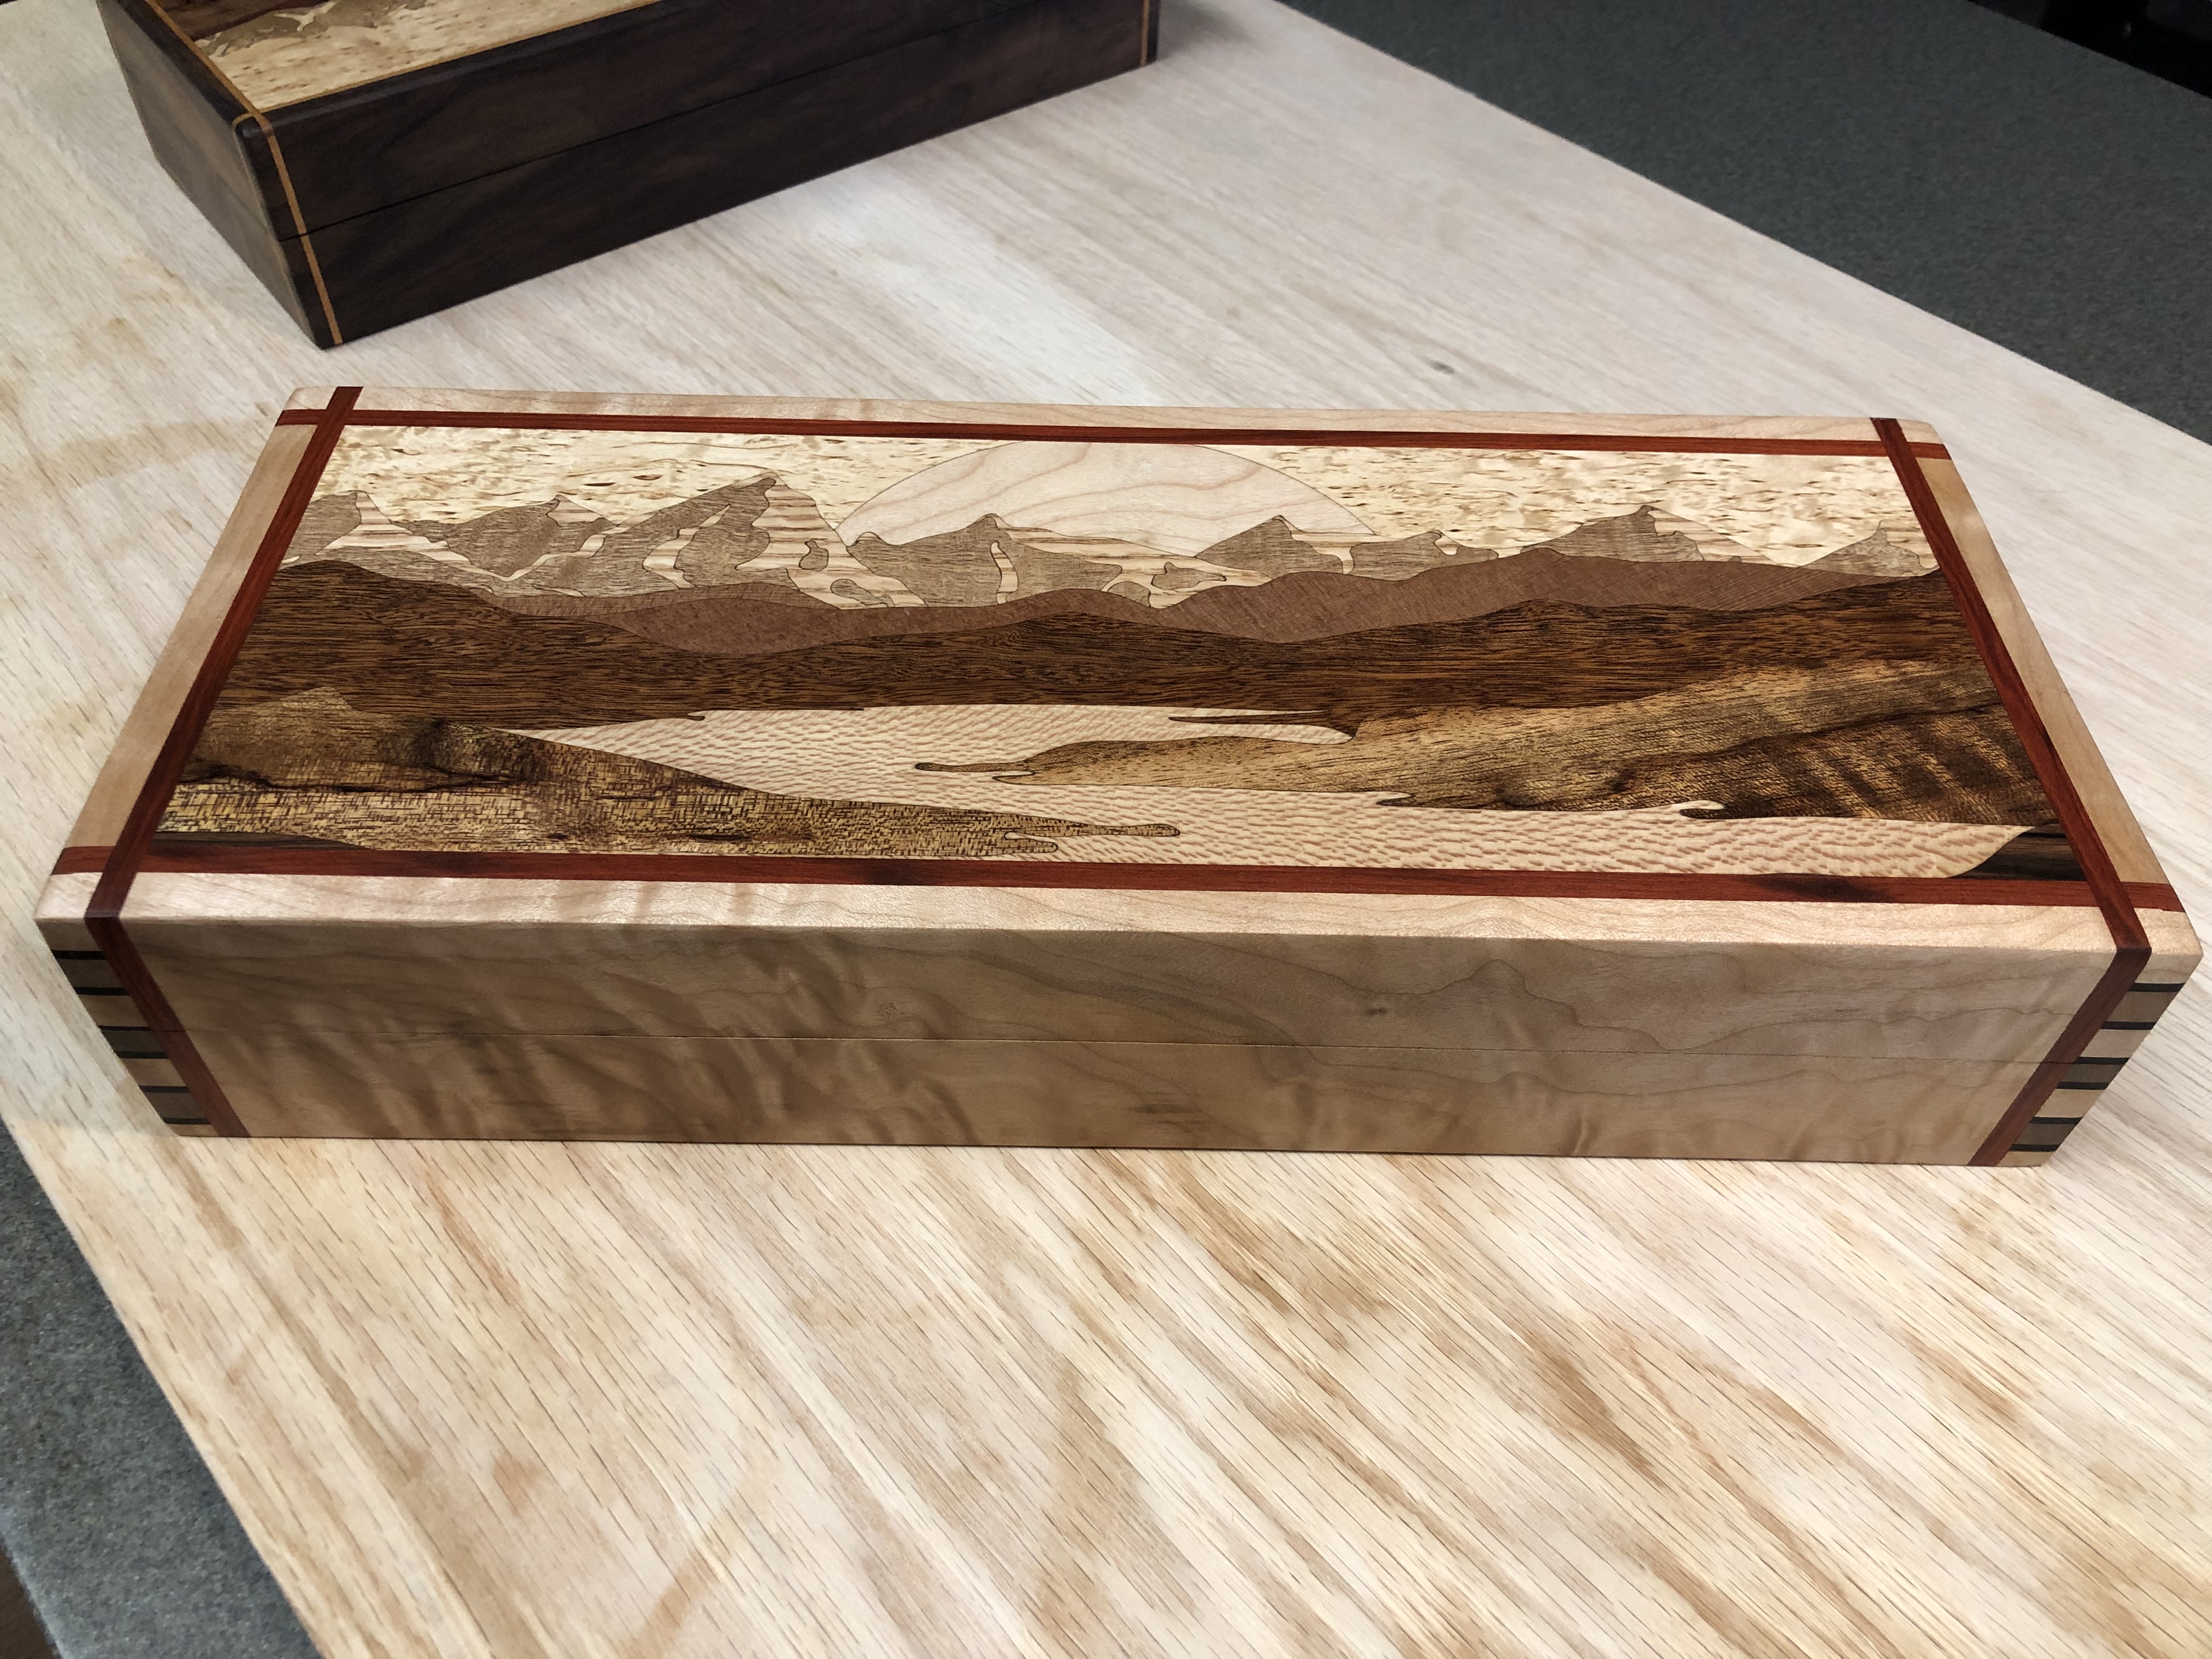
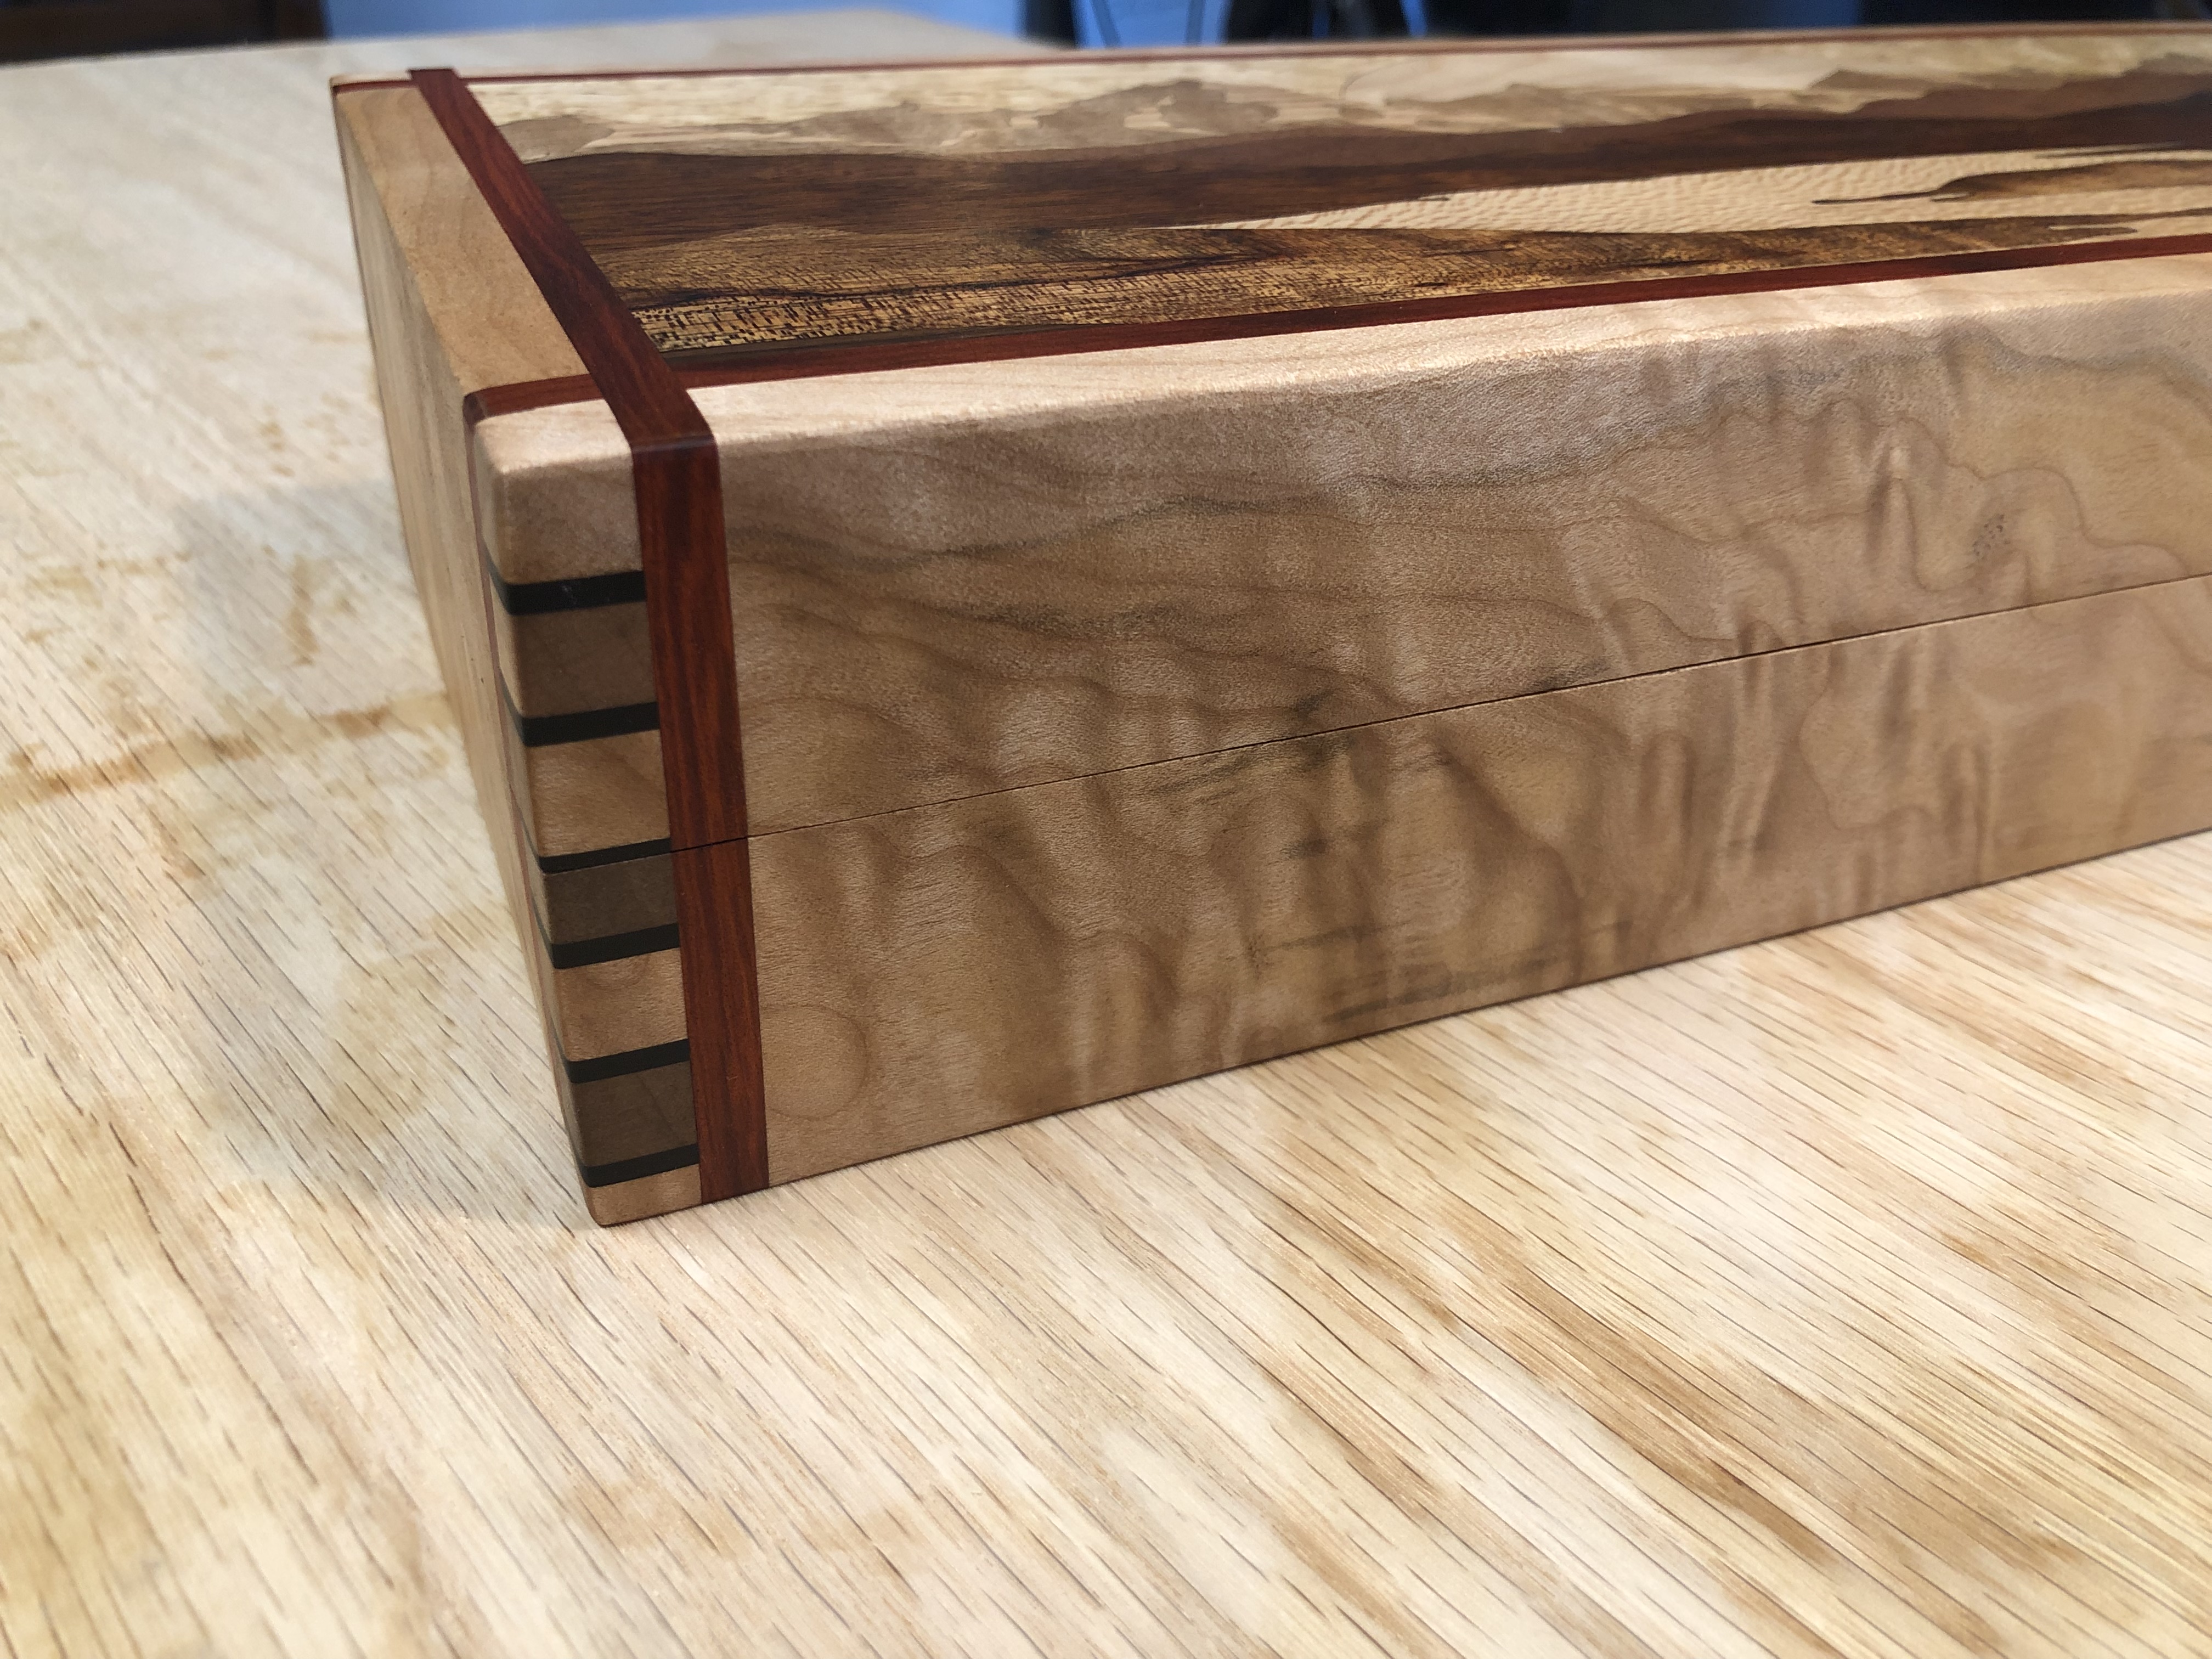
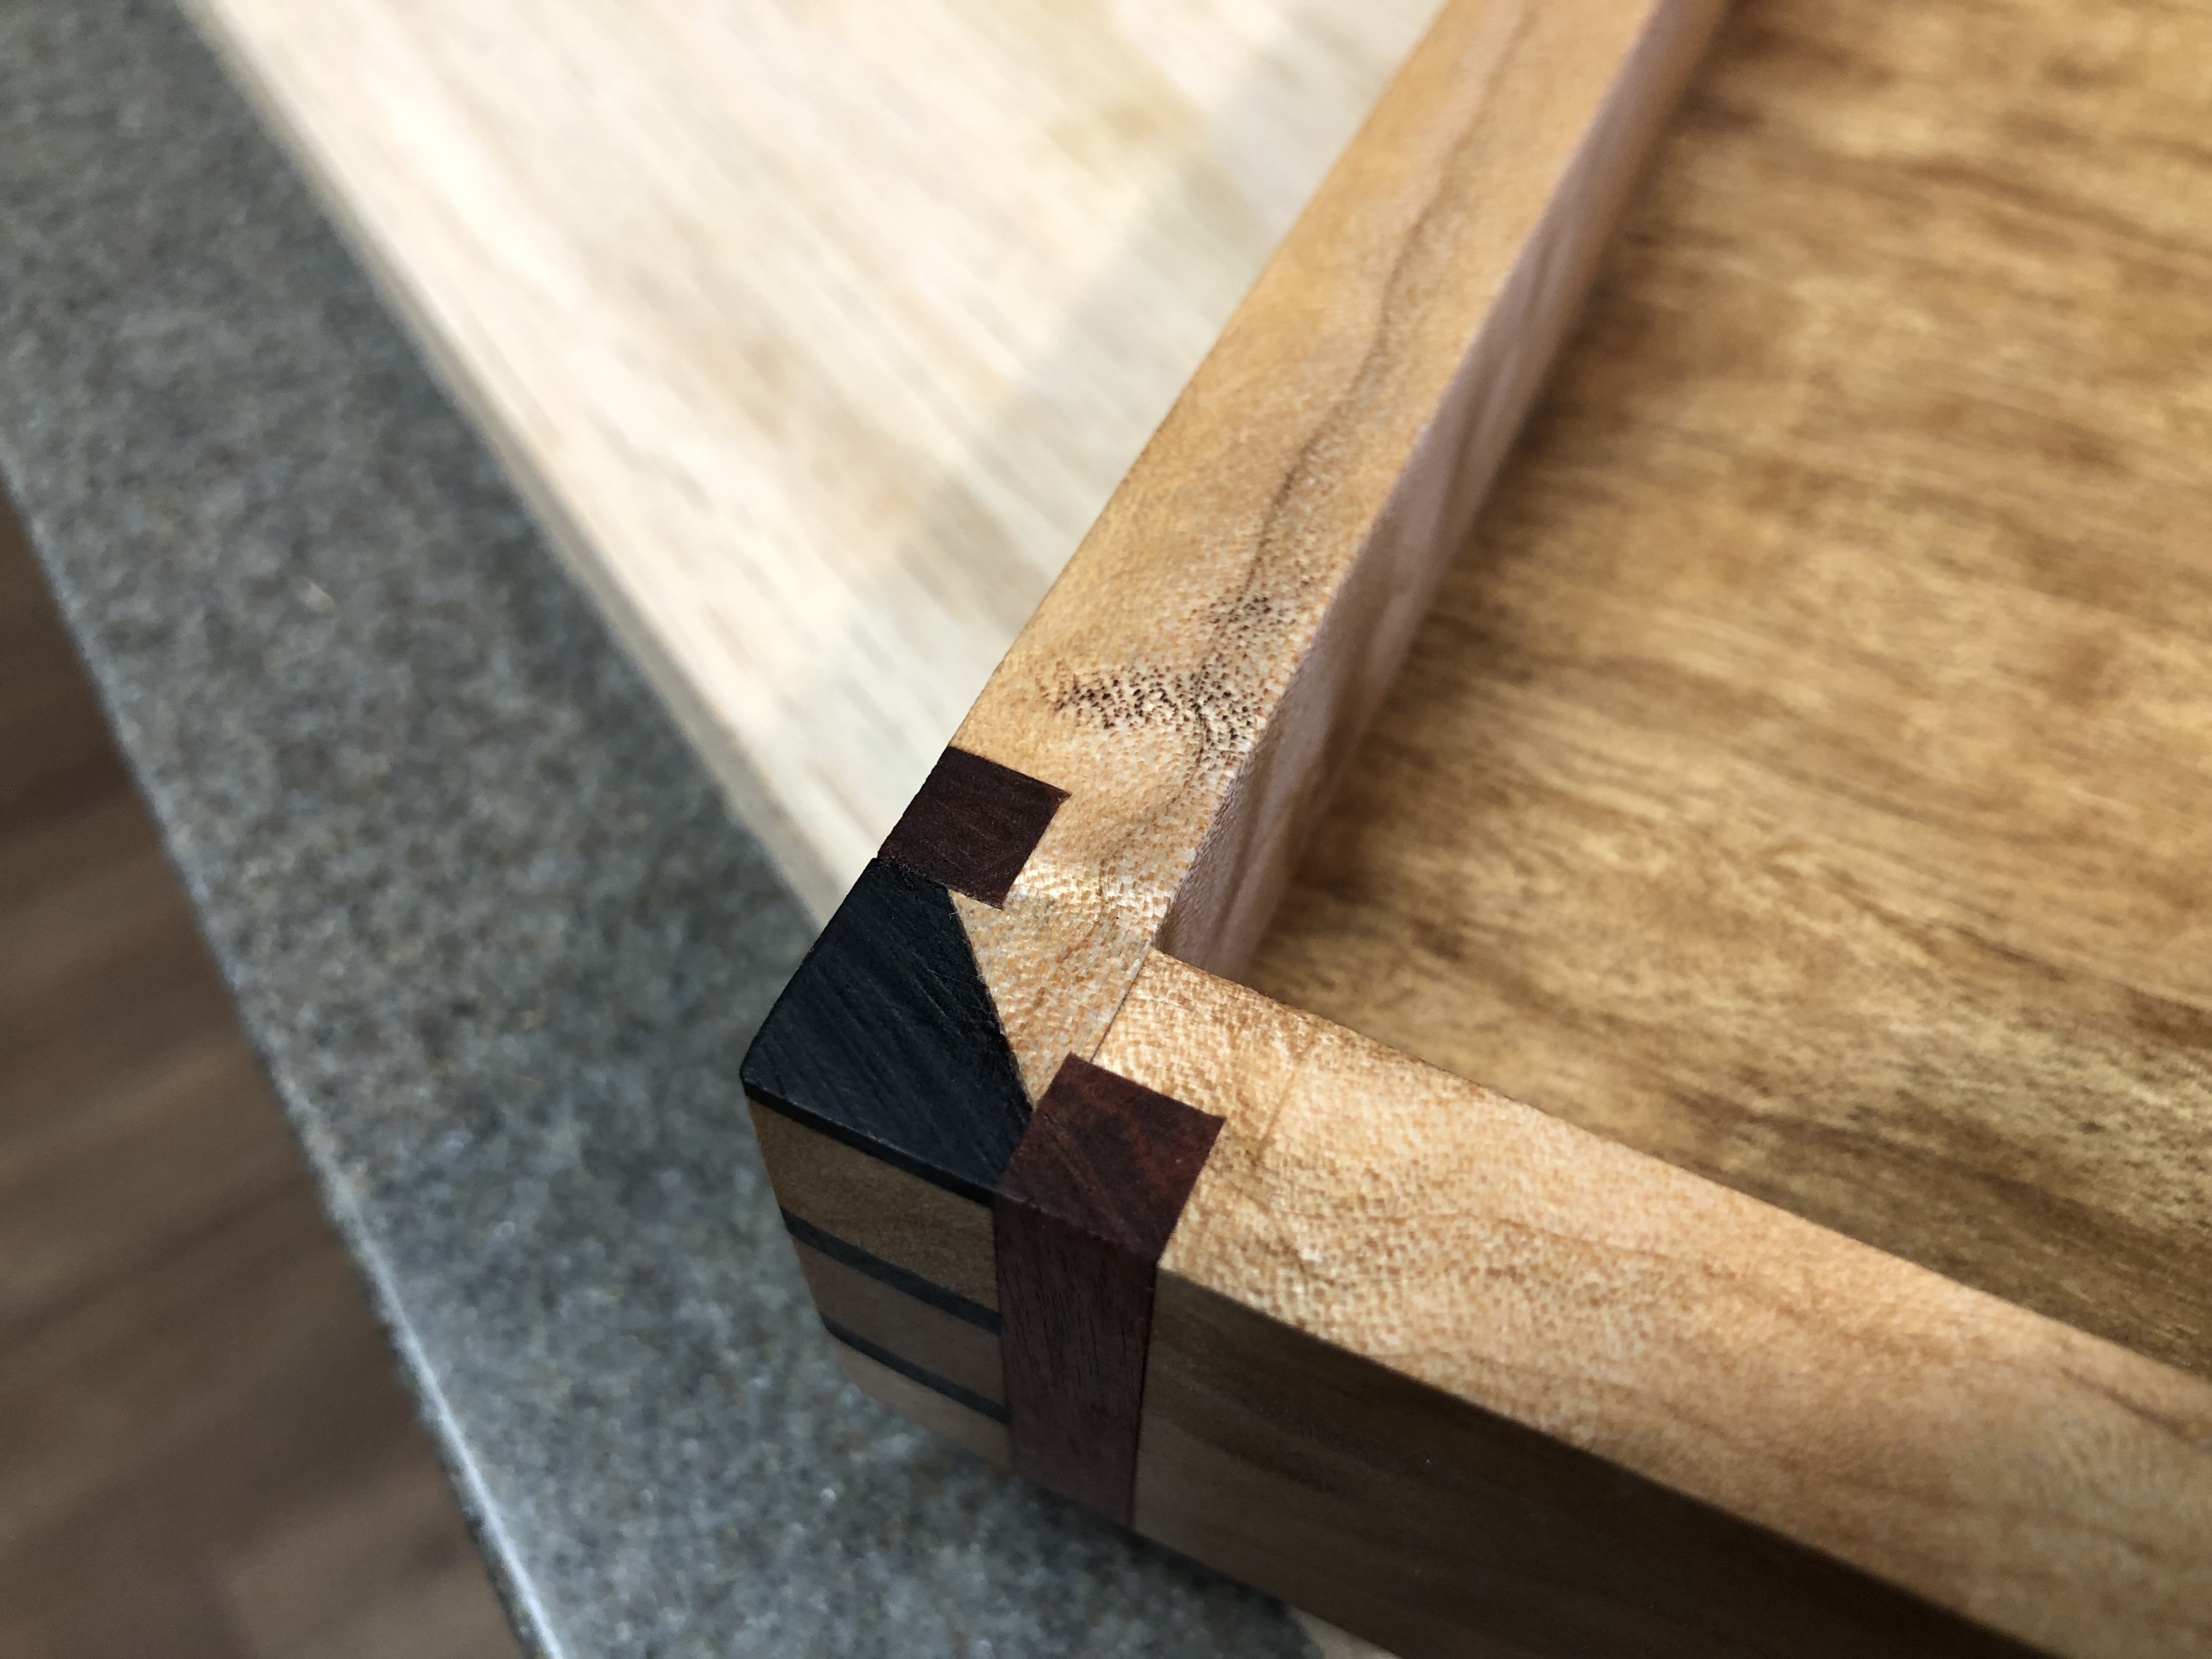
I started working on the keepsake box. I had some offcut quilted maple left over. The figure is still good for this. I’ll do some inlayed splined box joints for something extra.
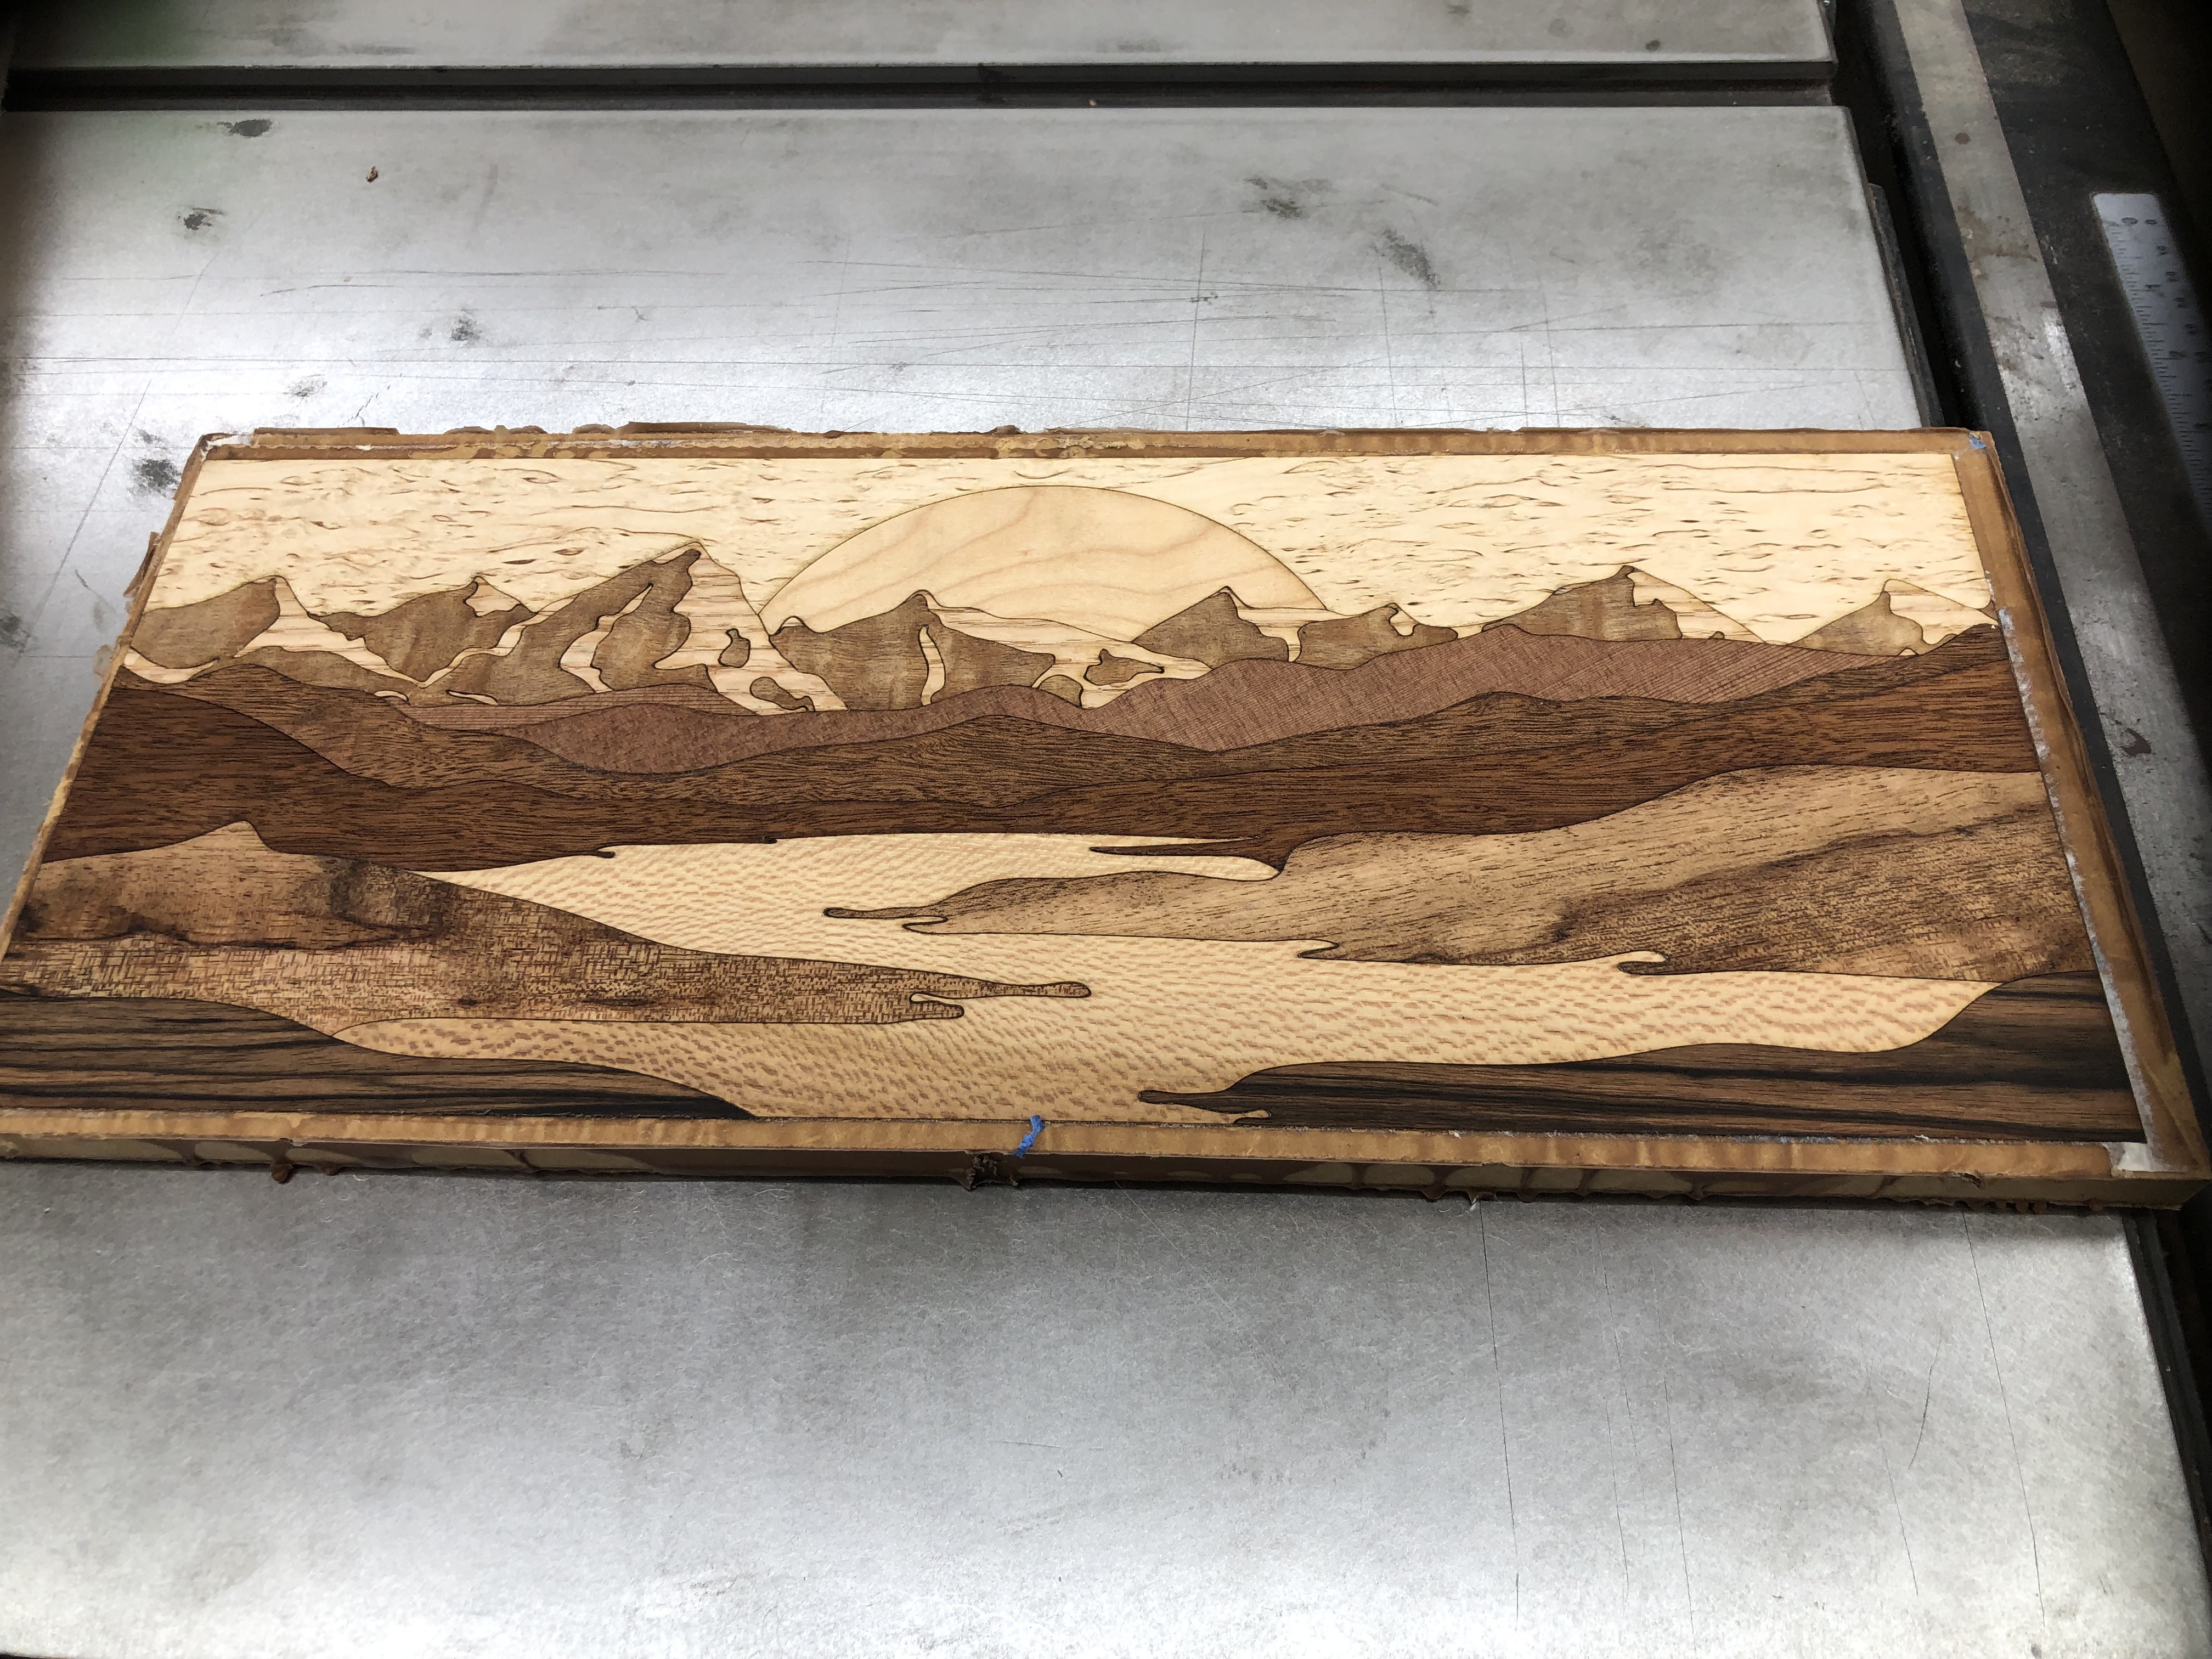
Also did some marquetry for the top of the box.
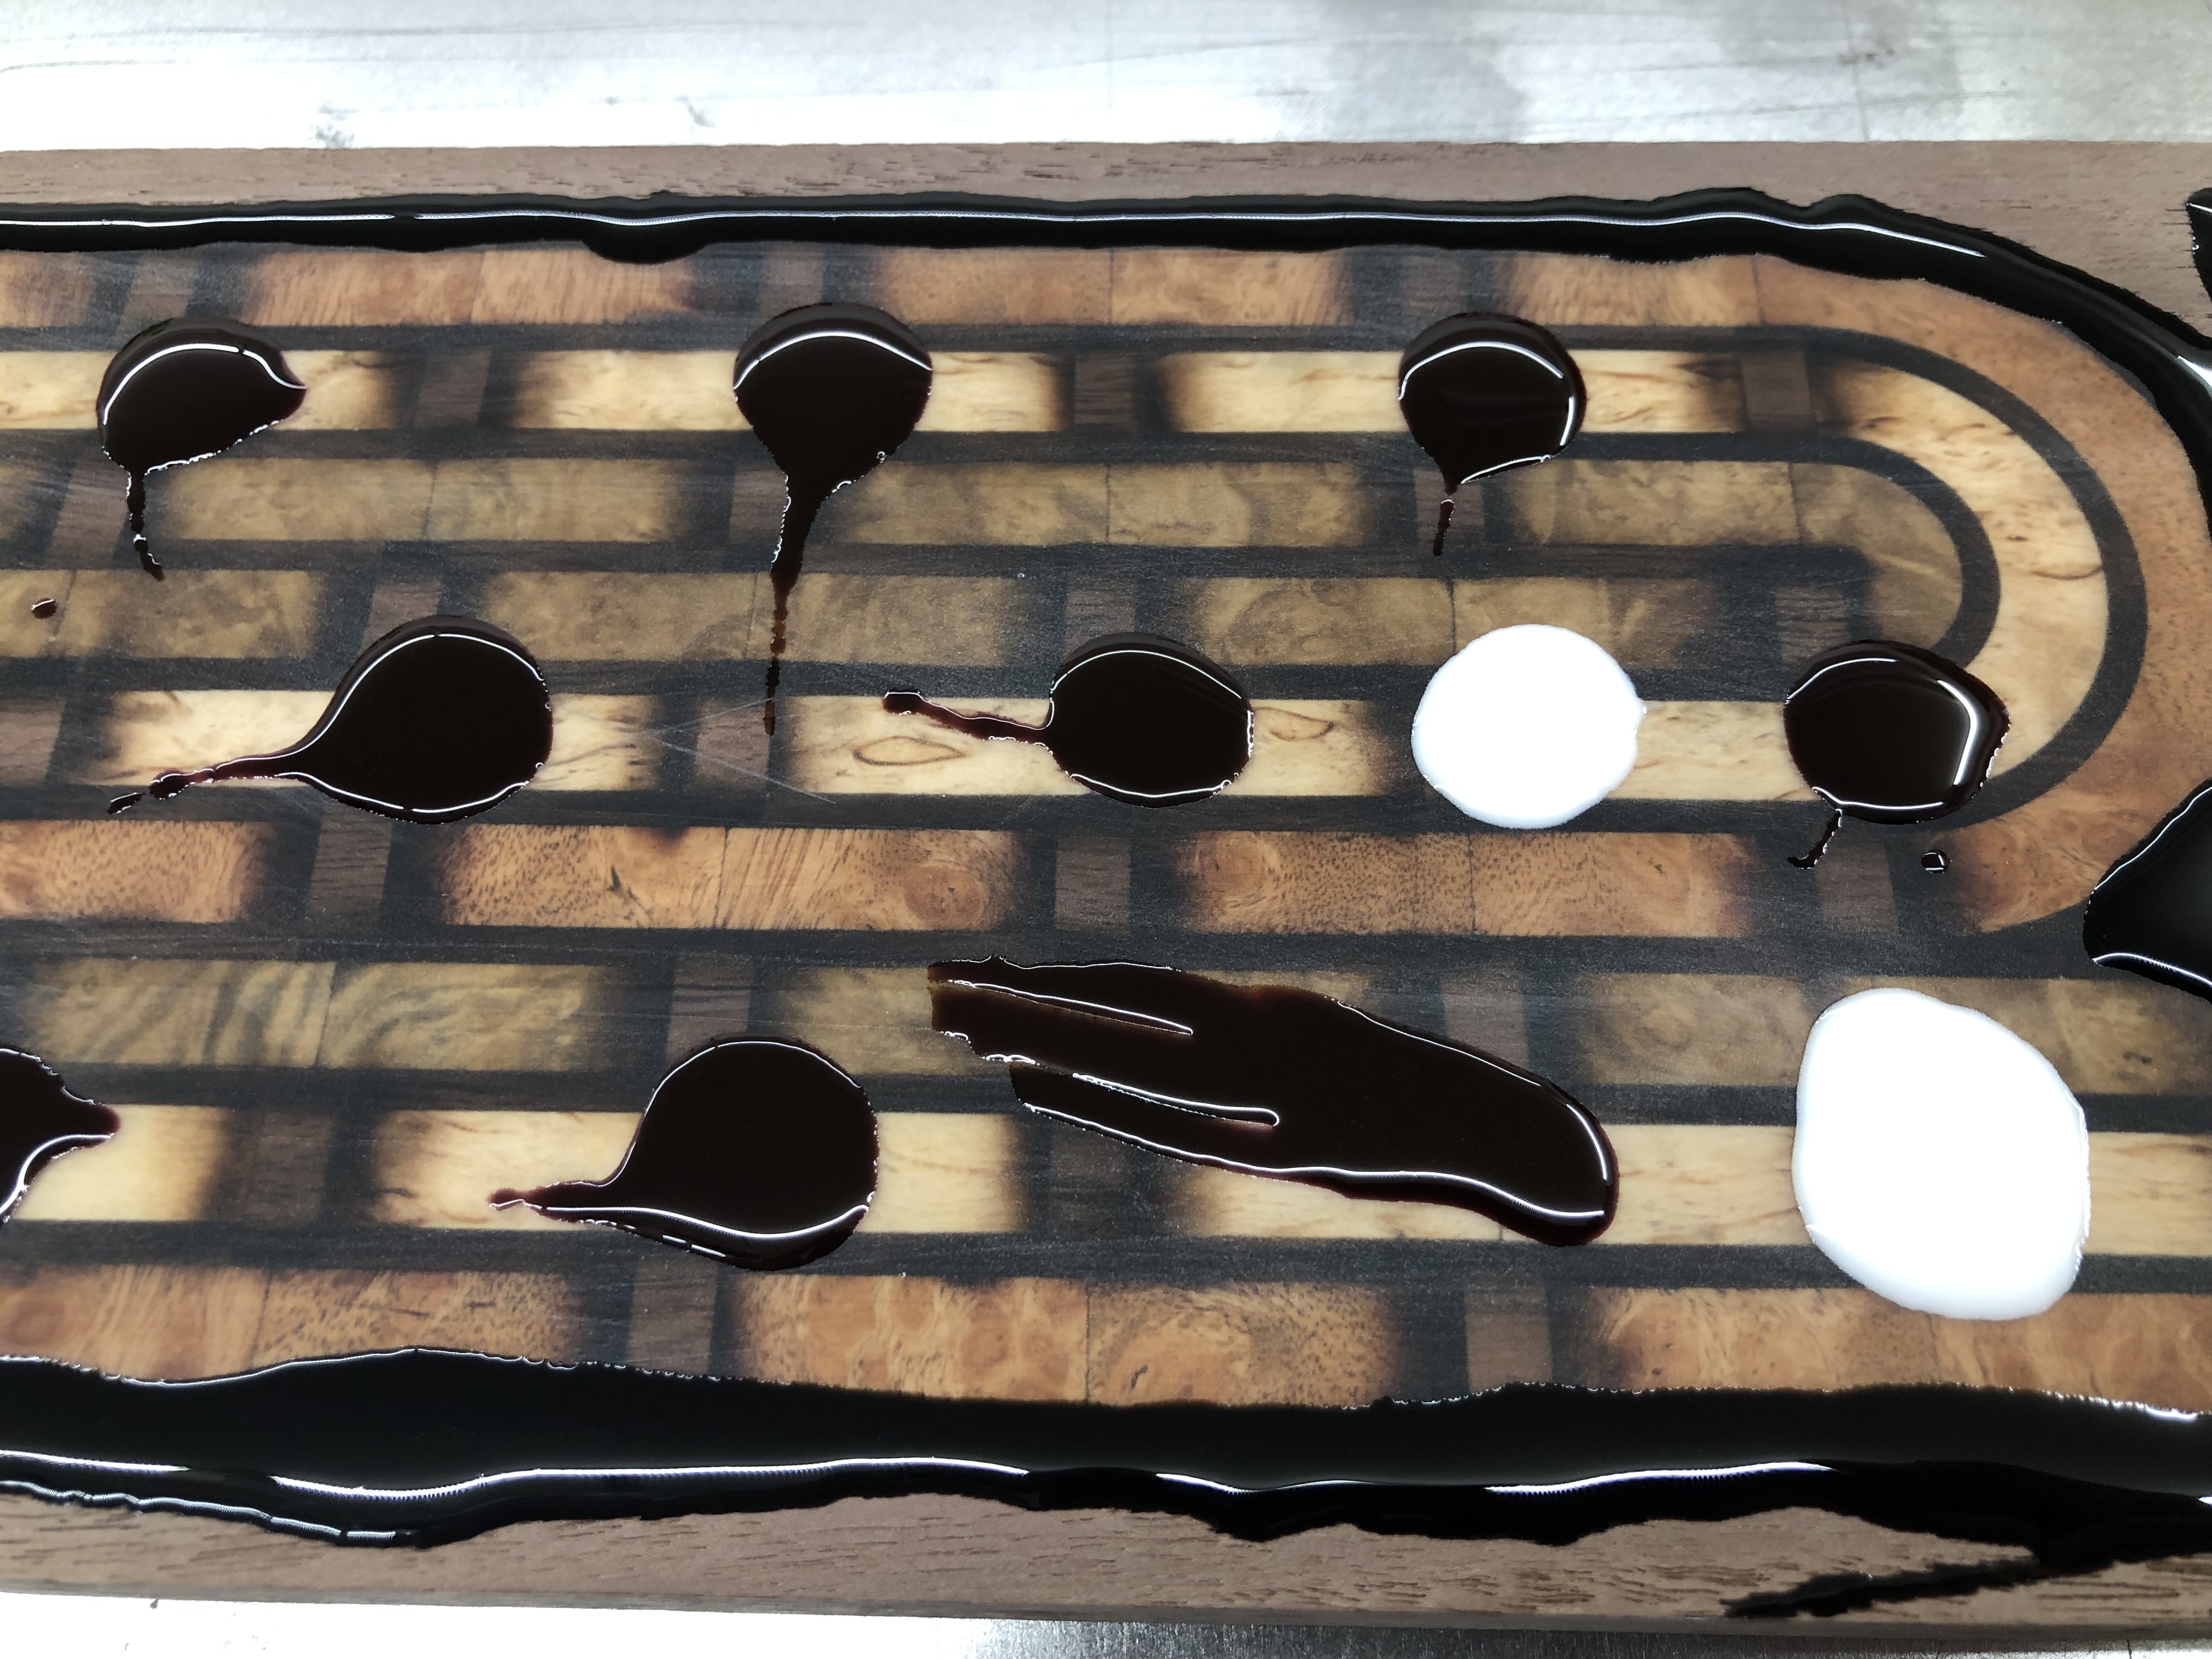
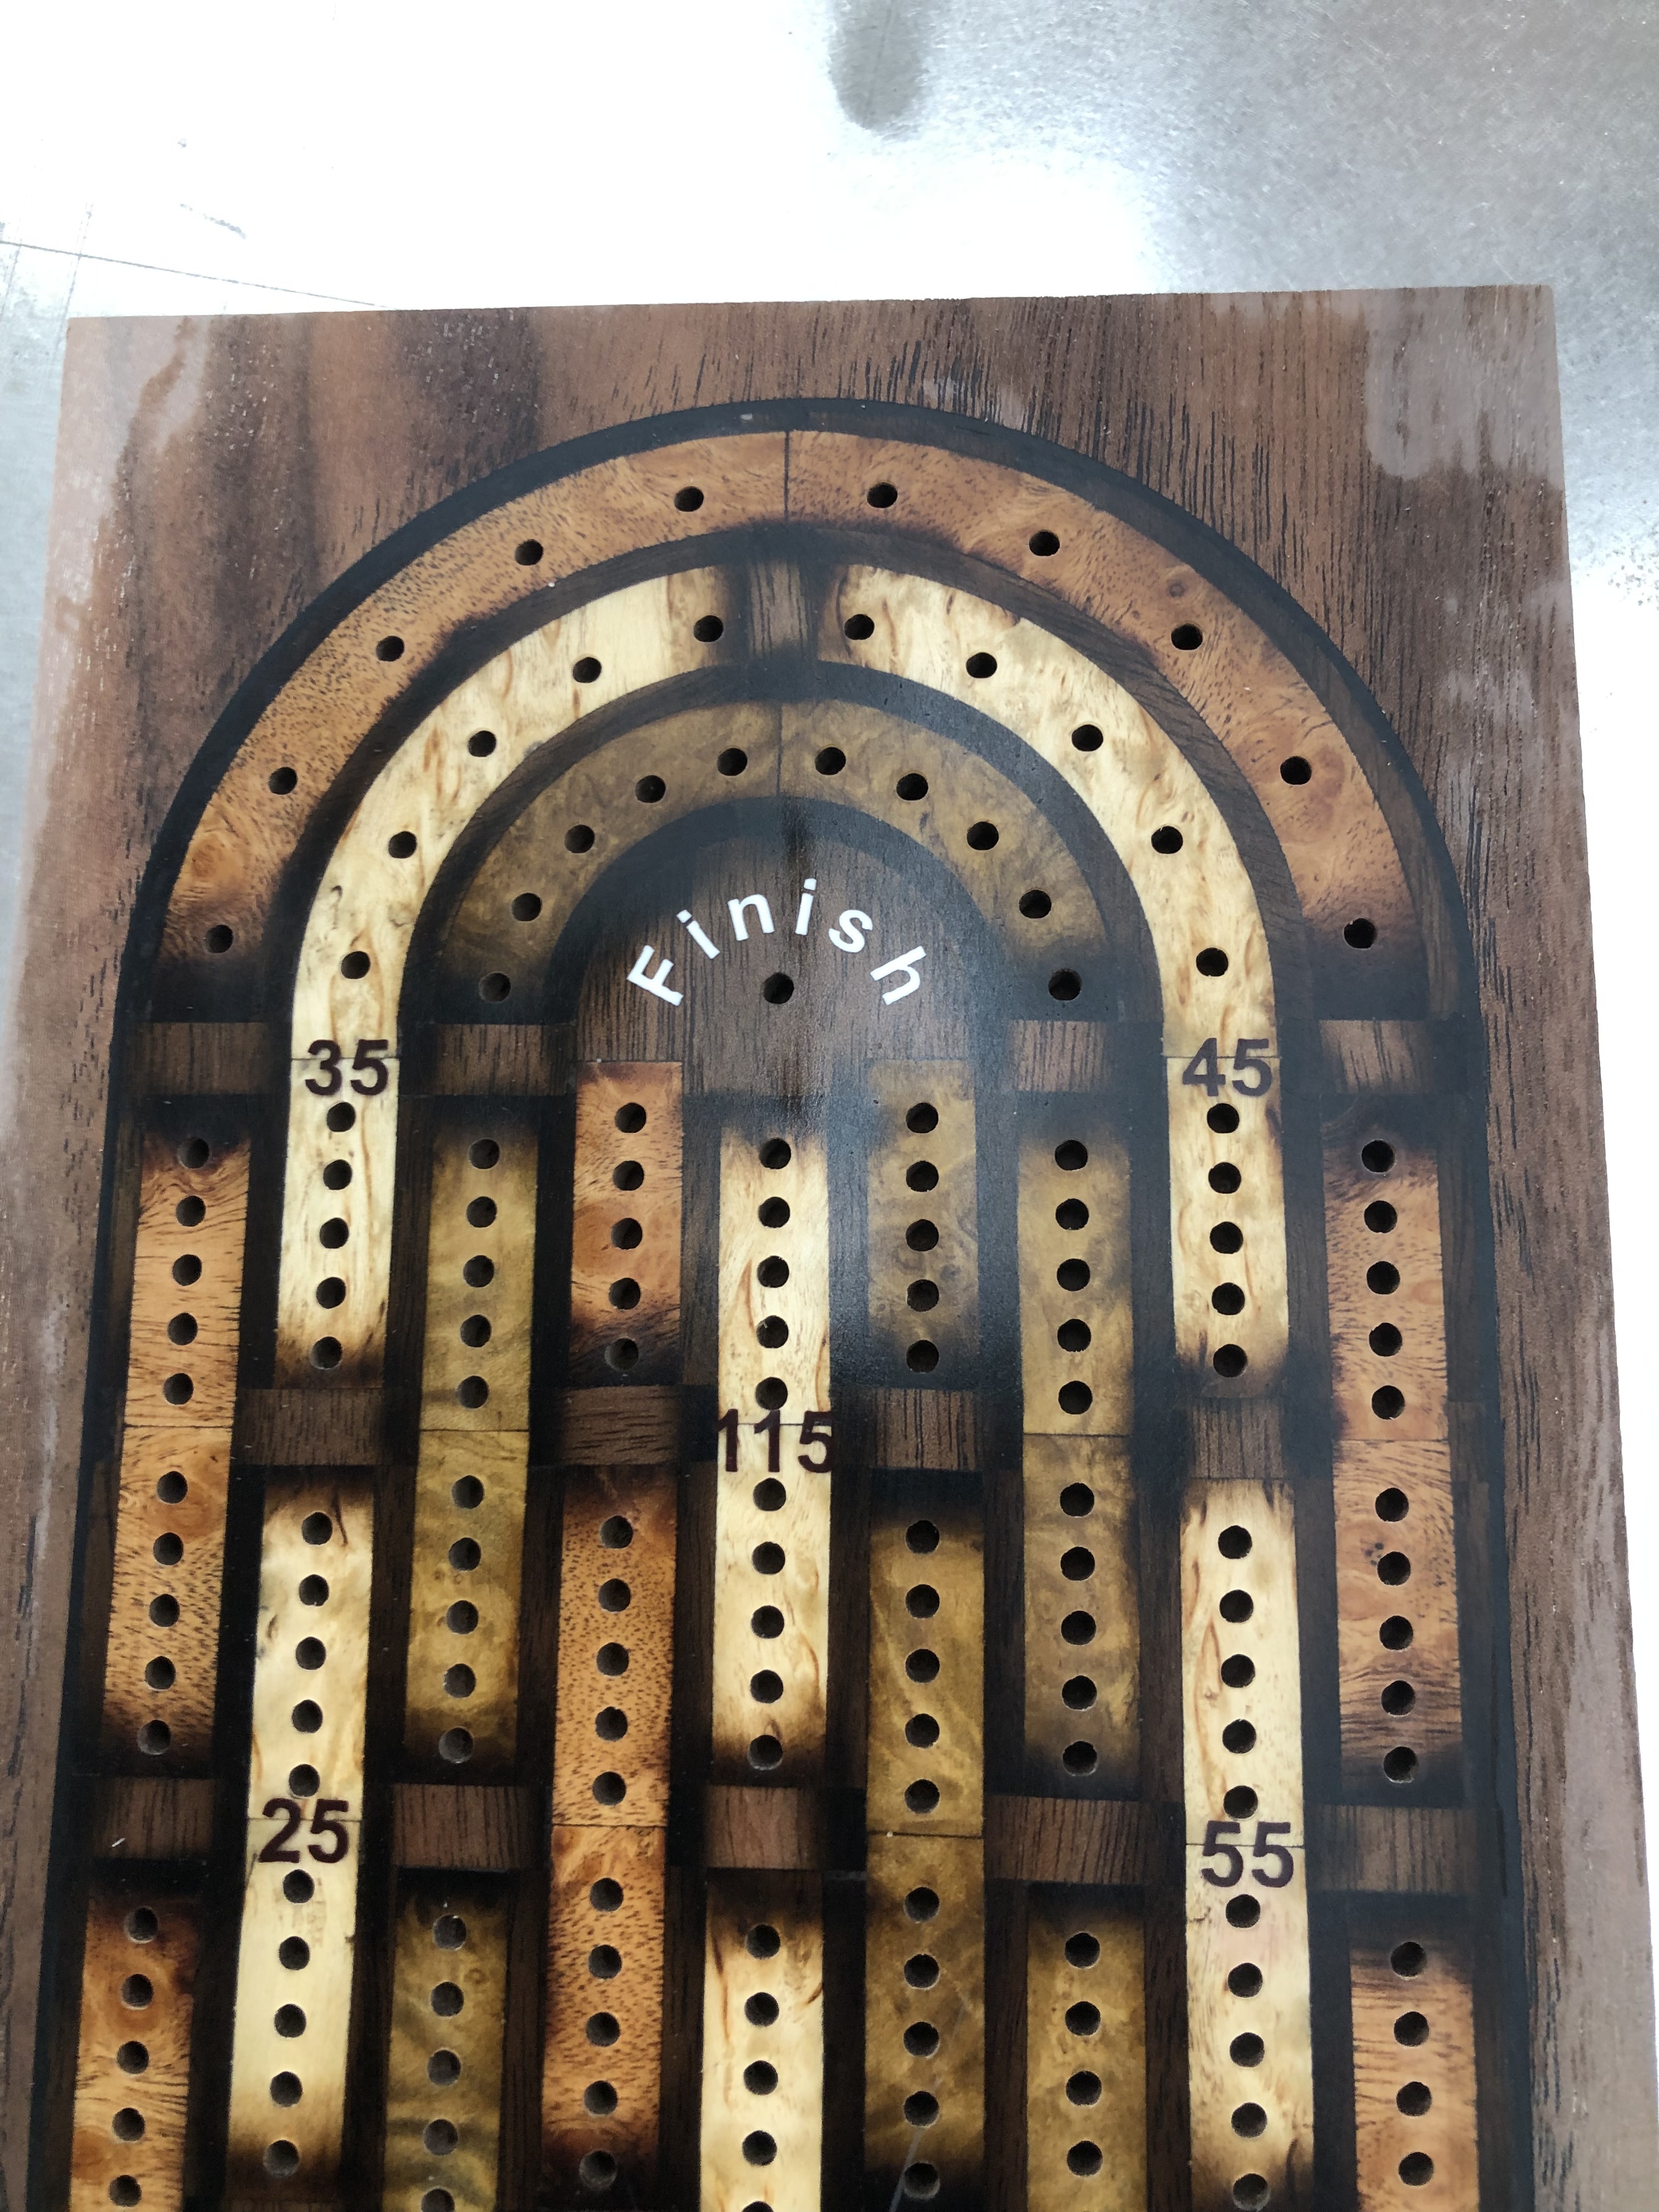
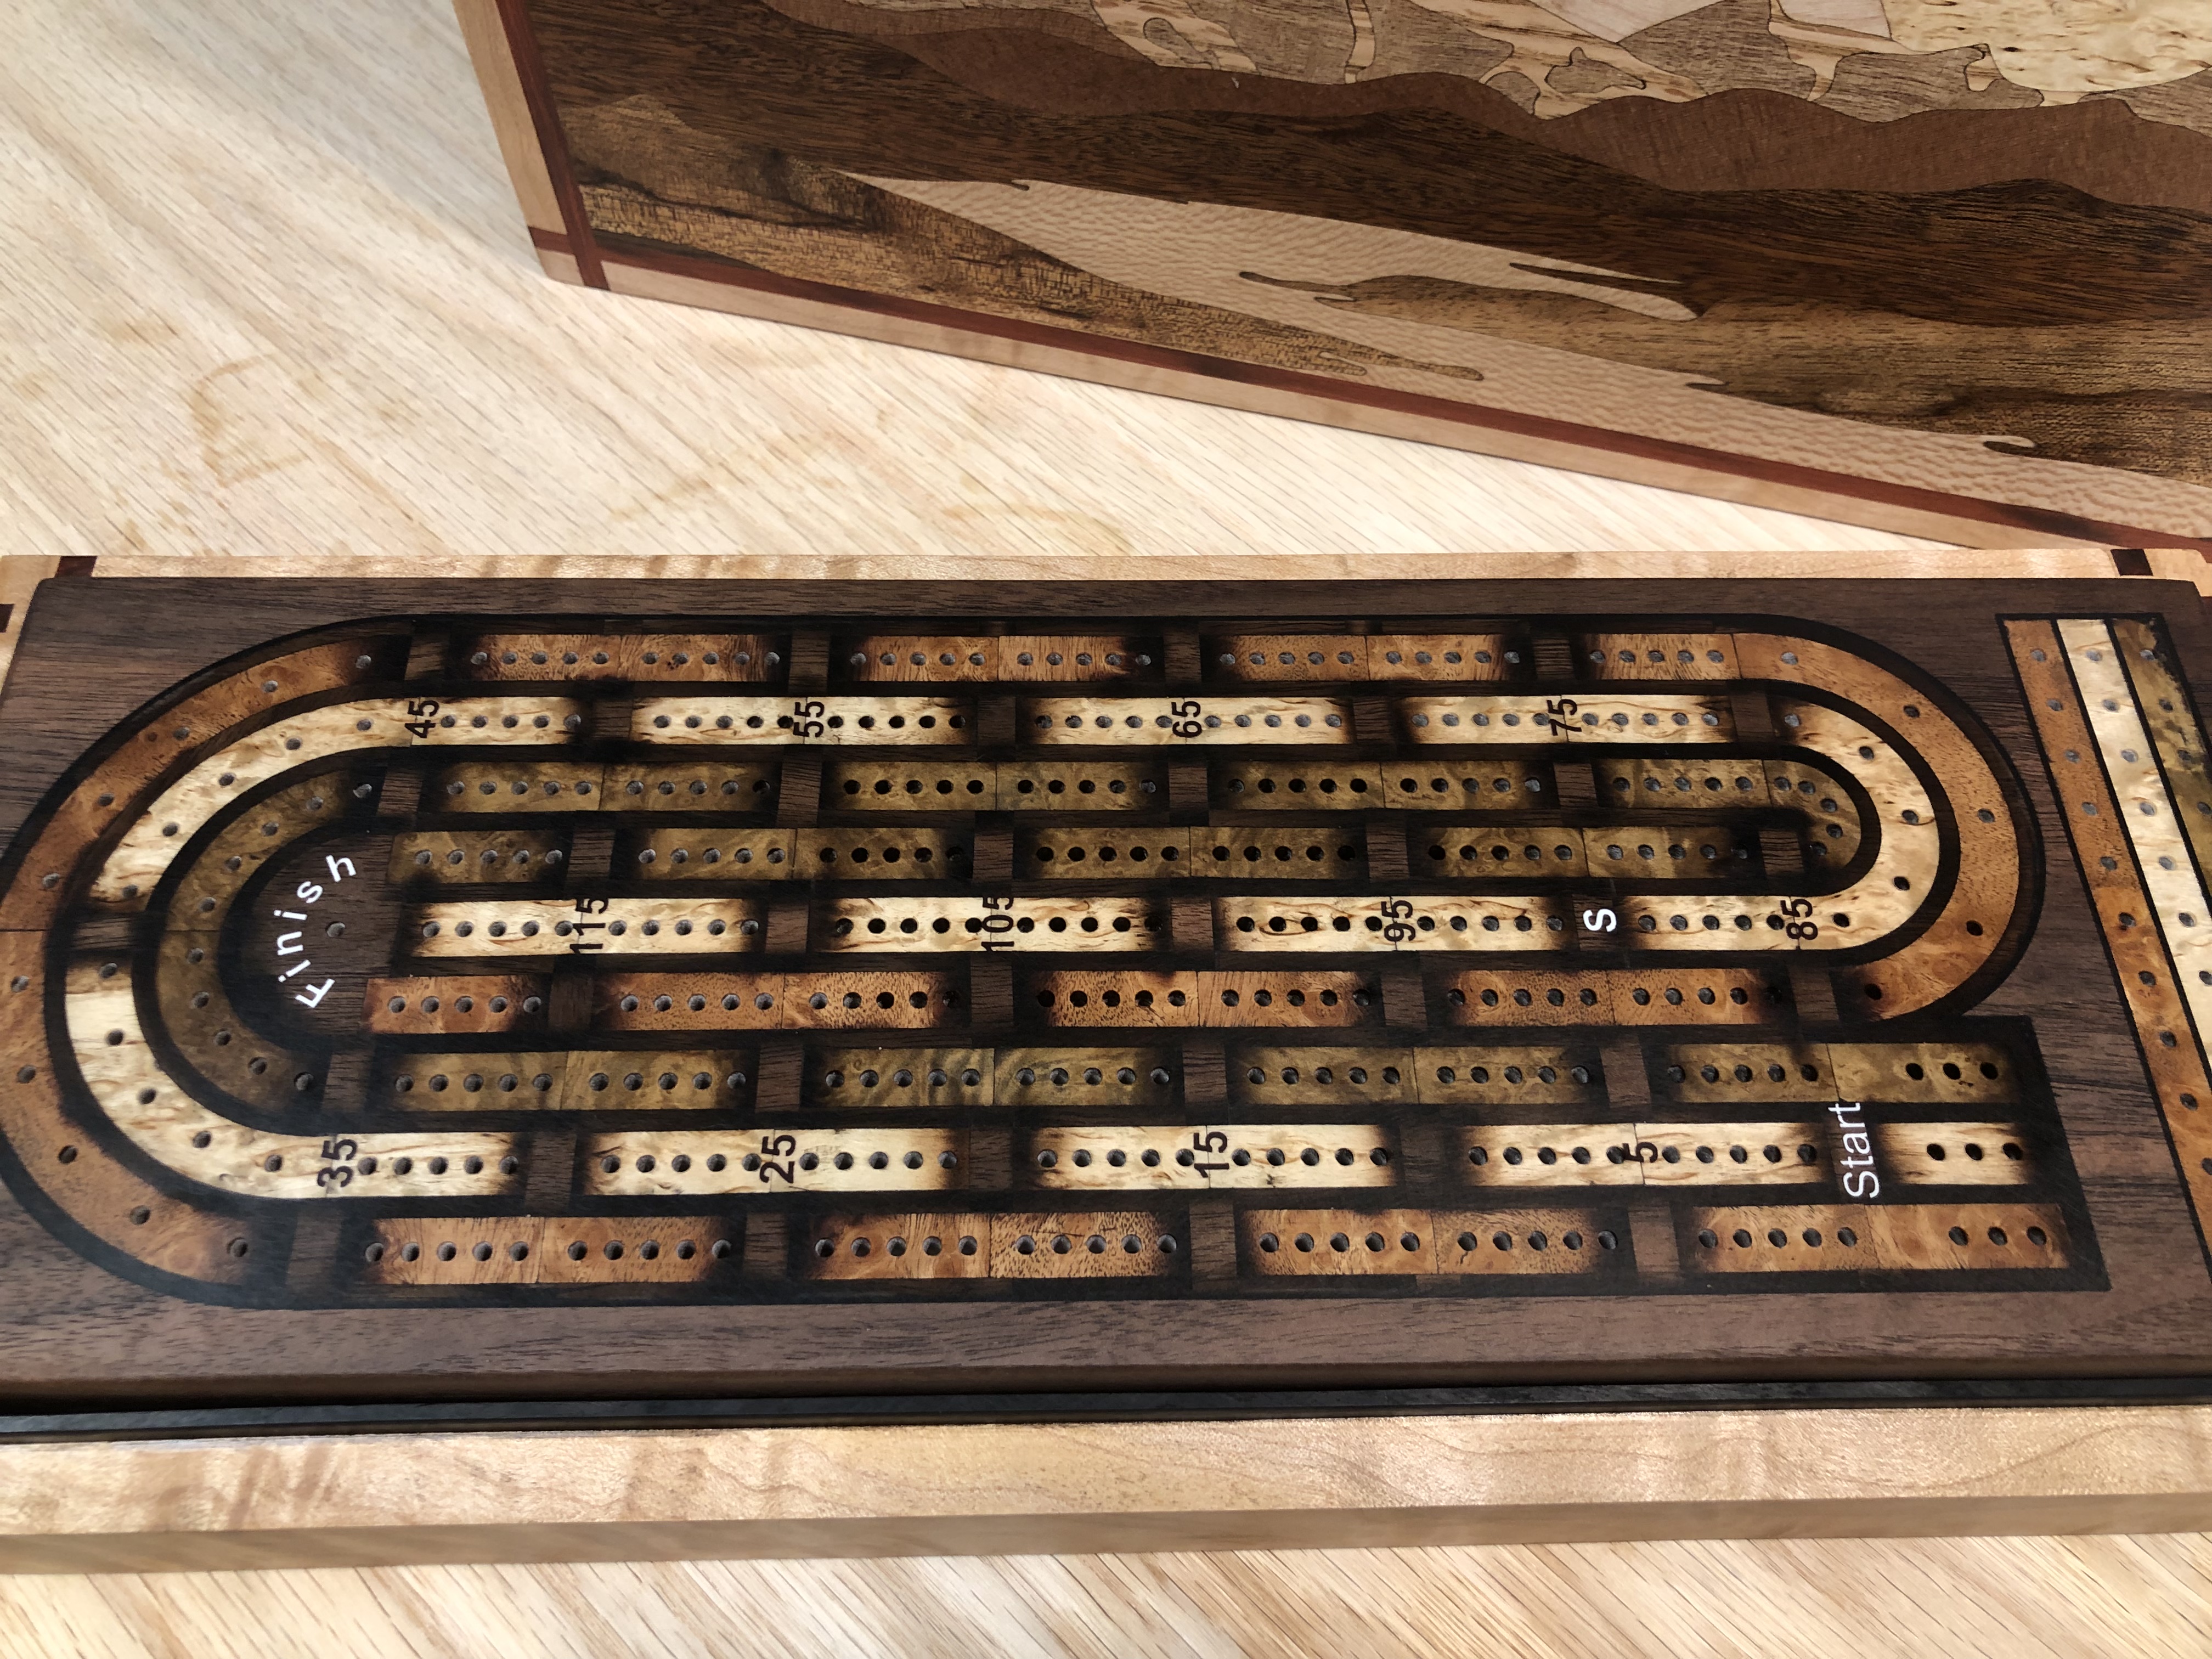
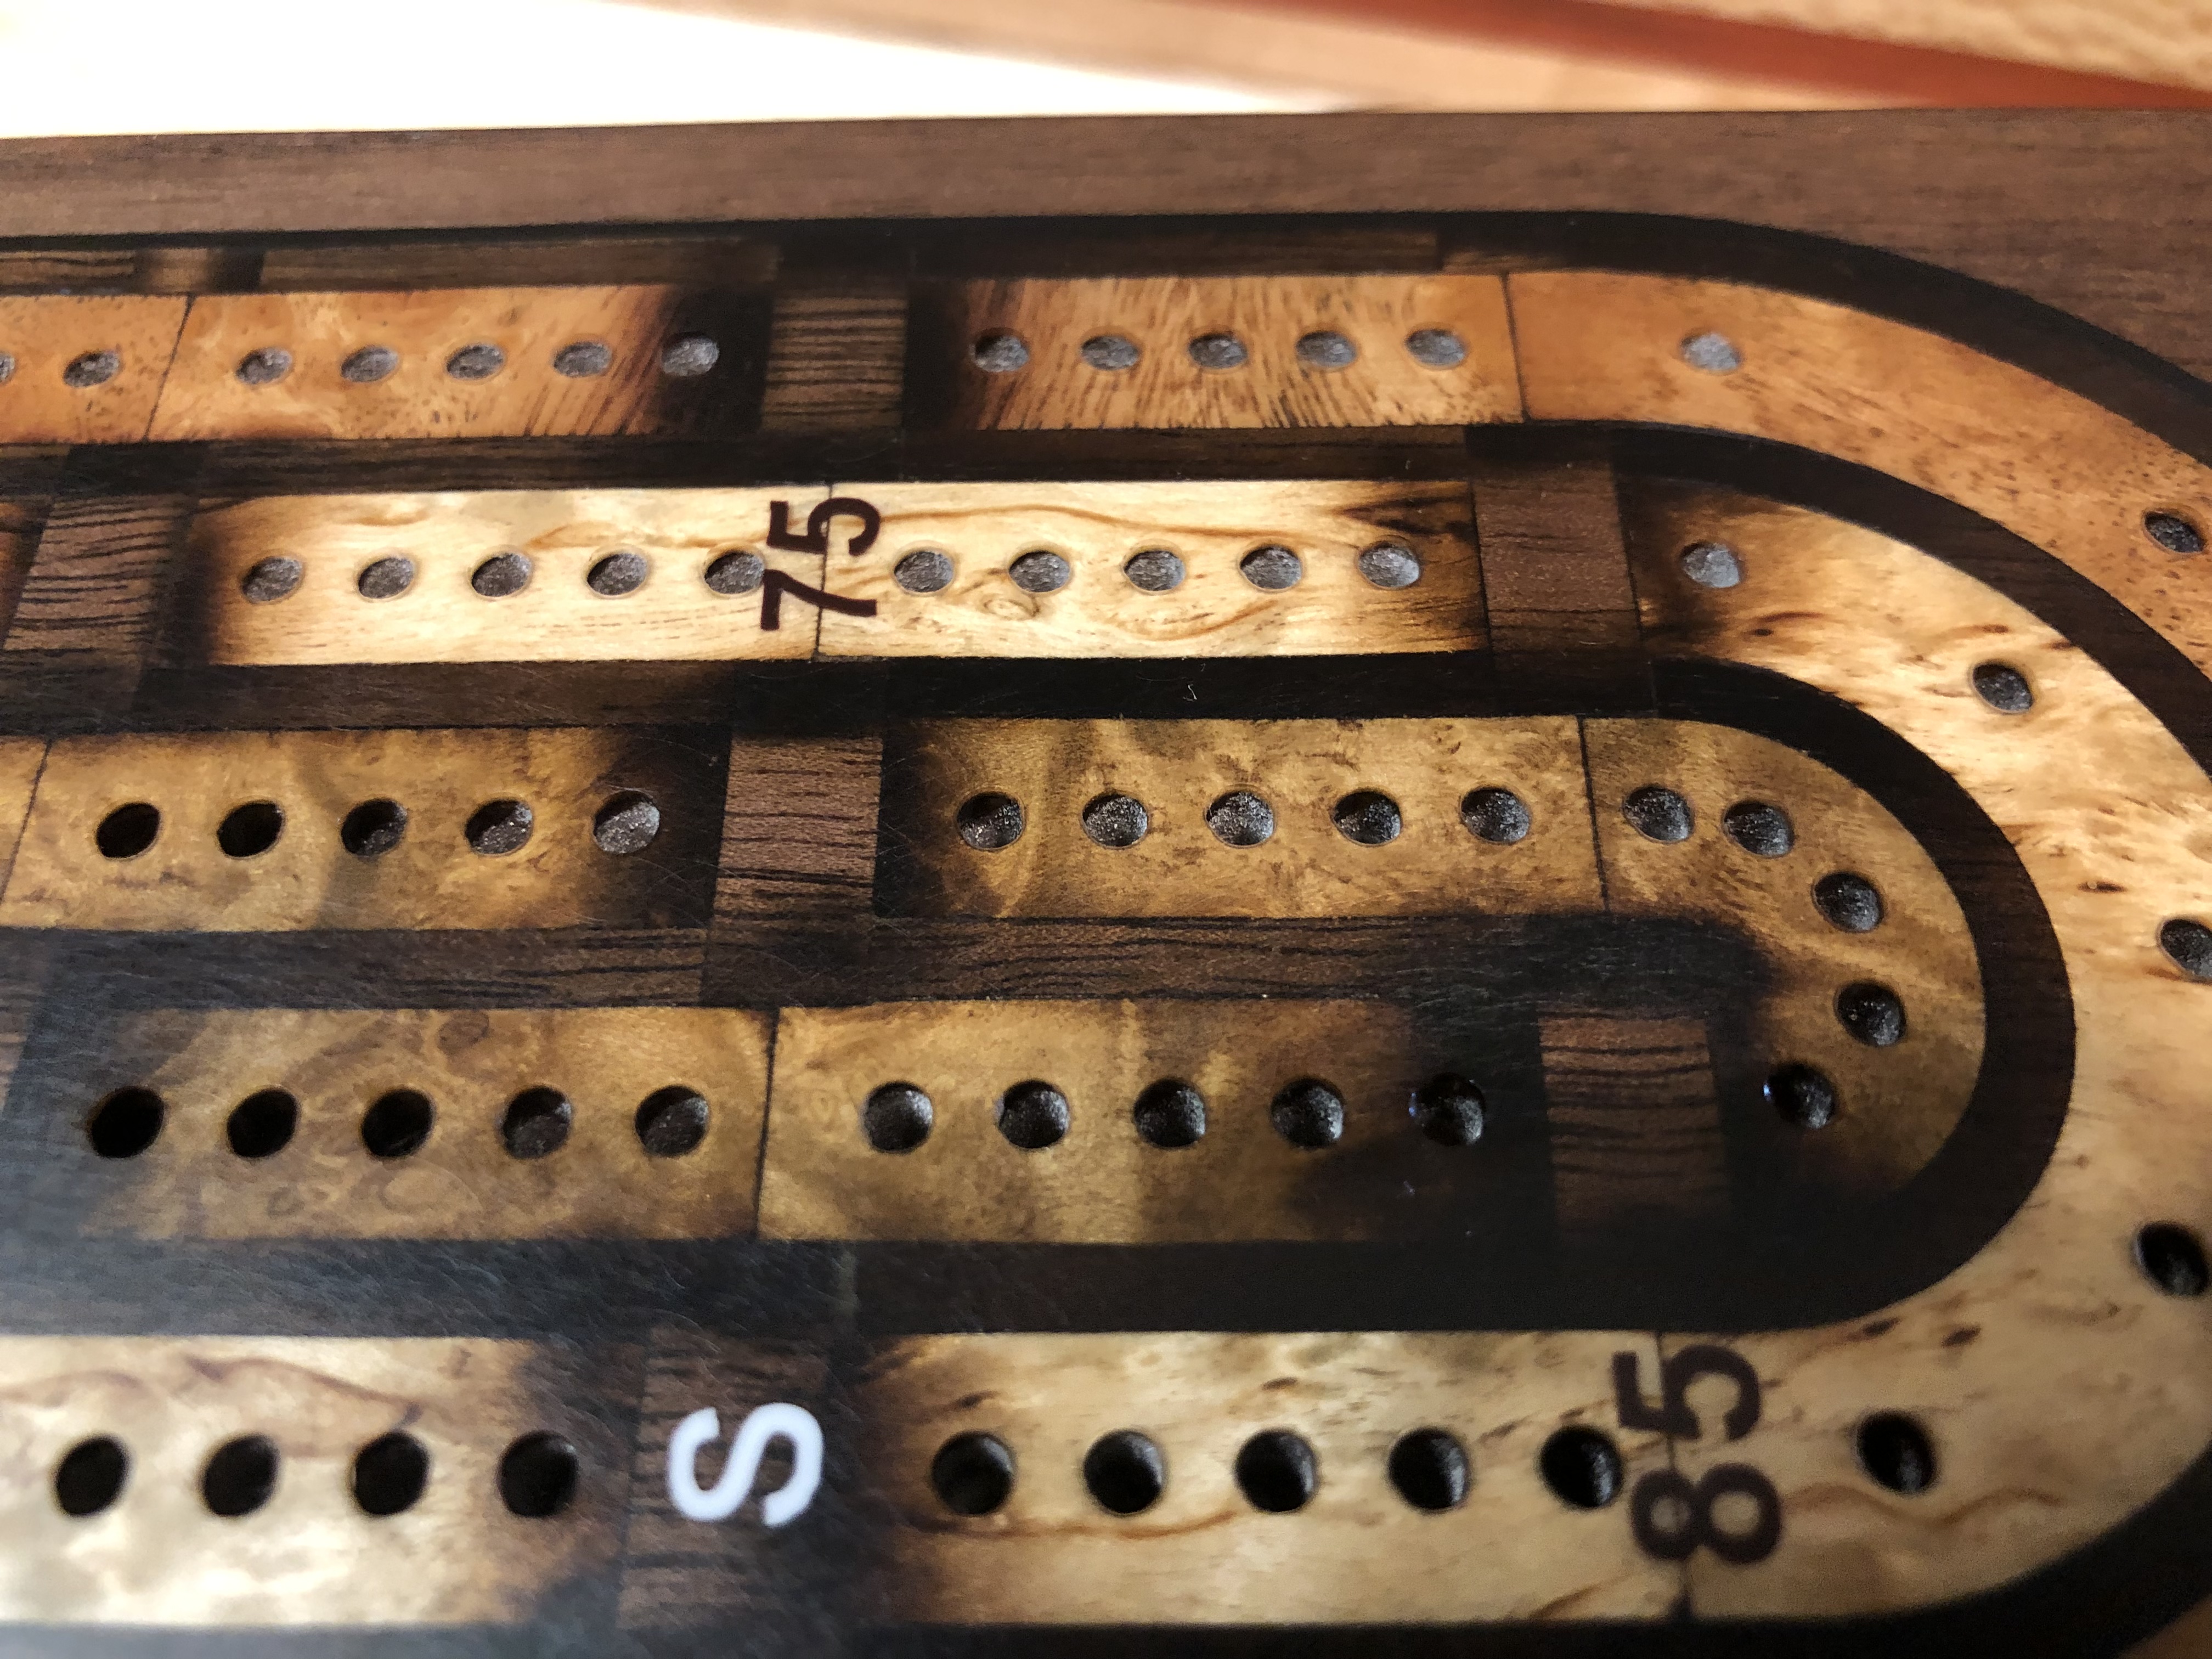
Finished up with Epoxy for the lettering and numbers, with some clean up black outline.
I ended up going with a dark red for the numbers and bone white for the start/finish. Tomorrow is hole city!
I forgot to mention…once this is done, I’m going to put this up for a free giveaway on my YouTube channel. With this being a prototype…somewhat…figured I’d get some more traffic.
Cheers! Should be done tomorrow!
Wow these are incredible.
As for pricing i saw a bit back on the thread. I break it all down, material cost, consumables, cnc time, etc, those are the core costs to produce, not factoring in time. Then figure in a hourly rate for finishing work, in your case epoxy pours etc. Don’t be afraid to price high, these are not $100 boards, you can get way more than that for these, they are incredibly well done and take a ton of time to assemble.
Again, amazing work!
Love how the numbers turned out. But everything I have seen you do is fantastic.
Showed my wife your quilted maple to show her what it is. The first thing she said was, look at the castle on the hill
Thanks!
Looking back at it, I should have used a darker silver instead of the bone white.
Not pleased…but the letters and numbers came out really good with no air bubbles.
You can always could’ev should’ev would’ev but in the end I think it looks nice. Lamenting on what you should have done is a waste of worry for this project, it is done. It is not wasted worry for the next one.
If you dont tell anyone neither will we.
Great Job.
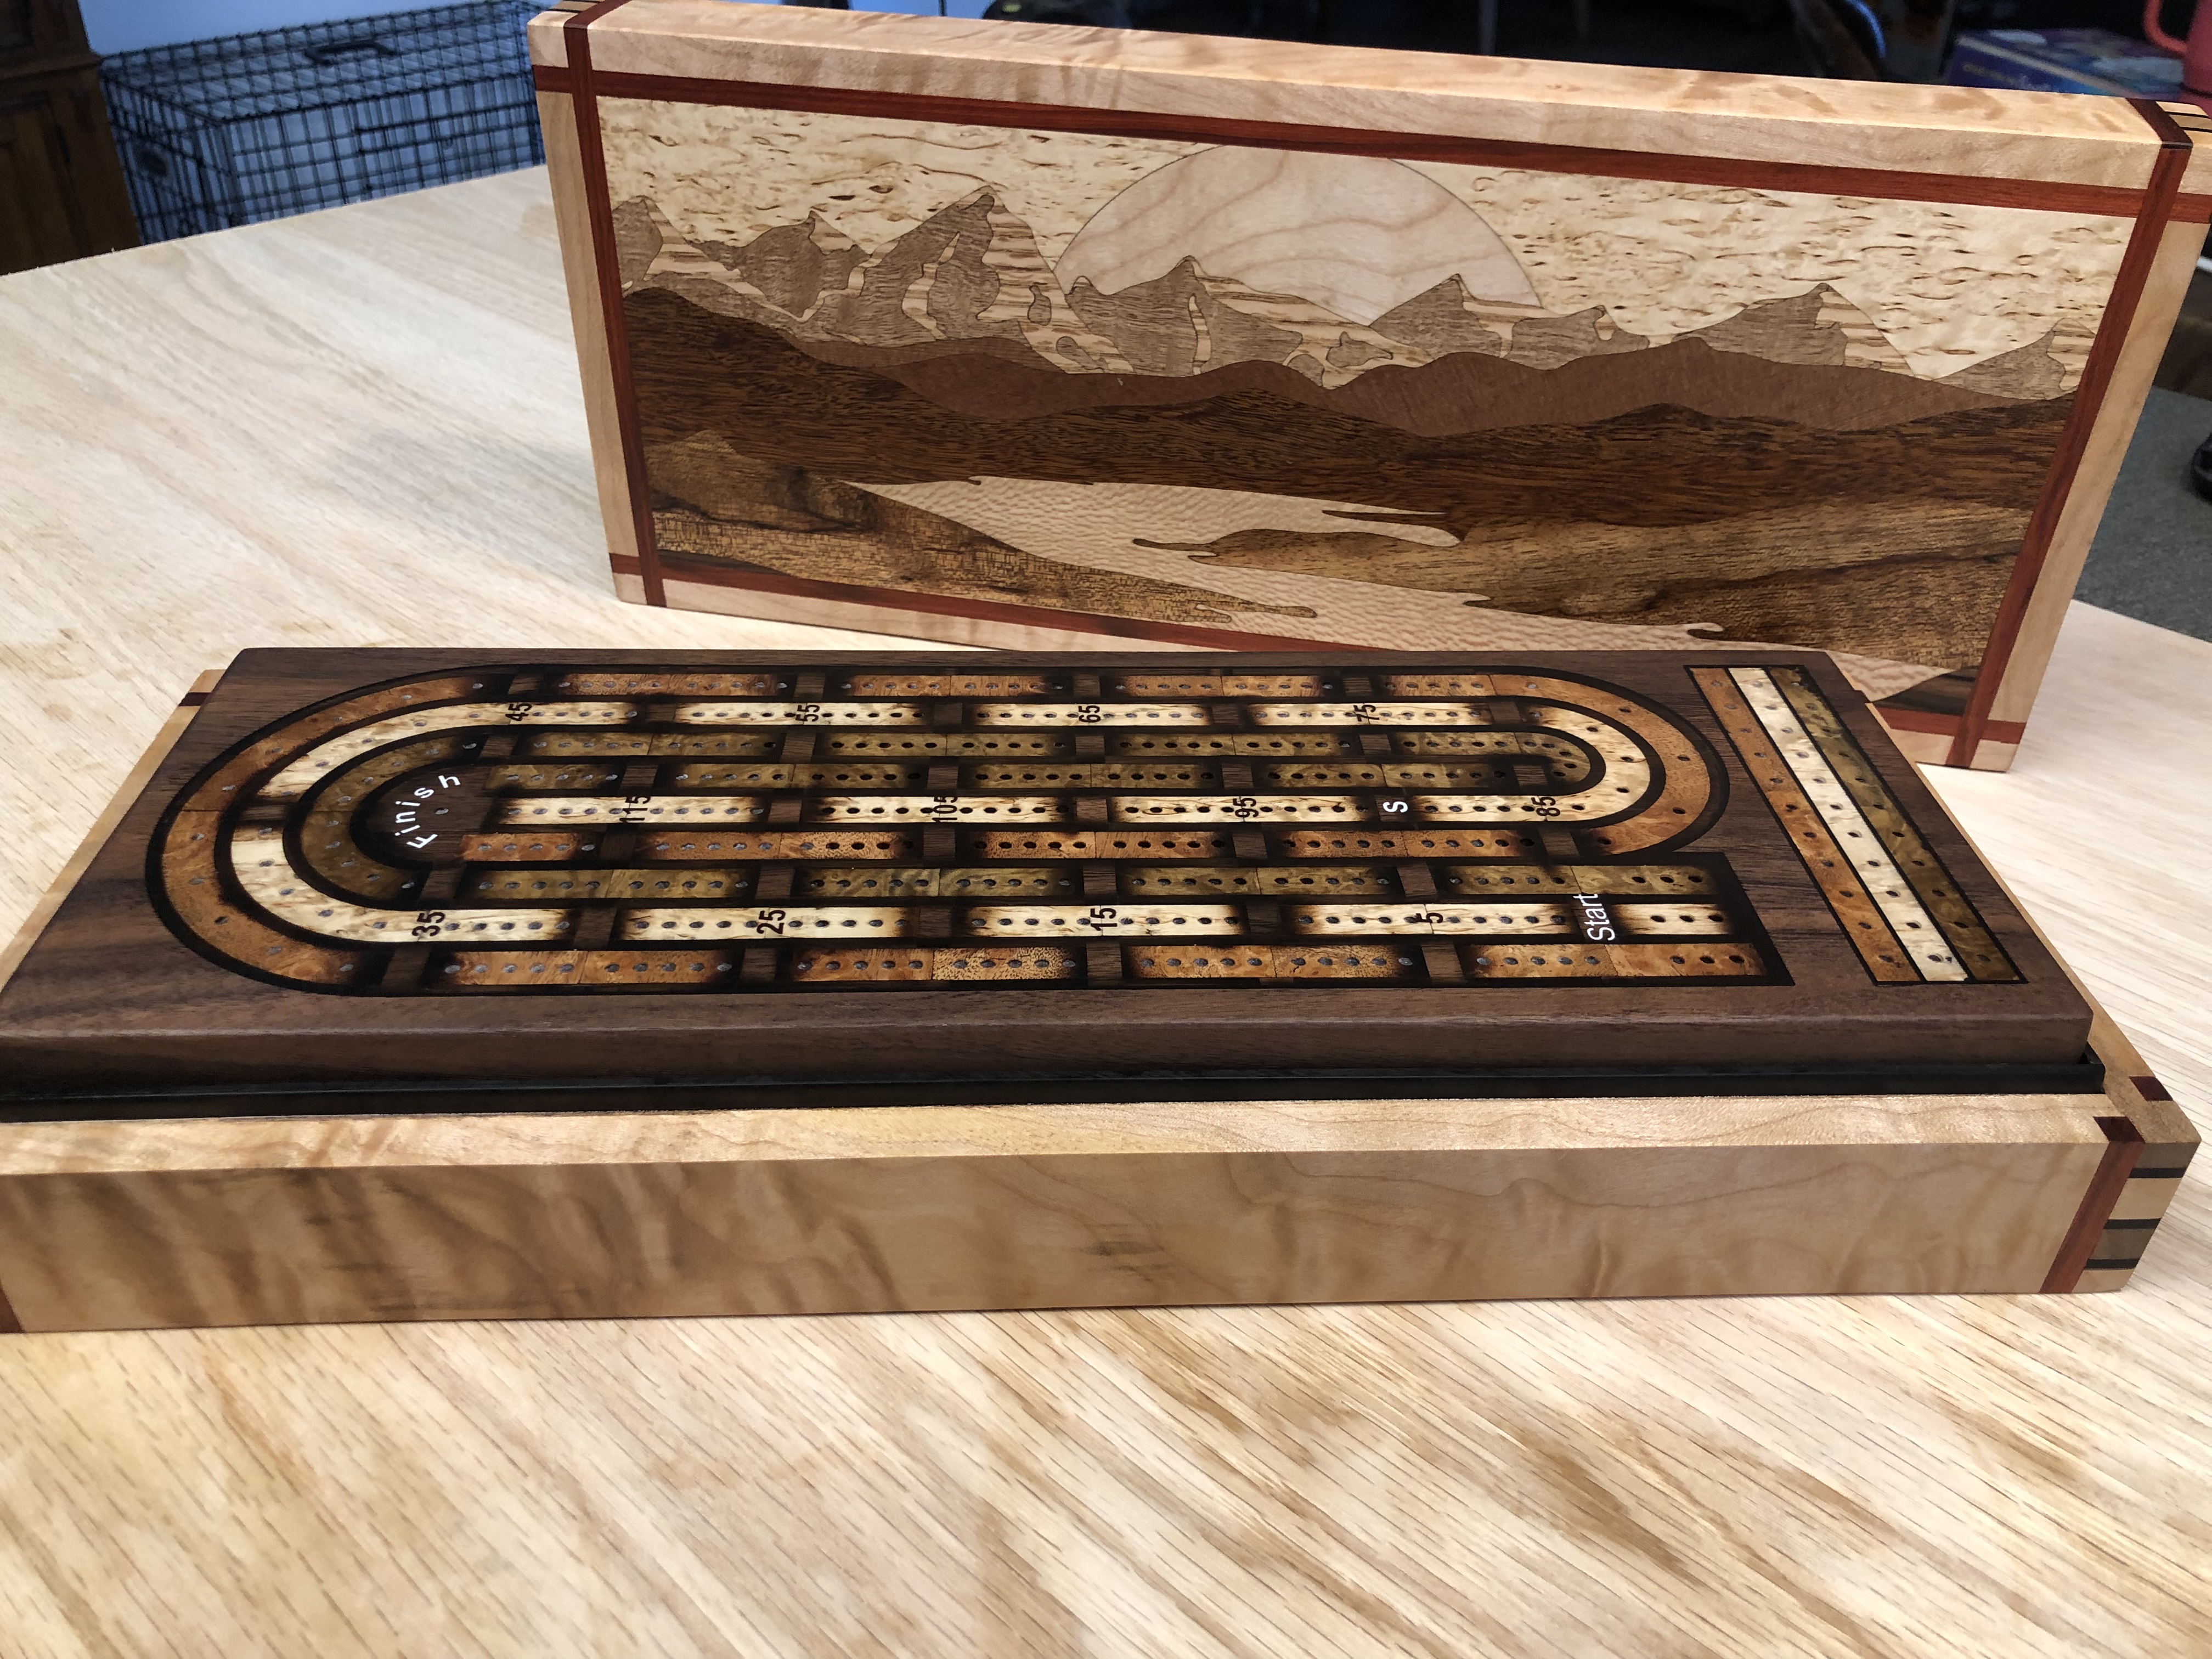
Just wanted to share something as I get asked a lot of questions on how I get the box top so flat. I purposely leave .1” of box material higher than the marquetry panel. Once the box is glued up I’ll flatten the excess in my drum sander…with being super careful not to touch the veneer. Just thought I would share. ![]()
The box is glued up, my 1/16th bit didn’t come in today so no holes in the cribbage board. Tomorrow this thing gets done. Cheers!
Urgh…ended up having to stay late at work, so it cut into my time in the garage.
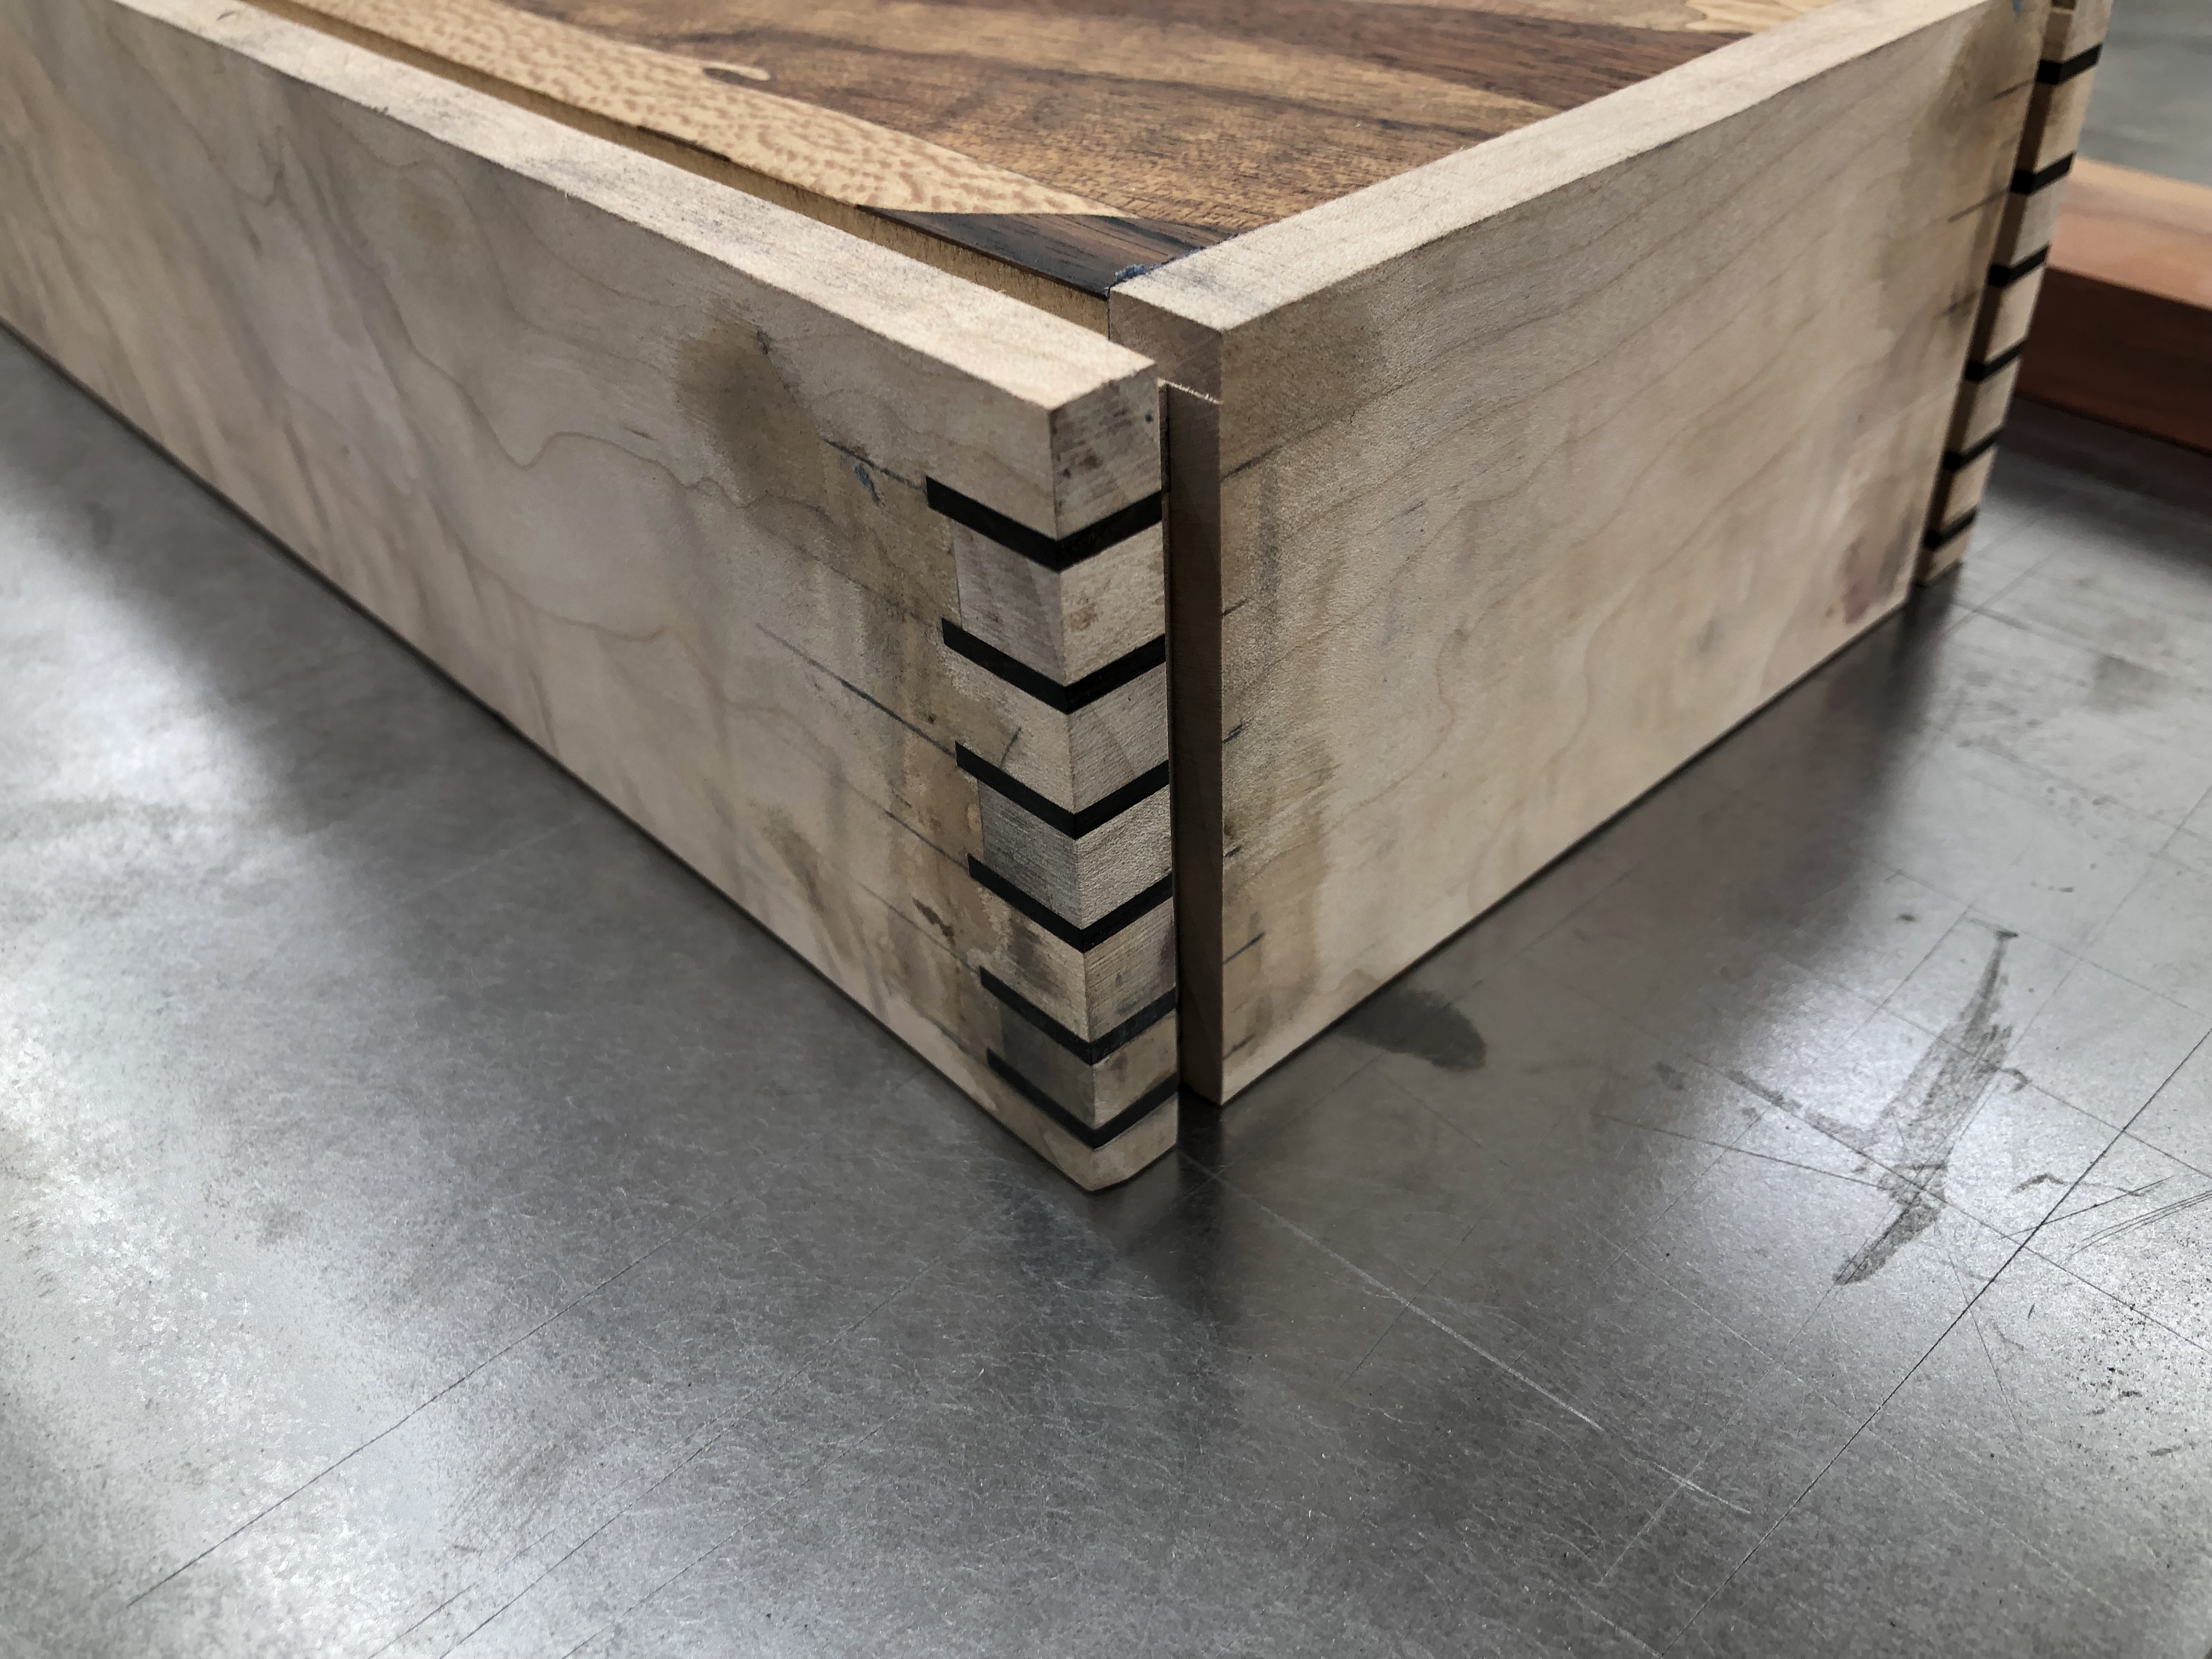
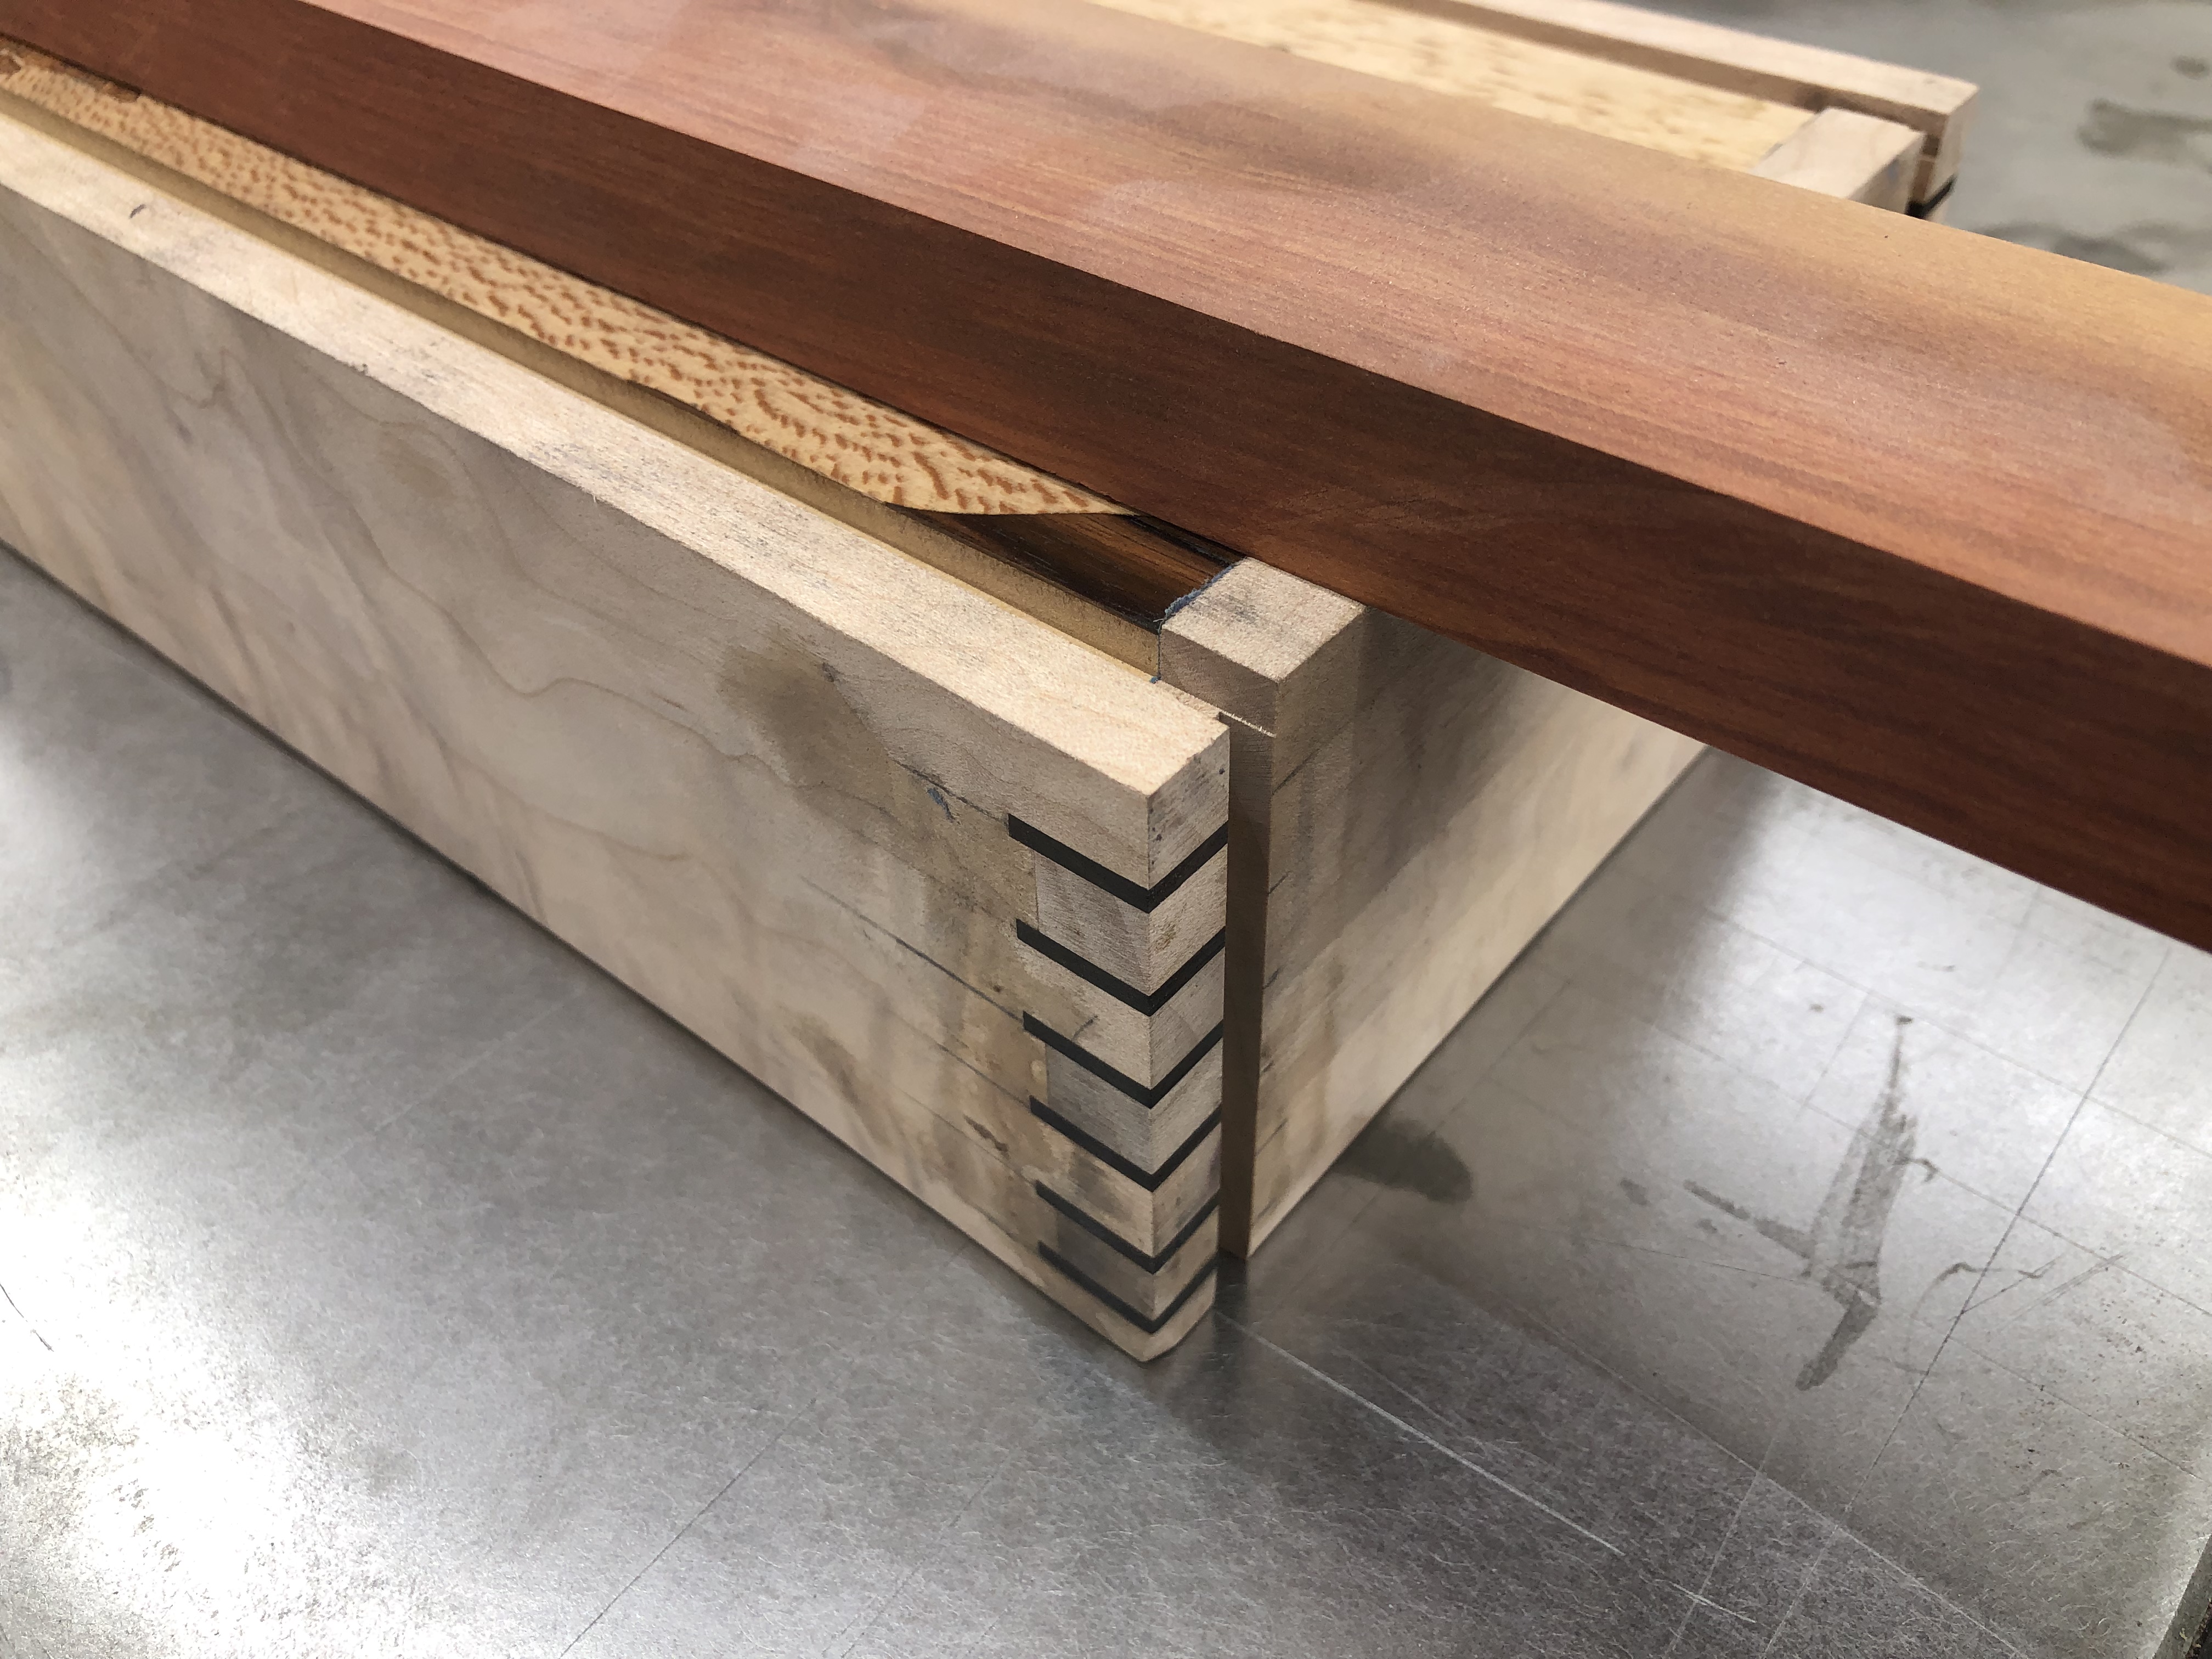
Finished all the holes tonight and worked on all the splines and inlays. I used ebony for the splines and ended up going to put in Redheart on the sides. Figured that would be a cool contrast once it’s finished.
The alignment for the holes were pretty accurate.
I forgot just how much work this is. There was 24 splines ![]()
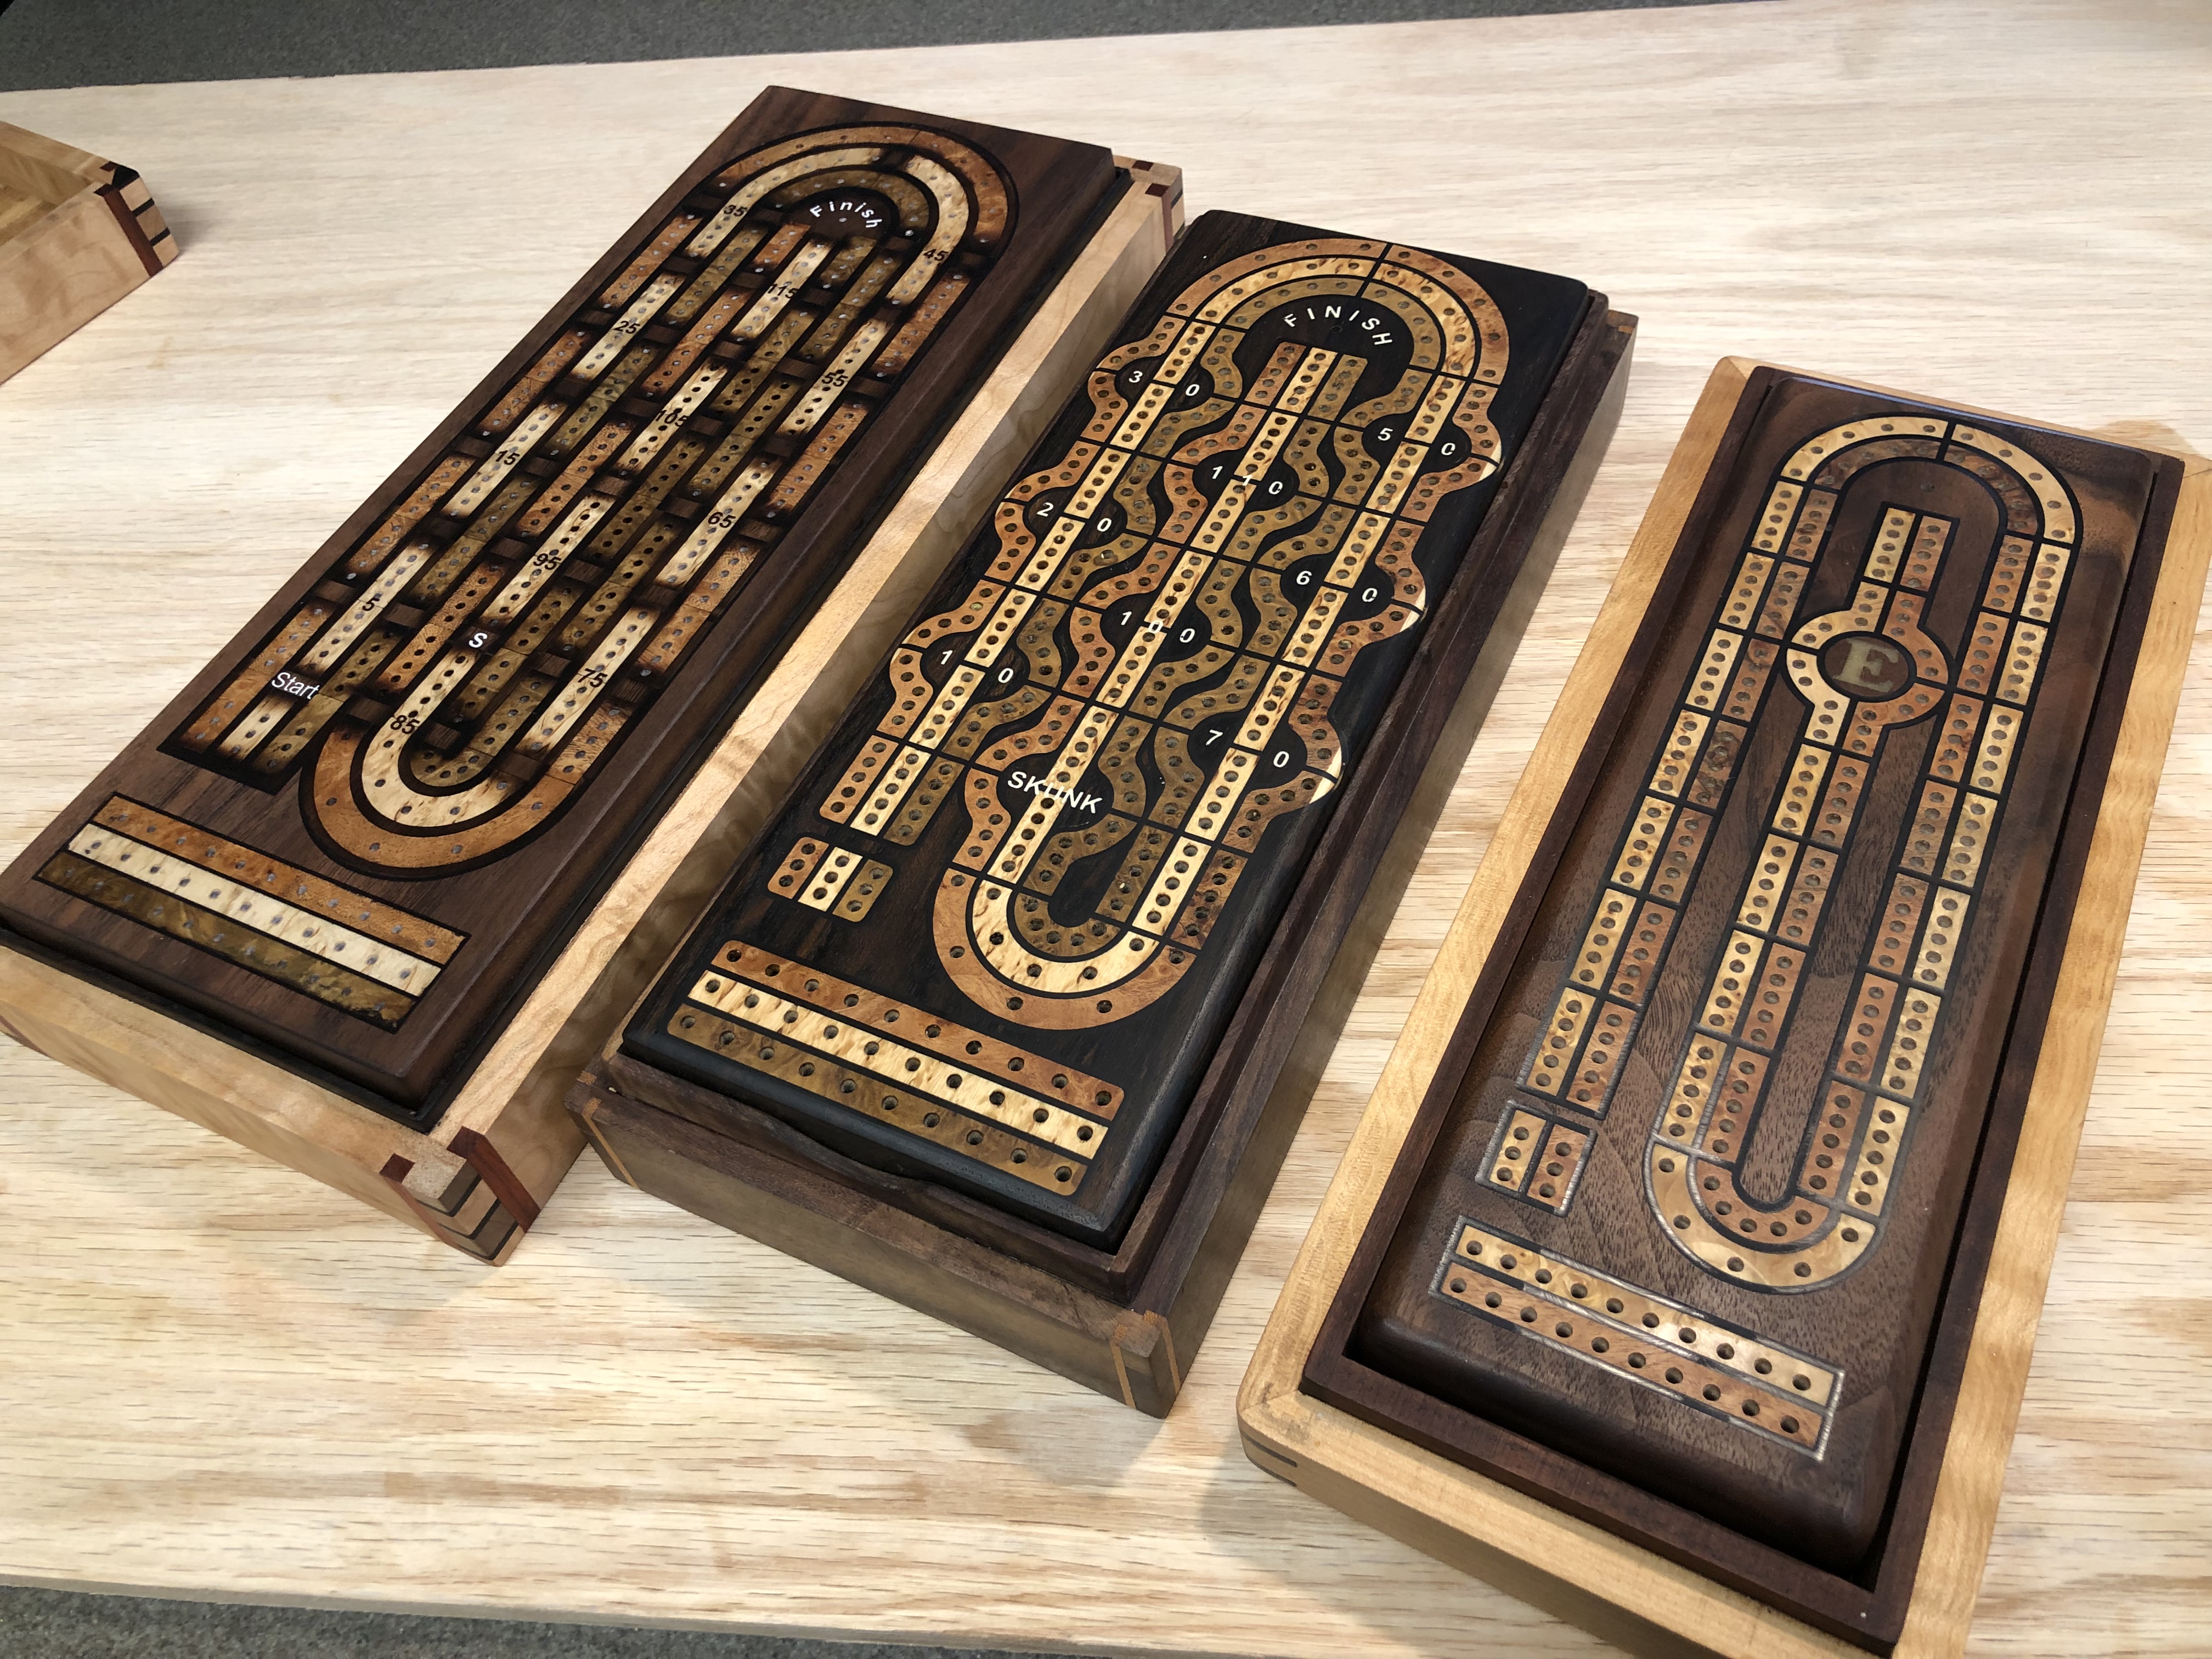
All complete! The cool thing is this was made from a ton of scrap wood I had on the shelve, minus the pegs, magnets, and a deck of cards…the YouTube give away didn’t cost that much other than a ton of time.
Making the video as I type this! ![]()
Cheers!
I was having fun experimenting with different combinations. Everything was super square.
Starting to get a series going. Cheers all!
Amazing work!!! I am in awe of the joinery and design work! I especially love the veneered lid design. I assume those are all laser cut? If you could provide me with some info on how you go about cutting all the different veneers and designing them that would be great. I have a laser here that I have not used much but would like to try cutting veneers in the same manner.
Here is the link to the build video. Cheers!
 | Woodworking")
@Spyd ill be doing an in-depth video on how to do marquetry with all the design steps. It takes awhile to understand different materials with offsets for kerf.
What bits do you all use for surfacing for the overfill on epoxy? I don’t have a drum sander or a planer right now and hand sanding is tedious (as you all know!).
@PatternedChaos I flatten with a Amana Tool RC-2248. It’s nice that I can replace the blades over time and are relatively cheap.
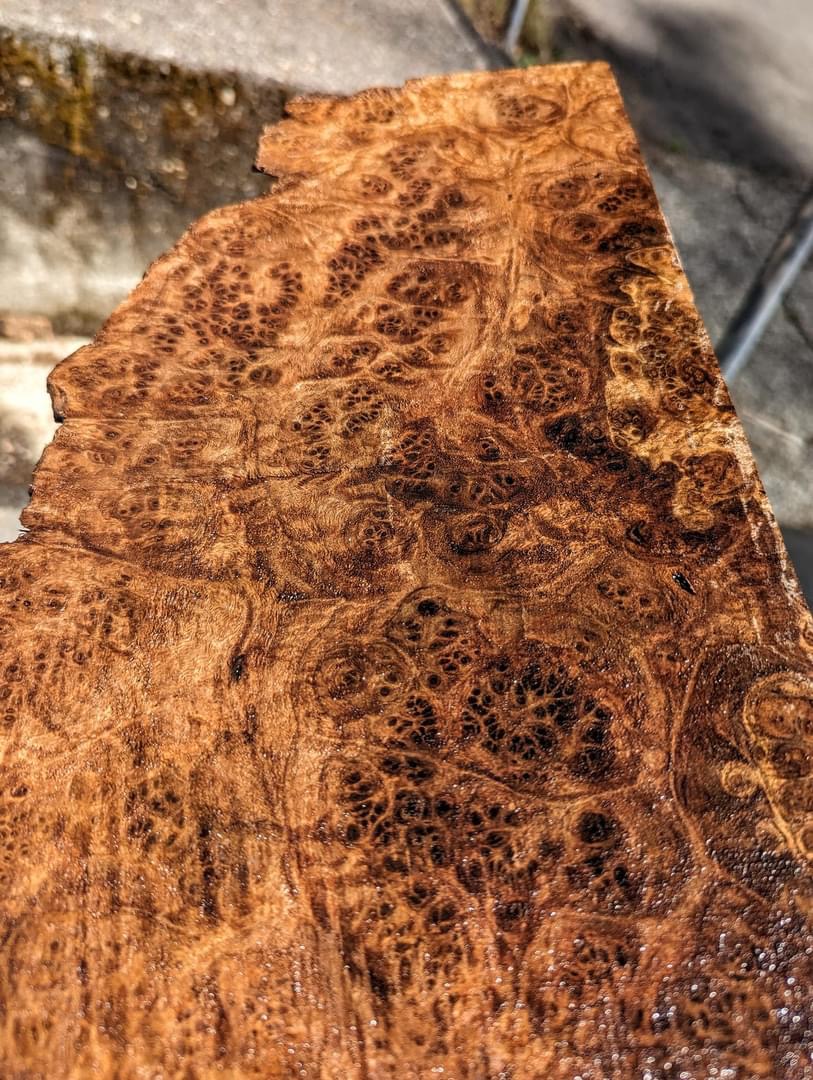
I finally stepped into the world of buying woods from different sawmills in the northwest. It’s been an expensive week of finding exotic woods with the right moisture counts and different wood grains. When they wife checks the account, I might be in some trouble.
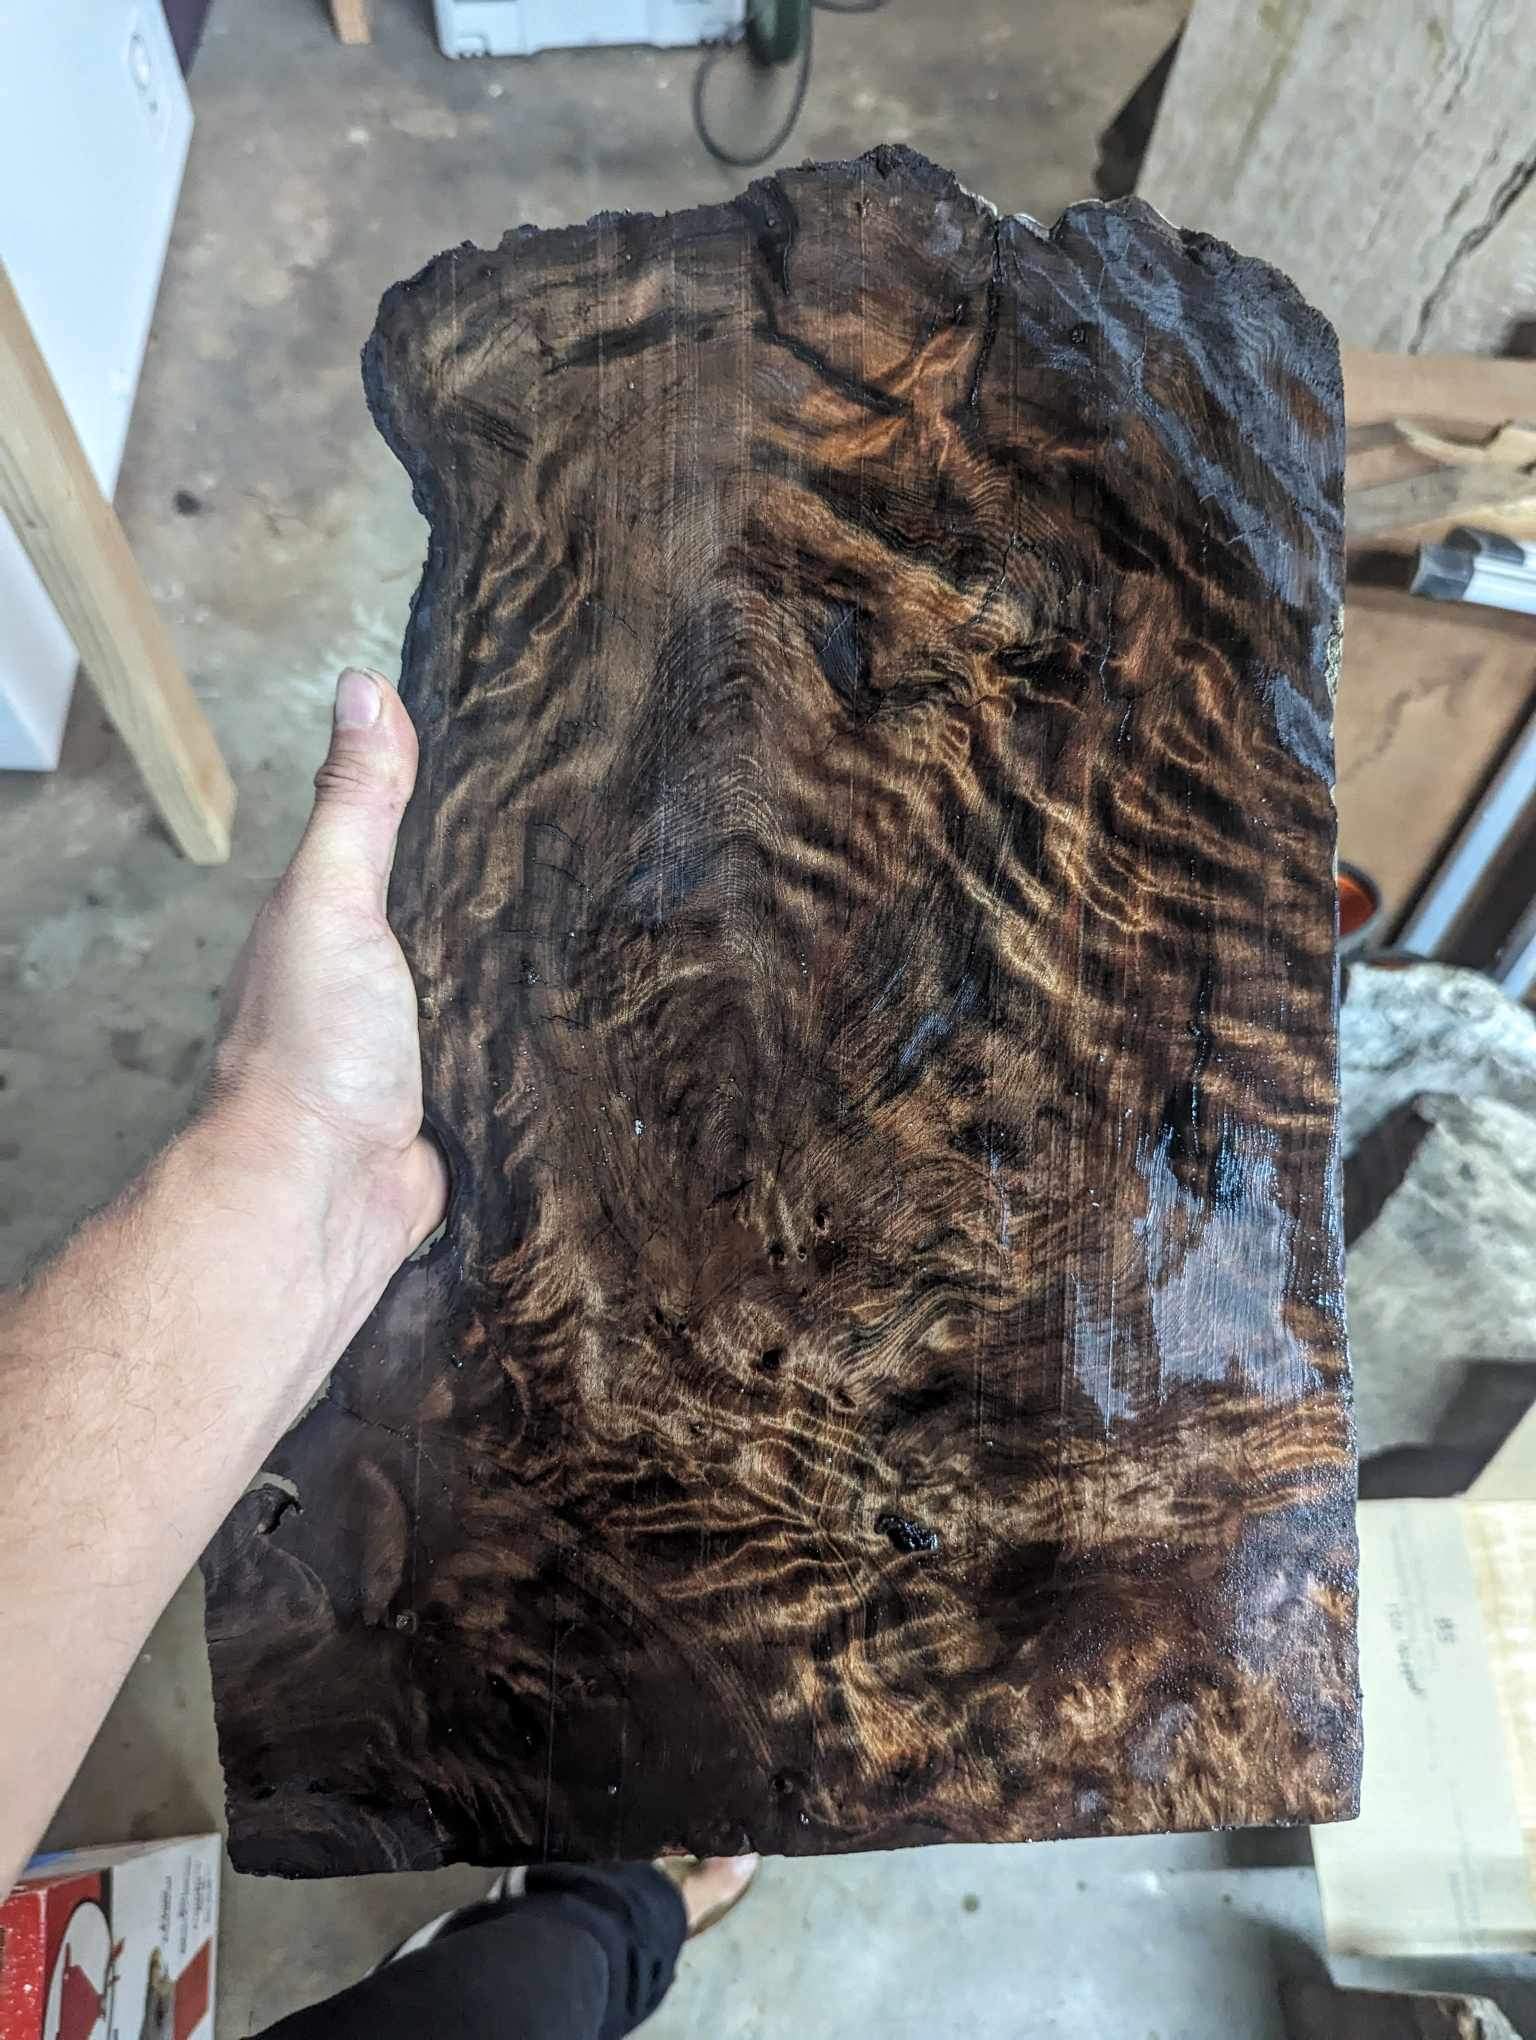
This is some old growth curly redwood. It’s super dense and hard as a rock, The growth lines have more in the pencil width than most new growth lumber has in total. The redwood is probably extremely old.
Picked up a bunch of Claro Walnut Burls
And a whole bunch of Maple Burl billets.
Trying to up my game in the material category to enhance my woodwork. I’m going to knock out an anniversary cribbage board for my parents this weekend and will use some of this stuff for the box. I’ll post some pictures ![]()
Cheers all! ![]()
Can I ask what mill in the PNW?
I’ve found two that has some pretty spectacular woods that I’m looking for.
Deadwood Sawmill out of Oregon. His Facebook account posts daily on different woods he sales, and they go super fast. I was lucky getting them. Once the items sell, he deletes the post.
https://www.deadwoodsawmill.com/
Then there’s Roger out of California. He hosts an online auction every Sunday, auctioning off crazy amounts of high end slabs, billets, and everything in between with no reserves. He’s a character and the wood is on the wet side, around 25-30%, but the prices are to die for.
Not trying to advertise anything, but this is the closest I could reach what I’m looking for. once you enter into the world of slinging wood, there’s no turning back.
Thank you. Will have to check the out.
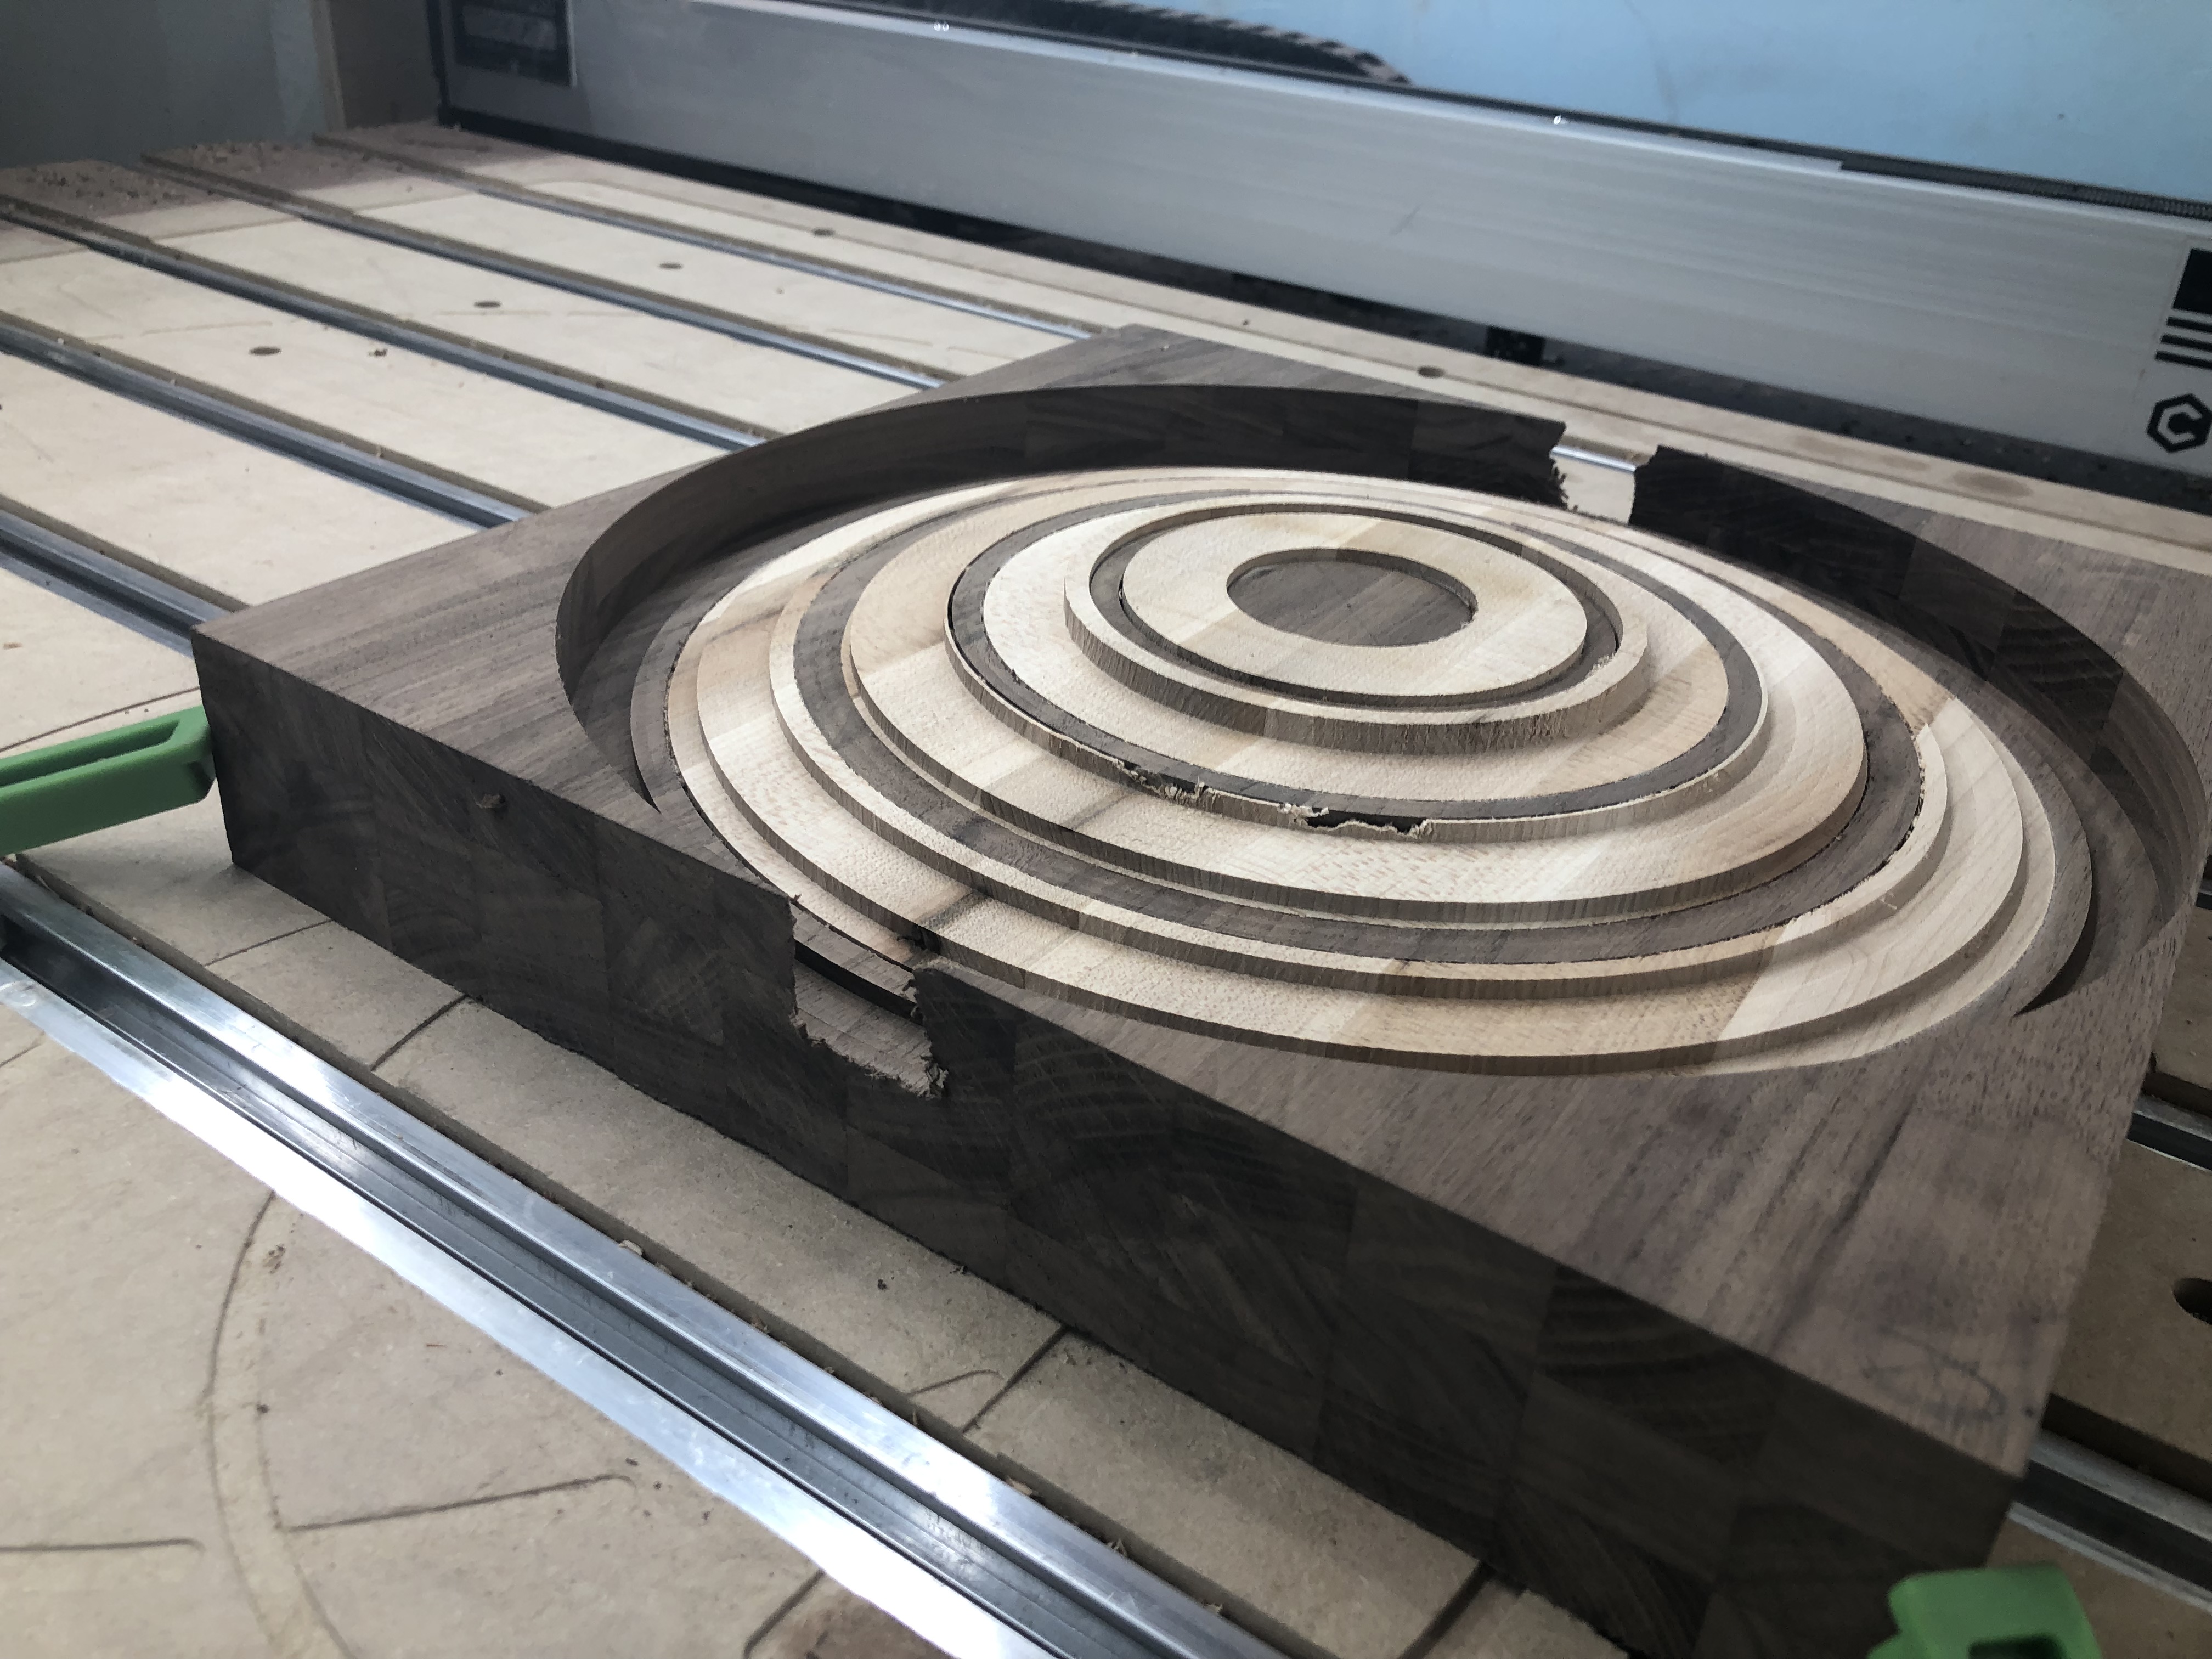
I started the anniversary cribbage board yesterday. Starting to look like something.
I left the maple inlay loose as I’m going to put a bevel along the walnut and maple, then seal with epoxy.
I fat fingered my bevel ![]() . It was supposed to be slightly smaller than the outside player track lol
. It was supposed to be slightly smaller than the outside player track lol
I’m going to Bob Ross this one, only happy mistakes.
I forgot how much I like Osage Orange and walnut.
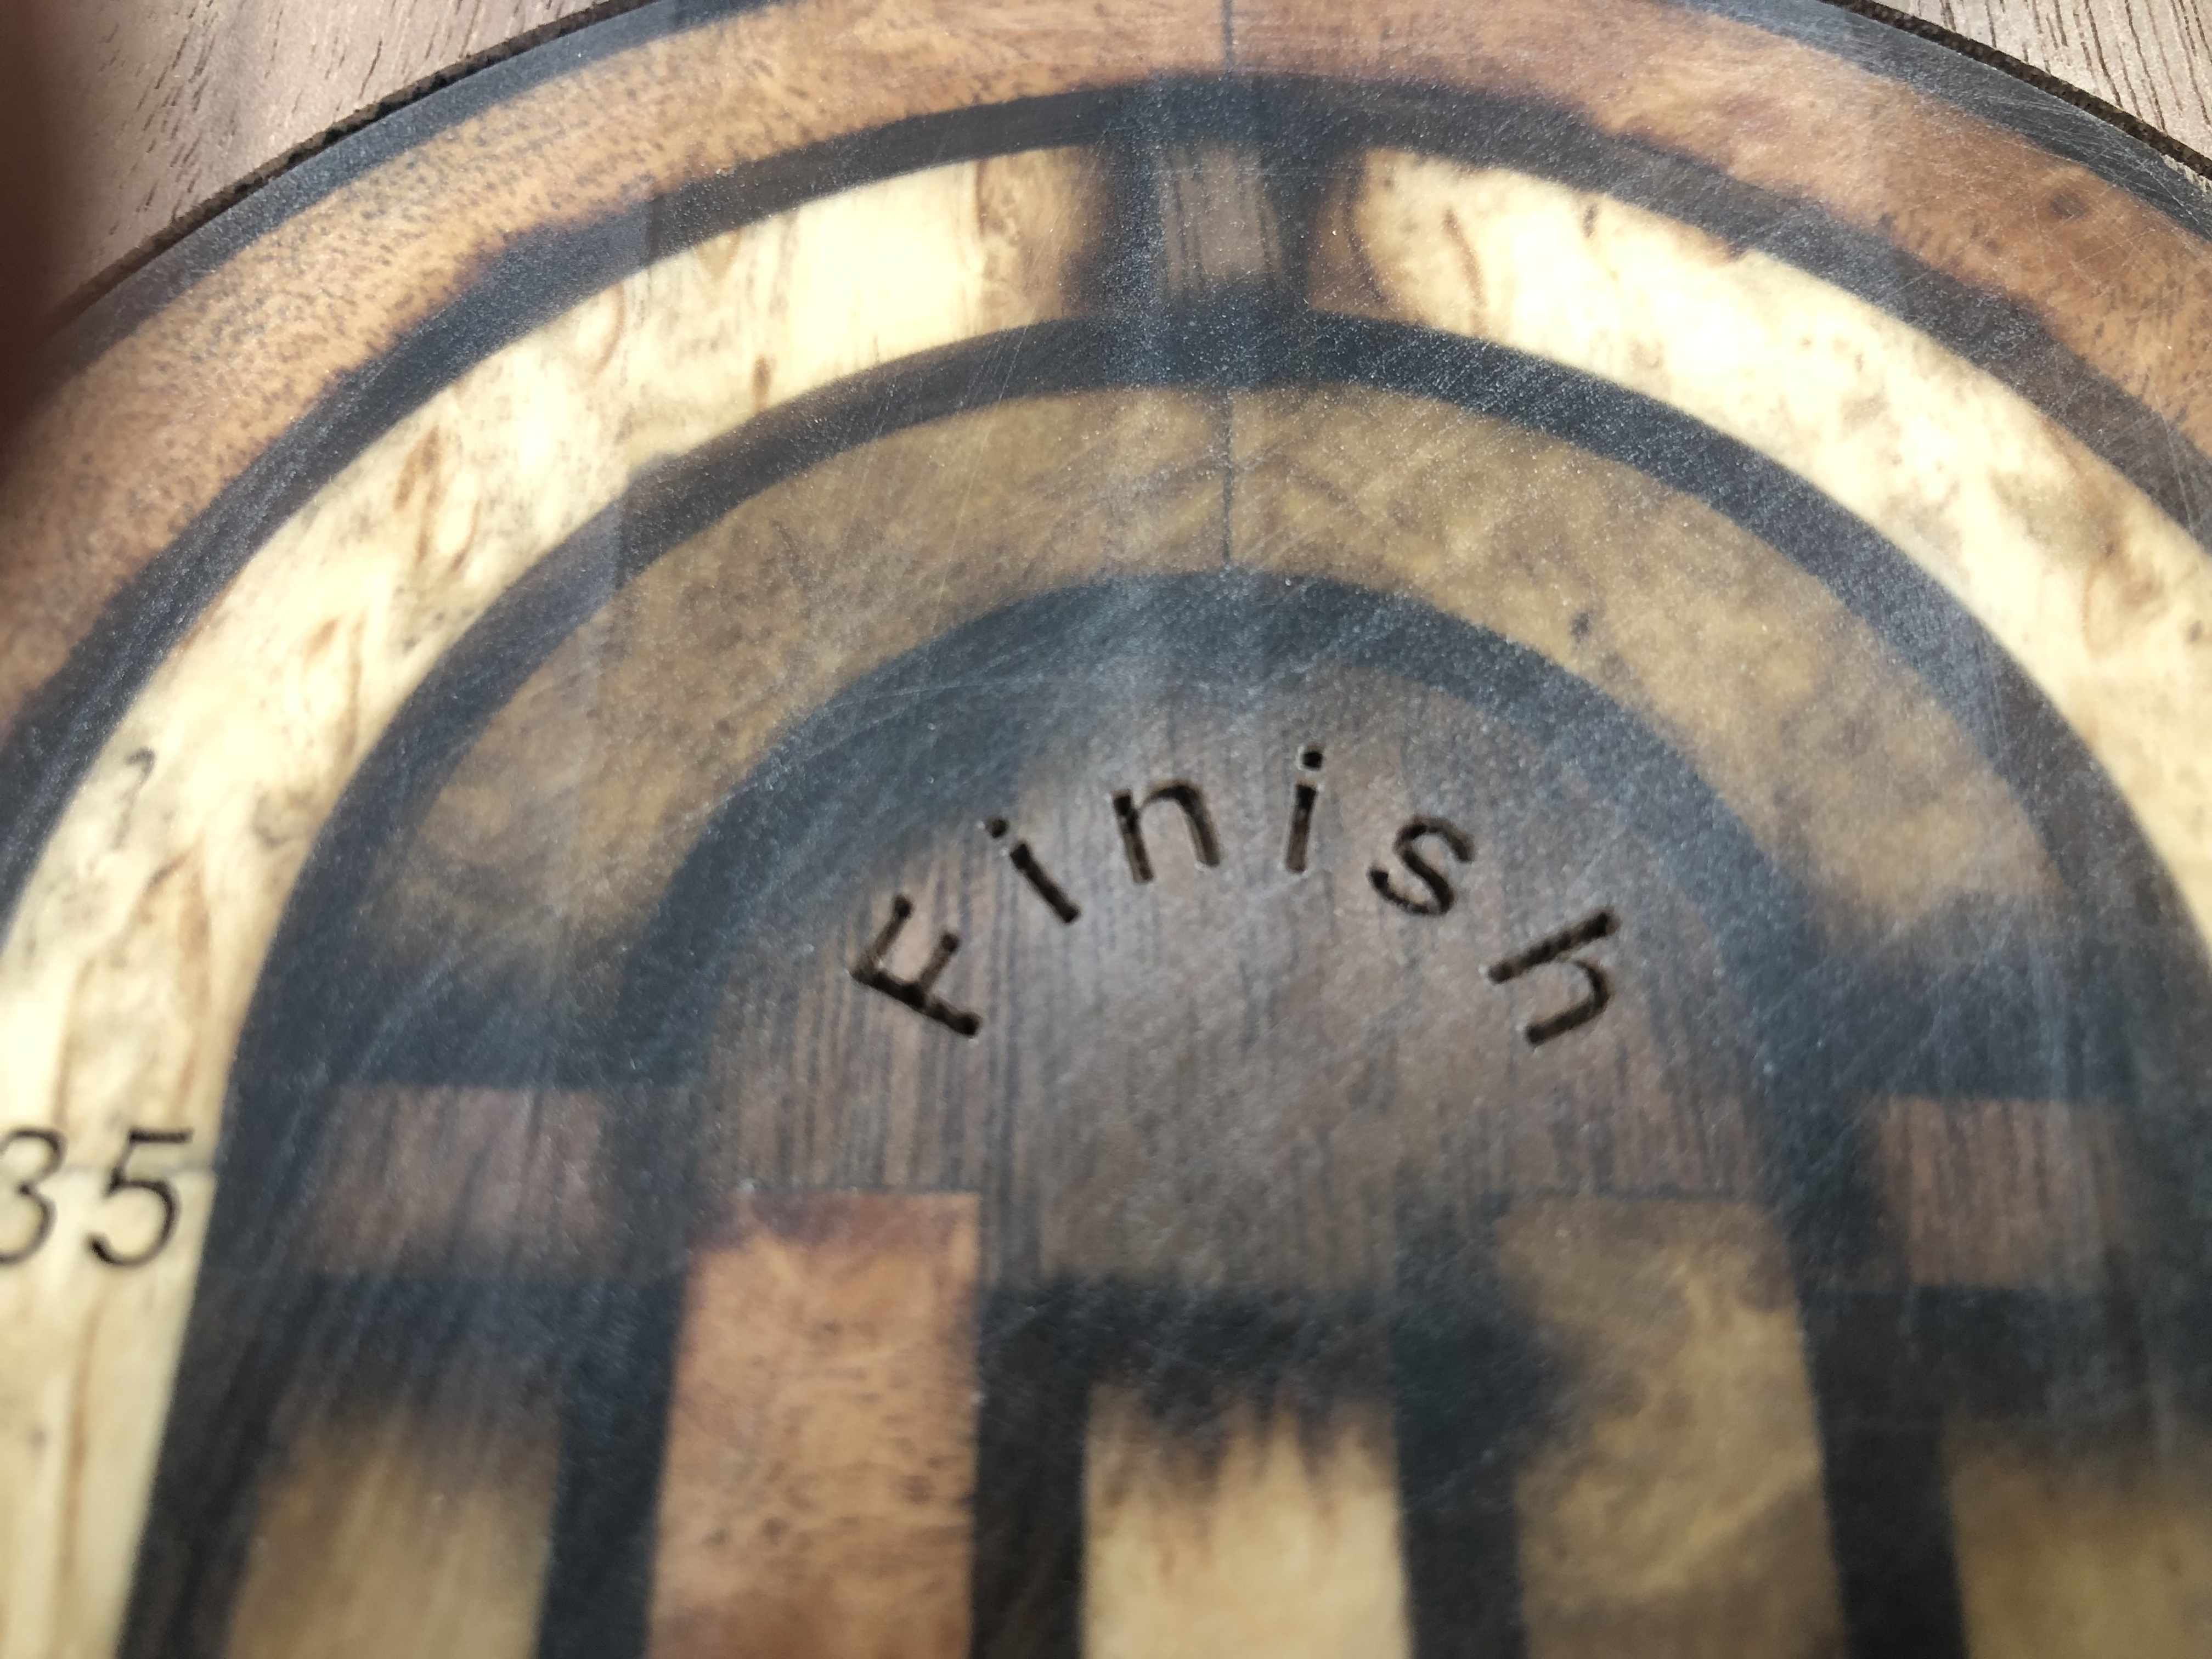
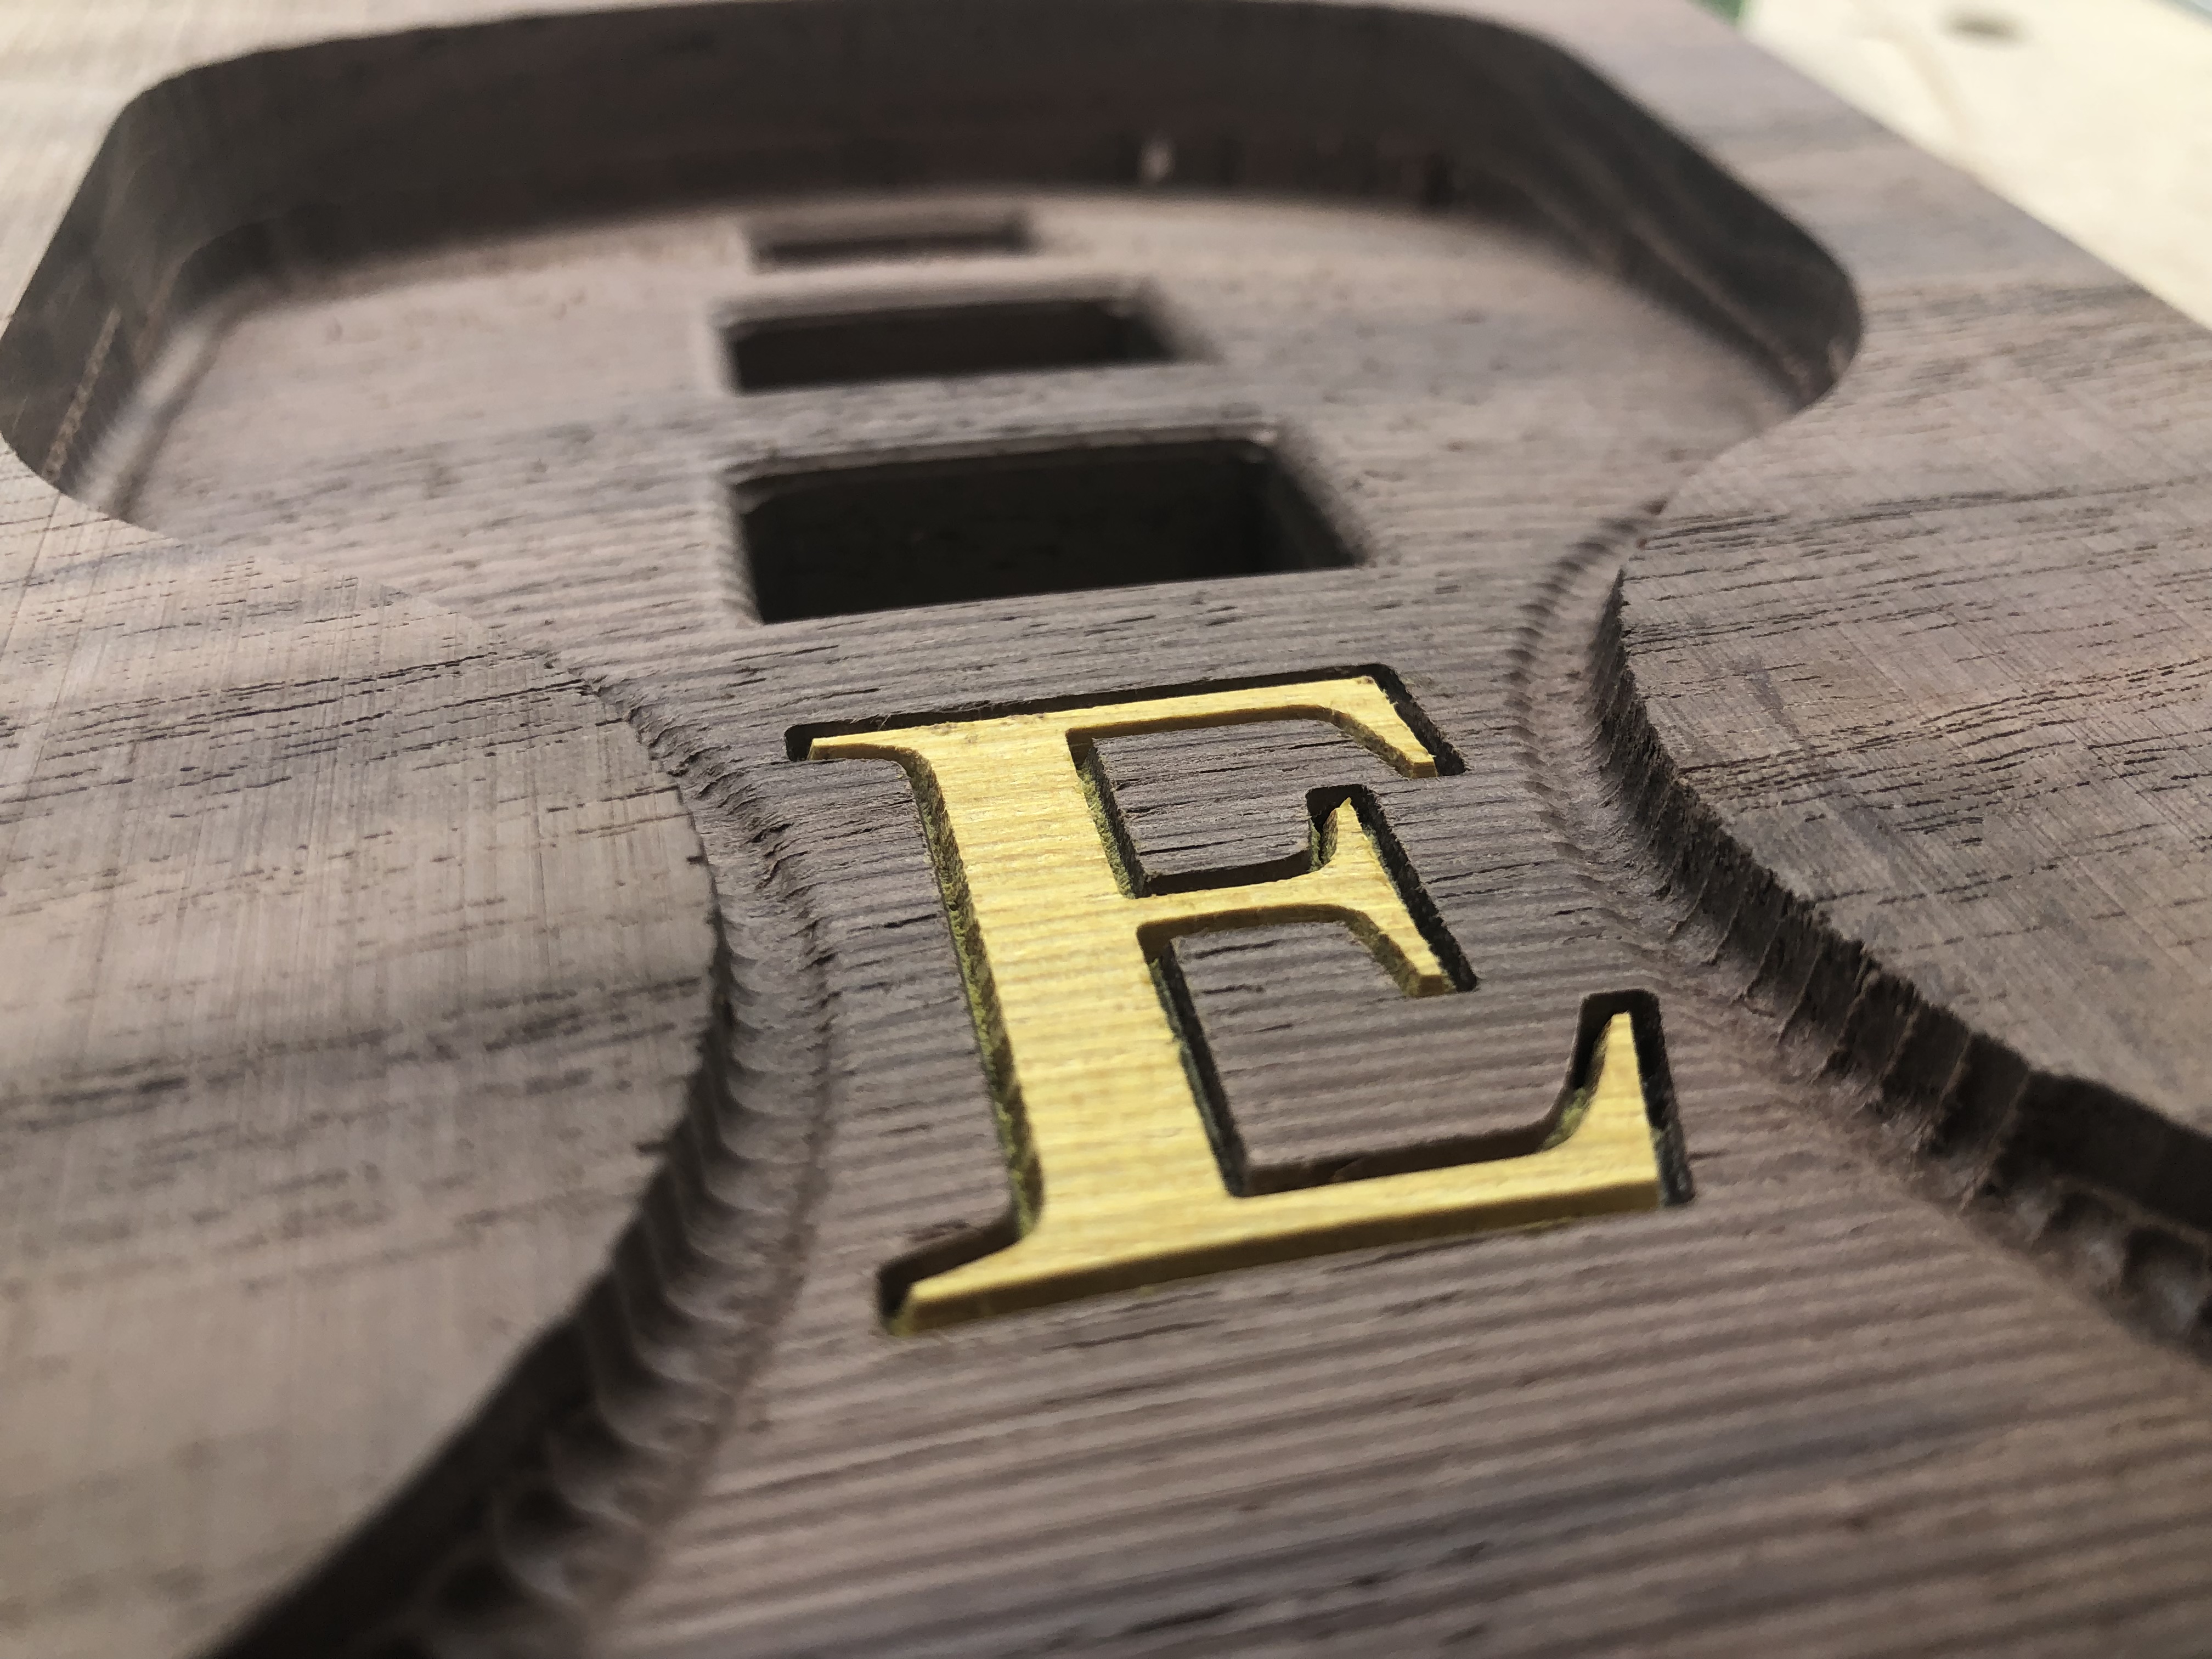
The outside line on the 3D surface for E will get black epoxy.