Im not understanding your question,sry
Yeah nevermind, I didn’t see the set screws in there, I’ve set them and will test in a few.
1 Like
But is one of the set screws ON THE MOTOR FLAT? This part is very important, but you don’t address it in your comment.
Edit: added picture
Thank you so much Rich and Mark! Sorry for the confusion on my last post, in frustration I didn’t see the set screws in there, thought they were empty. When I compared it to the others and they looked the same I realized they’re just small and dark and easy to miss. I got them set, I didn’t quite realize what Mark was saying (I thought he was saying make sure the belt was engaged with the pulley) hours ago, and I wasn’t looking for issues in there because it was put together by Carbide before the kit shipped, figured it was all correct.

Note: I’m not worrying about the spotty O, that’s just the pen missing the paper, all is awesome!
1 Like
I would check all the other pulleys aswell,its looking alot better 
Plan to, I’m calling it a win for now, the little glitches are likely because I just threw the paper on top of the previous one with a few pieces of tape and wasn’t careful.
As I mentioned upthread my carriages arrived from C3D with the set screws tight but not on the flat. This leads to all sorts of weird gremliny behavior, and in my view should be at the top of the list of things to check when the machine is not behaving as expected.
3 Likes
Thanks for this thread. My Hello World worked but I couldn’t cut round circles in plywood. I happened across this thread just coincidentally and loose set screws on both y-axis motors was my problem. Now the machine is cutting perfect circles.
Thanks,
Tom
1 Like
Glad its working better for you now
I just finished building my Shapeoko XL, and I am having problems with my “Hello World” looking similar to the “bad” pictures in this thread, and my test circle cuts are off as well. So, I’m glad to see potential solutions listed here. However… I am a newbie, and I don’t understand what the fix is! In the picture that Richard Counoyer posted, it is not clear to me what in the picture is being referred to as the “set screw”, and what it means to be flat. Someone else then mentioned this: “my carriages arrived from C3D with the set screws tight but not on the flat.”
So, can someone please explain a little better exactly what is being referred to and how it should be adjusted? I would appreciate it. Thank you.
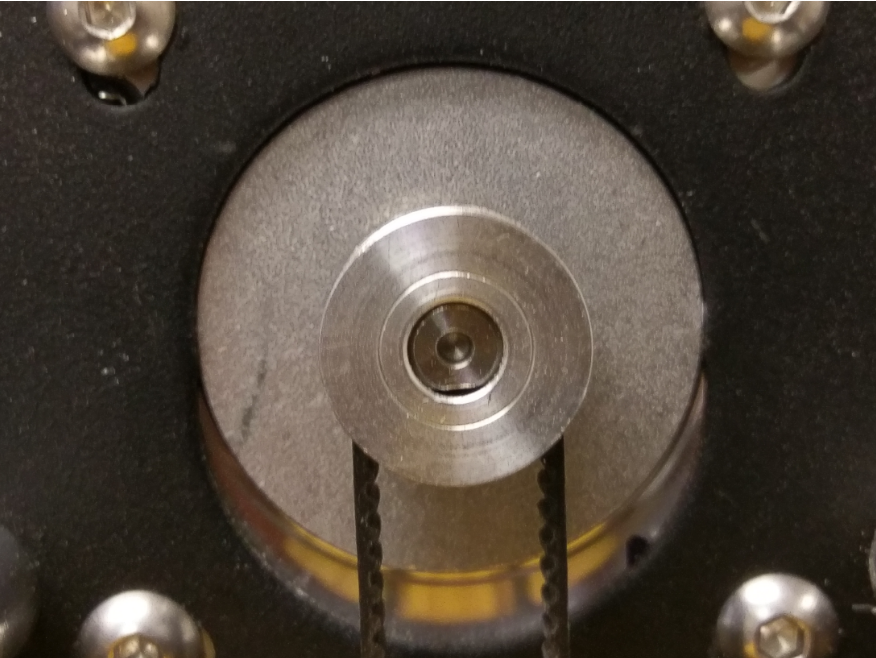
The motor axis are not fully round but have a flat part. This is where you want the setscrew (the tiny screw in the pully you use to fix it on the motor axis)
All,
I just found out that the Canada dist. (Sparkfun) is selling old stock and the motors DON’T have flats on them. This photo is for a kit that was delivered last week So the answer might be to CHECK for flats, etc…
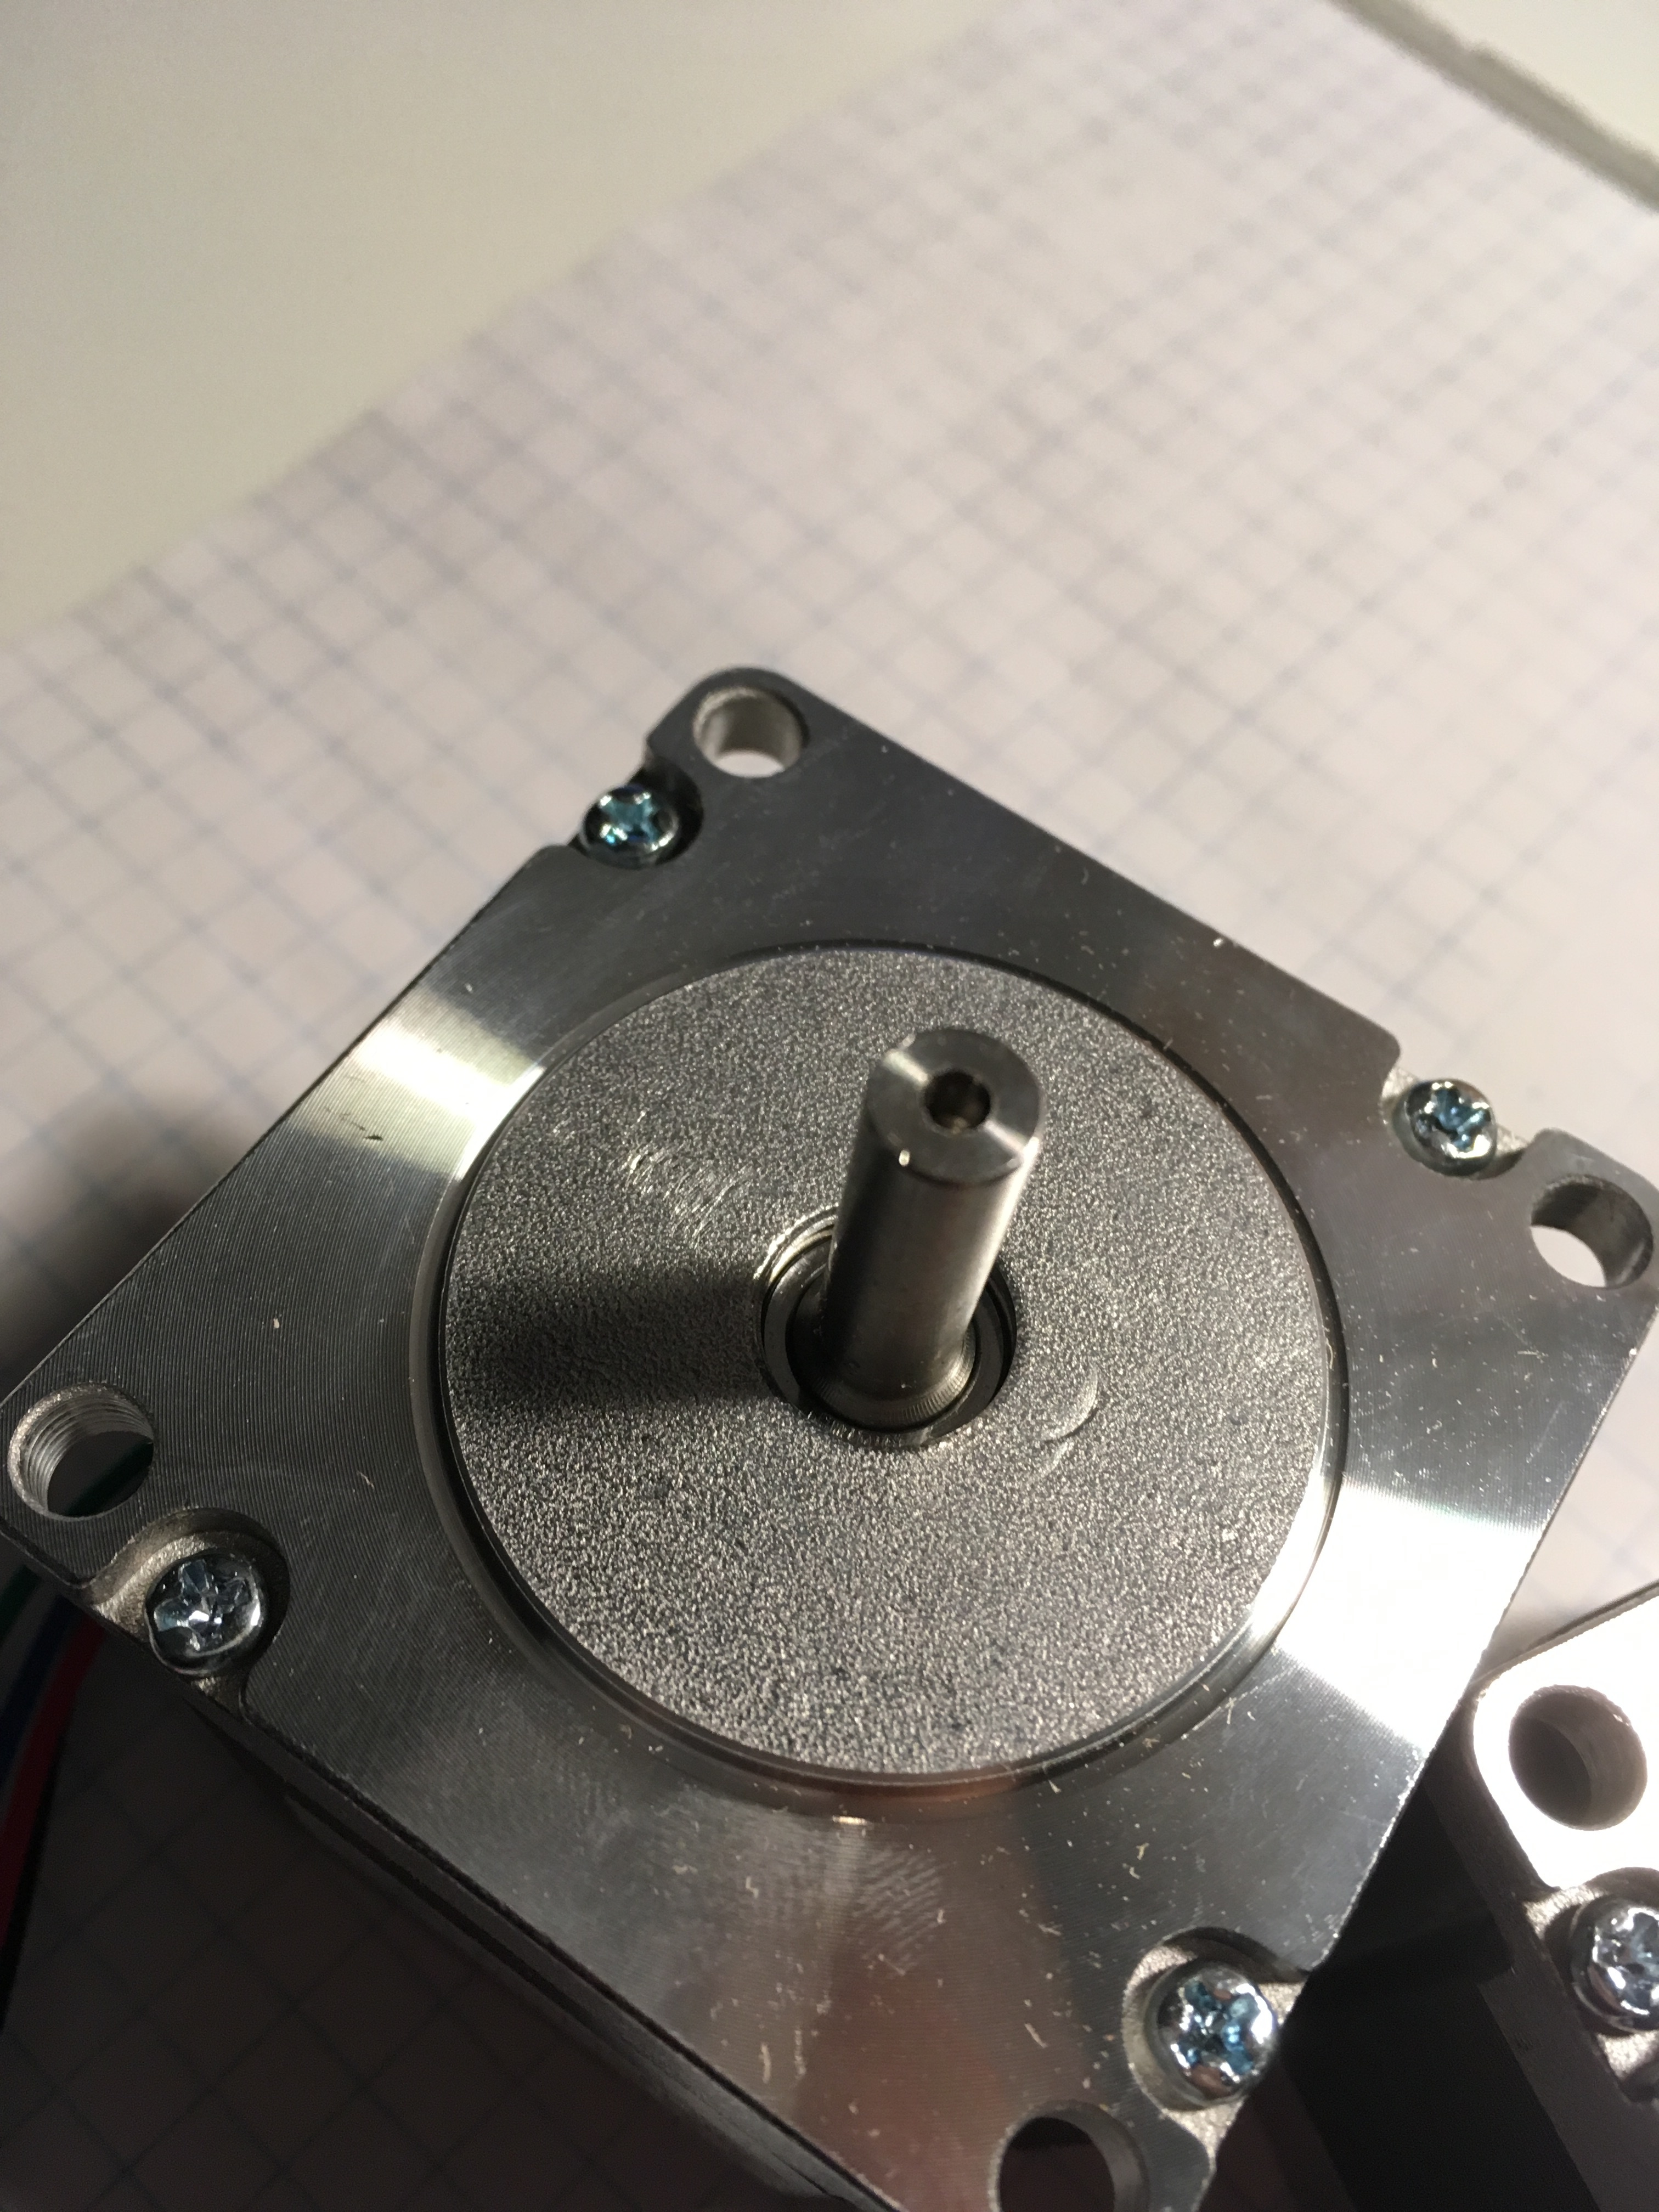
Image here
http://www.shapeoko.com/wiki/index.php/Shapeoko_3#Bill_of_Materials_.28B.O.M..29

set screws are the small black screws in front. Two are used per pulley
Mystified by why one has a 5mm bore though.
Thanks for the several of you that replied. I think I understand what everyone is saying. Basically, there is a flat portion of the motor axis. A tiny screw (which is the set screw) goes into the side of the axis perpendicular to this flat spot.
Now my problems is that I don’t see any tiny screws to use! I looked through all of my stuff, and don’t see them. It is possible that the screws were very tiny and I possibly did not see them in a bag and the bag may have been tossed. Can anyone point out what item they are on the Bill of Materials link that Bill Adams posted? Otherwise, I’ll contact support for the specs to see if I can get them from a local shop somewhere.
Thanks again for the help. I’ll post another message when something changes to let people know my status.
They could be in the pulley’s threaded holes. Can you confirm?
If you have one of the later, preassembled machines, the pulley set screws should already be installed
On the older machines they were with the pulleys in a bag.
they’ve been known to vibrate loose and be lost though. They’re a commodity part and any hardware store should have them.
The first time I looked in the holes I thought they looked empty, but they in fact had the set screw in them. I rotated it until one was perpendicular to the flat and tightened it down and that’s how I got it finally working. I seems this is a somewhat common occurrence with the preassembled units.
1 Like
The root cause of this problem is that the people assembling these machines are not being informed of this problem, because we see it repeating week after week. Apollo, Edward, Rob, how about some feedback on this problem?
It would help if everyone would remember that this is a kit, and that one should check the machine before each use:
http://docs.carbide3d.com/article/41-machine-operating-checklist
Are the screws so tiny that they would be recessed into one of the holes?