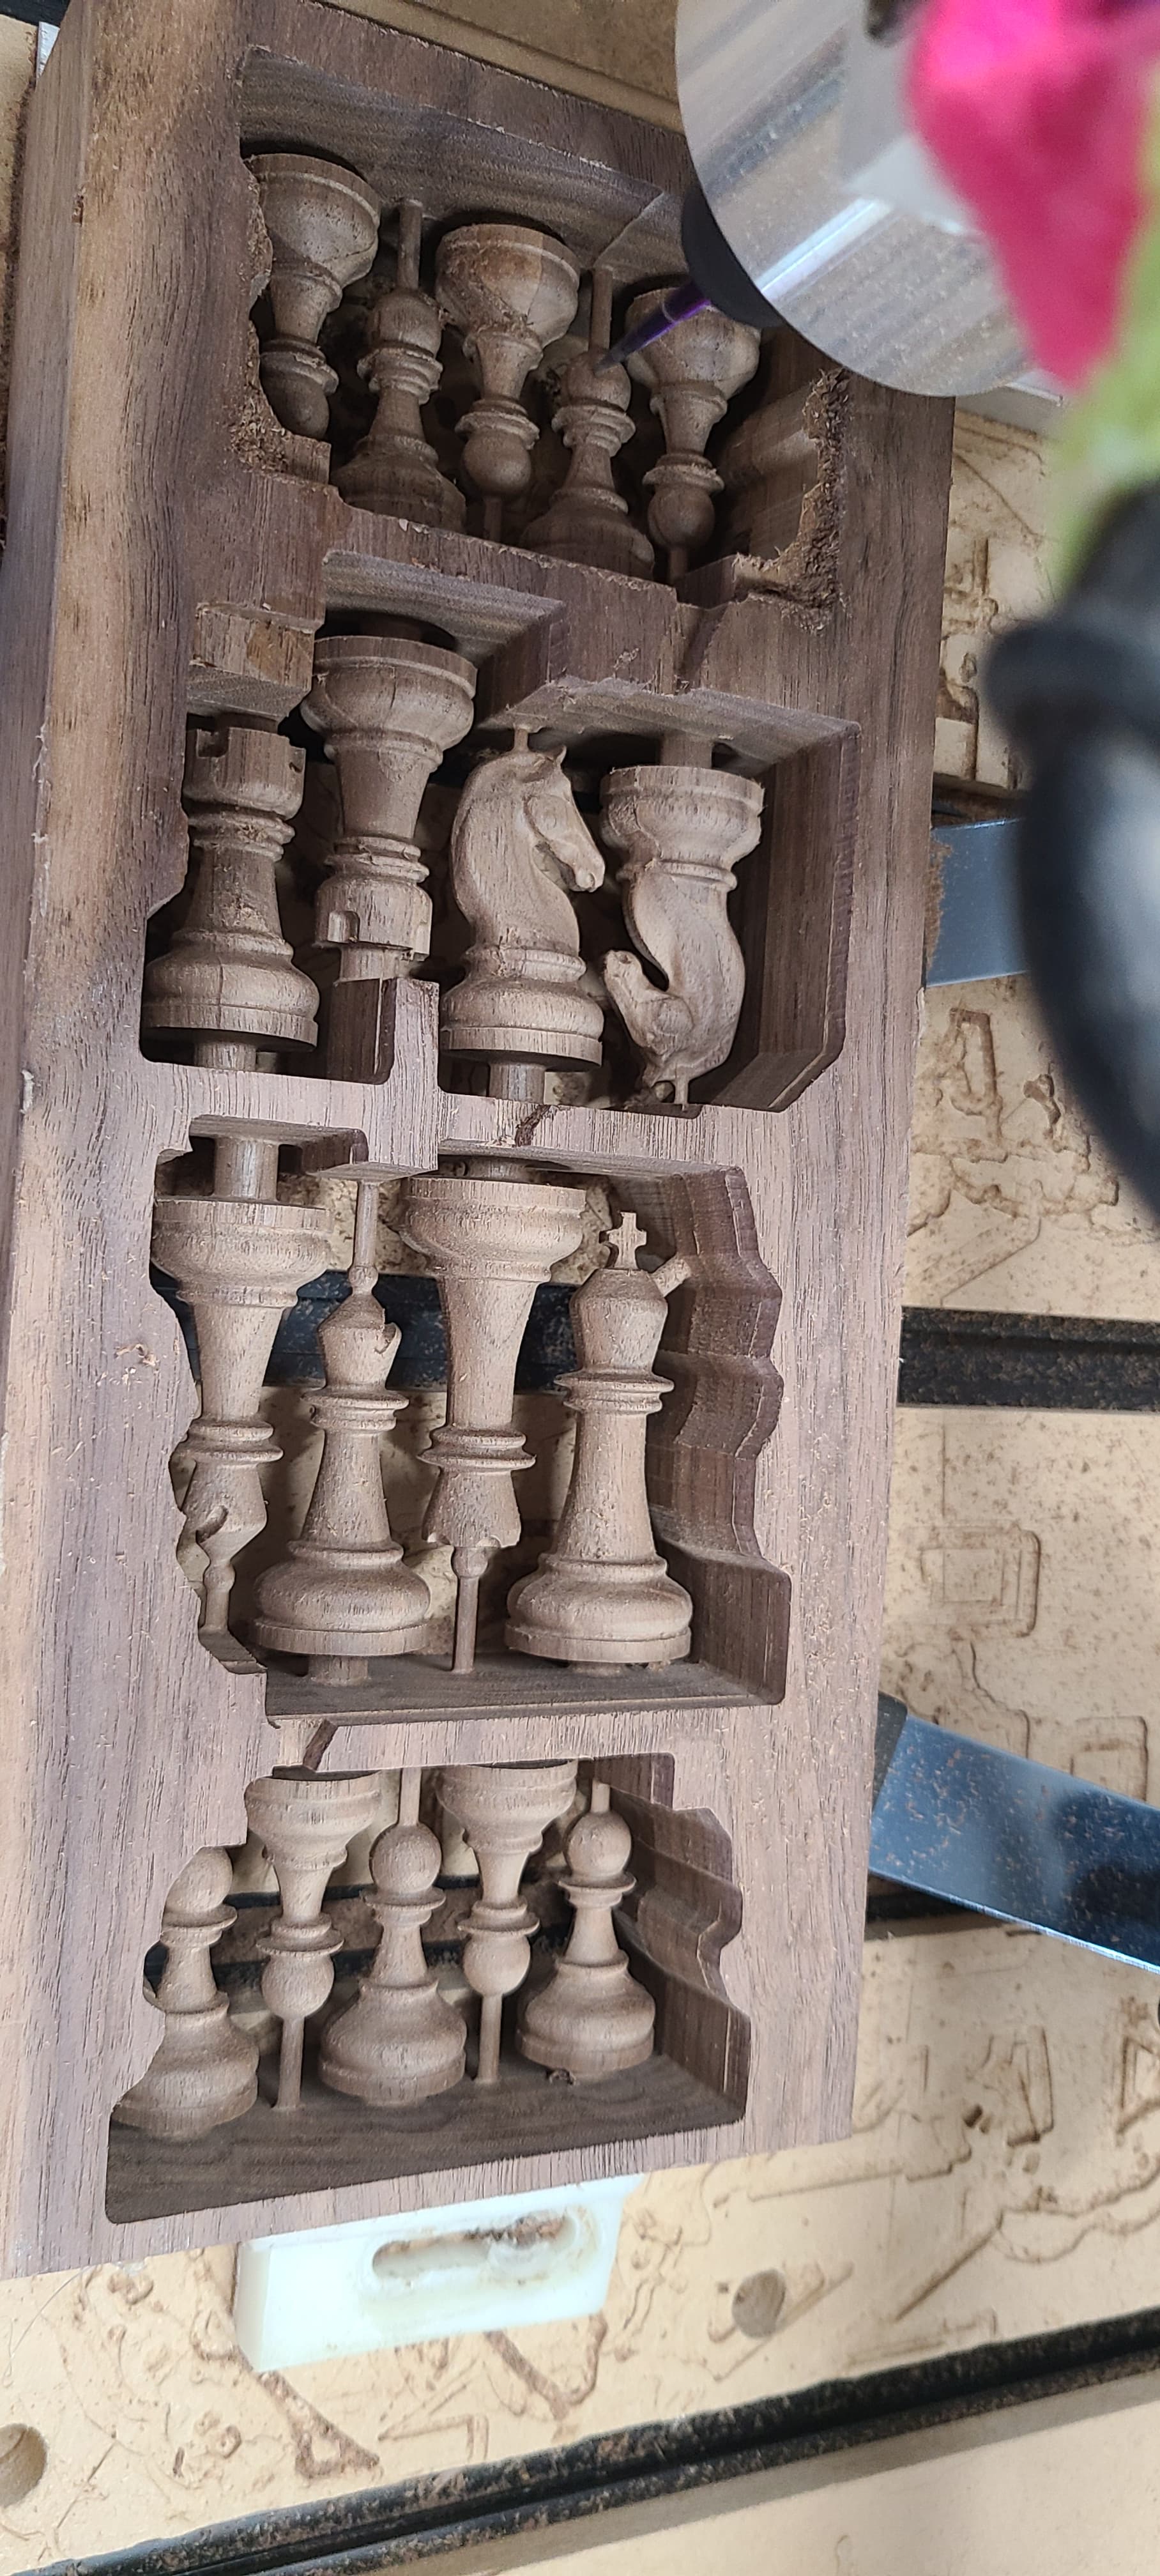
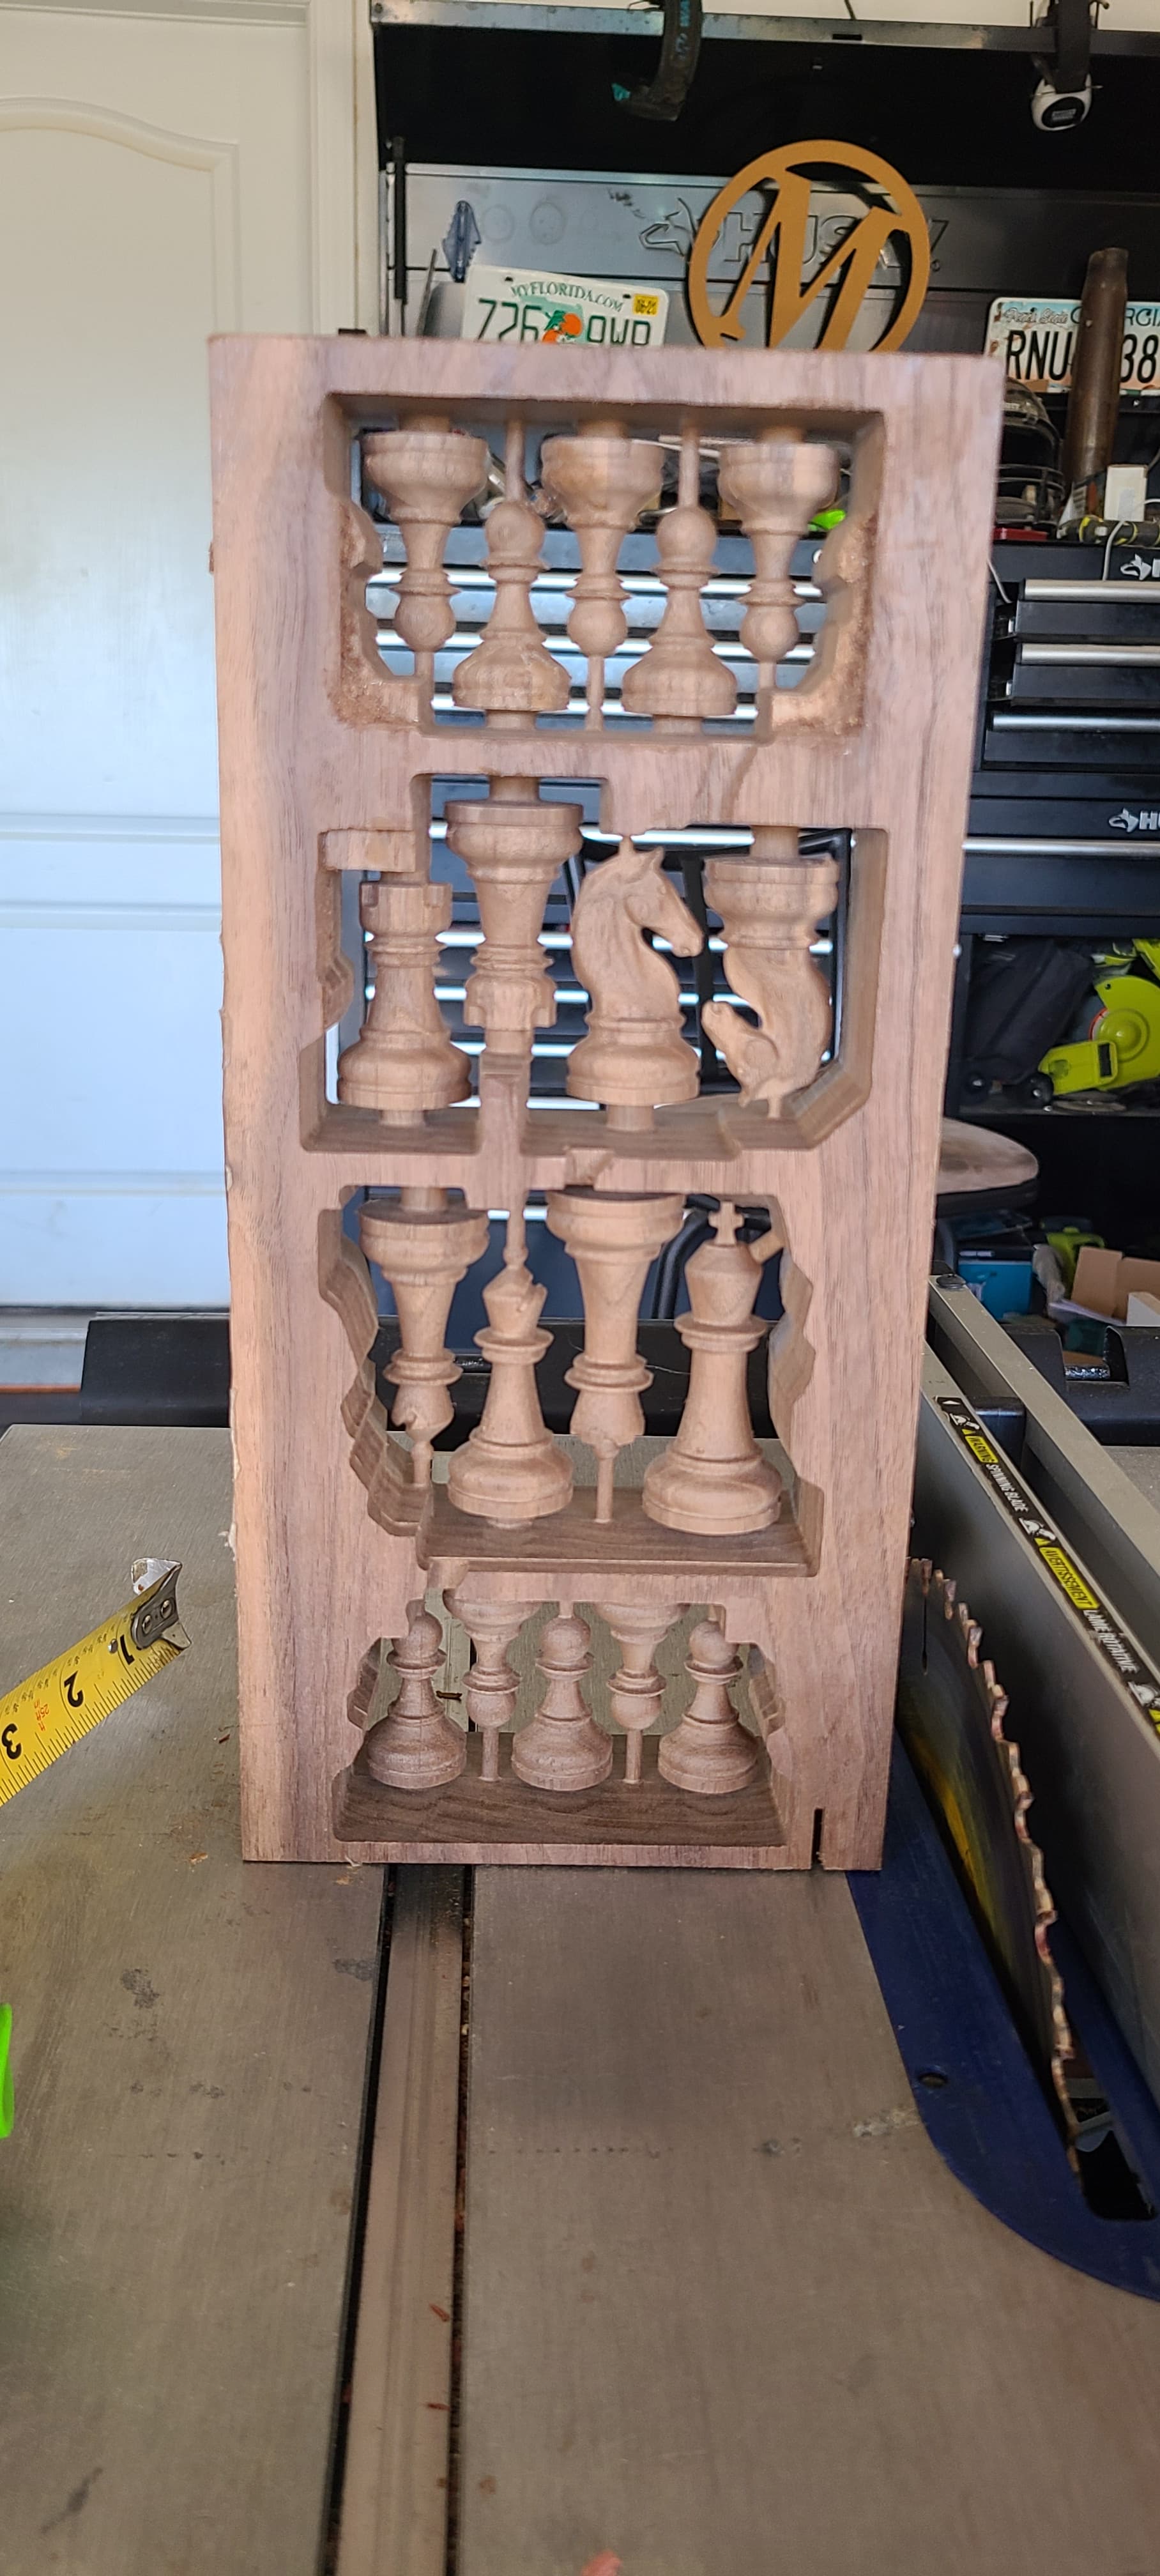
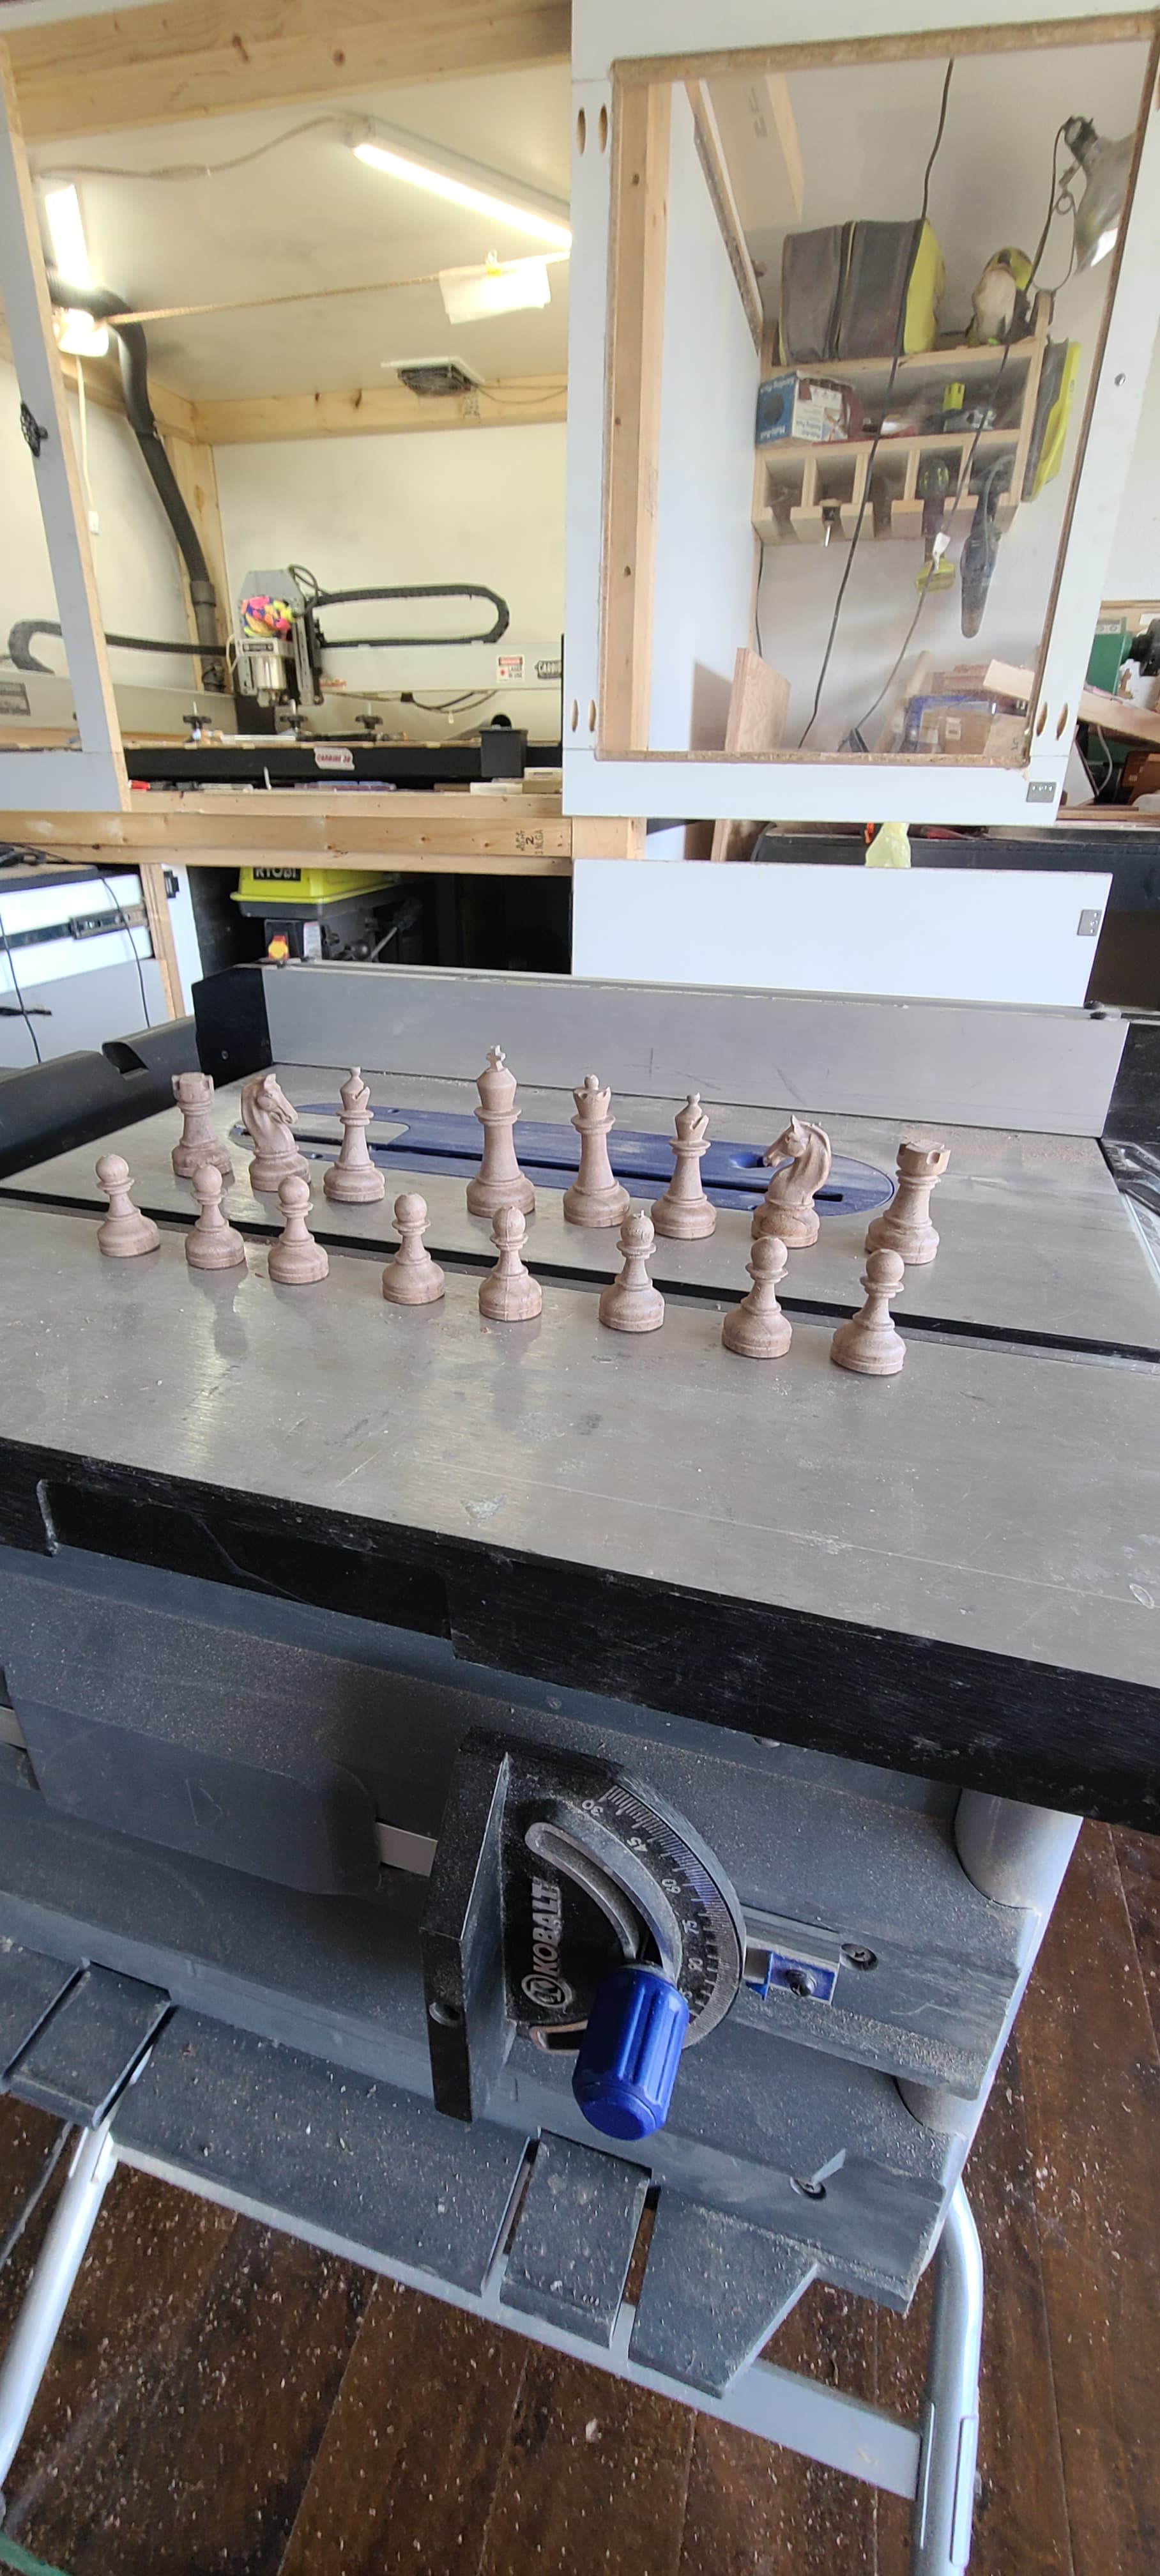
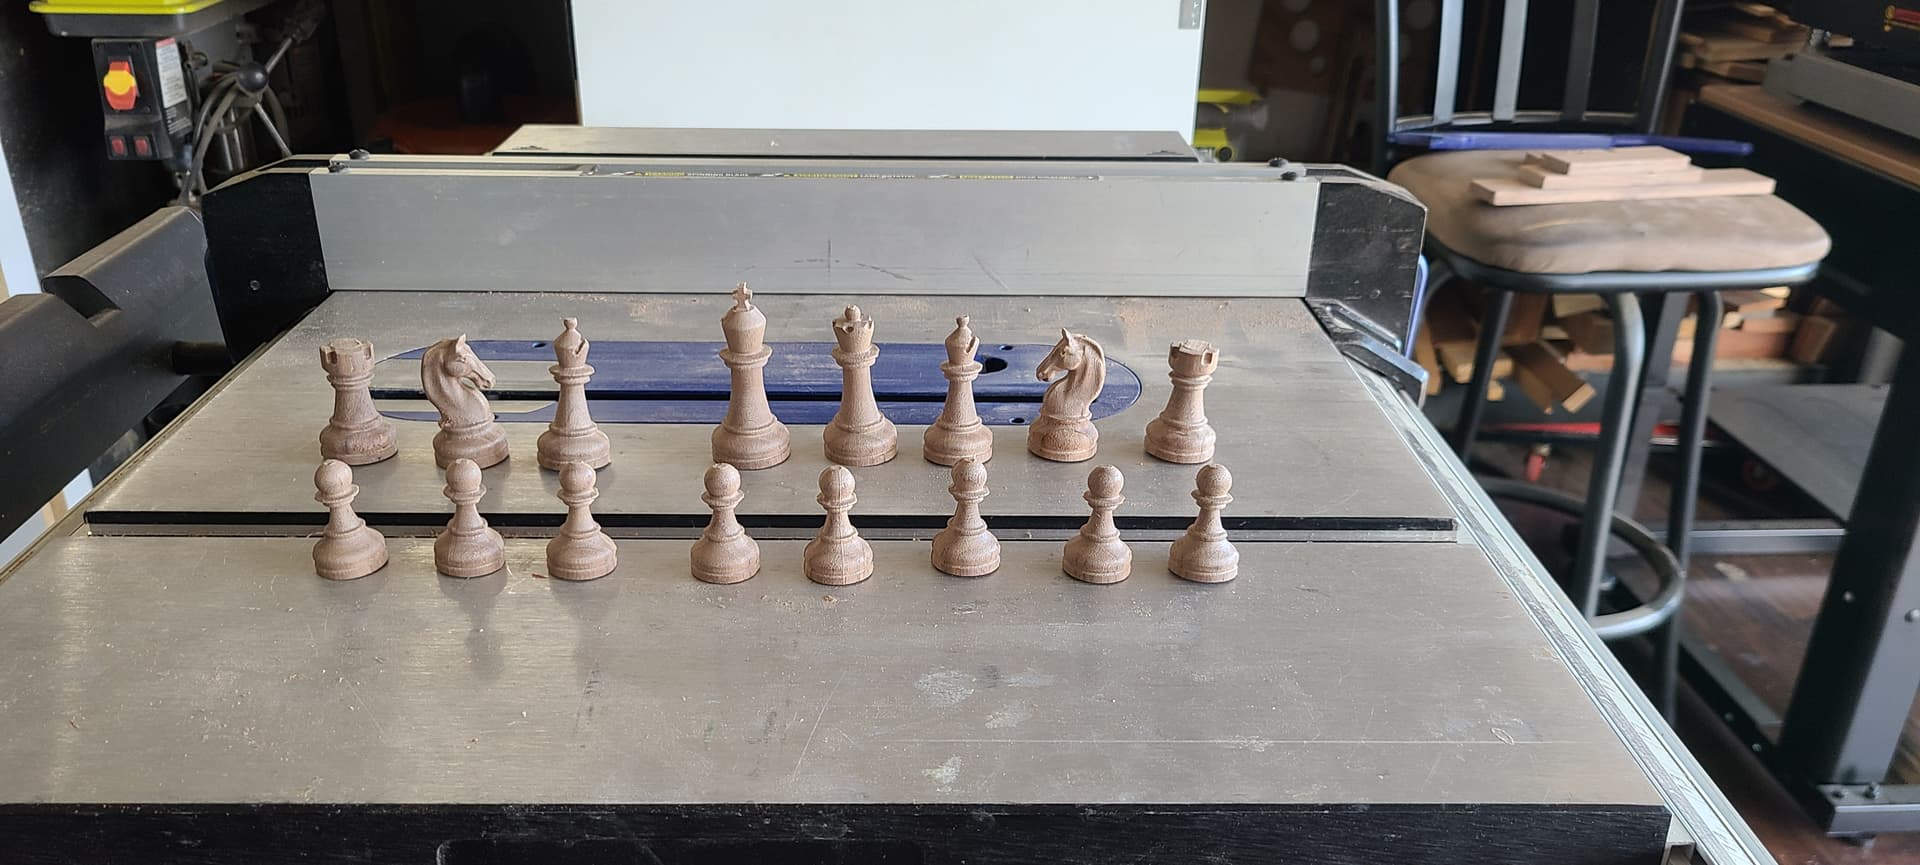
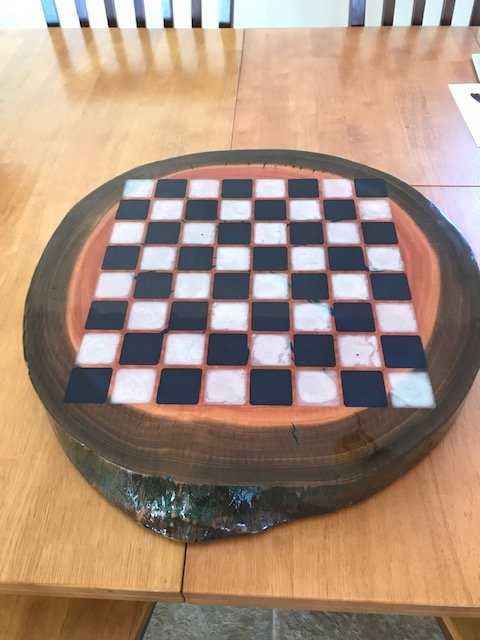
Finally after doing a bunch of reading and attempts at different methods I did some double sided machining and am happy with the result. What do yall think?
41 Likes
Super cool! Really like your layout/use of wood. Is this walnut? Will you make a matching set from a lighter wood?
2 Likes
@MikeG yes it walnut 2" quarter sawn from a local mill. I bought the file design from ETSY and got in tough with the seller. Did a video call with him and building a friendship (he is from Rome Italy) and he helped make adjustments for free and I am helping him advertise and explain thinga in English to appeal to american buyers! I have a 2" thick quarter sawn piece of Sycamore for the light pieces as well as building a board out of the same lumber. Amazing how our hobby can build friendships that is what i loke about this forum.
5 Likes
@Ensalaco dont sell yourself short I have seen your work and it is amazing. I settled on the referencing pin method and used aspire. I want to do a guitar for my brother in law but havent pulled the trigger yet.
1 Like
WOW!
What bit(s) did you use?
Was this designed in Carbide Create?
What did you do to keep the wood from twisting/warping while cutting?
Suggestion: Make a jig to hold the cutout pieces by the base (upside down) and carve something unique into the bottom. Maybe even embed magnets in each piece and the chess board so they snap into place when playing.
1 Like
Good questions from @ColdCoffee Will you drill the bottoms and add weight or felt?
Are the piece tournament size and if so, do you know the weights?
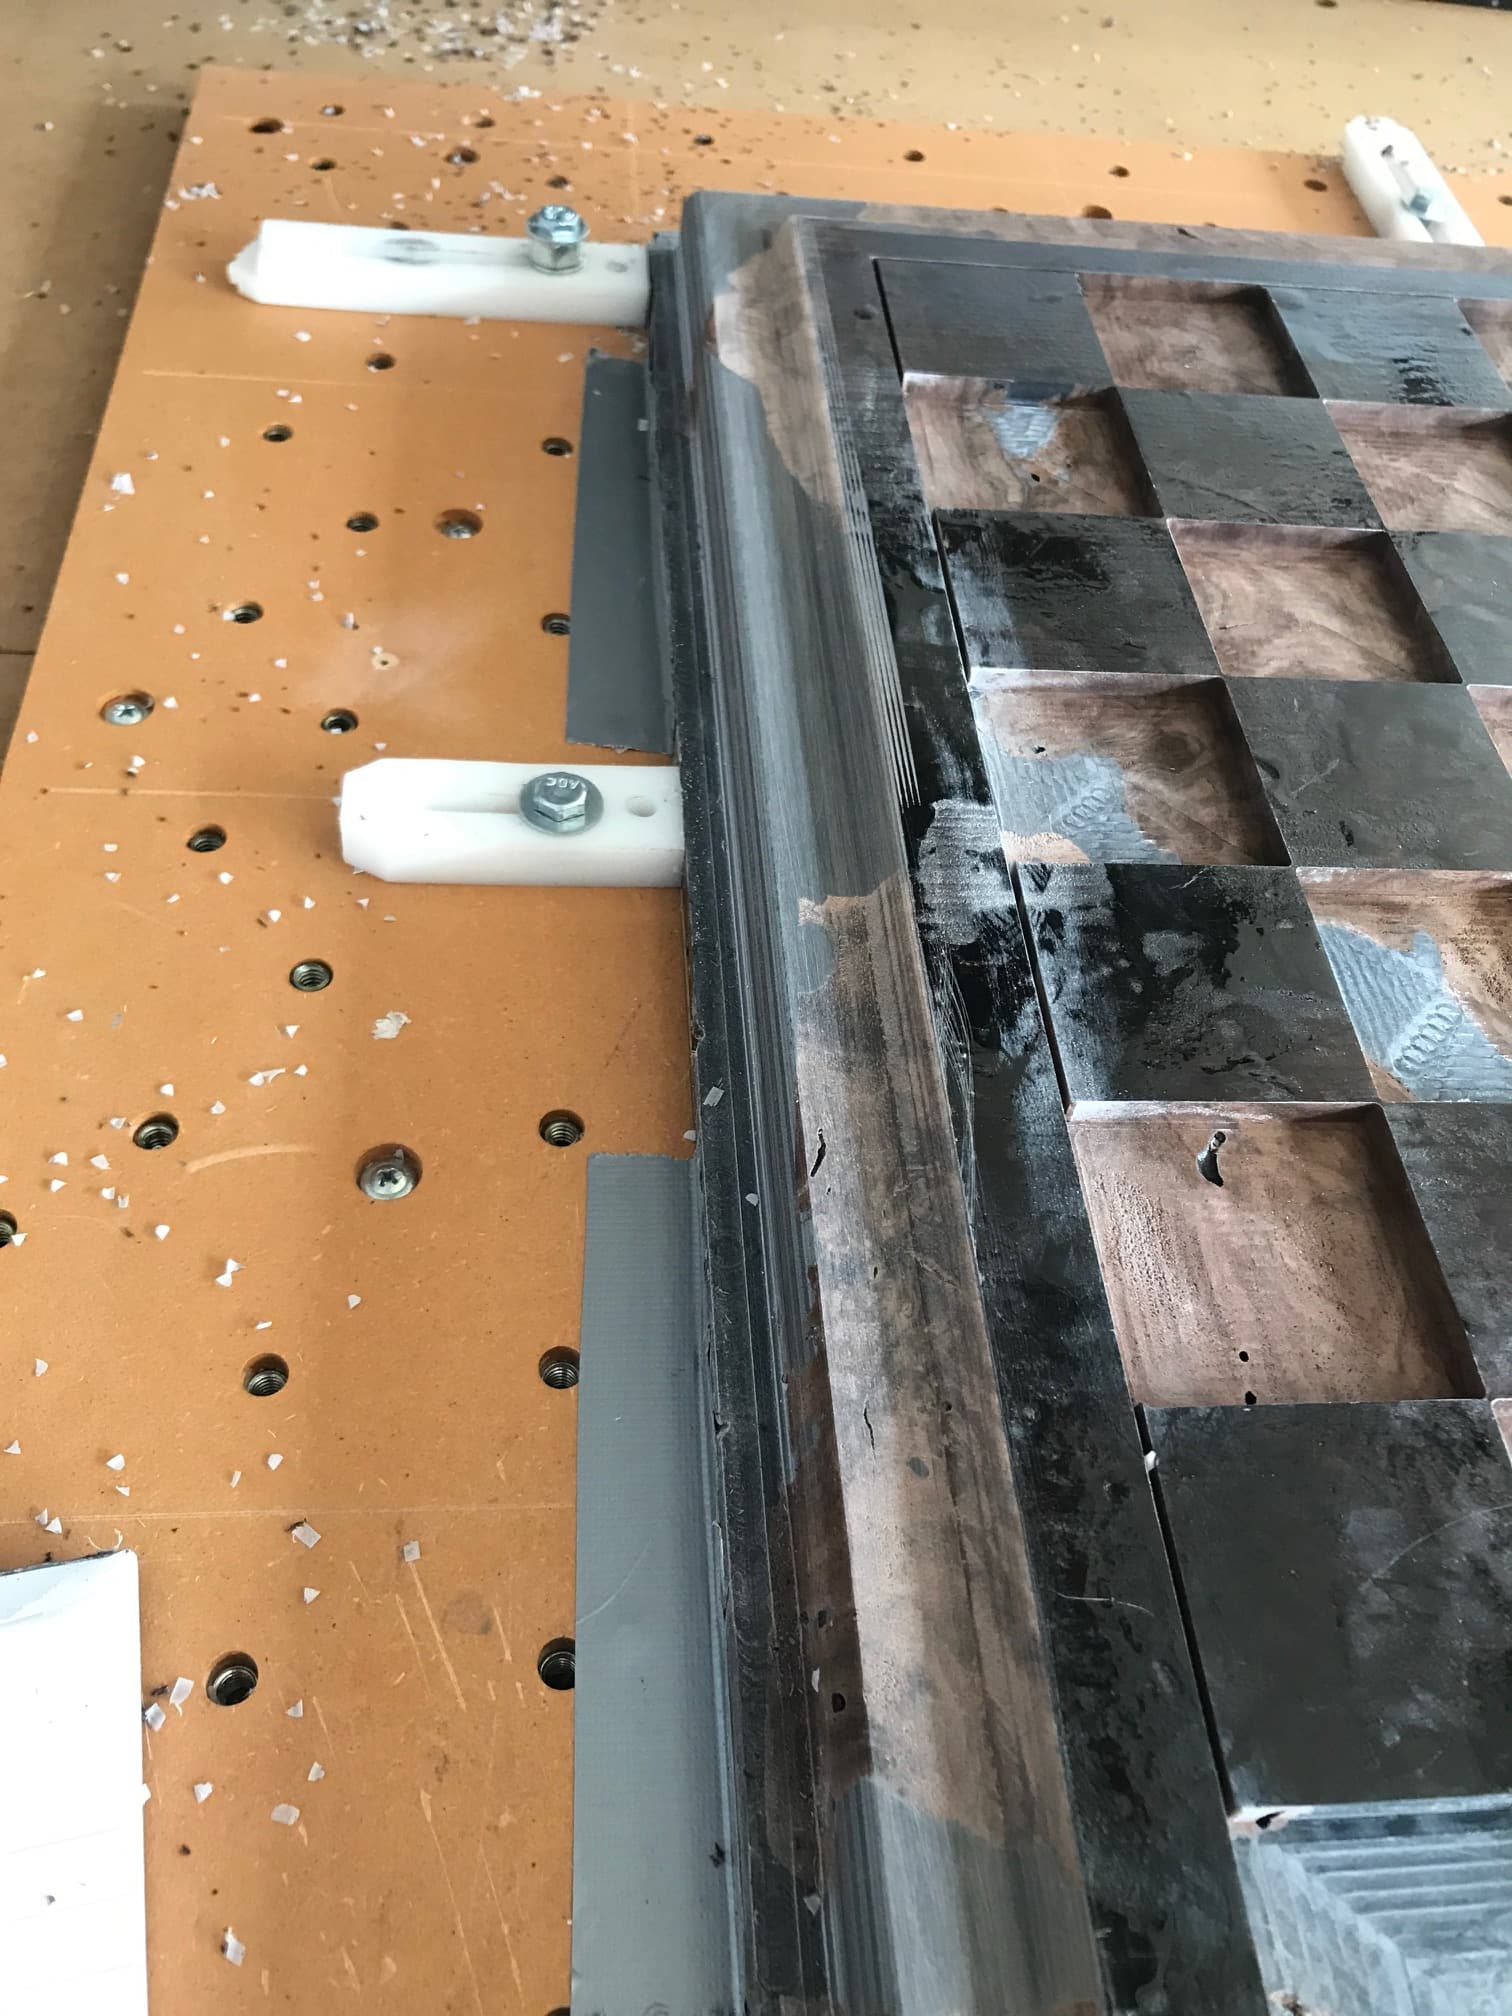
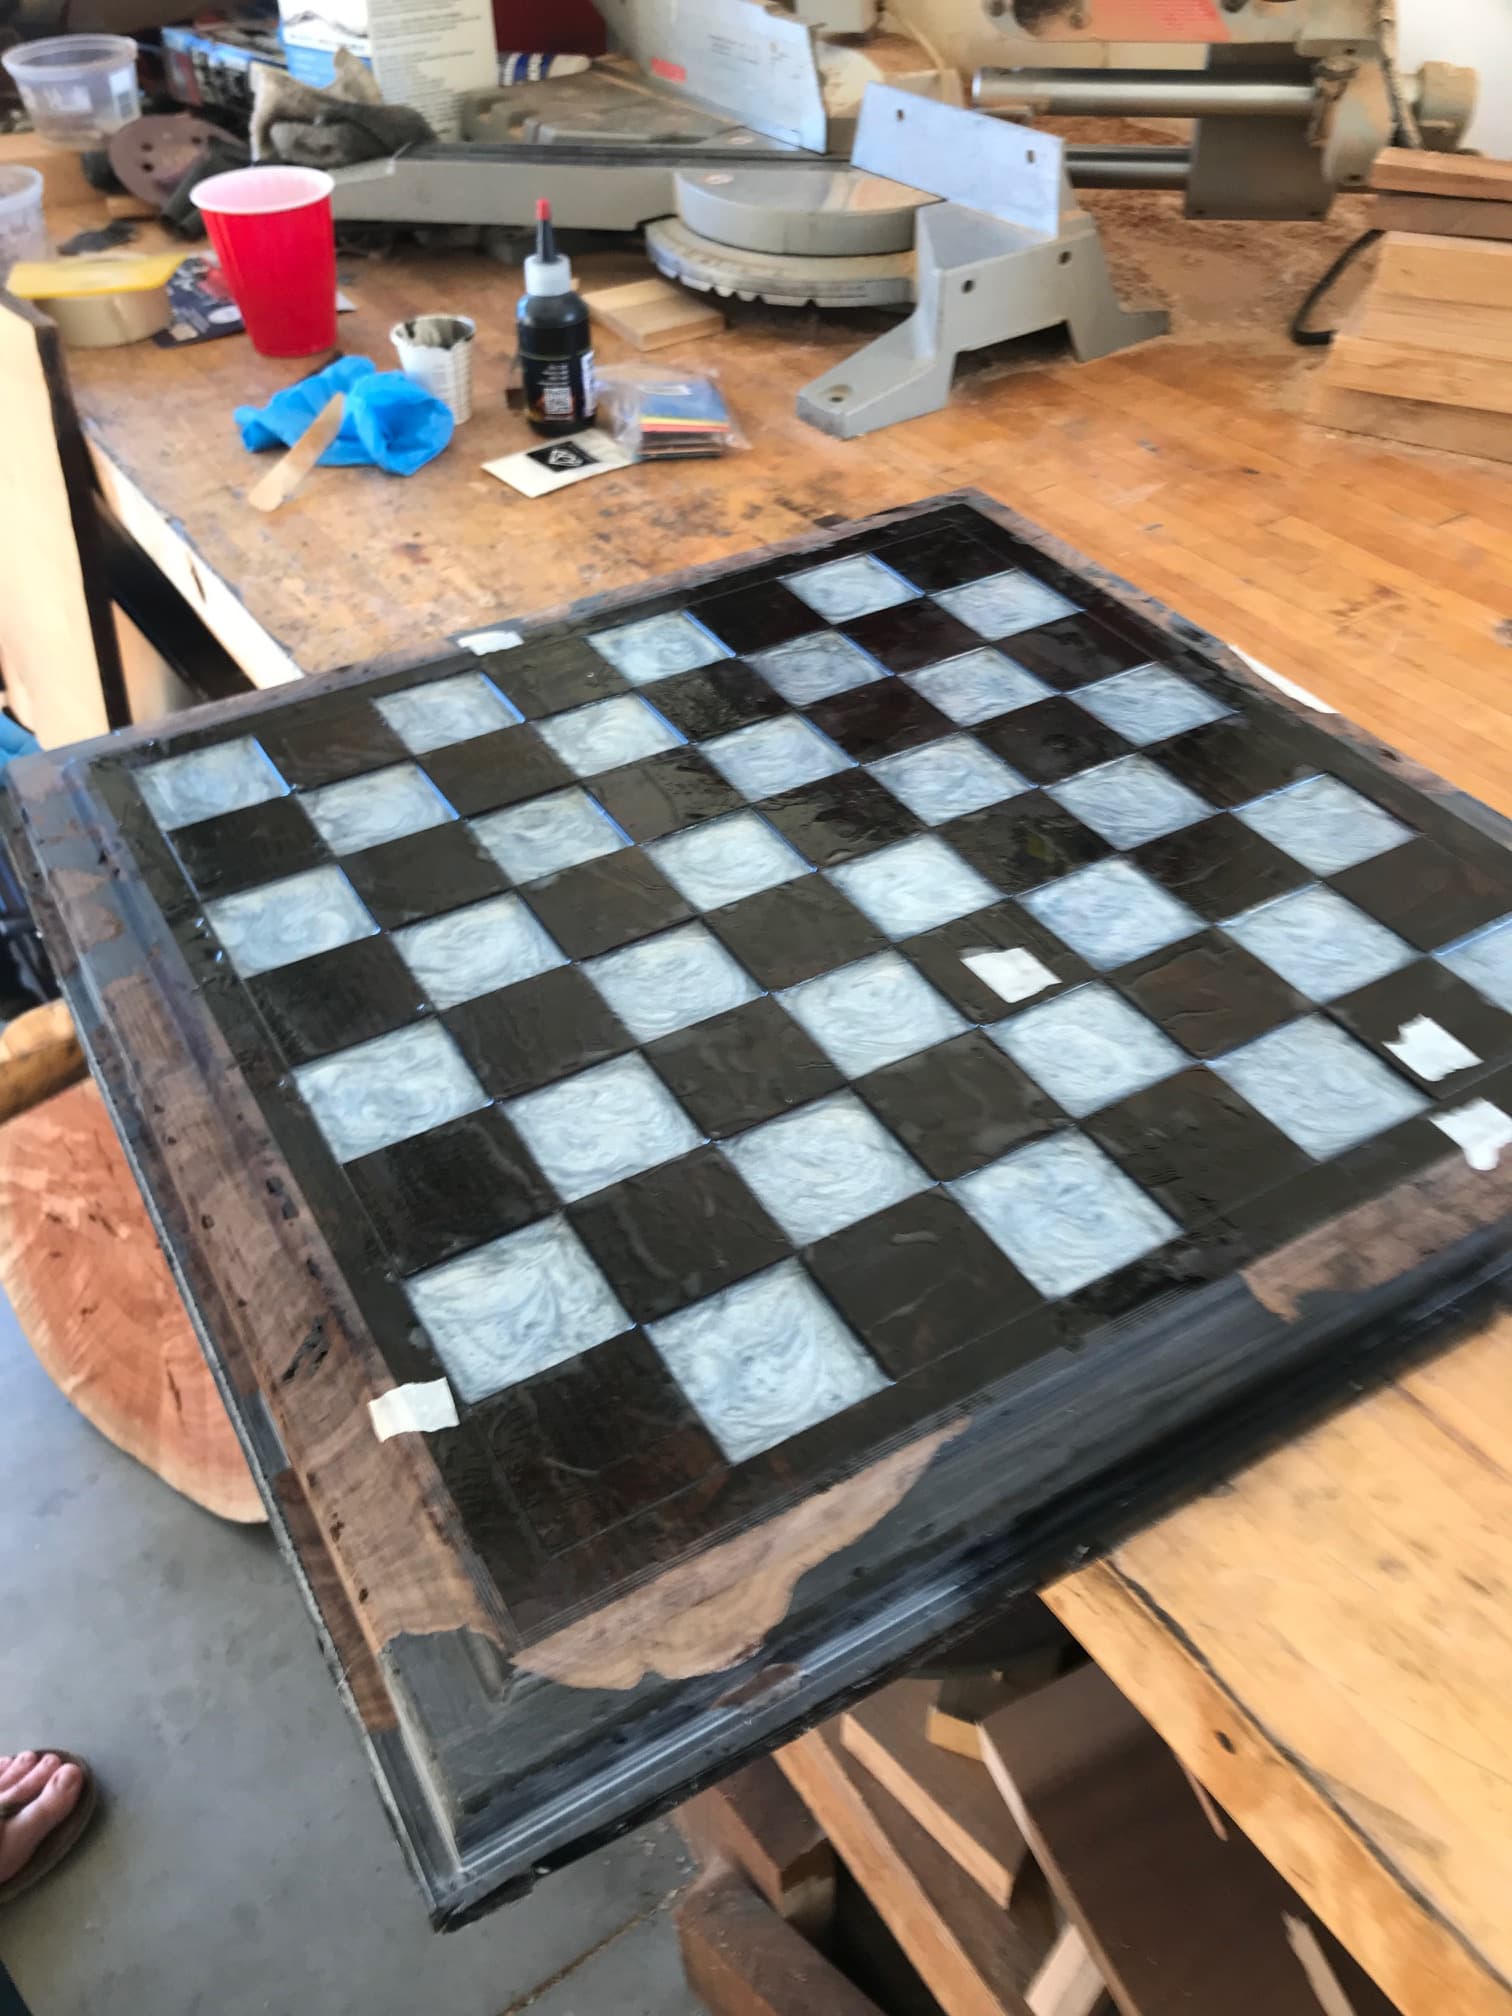
Thanks for the tips I zeroed manually from beginning left corner of stock with a 1/32 bit for best accuracy. I set up the file to carve top side and reference holes on top @ColdCoffee rough cut was done with a 1/4"endmill from carbide #201 then did a finish path with a 1/16" diameter tapered ball nose bit I got from amazon. I did all this using vetric aspire as carbide doesnt accept the geometry of tapered ball nose bits and vetric has a flipping option in the setup. I also do not have the pro version of carbide so cant speak to that. As far as how I kept the wood from twisting and warping I was conservative with cuts and was fortunate to get a nice kiln dried piece of walnut 2"in thick walnut 6" wide to utilize.
1 Like
After doing some research they are not perfectly to scale as a regulation size. Honestly havent decided if adding weights or felt on the bottom yet I do like the magnet idea, really i just wanted to try double-sided machining and found the file which made me remember playing with my great grandfather so just going from the pieces to a board and see where the journey takes me. I am also fortunate that I have a local supplier (30min) for hardwood supplies s2s s3s ect. That is chraper than the traditional rockler/woodcraft. To give you an idea I was able to get walnut and sycamore 6" wide 48" long 2" thick for under $50 with the size of these i can make 2 sets of pieces dark and light and 1 board.
As I am researching more on the game of chess my next set I will try to make fully regulation size and weight.
1 Like
Also like the idea of carving on the bottom the diameter of the bottom pieces is 1.25" which is close to regulation from what I have read.
Can you share the Etsy seller? My son is wanting to build a chess board and this is perfect. I would love to buy the plans.
CHESS / Cnc Chess / 3d Chess / Chess File / Router Chess Set / - Etsy. And like i said in the first post awesome seller as well. Key thing with the file is to pay attention to the initial size which he outlines and if you scale it ensure you scale XY and Z proportionally, (mistake i made on the test cut from scrap wood) @rnicolson
3 Likes
Been thinking of how to attack the board and doing some research. Found one idea that i was thinking of doing which is to put 1/16" or 1/8" dowels pins on all sides to minimize expansion and contraction. I dont know if it will work. I am still tweaking my inlay process. I probably over think things but am cautious before i go with expensive wood. One because i cant afford it lol!!
The supply I have is quartersawn so partially there i guess thank you for the tips. Any and all help!
1 Like
You’re very fortunate to have a hardwood supplier nearby. We’ve got a few in SoCal, but most of the wood like this is imported from other states.
Here’s a couple of board ideas, though you must keep in mind that I suffer from enjoying working with epoxy.
From a eucalyptus tree I cut nearby:
And another albeit, no top coat finish applied yet:
6 Likes
@MikeG I really like that. I have played with epoxy and dont mind it at all, just time consuming lol.
Not sure what i am going to do yet, one of those projects that i dont have a solid plan just trying new strategies out. I am fortunate to find the seller nearby for the hardwood and really got lucky. I dont have Facebook but am in the Navy so talking to some friends that do woodworking and they helped link me up with the supplier. Networking has led me down to meeting great people and lucky finds. I was stationed in SoCal and remember having to rely on big stores so I know it is a struggle.
4 Likes
@Ensalaco what program do you use? If you use aspire on double sided do you use the option to cut past i.e. overlap any?
Another note that i wanted to say is this is all on a stock 3xxl with the belt driven z axis and a makita router. I say that because i have read some negative comments and ppl having issues with their machines. In my own experience work with the makers here and the support team once you learn your machine they are amazing. Now do I want the 5pro 4x4 absolutely linear rails no more belts sign me up. But I have had this machine for going on 4 years and still havent maxed out its capabilities mostly because my imagination is still growing! @Carbide @WillAdams @robgrz @KevBarn14 @wmoy and the entire team thank you for a great machine. Also please keep supporting the 3 lol!
7 Likes
Okay thank you for the insight i have read a lot on fusion 360 just dont have the need to design like that. For me it is easier to buy designs vice put the time in to make them.
Did you use Carbide Create Pro to carve this or some other software? I have bought the files from Etsy and want to make sure CC Pro will do it ok.
I used aspire however CC pro should work. As long as you can import STL files which pro does I believe, (I only used the free trial so dont quote me) I am going solely off what i have read about pro. With those files it is 2 bits and the key is the reference holes. Just ensure the setup is accurate i.e. half and half.
1 Like