It would just be a matter of some patience to work up a 2.5D file for this in the bundled version — just draw the design up in profile and draw a series of matching circles, then apply toolpaths to the appropriate depths… hang on…
2 Likes
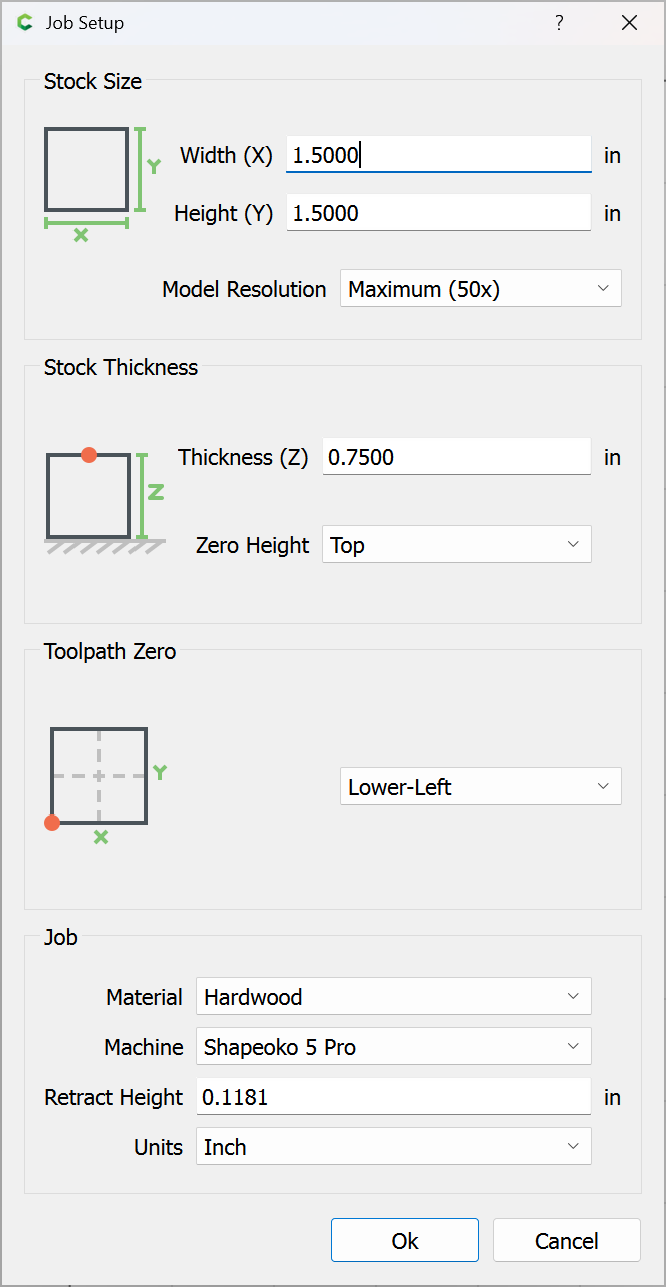
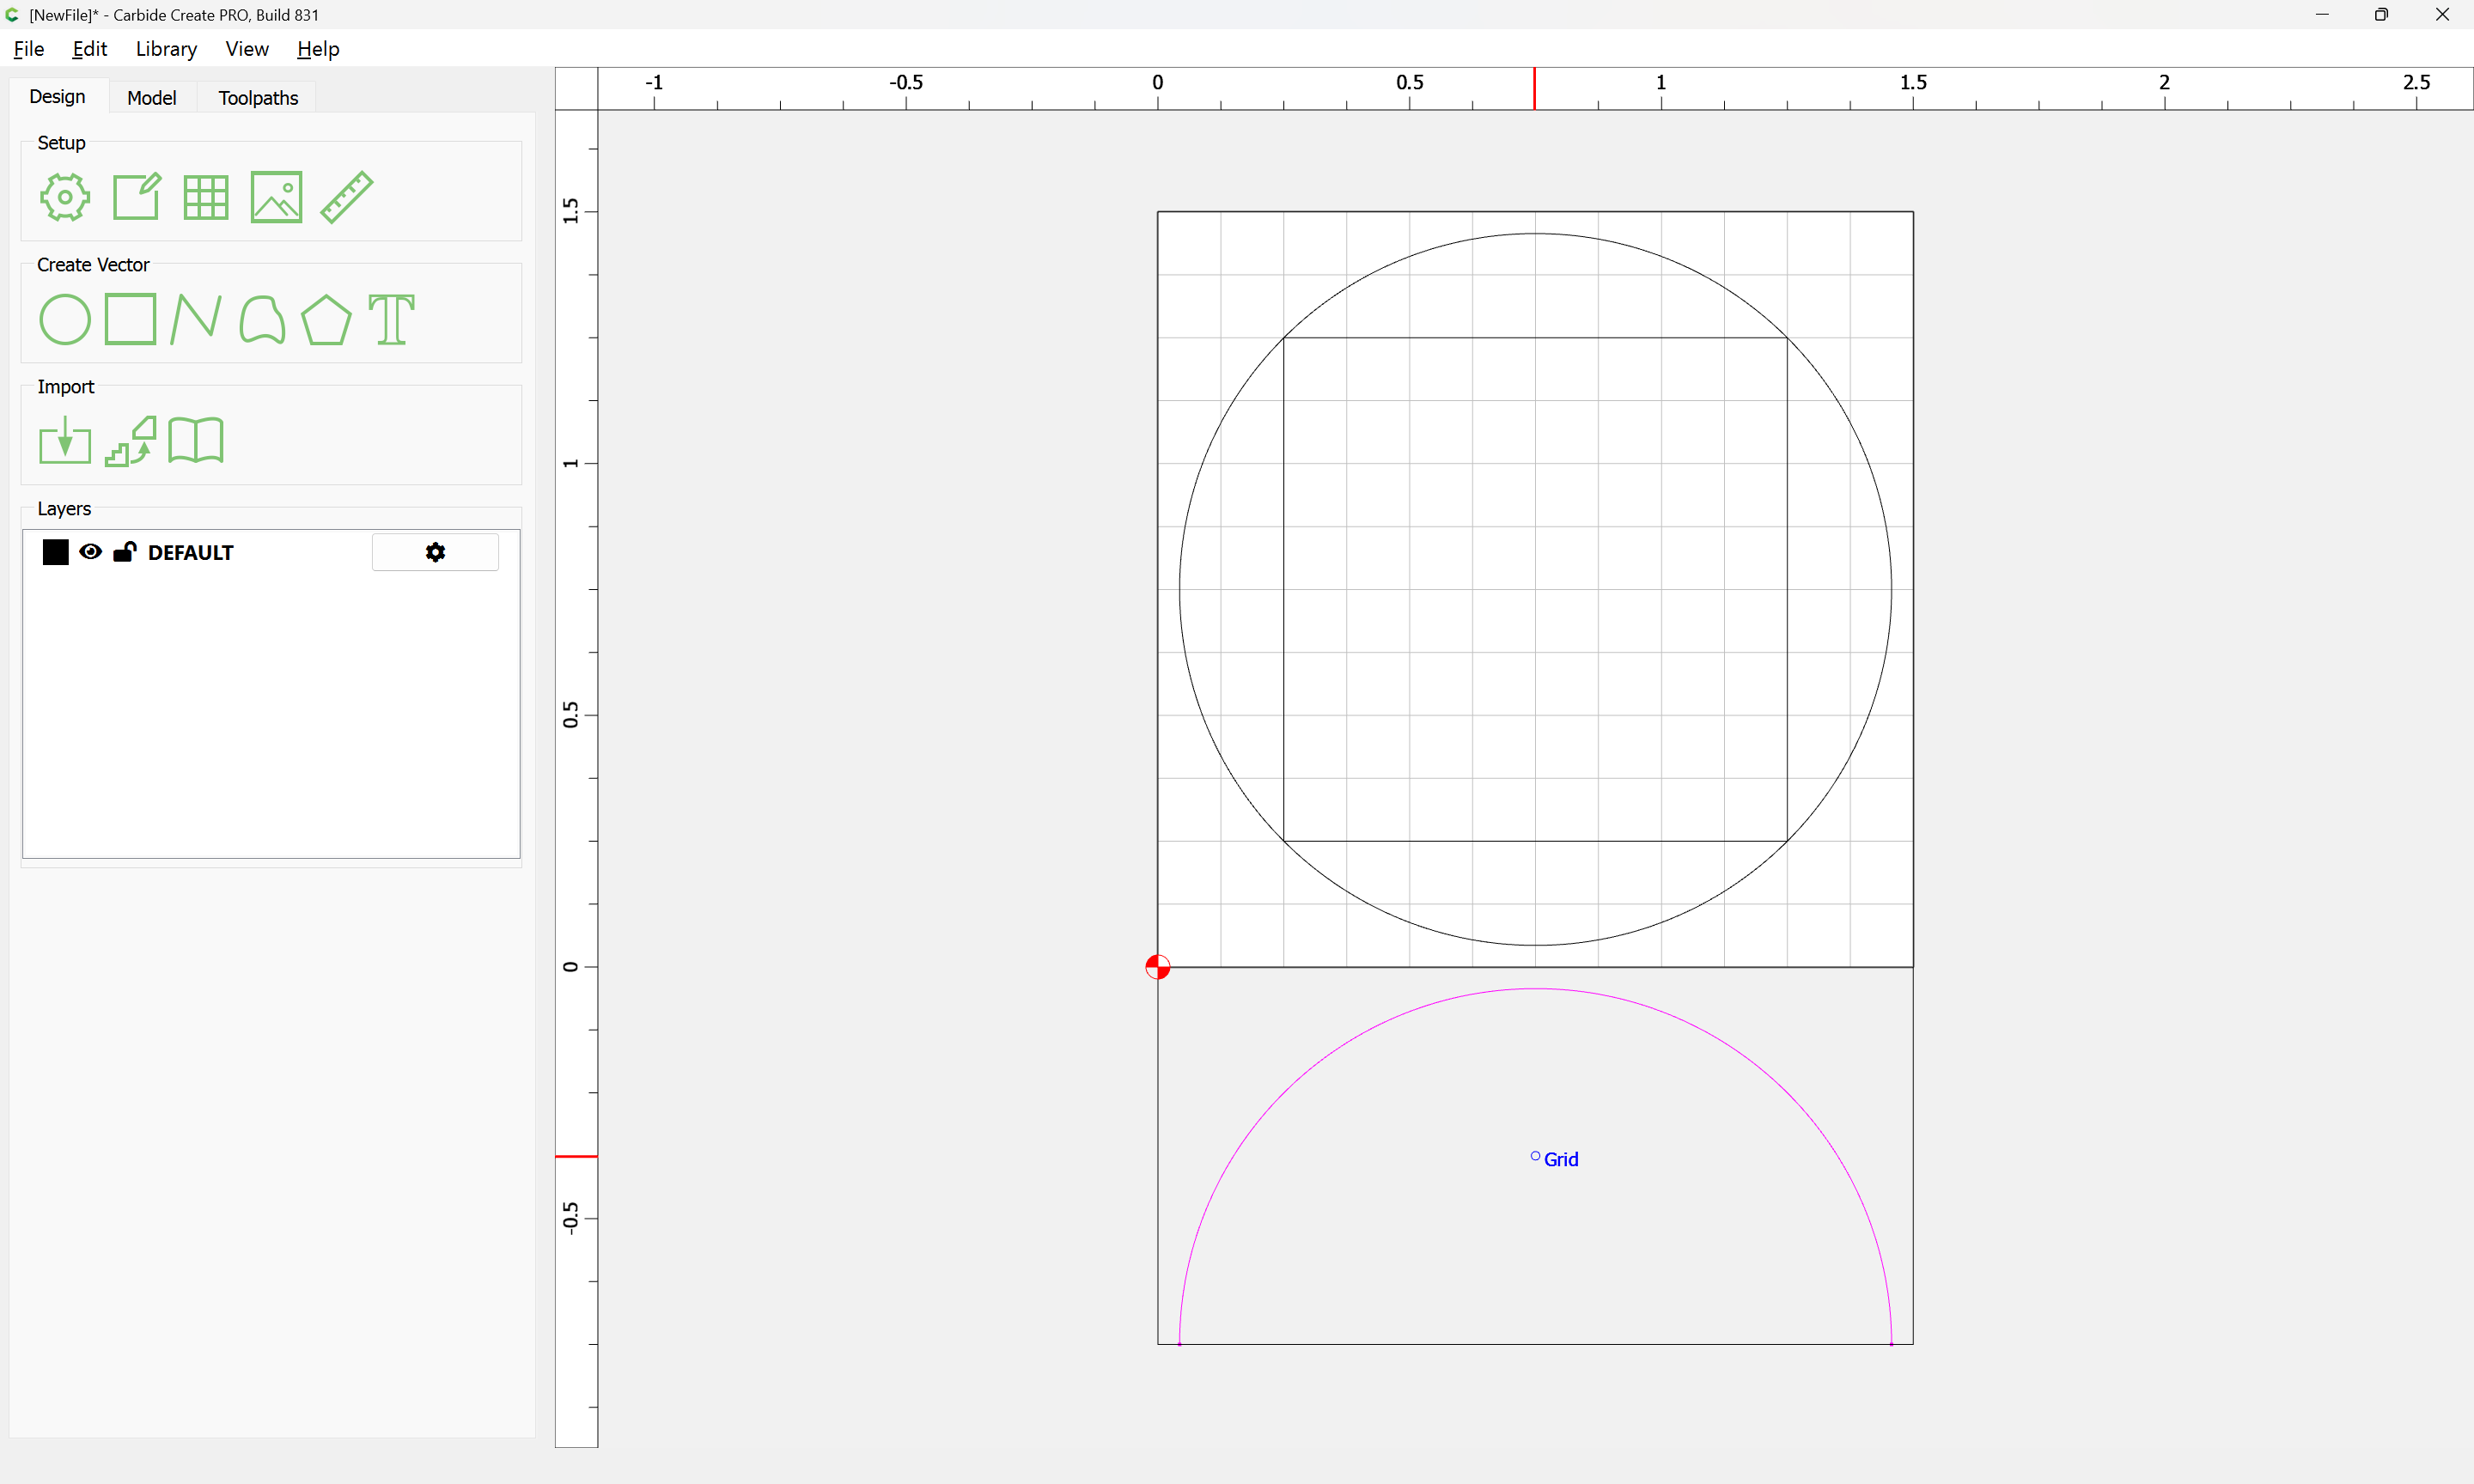
First, Job Setup:
Then draw the outline:
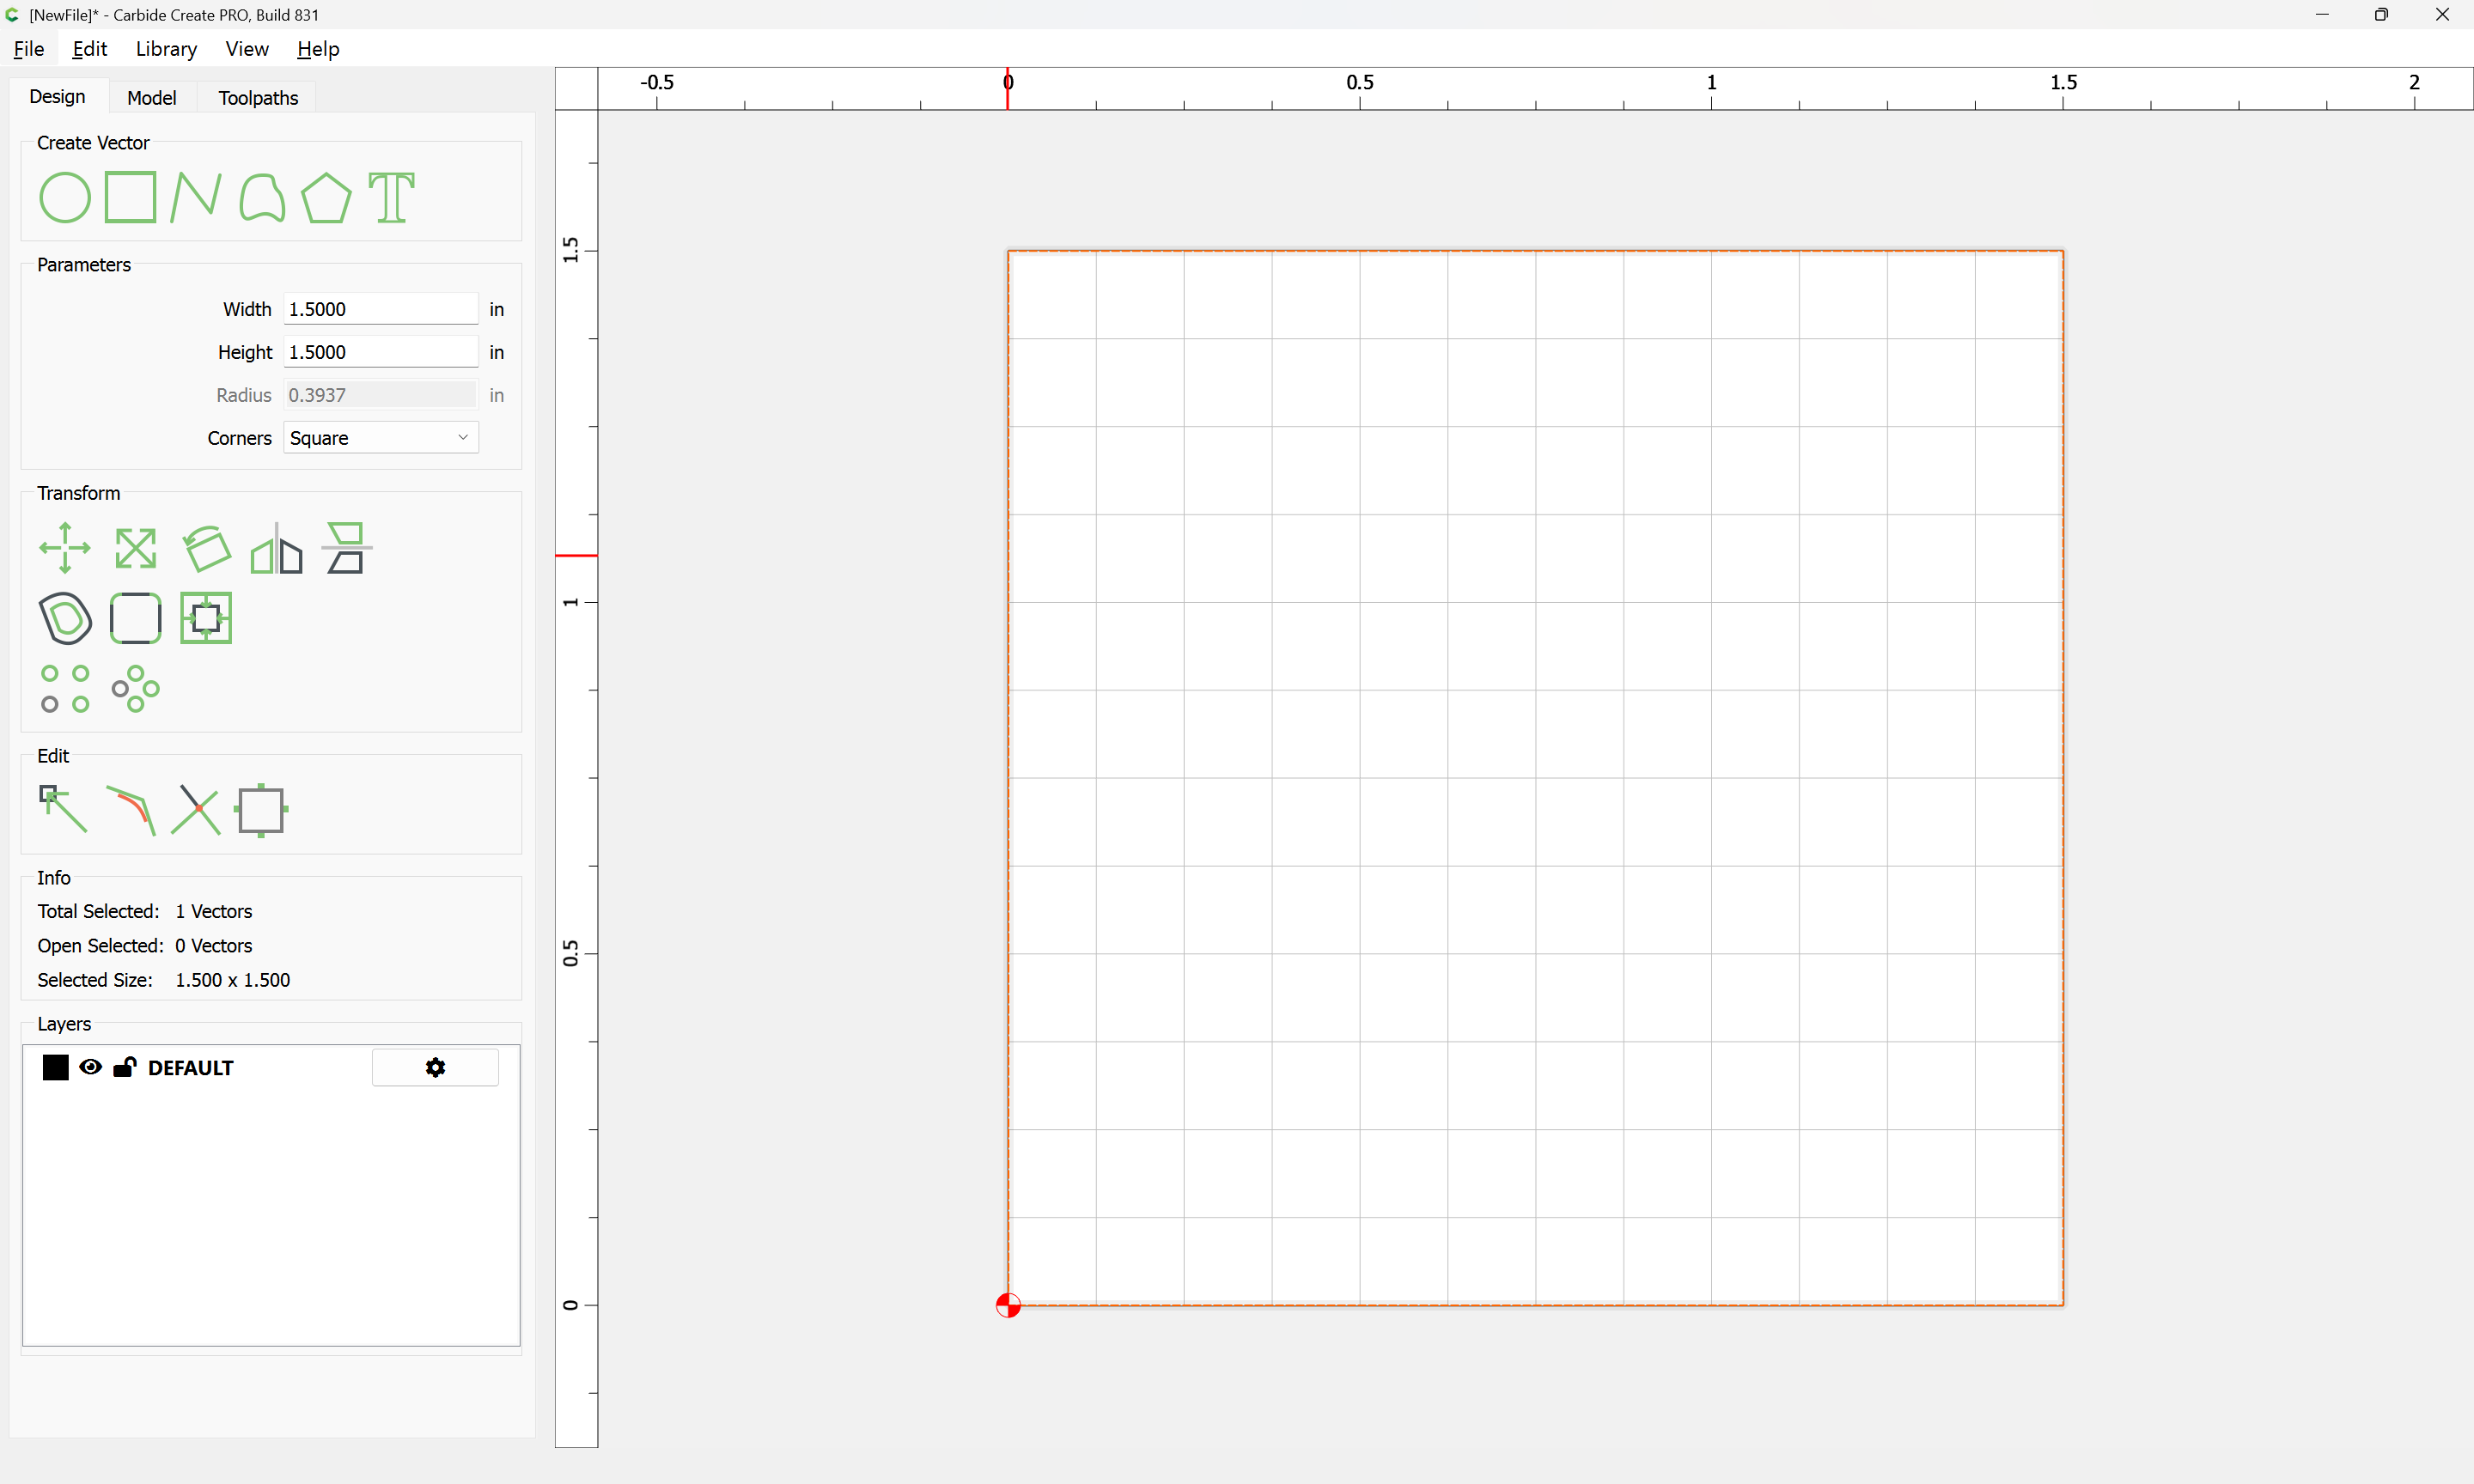
Then then interior rectangle:
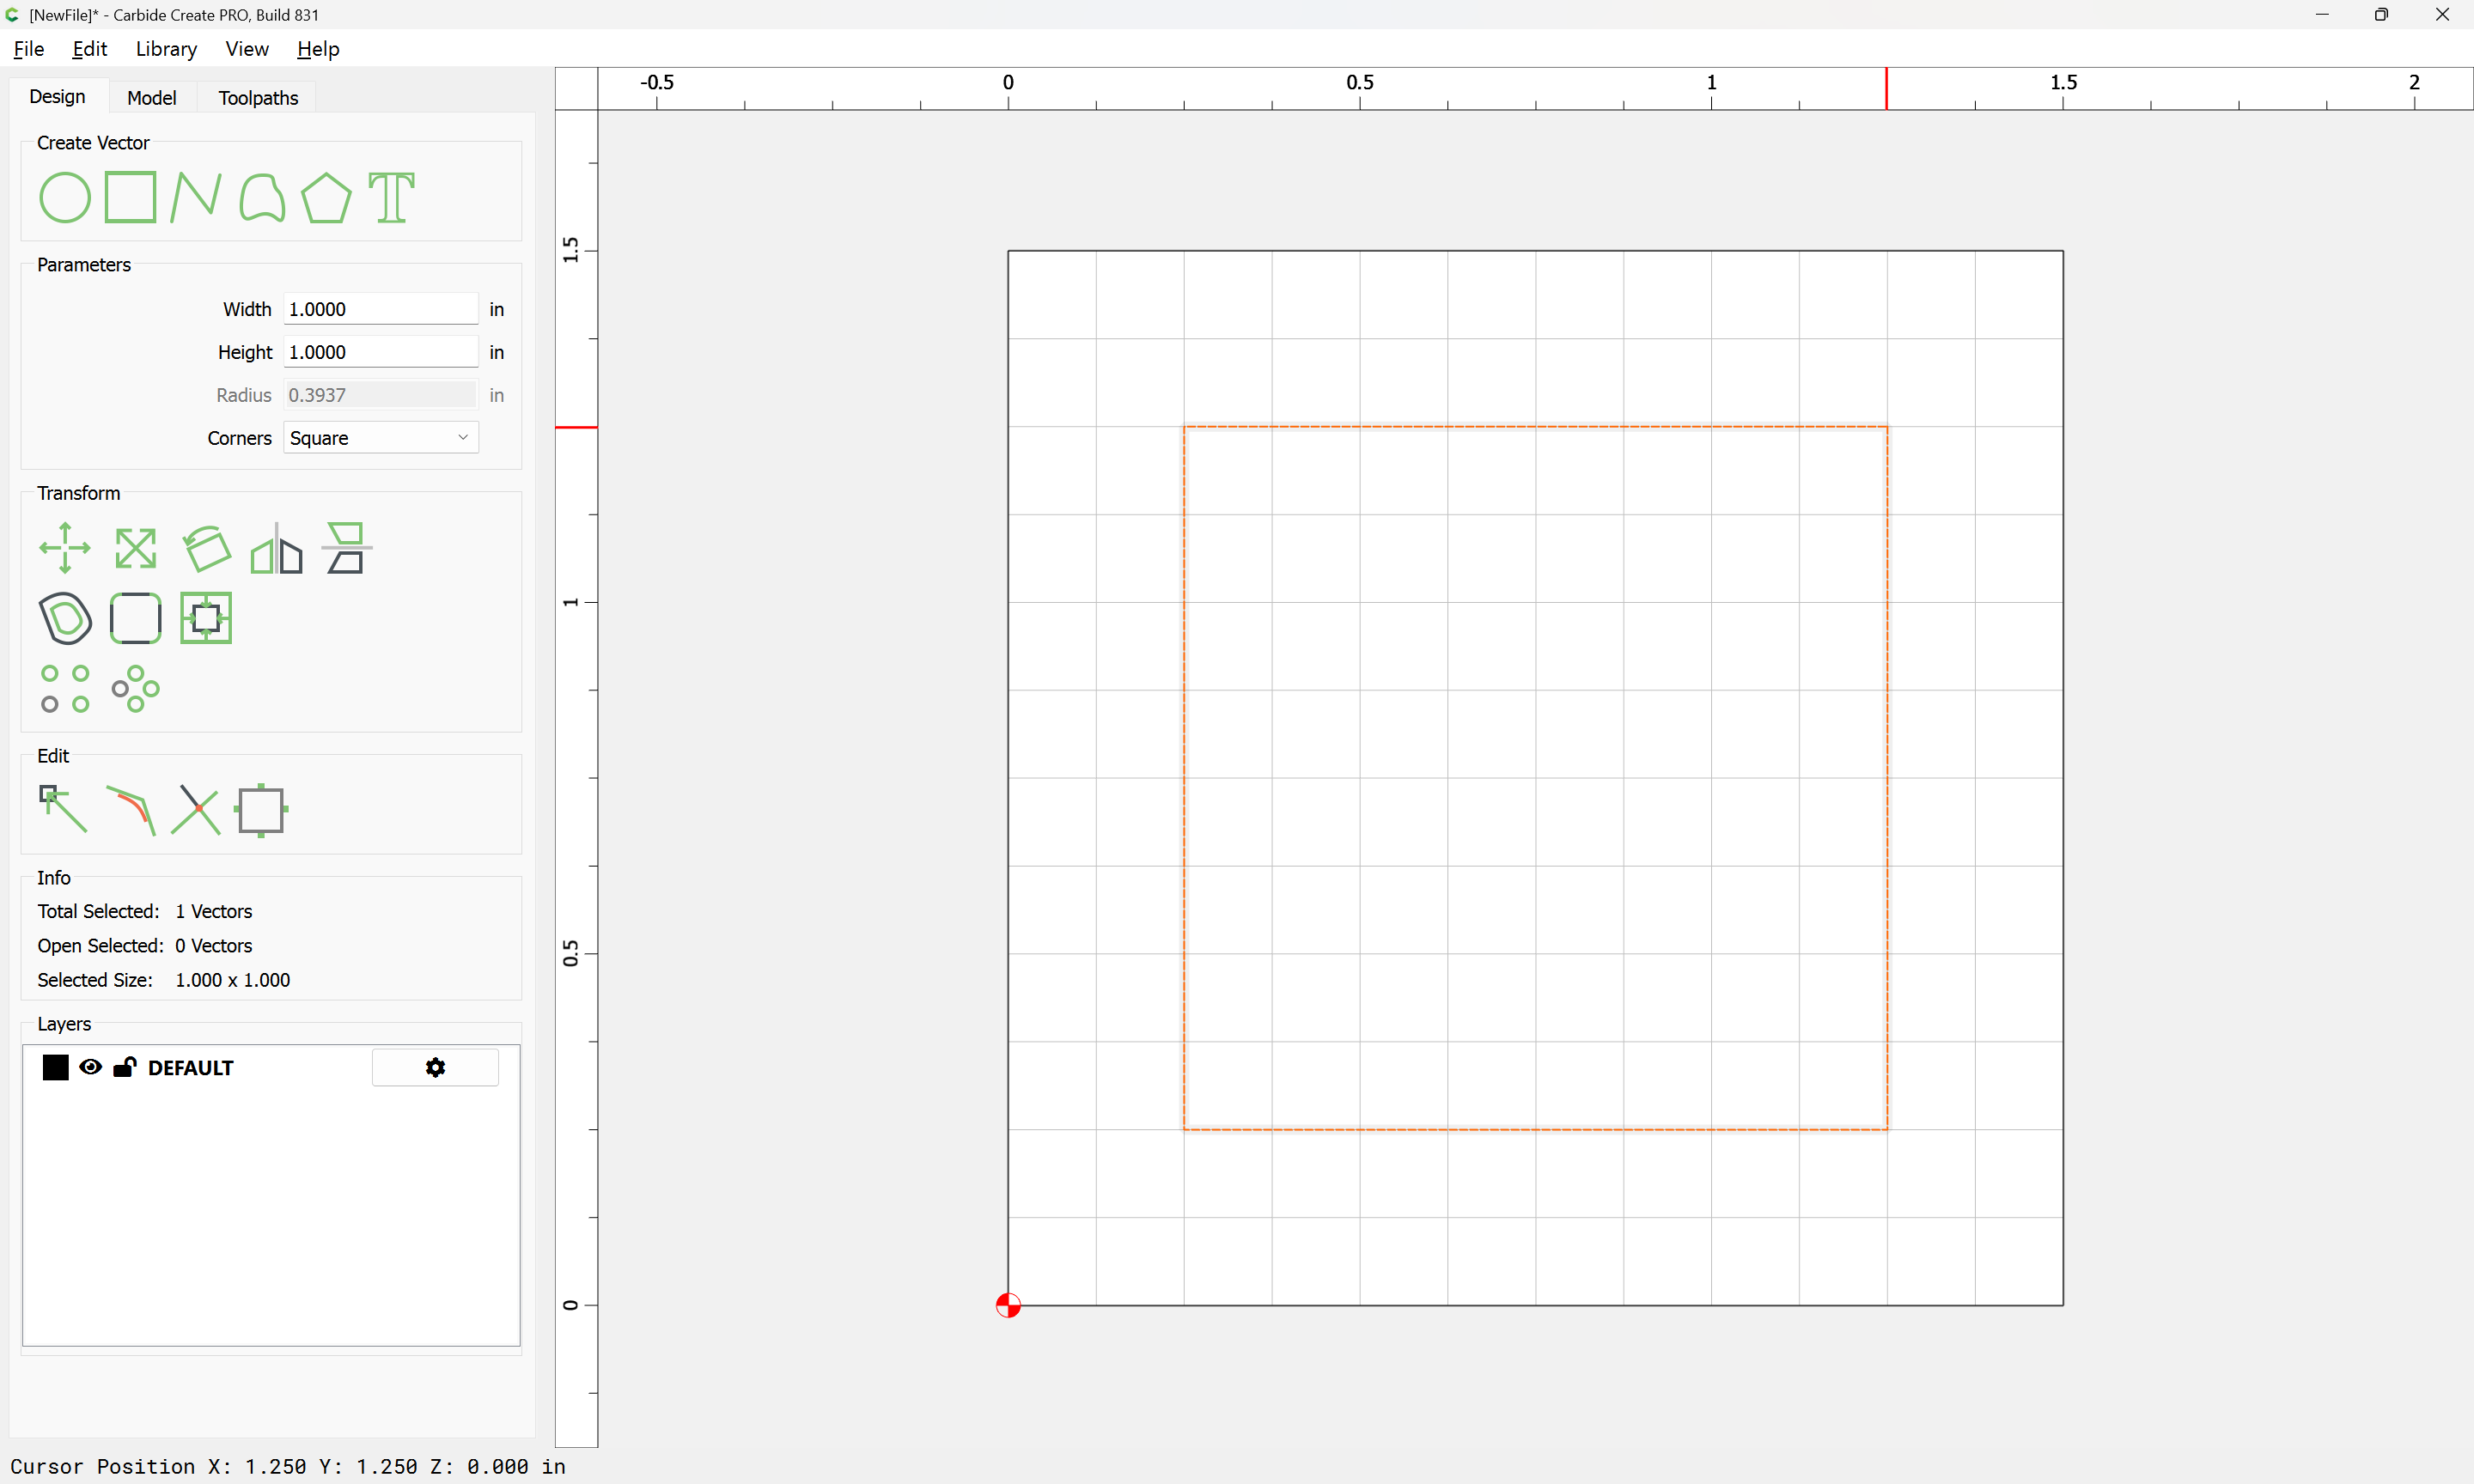
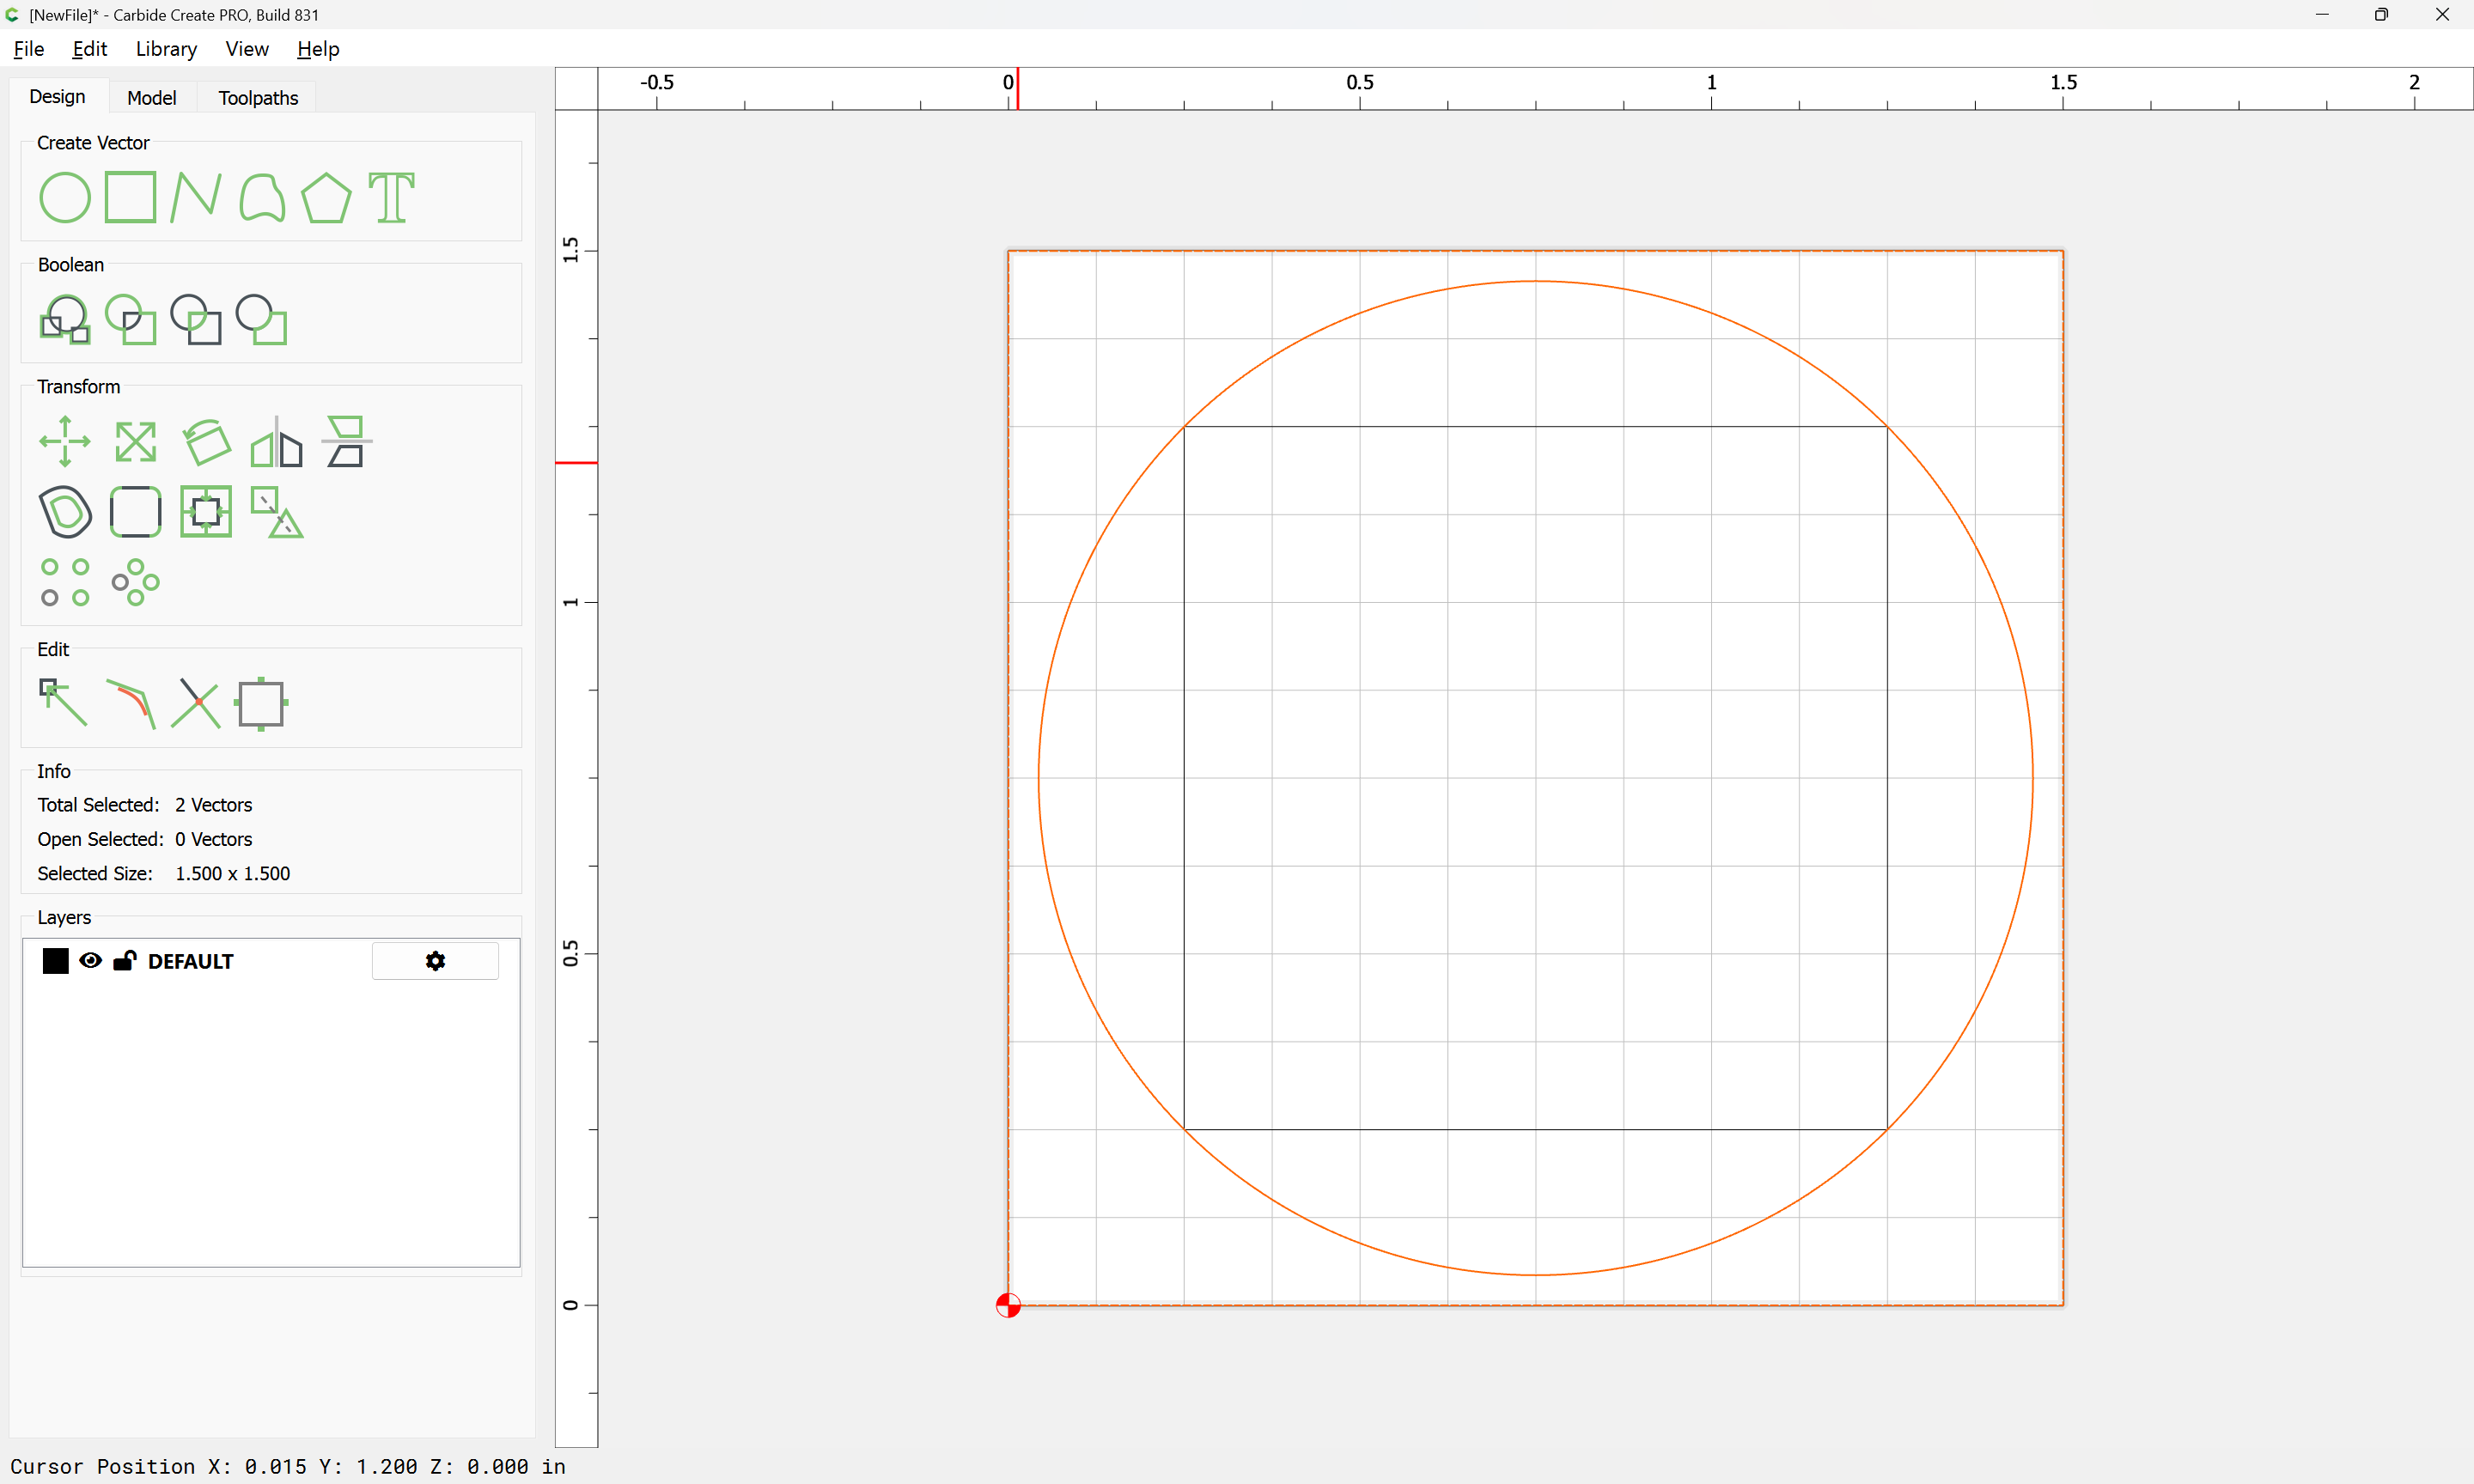
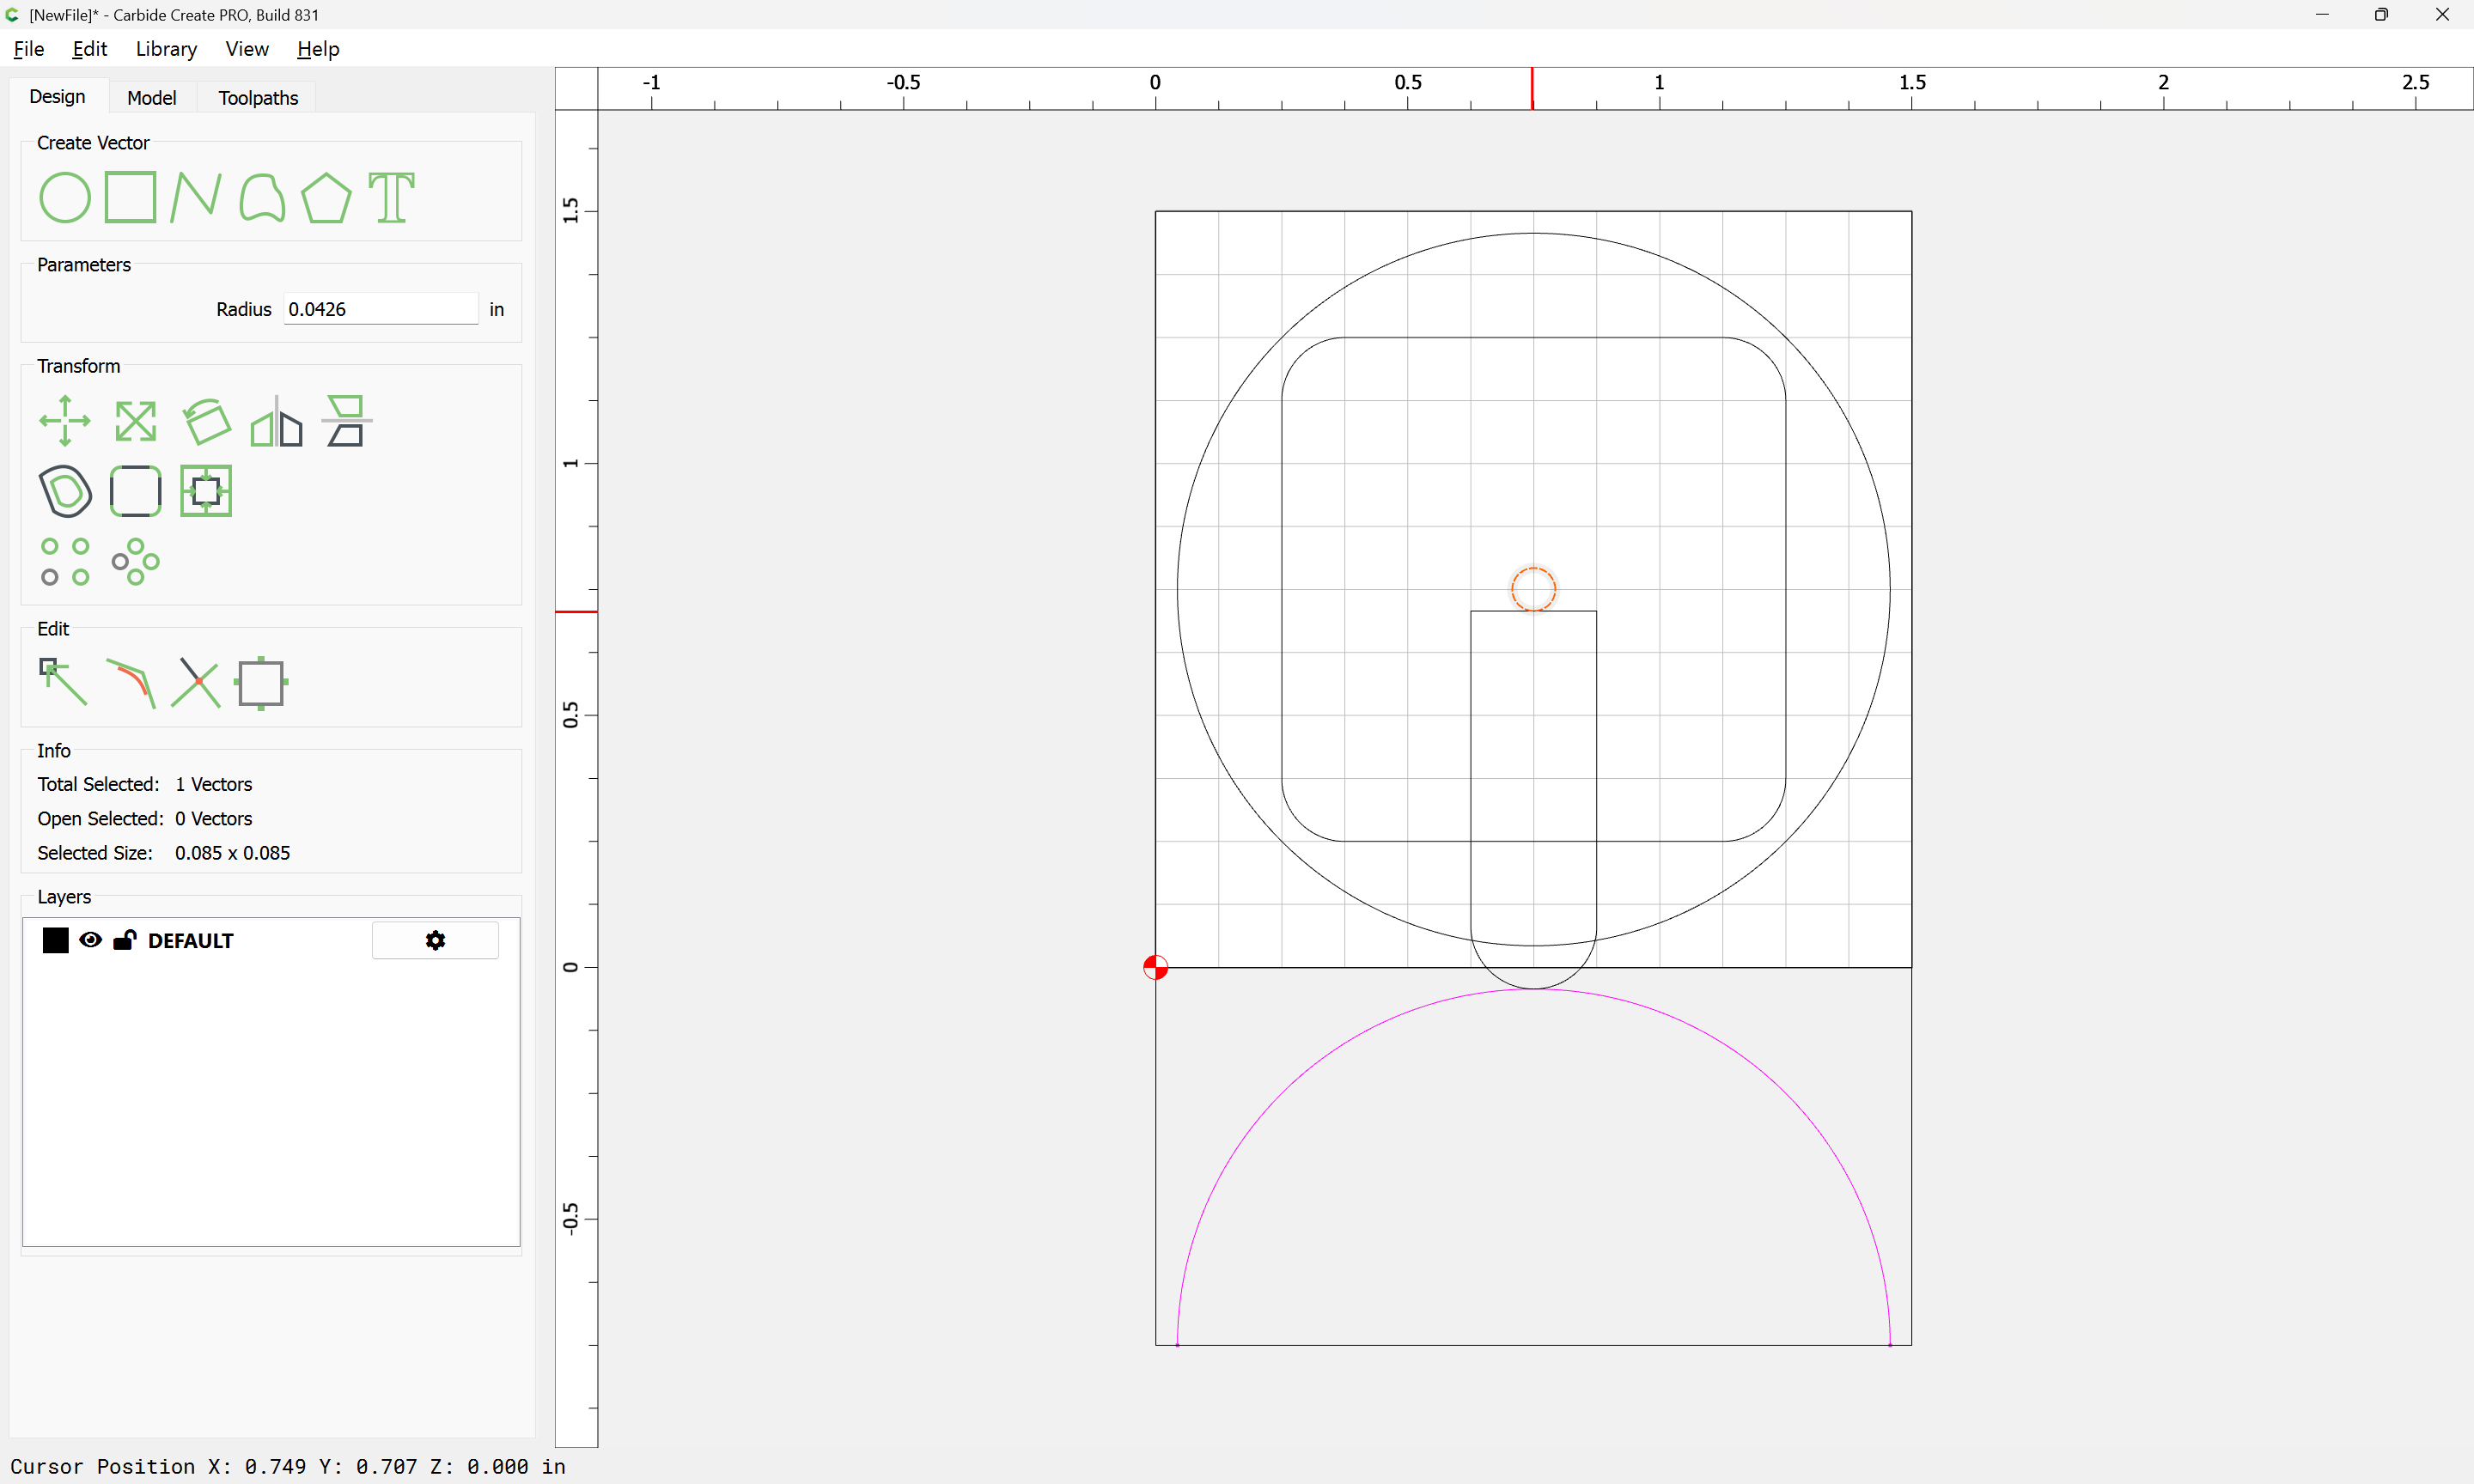
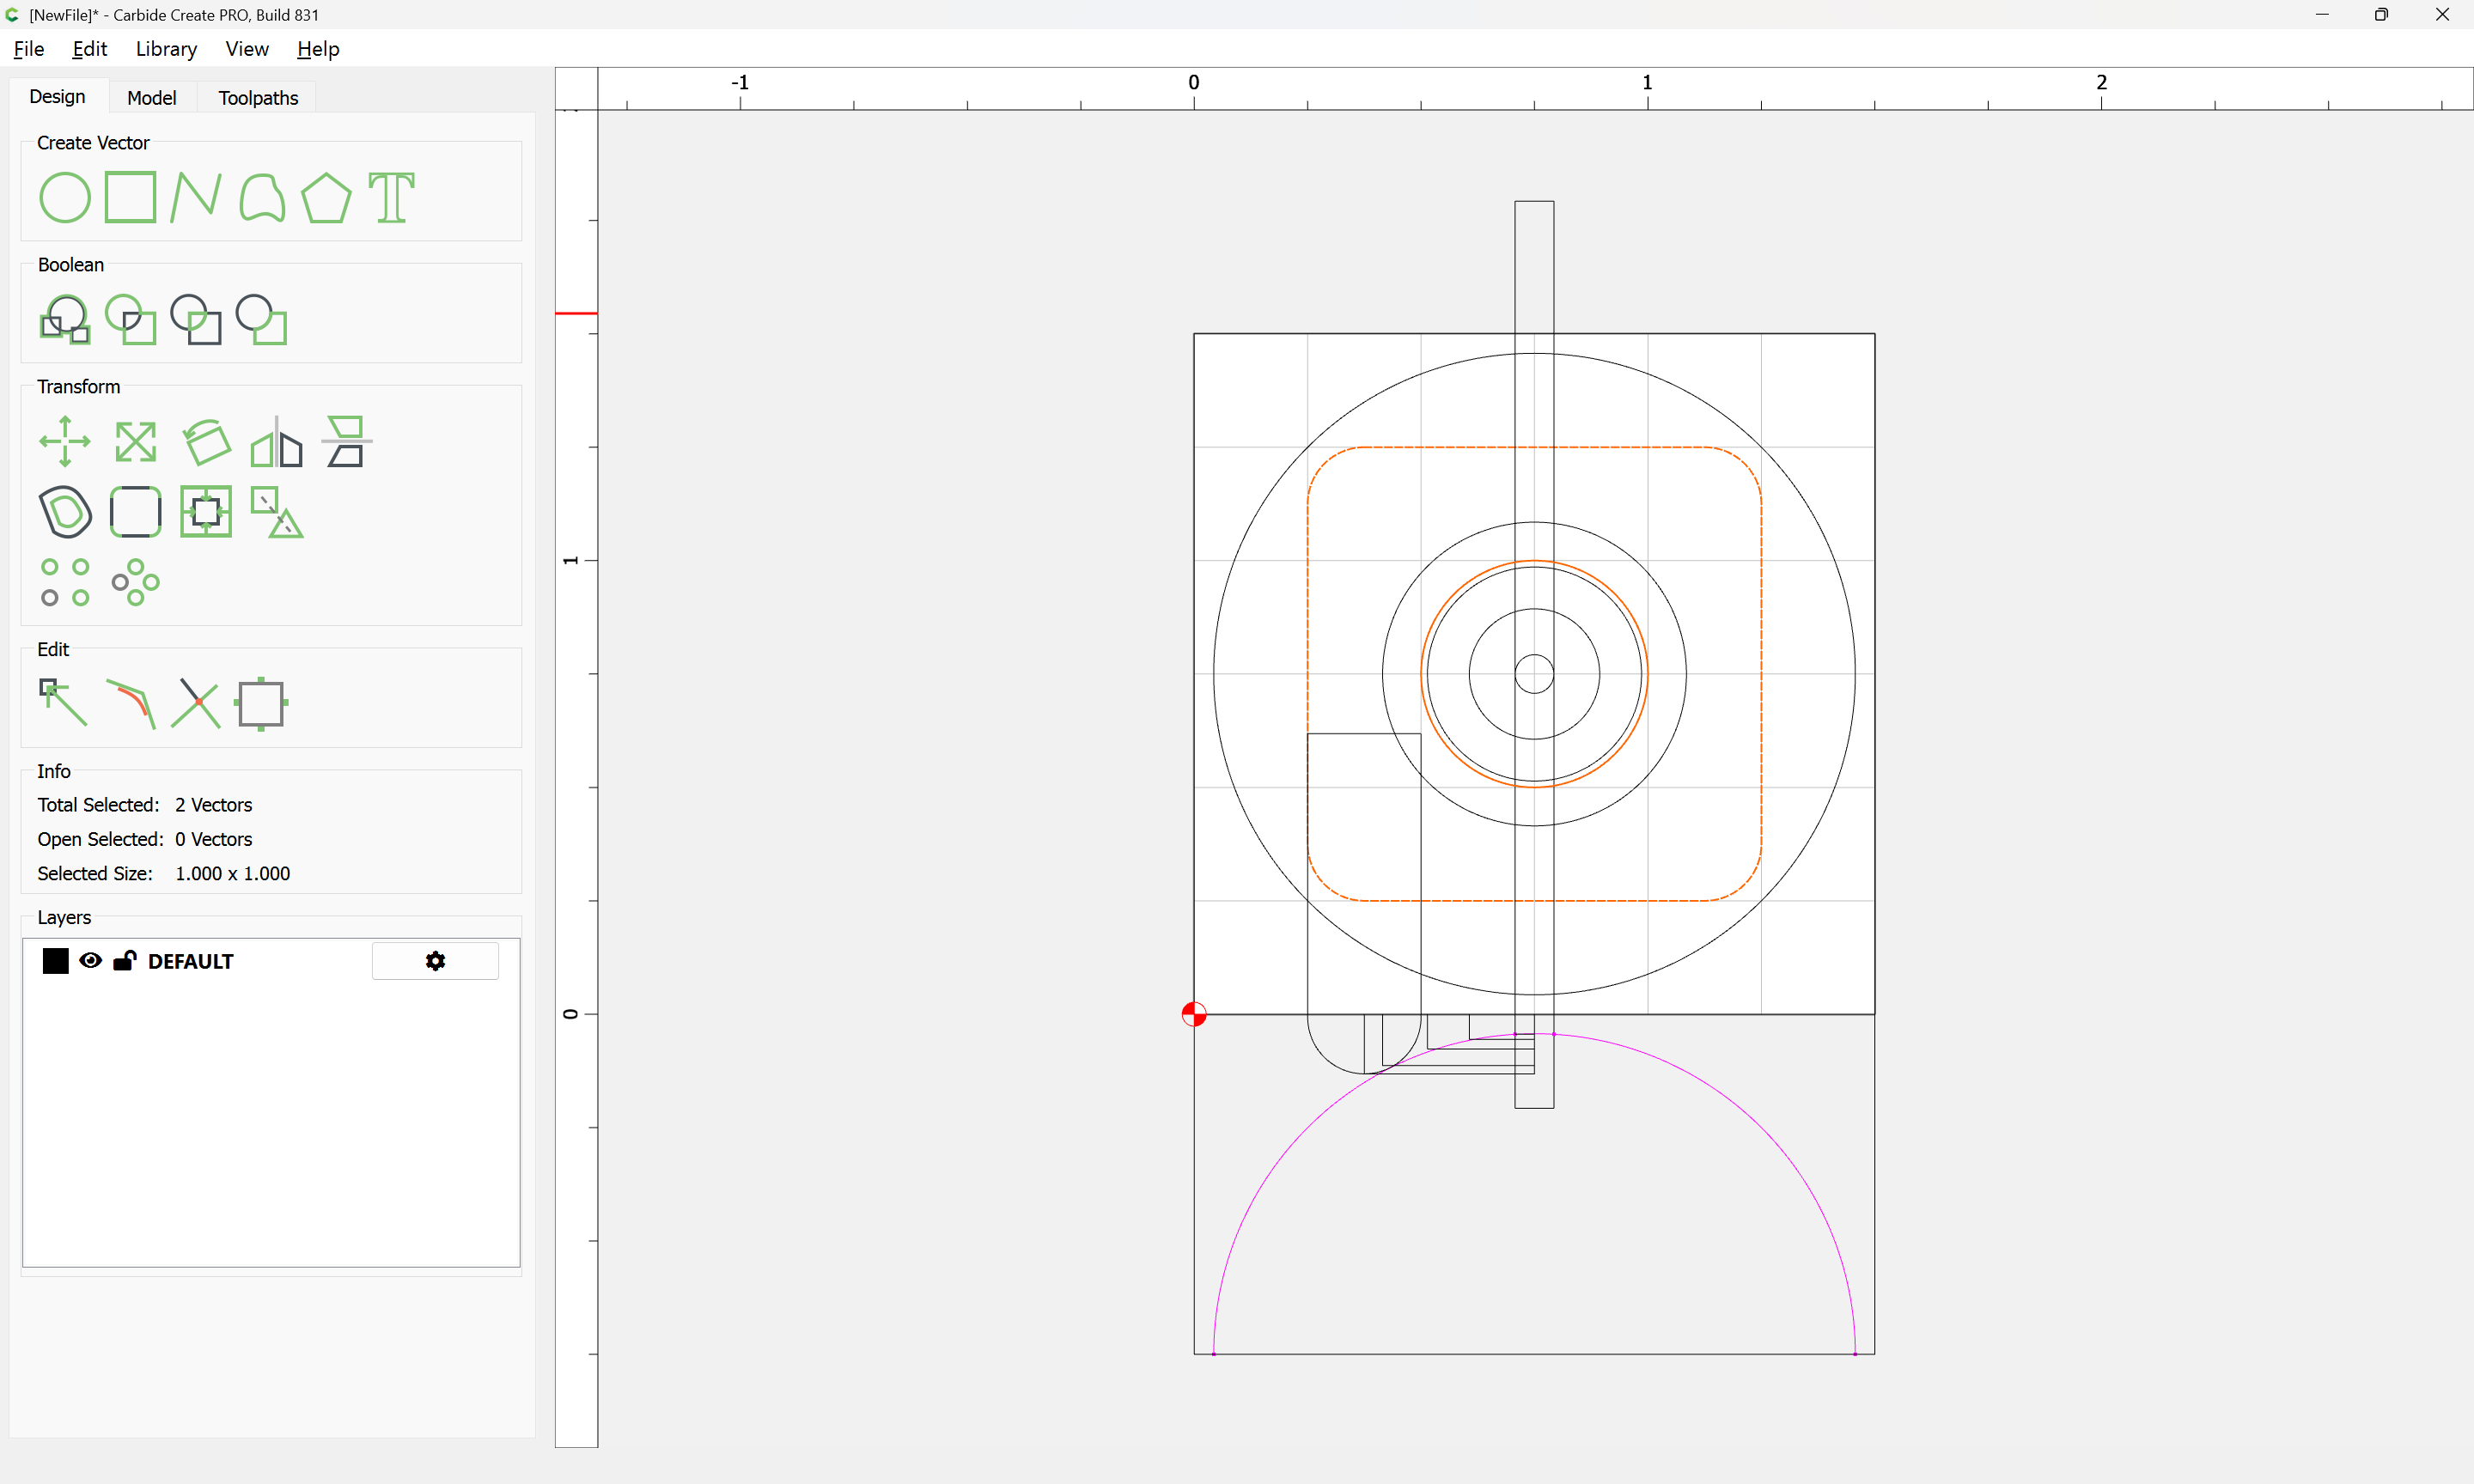
Then the circle:
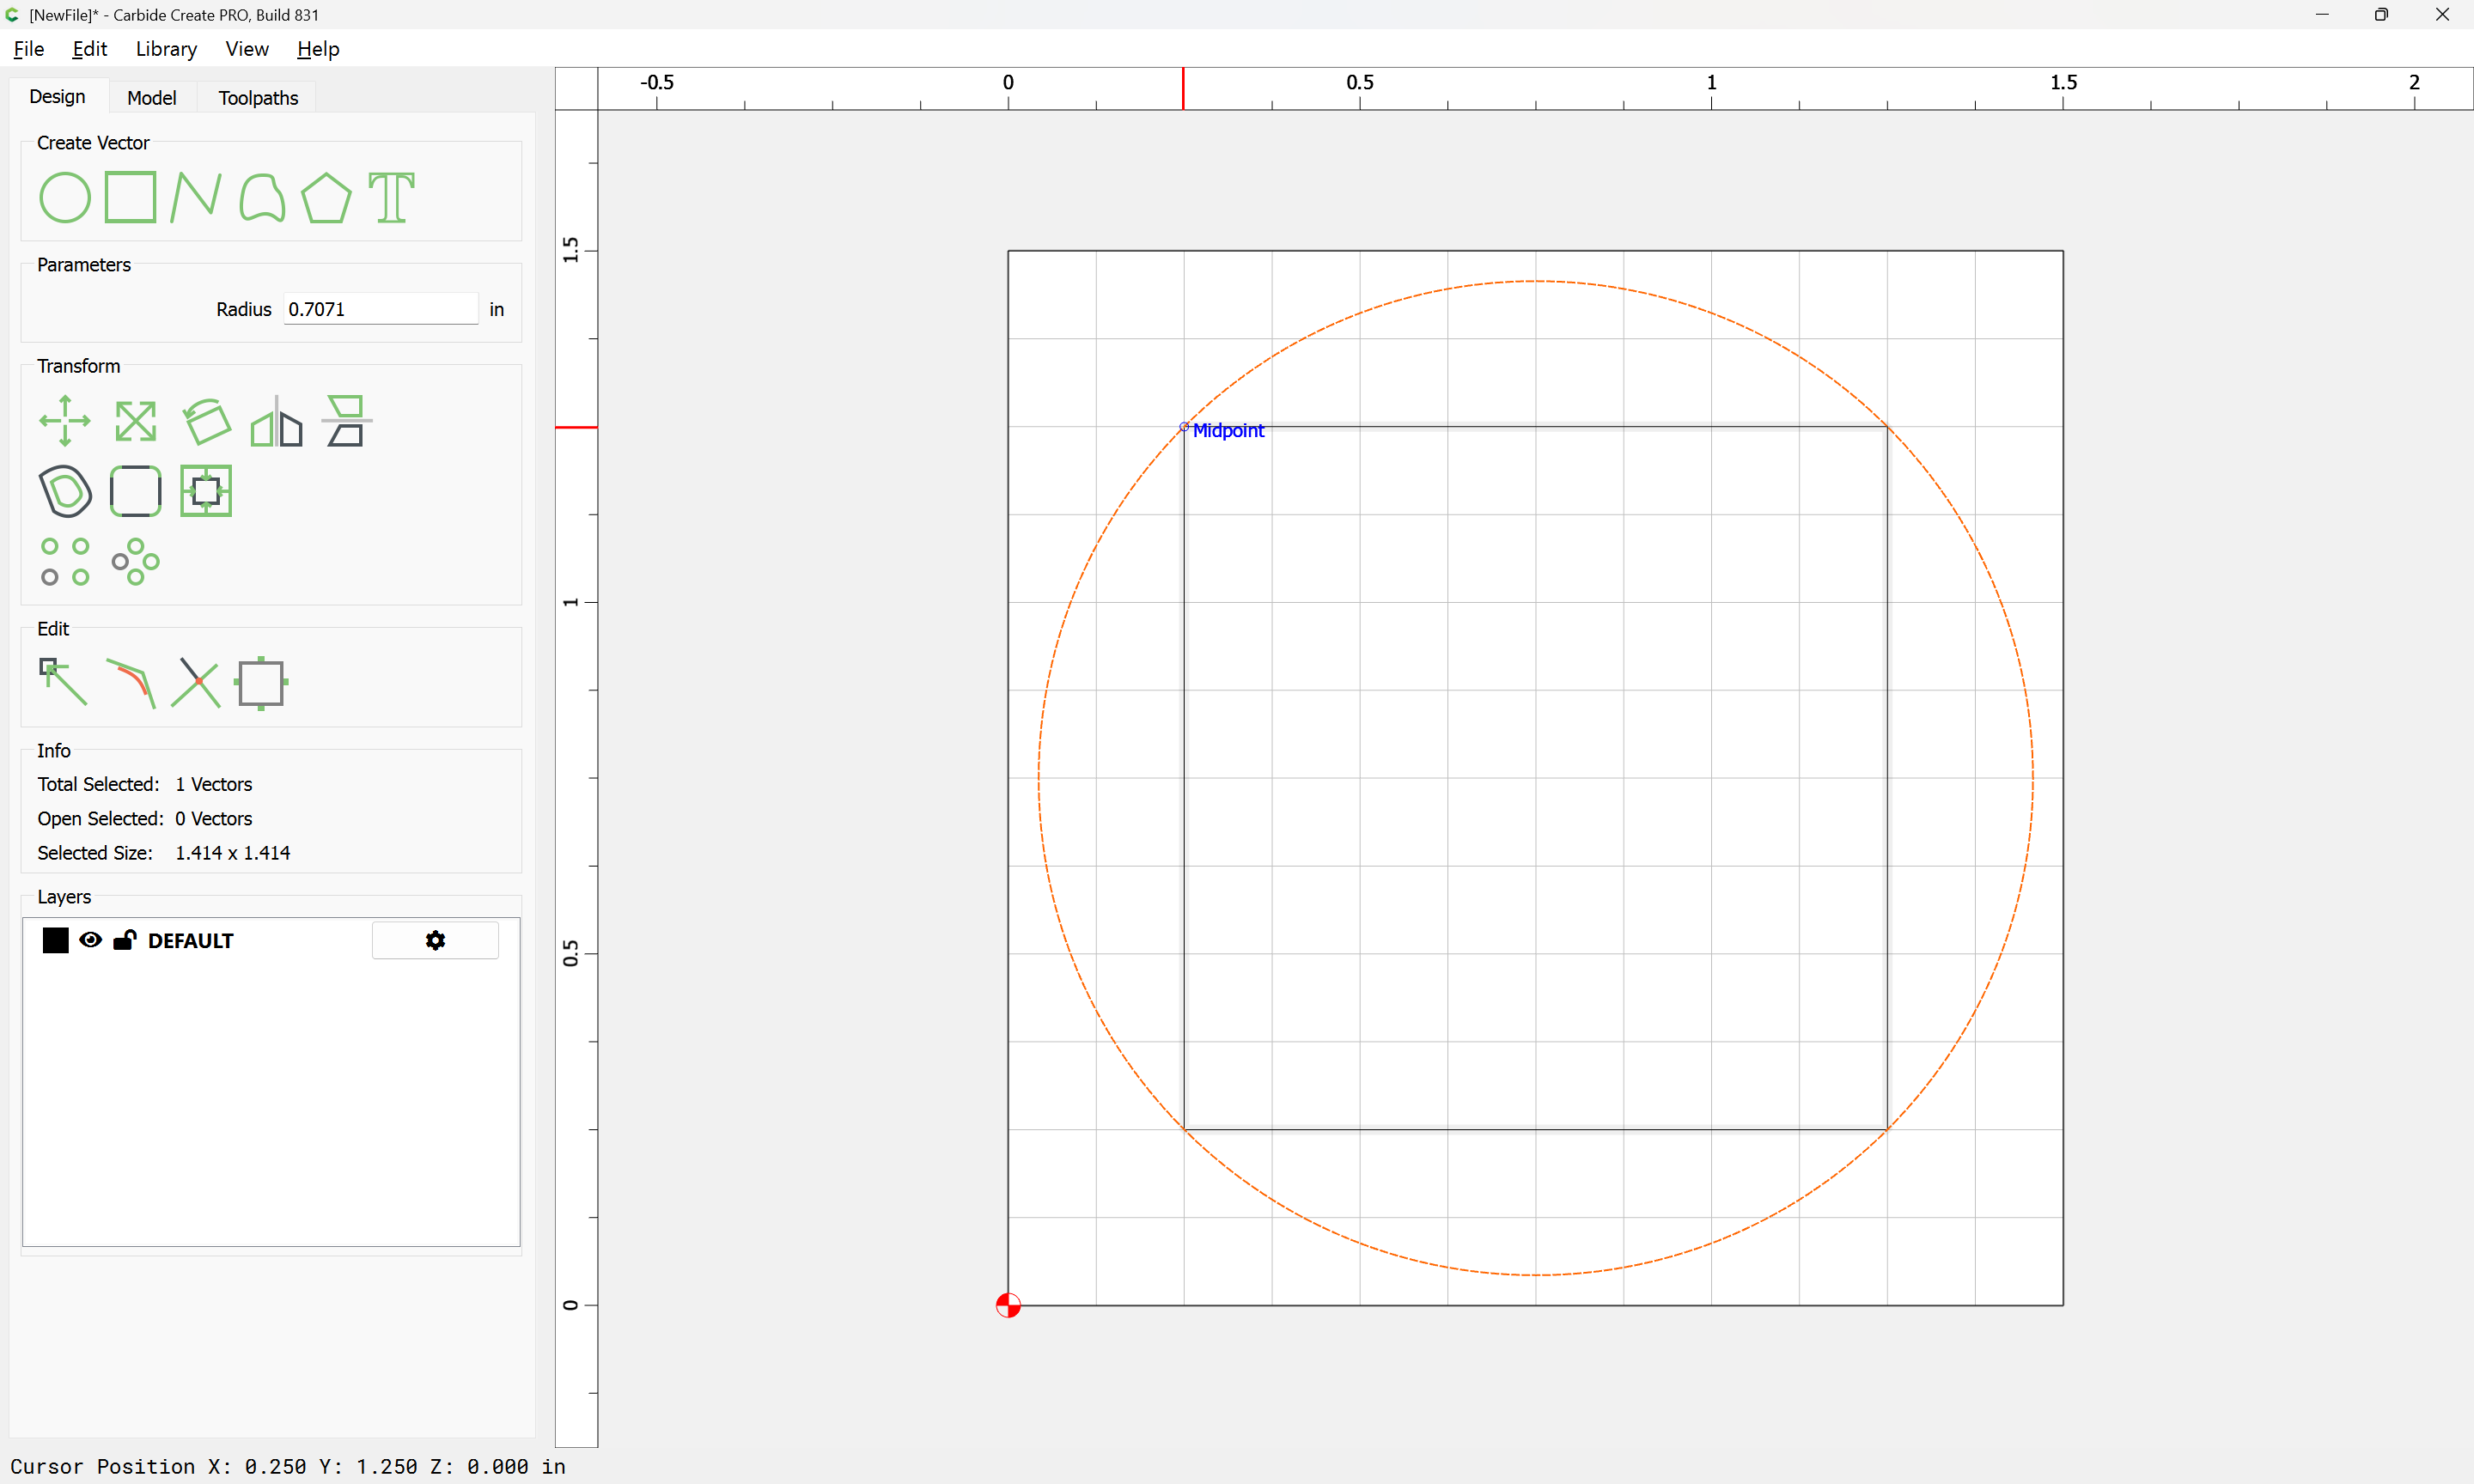
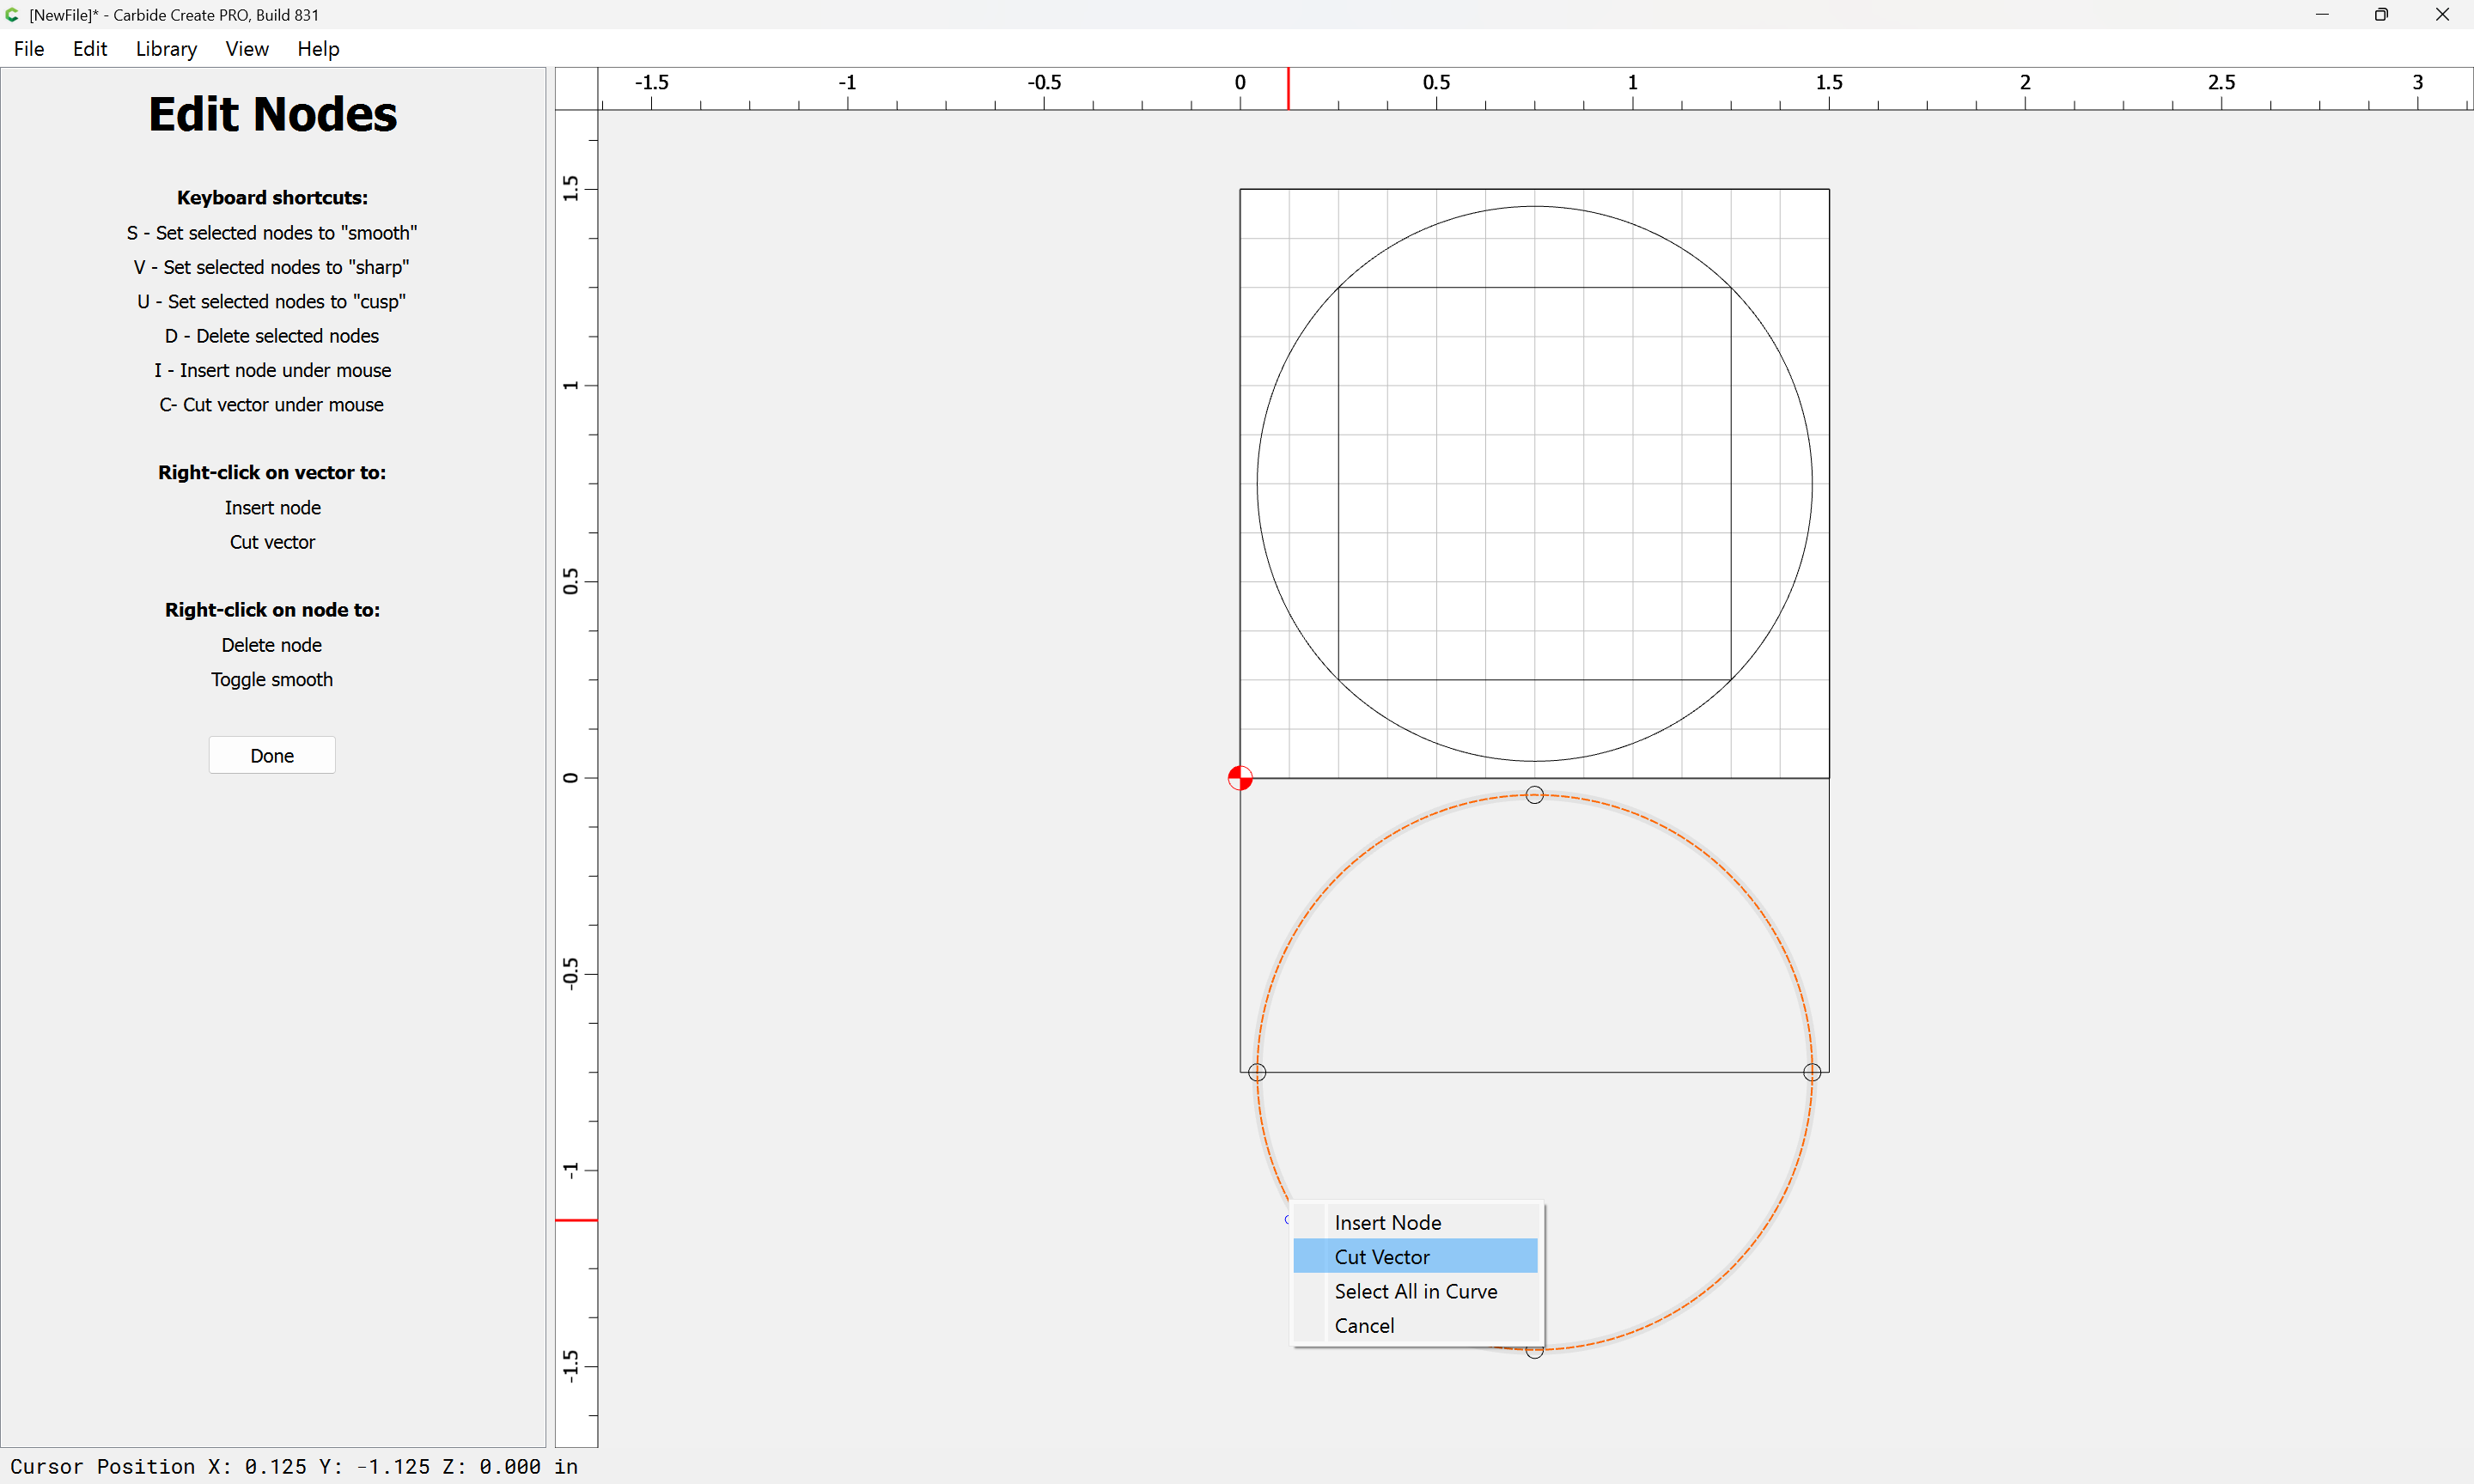
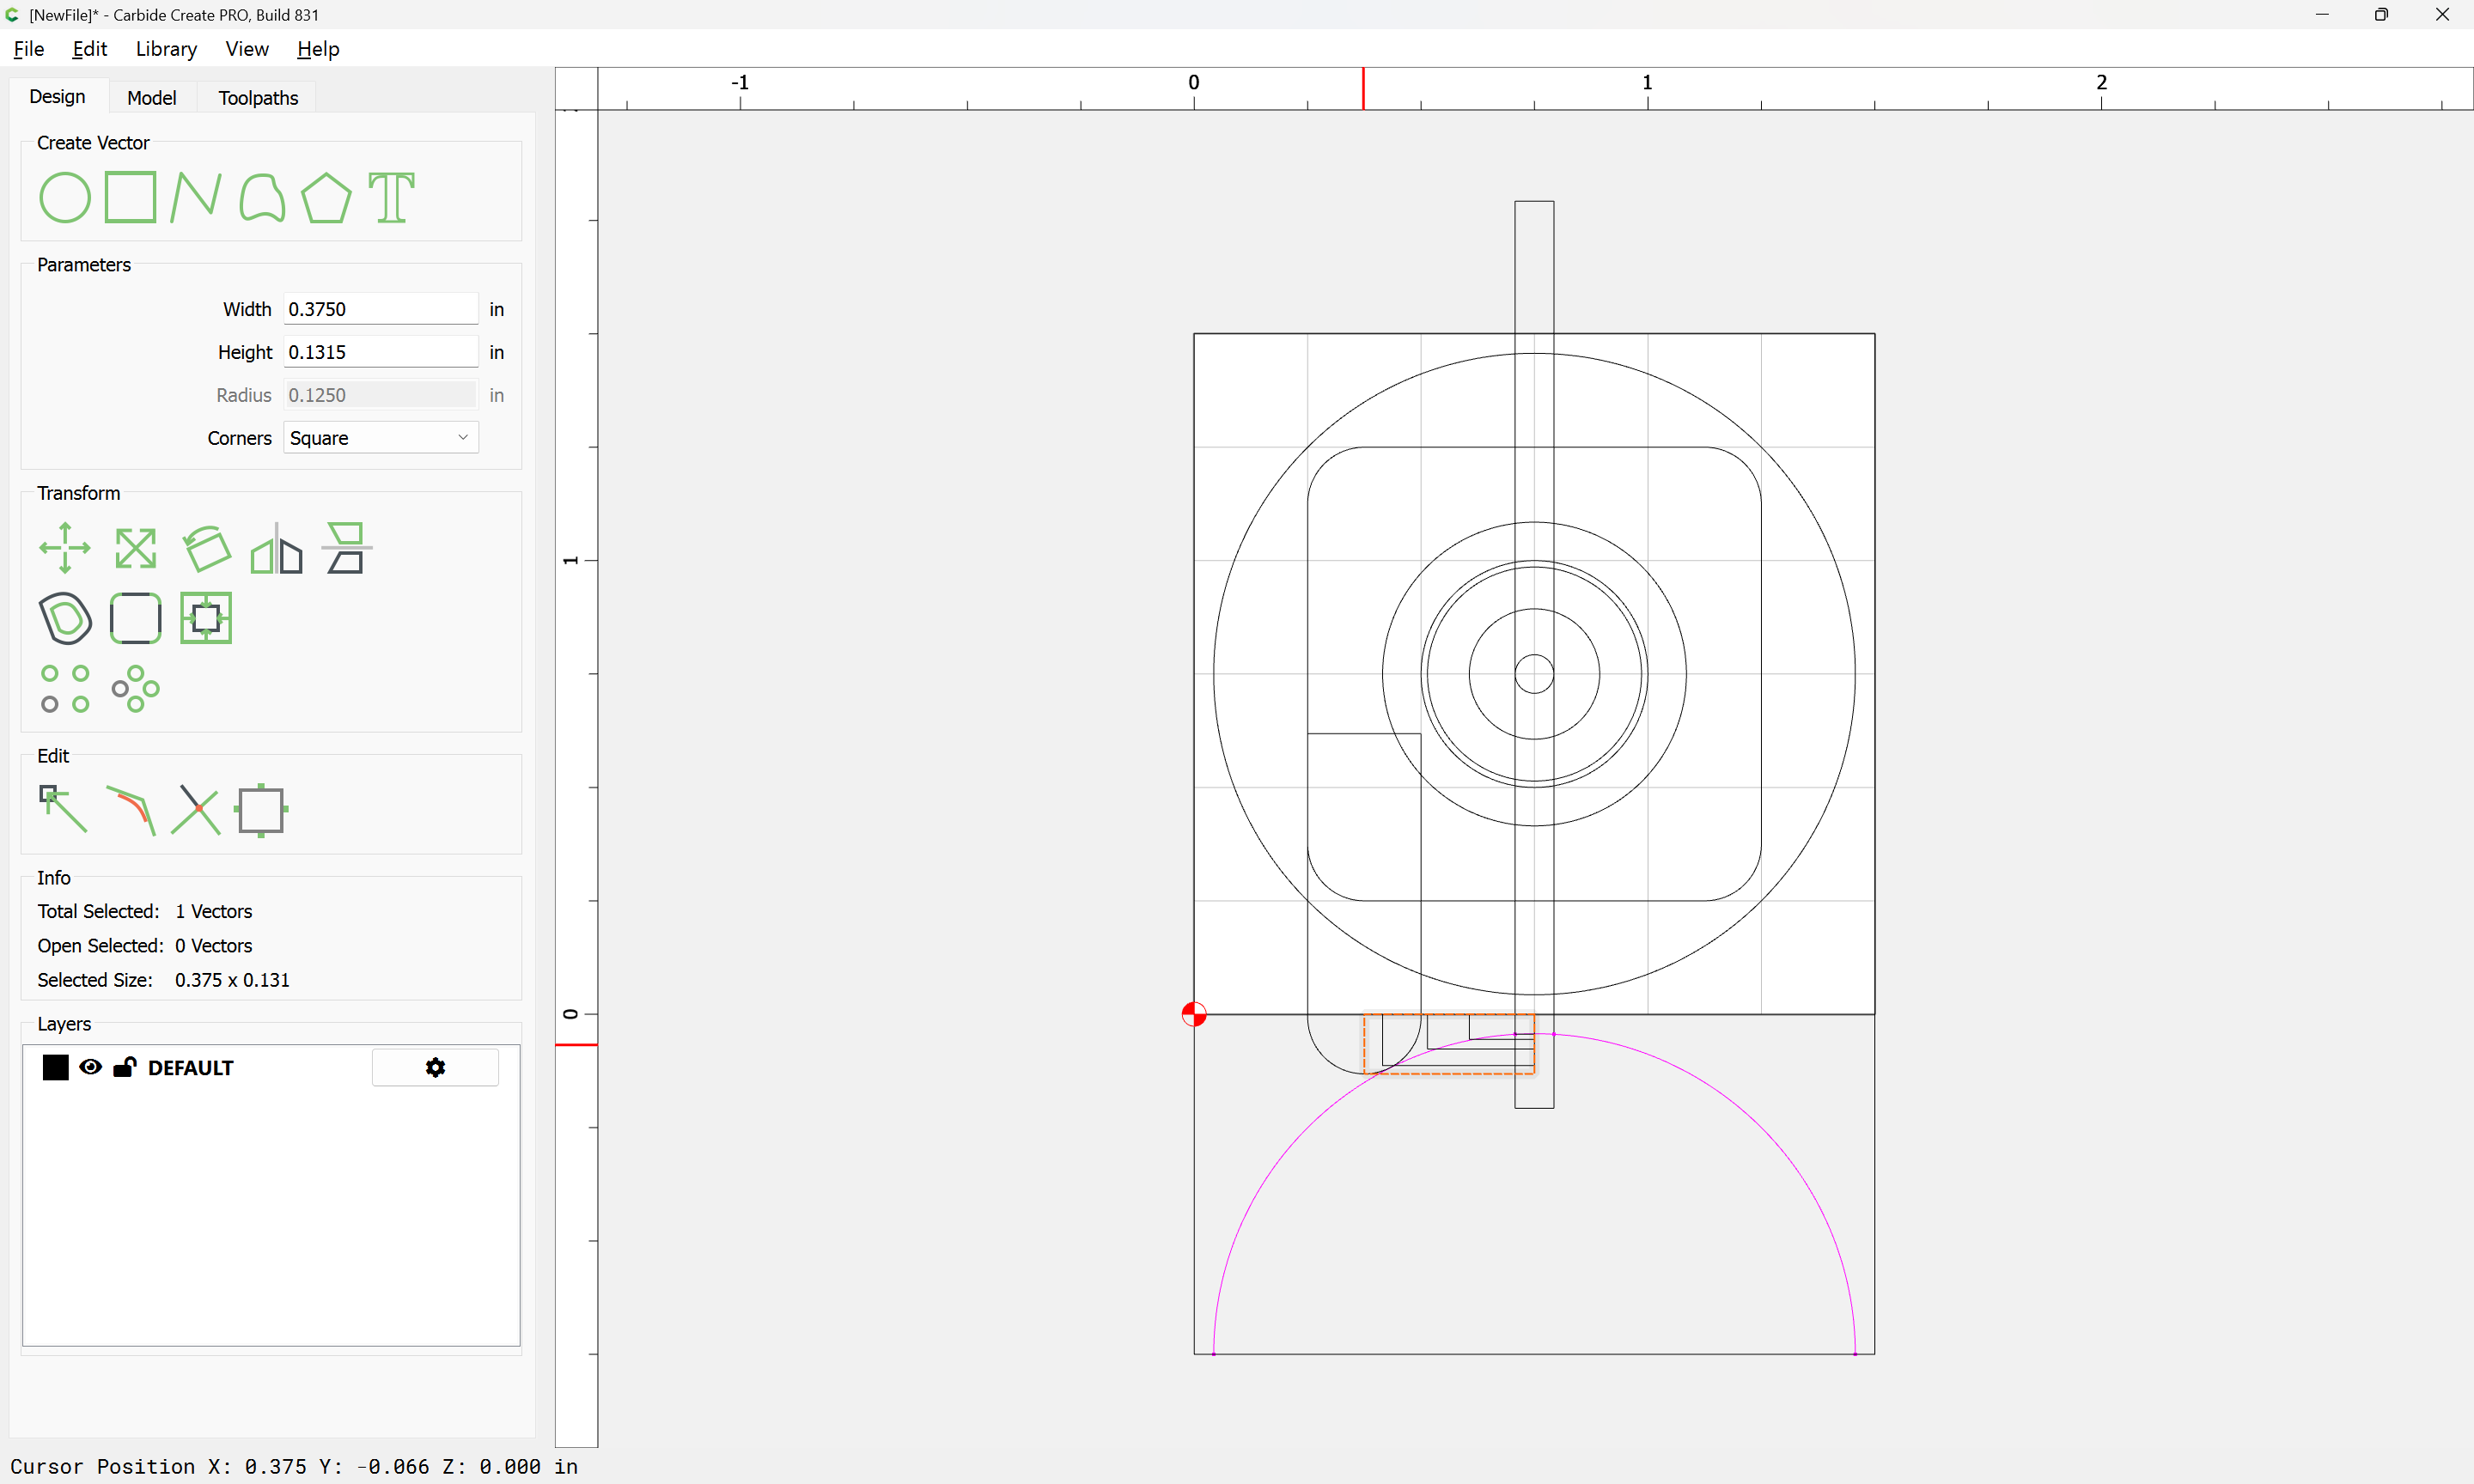
Duplicate the circle and outer perimeter (so as to preserve the positioning):
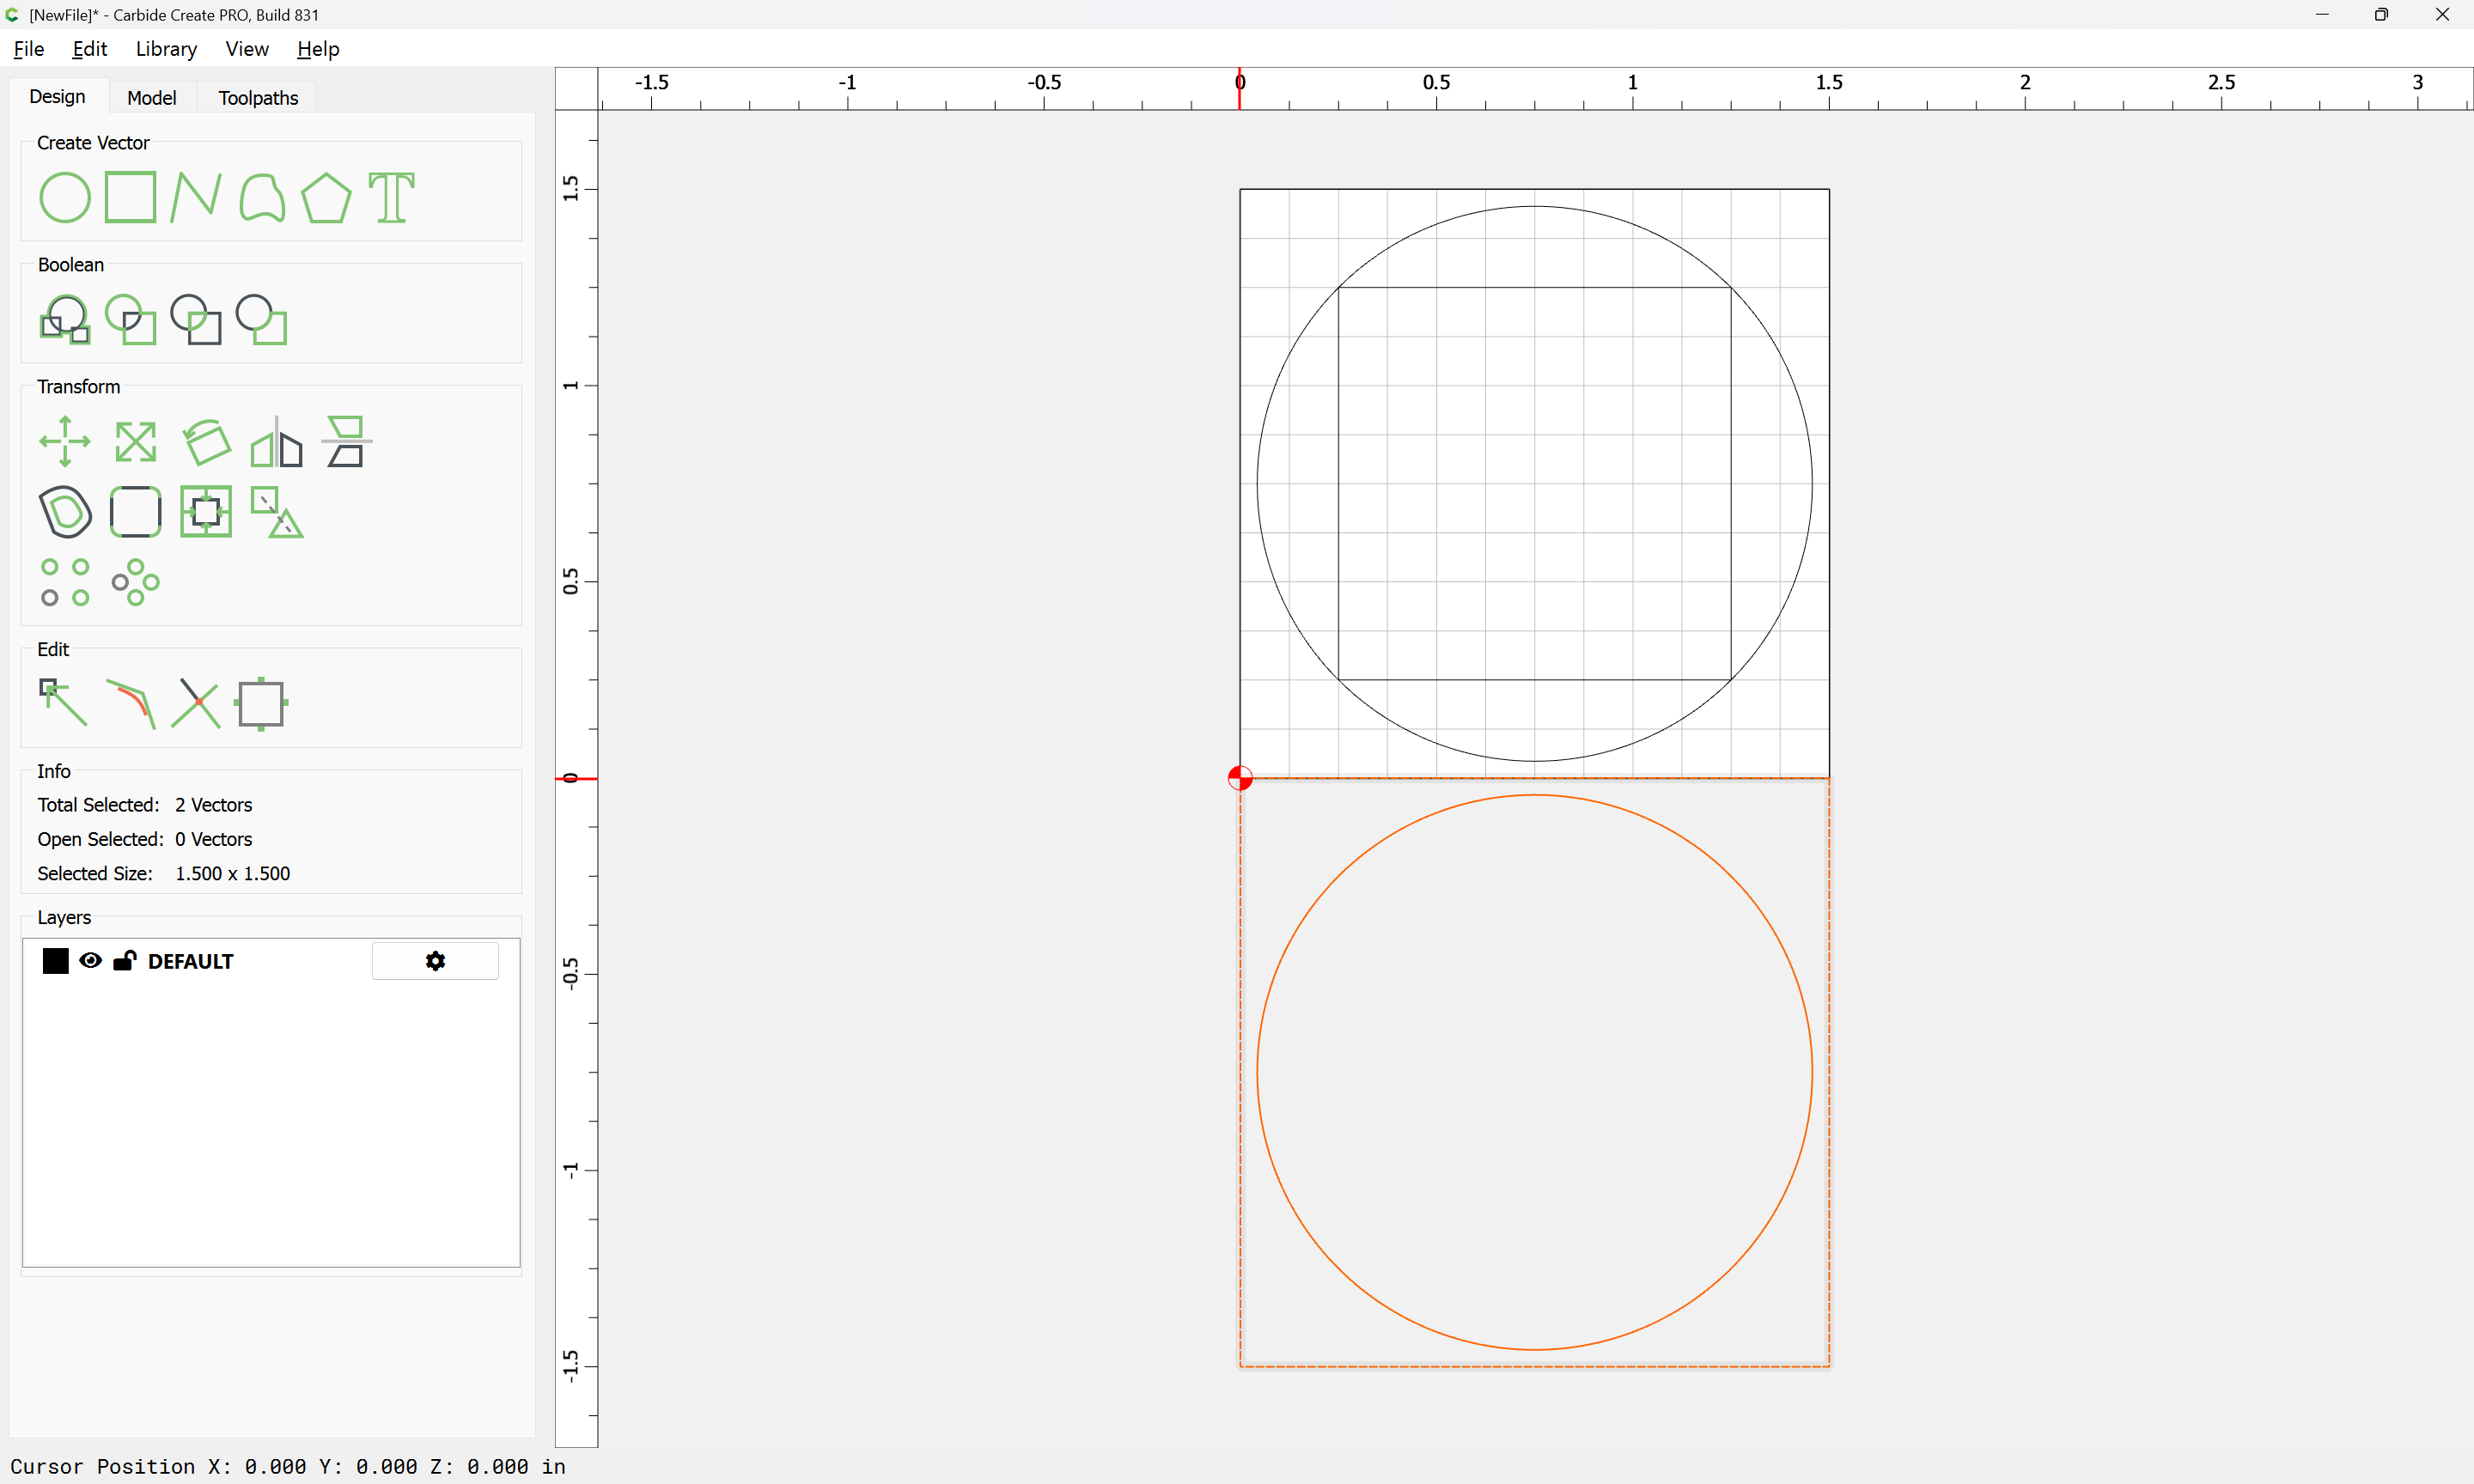
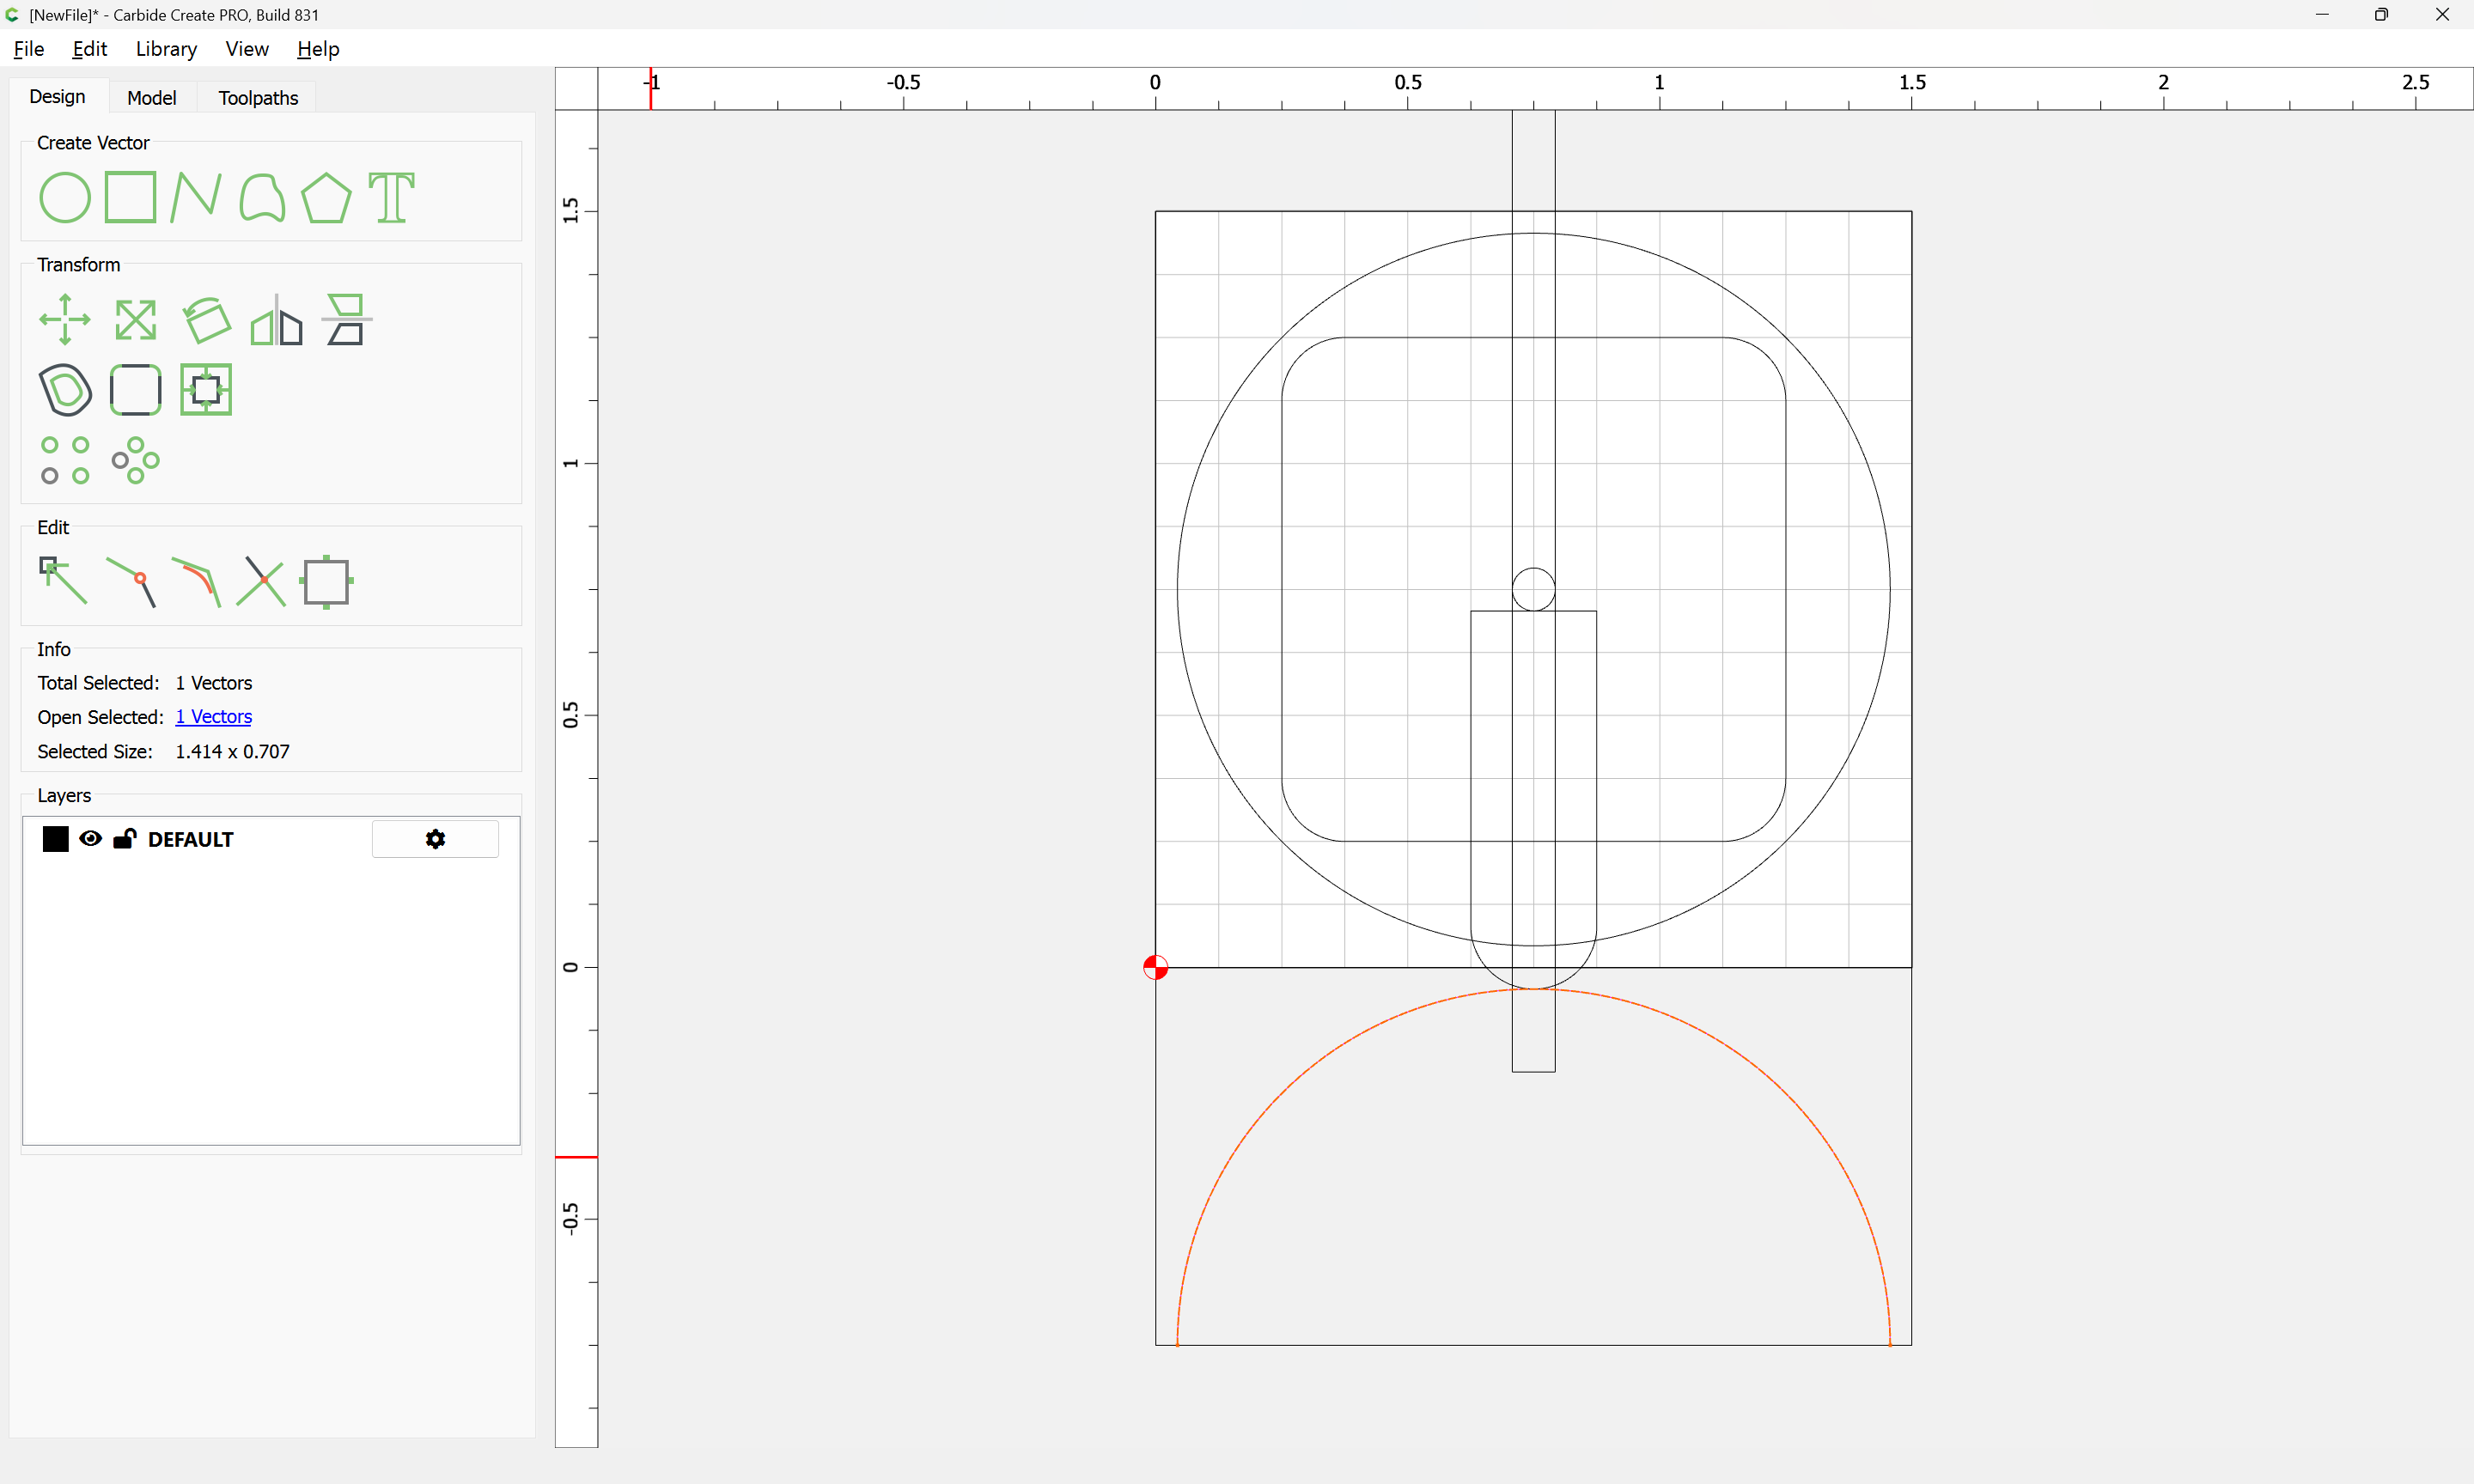
Since we only need to cut half:
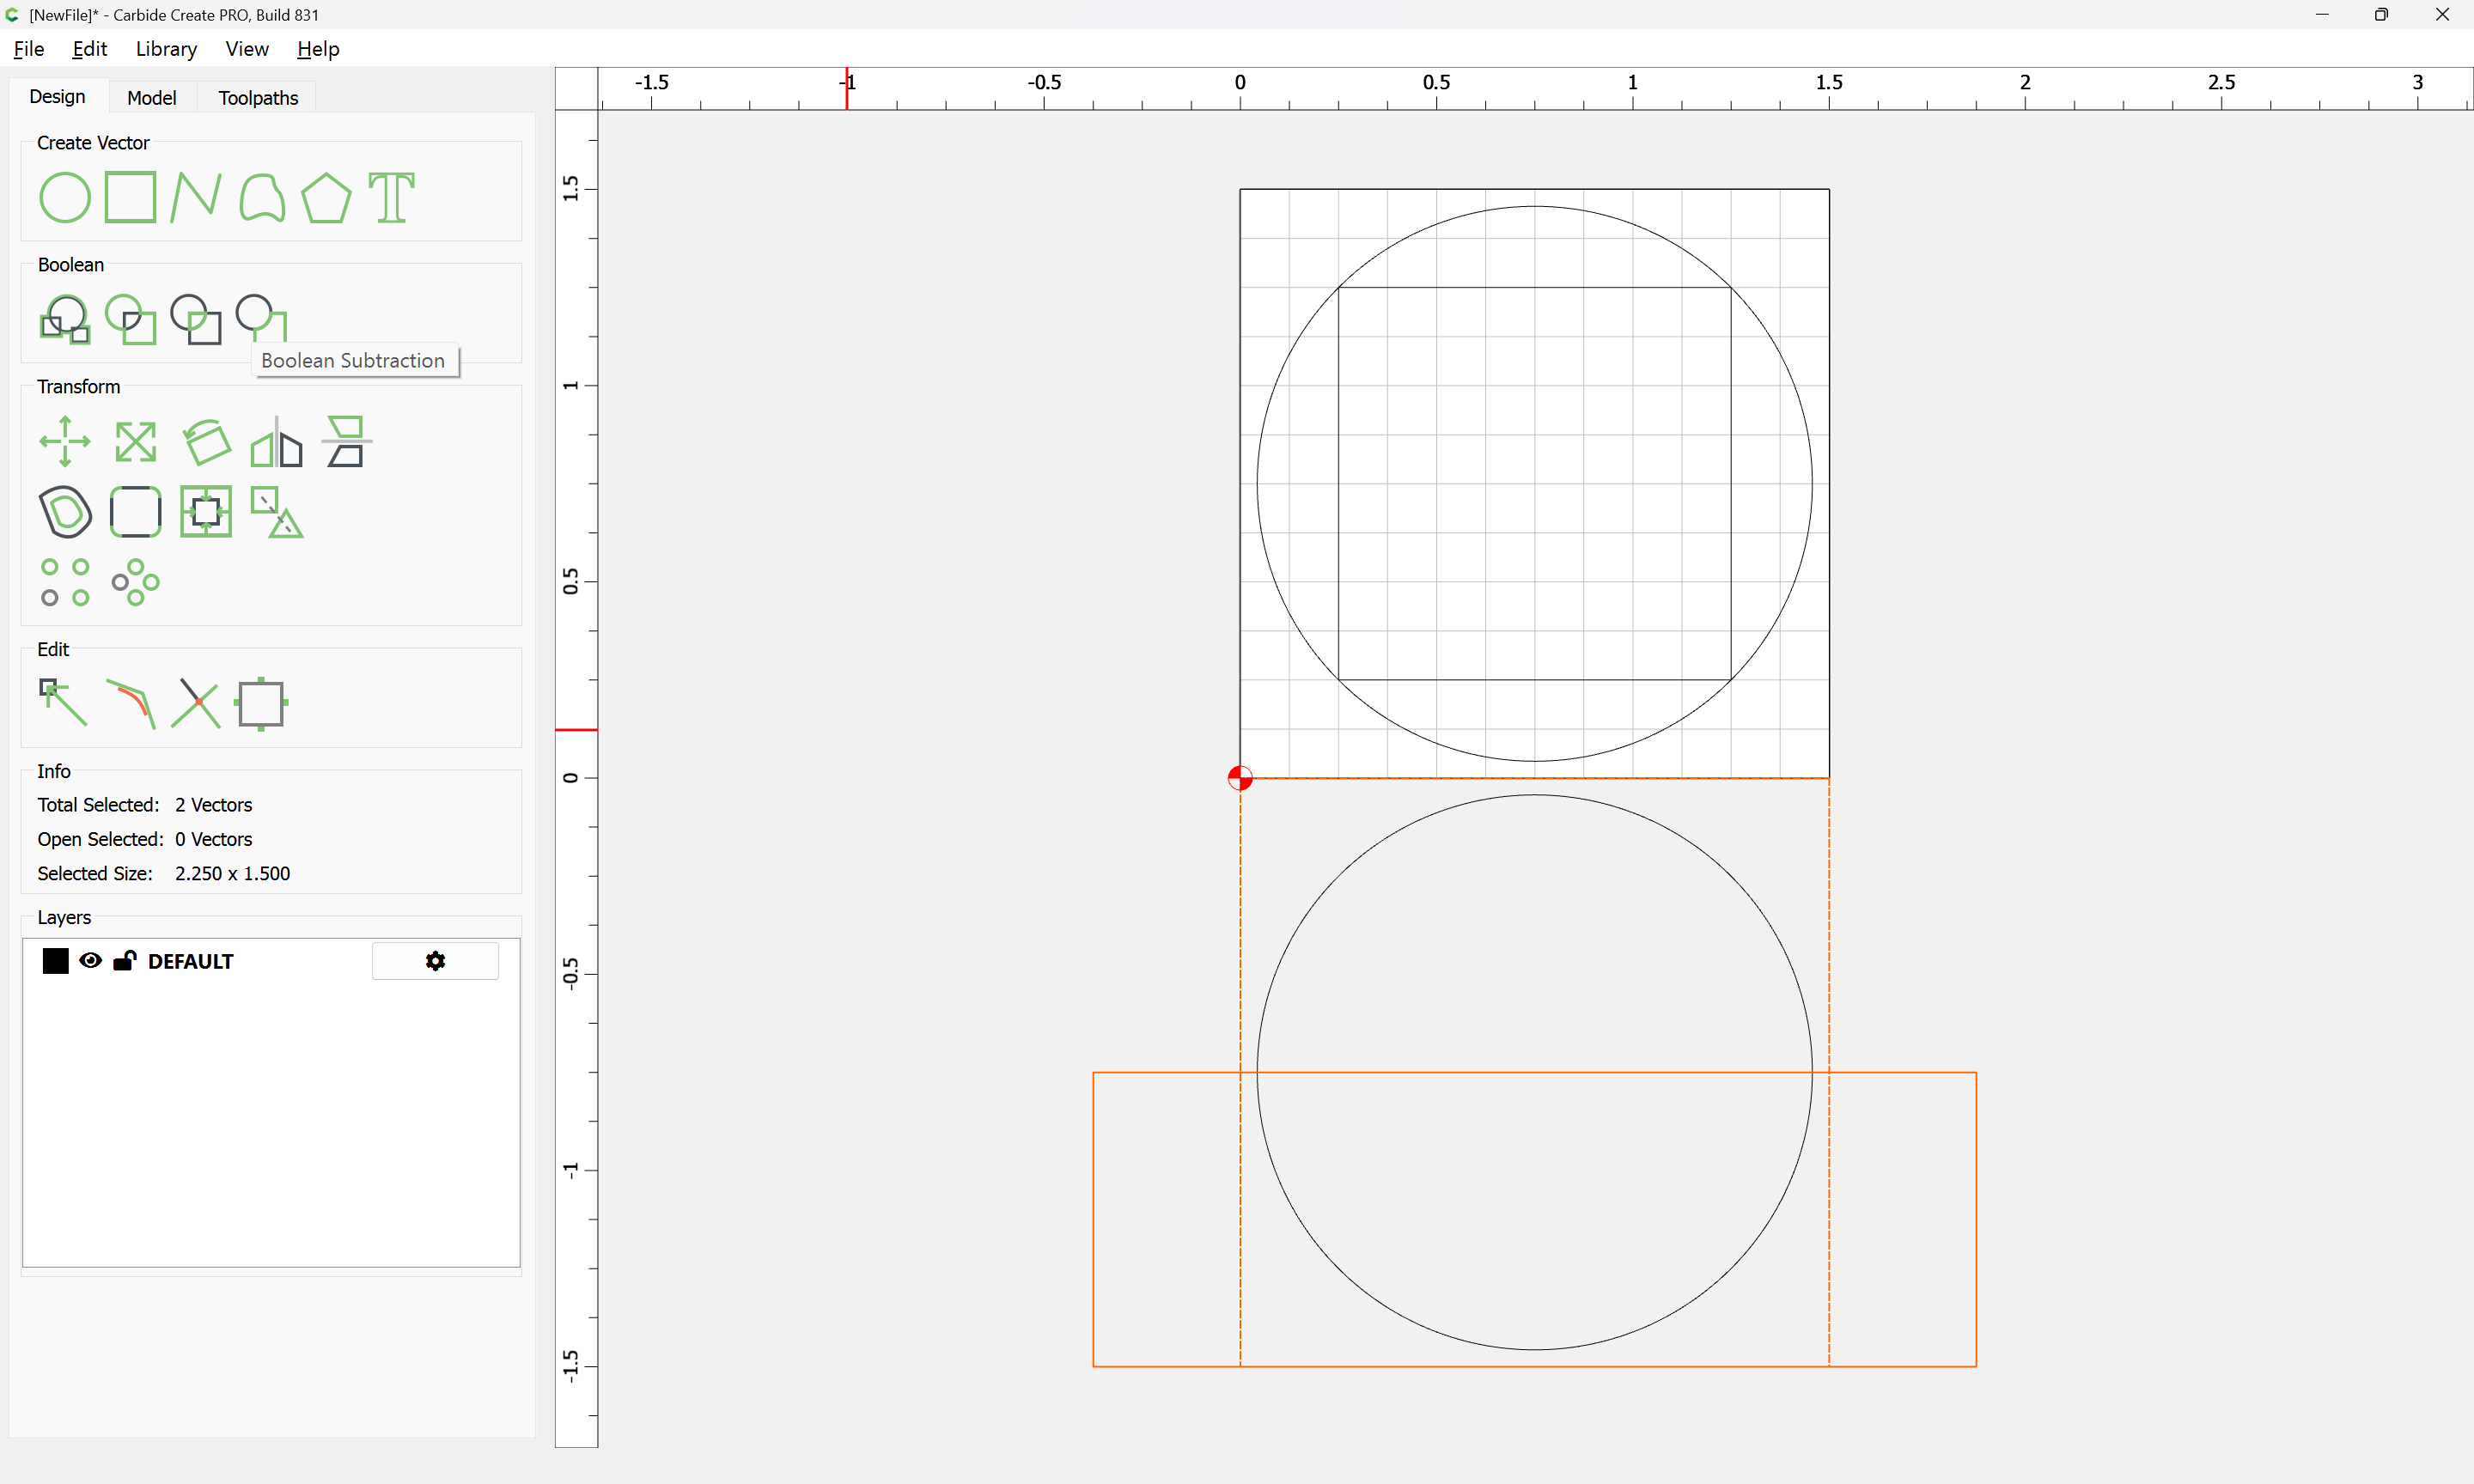
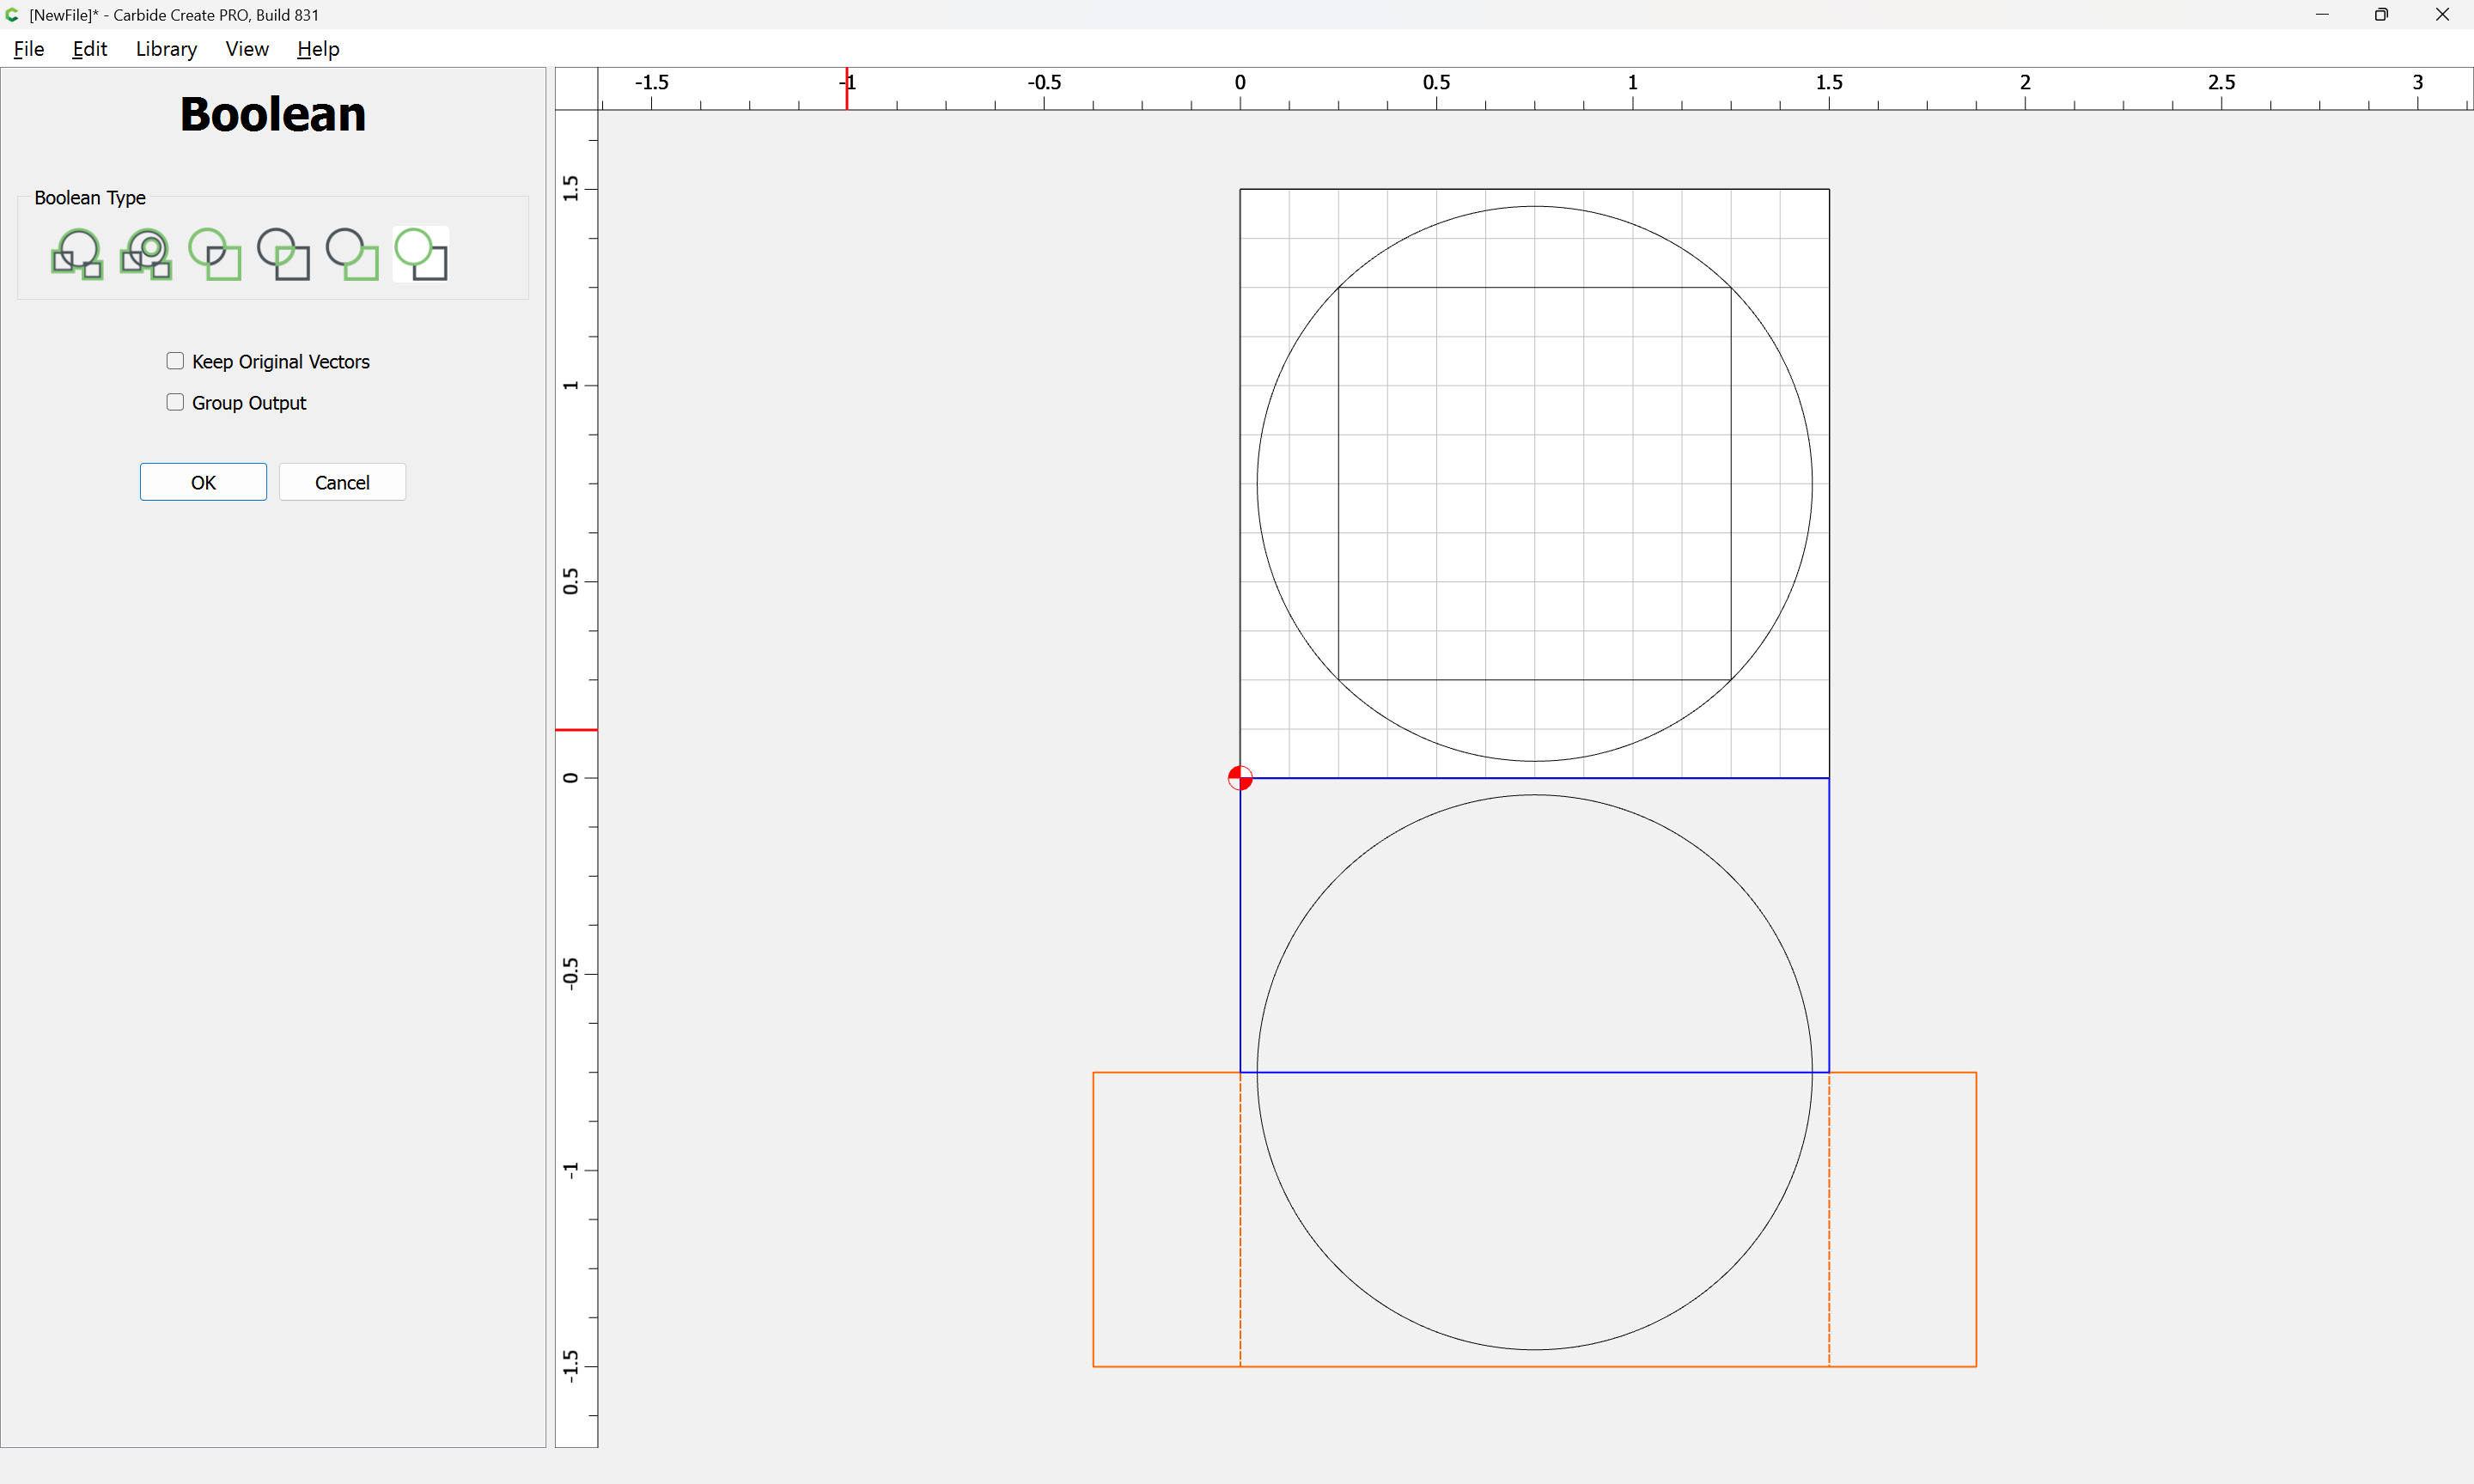

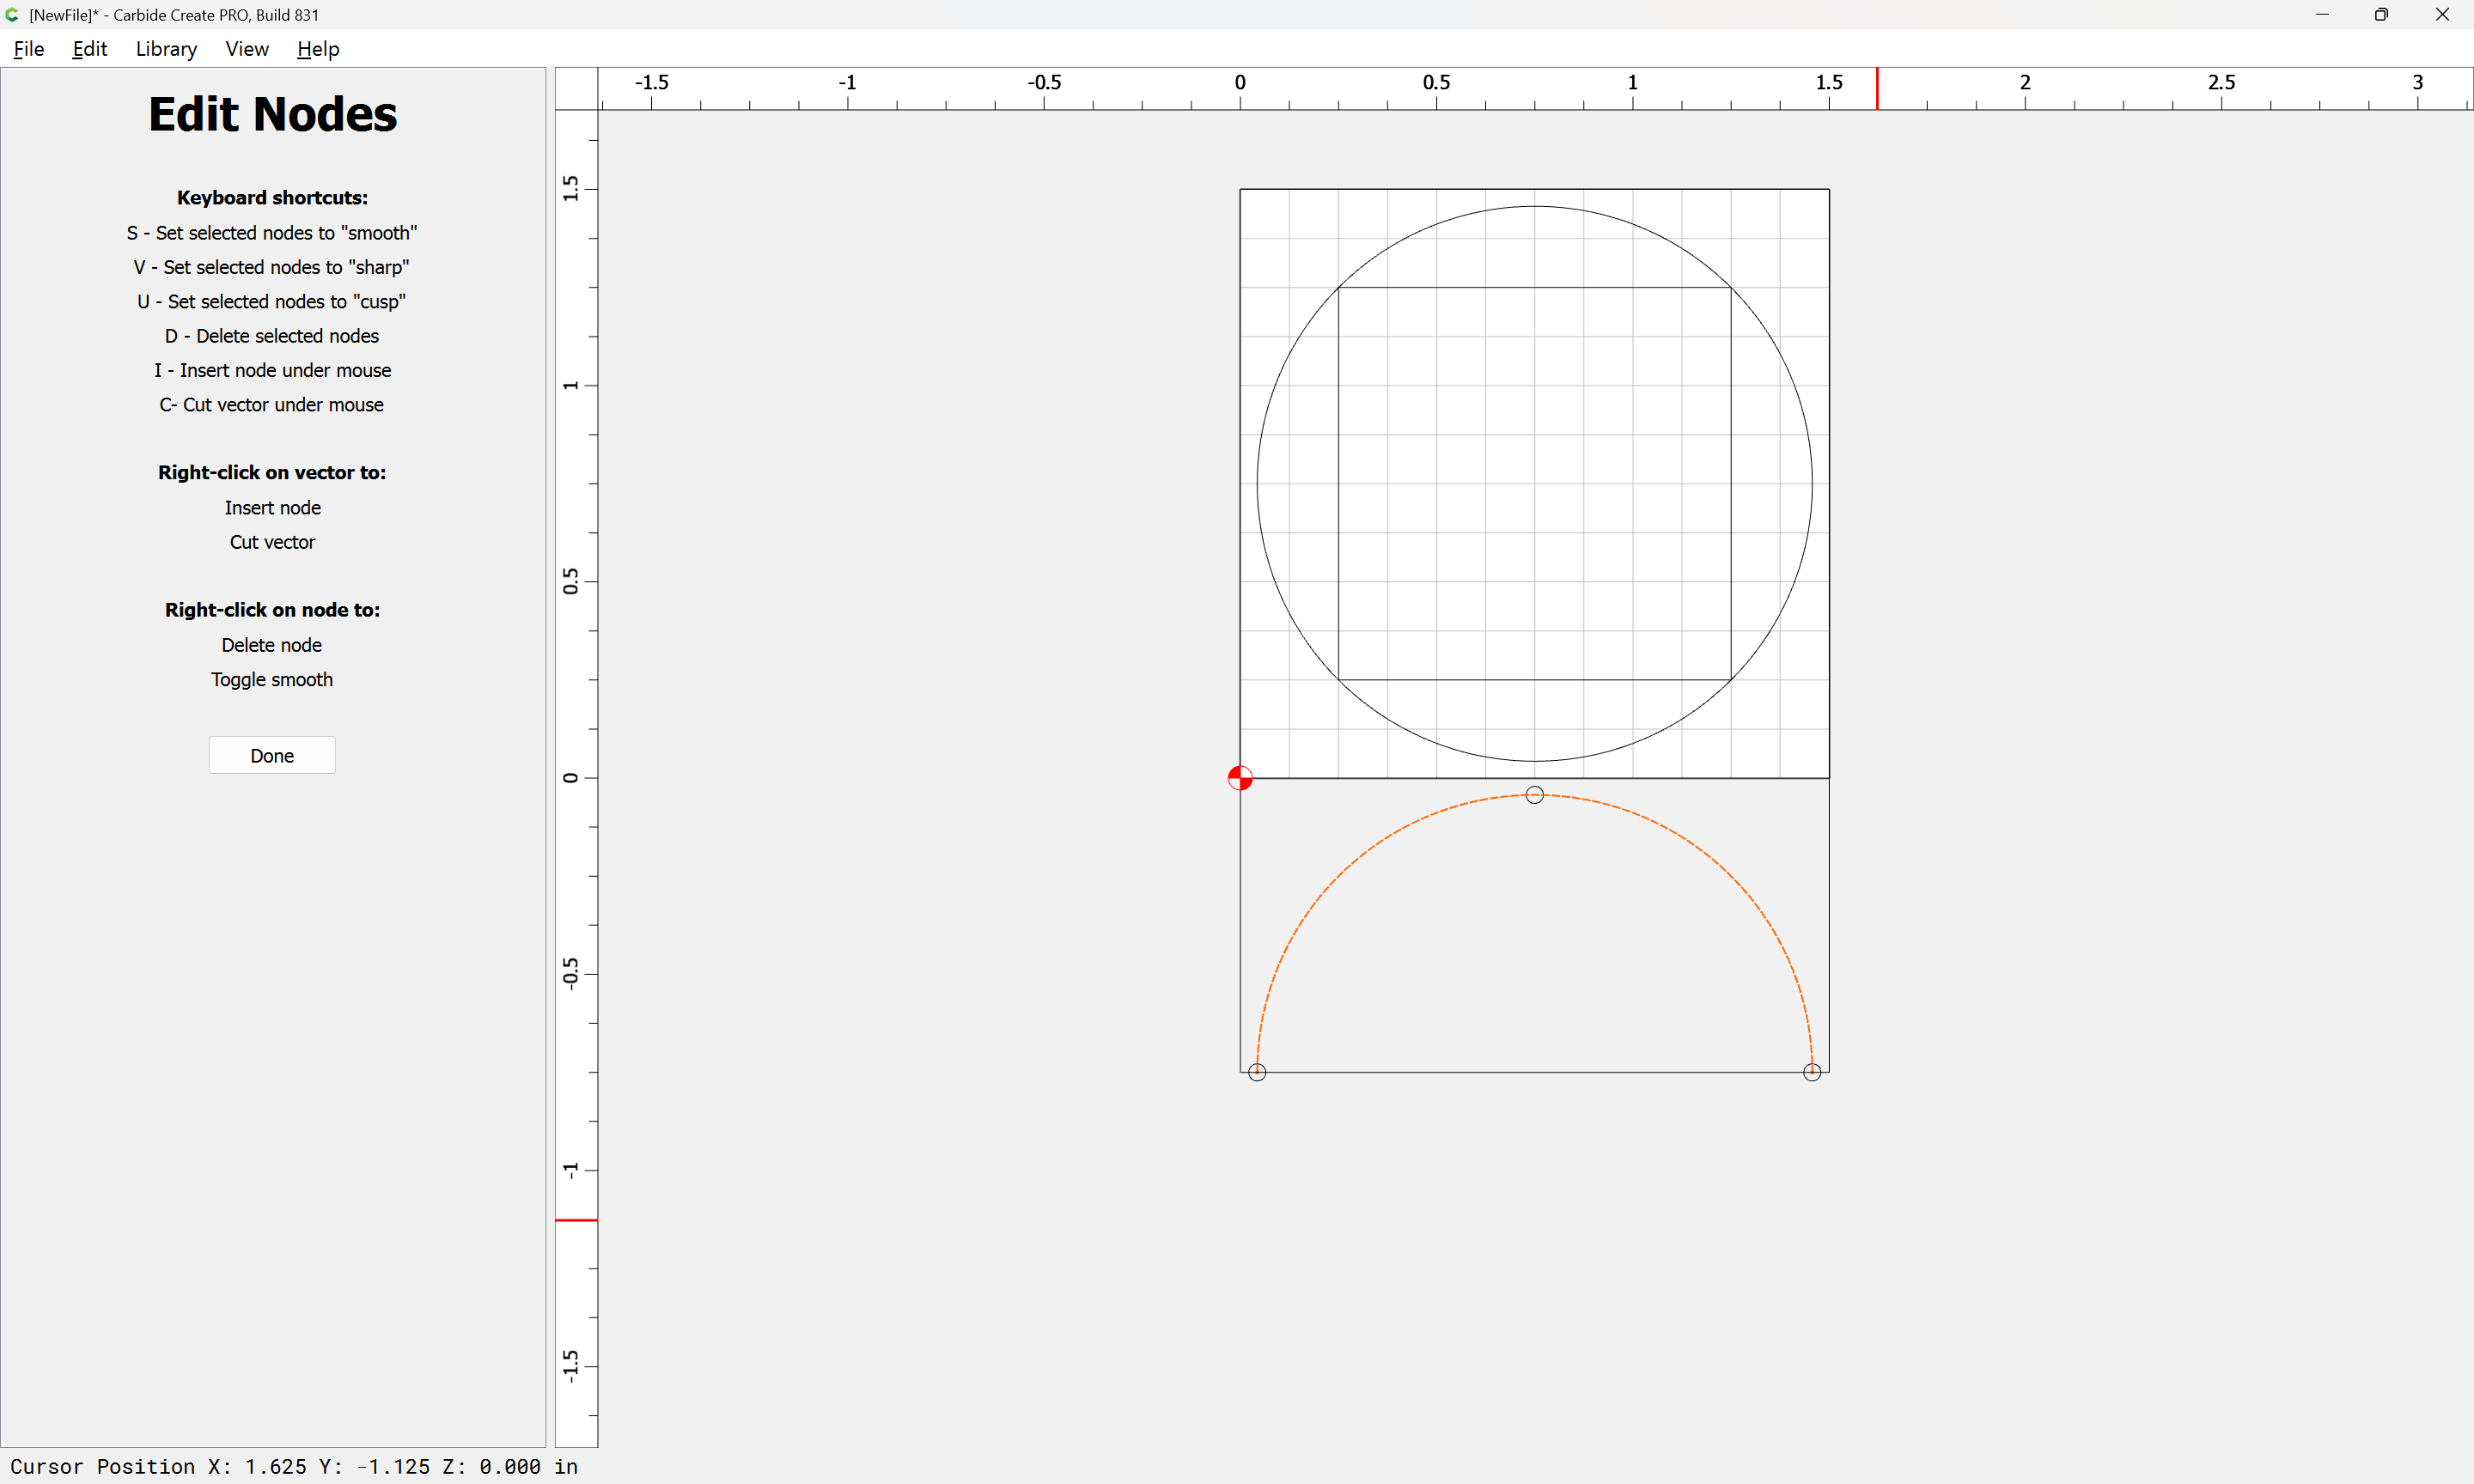
Done
Draw up the tool which one wishes to use in profile:
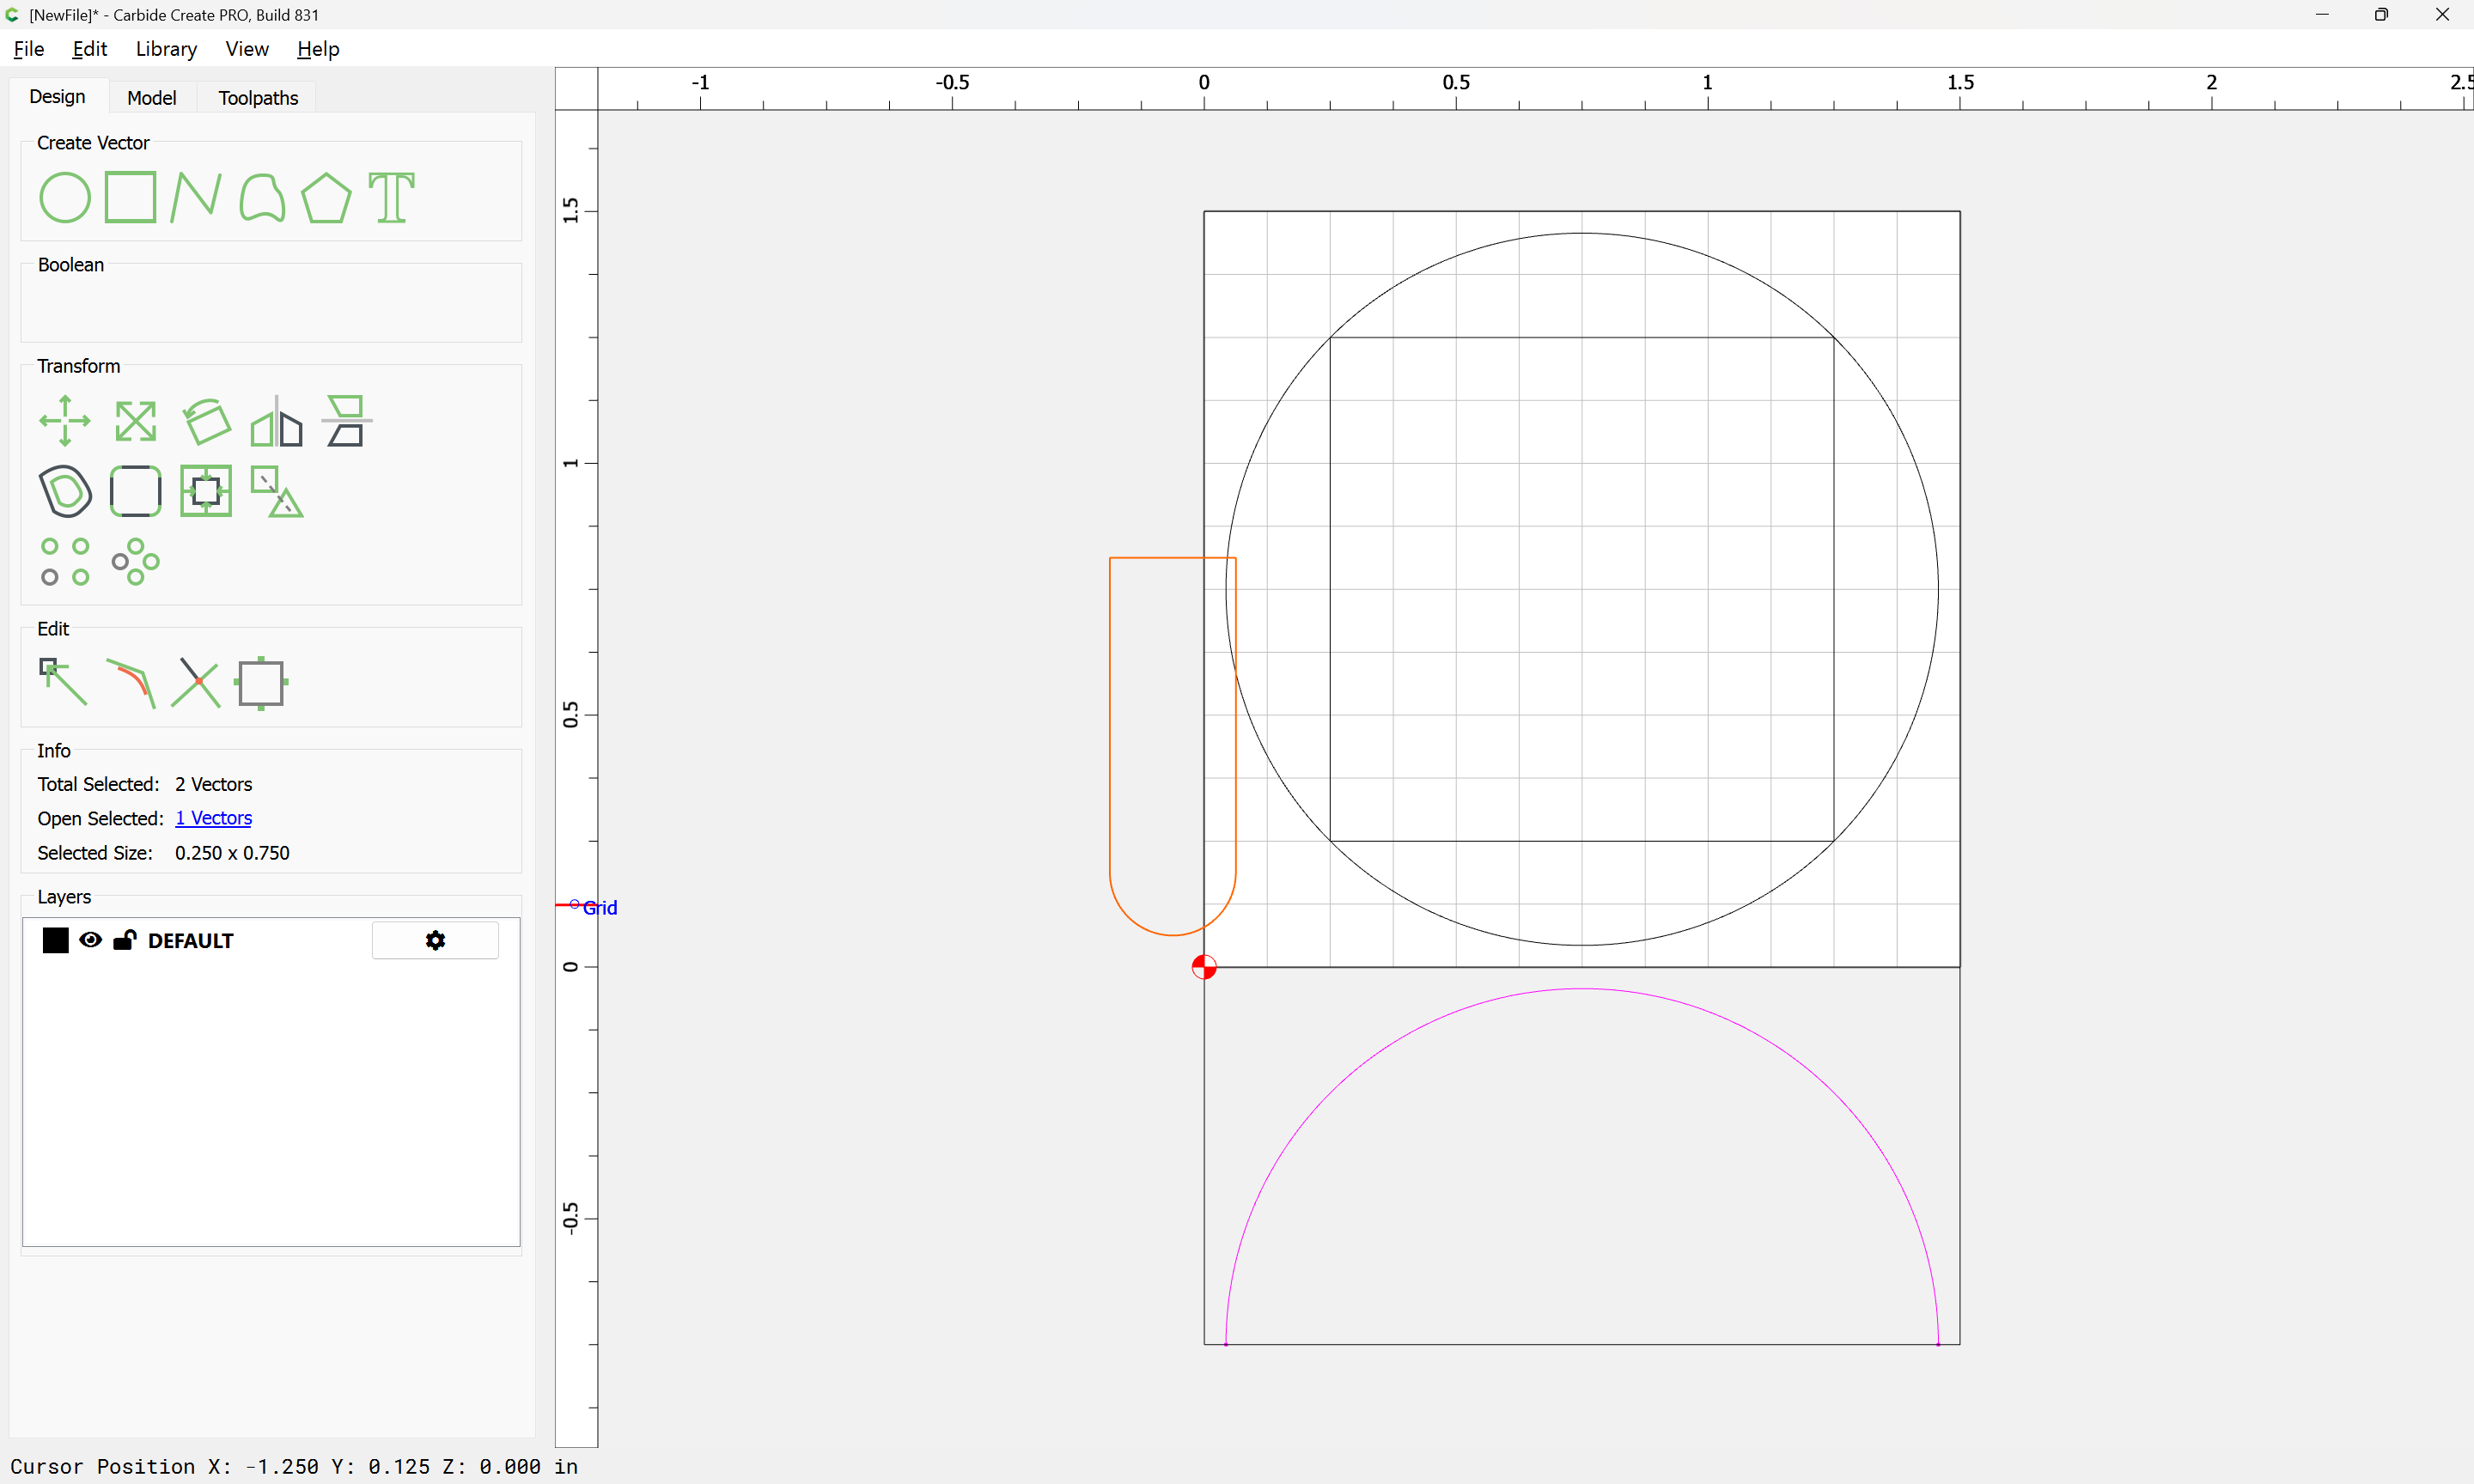

Then draw a series of concentric circles:
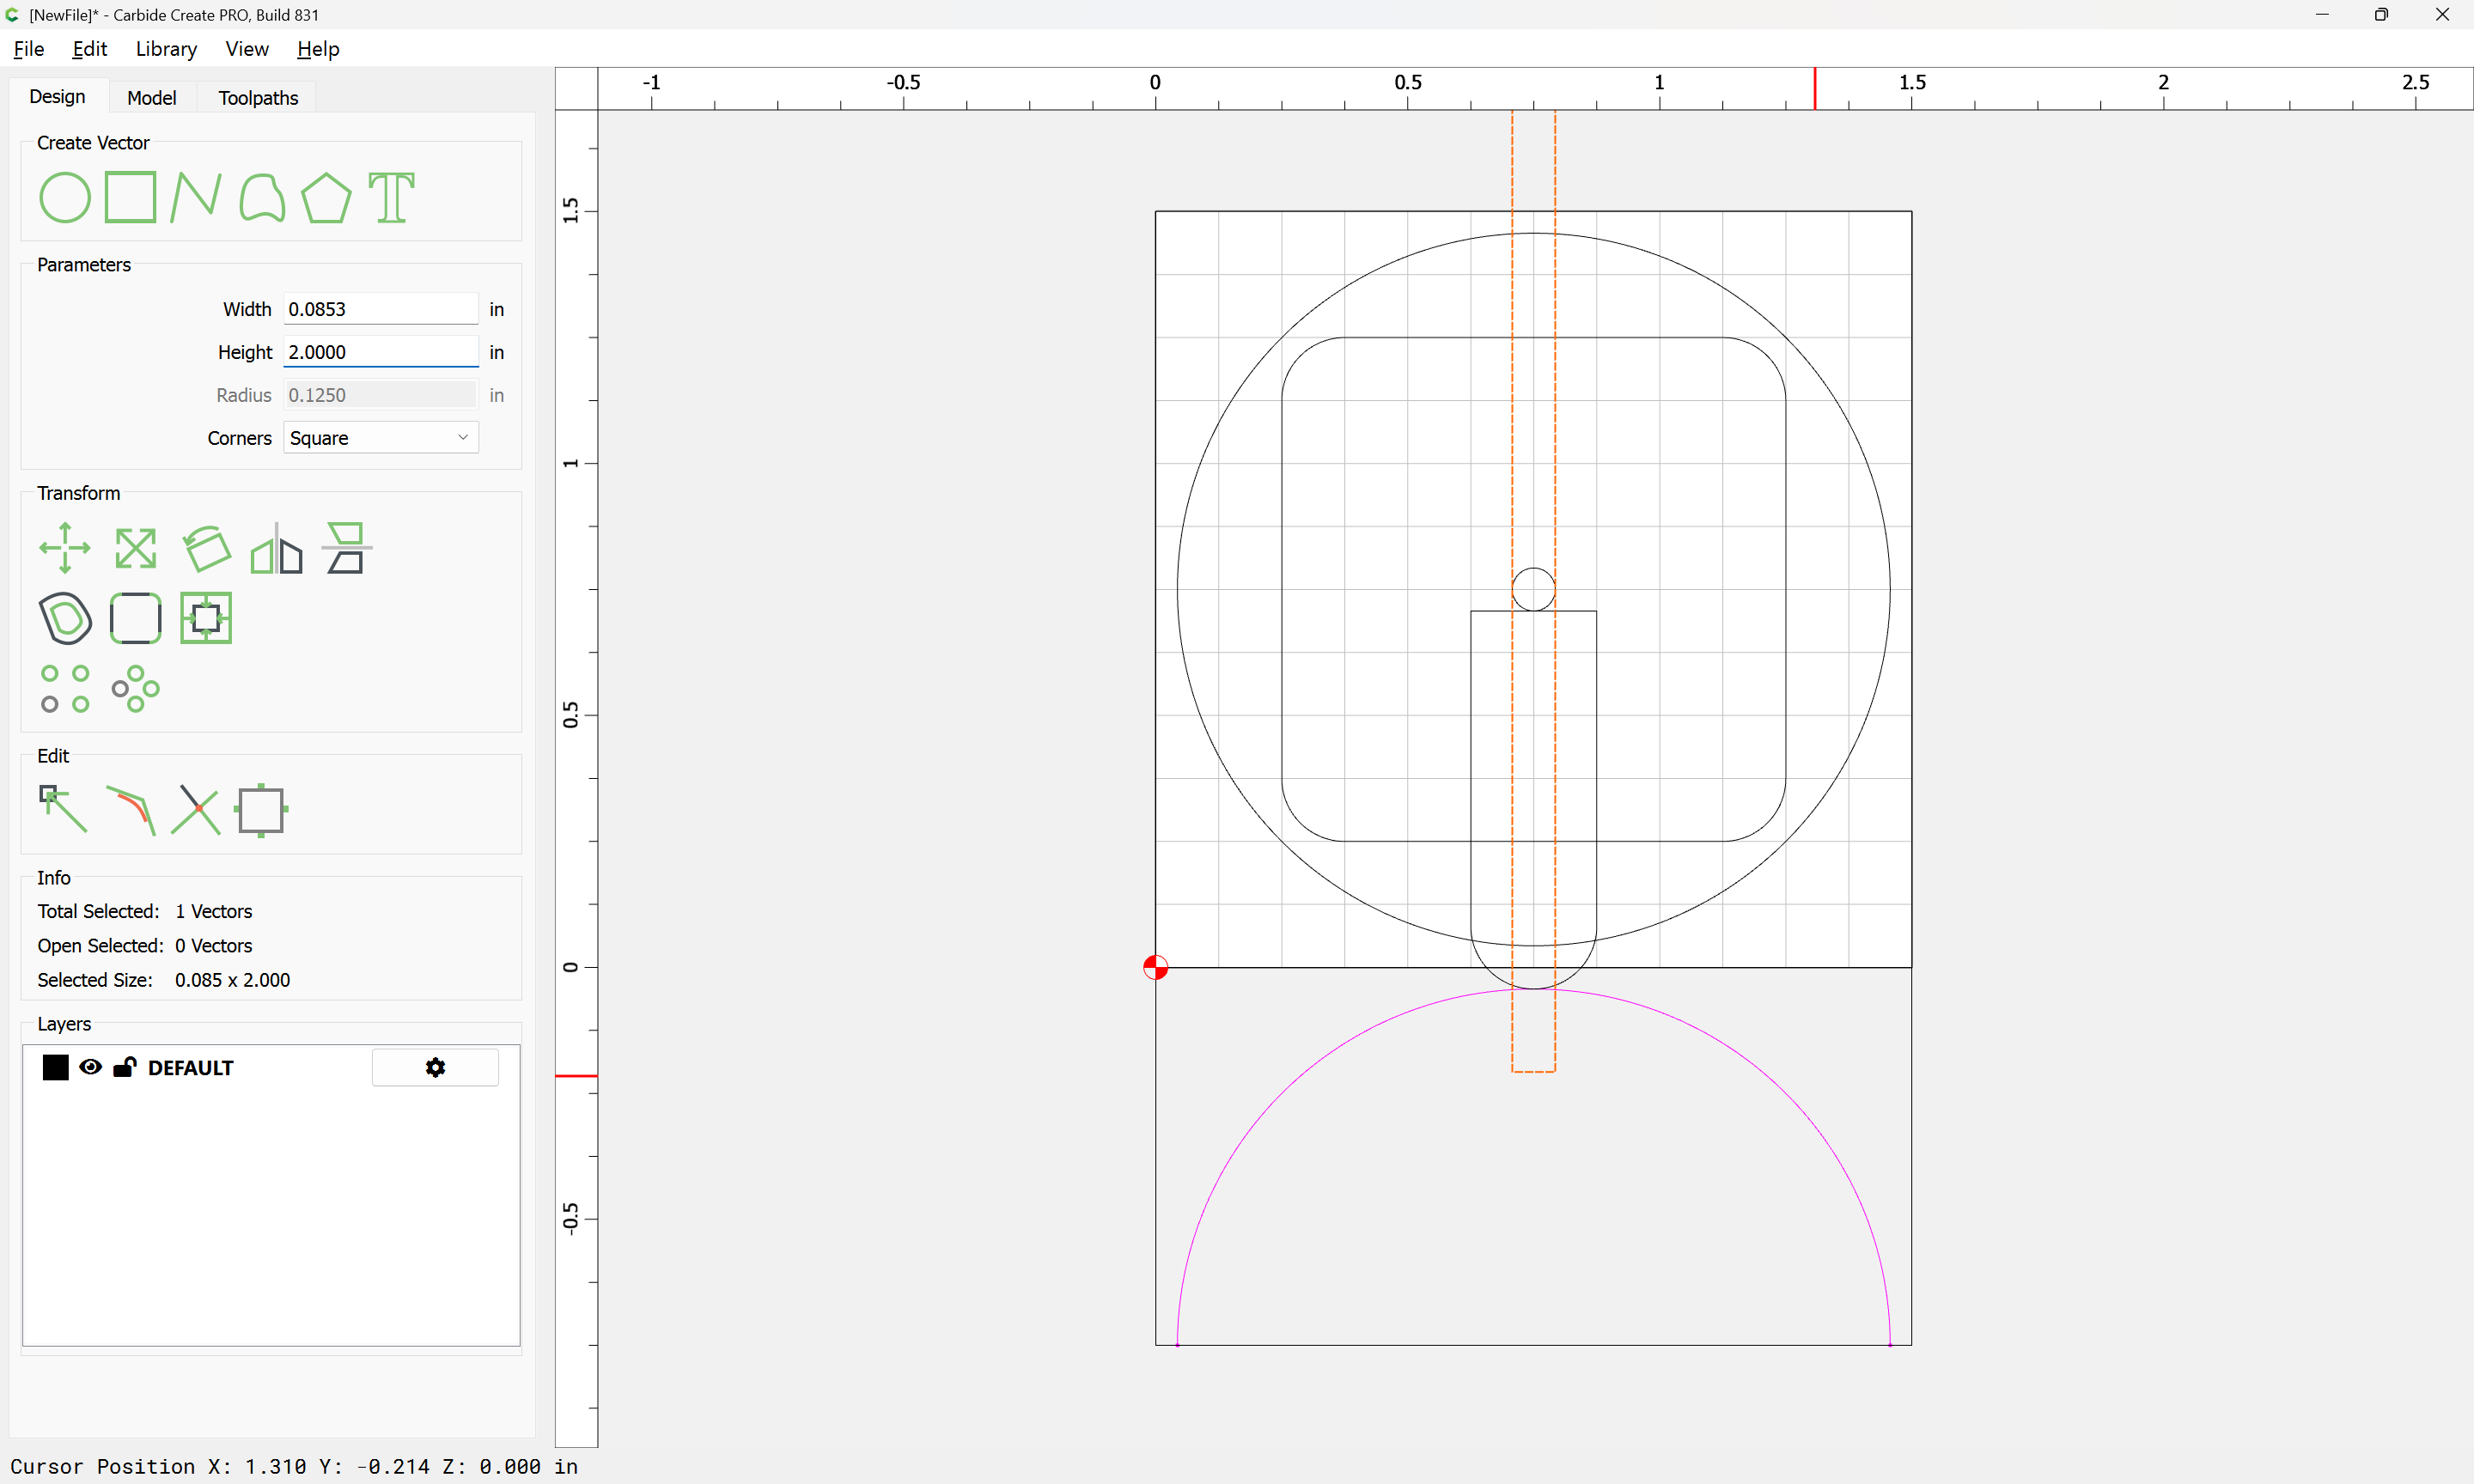
make a matching rectangle of a suitable length:
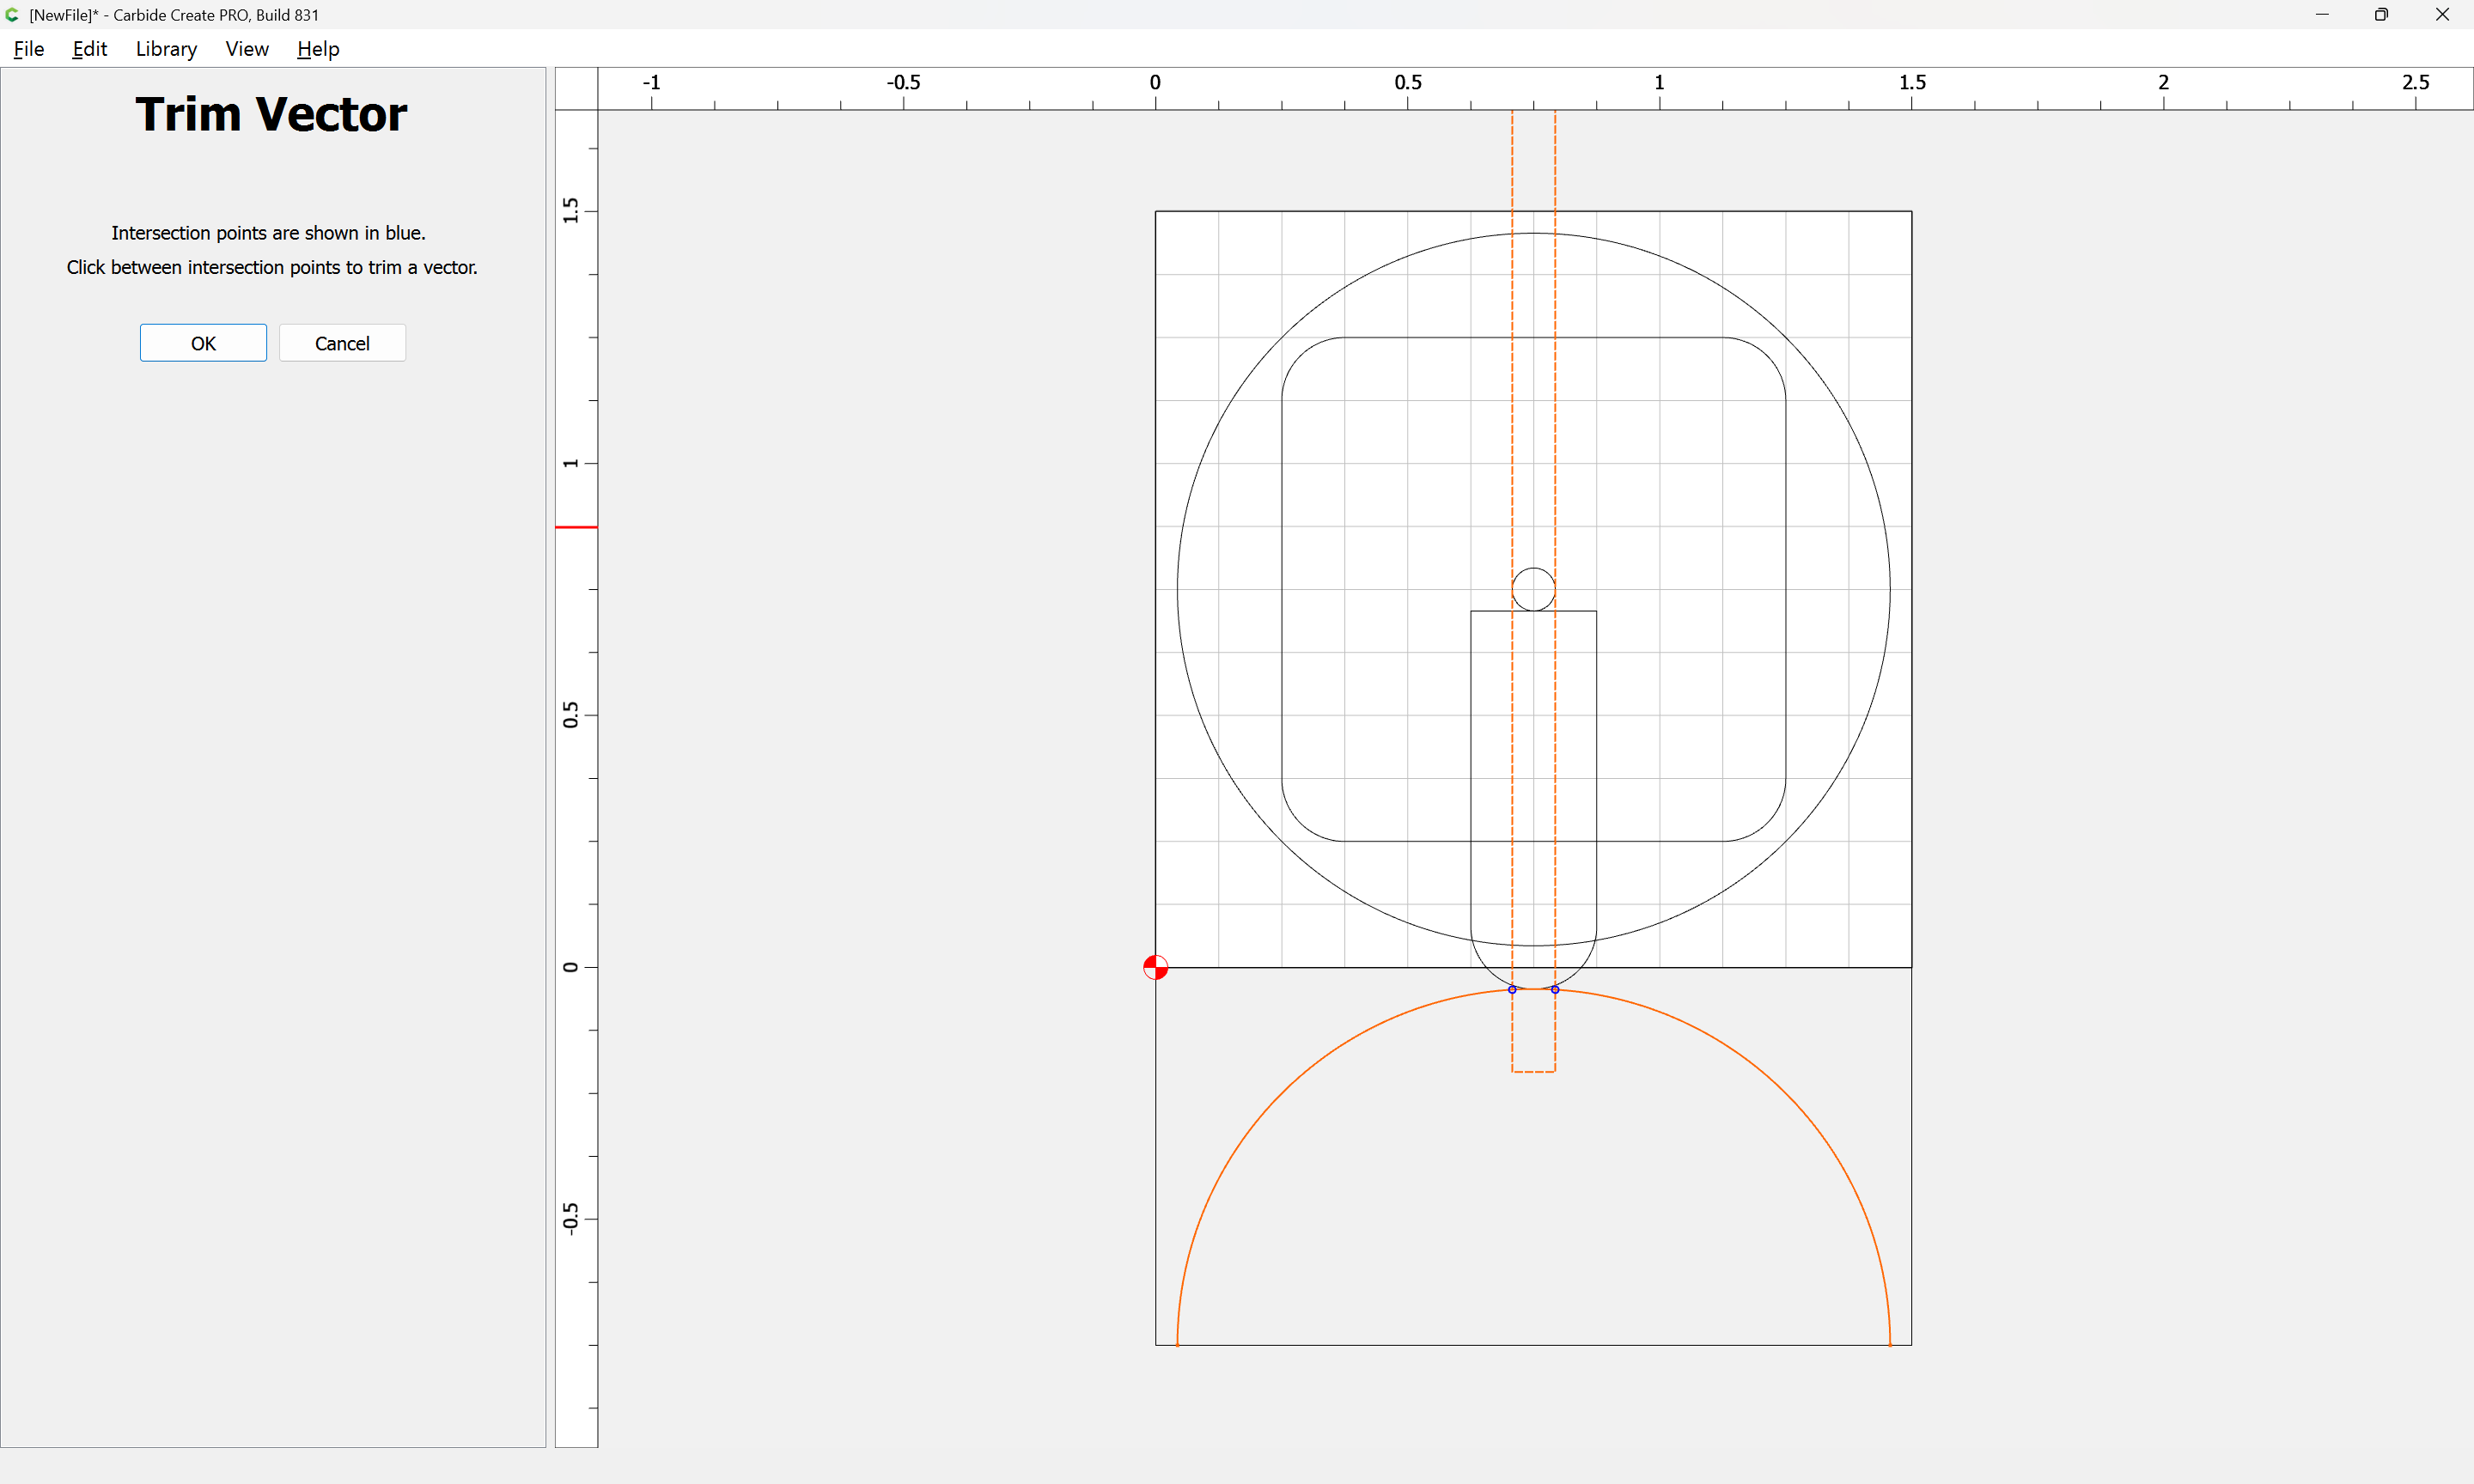
Duplicate the open vector for the Z-axis:
Select it and the rectangle:

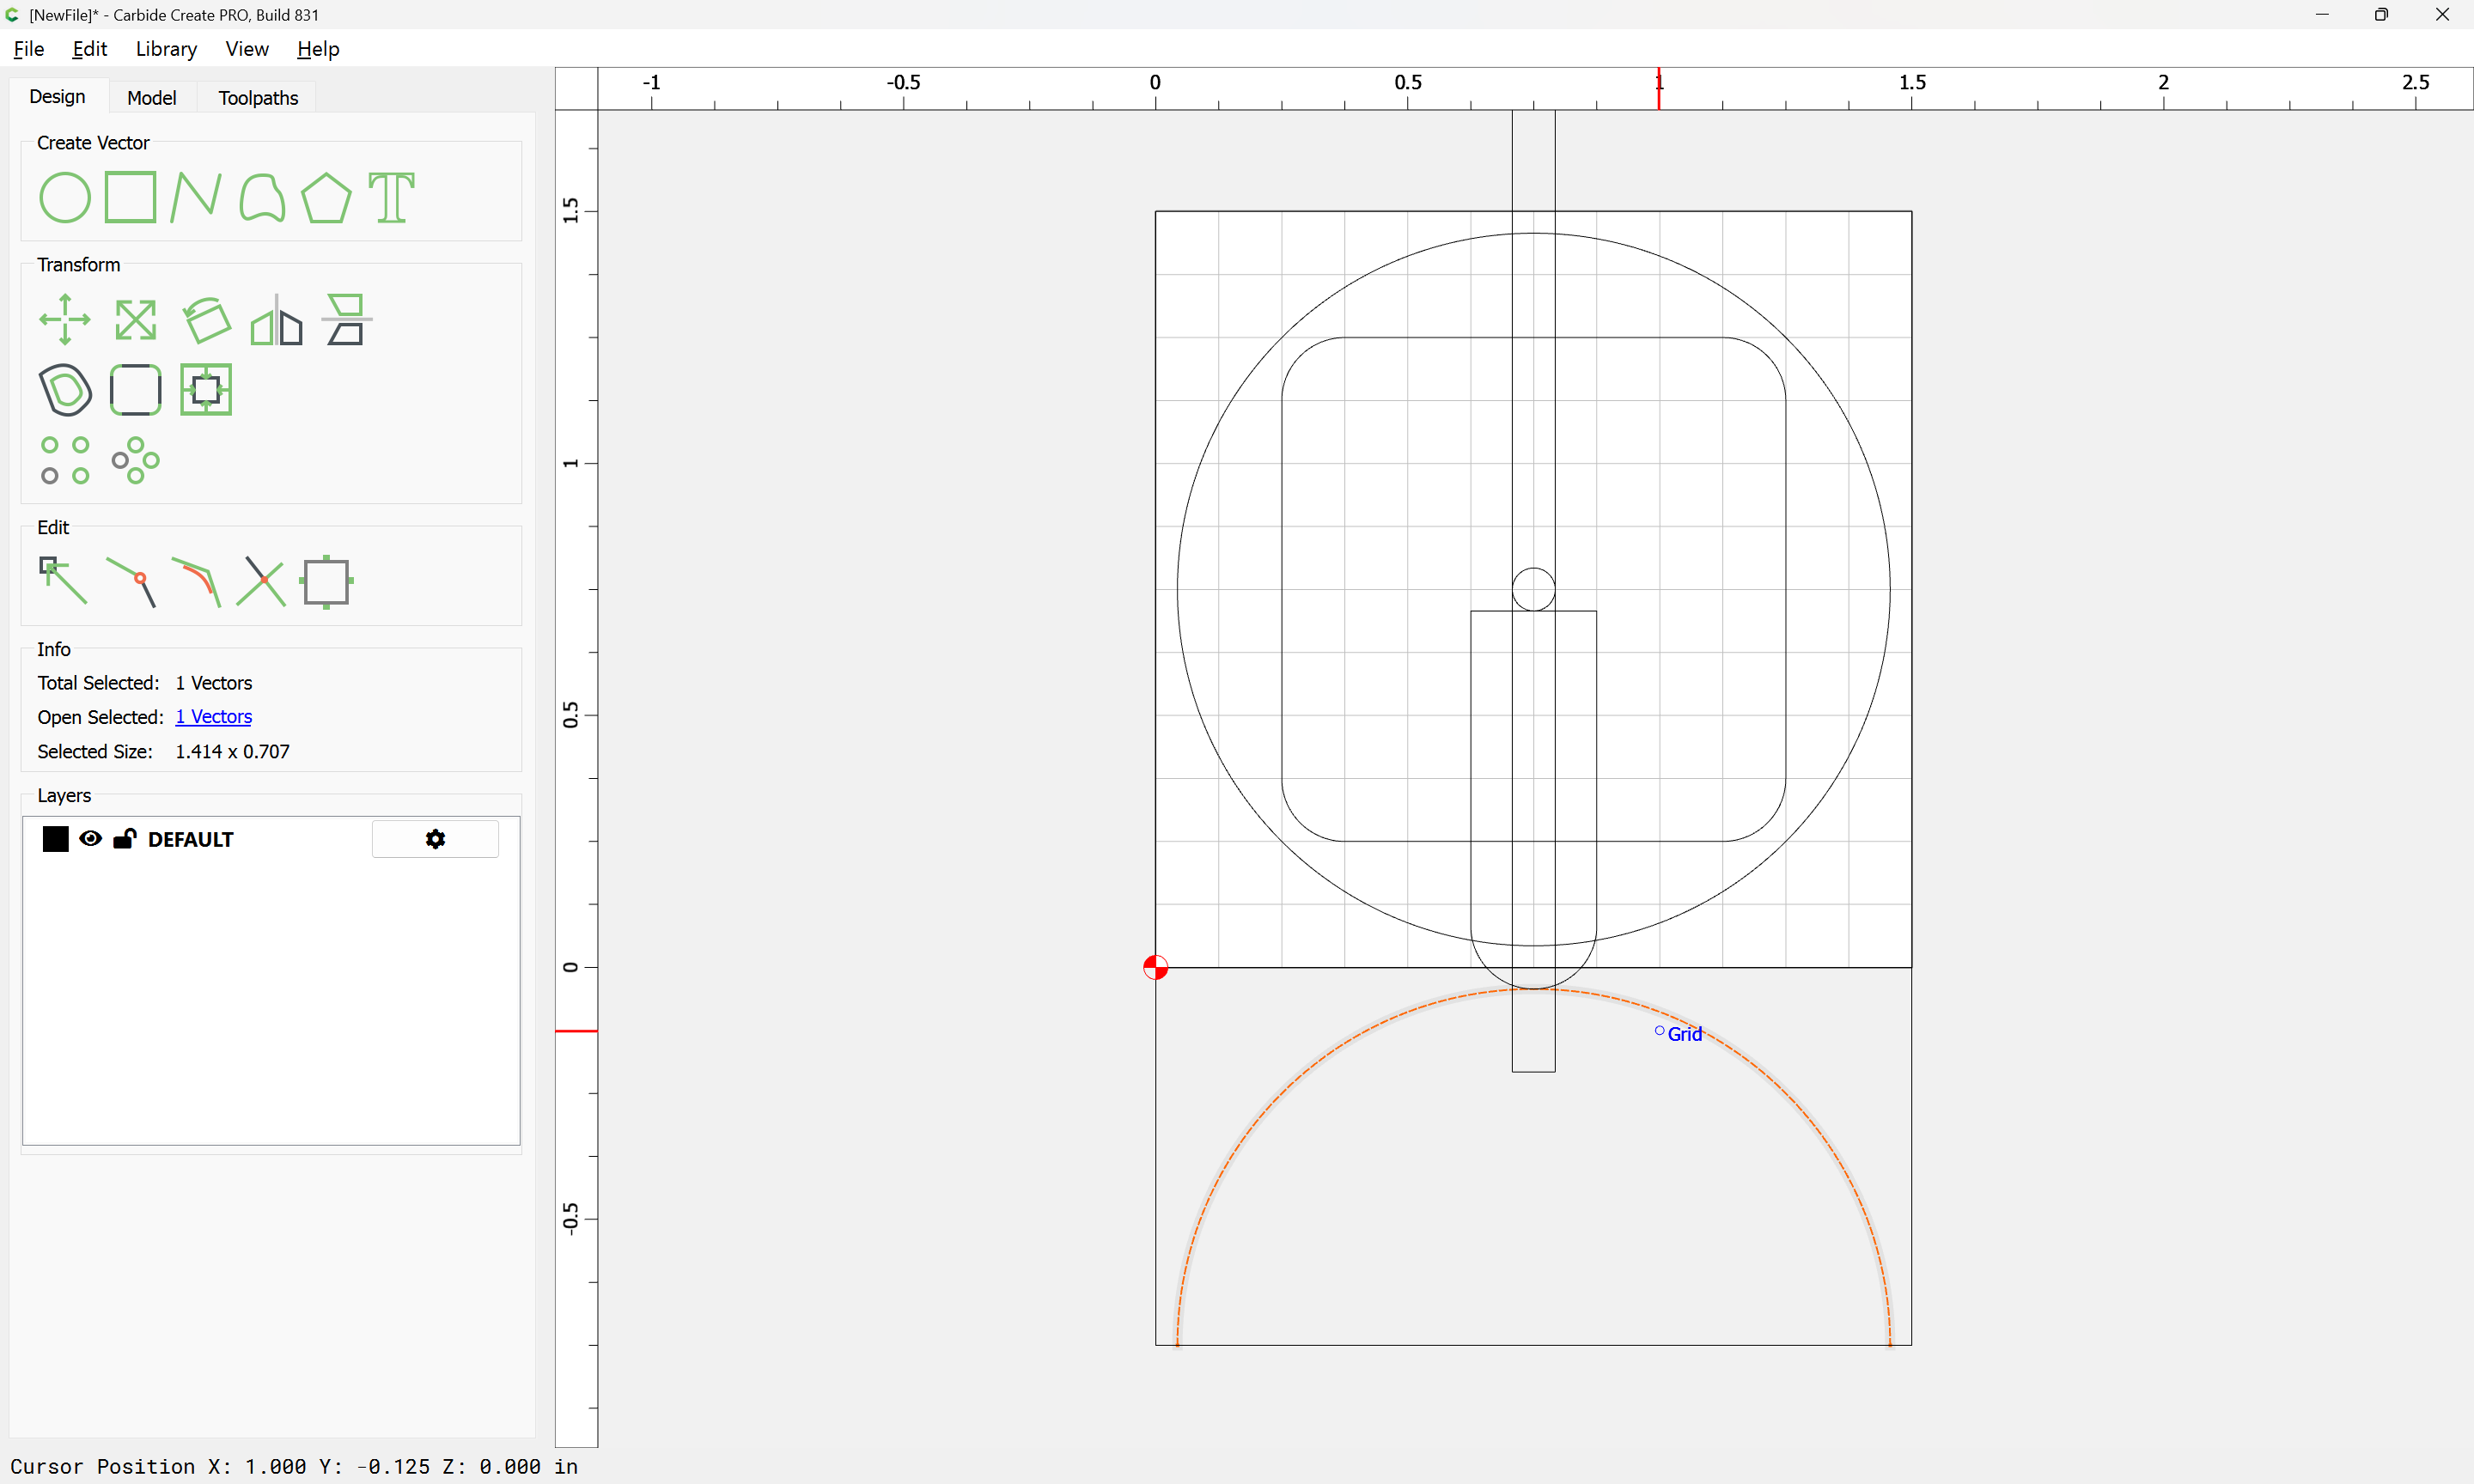
and use Trim Vectors to isolate the geometry for the depth:
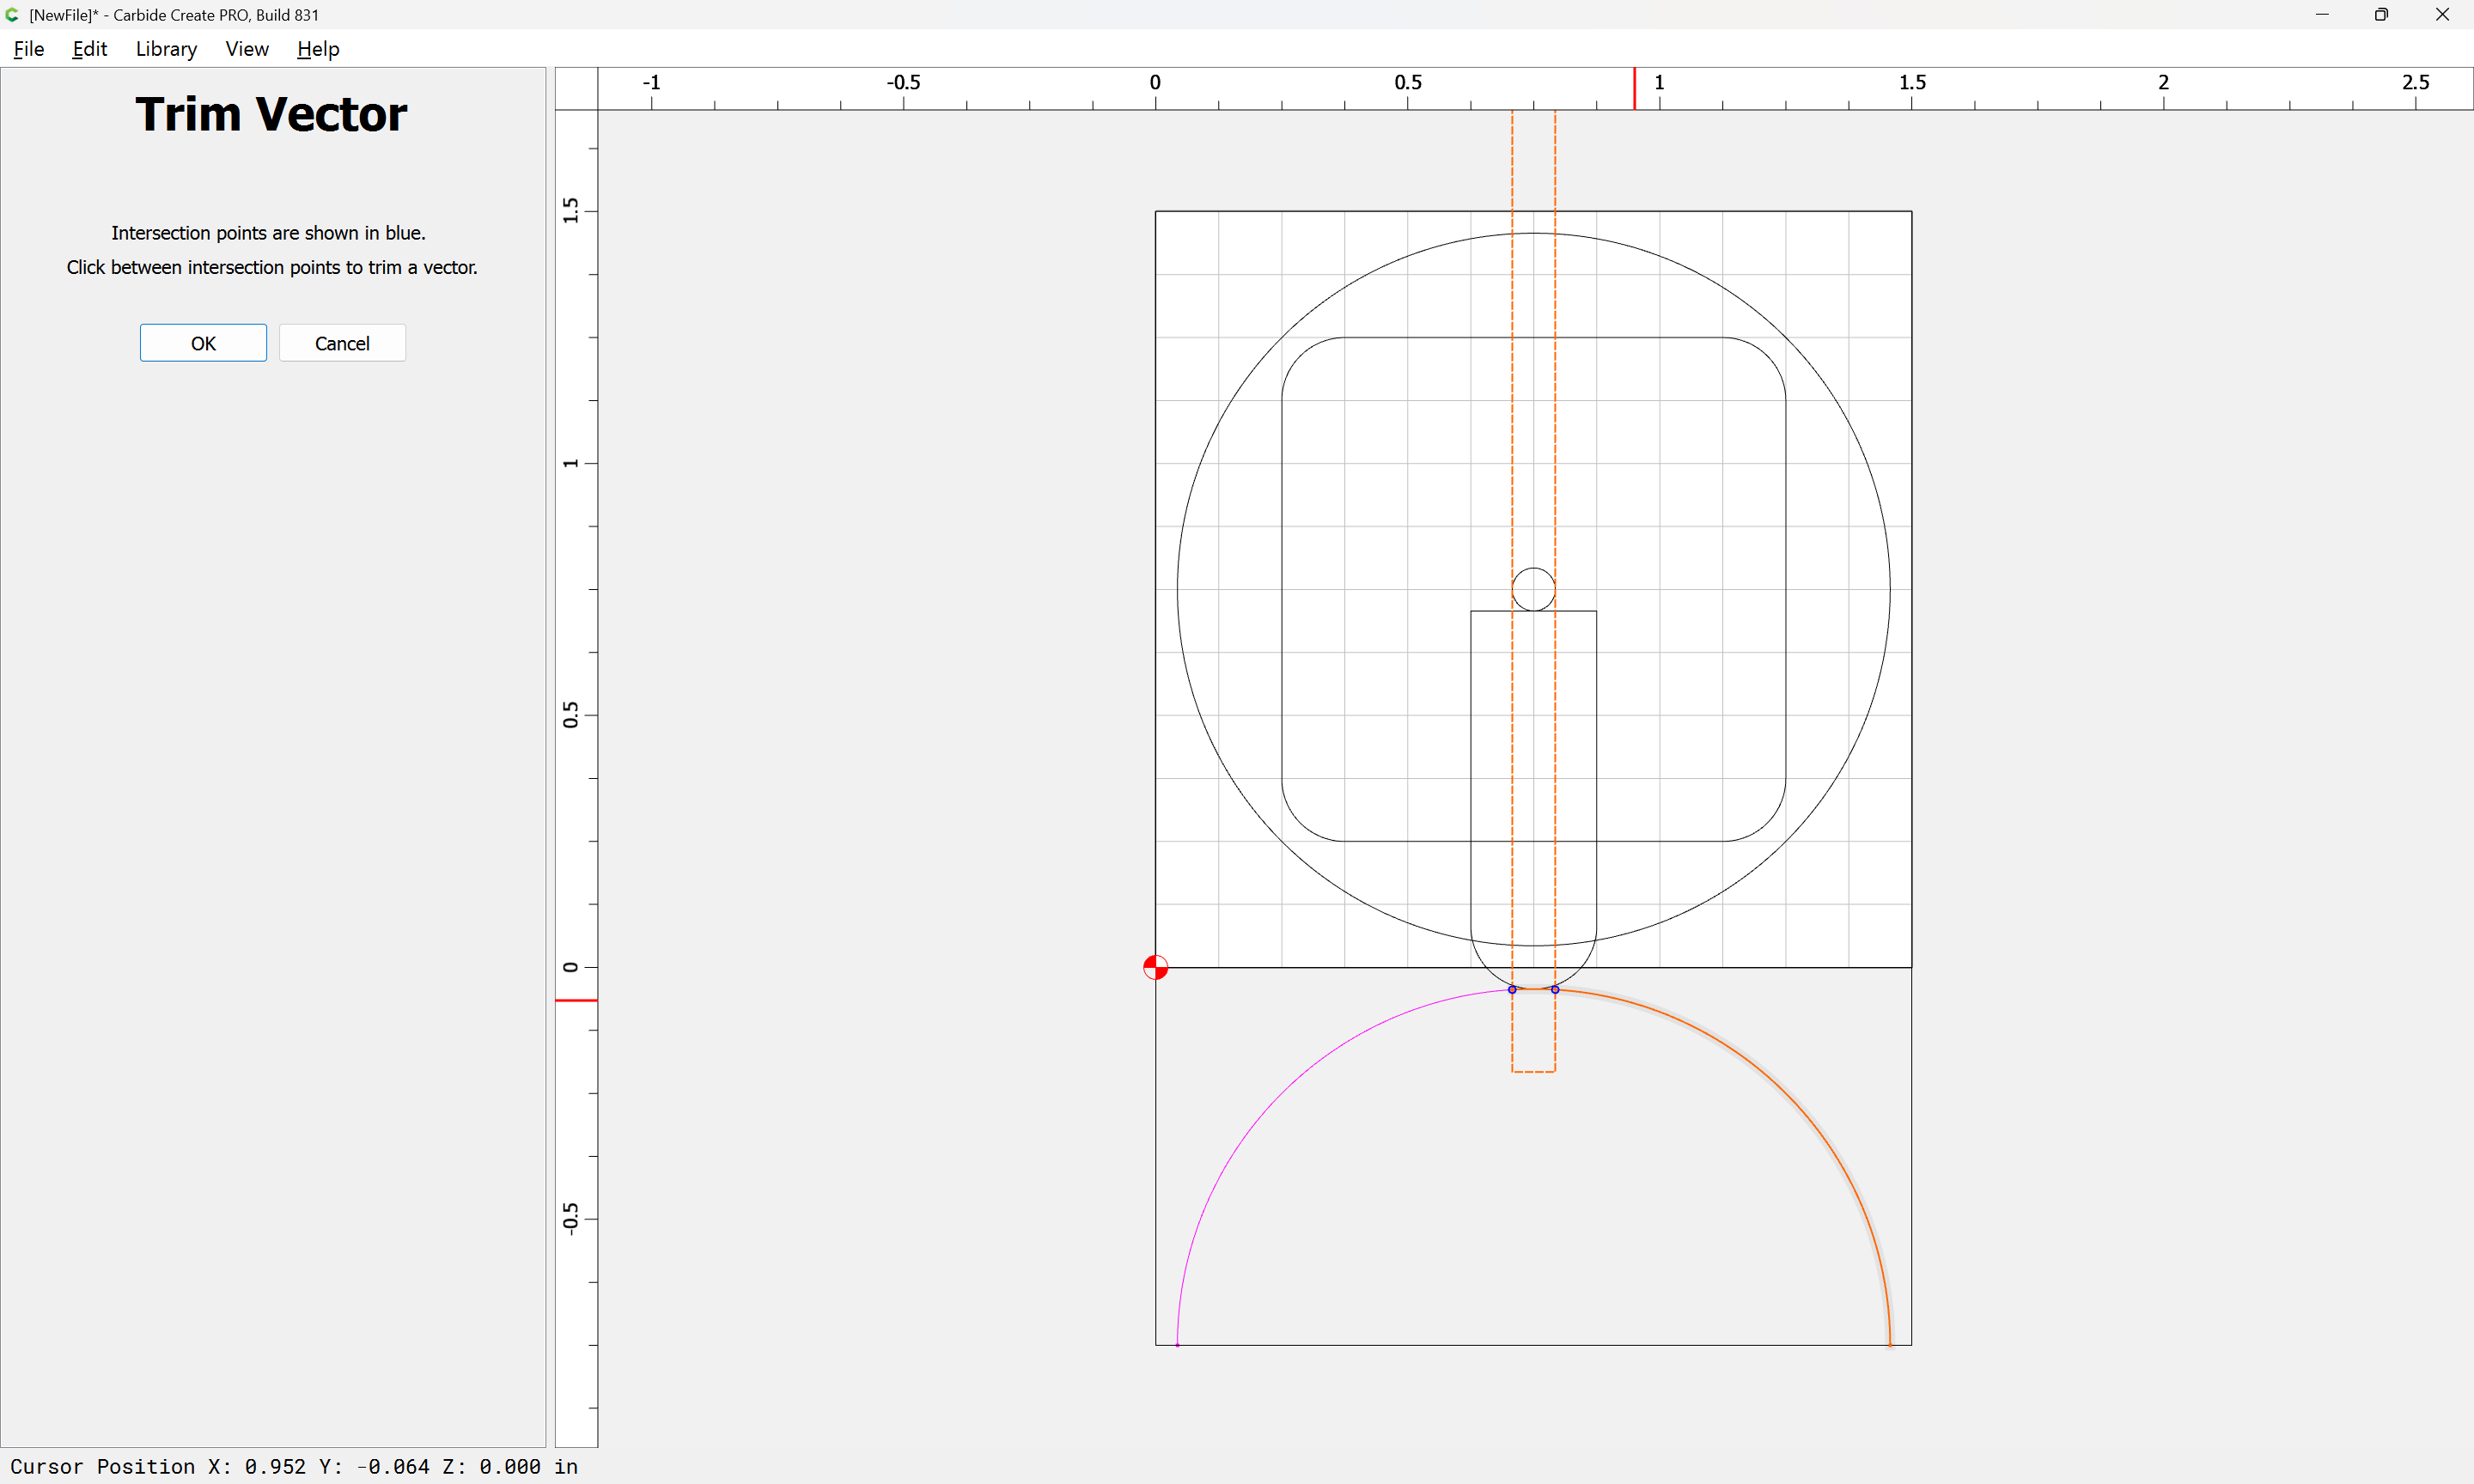
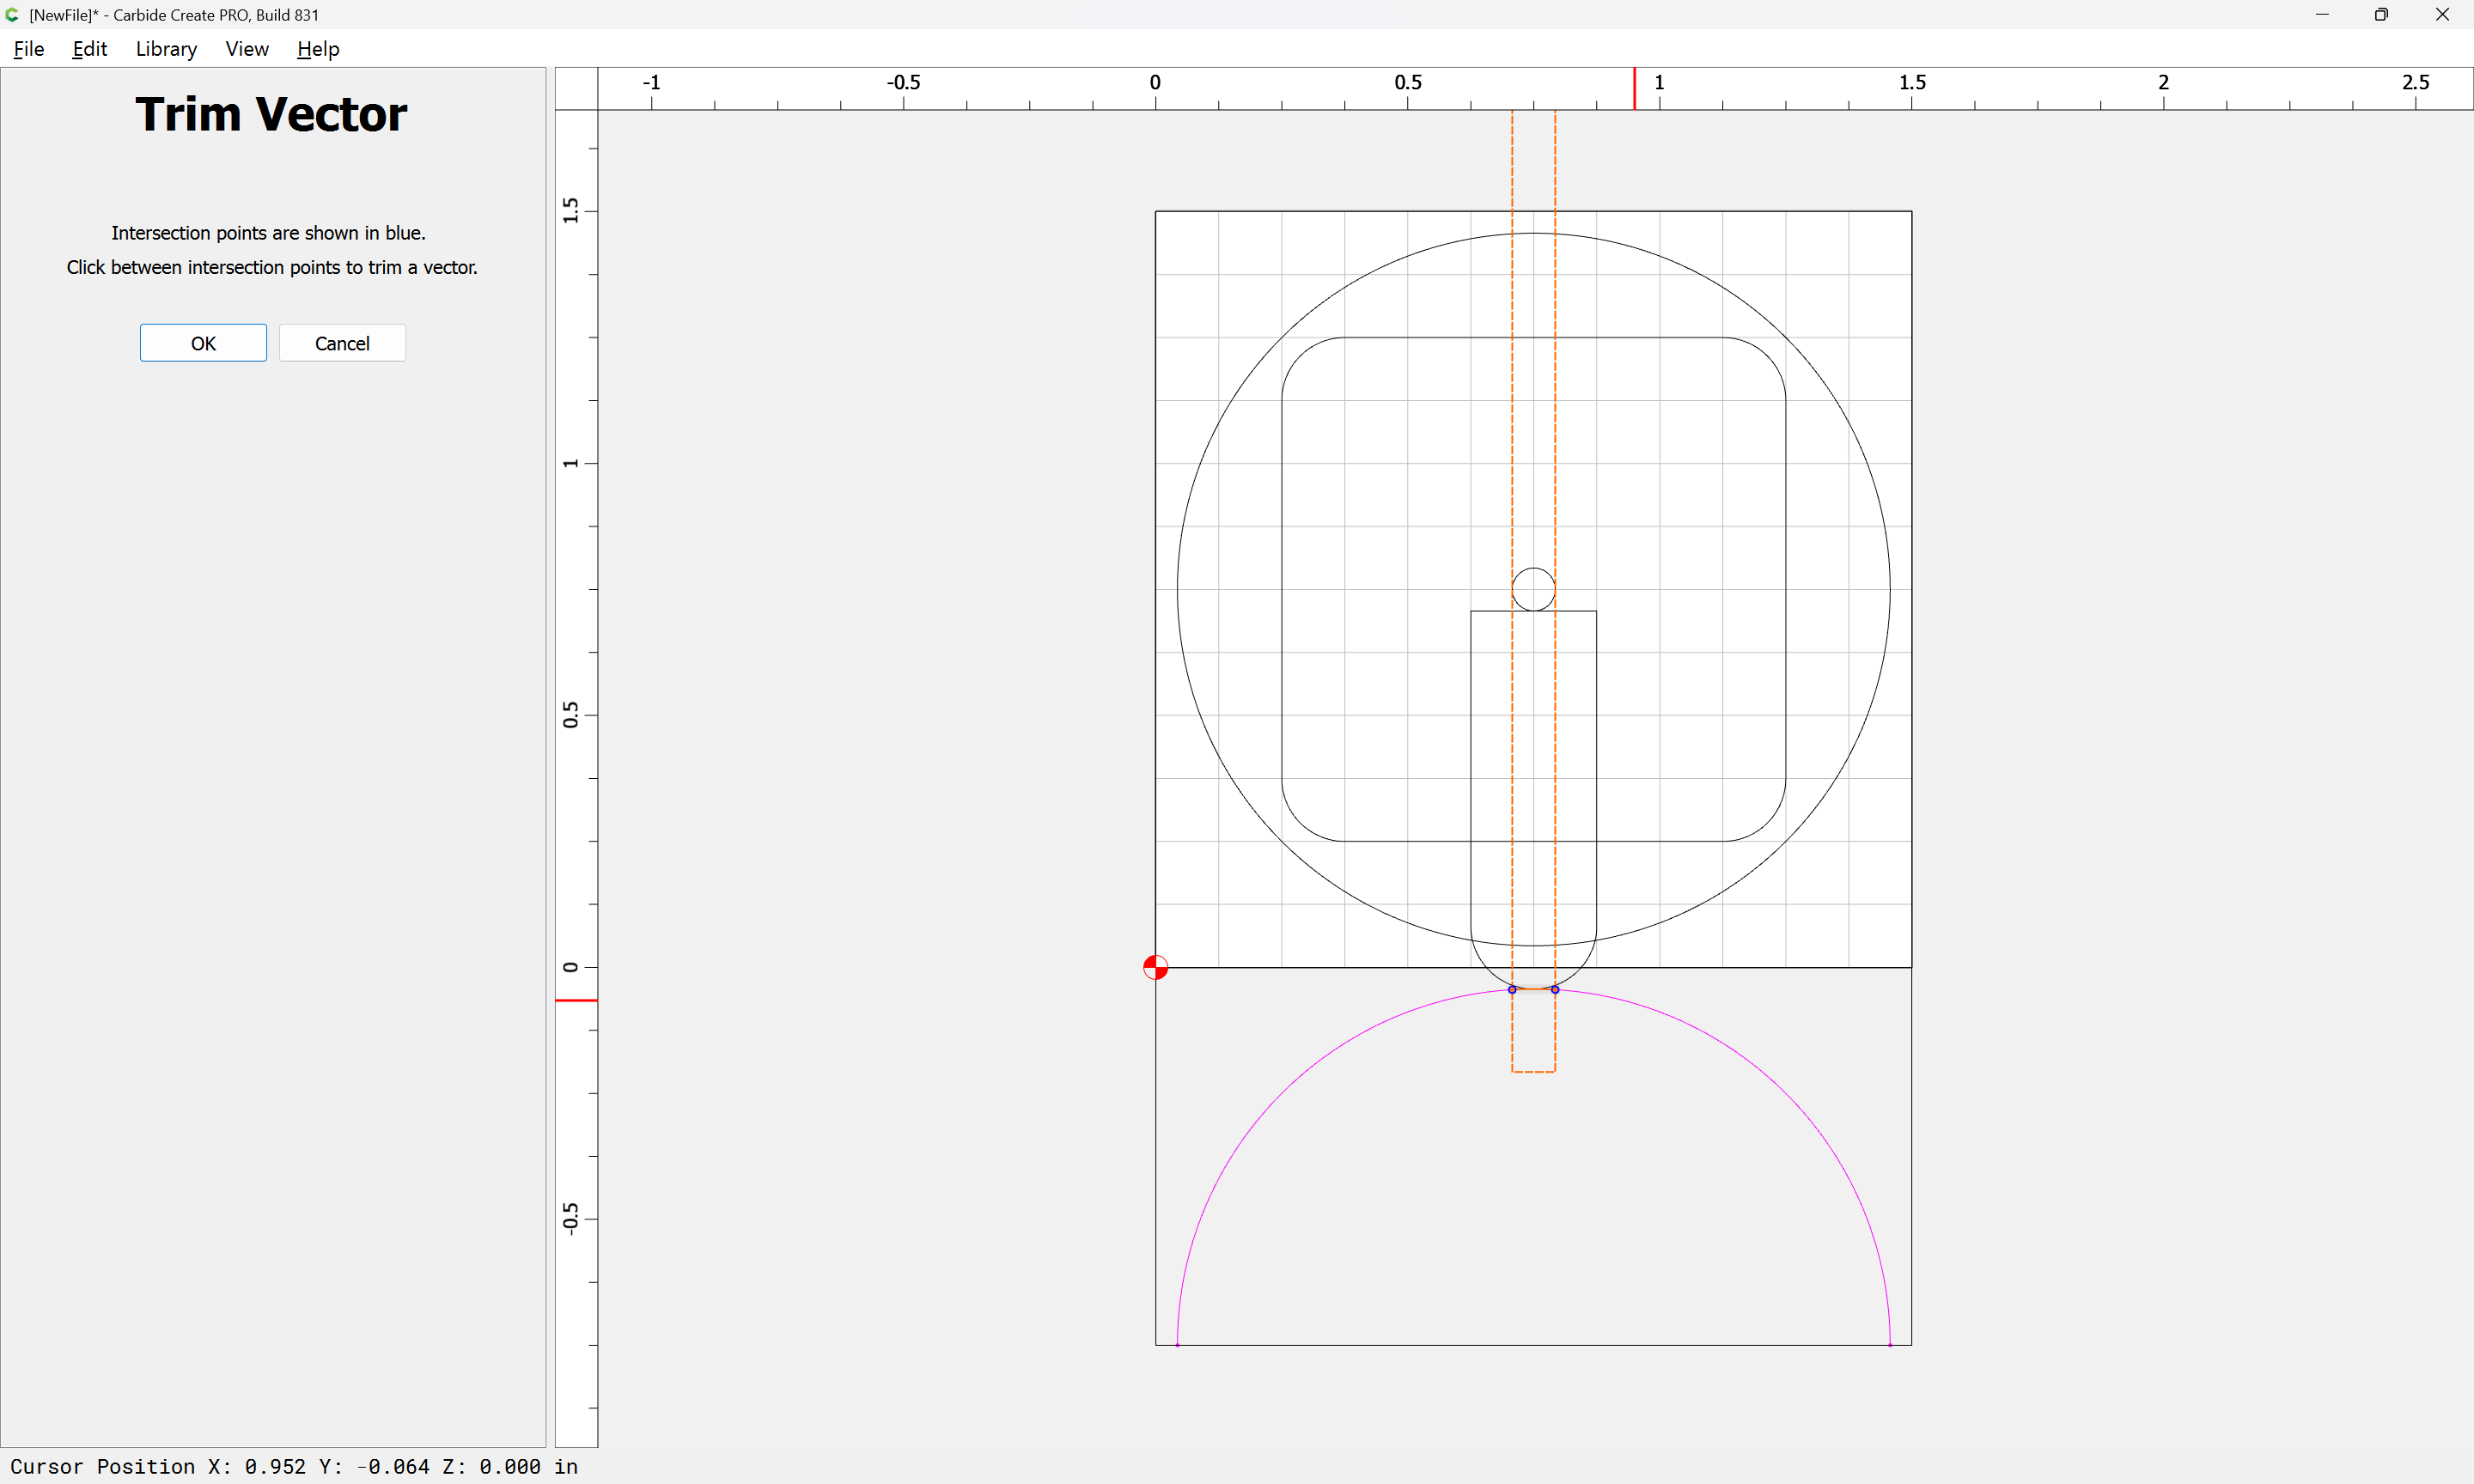
Done
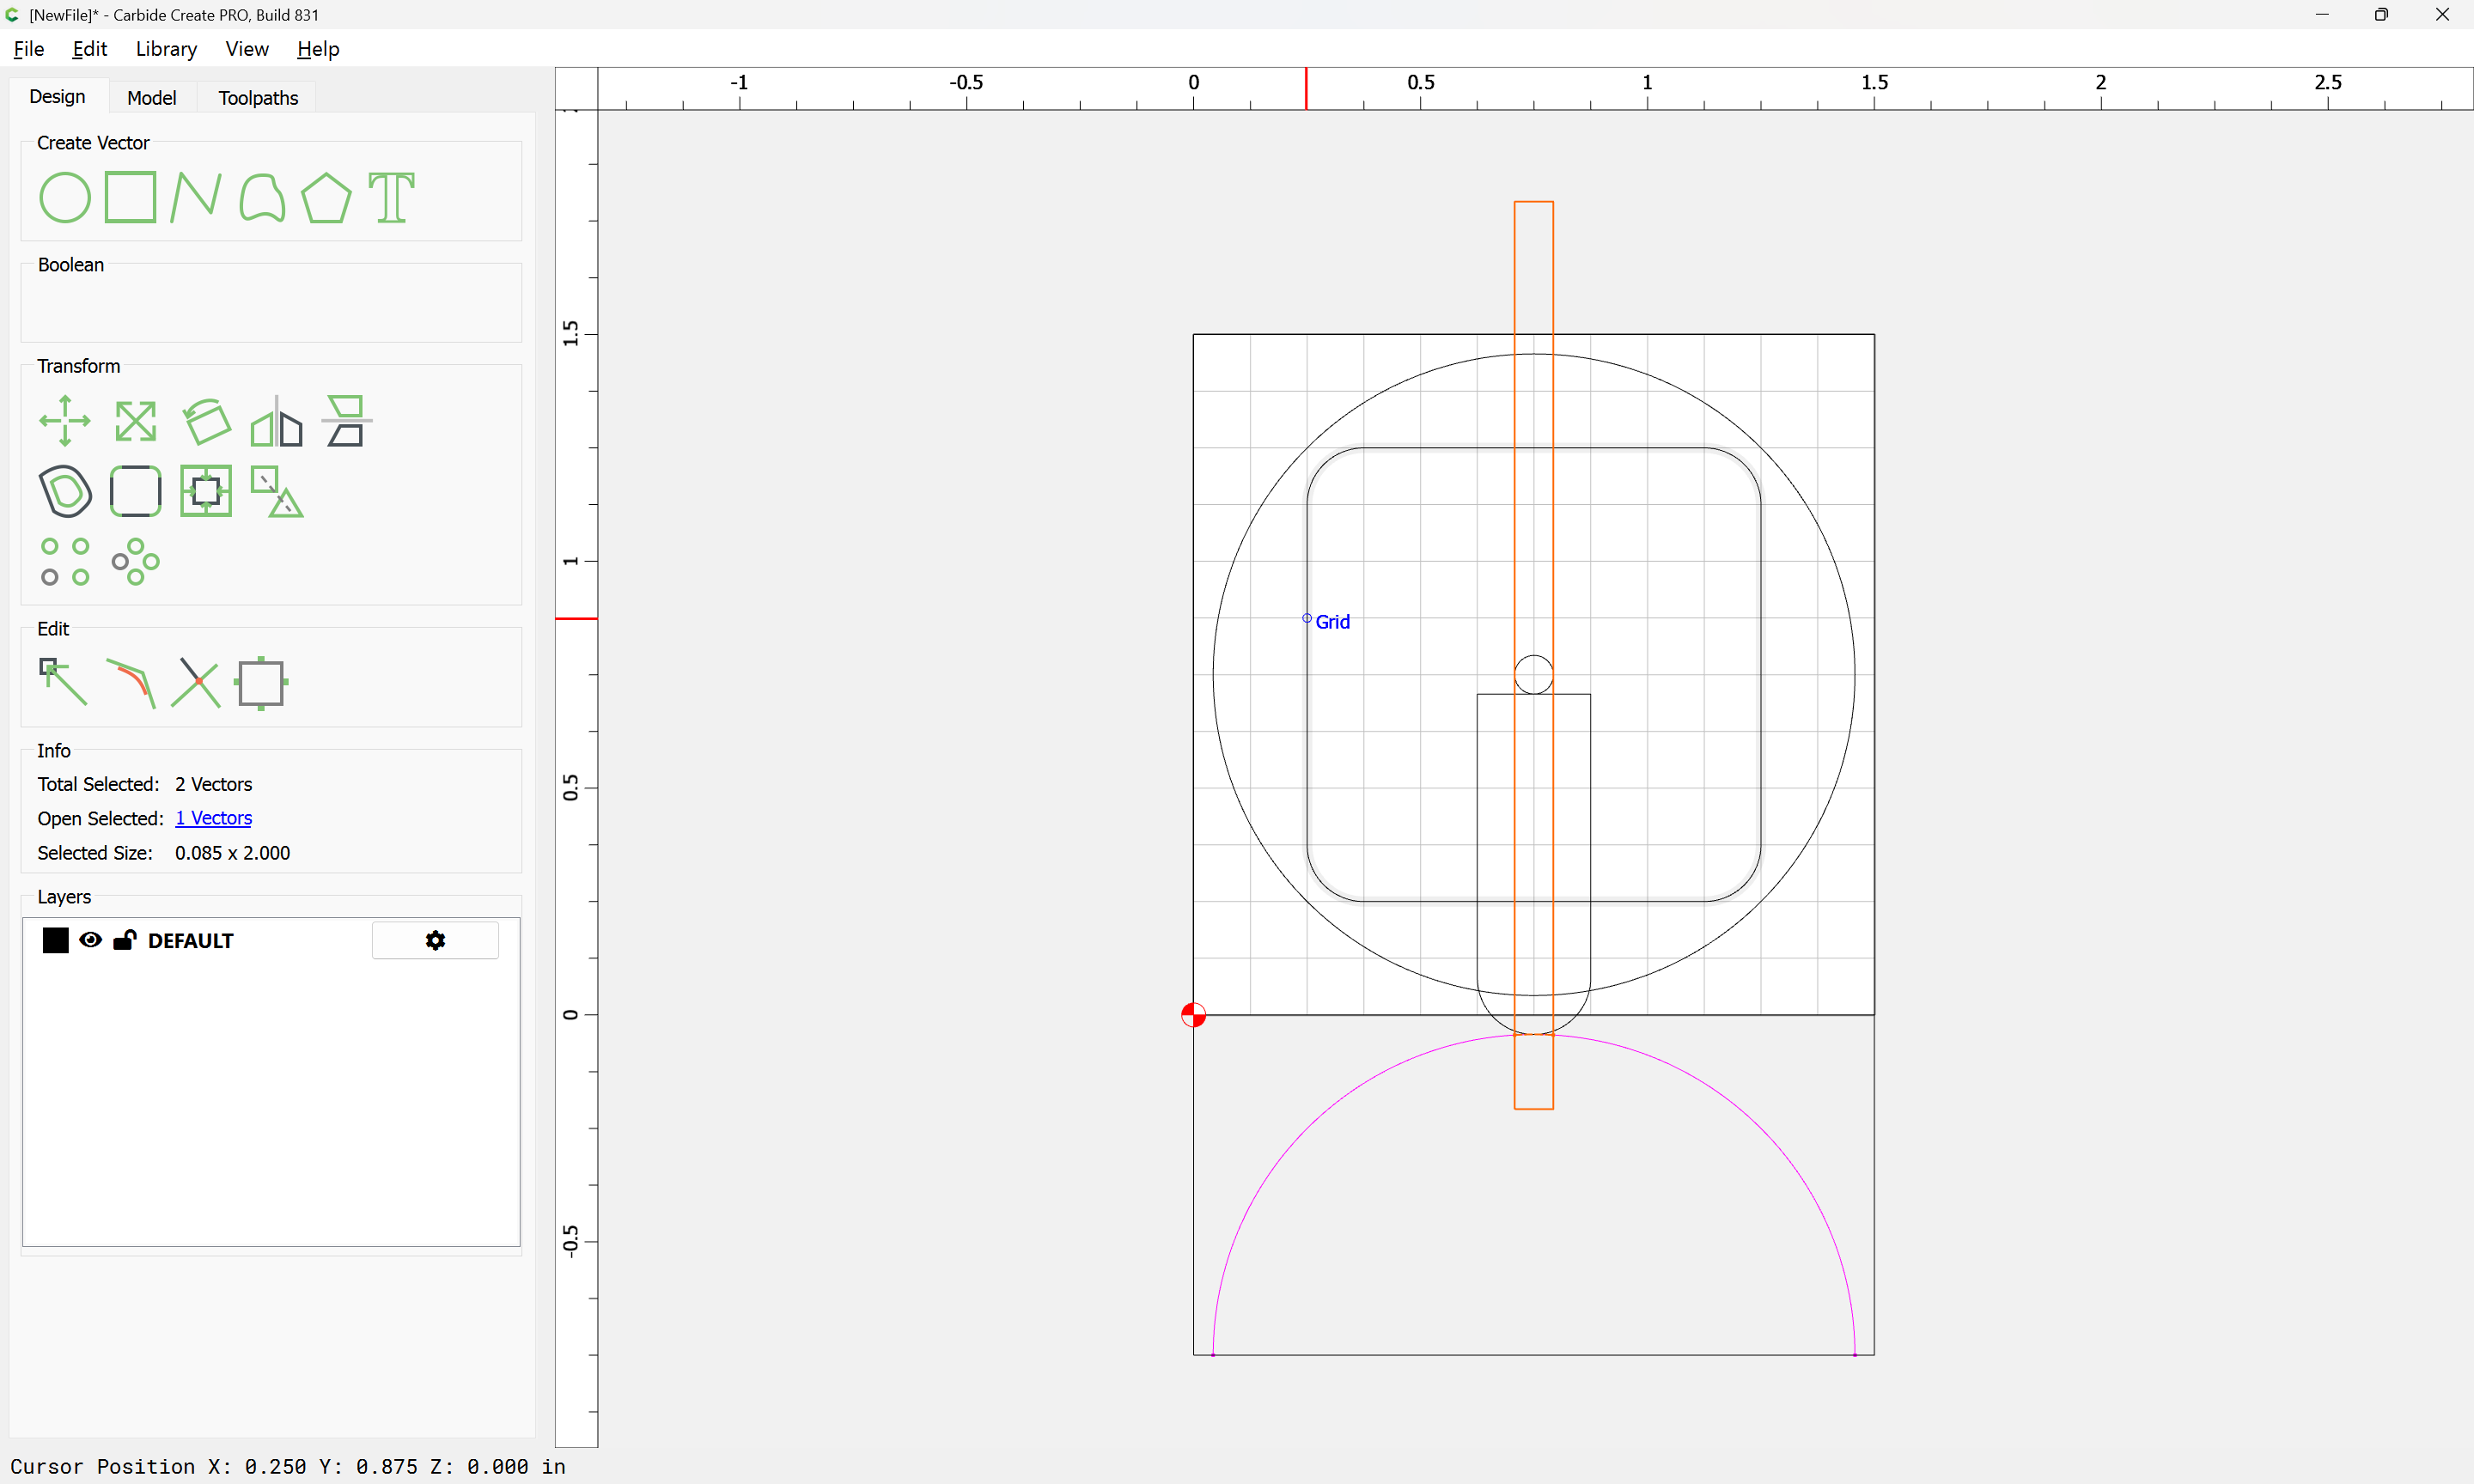
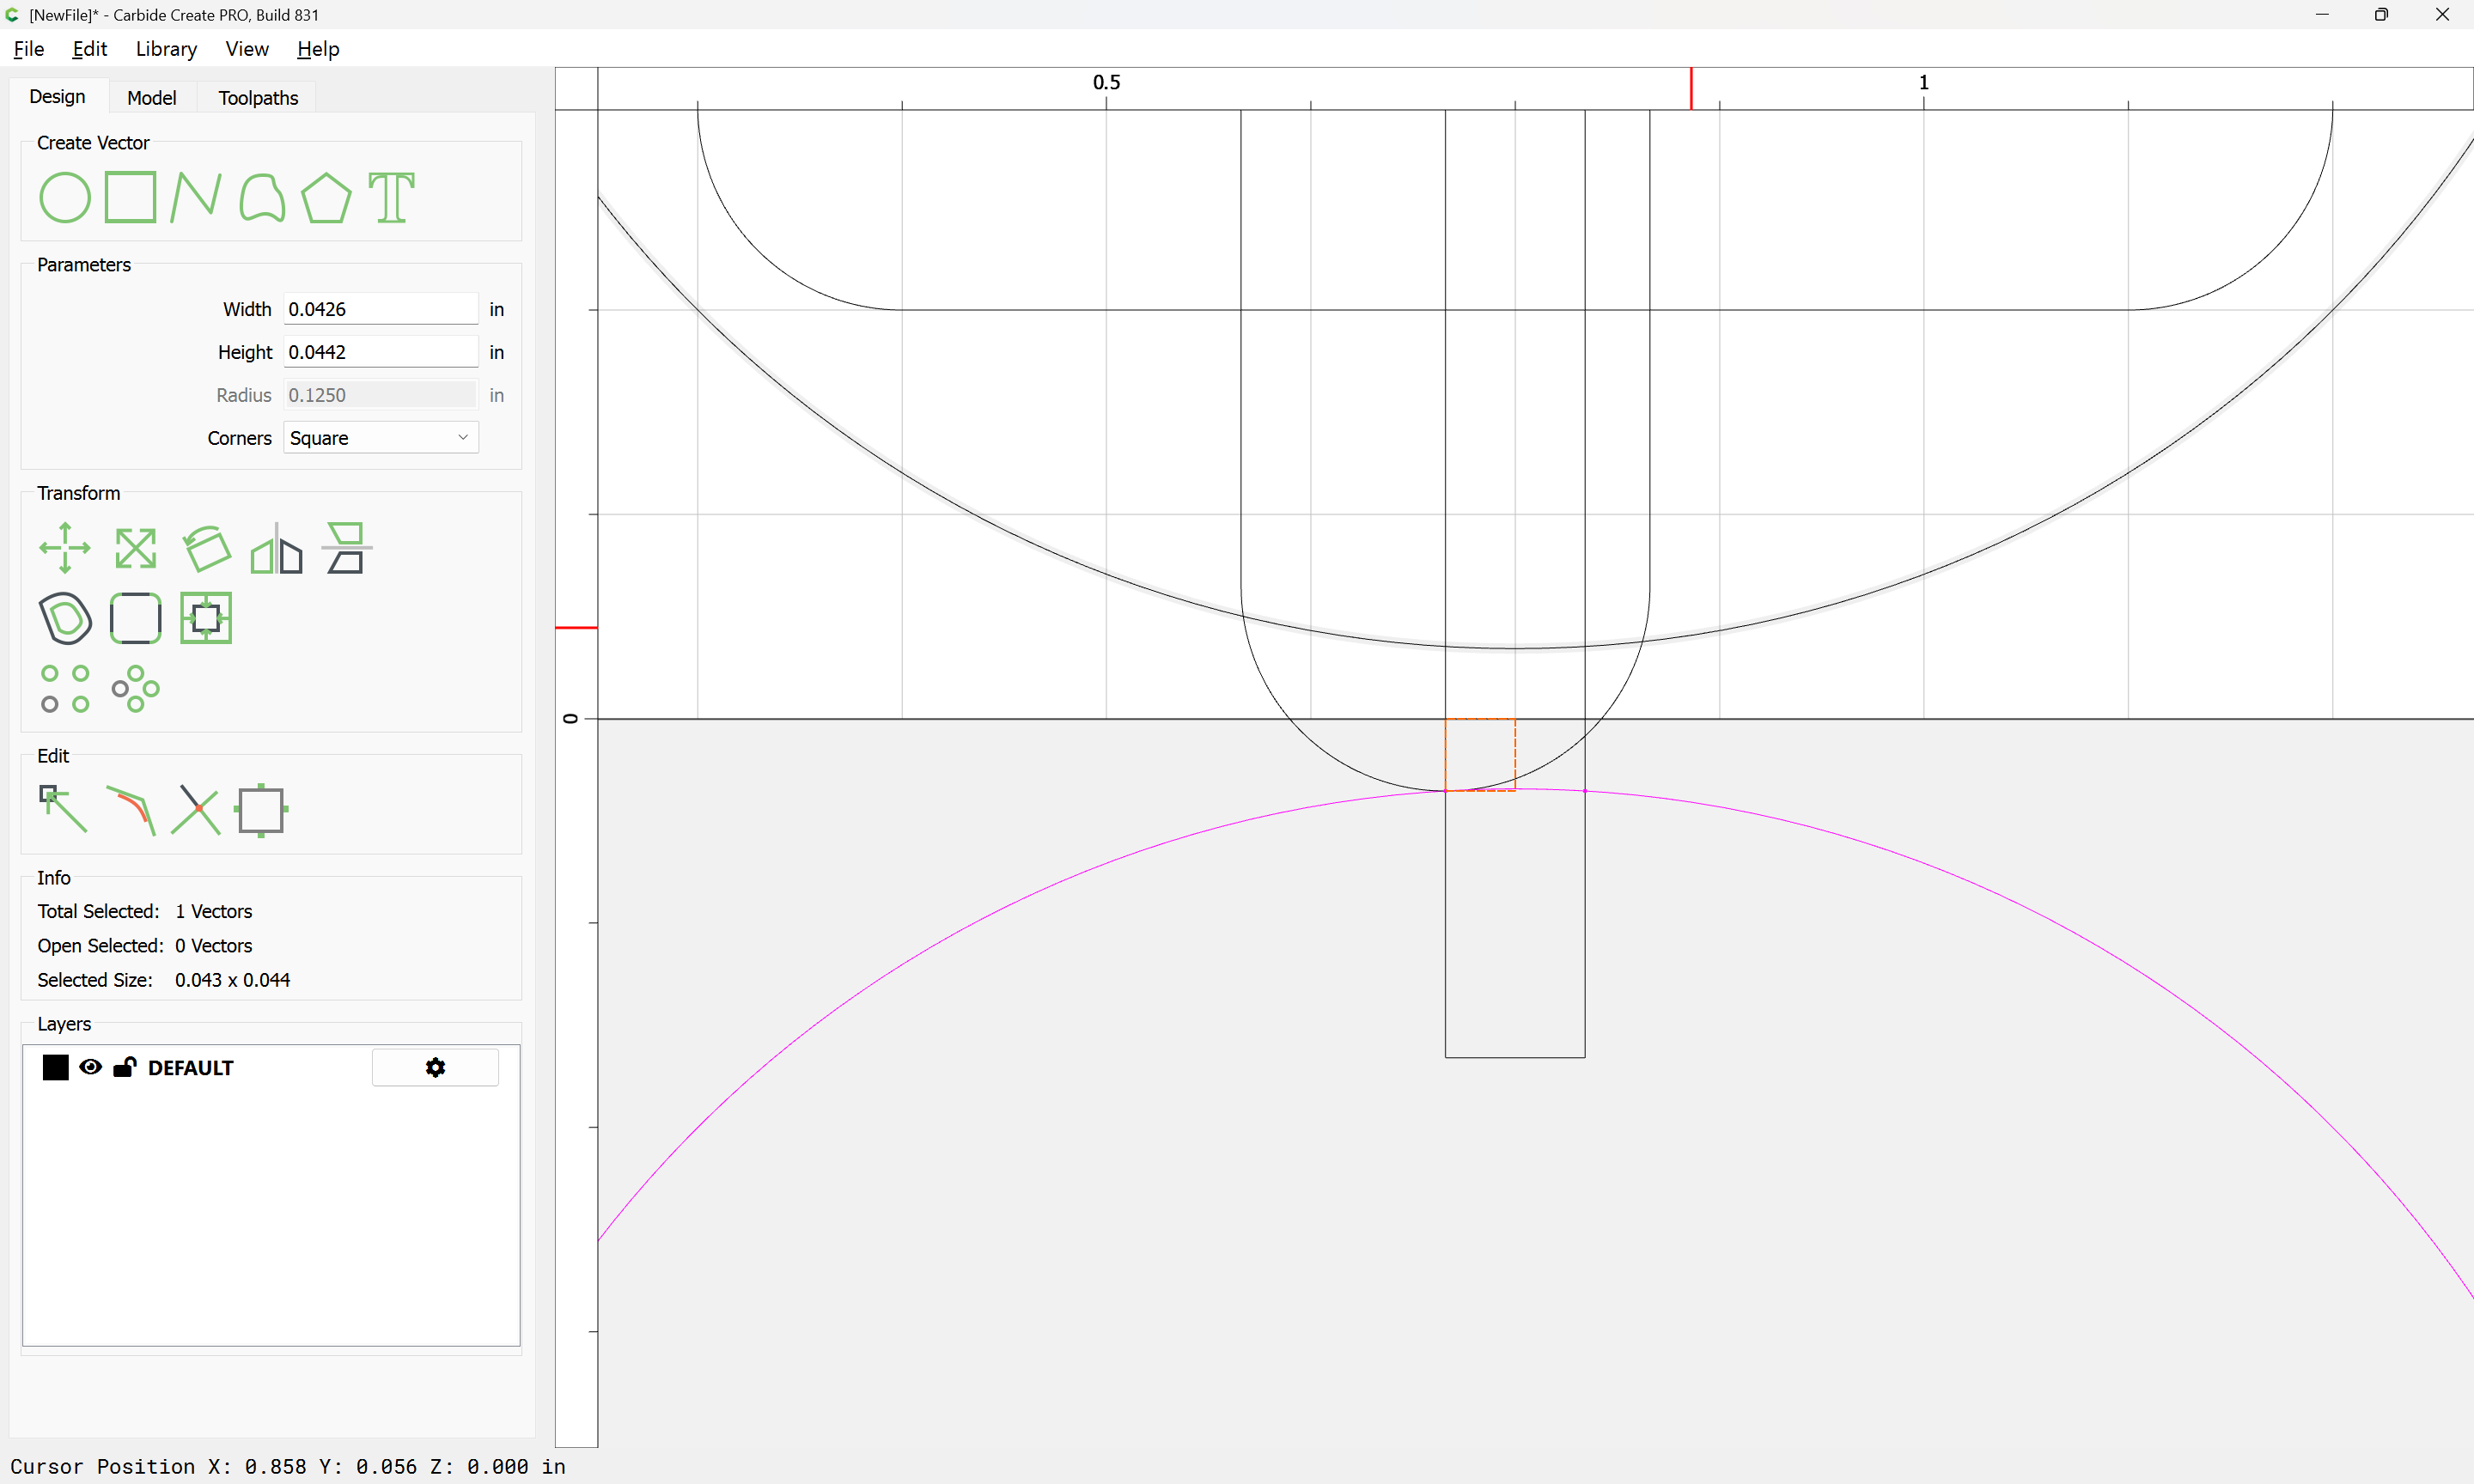
Select the isolated arc:

and then determine how far down the matching circle should be cut:
Assign a No Offset Contour to that depth:
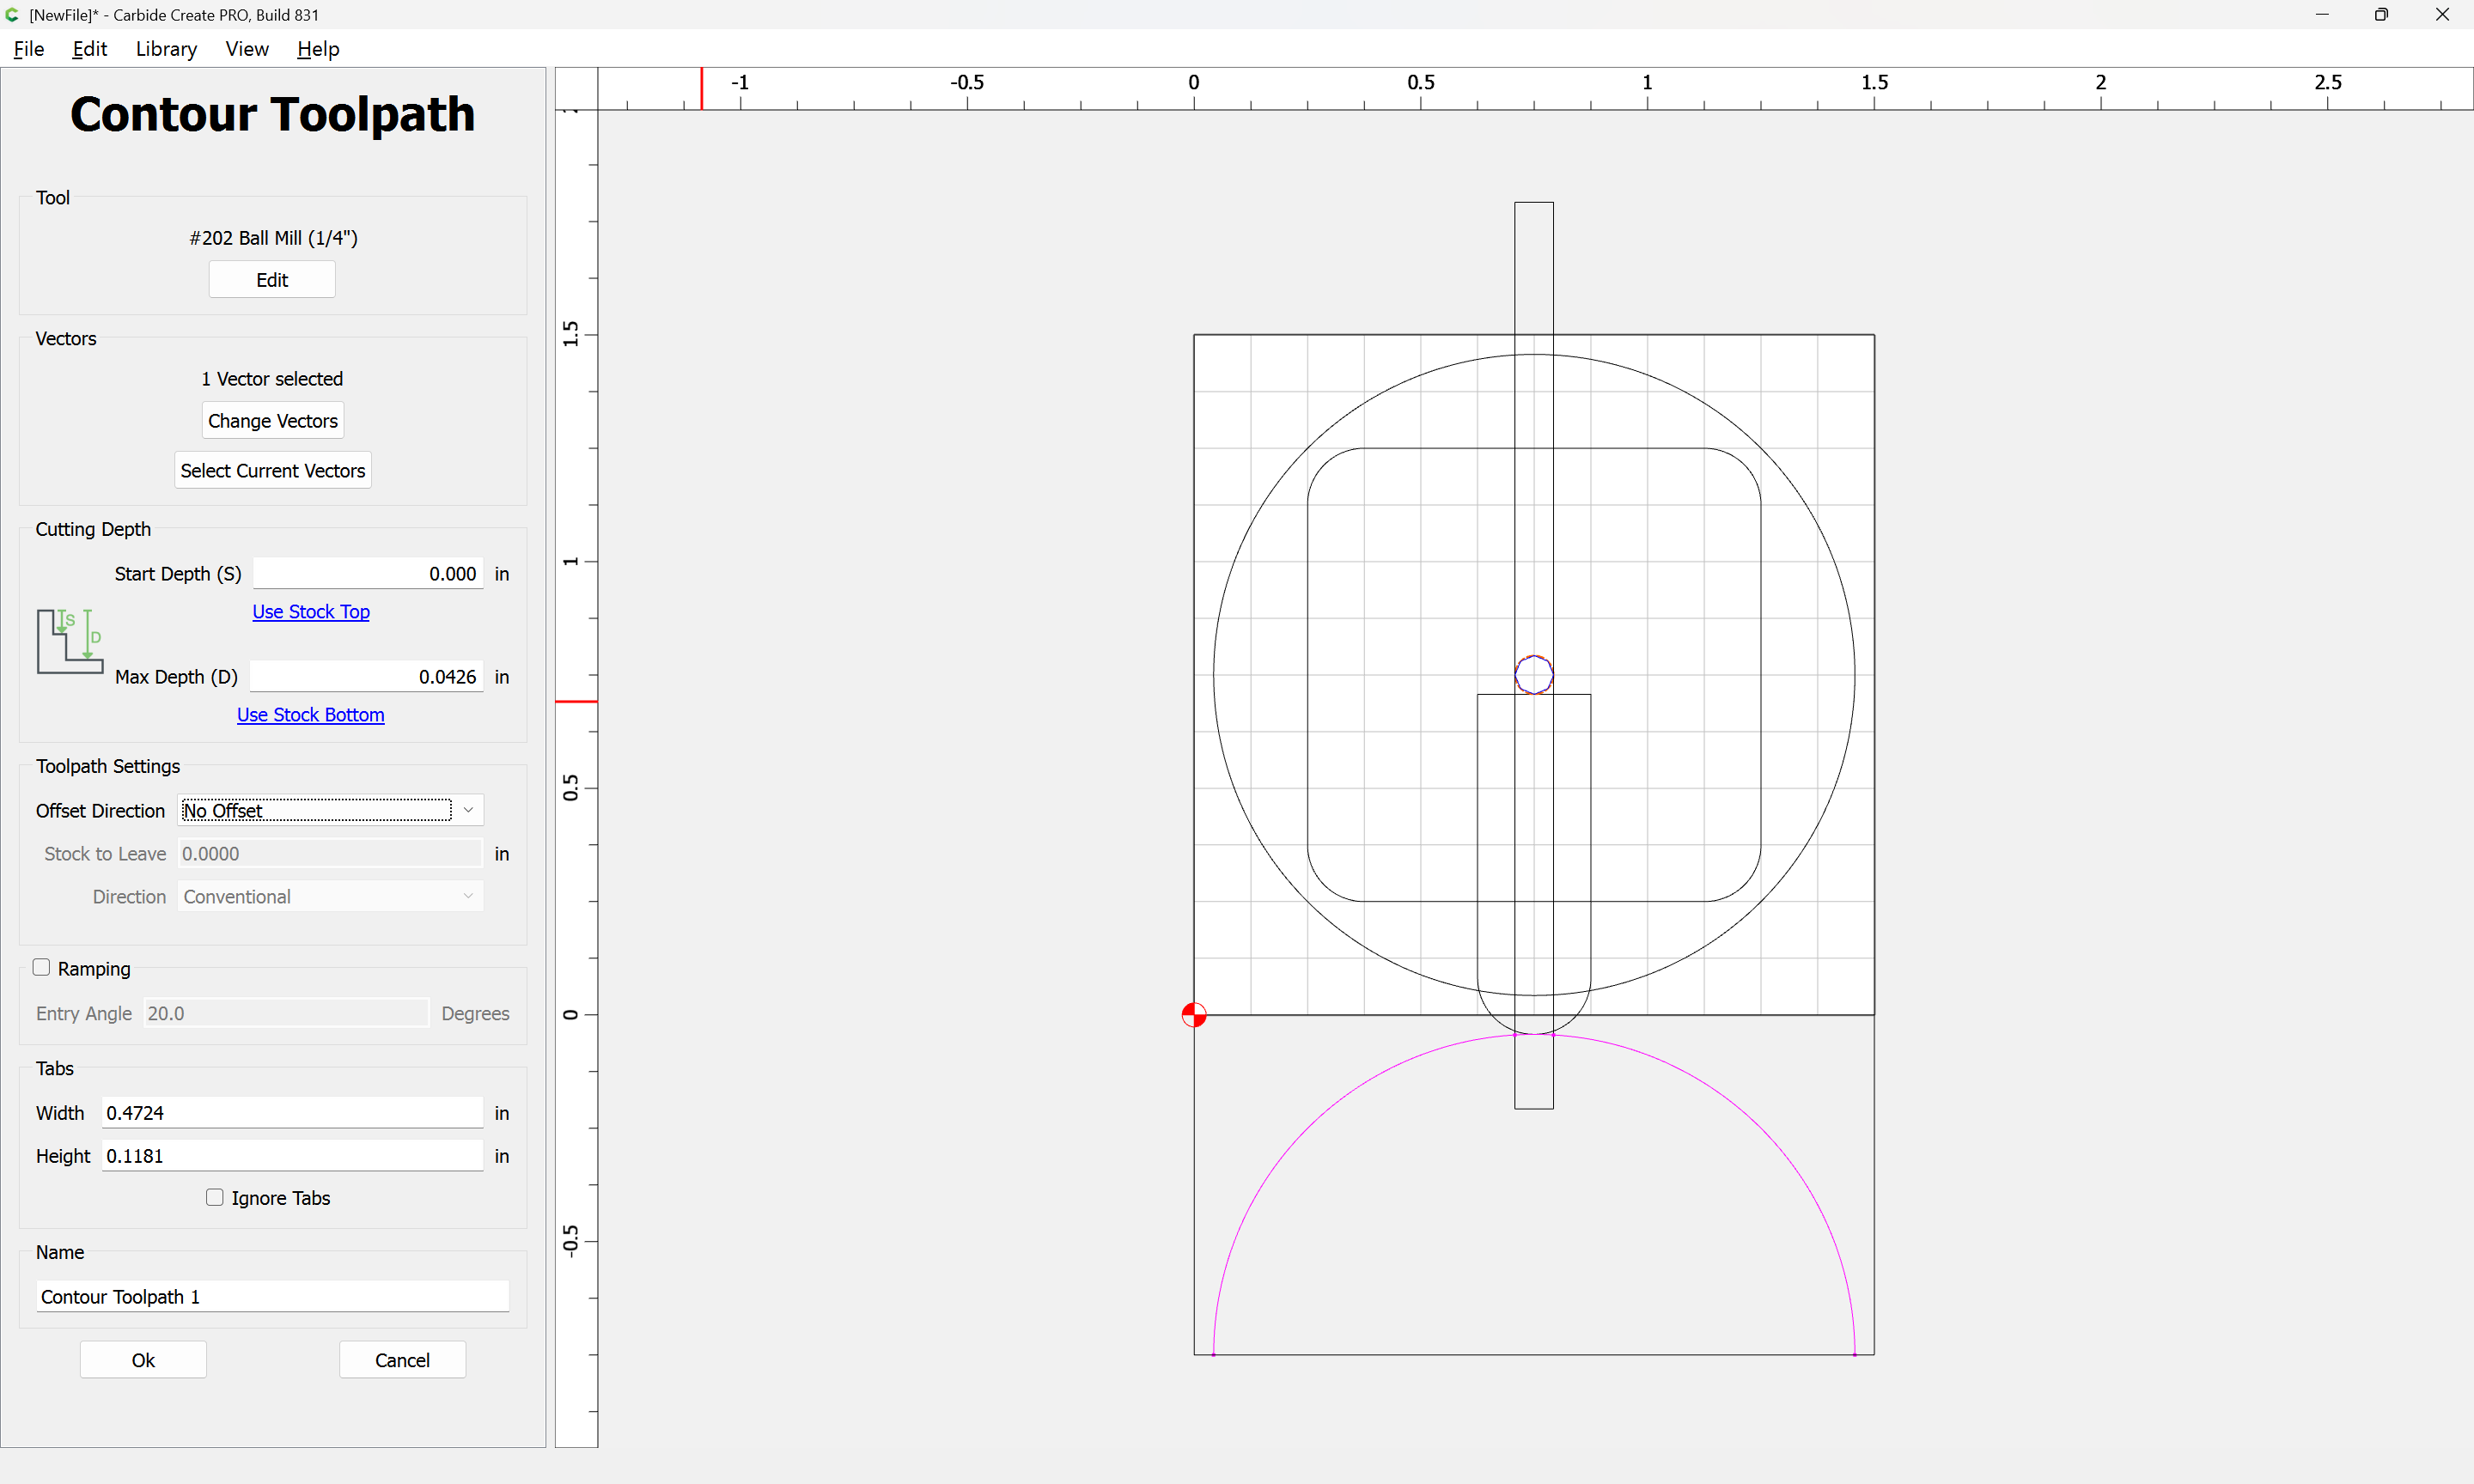
Repeat for as many circles as one feels are necessary to describe the ball…
1 Like
Note that it will be necessary to adjust things to take into account the radius of the tool (maybe using an outside profile would be easier?)
It will be necessary to adjust the depth to match what is indicated by an intersection of the radius, adjusted for the toolpath — probably the easiest way to do this would be to reposition the tool outline, then measure the position of its tip, then create a circle and toolpath depth to match.

Eventually one arrives at:
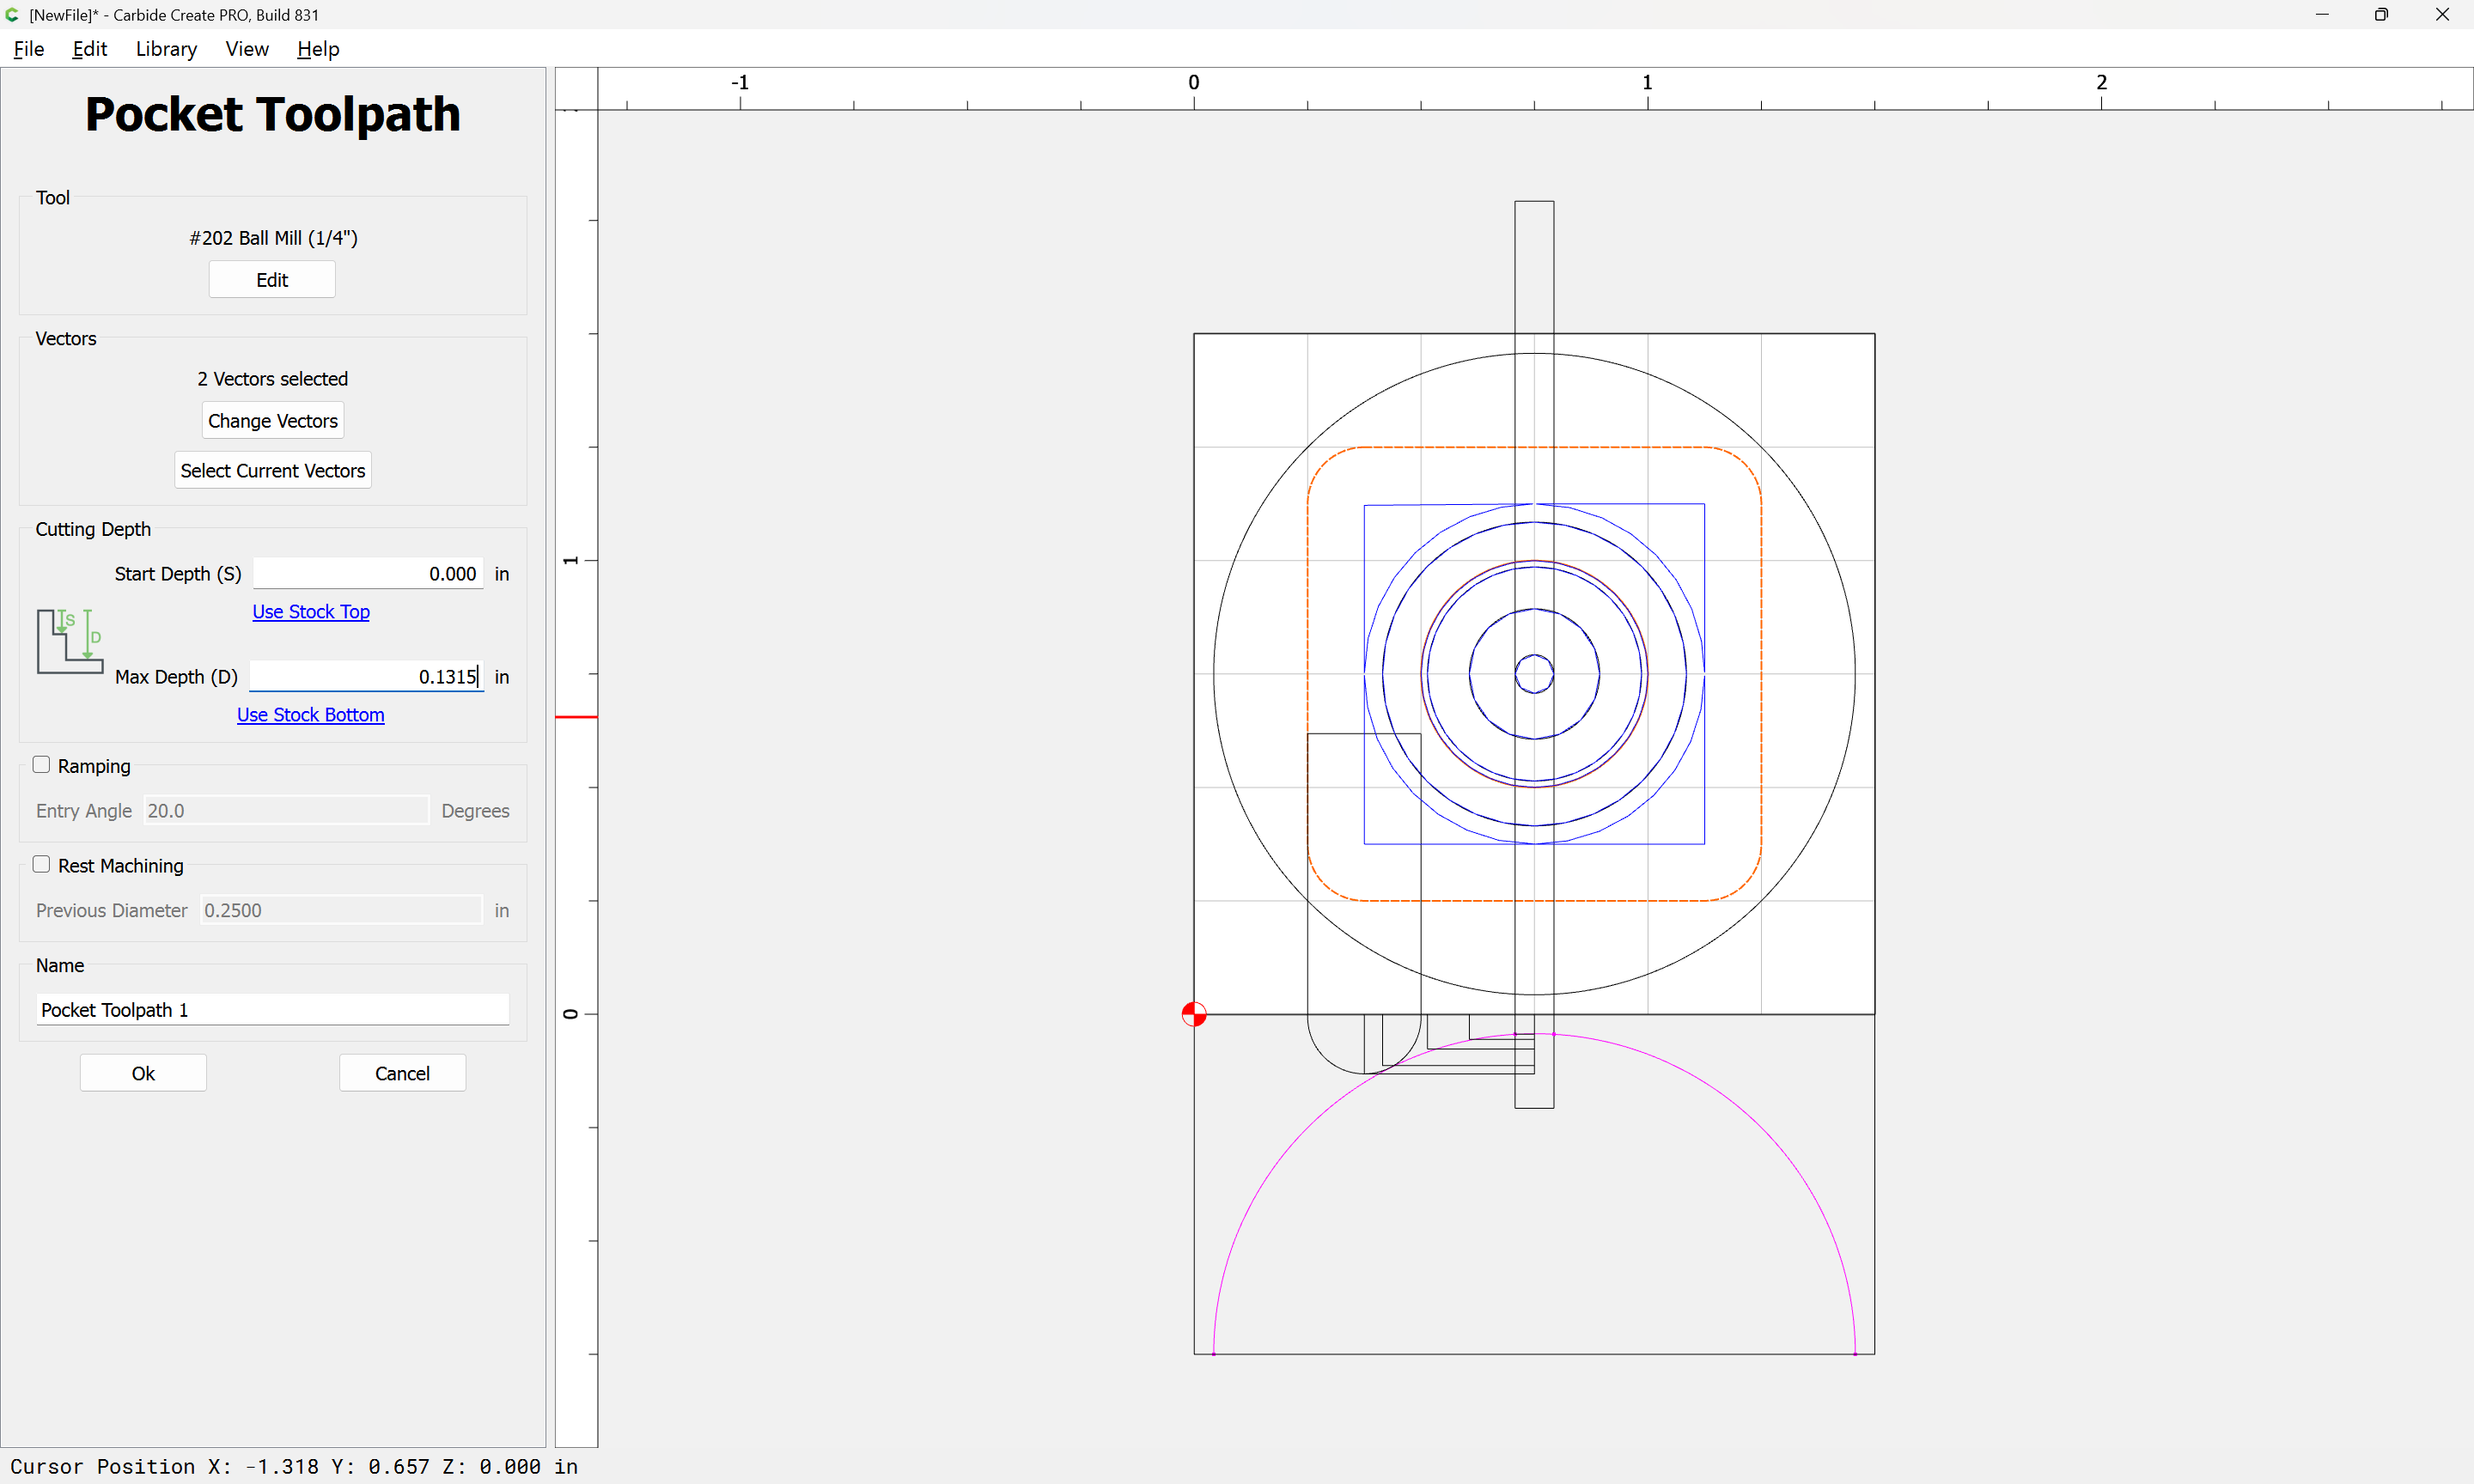
but it’s actually easier to inset the last circle by the radius of the tool:
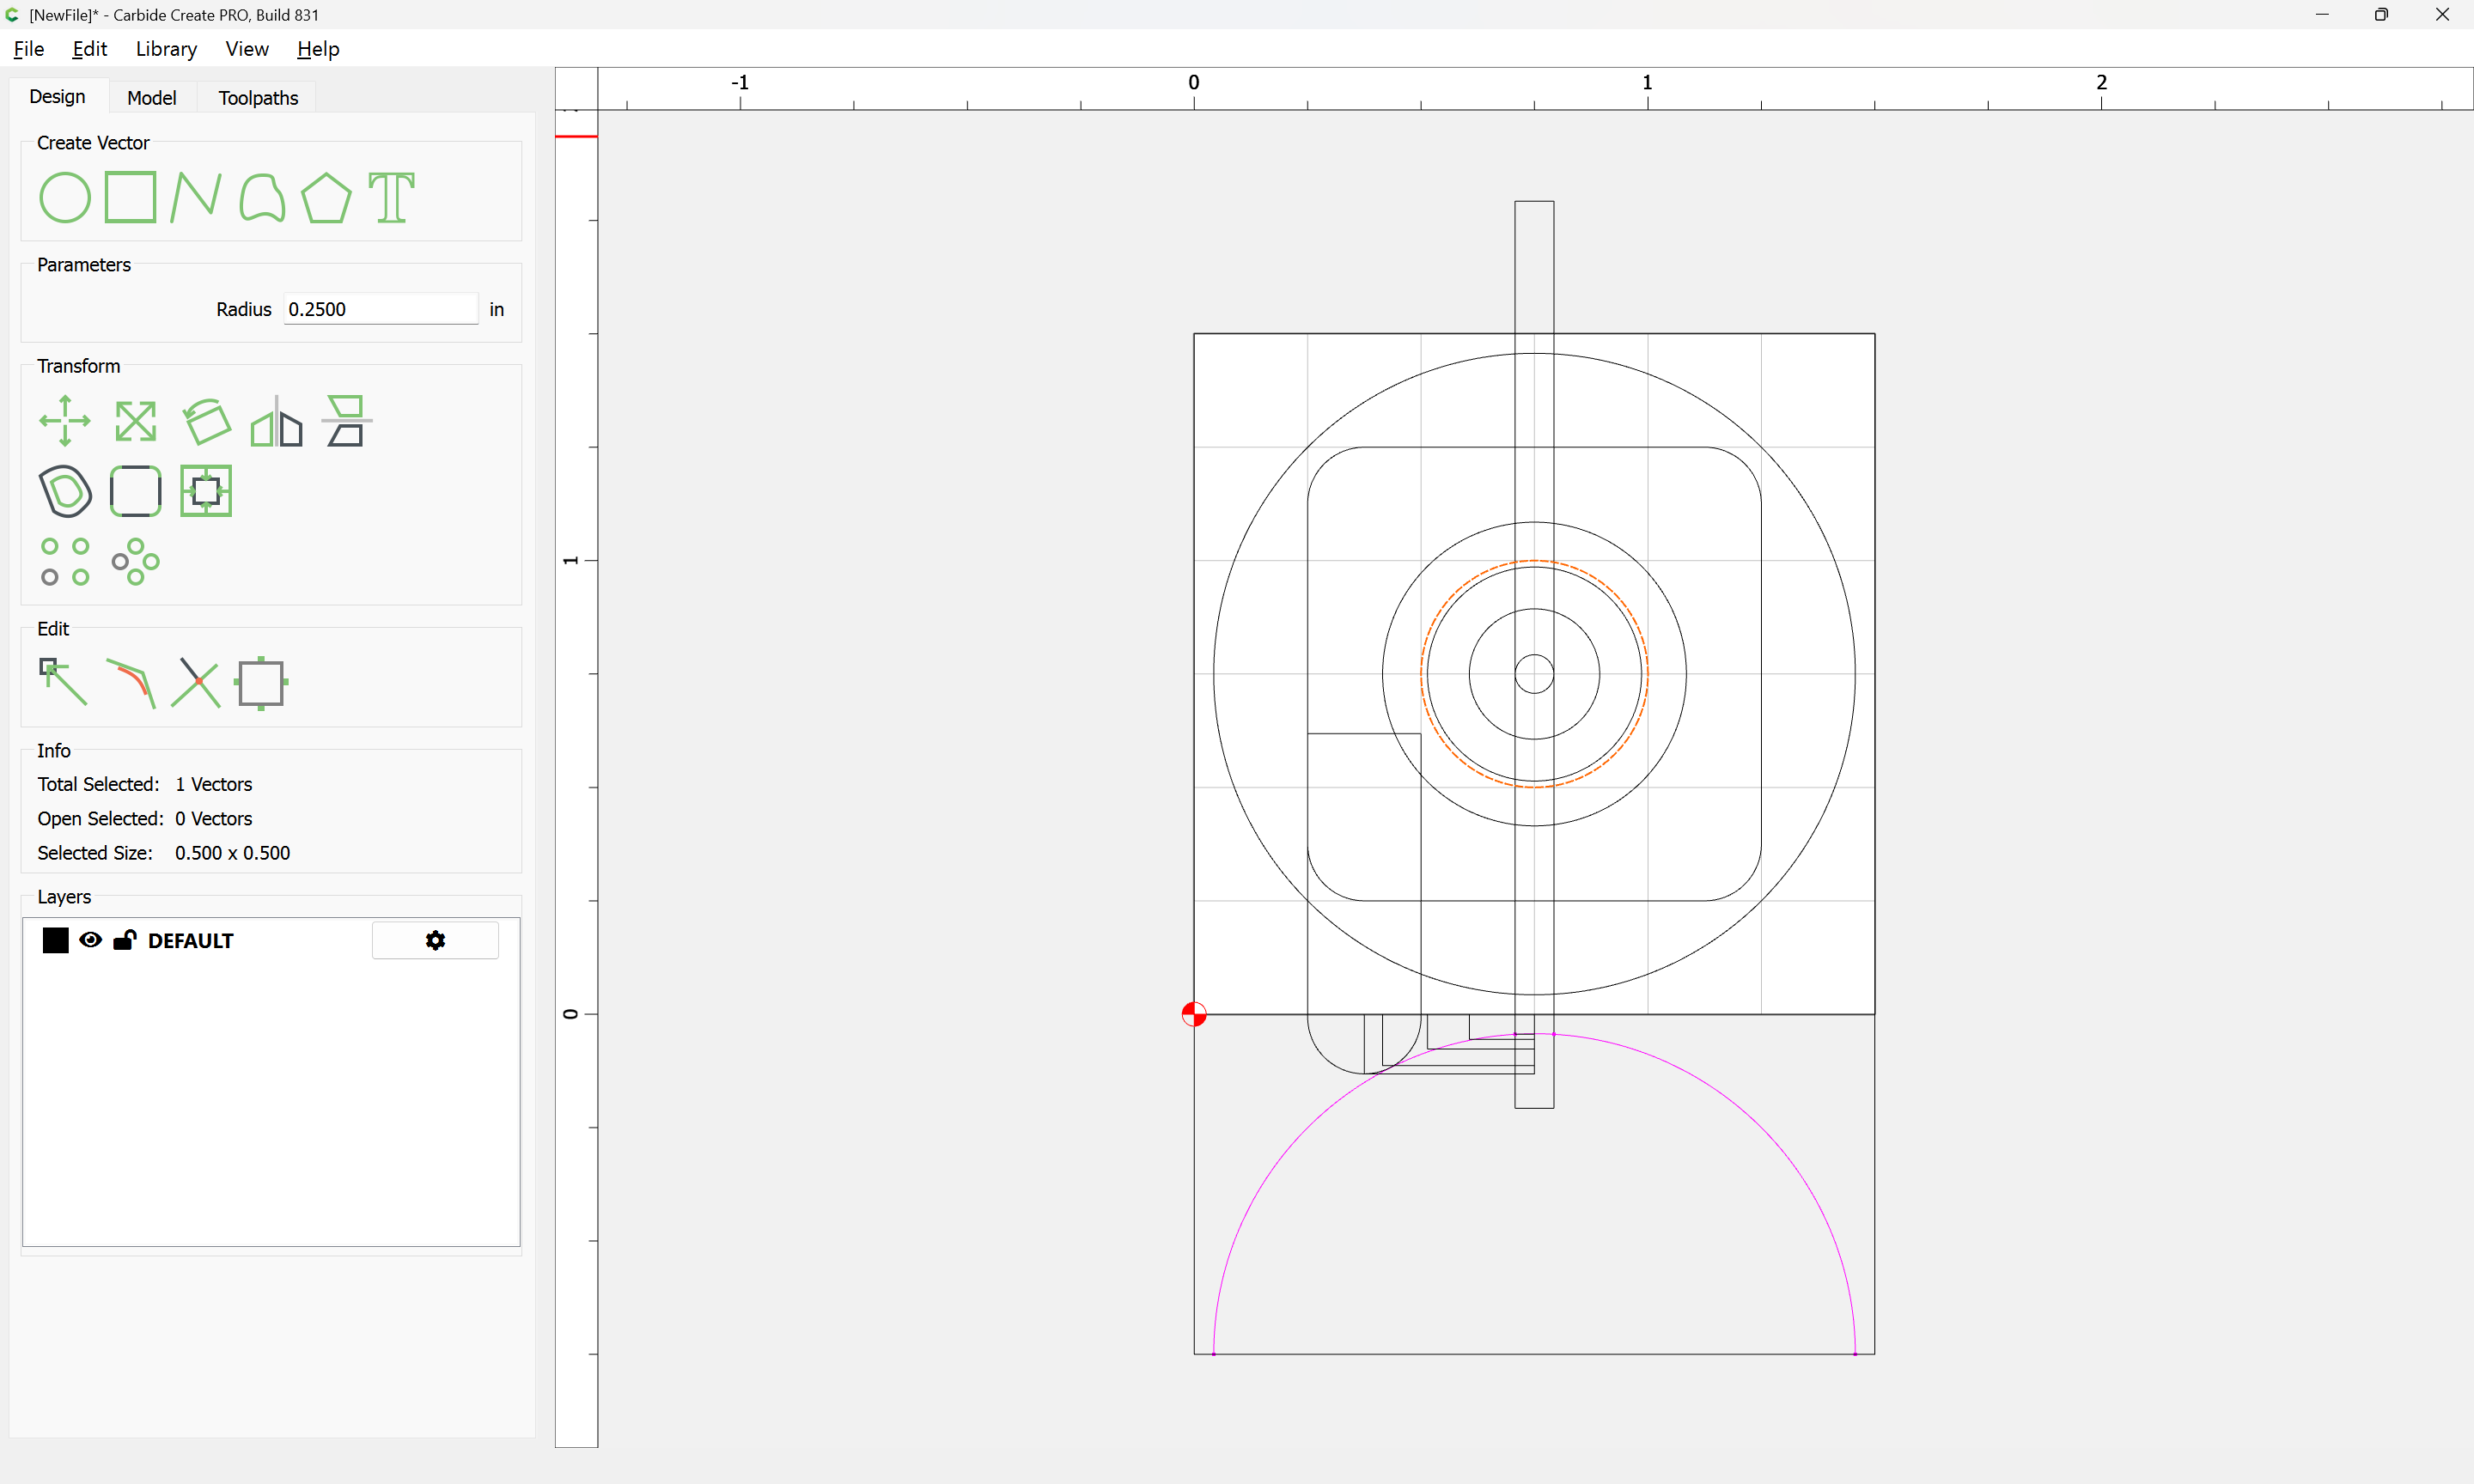
and cut as a pocket down to that depth:
Attached as a v8 file, in case anyone feels inclined to pursue this:
trapped_ball_v8.c2d (68 KB)
3 Likes
Will, you are off the scale. Nothing is too much. Thanks !
3 Likes
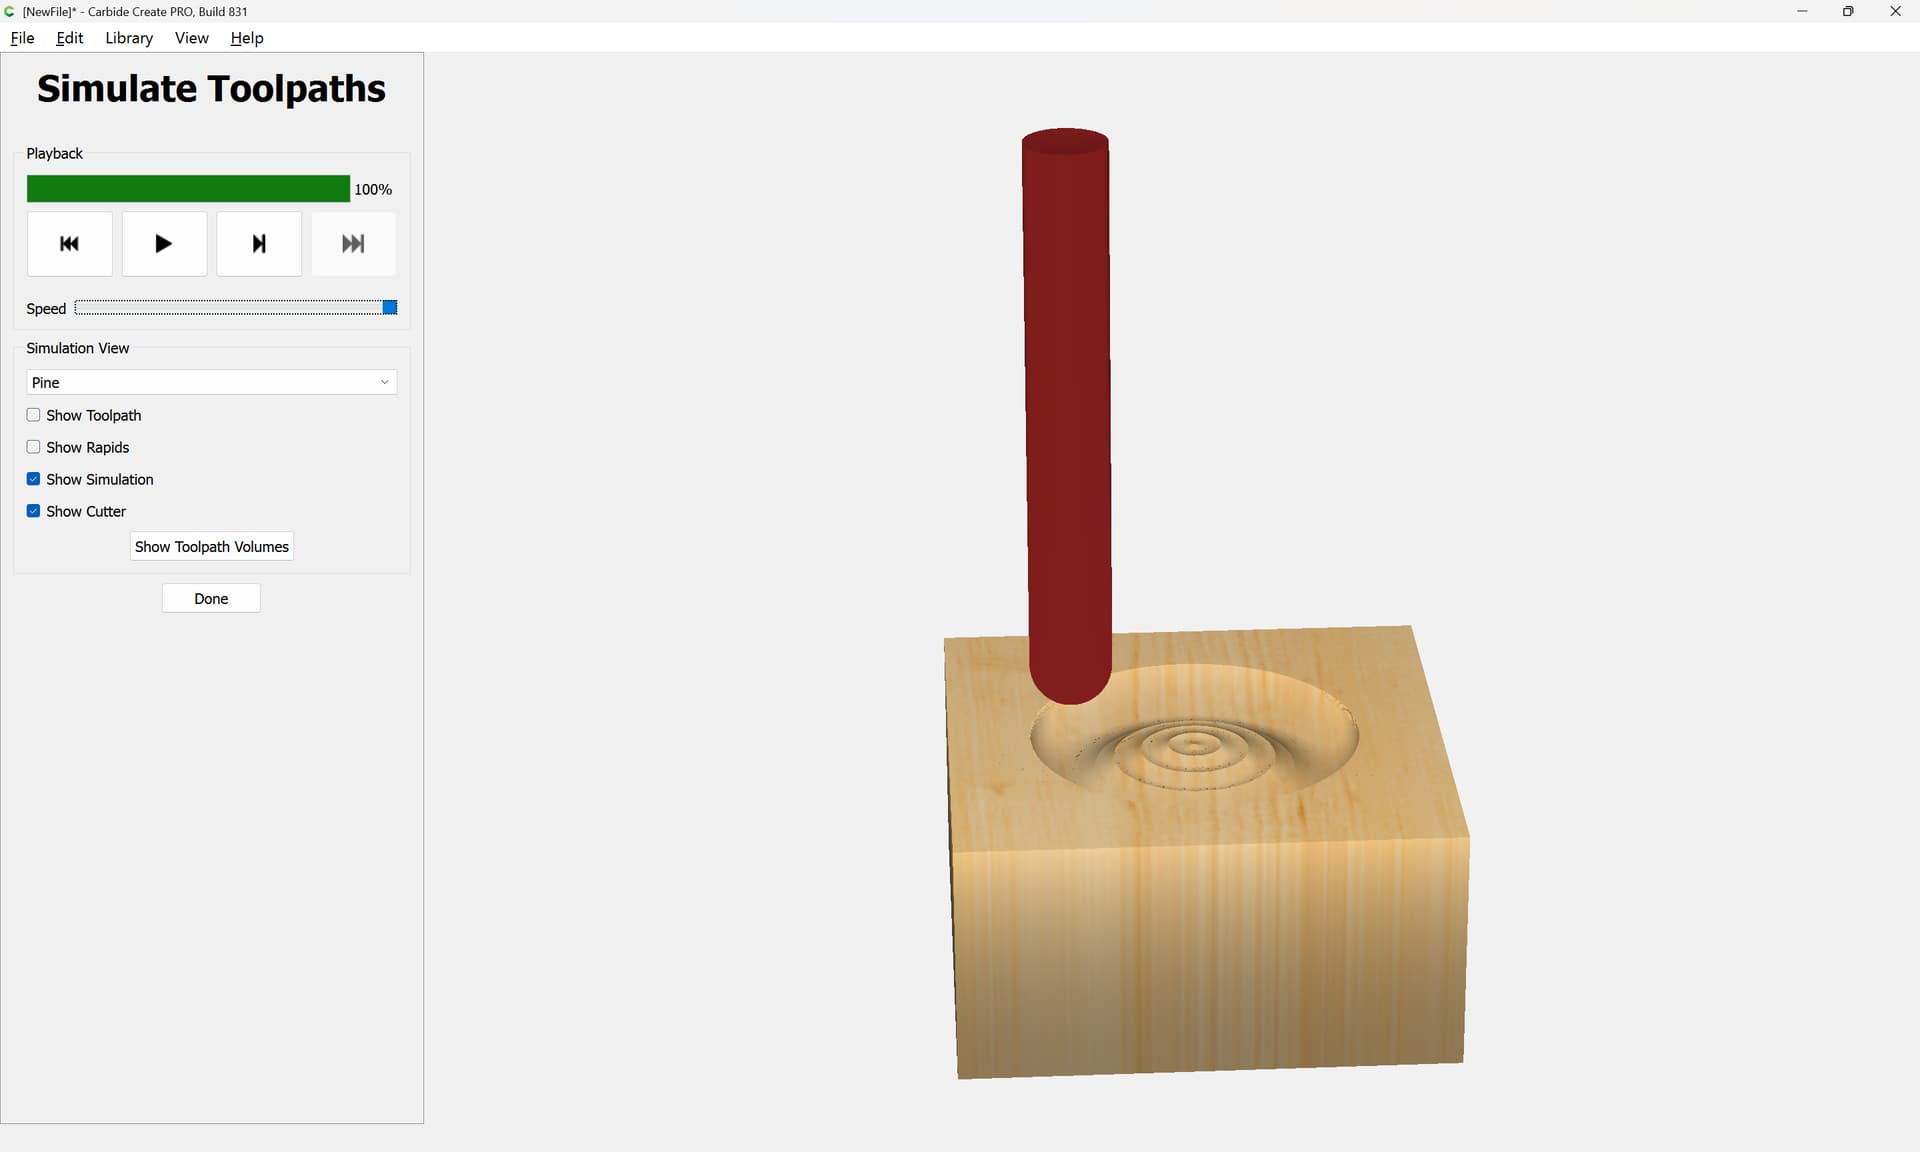
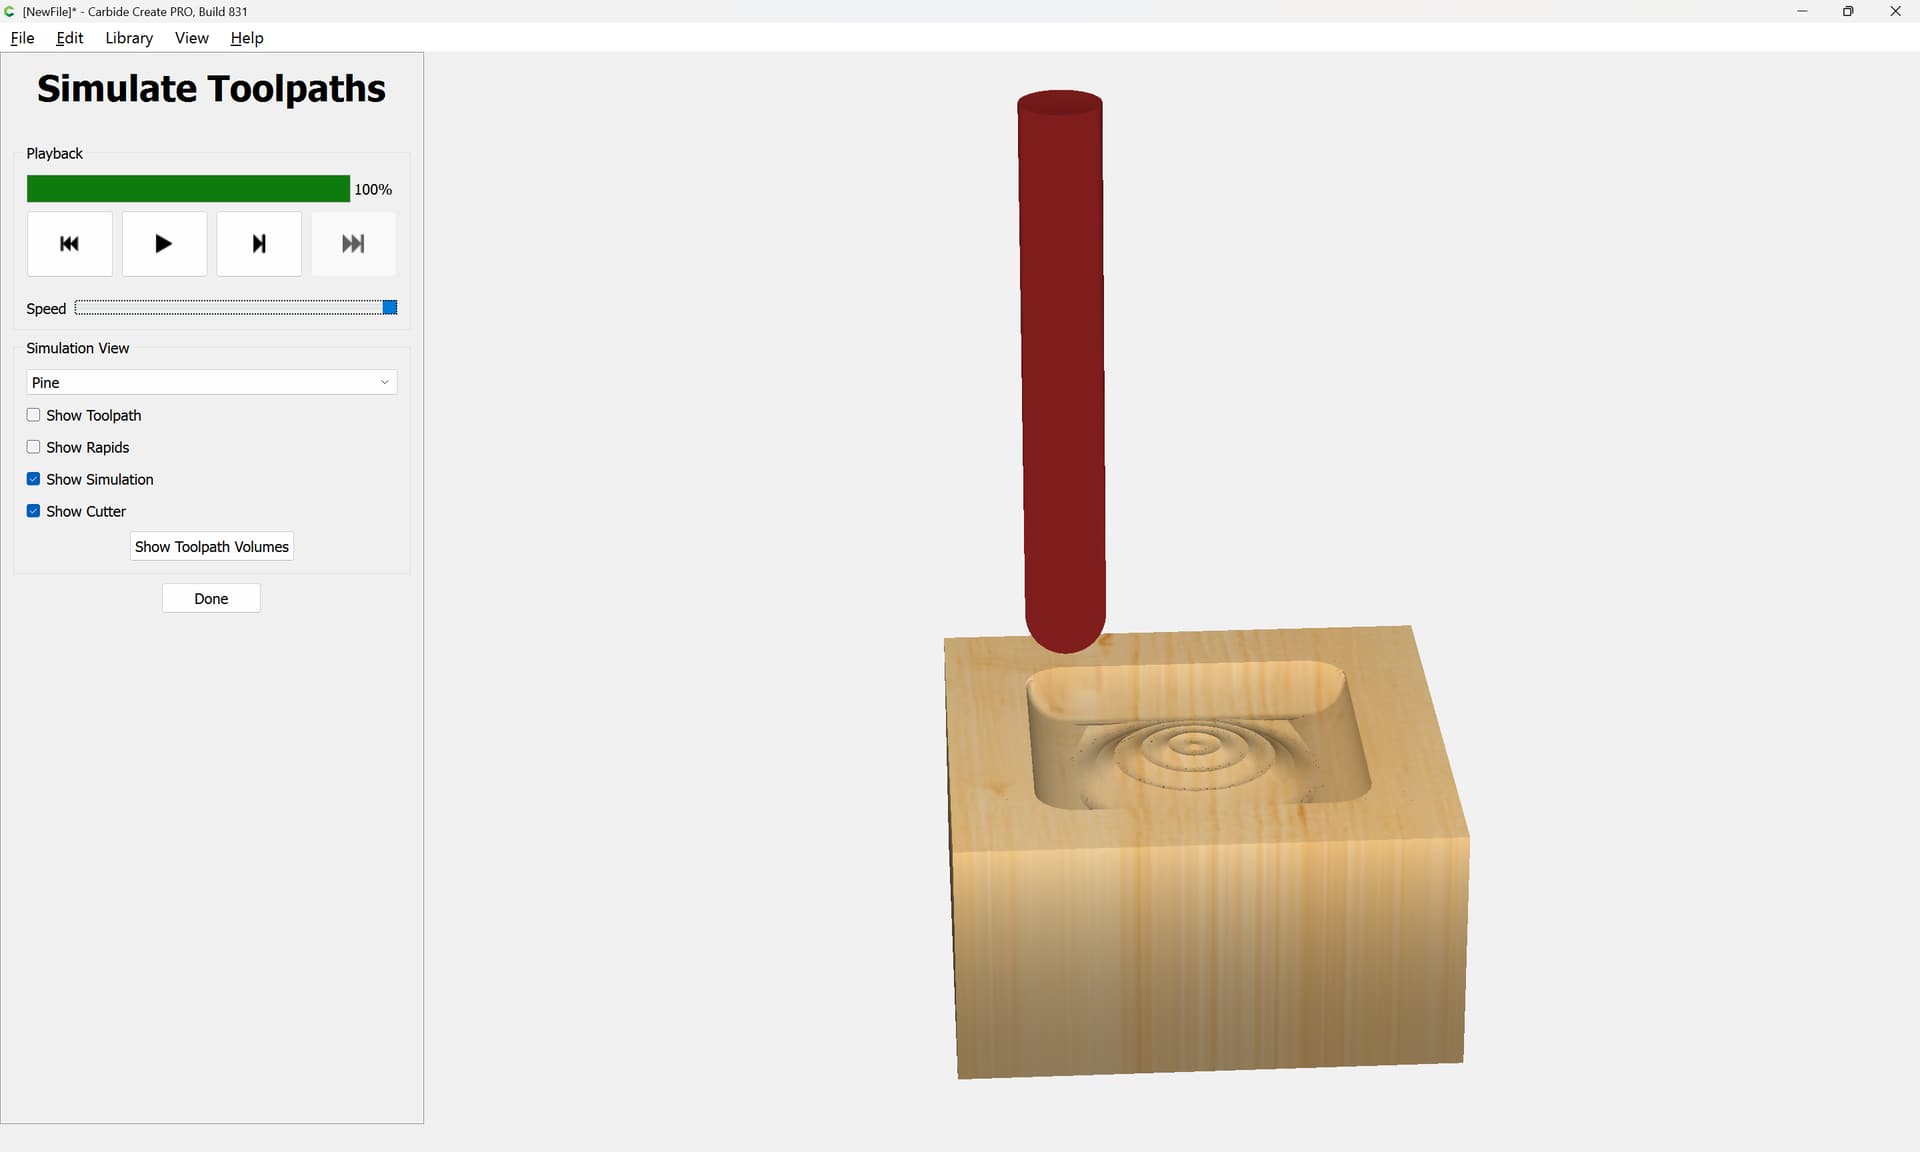
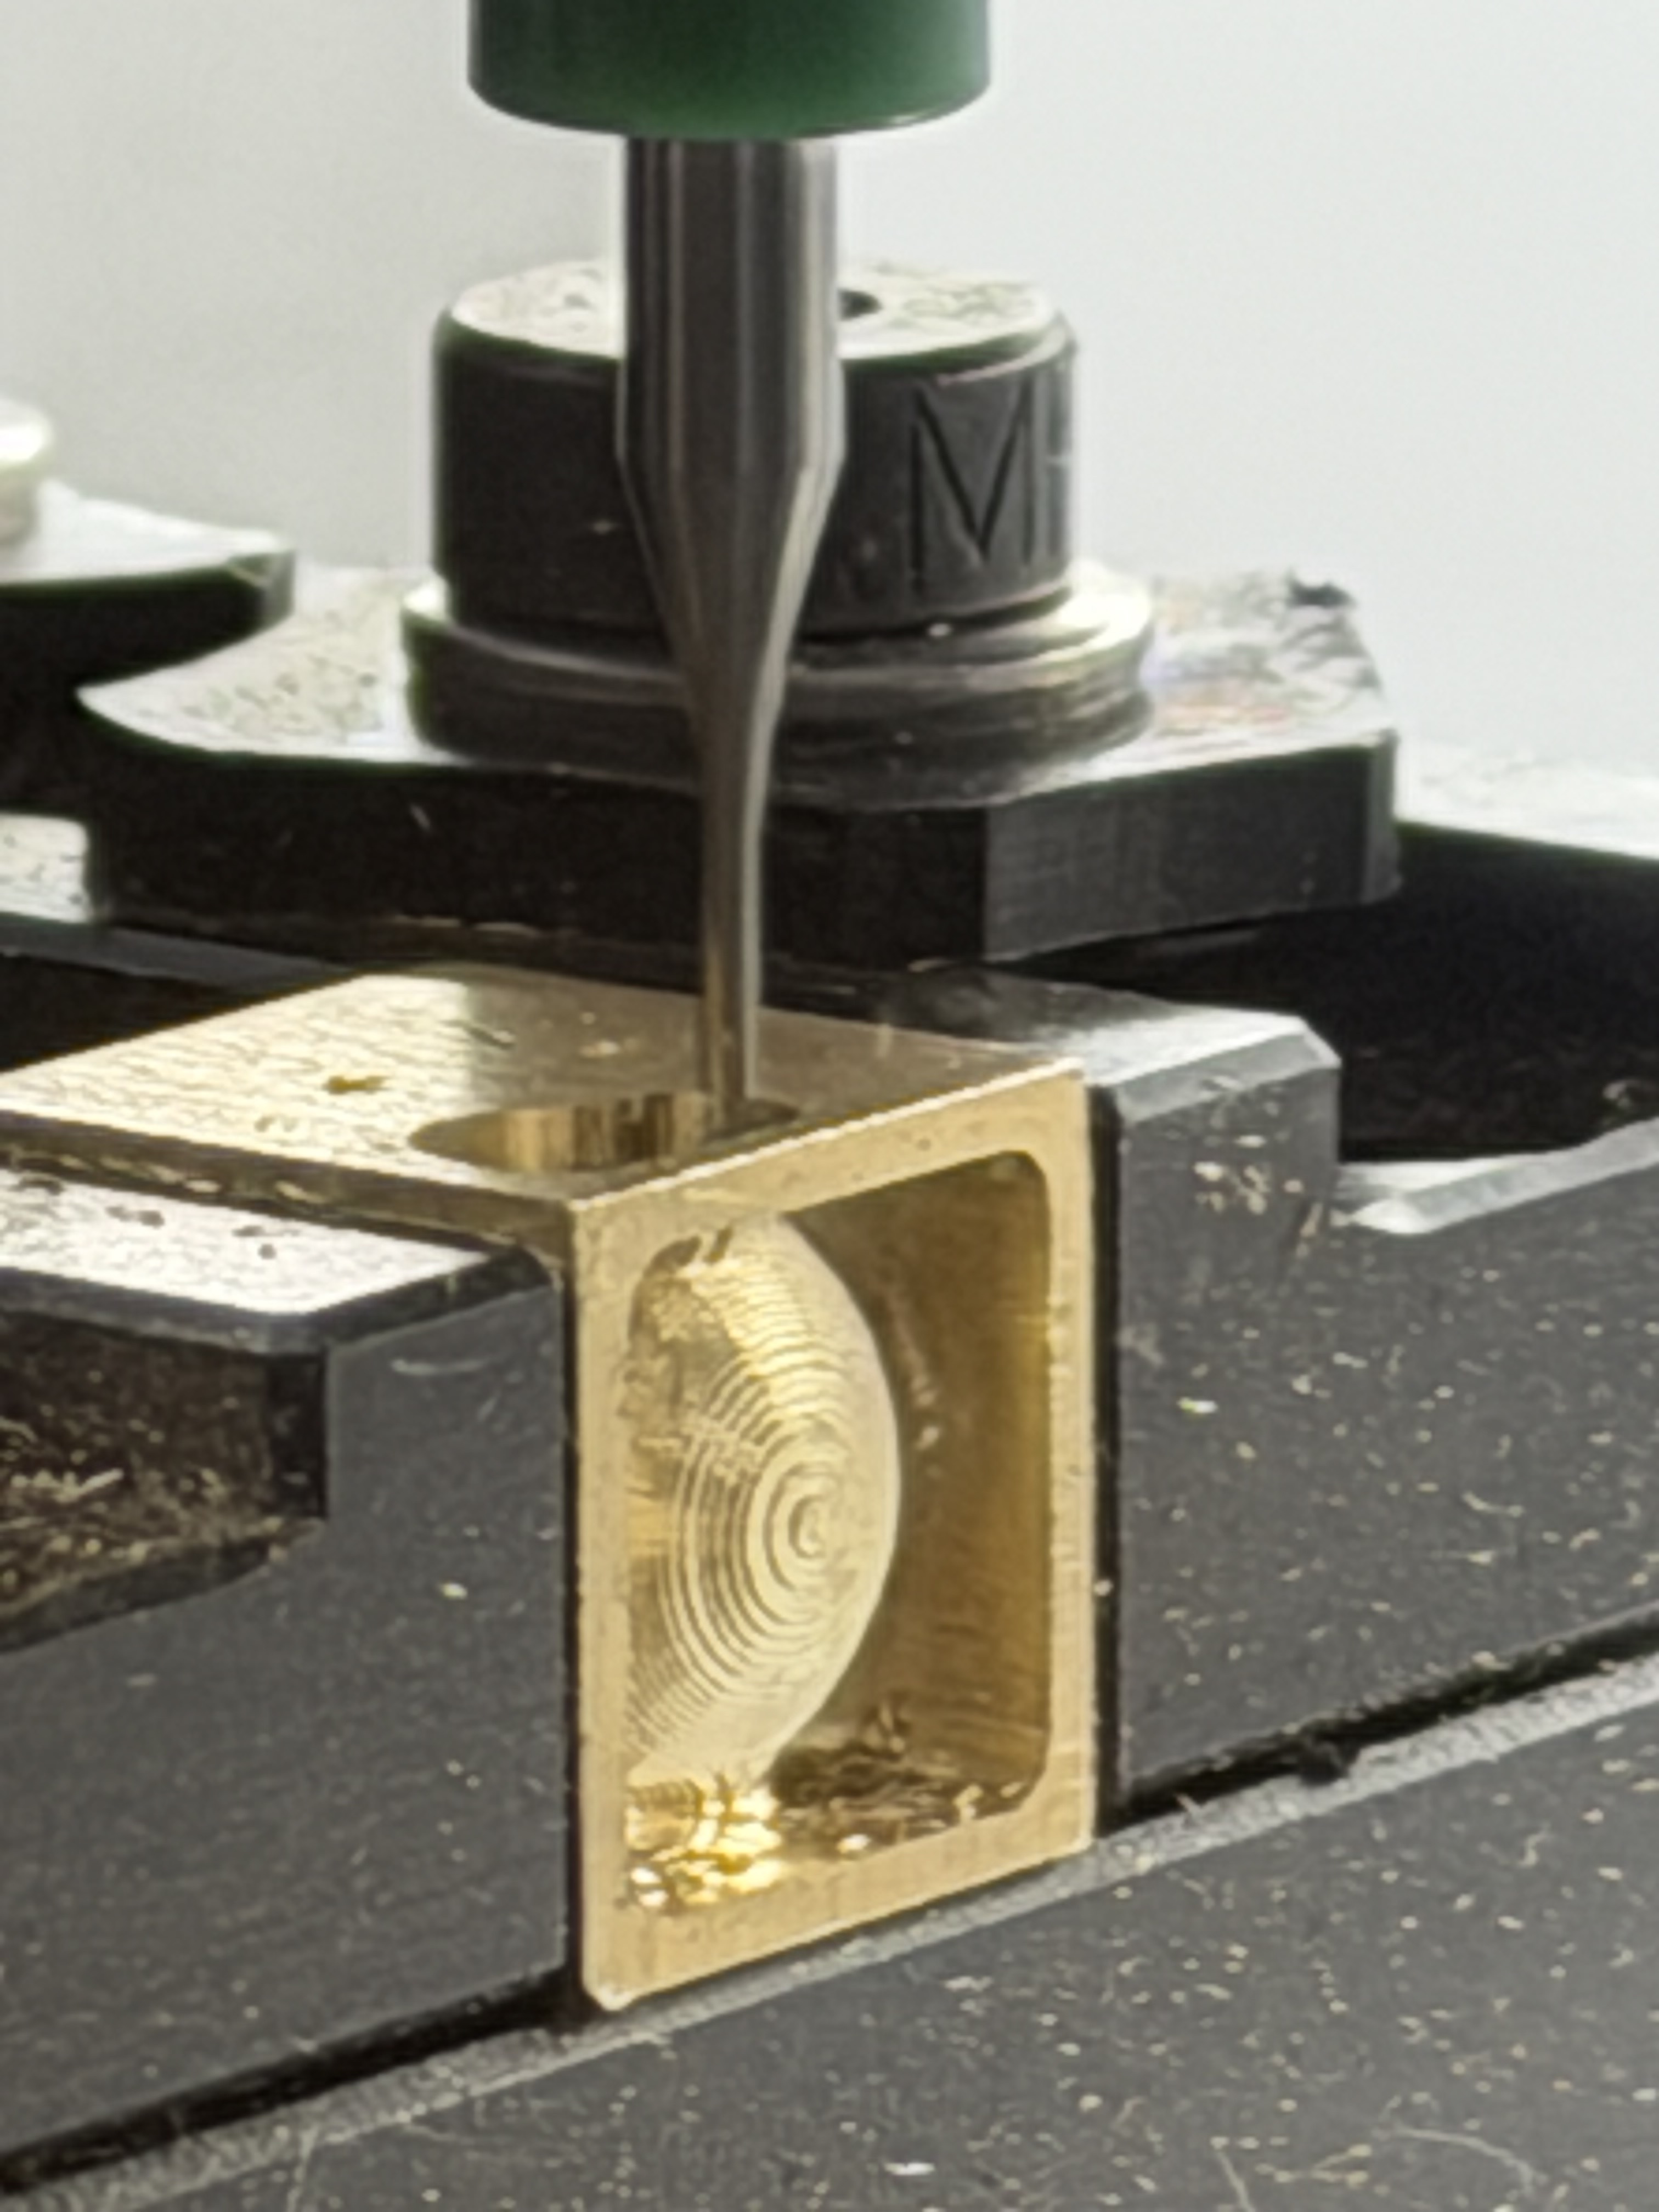
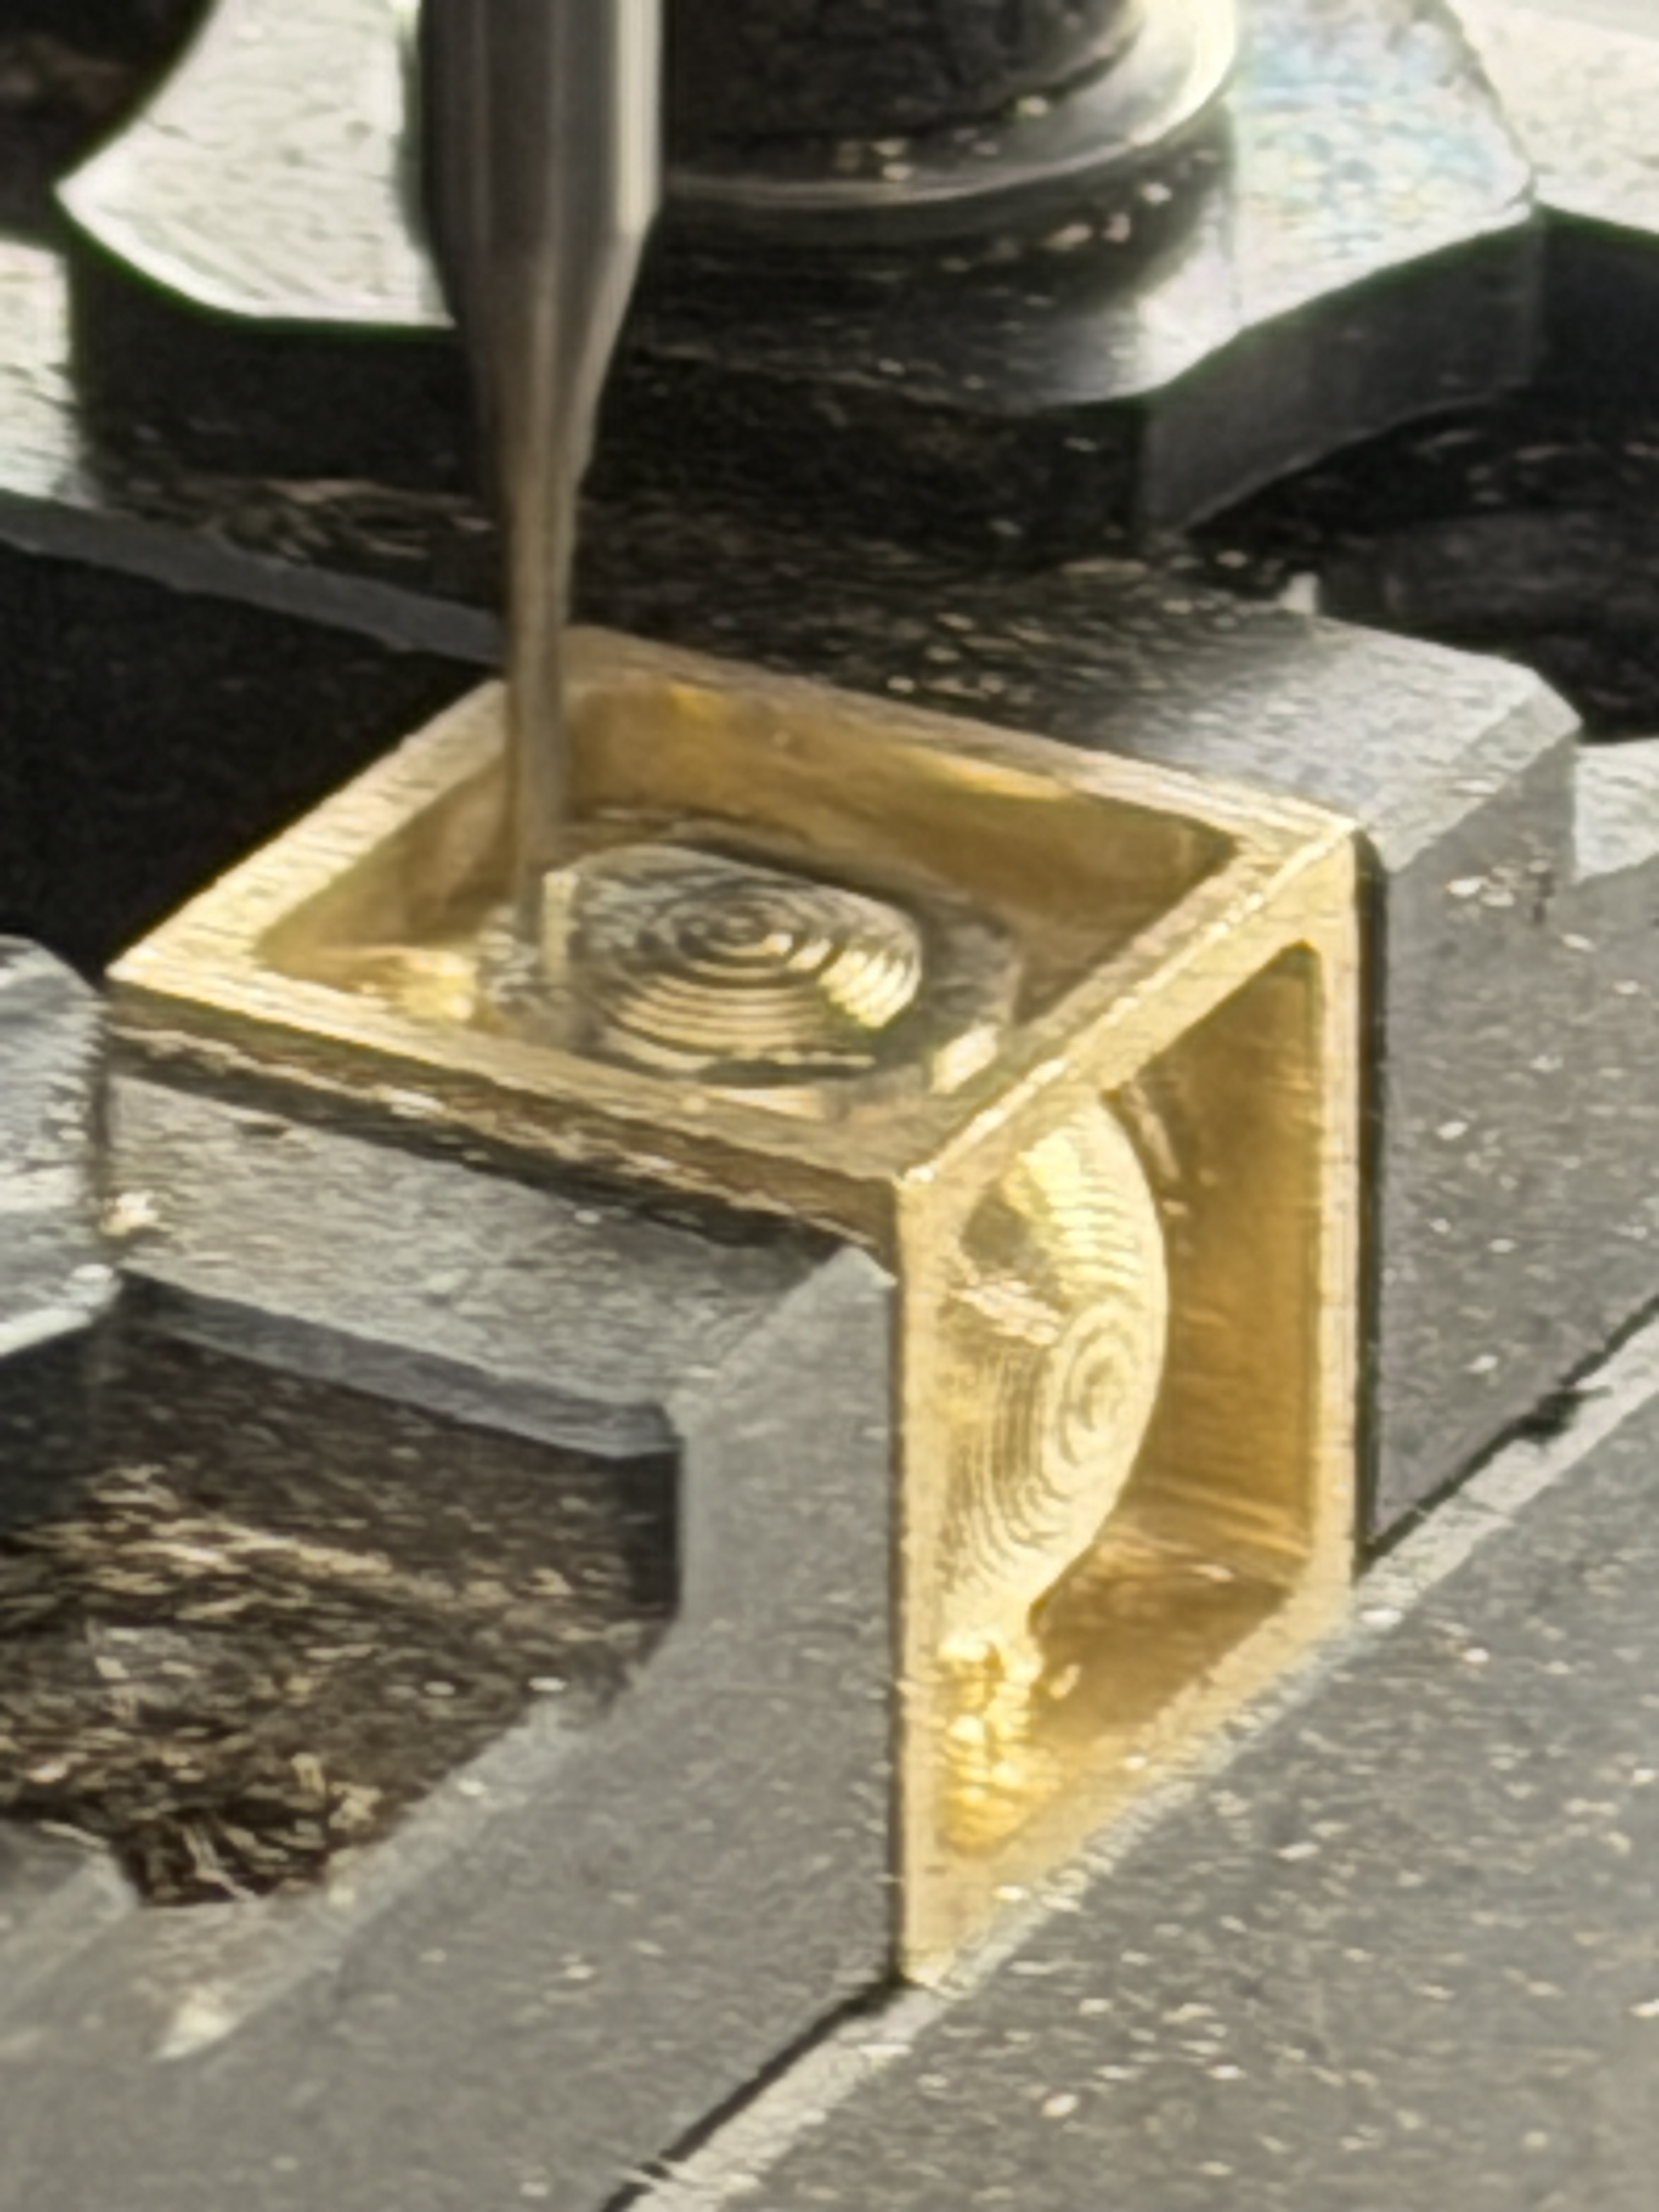
Probably working up finishing passes w/ a smaller tool will improve the appearance and roundness of the ball.
Looks like a fair bit is left uncut by the 1/4" tool:

1 Like
Yeah… Uh… I was lost after I read this…
Ever since Carbide Create gained the ability to preview contour toolpaths w/ arbitrary tooling (esp. V tools), one can do pretty much anything in it — the notable lacunae are moving the tool diagonally, or in an arc along the Z-axis — I don’t think that enough folks would want to do that, nor that the UI could be made simple enough to warrant doing it.
Probably the most extreme instance of this sort of thing was:
1 Like
LOL! I understand the process and tool paths, it’s your light speed in which you demonstrate the illustration to us. This would take me awhile to complete as you did.
I do appreciate the tutorial, thank you.
1 Like
Lots of time drawing lots of different things in vector tools
2 Likes
Does anyone know what happens if I run the provided file on my Shapeoko Pro (not 5 Pro) without changing the setup machine type from Pro 5 to Pro? It’s trivial to make the change in setup but I’m curious to know if it really matters.
The machine selection in Job Setup dates back to when Carbide Create would limit Stock Size to match a machine working area or calculate feeds and speeds based on chipload — it no longer does these things, so the machine selection merely serves as a reminder for which machine a file might have been set up for, or as advertising for Carbide 3D for Carbide Create Pro licenses.
1 Like
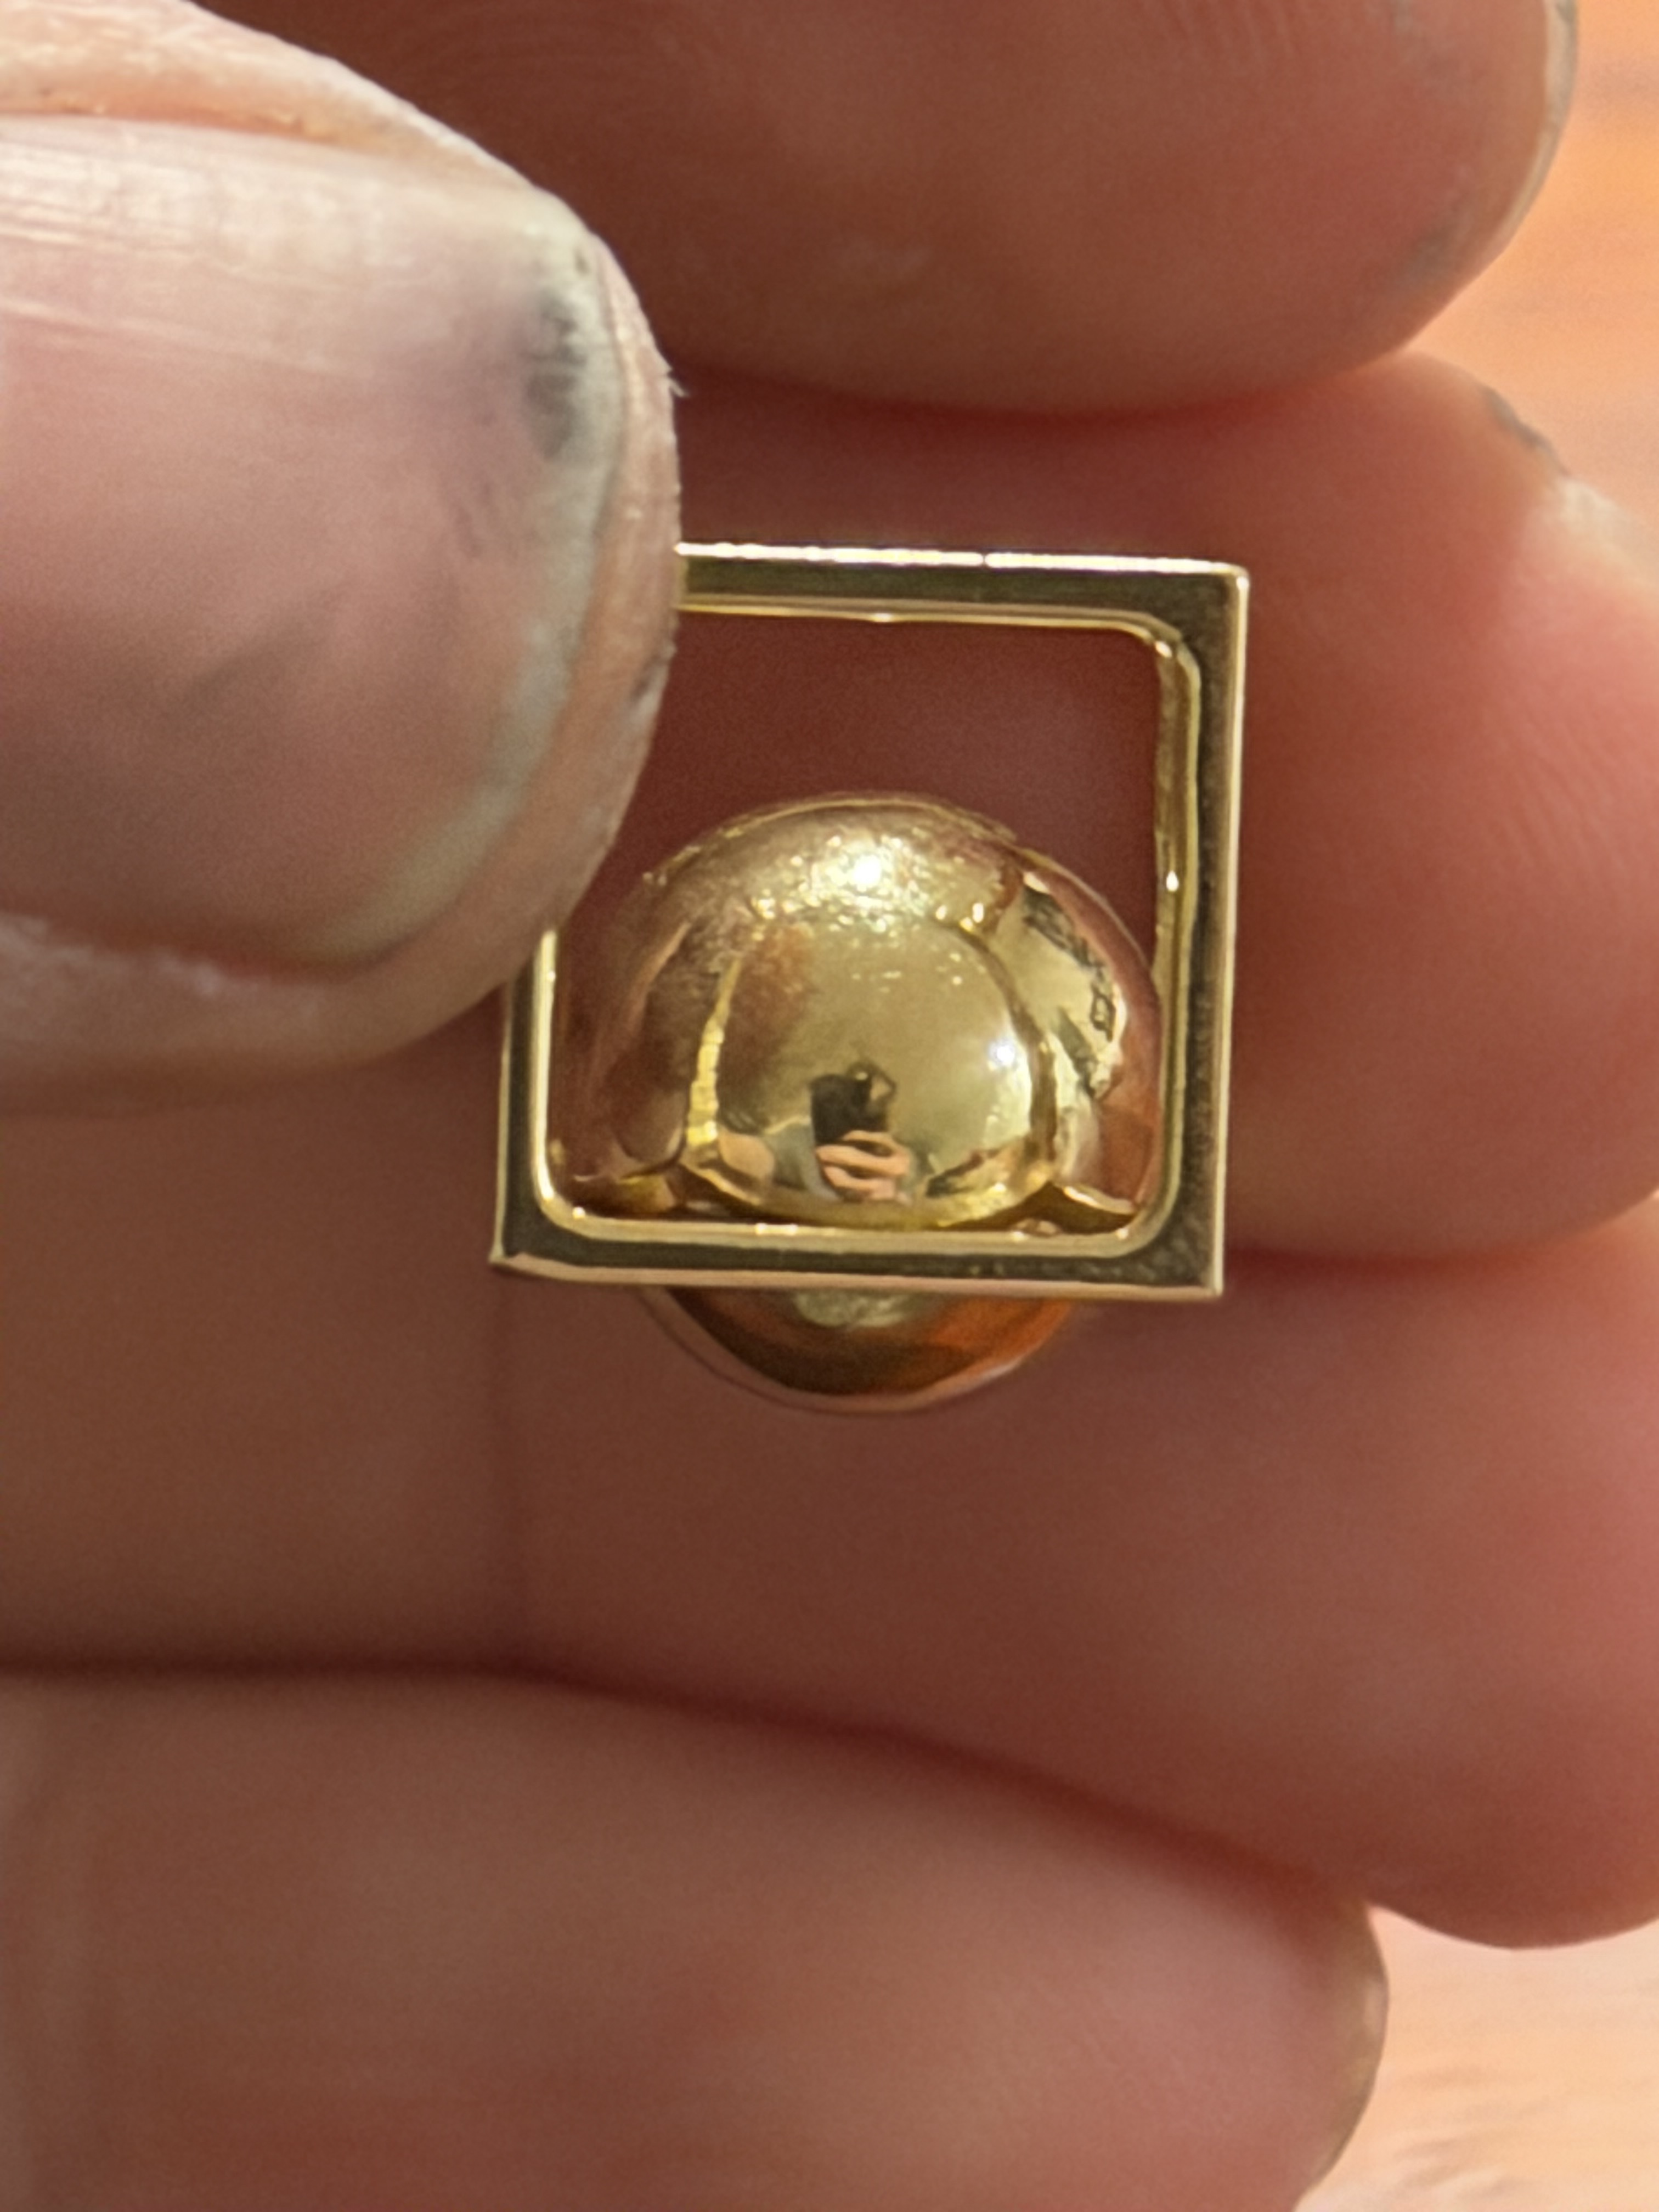
I finally got around to finishing my entry in the unofficial Ball in Box project. Definitely not a pretty as @HeuristicBishop entry but still fun to see it take shape.
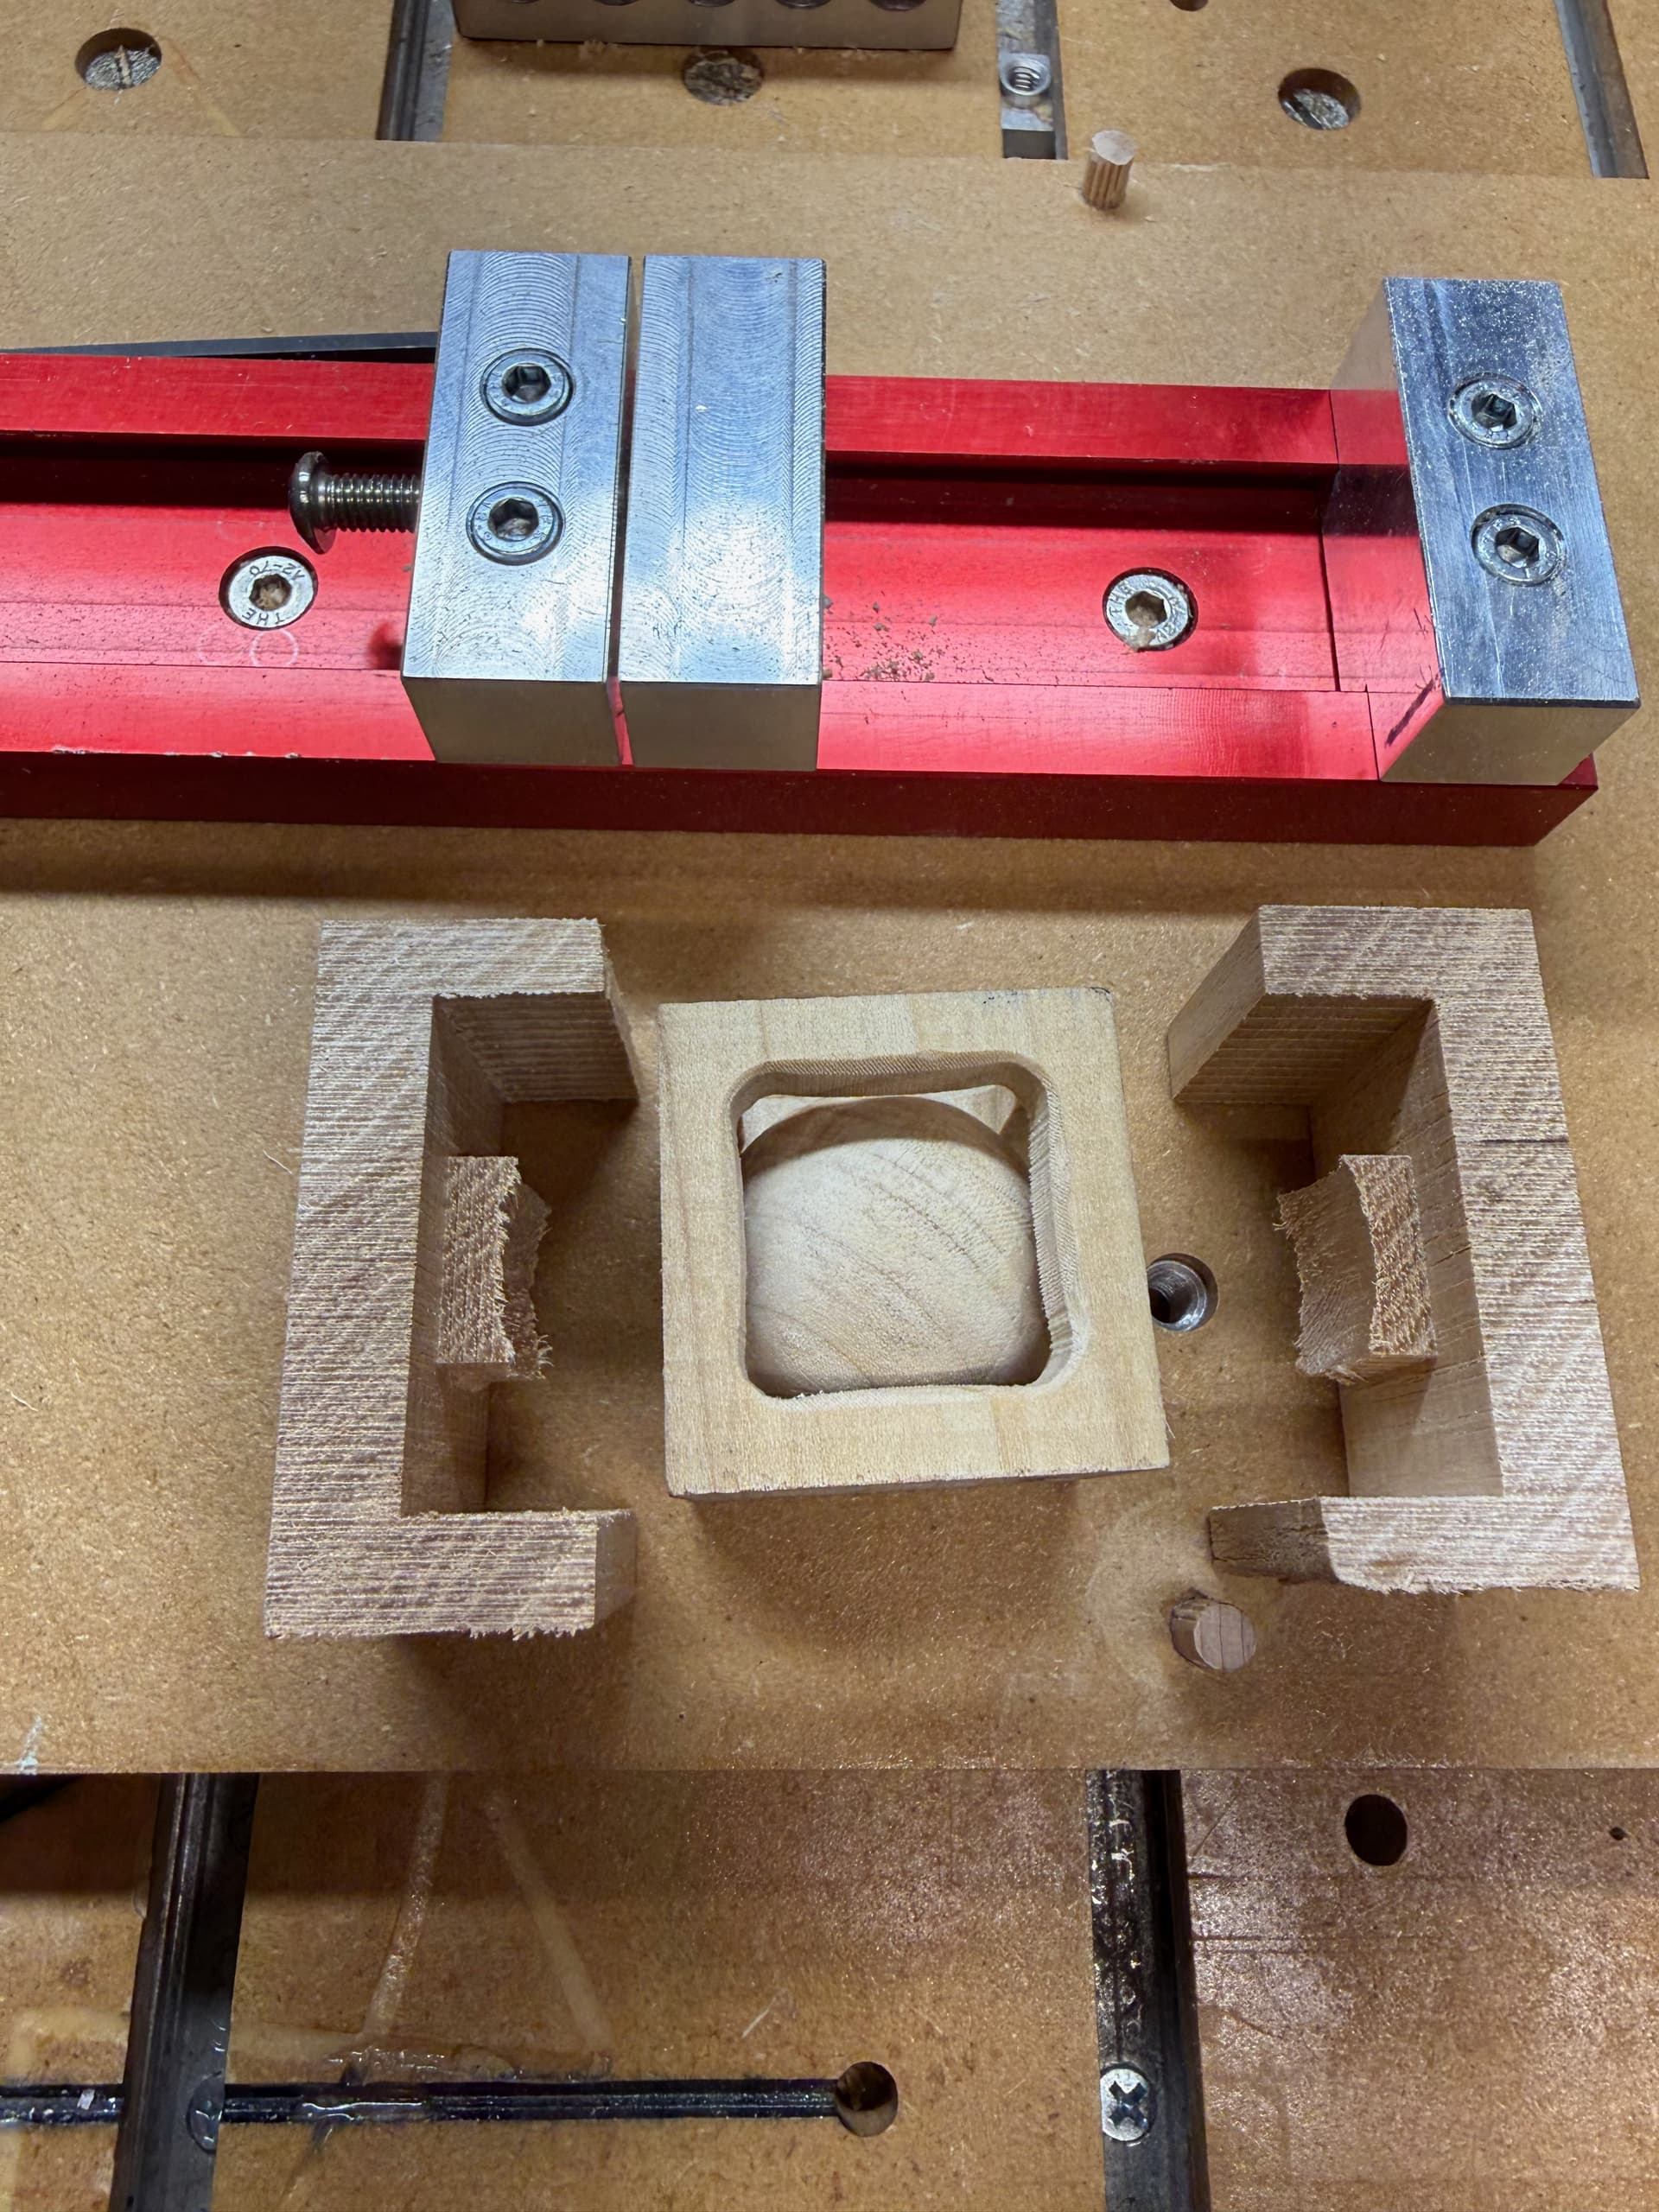
6 Likes
Maybe not as pretty but yours sells the effect better. Given the chunkier box frame and the fact it’s made of wood, folks are likelier to think “that’s impossible” compared to the thin metal of mine.
It’s just about the base assumptions people make, most of the people I’ve shown just assume the frame was carefully bent or even soldered together. With wood, they don’t have the same base intuition so it’s more immediately impactful ![]()
(Folks think mine is cool but only start to get into the “wait, this is impossible” arena after they’ve asked clarifying questions ![]() )
)
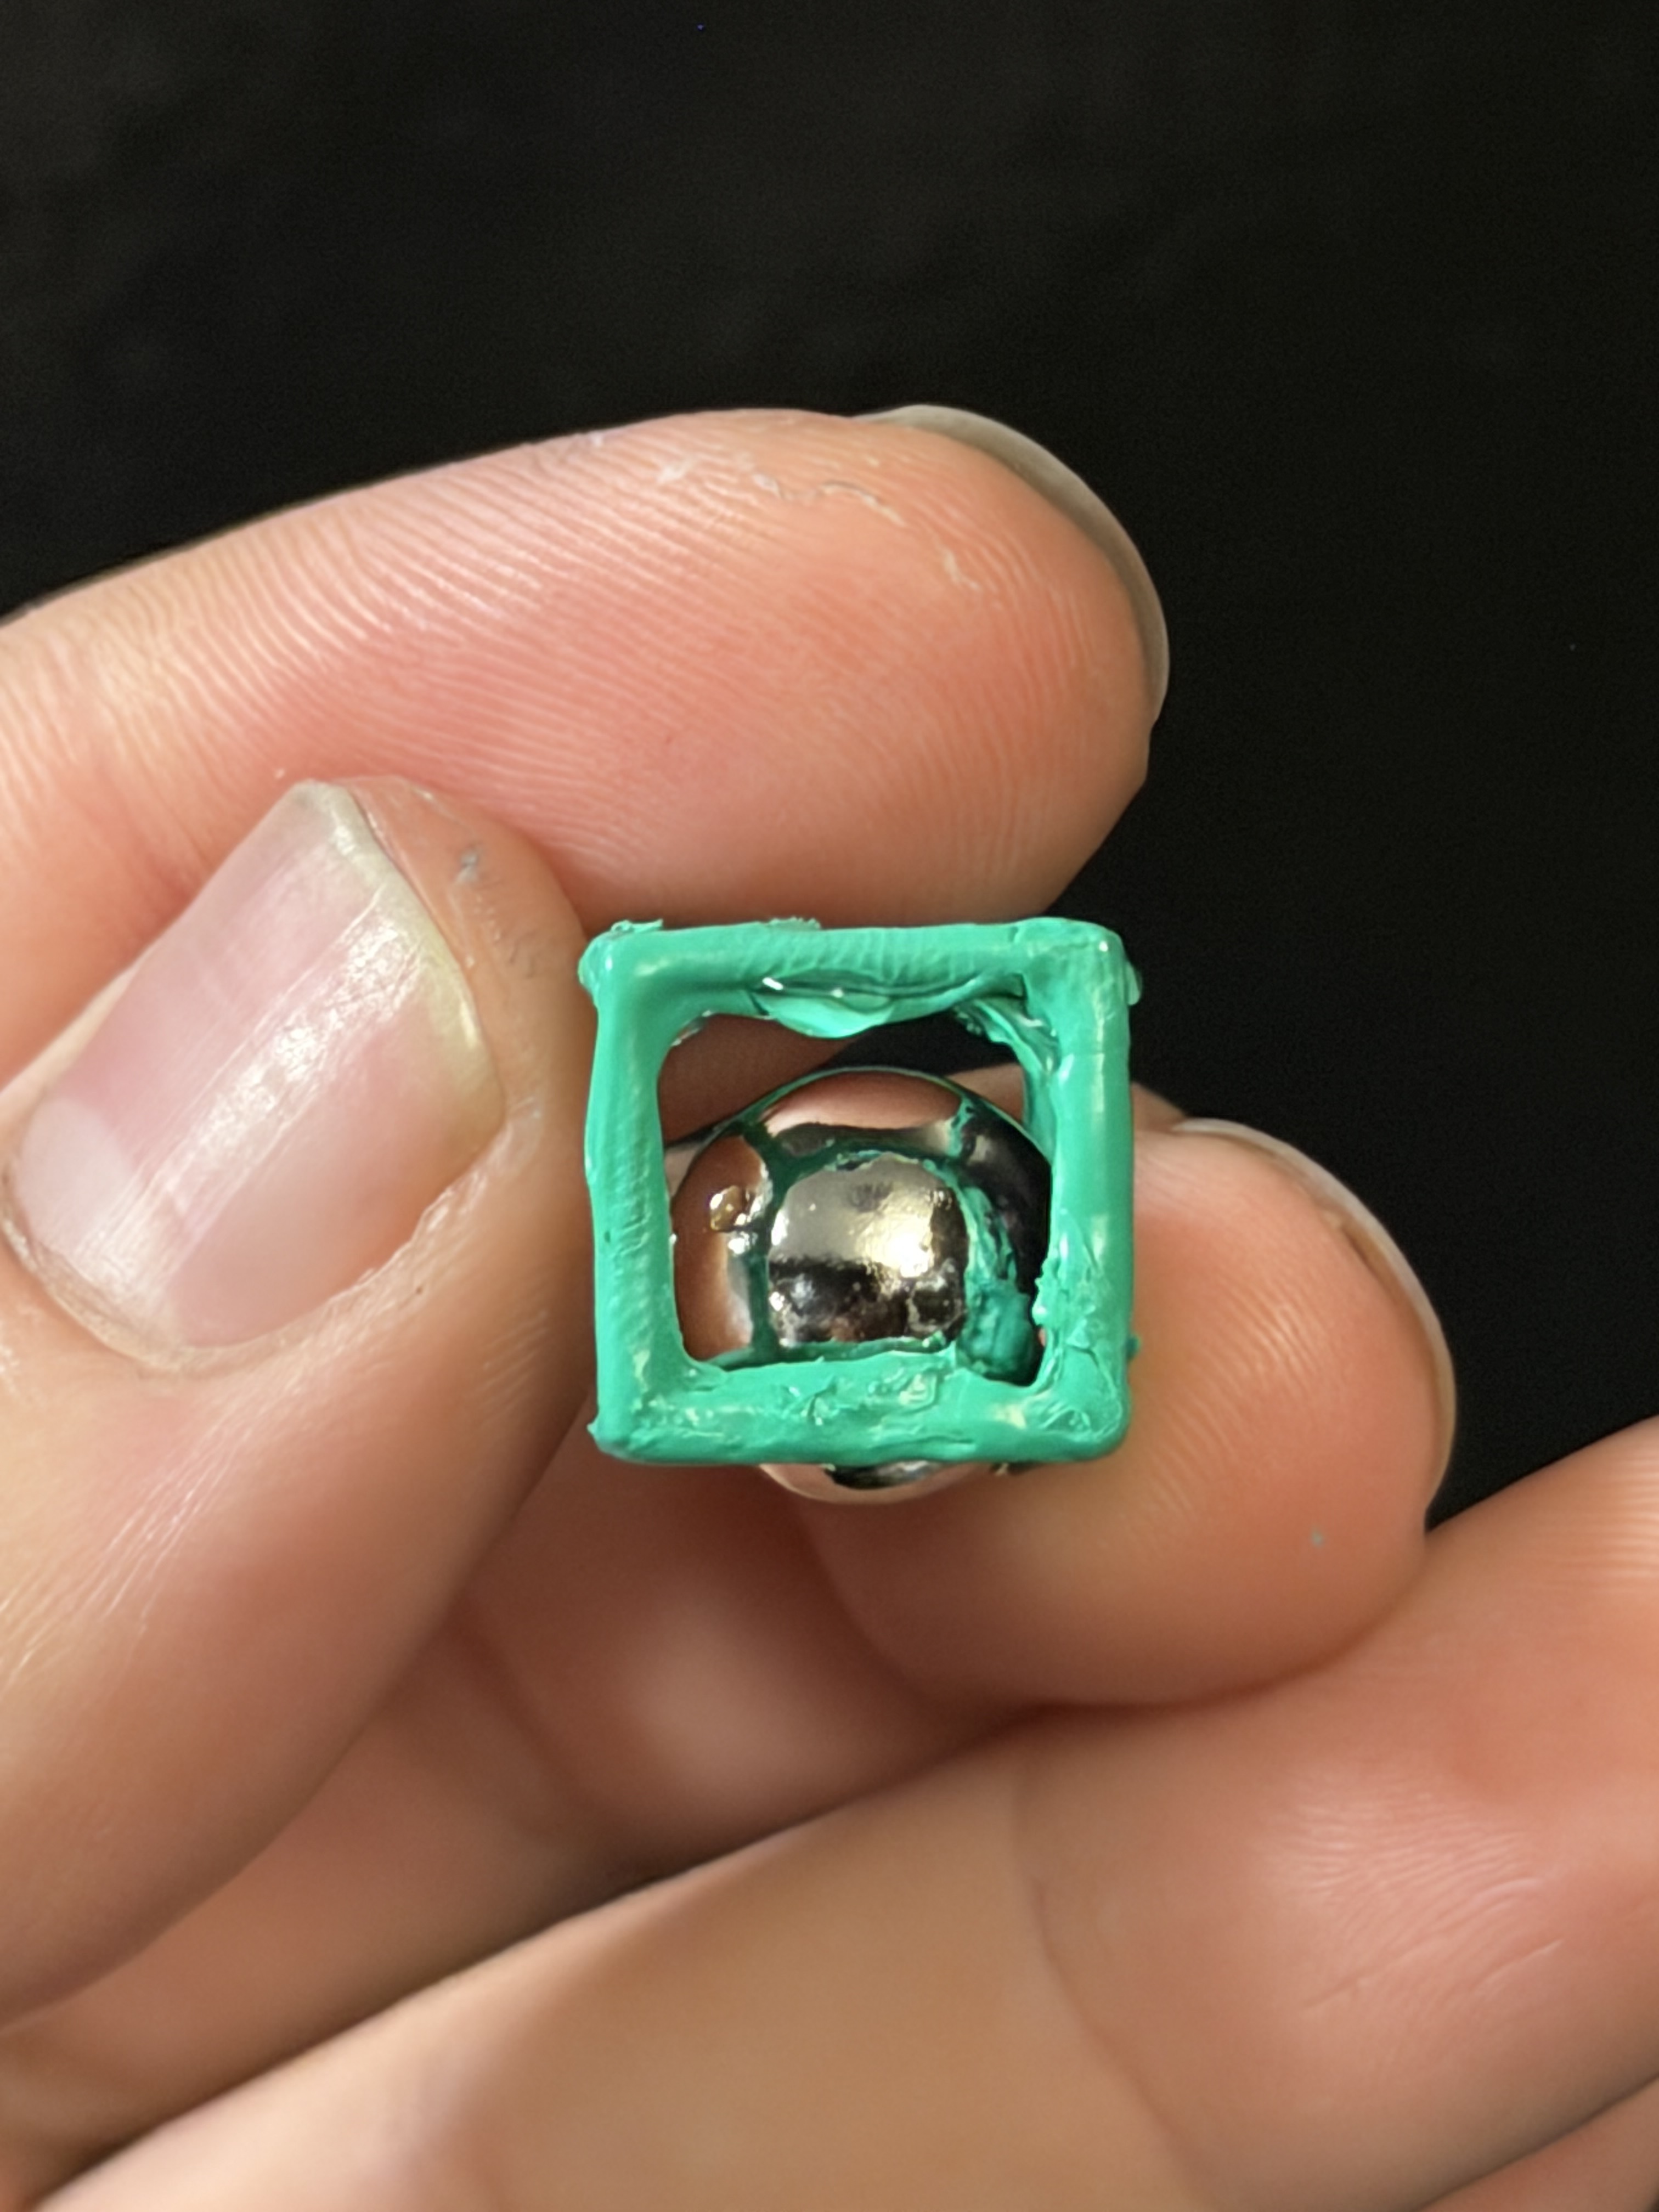
TLDR: I need to make a wooden one. Also the wife stole my metal one to use as a dangly charm for her purse ![]()
5 Likes
Did you use a 1/4" .25 mm TBN on the last finishing pass? Your clearing around the ball is much greater than mine assuming you used the same ball / box dimensions.
I modeled mine and did the toolpaths in Fusion 360.
My box is much smaller, the cube I started with is only 12mm.
I used a 1mm two flute square endmill for all of the clearing operations. I wanted to maximize material removal (or rather the ratio of ball to frame) and didn’t have a ball nose that small, so I opted to clean up the cusps with hand polishing/shaping…I don’t recommend this approach but it was a good lesson learned.

And a little WIP video showing the cusps before removal with a radial polishing wheel (headphone warning, it’s loud):

5 Likes
Time was, folks would do this w/ just a pocket knife — I did (and have a scar as a reminder) — wonder what happened to the one I made…
4 Likes
How long did it take to cut and how many tool changes?
As I recall, it was about a week of whittling one and off one summer, and I was using a stockman pattern pocket knife w/ carbon steel blades, so a lot of switching between blades and sharpening.
3 Likes
Just curious How long did this project take ?