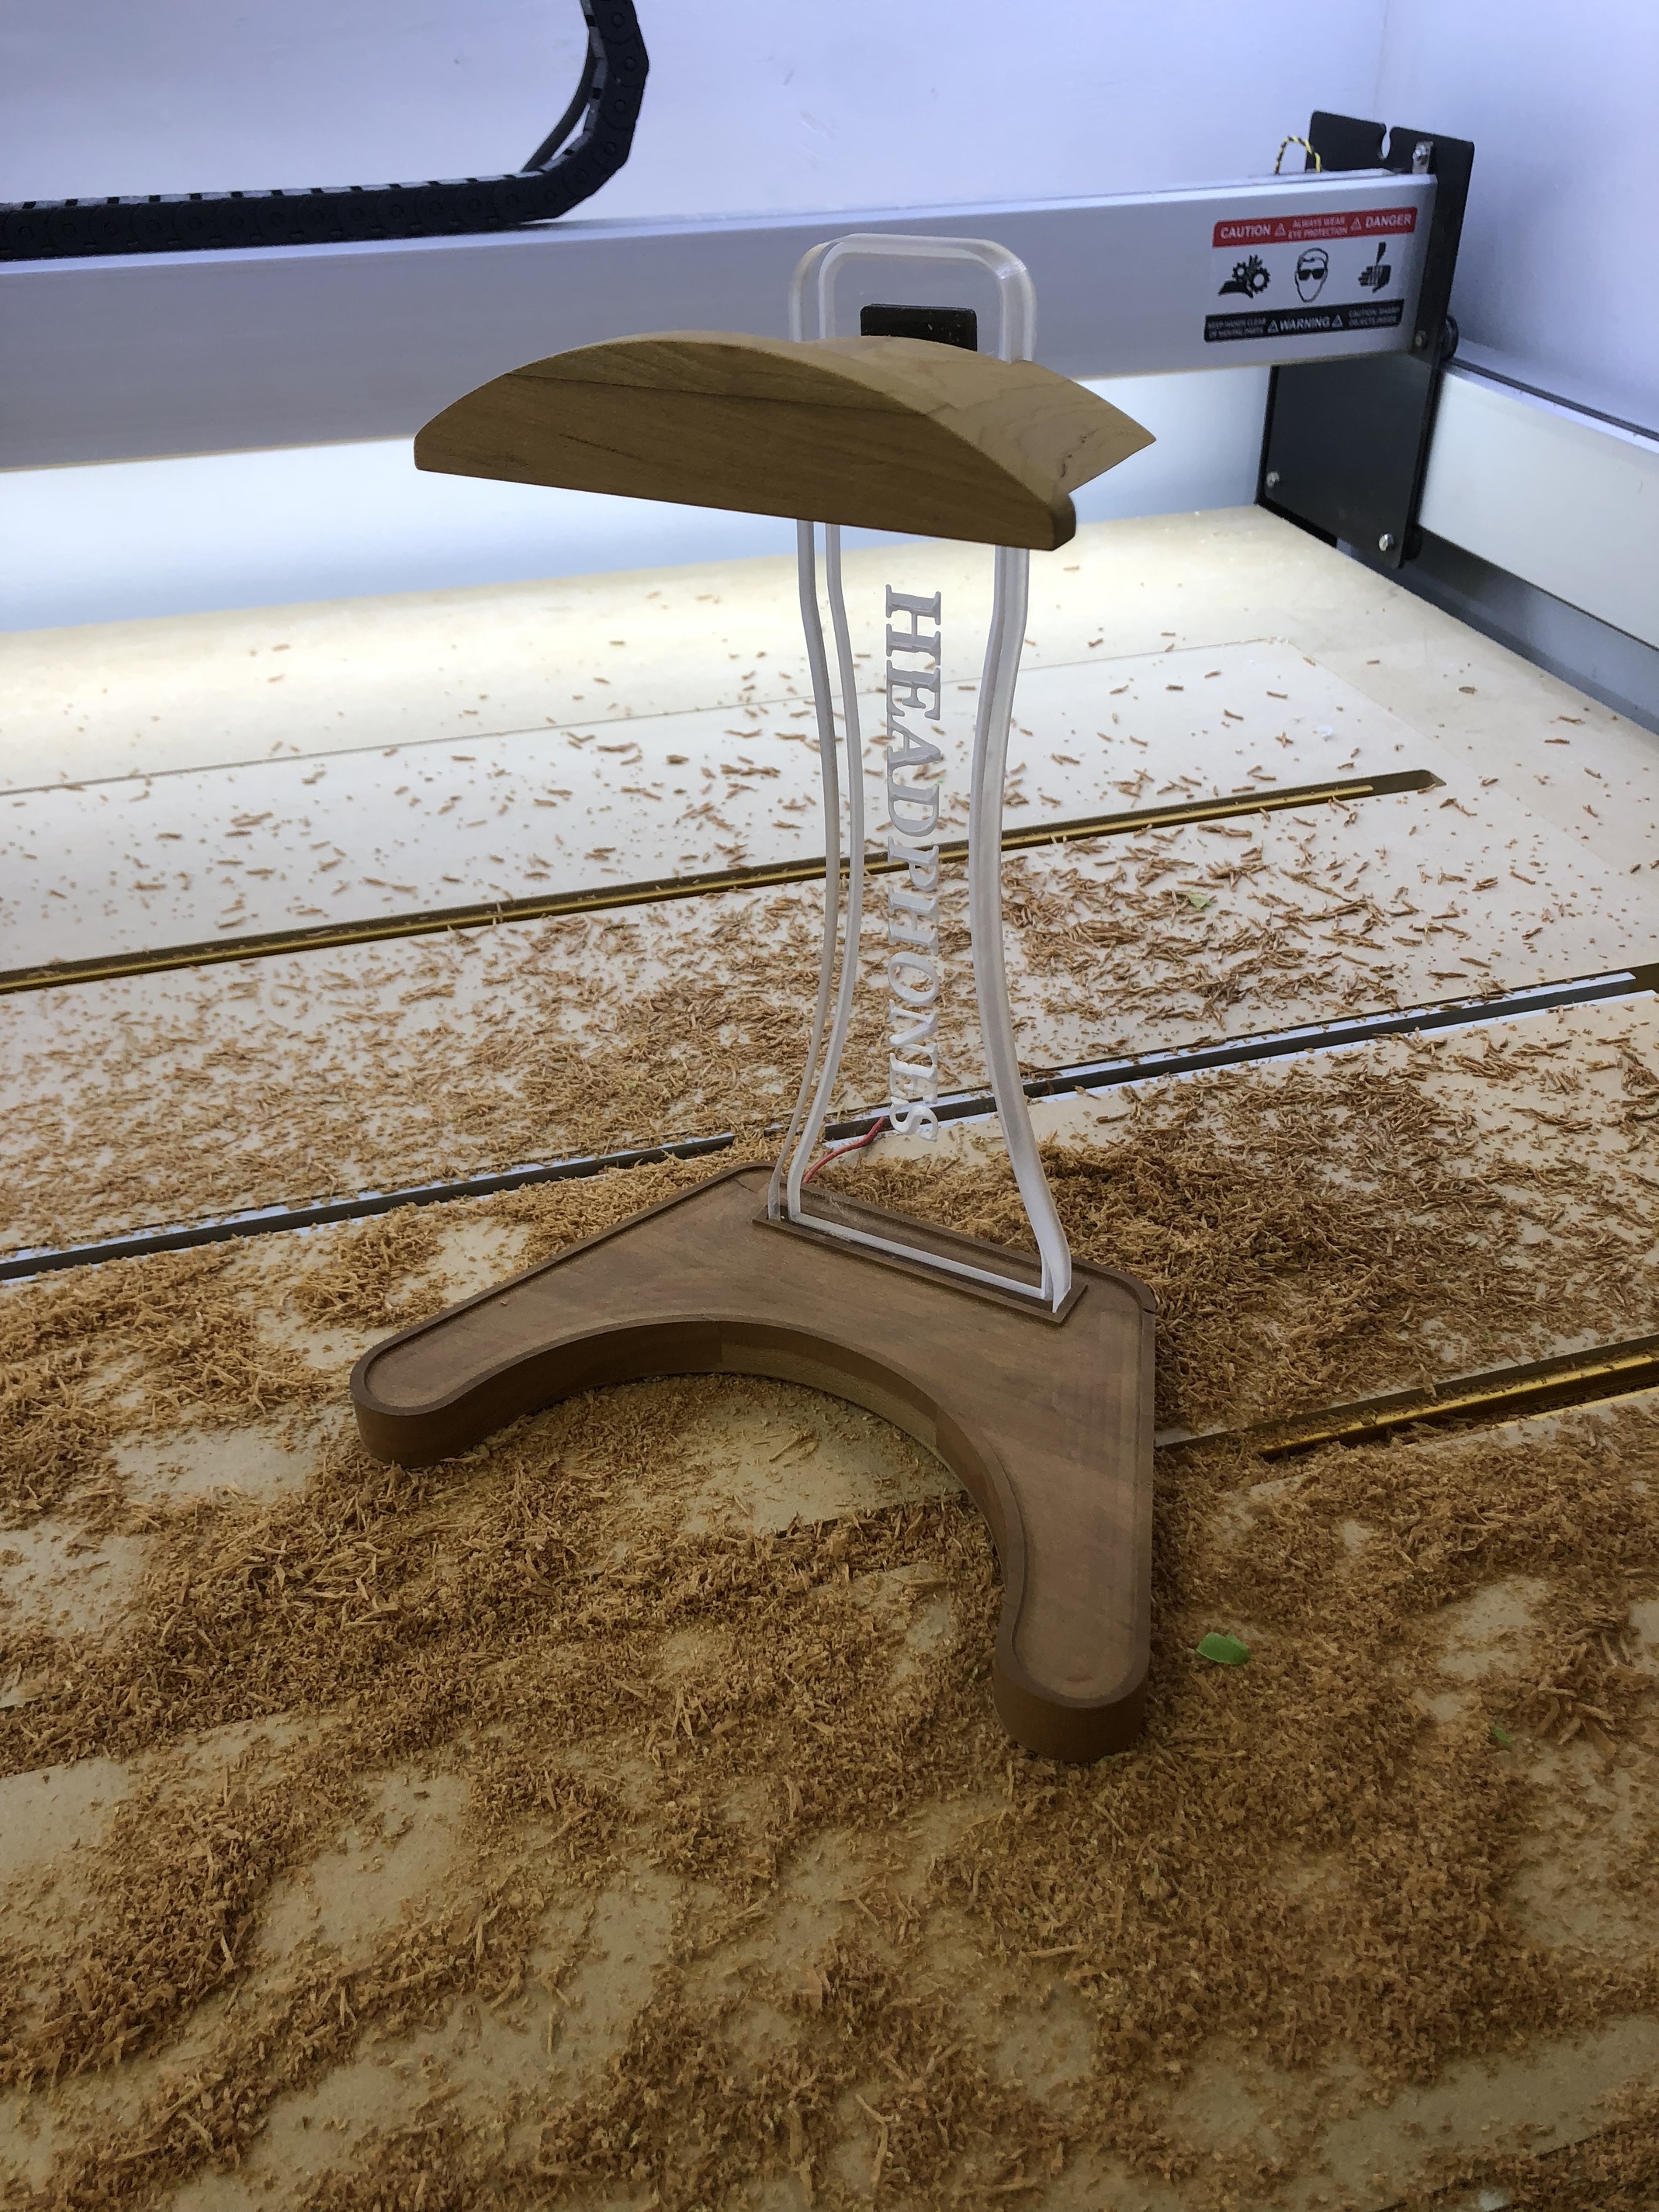
I had some scrap wood and acrylic from another project, so I thought I would try making a headphone holder.
The base and acrylic back took around 15-20 minutes to cut out, but the arch holder at the top took 1.5 hours. [Only using a .25" down cut end-mill and a 60 v-bit.]
Let me know what you think.


28 Likes
That is nice and very creative!!

Nice!! Very nice!!!
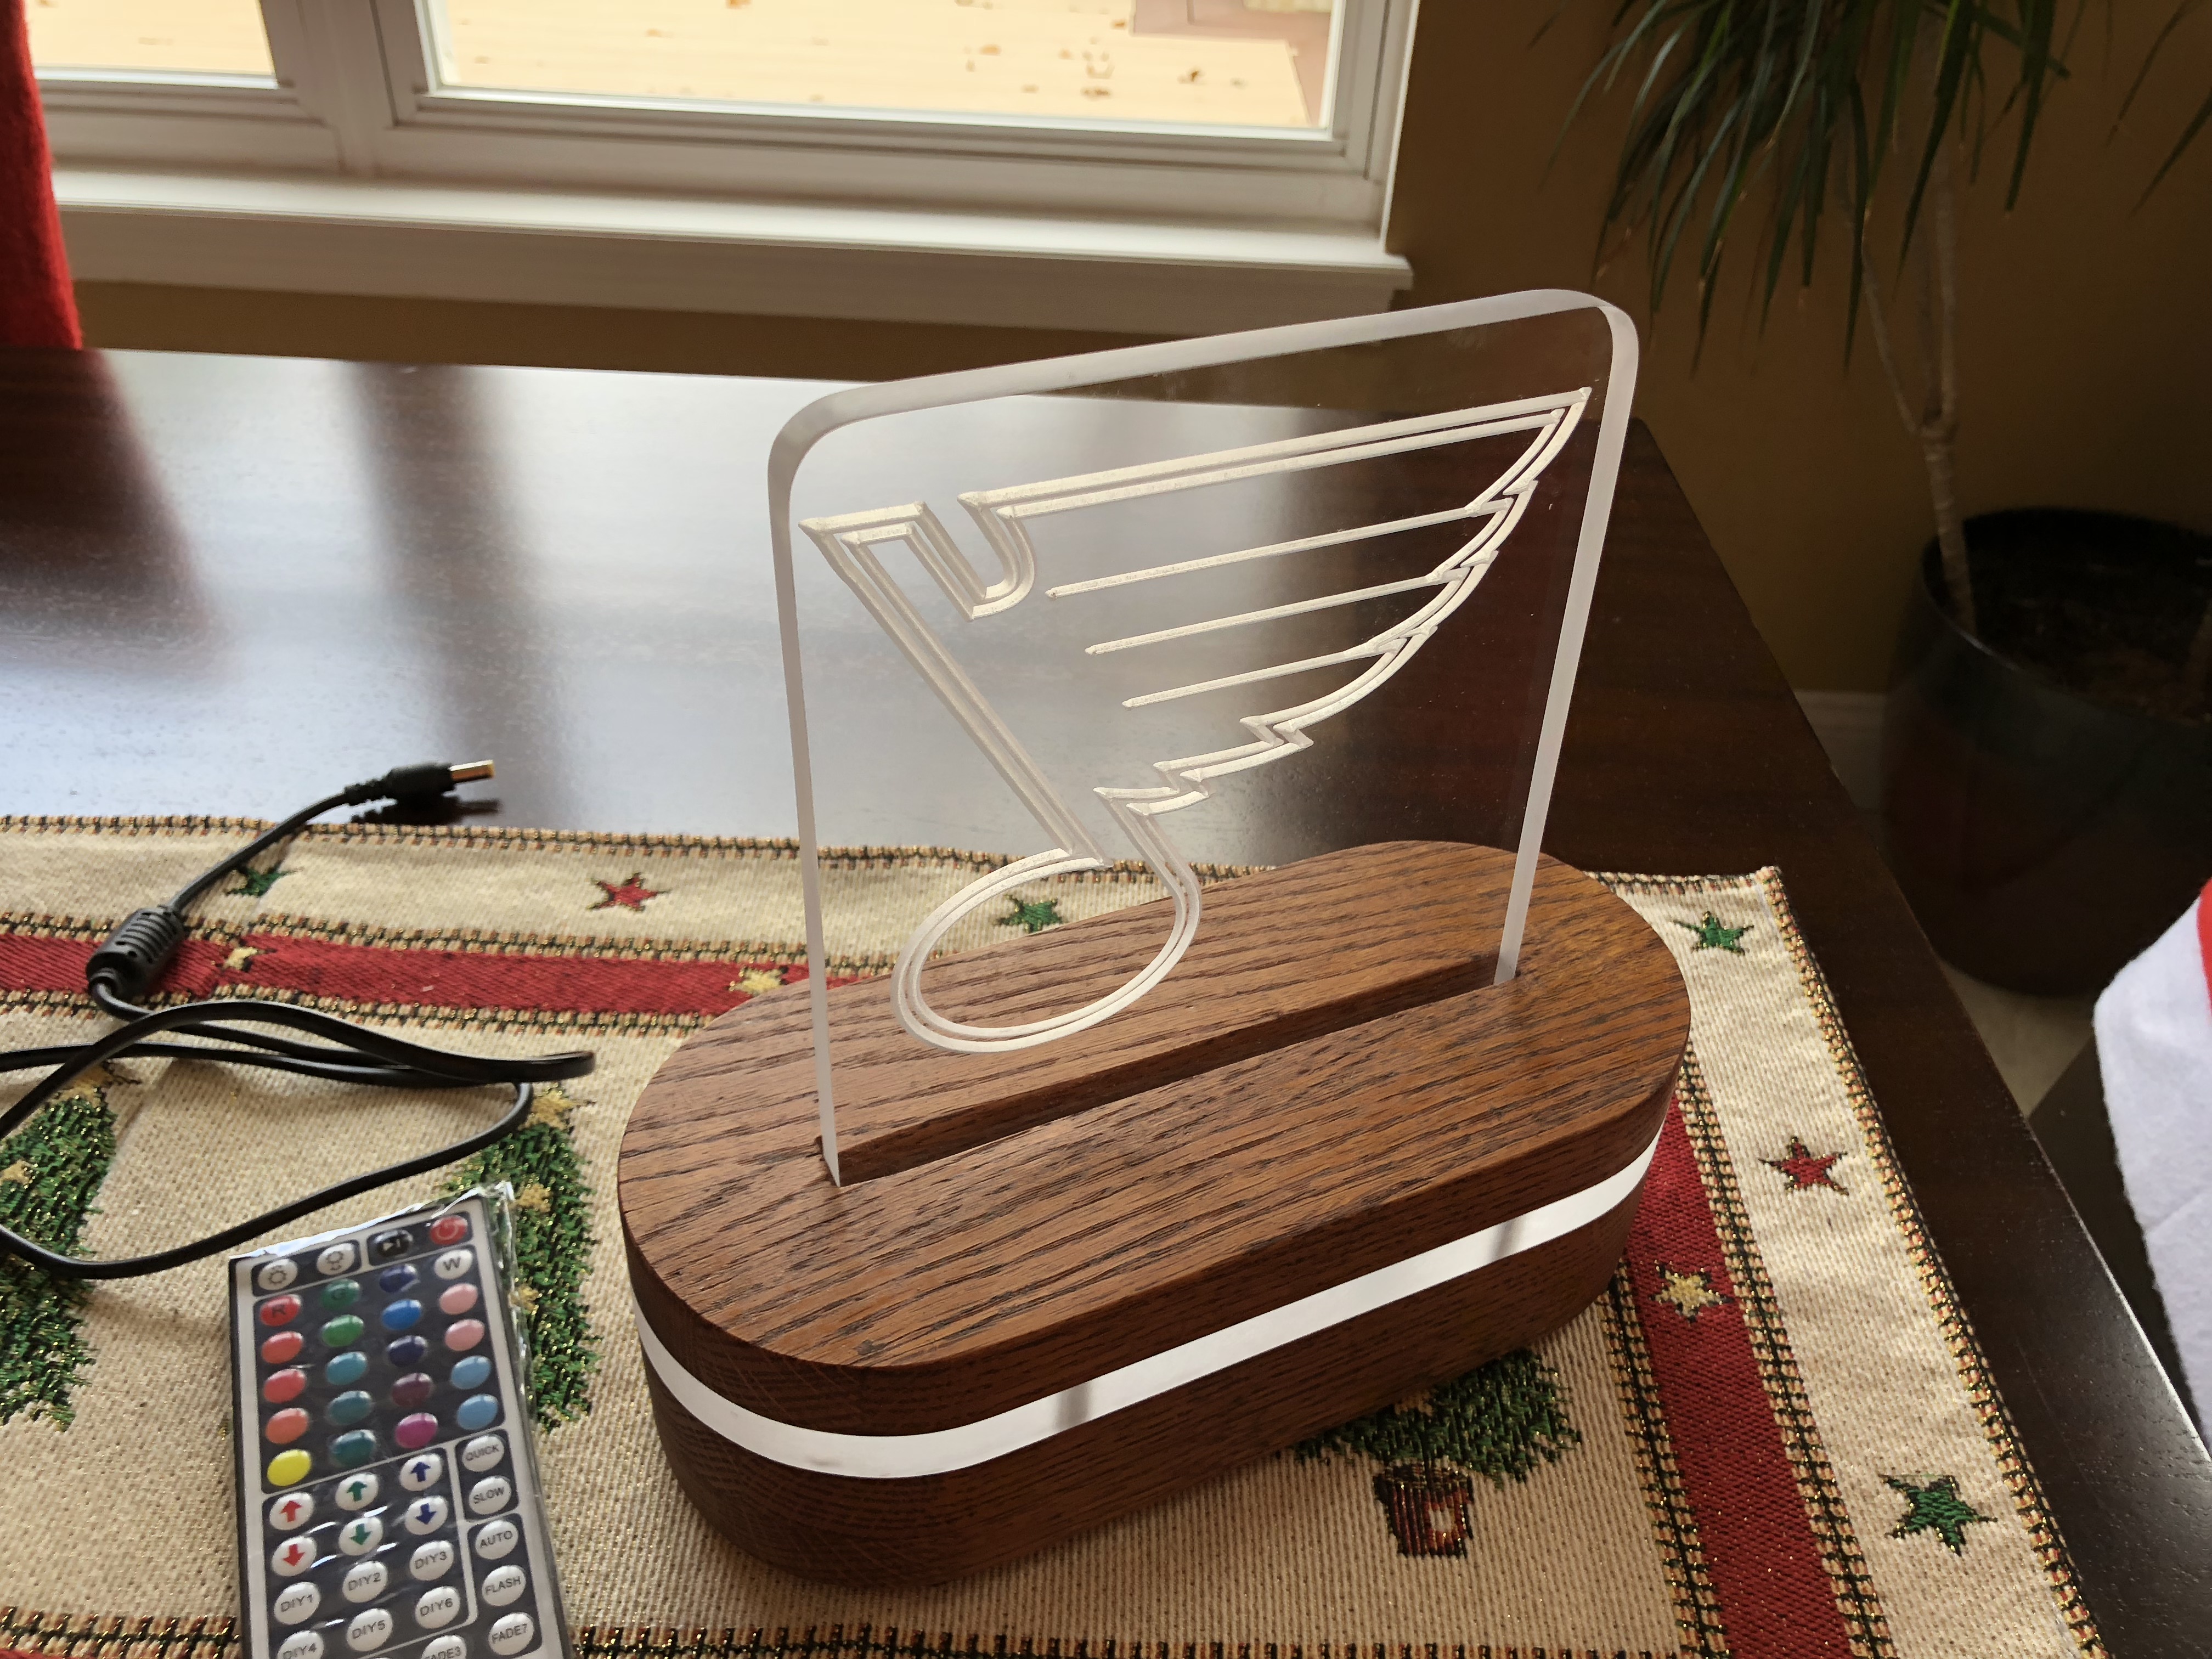
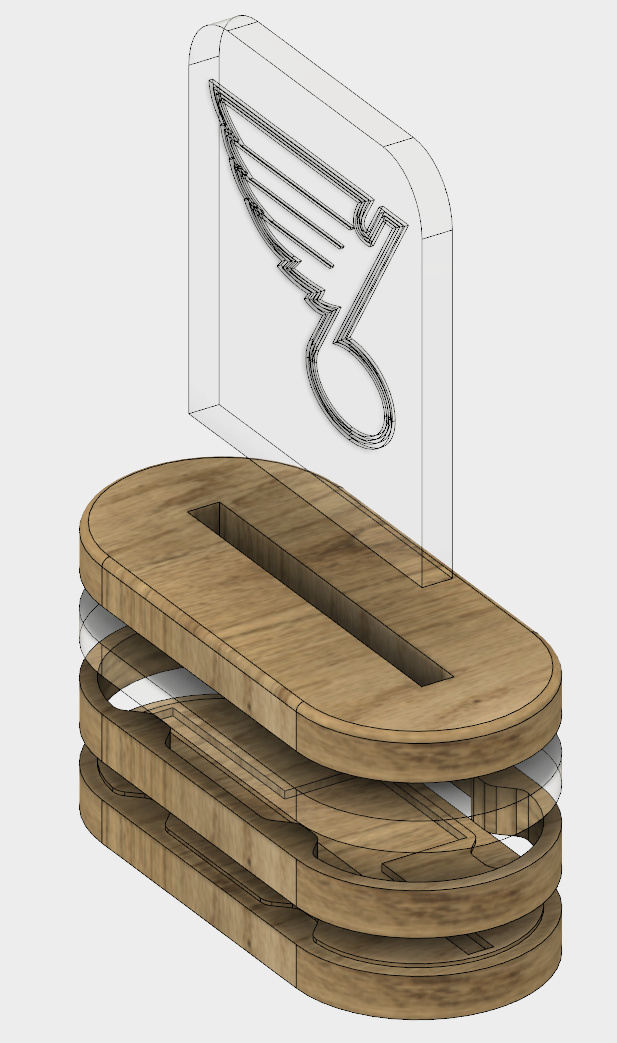
Both projects look great! What did you use to carve the acrylic? Can I get a lot more of the details on the blues job? I could earn some serious points with my in laws for duplicating that…
Thanks!
I found the blues logo online in an .SVG format and used fusion 360 to create the tool-path.
A 60 degree v-bit was used to cut the engraving, followed but a 2-flute up-cut endmill to cut out the final acrylic pieces.
All of the wood was cut out by a 2-flute down-cut endmill.
2 Likes
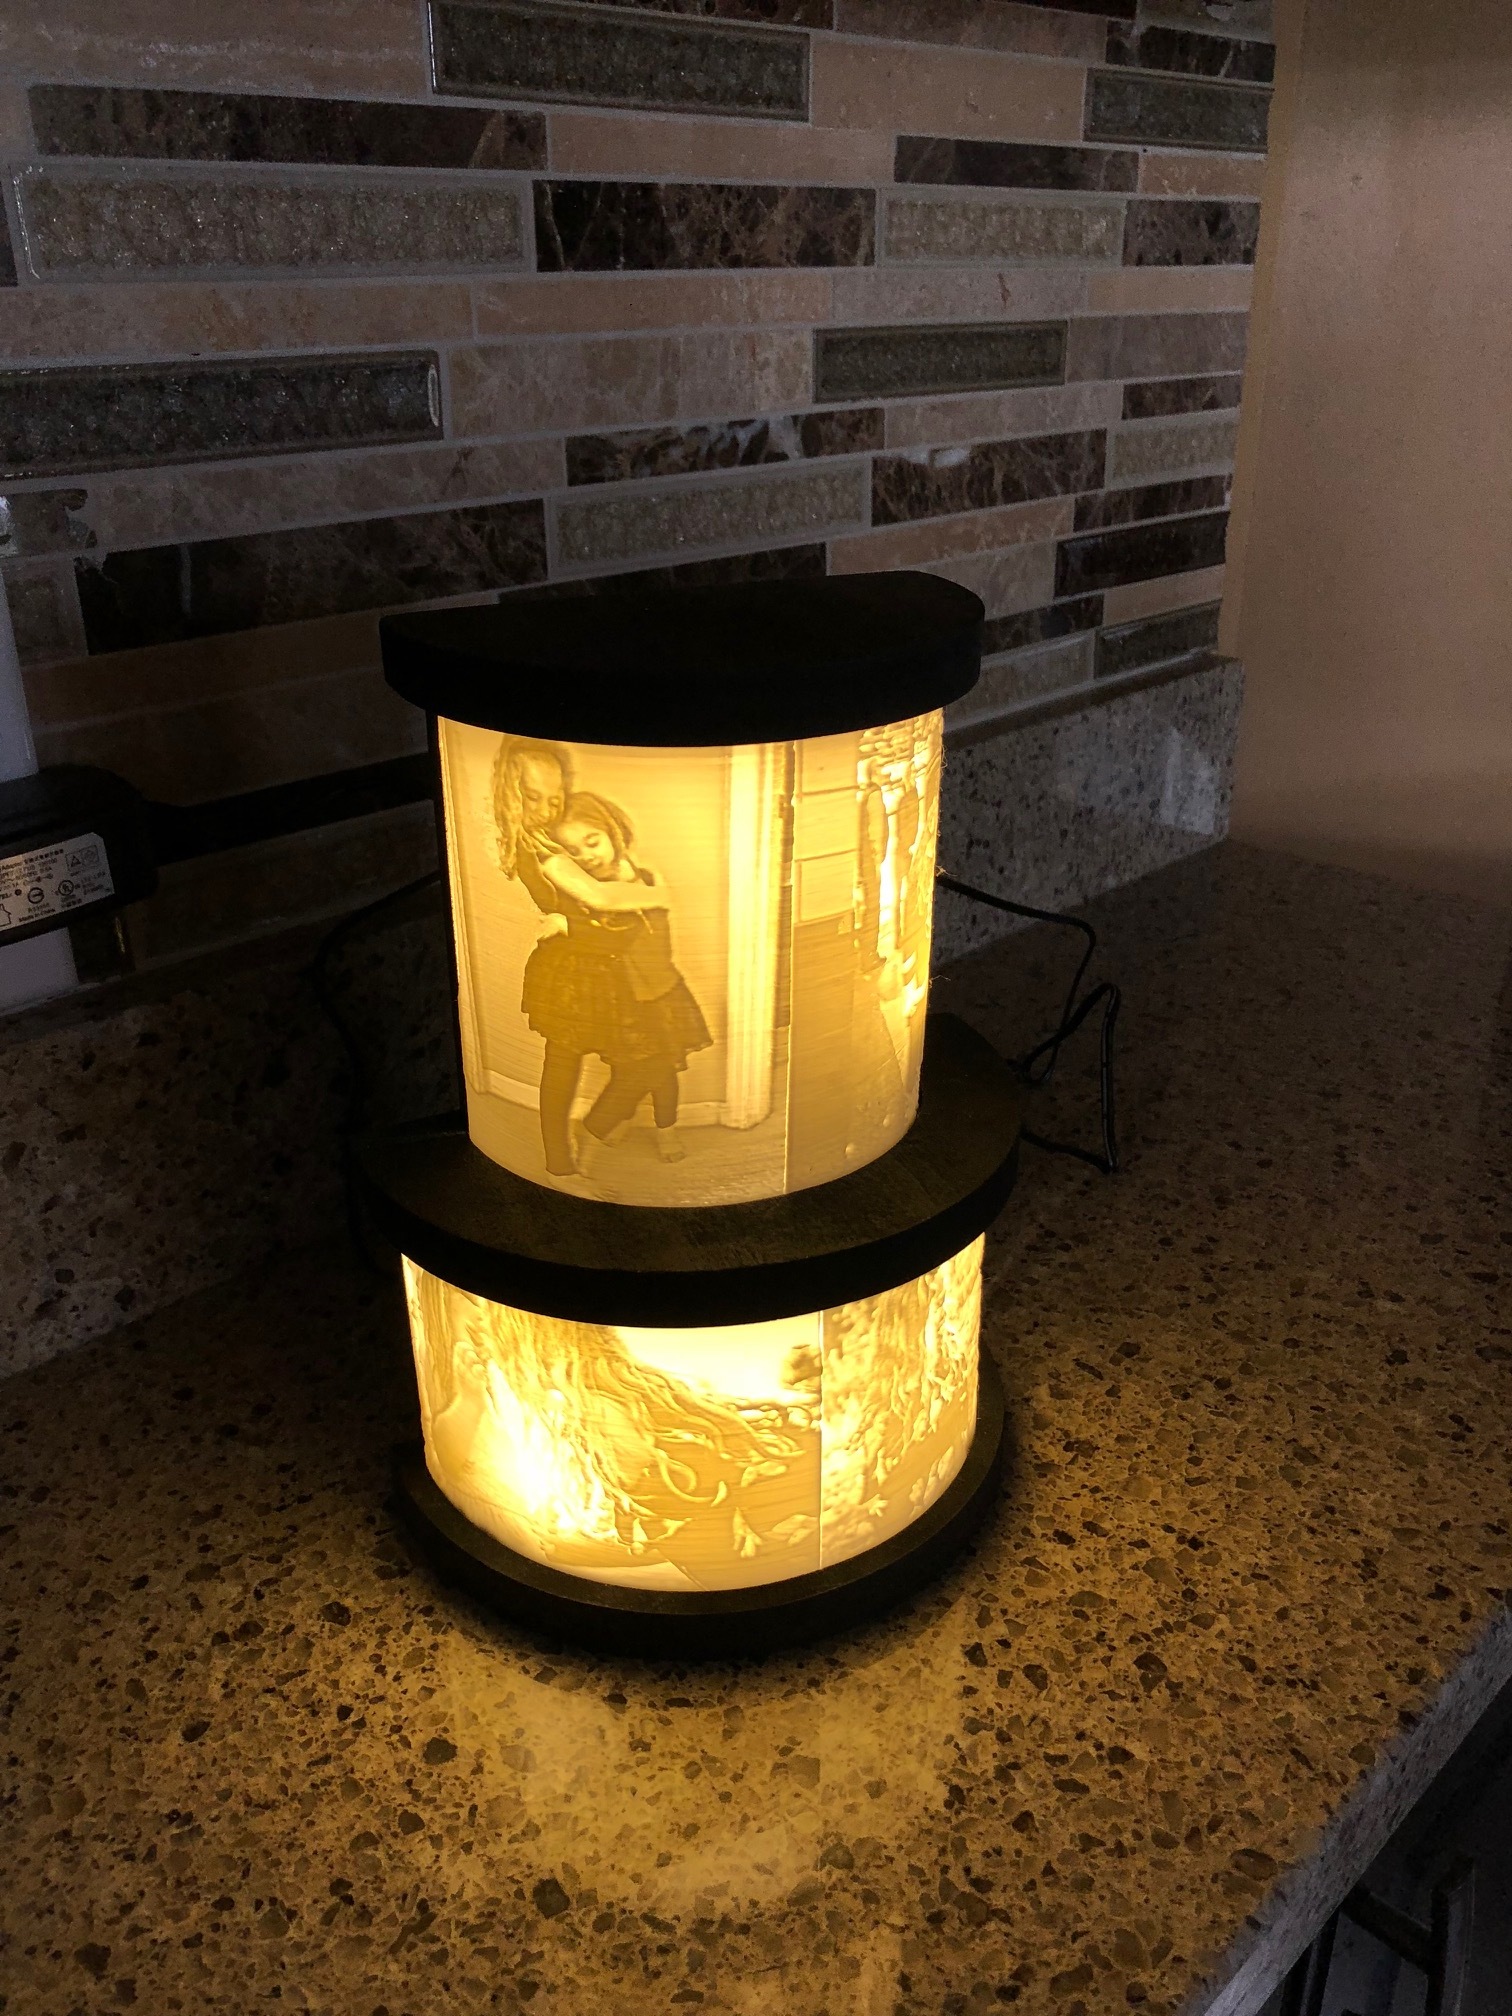
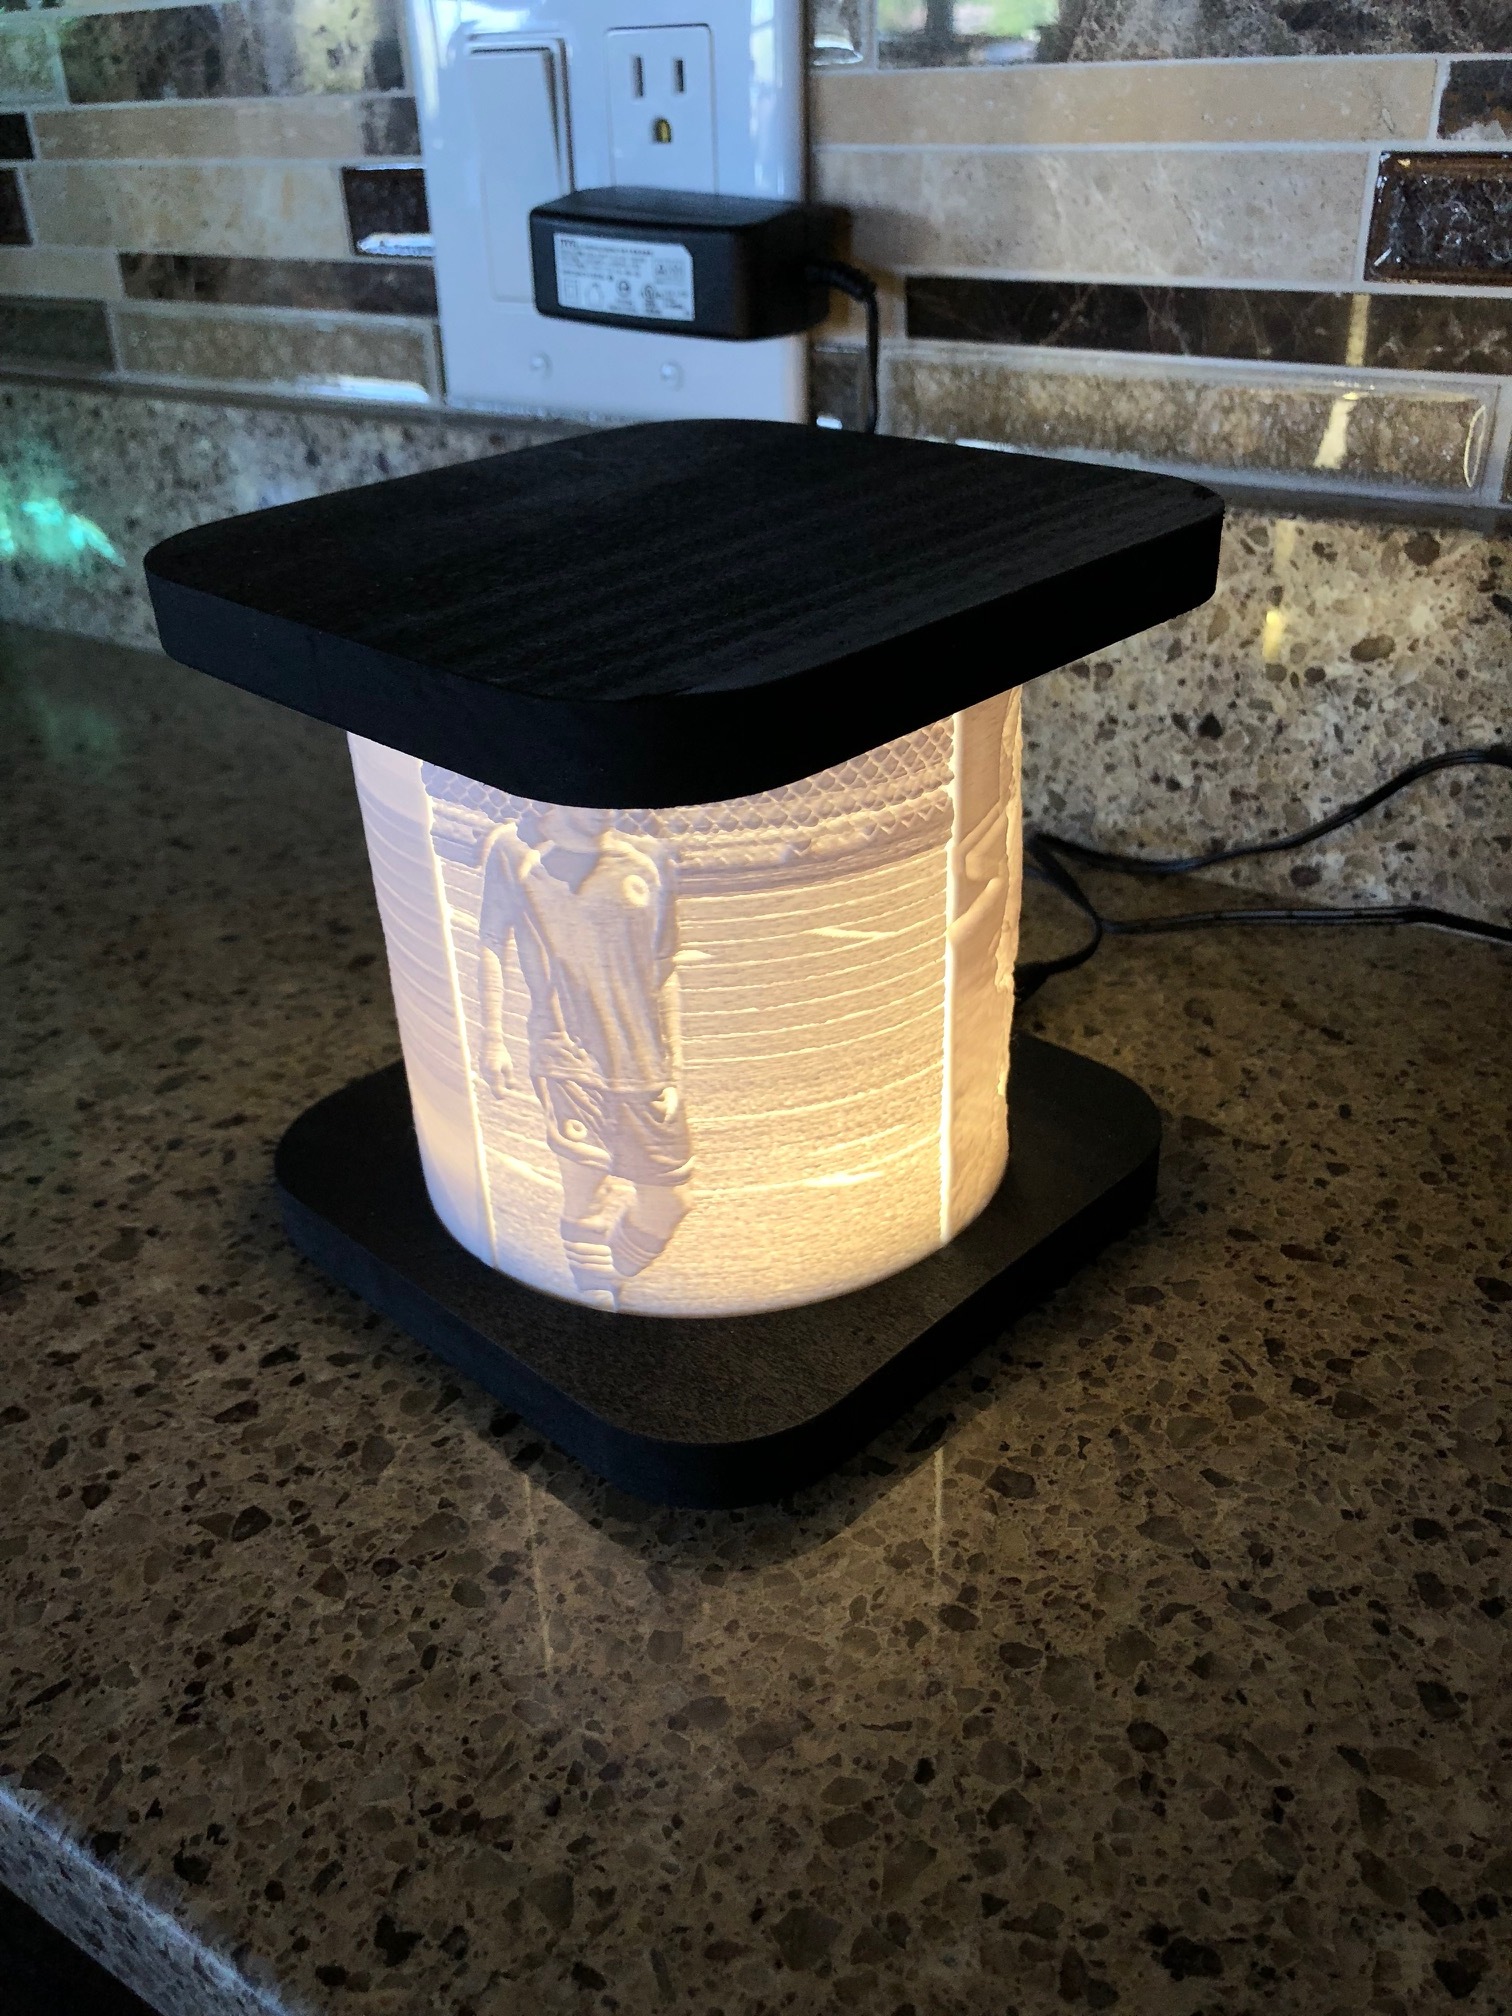
I decided to mix 3D printing and CNC in one project.
Let me know what you think, I would be happy to share the design process.

4 Likes
Very nice. Please do share the details !
Just upload your picture you want printed to: http://3dp.rocks/lithophane/
Once the pictures have been printed, I measure the curve and size to make the stands.
You can design the stands using the 3D model the website creates, however it will be a little different dimensions after it is printed.
Make sure to use white PLA or ABS for your prints.
I made mine with a 70% infill.
I recessed the LEDs in the stand so you would get more of a consistent light.
Thanks, simple and clean. While I am here, may I ask what 3D printer you have and if you’re happy with it ?
1 Like
I currently have 3 printers.
- Makerbot Replicator 2X, I use this mainly for ABS/Nylon since it has an enclosure.
I have had it about 5-6 years and have been really happy with it. - Formlabs Form 2, I only use this for fine detail work, clear prints and casting.
Great quality prints but I still think the price is a bit high for it.
I have had it for about a year, and it is the most expensive cost per print. - Anycubic Delta Linear Plus, I use this mainly for PLA.
This if by far my favorite printer. It was only $300 and the quality of my prints have been great. I have only had this printer for about 3 months.
If you are new to 3D printing this would be a great start.
Let me know if you have any questions, I would be happy to go further into detail about each of them.
1 Like
Good info, thanks. Since I do not need 3D prints very often, I am sitting on the fence between buying a printer (and then figuring out whether a cheap entry level one is going to be disappointing), and continuing to use online 3D printing services as I do from time to time (expensive, but quality is very good then, so for a few prints a year it’s been a good compromise). Mostly, I am trying to resist the urge to buy a printer and then getting sucked down another rabbit hole of learning/checking/tuning/optimizing the machine (yes, Shapeoko, I’m looking at you!  )
)
The first two are out of my intended budget. Would you say your Delta Linear Plus is simple and robust enough that it can be used as tool (i.e. “it just works”), not a hobby by itself ?
As a person who set up a 3D printer from the frame up (an Ordbot) as well as converting a Shapeoko to 3D printing ( https://www.shapeoko.com/wiki/index.php/RepStrapOko ), it’s a lot of fun, and once dialed in, works well — the big advantage is that it’s much less set up than a CNC router — just slice, power up, copy file, preheat, load filament, start printing, and wait — since the noise is less oppressive it’s usually something one can do with less juggling of social schedules and less of a time / energy / attention commitment.
I’ve been thinking about getting a delta 3D printer as well, but want something reasonably small / compact and ideally sort of portable.
If you are able to put together the shapeoko, I would say the Delta Linear Plus would be no issue for you. It took me about an hour to build it and I was printing with in 15 minutes after the build was complete. I have since made upgrades to the printer but they are in no way necessary (you can print most of the upgrades).But like Will said there is alot less setup vs CNC and you can walk away while it is running.
I choose the anycubic linear plus because I was new to delta style printers and at $300 it wasnt a big risk if I ran into issues. The construction of this printer allows me to take it places with out worrying about it falling apart. I am pretty shocked that a $300 printed turned into my work horse for 3D printing. If you are interested I can go over the upgrades I made, I think it cost be around $30-$40 for the upgrades.
1 Like
@aaI3D
Well this is tempting.
Yes sure it would be interesting for me to know about the possible upgrades for this machine.
@WillAdams, I’m sure it’s a lot of fun, this is exactly my problem, I probably wouldn’t be able to resist spending way too much time experimenting with it. So much fun to be had, so little time
I have the AnyCubic I3 Mega and love it. 8 bolts bolt the two piece frame together and it is ready to print. Pretty good print quality and the build size is pretty decent too.
1 Like
The upgrades that I did are:
- Stepper motor bushing (I bring this printer alot of places and I want to make it as quite as possible)
https://smile.amazon.com/gp/product/B079YWZ9X3/ref=oh_aui_detailpage_o04_s00?ie=UTF8&psc=1 - Build plate. (The build plate that came with the printer is good, but I prefect to print on a glass surface that has a coating)
https://smile.amazon.com/gp/product/B0776V9GJ5/ref=oh_aui_detailpage_o05_s00?ie=UTF8&psc=1 - 3D printed end caps. (This is only to make the printer look more finished.)
https://www.thingiverse.com/thing:1969059
https://www.thingiverse.com/thing:2058190 - Part Cooler. (This is one the best upgrades, it really helps with print quality)
https://www.thingiverse.com/thing:2451652
I have more I might do, but for now I am happy with the upgrades.
The nice thing about 3D printing is if you have a 5-10 hour print if gives you time to work on other things. My typical work flow is to start the 3D printer first, then start to work on the CNC side of the project.
2 Likes
Just placed an order for an AnyCubic Delta. I figured at 249 euros, I would not take a huge risk anyway and it looks perfect for a casual introduction to 3D printing. Thanks for the tips Aaron (and Pete).
2 Likes
Julien,
Welcome to the club.
If you have any questions, feel free to contact me, I would be happy to help.
I linked a file that will help you with the set up process in Cura to get you great prints right off the bat.
Just follow the instructions and you should be set.
1 Like
Great projects, Aaron! I’m interested in making something similar to the St Louis project you made for the kids. Maybe I missed it somewhere, but do you have details on what you did for the LED lights? I’m thinking of doing a Cleveland one for one of the kids bedrooms. Also, I like the wood look, but I could also do a corian and acrylic split…I’m trying to study up on the different types of adhesives to use. Thanks for posting these pictures!