A friend of my wife was taking drum lessons so I made this sign for her.

7 Likes
Oh my goodness !! I love that lol
Here’s the cd2 file if you would like it.
Hit Like a Girl.c2d (654.7 KB)
Thank you ! I really appreciate that ![]()
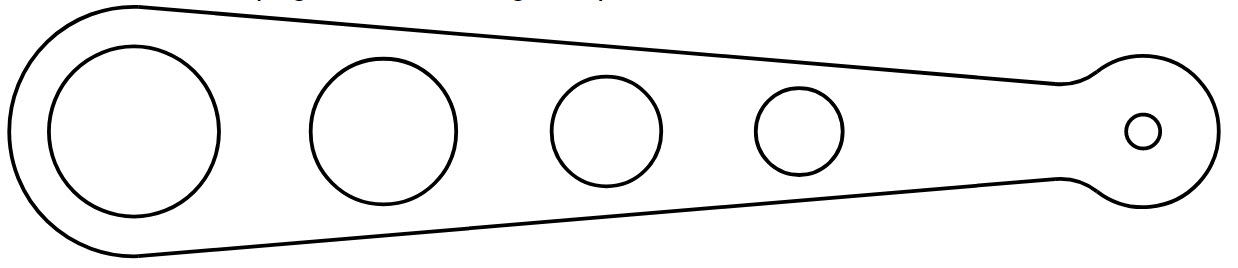
This would make a nice little beginner Project. Used to measure servings of pasta. Holes are 1 serving, 2 servings, 3 servings, or 4 servings. Made on 12 x 5 1/2 x 3/8 inch stock. I would recommend some type of hardwood. Make one and show your spouse it was worth spending all your money on a CNC machine. Or just go to the dollar store and pick one up for 2 dollars and tell her/him you made it. ![]()
You will need a 1/8 bit long enough to cut to 3/8 depth.
Pasta Measuring Tool.c2d (67.4 KB)
4 Likes
New one i just did, set of 2 spurtles
Spurtle and Spatula.c2d (50.5 KB)
1 Like
Simple Fall design. Made with 12 x 9.25 PVC
Black Letters, Green Wheat, Orange Pumpkin W / Green Stem
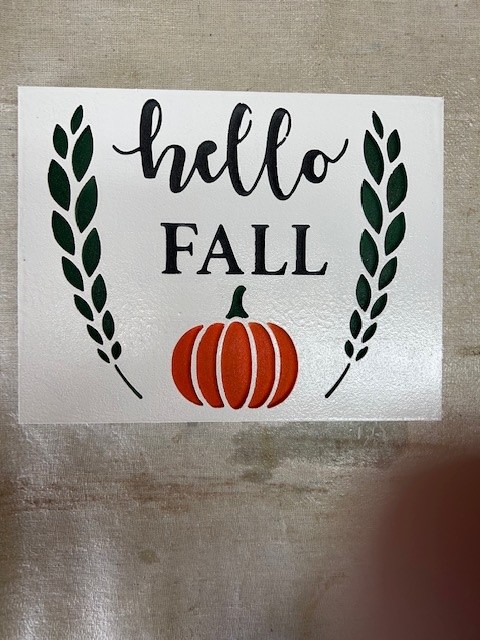
Hello Fall 1.c2d (290.9 KB)
3 Likes
On your Hello Fall are you masking and painting or just painting and then sanding the surface? On my wood projects that I make I have used masking but sometimes it gets torn up. Usually on wood I seal the carved project with shellac and then paint. Then I sand off the excess paint. Then the project gets a topcoat. On the PVC are you applying any top coat to protect your paint?
I mask the different areas separately, then spray the Green, Black, and orange. Then I use a 2 inch foam roller to paint the top white coat. Don’t press down too hard or use too much paint on the roller so it doesn’t get down into the cut. Will take about three coats to cover the overspray. I use a heat gun on low to dry between coats so I don’t have to wait between coats. Last step is clear coat spray either satin of glossy finish. Covering the project with clear shelf paper before cutting helps eliminate some fuzzies on cutting and eliminates some of the overspray when painting. Sometimes i do this sometimes i don’t. Either way a little cleanup with a small round jewelers file after cutting and before painting but cuts pretty clean
1 Like
Good evening,
I am just trying out PVC board for the first time and curious as to prep and finish yall are doing when painting. Do you paint, clear coat, then cut, paint again if need be and clear coat again? I painted then carved and maybe I didnt have good feeds and speeds but some of my pait seemed to be in the V Carve as in it melted or peeled and stick to the bit which placed it in the carve. Just looking at prep and finish or guidance on feeds and speeds. Also just standard clear coat spray seals it and protects it?
I found a V bit doesn’t work very well when the design is to be painted. When you do the top coat with a roller the paint gets down into the design. Better to use a straight bit.
Makes sense I have plenty of straight bits, do you typically paint, clear coat, cut, and paint again? Then a final clear coat. Also do you use regular spray clear coat? Or do you utilize the oramask technique?
I usually cut first, then spray the cut area. Then roller the top coat, several coats to cover. Then clear spray coat. I don’t usually use oramask. I just roller over the overspray. Use a heat gun between coats to dry the paint so i can do all the painting at one time.
1 Like
Awesome thanks for the info! Do you have a standard depth that you like? Or particular bit?
Standard depth i use is 0.190 inches. The Bit i use is the largest bit possible for the design. If you look at the file for the hello fall sign it shows what bits i used.
Will do thank you again for the knowledge!
Tried you method worked perfectly, however when i sprayed the clear coat my paint bubbled and cracked on the sprayed areas… ruining the project. Not sure if it was the spray paint or the clear coat… but the clear voat essentially ate wat the paint…
You should let the paint dry before you do the clear coat. I use rustoleum clear coat satin or semigloss finish. Also, use light coats on the clear coat. Dont spray too heavy.
2 Likes
Exactly what i did wrong little heavy on the clear coat as well as not sure the spray fully dried! Completely my fault.
@TonyMurray Sorry to hear about your loss! ![]() I did the same a couple of times by not having enough patience or time to complete. One time I put a finished piece in a drying (heat) box to dry the clear coat. What I didn’t do is give the underlying stain enough time to dry/cure, so it bubbled its way to the top in places. Ouch!
I did the same a couple of times by not having enough patience or time to complete. One time I put a finished piece in a drying (heat) box to dry the clear coat. What I didn’t do is give the underlying stain enough time to dry/cure, so it bubbled its way to the top in places. Ouch!
I’ll give most coatings two or three days to dry/cure. When I’m through with a layer, it gets 48 hours minimum to dry/cure. Sometimes you just have to wait, but its faster than rebuilding a project.