I really need help with this project

Hi guys, so here we go again, I’m stuck, I’ll try to explain my situation as clear as possible (Please have in mind English isn’t my first language, so I apologize about that)

I’m trying to do 3D carvings with my Shapeoko 4 using Teak wood, the Teak wood seems to be a lot less dense than oak and a little bit stringy but, I believe with the right settings this wood can work very good for 3D carvings.

Imgur

I really hope the 3D carvings will have these beautiful tones after applying 2 coats of mineral oil (I haven’t tested it yet)

Imgur

This is the best result I have been able to achieve, it’s also my second try of the same project btw. The first try was a total failure since I did the finishing toolpath against the wood grain and it ended up being too stringy to sand by hand (I tried for hours using sand paper and popsicle sticks) so I gave up and started again with another board.

xxxxxxxxxxxxxxxxxxxxxxxxxxxxxxxxxxxxxxxxxxxxxxxxxxxxxxxxxxxxxxxxxxx

The failure:

Imgur

Imgur

(As you can see there is no way of sanding the last supper without a dremel or something like that and I don’t have one)

xxxxxxxxxxxxxxxxxxxxxxxxxxxxxxxxxxxxxxxxxxxxxxxxxxxxxxxxxxxxxxxxxxx

Imgur

Imgur

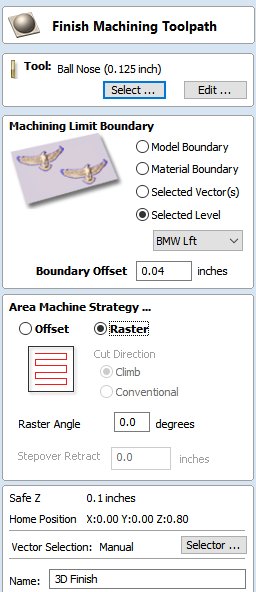
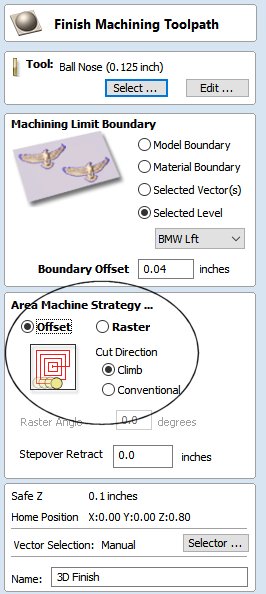
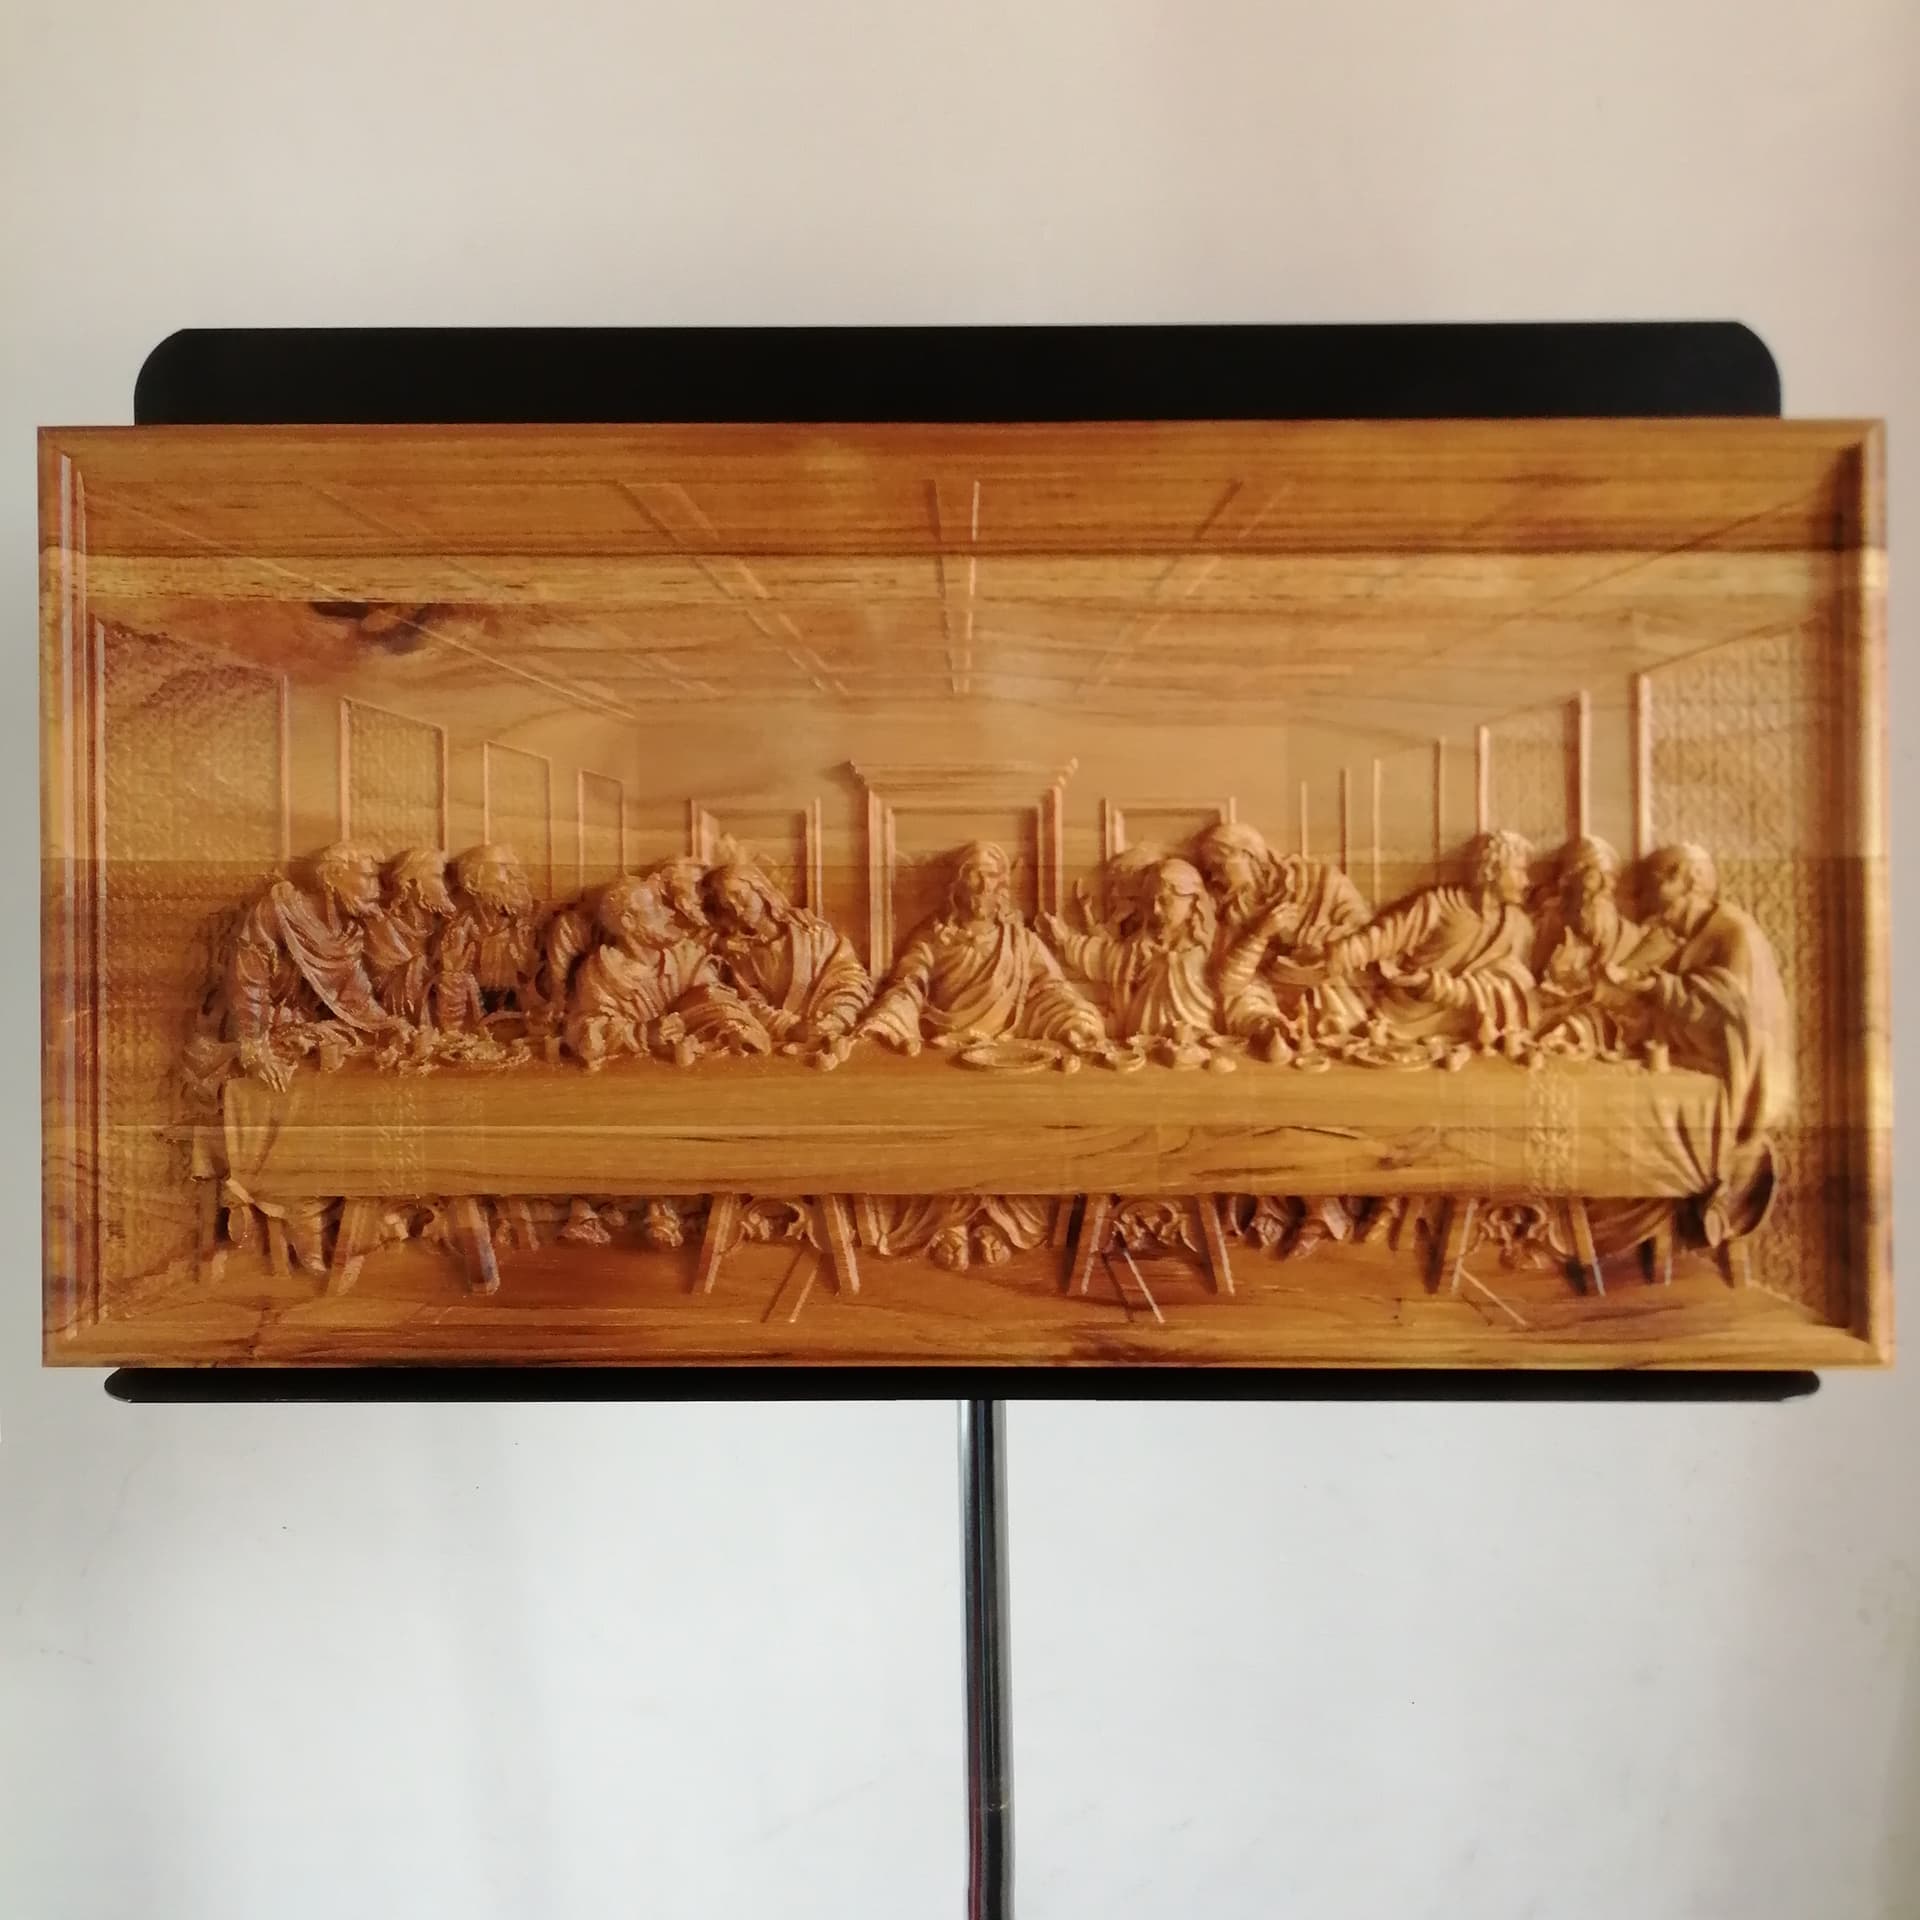
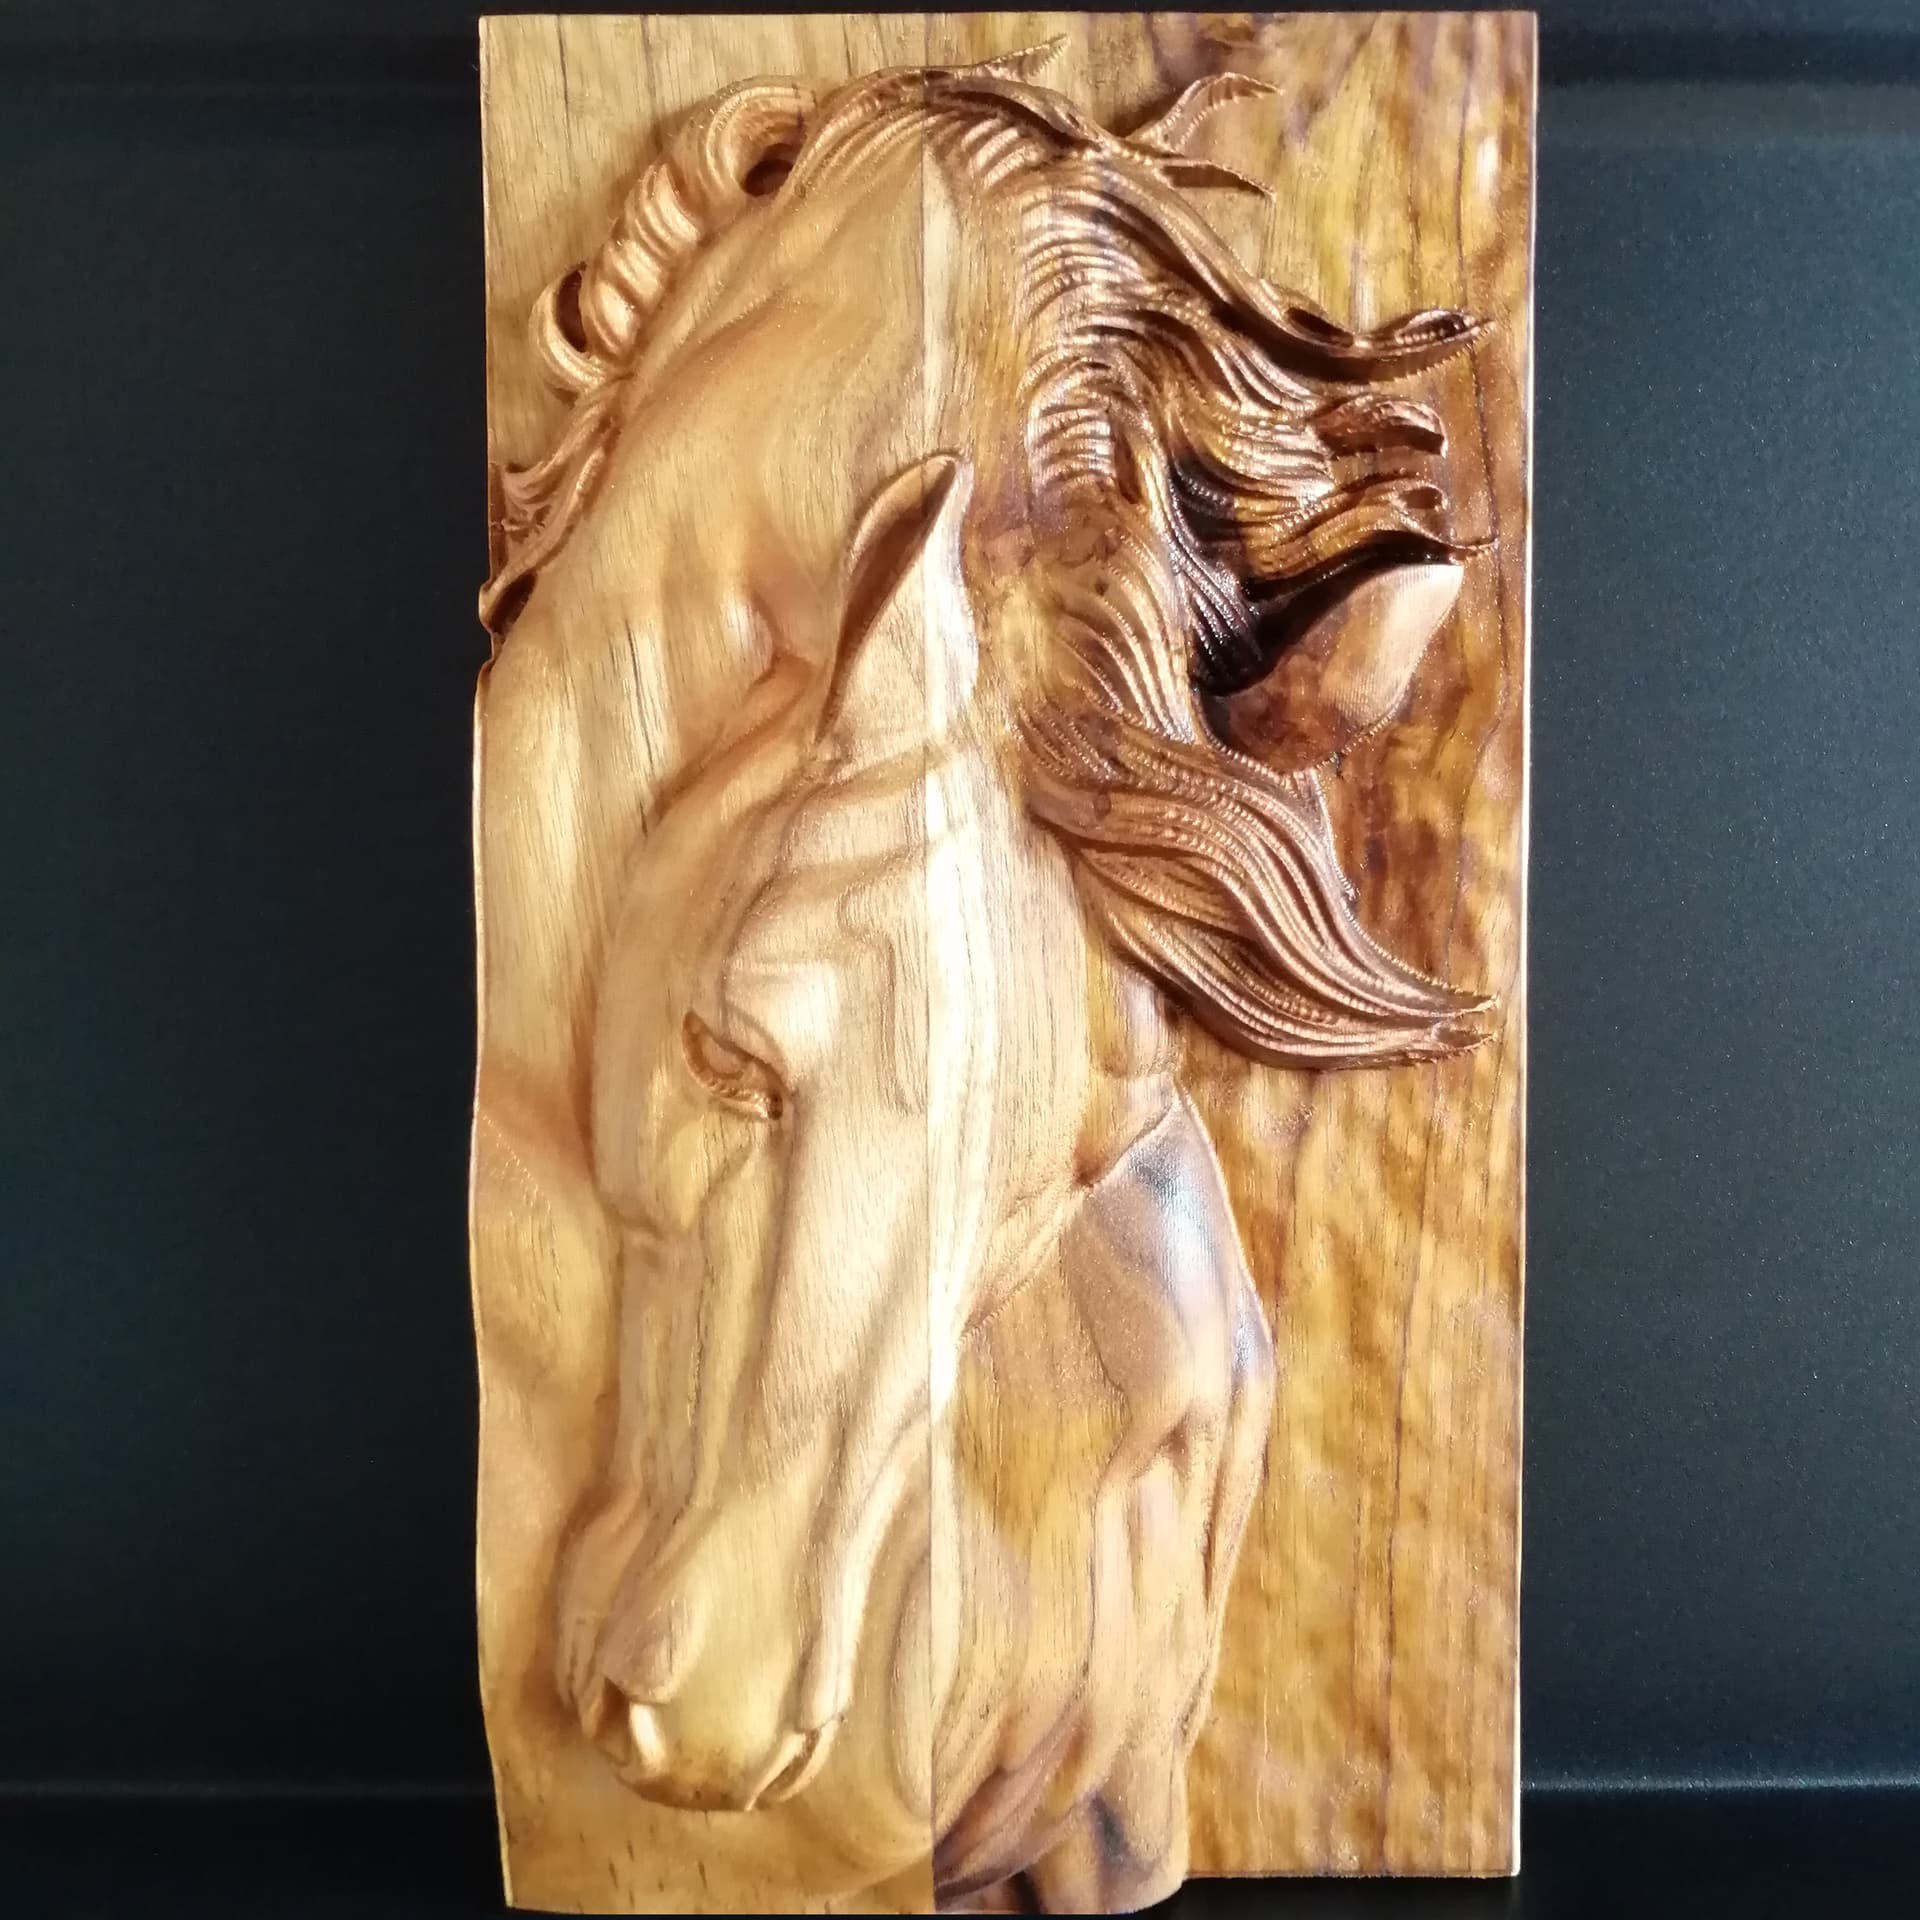
So, this time I did the finishing toolpath along the grain and it improved the quality of the carvings. As you can see the horses look very nice, they just need a little bit of sanding and they are ready to go, but the last supper…

Imgur

Imgur

Imgur

Imgur

Imgur

Imgur

Imgur

Of course the quality improved, it looks a lot better than the first attempt but, there are parts than I can’t sand by hand, I don’t have the tools to fix this and I believe this problem is because of the chip load.

For some reason I’m getting long and thick strings of wood, and I believe this is the reason why the carvings look great in plane surfaces but struggle in detailed areas (It should be small chips right?)

I was using a 1mm tapered ballnose at 18.000 RPM - 70 Inch per min - 20 plunge rate and 8% stepover.

While the project was running I tried to go faster in increments of 10% until 50% faster using the the “Feed rate +10%” option in carbide motion.

I also tried:

Going slower in 10% increments until 50% slower
Chaging the RPM to 12.000 RPM and testing going faster and slower in increments of 10% until 50%+ faster and 50%-slower

But no luck, I was having the same long chips of wood.

How do you guys think I could solve this? the board is still in place so I can machine the finishing toolpath again with new values. I would really apreciate a little bit of help here since to be honest I don’t know how to approach this problem, I feel that I’m so close to success… It would mean the world to me fix this. Thank you very much for your time guys :grin: :grin: :grin:

1 Like

I would just keep going w/ ever smaller tools.

Hi Will, but that would mean almost 40 hours more of carving with a 1/32 tapered ballnose bit. I even had to divide the last supper is two in order to let the machine work for 10 hours yesterday and 8 hours today for the finishing tooltpath using the 1/16 tapered ballnose bit, Is there no other way? Thanks :smile:

Honestly, I think your best bet for saving this particular carving is to get yourself a dremel and do some hand work.

Going from a 1mm ball to a 1/32" (~0.8mm) ball doesn’t feel like an option worth the time even though it would likely improve things.

Also, I know you really want this one to work out but if you’re only on your second carving in a new material(teak) then it’s not like calling it here is a failure. It just takes time and iteration to dial in a new material, especially wood… that stuff is finicky!
Work on some smaller scale tests and make sure to thoroughly document your attempts so you can make consistent forward progress :slight_smile:

Just my 2 cents, good luck to you with whatever you end up trying.

2 Likes

Bryan,

I wonder if now is the time for you to try @MikeG’s tip in the your thread from a few days ago:

It will be half the time to run a pass with a 1/32", and you may get away with it?
I’m not familiar with milling teakwood but don’t expect infinitely small detail from any wood, the grain size will come into play. I’m already impressed by the level of detail you got, to be honest (e.g. the patterns in the last supper table, and the horses look fantastic too)

5 Likes

@BAlexander , here’s the part you missed that you are now having trouble with; the 40 hour test cut. After you learned your first lesson with that piece, no one pointed out that you shouldn’t cut a new wood project without a proper test. That is a huge project to undertake when you don’t already know everything about it from a good test.

A test would only be a small detailed section of that overall project, so you can change feeds and speeds to see what works. You could also test finishing methods (when you get proper tools for that.)

Lesson learned? :smiley:

4 Likes

Perspective. How long would it take you carve that out by hand without a CNC machine?

Stringy is just the nature of that wood. If you were carving it by hand, you would continuously look at the grain & change your direction of cut accordingly.

I think the “liberal coat of finish followed by a 2nd finish cut.” might be your best bet here. You need a finish that hardens, so may have to give up the mineral oil idea. But any finish is going to bring out that beautiful grain.

Did you mention the software you are using? One other thing that might help is to make sure you are always climb cutting. (Can’t do this in CC). Razor sharp cutters are also a must with any wood.

Looking forward to seeing the finished product :slight_smile:

5 Likes

Hi Tod, thank you very much for your response. Yes, I understand, trust me that I would love the idea of leaving the machine working 40 hours with the 0.5mm bit in order to make a beautiful piece of art, but I would make my neighbors crazy with the noise that come from the machine (They could even call the police LOL). I try to let the machine work for 12-14 hours per day max. I’m glad you told me about “give up the mineral oil idea” since that was my concern about the “coat of polyurethane” method, this method seems like the best idea for me right know, since I can’t purchase a good dremel in this moment and it would take more than 30 days to arrive anyways. I’ll clean and sand a little bit the piece in the flat areas, then apply the coat of polyurethane (I believe I can purchase the spray version) and do the finishing pass a little bit faster so maybe I can end the piece in one pass and only one day. I’m using Aspire (I used the raster strategy with the horses and last supper) Could you please tell me why climb cutting is better with this kind of project or wood? Seems like something I need to give it a try. Thanks.

Hi Crooked, thanks for your response. Oh well, to be honest the horses were the “test” :rofl: It was my bad for not using a small and detailed model to test how the cutter would perform in detailed areas like you suggest. Do you have any idea on what is causing the chips of the wood to be this long and thick? Like I mentioned I tried to go faster and slower but the problem persisted so I have no idea on how to solve this problem. Thanks!

Great job posting the video, really helped me see what’s happening with your cutting. What program are you using to create your toolpaths, Vectric by chance? If so, the raster toolpath is not your friend in this case. What’s happening is that the wood is being peeled away from the material rather than making chips on the pass from left to right. This will of course vary throughout the material as the grain structure changes. If you are using a Vectric product, try changing the finishing pass to an offset toolpath using the climb cut direction. From this:


To this (what Tod (with 1 ‘d’) said):

You might be able to then lower your Z height .002 (.5 MM) and rerun the finishing pass.
Great looking project, I hope that you’re able to save it!

EDIT - and I see now from your response that you are using Aspire. Adding the polyurethane will probably help as well, but if you can set up and run a small test section with the lowered Z, you might find it unnecessarily.

3 Likes

In your video, the first pass (left to right) is conventional cutting. The cutter is pulling the wood away from the remaining stock and peeling off that last little bit of stringy wood that is no longer rigid enough to resist the force of the cutter. Whereas the 2nd pass (right to left) is climb cutting & pushing the wood toward the remaining material, resulting in a cleaner cut.

Climb Cutting | Wood

3 Likes

Hi Mike, OMG this could be the solution, and a easy one to apply BTW. I guess I just have to adjust the Z directly in carbide motion using the “Jog” mode until I get a “-0.002” Z or something like that. Thank you very much! :smiley: :smiley: :smiley: :smiley:

Exactly :grinning:
Looking forward to seeing the end result!!

1 Like

Hi Tod, Yeah :grin:, changing the strategy to “Offset - climb” seems to be the solution for this kind of wood. I really apreciate your help, the image really helped me understand what was happening. I’ll lower the Z axis by “0.002” and run the project again. It’s time for success!

You can also type a value in the Z location dialog, rather than clicking “Zero Z”.
So if you touch off to the same place you did before, you would enter 0.002, Enter in the dialog. Telling the machine that it is currently 2 thousanths above zero. Or that the Z zero is 0.002 into the stock.

I do this frequently when I’m surfacing a part. I will set the top of the part to 0.005, run the path and if it needs another pass, I will just look at the Set Zero screen. Say Z is at 4.321, and I want to remove another 0.005, I will set it to 4.326, and rerun the path.

Now that I’m checking the data, did you mean 0.02 inches right? that’s .5mm… 0.002 seems like too little. or am I wrong?

I just replied to your 0.002" comment. I see Mike wrote, “0.002” (0.5mm). Should have been 0.05mm.
Depending on how thickly you apply the finish, 0.02 might be too much if you cut through all of the finish.
I don’t know how the finish will absorb into that particular part.
You could cut it at 0.0, and just take off the top coat of finish and fuzzies. I would suggest a tiny bit into the wood, just to make sure you’re not cutting above the old cut. If you start the job and it looks like it’s not cutting anything, drop it a bit more.

1 Like

Thank you very much!

1 Like

Yes, what @Tod1d Said.
What I would suggest is drawing a vector box (a 1 or 2" square) around one of the areas with the must fuzzies, then run your finishing pass using that vector boundary. You might find that you only need to cut .002 - .004 to get the finish you are looking for. If you feel that losing a little bit more of the finial thickness isn’t going to be an issue, go ahead and go a little deeper. And if you haven’t applied any finish coat yet, I would hold off on doing so just to test the finish within the boundary box and see how it goes.

1 Like

You guys are the best!


7 Likes