I’m trying to figure out the whole in-lay process and i see several folks have different depths that they use. I found a dude on youtube that uses the .3/.2/.1 method and it used to work. Something has changed recently and now the inlays don’t fit right. Everything lines up accurately but it seems like the depths are wrong.
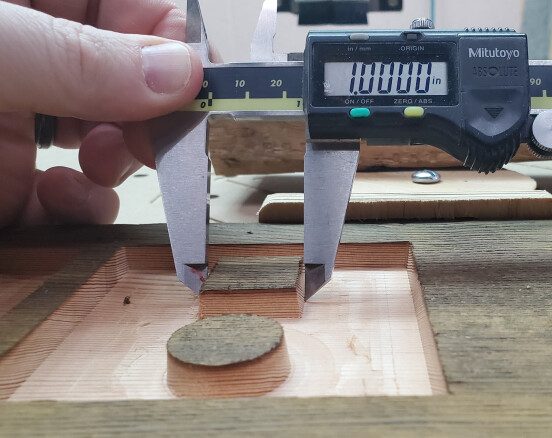
To test the sizes of everything, i created a 1" square using a 15 degree V-bit.
The female depth measures out at .3 so that seems accurate. Using a caliper, the 1" mark is .1 from the top surface.
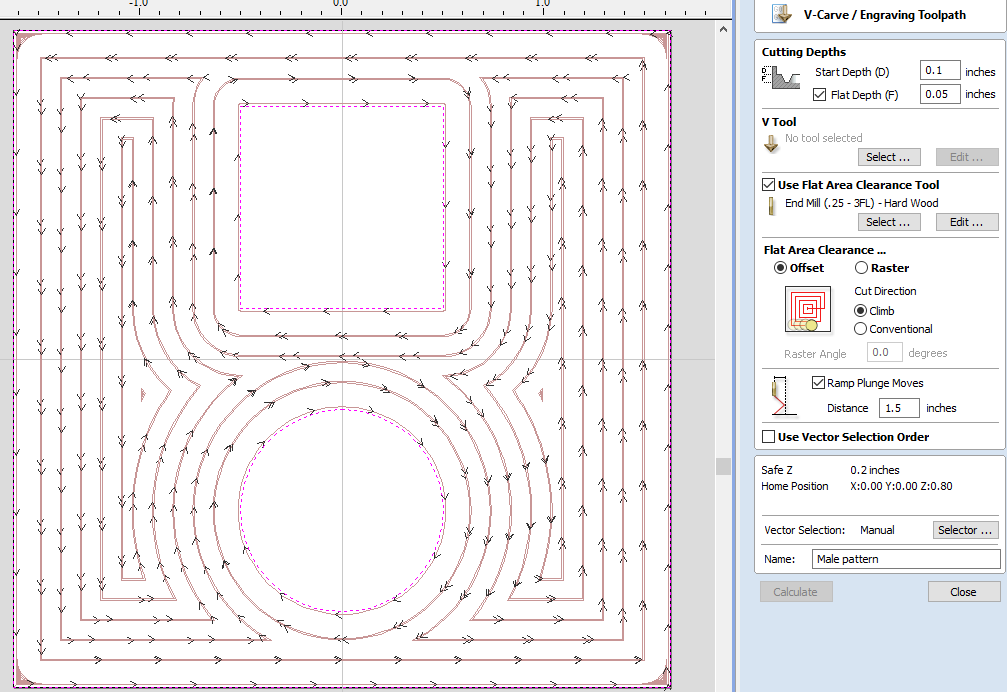
The male pattern (set start depth = .2, flat depth = .1) measured an overall depth of .3 and the bottom of the square (at the .3 depth) was 1".
I can’t help but think that there is a setting somewhere that i am missing that i somehow clicked or changed. These depth settings used to work but very recently something changed and the male patterns seem to be undersized or the depths are wrong. I’m really hoping you folks can help me out.
Yes, the “Z” zero for both pieces were set on the top of the material.
I’m going to try a .3 female and a .1/.1 male tonight and see how that measures up. What i can’t figure out is why i’ve had success with the .3/.2/.1 method before and all of a sudden, it starts cutting incorrectly and the male pattern is bottoming out.
Have you tried joining the sample inlay and cutting it down the center? That would give you a much better picture of what’s happening. When I do my inlays, I’ve had great success with a .25 pocket. For the inlay, I do .2 start and .05 flat.
Can you post the V-carve file for the test above? I’m still on v9.5ish, so if you have v10 maybe someone else can take a look.
Screenshots of your cut settings would help too.
I haven’t joined them together simply because of the measurements i took. If the female pocket measures 1.00" at .1 down from the top face and the male measured 1" at the base of it’s pocket at .3 down, i know that it would bottom out and the angled edges would only be close and not touching.
I’ve cut other tests down the middle for this purpose and they came together nicely. For whatever reason, now the fitments are different. I’m not sure what changed. When i look at at the settings for the previous cuts, nothing is different…hence my frustration.
This is actually something I hope the community is willing to try so i have something to compare to. I agree that the top area (Z zero) should be 1" x 1". Why my 1" square isn’t at Z zero is probably the reason as to why my fitments are off. I have no idea why the given dimension isn’t at Z zero.
Here’s screen grabs of v-carve file. I tried dragging the v-carve file itself into this post but it wouldn’t allow it.
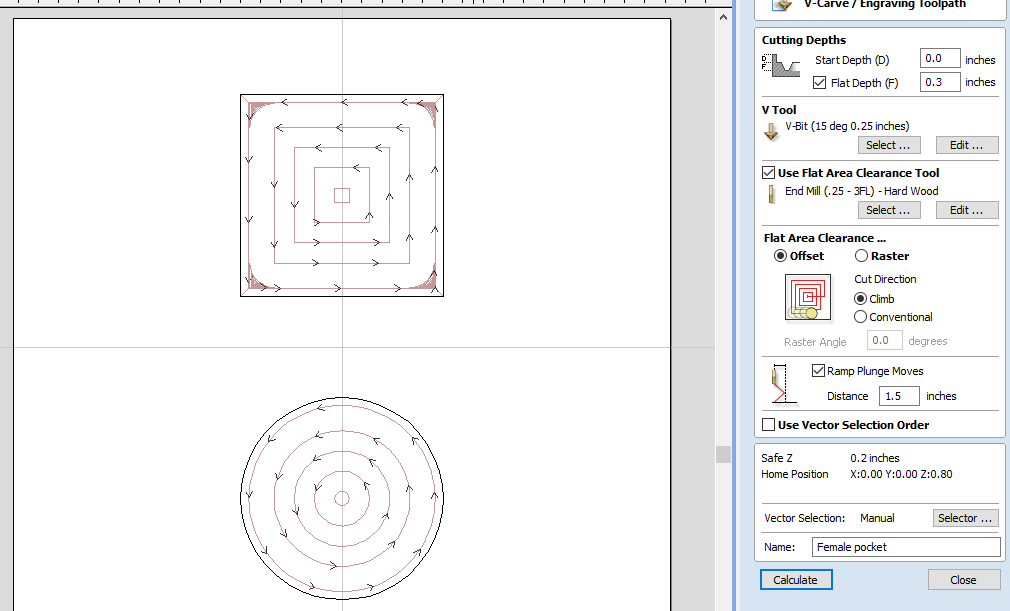
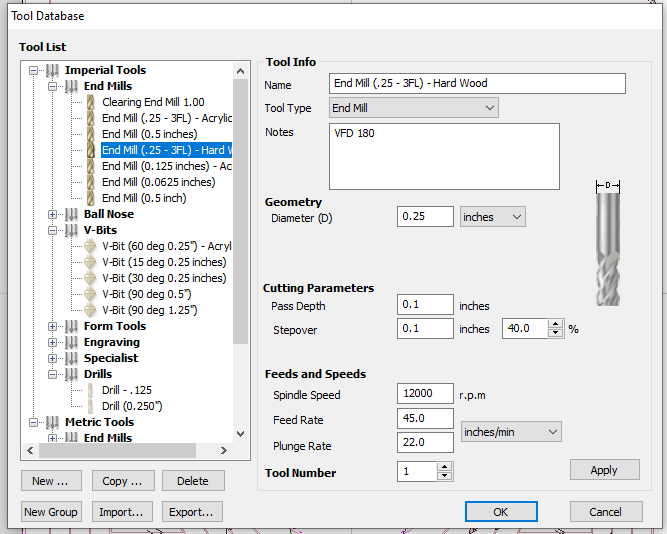
There is only 1 female pattern (.25 clearance and 15deg v bit) but there are a couple iterations of the male pattern. One pattern grouping has two separate .25 clearance tool paths. I created the dual clearance paths at different depths since (for whatever reason) the .25 bit plunges down to the .3 depth without considering the step down limit called out within the bit parameters. The second group is just 1 path for clearance and 1 path for the 15 degree v bit finish. Both paths yielded the same measurements after the cut was complete.
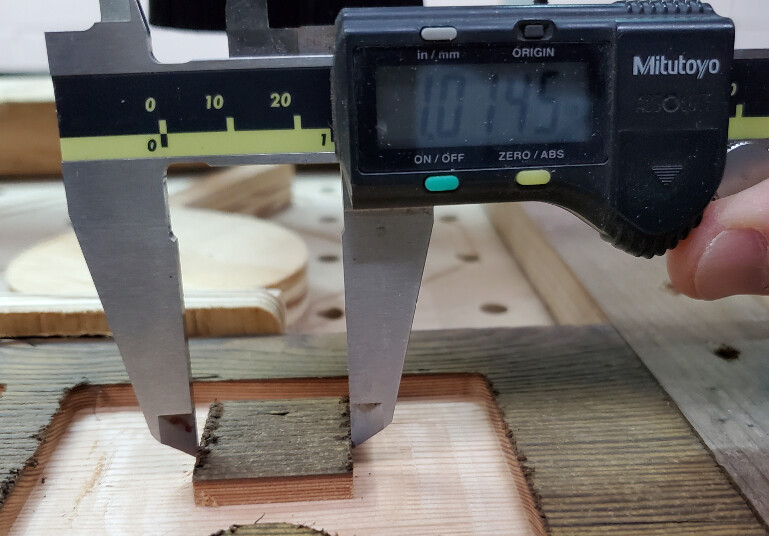
The first two image/measurements is just after the .25 clearance path and before the 15 degree V-bit path. The 1" square measures just over an inch and the depth is just over .2" deep.
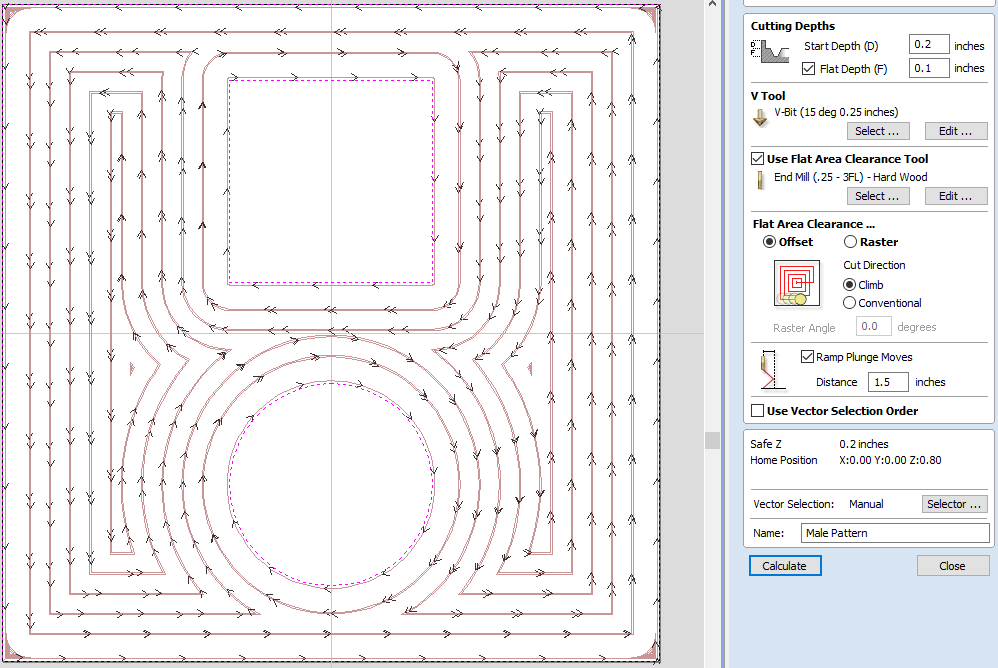
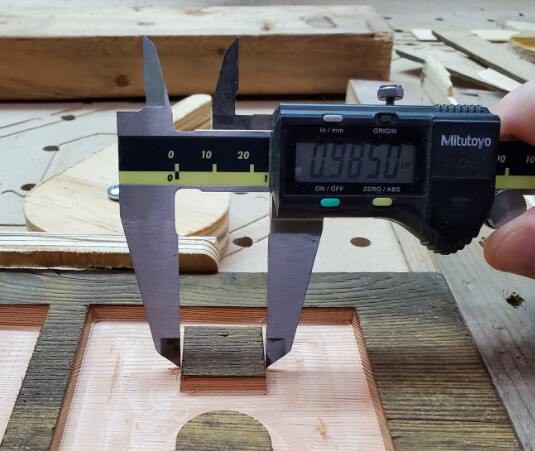
This measurement is the base of the square and measures just under 1" (at just over .2" deep).
This is really confusing. I have no idea how to get the 1" measurement on the male pattern so that it matches up with the 1" depth on the female i posted earlier in this thread.
I wish i knew how to fix that. right now, it’s 1" at .1 down from the top.
I’m not sure if it’s a setting with the bit or some hidden offset somewhere. I’m simply as familiar with v-carve or carbide motion as i’d like to be.
The depths im using are accurate but the measured outcome is incorrect.
Why is my 1" on the female lower than the Z zero? That’s the million dollar question.
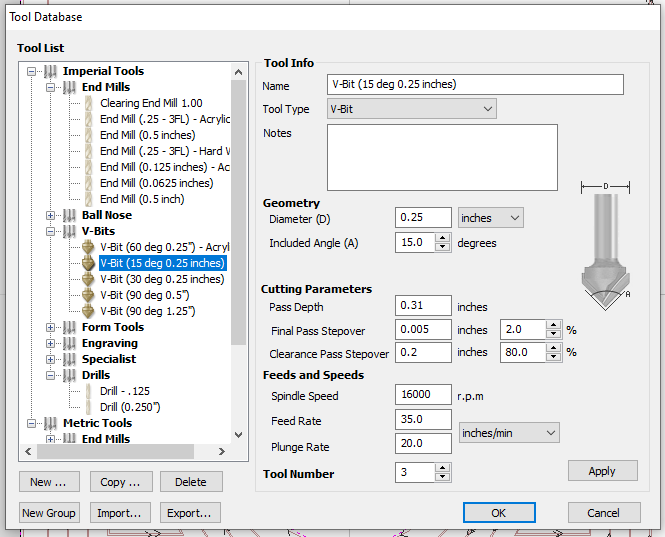
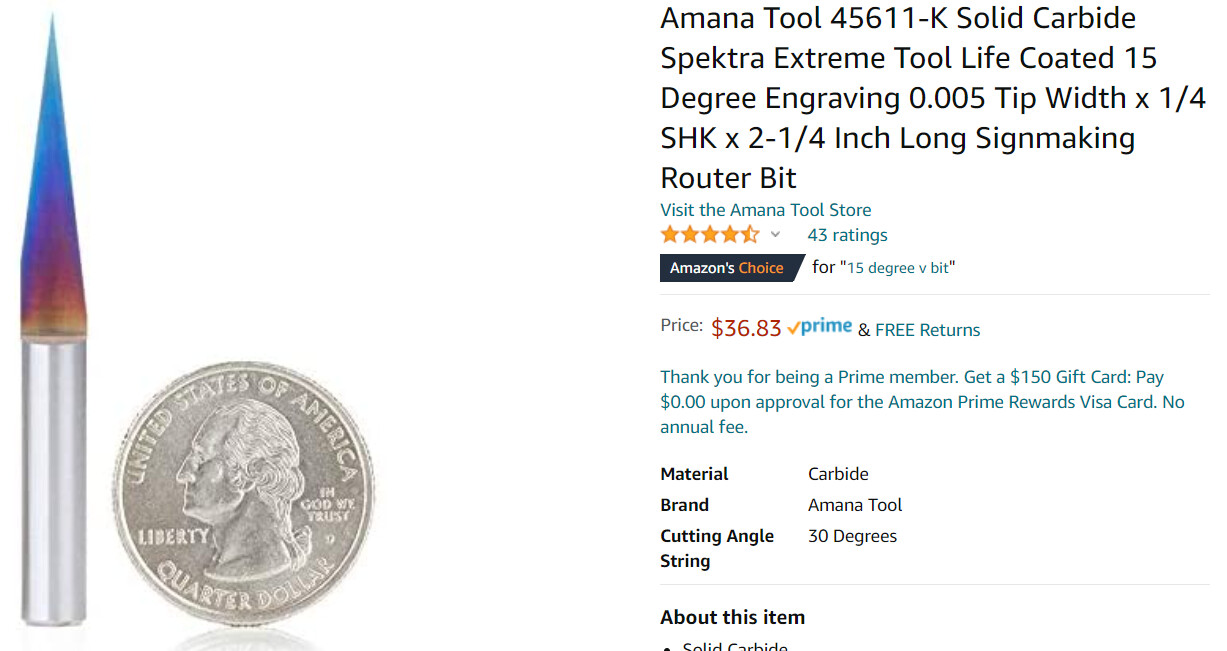
That looks like a 15 degree half-angle (since it says “Cutting Angle 30 degrees”), where VCarve is looking for the entire angle. In other words, I think your bit in VCarve needs to be set to 30 degrees.
Did you buy it from Amazon? Can you confirm the part number etched in the actual endmill?
Everything about that one on Amazon suggests it’s actually 15°, but the description does mention 30°. A part number from the actual tool will verify.