I am using the V7 Beta 723 and was wondering if anyone has an explanation about using the keyhole toolpath.
How do you enter the keyhole bit in the database. I know how to add a bit but what parameters do you use to enter it.
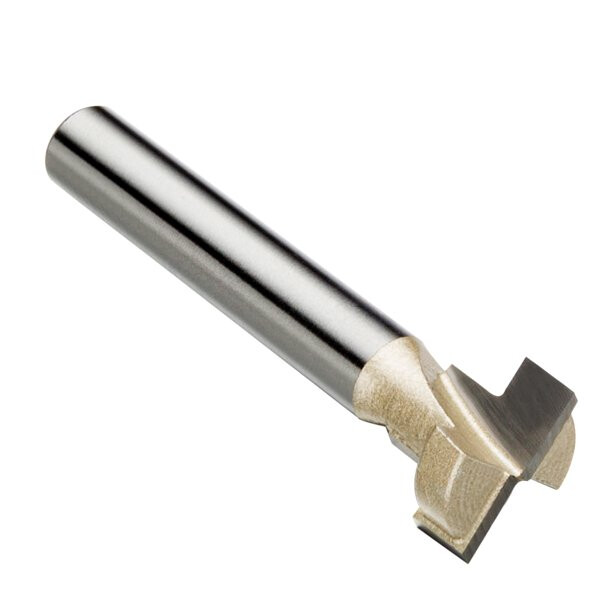
This is an example keyhole bit I found online.
Product Name: Keyhole Bit
Material: Steel,Tungsten Carbide;?Main Color: Beige, Silver Tone
Standard: 1/4 Inch x 1/2 Inch
Shank Diameter: 6.35mm / 1/4 Inch
Cutting Diameter: 12.7mm / 1/2 Inch
Cutting Diameter 1: 6.35mm / 1/4 Inch
Cutting Width: 4.76mm / 0.2 Inch
Cutting Depth: 9.5mm / 0.37 Inch
Total Length: 44mm / 1.73 Inch
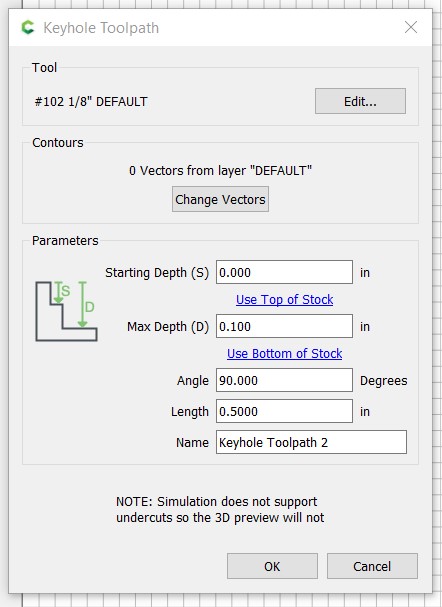
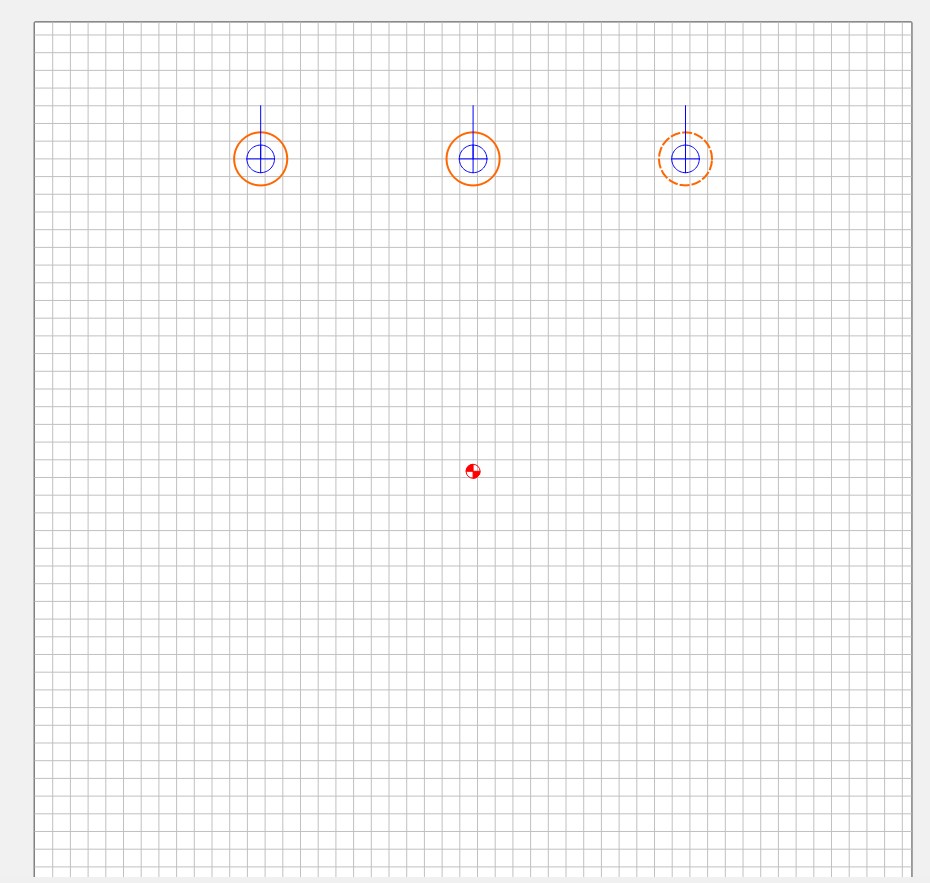
In the above picture the toolpath has 0 vectors chosen. What do you choose, a circle the diameter of your keyhole bit or what exactly should you draw to choose to make a keyhole.
After you enter a bit, choose a vector and fill out the tool path what is the tool path going to do. Plunge the keyhole bit to the max depth then move forward (in the example above 90 degrees) and then reverse and come out the same hole that the keyhole bit plunged into?
1: Simulation will not show correctly, so the only thing purely functional you are getting from the tool is the speeds & feeds. There is no 1/2" tool in the current database, so adding a new one couldn’t hurt.
Diameter: 1/2"
Plungerate: I usually go about 1/2 of feedrate
Feedrate & RPM: Depends on material, cutter material & coating, number of teeth.
Depth: doesn’t matter, the path will plunge the whole depth
3D Speeds and Feeds: Also doesn’t matter
2: Starting Depth: Top of stock from your zero. Usually 0.000
Max Depth: Bottom of keyhole
Angle: from +X = 0. Direction slot goes from initial plunge hole. Usually 90, keyhole going away from you. 0 if keyhole goes to the right.
Length: The distance the cutter moves along the Angle. From the center of the plunge hole to the center of the end of the keyhole slot.
3: any circle. It only uses the center point.
4: Yep, that’s pretty much it. It will use the plungerate & feedrate from your tool.
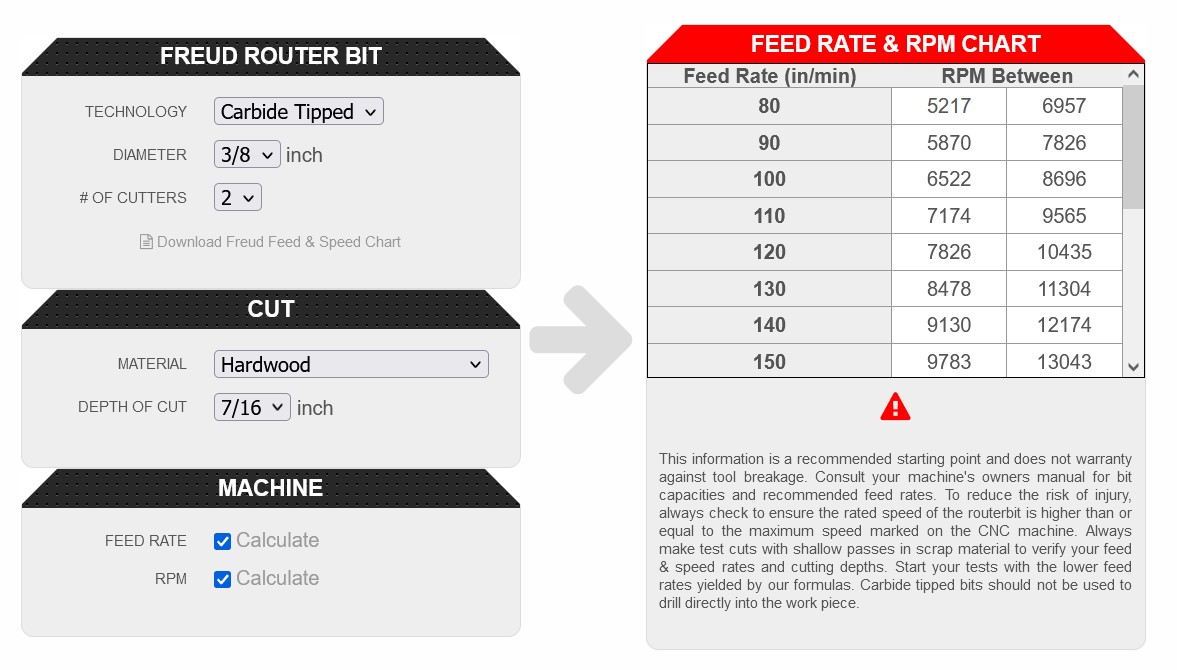
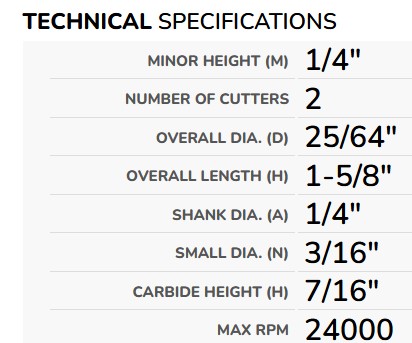
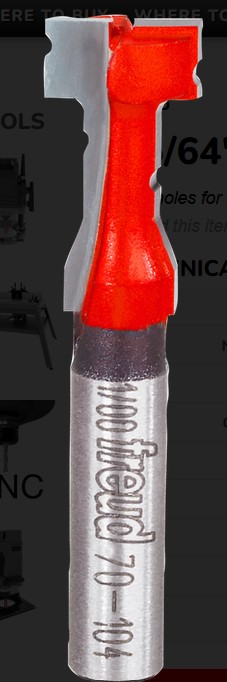
I did some more research for the Freud 70-104 Keyhole bit that I have. I found the specs and on the Freud site I found a F&S calculator for the bit. They dont ask for the machine type but they ask for depth of cut (7/16") and RPM (16000).
Please comment on this Freud recommended speed and feed. I would need to be running over 150 IPM to get to my Dewalt router minimum speed.
I refined my tool definition after cutting a test. The Freud recommended F&S was way too aggressive and the router was howling. I modified the parameters in my tool data base to 10 IPM Plunge and 60 IPM. The piece I wanted the key holes went perfectly.
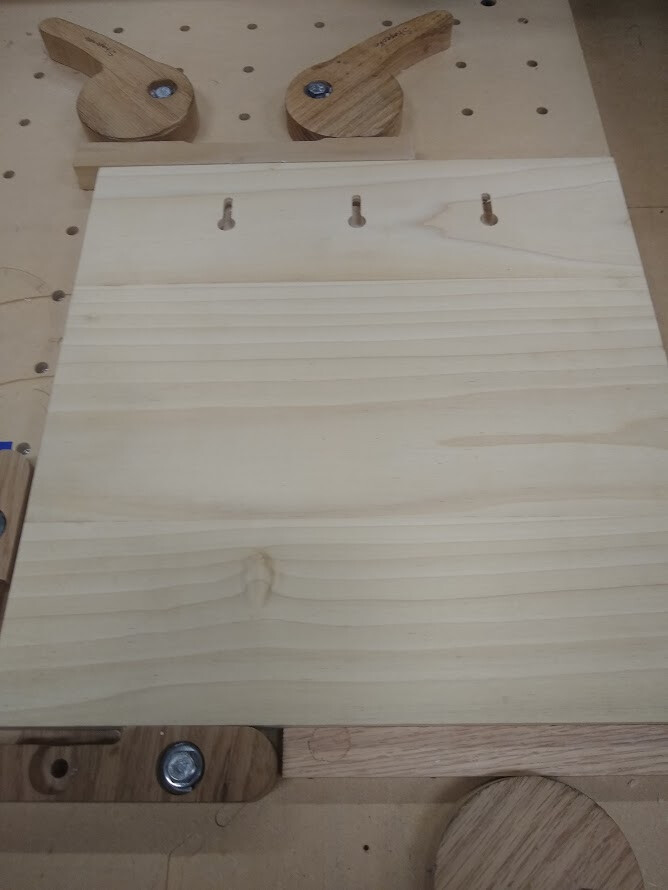
I put 3 keyholes in, one in the center and two more spaced 6" apart. You can hang it with 1 or 2 screws. I will make a paper template to drill the holes in the wall.
After getting the key holes made I went back to the shop and I think a #8 pan head screw will work. I dont have a #10 but I think that will work as well. This sign I am making is going to be into a brick wall. So I need to get hollow wall hangers.
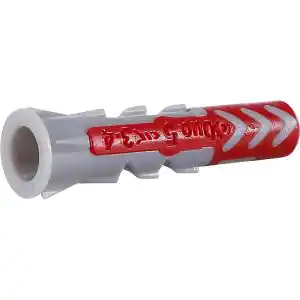
Something like this will likely work. Since it is motor I will be drilling into I need a masonry bit the size of the hallow wall hanger is 3/16" so I will need to find a 3/16" masonry drill bit.
Any suggestions for hanging in a brick wall that is adhesive?
On a router table what you said is true. I have made a few key holes in projects with the key hole feature in v7. I have a slot cutter that has no narrower cutting surface so that would not work for key holes in carbide create. I did some research for my Freud key hole bit and the Freud site gives fantastic fast F&S. Check out my post on key holes.