So I just replaced the wasteboard on my SO3 XXL, and I figured it might be a good time to add
T-tracks to it as well, to give me better workholding options.
My thought was just to run them parallel to the X-axis (I saw in another thread that this makes it easier to load and unload the clamps), and to use a simple straight bit to cut out the slots.
Is it really that simple, or are there tricks to it that I’m missing?
Which pocketing method is best? Just linear, or something else? Run the typical multi-pass with stepdowns, or go full depth and drop the feedrate? I’m using Aspire 12, and the Carbide router.
I planned to buy a set of 36" tracks and cut them down. My wasteboard is 33x31 (X/Y).
Any suggestions appreciated. I’m very new to this, and would like to not screw it up, or waste (really expensive) MDF. When did freakin’ MDF get expensive, BTW? ![]()
The original instructions had one simply placing the T-tracks on the surface of the MDF and drilling holes and screwing them in place, placing filler strips in-between as well.
Doing it this way allows one to use pre-cut lumber (I use PVC boards) as filler strips.
Side-to-side seems awkward to me, and I didn’t have any issue loading square nuts from the front or back.
Photo at:
I’d prefer not to lose the Z-height, if possible. This machine already doesn’t have a lot of clearance.
So I looked at the thread you posted… I can’t tell what that material is. I was in Lowes the other day buying the MDF, and I looked at the shett goods, trying to get project ideas. Other than being shocked at the pricing, I didn’t see anything that looked like that. What’s it called? I saw someone mention “Aztek”, but my searches didn’t come up with anything.
Did you have an SO3? It has a solid flat steel bar across the front, and the top of the wasteboard sits flush with the top of the steel bar. I can’t imagine how I’d be able to load a t-nut if the end of the slot was covered by the bar. I guess I could load from the back, but that would be cumbersome…
Yes, that photo is of my SO3, serial #0006, upgraded to XL size w/ a laquer-sprayed MDF baseboard, w/ T-tracks screwed into it, and PVC lumber for filler strips in-between, brand name “Azek”
It is a bit tight loading from the front (had to grind off the ends of insert nuts so that they could be loaded from the front), but M6 square nuts fit fine.
It’s hard to tell from that photo, but it looks like your T-tracks are up above the top of the metal plate that spans the front of the machine. Mine is down flush. Would that make a difference?
I found those PVC trim boards at Lowes.com. I’ll keep that in mind as an option. I wish I had seen this (or thought to ask!) before I spent $50 on a sheet of MDF. lol
I may still do it, and use the MDF for projects. ![]()
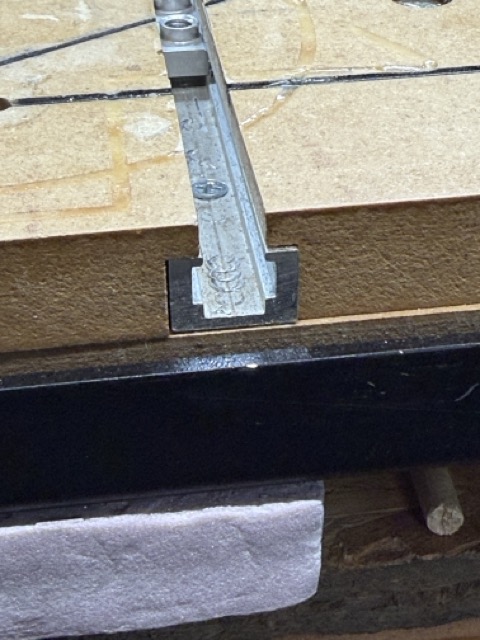
They are along the edge, partially above, partially below — originally, the T-track setup was on a second board, so fully above, which loss of Z-axis height was a problem — what is shown there was the best option I could work up for an SO3.
What about mounting the T-track about 1/2" - 3/4" back from the front crossbar? Slats could still go all the way to the front. Then you could drop the T-nut in the pocket & slide into the track.
Although don’t you lose a lot of stability not having a solid table? Doesn’t look like there’s any additional structure below it.
I machined my filler strips so they would go over the T-Track.
When I first installed those T-Track I just screwed them to the base board then put filler strips between them. The screws eventually loosened. Putting the filler strips over the T-Track helps hold them down and stiffens the base board underneath.
The filler strips are held down to the base board with 1/4" counter sunk screws and those barbed insert nuts, not sure what they are called. The nuts are inserted from under the base board.

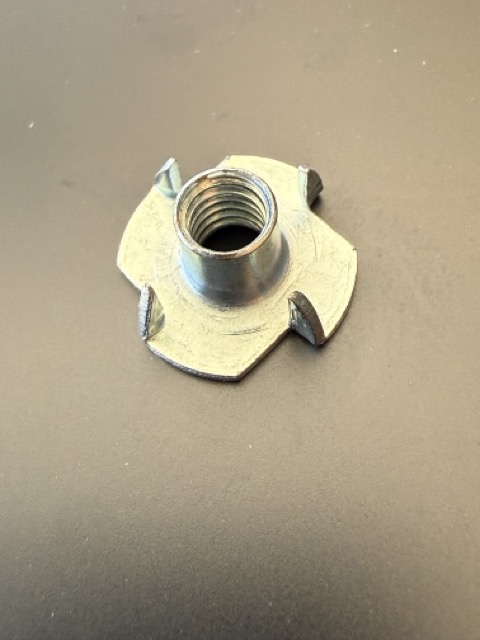
Pronged tee nuts! That’s a great idea. I may try that, in conjunction with Will’s idea of using the PVC trim strip as filler. I’d still have the issue of loss of Z travel, unless I remove my current wasteboard and bolt it all to the baseboard, which I may do.
That’s a good idea. I’ve seen a few photos of machines set up this way, and it looks like it will work.
The strips look painted: aren’t they? Recommended?
If you are referring to mine, they have many coats of shellac on them.
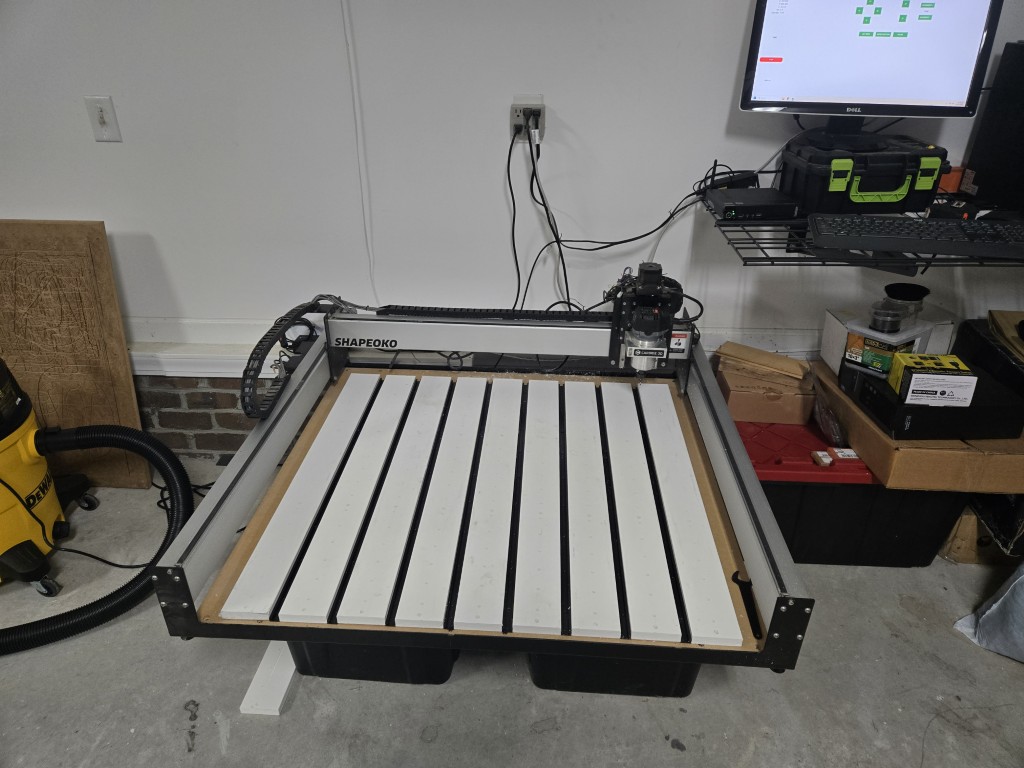
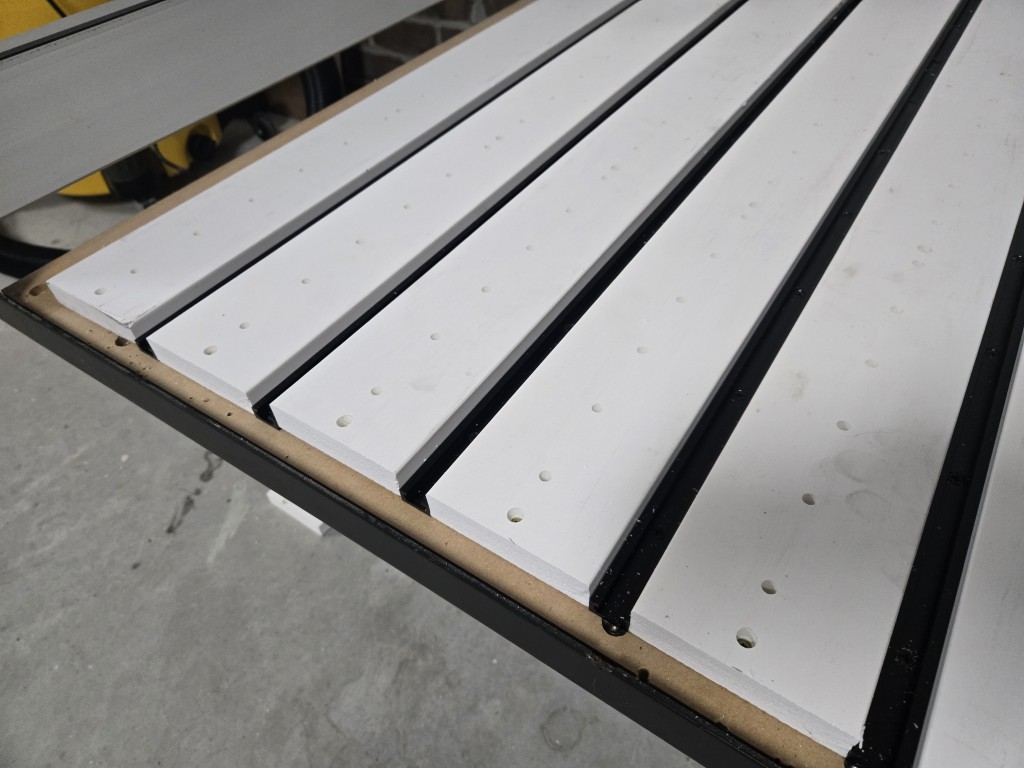
Ok, so I have the table built, and it came out great!
Thanks to @WillAdams for the great idea of using PVC trim board and screwing it directly to the bed.
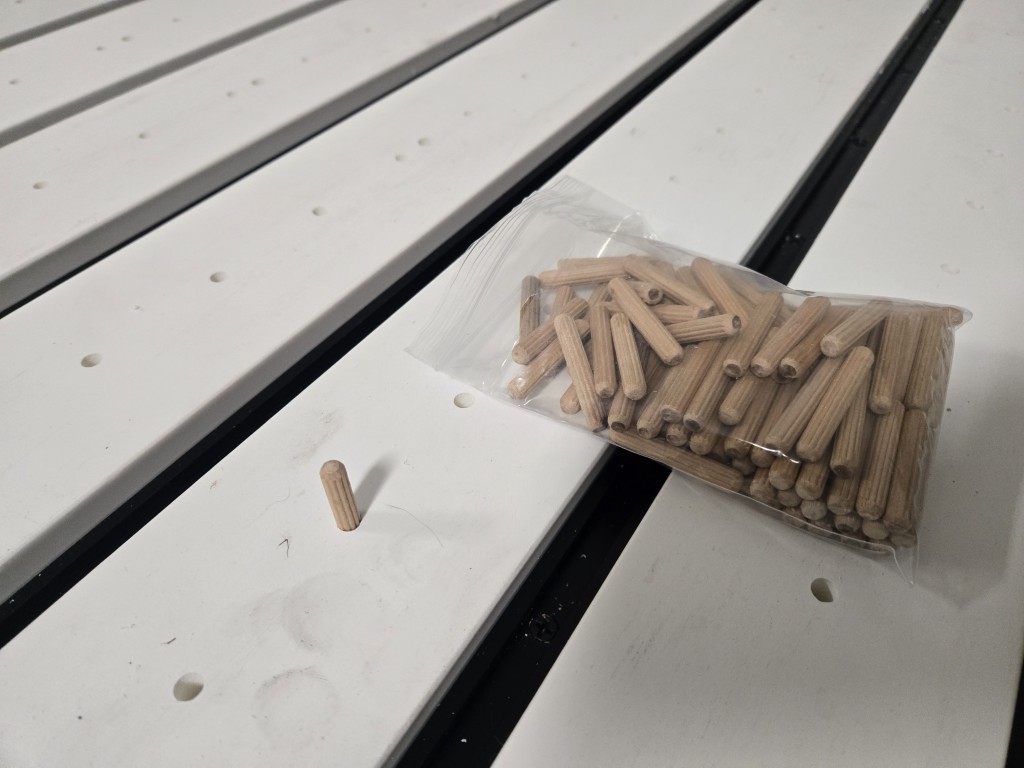
I milled 1/4 holes every 2" as well, to allow me to use fluted hardwood dowels as stop pins. I figure these won’t kill a cutter if I misjudge a cut. ![]()
Anyway, I’m almost set up for workholding, except that I’m having trouble with my clamps. I bought a couple cheap ones from China, but the T-nuts they came with are way too big. They appear to be sized for 1.5" slots or something.
I’m trying to find the correct size nuts on Amazon, but I’m not having any success. I need sliding T-nuts with M6 threaded holes, that will fit 3/4" track. Anyone found something that works?
What are you guys using for workholding/clamping in T-tracks?
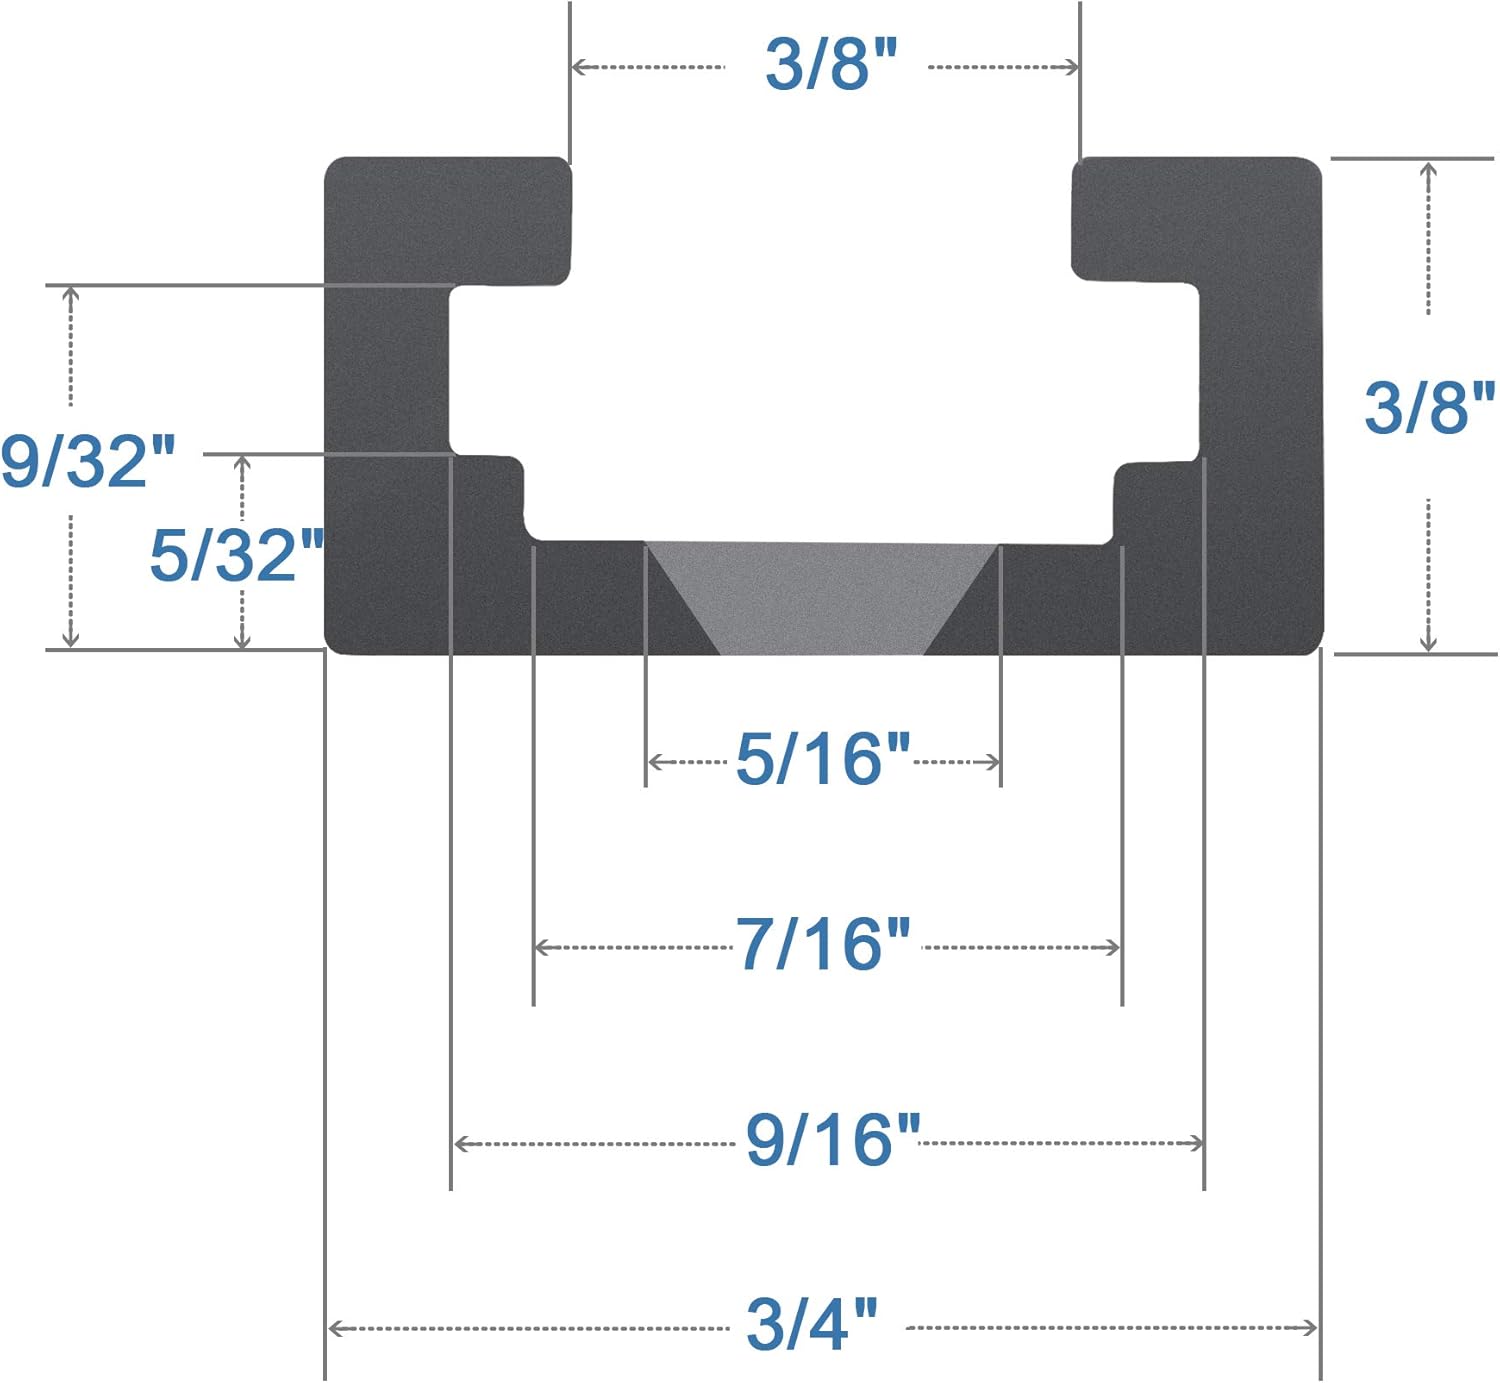
Dimensions?
I just use square M6 steel nuts on my SO3.
Dimensions of what?
Good tip about the square nuts, thanks! I’ll look into that.
Dimensions of the interior of the T-track.
Oh. It’s standard 3/4" T-track.
Here’s what the listing shows:
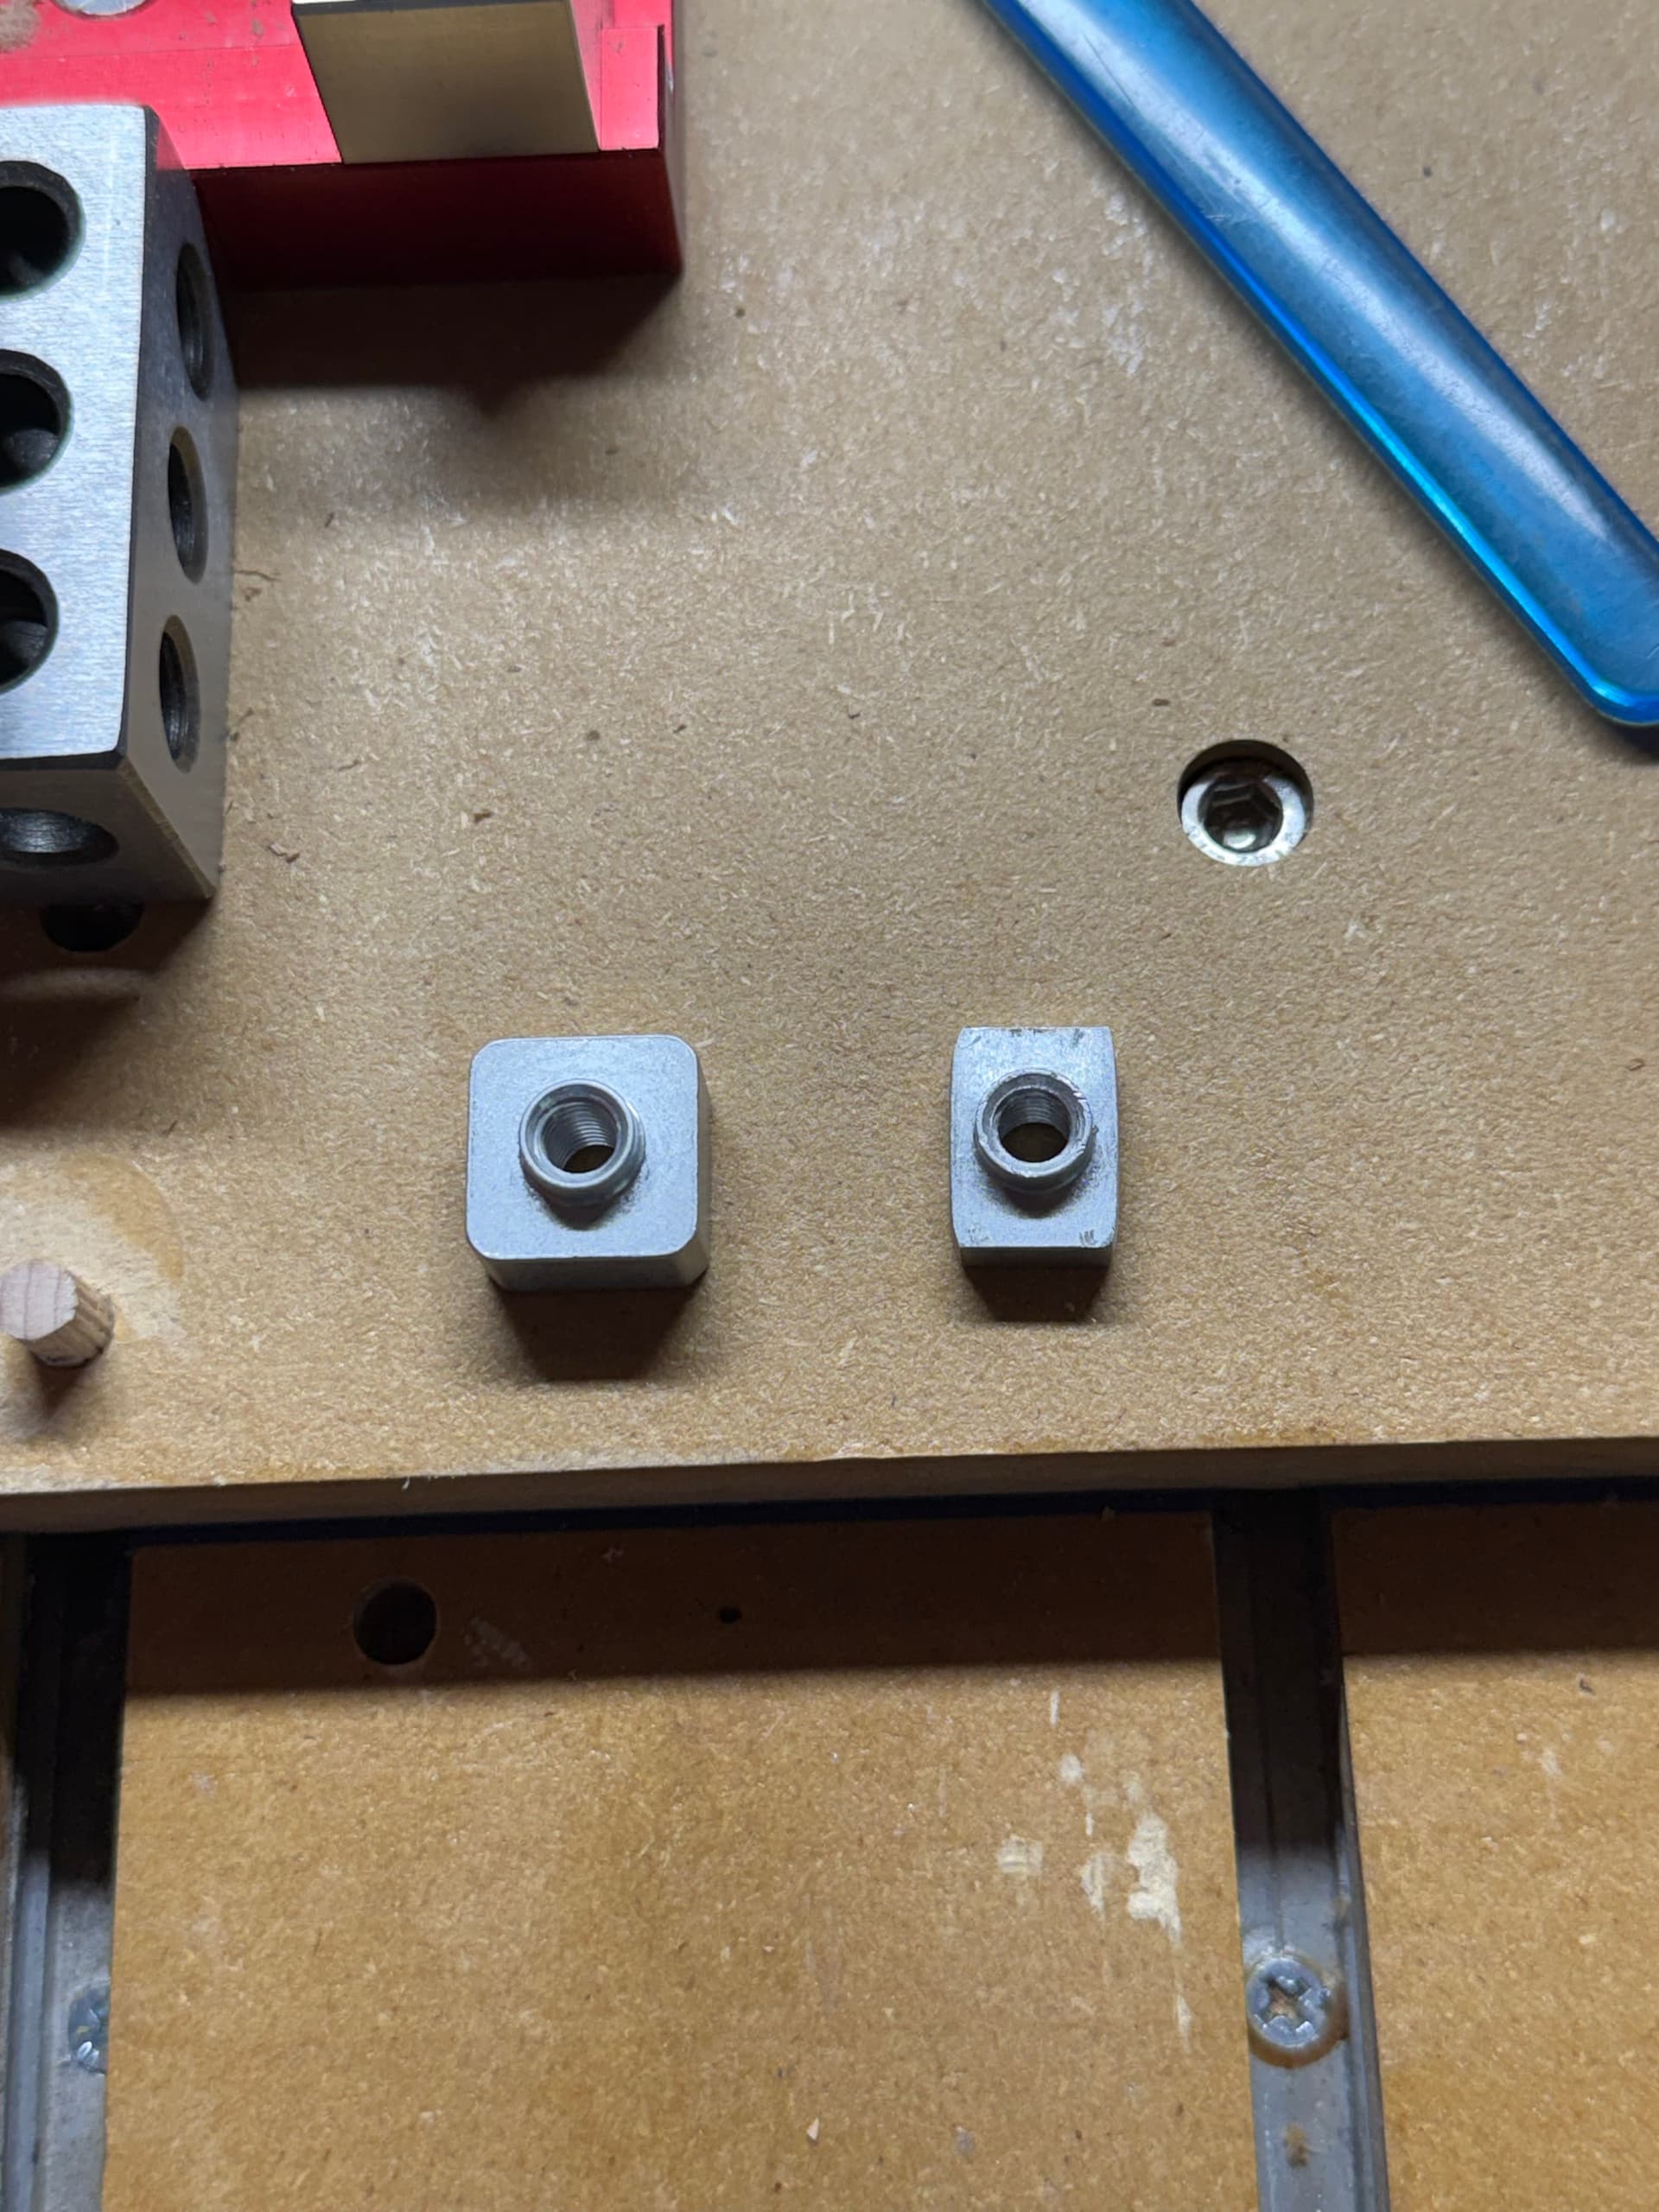
I found these square nuts, but they are too thick at 4mm. The track needs a slider of 3mm height (1/8"). I guess I could grind them down a bit…
I purchased this kit and machined the nuts down to size.
The tracks I bought from Woodcraft, and the ones which were used in the official Carbide 3D kits were quite a different profile (there’s a drawing somewhere around here).
Another option might be “insertion nuts” — they are quite low profile, the issue of course is that there isn’t much thickness for threads, I wound up using long nylon bolts as if they were all-thread and just snipping them off at a desired length.
Really? All the track I see for sale now is the same as what I’ve posted above. It’s all 3/4" outer width, with a 9/16" primary slot.
I know milling tables and such use a larger T-slot, which is what I think the clamps I bought were sized for, although I can’t imagine why. It’s like not you’d ever use an aluminum clamp on a vertical mill.
Dimensions for what Carbide 3D used were drawn up at:
(the ones I got from Woodcraft were similar — I believe the ones you have are billed as “low-profile”.