So I needed an excuse to test my new Amana 1/2" cutter (with a 1/4" shaft so it fits my ER11 nicely) while adding it to my STL cam tool… and decided to do an old staple, the Mt Hood volcano… but I also needed an excuse to test another toy out.
So the 1/2" bit for roughing cuts amazing. 2mm DOC at 80 IPM and it doesn’t even break out a sweat,
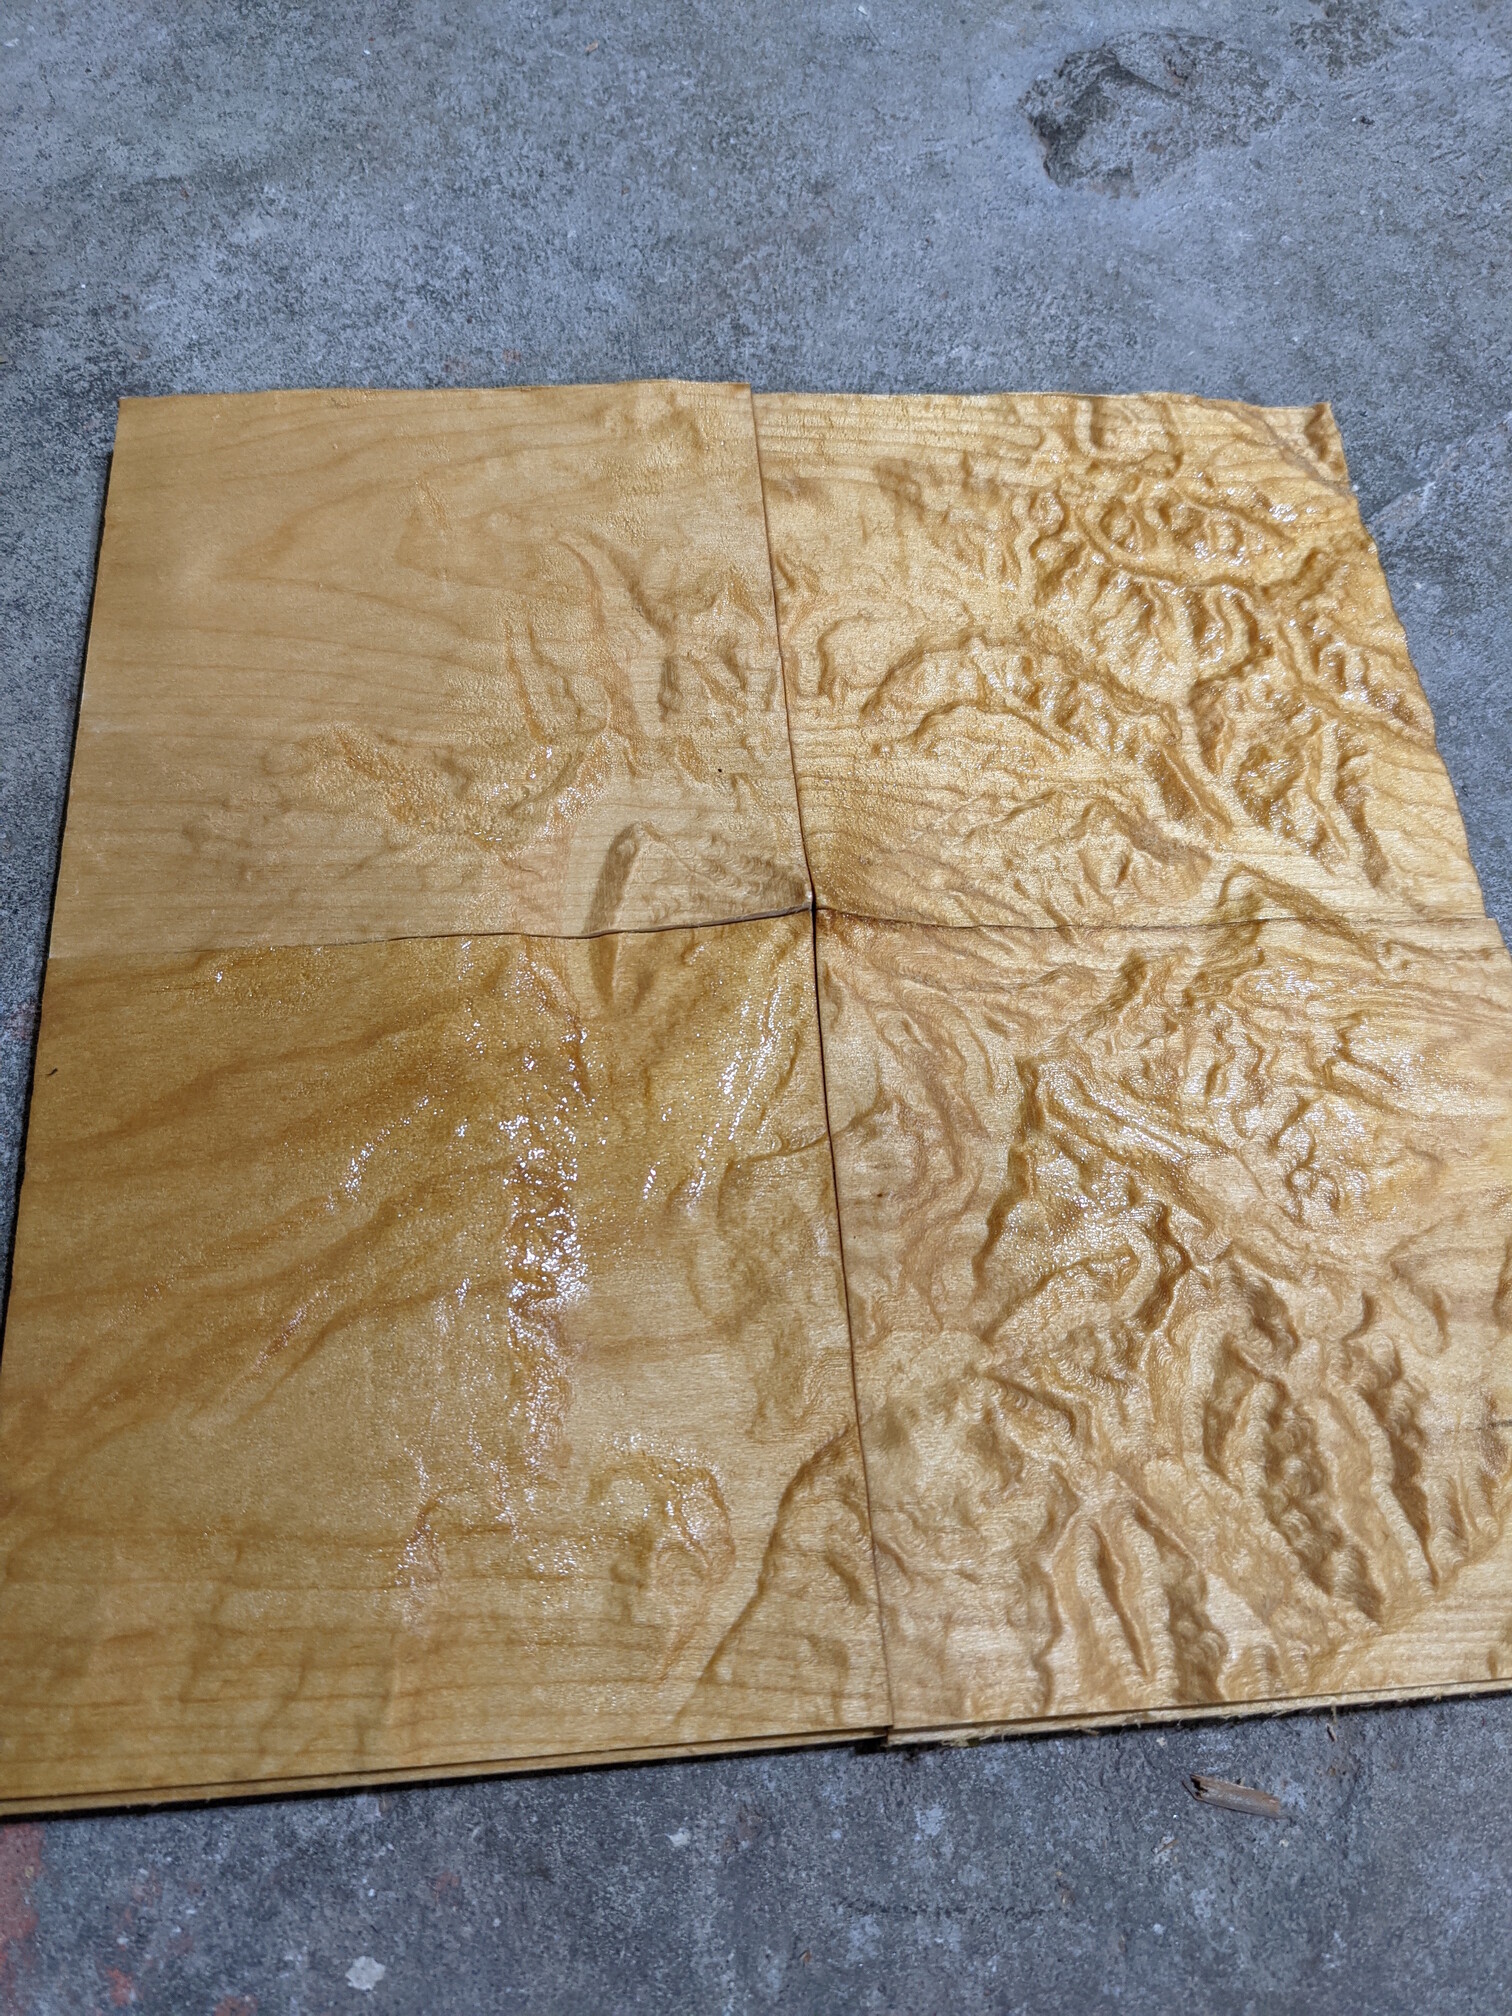
But as you may notice, this was not cut out of a single 10"x10"x1" piece of wood.
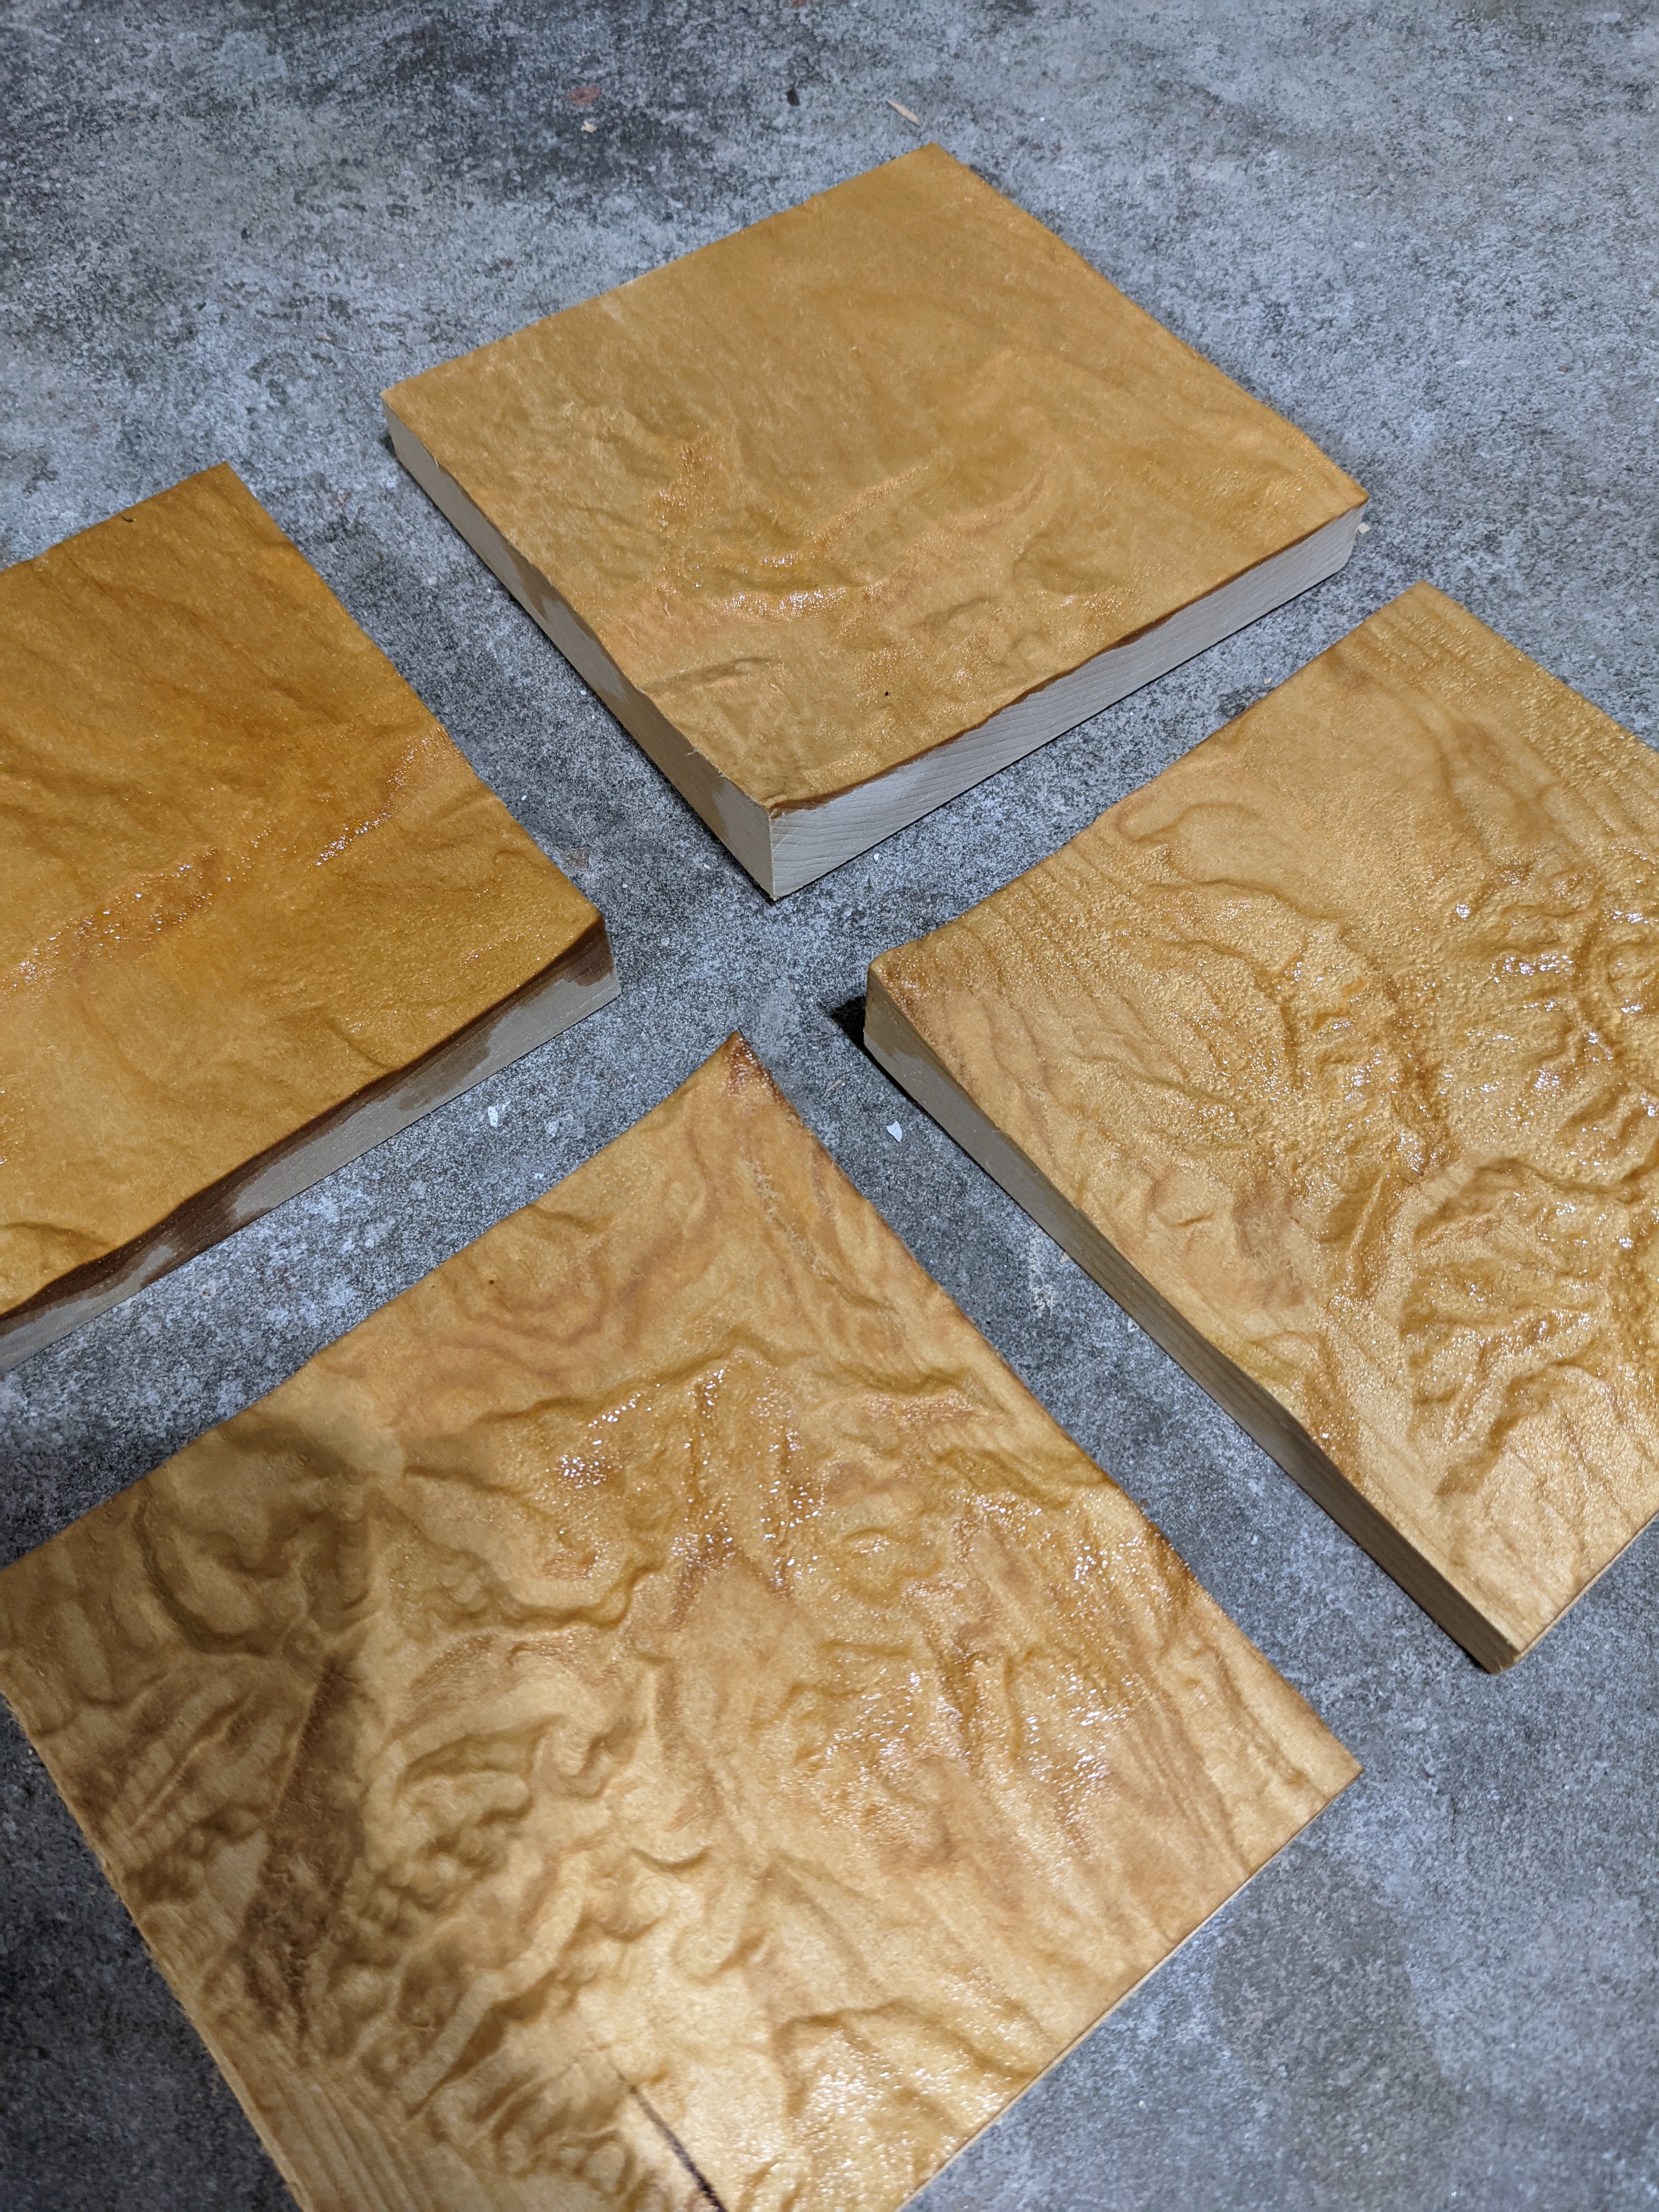
First of all, I didn’t happen to have one of those, but I did have a pile of 5"x5"x1" blocks of basswood.
But more… in Want to divide a heightmap into sections @goin4 asked if one could convert a landscape into tiles where the Z is consistent between the tiles… and I wanted to test the solution to that question.
Steps I used to get here:
Step 1: I used TouchTerrain (https://touchterrain.geol.iastate.edu/) to create a high detail STL of Mount Hood and surroundings… the STL is 97Mb in size (good luck importing that into Fusion360 fwiw)
Step 2: Use my STL CAM tool (https://fenrus75.github.io/FenrusCNCtools/stl2nc/stl2nc.html) to convert this to a 10"x10"x1" work piece GCODE file. Of course I selected the 1/2" bit for roughing… and ended up selecting the #102 1/8th inch flat bit for the finishing pass… since
basswood REALLY REALLY hates ballnose bits and is basically uncuttable with anything ballnose (I tried. a few times).
This gave me a 4.8Mb gcode file (too large to upload here)
Step 3: Use the new tool https://fenrus75.github.io/FenrusCNCtools/stl2nc/nctile.html to turn the gcode into 4 tiles, I used 5"x5" tiles with no overlap for this cut and downloaded the 4 new gcode files. Each tile will start at machine zero, so you can use this even if the original gcode you have is larger than your machine
mthood.stl.nc_tile_1_1.nc (3.9 MB)
mthood.stl.nc_tile_2_1.nc (3.4 MB) mthood.stl.nc_tile_2_2.nc (3.8 MB)
Step 4: Cut Cut Cut… cut each tile one at a time, for a total of a few hours in Carbide Motion. Crashed the new beta CM 517 several times, but thankfully not during cutting.
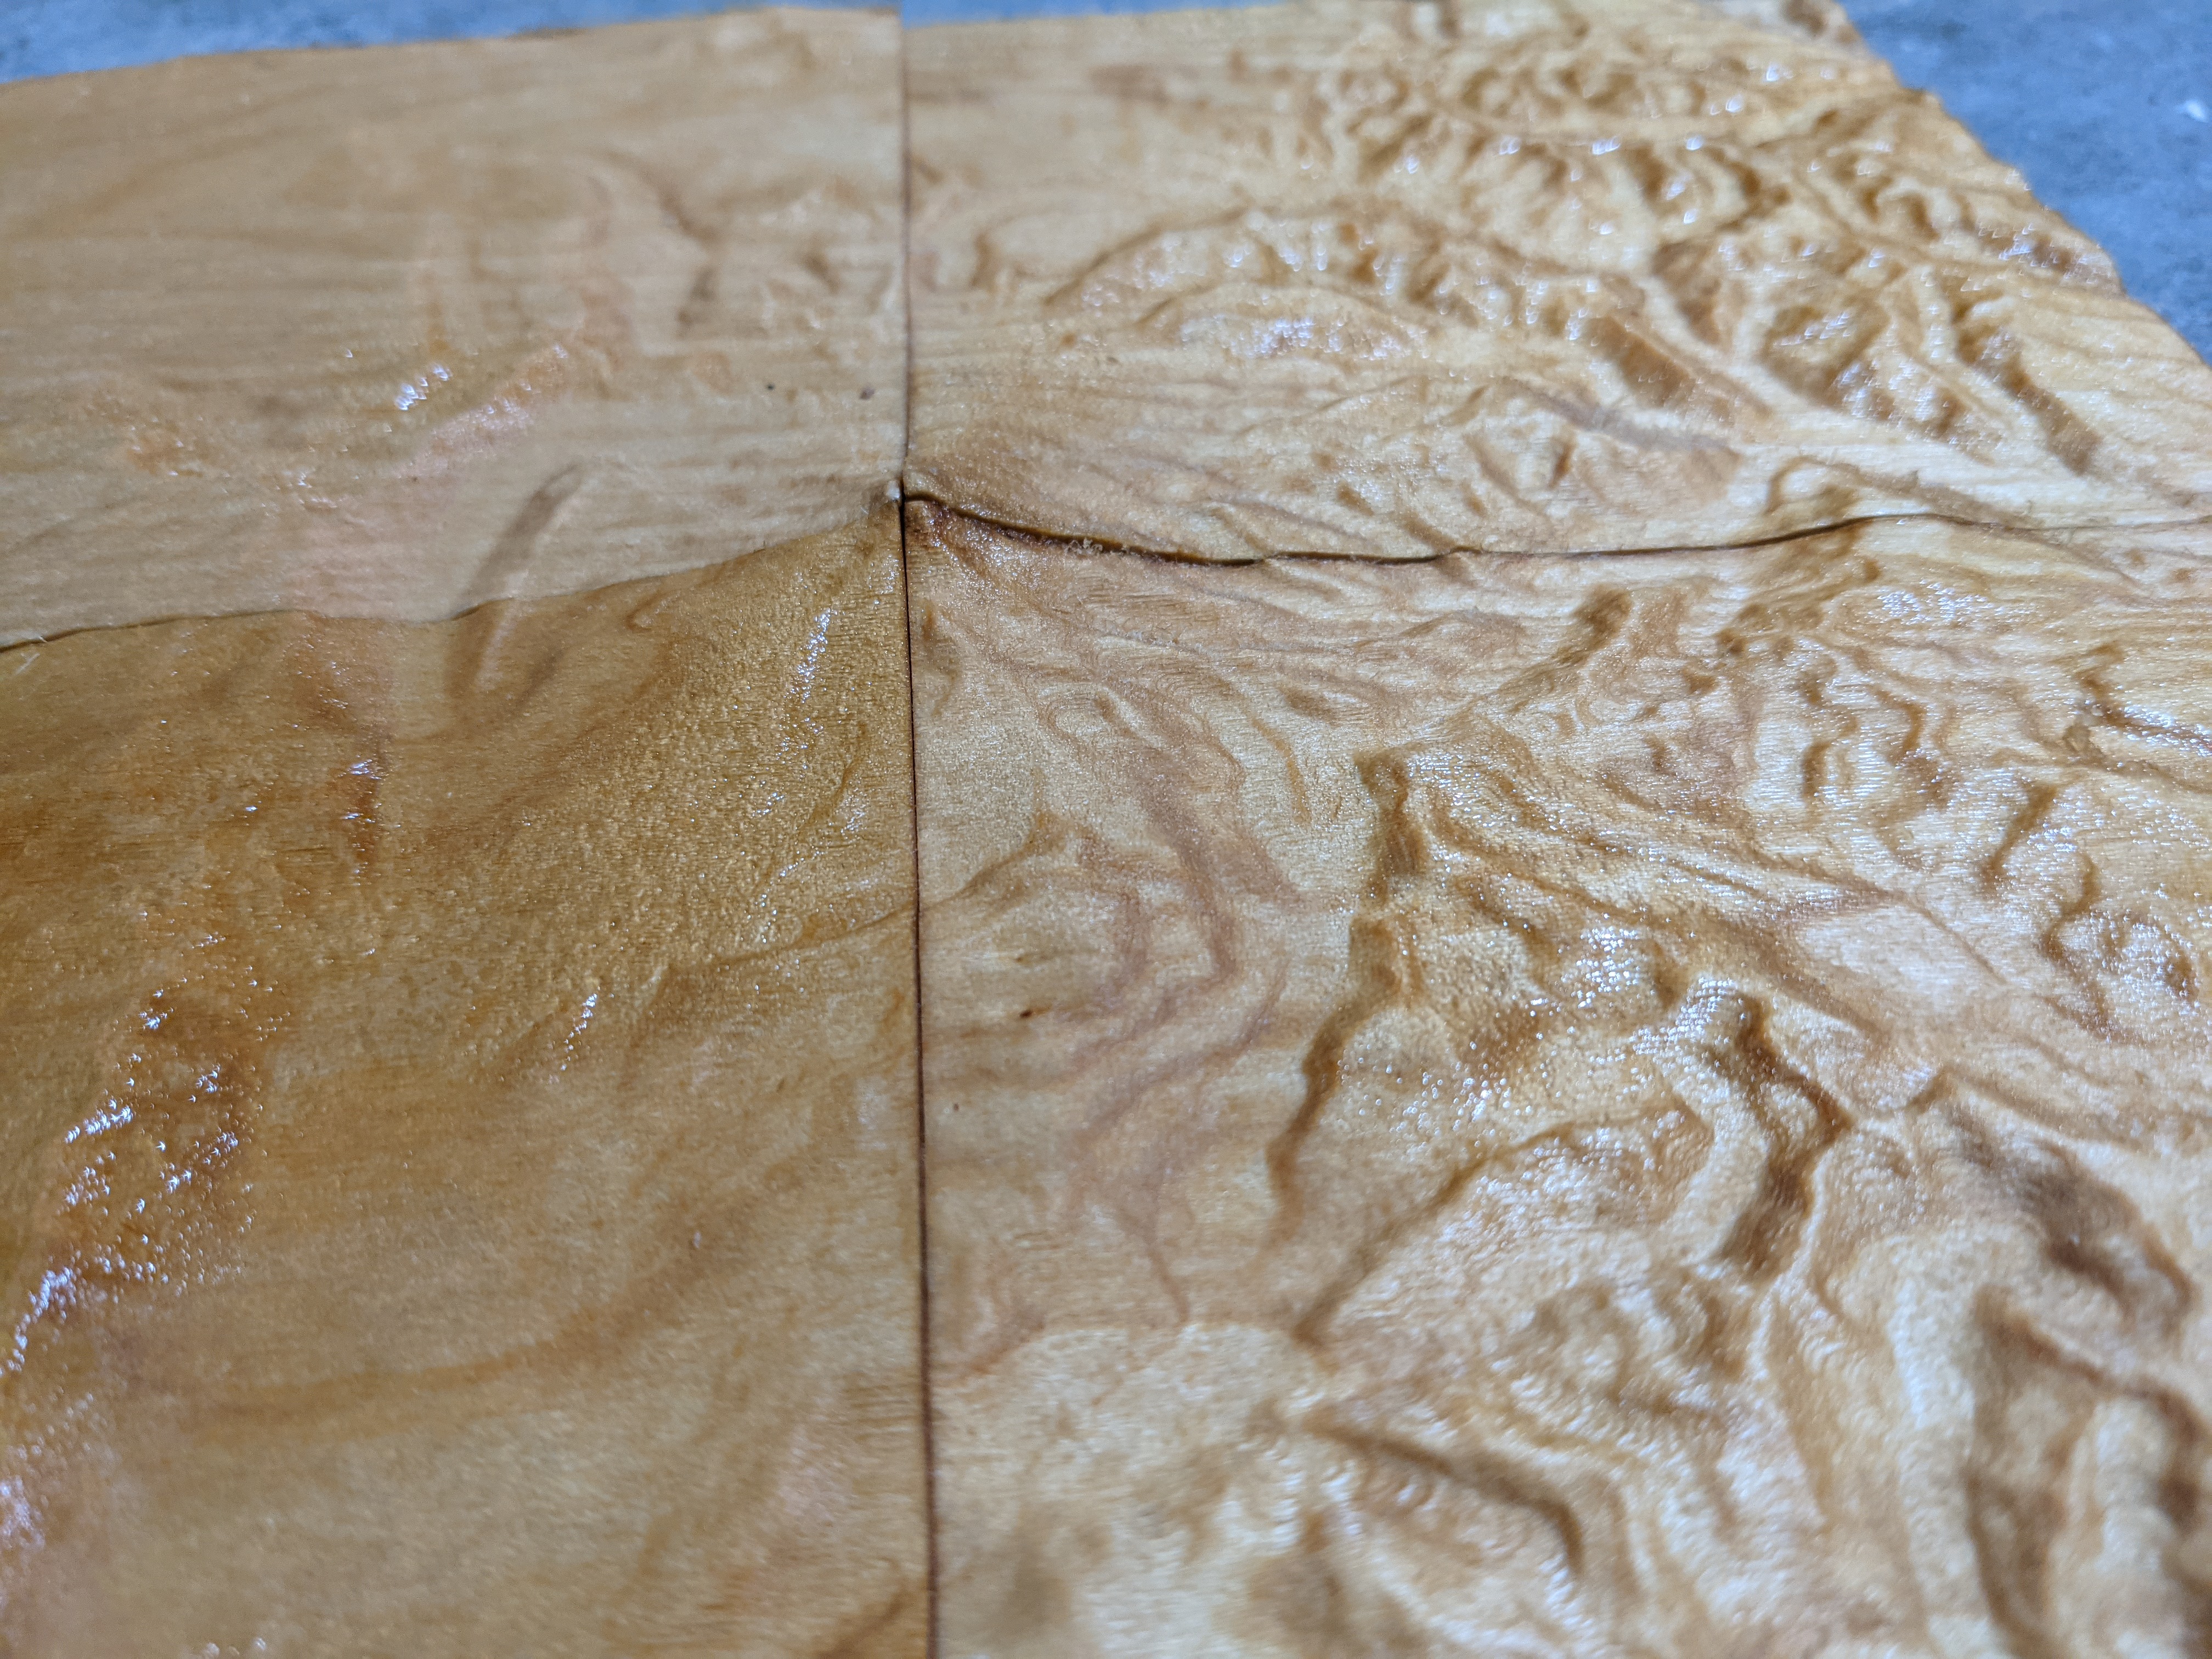
Step 5: Put a bit of oil on the wood and take the pictures.