My bracket for fixed-height dust shoe

I didn’t realize there is a Carbide 3D SO3 forum separate from the Shapeoko forum. I posted this idea over at the Shapeoko forum but figured I’d post here in case it gives others any ideas, or if anyone has any ideas.

This bracket mounts to the bottom of the Z-axis, but not the part that moves up/down. I had another CNC router and didn’t like much the dust shoe moving up and down with the spindle, it was difficult to gauge whether you’d hit any clamps and sometimes the brush would compress so much you wondered whether it would cause a problem.

The bracket attaches using the same machine screw that holds the bottom pulley. It has two slots (5/16") intended to capture 1/4" threaded rods attached to the actual shoe (I haven’t made that yet). The threaded rods will have washers and nuts that snug-up on the bracket.

If pictures are worth a thousand words, here are three thousand of them. Feedback welcome.

Edit: Well, one pic per post b/c I’m a new user. Here is 1,000 words:

2 Likes

Here is another pic of the bracket. My metalworking skills aren’t great, so apologies.

3 Likes

Looks great. I was looking at mine the other day trying to figure a good way to mount such a beast as well but I like the idea of it at the bottom lip there. I may make one similar!

Goferit, Roger, and let me know if you have any questions or figure out a better way to do anything.

I like it @cgallery! Looking forward to future updates.

I’m currently running a SuckIt Dust boot which I really like. Now that I’ve worked with it over several jobs it’s now a seamless part of my workflow. My only critique of the SuckIt boot is the loss of X-travel, which your approach mitigates.

I’m sure the SuckIt is awesome but that loss of X was a motivator for me to find another way. That, and the lead-time. And honestly I wanted to save some money, too.

Does anyone know where I can get some plastic to make a shoe, w/o spending too much money? Something that will machine well? I can use some plywood but clear plastic would be handy. Do places like Home Depot or Menards sell any plastics that machine okay?

I had to remove my SuckIt boot to cut a large experimental piece as I need that extra travel for my job (the Ikea GrowRoom). I had scaled the largest part for some 1/2" commodity ply @Home Depot and I was just short of travel, even with an optimized 45° layout on the bed.

Your local bigbox likely won’t have machinable sheet, but there’s bound to be a local source depending on your location along with tons of online sources. Good luck and post your work as you progress.

I made my dust shoes out of HDPE from cutting boards from the local restaurant stores:

https://www.shapeoko.com/wiki/index.php/Vendors#Pennsylvania

Did cut my most recent one out of a black cutting board from Target: http://www.target.com/p/architec-cutting-board-black/-/A-51837125 (though mine didn’t have the handle cutout and seems to no longer be available).

My first version was just some transparency film cut and folded w/ a vacuum wand zip tied to the router or something along those lines. Lots of ideas on this here: https://www.shapeoko.com/wiki/index.php/Spindle_Options and I tried to fully document my design / thought process here: http://www.shapeoko.com/forum/viewtopic.php?f=8&t=3658

My current mount is a slight variation on that (see the SVG further down the Makita list) which makes use of any mount (I’ve adapted it for use w/ both the Carbide 3D router mount and a generic one from eBay) — just a pair of plates held together w/ bolts and threaded couplers and some magnets to attach the dust shoe itself, with the skirt held in place by a hose clamp.

1 Like

Well made a little progress. I got a shape cut for the actual shoe. I lost quite a bit of Z somewhere, I had to complete my cutting on my router table w/ a flush-trim bit.

Nonetheless, here is a pic of the shoe shape mounted with two 1/4-20 machines screws and some nuts and wingnuts.

I had sorta figured I wouldn’t have a long brush or curtain on this as it can be adjusted to skim right along the top of the workpiece. My plan is to experiment with some pile-type weather seal on the bottom, and see how that works. Mostly, because I already have some pile-type weather seal.

I also visited the local Woodcraft store and picked-up some lightweight and flexible 2-1/2" hose. They had plastic with a plastic reinforcement spiral, and vinyl with wire. They were close in weight and flexibility, with the all-plastic stuff being a little lighter and a little more flexible (and a little less expensive). So that is what I went with. The benefit to the wire stuff is I can ground the wire and reduce the chances of static shock, so if I get static built-up, I’ll buy the other hose.

The stuff in the picture with the wire is the material I had on hand, it is about 2x the weight of the stuff I purchased today, and doesn’t really put as much stress on the parts as I thought it may.

5 Likes

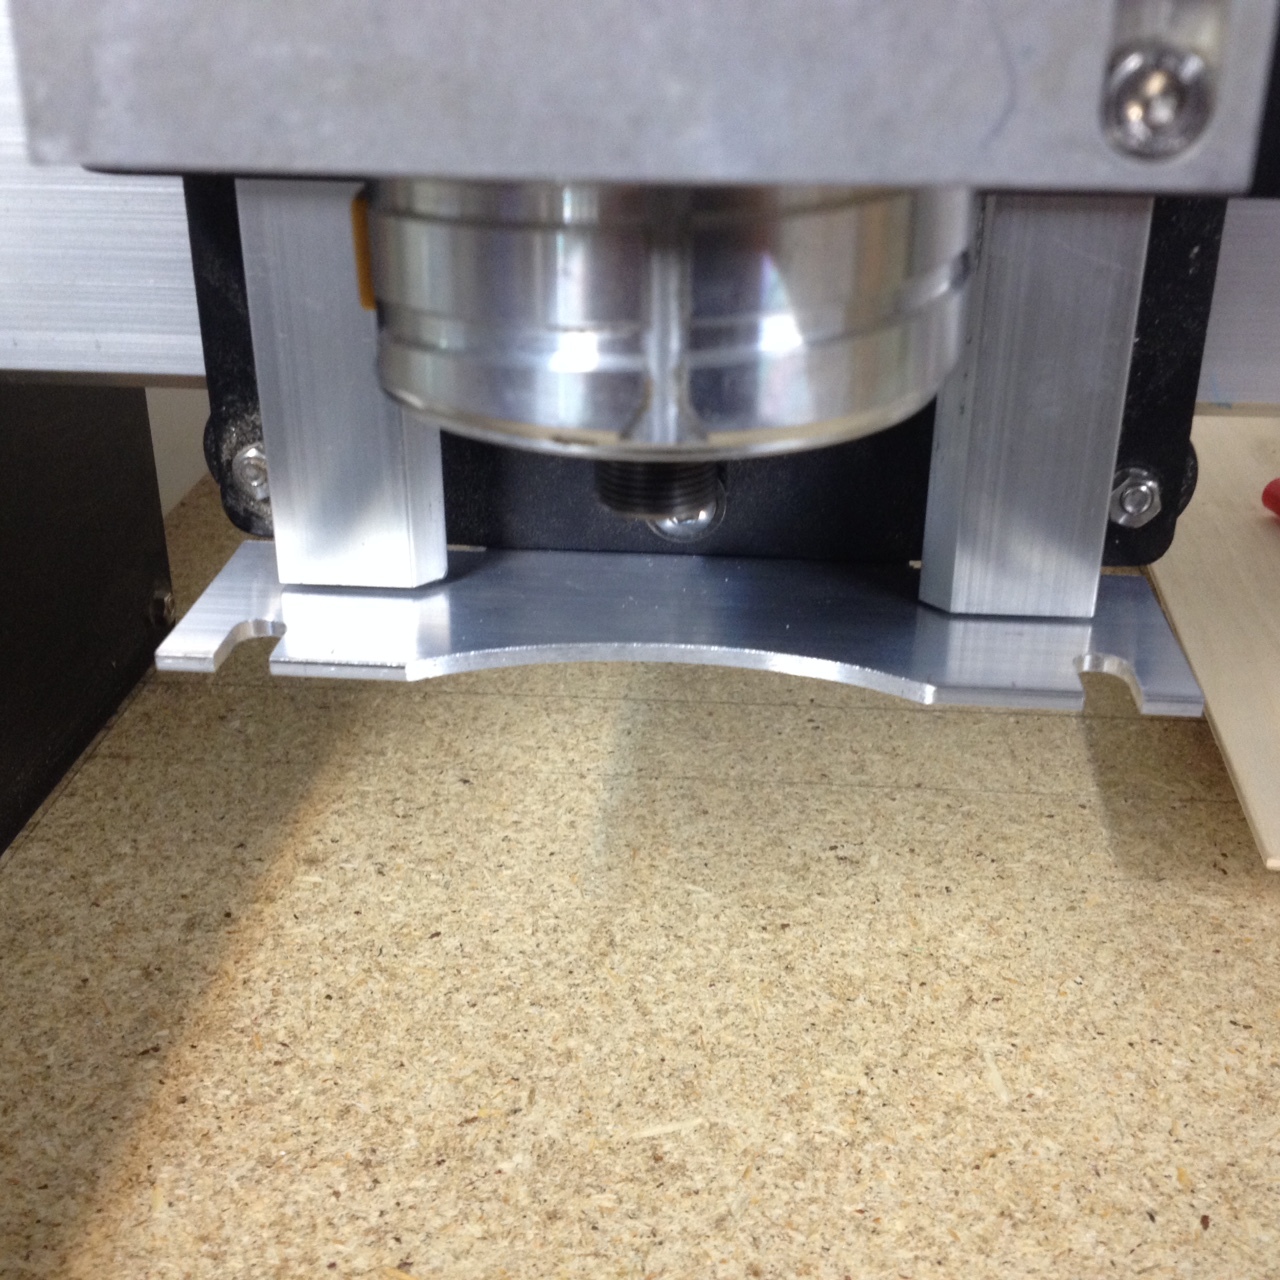
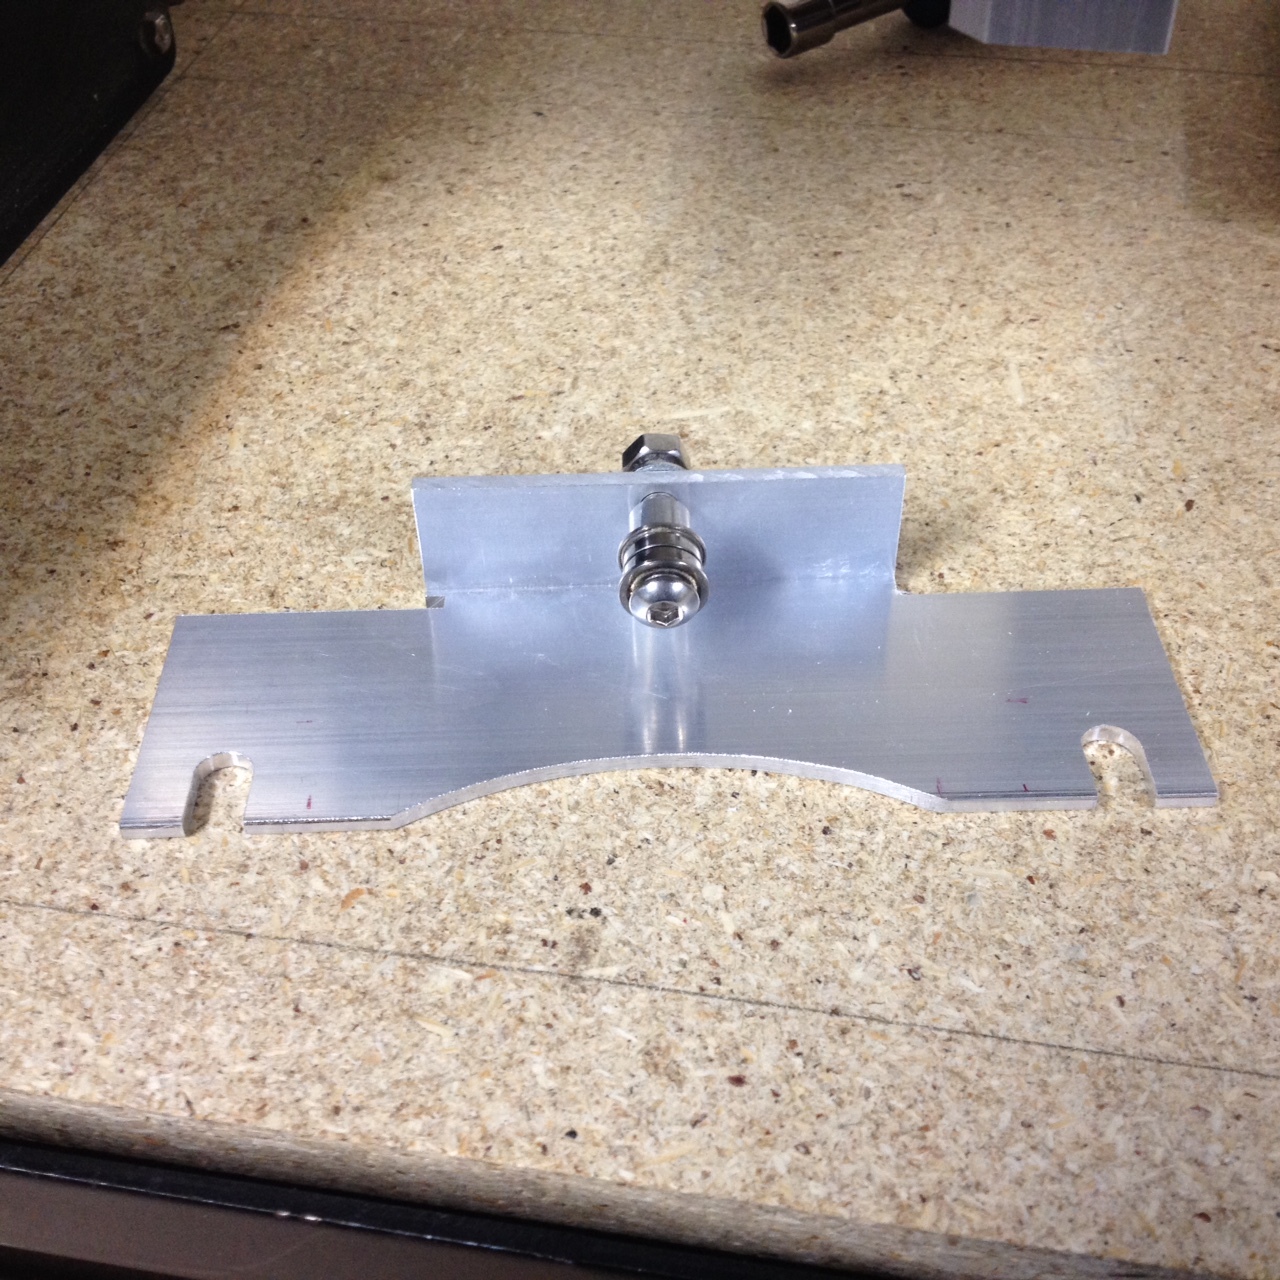
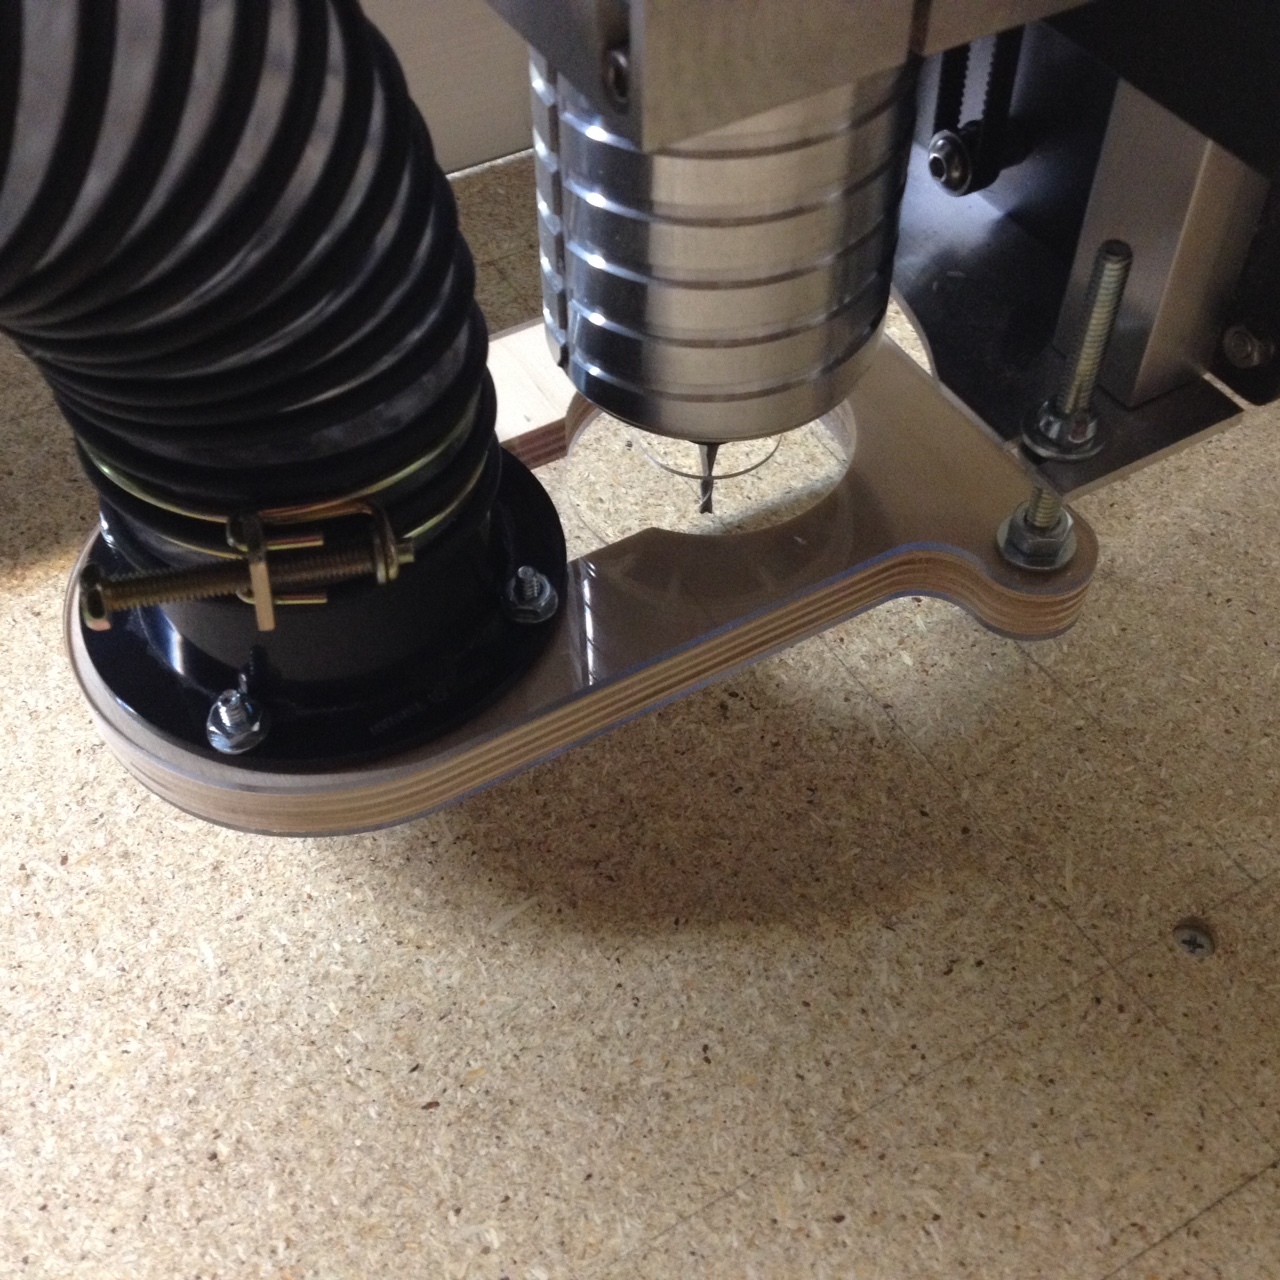
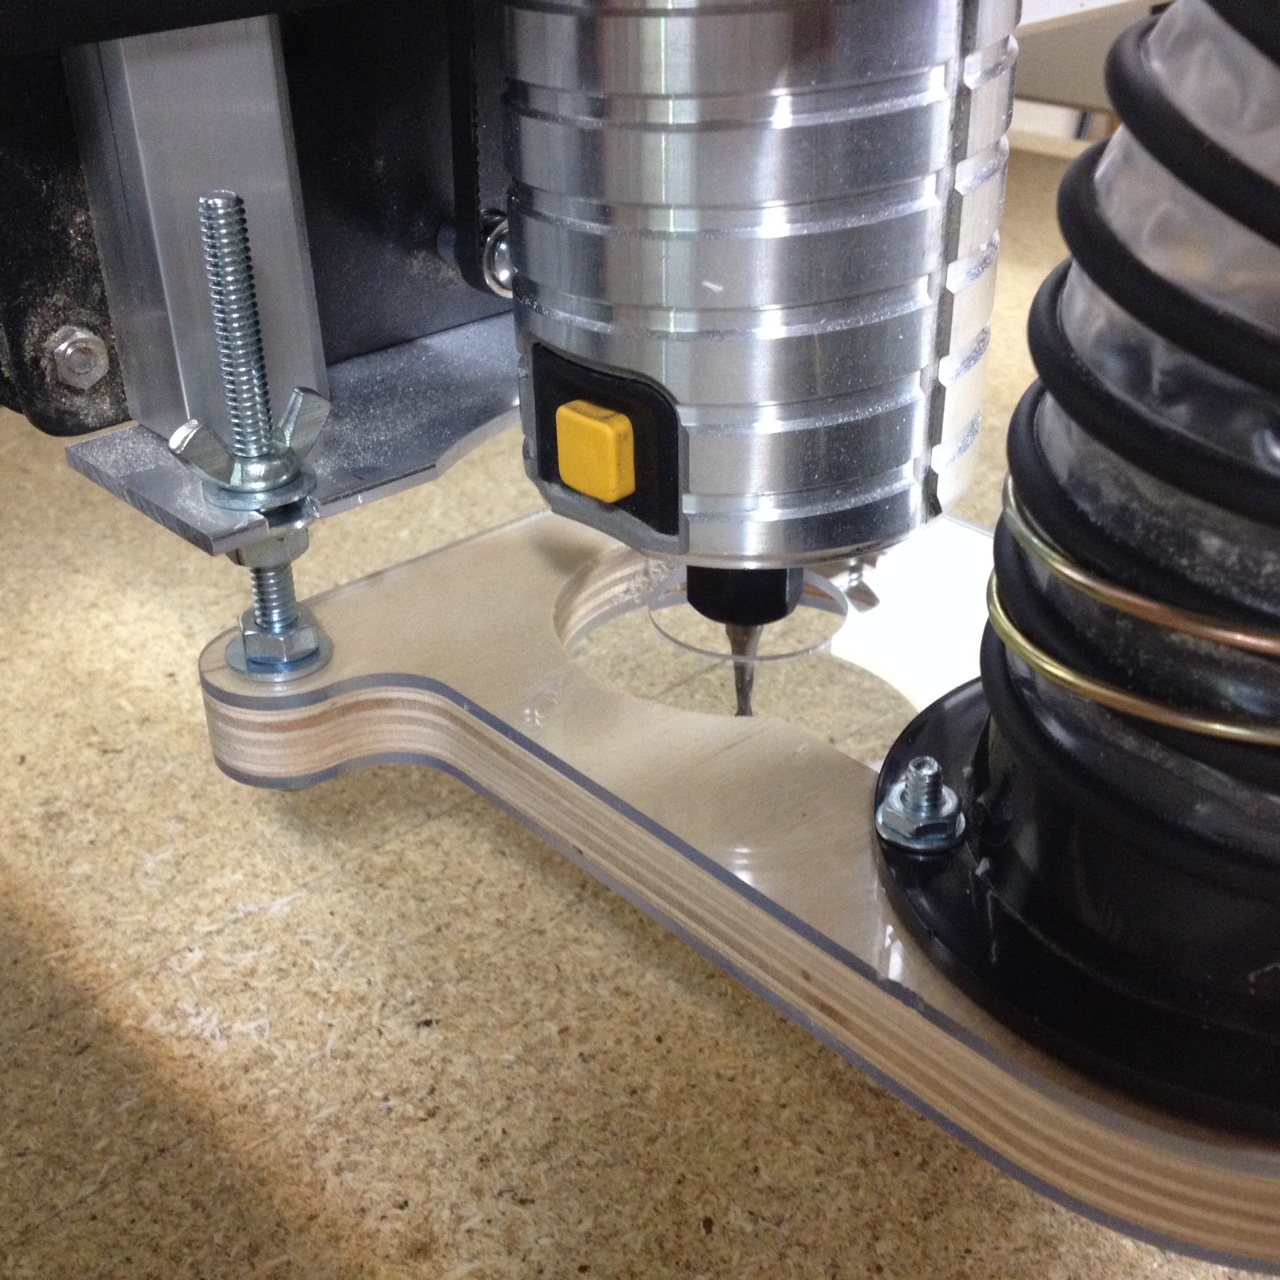
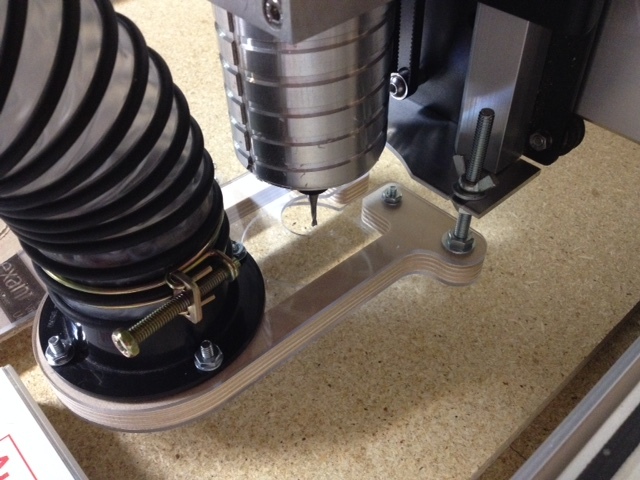
This afternoon I made an alternative shoe. I wanted to redirect the airflow around the bit w/o adding skirting below.

I also wanted some transparency to make alignment w/ cross-hatches on my workpieces a little easier (when I don’t need perfect alignment, but just want to know my project won’t cut off the edge of the workpiece).

I picked-up a 12x24 piece of Lexan at Home Despot and cut a top and bottom, I also cut a new BB center.

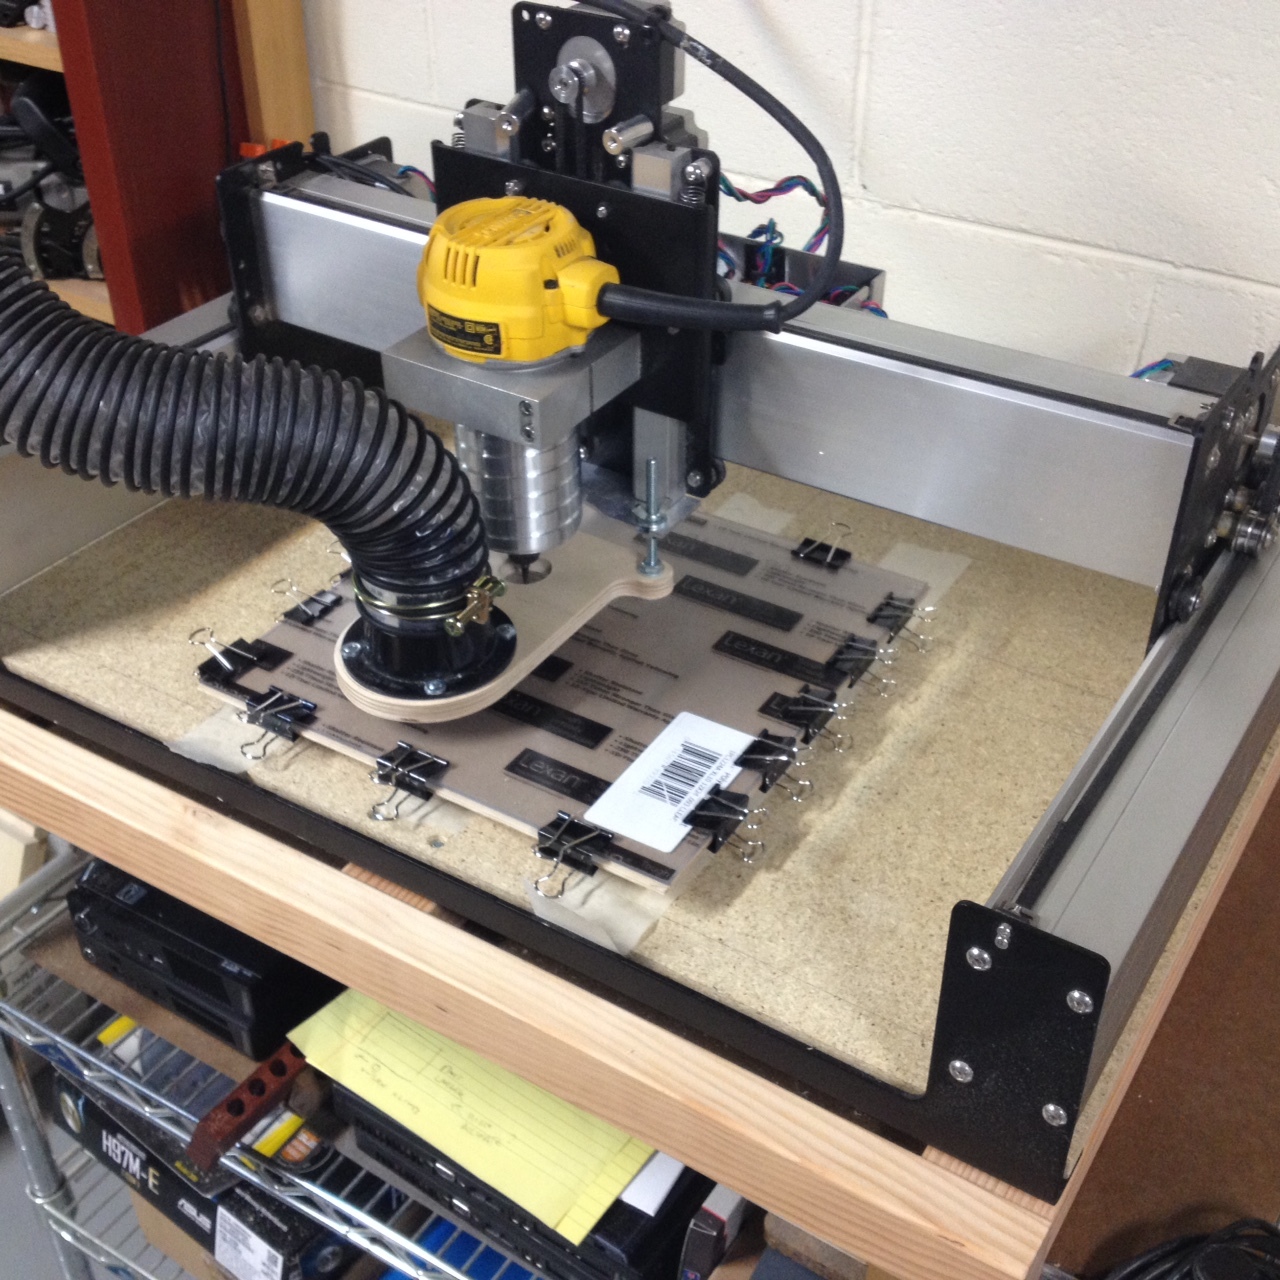
I’m including a couple of pics. The first is actually my binder clip clamping board. This is a holdover from my previous CNC machine, it allows me to clamp thin materials at the edges using binder clips. The surface is 12"x12" (perfect for materials that come in square feet) and I use a 12" square piece of cardboard underneath the Lexan as a spoil board. The board is just a 12" square of plywood with a 1/8" or 3/16" or so lip all around.

Binder clip clamping works pretty well. The trouble is that thin material can lift, so you have to pay attention to design (add tabs or leave an onion skin).

My binder clamping board is mounted to the Shapeoko 3 table with double-sided tape. My cuts here were all through cuts, I don’t have any precision pockets or anything to worry about here. So I used double-stick foam pads (1" squares) from McMaster. I use a layer of masking tape on the Shapeoko table and also the bottom of my binder clamping board, to make removal easier. I love my McMaster foam pads, $7.00 for qty. 250. I used six to hold my binder clip clamping board down, so it cost about seventeen cents.

So far I’m liking this new shoe quite a bit. My K2 router shoe (which I made) was a conventional up/down affair with a vinyl skirt. The skirt became problematic when cutting deeper than about 1/2". Yeah, I could make skirts of various lengths but I find this fixed-Z shoe more convenient.

If I had to find fault: (1) I should have left a slot at the front of my shoe to accommodate the bit, removal and replacement of the shoe would be easier. In all honesty, I’ve replaced the bit a couple of times w/ the shoe in place, though, so not a big enough deal for me to remake this. (2) I should have increased the cross-section (widen) for airflow in the center of the shoe. I’m getting plenty but more is always better. I was a little worried about removing too much material and keeping things sturdy.

I’ll use this a while and update if I make any more changes.

2 Likes

I’ve been thinking about shoeing my S03, but I just haven’t had the time yet. I had a thought about the brushes, though. Instead of having them fixed to the site of the shoe, why not let them float? Cut a slot in the shoe and insert a strip of brushes through that. As the shoe is lowered, the brushes would be pushed upwards and it would be easy enough to remove them if you were doing some delicate work where you wanted to keep an eye on every rotation. Raise the shoe up, and gravity would pull them back down to the work level.

1 Like

I think that could work real well, Carl. The only trick I guess would be making the brush move smoothly, even when there is only pressure on half the brush (for example, because the shoe is halfway over your workpiece and half hanging over the edge).

I wouldn’t mind figuring out a way to add a presser option to my shoe. High-end machines have these, they’re helpful for holding thinner materials to the table. I’ve never seen one in person though and I’m not sure what is involved in making one. It needs to hold the material down while also easily gliding over it.

An articulated brush.

Just out of curiosity, why didn’t you design the shoe so the hose connects behind the router by passing beneath the X axis? That would put the whole affair out of sight.

1 Like

I had thought about it. First concern was wall clearance, my unit is pushed up against a basement wall.

Second concern was that the gerbil board is attached to the back of my X-beam, so the hose would have to be quite a ways back, so the shoe would be maybe 1.5 or 1.75 longer than the current show. And any forces from the hose would see that much more leverage.

Third concern was trapping the shoe by the X-beam, because the threaded screws would be front of and the hose back of the beam. So in order to get the shoe off the table, I’d have to remove the hose or maybe angle it out from under the X-beam.

It all added up to the hose being in front.

1 Like

My degree was in journalism, so forgive the engineering ignorance. What if you were to mount a box on the back wall to which the main fat hose plugged and then you used several lighter, narrower hoses (I’m thinking of the 1 inch hoses that come with CPAP machines) connected from that box to the shoe? Do you think you would get enough suck from multiple smaller diameter hoses? My goal is to avoid having anything in front of the router that blocks my view or gets in my way or casts a shadow on my work area. So my requirement is that it has to connect from the back. What about feeding air in from a compressor or other blowy source via a nozzle at the bit and directing it to a collection hose at the back?

This kind of stuff keeps me awake at night. You ought to see me wandering around Lowes/Home Depot doing “engineering on the fly.” People probably wonder if I wandered off from the home.

They (Rockler, Woodcraft, online vendors, etc.) sell a DC flange that is angled that may work for such an application (hose behind and not in front of router). The small hose idea may work, it may cost a lot in terms of airflow, though.

1 Like

I have designed and built a new style dust boot for the SO3 XL & XXL which mounts to the rear of the X axis. I’ve been trying to find the time to bring it to kickstarter. My latest version (v3) works extremely well. V4 will have a few minor modifications to reduce weight and increase rigidity for height adjustment.

The standard SO3 can be modified to move the controller to the Y rails.

Not trying to hijack your thread, but you are going down the same path I started out on over a year ago.

It is funny that now that I’ve built this one, I have run into quite a few other shoes that look pretty amazing, including some of the 3D printed units.

I’d love to see more of your design, too. Don’t feel like you’re hijacking anything here, and don’t feel obligated either, but if you want to post pics or anything else in this thread, feel free to do so.

Well I guess this would be shoe V3.

It brings two improvements:

(1) Increased airflow, doesn’t have a choke point. So the hose doesn’t recoil as soon as I turn the vac on.

(2) Slot at front allows easy removal and replacement with bit in place. The other unit required maneuvering around the bit. Not that you need to remove it very often, but this is just better.

Still room for improvement:

Different hardware (not available locally) will allow me to maximize Z capacity. I’ll replace the standard nuts with (I think they’re called) barrel nuts. Note that I haven’t had a problem w/ Z capacity, and as pictured I have a 1/2" board on top of my spoil board, and another 1/2" board on top of that (for holding the .1" polycarbonate with my binder clip board). But still why not optimize.

2 Likes

Phil,
Here is a ‘Teaser’ shot of my design. I expect to have it on kickstarter within 2 weeks.

It solves many issues, concerns and inconveniences.

  • Obstruction free tool changes
  • No need to raise Z axis to place dust shoe after zeroing
  • No loss of X axis work area
  • Fixed height dust shoe
  • Will work in enclosure
  • Keeps dust hose off work area
  • Does not create stress on Z axis

Photo shows performance of dust collection with 2 flute bit .1" DOC, 80 ipm, 16K rpm.