New build: SO3 - Excited

Hello everyone:
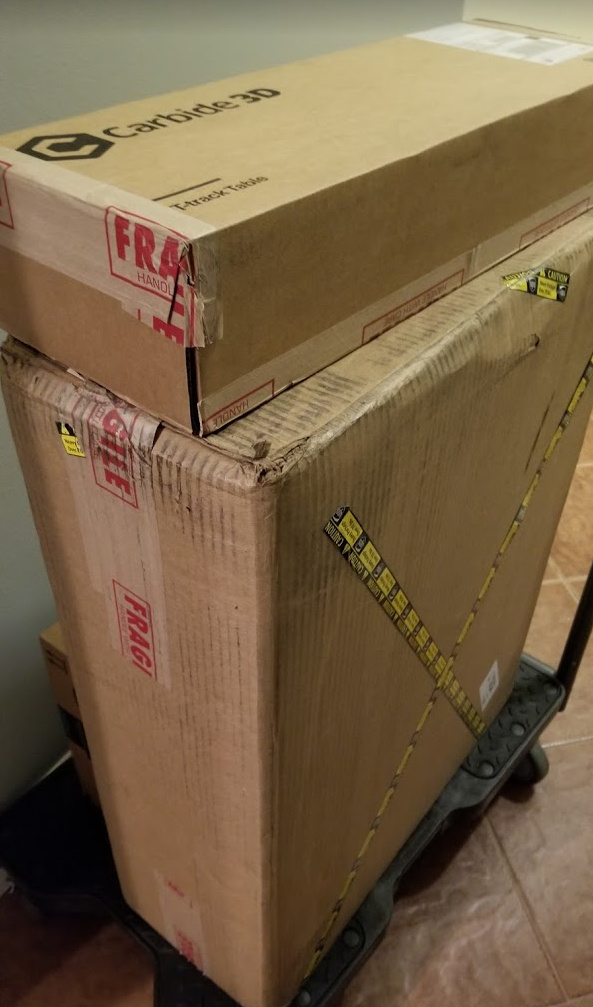
I am new to the forum and new to the Carbide 3D family. Last week I ordered a Shapeoko 3 with a few accessories and upgrades; HDZ and clamps.

I was really looking forward to ordering a metal threaded base plate but it will have to wait on that until they are in stock or make my own (anyone?).

I little bit of background, back in 2013 I bought my first CNC machine (CNC Mogul). I used it a few times but sold it shortly after. My lack of CNC knowledge caused some frustrations and my ignorance did not help much with this particular machine. Needless to say I need something a little sturdier for what I wanted to accomplish and with a bigger bed. After a few months late 2013 I order a CNC Router parts Pro with a table of 24X48. This was the perfect size for what I needed to do and over the years I kept up with their upgrades and updated the machine to their latest spec that included linear rails.

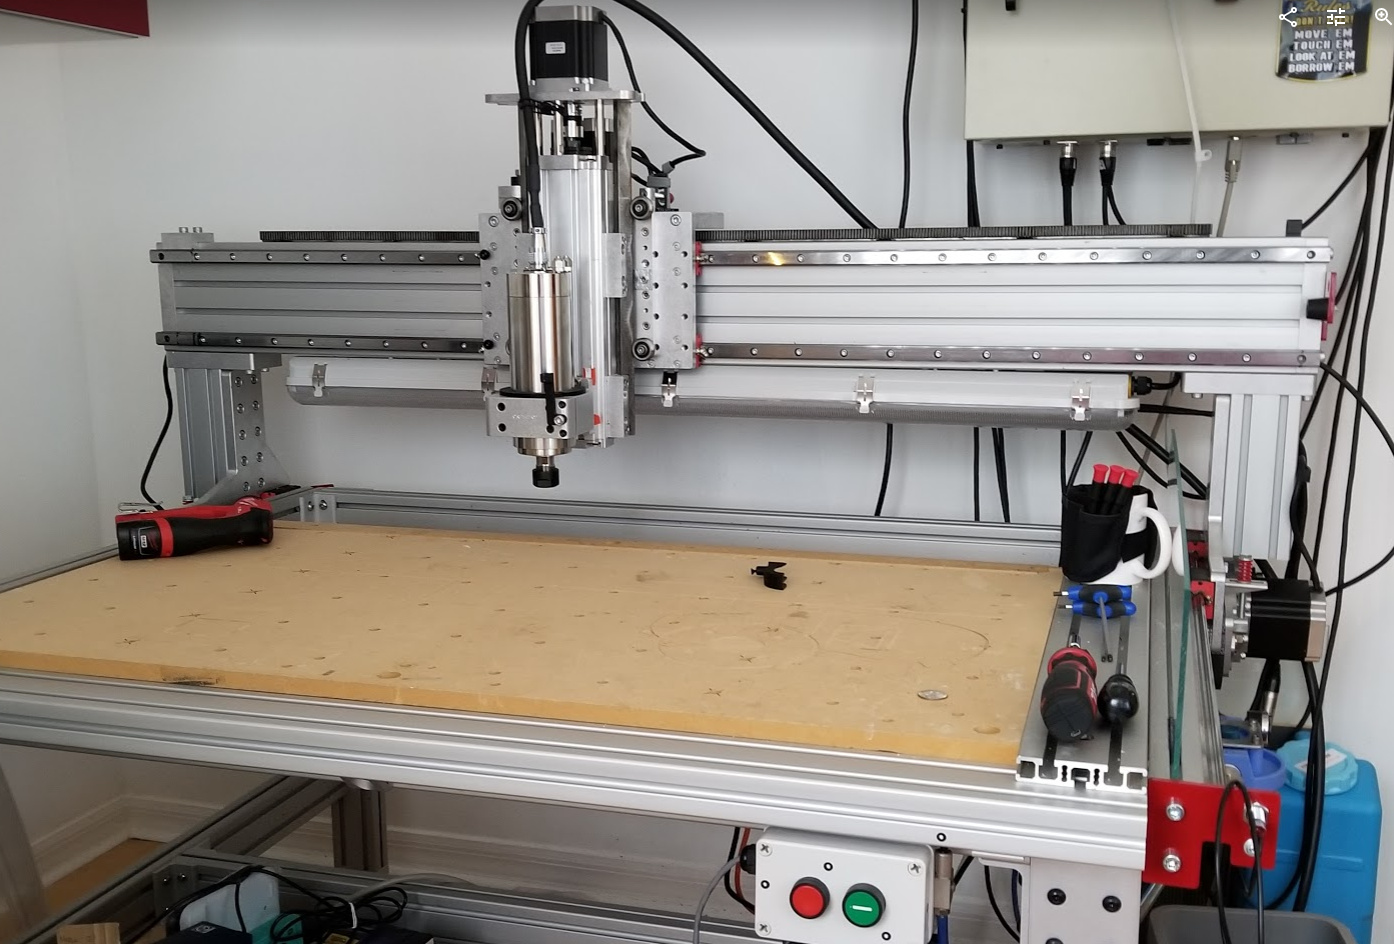
My CNCRP Pro / Avid, was running on UCCNC, with Nema34 motors and a water cooler spindle as you can see from the photo below. It was a beautiful machine and very capable. It cut MDF, plastics and Alum. quite well, accurately and reliably.

This was my fist real machine, and I learned a ton with it. I made some great parts with it.
I went from vectric, to Rhinocam and now to Fusion.

All these years I lived in an apartment, an then a townhouse with a single car garage with no space for this monster. With it being so larger, dust containment was always a challenge despite having a dust deputy and vacuum. I think all CNC machines need to have an enclosure not only to contain the mess but also for safety. The machine was kept and operated indoors and dust containment kept me form using it as much as I wanted to. The thought cleaning up really put me off.

I have now moved to a new house where I have a two car garage where I can have a CNC machine. However during all this time, I realized that aside from the one project that made me upgrade, I was only using a small part of the table 20x20 max. So this machine size was too big for my needs.

So I sold the machine . I took it apart and sent it off to its new owner (I think it is still in transit).
I looked at a CNC/Avid benchtop pro, as a replacement. Ball screws and linear rails (OMG) but again the size of the machine albeit having a 24x24 table would occupy a large area in my garage.

I also have a confession, I have always had a crush on the SHAPEOKO. (I looked at other brands but in the end SO3 has many advantages, coming for a larger machine).

While I wait for my SO3 to arrive (should be here this week) I decided to re-purpose some extrusion I had left over and build a bench for it. This bench is made from 8020 Alum extrusion and features leveling casters so that I can move the machine around if needed. The wheel levelers ratchet which is great. The SO3 will fit right on top and in the near future I will add an enclosure to this table. (I want my garage clean).

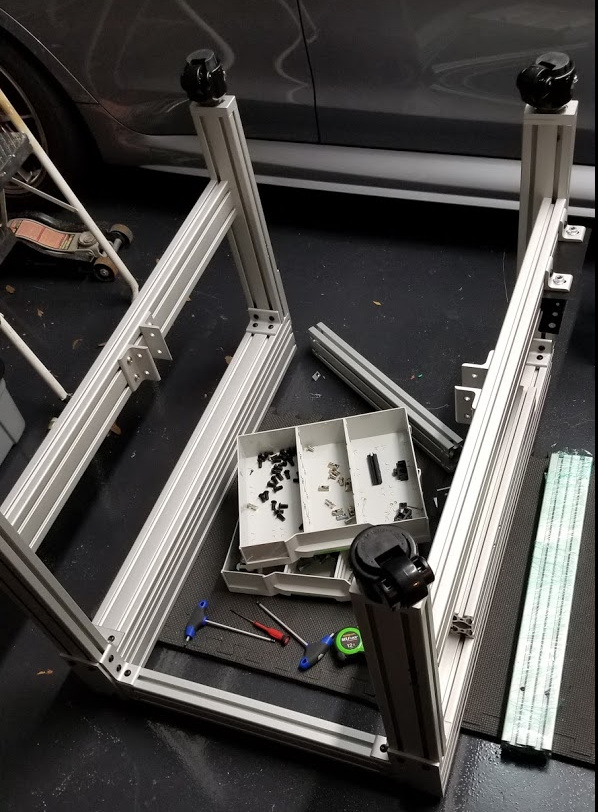
At this time, I need to finish or come up with a few more lateral braces and a top, but as it is this table it sturdy and will be a great foundation for any machine and certainly for my SO3.

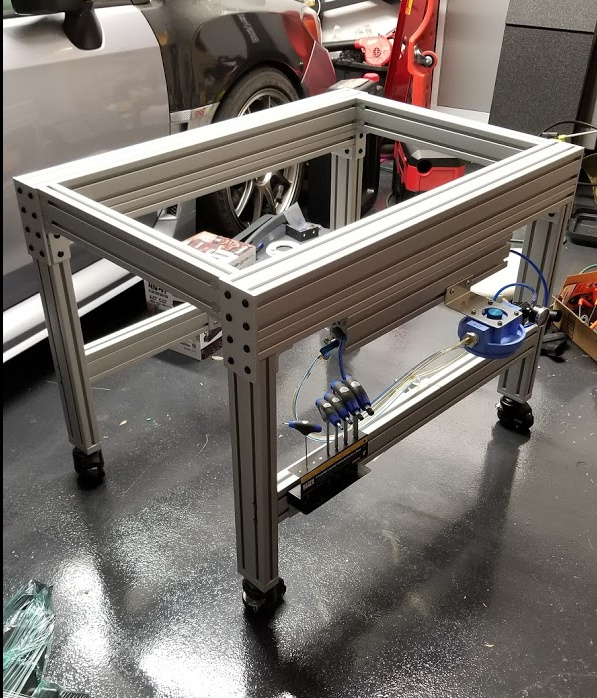
As you can see, I have a fog mister and a dust cyclone (not shown). but I am still far away from being done. I want to add compressed air and a nice flexible hose overhead (any recommendations of the hose)

6 Likes

Welcome to the club ! with that kind of CNC background you’ll be up and running in no time.

2 Likes

Welcome, all good stuff there.

LOL what I’m most jealous of is your…floor.

Welcome! With your background and experience with cad and cnc, I would check out this thread for a little inspiration:

https://community.carbide3d.com/t/hardcore-aluminum-milling-on-an-s3/9744

edit: that is, if you haven’t already. :grinning:
edit2: and I think you can find aluminum threaded base plates on Amazon and Ebay now. Maybe even etsy.

1 Like

You should be excited!!! Its a great machine and you bought some great accessories. If you don’t feel like waiting for the threaded table, you can make your own. Order a 1/2” to 3/4” plate of ATP-5 from Midwestern Metal Supply. For the standard size it will run you about $120 plus shipping. For me it was $150 total for 3/4” (its a 40lb plate!) Someone at C3D will happily send you the diagram for the table. If you are like me you will take that diagram to a print shop and blow it to full size, expecting to glue it down and make a template… but that won’t work! For some reason it’s not actual size. No worries, you can use your original bed as a template and plot out the holes from the diagram. While you wait for the plate, order some taps and drill bits in your preferred size plus cutting fluid. …And maybe some files or sandpaper to dull the edges of the plate if you don’t already have them. The plate comes razor sharp. I did 6mm x 1mm, but some people like english units. I burned through three taps and drill bits putting the 90 holes in my table. When the plate arrives you can drill and tap it to match your current table, the C3D one, or any host of cool designs (I’ve seen some people with circles that look cool). I made mine from scratch and also bought the HDZ. It took some time and hassling the team at C3D, but now I’m up and running and the SO3 is running flawlessly. You are in for such a treat. My biggest piece of advice is don’t drive yourself crazy waiting for it to be perfect to use it. I fell into that trap and I really regret being so neurotic about it. It works very well if you do your part. When you get it together and its reasonably dialed in, let it eat!

2 Likes

Look ma !

Today at around 1pm UPS came to my door with this !!!
I have already look at all the parts and I am excited. Everything looks of great quality and the small nema motors are “really cute” according to my wife. (well they are compared my older machine).

I am happy that the black steel plates have some weight to them (mass is good). I realized that my table is not wide enough for the orientation I wanted… But that that is alright I think it works out better in the end. For now sleep till tomorrow !! - we have some building ahead.

PS: Those boxes took a little bit of a beating due to their weight… but everything arrived just fine.

PS: It is always great to see when a company sends you all the required tools and supplied to assembly the products. They even included a sharpie !

2 Likes

Good luck with your new machine. Just pay attention to the instructions. When you get your Shapeoko assembled move the X and Y axis slowly and make sure they move to the limits on both ends smoothly. Do not move the axis fast because that causes the belts to slip. Depending on what Z axis you got, standard, Z-Plus or HDZ move the standard Z axis up and down. You cannot move the Z-Plus and HDZ except by turning the screw and that takes forever to get it up and down. The Z-plus and HDZ will most likely run smoothly right out of the box any way. When you put the pulleys on the X and Y be sure that one of the grub screws is over the flat spot on the motor. These are tiny allen screws and some people go to the hardware store and get cap screws to replace the little set screws. The larger cap screws are easier to tighten without stripping them. When you do tighten the allen screws use the long end in the set screw and tighten with the short end. If you use the short end in the allen screw and tighten with the long end you can strip the allen head. Just be sure you tighten them with out over tightening them and stripping.

Do this now while you are assembling the product. Don’t wait until you have a problem. Use that Loctite. Trust me. :smiley:

While you are out buy a set of wrenches that won’t round off after 3 or 4 screws tightened; (if you don’t have a set already.) I got some relief by grinding the rounded end off occasionally, so my set of “tools” is quite shorter than when new.

Good luck and take your time. If your squaring measurements imply to you that 1/16" is close enough do more squaring. Trust me.

A Shapeoko is not a “plug and play” machine. Did I mention to take your time?

1 Like

I am sure the tools they provide are not the best, but if you dont have any I think it is a nice touch. Thankfully I collect tools and toolboxes. :rofl: (maybe one day I will get a snapon monster) but for now my Husky and Milwaukee brand will do.

Yes thank for the reminded on the loctite. I have to say that I am a little disappointed on machining of the holes on the MDF. I hope this not an indication of how this machine will cut. They are not very round (come on Carbide, impressions count)

Yeah, a nicer set of wrenches (and a set of sockets and a ratchet) help a lot.

In particular, I’d recommend a nice low profile 13mm and stubby 22mm (for endmill changes assuming you got a Carbide Compact Router or Makita).

My understanding is the MDF is done by an outside vendor — please send us photos to support@carbide3d.com and we’ll take it up with them.

I received my HDZ today !!
too bad it seems …lets use the word defective. =( I hope Carbide 3D support is up to the task.

Please let us know at support@carbide3d.com and we’ll get this sorted out as quickly as we can.

I need some on the phone. I am missing a ton of items…

Rather than calling better to send documentary photos to us at support@carbide3d.com along with a link to the instructions you are using.

All I have to say is that sometimes a phone call as a follow up is great.
your customer service team is taking care of me and I am happy about that. I will focus on sorting out my table in the mean time.

PS: I want a nomad too. Is that bad ?

I think the two machines (Nomad and Shapeoko) are wonderfully complementary and use both on many projects (use Nomad to make metal hardware for larger projects on Shapeoko, use Shapeoko to make MDF wasteboards and other fixtures for the Nomad).

1 Like

I never intended to have the need to use one machine to make parts for the other but I see your point and I find myself in the boat at the moment :rofl::man_facepalming:.

Come on, tell your factory to start producing them (nomad).

Building Started and so have the modifications. (as per the post above, I wish I had a way to machine metal at the moment) (I really really wish I didn’t have the need and urge to modify my SO3, but if I am going to keep it and make it a capable machine there is one thing I need to address). This has been a real turn off - since I really want a plug n play solution that just works. (Without spending another 10K - Nomad maybe?).

As I began to assemble the base (BTW where are the assembly instructions Carbide 3d), I noticed that the bent steel supports, while nice and sturdy are not straight and the lack of cross members make things worse and even would allow the MDF base board to sag.

Once I assemble the base and placed on my 8020 frame it was evident that the frame was warped and that this would be the #1 cause for all other accuracy issues I would experience.
While it is true that we should ALWAYS plane of working surface to tram the machine, you really DO need a base that is flat and squared. This is something I leaned some time ago from my AVID CNC machine and other manufacturing methods.

PS: Carbide 3D - maybe there is an HD frame or some sort - the current frame is not what this machine wants.

Photos of gap on one corner while the other 3 rest on the table.

I explored several options to fix this and decided that the best approach would be to make my own 8020 frame and risers that would not only make the base squared, but also make it solid. (8020 frames are extremely rigid). Also by using compatible extrusion I can hard mount it to my bench. (we will see on that).

image

I was inspired by another thread here, where the OP is seeking more spindle clearance.

I am thankful to have a 3D printer so for now I am making some prototypes rapidly (see what I did there?) I will post when the part is done and test fitted.

1 Like

Here is the 3d printed part. Works well (with out the rest of the gantry) attached etc.
I am happy to be able to make these quick test before making a real metal part. Although this part was printed in ABS, I could reprint the final part with carbon fiber infused nylon which would make them very strong and durable while I get the machine up and running.

For me, it is important that both carriage extrusion beam that carry the gantry are leveled and parallel. This should take of this.

I’m working on the same thing right now… One thing worth thinking about is adding some height to your risers, just like Rich did. I’m still working on a way to make the height adjustable for an ease of traming.

1 Like