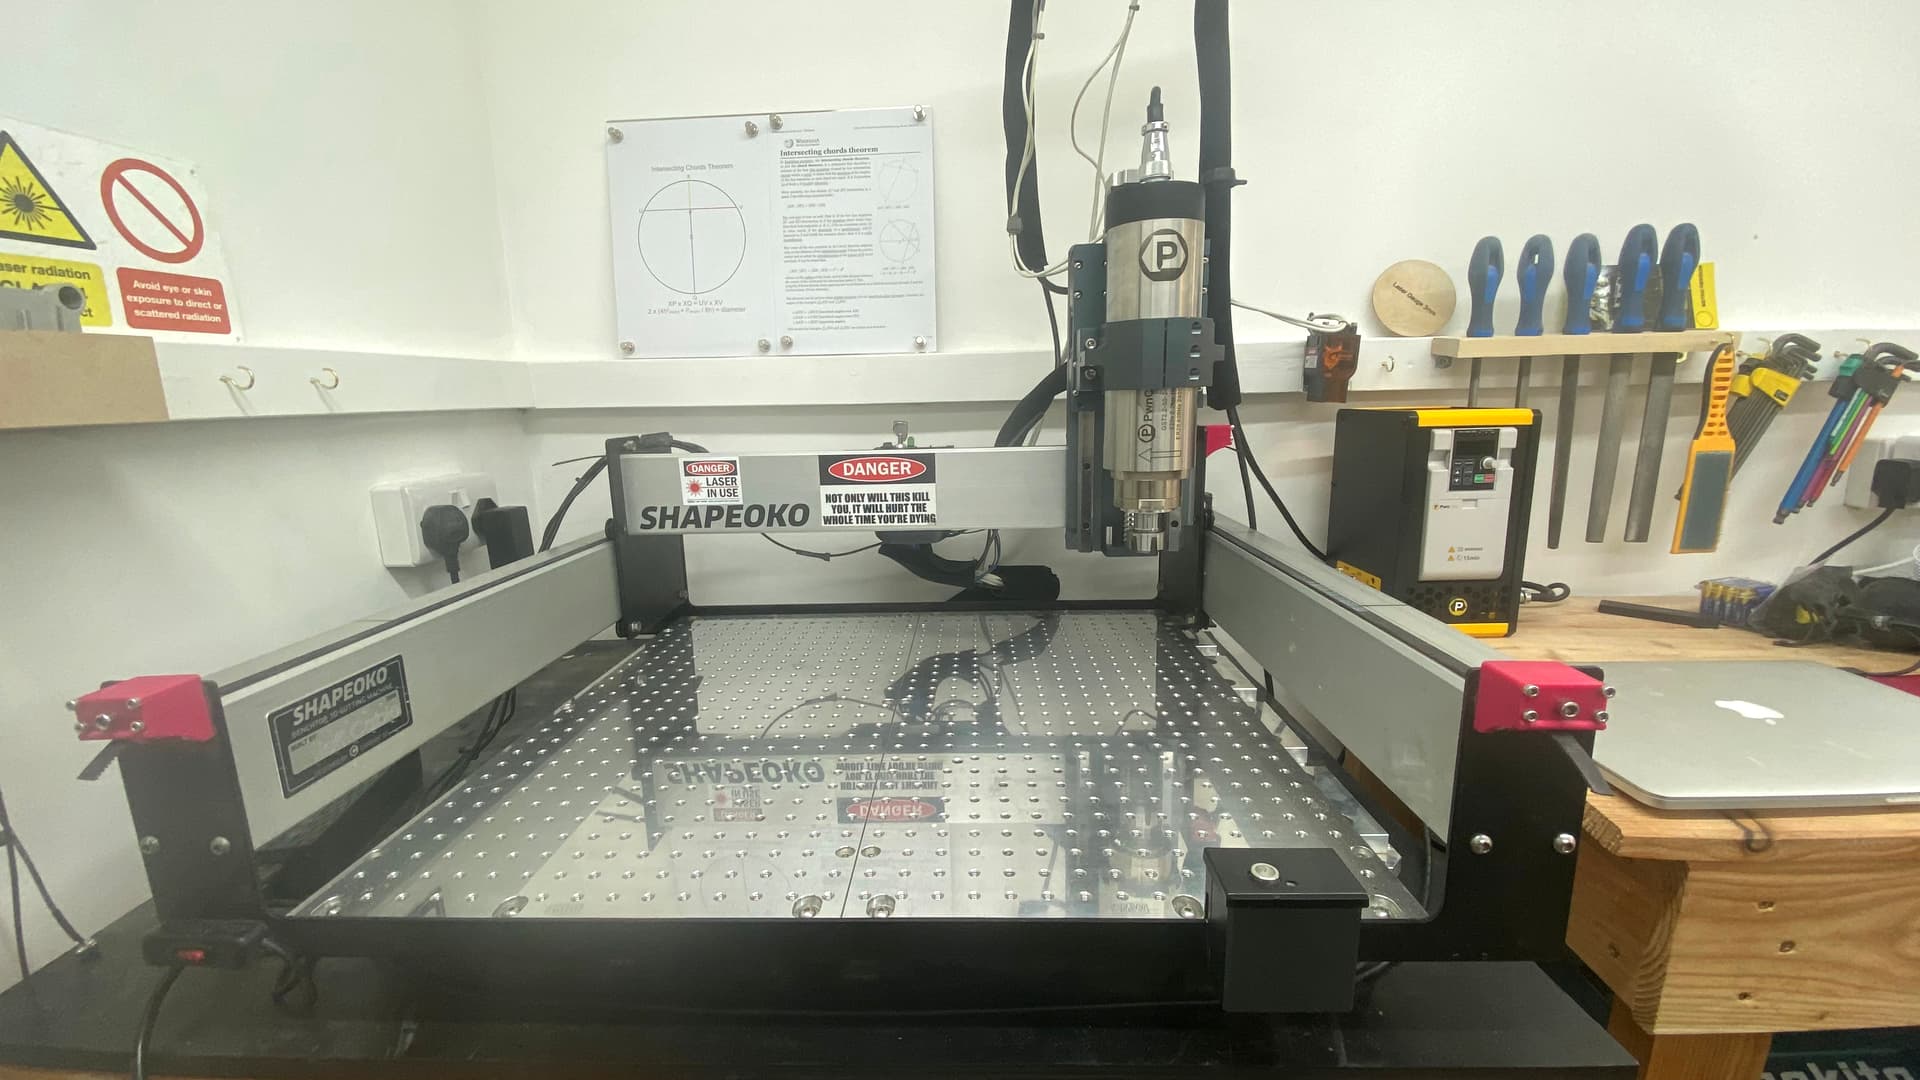
I purchased my SO3 in July 2020 and took delivery at the beginning of October of the same year. My teething troubles were related to assembly and insufficient knowledge to improve on how I was managing to use the machine. Eventually, I understood that an improvement in workholding could improve my work pieces. I created a sea of holes with M6 inserts in MDF. It worked well enough for a while but the inserts started to work loose and I could not manage sufficiently accurate work to undertake two sided milling.
It appeared to me as if a better baseboard was required to help with workholding and possibly add to the stiffness of the machine. The careful and often incredible work of @Vince.Fab was a revelation and an inspiration. I purchased a Saunders Machine Works Fixture Plate, the stiffener rails and two pairs of modular vices. My workholding options suddenly seemed limitless and superbly accurate and the fixture plate added the necessary stiffness to my machine. It was a night and day difference when compared with the MDF baseboards I had tried.
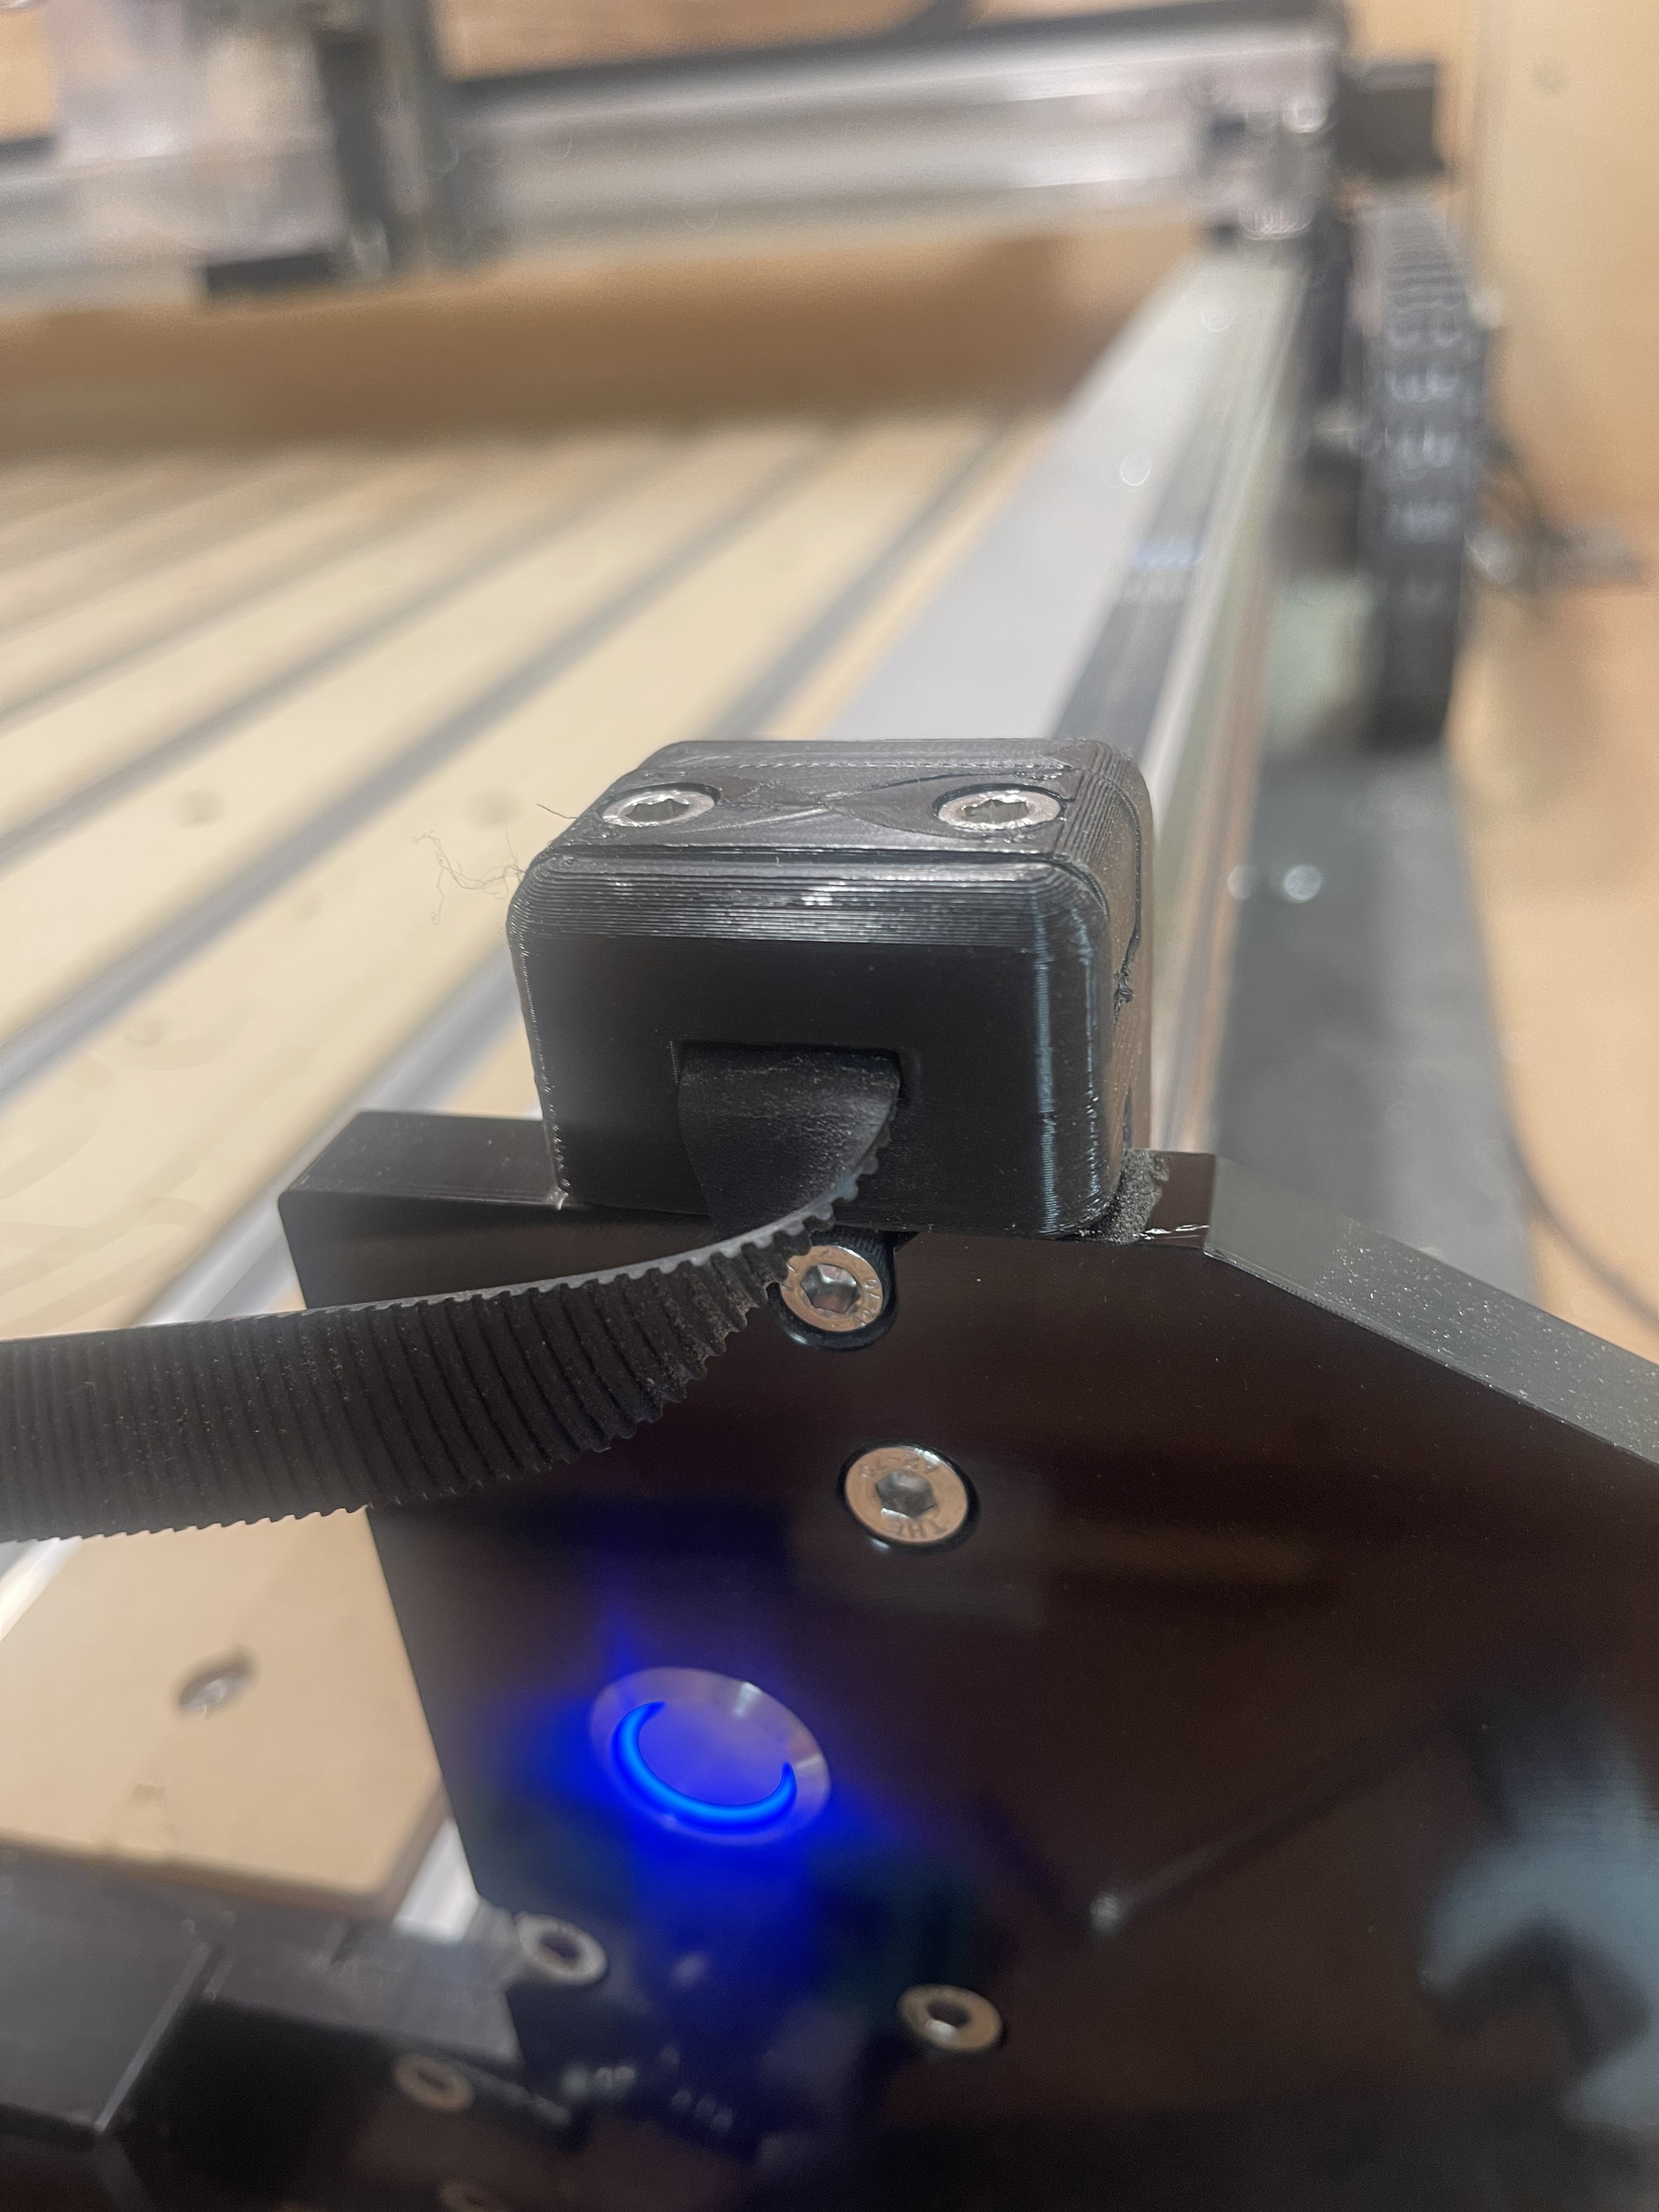
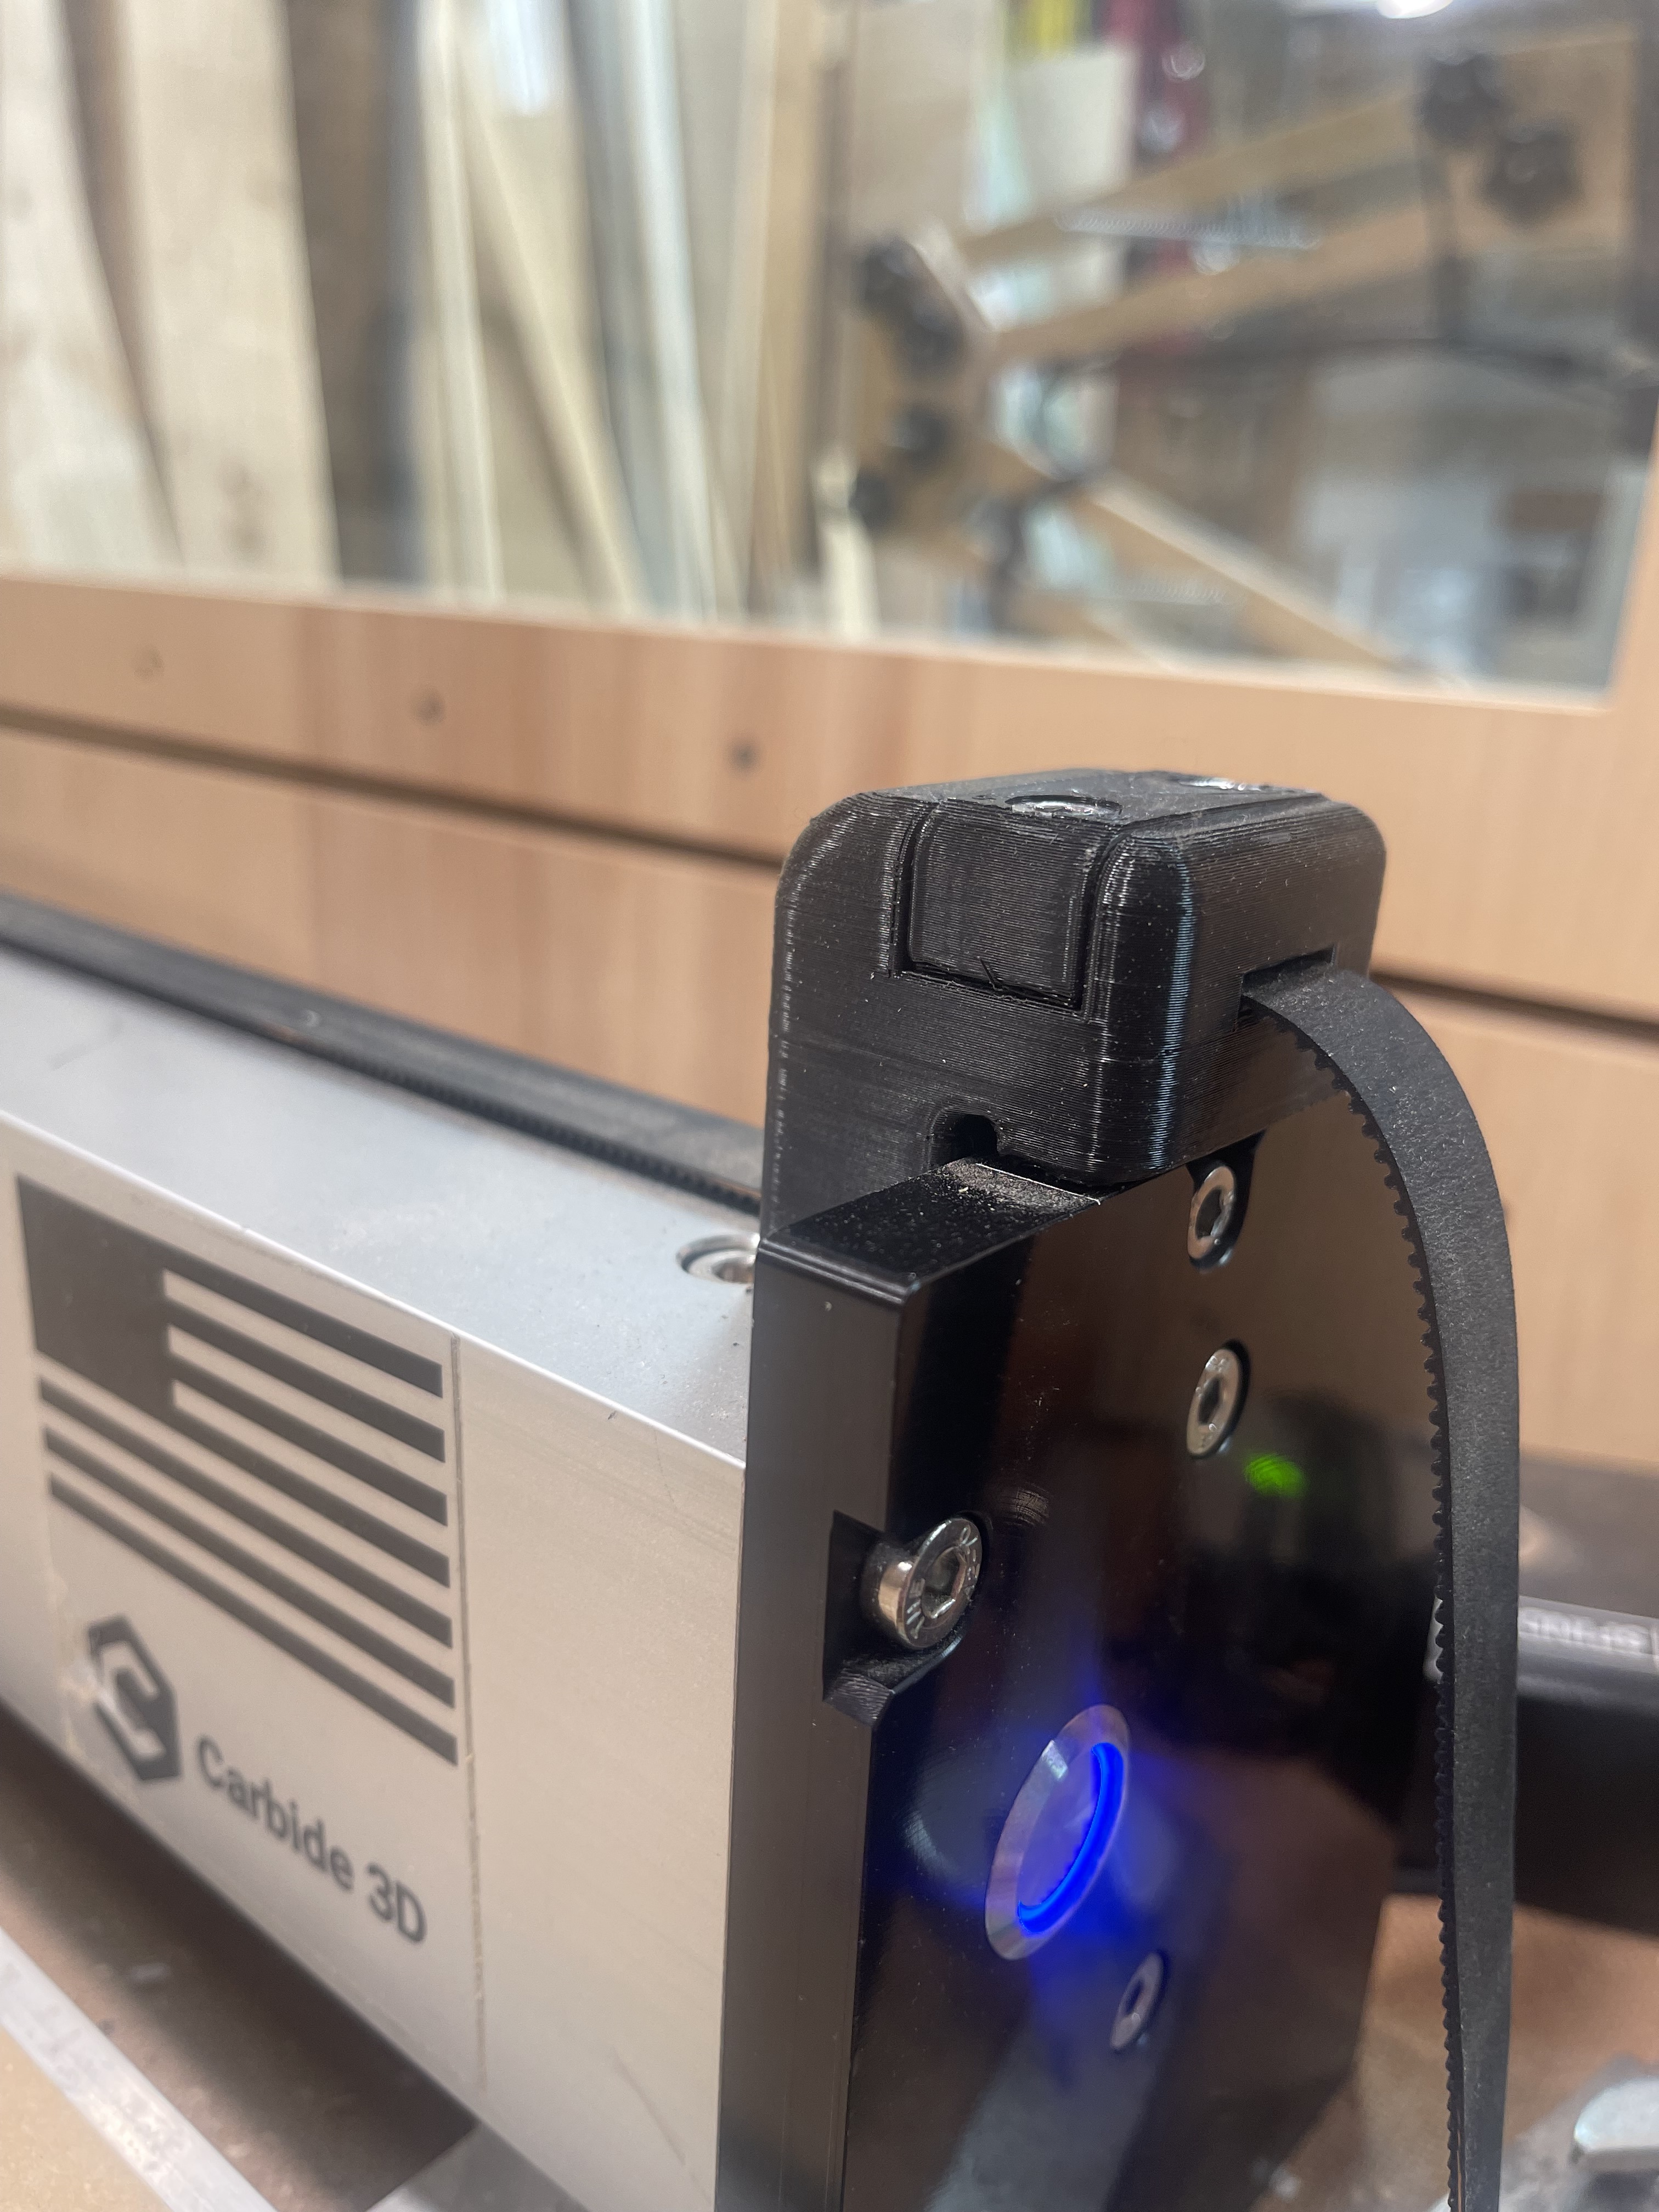
The next step was to try and bring some much needed accuracy to my belt tensioning and therein I found a problem with holding the ends of the belt tight enough to bend it through 90 degrees twice and then fix it with sufficient tension to be useful. I hated that job and resented the amount of time I had to spend on it, which often amounted to 20 minutes per belt. A solution was found when I discovered a tensioning block designed by @neilferreri on thingiverse. I had assistance to print the design and the tensioners provided a flat pathway and a job that could be done in 20 seconds. I believe it was @LiamN who printed them for me. I also used his superbly detailed exposition on belt tension, squaring and calibration to work out how best to tension the belts on my SO3.
My rails are only 600mm long and I marked lines at 160 and 440mm, leaving a belt section of just 280mm to be assessed for tension. I created a couple of 1/4" square section wooden blocks and place them on the lines so the belt is suspended above the rail. I use a wooden plectrum tool to pluck the belts so that my thumb or fingers did not deaden the resonance caused by plucking the belt. I then used a guitar tuner which works by sensing the frequency of the vibration and I tune the belts to 130Hz which approximates to C3. The write-up by @LiamN had suggested that a frequency of between 100 to 150Hz would be suitable for the Gates GT2 belts. I find that at C3, the belts stay in tune for many months. Each belt now takes about 20 seconds to tension accurately.
Next stop along the way was because I was considering a spindle upgrade, I wanted to exchange my Z plus Z axis for the more substantial HDZ. It is beautifully engineered and not light in weight. I used that opportunity to exchange all of my V wheels because the HDZ arrived with 4 new wheels. I also exchanged all of the Gates GT2 belts for new ones which I had on hand. The culmination of this upgrade pathway was the purchase of a spindle and an associated VFD. I am not very knowledgeable about coding or electronics so I opted for a plug and play solution from PwnCNC.
It was simplicity to place the 2.2kw spindle in the 80mm HD spindle mount of the HDZ upgraded Z axis. I tightened the bolts to 15Nm of torque after tramming with an Edge Technology Pro tramming aid. I used 10mm thick toughened float glass as my baseboard for tramming. I have good accuracy measured between X & Y directions with the deflections reading no more than 0.002". The final upgrade was to purchase REGO-FIX ultra precision collets with a total indicated runout of five microns (2 ten thousandths of an inch) and a REGO-FIX castellated clamping nut so that I can apply the recommended torque settings to each collet and tool combination.
i am delighted to report my SO3 is in great health and I look forward to using it to create many new things. The image shows my much changed machine.
Hi Liam. Good to see you here. I hope all is well with you. Yes, Neil’s tensioners have been a really worthwhile undertaking. I still have the original files and my ambitious intention is to make the tensioners from any metal which exhibits nice machining characteristics. I have a relative who works in the mechanical engineering field and he has offered to obtain some phosphor bronze for me if I want it.
I recall that a doyen of superb metal work, who used to reside in these forums, was the appropriately named @CNCInspiration. It would be interesting to get a view from Max on the most appropriate metals to use. FWIW, I am creating a small video presentation on tensioning the belts using my current methods. People with machines which use belts to move the X gantry rail and the Z axis may care to see whether such methods would bring positive benefits.
I had neglected to link to the files created by @neilferreri on Thingiverse so I will correct that omission with the hyperlinked text.
Does anyone know if those tensioners will work on the Pro (not 5 Pro). I too struggle with and read the tensioning process. I loosen things to point that I can get one more tooth in the current clamp and then it typically slides back as I am tightening and I don’t notice until I have gone through the whole process.
Any suggestion on the least destructive way to make the slot for the belt to slip through?
I don’t know your machine. Is the width of the belt 9mm or 15mm? The files I got from Thingiverse were for belts that were 9mm in width.
I marked the slot from the dimensions in the files and then drilled 5 1/8" holes in a straight line, which I then joined with a Dremel metal burr and a flat Pferd diamond needle file. The drills I purchased were a set of ten cobalt jobbers drills from Rennie Tools. In the event, I only used one drill and it was still sharp after drilling 30 holes.
Yeah these guys - I’ve had them on the machine (pro) for well over a year and they’ve held up great. I expected there to be some flex over time but I’ve seen none. Single screw adjustment. I could’ve trimmed my belts after installing but I just never did.
I can share if there is interest, but I’ll have to go digging for the files.
Hey Cullen - Found the original post and @WillAdams was kind enough to reopen for me so I could post the files there (Apologies to QDCvacuum for hijacking)